

Page 1

1 of 36
Page 2

Index
Authentication .......................................................................................................... 3
Live Video ..................................................................................................................... 5
Visualization Mode ........................................................................................................... 6
Selection panel of cameras ............................................................................................ 6
Full Screen ........................................................................................................................ 8
Camera Sequencer .......................................................................................................... 9
Advanced Options ........................................................................................................... 9
Advanced Options Menu ................................................................................................ 9
PTZ control (mouse) ..................................................................................................... 10
Joystick (USB) ................................................................................................................ 10
Installing Keyboard and Joystick ............................................................................ 10
Activating the Keyboard and Joystick .................................................................... 11
Enabling the Keyboard and Joystick ....................................................................... 11
Keyboard Commands ................................................................................................ 11
Joystick Commands ................................................................................................... 14
Capture Snapshots ........................................................................................................ 15
Snapshots Directory ...................................................................................................... 15
Digital Zoom ................................................................................................................... 15
Show/Hide cameras’ Name .......................................................................................... 15
Camera Selection Panel ................................................................................................ 18
Viewing Controls ............................................................................................................ 19
Video’s timeline bar ....................................................................................................... 20
Capture Snapshots ........................................................................................................ 20
Digital Zoom ................................................................................................................... 20
Show/Hide the cameras’ name ................................................................................... 20
Video Smart Search ...................................................................................................... 21
Smart Search ONLINE .................................................................................................. 21
Smart Search OFFLINE ................................................................................................. 24
Visual Video Search ....................................................................................................... 26
Electronic Map ....................................................................................................... 30
Using the map ................................................................................................................ 30
Editing the map ............................................................................................................. 31
Dragging and dropping cameras ................................................................................ 31
Importing Electronic Map ............................................................................................. 31
Erasing Electronic Map ................................................................................................. 32
Exit the system .............................................................................................................. 32
Appendix A – Error Messages .................................................................. 33
Appendix B – Problem Solving ................................................................ 34
2 of 36
Page 3
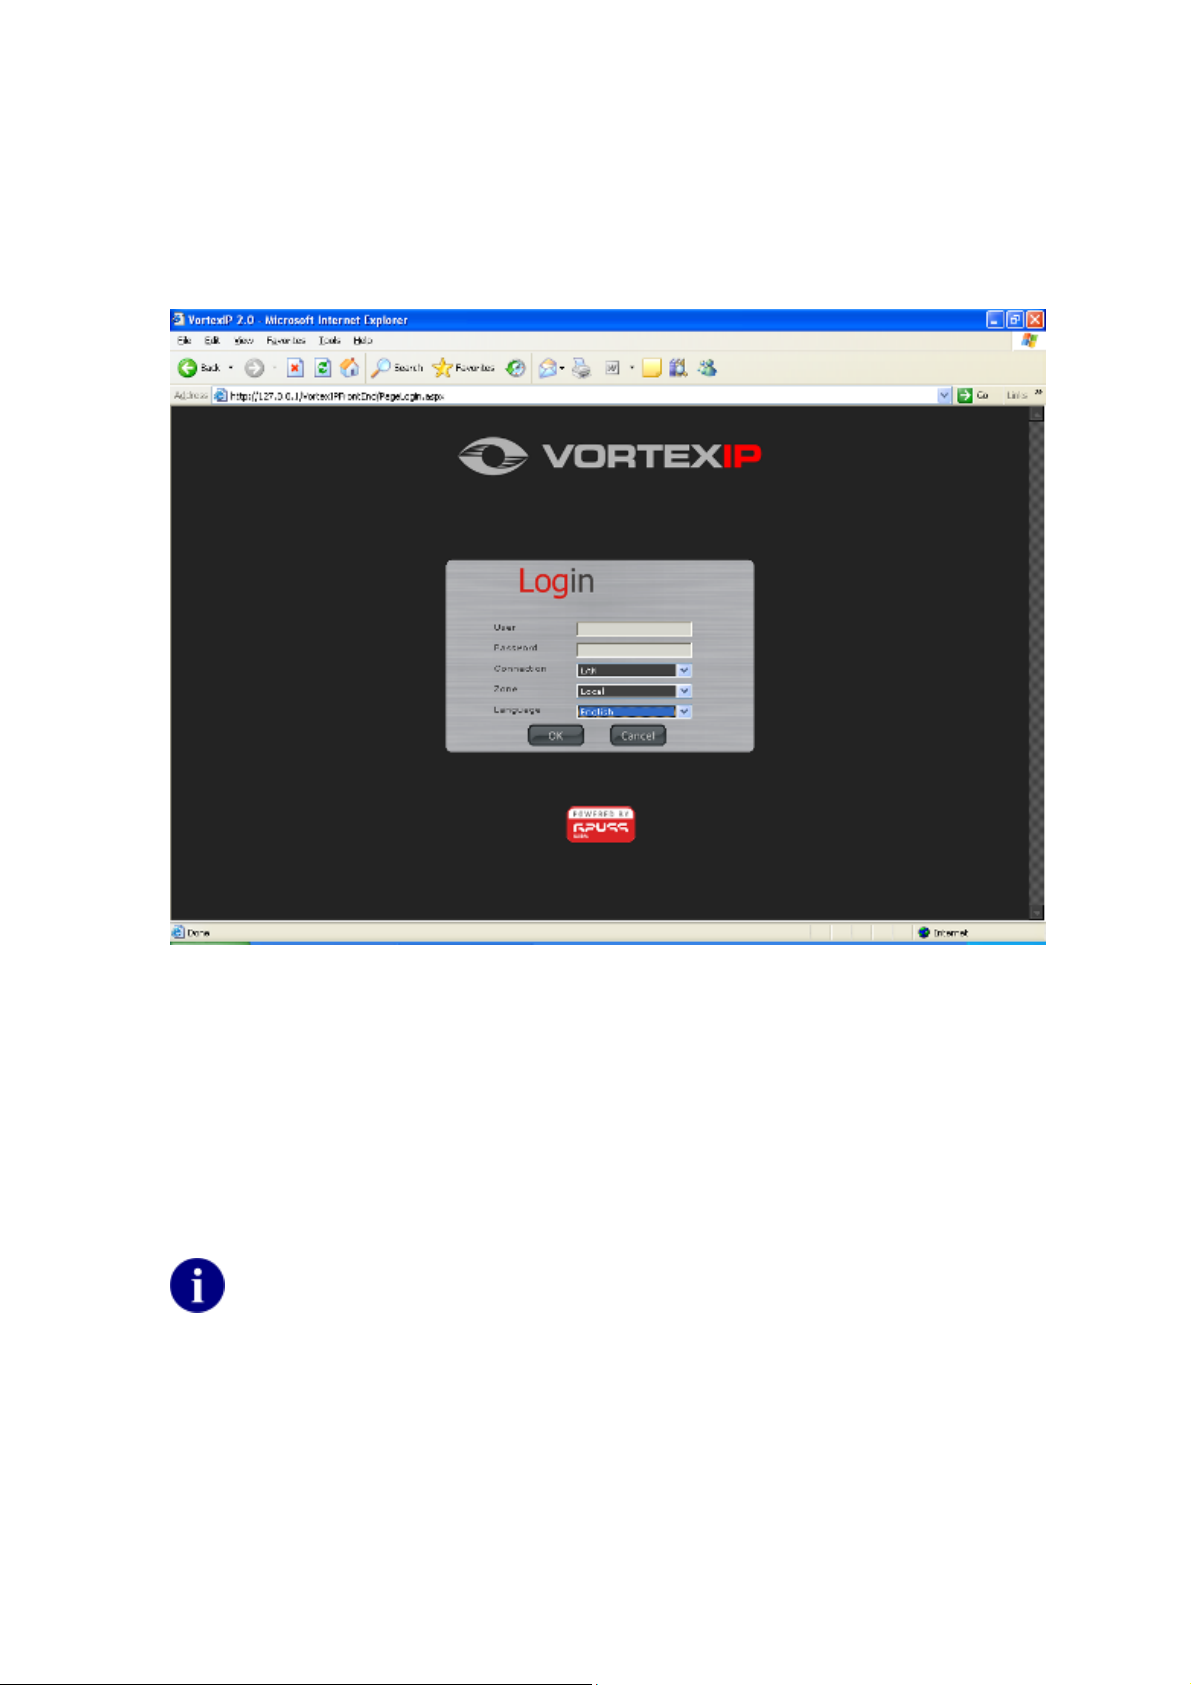
Authentication
To login to VortexIP, enter the URL or IP address of your server. The following screen will appear:
Enter your user name and password and select the type of connection you have: LAN, Broadband,
MODEM or Recording (same speed and compression of the image to the one configured for the
recording).
Under the zone option, choose Local or Remote. Local is for accessing it from the internal
network. Remote is for accessing it from outside the network.
To change the Language, select the language that you prefer and then click Ok. By default,
language is set to Spanish.
If this is the first time that you enter the system, remember that root is
the user name by default. By default, there is no password.
3 of 36
Page 4
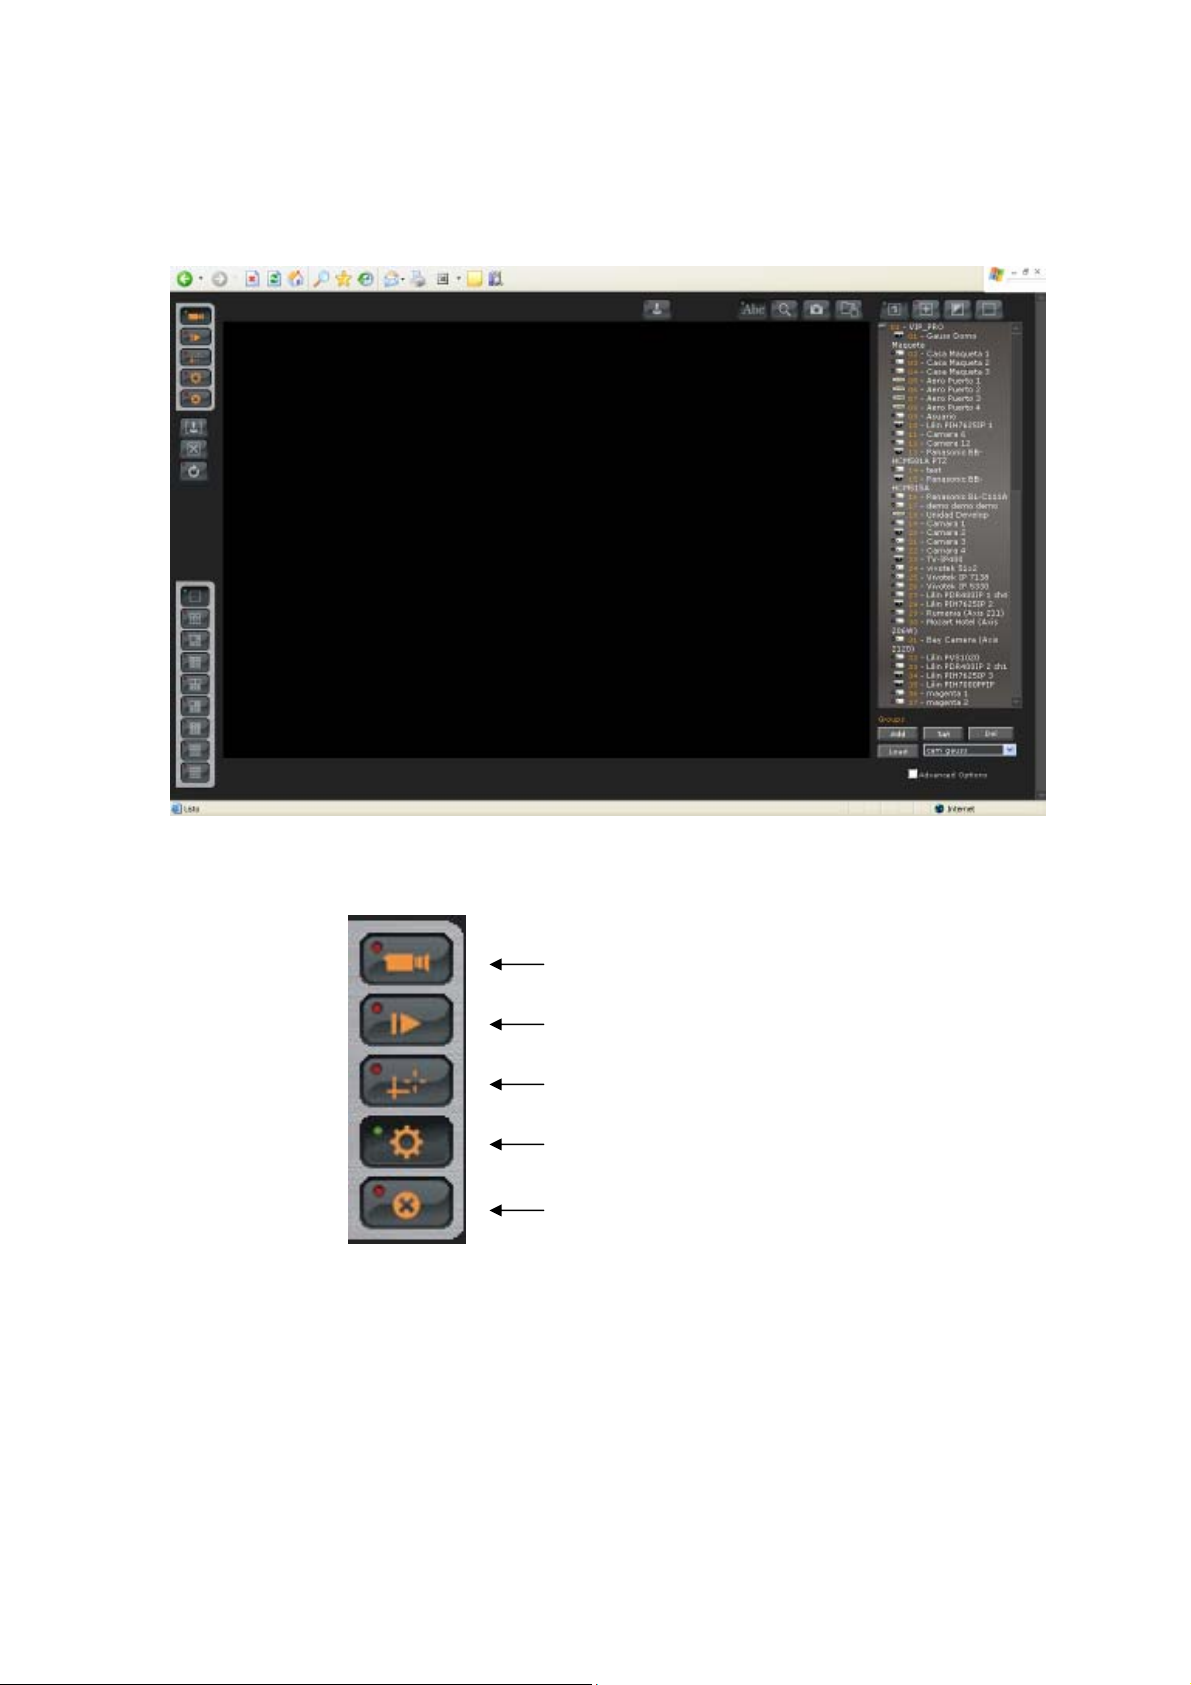
Once you have successfully entered the system, the following screen will appear. The following
g
options will appear on the upper left hand side of the screen: Live Video, Recorded Video, Maps,
Configuration and Close Session.
At any time, you will be able to use the side menu to access the desired function:
Live Video
Recorded Video
Maps
Confi
uration
4 of 36
Page 5
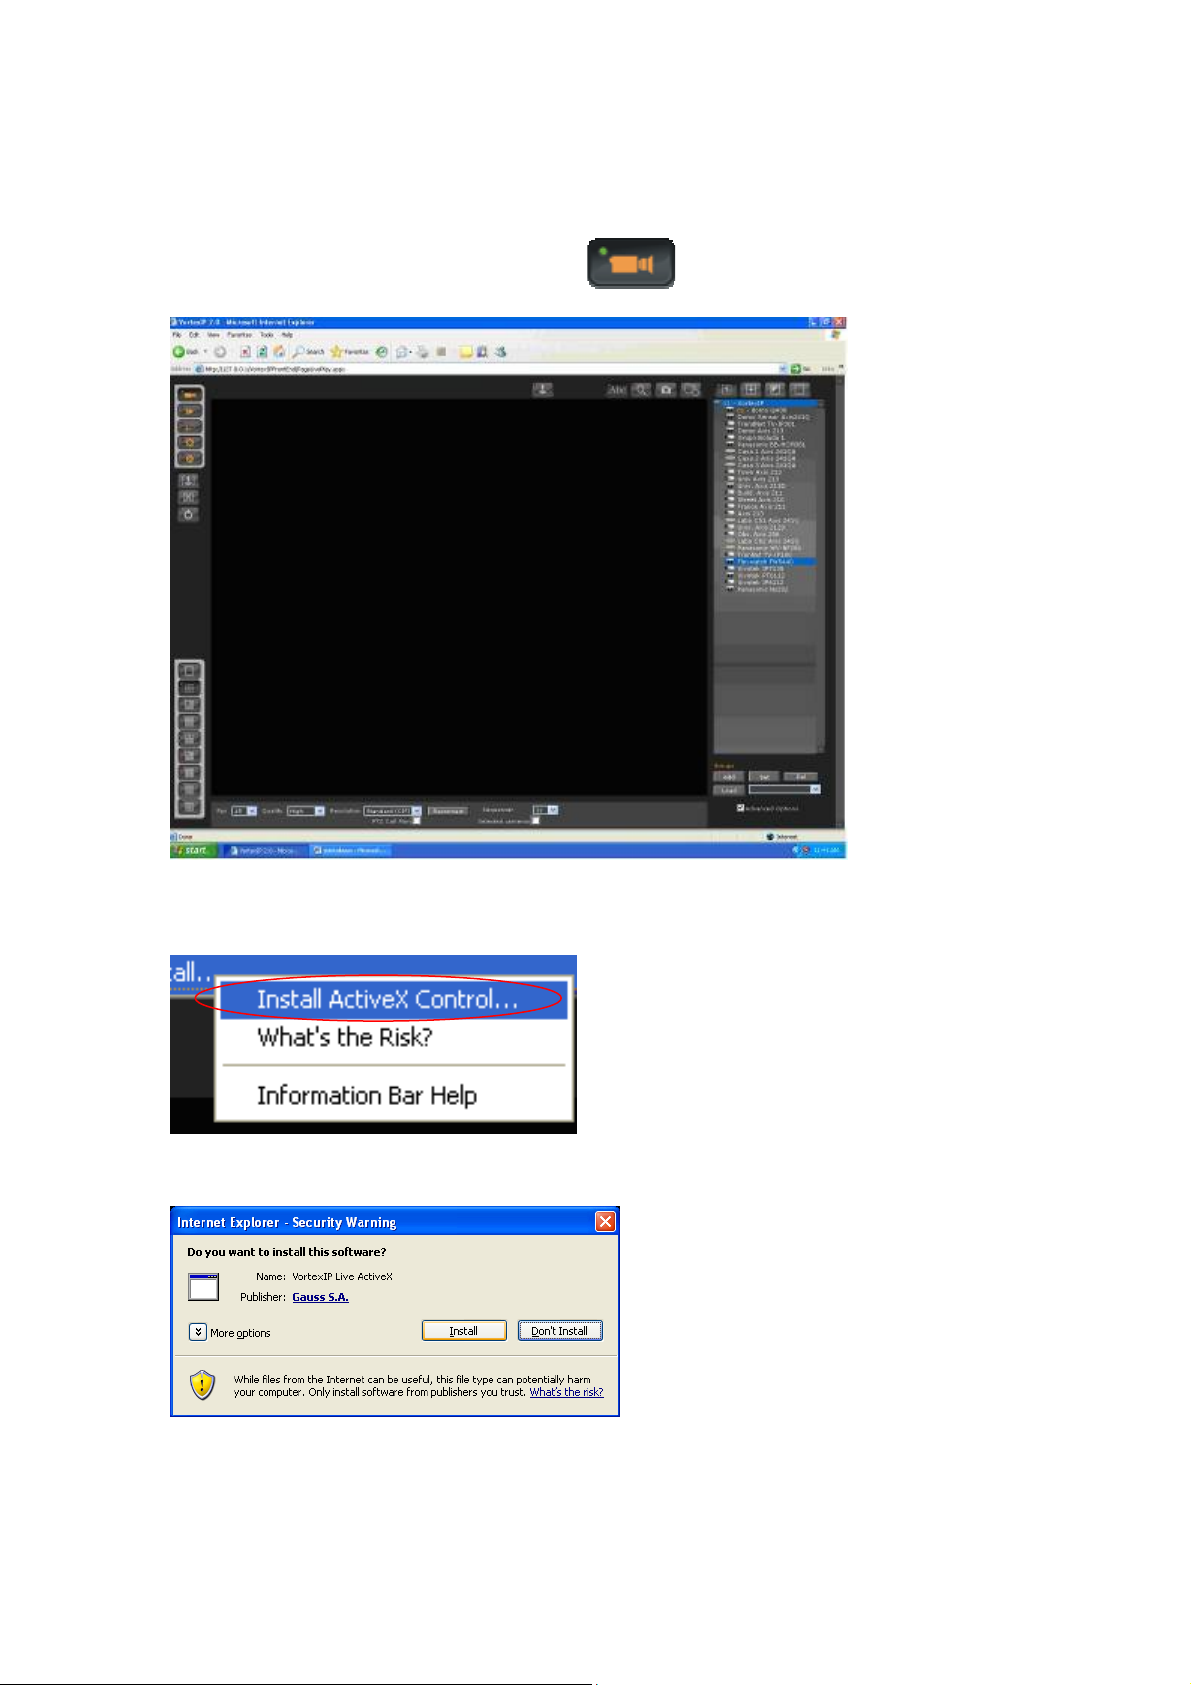
Live Video deo
To access cameras’ live video, click on this iconTo access cameras’ live video, click on this icon .
If you have not previously logged in to the system from the PC or laptop, you will have to install
the ActiveX component for live video. Click Install ActiveX Control.
The following dialog box appears. Click Install.
Once the installation is complete, you will be able to select the visualization mode for the cameras
that you want to view. You may choose from the following:
5 of 36
Page 6
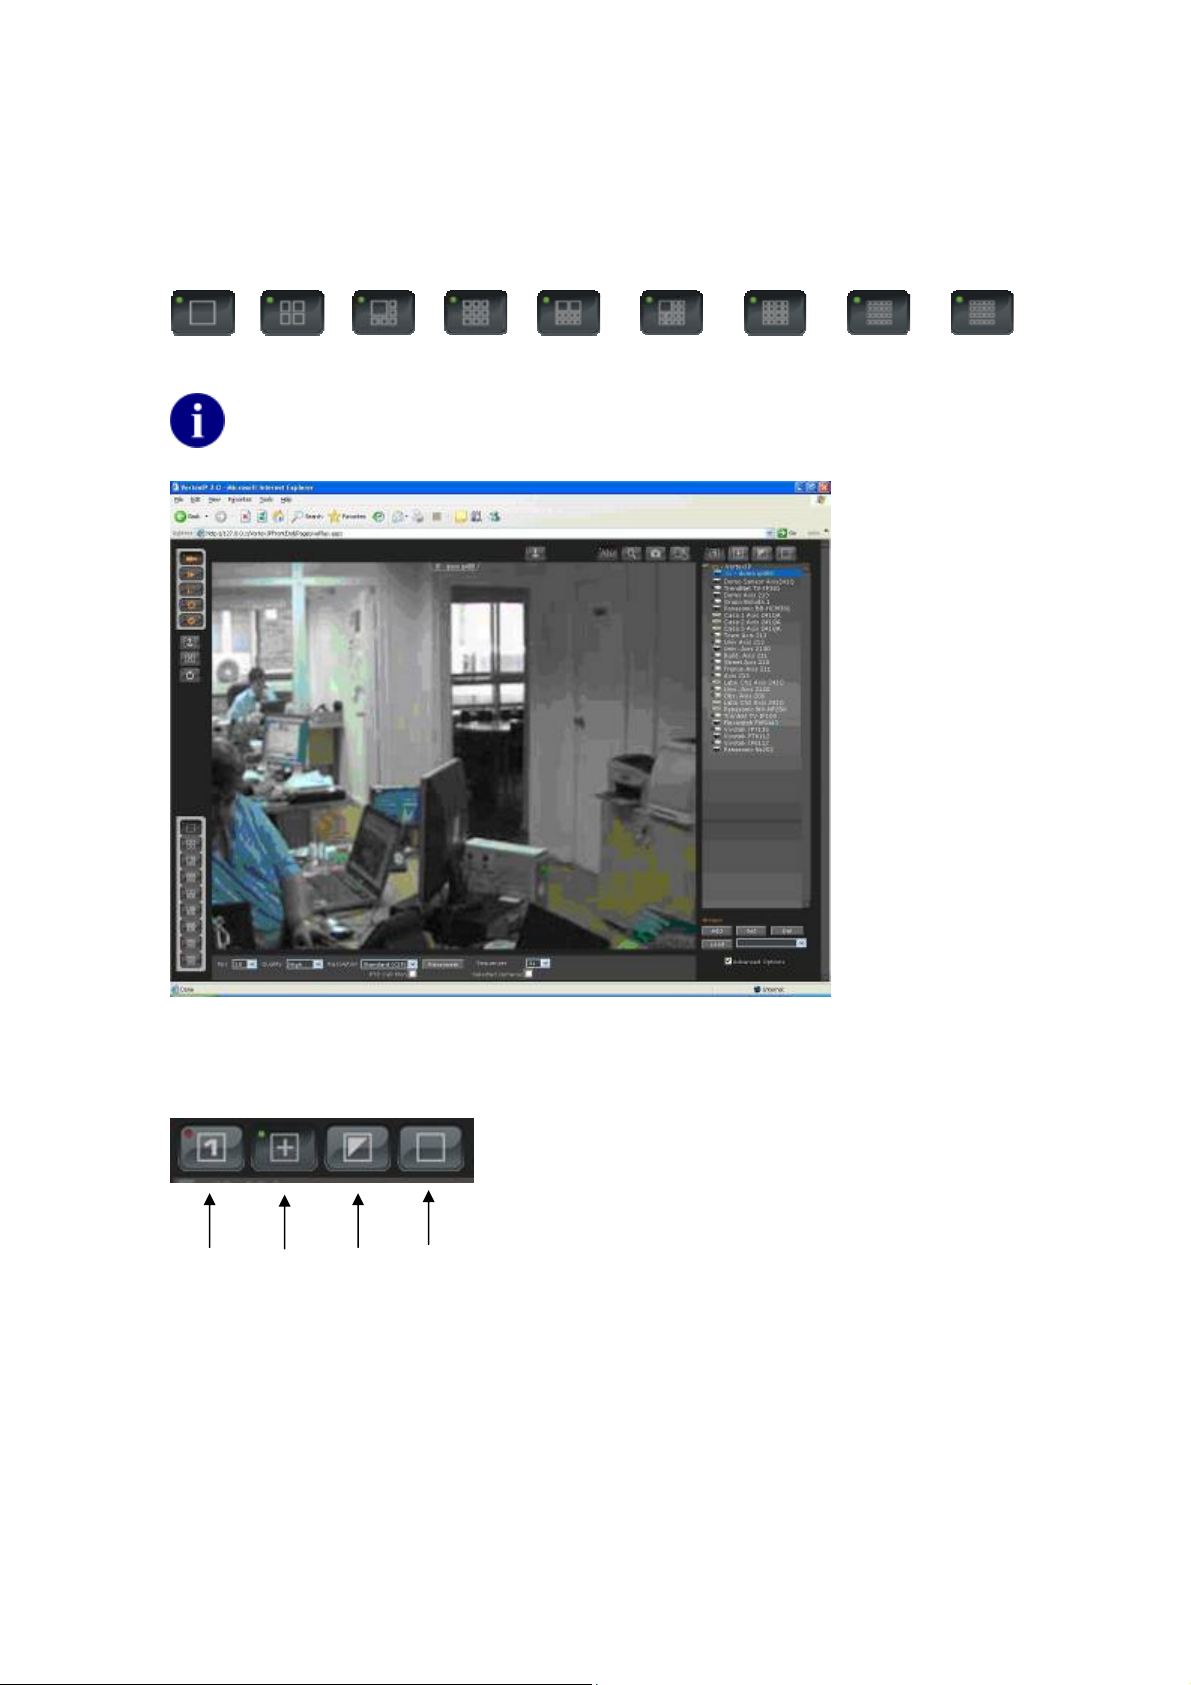
Visualization Mode
1
Camera 4 cameras 6 cameras 9 cameras
10
cameras
13
cameras
16
cameras
20
cameras
25
cameras
Every time that you choose a visualization mode and/or camera, the system will
automatically save these users’ preferences.
Selection panel of cameras
Single
Selection
Multiple
Selection
Invert
NVR
Deselect
All
6 of 36
Page 7
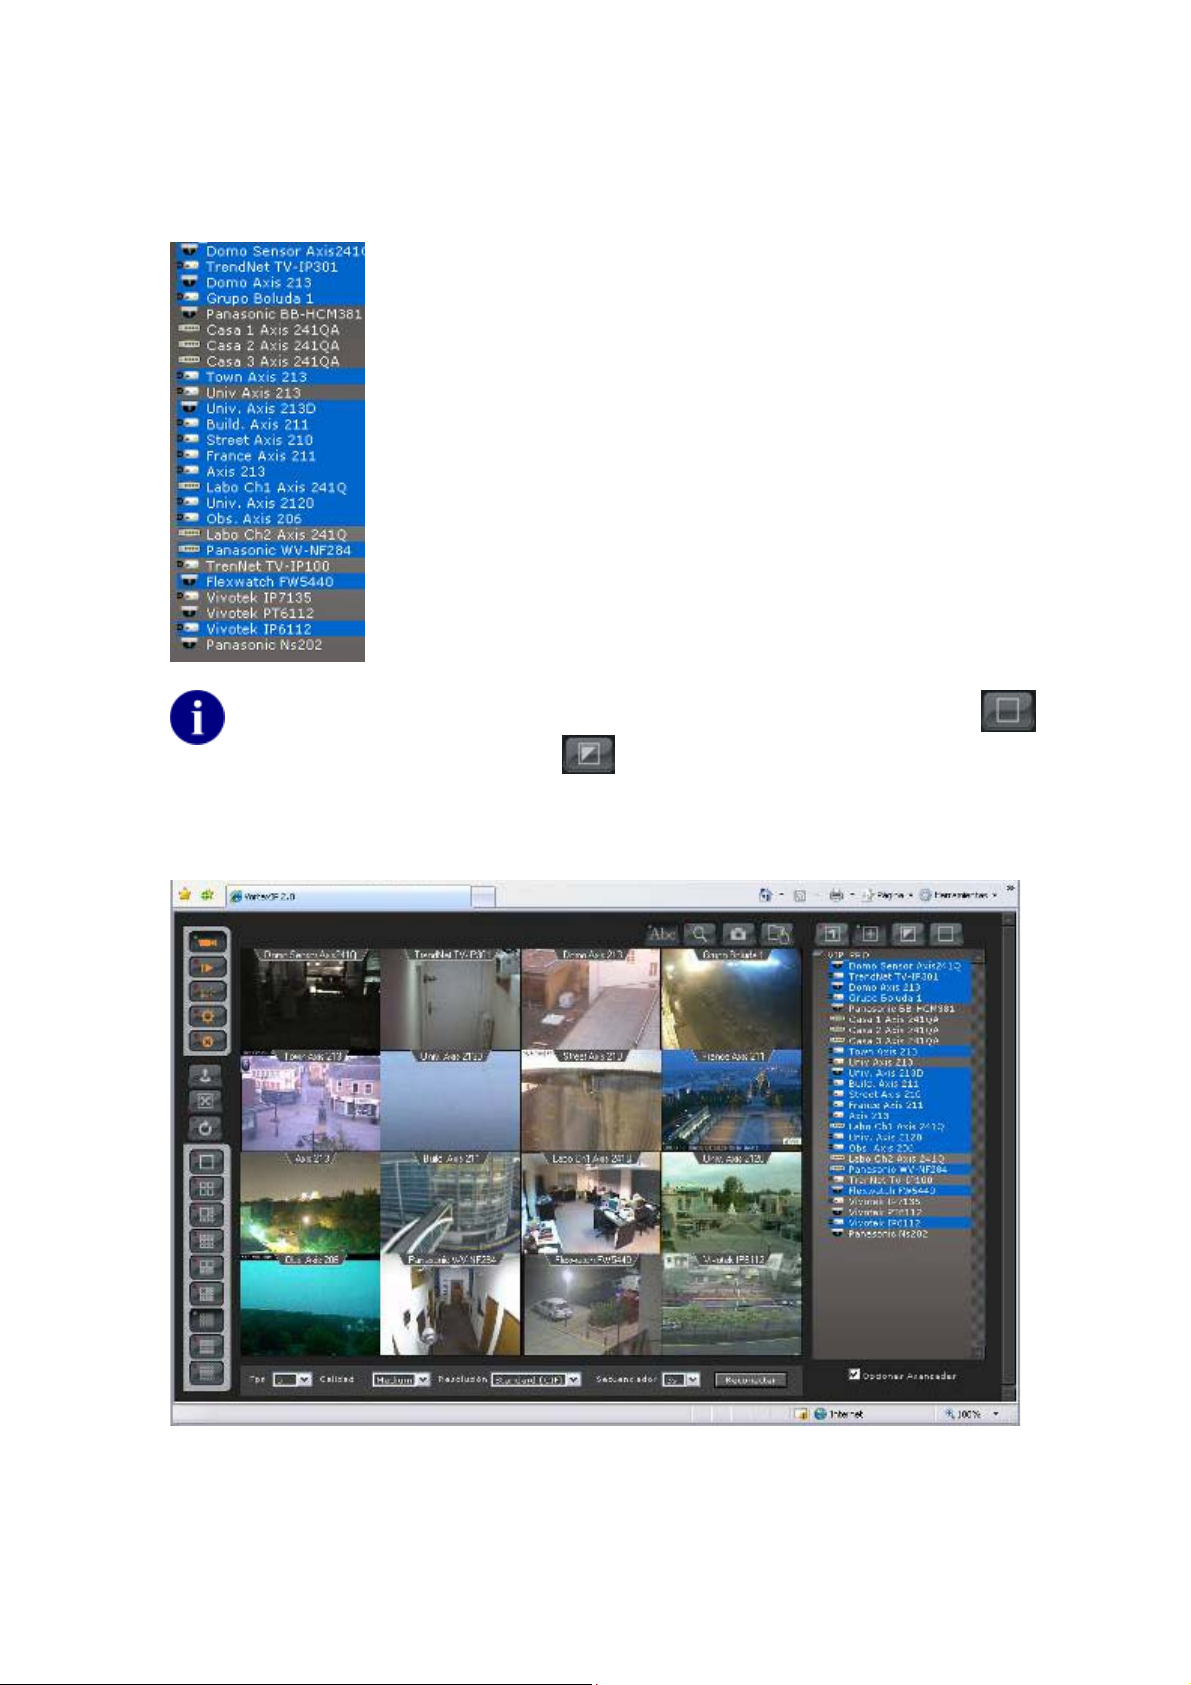
On the list of cameras, the cameras that are being viewed are highlighted in blue.
If you want to view more than one camera, first select the multiple
selection mode. Then click on the cameras that you want to view.
If you want to remove a camera, click on the camera you want to remove.
If you want to select all the cameras from a NVR, then, first click Deselect All
and then click Invert Selection .
An example of visualization mode is shown:
Visualization Mode x16
7 of 36
Page 8
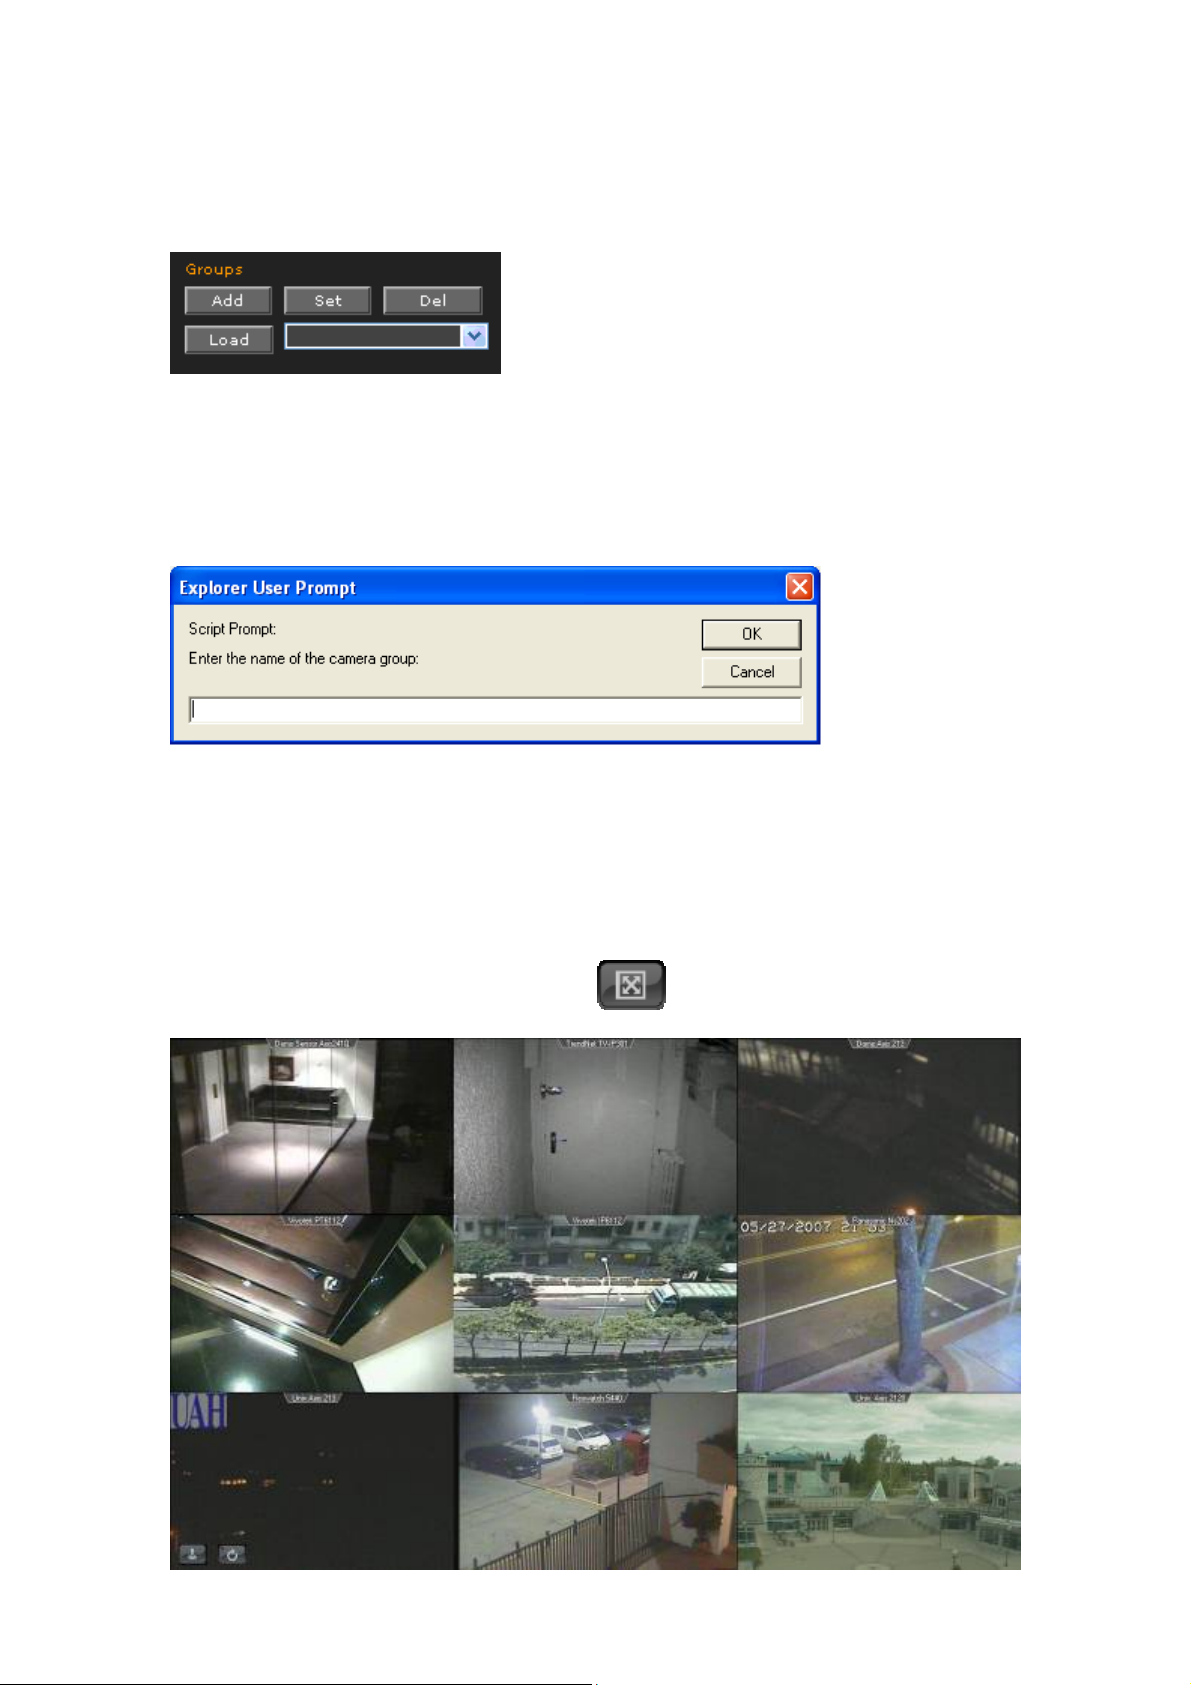
Camera Groups
The application allows the creation of groups of cameras in order to expedite surveillance.
First select the cameras that will belong to the group, and then click Load. The following window
will appear:
Enter a name for the group and then click OK.
Full Screen
If you want to view a group of cameras full screen, first choose the visualization mode and the
group that you want to see. Then click this icon
.
8 of 36
Page 9
To exit the full screen mode press ESC.
In full screen mode, you can activate camera sequencer
and the PTZ control .
If you do not want to see frames or edge of the browser, add the IP address or host
name as a trusted site in Internet Explorer.
Camera Sequencer
If you want to enable camera sequencer, click this icon . The cameras will be sequenced
every 5 seconds.
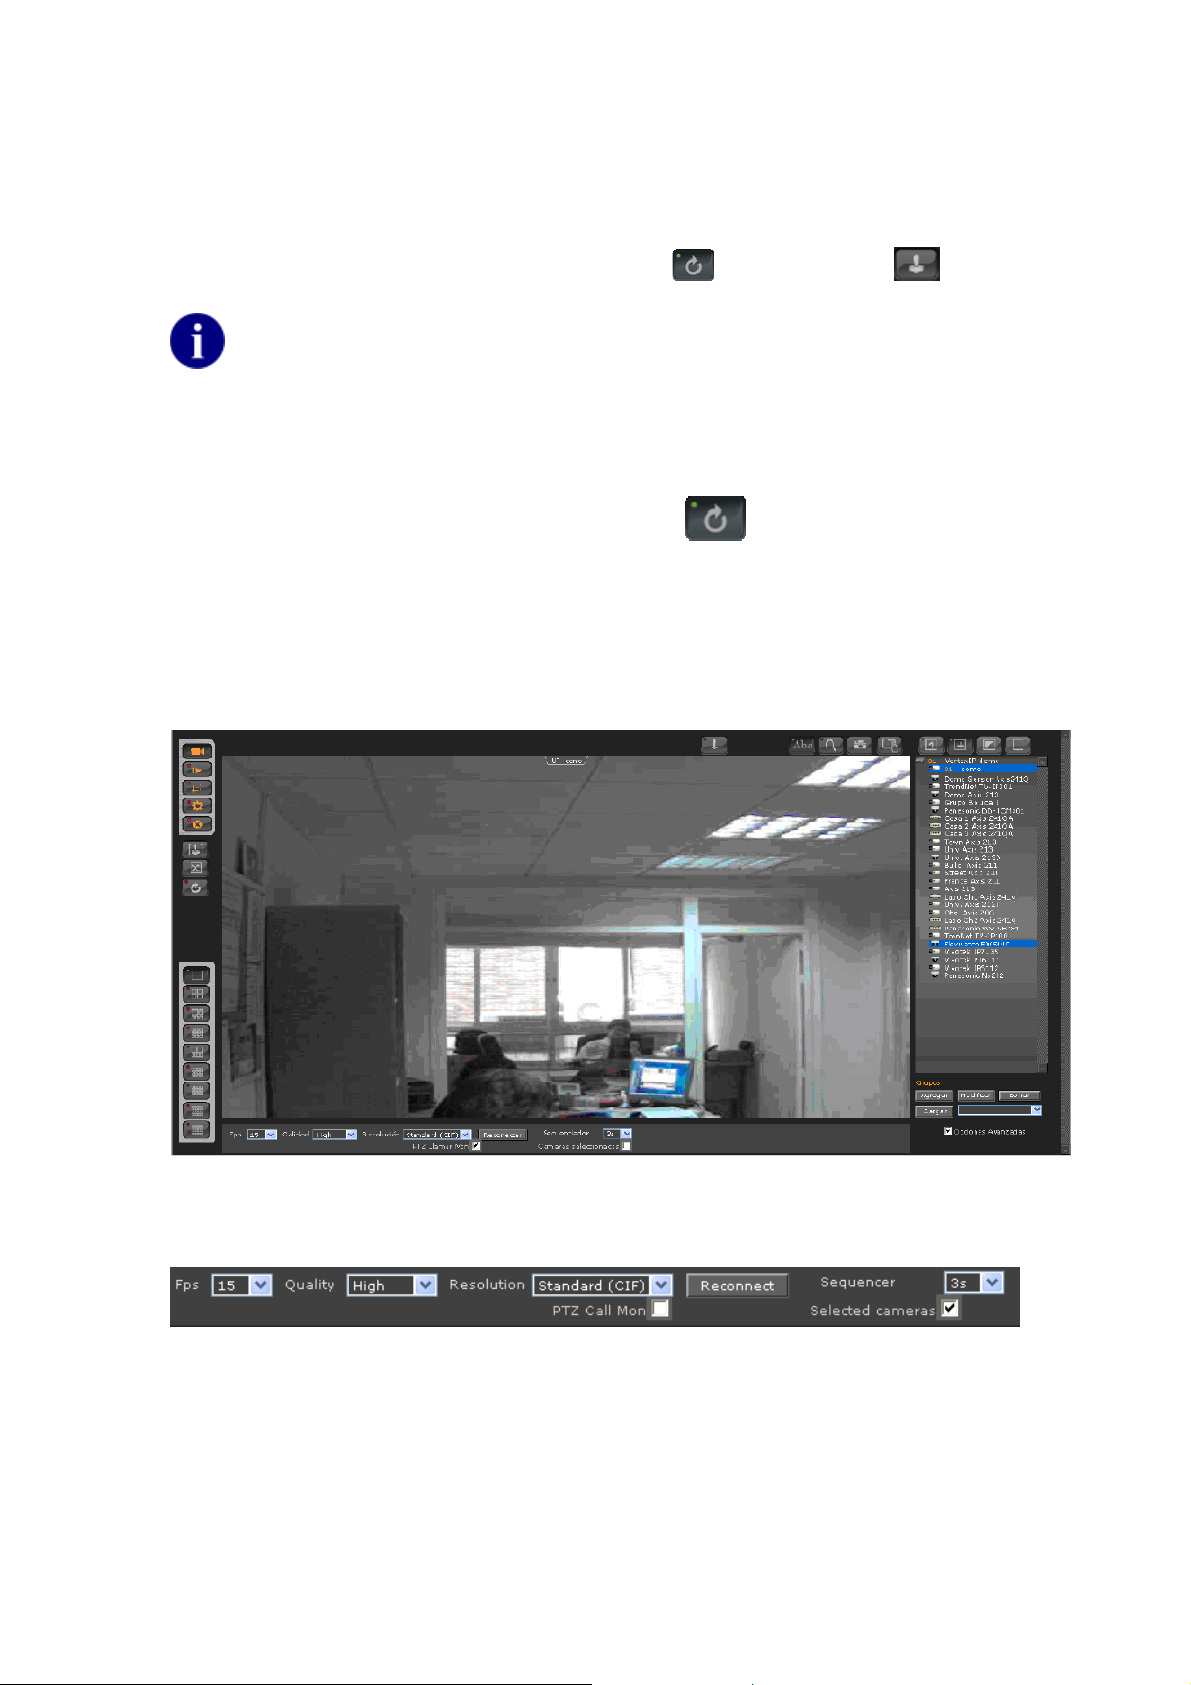
Advanced Options
Check “Advanced Options” to view additional options.
Advanced Options Menu
If you check Advanced Options, the following options will appear:
• FPS – Frames per second
• Quality
• Resolution
• Reconnect
• Sequencer – select the sequencer interval
• PTZ Call Mon – allows the use of a USB joystick and the keyboard.
• Selected cameras -- If checked, only these cameras will be rotated.
9 of 36
Page 10
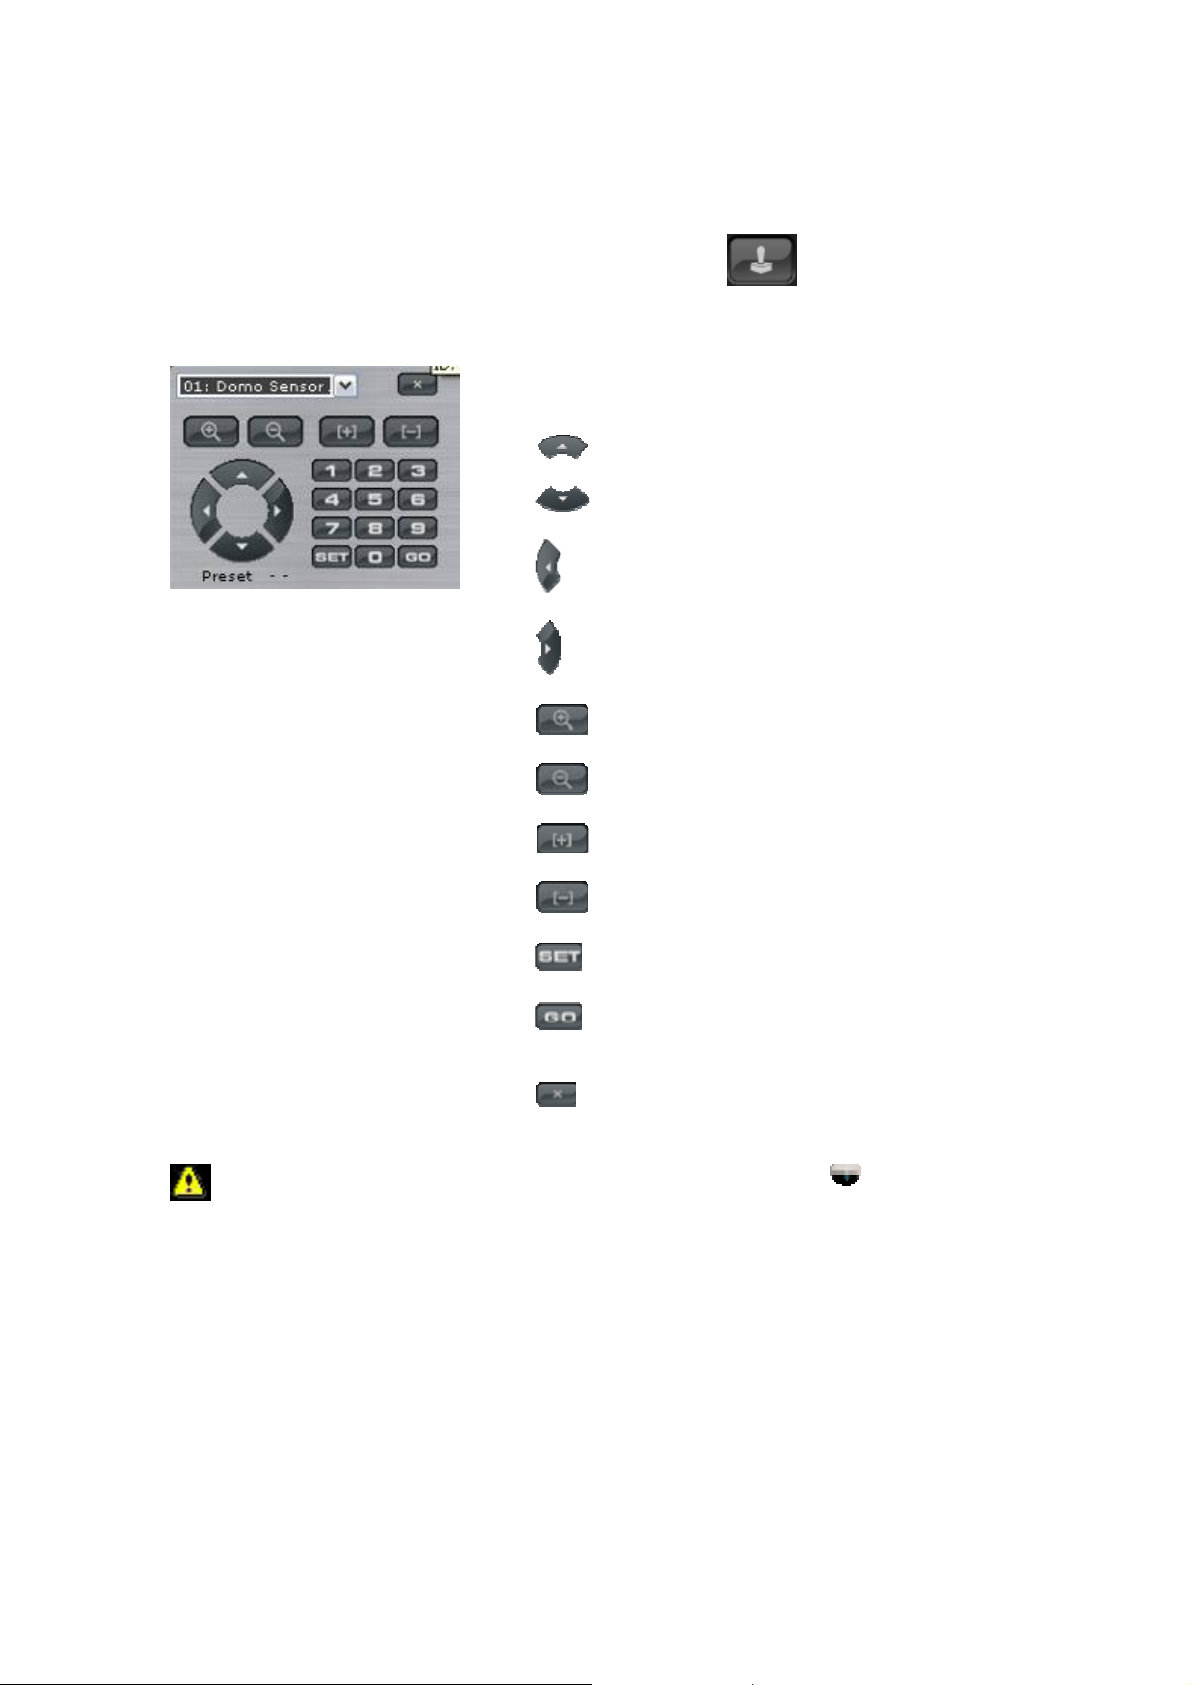
PTZ control (mouse)
To manage IP cameras that support PTZ control, click this icon
appear:
Select the camera that you wish to control from the
dropdown list.
Commands of the PTZ control
Up
Down
Left
Right
Zoom in
Zoom out
Near Focal Point.
. The following window will
Away from Focal Point.
Set the current position as preset.
First, you have to press the number for the preset.
Call a preset. First, you have to press the
number for the preset.
Close the PTZ control panel.
If you do not have any Domo (Pan and Tilt) type camera
control will not appear. To assign a camera as a Domo type, go to the configuration
guide.
selected, the PTZ
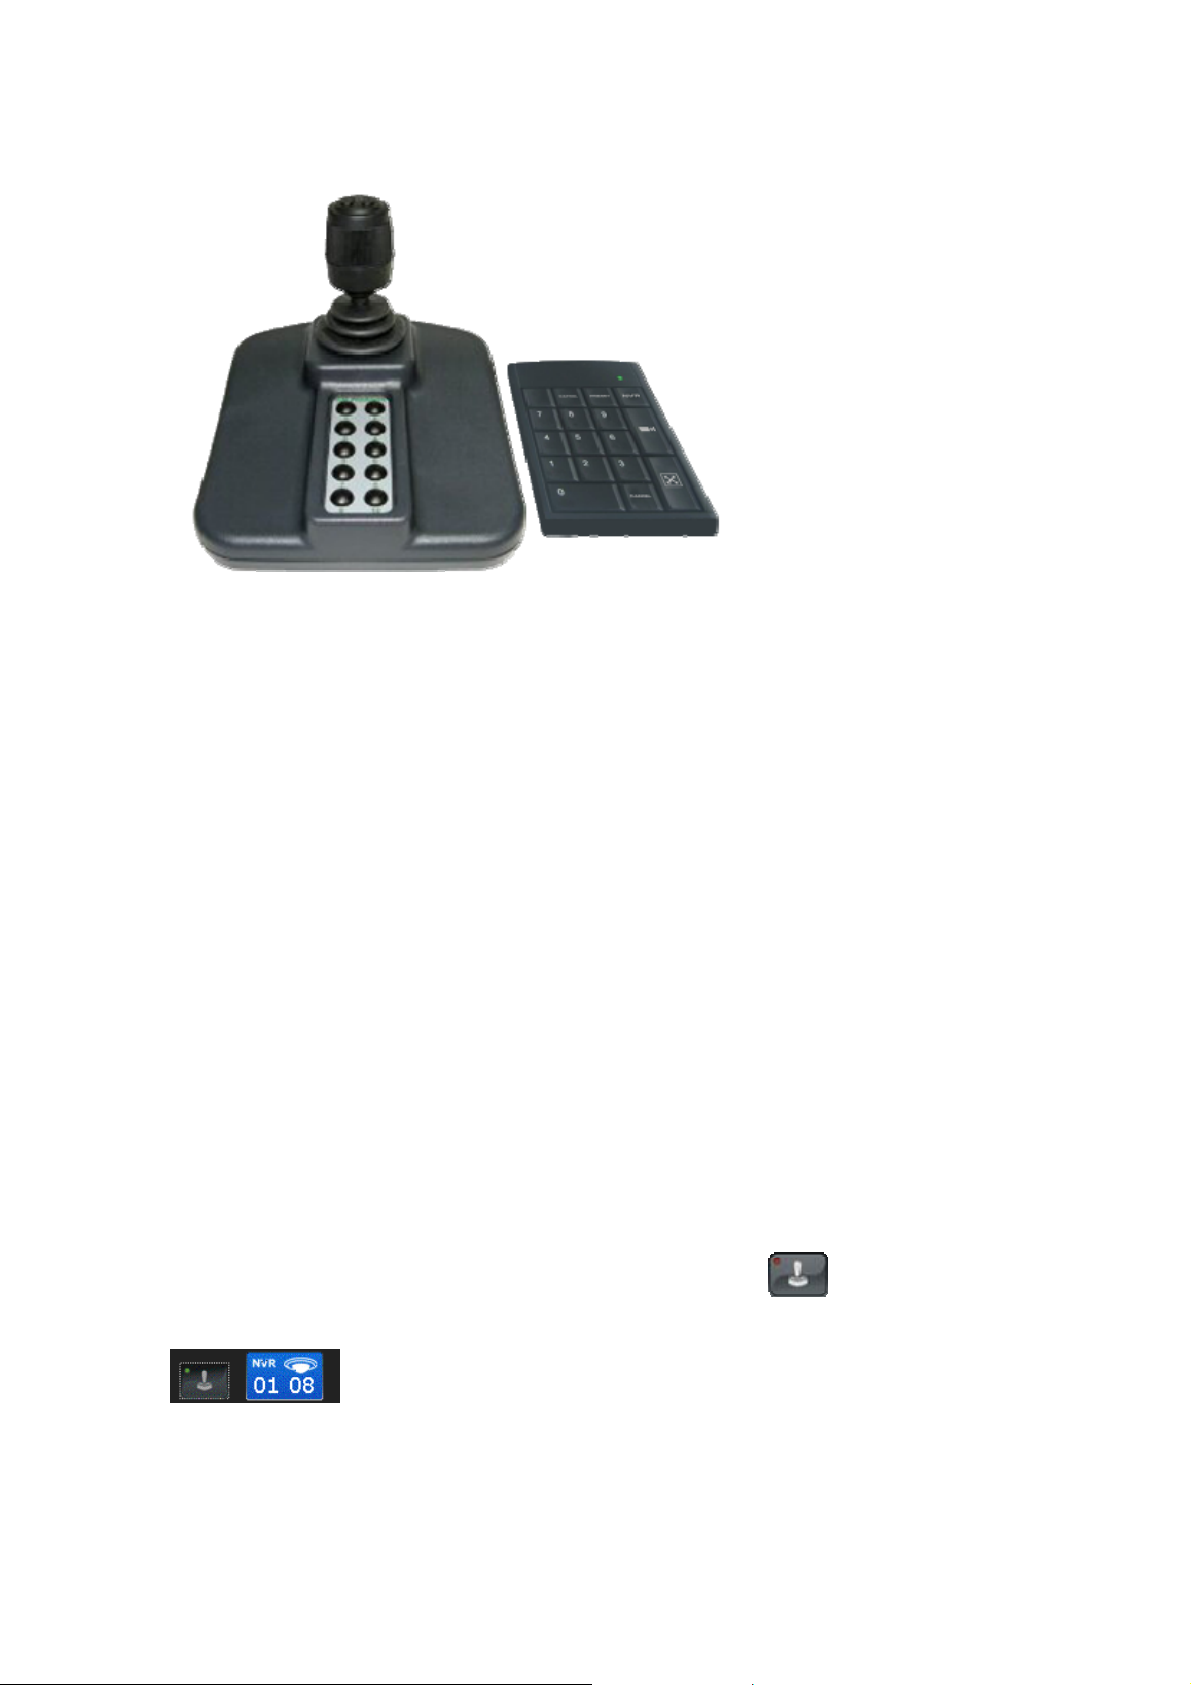
Joystick (USB)
Installing Keyboard and Joystick
VortexIP supports the use of a USB Joystick. It complementary combines with a numeric keyboard
to obtain full functionality of a joystick
Get a USB Joystick and a numeric USB Keyboard and connect them to your computer:
10 of 36
Page 11
Activating the Keyboard and Joystick
Access the VortexIP. When you access the live video page, there are two modes for the use of the
Joystick:
• Selection Mode
• Monitor Call Mode
Selection Mode
The Keyboard and Joystick only act over the list of selected cameras on the camera tree.
Whenever one camera is selected with the keyboard, the view will not be modified.
This is the default operation mode.
Monitor Call Mode
The Keyboard and Joystick act over the whole list of cameras of the camera tree. Whenever one
camera is selected with the keyboard, the camera is brought to the first position on the grid.
If you wish to enable this mode, click Live Video, check Advanced Options, then check PTZ
Call Mon.
Enabling the Keyboard and Joystick
To enable the operation of the keyboard and joystick click this icon .
Once it has been enable the PTZ console will appear:
Keyboard Commands
The numeric keyboard has been redefined to be able to operate as a PTZ console.
11 of 36
Page 12

Below is the keyboard mapping:
DVR Selection
In order to select the DVR you have to execute the following command
[DvrId] + [-]
For example:
If you press the following keyboard sequence:
[0][1][-]
The DVR with Id 01 will be selected
Camera Selection
In order to select the camera you have to execute the following command
[CamId] + [+]
For example:
If you press the following keyboard sequence:
[1][0][8][+]
The camera with Id 108 will be selected.
Preset Call
To invoke a camera preset you have to execute the following command
[NumPreset] + [*]
For example:
If you press the following keyboard sequence:
[1][9][*]
It calls preset 19 of the selected camera.
Initiate Monitoring
In order to initiate camera monitoring the following command has to be executed:
12 of 36
Page 13

[NumPatrol] + [/]
For example:
If you press the following keyboard sequence:
[0][/]
Initiates the monitoring 0 of the selected camera
Stop Monitoring
In order to stop camera monitoring you have to execute the following command
[NumPatrol] + [/]
For example:
If you press the following keyboard sequence:
[2] + [/]
It stops the monitoring 2 of the selected camera.
Cancel Command
To undo an incomplete command or to correct a non executed command you have to press the
following key:
[ .]
13 of 36
Page 14

Joystick Commands
The custom programming of buttons and configuration is saved in the PC where the joystick is
connected. Every time you change computers, you will have to configure it again.
In order to assign functions to the joystick for the buttons, you have to press the following button:
And the following configuration screen will appear:
Here you can program specific actions to buttons on the Joystick:
Initiate Auto Pan
In order to initiate the Auto Pan you have to press the programmed button on the USB Joystick.
Stop Auto Pan
In order to stop the Auto Pan you have to press the same programmed button to initiate the
Autopan.
Activate AutoFocus
In order to activate Auto Focus you have to press the programmed button on the USB Joystick.
14 of 36
Page 15

Go to Home Position
In order to call the Home position of the camera you have to press the programmed button on the
USB Joystick.
Activate Auto Iris
In order to activate Auto Iris you have to press the programmed button on the USB Joystick.
Iris Open
In order to open the Iris you have to press the programmed button on the USB Joystick.
Iris Close
In order to close the Iris you have to press the programmed button on the USB Joystick.
Focus Near
For bringing near the focus you have press the programmed button on the USB Joystick.
Focus Far
For moving further away the focus you have to press the programmed button on the USB Joystick.
Zoom In
For zooming in you may use the programmed button on the USB Joystick.
Zoom Out
For zooming out you may use the programmed button on the USB Joystick
Capture Snapshots
If you click this icon you will be able to capture an image instantaneous from all the cameras
that you are viewing.
Snapshots Directory
If you want to define where to store your photos, click this icon . You will be able to define
the directory’s root. Then every time click the Capture Snapshots icon
without bringing up the Save As dialog box.
, images will be saved
Digital Zoom
If you click this icon you will be able to enable digital zoom. To zoom in or zoom out, use the
mouse wheel. You can also zoom in or zoom out by using the buttons shown on the screen:
Zoom in, Zoom out.
Show/Hide cameras’ Name
If you click this icon you will be able to show/hide the cameras’ names.
15 of 36
Page 16

Recorded Video
To access recorded video for one or more cameras, click this icon .
If you have not previously access the system from your PC or laptop, you need to install the
ActiveX component for viewing recorded video.
.
Click Install Control ActiveX. The following dialog box will appear. Click Install:
Once the installation is completed, the following screen will pop up:
16 of 36
Page 17

Selection of the camera, Date/Hour
1. Select the camera/s 2. The system will mark the dates and
hours where you have recorded video.
Select the date and hour you want to
view.
The selected video will automatically load as shown on the following screen:
17 of 36
Page 18

Camera Selection Panel
Simple
Selection
Multiple
Selection
Invert
Selection
On the camera tree, the cameras in blue will be viewed.
If you want to view multiple cameras, first select Multiple Selection mode.
Then, click the name of the cameras that you want to view.
If you want to remove a camera, then click again on the camera you want
to remove.
Deselect
All
The example below displays recorded video for 4 cameras:
18 of 36
Page 19

Viewing Controls
Next, the each control for viewing recorded video will be detailed:
4
5
3 2
8
1 Control Status Indicator: Fast-forward, Rewind.
2 Video Playing Speed Indicator: To change this press one of the following buttons:
7 9 11
10
1
13
12 6
Fast-forward
Rewind.
3 Displays the Date and Time of the recorded video that it is being played.
4 Control what part of the video to be played. To fast-forward or rewind, click the Knob, drag it to
the specific point in the video that you are interested in view it and release the mouse button.
5 Rewind.
6 Go to the beginning of the Video.
7 Play backwards.
8 Previous frame.
9 Pause.
10 Next frame.
11 Play.
19 of 36
Page 20

12 Go to the end of the Video.
13. Fast Forward.
Video’s timeline bar
ActiveX Play Control has a video information bar. It covers a period of 1 hour and provides
information on the video.
XX:00:00 XX:59:59
Video Status:
No Video recorded
Video recorded
Video recorded by event
At any time, you may scroll and drop the scrolling cursor inside the
video time bar.
You may also use the mouse wheel on the time bar to move the scrolling
cursor forward or backwards.
After each hour, the control will automatically display the video time line to show information for
the corresponding hour.
Capture Snapshots
If you click this icon you will be able to capture an image instantaneous from all the cameras
that you are viewing.
Digital Zoom
Click this icon to enable the digital zoom. To zoom in or zoom out, use the mouse wheel.
You can also zoom in or zoom out by using the buttons shown on the screen:
zoom in, zoom out.
Show/Hide the cameras’ name
If you click this icon you will be able to show or hide the cameras’ name.
20 of 36
Page 21

Video Smart Search
The system offers video smart search feature, saving you precious time finding a specific event or
incident.
The smart search allows you to select an area of a recorded video for motion .
Video Smart Search is carried out on the server where VortexIP is running. No additional
resources will be used on your computer.
There are two different methods for carrying out smart searches:
• Smart Search ONLINE: It searches in a concrete part of the image, th e first occurrence of
motion. Once the motion is detected, the search will be stopped.
• Smart Search OFFLINE: It searches in an hour range, in a concrete part of the image, all
occurrence of motion. This search will list all detected events including date/hour.
Smart Search ONLINE
To use this function you have to be in single selection mode.
Then, choose a camera, date/hour that you are interested in and open the video.
You need to define the initial time from which you want to search in the video. It is mandatory to
position the video by using .
Then, click pause
Before starting the search, you have to select the motion sensitivity: High, Medium, and Low.
Then, click Smart
once you have correctly selected the start time desired.
. The following screen will appear:
21 of 36
Page 22

Using the mouse, select the area to be searched.
If you want to mark the detected movement areas within a search area,
check Show Overlay.
To begin the search, click this icon
While the search is taking place, the video will adjust to 1 frame per second, until it finds motion
within the search area.
Once the event has been found, the search will automatically stop.
.
22 of 36
Page 23

Click this icon
If you want to play the video normally, press this icon
click this icon
to look for the next occurrence of motion.
.
to disable the search, and then
23 of 36
Page 24

Smart Search OFFLINE
Note: To use this function you have to be in Single Selection mode.
If you are not in this mode, click the Single Selection icon. Choose the desired camera, choose the
desired date/hour and open the video.
Then click the Pause button
Select the motion sensibility: High, Medium and Low.
Click Smart
Then, click this icon
Select:
• Start Date/hour.
If you click on Date, the calendar will appear.
Select the desired start date, press Ok.
By pressing on
adjust the start time.
• End Date/hour.
If you click on Date, the calendar will appear.
Select the desired end date, press Ok.
By pressing on
adjust the end time.
• Select the interval for the searching
process.
and define the search area as shown on the previous section.
and you will be able to
and you will be able to
.
. The following screen will appear:
24 of 36
Page 25

Once you have made the desired changes, click Search. The progress bar will be automatically
updated. A list of detected movement events will appear.
When the search has been completed, you click on any of the detected events.
All the events from the list correspond to the previous instant of time (Pre-Alarm)
once motion inside the search area has taken place.
To play the video normally, click this icon
icon
.
to disable the search and then click this
25 of 36
Page 26

Visual Video Search
The visual search, allows you search the video based on images, so you will be able to save your
valuable time to find incidents, especially when you do not know the date or hour exact of the
event.
Video Smart Search is carried out on the server where VortexIP is running. No additional
resources will be used on your computer.
To use this function you have to be in single selection mode.
Then, choose a camera, date/hour that you are interested in and open the video.
Then, click the Visual Search icon . The following screen will appear.
Select the image corresponding to the desired hour. The following screen will appear:
26 of 36
Page 27

Images will appear in intervals of 2 minutes and 30 seconds. Select the desired image. The
following screen will appear:
27 of 36
Page 28

Images will appear in interval of 6 seconds. Select the desired image. The following screen will
appear:
Images will appear in interval of 1 second. Click on the image to load the associated video.
Click Back to go back.
28 of 36
Page 29

Export videos
If you click on this icon,
Define the date and the time of the video.
The new file will be saved in the Backup repository.
To view the exported files, click this icon
video will be exported in Windows Media Player format.
and then click on the Video Backup icon.
29 of 36
Page 30

Electronic Map
To access the Electronic Map, click this icon .
This feature will allow you to upload and view a physical or logical map of your Internet Camera
installations.
Using the map
To view the map, click on the map icon. If you move the cursor close to a certain camera, the
camera name will appear.
30 of 36
Page 31

Editing the map
If you have administrator privileges, you will be able to configure the cameras’ positions and
import the map’s image.
Dragging and dropping cameras
For editing a camera’s position, click this icon . Then, drag and drop the cameras to the
desired position. If you want to remove a camera from the map, drag and drop it inside the grey
screen and it will be automatically removed from the map.
Once the changes have been made, click this icon
Since the map has associated a logical or geographical distribution of the cameras, the
map is common to all users.
to keep the configuration of the map.
Importing Electronic Map
To import the map’s image, click Examine. Then, select the name of the file and click Accept.
Map’s compatible format is JPEG
To finish, click Upload.
31 of 36
Page 32

Erasing Electronic Map
To erase a map, first select it from the menu and click this icon
Exit the system
To exit, click this icon .
.
32 of 36
Page 33

Appendix A – Error Messages
You do not have enough rights to access this page.
Every time that you access a resource of the system, VortexIP will verify if you have the proper
permissions. If the user is not the root user, it has restrictions on certain resources (Electronic
Map, Playing, Configuration, etc). The following screen will appear:
33 of 36
Page 34

Appendix B – Problem Solving
1. I am not able to watch live video nor recorded video
• Check that you have correctly installed the .NET Framework 1.1.
• Check that ActiveX components both for live video and recorded video have been
correctly installed.
• Check that you have Internet access, by trying to access any known website in
Internet Explorer.
2. You are only able to watch live video
• Check that you have correctly installed the .NET Framework 1.1.
• Check that ActiveX component for live video is installed.
• Check that you have Internet access, by trying to access any known website in
Internet Explorer.
• Check that you do not have a configured Proxy Server in the Internet Explorer. ActiveX
live video allows you to connect the PC through a Proxy Server configured on your
Internet Explorer, but ActiveX does not support connections by means of Proxy Server.
3. ActiveX components does not get installed
• Check that you have correctly installed .NET Framework 1.1.
4. The NVR does not register video
• Check that the NVR has direct connection to the Internet and try to access any known
website in Internet Explorer.
• Ping the IP cameras that you want to record.
• Check that recording is already initialized.
• Check the cameras’ recording schedule. If they are configured to record by event
verify that the IP cameras are sending the events to the digital video recorder and that
the events’ reception port can be reached from the IP cameras to the VortexIP
recorder.
5. Service cannot be initialized, stopped or restarted by Web access
• This functionality is only available when VortexIP recorded is installed on Windows XP
Professional. If you are running Windows 2000 Server or Windows 2003 Server, then
you will not be able to make decisions about the recording service from the Web
access due to the security policy of the operating system.
6. Forgot my Administrator password
• For security reasons, passwords can not be restored. If you forget your root password,
you need to reinstall the product. Remember that by default, there is no administrator
password.
34 of 36
Page 35

7. VortexIP recorder works correctly, but whenever I want to watch a recorded
video of an event that happened less than 10 seconds ago, images do not
appear.
• VortexIP recorder has a buffer cache to maximize the useful life of its rigids disc.
Buffer’s length is by default 512Kbytes and it cannot be modified. This means that if
you are recording a camera at 1 FPS or less, then you will have to wait the equivalent
time according to the image size in Kbytes.
To view images recorded by a camera at 1 FPS you have to wait about 10 seconds,
which is the time that it takes to fill the buffer. This effect does not take place when
the recording speed is higher than 1 FPS, the time to fill the buffer becomes negligible.
35 of 36
Page 36

36 of 36
 Loading...