

Page 1
Guide d'installation rapide
TPE-S160
1.01
Page 2

Table of Contents
Français 1
1. Avant de commencer 1
2. Voyants 2
3. Installation du matériel 3
Technical Specifications 7
Troubleshooting 8
Version 03.23.2010
Page 3
1. Avant de commencer
Contenu de l'emballage
ŸTPE-S160
ŸGuide d'installation rapide en plusieurs
langues
ŸCordon d'alimentation
ŸKit de montage
ŸPieds en caoutchouc
Vérification de l'équipement
ŸUn ordinateur avec un adaptateur réseau correctement installé
ŸCâble réseau RJ-45
ŸLa surface sous le commutateur doit pouvoir résister à un poids minimum de 3.8kg
ŸLa prise secteur doit être située à un maximum de 1,82 mètres de l'appareil
ŸVérifiez la présence d'une source de ventilation adéquate autour du commutateur
pour une dissipation efficace de la chaleur
ŸNe placez pas d'objets lourds sur le commutateur.
ŸPériphérique alimenté par IEEE 802.3af
Équipement optionnel
ŸTPE-112GS (non fourni)
ŸUn rack EIA standard 19 pouces (non fourni)
Remarque:
Le TPE-S160 ne supporte que les péripériques alimentés qui respectent la norme
IEEE 802.3af
1
Page 4
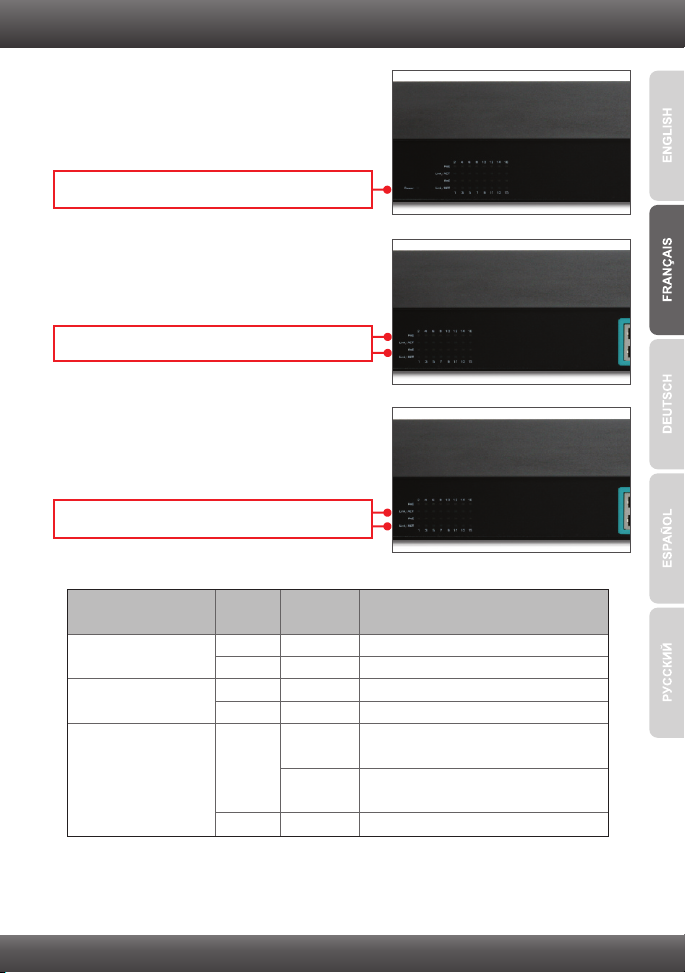
Voyant indiquant le
statut de l’appareil
Couleur
Séquence
Définition
PoE
(Power over Ethernet)
Power
Link/ACT
Jaune
Fixe
Fixe
Fixe
Clignotant
Jaune
Vert
N/A
Arrêt
Arrêt
Arrêt
N/A
N/A
PoE device is connected
Un périphérique PoE est connecté
Aucune connexion au port
Périphérique alimenté allumé
Périphérique alimenté éteint
100/200Mbps (Half/Full) ou 10/20 Mbps
(Half/Full Duplex) branché (par port)
Emission/réception de données
(par port)
2. Voyants
Power
PoE (Power over Ethernet)
Link/ACT
2
Page 5
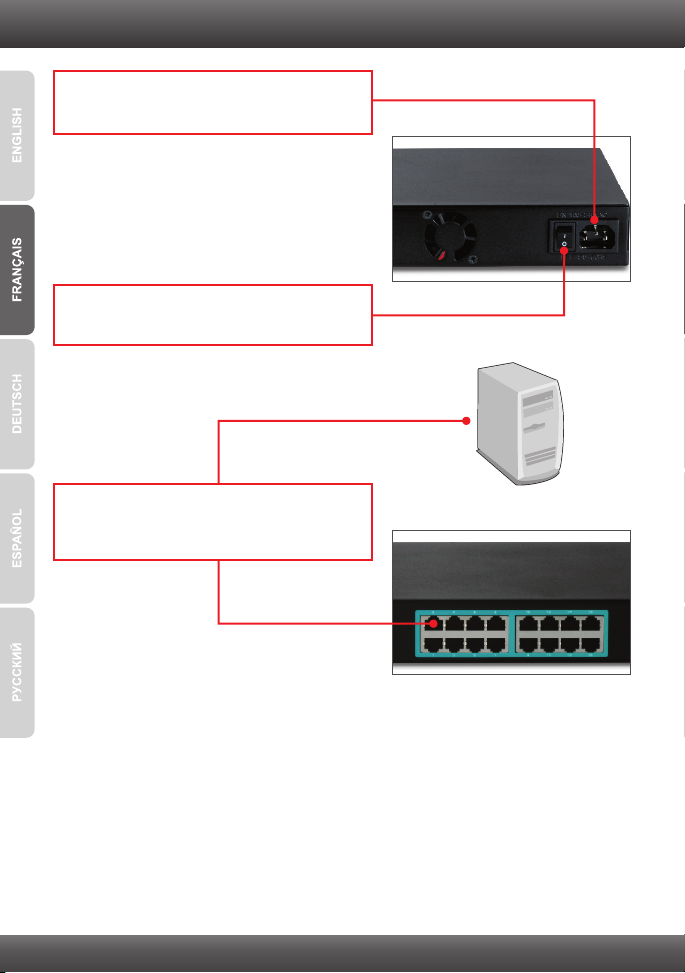
3. Installation du matériel
1. Branchez le Cordon électrique à l'arrière du
TPE-S160 et à une prise de courant.
2. Déplacer l'interrupteur d'alimentation en
position marche.
3. Branchez un câble réseau RJ-45 entre
l'ordinateur et un port Ethernet disponible sur le
TPE-S160.
3
Page 6

4. Branchez un câble RJ-45 cable entre un port
PoE du TPE-S160 et le port LAN du
périphérique PoE (p. ex. le TEW-638PAP)
5. Vérifiez que les voyants suivants du panneau
sont allumés: Power, PoE et Link/ACT.
4
Page 7

Utilisation du TPE-S160 et du TPE-112GS avec un périphérique non-POE
Remarque: Notez la puissance de sortie de votre périphérique non PoE.
Le TPE-112GS ne supporte que les périphériques non PoE avec une puissance de
sortie de 5V, 7,5V, 9V ou de 12V.
1. Sélectionnez le voltage adéquat (5V, 7.5V, 9V
ou 12V).
2. Branchez un câble Ethernet entre le port PoE
(1 à 4) du switch TPE-S160 et le port POE IN
du TPE-112GS.
3. Branchez une câble Ethernet entre le
périphérique non PoE et le port DATA OUT du
TPE-112GS.
4. Branchez le câble Jumper entre un
périphérique non PoE (p. ex. le TEW-637AP) et
le TPE-112GS.
5. Vérifiez que les voyants suivants du panneau
sont allumés: Power, PoE Status et Link/ACT.
5
Page 8

Montage du rack
Le Switch peut être installé dans un rack EIA standard de 19 pouces qui peut
être placé dans une armoire de répartition avec d'autres équipements.
1. Attachez les supports de montage des deux
côtés du switch et fixez les avec les vis fournies.
2. Installez soigneusement le switch dans le rack.
Alignez le support sur les trous des vis du rack
et utilisez les vis fournies avec le matériel pour
installer le switch.
6
Page 9

Technical Specifications
Hardware
Standard
ŸIEEE 802.3 10Base-T
ŸIEEE802.3u 100Base-TX
ŸIEEE 802.3af Power over Ethernet
ŸIEEE 802.3x Flow Control
16 x 10/100Mbps Auto-MDIX PoE ports
On/Off power switch
ŸEthernet: 10/20Mbps (half/full duplex)
ŸFast Ethernet: 100/200Mbps (half/full duplex)
1.5Mbits
4K MAC entries
3.2Gbps
100~240VAC 50/60Hz, internal universal switching power
Power, Link/Activity, PoE Act/Status
Ÿ6 Watts max. (no Power Device (PD) connected)
Ÿ260 Watts max. (16 PoE devices connected)
ŸOperating: 0° ~ 45°C (32° ~ 113°F)
ŸStorage: -10° ~ 70°C (14° ~ 158°F)
Ports
Power Switch
Data Transfer Rates
Data RAM Buffer
Address Table
Switch Fabric
Power
Diagnostic LEDs
Power Consumption
Temperature
10%- 95% (non-condensing)
440 x 220 x 44 mm (117.3 x 8.7 x 1.7 in.)
3.1 kg (6.9 lb)
CE, FCC
ŸUp to 15.4 watts per port; PD classification
ŸPolymer switch for short protection
ŸPoE: pin 3,6 for power (+) and pin 1,2 for power (-)
Humidity
Dimensions
Certifications
Weight
PoE
Power over Ethernet
7
Page 10

Troubleshooting
1. After connecting the Switch to a power outlet, the LEDs do not turn on.
1. Check the connection of the power cord to the TPE-S160 and the power outlet.
2. Verify that the power switch is set to the On position.
3. Check that the power outlet is receiving power.
2. After I connect my PCs to the Switch, I am unable to share files.
1. Check the LEDs on the Switch. Make sure the Link/ACT LED is on.
2. Check the network cable. The minimum length of the cable is 1.5 meters and
the maximum length of the cable is 100 meters.
3. Disable any software firewall program.
4. Verify that you have file sharing enabled. Please contact your Operating
System support for more information.
3. After I connect my PCs to the Switch, I can only get onto the Internet from one
computer.
The Switch was not designed to share Internet between multiple computers. You
need to get an Internet router such as the TW100-S4W1CA.
4. My 802.3af Powered device does not power on when I plug the device into the
Switch. What should I do?
1. Verify that the PoE device supports IEEE 802.3af protocol.
2. Verify that the power switch is set to the on position.
3. Power cycle the PoE switch. Move the power switch to the off position. Wait 15
seconds, then move the power switch back to the on position.
4. Plug the device into a different port on the PoE switch.
5. Try using another RJ-45 network cable.
5. Where is the uplink port located on the Switch?
Since all the ports on the Switch are Auto-MDIX, any of the ports can be used as
an uplink port.
If you still encounter problems or have any questions regarding the TPE-S160 please
contact Trendnet's Technical Support Department.
8
Page 11

Limited Warranty
TRENDnet warrants its products against defects in material and workmanship, under normal
use and service, for the following lengths of time from the date of purchase.
TPE-S160 – 3 Years Limited Warranty
AC/DC Power Adapter, Cooling Fan, and Power Supply carry a 1 year warranty.
If a product does not operate as warranted during the applicable warranty period, TRENDnet
shall reserve the right, at its expense, to repair or replace the defective product or part and deliver
an equivalent product or part to the customer. The repair/replacement unit's warranty continues
from the original date of purchase. All products that are replaced become the property of
TRENDnet. Replacement products may be new or reconditioned. TRENDnet does not issue
refunds or credit. Please contact the point-of-purchase for their return policies.
TRENDnet shall not be responsible for any software, firmware, information, or memory data of
customer contained in, stored on, or integrated with any products returned to TRENDnet
pursuant to any warranty.
There are no user serviceable parts inside the product. Do not remove or attempt to service the
product by any unauthorized service center. This warranty is voided if (i) the product has been
modified or repaired by any unauthorized service center, (ii) the product was subject to accident,
abuse, or improper use (iii) the product was subject to conditions more severe than those
specified in the manual.
Warranty service may be obtained by contacting TRENDnet within the applicable warranty
period and providing a copy of the dated proof of the purchase. Upon proper submission of
required documentation a Return Material Authorization (RMA) number will be issued. An
RMA number is required in order to initiate warranty service support for all TRENDnet
products. Products that are sent to TRENDnet for RMA service must have the RMA number
marked on the outside of return packages and sent to TRENDnet prepaid, insured and
packaged appropriately for safe shipment. Customers shipping from outside of the USA and
Canada are responsible for return shipping fees. Customers shipping from outside of the
USA are responsible for custom charges, including but not limited to, duty, tax, and other
fees.
9
Page 12

WARRANTIES EXCLUSIVE: IF THE TRENDNET PRODUCT DOES NOT OPERATE AS
WARRANTED ABOVE, THE CUSTOMER'S SOLE REMEDY SHALL BE, AT TRENDNET'S
OPTION, REPAIR OR REPLACE. THE FOREGOING WARRANTIES AND REMEDIES ARE
EXCLUSIVE AND ARE IN LIEU OF ALL OTHER WARRANTIES, EXPRESSED OR IMPLIED,
EITHER IN FACT OR BY OPERATION OF LAW, STATUTORY OR OTHERWISE, INCLUDING
WARRANTIES OF MERCHANTABILITY AND FITNESS FOR A PARTICULAR PURPOSE.
TRENDNET NEITHER ASSUMES NOR AUTHORIZES ANY OTHER PERSON TO ASSUME
FOR IT ANY OTHER LIABILITY IN CONNECTION WITH THE SALE, INSTALLATION
MAINTENANCE OR USE OF TRENDNET'S PRODUCTS.
TRENDNET SHALL NOT BE LIABLE UNDER THIS WARRANTY IF ITS TESTING AND
EXAMINATION DISCLOSE THAT THE ALLEGED DEFECT IN THE PRODUCT DOES NOT
EXIST OR WAS CAUSED BY CUSTOMER'S OR ANY THIRD PERSON'S MISUSE, NEGLECT,
IMPROPER INSTALLATION OR TESTING, UNAUTHORIZED ATTEMPTS TO REPAIR OR
MODIFY, OR ANY OTHER CAUSE BEYOND THE RANGE OF THE INTENDED USE, OR BY
ACCIDENT, FIRE, LIGHTNING, OR OTHER HAZARD.
LIMITATION OF LIABILITY: TO THE FULL EXTENT ALLOWED BY LAW TRENDNET ALSO
EXCLUDES FOR ITSELF AND ITS SUPPLIERS ANY LIABILITY, WHETHER BASED IN
CONTRACT OR TORT (INCLUDING NEGLIGENCE), FOR INCIDENTAL, CONSEQUENTIAL,
INDIRECT, SPECIAL, OR PUNITIVE DAMAGES OF ANY KIND, OR FOR LOSS OF REVENUE
OR PROFITS, LOSS OF BUSINESS, LOSS OF INFORMATION OR DATE, OR OTHER
FINANCIAL LOSS ARISING OUT OF OR IN CONNECTION WITH THE SALE, INSTALLATION,
MAINTENANCE, USE, PERFORMANCE, FAILURE, OR INTERRUPTION OF THE
POSSIBILITY OF SUCH DAMAGES, AND LIMITS ITS LIABILITY TO REPAIR,
REPLACEMENT, OR REFUND OF THE PURCHASE PRICE PAID, AT TRENDNET'S OPTION.
THIS DISCLAIMER OF LIABILITY FOR DAMAGES WILL NOT BE AFFECTED IF ANY
REMEDY PROVIDED HEREIN SHALL FAIL OF ITS ESSENTIAL PURPOSE.
Governing Law: This Limited Warranty shall be governed by the laws of the state of California.
Some TRENDnet products include software code written by third party developers. These codes
are subject to the GNU General Public License ("GPL") or GNU Lesser General Public License
("LGPL").
http://www.trendnet.com/gpl http://www.trendnet.com
Go to or Download section and look for
the desired TRENDnet product to access to the GPL Code or LGPL Code. These codes are
distributed WITHOUT WARRANTY and are subject to the copyrights of the developers.
TRENDnet does not provide technical support for these codes. Please go to
http://www.gnu.org/licenses/gpl.txt http://www.gnu.org/licenses/lgpl.txt
each license.
or for specific terms of
10
Page 13

Page 14

Page 15

Page 16

Page 17

Copyright ©2011. All Rights Reserved. TRENDnet.
 Loading...