

Page 1
Quick Installation Guide
TEW-755AP (V1)
Page 2

Table of Content
1 English
1. Before You Start
2. Web Browser Set-up
3. Mounting the Device
Page 3
1. Before You Start
WPS
Package Contents
ENGLISHFRANÇAISDEUTSCH
Ÿ TEW-755AP
Ÿ 1 x 5 ft. (1.5 m) network cable
Ÿ CD-ROM (User's Guide and Utility)
Ÿ Quick Installation Guide
Ÿ Power adapter (12V DC, 1A)
Ÿ Mounting Plate
Minimum Requirements
Ÿ Computer with network port and web browser
Ÿ Network switch or router with an available network port
Mac Users: Please refer to the User's Guide to manually configure the access point.
2. Web Browser Set-up
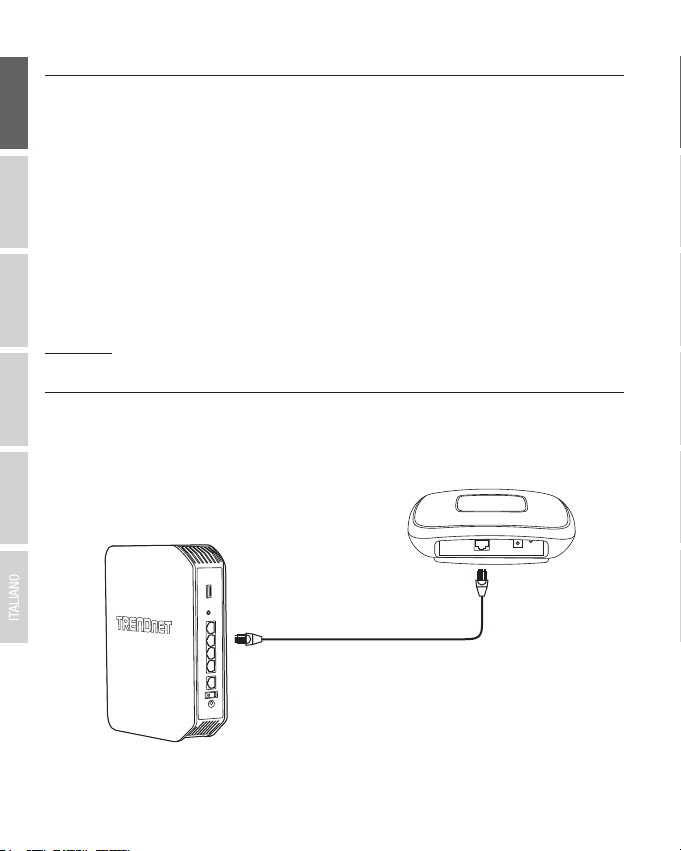
1. Connect the TEW-755AP to a switch. You may also connect the device directly to a network
ESPAÑOLРORTUGUÊS
port on your computer. If you are connecting to switch, make sure your computer is
connected to the same network.
1
Page 4
2. If you are connecting your TEW-755AP to a PoE switch, the device will power on
automatically. If you are connecting to a computer, or a non-PoE switch, you will need to use
the included power adapter.
3. To use the power adapter, plug the power adapter into the TEW-755AP, then plug the adapter
into an electrical outlet. Wait 60 seconds, then confirm that the status LEDs on the front of
the unit are illuminated. Your TEW-755AP access point is now active. The device is pre configured to automatically connect to your network, so no further setup is required to use
the device.
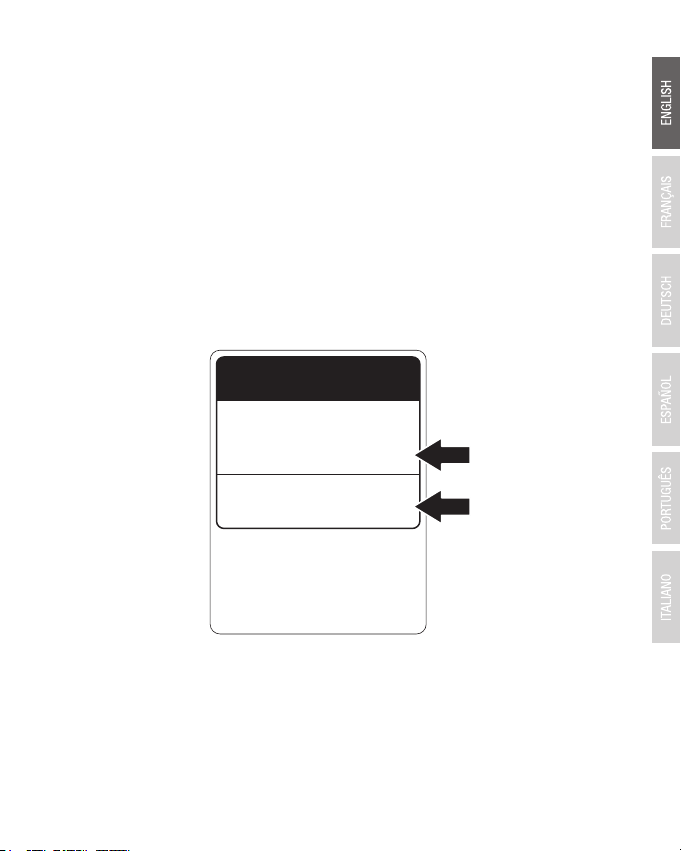
4. For your security, each TEW-755AP comes pre-encrypted with a unique WiFi Name (SSID)
and WiFi Password. You can find your device's SSID and WiFi Password on the white labels
located on the device. Use this information to connect to the TEW-755AP access point. If the
TEW-755AP is reset, the SSID and WiFi Password will also be reset to the default login
credentials located on the white label.
Preset
Wireless Settings
Wi-Fi Name/SSID
(N/B/G)
TRENDnetXXX_2.4GHz_XXXX
Wi-Fi Password
XXXXXXXXXXXXX
Management Login
http://tew-755ap
username: admin
password: admin
2
Page 5

5. Insert the CD that was packaged with your TEW-755AP into your computer, and select AP
Utility from the menu.
Note: The AP Utility only supports Windows based computers. Please visit TRENDnet.com
ENGLISHFRANÇAISDEUTSCH
for a complete list of the AP Utility supported operating systems.
6. Select your device from the dropdown menu or click on the Discover button to locate your
device.
ESPAÑOLРORTUGUÊS
7. Select your device by checking the box next to TEW-755AP, and click on Device Settings.
3
Page 6

8. The Device Settings page will show your basic Wi-Fi network settings. If your network
Static
requires a static IP address, select the Static radio button and enter your settings. If you are
not sure, leave IP Mode on the default setting, DHCP.
9. To configure your wireless network, enter your settings. The Key is your current WiFi
password. The default key is located on the white sticker on the bottom of the TEW-755AP.
10. When you are finished, enter the password for your TEW-755AP (NOT your WiFi key) and
click OK to save your changes. If this is the first time you are accessing the device, or if the
unit has been reset, the default password is admin. The utility will save your settings.
4
Page 7

11. Once your wireless network has been configured, confirm connectivity by logging into your
TEW-755AP WiFi network. If you can successfully connect, your configuration is complete.
12. To access the unit's advanced settings, launch the AP Utility, locate your TEW-755AP, click on
ENGLISHFRANÇAISDEUTSCH
the IP Address, and select Yes to configure your device.
13. This will launch your default web browser, and automatically direct it to your TEW-755AP for
ESPAÑOLРORTUGUÊS
advanced settings.
14. On the Login screen, enter the username and password. If this is your first time accessing
the device, or if the TEW-755AP has been reset, the default login credentials are: User
Name: admin
Password: admin
15. Select the desired language, then click Login to continue.
5
Page 8

16. The status screen will display information about your TEW-755AP access point, and the
unit's wireless networks.
17. For detailed information on advanced settings and features, please refer to the User's Guide.
6
Page 9

3. Mounting the Device
1. Remove the mounting plate from the TEW-755AP.
ENGLISHFRANÇAISDEUTSCH
2. Place the mounting plate on the wall or ceiling where the device will be located, and mark
the location of the screw holes. Ensure that the device has enough clearance to slide on and
off the mounting plate. If you are using a non-PoE router or switch, and external power is
required, ensure that your mounting location has access to an electrical outlet.
3. Drill out the marked screw holes, and insert the plastic wall anchors into the screw holes.
4. Secure the mounting plate, using the screws that came with the device.
ESPAÑOLРORTUGUÊS
5. Place the TEW-755AP on the mounting plate, and attach the network cable. If you are using a
non-PoE router or switch and require external power, connect the power adapter.
3
2
Toll Free English Technical Support
US/Canada: 855-373-4741
Hours: Monday-Friday
7:00 AM- 6:00 PM, Pacific Standard Time.
After hours: 866-845-3673
4
5
7
Page 10

Manufacturer’s Name and Address
TRENDnet, Inc.
20675 Manhattan Place
Torrance, CA 90501 USA
Zwolsestraat 156 2587 WB
The Hague The Netherlands
Product Information
Model Number:
Product Name:
Trade Name:
TRENDnet hereby declare that the product is in compliance with the essential requirements and
other relevant provisions under our sole responsibility.
Safety
EMC
Radio Spectrum & Health
Energy Efficiency
This product is herewith confirmed to comply with the Directives.
Directives:
Person responsible for this declaration.
Place of Issue: Torrance, California, USA
Date: March 14, 2017
Name: Sonny Su
Title: Director of Technology
Signature:
TEW-755AP
N300 PoE Access Point
TRENDnet
EN 60950-1: 2006 + A11: 2009: + A1: 2010 + A12: 2011 + A2: 2013
EN 301 489-1 V1.9.2: 09-2011
EN 301 489-17 V2.2.1: 09-2012
EN 55032: 2012 + AC: 2013
EN 55024: 2010
EN 300 328 V1.9.1: 02-2015
EN 62311: 2008
Regulation (EC) No. 1275/2008, No. 278/2009, No. 801/2013
Low Voltage Directive 2014/35/EU
EMC Directive 2014/30/EU
R&TTE Directive 1999/5/EC
EMF Directive 1999/519/EC
Ecodesign Directive 2009/125/EC
RoHS Directive 2011/65/EU
REACH Regulation (EC) No. 1907/2006
Page 11

Certifications
This device complies with Part 15 of the FCC Rules.
Operation is subject to the following two conditions:
(1) This device may not cause harmful interference.
(2) This device must accept any interference received.
Including interference that may cause undesired operation.
Waste electrical an electronic products must not
be disposed of with household waste. Please
recycle where facilities exist. Check with your
Local Authority or Retailer for recycling advice.
Applies to PoE Products Only: This product is to be connected
only to PoE networks without routing to the outside plant.
Note
The Manufacturer is not responsible for any radio or TV
interference caused by unauthorized modifications to this
equipment. Such modifications could void the user’s authority
to operate the equipment.
Advertencia
En todos nuestros equipos se mencionan claramente las
caracteristicas del adaptador de alimentacón necesario para
su funcionamiento. El uso de un adaptador di stinto al
mencionado puede producir daños fisicos y/o daños al equipo
conectado. El adaptador de alimentación debe operar con
voltaje y frecuencia de la energia electrica domiciliaria exitente
en el pais o zona de instalación.
Technical Support
If you have any questions regarding the product
installation, please contact our Technical Support.
Toll free US/Canada: 1-855-373-4741
Regional phone numbers available
at www.trendnet.com/support
TRENDnet
20675 Manhattan Place
Torrance, CA 90501
USA
Copyright © 2017. All Rights Reserved. TRENDnet.
Product Warranty Registration
Please take a moment to register your
product online. Go to TRENDnet’s website at:
www.trendnet.com/register
TEW-755AP (V1) /03.14.2017
 Loading...