


1

Contents
Introduction ........................................................................................................................... 4
Features......................................................................................................................... 4
Package Content............................................................................................................ 4
System Requirement...................................................................................................... 4
Wireless Performance Considerations............................................................................ 5
Installation............................................................................................................................. 6
Using the Utility ..................................................................................................................... 8
Profile............................................................................................................................. 9
Advanced......................................................................................................................12
Wi-Fi Direct ...................................................................................................................14
Link Information.............................................................................................................20
Link Status ....................................................................................................................20
Throughput....................................................................................................................20
Statistics........................................................................................................................21
About.............................................................................................................................21
WPS.....................................................................................................................................22
PIN Method ...................................................................................................................22
PBC Method..................................................................................................................24
Security................................................................................................................................25
WEP..............................................................................................................................25
WPA-PSK .....................................................................................................................27
WPA..............................................................................................................................28
Appendix ..............................................................................................................................32
Glossary........................................................................................................................32
Specification..................................................................................................................33
Limited Warranty ...........................................................................................................34
2

Federal Communication Commission Interference Statement
This equipment has been tested and found to comply with the limits for a Class B digital
device, pursuant to Part 15 of the FCC Rules. These limits are designed to
provide reasonable protection against harmful interference in a residential installation. This
equipment generates uses and can radiate radio frequency energy and, if not installed and
used in accordance with the instructions, may cause harmful interference
to radio communications. However, there is no guarantee that interference will not occur in a
particular installation. If this equipment does cause harmful interference to radio or television
reception, which can be determined by turning the equipment off and on, the user is
encouraged to try to correct the interference by one of the following measures:
- Reorient or relocate the receiving antenna.
- Increase the separation between the equipment and receiver.
- Connect the equipment into an outlet on a circuit different from that to which the receiver
is connected.
- Consult the dealer or an experienced radio/TV technician for help.
FCC Caution: Any changes or modifications not expressly approved by the party responsible
for compliance could void the user's authority to operate this equipment.
This device complies with Part 15 of the FCC Rules. Operation is subject to the following two
conditions: (1) This device may not cause harmful interference, and (2) this device must
accept any interference received, including interference that may cause undesired operation.
IMPORTANT NOTE:
Radiation Exposure Statement:
This equipment complies with FCC radiation exposure limits set forth for an uncontrolled
environment. End users must follow the specific operating instructions for satisfying RF
exposure compliance. To maintain compliance with FCC RF exposure compliance
requirements, please follow operation instruction as documented in this manual.
This transmitter must not be co-located or operating in conjunction with any other antenna or
transmitter.
SAR compliance has been established in typical laptop computer(s) with USB slot, and
The antenna(s) used for this transmitter must be installed to provide a separation distance of
product could be used in typical laptop computer with USB slot. Other application like
handheld PC or similar device has not been verified and may not compliance with related RF
at least 20 cm from all persons and must not be co-located or operated in conjunction with
exposure rule and such use shall be prohibited.
any other antenna or transmitter
The availability of some specific channels and/or operational frequency bands are country
dependent and are firmware programmed at the factory to match the intended destination.
The firmware setting is not accessible by the end user.
CE Mark Warning
This is a Class B product. In a domestic environment, this product may cause radio
interference, in which case the user may be required to take adequate measures.
This transmitter must not be co-located or operation in conjunction with any other antenna or
transmitter.
3

Introduction
TRENDnet’s compact 450Mbps Dual Band Wireless N USB Adapter, model TEW-684UB,
connects a laptop or desktop computer to an ultra-high performance 450Mbps dual band
wireless network.
Quickly connect to a 450Mbps 2.4GHz or 5GHz wireless network at the touch of a button
with the convenience of one-touch Wi-Fi Protected Setup (WPS). Seamlessly stream HD
video over the less congested 5GHz band.
Place the adapter in the most ergonomic location with the included USB extension cable.
Advanced Multiple Input Multiple Output (MIMO) antenna technology with three spatial
streams per antenna generates a maximum theoretical wireless throughput of 450Mbps.
WMM® Quality of Service (QoS) technology prioritizes gaming, Internet calls, and video
streams. LEDs on the front of the adapter convey device status. Upgrade your computer’s
wireless connection to experience the speed of a 450Mbps network.
Features
x 1 x USB 2.0 connector
x Wi-Fi compliant with IEEE 802.11n/g/b/a standards
x One-touch wireless connection with external Wi-Fi Protected Setup (WPS) button
x Multiple Input Multiple Output (MIMO) technology
x Maximum reliability, throughput, and connectivity with automatic data rate switching
x Supports 64/128-bit WEP, WPA/WPA2-RADIUS, and WPA-PSK/WPA2-PSK
x Wi-Fi Multimedia (WMM) Quality of Service (QoS) data prioritization
x Easy user setup and intuitive diagnostic utility
x Coverage of up to 50 meters indoor (164 feet) and 100 meters outdoor (320 feet)*
x 3-year limited warranty
Package Content
x TEW-684UB
x CD-ROM (Utility and Driver)
x Multi-Language Quick Installation Guide
x USB cable 100cm (39.3 in)
System Requirement
x Pentium class notebook computers with at least one available USB slot
x Microsoft Windows 7, Vista, XP and 2K
x CD-ROM drive
4

Wireless Performance Considerations
There are a number of factors that can impact the range of wireless devices.
1. Adjust your wireless devices so that the signal is traveling in a straight path, rather than
at an angle. The more material the signal has to pass through the more signal you will
lose.
2. Keep the number of obstructions to a minimum. Each obstruction can reduce the range of
a wireless device. Position the wireless devices in a manner that will minimize the
amount of obstructions between them.
3. Building materials can have a large impact on your wireless signal. In an indoor
environment, try to position the wireless devices so that the signal passes through less
dense material such as dry wall. Dense materials like metal, solid wood, glass or even
furniture may block or degrade the signal.
4. Antenna orientation can also have a large impact on your wireless signal. Use the
wireless adapter’s site survey tool to determine the best antenna orientation for your
wireless devices.
5. Interference from devices that produce RF (radio frequency) noise can also impact your
signal. Position your wireless devices away from anything that generates RF noise, such
as microwaves, radios and baby monitors.
6. Any device operating on the 2.4GHz frequency will cause interference. Devices such as
2.4GHz cordless phones or other wireless remotes operating on the 2.4GHz frequency
can potentially drop the wireless signal. Although the phone may not be in use, the base
can still transmit wireless signal. Move the phone’s base station as far away as possible
from your wireless devices.
If you are still experiencing low or no signal consider repositioning the wireless
devices or installing additional access points. The use of higher gain antennas may
also provide the necessary coverage depending on the environment.
5
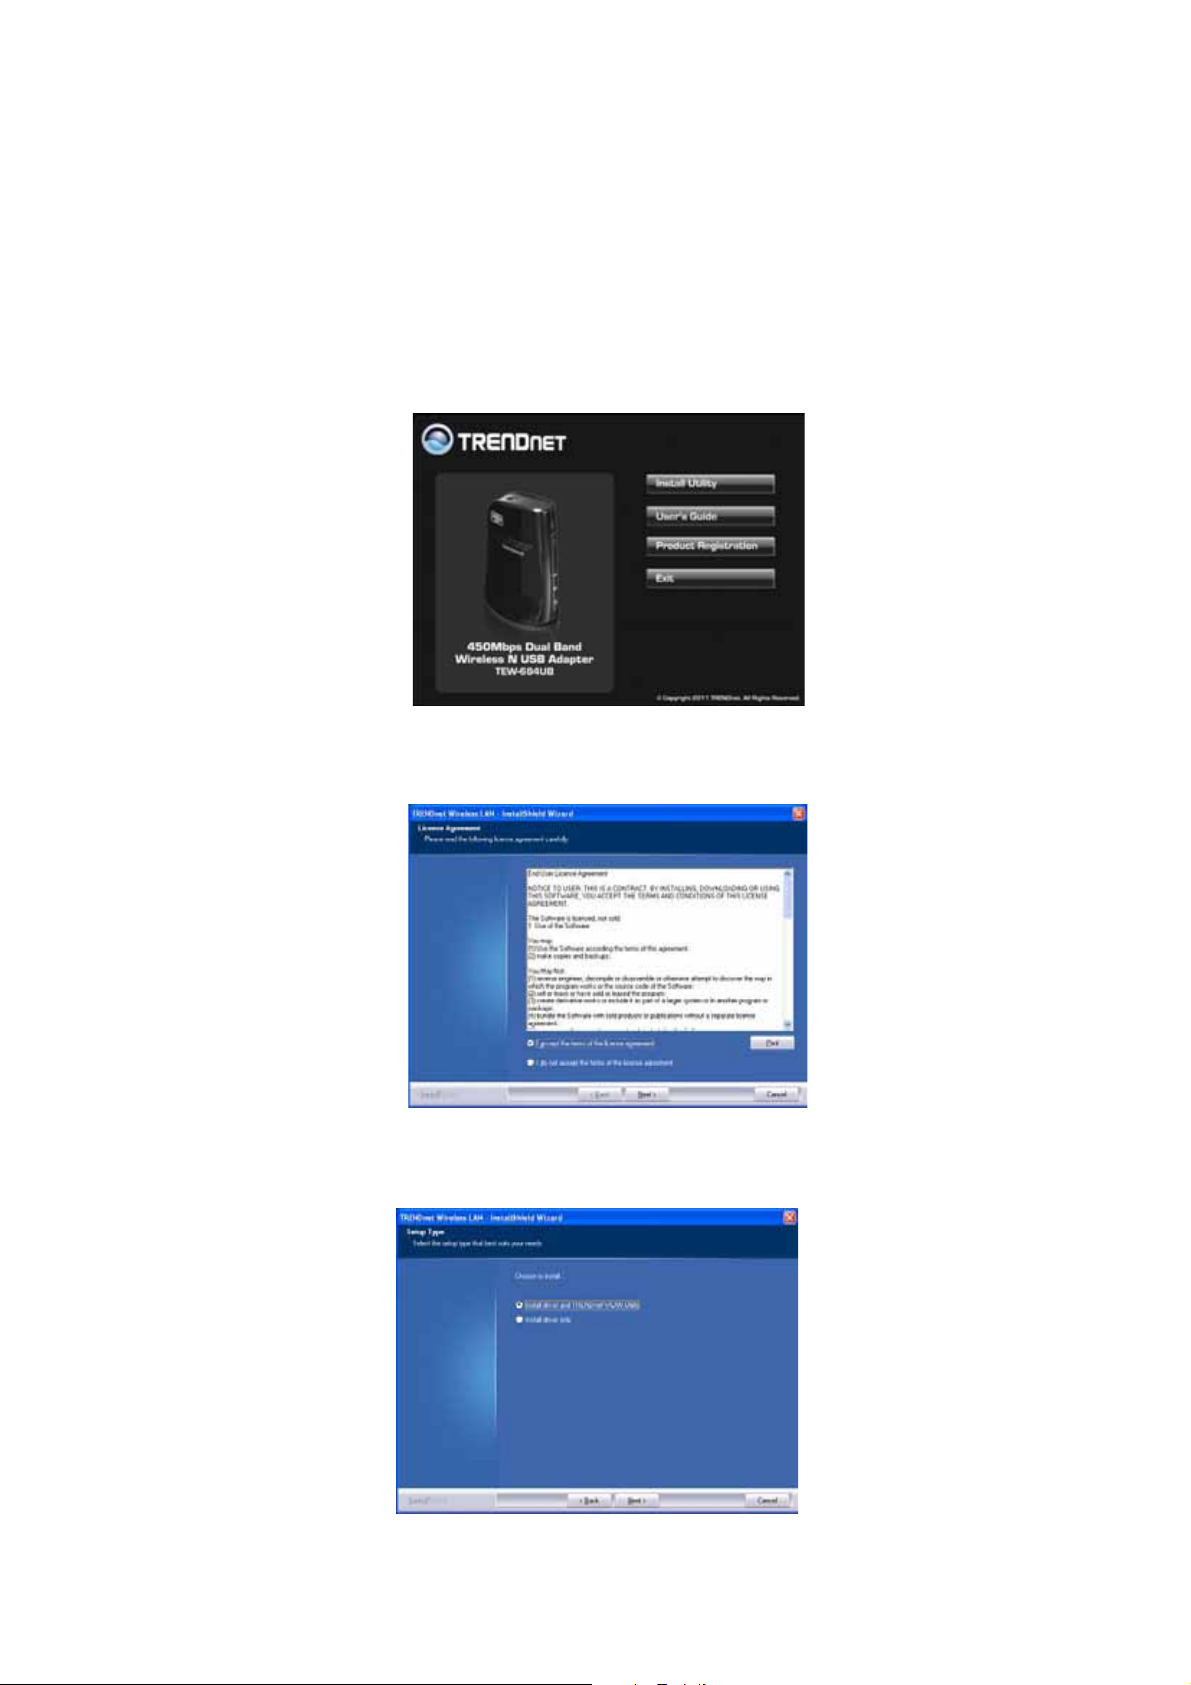
Installation
Important! DO NOT install the TEW-684UB in the computer until instructed to do so.
Follow the instructions below to install the USB Adapter and Utility.
STEP 1
Insert the Driver and Utility CD into CD drive
STEP 2
Click “Install Utility” button. If your CD Autorun is enabled, the installation procedures will
be started. (Otherwise open your CD folder and double-click on the “setup.exe” file)
STEP 3
Select I accept the terms and of the license agreement and click Next.
STEP 4
Select Install driver and TRENDnet WLAN utility and click Next.
6

STEP 5
Select TRENDnet Configuration Tool and click Next.
STEP 6
Click Install on it.
STEP 7
Click Finish to complete the client utility installation.
7

Using the Utility
When starting the utility, a small TRENDnet wireless icon appears in the notifications area of
the taskbar. You can double click it to maximize the dialog box if you selected to close it
earlier. You may also use the mouse's right button to close the utility.
Additionally, the small icon will change color to reflect current wireless network connection
status. The status is shown as follows:
: Indicates the connected and signal strength is good.
: Indicates the connected and signal strength is normal.
: Indicates that it is not yet connected.
: Indicates that a wireless NIC can not be detected.
: Indicates that the connection and signal strength is weak.
8
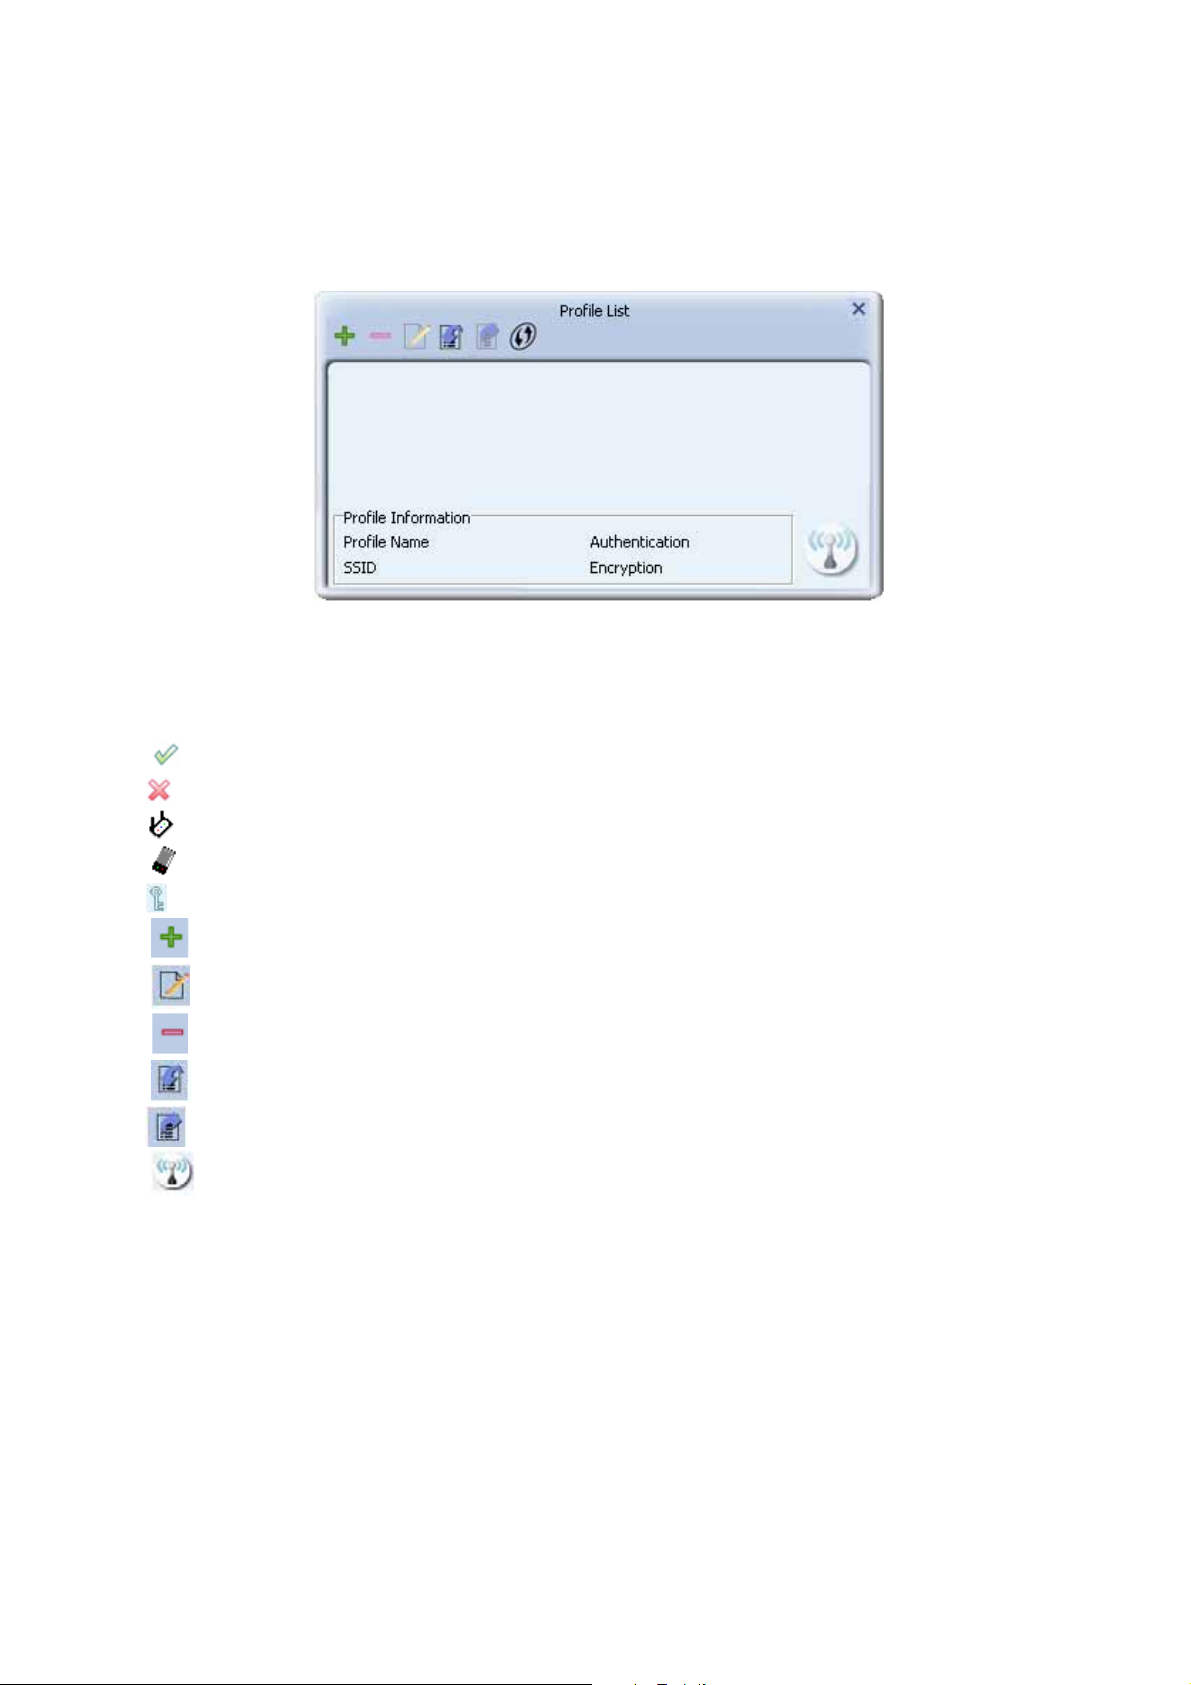
Profile
The Profile List keeps a record of your favorite wireless settings at home, office, and other
public hot-spots. You can save multiple profiles, and activate the correct one at your
preference.
Icons and buttons:
Indicates if a connection made from the currently activated profile.
Indicates if the connection has failed on a currently activated profile.
Indicates the network type is infrastructure mode.
Indicates the network type is in Ad-hoc mode.
Indicates if the network is security-enabled.
Click to add a new profile.
Click to edit an existing profile.
Deletes an existing profile.
Import an existing profile.
Export an existing profile.
Activates the selected profile.
Adding a Profile:
Click "Add" below the Profile List.
9

The "Add Profile" window will appear.
Enter or specify a profile name. Select an AP from the SSID drop-down list.
Now the profile which the user set appears in the profile list. Click "Activate" icon to
activate the connection.
10

Pre-logon Connect
Field definitions:
Pre-logon Connect: Use ID and Password in Profile.
** Recommend: You need to restart the computer when using/non-using Pre-logon connect
Adding a Profile to the Network using site survey
Select the AP from the list on the Network tab and click the “Add to Profile” button.
11
 Loading...