

Page 1

INSTRUCTIONS:
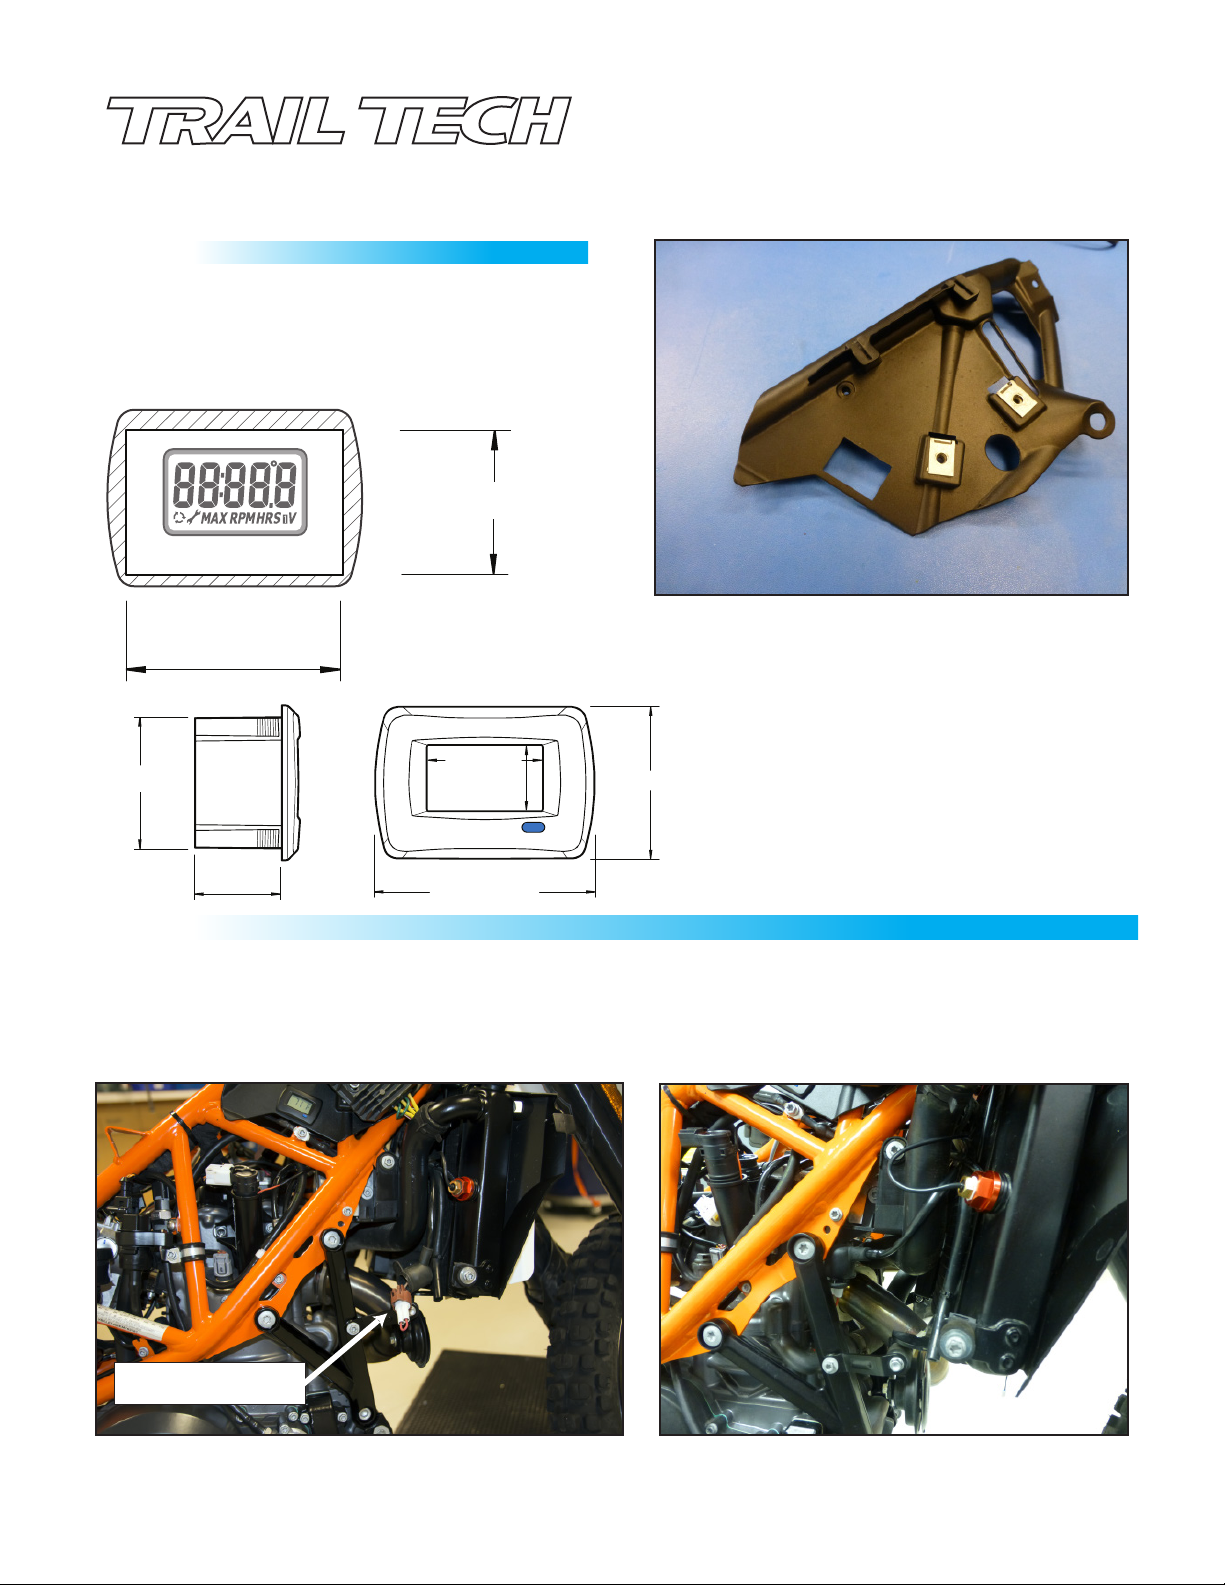
Temp. Sensor
010-ELV-163
KTM 690
TTV Upgrade Instructions
Tech Support: 360-687-4530
tech_support@trailtech.net
KTM 690
TTV UPGRADE INSTRUCTIONS
Connector/Jumper
Jumper Plug
O-Ring
TTV
STEP 1
Remove the seat, radiator shrouds and air box from the bike and drain the coolant system by removing the drain bolt
on the water pump cover. Remember to remove the radiator cap to ensure all uid is drained.
STEP 2
Remove the regulator/rectier
from the plastic shroud on the
right side of the bike. Then
remove the shroud.
Shroud
Regulator/Rectier
Page 2
KTM 690
TTV UPGRADE INSTRUCTIONS
STEP 3
Cut the shroud at the indicated spot to mount the TTV
meter. Cut out the template pictured below and use it
to cut a hole to correct size in specied location. Then
install the TTV meter into the shroud. Install shroud back
on to the bike and install reg/rec back on to the shroud.
25.4mm/1in
Actual Size
Panel Cutout
38.1mm/1.5in
(2-4mm/.07-.15in thick)
010-ELV-163
KTM 690
TTV Upgrade Instructions
Tech Support: 360-687-4530
tech_support@trailtech.net
25mm/.98in
17.5mm/.68in
23.7mm/.93in
13.6mm/.53in
44.8mm/1.76in
31.1mm/1.22in
STEP 4
Disconnect the OEM thermal switch from the bikes harness and then remove it from the radiator. Make sure to remove
the OEM o-ring. Install the provided red adaptor into the radiator using the included o-ring. Next install new threaded
probe sensor into the red adaptor and then plug the sensor into the mating connector from the TTV. Next install the
included jumper plug into the OEM thermal switch connector coming from the bike harness. Make sure to route the wire
so the air box will not pinch it when installed.
Jumper Plug
Page 3

KTM 690
TTV UPGRADE INSTRUCTIONS
GUIDE ON RELEASING CONNECTOR PINS:
See Step 4 on Reverse Side of Page.
Step 4-A:
Find the brown 2-pin
connector on the harness
that is connected to the
OEM thermal switch. Use a
screwdriver to push down
on the locking tab which
holds the male connector
to female connector.
Step 4-B: While depressing the locking tab, separate
the two connectors. Try not to pull on the wires.
010-ELV-163
KTM 690
TTV Upgrade Instructions
Tech Support: 360-687-4530
tech_support@trailtech.net
Step 4-C: Release
the terminals. Use
a thin tool (a jewelers
pick, razor blade, or
small screwdriver.)
Use the tool to flip up
the locking tab that
secures the terminals
inside the connector.
Gently pull on the
wire while holding
the lock tab up to
remove the wire from
the connector.
Step 4-E: Continue to step 5.
Use caution if
using a razor
blade.
Release the pins for the two wires and
remove them from the connector. Next
install the included two pin connector by
inserting the two wires into the connector.
Make sure to insert them all the way until
they click into the locked position.
Page 4

KTM 690
TTV UPGRADE INSTRUCTIONS
STEP 5
Disconnect the fan from the bike harness by unplugging
it from the power connector on the harness. Next plug
the fan into the TTV unit (short lead) and then plug the
power supply (long lead) from the harness into the TTV.
Power Connector
Fan Connector
Temp. Sensor
010-ELV-163
KTM 690
TTV Upgrade Instructions
Tech Support: 360-687-4530
tech_support@trailtech.net
STEP 6
Install radiator shrouds and seat back on to the bike.
Follow instruction on TTV Temperature Manual to set
desired temperature for fan activation.
Page 5

CHANGING TEMPERATURE UNITS AND FAN SETTING:
SETTING MENU
To enter set up menu, press and hold blue button for 3 seconds.
Release when all LCD segments flash on.
SET TEMPERATURE UNIT
Select Fahrenheit or Celsius by pressing blue button.
Note: You must adjust the fan on temperature if you
change the temperature units.
TEMPERATURE SETTING
After temperature unit is selected, wait 5 seconds and the word
“Hi” will display. Press and hold blue button to increment or
decrement fan on unit. Arrow in lower left corner indicates direction
of adjustment. The direction of adjustment will change automatically in 3 seconds if button is not pressed.
After 3 more seconds the meter will automatically exit setup mode and resume current temperature display.
Disclaimer: Trail Tech’s Fan Kit does not guarantee your vehicle will not overheat. If steam is present or engine
temperature is high, please stop and wait for engine to cool. Overheating may cause engine damage.
 Loading...