

KTM/HUSQVARNA DIGITAL FAN KIT
INSTALLATION GUIDE
1.) Make sure the gas is shut off. Remove the seat and the
gas tank with the radiator shrouds.
2.) Drain the coolant out of the bike by removing the drain
plug on the water pump located on the right side of the
engine. The drain plug is the bolt on the water pump that
has the copper washer. Do not lose or damage the copper
washer.
3.) Unbolt the right radiator from the bike. First, remove the
plastic protector on the front of the radiator and disconnect
the hoses from it. Be careful not to damage the fins on the
radiator.
KTM/HUSQVARNA Digital Fan Kit Installation Guide
010-ELV-146
Tech Support: 360-687-4530
tech_support@trailtech.net
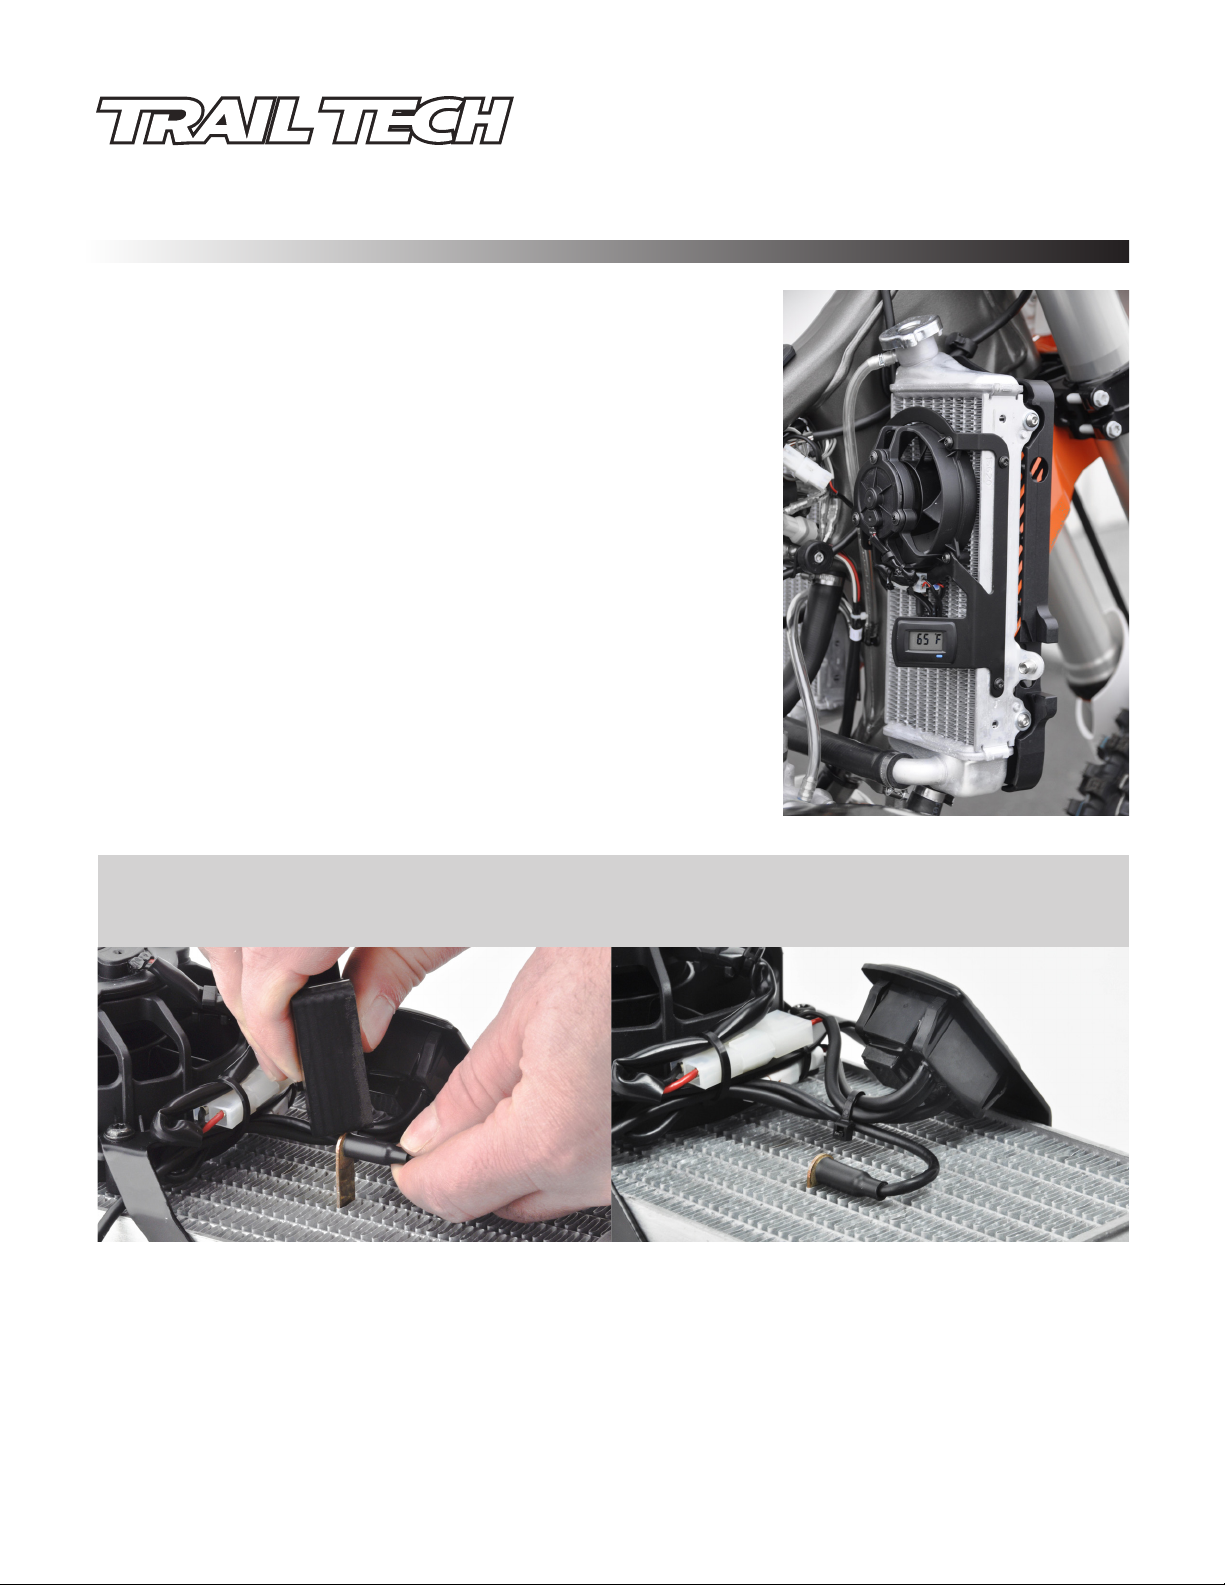
4.) Attach the fan mounting bracket to the radiator. Screw the
bracket to the holes on the inside and outside edges of the
radiator using the supplied self-tapping screws. Use a T20
Torx driver. Recommended torque is 20 in-lbs (2.5 N-m).
TIP: To Compensate for the influence of ambient air passing across the sensor, apply thermal grease (included in kit) into the gap between the fins of the radiator where the sensor will be installed. It is important to
place the grease only in the gap. Grease on the surface of the radiator will attract dirt and reduce function.
5.) Carefully insert the temperature probe into fins of radiator.
Make sure that the probe is lined up parallel to the fins to avoid damage. If it is too difficult to
press in, use a small wood or plastic block against the back side of the sensor while guiding the
sensor straight into the radiator. (See above photos)
6.) Mount radiator back on to bike frame and re-attach hoses to the radiator.
IMPORTANT: FILL THE RADIATOR BACK UP WITH THE CORRECT AMOUNT AND TYPE OF COOLANT (SEE
VEHICLE MANUAL).
Page 1 of 2
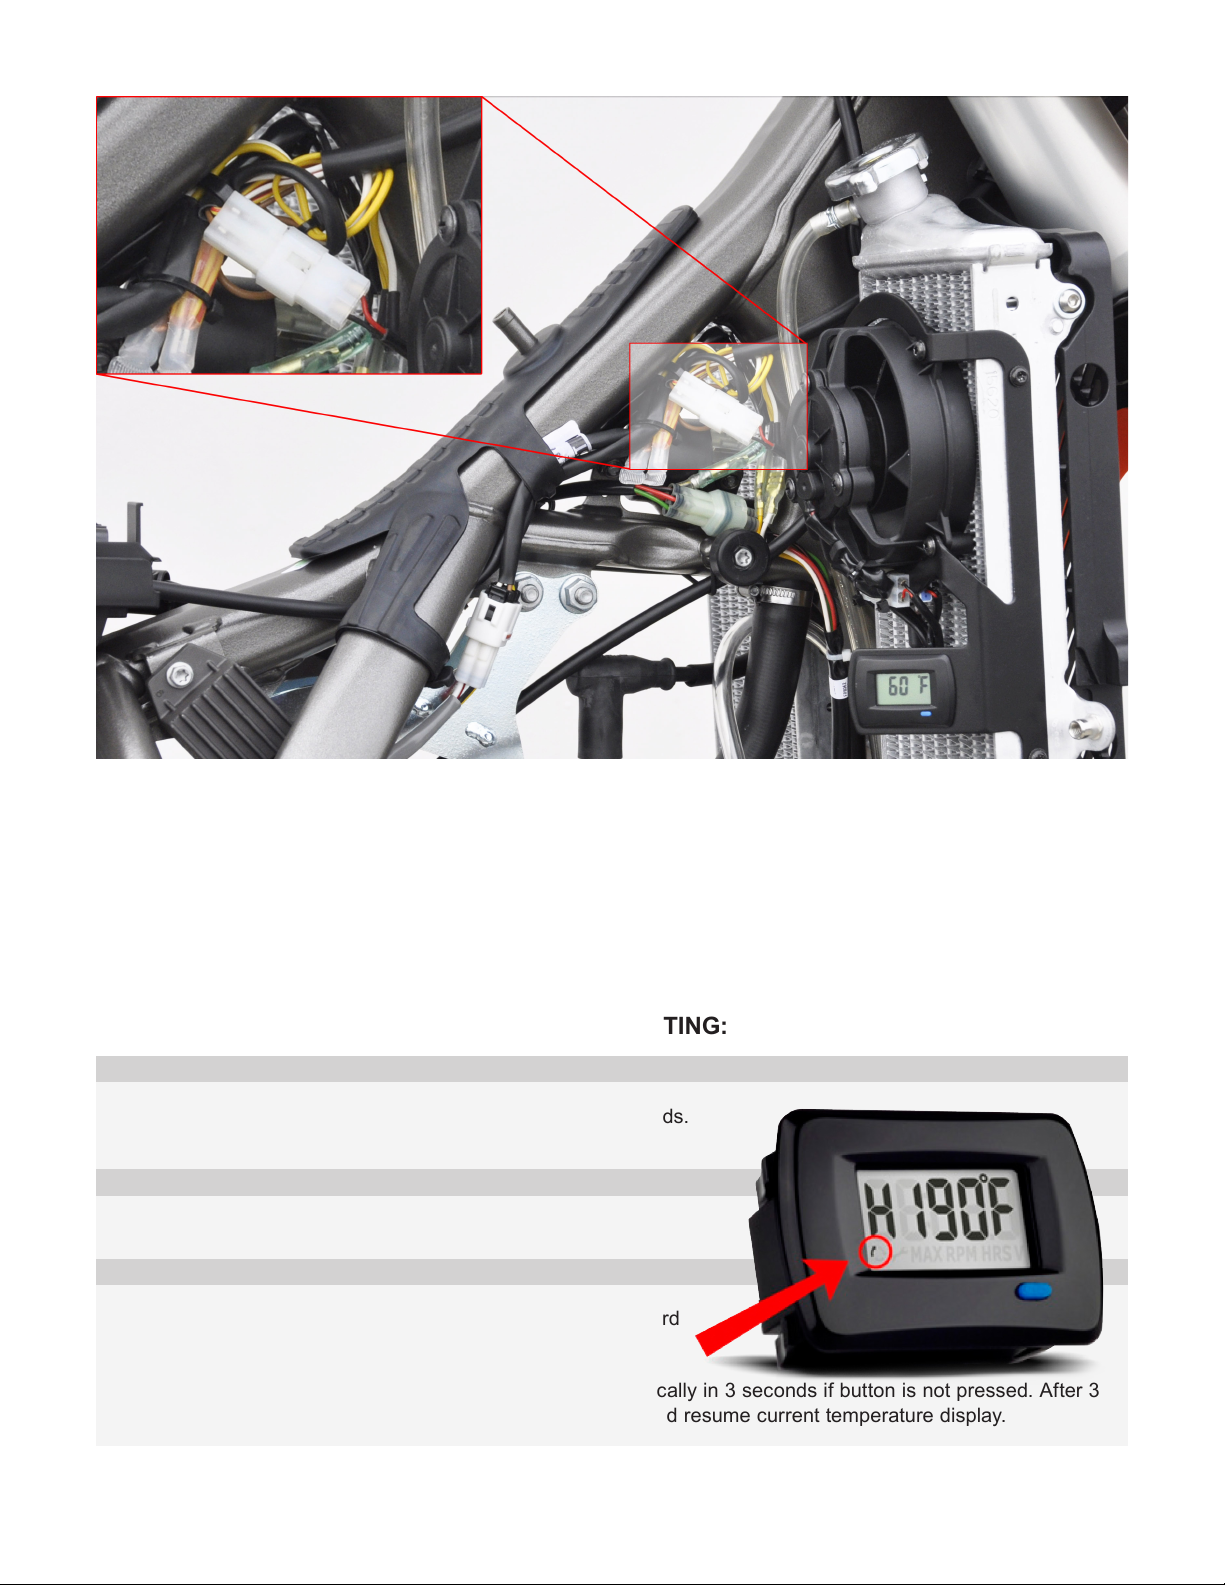
7.) Connect fan kit to bike power. If the motorcycle came from KTM/HUSQVARNA with the fan
harness then the Trail Tech fan kit will plug directly into the factory connector. This is located just
to the left of the radiator in the wiring above the motor (See above photo). If the motorcycle did
not come with a factory harness, then install the provided power lead for the fan kit. Connect
the ring terminals directly to the machine’s battery (Black to negative, red to positive).
8.) Install tank, shrouds and seat back on to the motorcycle.
CHANGING TEMPERATURE UNITS AND FAN SETTING:
SETTING MENU
To enter set up menu, press and hold blue button for 3 seconds.
Release when all LCD segments flash on.
SET TEMPER ATURE UNIT
Select Fahrenheit or Celsius by pressing blue button.
TEMPERATURE SETTING
After temperature unit is selected, wait 5 seconds and the word
“Hi” will display. Press and hold blue button to increment or
decrement. Arrow in lower left corner indicates direction of
adjustment. The direction of adjustment will change automatically in 3 seconds if button is not pressed. After 3
more seconds the meter will automatically exit setup mode and resume current temperature display.
Disclaimer: Trail Tech’s Fan Kit does not guarantee your vehicle will not overheat. If steam is present or engine
temperature is high, please stop and wait for engine to cool. Overheating may cause engine damage.
Page 2 of 2

Honda XR650R Fan Kit Installation
STEP 1
Remove right radiator shroud. Drain the coolant out of the bike by
removing the drain plug on the water pump located on the right side
of the engine. The drain plug is the bolt on the water pump that has
the copper washer. Do not lose or damage the copper washer.
STEP 2
Unbolt the right radiator from the bike. First, remove the plastic
protector on the front of the radiator and disconnect the hoses
from it. Be careful not to damage the fins on the radiator.
STEP 3
Cut the stock fan mounting tabs on the radiator flush to the sidewall of the radiator. (Four Places)
STEP 4
010-ELV-146
Tech Support: 360-687-4530
tech_support@trailtech.net
Place the Trail Tech fan onto the radiator, using a 1mm cardboard
shim between the fan housing and the radiator fins. Remove shim
before installing radiator back on the bike.
STEP 5
Adjust the fan bracket on the radiator to locate it as shown. Drill four
mounting holes using a #15 drill bit. Make sure the 1mm shim is in
place before drilling the mounting holes.
STEP 6
Install the fan bracket with fan onto the radiator using the provided mounting screws.
Remove the cardboard shim.
STEP 7
Carefully insert the temperature probe into fins of radiator. Make sure
that the probe is lined up parallel to the fins to avoid damage. If it is too
difficult to press in, use a small wood or plastic block against the back
side of the sensor while guiding the sensor straight into the radiator.
Reinstall radiator on bike.
TIP: To compensate for the influence of ambient air passing across the sensor, apply thermal grease (includ-ed in kit) into the
gap between the fins of the radiator where the sensor will be installed. It is important to place the grease only in the gap.
Grease on the surface of the radiator will attract dirt and reduce function.
STEP 8
Install the power harness (with built in fuse) onto the bike. This will connect directly to the battery. Red to Positive and
Black to Negative. Route the power lead forward to the front of the bike and connect it to the power connector on the fan.
 Loading...