

HONDA DIGITAL FAN KIT
INSTALLATION GUIDE FOR CRF 450X/250X
1.) Remove the seat and right radiator shroud. Unbolt the gas tank
and prop it up an inch or two for an easier installation process.
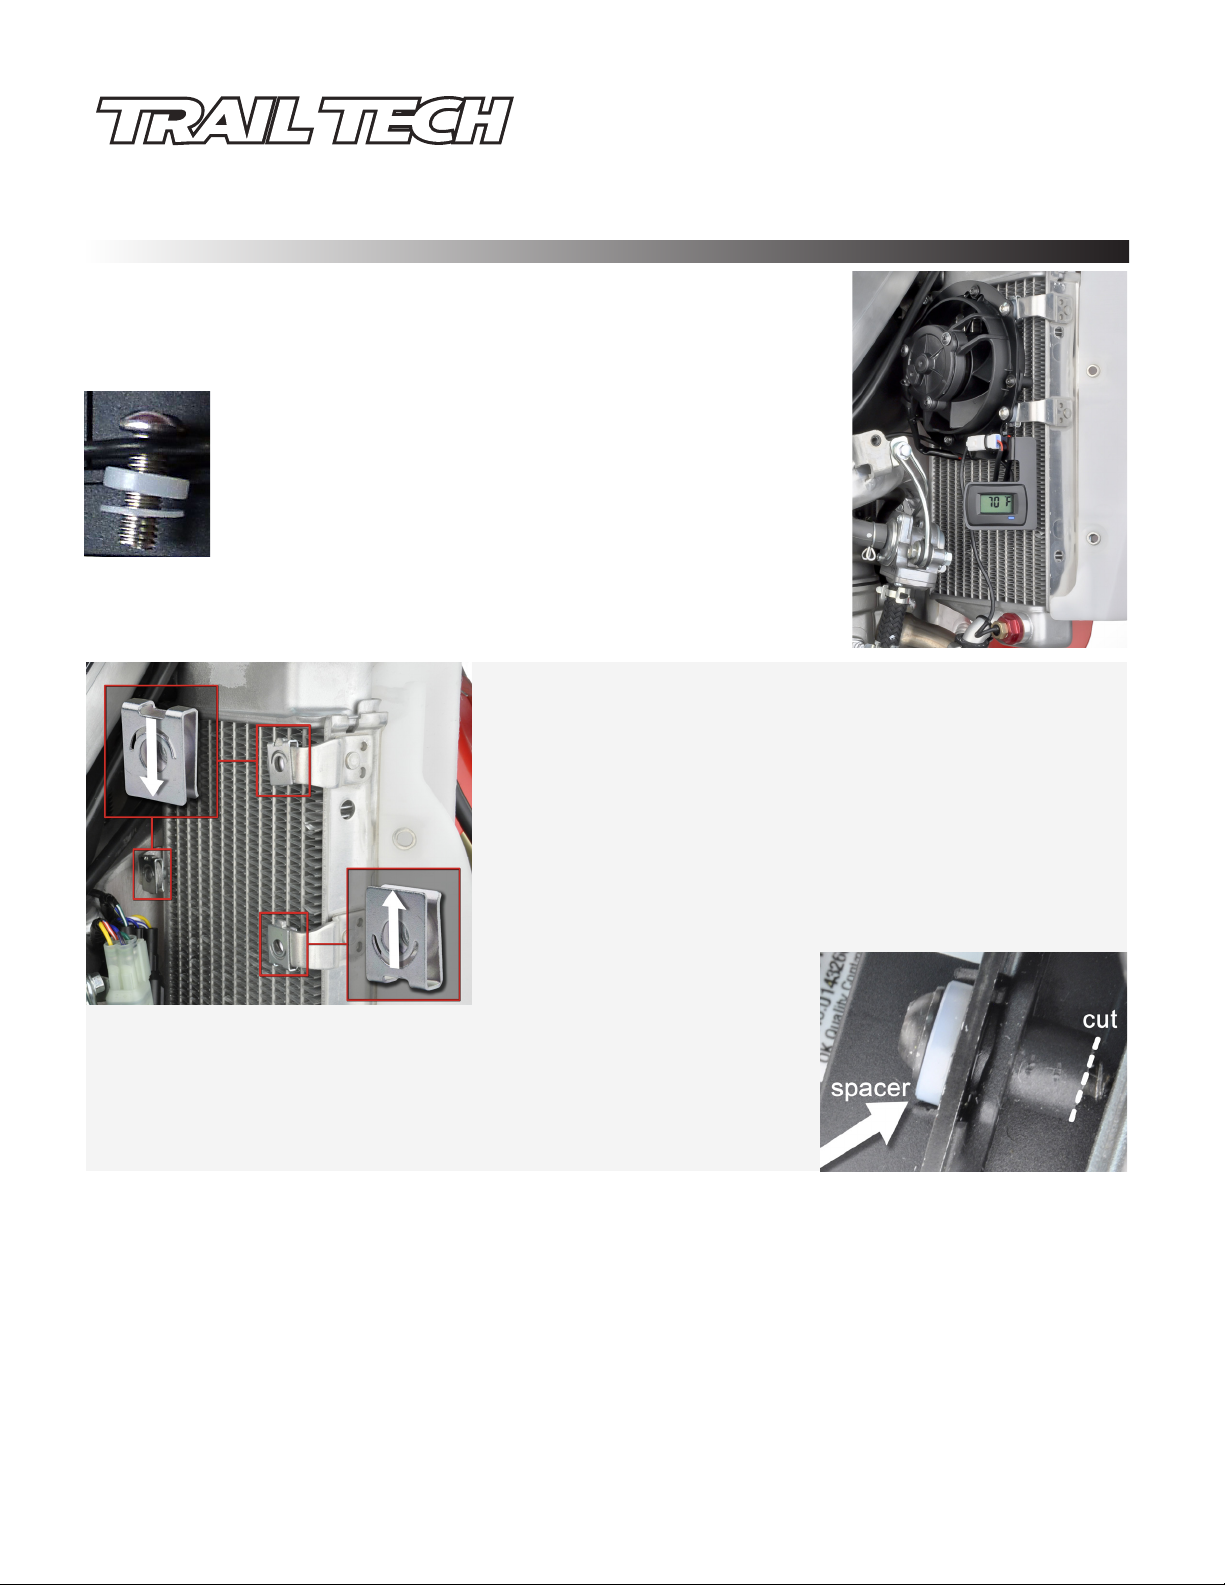
2.) Install the three supplied mounting bolts to the fan
bracket. Slide the plastic spacers over the bolts on the
back side of the bracket and install retaining washers to
hold the spacers in place. (see photo to left) Do not push
the retaining washer all the way down against the bracket.
The extra spacer is for the 250x. (see note below)
3.) Install clip nuts on radiator mounts. Position the clip nuts as shown
below.
Honda Digital Fan Kit Installation Guide
010-ELV-148
Tech Support: 360-687-4530
tech_support@trailtech.net
For CRF 250X models only:
If bike is equipped with an air suction valve, disconnect
factory wiring connectors from the air suction valve bracket
near the radiator. Remove the bolt holding the air suction
valve bracket to the frame. Rotate the air suction valve
down (clockwise as viewed from the riding position) so that
the bracket is out of the way. If bike does not have an air
suction valve, unbolt the factory wiring harness bracket
from the frame and move down and out of the way.
The upper fan mounting ear
interferes with the top radiator
tank and must be trimmed. Remove the fan to bracket screw (T20
Torx). Trim 1/8” (3mm) from the fan mounting ear using a hacksaw,
Dremel, or side cutters. Place the extra supplied plastic spacer on
the fan screw and reinstall. (See photo to right) Recommended
torque is 20 in-lb (2.5 Nm).
4.) Attach the fan mounting bracket to the radiator. A 4mm ball-end hex key is recommended for
ease of installation. Recommended torque is 50 in-lb (5.5 Nm).
5.) Ensure the engine and radiator are cool to the touch before installing the temperature sensor.
It is not necessary to fully drain the cooling system. Remove the radiator cap to relieve any
pressure, then reinstall cap. Place a drain pan underneath the radiator to catch drips. Unscrew the
drain plug from bottom of radiator and quickly screw in the temperature sensor with the copper
sealing washer installed. Tighten the temperature sensor to 15 ft-lb (20 Nm) and plug into
connector on fan assembly.
Page 1 of 2

Zip tie the wire to the coolant outlet pipe. (See photo to right)
IMPORTANT: FILL THE RADIATOR BACK UP WITH THE CORRECT AMOUNT AND
TYPE OF COOLANT (SEE VEHICLE MANUAL).
6.) Install the power harness. Route the harness along the frame from
the fan kit to the battery. For a clean installation, the positive harness
ring terminal can be routed inside the positive battery terminal
protective rubber boot and bolted to the positive terminal.
(See below)
For CRF 250X models only:
Reinstall air suction valve (if applicable). Reinstall factory harness connectors on to bracket.
You will need to bend the bracket slightly to clear the fan kit.
7.) Reinstall fuel tank, seat, and radiator shroud.
CHANGING TEMPERATURE UNITS AND FAN SETTING:
SETTING MENU
To enter set up menu, press and hold blue button for 3 seconds.
Release when all LCD segments flash on.
SET TEMPER ATURE UNIT
Select Fahrenheit or Celsius by pressing blue button.
Note: You must adjust the fan on temperature if you
change the temperature units.
TEMPERATURE SETTING
After temperature unit is selected, wait 5 seconds and the word
“Hi” will display. Press and hold blue button to increment or
decrement fan on unit. Arrow in lower left corner indicates direction
of adjustment. The direction of adjustment will change automatically in 3 seconds if button is not pressed.
After 3 more seconds the meter will automatically exit setup mode and resume current temperature display.
Disclaimer: Trail Tech’s Fan Kit does not guarantee your vehicle will not overheat. If steam is present or engine
temperature is high, please stop and wait for engine to cool. Overheating may cause engine damage.
Page 2 of 2
 Loading...