

KTM OEM Replacement Kickstand Leg
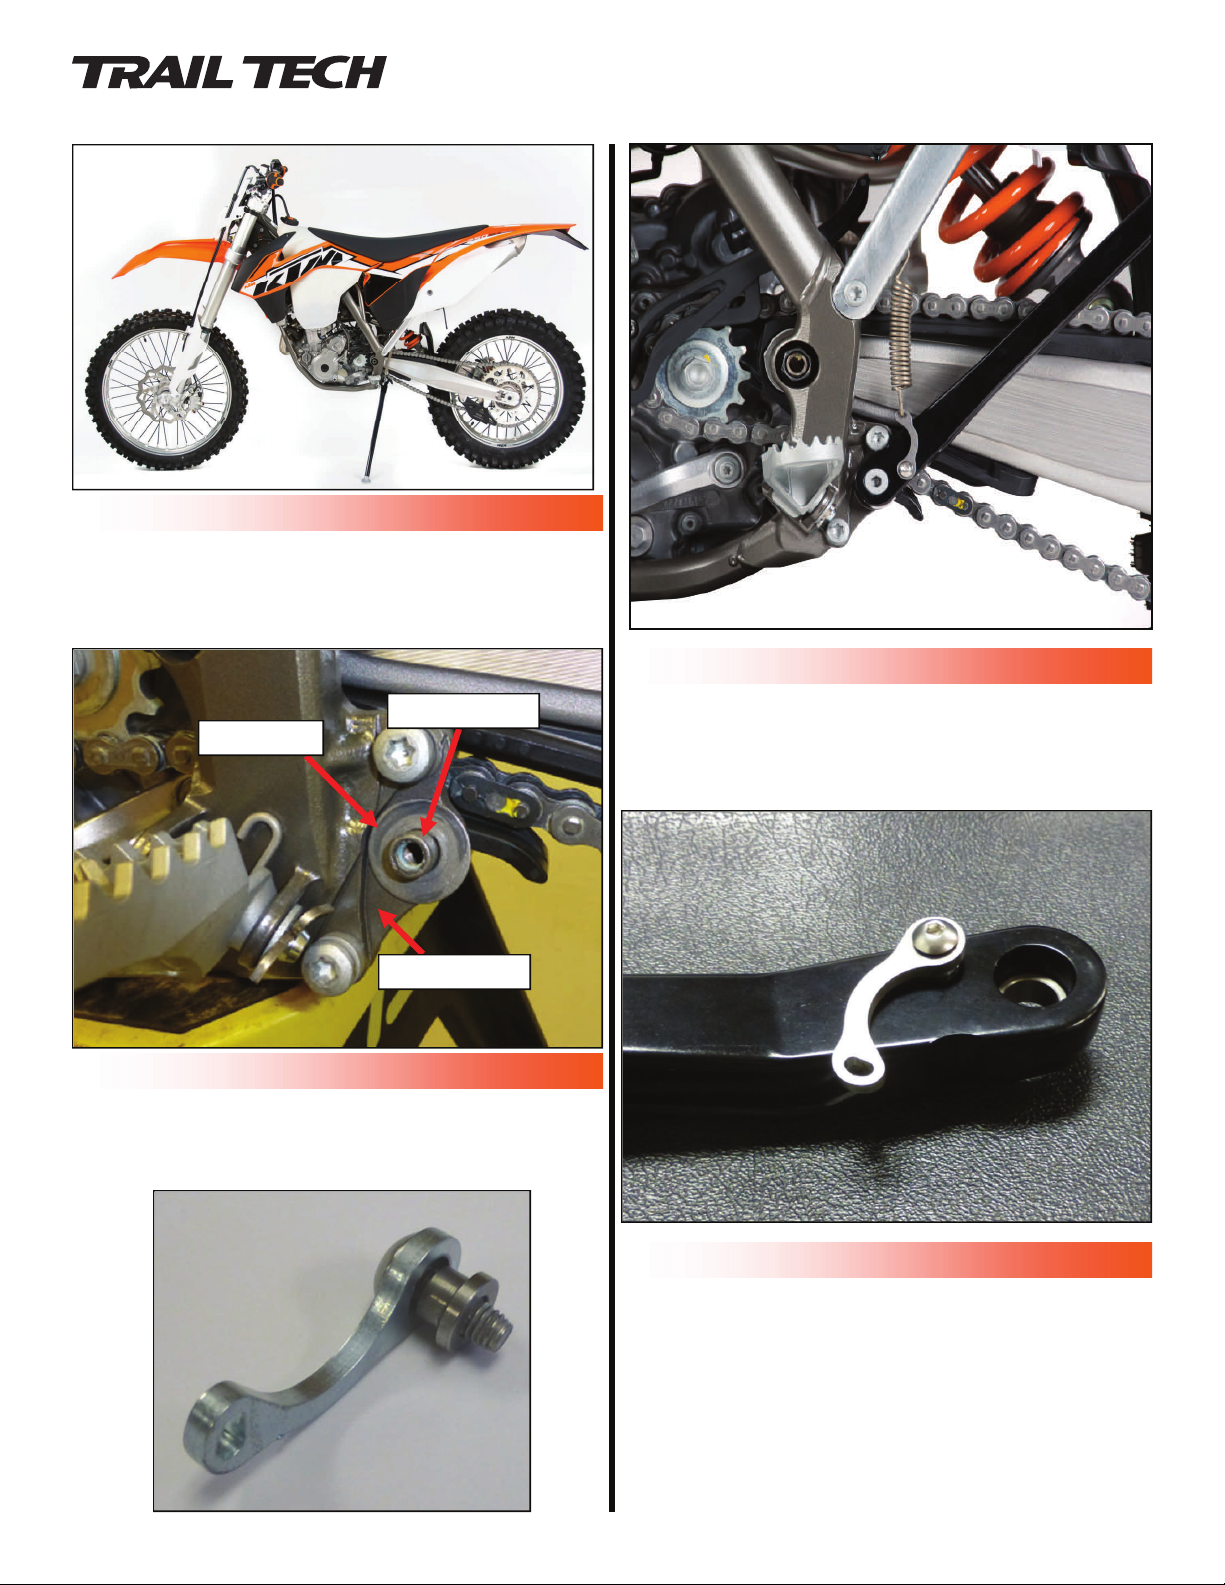
STEP 1
Place bike on stand. Unbolt factory kickstand arm and remove from bike. Remove OEM shim from kickstand
mounting boss on bike frame. Save for reinstallation
later.
010-ELV-166
Tech Support: 360-687-4530
tech_support@trailtech.net
Frame Boss
Shim
Frame Face
STEP 2
Unscrew spring hanger from factory kickstand arm.
Replace the old screw using the supplied M5 screw. Do
not bend or damage the spring hanger.
STEP 3
Install spring hanger on new arm, ensuring proper spring
hanger orientation. (See picture) IMPORTANT- Threadlocker MUST be used on this bolt. Torque to 5-7 Nm (4562 in-lbs).
STEP 4
Place new kickstand leg on frame boss. The leg will not
seat fully due to paint on the mounting boss. Loosely
thread supplied M8 kickstand pivot bolt into frame boss
(finger tight). Rotate the kickstand arm through its travel
while slowly threading in the pivot bolt. Repeat process if
necessary until arm rotates freely without sticking.
KTM OEM Replacement Kickstand Leg
010-ELV-166
Tech Support: 360-687-4530
tech_support@trailtech.net
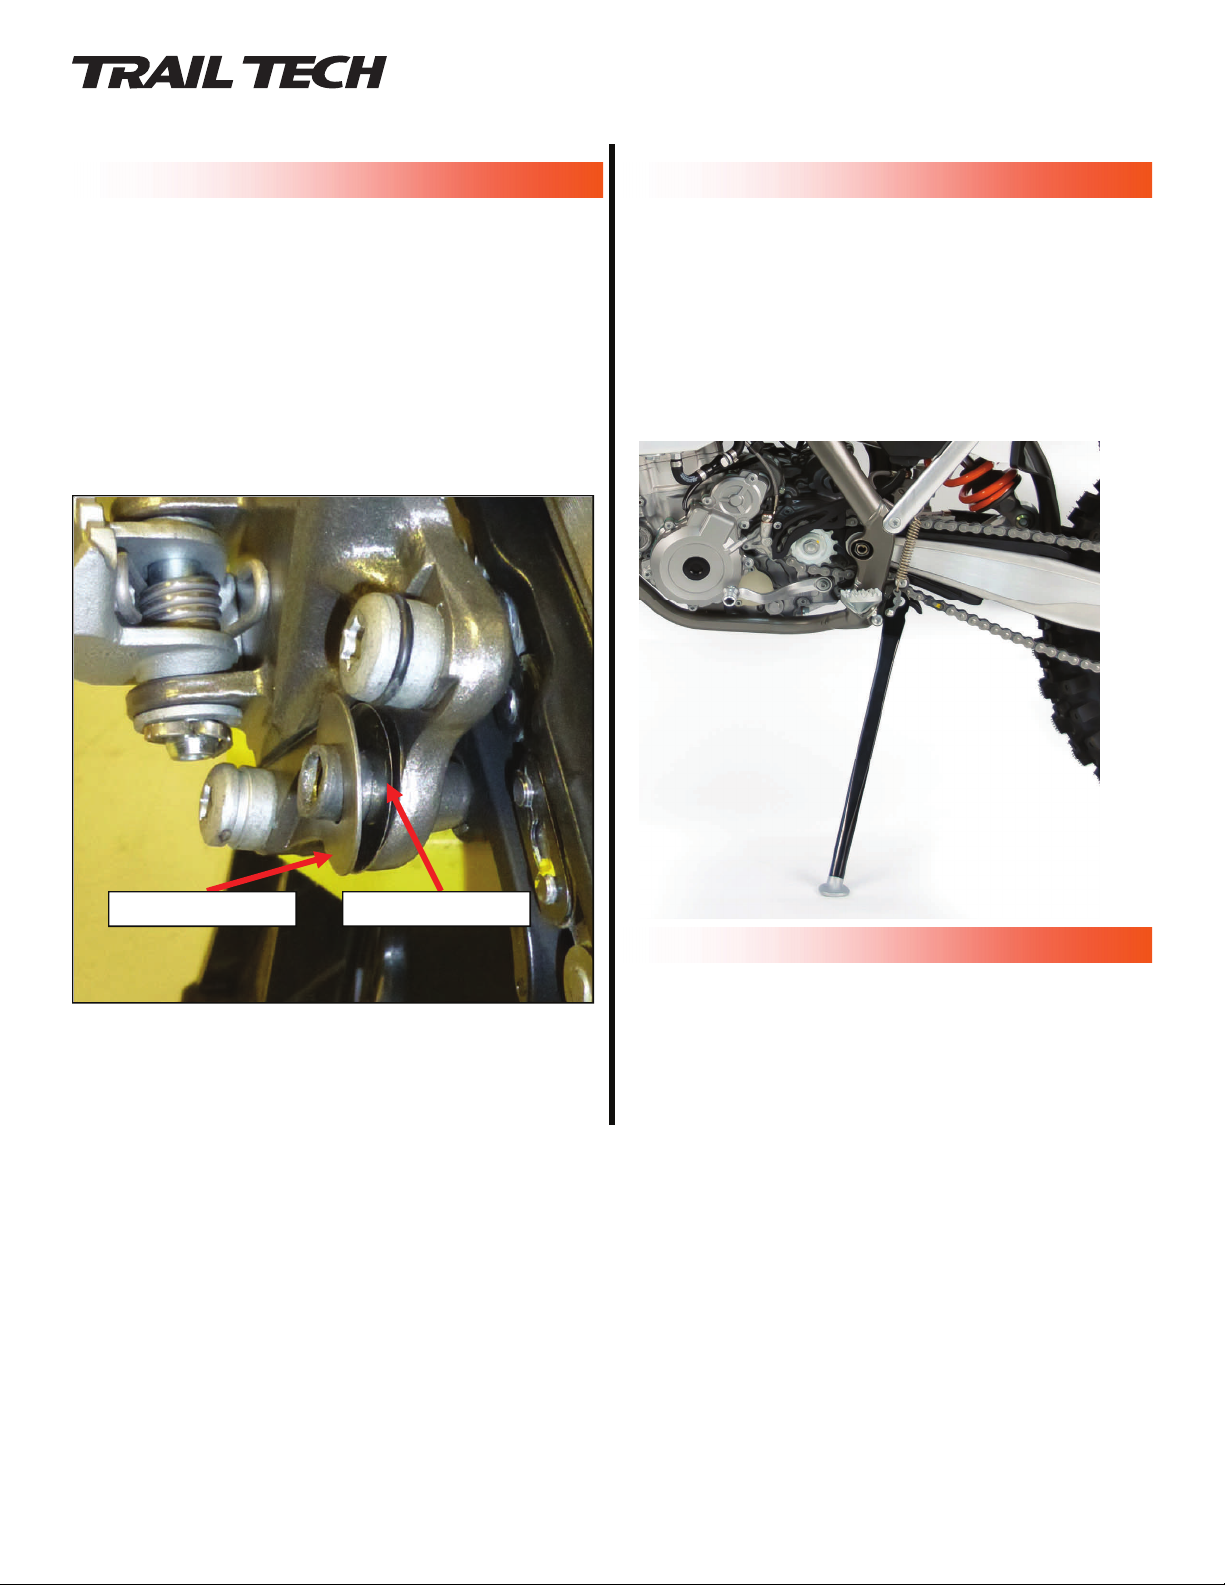
STEP 5
Reinstall OEM shim. Install kickstand arm and pivot bolt;
do not install spring or apply thread locker to bolt yet.
Torque to approximately 30 Nm (~20 ft-lb). Ensure
kickstand rotates freely. Move kickstand in and out on
frame boss to feel free play. If free play is excessive install
supplied 0.006” shims as necessary to reduce free play.
IMPORTANT – Place 0.006” shims between the frame
and OEM shim. Do NOT place them between OEM shim
and kickstand arm. Arm should rotate freely with minimal
free play at boss. If too many shims are installed arm will
bind.
STEP 6
Remove pivot bolt and kickstand arm. Hook smaller loop
end of kickstand spring onto spring hanger, and larger
loop onto frame behind subframe brace. Carefully install
kickstand leg onto frame boss, stretching the spring. The
kickstand leg should be in the “UP” orientation so that less
force is needed to stretch the spring. Rotate leg while
pushing inward to fully seat kickstand on frame boss. Apply permanent threadlocker to pivot bolt, and install.
Torque to 68 Nm (50 ft-lb).
0.006” Shims OEM Shim
STEP 7
After completing installation, spray a dry film lubricant
such as Teflon around the outside diameter of the bolt
head. Also spray shim area behind kickstand. Rotate kickstand to work lubricant into the pivot area. Grease and
other oil-based lubricants are not recommended as they
will attract dirt.
IMPORTANT : WEAR EYE PROTECTION WHEN HANGING SPRINGS!
Note: After every ride it is important to check your kickstand thoroughly for the following:
• Loose or damaged bolts • Bent or damaged kickstand leg or bracket • Damaged spring
Damaged or broken parts can result in serious injury! If any part of your stand has become
damaged do not ride the machine! Contact a factory trained technician or
Trail Tech directly for service or repairs.
LIMITED WARRANTY
TRAIL TECH INC. WARRANTS TRAIL TECH KICKSTAND PRODUCTS TO BE FREE FROM DEFECTS IN MATERIAL AND WORKMANSHIP
UNDER NORMAL USE AND IF PROPERLY INSTALLED FOR A PERIOD OF SIX MONTHS FROM DATE OF PURCHASE. IF FOUND TO BE
DEFECTIVE AS MENTIONED ABOVE, IT WILL BE REPLACED OR REPAIRED. THIS SHALL CONSTITUTE THE SOLE REMEDY OF THE
PURCHASER AND THE SOLE LIABILITY OF TRAIL TECH INC. TO THE EXTENT PERMITTED BY LAW, THE FOREGOING IS EXCLUSIVE
AND IN LIEU OF ALL OTHER WARRANTIES OR REPRESENTATIONS WHETHER EXPRESSED OR IMPLIED, INCLUDED ANY LIMITED
WARRANTY OF MERCHANTABILITY OR FITNESS. IN NO EVENT SHALL TRAIL TECH INC. BE LIABLE FOR SPECIAL OR
CONSEQUENTIAL DAMAGES.
 Loading...