

HONDA TRX700XX BAR CLAMPS
BAR CLAMP REPLACEMENT TIPS:
• Stock indicator lights: Carefully remove the colored
plastic caps with a small screwdriver, then push the
rubber boot down through the hole. To install the
rubber boots into the TrailTech clamp, apply a bead of
water or alcohol for lubrication.
• Stem Cover: On the steering stem, there are 2
welded wire tabs (See photo below.) The tabs will
either need to be removed, or the stem cover will need
to be modified to fit over the tabs. To remove the tabs,
bend them off with a pair of pliers, then use a grinder to
remove any sharp edges.
Trail Tech TRX700XX Bar Clamps
010-ELV-22
Tech Support: 360-687-4530
tech_support@trailtech.net
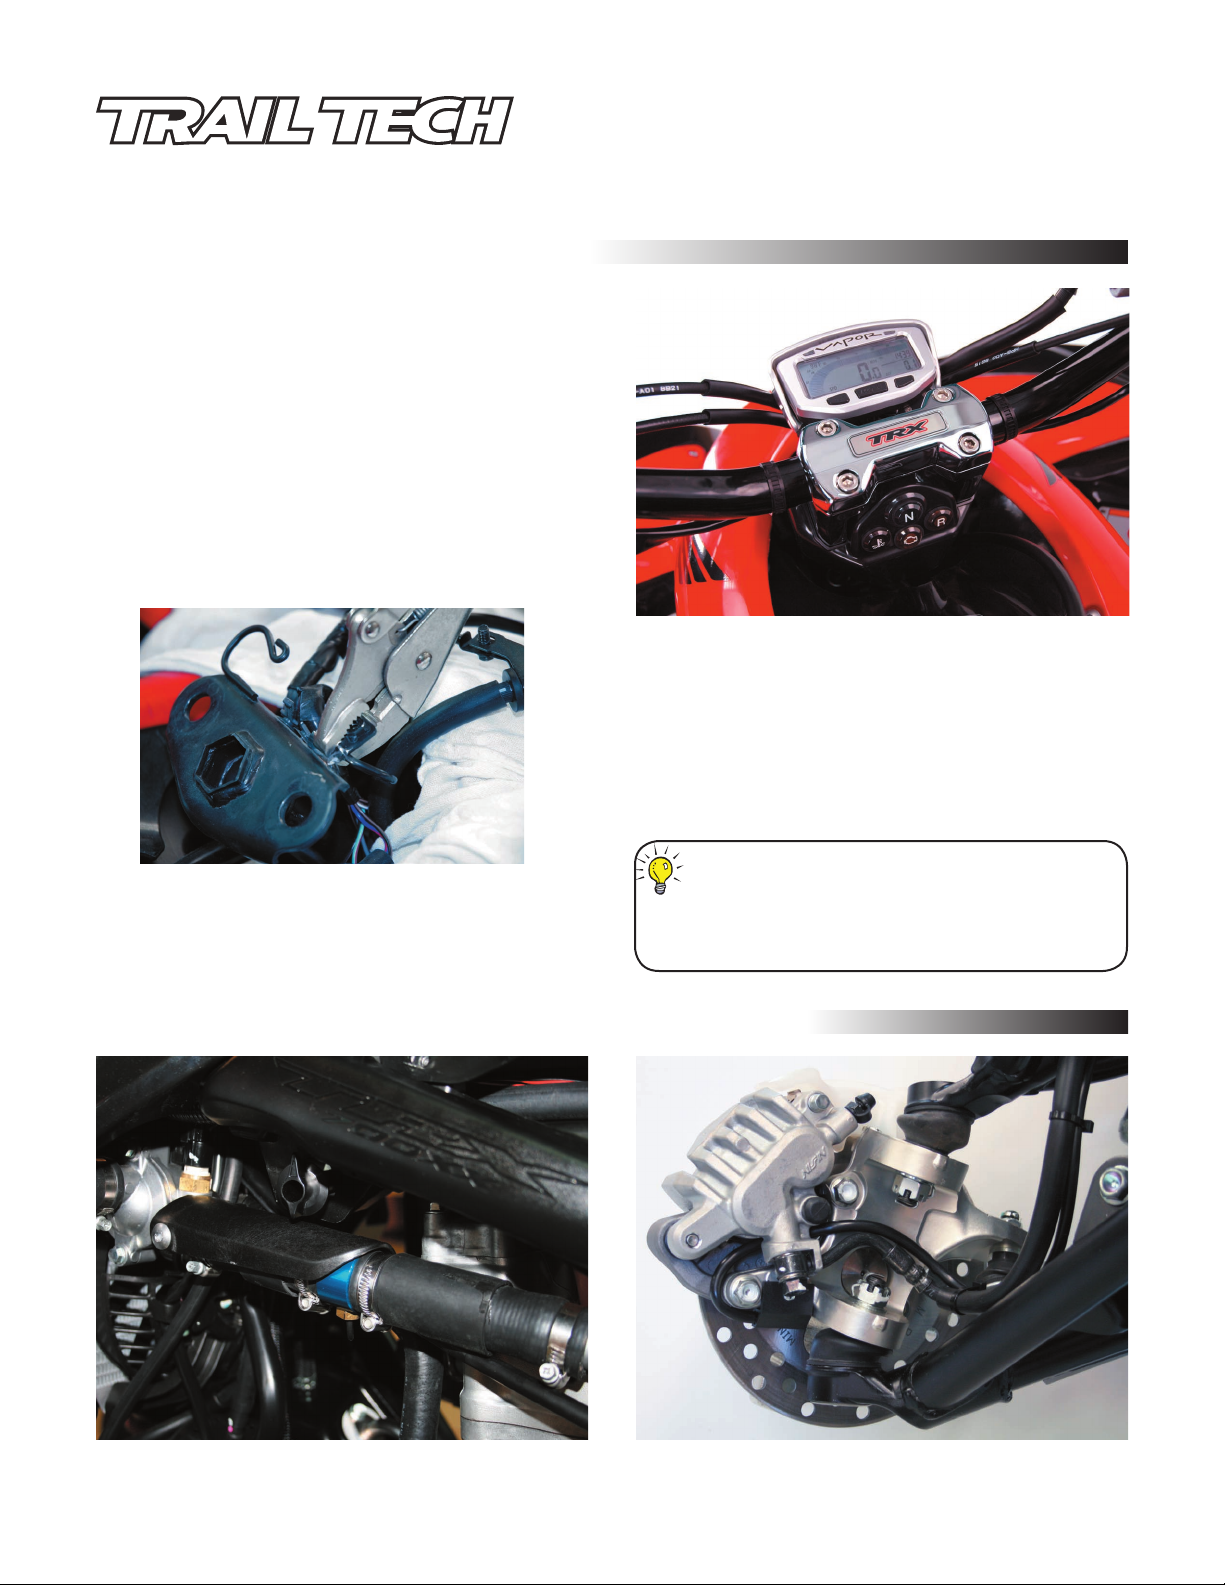
BAR CLAMP, X-BARS, AND VAPOR PROTECTOR
INSTALLED ON HONDA TRX700XX
• Bar Clamp: Install the stem cover first. Next, attach
lower portion of the Trail Tech bar clamp to the steering
stem. Place 1 1/8” bars in the cradle and secure with
TrailTech top clamp. Some controls may need to be
placed on the bars before the bar is installed.
TORQUE VALUES:
REMOVING WELDED WIRE TABS
HONDA TRX700XX
TIP:
Use OEM torque specs when attaching clamps to the steering stem.
The four top clamp bolts should be
torqued to 20 ft. lbs.
IF ALSO INSTALLING A TRAIL TECH SPEEDOMETER:
TRAIL TECH SPEEDOMETER TEMPERATURE SENSOR
INSTALLED ON HONDA TRX700XX
TRAIL TECH SPEEDOMETER SPEED SENSOR
INSTALLED ON HONDA TRX700XX
 Loading...