

Page 1
Quick Installation Guide
1 Connect to a Computer
2 Install Driver and Utility
3 Join a Wireless Network
Wireless USB Adapter
Images are for demonstration only.
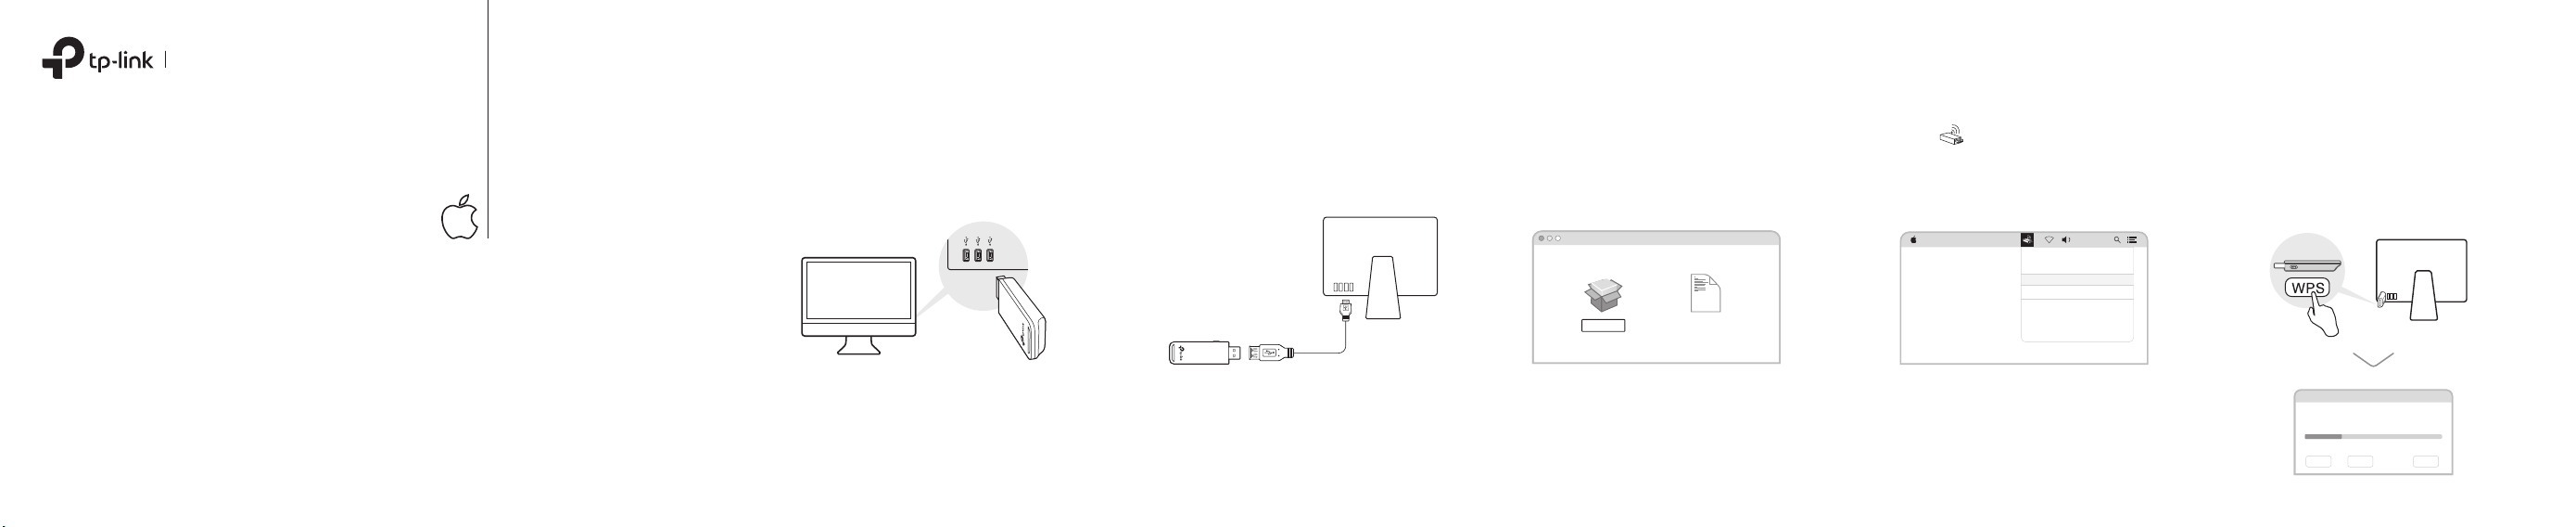
For Mac OS X
Option 1: Directly Option 2: Via the USB Extension Cable
(If provided)
a. Download the driver and utility at
https://www.tp-link.com/download-center
Note:
If your computer has a CD drive, you can also run the
included CD to install the driver and utility.
b. Unzip the downloaded folder and run the
Install.pkg.
SHELL
Install.pkg
Uninstall.command
c. Follow the instructions to complete the
installation.
Option 1: Via TP-Link Utility
a. Click (TP-Link Utility) on the menu
bar.
b. Select your Wi-Fi network and enter the
Wi-Fi password when prompted.
Fri 5:14 PM
USB-WiFi: On
Turn USB-WiFi O
TP-Link_XXXX
TP-Link_0903
Join Other Network...
WPS...
Open Wireless Utility...
Option 2: Via Wi-Fi Protected Setup (WPS)
(If your adapter has a WPS button)
a. Press the WPS button on your router.
b. Within 2 minutes, press and hold the WPS
button on the adapter until the WPS
progress window appears.
WPS
WPS Progress: Scan Active WPS AP
PIN PBC Cancel
Page 2
Connections are available
Wireless Network Connection
WPS
Cancel
1 Connect to a Computer 2 Install Driver
3 Join a Wireless Network
Troubleshooting
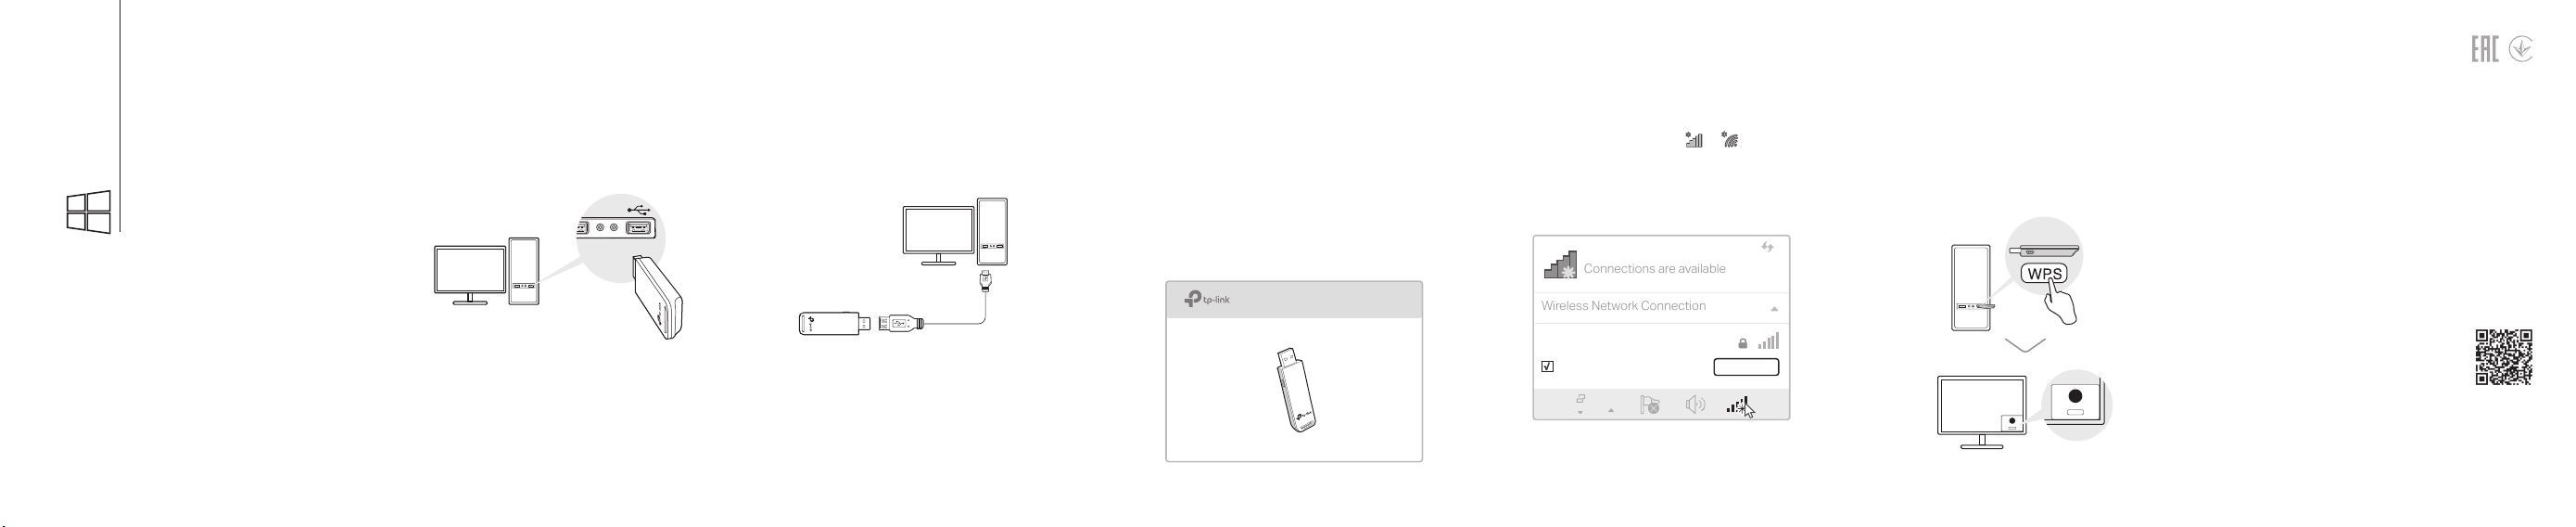
For Windows
Option 1: Directly Option 2: Via the USB Extension Cable
(if provided)
a. Insert the CD and run the Autorun.exe.
Note:
You can also download the driver or check the new
release at https://www.tp-link.com/download -center
b. Select your adapter and follow the
instructions to complete the installation.
Notes:
• If you can’t install the driver successfully, disable the
antivirus software and firewall, then try again.
• In Windows 7, if a Windows Security message pops up,
refer to Troubleshooting > T4.
Option 1: Via Windows Wireless Utility
a. Click the network icon ( or ) on the
taskbar.
b. Select your Wi-Fi network, click Connect
and enter the password when prompted.
TP-Link_XXXX
√
Connect automatically
Connect
Option 2: Via WPS Tool
(If your adapter has a WPS button)
a. Press the WPS button on your router.
b. Within 2 minutes, press and hold the WPS
button on the adapter until WPS Tool opens.
WPS
Cancel
If you have problems during the installation,
please refer to the following online FAQs.
T1. Can’t nd the hardware version of the adapter:
https://www.tp-link.com/faq-46.html
T2. Can’t nd or connect to the wireless networks:
https://www.tp-link.com/faq-2253.html
T3. Can’t install the driver:
https://www.tp-link.com/faq-2252.html
T4. How to fix Windows 7 Security issue:
https://www.tp-link.com/faq-2760.html
Support
For technical support, replacement
services, user guides, and other
information, please visit
https://www.tp-link.com/support, or
simply scan the QR code.
· Do not attempt to disassemble, repair, or modify the device.
· Do not use the device where wireless devices are not allowed.
· Keep the device away from water, re, humidity or hot environments.
· This USB Adapter can only be powered by computers that comply with
Limited Power Source (LPS).
7106508724 REV3.1.0©2020 TP-Link
 Loading...