

Page 1

MODEL VTV2034 USER GUIDE
5A90601A Cov.-In 18/6/2002, 15:161
Combination 20" TV/
Video Recorder
FASTEXT
Page 2

IMPORTANT
Unauthorized recording of copyright television programmes, films, video tapes and other materials
may infringe on the rights of copyright owners and be contrary to copyright laws.
WARNING
To prevent fire or shock hazard, do not expose this equipment to rain or moisture.
MAINS SUPPLY
This unit is designed to operate from AC 230~240V 50Hz household mains supply.
This unit is supplied with an approved 13 amp (BS 1363) fused mains plug. When replacing the fuse
always use a 5 amp (BS 1362) approved type.
If the mains sockets in your home differ or are not suitable for the type of plug supplied, then the plug
should be cut from the mains lead and a suitable type fitted.
WARNING: If the mains plug is cut from the mains lead of this appliance the plug must be destroyed. A
mains plug with bared wires is hazardous if engaged in a mains output line socket.
You must use a 13 amp plug (BS 1363) and fit a 5 amp fuse (BS 1362). If any other type of plug is used
a 5 amp fuse must be fitted, either in the plug, adaptor or at the distribution board.
WIRING INSTRUCTIONS
The wires in the mains lead are coloured in accordance with the following code:
BLUE — NEUTRAL
BROWN — LIVE
As the colours of the wires in the mains lead of the appliance may not
correspond to the coloured markings identifying the terminals in your
plug, proceed as follows:
The wire which is coloured BLUE must be connected to the terminal
which is marked with the letter N or coloured black.
The wire which is coloured BROWN must be connected to the terminal
which is marked with the letter L or coloured red.
No connection is to be made to the Earth (E, ) terminal.
HQ
This TV/VTR is equipped with HQ (High Quality) recording capability. A built-in detail enhancer is used to
boost the recorded signal for cleaner, sharper images and maximum picture playback.
5A90601A Cov.-In 18/6/2002, 15:162
Page 3

FEATURES
• Auto Set Up (Channel and Clock)
• FASTEXT Function
• 1 Month, 8 Programmes Timer
• One-Touch Timer Recording (OTR)
• 30 Minutes Back Up
• Real Time Tape Counter with Zero Return
• NTSC Playback (PAL 60Hz)
• Picture Control Adjustments
• TV Monitor
• Twin Tuner
• Video Index Search System
• Digital Auto Tracking
• PDC (Programme Delivery Control)
• ON/OFF Timer
• Auto Power On/Auto Play
• Auto Rewind/Auto Eject
• Dual Picture Search
• 2 Speed (SP/LP) Record/ Playback
• Sleep Timer
• Auto Repeat Play
CONTENTS
PREPARATION
SOME DOS AND DON'TS ON THE SAFE USE OF EQUIPMENT ...................................................................... 2
PRECAUTIONS .................................................................................................................................................... 3
LOCATION OF CONTROLS................................................................................................................................. 5
REMOTE CONTROL ............................................................................................................................................ 6
AERIAL CONNECTIONS...................................................................................................................................... 8
TV OPERATION
AUTO SET UP .......................................................................................................................................................9
MANUAL CLOCK SETTING ................................................................................................................................10
MANUAL TUNING ...............................................................................................................................................11
TV OPERATION ..................................................................................................................................................13
PICTURE CONTROL ADJUSTMENTS ...............................................................................................................15
TO SET THE ON TIMER .....................................................................................................................................17
TO SET THE OFF TIMER....................................................................................................................................18
PLAYBACK
LOADING AND UNLOADING THE VIDEO CASSETTE TAPE ...........................................................................19
PLAYBACK ..........................................................................................................................................................21
SPECIAL PLAYBACK ..........................................................................................................................................23
RECORDING
RECORDING A TV PROGRAMME .....................................................................................................................25
TIMER RECORDING ...........................................................................................................................................27
OTHER FUNCTIONS FOR TIMER RECORDING...............................................................................................29
ONE-TOUCH TIMER RECORDING (OTR) .........................................................................................................30
OTHER FUNCTIONS
USING THE REAL TIME TAPE COUNTER ........................................................................................................31
USING ZERO RETURN.......................................................................................................................................32
VIDEO INDEX SEARCH SYSTEM (INDEX)........................................................................................................33
DUPLICATING A VIDEO TAPE ...........................................................................................................................34
FASTEXT .............................................................................................................................................................35
BEFORE REQUESTING SERVICE.....................................................................................................................37
RECEPTION DISTURBANCE .............................................................................................................................39
SPECIFICATIONS ...............................................................................................................................................40
5A90601A P01-09 18/6/2002, 15:161
1
Page 4

SOME DOS AND DON'TS ON THE SAFE USE OF EQUIPMENT
This equipment has been designed and manufactured to meet international safety standards
but, like any electrical equipment, care must be taken if you are to obtain the best results and
safety is to be assured. So, please read the points below for your own safety. They are of a
general nature, intended to help you with all your electronic consumer products and some
points may not apply to the goods you have just purchased.
**************
DO read the operating instructions before you attempt to use the equipment.
DO ensure that all electrical connections (including the mains plug, extension leads and inter-
connections between the pieces of equipment) are properly made and in accordance with the
manufacturer's instructions. Switch off and withdraw the mains plug before making or changing
connections.
DO consult your dealer if you are ever in doubt about the installation, operation or safety of
your equipment.
DO be careful with glass panels or doors on equipment
**************
DON'T remove any fixed cover as this may expose dangerous voltages.
DON'T obstruct the ventilation openings of the equipment with items such as newspapers,
tablecloths, curtains, etc. Overheating will cause damage and shorten the life of the equipment.
DON'T allow electrical equipment to be exposed to dripping or splashing, or objects filled with
liquids, such as vases, to be placed on the equipment.
DON'T place hot objects or naked flame sources such as lighted candles or nightlights on, or
close to equipment. High temperatures can melt plastic and lead to fires.
DON'T use makeshift stands and NEVER fix legs with wood screws - to ensure
complete safety always fit the manufacturer's approved stand or legs with the fixings provided
according to the instructions.
DON'T use equipment such as personal stereos or radios so that you are distracted from the
requirements of traffic safety. It is illegal to watch television whilst driving.
DON'T listen to headphones at high volume, as such use can permanently damage your
hearing.
DON'T leave equipment switched on when it is unattended unless it is specifically stated that it
is designed for unattended operation or has a stand-by mode. Switch off using the switch on
the equipment and make sure that your family know how to do this. Special arrangements may
need to be made for infirm or handicapped people.
DON'T continue to operate the equipment if you are in any doubt about it working
normally, or if it is damaged in any way -switch off, withdraw the mains plug and consult your
dealer.
ABOVE ALL
---NEVER let anyone especially children push anything into holes, slots or any other
opening in the case - this could result in a fatal electrical shock;
---NEVER guess or take chances with electrical equipment of any kind
---it is better to be safe than sorry!
*************
2
5A90601A P01-09 18/6/2002, 15:162
Page 5
PRECAUTIONS
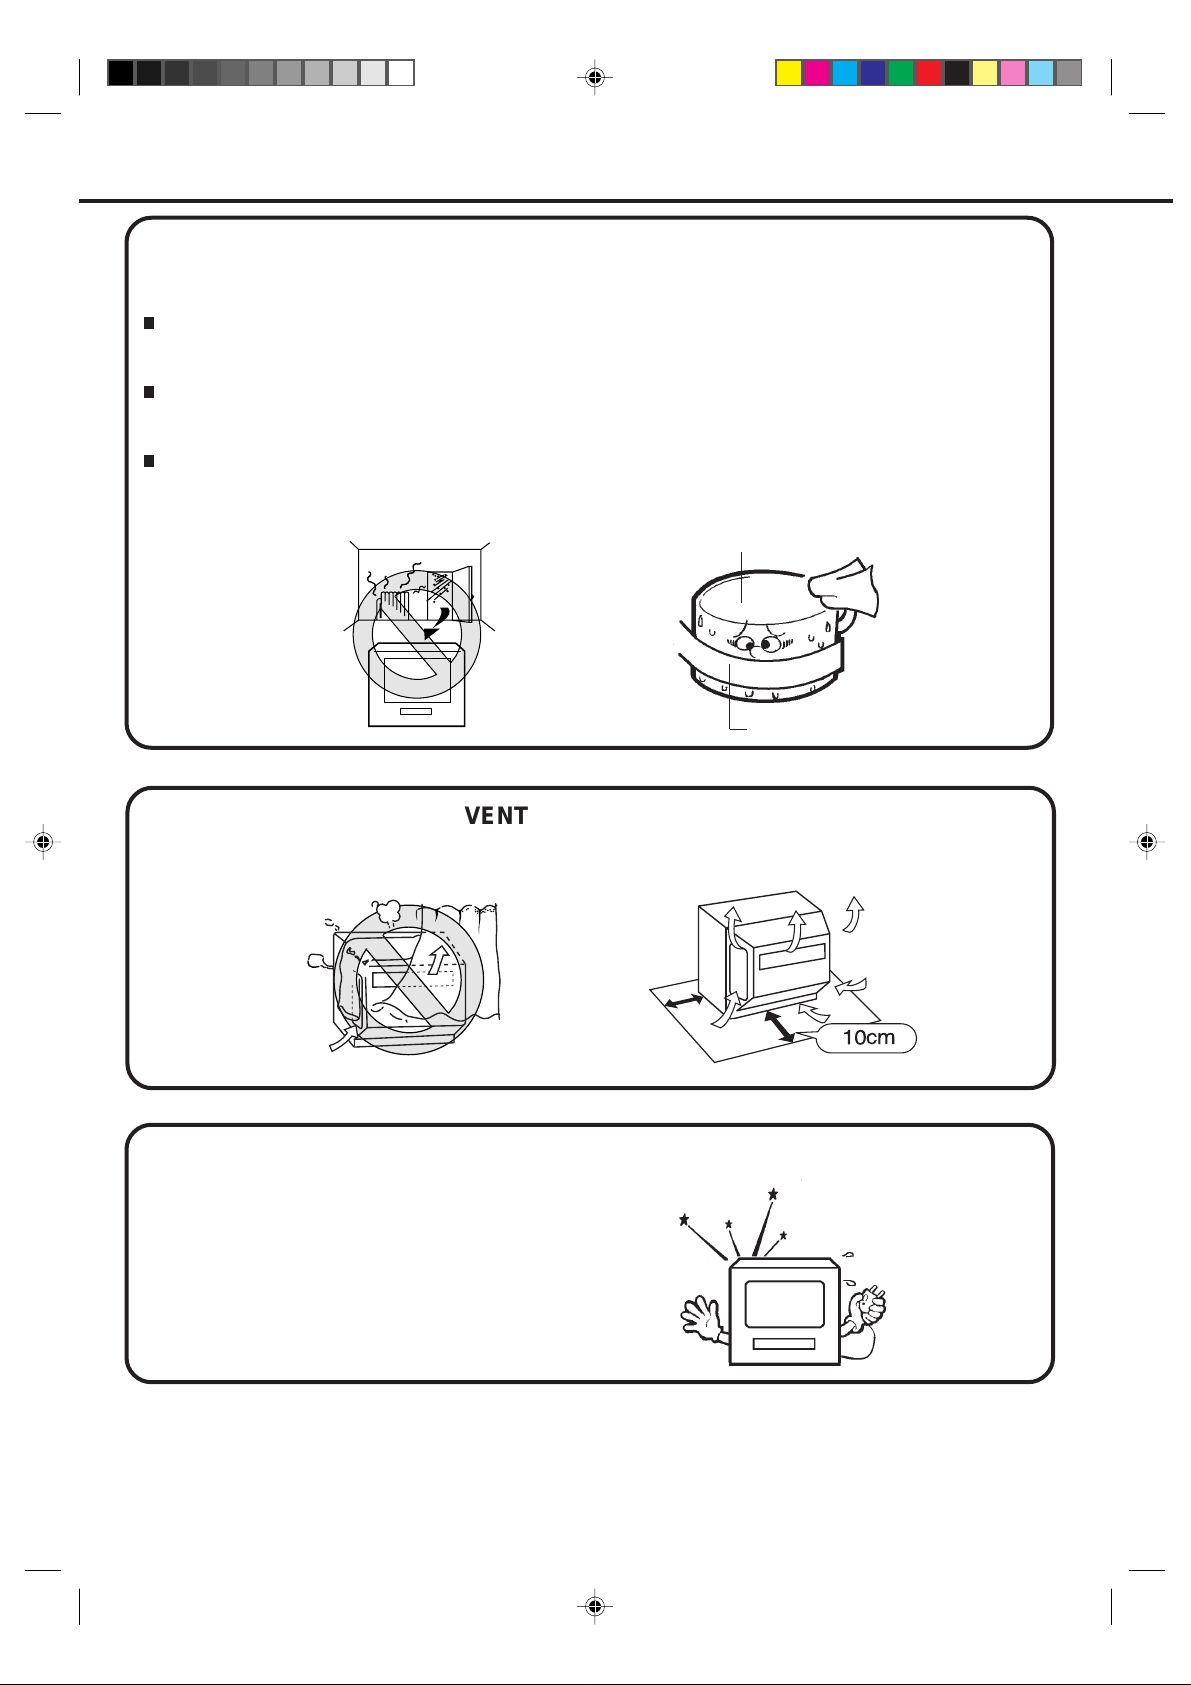
MOISTURE CONDENSATION
If the unit is suddenly moved from a cold place to a warm place, moisture may form inside the unit. In
this case, do not operate it for at least three hours.
WHAT IS MOISTURE CONDENSATION?
When cold water is poured into a glass, for, example, water vapor in the air will condense on the surface of
the glass. This is called moisture condensation.
MOISTURE WILL CONDENSE ON THE UNIT IN THE FOLLOWING CASES;
• When you move the unit from a cold to a warm place.
• After heating a cold room or under extremely humid conditions.
IF YOU EXPERIENCE THE ABOVE CONDITIONS;
Plug the AC cord to AC outlet, set the Main Power Switch to ON and leave the unit at the room temperature
until moisture condensation disappears. Depending on the surrounding conditions, this may take two or
three hours.
Head Drum
Video Tape
VENTILATION SPACE
Do not block the ventilation holes. Place the unit at least 10 cm away from the walls for good air
circulation.
10cm
Under certain conditions, such as low humidity or walking across wool carpet, you may experience
a static discharge when touching the TV/VTR. If this happens and it fails to function, follow the
procedure below.
1)
Un-plug the TV/VTR from the AC outlet.
2)
Wait for static charge to disappear, this may
take two or three hours.
3)
Re-plug the unit again.
5A90601A P01-09 18/6/2002, 15:163
3
Page 6
PRECAUTIONS (CONTINUED)
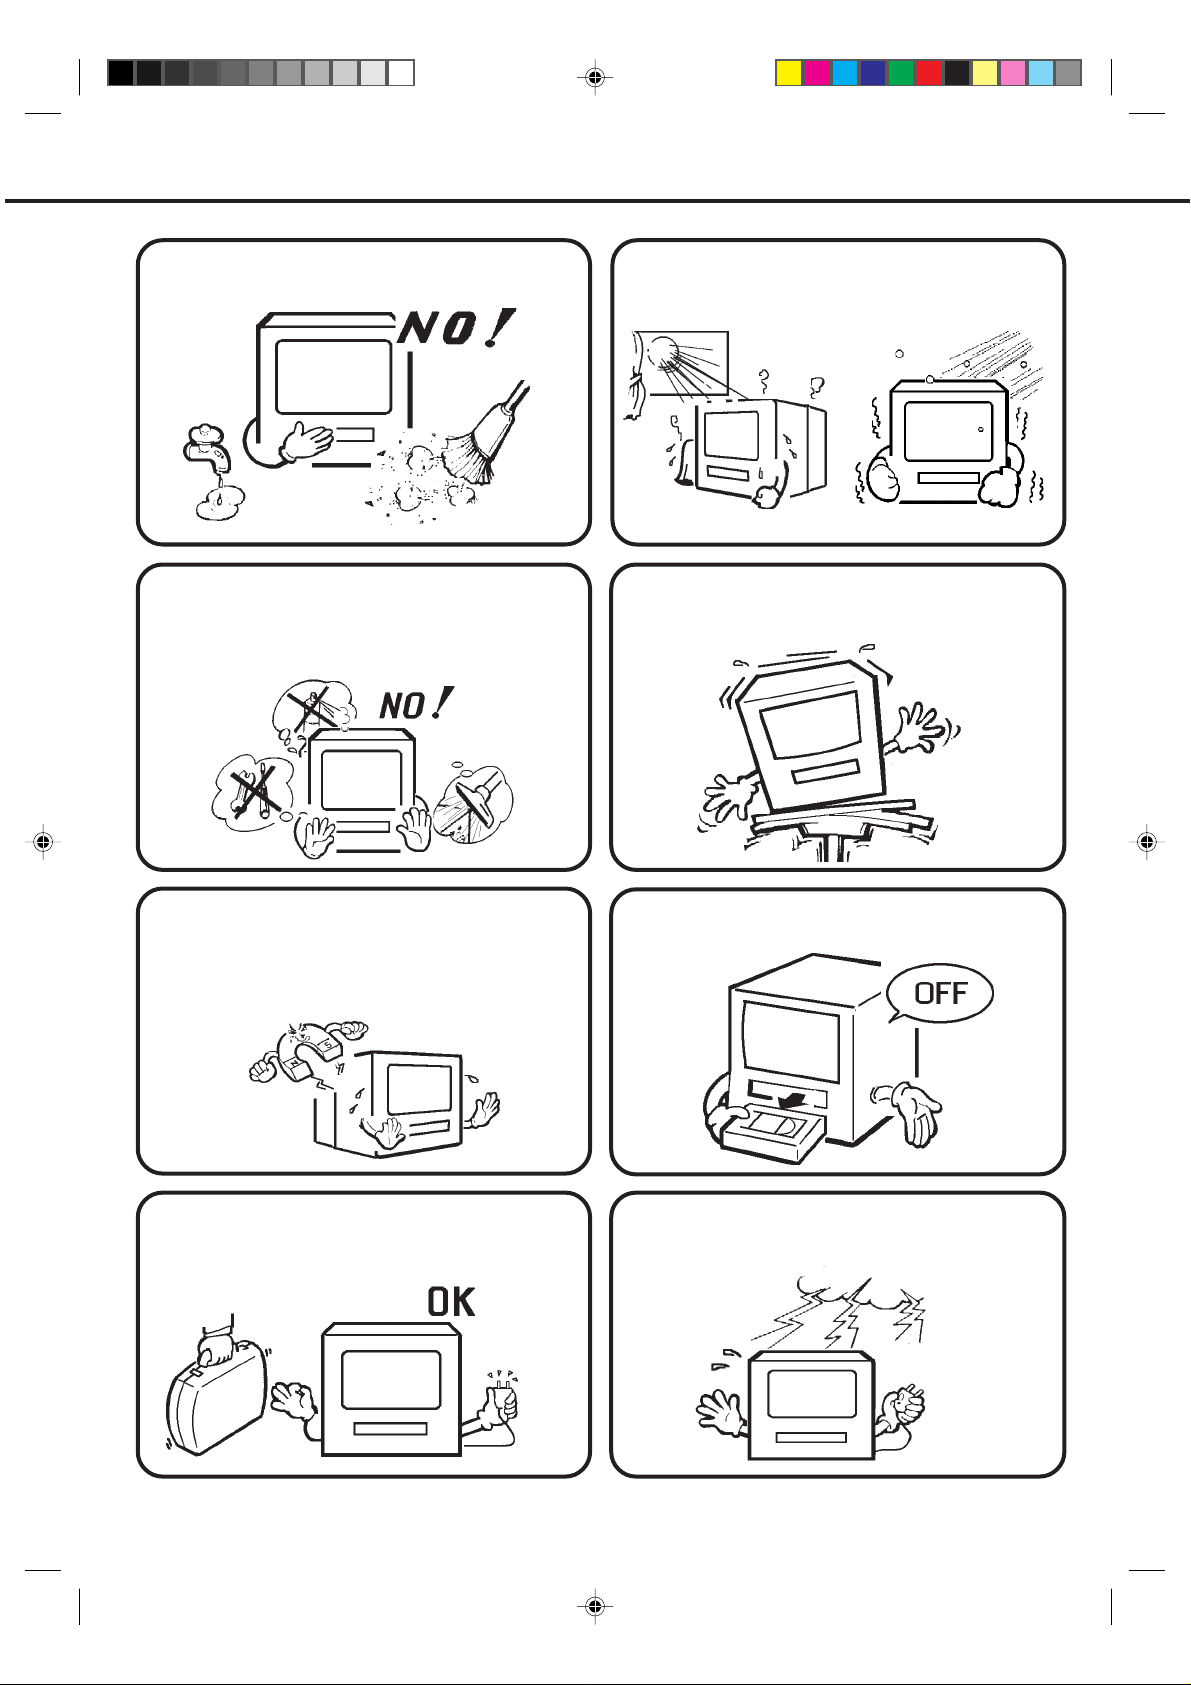
Avoid extreme moisture and dust.
Do not spray cleaner or wax directly on the
unit or use forced air to remove dust.
Avoid extreme heat and cold.
Place the unit on a flat, stable, level surface,
and never subject it to violent shaking or any
other shock or impact.
Do not place the unit on or near appliances
which may cause electromagnetic interference
eg. TV or hi-fi speakers, etc. Doing so may
affect operation of unit causing erratic playing
or recording, picture or sound distortion, or
noise.
When you leave your home for a long period of
time, unplug the AC mains lead.
When you finish operating the unit, always
unload the cassette and turn off the power.
To protect the unit during a thunder storm,
unplug the AC mains lead from the wall outlet
and disconnect the antenna.
4
5A90601A P01-09 18/6/2002, 15:164
Page 7

AERIAL
AV1
LOCATION OF CONTROLS
1
REARFRONT
2 3 4 6
REC/OTR
10
9
12
75
8
16
151311
14
DESCRIPTION OF CONTROLS
FRONT:
1. Cassette Loading Slot - To insert or remove a
video tape.
2. Main Power ( ) switch - Turn the TV/VTR power
on or off completely.
3. ON (
4. REC/OTR Indicator - Lights when the TV/VTR is
recording.
5. TIMER REC Indicator - This lights up when the
TIMER REC buttons are pressed.
6. STANDBY (
Power switch is turned on.
7. STOP/EJECT Button - Press once to stop the tape
in any mode. Press again to eject the tape.
8. FF (Fast Forward) Button - In the Stop mode, this
button rapidly winds the tape forward. In the Play
mode, this button activates forward search.
9. Remote Sensor - Signals from the Remote Control
are received here.
10. REC/OTR Button - Press once to start normal
recording. Additional presses activ ate One-T ouch Timer
Recording.
) Button - Press to turn the TV/VTR on or off.
) Indicator - Lights when the Main
17 18
19
11. VOLUME / Buttons - Press to raise or lower
the volume of the sound.
12. CHANNEL / Buttons - Press to select a
channel for viewing or recording.
13. PLAY Button - Press to play a prerecorded tape.
14. REW (Rewind) Button - In the Stop mode, this
button rapidly winds the tape backwards. In the
Play mode, this button activates reverse search.
15. AUDIO/VIDEO IN Jacks - Audio and video signal
cables from an external source can be connected
here.
16. PHONES socket - Plug monaural headphones or an
earphone with a 3.5 mm miniplug into this socket
for private listening.
REAR:
17. 21 pin SCART socket - Scart lead from an external
source can be connected here.
18. Aerial socket - Connect an outdoor aerial to this
socket.
19. MAINS LEAD - Connect to a 230~240V, 50Hz AC
outlet.
5
5A90601A P01-09 18/6/2002, 15:165
Page 8

REMOTE CONTROL
1
SLEEP
2
3
4
CALL 0 / AV MUTE
COUNTER
RESET
RETURN
PROGRAM SP/LP
ON/
STANDBYTV MONI.
321
CH/PAGE/TR
654
879
VOLUME
0
INDEX
SUB PAGE
ENTER/
HOLD
ATR
REVEAL
CANCEL/
F/T/B
ZERO
9
10
11
12
5
6
7
8
PLAY
FFREW
MENU PAUSE/STILL
STOP
TEXT/MIX/TV
TIMER
REC
REC/OTR
EJECT
13
14
15
DESCRIPTION OF CONTROLS
1. TV MONI. Button - Use to temporarily view a TV
channel selected on the TV/VTR while in the
playback or recording.
2. Direct Channel Selection Buttons (0-9) - Allows
direct access to any channel.
3. CALL Button - Displays the present time/day of the
week, channel, counter, speed selection (and VTR
mode if VTR is playing) on the TV screen.
4. ZERO RETURN Button - Use to stop the tape
when the counter reaches 00:00:00.
5. SP/LP Button - Sets the tape speed for recording.
6. REW (Rewind) Button - In the Stop mode, this
button rapidly winds the tape backwards. In the Play
mode, this button activates reverse search. Use to
go backward the tape one frame at a time during
still playback. Use to set or adjust in the menu mode.
7. MENU Button - Press to display the On-Screen
menu function.
8. REC/OTR Buttons - Press once to start normal
recording. Additional presses activate One-touch
Timer Recording.
9. CH/PAGE/TR Buttons - Press the
change to higher numbered channel set into memory.
Press the button to change to lower numbered
channel set into memory. During playback, they are
use to adjust tracking manually. Or use to utilize the
Fastext.
10. MUTE Button - Press to turn off the sound. Press
again to turn the sound back on.
11. ATR (Auto Tracking) REVEAL Button - Automatic
adjustment of tracking to minimize picture noise during playback. Or use to utilize the Fastext.
12. CANCEL F/T/B Button - Use to clear the selected
program or use to utilize the Fastext.
button to
16
17
18
19
SLEEP
879
CALL 0 / AV MUTE
0
COUNTER
ZERO
RESET
RETURN
PROGRAM SP/LP
321
654
INDEX
SUB PAGE
ENTER/
HOLD
ON/
STANDBYTV MONI.
CH/PAGE/TR
VOLUME
ATR
REVEAL
CANCEL/
F/T/B
23
24
25
26
20
21
22
PLAY
FFREW
MENU PAUSE/STILL
STOP
TEXT/MIX/TV
TIMER
REC
REC/OTR
EJECT
27
28
13. FF (Fast Forward) Button - In the Stop mode, this
button rapidly winds the tape forward. In the Play
mode, this button activates forward search. Use to
forward the tape one frame at a time during still
go
playback. Use to set or adjust in the menu mode.
14. PAUSE/STILL Button - During recording, this button
temporarily stops the tape. During playback, it stops
the tape and displays a still image on the TV screen.
15. TEXT/MIX/TV Button - Press the TEXT/MIX/TV
button to select fastext operation.
16. SLEEP Button - Sets the TV to turn off automatically
after up to 120 minutes.
17. AV Button - Select input signal source when
recording from an external unit.
18. COUNTER RESET Button - Use to reset the
counter to 00:00:00.
19. PROGRAM Button - Press to confirm the programmed timer recording and ON/OFF timer.
20. PLAY Button - Press to play a prerecorded tape.
Use to set or adjust in the menu mode.
21. STOP Button - Press once to stop the tape. Use
to set or adjust in the menu mode.
22. EJECT Button - Press to eject the tape.
23. ON/STANDBY Button - Press to turn the TV/VTR
on. Press again to turn the TV/VTR off.
24. VOLUME ▲ / ▼ Buttons - Press the ▲ button to
increase, or the ▼ button to decrease the volume level.
25. INDEX SUB PAGE Button - Use to search for the
INDEX mark or use to utilize the Fastext.
26. ENTER/HOLD Button - Use to enter information in
the menu mode or use to utilize the Fastext.
27. TIMER REC Buttons - Use to set the TV/VTR to
start recording at a preset time.
28. FOUR COLORED FASTEXT Buttons - Press one
of the button to access the Fastext information
(See page 35 for details).
6
5A90601A P01-09 18/6/2002, 15:166
Page 9

BATTERY INSTALLATION
Open the battery compartment cover.
Install two “AAA/R03/UM-4”
(penlight size) batteries.
Replace the cover.
BATTERY CAUTIONS
• Use two "AAA/R03/UM-4" size penlight batteries for the remote control transmitter.
• The batteries may last approximately one year depending on how much the remote control is used. For best
performance it is recommended batteries be replaced on a yearly basis, or when remote operation becomes
erratic.
• Do not throw your batteries into a fire. Dispose your batteries in a designated disposal area.
• Do not mix old and new batteries.
• Weak batteries can leak and severely damage the remote control transmitter. Always remove batteries as
soon as they become weak.
EFFECTIVE DISTANCE OF THE REMOTE CONTROL TRANSMITTER
NOTES: •When direct sunlight, an incandescent lamp, fluorescent lamp or any other strong light shines on the
remote sensor, the remote operation may be unstable.
•When there is an obstacle between the TV/VTR and the transmitter, the remote control transmitter may
not operate.
• When using the remote control, press the button at intervals of about 1 second to ensure the correct
mode of operation.
7
5A90601A P01-09 18/6/2002, 15:167
Page 10

AERIAL CONNECTIONS
Connect an aerial to the aerial socket at the rear panel as shown below.
For all aerial circuit problems, please consult your local dealer.
AERIAL
Wall Socket
AERIAL
AV1
Aerial socket
EXTERNAL AERIAL
The type of aerial required depends on the position of your home, it's distance from the transmitter and local
interference. If you do not have an aerial and you are uncertain of what to buy, you should seek the advice of a local
aerial contractor.
8
5A90601A P01-09 18/6/2002, 15:168
Page 11

AUTO SET UP
When first connected to the mains electricity supply the VTR will automatically search and store TV stations in
memory and also set the clock.
Make sure an aerial lead is connected from your household aerial (page 8).
You must follow the instructions on this page carefully.
Your TV/VTR will not function properly until Auto Set Up has been completed.
What is Auto Setup
• The AUTO SET UP feature makes installing your
TV/VTR easy. It automatically searches and tunes
all available TV Stations and stores them in your
TV/VTR, it then sets the correct time and date.
• During a power failure or disconnection of the
mains lead, the clock and all its programmed
setting will remain in the memory for 30 minutes. If
the power failure is longer than 30 minutes you will
have to reset the present time.
Make sure an aerial lead is connected from your
household aerial or cable box (if you subscribe to
a cable service).
Plug your TV/VTR into a mains socket.
Press MAIN POWER (
VTR. The STANDBY indicator on the TV/VTR
2
will light up.
NOTES:• To re-start AUTO SET UP, press and hold CHANNEL and buttons on the TV/VTR together for
more than a few seconds.
• Once you conduct AUTO SET UP, the previous settings will be cancelled.
5A90601A P01-09 18/6/2002, 15:169
) switch on the TV/
Press ON ( ) button on the TV/VTR. The
STANDBY indicator on the TV/VTR turns off.
3
(After the AC main is switched on, wait for about
5 seconds before pressing the ON button.)
"AUTO TUNING" appears on the screen. Your
TV/VTR is now automatically tuning in all available
TV stations and setting the correct time and date.
If the desired TV stations could not be preset,
set the channels manually. See page 11. If the
clock could not be set, set the clock manually.
See page 10.
AUTO TUNING
9
Page 12

MANUAL CLOCK SETTING
You must set the correct time and date on your TV/VTR before you make Timer recordings. You should only need to
set the time manually if it was not set during Auto Set Up.
EXAMPLE: Setting the clock to 11:30, 26th October, 2002.
Press the MENU button.
Press the or button to select the CLOCK SET
mode, then press the ENTER button.
MENU
PLAY
STOP
ENTER/
HOLD
TIMER REC SET
AUTO REPEAT OFF
CH TUNING
TV SETUP
CLOCK SET
:
SELECT
: ENTER
ENTER
: MENU
EXIT
1
MENU PAUSE/STILL
TEXT/MIX/TV
STOP
TIMER
REC
EJECT
REC/OTR
PROGRAM
PLAY
FFREW
2
CALL O / AV MUTE
COUNTER
RESET
ZERO
RETURN
SP/LP
ENTER/
HOLD
Press the or button to select the current
day, then press the button.
879
0
SUB PAGE
INDEX
VOLUME
REVEAL
ATR
CANCEL/
F/T/B
654
FFREW
SLEEP
321
CH/PAGE/TR
STANDBYTV MONI.
ON/
STOP
CLOCK SET
SELECT
SET
OK
2 3
26 SAT
DAY
1
MONTH
2002
YEAR
TIME
0:00
AUTO TIME ON
:
:/ 0-9
: ENTER
5
EXIT
: MENU
Set the month, year and hour
in the same way as in step 2.
3
NOTES:
FFREW
CLOCK SET
SELECT
SET
OK
During a power failure or disconnection of the mains lead the clock and all its programmed setting will
•
STOP
26 SAT
DAY
10
MONTH
2002
YEAR
TIME
11: 00
AUTO TIME ON
:
:/ 0-9
EXIT
: ENTER
: MENU
remain in the memory for 30 minutes. If the power failure is longer than 30 minutes you will have to reset
the present time.
If you want to correct the digits while setting, press the button until the item you want to correct, then
•
press the
or button to correct the desired setting.
10
5A90601A P10-15 18/6/2002, 15:1610
Press or button to
select current minute, then
4
press the button. The time
and date will be displayed.
FFREW
CLOCK SET
SELECT
SET
OK
4
STOP
26 SAT
DAY
10
MONTH
2002
YEAR
TIME
11: 30
AUTO TIME ON
:
:/ 0-9
EXIT
: ENTER
: MENU
Press or button to select
ON. Your TV/VTR automatically
5
corrects the clock setting every
hour once you set AUTO TIME
to ON. Press MENU button to
return to normal TV screen.
FFREW
CLOCK SET
SELECT
SET
OK
MENU
26 SAT
DAY
10
MONTH
YEAR
2002
TIME
11: 30
AUTO TIME ON
:
:
EXIT
: ENTER
: MENU
Page 13
MANUAL TUNING
CH 1
EXIT
SEARCH
: MENU
::/ F.TUNE
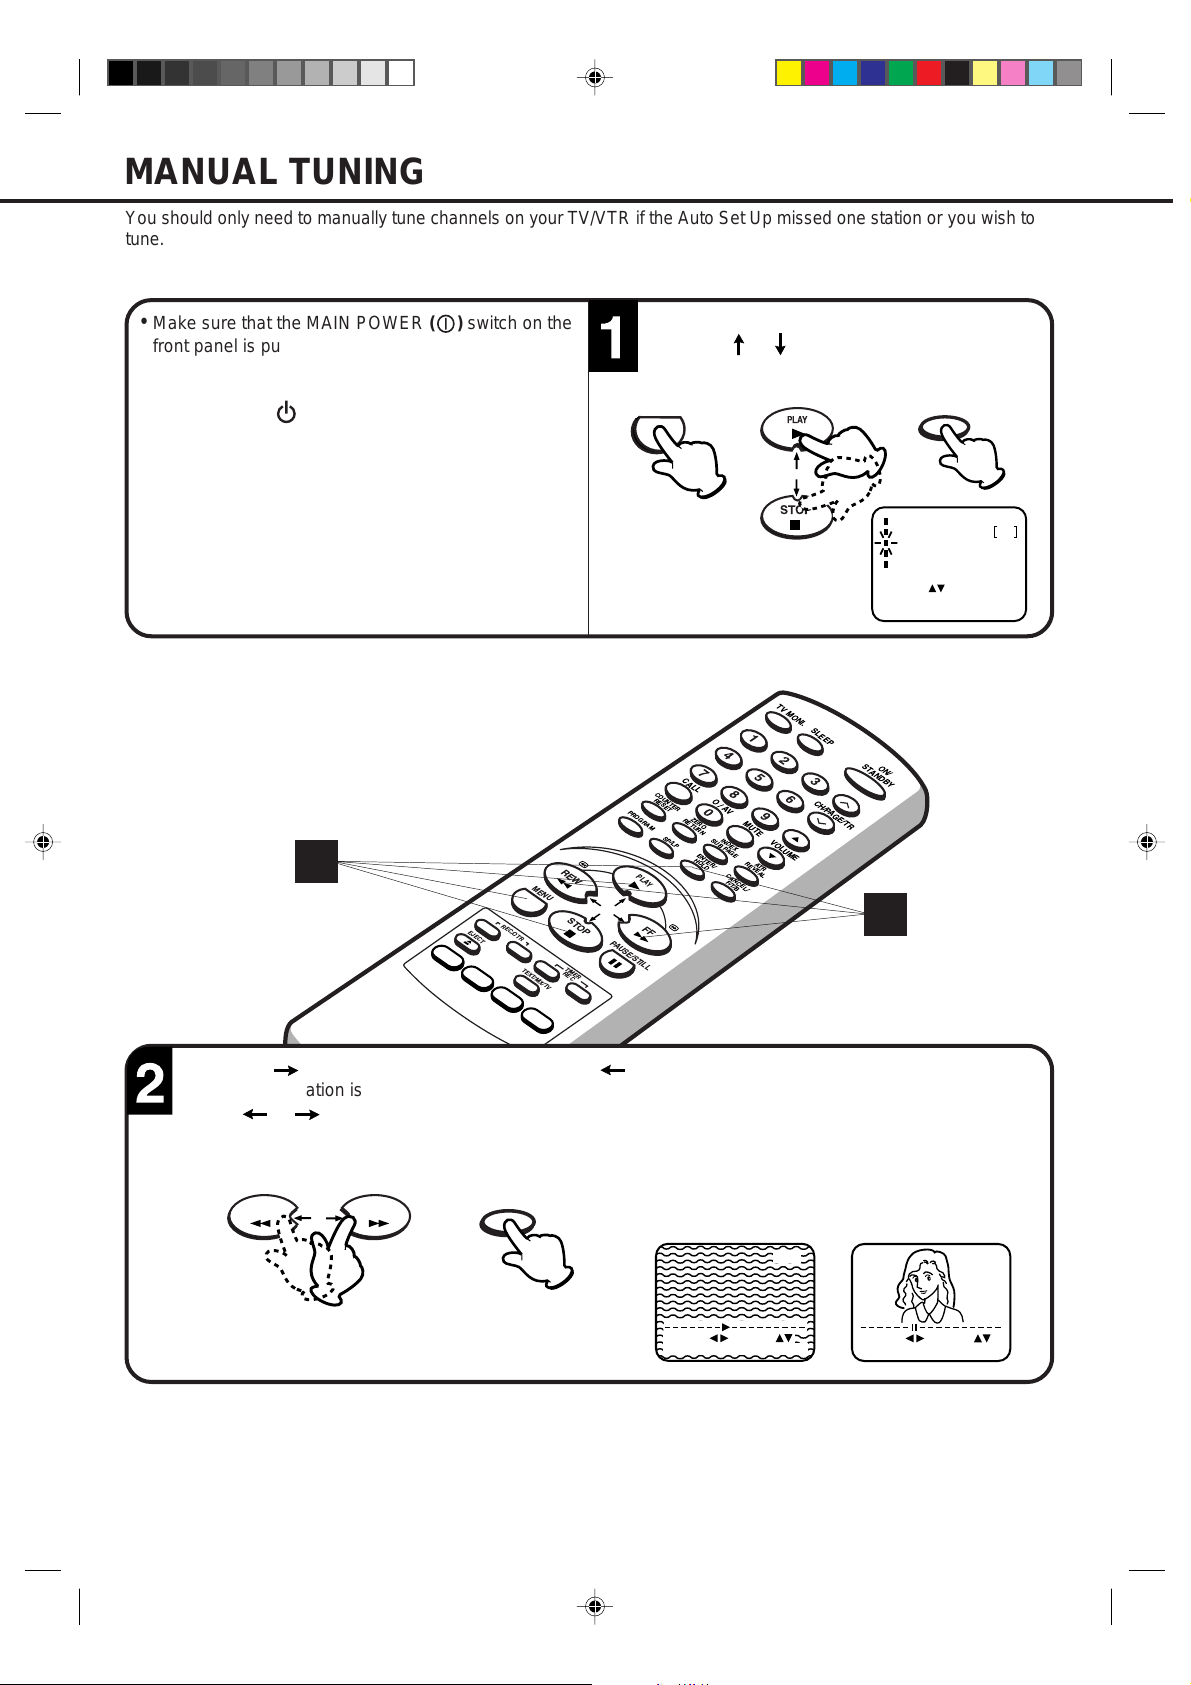
You should only need to manually tune channels on your TV/VTR if the Auto Set Up missed one station or you wish to
tune.
• Make sure that the MAIN POWER ( ) switch on the
front panel is pushed in (ON).
(The STANDBY indicator lights up.)
• Press the ON ( ) button to turn on the TV/VTR.
(The STANDBY indicator goes off.)
1
EJECT
MENU PAUSE/STILL
REC/OTR
STOP
Press the MENU button.
Press the or button to select the CH
TUNING mode, then press the ENTER button.
ENTER/
HOLD
TIMER REC SET
AUTO REPEAT OFF
CH TUNING
TV SETUP
CLOCK SET
:
SELECT
: ENTER
ENTER
: MENU
EXIT
ON/
2
PROGRAM
PLAY
FFREW
MENU
COUNTER
RESET
SP/LP
CALL O / AV MUTE
879
0
ZERO
RETURN
SUB PAGE
INDEX
ENTER/
HOLD
REVEAL
CANCEL/
F/T/B
ATR
PLAY
STOP
654
VOLUME
SLEEP
321
CH/PAGE/TR
STANDBYTV MONI.
TIMER
TEXT/MIX/TV
REC
Press the button to search up the waveband or button to search down the waveband.
Each time a station is found the search will stop.
Press or button to continue searching until the station you want is found. When the cursor stops
flashing press ENTER button to store the station you have selected.
ENTER/
FFREW
HOLD
SEARCH
OK
: / F.TUNE
: ENTER
EXIT : MENU
CH 1
:
11
5A90601A P10-15 18/6/2002, 15:1611
Page 14

CH 1
OKCH: ENTER
: / 0-9
EXIT : MENU
ENTER/
HOLD
MANUAL TUNING (CONTINUED)
If you cannot get a clear picture, press the or
button until the picture becomes clear.
When you have a clear crisp picture store this
setting by pressing ENTER button.
ENTER/
HOLD
PLAY
STOP
SEARCH
: / F.TUNE
EXIT
: MENU
3 4
6
EJECT
MENU PAUSE/STILL
REC/OTR
CH 1
STOP
Press the or button to select your required
channel number (1-80).
4
Press ENTER button to store the channel number.
PLAY
STOP
SLEEP
STANDBYTV MONI.
ON/
PROGRAM
PLAY
FFREW
CALL O / AV MUTE
COUNTER
RESET
ZERO
RETURN
SP/LP
HOLD
879
0
SUB PAGE
INDEX
ENTER/
REVEAL
ATR
CANCEL/
F/T/B
654
VOLUME
321
CH/PAGE/TR
TIMER
TEXT/MIX/TV
REC
The TV/VTR channels can be preset to different
TV broadcast channels at anytime simply repeat
5
steps 2-4.
2
When all required stations have been set,
press the MENU button repeatedly to return to
normal TV screen.
MENU
4
To skip a channel
If you wish to skip an unwanted channel when using CH/PAGE/TR or button, press CANCEL button when the
channel is displayed.
To cancel the skip function, select the channel with the number buttons then press CANCEL button.
12
5A90601A P10-15 18/6/2002, 15:1712
Page 15

TV OPERATION
VOLUME 32
Press the ON button.
ON/
STANDBY
Press the Direct Channel
Selection buttons.
1-9:
Press one of keys 1-9
as required.
10-80:
Press the two digits in
order from left to right.
CH 2
2
COUNTER
RESET
PROGRAM
SP/LP
PLAY
FFREW
EJECT
MENU PAUSE/STILL
REC/OTR
STOP
CALL O / AV MUTE
879
0
ZERO
RETURN
SUB PAGE
INDEX
ENTER/
HOLD
REVEAL
CANCEL/
F/T/B
21
ATR
654
VOLUME
The VOLUME can be adjusted
to a desired level by pressing
the VOLUME ▲ or ▼ button.
The VOLUME control is represented
by a green bar on the screen.
VOLUME
SLEEP
321
CH/PAGE/TR
STANDBYTV MONI.
ON/
1
TIMER
TEXT/MIX/TV
REC
MUTE
To cut off the sound, press this button once. The TV/VTR
will be silenced and the symbol "MUTE" will appear on
the screen. The muting can be released by pressing the
USING CH/PAGE/TR OR BUTTON
Press and release the CH/PAGE/TR or button.
For channels to change properly, they must be tuned into
the TV/VTR memory.
3
MUTE button again or the VOLUME ▲ / ▼ buttons.
MUTE
MUTE
CH/PAGE/TR
NOTE: If the station being viewed stops broadcasting, the TV will shut off after 15 minutes.
CH 2
13
5A90601A P10-15 18/6/2002, 15:1713
Page 16

TV OPERATION (CONTINUED)
CALL
Press the CALL button. The current time, channel number, real time tape counter, tape speed and VTR operation
will be indicated.
Press CALL button again to clear the call display.
Current time
VTR operation
CALL
EJECT
MENU PAUSE/STILL
TEXT/MIX/TV
STOP
TIMER
REC
REC/OTR
PROGRAM
PLAY
FFREW
11 : 30 SAT
CH 2
01 : 30 : 21 SP
Real Time Tape Counter
CALL O / AV MUTE
COUNTER
RESET
SP/LP
879
0
ZERO
RETURN
SUB PAGE
INDEX
ENTER/
HOLD
CANCEL/
F/T/B
REVEAL
ATR
654
VOLUME
SLEEP
321
CH/PAGE/TR
Channel No.
Auto Repeat
Tape In
Tape Speed
STANDBYTV MONI.
ON/
SLEEP
To set the TV to turn off at a set time, press the SLEEP button on the remote control. The clock will count down 10
minutes each time the button is pressed in the order of 120, 110.....20, 10, 0. After the sleep time is programmed,
the display will disappear and will reappear every 10 minutes. To confirm the sleep time setting, press the SLEEP
button once and the remaining time will be a momentarily displayed. To cancel the sleep time, press the SLEEP
button repeatedly until the display turns to 0.
SLEEP
SLEEP
90
NOTE: If the SLEEP button is pressed when the TV/VTR is the REC mode, the clock will count down and the picture
will shut off at the set time, but the recording continues.
14
5A90601A P10-15 18/6/2002, 15:1714
Page 17

PICTURE CONTROL ADJUSTMENTS
The picture setting have been factory adjusted under optimum signal reception. However, conditions may not be the same
in your area. After tuning in the TV/VTR, allow it to warm up for a few minutes. If the picture is not to your liking, make the
following adjustments using the remote control.
To adjust the picture, press the MENU button.
Press the or button to select the TV SETUP
mode, then press the ENTER button.
MENU
PLAY
STOP
ENTER/
HOLD
TIMER REC SET
AUTO REPEAT OFF
CH TUNING
TV SETUP
COLCK SET
SELECT
:
ENTER
: ENTER
EXIT
: MENU
1 2
41
EJECT
MENU PAUSE/STILL
REC/OTR
STOP
PROGRAM
PLAY
FFREW
Press the or button to select the PICTURE
mode, then press the ENTER button.
ENTER/
HOLD
TV SETUP
ON/OFF TIMER SET
PICTURE
SELECT
:
ENTER
: ENTER
EXIT
: MENU
STANDBYTV MONI.
ON/
3
CALL O / AV MUTE
COUNTER
RESET
ZERO
RETURN
SP/LP
HOLD
PLAY
STOP
879
0
SUB PAGE
INDEX
ENTER/
REVEAL
ATR
CANCEL/
F/T/B
654
VOLUME
SLEEP
321
CH/PAGE/TR
TIMER
TEXT/MIX/TV
REC
Press the ENTER button until your desired
PICTURE mode appears eg. brightness, contrast,
colour, sharpness. Then press the or
After finishing the adjustment, press the MENU
button repeatedly to return to normal TV screen.
4
button to adjust the PICTURE (See the next page
for detail).
ENTER/
HOLD
FFREW
SET
RESET
NEXT
BRIGHTNESS 0
EXIT : MENU
:
: CANCEL
: ENTER
MENU
NOTE: To resume the normal picture adjustment, press the CANCEL button, while in the picture mode menu.
15
5A90601A P10-15 18/6/2002, 15:1715
Page 18

NEXT
RESET
SET
: ENTER
EXIT : MENU
: CANCEL
:
CONTRAST 0
NEXT
RESET
SET
: ENTER
EXIT : MENU
: CANCEL
:
COLOUR 0
FFREW
PICTURE CONTROL ADJUSTMENTS (CONTINUED)
Each time you press the ENTER button, the picture adjustment Screen changes as follows.
BRIGHTNESS
Press the ENTER button until "BRIGHTNESS"
appears on the screen, then press the or
button to adjust the brightness. When the
button is pressed, the darker portions of
the picture become lighter.
ENTER/
HOLD
BRIGHTNESS 0
SET
:
RESET
: CANCEL
: ENTER
NEXT
EXIT : MENU
FFREW
SHARPNESS
CONTRAST
Press the ENTER button until "CONTRAST"
appears on the screen, then press the or
button to adjust the contrast. Pressing the
button improves the contrast and enhance
the colour. Picture looks sharper in the daytime
by increasing the contrast level and sharper at
night by lowering the contrast level.
ENTER/
HOLD
FFREW
COLOUR
Press the ENTER button until "SHARPNESS"
appears on the screen, then press the or
button to adjust the sharpness.
In the fringe viewing areas, the picture may be
more pleasing when the SHARPNESS is set
Press the ENTER button until "COLOUR"
appears on the screen, then press the or
button to adjust the intensity of the colours.
This should be set to where the colours appear
normal in intensity and brilliance.
at a lower level.
ENTER/
ENTER/
HOLD
SHARPNESS 0
SET
:
RESET
: CANCEL
: ENTER
NEXT
FFREW
EXIT : MENU
HOLD
NOTES:•The picture settings can only be adjusted by using the or button and ENTER button when they are
displayed on the screen.
•Press the MENU button repeatedly to return to normal TV screen.
•The On-screen display will disappear about one minute after finishing an adjustment .
16
5A90601A P16-23 18/6/2002, 15:1716
Page 19

TO SET THE ON TIMER
FF
This feature allows you to have the TV automatically turn "ON" at predetermined time. If you programme the ON
TIMER once the timer will turn "ON" the TV at the same time and to the same channel on the selected day(s).
EXAMPLE: Turning on the TV to channel 3 at 7:45, MONDAY-FRIDAY.
Press the MENU button.
Select the TV SETUP mode
using the or button, then
press the ENTER button.
MENU
PLAY
ENTER/
HOLD
Press the or button to select
the ON/OFF TIMER SET mode,
then press the ENTER button.
PLAY
ENTER/
HOLD
Press the or button to set
the ON TIMER option, then
press the ENTER button.
PLAY
ENTER/
HOLD
STOP
TIMER REC SET
AUTO REPEAT OFF
CH TUNING
TV SETUP
COLCK SET
:
SELECT
: ENTER
ENTER
: MENU
EXIT
–
1 6
6
1
3
Press the or button to set
the desired hour, then press
button.
the
PLAY
FF
EJECT
STOP
TV SETUP
ON/OFF TIMER SET
PICTURE
:
SELECT
: ENTER
ENTER
: MENU
EXIT
CALL O / AV MUTE
COUNTER
RESET
MENU PAUSE/STILL
TEXT/MIX/TV
REC
STOP
TIMER
REC/OTR
PROGRAM
PLAY
FFREW
SP/LP
ZERO
RETURN
HOLD
0
ENTER/
Set the desired minute, channel
and daily or weekly timer date
as in step 4, then press the
button.
PLAY
879
654
SUB PAGE
INDEX
VOLUME
REVEAL
ATR
CANCEL/
F/T/B
STOP
ON/OFF TIMER SET
ON TIMER
SUN-SAT
OFF TIMER
SELECT
ENTER
EXIT
SLEEP
STANDBYTV MONI.
321
CH/PAGE/TR
ON/
4 5
Press the or button to
select the SET mode, then
press the ENTER button.
Press the MENU button
repeatedly to return to
normal TV screen.
PLAY
ENTER/
HOLD
0 : 00 CH 1
0 : 00
:
: ENTER
: MENU
CANCEL
CANCEL
MENU
NOTES:
STOP
ON/OFF TIMER SET
ON TIMER
7 : 00 CH 1
SUN-SAT
OFF TIMER
0 : 00
SELECT
SET
OK
:
/ 0-9:
: ENTER
CANCEL
CANCEL
EXIT: MENU
•The TV will automatically turn off approximately 1 hour later after the ON TIMER turns on the TV. If you
STOP
ON/OFF TIMER SET
ON TIMER
7 : 45 CH 3
MON-FRI
OFF TIMER
0 : 00
SELECT
:
:
SET
OK
: ENTER
EXIT: MENU
CANCEL
CANCEL
STOP
ON/OFF TIMER SET
ON TIMER
7 : 45 CH 3
MON-FRI
OFF TIMER
0 : 00
SELECT
:
:
SET
OK
: ENTER
SET
CANCEL
EXIT: MENU
wish to continue watching the TV, press any button to cancel the one hour automatic shut off. This shut
off feature prevents the TV from playing continuously if no OFF TIMER is set.
•To cancel the ON TIMER function; To cancel ON TIMER, follow above steps 1-6, then press the or
button to select the CANCEL position. Press the MENU button to return to the TV.
•After setting the ON TIMER, " " of the OFF TIMER will flash on and off. If you wish to set the OFF
TIMER, press the ENTER button then follow the steps 3-5 on page 18.
5A90601A P16-23 18/6/2002, 15:1717
17
Page 20

TO SET THE OFF TIMER
7 : 45 CH 3
ON TIMER
8 : 30
OFF TIMER
MON-FRI SET
SET
ON/OFF TIMER SET
SET
SELECT
EXIT: MENU
:
OK
:
: ENTER
MENU
This feature allows you to have the TV turn "OFF" automatically at a predetermined time. If you programme the OFF
TIMER once, the TV will be automatically turned off at the same time daily.
EXAMPLE: Turning off the TV at 8:30.
Press the MENU button.
Select the TV SETUP mode
using the or button, then
press the ENTER button.
MENU
PLAY
ENTER/
HOLD
Press the or button to
select the ON/OFF TIMER SET
mode, then press the ENTER
button.
PLAY
ENTER/
HOLD
Press the or button to
set the OFF TIMER option,
then press the ENTER button.
ENTER/
PLAY
HOLD
STOP
TIMER REC SET
AUTO REPEAT OFF
CH TUNING
TV SETUP
COLCK SET
:
SELECT
: ENTER
ENTER
: MENU
EXIT
–
1 6
3
61
Press the or button to set
the desired hour, then press
button.
the
PLAY
FF
STOP
TV SETUP
ON/OFF TIMER SET
PICTURE
:
SELECT
: ENTER
ENTER
: MENU
EXIT
PROGRAM
PLAY
FFREW
EJECT
MENU PAUSE/STILL
TEXT/MIX/TV
STOP
TIMER
REC
REC/OTR
Press the or button to set
the desired minute, then press
button.
the
PLAY
FF
CALL O / AV MUTE
COUNTER
RESET
ZERO
RETURN
SP/LP
HOLD
879
0
SUB PAGE
INDEX
CANCEL/
F/T/B
REVEAL
VOLUME
ATR
ENTER/
STOP
ON/OFF TIMER SET
ON TIMER
7 : 45 CH 3
MON-FRI
OFF TIMER
0 : 00
SELECT
:
ENTER
: ENTER
EXIT
: MENU
SLEEP
STANDBYTV MONI.
ON/
654
321
CH/PAGE/TR
4 5
Press the or button to
select the SET mode, then
press the ENTER button.
Press the MENU button
repeatedly to return to
normal TV screen.
PLAY
ENTER/
HOLD
SET
CANCEL
STOP
ON/OFF TIMER SET
ON TIMER
7 : 45 CH 3
MON-FRI
OFF TIMER
8 : 00
SELECT
:
:
/ 0-9
SET
OK
: ENTER
EXIT: MENU
SET
CANCEL
STOP
ON/OFF TIMER SET
ON TIMER
7 : 45 CH 3
MON-FRI SET
OFF TIMER
8 : 30
SELECT
:
:
/ 0-9
SET
OK
: ENTER
EXIT: MENU
STOP
CANCEL
NOTES:•If a station being viewed stops broadcasting, the TV will automatically shut itself off after 15 minutes.
•To cancel the OFF TIMER function:
To cancel OFF TIMER, follow above steps 1-5, then press the or button to select the CANCEL
position. Press the MENU button to return to the TV.
•To confirm the ON/OFF TIMER:
18
5A90601A P16-23 18/6/2002, 15:1718
Press the PROGRAM button repeatedly to indicate the programmes on the screen.
Page 21

LOADING AND UNLOADING THE VIDEO CASSETTE TAPE
Use only video cassette tapes marked .
LOADING
Push the centre of the tape until it is automatically inserted.
AUTOMATIC POWER ON AND PLAY
When loading a cassette tape without the erase prevention tab intact, the TV/VTR will turn on and playback
will start immediately.
Insert the cassette with its labelled side facing you.
An inverted cassette cannot be inserted.
1
UNLOADING
To unload a video cassette, press the EJECT
button on the remote control, or press the STOP/
EJECT button on the TV/VTR twice. The first
press will stop the tape in any mode. The second
press will eject the tape.
EJECT
OR
AUTOMATIC EJECT
When the TV/VTR is automatically rewinding the tape and
reaches its end (AUTO REWIND), the tape will be ejected
automatically (See NOTE on page 26).
NOTES:•Always eject the tape when not in use.
•The cassette can be ejected even if the ON button is OFF.
2
Pull the cassette out.
19
5A90601A P16-23 18/6/2002, 15:1719
Page 22

LOADING AND UNLOADING THE VIDEO CASSETTE TAPE (CONTINUED)
TO PREVENT ACCIDENTAL ERASURE
After recording, break off the erase prevention tab if
you do not wish to record over the tape.
Screwdriver
Erase prevention tab
TO RECORD AGAIN
Cover the hole with adhesive tape.
Be careful the tape does not extend past the edges of
the cassette housing.
Adhesive tape
TAPE SPEED AND MAXIMUM RECORDING/PLAYBACK TIME
VIDEO CASSETTE TAPE
TAPE SPEED
E-180
3 hours
E-90
1-1/2 hours
SP (Standard Play )
E-300
5 hours
E-240
4 hours
E-60
1 hour
E-30
30 minutes
LP (Long Play)
10 hours
8 hours
6 hours
3 hours
2 hours
1 hour
20
5A90601A P16-23 18/6/2002, 15:1720
Page 23

STOP
PLAYBACK
To play a pre-recorded cassette tape.
TO START PLAYBACK
To turn "ON" the power of the TV/VTR, press
the ON button.
ON/
STANDBY
3
MENU PAUSE/STILL
EJECT
REC/OTR
STOP
PROGRAM
PLAY
FFREW
CALL O / AV MUTE
COUNTER
RESET
ZERO
RETURN
SP/LP
HOLD
Load a pre-recorded tape (When loading a
cassette tape without the erase prevention tab,
playback will start automatically).
879
0
SUB PAGE
INDEX
ENTER/
REVEAL
ATR
CANCEL/
F/T/B
654
VOLUME
SLEEP
321
CH/PAGE/TR
STANDBYTV MONI.
ON/
1
TIMER
TEXT/MIX/TV
REC
TO STOP PLAYBACK
Press the PLAY button. Playback will start.
"
" will appear on the screen.
PLAY
NOTE:
AUTO REWIND FEATURE:
This TV/VTR will automatically rewind and eject the tape when the tape has ended.
Press the STOP button.
" " will appear on the screen.
21
5A90601A P16-23 18/6/2002, 15:1721
Page 24

FF
PLAYBACK (CONTINUED)
TO REWIND OR FORWARD THE TAPE RAPIDLY
Press the REW button when in the STOP mode.
" will appear on the screen.
"
REW
Press the FF button when in the STOP mode.
" will appear on the screen.
"
FORWARD/REVERSE PICTURE SEARCH
If you want to see the tape program during REW(F.FWD)mode, press and hold the REW(FF) button.
The backward(forward) visual search picture will be seen on the screen. Release the button to return to the REW(FWD) mode.
SLEEP
STANDBYTV MONI.
ON/
EJECT
MENU PAUSE/STILL
REC/OTR
STOP
PROGRAM
PLAY
FFREW
CALL O / AV MUTE
COUNTER
RESET
ZERO
RETURN
SP/LP
879
0
SUB PAGE
INDEX
ENTER/
HOLD
REVEAL
ATR
CANCEL/
F/T/B
654
VOLUME
321
CH/PAGE/TR
TIMER
TEXT/MIX/TV
REC
DIGITAL AUTO TRACKING ADJUSTMENTS
When a tape is played, the Digital Auto Tracking system automatically
adjusts the tracking to obtain the best possible picture. If noise bars appear
during playback, adjust the tracking manually as follows:
• Press the CH/PAGE/TR or button to obtain the best possible
picture. "MANUAL TR." will appear for 4 seconds on the screen.
To revert to automatic tracking, press the ATR button. "AUTO TR." will
appear for 4 seconds on the screen.
ATR
REVEAL
CH/PAGE/TR
MANUAL TR.
CH :
AUTO TR.
22
TO MONITOR A TV PROGRAMME
Press the TV MONI. button while
in the playback mode. The video
tape will continue to play while
the picture switches to the TV
channel selected on the TV/VTR.
Press the button again to return
to playback picture.
While the TV/VTR is recording
one programme, another
programme can be seen.
TV MONI.
5A90601A P16-23 18/6/2002, 15:1722
Page 25

SPECIAL PLAYBACK
TO VISUALLY SEARCH FOR DESIRED POINTS
When either the FF or REW button is pressed in the
PLAYBACK mode, the speed search picture will appear.
When pressed twice the search picture will increase in
speed. Speed search times depend upon the speed used
(SP or LP) during recording. To rewind or fast forward a
tape, press the STOP button, and then press the REW or
FF button.
Press the REW button once or twice in the
PLAYBACK mode.
REW
To return to playback, press the PLAY button.
2
MENU PAUSE/STILL
EJECT
REC/OTR
STOP
SPEED SEARCH TIMES
PICTURE SEARCH SPEED
TAPE SPEED
SP (Standard Play)
PAL
LP (Long Play)
SP (Standard Play)
NTSC
PRESS ONCE
5 X
7 X
3 X
Press the FF button once or twice in the PLAYBACK
mode.
FF
SLEEP
STANDBYTV MONI.
ON/
PROGRAM
PLAY
FFREW
CALL O / AV MUTE
COUNTER
RESET
ZERO
RETURN
SP/LP
HOLD
879
0
SUB PAGE
INDEX
ENTER/
REVEAL
ATR
CANCEL/
F/T/B
654
VOLUME
321
CH/PAGE/TR
PRESS TWICE
7 X
13 X
5 X
TIMER
TEXT/MIX/TV
REC
STILL PICTURE
Press the STILL button in the PLAYBACK mode.
PAUSE/STILL
To prevent damage to the tape, STILL playback
is automatically resumed to the PLAY mode after
5 minutes.
NOTES:•The audio output is muted during SPEED SEARCH and STILL.
•A few noise bars will appear on the picture during SPEED SEARCH.
•It is normal for the picture to be less sharp in the STILL mode.
5A90601A P16-23 18/6/2002, 15:1723
To continue the normal playback, press PLAY
button.
1
PLAY
23
Page 26

SPECIAL PLAYBACK (CONTINUED)
NTSC TAPE PLAYBACK
Your TV/VTR can playback Video tapes recorded in the NTSC Colour System (TV system usually used in America
and Japan) on PAL 60Hz TV (TV system used in the United Kingdom).
Load a NTSC recorded tape (When loading a cassette
tape without an erase prevention tab, playback will start
automatically).
3
1
MENU PAUSE/STILL
EJECT
REC/OTR
STOP
To play the NTSC tape press the PLAY button. Your
TV/VTR will playback Video tapes recorded using
NTSC Standard play, Long play (LP) and Extended
play (EP). However there will be a deterioration in
sound quality in the Long play and Extended play modes.
SLEEP
STANDBYTV MONI.
ON/
PROGRAM
PLAY
FFREW
CALL O / AV MUTE
COUNTER
RESET
ZERO
RETURN
SP/LP
HOLD
879
0
SUB PAGE
INDEX
ENTER/
REVEAL
ATR
CANCEL/
F/T/B
654
VOLUME
321
CH/PAGE/TR
TIMER
TEXT/MIX/TV
REC
2
TO WATCH A TAPE REPEATEDLY
Press the MENU button.
Press the or button to
Press the button to
select the ON position.
select the AUTO REPEAT
option.
MENU
PLAY
STOP
TIMER REC SET
AUTO REPEAT OFF
CH TUNING
TV SETUP
CLOCK SET
: /
SELECT
: ENTER
ENTER
: MENU
EXIT
FF
TIMER REC SET
AUTO REPEAT ON
CH TUNING
TV SETUP
CLOCK SET
: /
SELECT
: ENTER
ENTER
: MENU
EXIT
NOTE: To cancel repeat mode, follow above steps 1 and 2, then press the button to select the OFF position.
Press the MENU button to return to the TV.
24
5A90601A P24-31 18/6/2002, 15:1824
Press the MENU button to return
to normal TV screen. If you press
the PLAY button, the TV/VTR
will repeat playing the video tape
until the repeat mode is canceled.
MENU
Page 27

RECORDING A TV PROGRAMME
RECORDING ONE PROGRAMME WHILE WATCHING ANOTHER
To turn "ON" the TV/VTR, press the ON button. Load a cassette tape with the erase prevention
tab intact.
ON/
STANDBY
3
MENU PAUSE/STILL
TEXT/MIX/TV
STOP
TIMER
REC
REC/OTR
EJECT
Press the SP/LP button to select the desired
tape speed SP or LP.
SP/LP
PROGRAM
PLAY
FFREW
SLEEP
STANDBYTV MONI.
CALL O / AV MUTE
COUNTER
RESET
ZERO
RETURN
SP/LP
879
0
SUB PAGE
INDEX
ENTER/
HOLD
REVEAL
ATR
CANCEL/
F/T/B
654
VOLUME
321
CH/PAGE/TR
ON/
Press the Direct channel selection buttons or
CH/PAGE/TR
4
be recorded (Example: Channel 2).
or
to select the channel to
21
OR
1
4
CH/PAGE/TR
CH 2
NOTE:• If the power is switched off during recording by the ON/STANDBY button on the TV/VTR or the remote contol,
the TV section shuts off and the VTR section continues to record.
5A90601A P24-31 18/6/2002, 15:1825
25
Page 28

REC/OTR
RECORDING A TV PROGRAMME
TO STOP RECORDING
Press the REC/OTR buttons.
" and the channel number will appear on the
"
screen and the REC/OTR indicator will light.
While the TV/VTR is recording one programme,
another programme can be seen on this unit.
After the recording, select the TV channel you
want to watch.
Recording(RED)
Watching(GREEN)
CH 3
CH 2
5
MENU PAUSE/STILL
EJECT
REC/OTR
STOP
Press the STOP button to stop recording.
" " will appear on the screen.
STOP
SLEEP
STANDBYTV MONI.
ON/
PROGRAM
PLAY
FFREW
CALL O / AV MUTE
COUNTER
RESET
ZERO
RETURN
SP/LP
HOLD
879
0
SUB PAGE
INDEX
CANCEL/
F/T/B
REVEAL
ATR
VOLUME
ENTER/
654
321
CH/PAGE/TR
TIMER
TEXT/MIX/TV
REC
TO STOP RECORDING TEMPORARILY
Press the PAUSE button to stop recording of unwanted material. "
indicator will blink on and off.
Press again or press the REC/OTR buttons to continue the recording.
PAUSE/STILL
NOTE:
" will appear on the screen and the REC/OTR
• To prevent damage to the video head and video tape the pause function will stop the VTR operation after
about 5 minutes.
NOTE:
AUTO REWIND FEATURE:
This feature is disabled during OTR and TIMER REC.
• If the tab has been removed, the tape will eject whenever REC/OTR is pressed.
26
CH 2
5A90601A P24-31 18/6/2002, 15:1826
Page 29

TIMER RECORDING
Timer recording can be programmed on screen with the remote control. The built-in timer allows automatic
unattended recording of up to 8 programmes within 1 month.
•Load a cassette tape with the erase prevention tab intact. The TV/VTR will automatically turn on.
•Make sure that the clock shows the present time correctly.
EXAMPLE:
Programme a timer recording for 13:00-14:30, channel 3, on timer programme number 1 (Tape speed : LP).
Press the MENU button.
MENU
3
1
EJECT
MENU PAUSE/STILL
REC/OTR
STOP
PROGRAM
PLAY
FFREW
Select the TIMER REC SET option, then press
the ENTER button.
ENTER/
HOLD
TIMER REC SET
AUTO REPEAT OFF
CH TUNING
TV SETUP
CLOCK SET
:
SELECT
: ENTER
ENTER
: MENU
EXIT
SLEEP
STANDBYTV MONI.
CALL O / AV MUTE
COUNTER
RESET
ZERO
RETURN
SP/LP
879
0
SUB PAGE
INDEX
ENTER/
HOLD
REVEAL
ATR
CANCEL/
F/T/B
654
VOLUME
321
CH/PAGE/TR
ON/
4
32
TIMER
TEXT/MIX/TV
REC
Press the or button to select one of the
program lines, then press the ENTER button.
ENTER/
PLAY
STOP
HOLD
SELECT
EXIT
: MENU
/ ENTER:
Press the or button to select the desired
date or every day or every week setting, then
4
press the button.
FFREW
STOP
TIMER REC SET
SELECT
SET
EXIT
DATE
START
END
CH
SPEED
PDC OFF
:
:/ 0-9
: MENU
23 SAT
11: 30
– –
:
1
SP
– –
NOTES:•If programming is performed without a tape in the TV/VTR, or with a tape without an erase prevention tab,
the Timer Recording is not possible. If a tape without an erase prevention tab is in the TV/VTR, the tape
will be ejected.
•To record from the external equipment press the or button repeatedly until "AV1 (from 21 pin
SCART socket on the rear)" or "AV2 (from Video/Audio In jacks on the front)" appears when setting the
channel in step 5.
27
5A90601A P24-31 18/6/2002, 15:1827
Page 30

EXIT
SELECT
: MENU
/ ENTER:
23 SAT 13 : 00
14 : 30
LP3
:
:
:
:
:
:
:
:
:
:
:
:
:
:
EXIT
SET
SELECT
: MENU:OK : ENTER
:
TIMER REC SET
DATE
START
END
CH
SPEED
23 SAT
1
LP
PDC ON
13: 00
14: 30
TIMER
REC
MENU
TIMER RECORDING (CONTINUED)
All the recordings made on this unit will be made with PDC (Programme Delivery Control) ON. This means that the
broadcaster controls the Start and Stop times of the recording and can delay the start or extend the recording if
required.
To make certain this works correctly always enter the EXACT Start Time as published in the newspaper or TV listings
magazine. Do not set it a few minutes early because the unit will not understand this and will not record the programme.
Set the start time, end time, channel and tape
speed as in step 4.
TIMER REC SET
DATE
23 SAT
START
13: 00
END
14: 30
CH
1
SPEED
LP
PDC OFF
SELECT
:
SET
EXIT
: MENU:OK : ENTER
6
MENU PAUSE/STILL
TEXT/MIX/TV
REC
STOP
TIMER
EJECT
REC/OTR
Press the or button to select PDC ON or
OFF. When you have finished setting all your
65
recordings, press ENTER.
ENTER/
PROGRAM
PLAY
FFREW
CALL O / AV MUTE
COUNTER
RESET
ZERO
RETURN
SP/LP
879
0
SUB PAGE
INDEX
ENTER/
HOLD
REVEAL
ATR
CANCEL/
F/T/B
FFREW
VOLUME
654
SLEEP
321
CH/PAGE/TR
HOLD
STANDBYTV MONI.
ON/
7
To set the timer for another programme, press the
or button to select another programme line, then
press the ENTER button.
Repeat steps 4 to 6 to set the second programme.
Press the TIMER REC buttons. The TIMER
REC indicator will light up. When the programmed
7
time is reached, the recording is automatically
started.
4
6
NOTES:•The VTR section cannot be used while the TIMER REC indicator is lit. If you want to use the VTR
28
5A90601A P24-31 18/6/2002, 15:1828
operation, press the TIMER REC buttons to deactivate the timer.
•After a power failure or disconnection of the power plug, all programmed recording setting and time display
will be lost upon resumption of power if the failure is longer than 30 minutes. In this case, reset the clock
(see page 10) and reprogramme any timer recordings.
•If you want to correct the digits while setting, press the button until the item you want to
correct, then press the or button to correct the desired setting.
To cancel timer recording, press the buttons again and
TIMER REC indicator will go off.
Page 31

OTHER FUNCTIONS FOR TIMER RECORDING
CLEAR
SELECT
:
CANCEL EXIT: MENU
/ ENTER:
23 SAT 13 : 00
14 : 30
LP3
:
:
:
:
:
:
:
:
:
:
:
:
:
:
TO SET DAILY/WEEKLY TIMER
When setting the date in the step 4 on page 27, press
the button repeatedly when the current day is
displayed.
The setting changes as follows:
Example
The current day (Friday) SUN-SAT (Sunday to Saturday)
MON-SAT (Monday to Saturday)
One month later
minus one day MON-FRI (Monday to Friday)
WKL-WED WKL-THU (Weekly Thursday)
(Weekly Wednesday)
MENU PAUSE/STILL
EJECT
REC/OTR
STOP
TO CONFIRM THE SETTINGS
Press the PROGRAM button once. The TV screen
displays the timer program list.
Press the PROGRAM button again. The TV screen displays the ON/OFF timer setting.
PROGRAM
Press the PROGRAM button 3 times. The screen
returns to the normal screen.
CALL O / AV MUTE
PROGRAM
PLAY
FFREW
COUNTER
RESET
SP/LP
879
0
ZERO
RETURN
SUB PAGE
INDEX
ENTER/
HOLD
CANCEL/
F/T/B
REVEAL
VOLUME
ATR
(once)
ON/OFF TIMER SET
ON TIMER
7 : 45 CH 3
MON-FRI SET
OFF TIMER
8 : 30
SELECT
ENTER
EXIT : MENU
SLEEP
STANDBYTV MONI.
321
654
CH/PAGE/TR
ON/
(twice)
:
: ENTER
SET
TIMER
TEXT/MIX/TV
REC
TO CANCEL A PROGRAMME
Press the or button to select the TIMER REC SET
option in the MENU, then press the ENTER button.
Press the or button to select the unnecessary
programme, and press the CANCEL button to cancel
IF THE PROGRAMME OVERLAPS ANOTHER
NOTE:
Do not overlap programmes as portions of
the conflicting programmes will be lost. The
first recording time has priority over the next
recording time as shown in the diagram.
the programme.
CANCEL/
F/T/B
SELECT
EXIT
: MENU
8 : 00
/ ENTER:
9 : 00
10 : 00
11 : 00
NOTES:•The everyday/every week recording can be made continuously until the recording is canceled or the tape
reaches the end.
•During timer recording, the automatic rewinding mechanism does not function.
•You can correct or cancel the programmed setting in programme confirm mode provided the timer has not
been set.
•If you press an invalid button during timer recording (such as PLAY, STOP, REC/OTR etc), "RECORDING
IN PROGRESS" will appear on the TV screen for approx. 4 seconds.
29
5A90601A P24-31 18/6/2002, 15:1829
Page 32

ONE-TOUCH TIMER RECORDING (OTR)
2
The one-touch timer recording feature provides a simple and convenient way to make a timed recording.
EXAMPLE: One-touch Timer Recording for 30 minutes.
Press the ON button
to turn on the TV/VTR.
ON/
STANDBY
Load a video cassette
with the erase prevention
tab intact.
Press the SP/LP button to
select the desired tape
speed (SP or LP). SP or LP
will appear on the screen.
SP/LP
3
5
EJECT
Press the Direct Channel Selection buttons or
CH/PAGE/TR
channel to be recorded (Example: Channel 2).
or button to select the
OR
CH/PAGE/TR
MENU PAUSE/STILL
TEXT/MIX/TV
REC
TIMER
STOP
CH 2
REC/OTR
PROGRAM
PLAY
CALL O / AV MUTE
COUNTER
RESET
ZERO
RETURN
SP/LP
HOLD
879
0
SUB PAGE
INDEX
CANCEL/
F/T/B
REVEAL
ATR
VOLUME
ENTER/
654
SLEEP
321
CH/PAGE/TR
STANDBYTV MONI.
ON/
1
4
FFREW
Press the REC/OTR buttons to begin recording.
Press the buttons again to stop recording after 30
minutes. Each additional press of the REC/OTR
buttons will increase recording time as shown below, up
to a maximum of 5 hours. “OTR” will appear on the screen.
REC/OTR
OTR 0 : 30 CH 2
CH 2
INDEX
NOTES:•Press the REC/OTR buttons to increase the time needed for recording (See the chart below).
Press
Recording time
once
NORMAL REC
twice
0:30
3 times
1:00
4 times
1:30
5 times
2:00
6 times
3:00
7 times
4:00
8 times
5:00
9 times
NORMAL REC
When the tape speed LP is selected, the recording time can be set up to 10 hours.
• To cancel OTR, press the STOP button.
30
5A90601A P24-31 18/6/2002, 15:1830
Page 33

USING THE REAL TIME TAPE COUNTER
CALL
The On-Screen Real Time Tape Counter shows the tape running time in Hours, Minutes and Seconds.
You can easily determine how long the tape has been running or how much time is left on the tape.
TO VIEW THE COUNTER DISPLAY
Press the CALL button to display the Real
Time Tape counter.
CALL
11 : 30 SAT
01 : 30 : 21 SP
2
3
MENU PAUSE/STILL
REC/OTR
EJECT
41
STOP
Press the COUNTER RESET button to set the
counter to "00:00:00".
COUNTER
RESET
11 : 30 SATCH 2
SLEEP
STANDBYTV MONI.
ON/
PROGRAM
PLAY
FFREW
CALL O / AV MUTE
COUNTER
RESET
ZERO
RETURN
SP/LP
879
0
SUB PAGE
INDEX
ENTER/
HOLD
REVEAL
ATR
CANCEL/
F/T/B
654
VOLUME
321
CH/PAGE/TR
CH 2
00 : 00 : 00 SP
TIMER
TEXT/MIX/TV
REC
Press the PLAY or REC/OTR buttons to start the
tape, the counter will display the passed time.
When you wish to make the counter disappear,
press the CALL button once again.
4
REC/OTR
PLAY
OR
NOTES:•If you rewind the tape from "00:00:00", a minus sign "–" will be displayed in front of the timer.
•When you load a tape, the counter will change to "00:00:00".
•The counter does not function on non-recorded (blank) sections of the tape. When you rewind, fast
forward or play tapes through blank sections, the counter stops.
31
5A90601A P24-31 18/6/2002, 15:1831
Page 34

USING ZERO RETURN
ZERO
RETURN
The zero return function provides a convenient method of rapidly returning to the starting point of recording
or playback. The starting point can be indexed for any location on the tape by pressing the COUNTER
RESET button and ZERO RETURN button.
Press the CALL button to display the counter.
CALL
11 : 30 SAT
01 : 30 : 21 SP
1
2
5
MENU PAUSE/STILL
3
EJECT
REC/OTR
TEXT/MIX/TV
REC
STOP
TIMER
Before playback or recording, press the
COUNTER RESET button to set the counter
to “00:00:00”.
COUNTER
RESET
SLEEP
STANDBYTV MONI.
ON/
4
PROGRAM
PLAY
FFREW
CALL O / AV MUTE
COUNTER
RESET
ZERO
RETURN
SP/LP
HOLD
879
0
SUB PAGE
INDEX
ENTER/
REVEAL
ATR
CANCEL/
F/T/B
654
VOLUME
321
CH/PAGE/TR
11 : 30 SATCH 2
CH 2
00 : 00 : 00 SP
Begin playback or recording.
PLAY
OR
32
5A90601A P32-last 18/6/2002, 15:1932
REC/OTR
Press the STOP button.
4
STOP
Press the ZERO RETURN
button. The tape will rewind
and automatically stop at
the “00:00:00” position.
11 : 30 SAT
CH 2
00 : 00 : 00 SP
Page 35

VIDEO INDEX SEARCH SYSTEM (INDEX)
The VIDEO INDEX SEARCH SYSTEM (INDEX) enables you to locate the beginning of any recording made on the
TV/VTR. The Index Search function automatically records an INDEX mark on the tape whenever a recording is initiated.
This mark can easily be located by using the FF and REW buttons.
SEARCHING FOR AN INDEX MARK
To search for an index mark, or skip over a
number of index marks:
Press INDEX button during stop or playback.
INDEX
SUB PAGE
INDEX 1
1-9:
NO.
:
SEARCH
: INDEX
EXIT
2
MENU PAUSE/STILL
3
EJECT
REC/OTR
Select the number of INDEX marks to be skipped
by using the Channel Number keys (1-9).
4
INDEX 4
NO.
SEARCH
EXIT
EXAMPLE: When the tape has four separate recorded
Programmes, select 4 to go to the beginning of the 4th
programme (4th index mark).
SLEEP
STANDBYTV MONI.
ON/
STOP
PROGRAM
PLAY
FFREW
CALL O / AV MUTE
COUNTER
RESET
ZERO
RETURN
SP/LP
ENTER/
HOLD
879
0
SUB PAGE
INDEX
VOLUME
REVEAL
ATR
CANCEL/
F/T/B
654
321
CH/PAGE/TR
1-9:
:
: INDEX
TEXT/MIX/TV
TIMER
REC
1
Press the FF or REW button. The TV/VTR will skip over the selected number of INDEX marks and will
start playback at the selected mark.
REW
FF
OR
INDEX 4
1-9:
NO.
:
SEARCH
: INDEX
EXIT
NOTES:•When you recorded an INDEX mark at the very beginning of the tape, the mark may not be found.
•During INDEX search, the tape may stop and begin to play at a slightly different location.
•INDEX may not function properly with old or worn out video tapes.
33
5A90601A P32-last 18/6/2002, 15:1933
Page 36

DUPLICATING A VIDEO TAPE
If you connect the TV/VTR to another VTR or VIDEO CAMERA, you can duplicate a previously recorded tape. Make
all connections before turning on the power.
Load a blank cassette tape with the erase
prevention tab intact into the recording TV/VTR.
Load a previously recorded tape into the
playback VTR or VIDEO CAMERA.
CONNECTION TO ANOTHER VTR
RECORDING TV/VTR
PLAYBACK VTR
To select the AV channel, press the AV button
until AV2 is displayed.
0 / AV
0
AV 2
NOTE: You can also use the rear 21 pin SCART
socket. Select "AV1" by pressing the AV button.
CONNECTION TO CAMCORDER
For duplicating a previously recorded tape from a camcorder ,
follow the camcorder manufacturer’s instructions. A typical
camcorder dubbing hookup is shown below.
RECORDING TV/VTR
PLA YBACK
CAMCORDER
To AV Jack
NOTES:
TO AUDIO OUT
TO VIDEO OUT
AUDIO/VIDEO lead (NOT SUPPLIED)
Press the REC/OTR buttons
on the remote control of the
TV/VTR, then press the
PAUSE button.
REC/OTR
It is recommended that the tape speed be set to the SP mode on the TV/VTR for best results.
•
Unauthorized recording of copyrighted television programs, films, video cassettes and other materials
•
may infringe the rights of copyright owners and be contrary to copyright laws.
PAUSE/STILL
TO VIDEO IN
TO AUDIO IN
Press the PLAY Button on the
playback VTR, then press the
4
PAUSE button.
PLAY
TO VIDEO IN
TO AUDIO IN
AUDIO/VIDEO lead (NOT SUPPLIED)
Release the recording pause
and still playback to begin the
duplicating process.
PAUSE/STILL
PLAY
34
5A90601A P32-last 18/6/2002, 15:1934
Page 37

FASTEXT
Most broadcasting stations offer the fastext in addition to their standard TV programme.
The fastext offers news, weather forecast, winning Lotto numbers, the program overview and other interesting news.
The text is received page b y page, as soon as you select the broadcasting station. A single page can be displayed on
the screen. The pages are numbered and broadcasted one by one. Theref ore y ou'll hav e to w ait a certain time until the
selected page is display on the screen. The page will be displayed as soon as it is broadcasted.
Certain pages can be displayed more easily by the push of one of the FOUR COLORED FASTEXT buttons.
Basic operation
1 Select the broadcasting station, whose text you want to read. In order to do so, select the station's channel with the
remote handset.
2 Push TEXT/MIX/TV button.
The first push on the TEXT/MIX/TV button displays Fastext.
The second push on TEXT/MIX/TV displays the TV programme and the Fastext together (MIX).
The third push on the TEXT/MIX/TV button turns the Fastext off and returns to the TV programme.
The first operation of the fastext normally opens the page 100 with the table of contents.
Example for a fastext page:
P100 FASTEXT 100 JAN 1 12 : 00 : 00
Selected page
number
Press the red
Fastext ke
access
information
TV GUIDE
Fastext service name Date
Displayed page number
(scrolls when searching)
y to
Press the green
Fastext ke
access
information
y to
Press the yellow
Fastext ke
access
information
SPORT NEWS WEATHER
y to
Time
Press the blue
Fastext key to
access
information
Select the desired fastext page from the broadcasting station's table of contents.
HOLD
Some pages hold more text, as can be displayed in only one page. The broadcasting station separates these pages
into sub-pages, which are broadcasted one by one automatically. To study one sub-page thoroughly push the HOLD
button. The HOLD-symbol will be displayed.
The associated sub-pages will appear automatically, when you push HOLD second time.
5A90601A P32-last 18/6/2002, 15:1935
35
Page 38

FASTEXT (CONTINUED)
To call a fastext page
Leaf through the pages with the PAGE (
backward).
Note: you will not necessarily find an existing page. for every page
number you enter..E.g. you have called the page no. 116, but it
will not appear on your screen. This happens because the broad
casting station momentarily does not offer this page. Available
page numbers you will find inside the station's table of contents
(toc). (most stations offer this toc on fastext page 100).
Inside the fastext mode you cannot change to another broadcasting station..
To switch to another channel, leave the fastext mode by pushing the TEXT/MIX/TV button.
How to call a definite sub-page
Push SUB PAGE button.
The screen's lower left corner will display the Fastext page number followed by - - - - .
To call sub-page 2 enter: 0 0 0 2 .
Your input will be displayed in the lower left corner: 0002.
The , red or green button can be used to change the sub-page number.
It may take some time until the sub-page 2 is broadcast.
The sub-page will not be displayed before it is broadcast.
//
/ ) - button (forward or
//
Enter the three-digit page number with the
number buttons.
Example:
You want to display page 300.
Enter: 3 then 0 and 0.
T o correct a faulty input, enter the wrong page
number completely (all three digits), then
enter the correct page number.
To leave the sub-page mode push SUB PAGE button again.
When you are in the sub-page mode you cannot call sub-pages from other Fastext pages. To call
other Fastext pages you must leave the sub-page mode.
Magnifying
To magnify the letters push F/T/B button.
You can magnify either the upper or the lower half of the screen.
Each push on F/T/B buttons between the screen's upper and lower half and the full screen.
(F/T/B = Full / Top / Bottom)
REVEAL
Pushing REVEAL will give you the hidden answers to the questions on a Quiz-page.
Not every broadcasting station offers Quiz-pages and they are not constantly offered.
36
5A90601A P32-last 18/6/2002, 15:1936
Page 39

BEFORE REQUESTING SERVICE
If your TV/VTR does not work properly check the following before calling a service engineer.
SYMPTOMS SOLUTION PAGE
CAUSE
POWER
No power.
Recorder does not work
even though STANDBY.
The Mains lead is not connected.
Main power switch is OFF.
TIMER REC button is ON
(TIMER REC indicator is on).
Moisture condensation has formed inside
recorder.
Connect Mains lead to AC outlet.
Set it to ON.
Set it to OFF
(TIMER REC indicator is off).
Wait for a few hours.
TV BROADCAST RECEPTION
No picture, no sound.
Sound OK, poor picture.
Picture OK, poor sound.
Poor reception.
Poor colour or no colour.
The Mains lead is disconnected.
Aerial connector is not connected or wires
are broken.
ON button is off.
Possibly station trouble.
Possibly station trouble.
Aerial connector is not connected or wires
are broken.
Possibly local interference.
Possibly station trouble.
Possibly local interference.
Volume control set at minimum position.
Aerial connector is not connected or wires
are broken.
Possibly station trouble.
Aerial connector is not connected or wires
are broken.
Possibly station trouble.
Possibly local interference.
Colour control is not adjusted.
Connect the Mains lead to the AC outlet.
Check aerial connections or broken wires.
Press the ON button.
Try another channel.
Try another channel.
Check aerial connections or broken wires.
Move the aerial away from the source of
interference.
Try another channel.
Move the aerial away from the source of
interference.
Increase VOLUME control.
Check aerial connections or broken wires.
Try another channel.
Check aerial connections or broken wires.
Try another channel.
Move the aerial away from the source of
interference.
Press the CANCEL button.
RECORDING
Recording does not work.
Timer recording does not
work.
INDEX mark was not
registered.
Protection tab on the cassette tape has been
removed.
Main power switch is OFF.
Clock is not set.
START/END time is not set correctly.
TIMER REC button is OFF.
Present time is not set correctly.
INDEX mark was recorded at the beginning
of the tape.
Place an adhesive tape over the gap.
Set main power to ON.
Set the clock.
Set the START/END time correctly.
Set the TIMER REC button to ON.
Set the present time correctly.
Let the tape run for a couple of seconds
before recording the first INDEX mark.
5
5
28
3
9
8
5
13
13
8
39
13
39
13
8
13
8
13
39
15
20
5
10
27/28
28
10
33
5A90601A P32-last 18/6/2002, 15:1937
37
Page 40

BEFORE REQUESTING SERVICE (CONTINUED)
SYMPTOMS
CAUSE SOLUTION PAGE
PLAYBACK
Noise bars on screen.
Cannot locate INDEX
mark.
Tracking is not adjusted.
Video heads are dirty.
The tape is worn or damaged.
The tape is worn or damaged.
Adjust the TRACKING control.
Clean the video heads.
Try another tape.
Try another tape.
REMOTE CONTROL
Aim it at the remote control sensor.
Operate within 5 metres and reduce the
light of the room.
Clear the path of the beam.
Replace batteries.
Install batteries correctly.
Remote control does not
work.
It is not aimed at the remote sensor.
Distance too far or there is too much light in
the room.
Obstacle in the path of beam.
Batteries are weak.
Polarities of the batteries, + or –, are not
inserted correctly.
VIDEO HEAD CLOGGING
The video heads record and playback picture and sound on the video tape. In the event that they become
dirty you won't be able to do a perfect recording and the playback picture will be extremely snowy with
good sound. If this happens have the TV/VTR checked by qualified service personnel.
22
38
-
-
7
7
7
7
7
NOTES:
Video heads may eventually wear out and should be replaced when they fail to produce clear pictures.
•
To help prevent video head cleaning, use only good quality VHS tapes. Discard worn tapes.
•
38
5A90601A P32-last 18/6/2002, 15:1938
Good Picture Snowy Picture
Page 41

The most common types of television interference are as follows.
IGNITION
Black spots or horizontal streaks may appear, picture may flutter or drift.
Usually caused by interference from car ignition systems, neon lamps, electrical
drills and other electrical appliances.
GHOSTS
Ghosts are caused by the television signal following two paths. One is the direct
path and the other is reflected from tall buildings, hills or some other object.
Changing the direction or position of the antenna may improve the reception.
SNOW
If your receiver is located in the fringe area of a television station where the
signal is weak, your picture may be marred by the appearance of small dots.
When the signal is extremely weak, it may be necessary to install a special
antenna to improve the picture.
SPRECEPTION DISTURBANCE
RADIO FREQUENCY INTERFERENCE
The interference produces moving ripples or diagonal streaks, and in some
cases, causes loss of contrast in the picture.
PICTURE SIZE VARIATION
A slight picture size variation is normal when you adjust the CONTRAST or
BRIGHTNESS control.
CARE AND MAINTENANCE
To prevent fire or shock hazard, disconnect the TV/VTR from the AC power source before cleaning. The finish on
the cabinet may be cleaned with mild soap and a soft damp cloth. Take care when cleaning or wiping the plastic
parts.
5A90601A P32-last 18/6/2002, 15:1939
39
Page 42

SPECIFICATION
TELEVISION
Picture Tube:
20" (48.0 cm "V") measured diagonally
90 degree deflection
Tuner:
Receiving Channels:
Aerial Input:
Audio Output Power:
Speaker:
VTR
Operating Temperature:
Television System:
Video Recording System:
Audio Track:
Tape Format:
F. FWD/REW Time at 25˚C:
Tape Speed:
Play Back Time:
Input Level:
Output Level:
GENERAL
Power Source:
Power Consumption:
Weight:
Dimensions:
Electronic 2 Tuners
UHF: 21 - 69
VHF/ UHF 75 ohm unbalanced
2.5 W
7.6 cm 8 ohm
5°C to 40°C
UK 625 Lines 50 Fields
PAL I
VHS, 2 Rotary Heads Helical Scanning System
Luminance: FM azimuth recording
Color signal: converted sub-carrier phase shift recording
1 Track
12.65mm high density tape
Approx. 1 minute 48 seconds (With E-180 Cassette Tape)
SP: 23.39 mm/s, LP: 11.69 mm/s (NTSC SP: 33.35 mm/s)
300 min.with E-300 video cassette (PAL)
210 min.with T-210 video cassette (NTSC)
Video: 1.0 Vp-p 75 ohm unbalanced
Audio: 500 mV, 50k ohm unbalanced
Video: 1.0 Vp-p 75 ohm unbalanced
Audio: 500mV, 1k ohm unbalanced
AC 230~240V, 50Hz
60 W
22.0 kg
489(W)x465(D)x479.5(H)mm
REMOTE CONTROL UNIT
Power Supply:
ACCESSORIES
Weight and Dimensions are approximate. Because we continually strive to improve our products we
may change specifications and designs without prior notice.
DC 3V (Two batteries, AAA/ R03/ UM-4)
Remote Control unit
2 Batteries (AAA/ R03/ UM-4)
Aerial Lead
40
5A90601A P32-last 18/6/2002, 15:1940
Page 43

MEMO
○○○○○○○○○○○○○○○○○○○○○○○○○○○○○○○○○○○○○○○○○○○○○○○○○○○○○○○○○○
○○○○○○○○○○○○○○○○○○○○○○○○○○○○○○○○○○○○○○○○○○○○○○○○○○○○○○○○○○
○○○○○○○○○○○○○○○○○○○○○○○○○○○○○○○○○○○○○○○○○○○○○○○○○○○○○○○○○○
○○○○○○○○○○○○○○○○○○○○○○○○○○○○○○○○○○○○○○○○○○○○○○○○○○○○○○○○○○
○○○○○○○○○○○○○○○○○○○○○○○○○○○○○○○○○○○○○○○○○○○○○○○○○○○○○○○○○○
○○○○○○○○○○○○○○○○○○○○○○○○○○○○○○○○○○○○○○○○○○○○○○○○○○○○○○○○○○
○○○○○○○○○○○○○○○○○○○○○○○○○○○○○○○○○○○○○○○○○○○○○○○○○○○○○○○○○○
○○○○○○○○○○○○○○○○○○○○○○○○○○○○○○○○○○○○○○○○○○○○○○○○○○○○○○○○○○
○○○○○○○○○○○○○○○○○○○○○○○○○○○○○○○○○○○○○○○○○○○○○○○○○○○○○○○○○○
○○○○○○○○○○○○○○○○○○○○○○○○○○○○○○○○○○○○○○○○○○○○○○○○○○○○○○○○○○
○○○○○○○○○○○○○○○○○○○○○○○○○○○○○○○○○○○○○○○○○○○○○○○○○○○○○○○○○○
○○○○○○○○○○○○○○○○○○○○○○○○○○○○○○○○○○○○○○○○○○○○○○○○○○○○○○○○○○
○○○○○○○○○○○○○○○○○○○○○○○○○○○○○○○○○○○○○○○○○○○○○○○○○○○○○○○○○○
○○○○○○○○○○○○○○○○○○○○○○○○○○○○○○○○○○○○○○○○○○○○○○○○○○○○○○○○○○
○○○○○○○○○○○○○○○○○○○○○○○○○○○○○○○○○○○○○○○○○○○○○○○○○○○○○○○○○○
○○○○○○○○○○○○○○○○○○○○○○○○○○○○○○○○○○○○○○○○○○○○○○○○○○○○○○○○○○
○○○○○○○○○○○○○○○○○○○○○○○○○○○○○○○○○○○○○○○○○○○○○○○○○○○○○○○○○○
○○○○○○○○○○○○○○○○○○○○○○○○○○○○○○○○○○○○○○○○○○○○○○○○○○○○○○○○○○
○○○○○○○○○○○○○○○○○○○○○○○○○○○○○○○○○○○○○○○○○○○○○○○○○○○○○○○○○○
○○○○○○○○○○○○○○○○○○○○○○○○○○○○○○○○○○○○○○○○○○○○○○○○○○○○○○○○○○
○○○○○○○○○○○○○○○○○○○○○○○○○○○○○○○○○○○○○○○○○○○○○○○○○○○○○○○○○○
○○○○○○○○○○○○○○○○○○○○○○○○○○○○○○○○○○○○○○○○○○○○○○○○○○○○○○○○○○
5A90601A P32-last 18/6/2002, 15:1941
41
Page 44

5A90601A
U
02/07
5A90601A P32-last 18/6/2002, 15:1942
 Loading...