

Toshiba SD4300KU, SD4300 User Manual
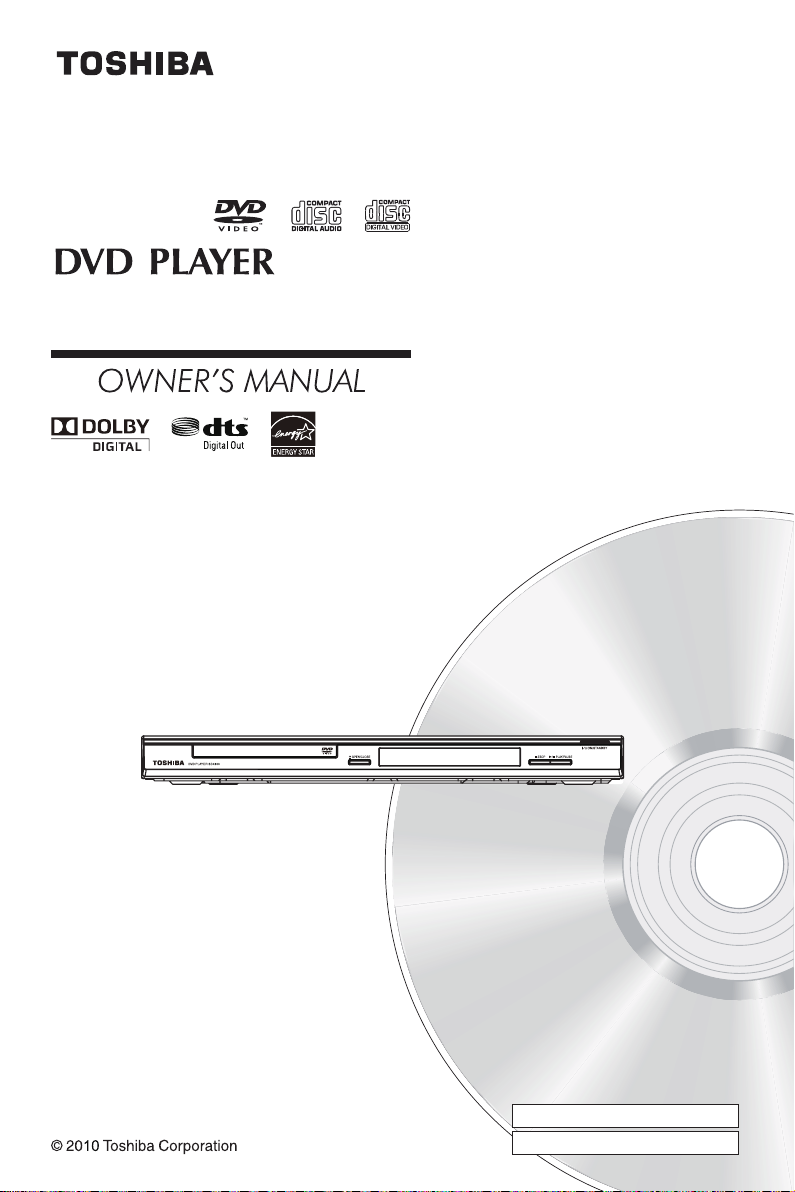
SD4300KU
Owner’s Record
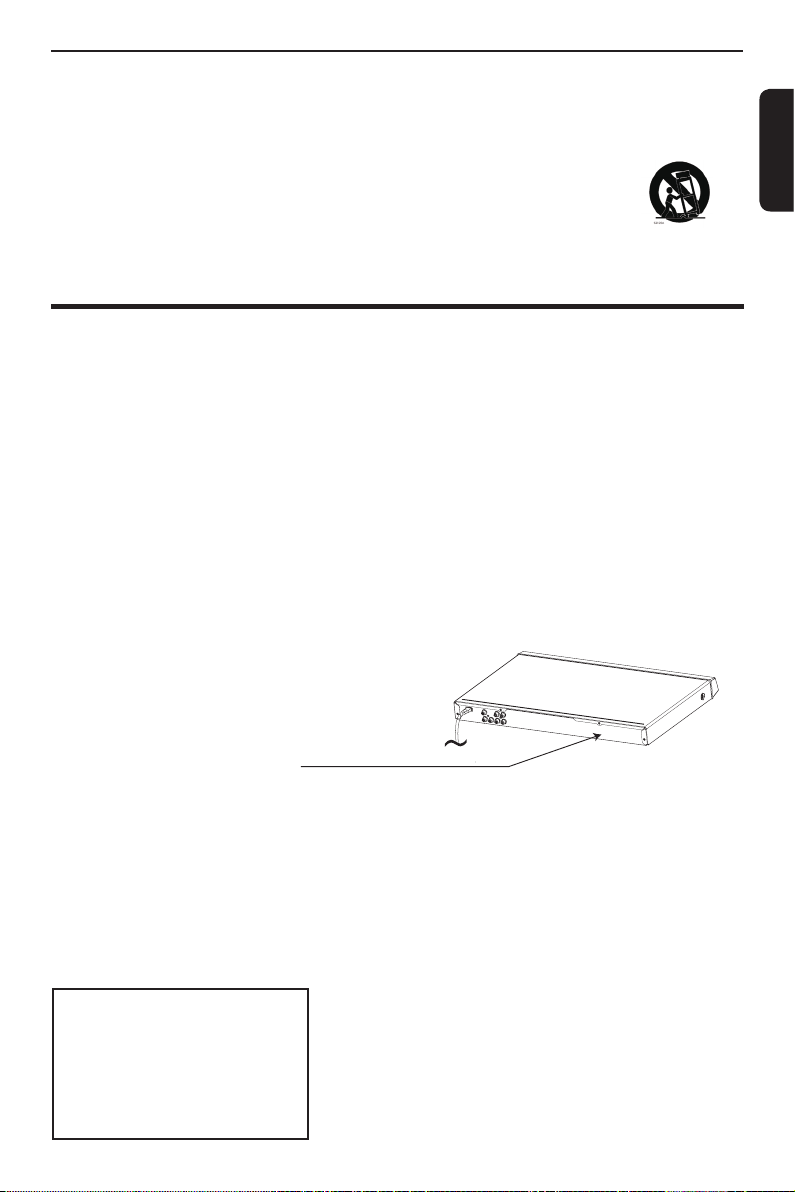
The model number and serial number are on the back
of your DVD Player. Record these numbers in the spaces
below
Refer to these numbers whenever you
communicate with your Toshiba dealer about this DVD
Player.
Model number:
Serial number:
Introduction
CAUTION: VISIBLE LASER RADIATION WHEN
OPEN. DO NOT STARE INTO BEAM.
SAFETY PRECAUTIONS
English
ENERGY STAR® qualied DVD. Products that earn the ENERGY STAR prevent green house gas
emissions by meeting strict energy efciency guidelines set by the U.S. Environmental Protection Agency
and the U.S. Department of Energy. ENERGY STAR and the ENERGY STAR mark are registered U.S.
marks.
WARNING:
TO REDUCE THE RISK OF FIRE OR ELECTRIC SHOCK, DO NOT EXPOSE THIS APPLIANCE TO
RAIN OR MOISTURE. DANGEROUS HIGH VOLTAGES ARE PRESENT INSIDE THE ENCLOSURE.
DO NOT OPEN THE CABINET. REFER SERVICING TO QUALIFIED PERSONNEL ONLY.
CAUTION:
TO PREVENT ELECTRIC SHOCK, MATCH WIDE BLADE OF PLUG TO WIDE SLOT, FULLY INSERT.
ATTENTION:
POUR EVITER LES CHOCS ELECTRIQUES, INTRODUIRE LA LAME LA PLUS LARGE DE LA
FICHE DANS LA BORNE CORRESPONDANTE DE LA PRISE ET POUSSER JUSQU' AU FOND.
CAUTION:
PLEASE READ AND OBSERVE ALL WARNINGS AND INSTRUCTIONS GIVEN IN THIS OWNER' S
MANUAL AND THOSE MARKED ON THE UNIT. RETAIN THIS BOOKLET FOR FUTURE REFERENCE.
CAUTION:
USE OF ANY CONTROLS, ADJUSTMENTS, OR PROCEDURES OTHER THAN THOSE SPECIFIED
HEREIN MAY RESULT IN HAZARDOUS RADIATION EXPOSURE.
FCC NOTICE:
This equipment has been tested and found to comply with the limits for a Class B digital device, pursuant to
part 15 of the FCC Rule.
These limits are designed to provide reasonable protection against harmful interference in a residential installation. This
equipment generates, uses, and can radiate radio frequency energy and, if not installed and used in accordance with
the instructions, may cause harmful interference to radio communications.
However, there is no guarantee that interference will not occur in a particular installation.
If this equipment does cause harmful interference to radio or television reception, which can be determined by turning
the equipment off and on, the user is encouraged to try to correct the interference by one or more of the following
measures:
- Reorient or relocate the receiving antenna.
- Increase the separation between the equipment and receiver.
- Connect the equipment into an outlet on a circuit different from that to which the receiver is connected.
- Consult the dealer or an experienced radio/TV technician for help.
Changes or modications made to this equipment, not expressly approved by Toshiba, or parties
authorized by Toshiba, could void the user' s authority to operate the equipment.
The lightning ash with arrowhead
symbol, within an equilateral triangle, is
intended to alert the user to the presence
of uninsulated 'dangerous voltage' within
the product' s enclosure that may be of
sufcient magnitude to constitute a risk of
electric shock to persons.
The exclamation point within an equila-
teral triangle is intended to alert the user
to the presence of important operating
and maintenance (servicing) instructions
in the literature accompanying the
appliance.
The symbol for CLASS II (Double
Insulation)
IMPORTANT SAFETY INSTRUCTIONS
1. Read these instructions.
2. Keep these instructions.
3. Heed all warnings.
4. Follow all instructions.
5. Do not use this apparatus near water.
6. Clean only with dry cloth.
7. Do not block any ventilation openings. Install in accordance with the manufacturer’s instructions.
8. Do not install near any heat sources such as radiators, heat registers, stoves, or other apparatus (including
ampliers) that produce heat.
1
Introduction
9. Do not defeat the safety purpose of the polarized or grounding-type plug. A polarized plug has two blades with one
wider than the other. A grounding type plug has two blades and a third grounding prong. The wide blade or the third
prong are provided for your safety. If the provided plug does not t into your outlet, consult an electrician for
replacement of the obsolete outlet.
10. Protect the power cord from being walked on or pinched particularly at plugs, convenience receptacles, and the
point where they exit from the apparatus.
11. Only use attachments/accessories specied by the manufacturer.
12. Use only with the cart, stand, tripod, bracket, or table specied by the manufacturer, or sold with
the apparatus. When a cart is used, use caution when moving the cart/apparatus combination
to avoid injury from tip-over.
13. Unplug this apparatus during lightning storms or when unused for long periods of time.
14. Refer all servicing to qualied service personnel. Servicing is required when the apparatus has been damaged in
any way, such as power-supply cord or plug is damaged, liquid has been spilled or objects have fallen into the
apparatus, the apparatus has been exposed to rain or moisture, does not operate normally, or has been dropped.
Additional Safety Instructions
15. Do not overload wall outlets; extension cords, or integral convenience receptacles as this can result in a risk of re
or electric shock.
16. Apparatus shall not be exposed to dripping or splashing and no objects lled with liquids, such as vases, shall be
placed on the apparatus.
17. Keep your ngers well clear of the disc tray as it is closing. Neglecting to do so may cause serious personal injury.
18. Do not place a heavy object on or step on the apparatus. The object may fall, causing serious personal injury and
serious damage to the apparatus.
19. Do not use a cracked , deformed, or repaired disc. These discs are easily broken and may cause serious personal
injury and apparatus malfunction.
20. If the apparatus should smoke or smell,immediately disconnect the power cord from the wall outlet. Wait until the
smoke or smell stops, then ask your dealer for a check and repair. Neglecting to do so may cause re.
21. While it is thundering, do not touch the connecting cables or the apparatus.
22. Warning: To prevent the spread of re, keep candles or other open ames away from this product at all times.
CAUTION:
This Digital Video Disc Player employs a Laser System.
To ensure proper use of this product, please read this owner’s manual carefully and retain for future reference
Should the unit require maintenance, contact an authorized service location.
Use of controls or adjustments or performance of procedures other than those specied herein may result in
hazardous radiation exposure.
To prevent direct exposure to laser beam, do not try to open the enclosure.
Visible and invisible laser radiation when open and interlocks defeated.
DO NOT STARE INTO BEAM.
Location of the required label:
CERTIFICATION:This product complies
with FDA Rule 21 CFR Subchapter J in
effect at date of manufacture.
CAUTION: These servicing instructions are for use by qualied service personnel only. To reduce the risk of
electric shock do not perform any servicing other than that contained in the operating instructions unless you are
qualied to do so.
Be aware that this equipment is still powered when in standby mode. To disconnect this equipment completely from the
mains power, pull out the power plug from the wall outlet.
The mains plug is used as the disconnect device, the disconnect device shall remain readily operable.
Environmental Information
All unnecessary packaging has been omitted. The packaging has been made easy to separate into three materials;
cardboard (box), polystyrene foam (buffer) and polyethylene (bags, protective foam sheet).
Your DVD player consists of materials which can be recycled and reused if disassembled by a specialised company.
Please observe the local regulations regarding the disposal of packaging materials, exhausted batteries and old
equipment.
LASER
Type Semiconductor laser
InGaAIP(DVD)
AIGaAs(CD)
Wave length 657 nm(DVD)
790 nm(CD)
Output Power 5.5 mW(DVD)
7.0 mW(VCD/CD)
Beam divergence 60 degrees
English
2
10cm (4.0")
10cm (4.0")
5cm (2.0")
5cm (2.0")
Introduction
WARNING:
RISK OF ELECTRIC SHOCK!
English
Never attempt to service this product yourself.
Opening and removing the covers may expose you
to dangerous voltage or other hazards. Failure to
follow this WARNING may result in death or serious
injury. Refer all servicing not specied in this manual
to a Toshiba Authorized Service Center.
Setup
Finding a suitable location
-Place the set on a at, hard and stable surface.
-Do not place the set on a carpet.
-Do not position the set on top of other equipment
that might heat it up (e.g., receiver or amplier).
-Do not put anything under the set
(e.g.CDs, magazines).
-Install this unit near the AC outlet and where the
AC power plug can be reached easily.
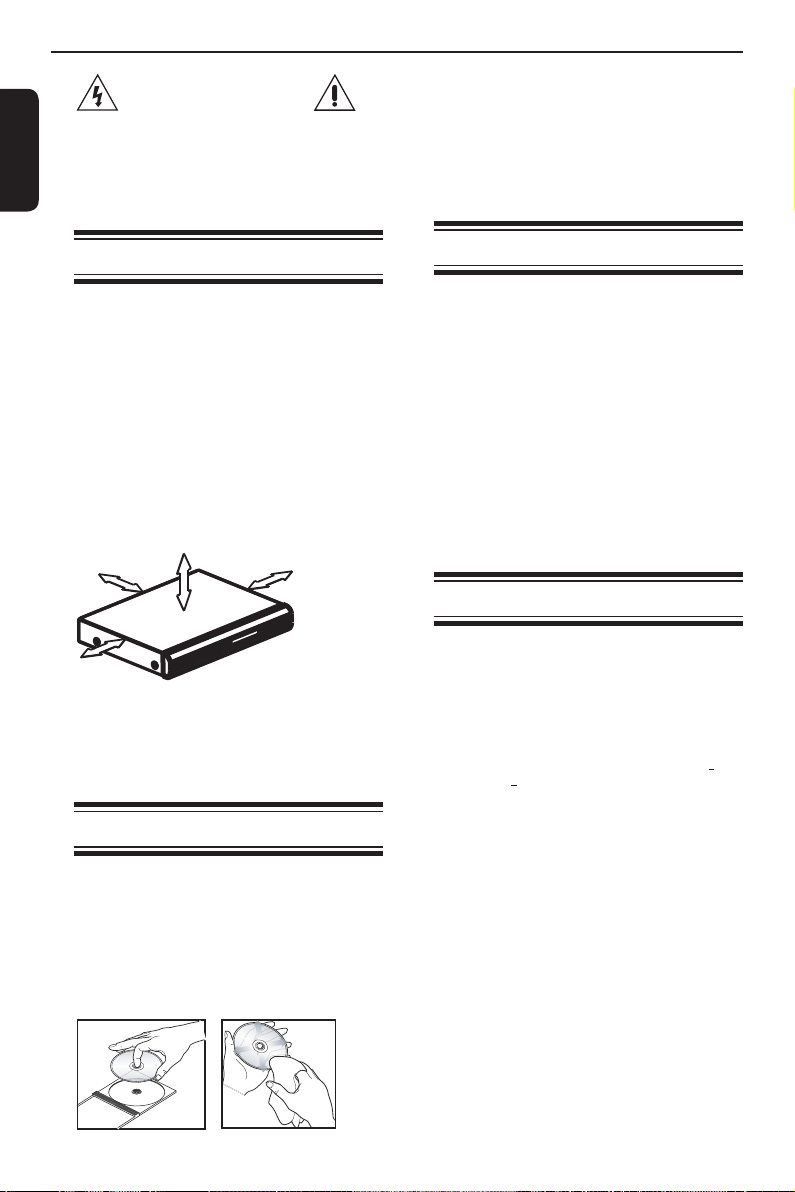
Space for ventilation
-Place the apparatus in a location with adequate
ventilation to prevent internal heat build up. Allow at
least 10 cm (4.0'') clearance from the rear and the
top of the set and 5 cm (2.0'') from the left and right
to prevent overheating.
Avoid high temperatures, moisture, water and
dust
-Apparatus shall not be exposed to dripping or
splashing.
-Do not place any sources of danger on the
apparatus (e.g., liquid lled objects, lighted candles).
Cleaning discs
Some problems occur because the disc inside the
system is dirty (frozen picture, sound disruptions,
picture distortions). To avoid these problems, discs
should be cleaned on a regular basis.
To clean a disc, use a micro bre cleaning cloth
and wipe the disc from the center to the edge in a
straight line. Do not touch the playback side of the
disc.
CAUTION!
Do not use solvents such as benzene, thinner,
commercially available cleaners, or anti-static sprays
intended for analog discs. Since the optical unit
(laser) of the DVD system operates at a higher
power than regular DVD or CD players, cleaning
CDs intended for DVD or CD players may damage
the optical unit (laser). Therefore, refrain from using
a cleaning CD.
Moisture Condensation
Moisture condensation damages the DVD player.
Please read the following carefully. Moisture
condensation occurs, for example, when you pour a
cold drink into a glass on a warm day. Drops of water
form on the outside of the glass. In the same way,
moisture may condense on the optical pick-up lens
inside this unit, one of the most crucial internal parts
of the DVD player.
If you use the DVD player in such a situation, it may
damage discs and internal parts. Remove the disc,
connect the power cord of the DVD player to the wall
outlet, turn on the DVD player, and leave it for two or
three hours. After two or three hours, the DVD player
will have warmed up and evaporated any moisture.
Keep the DVD player connected to the wall outlet
and moisture condensation will seldom occur.
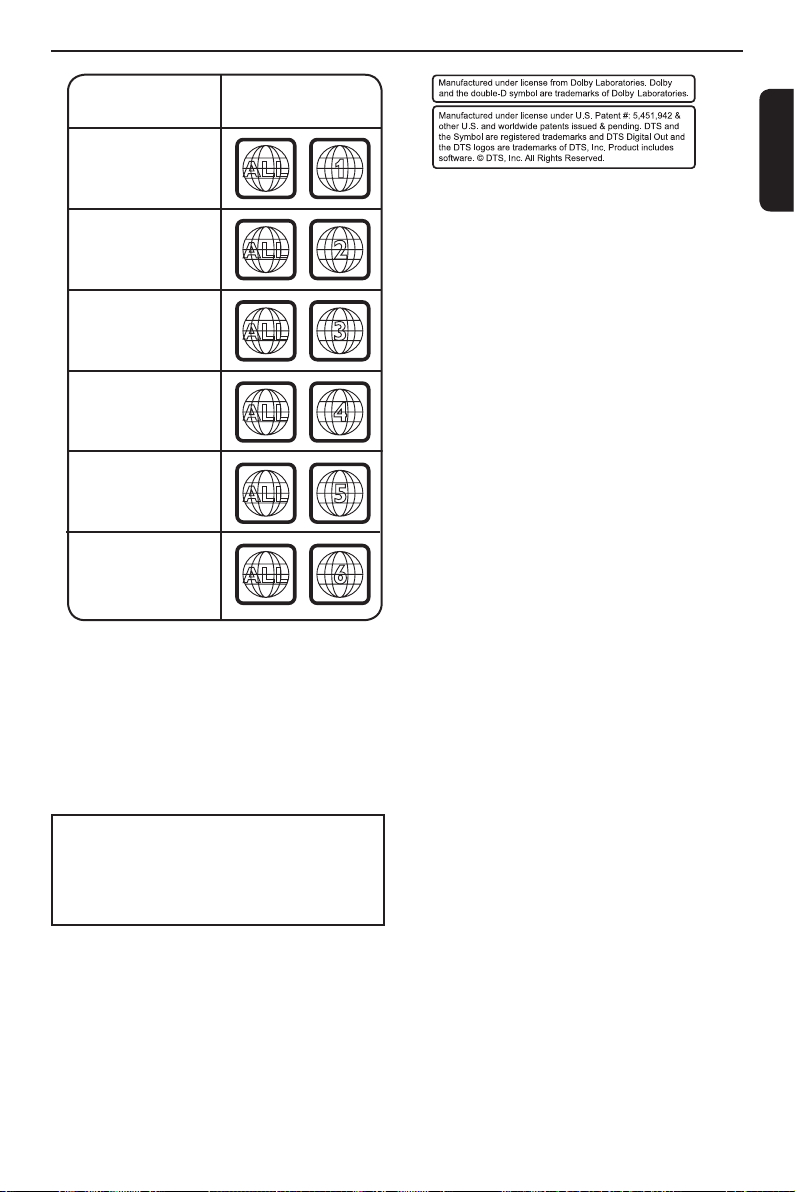
Region Codes
This DVD player is designed to support the Region
Management System. Check the regional code
number on the disc package. If the number does
not match the player' s region number (see table on
page 4), the player may be unable to playback the
disc.
Tips:
-It may not be possible to play CD-R/RW , DVD+R/
RW , or DVD+R DL in all cases due to the type of
disc or condition of the recording.
-If you are having trouble playing a certain disc,
remove the disc and try a different one. Improperly
formatted disc will not play on this DVD Player.
3
Introduction
ALL
4
Region
U.S.A. and
Canada regions
U.K.,
Europe regions and
Asia Paci c,
Taiwan, Korea
Australia,
New Zealand,
Latin America
Russia and
India regions
China, Calcos Islands,
Walls and Futuna
Islands
ALL
ALL
5
6
Discs that can
be played
ALL
1
ALL
ALL
2
3
Japan
English
This product incorporates copyright protection technology that is protected by method claims of certain
U.S. patents and other intellectual property rights
owned by Macrovision Corporation and other rights
owners. Use of this copyright protection technology
must be authorized by Macrovision Corporation, and
is intended for home and other limited viewing uses
only unless otherwise authorized by Macrovision
Corporation. Reverse engineering or disassembly is
prohibited.
Notes on copyright
The unauthorized recording, use, distribution, or revision
of television programs, videotapes, DVDs and other
materials, is prohibited under the Copyright Laws of the
United States and other countries, and may subject you
to civil and/or criminal liability.
4

Introduction
Table of Contents
Introduction
English
SAFETY PRECAUTIONS 1
IMPORTANT SAFETY INSTRUCTIONS 1-2
Setup 3
Cleaning discs 3
Moisture Condensation 3
Region Codes 3-4
Table of Contents 5
Connections
Connecting to television 6
Connecting to a Stereo System 7
Connecting to a Digital AV Receiver 7
Connecting the power cord 8
Product Overview
Front and Rear panels 9
Remote Control 10
Getting Started
Inserting Batteries 11
Finding your viewing channel 11
Setting up Progressive Scan feature 11-12
Setting the language 12
.
Playback from Disc
Playable discs 12-13
Playback Feature
Starting disc playback 13
Basic playback control 13-14
Operations for video playback (DVD/VCD/SVCD) 14
Selecting various repeat functions 14-15
Viewing the disc playback Information 15
Special DVD Features 15
Special VCD and SVCD Features 15
Playing MP3/JPEG/Kodak picture CD 16-17
DVD Menu Options
Using the Language setup menu 17
Using the Video setup menu 17-18
Using the Audio setup menu 18-19
Using the Rating setup menu 19-20
Using the Misc (Miscellaneous) setup menu 20
Tray Lock 20
Others
Specications 21
Troubleshooting 22-23
Glossary 24
Limited United States Warranty 25
Canadian Warranty Information 26-27
5
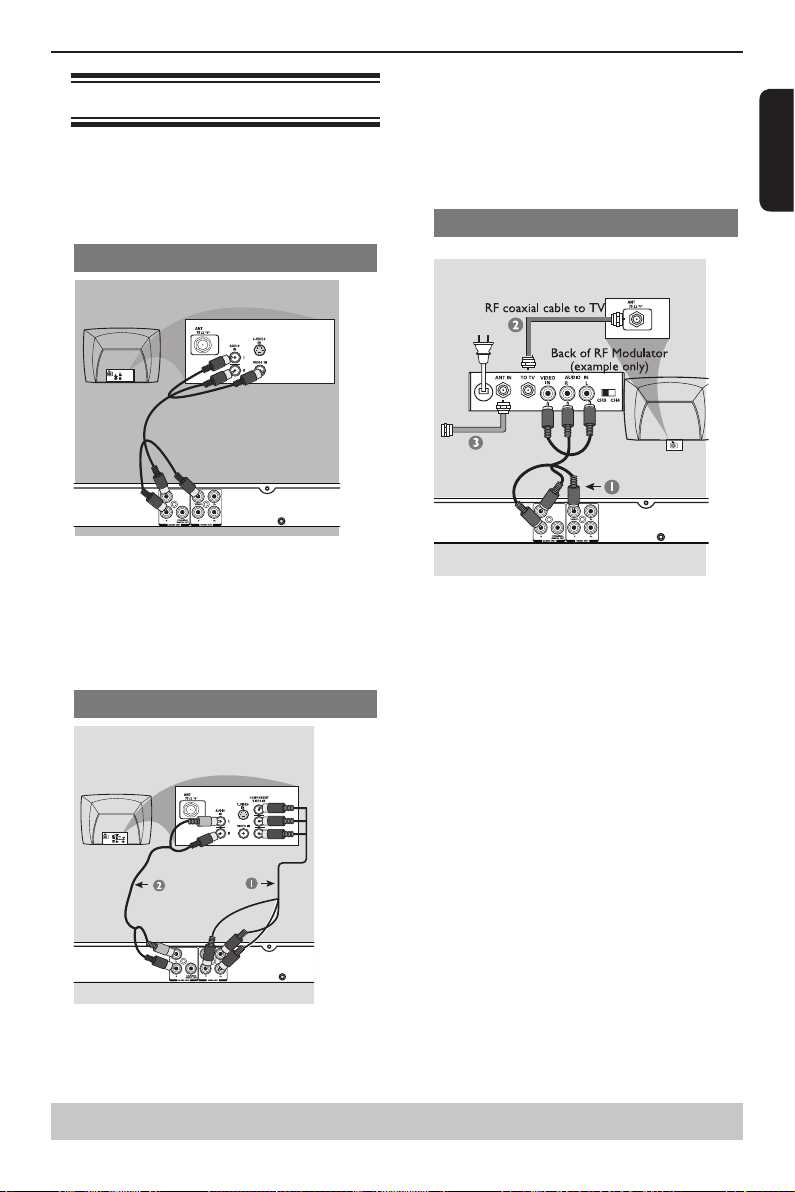
Connecting to television
IMPORTANT!
– You only need to make one video connection
from the following options, depending on the
capabilities of your television.
– Connect the DVD player directly to the
television.
Using Composite Video Jack(CVBS)
A Use the composite video cable (yellow) to connect
the DVD player' s VIDEO(CVBS) jack to the video
input jack(or labeled as A/V in, Video In or
Composite) on the TV(cable supplied).
To hear the sound of this DVD player through your
TV, use the audio cables(white/red)to connect
AUDIO OUT(L/R)jacks of the DVD player to
corresponding AUDIO IN jacks on the TV(cable
supplied).
Using Component Video Jacks(Y, PB, PR)
Connections
corresponding Component video input jacks (or
labeled as Y, Pb, Pr) on the TV (cable not supplied).
B Use the audio cables (white/red) to connect AUDIO
OUT (L/R) jacks of the DVD player to the
corresponding AUDIO IN jacks on the TV (cable not
supplied).
C Proceed to page 11 for detailed Progressive Scan set
up.
Using a RF modulator
IMPORTANT!
-If your TV only has a single Antenna In jack (or
labeled as 75 ohm or RF In), you will need an RF
modulator in order to view the DVD playback on
the TV.
A Use the composite video cable (yellow) to connect
the DVD player' s VIDEO (CVBS) jack to the video
input jack on the RF modulator (cable supplied).
To hear the sound of this DVD player through your
TV, use the audio cables(white/red) to connect
AUDIO OUT (L/R) jacks of the DVD player to the
corresponding AUDIO IN jacks on the RF modulator
(cable supplied).
B Use the RF coaxial cable (not supplied) to connect
ANTENNA OUT or TO TV jack on the RF modulator
to the ANTENNA IN jack on the television.
C Connect the Antenna or Cable TV service signal to
the ANTENNA IN or RF IN jack on the RF modulator.
(It may have been connected to your TV previously.
Disconnect it from the TV.)
English
IMPORTANT!
-The progressive scan video quality is only
possible when using Y, PB, PR and a progressive
scan TV is required.
A Use the component video cables (red/blue/green) to
connect the DVD player' s Y, PB, PR jacks to the
Helpful hint: Before making or changing any connections, make sure that all the devices are
disconnected from the power outlet.
6
Connections
MAINS
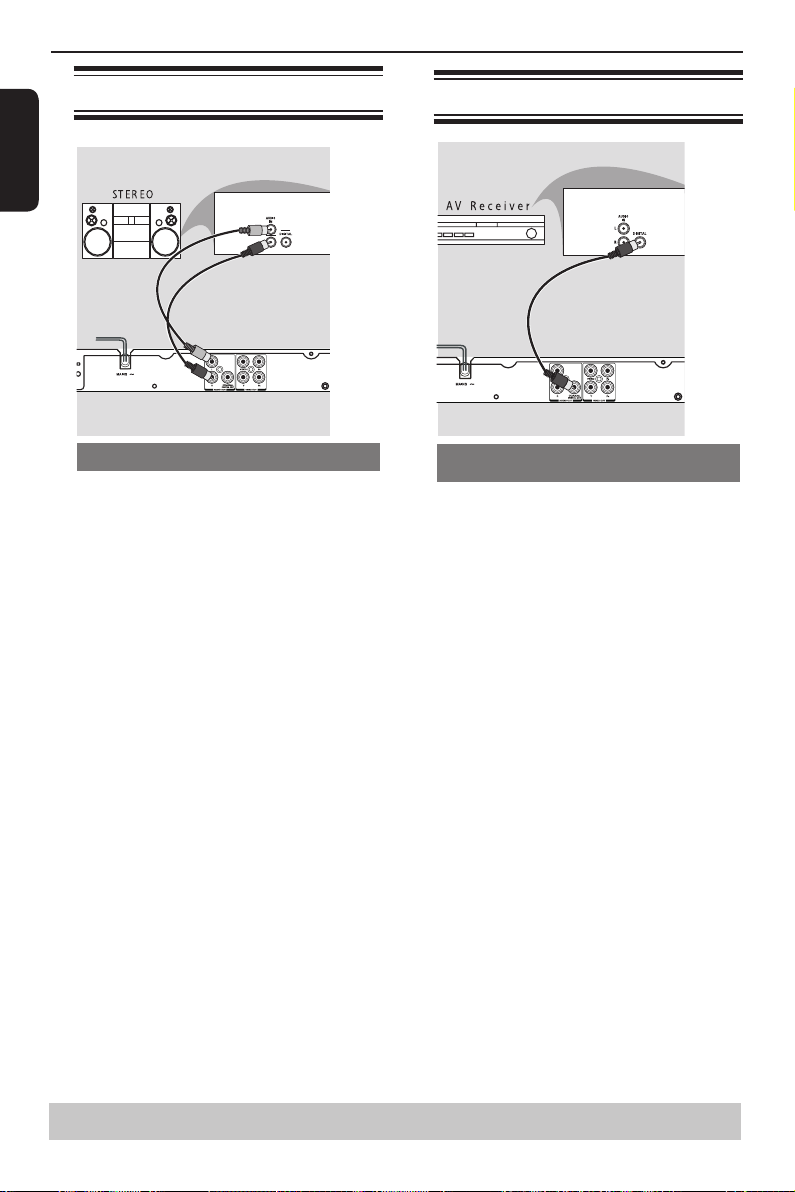
Connecting to a Stereo System
English
Stereo System with Left/Right Audio In Jacks
A Select one of the video connections (CVBS VIDEO
IN or COMPONENT VIDEO IN)
depending on the options available on your TV.
B Use the audio cables (white/red) to connect AUDIO
OUT (L/R) jacks of the DVD Player to the
corresponding AUDIO IN jacks on the stereo system.
Connecting to a Digital AV Receiver
Receiver has a PCM, Dolby Digital or MPEG
decoder
A Select one of the video connections (CVBS VIDEO IN
or COMPONENT VIDEO IN)
depending on the options available on your TV.
B Connect the COAXIAL jack of the DVD player to the
corresponding Digital Audio In jack on your Receiver
(cable not supplied).
C Set the DVD Player' s Digital Output to PCM or All
depending on the capabilities of your Receiver (see
page 19 {Digital Output}).
Tip:
-If the audio format of the Digital Output does not
match the capabilities of your receiver, the receiver
will produce a strong, distorted sound or no sound at
all.
Helpful hint: Before making or changing any connections, make sure that all the devices are
disconnected from the power outlet.
7

Connecting the power cord
After everything is connected properly, plug in the AC
power cord to the power outlet.
Never make or change any connections with the
power switched on.
Connections
English
Helpful hint: Before making or changing any connections, make sure that all the devices are
disconnected from the power outlet.
8
 Loading...