

Page 1

e
Reliability in motion
Phone: 800.894.0412 - Fax: 888.723.4773 - Web: www.ctiautomation.net - Email: info@ctiautomation.net
Q7 Flow Adjustable S p eed Driv
Installation and Operation
Manual
Document Number: 54963-002
Date: December, 2004
Page 2

About This Manual
Phone: 800.894.0412 - Fax: 888.723.4773 - Web: www.ctiautomation.net - Email: info@ctiautomation.net
This manual was written by the Toshiba Technical Publications Group. This group is tasked with providing
technical docum entation for the Q7 Flow system. This manual provides information that will assist the
qualified ins taller, operat or, or maintenance personnel in the safe installation and operation of the Q7 Flow.
This manual is intended to be used in conjunction with the Q7 ASD Installation and Operation Manual
(P/N 57246).
This manual provides inform ation on the various features that pertain to the installation and operation of this
powerful cos
Every effort has been ma de to provide accurate and concise info rma tion to you, our customer.
TOSHIBA is a registered trademark of the Toshiba Corporation.
Reliability in motion is a trademark of the Toshiba Corporation.
All other product or trade references appearing in this manual are registered trademarks of their respective
owners.
The
information in this manual is subject to change withou t notice.
Toshiba International Corporation (TIC) shall not be liable for technical or editorial omissions or
m
istak
use of information contained in this manual.
This manual is copyrighted. No part of this manual may be photocopied or reproduced in any form without the
prio
r writt
t-saving de vice and is applicable to the Q7 Flow only.
es in this manual, nor shall it be liable fo r incidental or c onsequential damages resulting from the
en consent of Toshiba International Corporation.
Email your comments, questions, or concerns about this publication
to Toshiba.
Contacting Toshiba’s Customer Support
Center
Toshiba’s helpful Customer Support Center can be contacted to obtain assista nce in resolving any Q7 Flow
system problem that you may experience or to provide application information.
The center is open from 8 a.m. to 5 p.m. (CST), Monday through Friday. The Support Center’s toll free
number
You may also contact Toshiba by writing to :
For further information on Toshiba’s products and services, please visit our website. © Copyright 2004
Toshiba International Corpo
is US (800) 231-1412/Fax (713) 466-8773 — Canada (800) 527-1204.
Toshiba International Corporation
13131 West Little York Road
Houston, Texas 77041-9990
Attn: ASD Product Manager.
ration.
All rights reserved.
Printed in the U.S .A.
Page 3

Introduction
Phone: 800.894.0412 - Fax: 888.723.4773 - Web: www.ctiautomation.net - Email: info@ctiautomation.net
Congratulations on the purchase of the new Q7 Flow Adjustable Speed Drive (ASD). The Q7 Flow is a
solid- st at e A C dr iv e . Th e Q7 Flow is ideally suited to drive the variable torque load in your HVA C system.
Tos hiba’s technology, quality, and reliability enables the motor to de velop good torque and provide
compensation f or motor sl ip, whic h re sults i n smoo th, qui ck st arts and hi ghl y effi ci ent ope ration. The Q7 Flow
uses digitally-controlled pulse width modulation. The programmable functions may be accessed via the easyto-use menu. The se fea tures, combin ed with Toshiba’ s high-pe rforman ce soft ware, d elive rs unpa ralle led mot or
control and reliability.
The Q7
LCD screen that provides easy access to the many monitoring and programming features of the Q7 Flow.
The motor control software is menu-driven, which allows for easy access to the motor control parameters and
quick
The Q7 Flow a
including the abi lity to run at 110% for up to 60 seconds. Bot h systems have the added advantage of being
offered at a significantly reduced cost when compared to comparably sized ASD systems.
To m aximize the abilities of your new Q7
manual has been prepared for the Q7 Flow installer, ope rator, and maintena nce personnel.
Whether you are using the Q7 AS
Flow is
changes when required.
a very powerful tool, yet surpris ingly simple to operate. The Q7 Flow has an easy -to - read
nd the Q7 ASD systems perform all of the ASD functions that Toshiba has become known for
w, a working familiarity with this manual will be required. This
Flo
D Power Unit or the Q7 Flow, both are truly Reliability in motion.
Important Notice
This manual may not cove r all of the variations of ASD applications, nor may it provide information on every
possible conti ngency concerning installation.
The contents of this manual shall not become a part of or modify any prior agreement, commitment, or
rela
tionship betw ee n the customer and Toshiba International Corporation. The sales contract contai ns the
entire obligation of Toshiba International Corporation. The warranty contained in the contract between the
parties is the sole warranty of Toshiba Internati onal Corporati on's ASD Division and any statement s containe d
herein do not create new war ranties or modify the existing warranty.
Any electrical or mechanical modifications to this equipment without prior written consent of Toshiba
Inte
certifications. Unauthorized modifications may also result in equipment damage or personal injury.
ional Corporation will void all warranties and may void the UL/CUL li sting or other safety
rnat
Page 4

TOSHIBA INTERNATIONAL CORPORATION
Q7 Flow Adjustable Speed Drive
Phone: 800.894.0412 - Fax: 888.723.4773 - Web: www.ctiautomation.net - Email: info@ctiautomation.net
Please complete the Warranty Card supplied with the ASD and return it to Toshiba by prepaid mail. This will
activate the 12 month warra nty from the date of installation; but, shall not exceed 18 months from the date of
purchase.
Complete the following informati on about the drive and retain it for your records.
Q7 Flow Model Number:
Q7 Flow Serial Number:
Project Number (if applicable):
Inspected By:
Name of Application:
Date of Installation:
Page 5

Table of Contents
Phone: 800.894.0412 - Fax: 888.723.4773 - Web: www.ctiautomation.net - Email: info@ctiautomation.net
Gener a l Sa fe t y Inf o r ma t i on . ......... .......... .......... ......... ................. .......... .......... .......... ......... .....1
Specia l S y mb o ls . .......... .......... .......... ......... .......... .......... ......... ................. .......... .......... ....... 2
Equipment Warning Labels ................................................................................................ 2
Qualified Pers onnel ..... .......................................................................................................3
Equipment Inspection ......................................................................................................... 3
Handling and Storage .........................................................................................................3
Disposa l ....... ....... .......... .......... .......... ....... .......... ......... .......... ....... .......... .......... .......... ......... 4
Install at i on P r ec au ti o n s ... .. .......... ......... .......... ................. .......... .......... ......... .......... .......... .. 4
System I n tegratio n Precaution s .................... ......... .......... .......... .......... ......... .......... .......... .. 6
System S et u p Req u i re m e n ts ... .......... ......... .......... .......... ......... .......... .......... .......... ......... ..... 7
Opera ti on a l an d Ma in t en ance Prec au t io n s .................... ......... .......... ................. .......... ....... 8
CE Compliance Requirements ............................................................................................... 9
Using RC D P ro tection ....... .......... ......... .......... .......... .......... ......... .......... .......... .......... ......... 9
EMC Installation Guidelines .............................................................................................. 9
Q7 Flo w In st a l la t io n .......... ... ......... .......... .......... ......... .......... .......... .......... ......... .................... 11
Install at i on N ot e s ... .. .......... .......... ......... .......... .......... .......... ......... .......... .......... .......... ....... 11
Q7 Flow Mounting and Connections ................................................. .............................. 12
I/O and C o nt rol . ... ......... .......... .......... ......... ................. .......... .......... .......... ......... .......... .......... 15
Q7 Flow Monitoring/Control Interface ............................................................................ 19
Typ i cal Q7 Flow Connection Di ag r a m .......... .......... .......... ......... .......... .......... .......... ....... 20
System Protection .................................................................................................................. 25
ASD Protection ................................................................................................................ 25
Motor Protection .............................................................................................................. 27
Q7 Flow Control Panel Features ...................................................................................... 30
Q7 Flow Theory of Operation .......................................................................................... 32
Enclo su re D im ensiona l Info rmation and Weights . ................. .......... ......... .......... .......... ..... 34
Enclosu r e D imensio n s/Weight s ... ......... .......... .......... .......... ......... .......... .......... .......... ....... 35
Cable/Termin a l Sp ec if i ca t i o ns .... .. .......... .......... ......... .......... .......... .......... ......... .......... .......... 38
Current/Voltage Specifications ............................................................................................. 40
Q7 Flow Insta llation and Operati on Manual i
Page 6

General Safety Information
Phone: 800.894.0412 - Fax: 888.723.4773 - Web: www.ctiautomation.net - Email: info@ctiautomation.net
DO NOT attempt to install, operate, maintain or dispose of this equipment until you have read and
understood all of the product safety information and directions that are contained in this manual.
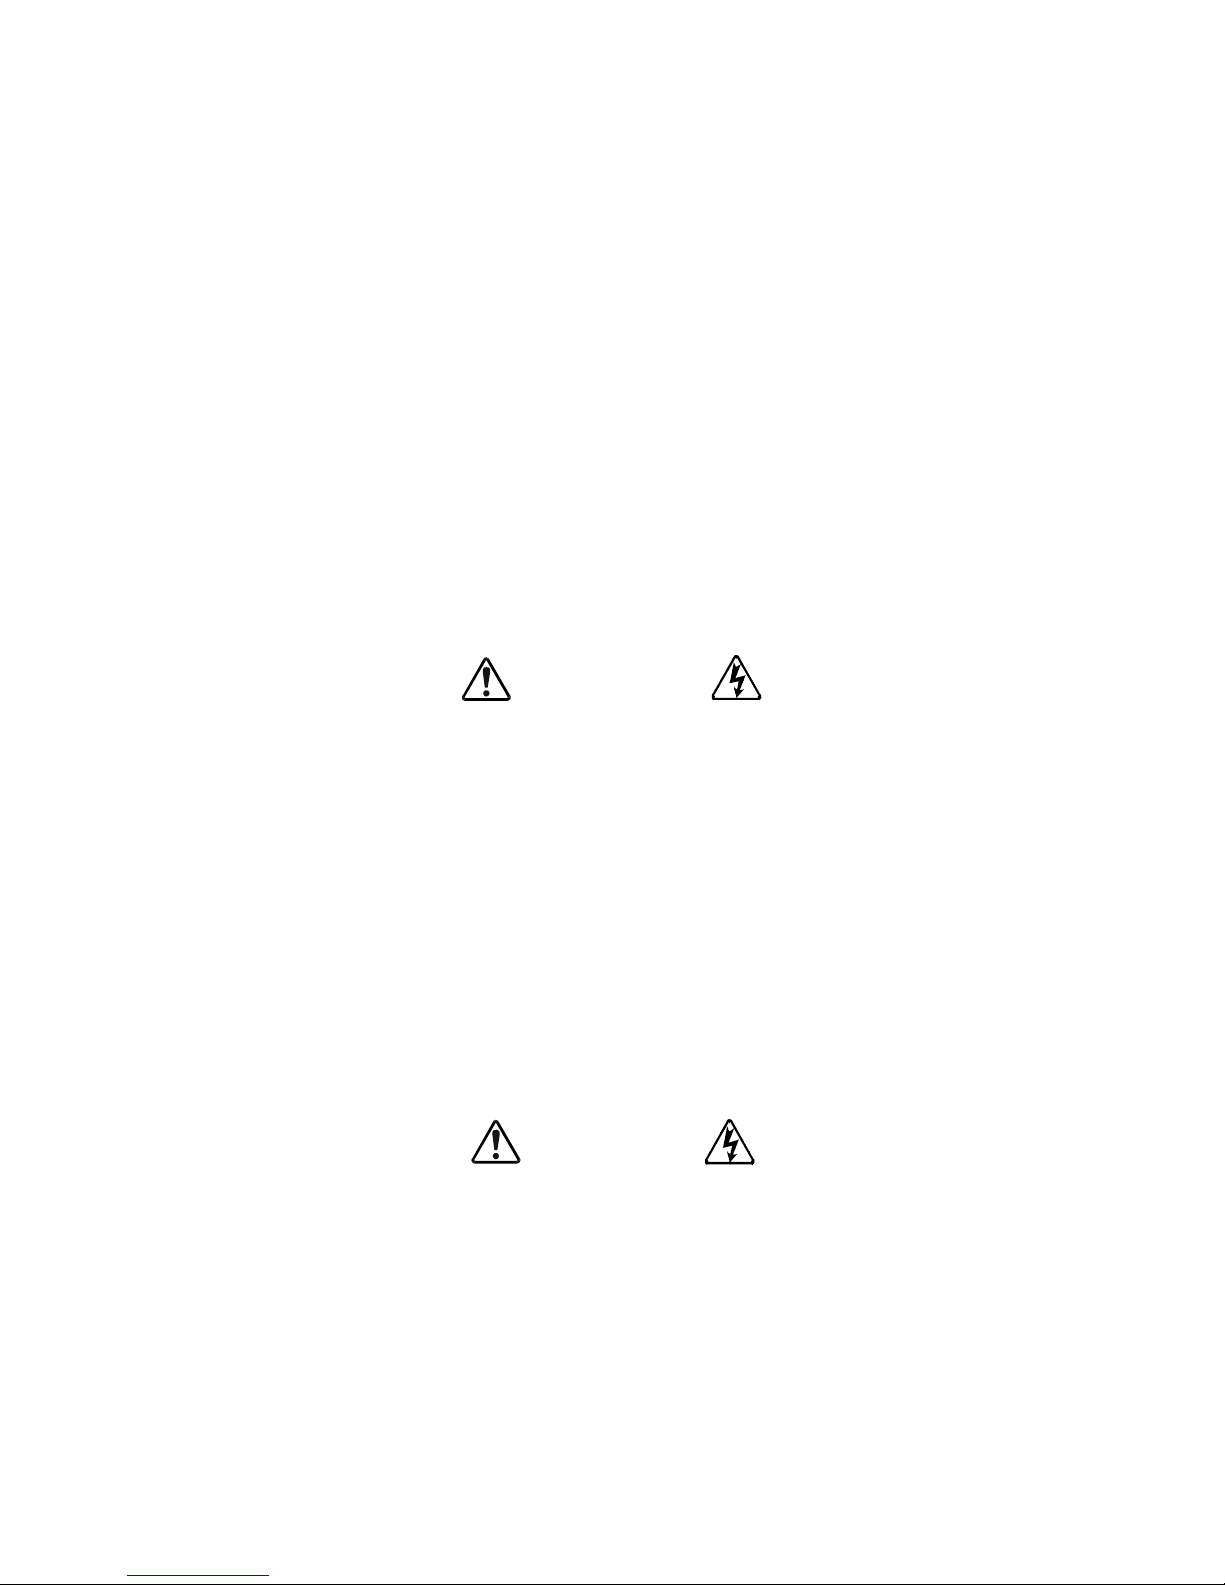
Safety Alert Symbol
The Safety Alert Symbol indicates that a potential personal injury hazard exists. The symbol is
comprised of an equilateral triangle enclosing an exclamation mark.
Signal Words
Listed below are the signal words that are used throughout this manual followed by their descriptions
and associated symbols. When the words DANGER, WARNING and CAUTION are used in th is
manual they will be followed by important safety information that must be carefully adhered to.
The word DANG
situatio n exis ts that, if not avoided, will r es ult in death or serious injury to personnel.
receded by th e safety al ert symbol in di ca t es th a t an imminent l y h az ar d o us
ER p
DANGER
The word WARNING p
situatio n exis ts that, if not avoided, could result in death or serious injury to personnel.
receded by the safety alert symbol indicates tha t a potentially hazardous
WARNING
The word CAUT
situation exists which, if not avoided, may result in minor or moderate injury.
N preceded by the safety alert symbol indicates that a potentially hazardous
IO
CAUTION
The word CAUT
which, if not avoided, may result in equipment and property damage.
N without the safety alert symbol indicates a potentially hazardous situa tion exists
IO
CAUTION
Q7 Flow Installation and Operation Manual 1
Page 7

Special Symbols
Phone: 800.894.0412 - Fax: 888.723.4773 - Web: www.ctiautomation.net - Email: info@ctiautomation.net
To identify special hazards, other symbols may appear in conjunction with the DANGER, WARNING
and CAUTION signal words. Thes e symbols indicate areas that require special and/or strict adherence
to the procedures to prevent serious injury to personnel or death.
Electrical Hazard Symbol
A symbol which indicates a hazard of injury from electrical
shock or burn. It is comprised of an equilateral triangle
enclosing a lightning bolt.
Explosion Hazard Symbol
A symbol which indicates a hazard of injury from exploding
parts. It is comprised of an equilateral triangle enclosing an
explosion image.
Equi pment Warning Labels
DO NOT attempt to insta ll, operate, perform maintenance, or dispose of this equipment until you have
read and understood all of the product labels and user direc tions that are contained in this ma nual.
Shown below are examples of safety labels that may be found attached to the equipment. DO NOT
re
move or cover any of the labels. If the labels are damaged or if additional labels are required, contact
your Toshiba sales representative for additional labels.
Labels atta ched to the equipment are there to provide useful information or to indica te an imminently
ha
rdous situ ation that may result in serious injury, severe property and equipment damage, or death if
za
the inst r uctions are not followed.
Figure 1. E
!
DO NOT REMOVE, DEST ROY, OR COVER THIS LABEL.
READ THE INSTRUC TION MANUAL CAREFULLY BEFORE
ENTERING THIS COMPARTMENT.
!
Excessive Loadin g of Operating Shaft
Can Prevent Conta ctor From Clos i ng
Properly Resulti ng In Major Damage.
Do Not Use Contactor Shaft To Drive
Accessories Such As Mechanical Interlocks
Which Require More Than 5 Kgf-cm Of
Torque To Operate.
xamples of labels that may be found on the equipment.
DANGER
HAZARDOUS VOLTAG E Behind These Pane ls.
Contact With Energized Main Bus Will Cause
Severe Injury, Death, Fire, Explosion, Or
Proper t y Da ma ge .
Turn Off And Loc k o ut Pr i m ar y And
Control Circuit Power Before O pe ni ng
These Panels.
Quali fie d O pe r ators Only.
DO NOT REMOVE, DESTROY, OR COVER THIS LABEL.
READ THE INSTRUCTION MANUAL CAREFULLY BEFORE
INSTALLING, OPERATING, OR SERVICING THIS EQUIPMENT.
CAUTION
!
DO NOT OPEN THIS DOOR WHILE THE UNIT IS RUNNING.
THIS DOOR IS INTERLOCKED WITH ASD OPERATION.
HAZARDOUS VOLTAGE MAY BE PRESENT.
Capacitors Are Charged. Wait
At Least 5 Minutes Before Entry.
Check For Charged Voltage
To Dissipate To A Safe Level
Before Opening The Equipment.
DANGER
!
HAZA RD OUS VOLTAGE
Can Cause Severe Injury, Death, Explosion,
Fire, Or Property Damage.
Only Qualified Personnel Should Be Permitted
To Operarate or Service This Equipment.
Disconnect And Lockout Primary And Control
Circuit Power Before Servicing.
Keep All Panels And Covers Securely In Place.
Never Defeat, Modify, Or Bypass Safety
Interlocks.
Foreign Voltage May Be Present At Interface
Terminals. Isolate Before Performing Service
Or Repairs.
Unauthorized Modifications To This Equipment
Will Void The Warranty.
DANGER
2 Q7 Flow Instal lation and Operation Manual
Page 8

Qualified Personnel
Phone: 800.894.0412 - Fax: 888.723.4773 - Web: www.ctiautomation.net - Email: info@ctiautomation.net
Installatio n, ope ratio n, and maint enanc e shal l be perfor med by Qualified Personnel Only. A Qualified
Person is one that has the skills and knowledge relating to the construction, installation, operat ion, and
maintenance of the electrical equipment and h as received safety training on the hazards involved (Refer
to the latest edition of NFPA 70E for additional safety requirements).
Qualified Personnel sh
• Have carefully read the entire ope rat ion manual.
• Be familiar with the construction and funct ion of the Q7
hazards involved.
• Able to recogniz e and properly address hazards assoc iated with the application of motor-driven
equipm
• Be trained and authorized to safely energize, de-energize, ground , lockout/tagout circuits and
equ
• Be trained in the proper care and use of protective equipment such a s safe ty shoes, rubber gloves,
hard hat
practices.
• Be trained in renderi ng firs t aid.
For further information on workplace safety visit www.osha.gov.
ent.
ipment, and clear faults in accordan ce with established safety practices.
s, safety glasses, face shields, flash clothing, etc ., in accordance with established safety
al
l:
Equipment Inspection
• Upon receipt of the equipment inspect the packaging and equipment for shipping damage.
• Carefully unpack the equipment and check for parts that may have been damaged during shipping,
sing parts, o r con ceal ed damage . I f any dis crepa ncie s are disco vered, it s hould be note d wit h the
mis
carrier prior to accep ting the shipment, if possible. File a clai m with the carrier if necessary and
immediately notify your Toshiba sales representative.
Flow,
the equipment being d riven, and the
• DO
• Check to see that the rated capacity and the model number specified on the nameplate conform to
• Modification of this equipment is dangerous and must not be performed except by factory trained
• Inspections may be required before and after moving installed equipment.
• Keep the equipment in an upright position.
• Contact your Toshiba sales representative to report discrepancies or for assis tance if required.
NOT ins
during operation resulting in equipment damage or personal injury.
the orde
repres
tall or energize equipment that has been damaged. Damaged equipment may fail
r specifications.
entatives. When mo difications are required contact your Toshib a s ale s representative.
Handling and Storage
• Use proper lifting techniques when moving the Q7 Flow; including properly sizing up the load,
getting assistance, and using a forklift if required.
• Store in a well-ventilated covered location and p r eferab
will not be used upon receipt.
• Store in a cool, clean, and dry location. Avoid storage locations with extreme temperatures, rapid
tem
perature changes, high humidity, moisture, dust, corrosive gases, or metal particles.
Q7 Flow Installation and Operation Manual 3
ly in the original carton if the equipment
Page 9

• The storage temperature range of the Q7 Flow is 14° to 104° F (-10 to 40° C).
Phone: 800.894.0412 - Fax: 888.723.4773 - Web: www.ctiautomation.net - Email: info@ctiautomation.net
• Do not store the unit in pl aces tha t a re exposed to outsi de weat her condi tions (i.e. , wind, rain, snow,
.
etc.)
• Store in an upright position.
Disposal
Never dispose of electrical components via incineration. Contact your state environment al agency for
details on disposal of electrical components and packaging in your area.
Installation Precautions
Location and Ambient Requirements
•The Toshiba Q7 Flow is intended for permanent installations only.
• Select a mounting location that is easily accessible, has adequate personnel working space, and
quate illumination for adjustment, inspection, and maintenance of the equipment (refer to 2002
ade
NEC Article 110-13).
• Do Not m
from its mounting location (equipment damage or injury).
ount the
Q7 Flow in a location that would produce catastrophic results if it were to fall
• Do Not mount t
or gasses, water, solvents, or other flu ids .
• The ambient operating temperature range of the Q7 Flow i
• The installation location shall not be exposed to direct sunlight.
• Avoid installation in areas where vibration, heat, humidity, dust, fibers, metal particles, explosive/
orrosi
ve mists or gases, or sources of electrical noise are present.
c
• Allow proper clearanc e spac es for installation. Do not obstruct the ventilation openings. Refe r to
the s
ection titled Installation and Connections of the Q7 ASD Installation and Operation
Manual (P/N 57246) for further information on ve ntilation requirements and in stallation.
he Q7 Flow in a location that would allow it to be exposed to flammable chemi cals
s 14° to 104° F (-10 to 40° C).
4 Q7 Flow Instal lation and Operation Manual
Page 10
Mounting Requirements
Phone: 800.894.0412 - Fax: 888.723.4773 - Web: www.ctiautomation.net - Email: info@ctiautomation.net
• Only Qualified Personnel should instal l this equipment.
• Install the unit in a secure and upright position in a well-ventilated area.
• A noncombustible insulating floor or mat should be provided in the area immediately surrounding
the el
ectrical system at th e p lace where ma in tenance ope rations are to b e p erformed.
• Installation should conform to the 20
(Requirements For Elec trical Installations), all regulations of the Occupational Safety and
Health Administration, and any other applicable na tional, regional, or industry codes and
standards.
• Installa tion practices should conform to the la test revision of NFPA 70E Electrical Safety
Re
• It is the responsibility of the person insta lling the Q7
to ensure that the unit is installed into an enclosure that will protect personnel against electric
shock.
ments for Employee Workplaces.
quire
02 National
Electrical Code — Article 110 (NEC)
Flow or t
he electrical maintenance personnel
Conductor Requirements and Grounding
WARNING
• Use separat e meta l condui ts fo r rout ing the i nput power , out put powe r , a nd c ontrol cir cuits a nd e ach
shall have its own ground cable.
• A separate ground ca ble should be run inside the conduit with the input power, outpu t power, and
a
ntrol circuits.
nd co
• DO
• Always ground the uni t to prevent electrical shock an d to help reduce electrical nois e.
NOT co
nnect control terminal str ip ret urn marked CC to earth ground.
• It is the responsibility of the person insta lling the Q7 Flow or t
to provide proper grounding and branch circuit protection in accordance with the 2002 NEC and
any applicable local codes.
The Metal Of Conduit Is Not An Acceptable Ground.
he electrical maintenance personnel
Power Connections
DANGER
Contact With Energized Wiring Will Cause Severe Injury Or Death.
• Turn of f, lockout, and tagout all powe r sources before proceeding to connect the power wiring to
the eq
uipment.
• Ensure the correct supplied voltage , wiring used, and syste m type for the application (refer to NEC
Art
le 300 – Wiring Methods and Article 310 – Conductors For General Wiring). Size the branch
ic
circuit conductors in accordance with NEC Table 310.16.
• Only after ensuring that all power sources are turned off and isolated in acco rdance with
e
sta
blished lockout/tagout procedures, shall a three-phase power source of the correct voltage be
connected to the input terminals and the system output terminals be connected to a motor.
Q7 Flow Installation and Operation Manual 5
Page 11

• Adhere to the recommended conductor s i zes listed in the section titl ed Cable/Terminal
Phone: 800.894.0412 - Fax: 888.723.4773 - Web: www.ctiautomation.net - Email: info@ctiautomation.net
Specifications on pg. 38. If multiple conductors are use d in para llel for the input or output power,
each branch of the parallel set shall have its own conduit and not share its conduit with other
ralle
l sets (i.e., place U1, V1, and W1 in one condu it and U2, V2, and W2 in another) (refer to
pa
NEC Article 300. 20 and Article 310.4). National and local electrical codes should be referenced if
three or more power conductors are run in the same conduit (refer to 2002 NEC Article 310
adjustment factors).
• Ensure that the 3-ph as e input power is Not
damage the system and may cause injury to personnel.
• Do not install the Q7 Flow
• Do Not con
• Ensure the correct pha se sequence and the desired direction of motor rotation in the Bypa
(if applicable).
• Turn the power on only after attaching and/or securing the front cover.
nect resistors across terminals PA – PC or PO – PC. This may cause a fire.
if it is damaged or if it is missing any component(s).
cted to the output of the Q7 Flow. This will
conne
Protection
• Ensure that prim ary prote ction ex ists for the input wirin g to the equi pment. Th is prote ction must be
able to interru pt the available fault current from the powe r line. The equipment may or may not be
equipped with an in put disconnect (option).
• All cable entry openings must be sealed to reduce the risk of entry by vermin and to allow for
m
imum cooling efficiency.
ax
• Follow all warnings and precautions and do not exceed equipment ratings.
• If using multiple motors provide separate overload protection for each motor and use V/f control.
• External dyna mi c braking resistors must be thermal ly protected.
• It is the responsibility of the person insta lling the Q7
to setup the Emergency O f f braking syste m of the Q7 Flow. The functio n of the Em erg e n cy Of f
braking function is to remove output power from the drive in the event of an emergency. A
supplemental braking system may also be engaged in the event of an emergency. For further
information on braking sy stems, see DC Injection Braking and Dynamic Braking Enable in the
Q7 ASD Installation and Operation Manual.
Flow or t
he electrical maintenance personnel
ss mode
Note: A
• Follow all warnings and precautions and do not exceed equipment ratings.
supplemental emer gency stopping system should be used with the Q7 Fl
Emergency stopping should not be a task of the Q7 Flow alone.
ow.
Syste m Integration Precautions
The following preca utions are provided as general guidelines for the setup of the Q7 Flow system.
•The Toshiba Q7 Flow
design should take this into consideration . Please contact your T oshiba sales representative for
application-specific information or for training support.
•The Toshiba Q7
on observing certain precautions and performing proper system integration.
• A detailed system analysis and job safety analysis shoul d be performed by the systems designer
and/or
systems inte grator before the installation of the Q7 Flow component . Contact your T oshiba
sales representative for options availability and for application-specific system integration
information if required.
6 Q7 Flow Instal lation and Operation Manual
is a general-purpose product. It is a system component only and the s yst em
is part of a larger system and the safe operation of the Q7 Flow will depend
Flow
Page 12

Personnel Protection
Phone: 800.894.0412 - Fax: 888.723.4773 - Web: www.ctiautomation.net - Email: info@ctiautomation.net
• Installa tion, operation, and maintena nce shall be performed by Qualified Personnel Only.
• A thorough understanding of the Q7 Flow wi
maintenance of the Q7 Flow.
ll be required before the in st allation, operation, or
WARNING
• Rotating machinery and live conductors can be hazardous and shall not come into contac t with
hu
ns. Personnel should be protected from all rotating machinery and electrical hazards at all
ma
times.
• Insulators, machine guards, and electrical safeguards may fail or be defeated by the purposeful or
in
ad
vertent actions of workers. Insulators, machine guards, and electrical safeguards are to be
inspected (and tested where possible) at installation and periodically after installation f or potential
hazardous conditions.
• Do not allow personnel near rotating machinery. Warning signs to this effect shall be posted at or
n
the machinery.
ear
• Do not allow pe rsonne l near e lect ric al co nductors. Human c ontac t with e lect ric al con ductors c an b e
fa
Wa rning signs to this effect s hall be posted at or near the hazard.
tal.
• Personal protection equipment shall be pro vided and used to protect employees from any hazards
i
nt to system operation.
nhere
• Follow all warnings and precautions and do not exceed equipment ratings.
System Setup Requirements
• When using the Q7 Flow as an integral part of a larger system, it is the res ponsibility of the
Q7 Flow
arra
• System safet y feat ures should be employed and designed into the integrated system in a manner
s
uch
personnel injury or system damage (i.e., E-Off, Auto-Restart settings, System Interlocks, etc.).
• The programming setup and system configuration of the Q7
unexpectedly. A familiarity with the Auto-restart settings is a requirement to use this product.
• Improperly desig ned or improper ly inst alle d system inte rlocks may render t he motor unable to sta rt
or
st
• The failure of external or ancillary components may cause intermittent system operation, i.e., the
s
ys
• There may be thermal or physical properties, or ancillary devices integrated into t he overall system
th
at m
installa tion must be posted to this effect.
• If a secondary magnetic contactor (MC) is used between the ASD and the loa d, it should be
i
nterloc
bypass operati on, it must be interlocked such that commercial power is never applied to the ASD
output terminals (U, V, W).
• Power factor improvement capacitors or surge absorbers must not be installed on the output of the
Q7
installer or maintenance personnel to ensure that there is a fail-safe in place, i.e., an
ngement designed to switch the system to a safe condition if there is a faul t or f ailure.
that sys te m operation , ev en in th e ev ent of system failu r e, wi ll not cause har m o r res ul t in
Flow m
op on command.
tem may start the motor without warning.
ay allo w f or th e Q7 Flow to start the motor without warning. S igns at the equipment
ked to halt the ASD before the secondary contact opens. If the output contactor is used for
Flow.
ay allow it to start the motor
Q7 Flow Installation and Operation Manual 7
Page 13

• Use of the built-in sy st em protective features is highly recommend ed (i. e., E-Off, Overload
Phone: 800.894.0412 - Fax: 888.723.4773 - Web: www.ctiautomation.net - Email: info@ctiautomation.net
Protection, etc.).
• The operating controls and system status indic ators should be clearly readable and posi tioned
where
the operator can see them wit hout obstruction.
• Additiona l warnings and notifications shall be posted at the equipment insta llation location as
deem
ed required by Qualified Personnel.
• Follow all warnings and precautions and do not exceed equipment ratings.
Operational and Maintenance Precautions
WARNING
• Tur n off, lockout, and tagout the main power, the control power, and instrumentation connections
before inspecti ng or servicing the drive, or opening the door of the enclosure.
• Tur n off, lockout, and tagout the main power, the control power, and instrumentation connections
before
proceeding to disconnect or connect the power wiring to the equipment.
• The capacitors of the Q7 Flow
the Q7 Flow.
ge LED. Wait for at least the minimum tim e indicated on the enclosur e-m ounted label and
Char
ensure th at the Charge LED has gone ou t before opening the door of the Q7 Flow once the power
has been turned off.
• Turn the power on only after attaching (or closing) the front cover and Do
cover of the Q7 Flow when the power is on.
• Do Not att
for repair information.
• Do not place any objects inside of the Q7
If the system should emit s moke or an unusual odor or sound, turn the power off immediately.
•
• The heat sink and other compone nts may bec ome extremel y hot t o the touch . Allow the uni t to cool
fore c
be
• Remove power from the Q7 Flow duri
• The system should be inspected periodically for dama ged or improperly functioning parts,
anliness, and to ensure that the connectors are tightened securely.
cle
• Ensure that the Run functi
a Reset. The post-reset settings may allow the motor to start unexpectedly.
• Re
try or Re
be clearly poste d on or near the Q7 Flow and the motor.
The required time for each sys tem typeform is indicated with a cabinet labe l and a
empt to disassemb le, modify, or repai r the sy stem. Call your Toshiba sales re presenta ti ve
oming in contact with these items.
set settings may allow the motor to start unexpecte dly. Warnings to this effect should
maintain a residual charge for a period of time after turning the off
No
t remove the front
Flow.
ng extended periods of non-use.
ons (F, R, Preset Speed, etc.) of the Q7 Flow are off before performing
• In the event of a power failure, the motor may restart after power is restored.
• Follow all warnings and precautions and do not exceed equipment ratings.
• Use caution when setting the output frequency. Over speeding a moto r decreases its ability to
r torque and may result in damage to the motor and/or the driven equipment.
delive
•The Q7 Flo
before using the Q7 Flow for special applic ations such as with an explosion-proof mot or or
applicati ons with a piston load.
DO NOT ins
understood all of the product warnings and user directions. Failure to do so may result in equipment
damage, operator injury, or loss of life.
8 Q7 Flow Instal lation and Operation Manual
w is designed to operate NEMA B motors. Consult with your sales representative
ll, operate, perform maintenance, or dispose of this equipment until you have read and
ta
Page 14

CE Compliance Requirements
Phone: 800.894.0412 - Fax: 888.723.4773 - Web: www.ctiautomation.net - Email: info@ctiautomation.net
In addition to the local and regional safety requirements, this section describes additional criteria that
must be met to qualify for Eur opean Conformity (CE) certification. All relevant apparatus placed on
the European market is required to comply to the European Community directive on electromagnetic
compatibility (EMC). The following instructi ons provide a means of compliance for the Q7 Flow. A
Technical Construct ion F ile (TFC) indicates the rationale used to declare compliance and is on file at
Toshiba International Corporation, Houston, Texas, U.S.A.
Using RCD Protection
Where a residual-current-operated protective dev ice (RCD) is used to guard against direct or indirect
contact, only an RCD of Type B is allowed on the s upply side of this Electronic Equi pment.
Otherwise, anot her protective measure shall be applied, such as sep aration of the Electronic E quipm ent
fro
supply side by a transformer.
EMC Installation Guidelines
All systems placed on th e European market are required to comply with the European Community
directive regarding electromagnet compatibility (EMC). Toshiba ensures that all systems deployed in
the European market ha ve be en s cre ened and are in 100% compliance with the foll owing s tandards:
environment by double or rei nforced insulation, or isolation of the Electronic Equipment and
m the
• Radiated Interference: EN 55011 Group 1 Class A
• Mains Interferen ce: EN 55011 Group 1 Class A
• Radiated Sus ceptibility: IEC 801-3 1984
• Conducted RFI Susceptibility:
• Electrosta tic Discharge: IEC801-2 1991
• Electrical Fast Transient: IEC 801-4 1988
• Surge: IEC1000-4-5 1995 2 KV line-to-line, 4 KV line-to-ea rth
• Voltage Interruption: IEC 1000-4-11
prEN55101-4 (prIEC801-6) Doc 90/30270
General EMC Guidelines for Consideration
• Input filters of the appropriate rating shall be used.
• Proper grounding is a requirement.
• Grounds shall be kept to the minimum length to accomplish the connection.
• Grounds shall have low RF impedance.
• A central ground sh all be employed in a complex system.
• Paint or corrosion can hamper good grounding; remove as required.
• Keep control and power ca bling separated. Minimize expos ed (unscreened) cable.
• Use 360° shielded connections where possible.
Q7 Flow Installation and Operation Manual 9
Page 15

CE Compliant Installation Guidelines
Phone: 800.894.0412 - Fax: 888.723.4773 - Web: www.ctiautomation.net - Email: info@ctiautomation.net
The Q7 Flow should be installed in accord anc e with the following guidelines.
1. Filtering — An in
put filter sh all be used with the ASD. A Sc haf fn er FN 258 se ri es in put f ilt er of th e
appropriate rating shall be used and mounted adjacent to the ASD.
2. Me
chanical —
The ASD and the associated equipment shall be mounted on a flat metallic
backpla ne. A mini mu m spac e of 5 cm (2 in ch es) s hal l ex ist b etw een th e ASD an d the fi lt er to a llo w
for ventilation. The filter output cable is to be co nnected from the bottom of the filter to the ASD
power input and is to be the mini mu m length required for a connection.
Units received as an Open Chassis shall not be placed into operation until being placed int o an
a
pprove
d enclosure that will protect personnel against electrical shock.
Opening and closing of enclosures or barriers should be poss ible only with the use of a key or a
t
ool.
3. Cabl
ing —
T
he cables of the input power, filter , and motor shall be of the appropriate current
rating. T he cables shall be connected in accordance with the guidelines of the manufacturer and the
applicable local and national agencies. A 4-core screened cable (such as RS 379-384) is to be used
for the power and earth connections to minimize RF emissions. Control cabling must be screened
using
P/N RS 367-347 or a similar component.
4. Gr
ounding — T
he mains (input) ground shall be connected at the ground ter minal provided on the
filter. The filter and motor shall be grounded at the ground terminals provided in the ASD.
5. S
creening — T
he mains (input) s creen is to be connected to the metallic back-plane at the filter;
remove any finish coating as required. The screen over the filter output cables, the motor cable
screen, and the control wire screens must be connected to the ASD case using glands or conduit
connectors. The motor cable screen shall be connected to the motor case. When using a braking
resistor, the cabling between the resistor and ASD shall also be screened. This screen shall connect
to both the ASD enclosur e and the resis to r enclosure.
See the Q7
Flow
Filter Selection below for the recommended input filters for a given typeform.
Q7 Flow Filter Selection Table
230V
Q72010B
Q72025B
Q72035B Q74055B
Q72055B
Q72080B Q74110B
Q72110B FN
Q72160B FN
Q72220B
Q72270B Q74330B
Q72330B FN
Q72400B FN
Q72500B FS
Q72600B
Q72750B Q7410KB FS
Q7210KB
Q7215KB Q7420KB
Filter
Number
FN258-7
258-16
FN
258-30
FN
258-42 Q74160B
258-75 Q74220B FN258-42
258-100
FN
258-130 Q74400B FN258-75
258-180 Q74500B
5236-180 Q74600B
5236-300
FS
5236-500
FS
460V
Q74015B
Q74035B
Q74080B
Q74270B
Q74750B FS5236-130
Q7412KB
Q7425KB
Q7430KB
Q7435KB
Q7440KB
Filter
Number
FN258-7Q72015B Q74025B
258-16
FN
258-30
FN
FN258-55
FN258-100
5236-180
FS5236-300Q7212KB Q7415KB
5236-500
FS
10 Q7 Flow Instal lation and Operation Manual
Page 16

Q7 Flow Installation
Phone: 800.894.0412 - Fax: 888.723.4773 - Web: www.ctiautomation.net - Email: info@ctiautomation.net
The Q7 system is available in two primary system configurations: the stand-alone ASD unit and the
Q7 Flow (
categorized into three system configuration s id entified by the part number suffixes of IA, IC, and IE.
See Figure 4. on pg. 20, F igure 5. on pg. 21, and Figure 6. on pg. 22 for further information on the IA,
IC, and IE variations.
stand-alone unit enclosed within the integrated enclosure) . The Q7 Flo
w is further
This manual wil l provide installation an d connection information for the Q7
intended to be used in conjunction with the Q7 ASD Installation and Oper ation Manual (P/N 57246).
The Q7
designed to fa cilit at e syste m diagnos tics and m ainte nance ope rat ions. T he avai lable Q7 Flow typeforms
and HP ranges for the 230- and 460-volt units are listed in the section titled Current/Voltage
Specifications on pg. 40.
Flow m
ay be ordered with the optional system protection hardware and the bypas s circuitry
Installation Notes
Input Power
The Q7 Flow input voltage should remain within 10% of the specified input voltage range. Input
voltages approaching the upper or lower limit sett ings may require that the overvoltage and
undervoltage stall protection level parameters be adjusted. Voltages outside of the permissible t olerance
should be avoided.
The input power frequency should be ±2 Hz of the specified input frequency.
Do not use an adjustab le speed drive with a mot or that ha s a high er power rat ing than the rated out put of
t
justable speed drive.
he ad
Control Signal Isolation
Interface problems may occur when the Q7 Flow is used in conjunc tion with some types of process
controllers . Signal isolation may be required to prevent controller and/or Q7 Flow malfunctions. The
Q7 Flow option, the ASD-ISO-1, prov ides isolation of the Control Board output circuit from the AM/
FM output and from the II input (for further information on the ASD-ISO-1 option contact your
Toshiba sales representative or contact the manufacturer of the process controller for additiona l
information on controller compatibility and signal isolation).
only . This manual is
Flow
Jumper Requirements
The Q7 Flow is shipped with jumpers connected to the foll owing terminals:
ST to CC (coasts to stop if removed),
S4 to CC (Emergency Off trip if removed),
CIA to CIB (Customer Interlock; user-specific), and
DRA to DRB (Disables the system if open).
All four jumper connect ions are required for normal operation of the Q7 Fl
settings configuration (see the Q7 ASD Installation and Operation Manual P/N 57246 for information
on changing the default settings).
ow whil
e in the default
Output Terminals
Do Not apply commercial power to the output terminals T1/U, T2/V, or T3/W.
Isolate the Q7 Flow
Q7 Flow Installation and Operation Manual 11
from the motor before megging th e motor.
Page 17

When a brake-equipped motor is connected to the Q7 Flow, it is possible that the brake may not release
Phone: 800.894.0412 - Fax: 888.723.4773 - Web: www.ctiautomation.net - Email: info@ctiautomation.net
at startu p becau se of i nsuf fic ient vo lta ge . To avoid this co ndit ion , Do Not conne ct the brake o r the bra ke
contactor to the output of the Q7 Flow.
Q7 Flow Mounting and Connections
The Q7 Flow may be set up initially by performing a few simple configuration setting s. To operate
properly, the Q7 Flow must be securely mounted and connected to a power source (3-phase AC input at
the L1/R, L2/S, and L3/T ter minals). The c ontrol terminals of the Q7 Flow may be used by connecting
the term inals of the Control Terminal Strip to the proper sensors or si gnal input sources (see the
section titled I/O and Control on pg. 15 for an expanded description of the system control options).
The output terminals of the ASD (T1/
contr o lled. See Figure 3. on pg. 19 for the connection diagram of the Q7
a minimum, the install ation of the ASD shall conform to Arti
As
Occupational Safety and Health Administration requirements, and to any other local and regi onal
industry code s a nd st andards.
U, T2/V,
and T3/W) must be connected to the motor th at is to be
Flow.
cle 110 of the 2002 NEC, the
Mounting the ASD
CAUTION
The ambient operating temperature rating for the Q7 is from 14 to 104° F (-10 to 40° C). The process of
converting AC to DC, and then back to AC produces heat. During normal ASD operation, up to 5% of
the input energy to the ASD may be dissipated as heat.
The Q7
perimeter of the enclosure in a well ventilate d area that is out of direct sunlight.
When ins t alling mult iple ASDs, ensure that there is a clearance space of at least 8 in ches (20 cm) from
t
adjacent un its. For the models below 50 HP the top and bottom clea rance spe cific ations may be reduc ed
to 4 inch es (10 cm ) . Thi s sp ace ensur es th at adequate vent il ation is p r ovided (se e th e se ct io n ti tl ed
Enclosure Dimensional Information and Weights on pg. 34 for additional information on mounting
space req u ir e ments).
Flow s
top and the bottom of adjacent units. There should be at least 5 cm (2 inches) on either side of
he
hould be installed securely using the four mounting holes on the top and bottom
Note: Ensure that the ventilation openings are not obstructed.
Do Not operate the ASD with the enclosure door open.
ASDs
produce high-frequency noise — steps must be taken during installation to avoid the negative
effe
cts of noise. Listed below are some examples of measures that will help to combat noise problems.
• Separate the input and output power conductors of the main ci rcuit. Do not install the input and
ou
wires in the same duct or in parallel with each other, and do not bind them together.
tput
• Do not install the input or output power conductors of the main circuit and the wires of the control
c
uit in the same duct or in parallel with each other, and do not bind them together.
irc
• Use shielded wires or twisted wires for the control circuits.
• Ensure that the grounding terminals (G/E) of the ASD are securely connected to ground.
• Connect a surge suppressor to every electromagnetic contactor and every relay installed near the
ASD.
• Install noise filters as required.
12 Q7 Flow Instal lation and Operation Manual
Page 18

Connecting the ASD
DANGER
Phone: 800.894.0412 - Fax: 888.723.4773 - Web: www.ctiautomation.net - Email: info@ctiautomation.net
DANGER
Refer to the section titled Installation Precautions on pg. 4 and the section titled Lead Length
Specifications of th
ASD and the motor to electrical power.
System Grou nding
Proper grounding helps to prevent electrical sh ock and to reduce electrical noise. The ASD is designed
to be grounded in accordance with Article 250 of the 2002 NEC or Section 10/Part One of the
Canadian Electrical Code (CEC).
e Q7 ASD Installation and Operation Manual before attempting to connect the
The grounding condu ctor shall be sized in accordance with Ar
Table 6 of
The
The input, output, and control lines of the system shall be run in separate metal conduits and each shall
have i
the CEC.
Metal Of Conduit Is Not An Acceptable Ground.
ts own ground conductor.
le 250-122 of the NEC or Part One-
tic
Power Connections
L1/R, L2/S, and L3/T are the 3-phase input supply terminals for the Q7 Flow. An AC Reactor may be
installe d to the 3-phase input to the Q7 Flow to provide fi ltering of the input voltage.
T1/U, T2
may be connect ed across terminals PA and PO to provide ad ditional filtering. Wh en not used, a jumper
is connected across these terminals (see Figure 3. on pg. 19).
Filtering provides an increased line transient immunity and a lower harmonic current.
Connect the input and output power lines of the Q7
Note: In the event that the motor rotates in the wrong direct ion when powered up, reverse
nd T3/W are the output terminals of the ASD tha t connect to the motor. A DC Reactor
/V, a
shown in Figure 4. on pg. 20.
any
two of the three leads connected to the motor.
Flow as
Connect the 3-phase input power to the input terminals of the Q7 Flow at
terminals. Connect the output termina ls T1/U, T2/V, and T3/W of the Q7 Flow to the motor. The input
and output conductors and terminal lugs used shall be in ac cordance with the requirements listed in
Cable/Terminal Specifications on pg. 38.
If conductors smaller than the recommended sizes are used in parallel for the input or output power,
eac
h branch of the parallel set sha ll have its own conduit and not share its co nduit with other parallel
sets (i.e., place U1, V1, and W1 in one conduit and U2, V2, an d W2 in another conduit).
Note: Na
Install a molded c ase ci rcuit bre aker (MCC B) or fuse bet ween the 3-ph ase power sourc e and th e ASD in
accor
Q7 Flow (
Q7 Flow Installation and Operation Manual 13
tional and local codes should be referenced when running more than three
conduc
tors in the same conduit.
dance with the 2002 NEC Article 4 3 0 -102 through 430-111 an d t h e Fault Current setting of the
Electronic Thermal Protection setting).
the L1/R, L2/S, and L3/T
Page 19

Startup and Test
Phone: 800.894.0412 - Fax: 888.723.4773 - Web: www.ctiautomation.net - Email: info@ctiautomation.net
Before turning on the unit, the following checks are to be performed by Qualified Personnel.
• L1/R, L2/S,
• T1/U, T2/V,
• The 3-phase input voltage is within the ASD setup tolerances.
• There are no shorts and all grounds are secured.
• With the previous checks confirmed, ensure that the direction of the motor rotation in the Bypa
mode and in the ASD-driven mode is consistent.
and L3/T are connected to the 3-phase input power.
and T3/W are connected to the motor.
ss
14 Q7 Flow Instal lation and Operation Manual
Page 20

I/O and Control
Phone: 800.894.0412 - Fax: 888.723.4773 - Web: www.ctiautomation.net - Email: info@ctiautomation.net
The ASD can be controlled by several input types and combi nations thereof, as well as operate within a
wide range of voltage le vels. This section discusses the ASD control methods and supported I/O
functions.
The Contr
ol Terminal Strip PCB (P
/N 53750; shown on pg. 18) of the Q7 Flow supports discrete and
analog I/O functi ons. Table 1 lists the names, the default settings (where applicable), and the
on
descriptions of the input and output terminals of the C
Table 1.
Terminal
Name
ST Discrete Input Standby — Multifunctional programmable discrete input (co nnect to CC to
RES Discrete Input Reset — Multifunctional programmable discrete input.
F Dis
R Discrete Input Reverse — Multifunctional programmable discrete input.
S1 Dis
S2 Discrete Input Prese t Speed 2 — Mu
S3 Discrete Input Damper Fdbk — Mu
S4 Discrete Input Emergency Off — Mu
CIA/CIB Discrete Input
DRA/DRB Discrete Input
RR Analog Input RR — Multifunction programmable analog input (0.0 to 10 vol t input — 0 to 80 Hz output).
RX An
II An
VI An
P24 DC Ou
PP DC Output PP —
DSA/DSB
(OUT
OUT2 A/B
FLA Discrete Output Fault Relay - ra te
FLB Discrete Output Fault Relay - rate
FLC Discrete Output Fault Relay - ra te
FP Out put
AM Output
FM Output
CC — Control common (Do No
Discrete Input T erminals
Analog Input Terminals refe
Input/Output Function (Default for programmable terminals)
crete Input Forward — Mu
Discrete Output
1)
Discrete Output
Discrete Output
crete Input
alog Input RX — Multifunctio nal programmable analog input (-10 to +10 VDC input — Unassigne d).
alog Input II — Multifunctional programmable analog input (4 to 20 mADC in put — Unassigned).
alog Input VI — Multifunctional programmable analog input (0 to 10 VDC input — Unassigned).
tput 24 VDC @ 50 mA output.
Fire Speed — Multifunct ional programmable discrete input .
Customer Interlock — T
user-selected means and is required for normal system operation.
Damper Response — T
opened damper and is required for normal system operation.
10.0 VDC voltage source for the external potentiometer.
Damper Command —
damper motor power circuit when the motor is ASD-driven (see Q7 Flow Theo ry of Operation on pg. 32).
Acc/Dec Co m p lete — Mu
accele ration or deceleration ramp is reached.
Frequency Pulse —
frequency which is based on the output frequency of the ASD.
Output Current —
to the magn itude of the output current.
Output Frequency
proportional to the magnitude of the output frequency.
⇒
On = connected to CC.
rence CC.
Input/Outpu t terminal names and functions.
ltifunctional programmable d iscrete inp ut.
ltifunctional programma ble discrete input .
ltifunctional programmable discrete input (connect to CC to operate the uni t).
ltifunctional programmab le discrete input (connect to CC to operate the unit).
CIA-to-CIB connection is accomplished via a jumper, a relay, or some other
he
DRA-to-DRB connect io n is ac co m p lished via limit switches at th e fu ll y-
he
Multifunctional programmable output that is used to open/close the 120 VAC
ltifunctional program mable output that ch anges state when the programmed
d at 2A/250 VAC (N.O.). Connects to FLC at power up.
d at 1A/250 VAC (N.C.). Disconnects from FLC at power up.
d at 2A/250 VAC (com). Connects to FLA at power up. Connects to FLB at Fault.
ultifunctional programmable output that produces a pulse train that has a
M
ltifunctional progra mmable output that produces a DC current that is proportional
Mu
Multifunctional programm able output that produces a DC current that is
—
t connect to Earth Gnd).
trol Terminal Strip PCB.
operate the unit).
Note: Multifunctional terminals are shown in the default setting condition.
Q7 Flow Installation and Operation Manual 15
Page 21

I/O Terminal Descriptions
Phone: 800.894.0412 - Fax: 888.723.4773 - Web: www.ctiautomation.net - Email: info@ctiautomation.net
Note: The programmable term inal assignments may be accessed and c hanged from their
default set tings as described in the Q7 ASD Installation and Operation Manual.
ST —
The default setting for this terminal is ST. T
controller (system is in Standby when on). As the default setting, this terminal must be connected to
CC for normal oper ation. If not connected to CC, Off replaces Output Frequency on the LCD screen.
This discret e input terminal may be programmed to any 1 of the 68 funct ions that are listed in the Q7
ASD Installation and Operation Manual.
RES —
and any fault indications from the display. Reset is effective when faulted only. This discrete input
terminal may be progr ammed to a ny 1 of the 68 func ti ons tha t are li ste d in the Q7 ASD Ins talla tio n and
Operation Manual.
F
Forward direction when it is on. This discrete input terminal may be programmed to any 1 of the 68
funct io n s that are listed in the Q7 ASD Installation an d Oper ation Manual.
R —
direction when it is on. This discrete input terminal may be programmed to any 1 of the 68 functions
that are listed in th e Q7 ASD Installation and Operation Manual.
S1 —
run the motor at the Preset Speed #1 setting when it is on. This terminal may be activated by a fire
alarm signal or fire sens ing device. This discrete input terminal may be programmed to any 1 of the 68
funct io n s that are listed in the Q7 ASD Installation an d Oper ation Manual.
S2 —
Preset Speed #2 when it is on. This discrete input terminal may be programmed to any 1 of the 68
funct io n s that are listed in the Q7 ASD Installation an d Oper ation Manual.
S3 —
Feedback is to com p lete the req u ir ements for normal system operation as de scribed in t h e section titled
Q7 Flow Theory of Operation on pg. 32. This discrete input terminal may be programmed to any 1 of
the 68 functions that are listed in the Q7 AS
S4 — The default setting for this ter minal is Eme
input as Emergency O ff is to remove power from the output of the ASD and may apply a supplemental
braking sys tem usi ng the m ethod se le cted a t the Em g Off Mo de sel ecti on pa rameter. This di scre te inp ut
terminal may be progr ammed to a ny 1 of the 68 func ti ons tha t are li ste d in the Q7 ASD Ins talla tio n and
Operation Manual.
CIA/CIB —
requirement for normal Q7 Flow operation. These terminals may be c onnected using a jumper or used
to Enable/D is able the system as a function of an event or condition that opens or closes t his circuit. See
the section titled Q7 Fl ow Theory of Opera t i on on pg. 32 for further information on these termina ls .
DRA/DRB
DRB connection is a requirement for normal Q7 Flow operation. These terminals may be connected
using a j umper or used to Ena ble/Disable the sys tem as a functio n of an event or condition that opens or
closes t his circuit. Se e the section titled Q7 Flow Theory of Operation on pg. 32 for further information
on thes e te r minals.
RR —
The RR terminal accepts a 0 – 10 VDC analog input signal and controls th e func tion assigned to this
terminal. This input terminal may be programmed to control the speed or torque of the motor. It may
also be used to regulate (limit) the speed or torque of the motor. The gain and bias of this terminal may
be adjus te d for app licat io n- spec ifi c s uit abi li ty. See the Q7 ASD Installat ion and Operat ion Man ual for
further information on this terminal.
The default setting for this terminal is Res
— The default setting for this terminal is For
The default setting for this terminal is Re
The defaul t setting for this terminal is Fire S
The defaul t setting for this terminal is S2. T
The default s etting for this terminal is Da
ese terminals make up the Custome r Interloc k. The CIA-to-CI B connection is a
Th
— These t er minals are used to complete the Damper Response func
The default function assigned to this terminal is to carry out the Fr
he function of this input as ST is a Standby mode
et. A momentary connection to CC resets the ASD
ward Run. Forward Run runs the motor in the
verse Run. Reverse Run runs the motor in the Reverse
peed. The function of this input as Fire Speed is to
he function of this input as S2 is to run the motor at
mper Feedback. T he function of this input as Damper
D Installation and Operation Manual.
rgency Off (normally closed). The function of this
tion. The DRA-to-
equency Mode #1 setting.
16 Q7 Flow Instal lation and Operation Manual
Page 22

RX — The RX termina l accepts a ±10 VDC analog input signal and controls the function assigned to
Phone: 800.894.0412 - Fax: 888.723.4773 - Web: www.ctiautomation.net - Email: info@ctiautomation.net
this terminal. This input terminal may be programmed to control the speed, torque, or direction of the
motor. It may also be used to regulat e (limit) the speed or torque of the motor. The gain and bias of this
terminal m ay be adjusted for appli cation-specific suitability. See the Q7 ASD Installation and
Operation Manual for further information on this terminal.
II — T
he II terminal acce
pts a 4 – 20 mA analog input signal and controls the function assigned to this
terminal. This input terminal may be programmed to control the spe ed or torque of the motor and may
not be used when using the VI input. It may also be used to regu late (limit) the speed or torque of the
motor. The g ain and bias of this term inal may be adjusted for application-specific sui tability. See the Q7
ASD Installation and Operation Manual for further information on this terminal.
VI — T
he VI ter
minal accepts a 0 – 10 VDC analog input sig nal and controls the function assign ed to
this terminal. This input terminal may be programmed to control the speed or torque of the motor and
may not be used when using the II input. It may also be used to regulate (limit) the speed or torque of
the motor. The gain and bias of thi s term in al may be adj uste d for appli ca tio n-spec if ic s uita bil ity. See th e
Q7 ASD Installation and Operation Manual for further information on this terminal.
P24 —
+24 VDC @ 50 mA power supply for customer use.
PP — The function of output PP i
s to provide a 10 VDC output that may be divided using a
potentiome ter. The tapped voltage is applied to the RR input to provide manual control of the RR
programmed functi on.
DSA/DSB (OUT1) —
default function as si gned to this output terminal is Damper Command.
The
This output term inal m ay be progra mmed to provid e an indic at ion that 1 of 60 possible events has ta ken
place. This fun ction may be used to signal external equipm ent or to activate the brake. The OUT1
contact is rated at 2A/250 VAC.
OUT2 —
The default function assigned to this output terminal is ACC/DEC Com
plete. This output
terminal may be programmed to provide an indication that 1 of 60 possible events has taken place. This
function may be used t o sign al ext ernal equipment or t o acti vate the bra ke. Th e OUT2 contact is r ated a t
2A/250 VAC.
FLA — One of two contacts that, under user-defined conditions, conne ct to FLC.
FL
B — One of two contacts that, under user-defined conditions, connect to FLC.
C — FLC is the
FL
middle leg of a single-pole double-throw (relay) switch. Thi s FLC contact of the
relay is switch ed, under user-defined cond itions, between FLB and FLA. This outpu t contact may be
programmed to swit ch between FLB and FLA as a function of any 1 of the 60 conditions list ed in the
Q7 ASD Installation and Operation Manual.
Note: Th
e FLA and
FLC contacts are rated at 2A/250 VAC. The FLB contact is ra ted at
1A/250 VAC.
FP — The default function ass igned to this open collector output terminal is Output Fr
equency. This
output termin al produces an output pulse train that has a frequency which is proportional to the
magnitude of the function assigned to this terminal. This output terminal may be programmed to
provide an output that is a function of any 1 of the 31 functions li s ted in the Q7 ASD Installation and
Operation Manual.
AM — T
he default function assigned to this output terminal is Output Curr
ent. This output terminal
produces an output current that is proportional to the magnitude of the function assigned to this
terminal. T his out put te rmina l may b e programmed t o pro vide an outp ut that is a functi on of a ny 1 of th e
33 function s listed in th e Q7 ASD Installation an d Oper ation Manual.
FM —
The default funct ion as signe d to this output te rminal is Out
put Frequency. Thi s outpu t ter mina l
produces an output current that is proportional to the magnitude of the function assigned to this
terminal. T his out put te rmina l may b e programmed t o pro vide an outp ut that is a functi on of a ny 1 of th e
33 function s listed in th e Q7 ASD Installation an d Oper ation Manual.
CC —
Control common (Do Not conne
ct to Earth Gnd).
Q7 Flow Installation and Operation Manual 17
Page 23

Q7 Flow Monitoring/Control Interface
Phone: 800.894.0412 - Fax: 888.723.4773 - Web: www.ctiautomation.net - Email: info@ctiautomation.net
Note: See the Q7 ASD Installation and Operation Manual (P/N 57246) for detailed
information on Q7 control.
The Control Terminal Strip PCB (P/N 53750) serves as a monitoring and control interface for the
Q7 Flow.
moni
provides output signals that may b e us ed to control ancillary devices, close a contact, notify the user, or
monitor system va riables.
See Figure 3. on pg. 19 for a connection diagram of the Control Terminal Strip PCB (PCB12).
The Control Terminal Strip PCB receives input from ancillary devices, transducers that
tor system variable s, or from the user via the keypad. The Control Terminal Str ip P CB also
Figure 2. Control Terminal Strip PCB (P/N 53750).
TB1 Terminals
TB1 Terminals
18 Q7 Flow Instal lation and Operation Manual
Page 24

Typical Q7 Flow Connection Diagram
Phone: 800.894.0412 - Fax: 888.723.4773 - Web: www.ctiautomation.net - Email: info@ctiautomation.net
Three variations of the Q7 Flow system are availab le. The variations may include bypas s circuitry ,
optional pr otection features, and/or additional filtering. The different systems are identified by the IA,
IC, or IE part number suffix as shown in figures 4, 5, and 6.
Figure 3. Q7 Fl
Note: When connect ing multiple wires to the PA, PB, P C, or PO
MCP
L3L1 L2
G
INPUT FUSES
*
3M
*
T1 T2
1FU
2FU
BLBKRD
T1 T2 T3
S
T3
3FU
LCD/LED
KEYPAD
L3L1 L2
L3L1 L2
T3T1 T2 95
1M
*
AC REACTOR
G
2M
*
M
96
ow typical connection diagram.
terminals, do not connect a solid wire and a str anded wire to the
same terminal.
LS
4FU
H1
H3
H2
H4
5FU
L3L1 L2
T3T1 T2
*
L3L1 L2
CN8
CHARGE INDI CA TOR LED
Q7 ASD
T3T1 T2
L3L1 L2
T3T1 T2
Motor
*
Overcurrent
Protection
(OCP)
9897
PO
CNU1
RS232/
RS485
X1
X2
TYPICAL LED CIRCUIT
R
R
6FU
115VAC
PA
CN7
CNU2
TTL
A2
A2
A2 A1
1M
2M
3M
LED
D
CPT
DC REACTOR
25 COND
A1
A1
PCB11
LED2
K2
14
4
1
2
3
K
1
1
13 13 14
2
K
1
2
1
K
6
1
0
2
354
2
JPDS1
(OUT1)
JPDS2
CC
SW2 (FM)
0-1mA
SW1 (AM)
2
K
8
LED3
0
3
2
K4
K3
LED4
1
9
9
K
5
5
1
1
2
K
7
76
67
534
TB1
1
2
3CC
4
5
6
7
8
9
10
11
12
13
14
15
16
17
18
JP1 19
20
21
22
23
24
25
+
TB2
-CC
+
TB3
4-20mA
-
+
TB4
-
+
TB5
-
+
TB6
-
5
9
SW1
3
TEST
LED5
4
21355
4
K4
LED1
K1
14
13
3
K
SW2
INV
1
2
1
2
OFF
3
BYP
CN2
CN2A
1
6
K
1
0
2
K
2
1
K
9
CN1
PCB12
123
CN1A
CNCPT
1
4
CNLS
1
2
*
CN7A
ST
CN1M
1
2
CN23M
3M
1
22
2
2M
3
22
4
CNOL
1
3
FactoryInstalled
Jumpers
ST
CC
RX
PP
CIA
CIB
DRA
DRB
FLC
FLB
FLA
OUT2A
OUT2C
DSA
DSB
S4
S3
S2
S1
R
F
RR
RES
P24
FM
AM
CC
II
CC
VI
CC
FP
CC
LEGEND
MOTOR
OPTIONAL-
()
*
-ASD
ADJUSTABLE SPEED DRIVE
MCP-
MTR CIRCUIT PROTECTOR
DS(A,B)
DAMPER SEN D
-
DR(A,B)
DAMPER RESPONSE
-
CI(A,B)
CUSTOMER INTERLOCK
-
LS-
DOOR SWITCH
MECHANICAL INTERLOCK
GROUND
-
RD
RED-
BK
BLACK
BLUE-BL
OPTIONAL AC REACTOR
R3RD
OPTIONAL DC REA CTOR-
TEST
-LED1
INVERT ER MOD E
LED2
BYPASS MODE
LED3-
SYSTEM INTERLOCK
LED4
CONTROL POWER
LED5-
MG-
Note: The negative te rminal s of the AM, FM, and II an alog inputs are connected to CC unless
isolated via the optional ASD-TB1-AC1 PCBA.
Note: See alternative ST-to-CC activation configuration on pg. 26.
Q7 Flow Installation and Operation Manual 19
Page 25

Figure 4. Q7 Flow-IA typical connection diagram.
Phone: 800.894.0412 - Fax: 888.723.4773 - Web: www.ctiautomation.net - Email: info@ctiautomation.net
MCP
G
OPTIONAL
LCD/LED
KEYPAD
INPUT FUSES
R3
AC REAC TOR
G
L3L1 L2
T3T1 T2
BLBKRD
1FU
2FU
3FU
L3L1 L2
CN8
CHARGE INDI CA T OR LED
Q7 ASD
T3T1 T2
MOTOR
S
PO
CNU1
RS232/
RS485
PA
CNU2
TTL
LS
4FU
H1
H3
H2
H4
5FU
RD
DC REACTOR
CN7
25 Condu cto r R ibbon Cable
X1
6FU
115VAC
X2
Optional
Reactances
PCB12
1
4
1
2
1
2
1
2
3
4
1
3
CN1A
CNCPT
CNLS
CN1M
CN7A
ST
CN23M
CNOL
CPT
4
123 5 1
K4
CN2A
2
JPDS1
(OUT1)
JPDS2
CC
SW2 (FM)
0-1mA
SW1 (AM)
534 67
K4
4-20mA
TB1
JP1 19
TB2
TB3
TB4
TB5
TB6
FactoryInstalled
Jumpers
1
ST
2
CC
3CC
RX
4
PP
5
CIA
6
CIB
7
DRA
8
DRB
9
FLC
10
FLB
11
FLA
12
OUT2A
13
OUT2B
14
DSA
15
16
DSB
17
S4
18
S3
S2
20
S1
21
R
22
F
RR
23
RES
24
25
P24
FM
+
-CC
AM
+
CC
II
+
CC
VI
+
CC
-
+
FP
-
CC
LEGEND
G-
ASD-
ADJUSTABLE SPEED DRIVE
MCP
-
MTR CIRCUIT PROTECTOR
DS(A,B)
-DAMPER SEND
DR(A,B)
-
DAMPER RESPONSE
CI(A,B)
-
CUSTOMER INTERLOCK
-LS
DOOR SWITCH
GROUND
-RD
RED
-BK
BLACK
BL-
BLUE
OPTIONAL AC REACTOR-R3
OPTIONAL DC REACTORRD-
20 Q7 Flow Instal lation and Operation Manual
Page 26

Figure 5. Q7 Flow-IC typical connection diagram.
Phone: 800.894.0412 - Fax: 888.723.4773 - Web: www.ctiautomation.net - Email: info@ctiautomation.net
MCP
G
OPTIONAL
Contactors
3M
INPUT FUSES
1FU
2FU
BLBKRD
T1 T2 T3
L3L1 L2
S
T3T1 T2
3FU
R3
LCD/LED
KEYPAD
L3L1 L2
L3L1 L2
T3T1 T2 95
LS
4FU
H1
H3
TYPICAL LED CIRCUIT
R
R
X1
6FU
PCB11
LED
D
LED5
SW2
2
BYP
LED2
14
3
K
4
INV
1
2
1
OFF
3
K2
13 13 14
2
K
2
1
LED3
K3
0
LED4
115VAC
3
K
6
1
0
JPDS1
(OUT1)
JPDS2
CC
0-1mA
K
354
9
5
2
2
1
2
K
1
1
8
7
76
534
67
FactoryInstalled
Jumpers
TB1
1
ST
2
CC
3CC
4
RX
5
PP
6
CIA
7
CIB
8
DRA
9
DRB
FLC
10
FLB
11
FLA
12
OUT2A
13
OUT2B
14
DSA
15
16
DSB
17
S4
18
JP1 19
K4
TB2
TB3
4-20mA
TB4
TB5
TB6
S3
S2
20
S1
21
R
F
22
RR
23
RES
24
P24
25
FM
+
-CC
AM
+
CC
II
+
CC
VI
+
CC
-
+
FP
-
CC
H2
5FU
H4
X2
Reactances
Optional
PCB12
CN1A
CNCPT
1
4
CNLS
1
2
CN1
21355
123
4
4
CPT
CN2
CN2A
3
K
2
1
2
1
RD
AC REACTOR
PO
L3L1 L2
CN8
CHARGE INDICATOR LED
PA
Q7 ASD
G
2M
M
9897
96
CNU1
T3T1 T2
RS232/
L3L1 L2
RS485
T3T1 T2
Overcurrent
Protection
(OCP)
CNU2
TTL
CN7
A2 A1
2M
A2 A1
3M
DC REACTOR
25 COND
3M
2M
K4
CN7A
ST
CN1M
1
2
CN23M
1
22
2
3
22
4
CNOL
1
3
SW2 (FM)
SW1 (AM)
LEGEND
MG-
MOTOR
-ASD
ADJUSTABLE SPEED DRIVE
MCP-
MTR CIRCUIT PROTECTOR
DS(A,B)
-
DAMPER SEND
DR(A,B)
-
DAMPER RESPONSE
CI(A,B)
CUSTOMER INTERLOCK-
DOOR SWITCHLS-
MECHANICAL INTERLOCK
-
GROUND
RED-
RD
-
BK
BLACK
BLUE
-
BL
R3-
OPTIONAL AC REACTOR
-
LED2
INVERTER MODE
LED3-
BYPASS MODE
-
LED4
SYSTEM IN T ER L O CK
CONTROL POWE RLED5-
RD -
OPTIONAL DC RE ACTOR
Q7 Flow Installation and Operation Manual 21
Page 27

Figure 6. Q7 Flow-IE typical conn ection diag ram .
Phone: 800.894.0412 - Fax: 888.723.4773 - Web: www.ctiautomation.net - Email: info@ctiautomation.net
MCP
G
OPTIONAL
Contactor
Optional
Reactances
Contactors
3M
INPUT FUSES
1FU
2FU
BLBKRD
T1 T2 T3
L3L1 L2
T3T1 T2
3FU
R3
LCD/LED
KEYPAD
L3L1 L2
L3L1 L2
T3T1 T2 95
LS
S
4FU
H1
H3
TYPICAL LED CIRCUIT
R
R
X1
6FU
PCB11
LED
D
1
6
K
1
0
2
2
K
K
1
5
9
9
3
SW1
TEST
LED1
K1
13
1
2
2
SW2
LED2
LED3
K2
14
14
4
K
3
INV
2
1
1
OFF
3
BYP
K3
13 13 14
2
2
K
0
1
LED4
115VAC
1
K
9
9
3
6
3
K
0
1
2
2
(O U T1 )
CC
SW2 (FM)
0-1mA
SW1 (AM)
K
354
JPDS1
JPDS2
K
5
5
1
1
2
2
K
1
2
8
7
76
534
67
TB1
JP1 19
K4
TB2
TB3
4-20mA
TB4
TB5
TB6
FactoryInstalled
Jumpers
1
ST
2
CC
3CC
4
RX
5
PP
6
CIA
7
CIB
8
DRA
9
DRB
10
FLC
11
FLB
12
FLA
13
OUT2A
14
OUT2B
15
DSA
16
DSB
S4
17
S3
18
S2
S1
20
R
21
F
22
RR
23
RES
24
P24
25
FM
+
-CC
+
AM
-
CC
+
II
-
CC
+
VI
-
CC
FP
+
CC
-
H2
X2
H4
5FU
CPT
PCB12
1M
L3L1 L2
1
4
T3T1 T2
1
2
CN1
CN1A
CNCPT
CNLS
LED5
21355
123
CN2
CN2A
1
1
4
4
RD
AC REACTO R
L3L1 L2
CN8
PO
CHARGE INDICATOR LED
Q7 ASD
G
2M
M
96
9897
CNU1
T3T1 T2
RS232/
L3L1 L2
RS485
T3T1 T2
Overcurrent
Protection
(OCP)
PA
CNU2
TTL
CN7
A2
1M
A2
2M
A2 A1
3M
DC REACTOR
25 COND
A1
A1
3M
2M
K4
CN7A
ST
CN1M
1
2
CN23M
1
22
2
3
22
4
CNOL
1
3
LEGEND
MECHANICAL INTERLOCK
MG-
GROUND
-
RD
RED-
BK
BLACK
-
-BLUEBL
OPTIONAL AC REACTOR
R3-
TEST
-LED1
INVERTER MODE
LED2
-
LED3
BYPASS MODE
SYSTEM INTERLOCK
LED4
CONTROL POWER
LED5-
OPTIONAL DC REACTOR
RD-
MOTOR
ADJUSTABLE SPEED DRIVE
-ASD
MTR CIRCUIT PROTECTOR
MCPDS(A,B)
DAMPER SEND
-
DR(A,B)
DAMPER RESPONSE
-
CI(A,B)
CUSTOMER INTERLOCK-
DOOR SWIT CHLS-
22 Q7 Flow Instal lation and Operation Manual
Page 28

System Protection
Phone: 800.894.0412 - Fax: 888.723.4773 - Web: www.ctiautomation.net - Email: info@ctiautomation.net
The Q7 Flow has protection features that are designed to protect the ASD and the m otor from overload/
overcurrent damage a nd fr om the undesira bl e ef fects of unde rvol tage operat ion. Be caus e of t he dif fe rent
types of overcurrent conditions that may occur (e.g., inrush current, short circuit current, exte nded
overlo a ds, etc.), the Q7 Flow is equipped to protect the system from start-up overcurren t and running
overcurrent da mage. Both protection mechanisms require an application-specific adjustment for
performance optimization and the minimization of nuisance tripping.
There ar e tw o syst em oper ati ng m ode s: Q7 Flow-dri
driven by the ASD of the Q7 Flow, the primary overcurrent protection and extended overload
prote ct ion fo r the AS D is accom pli s hed via t he El ec tr on i c Ther mal Pr ot ec t ion s etti ng of the Q7 Flow.
This parameter should be set as a ratio of the FLA of the ASD to the FLA of the motor. The power unit
of the Q7 Flow is rated for 200,000 Amps Interrupting Capacity (AIC). The bypass circuit is rated for
100,000 Amps Interrupting Capacity.
When the motor is being driven by the ASD of the Q7 Flow,
extended over load prote ction is accom pli shed via the Electronic Thermal Protection setting of the Q7
Flow.
Overload protec tion for the Bypass mode of operation is accomplished via the Motor Circuit Protector
shown on pg. 28
and the Overload Circuit Protector shown on pg. 2
ASD Protection
The Q7 Flow is designed and manufactured to accommodate a wide range of voltage and current
requirements; from the 0.75 HP to the 350 HP ASD (Typeform). Each typeform is desi gned to operate
at 100% output continu ous ly and can opera te at 1 10% for up t o 60 seconds . A trip will be incurred if the
design specifications are exceeded for a given typeform.
ven and Bypass operat ion. When the motor is be ing
the primary overcurrent protection and
9.
ASD overload protec tion is accomplished via the ASD software which can be configured to disable the
em in the event of an overload. Using the Electronic Thermal Protection setting, the ASD may be
syst
properly matched to the motor being driven and the application.
The short-circuit protection, which is provided by hardware and software, disables the system in the
ven
t of a fault.
e
On some devices the system may be disabled via the MS1 AUX re
(see Figure 7).
The MS1 AUX relay
normal system power is available. The MS1 AUX relay circu it pr ohibits the ST-to-CC connection in
the event that the MS1 contactor fails to close during start up or if the MS1 contactor opens whil e the
Q7 Flow is running.
the 230 volt ASD this feature is available on the 40 HP and above systems and on the 460 volt ASD
For
this fe
ature is available on the 75 HP and above systems.
Q7 Flow Installation and Operation Manual 25
circuit is normally-open and closes the ST-to-CC conn ection (via ST1) only after
lay-controlled ST-to-CC connection
Page 29

Figure 7. ST activation using the MS1 AUX circuit configuration.
Phone: 800.894.0412 - Fax: 888.723.4773 - Web: www.ctiautomation.net - Email: info@ctiautomation.net
All Q7 Flow AS
are optional. When connecting two or more drive systems that have no internal fuses to the same power
line as shown in Figure 8, it will be necessary to select a circuit-breaking configuration that will ensure
that if a short circui t occurs in system 1, only MCCB2 trips, not MCCB1. If it is not feasible to use this
con
ration, insert a fuse between MCCB2 and system 1.
figu
Figure 8. Circuit breaker configuration.
Ds are equipped wit h inter nal DC bus fuses. However, internal primary powe r inp ut fuse s
Read and understand all safety warnings before operating this equipment!
26 Q7 Flow Instal lation and Operation Manual
Page 30

Motor Protection
Phone: 800.894.0412 - Fax: 888.723.4773 - Web: www.ctiautomation.net - Email: info@ctiautomation.net
Motor circuit protection is accomplished using circuit breakers that have adjusta ble trip thresholds. The
threshold settings must be properly matched the motor being driven and the application. The circuit
breakers are set to the minimum curre nt value of the circuit bre aker at the factory and must be adjusted for
the motor being used and to properly match the requirements of the application.
The motor protection hardware is comprised of a Moto
input and an Overload C ircu it Pr ote c to r (OCP) connected to the motor (see Figure 3. on pg. 19).
Overload settings are application-specific and should be set and/or adjusted by Qualified Personnel
ONLY.
The MCP tha
used to further enhanc e the system protection function of the Q7 Flow. The Shunt Trip feature may be
connected such that th e L1, L2, and L3 MCP may be opened by a state change of the LS switch. The LS
switch may be operated by an ancillary circuit or relay. If an ancillary circuit is experiencing a condition
which warrants a system shutdown (i.e., door is opened), the L1, L2, and L3 MCP will be opened by
closing the Shunt Trip circuit. During normal operation the Shunt Trip circuit is o pen.
Read and under stand all safety warnin gs before operating this eq uipment!
t is used on th e L1, L2, and L3 input power lines has a Shunt Trip feature which may be
r Ci
rcuit Protect or (MCP) at the 3-phase system
Q7 Flow Installation and Operation Manual 27
Page 31

MCP Adjustment and Setting
Phone: 800.894.0412 - Fax: 888.723.4773 - Web: www.ctiautomation.net - Email: info@ctiautomation.net
CAUTION
The trip threshol d of the MCP is set to the lowe st s ettin g when th e produ ct shi ps fr om the fa cto ry. Refer
to NEC Table 430-152 for recommendations and guidelines on establishing the proper MCP setting for
a given application. With the vast number of applicat ion system variables, the MCP may have to be set
as a reference, tested, and adjusted up or down until the desir ed result is achieved.
When using a De
than 1100% of the full-load input current. The maximum sett ing for a motor, o ther than Design E, shall
be 800% of the input current. This is done to ensure that the protection does not activate while sta r ting
the motor, but is able to provide adequat e protection for a fault condition.
Overload set tings are application-s pecific and should be set and/or adjusted by Q
ONLY (see Qualified Personnel on pg. 3).
Figure 9. M CP Adjustme n t .
Set to minimum at the
factory. Application-specific
adjustme nt is required.
si
gn E motor, the setting for the instantaneou s trip circuit breaker shall not be more
ified Personnel
ual
28 Q7 Flow Instal lation and Operation Manual
Page 32

OCP Adjustment and Setting
Phone: 800.894.0412 - Fax: 888.723.4773 - Web: www.ctiautomation.net - Email: info@ctiautomation.net
CAUTION
The trip threshold of the OCP is set to the lowes t setting when the product ships from the factory. The
OCP setting should allow for th e high inrush current of startup and the sh ort-time overload current of
high-inertia loads and not be set so high as to provide inade quate overcurrent protection. The OCP
should be set to a level that is just above the maximum level of the application’s normal operating
requirements.
For large motor applications, a motor starter is recommended.
Overload set tings are application-s pecific and should be set and/or adjusted by Q
ONLY (see Qualified Personnel on pg. 3).
Figure 10. Motor OCP Adjustment and OCP Contactor.
ual
ified Personnel
Set to minimum at the factory.
Application-specific
adjustment is required.
Q7 Flow Installation and Operation Manual 29
The Normally Open (NO) and the Normally Closed (NC) contacts remain
in their normal states during normal operation. Both contacts change
states during an overload trip.
The contacts may be used with ancillary circuitry to annunciate an
overload trip or to control other system features.
Page 33

Q7 Flow Control Panel Features
Phone: 800.894.0412 - Fax: 888.723.4773 - Web: www.ctiautomation.net - Email: info@ctiautomation.net
There ar e three types o f Q7 Flow control panels available. The panel used will be a function of the
system feature s available for a given system. Two of the panels provide the user with control and
monitoring features and one is used as a cover for an unused panel mounting hole and has no active
features.
Figure 11 sh ows the three Q7
each.
Figure 11. Available Q7 Panels.
Panel Items
Flo
w panel types followed by a description of the applicable features of
1. Control Power LED (LED 5) — On when the control circuit power is available. This is n ot an
indication that power is off.
2. Sy
stem Interlock LE
• Control Power is a
• Door switch (LS) is closed,
• P
rotective Overload conta
• Customer Interface con
• The damper is full y open (DRA conne
3. Inverter L
• Control Power is a
• Door switch (LS) is closed,
• P
• Customer Interface con
•The Inverter Mode sw
This clo ses the 1M and 2M c
30 Q7 Flow Instal lation and Operation Manual
ED (LED 2) — On when the following conditions are met:
rotective Overload conta
D (LED 4) — On when the following conditions are met:
pplied,
ctor (OL) is closed,
tact (CI ) is closed, an d
cted to DRB).
pplied,
ctor (OL) is closed,
tact (CI ) is closed, an d
itch is sw i tc h ed to INV.
ontactors allowing for normal ASD operation.
Page 34

4. Bypass LED (LED 3) — On when the following conditions are met:
Phone: 800.894.0412 - Fax: 888.723.4773 - Web: www.ctiautomation.net - Email: info@ctiautomation.net
• Control Power is a
pplied,
• Door switch (LS) is closed,
• Protective Overload conta
• Customer Interface co
• The damper is full y open (DRA conne
•The Inverter Mode sw
This opens the 2M con
tactor and closes the 3M contactor.
5. Inverter Mode Switch — With the System Interlock LED cri
ctor (OL) is closed,
ntact (CI) is closed,
cted to DRB), and
itch is sw i tc h ed to BYP.
teria being met, the Inverter Mode
switch allows the user to switch the system to the Inverter Mode, the Bypass Mode, or Off.
6. Inv
erter Test Mode Switch — W
ith the CPT input power applied and the door closed, the
Inverter Test Mode switch closes the 1M contactor (via K1) to test the ASD section of the system
without providing an output to the connected motor.
7. Te
s t LED (L
ED 1) — On during Test Mode operation.
Q7 Flow Installation and Operation Manual 31
Page 35

Q7 Flow Theory of Operation
Phone: 800.894.0412 - Fax: 888.723.4773 - Web: www.ctiautomation.net - Email: info@ctiautomation.net
The fol l o w ing explanation targets the Q7 Flow IE configuration. System operation for th e Q7 Flow IA
and IC configurations differ where the referenc ed func tion is not supported by the IA or IC typeform.
Note: Re
Initially all switches are open and the normal states of all relays are as indicated in Figure 12 on pg. 33.
ference Figure 3. on pg. 19 and Figure 12 on pg. 33 for the following explanation.
Stage 1 Function
Power is ap p li e d to stage one via th e Control Power Transformer (CPT). The 120 VAC signal is
applied to the Shunt Trip circuit and LED 5 (Control Power). If the LS switch is open, the Shunt Trip
circuit enable s the system for normal operation and LED 5 illumina tes.
If the LS s
The
of a system malfunction or an ancillary circuit status change (i.e., door opens, etc.).
witch is closed, the MCP is opened and the 3-phase input voltage to the system is terminated.
LS switch may be conne cted t o an anc illar y ci rcuit t hat ca n perform a s yste m shutdown in the event
Stage 2 Function
Stage two has two operating modes: Test operation and INV operation (K2 energized). If the Test
switch (SW1 ) is closed or if K2 is energized via SW2 (SW2 to INV, OL closed [open = overload], and
CIA-to-B clos ure required), the K1 relay is en ergized an d the states of the K1 contacts change. The 1M
contactor energizes which closes the 1M contacts (see Figure 3. on pg. 19; 3-phase input is applied to
the ASD).
Stage 3 Function
The closures of the OL contacts and the CIA/B contacts are requi red to provide 120 VAC to stage 3.
The three po sitions of SW2; Off, INV,
Off — K2 and K3 r
INV — Energi ze s K2 which tur
stage 3, clo s es K2 at stage 4, and completes the ST termi n al path via PCB 11. The r esu l ti n g cl o su r e of
K2 at stage 4 energizes the 2M contactor (jumper or open-damper signal at DRA/B required) which
allows the ASD output to be app lied to the motor (see 2M at Figure 3. on pg. 19).
BYP —
opens K2 at stage 4 (which opens 2M if closed), and close s K3 at stage 4. The resulti ng clos ure of K3 at
stage 4 energizes the 3M contactor (jumper or open-damper signal at DRA/B required) which allows
the utility powe r to be ap plied directly to the motor bypassin g the ASD (see 3M at Figure 3. on pg. 19).
Note: E
The Dam
forc
Damper motor power (120 VAC) is provided from an external source and is applie d via the DSA/DSB
c
Bypass mode.
In the IN
damper motor. Once the damper-mounted DRA-to-DRB contacts are closed (fully open damper
required), K4 is energized. LED 4 (System Interlock) illuminates and the K4 contac ts close the S3-to-
Energizes K3 which tur
nsure that the phase relationship of the L1, L2, and
the Bypass mode of operation and for the ASD-driven operation are consistent. The
Reverse and Forward functions will be reversed if not properly connected (see
diagram in Figure 3. on pg. 19).
per Response feedback circuit (DRA/B) may be used to prevent a motor from attempting to
e air flow through a duct that has a closed damper.
ircuit. The 120 VAC is switched via the OUT1 contacts in the INV mode or the K3 contacts in the
V mode
emain in the norm al state.
the OUT1 closure occurs upon receiving a Run command and applies power to the
and BYP, are described below .
ns off LE D 1 ( Test; if on) , illu mi nat es LED 2 (INV Mode ), opens K2 at
ns off LED 2 (INV Mode) (if on), illuminates LED 3 (Bypass Mode),
L3 connecti ons to the motor for
32 Q7 Flow Instal lation and Operation Manual
Page 36

CC connection compl eting the Damper Feedback requirement for ASD operation. The DRA-to-DRB
Phone: 800.894.0412 - Fax: 888.723.4773 - Web: www.ctiautomation.net - Email: info@ctiautomation.net
closure also provides power to the 2M coil allowing for the ASD output to be applied to the motor.
Switching SW2 to t
he Bypass operating mode (jumpers JPDS1 and JPDS2 are req uired) energizes K3.
The K3 contact closure (at PCB11) applies power to the damper motor. Once the damper-mo unted
DRA-to-DRB contacts are closed (fully open damper required), the 3M coil is energized providing
utilit y power to the motor.
The DRA-t
o-DRB c
ontacts are provided via a reversible limit switch mounted on the damper. The
switch terminates power to the damper motor once the damper is full y open or fully closed (reversible
means that onl y the opposite function is available once reaching the fully open or fully closed position).
Only a fully opened damper provides the DRA-t
o-DRB conn
ection that is required for normal s ystem
operation in either mode.
Figure 12. Simplified depiction of the Q7 Flow Bypass o
peration.
Q7 Flow Installation and Operation Manual 33
Page 37

Enclosure Dimensional Information and
Phone: 800.894.0412 - Fax: 888.723.4773 - Web: www.ctiautomation.net - Email: info@ctiautomation.net
Weights
Q7 Flow Part Numbering Convention.
See pg. 40.
Note: The Type 1 enclosed versions of the Q7 Flow meet or ex ce ed th e s p ec if i ca ti o n UL
1995, the Standard for Heating and Cooling Equipment, and complies with the
applicable r equirements for installation in a compartment handling conditioned air.
Figure 13. Q7 Fl
ow Enclosure components.
34 Q7 Flow Instal lation and Operation Manual
Page 38

Enclosure Dimensions/Weights
Phone: 800.894.0412 - Fax: 888.723.4773 - Web: www.ctiautomation.net - Email: info@ctiautomation.net
Table 2. Q7 Fl ow Series Enclosure Size 1.
Shipping
Model
Number Q7
2010B
2015B
2025B
2035B
2055B
2080B
Weight
Max.
(Lbs.)
4015B
4025B
4035B
4055B
4080B
4110B
4160B
72
Q7 Flow Installation and Operation Manual 35
Page 39

Model
Phone: 800.894.0412 - Fax: 888.723.4773 - Web: www.ctiautomation.net - Email: info@ctiautomation.net
Number Q7
2110B
2160B
2220B
2270B
Table 3. Q7 Flow Series Enclosure Si ze 2.
Shipping
Weight
Max.
(Lbs.)
4220B
4270B
4330B
4400B
4500B
4600B
140
36 Q7 Flow Instal lation and Operation Manual
Page 40

Model
Phone: 800.894.0412 - Fax: 888.723.4773 - Web: www.ctiautomation.net - Email: info@ctiautomation.net
Number Q7
4750B
412KB
Table 4. Q7 Flow Series Enclosure Si ze 3.
Shipping
Weight
Max.
(Lbs.)
160410KB
Q7 Flow Installation and Operation Manual 37
Page 41

Cable/Terminal Specifications
Phone: 800.894.0412 - Fax: 888.723.4773 - Web: www.ctiautomation.net - Email: info@ctiautomation.net
The following ratings are gui delines and shall not be the sole de termining factor of the lug or wire size used
with the Q7 Flow. Applicatio n-spec ific va riabl es, wire i nsula tion typ e, and conductor mater ial are but a few
of the considerations when selecting the actual lug and wire type to be used with the Q7 Flow.
As a minimum, the installation of the ASD shall conform to the requirements of the 2002 NE
and Article 430, th e Occupational Safety and Health Administration requirements, and to any other
local and region al industry codes and standards.
Note: Us
Q7
MCP
Rating
(Amps)
Model
No.
2010B 15 14
2015B 15 14
2025B 15 14
2035B 20 14
2055B 30 10
2080B 50 8
2110B 75 8
2220B 100 4
2270B 125 3
2330B 150 2
2400B 200 2/0
2500B 250 3/0
2600B 300 250 – *1/0
2750B 400 *3/0
210KB 500 *250
215KB 700 *400
e only 75° C copper wire/cable for motor and power connections.
Input/Output
Power
Note: Wire size in AWG or kcmil.
Table 5. Q7 Flow 230 Volt Drive Cable/Terminal Specifications.
Typical Wire/Cable Size Lug Size/ Wire Capacity
AM, FM, and II
Terminals
20
(3-core shield)
Contro l Termi na l
Strip
18
(2-core shield)
Input OL Relay Output ASD Output
18 – 8 24 – 8
14 – 1/0
6 – 4
TBD TBD
C Arti
*(1/0 – 500)212KB 600 *350
cle 110
18 – 42160B 75 6
16 – 1
12 – 4/0
*(6 – 250)
Note: (*) Indicates that the item is one of a set of two parallel cabl es .
⇒
: TBD
Note
38 Q7 Flow Instal lation and Operation Manual
Contact Toshiba Customer Support Center.
Page 42

Table 6. Q7 Flow 460 V olt Drive Cable/Terminal Specifications .
Phone: 800.894.0412 - Fax: 888.723.4773 - Web: www.ctiautomation.net - Email: info@ctiautomation.net
Typical Wire/Cab le Size Lug Size /Wire Capacity
AM, FM, and
II
rminals
Te
20
(3-core shield)
Control Terminal
Strip
18
(2-core shield)
Input OL Relay Output ASD Output
18 – 8
14 – 1/0
6 – 4
12 – 4/0
*(6 – 250)
TBD TBD
*(1/0 – 500)
24 – 8
18 – 4
Q7
MCP
Rating
(Amps)
Input/Output
Power Wire
Size
Model
No.
4015B 15 14
4025B 15 14
4035B 15 14
4055B 15 14
4080B 30 14
4110B 30 12
4160B 30 10
4220B 50 8
4270B 75 8
4330B 75 6
4400B 100 6
4500B 100 4
4600B 125 3 16 – 1
4750B 150 1 4 – 350 6 – 3/0 1 0 – 1/0
410KB 200 2/0 4 – 350 6 – 3/0
412KB 250 3/0 4 – 350 6 – 3/0
415KB 300 250 – *1/0
420KB 400 *3/0
425KB 500 *250
430KB 600 *350
435KB 700 *500
440KB 700 *500
Note: Wire size in AWG or kcm il.
Note: (*) Indicate
s that the item is one of a set of two parallel cables.
(**) Indicates that the item is one of a set of three parallel cables.
⇒
Note: TBD
Q7 Flow Installation and Operation Manual 39
Contact Toshiba Customer Support Center.
Page 43

Current/Voltage Specifications
Phone: 800.894.0412 - Fax: 888.723.4773 - Web: www.ctiautomation.net - Email: info@ctiautomation.net
Table 7. 230 Vo lt NEMA Type-1 Chassis standard ratings table.
Model No.
Q7
2010B 1.0 0.75/0.56
2015B 1.5 1.0/0.75 4.8 A 5.3 A
2025B 2.5 2.0/1.5 7.8 A 8.6 A
2035B 3.5 3.0/2.2 11. 0 A 12.1 A
2055B 5.5 5.0/3.7 17.5 A 19.3 A
2080B 8.0 7.5/5.6 25.3 A 27.8 A
2110B 11.0 10.0/7.5 32.2 A 35.4 A
2160B 16.0 15.0/11.2 48.3 A 53.1 A
2220B 22.0 20.0/14.9 62.1 A 68.3 A
2270B 27.0 25.0/18.5 78.2 A 86.0 A
2330B 33.0 30.0/22.0 92.0 A 101.2 A
2400B 40.0 40.0/30.0 130.0 A 143.0 A
Rated
KVA
Motor
HP/Kw
Inpu t Voltage
3-Ph 50/60
± 2 Hz
200 – 240 VAC
(±10%)
Output
Voltage
3-Ph Variable
Frequency
Input Voltage
(Max.)
Level
Output
Current 100%
Continuous
3.7 A 4.1 A
Overload
Current 110%
for 60 Secs.
2500B 50.0 50.0/37.3 156.0 A 171.6 A
2600B 60.0 60.0/44.7 192.0 A 211.2A
2750B 75.0 75.0/56.0 248.0 A 272.8 A
210KB 100 100.0/74.6 312.0 A 343.2 A
212KB 125 125.0/93.2 370.0 A 407.0 A
215KB 150 150.0/112.0 415.0 A 456.5 A
40 Q7 Flow Instal lation and Operation Manual
Page 44

Table 8. 460 Volt NEMA Type-1 Chassis standard ratings table.
Phone: 800.894.0412 - Fax: 888.723.4773 - Web: www.ctiautomation.net - Email: info@ctiautomation.net
Model No.
Q7
4015B 1.5 1.0/0.75
4025B 2.5 2.0/1.5 3.4 A 3.7 A
4035B 3.5 3.0/2.2 4.8 A 5.3 A
4055B 5.5 5.0/3.7 7.6 A 8.4 A
4080B 8.0 7.5/5.6 11.0 A 12.1 A
4110B 11.0 10.0/7.5 14.0 A 15.4 A
4160B 16.0 15.0/11.2 21.0 A 2 3.1 A
4220B 22.0 20.0/14.9 27.0 A 2 9.7 A
4270B 27.0 25.0/18.5 34.0 A 3 7.4 A
4330B 33.0 30.0/22.0 42.0 A 4 6.2 A
4400B 40.0 40.0/30.0 52.0 A 5 7.2 A
4500B 50.0 50.0/37.0 65.0 A 7 1.5 A
4600B 60.0 60.0/45.0 77.0 A 8 4.7 A
4750B 75.0 75.0/55.0 96.0 A 105.6 A
410KB 100 100/75.0 124.0 A 136.4 A
412KB 125 125/90.0 156.0 A 171.6 A
415KB 150 150/110 190.0 A 209.0 A
420KB 200 200/150 240.0 A 264.0 A
425KB 250 250/185 302.0 A 332.2 A
430KB 300 300/220 370.0 A 407.0 A
435KB 350 350/280 450.0 A 495.0 A
440KB 400 400/298 492.0 A 541.2 A
Rated
KVA
Motor
HP/Kw
Input Voltage
3-Ph 50/60
± 2 Hz
380 – 480 VAC
(±10%
)
Output
Voltage
3-Ph Variable
Frequency
Input Voltage
Level (Max.)
Output
Current 100%
Continuous
2.6 A 2.9 A
Overload
Current 110%
for 60 Se
cs.
Q7 Flow Installation and Operation Manual 41
Page 45

Index
Phone: 800.894.0412 - Fax: 888.723.4773 - Web: www.ctiautomation.net - Email: info@ctiautomation.net
Numerics
1M, 32
1M contactor, 30
230 Volt NEMA Type-1 Chassis, 40
2M, 32
2M contactor, 30
3M, 32
3M contactor, 31
460 Volt NEMA Type-1 Chassis, 41
A
About This Manual, 2
AM, 15, 18
Amps Interrupting Ca pacity (AIC), 25
ASD Protection, 25
ASD-TB1-AC1, 20
B
BYP, 32
Bypass LED, 31
Bypass operation, 33
C
Cable/Terminal Specifications, 38
CC, 15, 18
CE Complianc e Requirements, 9
CIA to CIB, 11
CIA/B contacts, 32
CIA/CIB, 15 , 17
Circuit Breaker Rating, 39
Connecting the ASD, 13
Control Pane l Features, 30
Control Power LED, 30
Control Power Transformer, 32
Control Terminal Strip, 15
Control Terminal Strip PCB (P/N 53750), 19
Current/Voltage Specifications, 40
Customer Interl ock, 11, 15
Customer Support Center, 2
D
Damper Fdbk, 15
Damper Feedback, 33
Damper Feedback (DRA/B circuit), 32
Damper Response, 15, 32
Disposal, 4
DRA, 15
DRA to DRB, 11
DRA/DRB, 17
DRA-to-DRB, 32
DSA/DSB, 18, 32
E
Emergency Off, 15
Enclo sure components, 34
Enclosure Dimensi ons, 34
Enclosure Dimensi ons/Weight, 35
Enclosure Size 1, 35
Enclosure Size 2, 36
Enclosure Size 3, 37
Equipment Inspection, 3
Equipment Warning Labels, 2
F
F, 15 , 17
Filter Selection Table, 10
Fire Speed, 15
FLA, 15, 18
FLB, 15, 18
FLC, 15, 18
FM, 15, 18
Forward, 15
FP, 15, 18
G
General Safety Information, 1
H
Handling and Storage, 3
HP/Kw, 40
I
I/O and Control, 15
II, 15, 18
Important Notice, 3
information about the drive, 4
Input Voltage, 40
Input/Output terminal names and functions, 15
Inst al lation , 11
Installation Note s, 11
Installation P recautions, 4
INV, 32
Inverter LED, 30
Inverter Mode Switch, 31
L
LS switch, 32
Lug Size, 38, 39
42 Q7 Flow Installation and Oper ation Manual
Page 46

M
Phone: 800.894.0412 - Fax: 888.723.4773 - Web: www.ctiautomation.net - Email: info@ctiautomation.net
MCP Adjustment and Setting, 28
MCP Rating, 38
Mode Switch, 31
Monitoring/Control Interface, 19
Motor Protection, 27
Mounting and Conn ec tions, 12
Mounting the ASD, 12
MS1 AUX, 25
O
OCP Adjustment and Setting, 29
Off, 32
OL contacts, 32
Operational and Maintenance Precautions, 8
OUT1, 18
OUT1A, 15
OUT2, 18
OUT2A, 15
Output Current, 40
Output Voltage, 40
Overlo ad Cu r rent, 40
P
P24, 15, 18
Part Numbering Conve ntion, 34
phase relationship of the L1, L2, and L3 connections, 32
Power Connections, 13
PP, 15, 18
Preset Speed 2, 15
Q
Q7 Flow Connection Diag ram, 20
Q7 Flow Enclosure, 34
Q7 Flow-IA, 21
Q7 Flow-IC, 22
Q7 Flow-IE, 23
Qualified Pers onnel, 3
Rated KVA, 40
RES, 15, 1 7
Reset, 15
Reverse, 15
Reverse and Forward functions, 32
RR, 15, 17
RX, 15, 18
S
S1, 15, 17
S2, 15, 17
S3, 15, 17
S4, 15, 17
S4 to CC, 11
Shipping Weight, 35
Shunt Trip, 27, 32
Special S ymbols, 2
ST, 15, 17
ST to CC, 11
ST1, 25, 26
Standby, 15
Startup and Test, 14
System Grounding, 13
System Integration Precautions, 6
System Interlock LED, 30
System Protection, 25
T
TB1 Terminals, 19
Terminal Descriptions, 17
Terminal Sp ecifications, 38
Test LED, 31
Test Mode Switch, 31
Theory of Operation, 32
Typical Wire/Cable Size, 38, 39
V
VI, 15, 18
Voltage Specifications, 40
R
R, 15, 17
Q7 Flow Installation and Op eration Manual 43
W
Weig hts, 34
 Loading...