

Page 1
Hi-Speed USB 2.0
Portable Hard Drive
USER’S GUIDE
For Models:
PX1275E-1G04
PX1276E-1G06
PX1277E-1G08
PX1278E-1G10
PX1279E-1G12
Page 2

Contents
Getting Started
7 Welcome
8 Precaution
9 Package content
10 System requirement
Getting to know your Toshiba 2.5" Portable Hard Drive
12 Toshiba 2.5" Portable Drive at a glance
13 Toshiba 2.5" Drive in-dept
13 About Hi-Speed USB 2.
15 CD + Secure HDD & Password Securit
16 PushButton™ Backu
18 Synchronization (Sync
19 Bus-Powered Operatio
19 Using Bus-Power with your Toshiba Driv
21 Hot-Pluggable
21 Fanless Desig
22 Technical specification
s
s
s
h
0
p
)
n
n
s
y
e
Page 3

Drive Installation & Setup
24 Installing the Drive
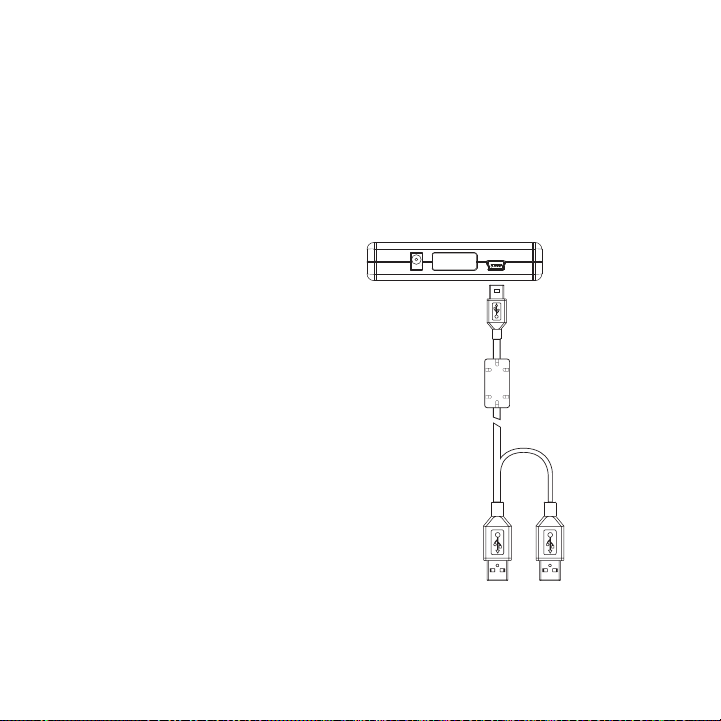
24 About the supplied USB cable
26 Connecting the Drive to your compute
26 Bus-Powered Operatio
28 Password Securit
28 Setting up Password Security for the first tim
29 Disabling Password Securit
30 Enabling Password Securit
31 What if you forget your password
33 Naming your Driv
34 Re-formatting the Driv
y
e
e
:
n
y
y
?
Using the Drive
37 Performing routine tasks
37 Opening files and folder
37 Copying files and folders to your Driv
38 How to unmount and disconnect the Driv
s
PushButton™ Backup
40 About PushButton™ Backup
40 PushButton Backup Operation
41 Backup
s
r
e
e
e
Page 4

42 Duplicate
43 Synchronization (Sync
44 Installing Regen backup softwar
45 Installing Rege
45 Uninstalling Regen
46 Setting up and using PushButton Backu
47 Setting up a Backup Stor
51 Setting up a Duplicate Stor
54 Setting up a Sync Stor
)
n
e
e
e
Using other Functions in Regen
59 Other Backup Operations
59 Archive
59 How to run an Archive operatio
61 Disaster Recover
62 Restor
62 About the Restore operation
63 How to Use Full Restore
65 How to Use File Restore
67 Using Find Files
71 Tool
71 Repair Catalo
72 Manage Store
73 Selectors
e
s
y
g
s
e
p
n
s
Page 5

Maintenance, Help & Other Information
76 Maintaining your Drive
77 Examining and Repairing a Hard Driv
78 Protecting Your Data from Viruse
78 Cleaning the Drive Cas
79 Frequently Asked Question
83 Troubleshootin
86 Following information is only for EU-member states
86 Working environmen
88 CE complianc
89 Notice
s
g
e
e
s
t
e
s
:
Page 6

Getting Started
Page 7
Welcome
Welcome, and thank you for
choosing a Toshiba Portable
Hard Drive.
Your Toshiba Drive features highquality construction, advanced
engineering, and state-of-the-art data storage technology,
designed to provide years of reliable, user-friendly performance.
This guide contains important information for the proper
installation, use, and care of your Toshiba Drive. Please read this
guide carefully and retain it for future reference.
Symbols used in this guide:
This symbol alerTs The
reader To a warning or To
some very impor TanT
informaTion.
his symbol alerTs The
T
reader To helpful Tips and
oTher useful informaTion.
7
T
he usb logo alerTs
The reader To imporTanT
informaTion specifically
abouT usb-relaTed issues.
Page 8

Precautions
Please follow the precautions listed below. Failure to so do may result
in damage to the device, loss of data, and voiding of the warranty.
• If using this device for general-purpose storage, we strongly recommend
that you backup the files stored on the device. Toshiba is not responsible
for data loss or corruption; nor will Toshiba perform recovery of lost
data or files.
• Do not attempt to open, disassemble, or modify the device.
• Do not expose the device to damp or wet conditions.
• Never place containers of liquids on the device. This can damage
the device and increase the risk of electric shock, short-circuiting,
fire, or personal injury.
• Do not expose this device to temperatures outside the range of
5°C to 40°C when the device is in operation, and -20ºC to 60ºC
when not in operation.
• Do not use a third-party AC adapter or power cord.
• Do not bump, jar or drop the device.
• Do not stand the device in a way not described in this guide.
• Do not disconnect any cables, while the device is powered on,
without first unmounting the device.
8
Page 9
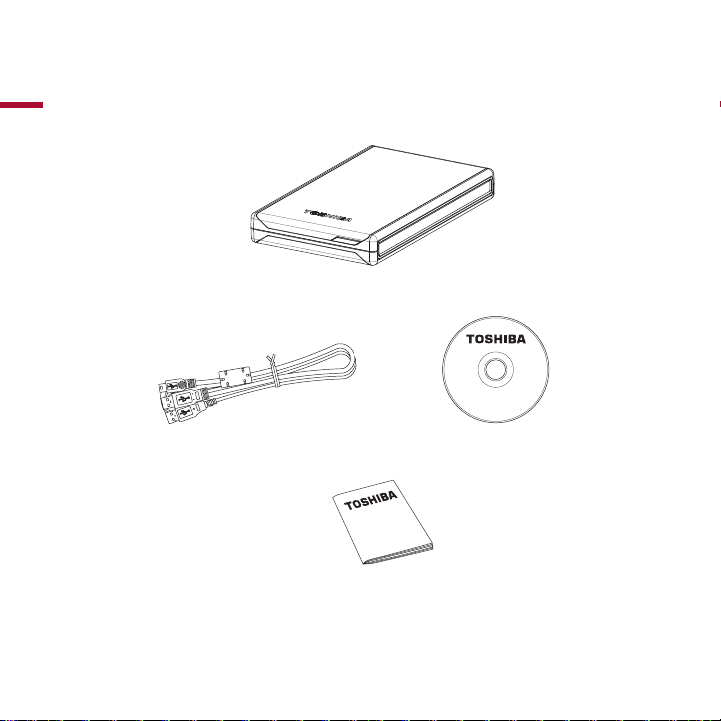
Package contents
Toshiba Portable Hard Drive
USB Cable
Software
CD
QuickStart Guide
9
Page 10

System requirements
What you need:
• Minimum 233 MHz processor
• Windows 2000 or XP (Home Edition, Professional, Professional x64
Edition, Media Center Edition)
• 2 available USB 2.0 or USB 1.1 ports
Windows XP users must have XP Service Pack 1 or later.
Windows 2000 users must have 2000 Service Pack 4 or later.
To get Windows updates go to www.microsoft.com and click on the
Microsoft Update link.
If connecting to a USB 1.1 port on your computer or hub, the Drive
will operate at USB 1.1 speeds (up to 12 Mbps).
(Pentium, Celeron, AMD, etc.)
10
Page 11

Getting to
know your
Toshiba
2.5" Portable
Hard Drive
Page 12

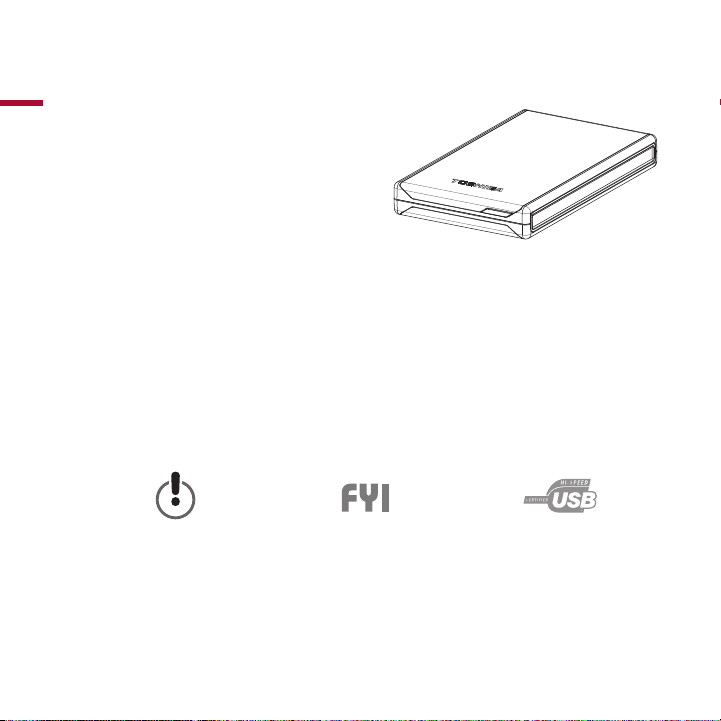
Toshiba 2.5" Portable Drive at a glance
PushButton
you press The pushbuTTon To
auTomaTically run daTa backups. The
p
ushbuTTon lighTs up when The drive
is powered on, and flashes when
reading or wriTing daTa.
usB 2.0 Port
The drive has a mini-usb porT,
and your compuTer has a Type a
usb porT, which correspond To The
connecTors on The supplied usb
cable. The drive is also compaTible
wiTh usb 1.1.
12
FRONT VIEW
REAR VIEW
Page 13

Toshiba 2.5" Drive in-depth
With a host of highly advanced features, your Toshiba 2.5" External
Hard Drive is much more than high-performance data storage.
It's a truly powerful data management system that can greatly
simplify how you access, organize, and safeguard your data.
About Hi-Speed USB 2.0
Your Toshiba 2.5" Drive is equipped with a Hi-Speed USB 2.0 interface.
USB (Universal Serial Bus) is serial data transmission technology. The
original standard (USB 1) could transmit data at speeds of up to
12 Mbps (Megabits per second). USB 2.0 has a maximum throughput
of 480 Mbps—that’s up to 40 times faster than USB 1.
Interface transfer rates up to 480 Mbps
USB 2.0 can transfer data at speeds of up to 480 Mbps. However,
data transfer rates will depend on a number of factors, including
available CPU resources, and the number of USB devices attached
to your computer. Also, as with any data I/O (input/output)
technology, some bandwidth is taken up by the data protocols
that structure and govern data transmissions. In day-to-day use,
you can expect maximum sustained transfer rates in the low to
mid-30s MB/s (Megabytes per second).
13
Page 14

Supports up to 127 devices
A single USB bus can support up to 127 USB devices. However,
connecting more than one or two USB devices to a computer
usually requires the use of one or more USB-equipped hubs.
A typical USB hub can accommodate several USB devices.
Master-slave architecture
The computer (the “master”) dictates data flow to, from, and
between attached USB devices (the “slaves”).
Cable length up to 5 m (16.4 ft.)
On-bus power
USB can supply enough electricity to run many low-power devices—
such as keyboards, scanners, and memory card readers—eliminating
the need for an electrical outlet in many cases.
Plug & Play
USB does not require ID numbers or terminators. On most
operating systems you do not need to install drivers.
Hot-Pluggable
You can add/remove devices while the computer is running. Always
unmount a hard drive before turning it off or disconnecting it.
14
Page 15

CD + Secure HDD & Password Security
About CD + Secure HDD
Your Toshiba Drive uses an advanced partition scheme called
CD + Secure HDD. The Drive was specially prepared at the factory
with two partitions. As the name suggests, one is the CD partition;
the other is Secure HDD (Hard Disk Drive) partition.
When the Drive mounts to your computer, it mounts two volumes.
The CD partition mounts just like a CD-ROM volume, and it will
appear in My Computer under Devices with Removable Storage.
It is a read-only partition that takes up only about 4 Megabytes.
You cannot delete it or change it in any way. The sole purpose of
the CD partition is to store the Password Security software.
The hard disk drive partition of your Toshiba Drive is used to store
your data. It is a standard hard disk drive partition that mounts to
your system just like any other normal hard disk drive volume.
About Password Security
The CD + Secure HDD scheme makes the Password Security
feature a simple, yet very powerful tool that can be used to
safeguard your Toshiba Drive from unauthorized access.
Because the Password Security software is stored on the Drive
itself—rather than on a computer—no matter what computer
15
Page 16

you connect your Drive to, it is always secure. When you connect
the Drive to a computer, a login screen will appear asking you to
input your password. If you do not input the correct password,
the hard disk drive partition of the Drive will not mount. (The CD
partition will mount regardless if you login or not, for the login screen
is launched from this partition.)
Password Security employs SHA2 encryption, which uses a type
of algorithm, known as a hash function, to encrypt your password.
The encrypted password is stored as a hash value (a fixed-sized
output generated from a variable-sized amount of text). Because
the hash is one-way only, it is extremely difficult to decrypt,
making Password Security very secure, to say the least. It is so
secure, in fact, that if you forget your password you will simply
never be able to access the stored data. The data is effectively lost.
Luckily, you can create a password hint to help you remember.
Instructions for using Password Security are included in the
chapter "Password Security".
PushButton™ Backup
PushButton Backup is a faster, easier way to run routine data
backups. Rather than having to launch a backup utility and setting
cumbersome parameters every time you want to backup, all you
need to do is press the PushButton on your Toshiba Drive.
16
Page 17

Not only does PushButton Backup make backups simpler and
more convenient, but since you’re backing up your data to a highperformance hard drive—as opposed to say, tape or optical
media—backups are also much faster.
How does PushButton Backup work?
PushButton Backup is a custom feature that was added to
the Regen backup application, specifically and exclusively, for
PushButton Drives.
After you install Regen, the first time you press the PushButton,
Regen will launch the PushButton Backup Wizard. The wizard
takes you through a few simple steps to set up a customized
backup strategy, tailored to your needs. Each subsequent time
you press the PushButton, Regen will launch automatically, run
the backup and then close.
PushButton Backup also gives you the flexibility to use your
Toshiba Drive as both a backup device and a general-purpose
storage device. Your backed up data will take up a certain amount
of the Drive's capacity. Any space left over can be used to store
working files that you need to access on a regular basis.
Just keep in mind that the amount of space taken up by your
backups will likely increase with every backup session, leaving less
and less capacity for your working files. However, unless your initial
backup takes up most of the Drive's capacity, or you are routinely
17
Page 18

backing up extremely large files, this will probably not be an issue
for quite some time.
A detailed explanation of the various backup operations available,
as well as full instructions for setting up and using PushButton
Backup and the Regen application, are provided in "PushButton
Backup" and "Using Regen's Other Functions".
Synchronization (Sync)
Synchronization, or Sync, is one of the most powerful features
available with your Toshiba Drive. While providing the benefits of
data redundancy, Sync also synchronizes the data on two or more
hard drives, allowing you to work from multiple drives without the
need to keep track of what files are on which drives.
The Sync operation is one of the backup operations that can be
launched via the PushButton. Instructions are provided in the
chapter "Setting up and using PushButton Backup".
18
Page 19

Bus-Powered Operation
Some interface technologies, such as USB, are able to supply
electricity as well as data to power peripheral devices. This is
referred to as "on-bus power". (A "bus" is an electronic pathway, or
channel, that conveys data between digital devices in the form of
electrical impulses.) The actual electricity to power the device is
supplied by the internal power supply of the computer to which
the device is attached.
Since a bus-powered device gets its power from the computer,
it does not need to be plugged into an AC outlet. This allows for
easier portability, requires potentially fewer cables, and affords
greater freedom of movement. As such, bus-powered operation
is of great benefit to laptop users who often find themselves
in locations where access to an AC outlet is unavailable—and
besides, who doesn’t appreciate fewer cables?
Using Bus-Power with your Toshiba Drive
Using bus-powered operation is the simplest, most convenient
way to run the Drive because the USB cable supplies both data
and power.
In all but a few cases, only one USB port is needed for bus-powered
operation. However, a few laptops, some hubs, and even a small
number of desktop systems, limit bus power. In these few cases, two
19
Page 20

USB ports are required for bus-powered operation. The supplied USB
cable has an extra USB connector that can be plugged into a second
USB port if needed.
The USB electrical specifications of the myriad models of
computers on the market are not typically published. Therefore,
the only way to know for sure if you will need to use two USB
ports for the Drive is to actually connect it to your computer and
see if it mounts. Details and instructions are given in the chapter
“Connecting the Drive to Your Computer”.
20
Page 21

Hot-Pluggable
You can connect and disconnect the Drive while your computer is
running. This makes portability much easier, allows you to use the
Drive only when you need it, and saves electricity/battery power.
Always unmount the Drive or turn off your computer before
disconnecting the Drive. See “Unmounting and Disconnecting the
Drive” for details.
Fanless Design
All hard drives generate some heat during normal operation.
However, your Toshiba Drive was engineered to dissipate heat so
efficiently it doesn’t need a fan. The result is near-silent operation.
21
Page 22

Technical specifications
Dimensions: ....................................................................................W 78 X H 17 X D 125.5 (MM)
...................................................................................... W 3.07" X H 0.67" X D 4.95" (INCHES)
Interface: .........................................................................................................Hi-Speed USB 2.0
Interface transfer rate (max.):
Data buf fer (cache)
Rotational speed
Error rate (nonrecoverable)
Load/unload cycles
Power requirement (max.)
Ambient operating temperature
Operating humidity (RH non-condensing)
Chassis (approve d/recognized)
........................................................................................................5,400 RPM
..................................................................................... 480 Mbps
..............................................................................................................2 MB
.............................................................................1 in 1014 bits read
......................................................................................................... 600,000
...............................................................................................4.75 W
.................................................... 5ºC – 40ºC (41°F – 104°F)
..................................................................8%–90%
............................................................................................... CE
22
Page 23

Drive Installation & Setup
Page 24
Installing the Drive
1SJNBSZ
64#UZQF"
DPOOFDUPS
4FDPOEBSZ
64#UZQF"
DPOOFDUPS
NJOJ64#
DPOOFDUPS
Place the Drive on a sturdy, flat surface. Do not place the Drive on
an unstable or makeshift base, such as a stack of books, that may
be prone to collapse or toppling.
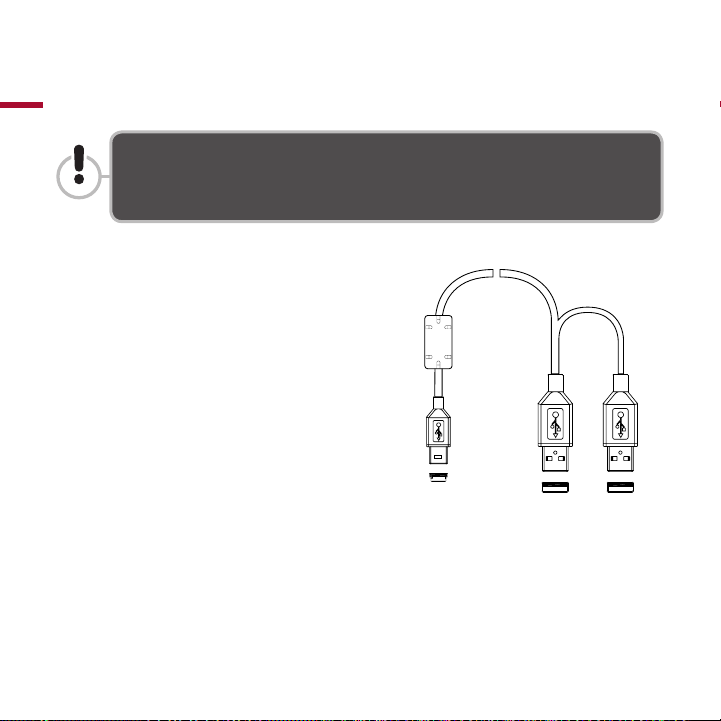
About the supplied USB cable:
The USB cable supplied with
your Toshiba 2.5" Portable Drive
has a primary Type A connector,
a secondary Type A connector,
and a mini-USB connector. In
most cases, you will not need
to use the secondary USB Type
A connector. (See "Connecting
the Drive to your computer" for
instructions.)
USB connectors can only be
inserted one way. When making
the connections, be sure to
correctly insert the connectors,
or you may damage the Drive
and void the warranty.
24
Page 25

If you plan to connect the Drive to a USB hub…
We recommend that you first connect the Drive directly to your computer.
Once the installation has been successfully completed, you can then
connect the Drive to a USB hub if you wish. This approach will simplify
troubleshooting if you experience a problem.
Note: The USB hub needs to be powered by an external power supply.
25
Page 26
Connecting the Drive to your computer
WARRANTY VOID
IF REMOVED
1SJNBSZ64#
UZQF"DPOOFDUPS
QMVHJOUPZPVS
DPNQVUFS
4FDPOEBSZ
64#UZQF"
DPOOFDUPS
QMVHJOUPB
TFDPOE64#QPSU
JGOFFEFE
NJOJ64#
DPOOFDUPS
Bus-Powered Operation
Bus-powered operation may require the use of two USB ports in some
cases. There is no way to know for certain until you connect the Drive.
1. Plug the primary USB
type A connector into a USB
port on your computer—
preferably a USB 2.0 port.
2. Plug the mini-USB
connector into the miniUSB port on the Drive. The
PushButton will illuminate
and Drive should power up.
After the Drive powers
up, the Password Security
login screen will appear.
Proceed to the next chapter
"Password Security."
26
Page 27

If you do not see the login screen…
If the login screen does not appear after several seconds, the Drive is
not receiving sufficient electrical current to power up—even though
the PushButton may be illuminated. You have two alternatives…
1) If you have a second free USB port, you can use that port to
augment the current needed to power up the Drive (follow the
instructions below):
1. Unplug the mini-USB connector from the Drive.
2. Plug the secondary USB type A connector into a second USB port
on your computer.
Because this second port will supply power only, it does not matter if the
port is USB 1.1 or USB 2.0.
3. Plug the mini-USB connector back into the Drive. After the Drive
powers up, the Password Security login screen will appear. Proceed
to the next chapter "Password Security."
27
Page 28

Password Security
Setting up Password Security for the first time
Your Toshiba Drive came from the factory with Password Security
enabled, and programmed with a pre-set password. The first time
you connect the Drive to your computer, the login screen will appear.
If you want to keep Password Security enabled, follow the
instructions below to change the pre-set password. If you want to
disable Password Security, go to "Disabling Password Security" on
the next page.
How to change the pre-set password
1. In the login screen, click on the Options button.
2. In the Current Password field, enter 12345 (this is the password
that was set at the factory).
3. In the New Password field, enter your new password.
4. In the Confirm New Password field, enter the new password again.
5. In the Hint field, type in a word or short phrase that will help you
remember your password in the event that you forget what it is.
6. Click OK. You will see a message telling you to unplug and plug
in the device. Click OK, then unplug and plug in the USB cable
connected to your computer.
28
Page 29

7. The login screen will appear. Enter your password and click OK.
The Drive will mount, and the drive icon/letter for your Toshiba Drive
will appear in My Computer under Hard Disk Drives.
You will also see a CD-ROM icon/letter under Devices with
Removable Storage. This is the CD partition used to store the
Password Security software.
Disabling Password Security
You can disable or enable Password Security at any time. Doing so will
not affect any data stored on your Drive. If you disable Password Security,
then later on decide to re-enable it, you will have to run through the
enabling procedure and create a password and password hint.
How to disable Password Security
1. In the login screen, click on the Options button.
2. Check Disable Password Security.
3. In the Current Password field, enter the current password. If this is
your first time connecting the Drive to your computer, enter 12345
(this is the default password set at the factory).
4. Click OK. You will see a message telling you to unplug and plug
in the device. Click OK, then unplug and plug in the USB cable
connected to your computer.
29
Page 30

5. The Drive will now mount; no login will be required.
The drive icon/letter for your Toshiba Drive will appear in
My Computer under Hard Disk Drives.
You will also see a CD-ROM icon/letter under Devices with
Removable Storage. This is the CD partition used to store the
Password Security software.
Enabling Password Security
You can enable or disable Password Security at any time. Doing
so will not affect any data stored on your Drive. Follow the
instruction below to enable Password Security for an unsecured
Drive.
How to enable Password Security
1. Double-click the CD Drive icon of your Drive in My Computer. The
contents of the CD Drive will be displayed.
2. Double-click on ONSPCSET.exe. The password screen will appear.
3. In the New Password field, enter a password.
4. In the Confirm New Password field, enter the password again.
5. In the Hint field, type in a word or short phrase that will help you
remember your password in the event that you forget what it is.
30
Page 31

6. Click OK. You will see a message telling you to unplug and plug
in the device. Click OK, then unplug and plug in the USB cable
connected to your computer.
7. The login screen will appear. Enter your password and click OK.
From now on, before the Drive will mount, the login screen will
appear and you will need to input your password.
What if you forget your password?
If you permanently forget your password, you will not be able to
access the Drive, and any data stored on the Drive will effectively
be lost.
Password Security allows three consecutive attempts to enter your
password at login. If the third attempt is unsuccessful, you will be
able to view your Hint, and you will have another chance to enter
your password.
If you still cannot remember your password, you will need to
unplug and plug in the USB cable from your computer in order to
access the login screen again and make further attempts.
31
Page 32

If you permanently forget your password you will not be able
to access the Drive. For all intents and purposes, the Drive will
be rendered unusable, and any data stored on the Drive will
effectively be lost.
If you want to regain the use of your Drive, you will need to
make arrangements to return the Drive to the factory, where the
CD + Secure HDD partitions will be deleted and re-created. The
data cannot be recovered, but at least the Drive will again be
functional.
32
Page 33

Naming your Drive
Now that your Drive has been connected and mounted, you
should give it a unique name (label) to distinguish it from other
storage devices/volumes connected to your computer.
Follow these instructions to name your Drive:
1. Double-click on My Computer.
2. In My Computer click the drive icon for your Toshiba Drive.
3. In the File menu, select Properties.
4. Under the General tab of the Properties window, type a name in
the text field beside the Drive icon.
33
Page 34

Re-formatting the Drive
Formatting a hard disk erases all data stored on the disk! Before
you re-format or partition your Drive, be sure to save a copy of
any files you wish to keep to another storage device.
Your Toshiba Drive was formatted at the factory…
You do NOT need to format the Drive. We recommend that you only
re-format or partition the Drive if absolutely necessary.
You can only re-format the HDD partition. Formatting the HDD
partition has no effect on the CD partition. The CD partition
cannot be altered or deleted.
How to re-format the Drive
1. Disable any anti-virus software you may have running.
2. Double-click on My Computer. In My Computer, right-click the
Toshiba Drive icon and select Format… in the pop-up menu. The
Format dialog box will appear.
3. Under Capacity, verify the Drive capacity. It should be close to the
stated capacity of your Drive in gigabytes.
34
Page 35

4. In the File System pop-up menu, select the file system.
If you need Password Security, select FAT32, if available. Password Security
will not work with NTFS formatted disks.
5. In the Allocation unit size pop up, select “Default allocation size.”
6. In the Volume label field, type in a name for the Drive.
7. Under Format options you can check Quick Format.
If you leave it unchecked Windows will run a Full format. A Full format will
take about 30-90 minutes. A Quick format will take just a few minutes, but
will do less verifying of the Drive.
8. Click Start. Once the format process is complete, the Drive will be
ready to use.
35
Page 36

Using the Drive
Page 37

Performing routine tasks
Opening files and folders
1. Double-click on the Drive icon. A window showing the files and
folders stored on the Drive will appear.
2. Double-click on the file or folder that you want to open.
Copying files and folders to your Drive
1. Click on the file or folder you want to copy.
2. With the file/folder highlighted, go to Edit --> Copy.
3. Double-click on the Drive icon to open it. If you want to copy the
file or folder to a specific folder on the Drive, double-click that folder
to open it.
4. Go to Edit --> Paste. The file or folder will copy over.
37
Page 38

How to unmount and disconnect the Drive
When a device, such as a hard drive, is “mounted” to a computer,
that means the computer has established a communications link
with it. When you unmount a device, the communications link is
severed and the computer can no longer access it.
Never disconnect any cables while the Drive is mounted. You may
lose data or damage the Drive.
1. In the system tray at the bottom of your screen, click the safely
remove/icon (the icon with the green arrow). A pop-up message will
appear with a list of devices connected to your computer.
2. Select the Toshiba Drive. After a few seconds the Drive will
unmount and Windows will give you a message that it is safe to
remove the device.
3. Click OK. You can then safely disconnect the Drive.
If you disconnect the Drive after you shut down your computer,
you do not need to manually unmount it. The Drive will unmount
automatically when the computer shuts down.
38
Page 39

PushButton™ Backup
Page 40

About PushButton™ Backup
PushButton Backup is a custom feature set that was added to
Regen specifically, and exclusively, for PushButton Drives. Before the
addition of PushButton Backup, Regen was already an extremely
powerful, yet very user-friendly application. The combination of
Regen and PushButton Backup makes PushButton Drives perhaps
the ultimate in multi-function data backup and storage.
PushButton Backup Operations
There are three types of backup operations available with
PushButton Backup: Backup; Duplicate; and; Synchronization. Each
one can be customized for maximum utility and convenience.
When you setup your Toshiba Drive for PushButton Backup, you
specify which one of the three backup operations you want to
launch via the PushButton. To help you decide which operation to
choose, we offer in-depth descriptions below.
40
Page 41

Backup
The Backup operation is best suited for those who want to backup
their entire startup disk. As well as backing up files, Backup can also
save other types of data, including user settings, applications and
their settings, and the operating system and its settings (including
the registry). This information is required if you need to perform
disaster recovery on a computer that has become unresponsive.
Backup Stores, Catalog Files, and Snapshots
The Backup process “packages” backed up files, saving them
in a proprietary format, and storing them in a Backup Store,
complete with encryption, and compression, if specified. Files in
a Backup Store cannot be accessed via the Desktop; they can only
be accessed through the Regen interface.
Regen keeps track of files in a Backup Store using a special type of
index called a Catalog File. At each backup session, Regen takes
a Snapshot of the source volume. The Snapshot is a record of all
the files on the source at the time of the backup. While only the
most recent Snapshot is saved in the Catalog file, Regen saves every
Snapshot ever taken to the destination (i.e. your Toshiba Drive). In
this way Regen can keep track of all versions of backed-up files in
a very organized and efficient manner. Because all previous versions
of backed up files are saved in the Backup Store, you have the
ability to restore a file from any point in the backup history.
41
Page 42

Regen allows you to setup and maintain several distinct Backup
Stores. This means you can have several PushButton Drives
connected to your computer.
Duplicate
The Duplicate operation is well suited for users who need quick
access to their backed up files and who do not need to backup
their operating system or application files.
The Duplicate operation is essentially a “smart” copying process.
Files and folders from the source volume (e.g. your computer’s
startup disk) are copied to your Toshiba Drive. Duplicated files and
folders can be viewed and utilized just like the original source files
because a duplicated file is a straight copy of the source file in its
native format.
The Duplicate process saves space by overwriting old versions of
duplicated files with the latest versions from the source volume.
It also saves time by giving you the option to run incremental
duplicates, where only files that are new or that have been
modified since the last Duplicate was run are copied.
Because duplicated files are copied in their native formats, you
cannot apply compression or encryption. However, this also
means you can restore duplicated files simply by dragging and
dropping them from the destination back to the source.
42
Page 43

Synchronization (Sync)
Synchronization, or Sync, is one of the most powerful features
available with PushButton Backup. While providing the benefits
of data redundancy, the Sync operation also synchronizes the data
on two or more hard drives, so you can work from multiple drives
without the need to keep track of what files are on which drives.
Let’s say you routinely do work at both the office and at home.
At the office you store your files on your office PC but you
maintain copies of your files on your Toshiba Drive that you
use when working from home. Using the Sync operation, you
can synchronize your office PC with your Toshiba Drive. When
you run a Sync operation, Regen compares the files stored on
your synched drives. It finds the files that are new or have been
modified since the last Sync operation—no matter which drive
they may be on—and copies the modified and new files to each
synched drive as needed.
43
Page 44

Installing Regen backup software
System Requirements
Regen should be installed on a PC that meets the following
minimum requirements:
• Windows 2000 or XP (Home, Pro, Pro x64, Media Center)
• 800 MHz Intel Pentium class processor
• 128 MB RAM
In order to backup a volume, Regen must be run under a user
account that has full access privileges to that volume. We
recommend that you create an account that has Administrator
access to all resources before installing Regen.
44
Page 45

Installing Regen
1. Save your open files and exit any running applications.
2. Insert the Toshiba CD in your CD/DVD drive. The CD will launch
automatically and you will see the Toshiba splash screen. If the CD is
already in the drive, locate the CD icon in My Computer. Right-click
the icon and select AutoPlay.
3. In the splash screen, select “Install Regen.”
4. Follow the instructions in the Regen Setup Wizard to install the
software on your computer.
Uninstalling Regen
Option 1:
1. Open the Control Panel (Start > Control panel).
2. Double-click the Add or Remove Programs icon.
3. Select the Regen application from the program list.
4. Click the Change/Remove button to uninstall the application.
Option 2:
Go to Start > All Programs > OnSpec Regen > Uninstall Regen.
45
Page 46

Setting up and using PushButton Backup
Before you begin…
Before you can set up your Toshiba Drive for PushButton Backup you
must make sure of the following:
1) The Drive must be connected, powered on, and mounted to
your computer. If you have not yet installed the Drive, follow the
instructions in "Drive Installation & Setup".
2) The Regen application must be installed on your computer. If you
have not yet installed Regen, go to "Installing Regen" in this chapter.
When you setup PushButton Backup, you create either a Backup
Store, a Duplicate Store or a Sync Store depending on the backup
strategy that best suits your needs. Each type of store has settings
and options that you can customize.
This chapter provides separate instructions for setting up
a Backup Store, a Duplicate Store, and a Sync Store.
46
Page 47

Setting up a Backup Store
1. Press the PushButton on the Drive.
Regen will launch and the PushButton Backup Wizard will appear.
Click Next to proceed to the next screen.
2. PushButton Backup Wizard>Enter a device name
Enter a device name in the text field, and click Next.
We recommend that you use the same name that you gave your Drive
during the naming process. Regen uses the device name to identify your
PushButton Drive and keep track of backups. This feature is especially useful
if you have more than one PushButton Drive connected to your computer.
3. PushButton Backup Wizard>Select a backup type
Select Backup and click Next.
4. Backup Wizard>What do you want to backup?
Select what you want to backup. The choices are: My Computer;
Documents and Settings, and; Let me select. Descriptions of each are
provided on screen. Make your selection and click Next.
If you chose Let me select, in the next screen you will see a list of
disks mounted to your computer. You can either select a drive or
a folder on the drive as the source volume.
47
Page 48

To select a drive as the source volume, check the box next to the
drive and click Next.
To select a folder as the source volume, you must first define that
folder as a volume. To do so, select a drive and click the Show Folders
button. A new window will appear, listing the folders currently on
the drive. To define an existing folder, select the folder and click
the Define button. To create and define a new folder, click the New
Folder button. Type a name for the folder in the Create New Folder
window, and click OK. The new folder will now appear in the folder
list. Select the new folder and click the Define button.
The folder you just defined as a volume will now be listed under
the drive. Check the box next to the folder to select it as the source
volume, and click Next.
5. Backup Wizard>What file types do you want to backup?
Specify the file types. If you select All Files, all of the file types in the
File Type list will be included. To specify only specific file types, click
Let me select. Make your selection(s) and click Next.
6. Backup Wizard>Select the destination disk for your backups.
Your Toshiba Drive will be listed in the window by the name you
assigned earlier. Select the Drive. If you want to create a folder on
the Drive as the location for the Backup Store, click the Browse button.
48
Page 49

In the Backup Store location window, select the Toshiba Drive and
click the Open button. Click the New Folder button; type a name for
the folder in the Create New Folder window and click OK. The new
folder will now appear in the Backup Store location window. Select
the folder and click OK. In the Location for Backups field, you will see
the path to the folder. Click Next.
7. Backup Wizard>When do you want to run the Backup?
Select Run the Backup now and Click Next.
8. Backup Wizard>Name this Backup Store
Enter a name for this Backup Store. It may be helpful to use a name
that indicates what you are backing up, such as "My Computer
Backups" or "My Music Backups" etc. After you enter a Backup Store
name, click Next.
9. Backup Wizard>Would you like to compress your backed up
files?
Choose whether you want to compress your data, and whether you
want to use the Verification option. Explanations are given on screen.
Make your selections and click Next.
49
Page 50

10. Backup Wizard>Enable security for this Backup Store?
Please Note: Do not confuse Regen's security feature with the Drive's own
Password Security. They have two separate and distinct functions. While
Password Security protects the Drive itself from unauthorized access, the
security feature in Regen protects only the data in the Backup Store.
If you do not want to enable security, select None from the drop-
down menu and click Next.
If you want to enable security, you have three choices:
• Password only (no encryption)
• Simple Crypt encryption (faster)
• AES-128 encryption (most secure)
After you make your selection, type a password in the Password field.
Type the password again in the Confirm field. You must also create
a password hint to help you remember the password in case you forget.
In the box that says "Would you like Regen to remember your
password…" it does not matter if you check Yes or No since you will
not be running scheduled Backups.
11. Backup Wizard>Backup Summary
Review the Backup Summary. To make any changes to the settings
for this Backup Store, click the Back button, or else click Finish to run
the Backup. You will be able to view the Backup process in the Log
Monitor window that appears.
50
Page 51

From now on, whenever you want to run a Backup, simply press the
PushButton. Regen will automatically launch, run the Backup and
close.
Setting up a Duplicate Store
1. Press the PushButton on the Drive.
Regen will launch and the PushButton Backup Wizard will appear.
Click Next to proceed to the next screen.
2. PushButton Backup Wizard>Enter a device name:
Enter a device name in the text field, and click Next.
We recommend that you use the same name that you gave your Drive
during the naming process. Regen uses the device name to identify your
PushButton Drive and keep track of backups. This feature is especially
useful if you have more than one PushButton Drive connected to your
computer.
3. PushButton Backup Wizard>Select a backup type:
Select Duplicate and click Next.
51
Page 52

4. Duplicate Wizard>What do you want to Duplicate?
You can select a disk or a folder as the source volume.
To select a disk as the source volume, select the disk in the window
and click Next.
To select a folder as the source volume, you must first define that
folder as a volume. To do so, select a disk and click the Show Folders
button. The Browse window will appear, listing the folders currently
on the disk. To define an existing folder, select the folder and click
the Define button. To create and define a new folder, click the New
Folder button. Type a name for the folder in the Create New Folder
window, and click OK. The new folder will now appear in the folder
list. Select the new folder and click the Define button.
The folder you just defined as a volume will now be listed under the
drive. Select the folder and click Next.
5. Duplicate Wizard>What file types do you want to duplicate?
Specify the types of files you want to duplicate. If you select All Files,
all of the file types in the File Type list will be included. To specify
only specific file types, click Let me select. Make your selection(s) and
click Next.
6. Duplicate Wizard>Where do you want the duplicate to be stored?
Your Toshiba Drive will be listed in the window by the name you
assigned earlier. You can either define the entire Drive as the
52
Page 53

destination volume, or you can define a folder on the Drive as the
destination volume.
To define the Drive as the destination volume, select the Drive in the
window and click Next.
To define a folder as the destination volume, select the Drive and
click the Show Folders button. The Browse window will appear. Click
the New Folder button; enter a folder name in the Create New Folder
window, and click OK. The new folder will now appear in the folder
list of the Browse window. Select the new folder and click Define.
The folder that you defined will now appear under the Toshiba Drive.
Select the folder.
In the Duplicate Method box, select a Duplicate Method. Most users
will want to use "Duplicate only new and/or modified files from the
source." If you select the other option, the entire source volume
will over-write the entire destination volume at every Duplicate
session. If you are duplicating a large amount of data, duplicating
the entire source volume every time will take much longer than only
duplicating new or modified files.
Click Next.
7. Duplicate Wizard>When do you want to run the Duplicate?
Select Run the Duplicate now and Click Next.
53
Page 54

8. Duplicate Wizard>Duplicate Summary
Enter a name for the Duplicate Store in the text field.
Review the Duplicate Summary. To make any changes to the settings,
click the Back button, or else click Finish to run the Duplicate.
You will be able to view the Duplicate process in the Log Monitor
window that appears. When the Duplicate is complete, Regen will close.
From now on, whenever you want to run a Duplicate, simply press
the PushButton. Regen will automatically launch, run the Duplicate
and close.
Setting up a Sync Store
1. Press the PushButton on the Drive.
Regen will launch and the PushButton Backup Wizard will appear.
Click Next to proceed to the next screen.
2. PushButton Backup Wizard>Enter a device name:
Enter a device name in the text field, and click Next.
We recommend that you use the same name that you gave your Drive
during the naming process. Regen uses the device name to identify your
PushButton Drive and keep track of backups. This feature is especially useful
if you have more than one PushButton Drive connected to your computer.
54
Page 55

3. PushButton Backup Wizard>Select a backup type:
Select Synchronization and click Next.
4. Sync Wizard>What do you want to Synchronize?
You can select a disk or a folder as the source volume.
To select a disk as the source volume, select the disk in the window
and click Next.
To select a folder as the source volume, you must first define that
folder as a volume. To do so, select a disk and click the Show Folders
button. The Browse window will appear, listing the folders currently
on the disk. To define an existing folder, select the folder and click
the Define button. To create and define a new folder, click the New
Folder button. Type a name for the folder in the Create New Folder
window, and click OK. The new folder will now appear in the folder
list. Select the new folder and click the Define button.
The folder you just defined as a volume will now be listed under the
disk. Select the folder and click Next.
55
Page 56

5. Sync Wizard>What file types do you want to Synchronize?
Specify the types of files you want to synchronize. If you select
All Files, all of the file types in the File Type list will be included.
To specify only specific file types, click Let me select. Make your
selection(s) and click Next.
6. Sync Wizard>Where do you want the synchronized files to be
stored?
Your Toshiba Drive will be listed in the window by the name you
assigned earlier. You can either define the entire Drive as the destination
volume, or you can define a folder on the Drive as the destination volume.
To define the Drive as the destination volume, select the Drive in the
window and click Next.
To define a folder as the destination volume, select the Drive and
click the Show Folders button. The Browse window will appear. Click
the New Folder button; enter a folder name in the Create New Folder
window, and click OK. The new folder will now appear in the folder
list of the Browse window. Select the new folder and click Define.
The folder that you defined will now appear under the Toshiba Drive.
Select the folder.
In the Sync Method box, select a Sync Method and then click Next.
56
Page 57

7. Sync Wizard>When do you want to run the Sync?
Select Run the Sync now and click Next.
8. Sync Wizard>Sync Summary
Enter a name for the Sync Store in the text field.
Review the Sync Summary. To make any changes to the settings,
click the Back button, or else click Finish to run the Synchronization
process.
You will be able to view the progress in the Log Monitor window
that appears. When the Sync is complete, Regen will close.
From now on, whenever you want to run a Sync, simply press the
PushButton. Regen will automatically launch, run the Sync and close.
57
Page 58

Using other Functions in Regen
Page 59

Other Backup Operations
Archive
The Archive operation is used for the one-time backup of files that
you no longer need to access on a regular basis but that you need
to store indefinitely, such as finished projects, photo archives,
important document, etc.
Archive is similar to Backup in that files are saved to a Backup
Store, but Archive is not tied to any specific Backup Store. You can
archive files to any available Backup Store; you can also create
a new Backup Store for the archive.
With Archive you have the option to erase files from the source
volume once they are copied to the Backup Store.
How to run an Archive operation
1. Click the Archive icon in the Backup group. The Archive Files
window will open displaying a list of mounted disks (volumes).
2. To select a disk as the source volume, check the box next to the
disk and click Next.
To use a folder as the source volume, you must first define that
folder as a volume. To do so, select a disk and click the Sub-volume
button. The Browse window will appear, listing the folders currently
59
Page 60

on the drive. To define an existing folder, select the folder and click
the Define button. To create and define a new folder, click the New
Folder button. Type a name for the folder in the Create New Folder
window, and click OK. The new folder will now appear in the folder
list. Select the new folder and click the Define button.
The folder you just defined as a volume will now be listed under the
disk in the Source Selection window. Check the box next to the folder
to select it as the source volume, and click OK.
The name of the source volume now appears next to the Sources
button in the Archive Files window.
3. Click the Destination button. In the Backup Stores window select
a Backup Store from the Stores list. To create a new Backup Store for
this archive, click the Create New… button.
When you're finished, click OK. The name of the Backup Store now
appears next to the Destination button in the Archive Files window.
4. Click the Options button. Follow the instructions on screen and
click OK. The option you selected now appears next the Options
button.
5. Click the Archive button to run the Archive.
60
Page 61

Disaster Recovery
Although complete system failures are rare, they do happen.
Regen provides an easy way to restore a computer that has been
rendered inoperable due to a major system malfunction, such as
those caused by a hard disk crash or virus attack.
Disaster Recovery can only be performed on a computer if the
computer's entire startup disk was backed up.
The following steps will show how to prepare your computer for
Disaster Recovery.
1. Click on the Disaster Recovery icon in the Backup group. The
Disaster Recovery window will open, click Next
2. In the next screen, select a Backup Store and Snapshot. The
Backup Store must contain a backup of the entire startup disk. Click
Next.
3. Review the Disaster Recovery Summary. This information will be
used by Regen to prepare a Disaster Recovery guide. Click the Finish
button to view the guide.
4. Print the Disaster Recovery guide and keep it in a safe place. You
will need this guide to recover your computer should disaster strike.
61
Page 62

Restore
About the Restore operations
The Restore operations are used to retrieve files from a Backup
Store in the event that the source files are lost or corrupted.
There are three types of Restore operations: Full Restore; File
Restore, and; Find Files.
Full Restore is used to restore all of the files in a Backup Store
(i.e. restore the entire source volume).
File Restore lets you restore selected files and folders from
a Backup Store.
Find Files lets you search for and restore files based on specific
criteria that you define. Find Files can be very helpful when
you need to restore a file whose name and location you can't
remember because you may have backed it up long ago.
Each operation allows you to select a specific Snapshot in the
Backup Store. This allows you to restore files from any point in the
backup history.
62
Page 63

How to Use Full Restore
1. Click the Full Restore icon in the Restore group.
2. The Full Restore Wizard will launch. Click Next.
3. Full Restore Wizard>What Backup Store do you want to restore from?
The list of available Backup Stores will be displayed. Select the
Backup Store and click Next.
4. Full Restore Wizard>Which Snapshot do you want to restore from?
The available Snapshots will be displayed. Select the one you want
to restore from and click Next.
5. Full Restore Wizard>Where do you want to restore?
Select Original location to restore the files to the source volume.
Select New location if you want to restore the files to another
volume.
If you select New location, you can select a disk or a folder as the
Restore destination.
To select a disk as the Restore destination, select the disk in the
window and click Next.
63
Page 64

To select a folder as the Restore destination, you must first define
that folder as a volume. To do so, select a disk and click the Show
Folders button. The Browse window will appear, listing the folders
currently on the disk. To define an existing folder, select the folder
and click the Define button. To create and define a new folder, click
the New Folder button. Type a name for the folder in the Create New
Folder window, and click OK. The new folder will now appear in the
folder list. Select the new folder and click the Define button.
The folder you just defined as a volume will now be listed under the
drive. Select the folder and click Next.
6. Full Restore Wizard>When do you want to restore?
Select "Run the Restore now" and click Next.
7. Full Restore Wizard>Restore Summary
Review the Restore Summary. To make any changes to the settings,
click the Back button, or else click Finish to run the Restore process.
64
Page 65

How to Use File Restore
1. Click the File Restore icon in the Restore group.
2. The File Restore Wizard will launch. Click Next.
3. File Restore Wizard>What Backup Store do you want to restore
from?
The list of available Backup Stores will be displayed. Select the
Backup Store and click Next.
4. File Restore Wizard>Which Snapshot do you want to restore from?
The available Snapshots will be displayed. Select the one you want
to restore from and click Next.
5. Full Restore Wizard>Where do you want to restore?
Select Original location to restore the files to the source volume.
Select New location if you want to restore the files to another
volume.
If you select New location, you can select a disk or a folder as the
Restore destination.
To select a disk as the Restore destination, select the disk in the
window and click Next.
65
Page 66

To select a folder as the Restore destination, you must first define
that folder as a volume. To do so, select a disk and click the Show
Folders button. The Browse window will appear, listing the folders
currently on the disk. To define an existing folder, select the folder
and click the Define button. To create and define a new folder, click
the New Folder button. Type a name for the folder in the Create New
Folder window, and click OK. The new folder will now appear in the
folder list. Select the new folder and click the Define button.
The folder you just defined as a volume will now be listed under the
drive. Select the folder and click Next.
6. File Restore>Select Files to restore
Click the Select Files Button to select the files you want to restore.
The Select Files window will launch. Expand the folders in the left-
hand window as needed to find the folder(s) you are looking for.
Click the box next to a folder to mark the folder for restore and to
view a list of enclosed files and folders in the right-hand window.
If you mark a folder, by default all of the folder's contents will also
be marked for restore. You can mark or unmark individual files and
folders in the right-hand window to select only the specific files/
folders you want to restore.
After you make your selection(s), click OK. You will be taken back to
the File Restore Wizard. Click Next to continue.
66
Page 67

7. File Restore>Replace matching files?
Follow the instructions on screen and click Next.
8. File Restore Wizard>Restore Summary
Review the Restore Summary. To make any changes to the settings,
click the Back button, or else click Finish to run the Restore process.
Using Find Files
1. Click the Find Files icon in the Restore group. The Searching and
Retrieval window will open.
2. Click the Source button. The Select Files window will open
displaying the available Backup Store(s).
3. Click on a Backup Store to view a list of available Snapshots in the
Snapshots list. Select a Snapshot by checking the box next to the Snapshot's
name, then click OK. Back in the Searching and Retrieval window, the name
of the Backup Store will now appear next to the Source button.
4. Click the Destination button. In the window that appears, you can
select a disk or a folder as the Restore destination.
67
Page 68

To select a disk as the Restore destination, select the disk and click OK.
To select a folder as the Restore destination, select a disk and click
Open. The window will display the folders currently on the disk. To
select an existing folder as the destination, select the folder from the
list and click OK. To create a new folder for the destination, click the
New Folder button. Type a name for the folder in the Create New
Folder window, and click OK. The new folder will now appear in the
folder list. Select the new folder and click OK.
Back in the Searching and Retrieval window, the disk/path will be
displayed next to the Destination button.
5. Click on the Searching button. The Selectors window will open.
Selectors are essentially lists of conditions you employ to aid in your
file search.
Using the All Files Selector
By default, the Selector Name window contains the All Files Selector.
You use the All Files Selector if you want to include all of the files in
a Backup Store in your search.
To use the All Files Selector, select it and click OK. In the Searching
and Retrieval window "All Files" will be displayed next to the
Searching button. Next to the Files Chosen button, the Total Files and
Total Size will be displayed.
68
Page 69

Click the Files Chosen button. In the Select Files window, you can
search through the available files and folders. Expand a folder to
view it's contents. Click the box next to a folder or file to mark it for
retrieval. When you are done, click OK.
The Total Files and Total Size will now reflect the file(s) you have chosen.
Click the Retrieve button to retrieve the selected files.
Creating Customized Selectors
You can create your own Selectors to search for files. Each Selector
that you create can contain up to three Condition Sets. You create
Condition Sets by editing the Condition Settings of the available
Condition Types.
6. If the Selectors window is not already open, click the Searching
button to open it. In the Selectors Window, click the New button.
You will be prompted to enter a name for the Selector. Enter a name
and click OK.
7. A new window with name of the Selector will appear. Click the
Add button to launch the Condition window. This window allows
you to select the Condition types and their corresponding Condition
Settings.
Expand the Universal folder in the Condition Type window. There are
three Condition types available: Attributes; Name, and; Size.
69
Page 70

Select a Condition Type and edit its Condition Settings accordingly.
When you are done editing the Condition Settings, click OK. The
Condition Set will now be included in the Condition Sets list.
To add another Condition Set, click the Add button and run trough
the process again.
When you are finished adding Condition Sets, close the window.
The new Selector will now appear in the Selector Name list in the
Selectors window. Click on the Selector and then click OK.
Next to the Files Chosen button you will see the Total Files that
match the criteria of the search, as defined by the Selector.
Click the Files Chosen button. In the Select Files window, you can
search through the available files and folders. Expand a folder to
view it's contents. Click the box next to a folder or file to mark it for
retrieval. When you are done, click OK.
The Total Files and Total Size will now reflect the file(s) you have
chosen.
Click the Retrieve button to retrieve the selected files.
70
Page 71

Tools
PushButton Manager
The PushButton Manager provides a central location from which
to view, edit, or delete the Store(s) used for PushButton Backup.
While you can only have one Store per PushButton Drive, you
can use the PushButton Manager to manage the Stores of several
Drives. To launch PushButton Manager select its icon in the Tools
group.
Repair Catalog
Use the Repair Catalog tool to rebuild a Catalog file that has been
corrupted or lost. The Catalog will be rebuilt from a Backup Store.
1. Click the Repair Catalog icon in the Tools group.
2. You will be prompted to select an option for Catalog repair. Select
Disk and click OK.
3. Next you will be asked "Which disk(s) do you want Regen to check
for Backup Store data files?" Select All Disks to specify the disks that
Regen will search. Select Last Disk to have Regen search only the last
disk used for backups.
71
Page 72

4. In the next window, select a disk and click OK. A new window will
appear displaying the Backup Store(s) on the disk. Select a Backup
Store and click OK.
5. Next, you will be asked if there are more disks included in this
Backup Store. After you make your selection the Catalog file will be
rebuilt.
Manage Stores
The Manage Stores tool provides comprehensive set of tools to
manage your Backup, Duplicate and Sync Stores from a central
location.
How to Use Manage Stores
1. Click on the Manage Stores icon in the Tools group.
2. Select a Store by clicking on one of the tabs near the top of the
Manage Stores window. A complete list of Stores of that type will be
displayed in the Stores window.
To view a Store's properties, select the Store and click the Properties
button.
To remove a Store that you no longer need, click the Forget… button.
You will be give the option to permanently remove the Store.
72
Page 73

To create a new Store…
1. Select the tab for the kind of Store you want to create but do not
select a Store in the Stores window.
2. Click the Create New… button. The Backup/Duplicate/Sync Wizard
will launch. Follow the instructions in the wizard to set up the new
Store.
Selectors
Selectors are used in the Find Files operation. Use the Selectors
Tool to quickly edit, delete or to create Selectors.
To create a Selector
1. Click on the Selectors icon in the Tools group.
2. In the Selectors Window, click the New button. You will be prompted
to enter a name for the Selector. Enter a name and click OK.
3. A new window with name of the Selector will appear. Click the
Add button to launch the Condition window. This window allows
you to select the Condition types and their corresponding Condition
Settings.
Expand the Universal folder in the Condition Type window. There are
three Condition types available: Attributes; Name, and; Size.
Select a Condition Type and edit its Condition Settings accordingly.
73
Page 74

When you are done editing the Condition Settings, click OK. The
Condition Set will now be included in the Condition Sets list.
To add another Condition Set, click the Add button and run trough
the process again.
When you are finished adding Condition Sets, close the window.
The new Selector will now appear in the Selector Name list in the
Selectors window. The next time you use the Find Files operation,
the new Selector will be available for your files search.
74
Page 75

Maintenance, Help & Other Information
Page 76

Maintaining your Drive
Defragmenting and Optimizing a Hard Drive
A hard drive stores data on disks called platters. Each platter surface
is divided into concentric tracks. Each track is divided into sections
called sectors. A group of sectors, called a cluster, is the smallest unit
of data storage space on a platter.
When data is saved to a new hard drive, it is written to the disk(s)
contiguously, one cluster after another. As old files are erased,
clusters that were previously occupied become available for new
data. However, there may not be enough space for the drive to
write a new file in a contiguous set of clusters. The drive uses the
clusters it can; if more are needed it searches for empty clusters in
other locations on the disk(s). The result is a fragmented file.
Over time, as more and more files are erased and new files are
written, the data on the disk(s) becomes increasingly fragmented.
The more fragmented a disk becomes, the longer it takes to read
and write data because the Drive’s read/write mechanism spends
more time moving back and forth over the platter searching for
fragmented data or free clusters.
We recommend using defragmentation and optimization software
to maximize storage efficiency and optimize performance.
Optimization software re-organizes files so that the files you
76
Page 77

use most often can be accessed more quickly. Defragmentation
(defragging) software consolidates file fragments into more
efficient contiguous clusters.
Quite often, defragging and optimization functions will be
included in one software package, such that both operations are
performed at the same time.
Examining and Repairing a Hard Drive
There are a number of reasons why a hard drive may become
damaged or the data may become corrupted. Regular examination
of your Toshiba Drive with a quality diagnostic and repair utility is the
best way to prevent irreparable disk damage and avoid data loss.
There are several software packages available that offer a suite of
disk management and repair utilities, including defragmentation,
optimization, repair, erased file recovery and more. How often you
should perform maintenance depends on how much you use the
Drive. Generally speaking, it’s a good idea to examine a hard drive
for damage at least once a month.
Some maintenance and repair operations can take quite some
time, so it’s wise to perform hard drive maintenance at times when
you don’t need to use your computer. The good news is that, for
the most part, you won’t need to tend to the computer while the
software performs these operations.
77
Page 78

Protecting Your Data from Viruses
One of the greatest threats to your data comes from viruses.
These nasty-sounding creatures are insidious programs created by
malefactors. Some viruses are designed to render your computer
inoperable; others will erase files. The worst part is you may not be
aware that your system has been infected until it’s too late.
The most common way computers catch viruses is by
downloading and sharing infected files via e-mail and other
Internet services. You can protect your data against viruses by
using ant-virus software. These programs are designed to seek
out and eradicate or quarantine viruses before they can cause
damage. There are a number of good anti-virus programs on the
market.
Cleaning the Drive Case
Always unplug all cables from the Drive before cleaning it. Clean
the Drive using a soft, dry cloth. For tough dirt, dampen a soft
cloth with some neutral detergent diluted in 5 to 6 parts water;
wipe off the dirt, then wipe off the Drive with a dry cloth. Do not
use alcohol, paint thinner, or other chemicals; they may damage
the case materials.
78
Page 79

Frequently Asked Questions
Q: Can I use my Drive on two computers at the same time?
A: No. If you connect the Drive to two computers at the same
time, you may damage the Drive and the computers.
Q: Do I have to format my Toshiba Drive prior to using it?
A: No, the Drive was formatted at the factory.
Q: What is the difference between FAT32 and NTFS?
A: FAT32 is an older and more compatible file system but it has
certain limitations, such as file size (maximum 4 GB). NTFS is more
secure and has fewer limitations.
Q; Where are the USB drivers for Windows XP, 2000?
A: They are built into the respective operating systems. However,
you may need to upgrade your Windows OS. See “System
Requirements.”
Q: Can I connect the Drive to a USB expansion card?
A: Yes, but you may need to update the software/firmware for the
card. We recommend you check with the card’s manufacturer for
the latest updates.
79
Page 80

Q: What is the cache (buffer) size of my Toshiba Portable Drive?
A: 2 MB.
Q: Can you make the Drive bootable?
A: No. Windows does not support the use of external hard drives
as boot volumes.
Q: Why doesn’t the Drive need a fan?
A: Heat generation can be an issue with some hard drives, which is
why they often have big, noisy fans. Toshiba Drives are engineered
to be more efficient and to generate so little heat that they do not
need fans. The result is near-silent operation.
Q: Why is the capacity of my Drive as shown in Windows lower
than the Drive’s actual stated capacity?
A: The difference is mostly due to the way operating systems
measure disk capacity, as compared to the method used by hard
drive manufacturers. Hard Drive manufacturers have always used the
decimal (base 10) method, where 1GB = 1,000 MB = 1,000,000 KB =
1,000,000,000 bytes. Operating systems use the binary (base 2)
method, where 1GB = 1,024 MB = 1,048,576 KB = 1,073,741,824 bytes.
For this reason, a hard drive with a capacity of 120 GB (decimal) will
appear in Windows with a capacity of around 112 GB (binary). It
must also be noted that operating systems reserve a portion of
80
Page 81

hard disk space for their own purposes. The actual amount can vary,
depending on the operating system.
Hard Drive manufacturers use the decimal method because it is
simpler and less confusing to consumers who may not be familiar
with the base 2 number system. Manufacturers of operating systems
do not need to concern themselves with this issue, so they use the
more traditional binary method.
Q: Can I use my Toshiba Drive to copy an operating system from
one computer to another?
A: You cannot transfer an installed operating system to another
computer or hard drive simply by copying the operating system’s
files. In order to install an operating system you’ll need to follow
the manufacturer’s installation procedure. If you wish to transfer
the contents of one startup (boot) disk to another, you will first
need to properly install the operating system on the target disk.
You can then use your Toshiba Drive to transfer your files (except
the operating system).
Q: Does Toshiba provide data recovery services?
A: Toshiba does not provide data recovery services.
81
Page 82

Q: What are the specific file formats that Regen can backup?
A: The supported file format for each type of file are:
• Picture: JPG, JPEG, BMP, TIF, GIF, PSD
• Music: MP3
• Movies: AVI, WMV, WM9, and MPG
• Office Documents: DOC, XLS, XLA, PPT, PDF, MDB, and RTF
Q: After Standby or Hibernation, I receive an error message
from Sonic DLA?
A: If Sonic DLA and the data back-up software Regen is installed
on your computer, error messages may occur in connection
with Hibernation and Suspend. To prevent this, remove the hard
disk drive from Standby or Hibernation via the “Remove Safely”
function.
82
Page 83

Troubleshooting
My computer does not recognize the Drive.
A: This could be due to several reasons:
• Make sure all of your connections are secure;
• If you are attempting to run the Drive off of bus power, you may
need to use two USB ports. See the chapter "Installing the Drive"
for details and instructions;
• If using an add-on card, make sure it is working properly, and
update the software/firmware;
• If using Windows XP, make sure you have Service Pack 1 or later.
If using Windows 2000, make sure you have Service Pack 4 or later.
When I leave my computer idle for a while and come back, the
Drive won’t work properly.
A: The most likely cause is that your computer is going into Sleep
mode. The immediate solution is to restart your computer. To prevent
this problem from re-occurring, go into your Power Settings/Energy
Saver and set it to where it never goes into Sleep mode.
The Drive feels warm when powered on. Is this dangerous?
A: When in operation, the Drive may feel quite warm to the touch.
This is normal.
83
Page 84

The Drive gives me a “Device cannot start. Code (10).”
A: This is a power issue. Make sure your connections are secure.
The other possibility is that the Drive has malfunctioned and
requires service.
I don’t see my Toshiba Drive in My Computer, but it does
appear in Device Manager.
A: Right-click on My Computer. Select Manage in the pop-up menu.
In the Computer Management window, select Storage, then select
Disk Management. In the Disk Management window, you should see
a list of available storage devices. Look for the disk that has a capacity
closest to your Toshiba Drive. Right-click on the right-hand box; in
the pop-up menu select Delete Partition. Once you do this, it will say
“Online” & “Unallocated.” Right-click on the box and select Create New
Partition in the pop-up menu. When the Partition Wizard appears,
select Primary Partition and click on Next. You will see a default value
for the Toshiba Drive; click Next. You will then see a Drive letter (you
can change this Drive letter if you wish); click Next. You will then be
asked to format the Toshiba Drive.
When I try to format my Drive I get the message: “Could not
complete format.”
A: This problem can occur if you are using an expansion card to
connect the Toshiba Drive. Plug the Drive into a data port on your
84
Page 85

computer and try the format again. You may also come across this
error if you try to format the Drive using the FAT32 file system.
After I connected the Drive to my PC, I got the following alert
message: “Hi-Speed USB device plugged into non-Hi-Speed
USB Hub.” What does this mean?
A: You will get this alert message if you plugged the Drive into
a USB port that only support USB 1.1. This is fine, except your
Toshiba Drive will operate USB 1.1 speeds (up to 12 Mbps).
The Drive seems to be operating slower than 480 Mbps.
A: First, in order to reach USB 2.0 speeds, you need a connection
that supports USB 2.0. If the connection only supports USB 1.1 the
Drive will operate at USB 1.1 speeds (up to 12 Mbps). The Drive
will auto-sense the speed of your USB port and adjust between
USB 1.1 and USB 2.0. Second, 480 Mbps is the maximum speed of
USB 2.0 devices. Actual data transfer rates will vary depending on
a number of factors, including available CPU resources.
85
Page 86

Following information is only for EU-member states:
The use of the symbol indicates that this product may
not be treated as household waste. By ensuring this
product is disposed of correctly, you will help prevent
potential negative consequences for the environment
and human health, which could otherwise be caused
by inappropriate waste handling of this product. For
more detailed information about recycling of this
product, please contact your local city office, your household waste
disposal service or the shop where you purchased the product.
Working environment
This product was designed to fulfill the EMC (Electromagnetic
Compatibility) requirements for “residential, commercial and light
industry environments”.
Please refer to the operator’s instructions of the product this option
is being connected to for further advices regarding intended
working environment. If there are advices unlisted, please refer to
the following general advices.
The following environments are not approved:
• Industrial Environments (e.g. environments where a mains
voltage of 380V three-phase is being used).
86
Page 87

In the following environments the use of this product can be
restricted:
• Medical Environments: This product is not certified as a medical
product according to the Medical Product Directive 93/42/EEC.
• Vehicle Environments: Please read the operator’s manual of the
vehicle manufacturer for further restrictions of use.
• Aircraft Environments: Please follow the advices of the flight
personnel regarding restrictions of use.
Any consequences resulting from the use of this product in working
environments that are not approved or the use is restricted are not
the responsibility of Toshiba Corporation. The consequences of the
use of this product in those working environments may be:
• Interference with other devices or machines in the nearby
surrounding area
• Malfunction of, or data loss from, this product caused by
disturbances generated by other devices or machines in the
nearby surrounding area
Furthermore, for general safety reasons, the use of this product in
environments with explosive atmospheres is not permitted.
87
Page 88

CE compliance
• This product is labelled with the CE Mark in accordance with the
related European Directives, notably CE Directive 93/68/EEC and
Electromagnetic Compatibility Directive 89/336/EEC.
• CE marking under the trade brand TOSHIBA is the responsibility
of TOSHIBA EUROPE GmbH, Hammfelddamm 8, 41460 Neuss,
Germany, phone +49-(0)-2131-158-01.
• For a copy of the related CE Declaration of Conformity please
refer to the following website: http://epps.toshiba-teg.com
88
Page 89

Notices
Copyrights
copyrighT © 2006 Toshiba. all righTs reserved. no par T of This publicaTion may be reproduced
sTored in a reTrieval sysTem, or TransmiTTed in any form or by any means, elecTronic, mechanical
phoTocopying, recording or oTherwise, wiThouT The prior wriTTen consenT of Toshiba.
trademarks
The Toshiba name and iTs logos are regisTered Trademarks of Toshiba. all oTher Trademarks menTioned
or appearing in This documenT are The properTy of Their respecTive owners.
Changes
The maTerial in This documenT is for informaTion only and subjecT To change wiThouT noTice. while
reasonable efforTs have been made in The preparaTion of This documenT To assure iTs accurac y,
Toshiba assumes no liabiliTy resulTing from errors or omissions in This documenT, or from The use
of The informaTion conTained herein. Toshiba reserves The righT To make changes or revisions in The
producT design or The producT manual wiThouT reservaTion and wiThouT obligaTion To noTify any
person of such revisions and changes.
Federal CommuniCations Commission (FCC)
Radio FRequency inteRFeRence Statement
This equipmenT has been TesTed and found To comply wiTh The limiTs for a class b digiTal device,
pursuanT To parT 15 of The fcc rules.
canada compliance Statement
This class a digiTal apparaTus meeTs all requiremenTs of The canadian inTerference-causing
equipmenT regulaTions.
89
Page 90
Transportables
Hochgeschwindigkeits-USB 2.0Festplattenlaufwerk
BENUTZERHANDBUCH
Für die Modelle:
PX1275E-1G04
PX1276E-1G06
PX1277E-1G08
PX1278E-1G10
PX1279E-1G12
Page 91

Inhalt
Erste Schritte
7 Willkommen
8 Vorsichtsmaßnahme
10 Packungsinhal
11 Systemanforderunge
Kennenlernen des transportablen
Toshiba 2,5-Zoll-Festplattenlaufwerks
13 Transportables Toshiba 2,5-Zoll-Laufwerk auf einen Blick
14 Toshiba 2,5-Zoll-Laufwerk – Ausführliche Beschreibun
14 Hochgeschwindigkeits-USB 2.
16 CD + Secure HDD und Password Securit
18 PushButton™ Backu
20 Synchronization (Sync, Synchronisierung
20 Bus-Betrieb
21 Verwendung des Toshiba-Laufwerks im Bus-Betrie
22 Im Betrieb austauschbar (Hot-Pluggable
22 Lüfterloser Aufba
23 Technische Date
t
n
n
n
g
0
y
p
)
b
)
u
Page 92

Installation und Einrichtungdes Laufwerks
25 Installation des Laufwerks
25 Mitgeliefertes USB-Kabel
27 Anschließen des Laufwerks an den Compute
27 Spannungsversorgung über den Bu
29 Password Securit
29 Erstmalige Einrichtung von Password Securit
30 Deaktivieren von Password Securit
32 Aktivieren von Password Securit
33 Passwort vergessen
35 Benennen des Laufwerk
36 Neuformatierung des Laufwerk
y
:
r
s
y
y
y
?
s
s
Verwendung des Laufwerks
40 Durchführen von Routineaufgaben
40 Öffnen von Dateien und Ordner
40 Kopieren von Dateien und Ordnern auf das Laufwer
41 Beenden der Bereitstellung und Entfernen des Laufwerk
n
PushButton™ Backup
44 Allgemeine Informationen zu PushButton™ Backup
44 Datensicherungsoperationen in PushButton Backu
45 Backup
k
s
p
Page 93

46 Duplicate (Duplizieren)
47 Synchronization (Sync, Synchronisierung
49 Installation der Datensicherungssoftware Rege
50 Installation von Rege
50 Deinstallation von Regen
52 Einrichtung und Verwendung von PushButton Backu
53 Einrichtung eines Backup Stor
59 Einrichtung eines Duplicate Stor
63 Einrichtung eines Sync Stor
n
e
e
e
)
n
Verwendung anderer Funktionen in Regen
69 Sonstige Datensicherungsoperationen
69 Archivierung
69 Durchführung eines Archivierungsvorgang
71 Disaster Recover
73 Wiederherstellun
73 Allgemeine Informationen zu den Wiederherstellungsoperatione
74 Full Restore (Vollständige Wiederherstellung)
76 File Restore (Dateiwiederherstellung)
80 Find Files (Dateisuche)
85 Tool
85 Repair Catalog (Katalogreparatur
86 Manage Stores (Speicherbereichsverwaltung
87 Selectors (Auswahlkriterien
s
y
g
)
)
s
)
p
n
Page 94

Wartung, Hilfe und sonstige Informationen
91 Wartung des Laufwerks
92 Überprüfung und Reparatur eines Festplattenlaufwerk
93 Schutz der Daten vor Vire
94 Reinigen des Laufwerkgehäuse
95 Häufig gestellte Frage
99 Fehlerbehebun
103 Die folgenden Informationen gelten nur für
die Mitgliedstaaten der EU
103 Arbeitsumgebung
105 CE-Konformität
106 Notize
n
g
n
s
n
:
s
Page 95

Erste Schritte
Page 96

Willkommen
Willkommen und vielen
Dank, dass Sie sich für ein
transportables ToshibaFestplattenlaufwerk
entschieden haben.
Ihr Toshiba-Festplattenlaufwerk zeichnet sich durch eine qualitativ
hochwertige Ausführung, fortschrittliche Technik und modernste
Datenspeicherungstechnologie aus, damit Ihnen sein hohes
Leistungspotenzial und zuverlässiger, benutzerfreundlicher
Betrieb viele Jahre zur Verfügung stehen.
Dieses Handbuch enthält wichtige Informationen zur
ordnungsgemäßen Installation, Nutzung und Wartung Ihres
Toshiba-Laufwerks. Lesen Sie dieses Handbuch daher sorgfältig
durch und bewahren Sie es für eine spätere Verwendung auf.
In diesem Handbuch verwendete Symbole:
Dieses symbol kennzeichnet
einen WarnhinWeis oDer
eine Wichtige information.
D
ieses symbol kennzeichnet
hilfreiche tipps unD anDere
nützliche informationen.
7
D
as usb-logo
kennzeichnet Wichtige
i
nformationen, Die sich
speziell auf usb beziehen.
Page 97

Vorsichtsmaßnahmen
Bitte beachten Sie die folgenden Vorsichtsmaßnahmen.
Das Nichtbefolgen kann zu einer Beschädigung des Geräts,
Datenverlusten und zum Verfall der Garantie führen.
• Wenn Sie dieses Gerät für allgemeine Speicherzwecke verwenden,
sollten Sie unbedingt die auf dem Gerät gespeicherten Dateien
regelmäßig sichern. Toshiba ist nicht verantwortlich für Datenverluste
und -beschädigungen und schließt jegliche Rückvergütung für
Daten- oder Dateiverluste aus.
• Versuchen Sie auf keinen Fall, das Gerät zu öffnen,
auseinanderzubauen oder anderweitig zu verändern.
• Schützen Sie das Gerät vor Feuchtigkeit und Nässe.
• Stellen Sie niemals mit Flüssigkeiten gefüllte Behälter auf das
Gerät. Dies kann zu Schäden am Gerät führen und das Risiko eines
elektrischen Schlags, Kurzschlusses, Feuers oder Personenschadens
erhöhen.
• Das Gerät darf nur bei Temperaturen zwischen 5 °C und 40 °C
betrieben werden. Bei der Lagerung des Geräts darf ein
Temperaturbereich von –20 °C bis 60 °C nicht unter- oder
überschritten werden.
• Verwenden Sie niemals einen Wechselstromadapter oder ein
Netzkabel eines Fremdanbieters.
8
Page 98

• Setzen Sie das Gerät niemals Erschütterungen, Stürzen oder
anderen Schlageinwirkungen aus.
• Stellen Sie das Gerät niemals anders als in diesem Handbuch
beschrieben auf.
• Trennen Sie Kabel erst ab, nachdem die Bereitstellung des Geräts
aufgehoben und es ausgeschaltet wurde.
9
Page 99

Packungsinhalt
Transportables Toshiba-Festplattenlaufwerk
USB-Kabel
Software-CD
QuickStart-Handbuch
10
Page 100

Systemanforderungen
Voraussetzungen:
• Prozessor mit mindestens 233 MHz (Pentium, Celeron, AMD o. ä.)
• Windows 2000 oder XP (Home Edition, Professional,
Professional x64 Edition, Media Center Edition)
• Zwei freie USB 2.0- oder USB 1.1-Anschlüsse
Benutzer von Windows XP benötigen Service Pack 1 oder höher.
Benutzer von Windows 2000 benötigen Service Pack 4 oder höher.
Um Windows-Updates herunterzuladen, rufen Sie die
Website www.microsoft.com auf und klicken Sie auf den
Link „Microsoft Update“.
Wenn Sie das Laufwerk an einen USB 1.1-Anschluss am Computer
oder an einem Hub anschließen, arbeitet das Laufwerk mit
USB 1.1-Geschwindigkeiten (bis zu 12 Mbit/s).
11
 Loading...