

Page 1
Scan Operator’s Guide
Version 1.0.6
Your guide to using the Scan functions of your TOSHIBA
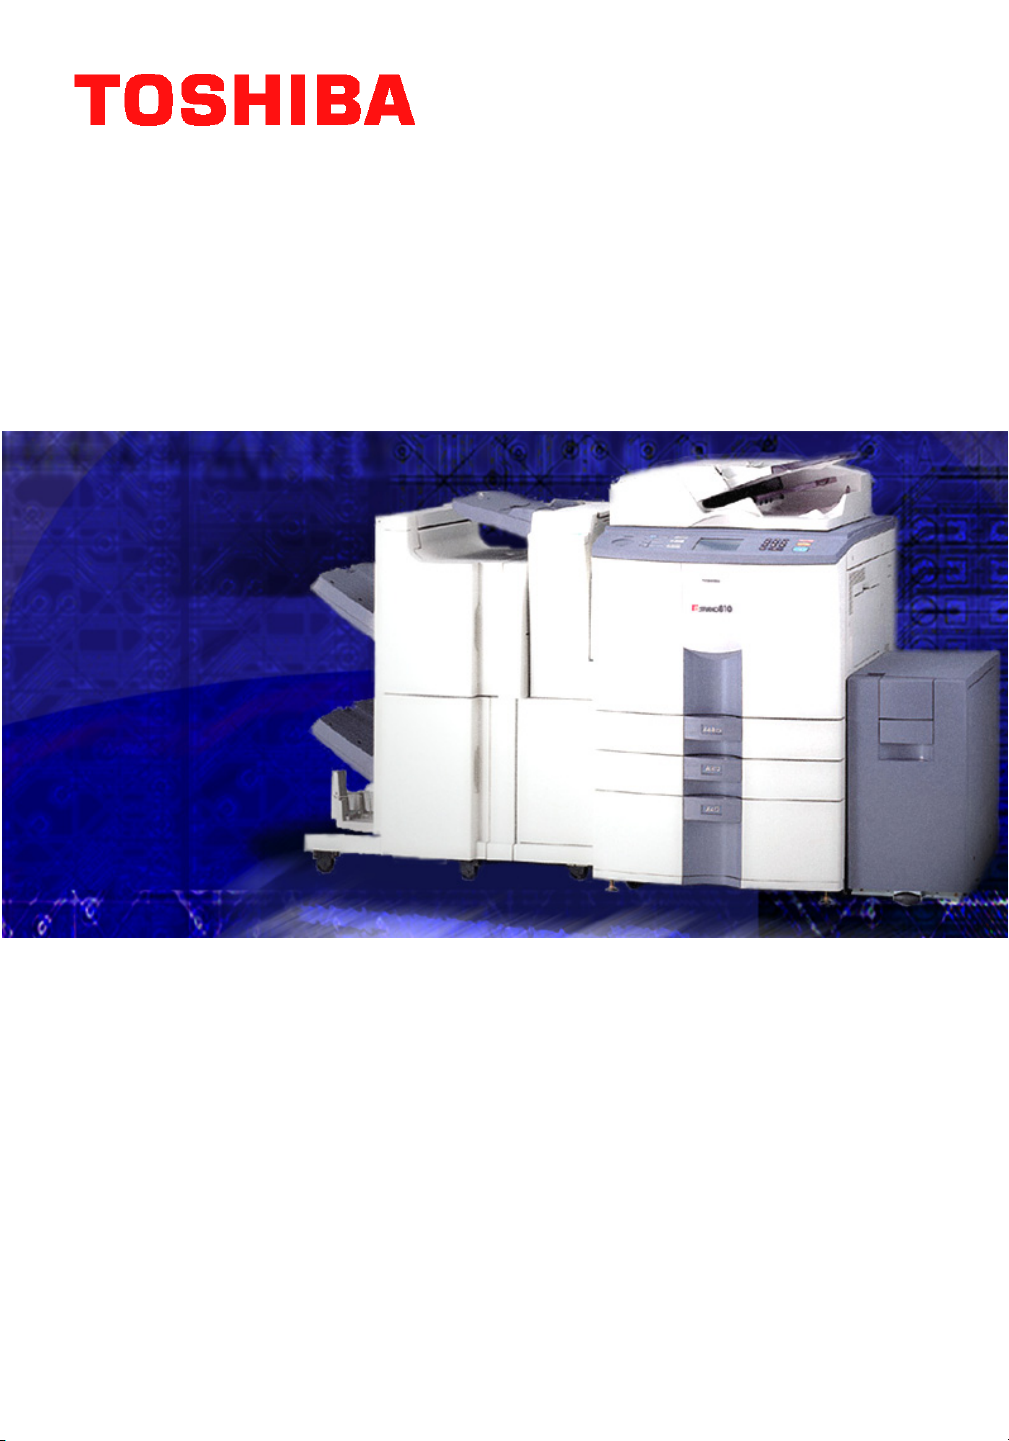
e-STUDIO550-810 Electronic Document Processing System
Page 2

TABLE OF CONTENTS
PREFACE . . . . . . . . . . . . . . . . . . . . . . . . . . . . . . . . . . . . . . . . . . . . . . . . . . . 6
Introduction. . . . . . . . . . . . . . . . . . . . . . . . . . . . . . . . . . . . . . . . . . . . . . . . . 7
Intended Audience . . . . . . . . . . . . . . . . . . . . . . . . . . . . . . . . . . . . . . . . . . . 7
Who Should Read This Guide? . . . . . . . . . . . . . . . . . . . . . . . . . . . . . . . 7
Scope. . . . . . . . . . . . . . . . . . . . . . . . . . . . . . . . . . . . . . . . . . . . . . . . . . . 7
Using this Guide . . . . . . . . . . . . . . . . . . . . . . . . . . . . . . . . . . . . . . . . . . . . . 8
Styles and Conventions . . . . . . . . . . . . . . . . . . . . . . . . . . . . . . . . . . . . . 8
How this Guide is Organized . . . . . . . . . . . . . . . . . . . . . . . . . . . . . . . . . 9
Terms and Concepts . . . . . . . . . . . . . . . . . . . . . . . . . . . . . . . . . . . . . .10
Supplemental References . . . . . . . . . . . . . . . . . . . . . . . . . . . . . . . . . . . . 11
FEATURES AND FUNCTIONS . . . . . . . . . . . . . . . . . . . . . . . . . . . . . . . . . .13
Features and Functions . . . . . . . . . . . . . . . . . . . . . . . . . . . . . . . . . . . . . . 14
Software Components . . . . . . . . . . . . . . . . . . . . . . . . . . . . . . . . . . . . . 14
System Components . . . . . . . . . . . . . . . . . . . . . . . . . . . . . . . . . . . . . . . . 15
Scanning Modes . . . . . . . . . . . . . . . . . . . . . . . . . . . . . . . . . . . . . . . . .15
Scan Destinations . . . . . . . . . . . . . . . . . . . . . . . . . . . . . . . . . . . . . . . . 16
System Requirements . . . . . . . . . . . . . . . . . . . . . . . . . . . . . . . . . . . . . . . 16
SCANNING OVERVIEW . . . . . . . . . . . . . . . . . . . . . . . . . . . . . . . . . . . . . . .17
About Scan Templates . . . . . . . . . . . . . . . . . . . . . . . . . . . . . . . . . . . . . . . 18
Scan Transfer Agents . . . . . . . . . . . . . . . . . . . . . . . . . . . . . . . . . . . . . 18
Setting Up. . . . . . . . . . . . . . . . . . . . . . . . . . . . . . . . . . . . . . . . . . . . . . . . . 19
GL-1020 Scan Operator’s Guide 2
Page 3

Creating a template . . . . . . . . . . . . . . . . . . . . . . . . . . . . . . . . . . . . . . .19
Scanning a Document. . . . . . . . . . . . . . . . . . . . . . . . . . . . . . . . . . . . . . . .20
Cancelling a Scan Job . . . . . . . . . . . . . . . . . . . . . . . . . . . . . . . . . . . . .20
Sending a Fax. . . . . . . . . . . . . . . . . . . . . . . . . . . . . . . . . . . . . . . . . . . . . .20
SETUP . . . . . . . . . . . . . . . . . . . . . . . . . . . . . . . . . . . . . . . . . . . . . . . . . . . . 22
Using Scan Transfer Agents . . . . . . . . . . . . . . . . . . . . . . . . . . . . . . . .23
Setting up Templates . . . . . . . . . . . . . . . . . . . . . . . . . . . . . . . . . . . . . .24
Using Public Templates. . . . . . . . . . . . . . . . . . . . . . . . . . . . . . . . . . . . . . .25
Viewing Public Templates. . . . . . . . . . . . . . . . . . . . . . . . . . . . . . . . . . .25
Private Groups and Templates . . . . . . . . . . . . . . . . . . . . . . . . . . . . . . . . .25
Creating Private Groups. . . . . . . . . . . . . . . . . . . . . . . . . . . . . . . . . . . .25
Editing Private Group Information . . . . . . . . . . . . . . . . . . . . . . . . . . . .26
Setting or Changing Passwords for Private Groups. . . . . . . . . . . . . . .27
Deleting Private Groups . . . . . . . . . . . . . . . . . . . . . . . . . . . . . . . . . . . .28
Creating Private Templates . . . . . . . . . . . . . . . . . . . . . . . . . . . . . . . . .28
Editing Private Templates. . . . . . . . . . . . . . . . . . . . . . . . . . . . . . . . . . .29
Setting or Changing Passwords for Private Templates . . . . . . . . . . . .30
Deleting Private Templates . . . . . . . . . . . . . . . . . . . . . . . . . . . . . . . . .30
Configuring Agent Settings . . . . . . . . . . . . . . . . . . . . . . . . . . . . . . . . . . .32
Configuring the Send to File Agent . . . . . . . . . . . . . . . . . . . . . . . . . . .32
Configuring the Send to Email Agent . . . . . . . . . . . . . . . . . . . . . . . . . .32
Configuring the Send to iFax Agent . . . . . . . . . . . . . . . . . . . . . . . . . . .33
Configuring the Send to TopAccessComposer Agent . . . . . . . . . . . . .34
Configuring the FTP Agent. . . . . . . . . . . . . . . . . . . . . . . . . . . . . . . . . .35
SCANNING DOCUMENTS . . . . . . . . . . . . . . . . . . . . . . . . . . . . . . . . . . . . . 36
Introduction . . . . . . . . . . . . . . . . . . . . . . . . . . . . . . . . . . . . . . . . . . . . . . . .37
Placing the Originals . . . . . . . . . . . . . . . . . . . . . . . . . . . . . . . . . . . . . . . . .37
Using the Automatic Document Feeder . . . . . . . . . . . . . . . . . . . . . . . .37
Placing the Originals on the Glass . . . . . . . . . . . . . . . . . . . . . . . . . . . .38
Scanning Procedures . . . . . . . . . . . . . . . . . . . . . . . . . . . . . . . . . . . . . . . .39
Scanning the Originals . . . . . . . . . . . . . . . . . . . . . . . . . . . . . . . . . . . . .39
Selecting a Group for Private Scanning. . . . . . . . . . . . . . . . . . . . . . . .40
Selecting a Template . . . . . . . . . . . . . . . . . . . . . . . . . . . . . . . . . . . . . .41
Scanning from the Glass . . . . . . . . . . . . . . . . . . . . . . . . . . . . . . . . . . .43
ADF Scanning . . . . . . . . . . . . . . . . . . . . . . . . . . . . . . . . . . . . . . . . . . .43
Handling Paper Jams . . . . . . . . . . . . . . . . . . . . . . . . . . . . . . . . . . . . . . . .44
Continuing after Clearing a Jam. . . . . . . . . . . . . . . . . . . . . . . . . . . . . .44
Cancelling a Job after Clearing a Jam . . . . . . . . . . . . . . . . . . . . . . . . .44
Error Handling . . . . . . . . . . . . . . . . . . . . . . . . . . . . . . . . . . . . . . . . . . .44
Scan Parameter Settings . . . . . . . . . . . . . . . . . . . . . . . . . . . . . . . . . . . . .45
Scan Agent Settings in the Control Panel. . . . . . . . . . . . . . . . . . . . . . . . .46
Scan and Agent Settings Summary Screens. . . . . . . . . . . . . . . . . . . .46
Scan Settings and TWAIN Agent Settings Summary. . . . . . . . . . . . . .47
Scan Settings and FileShare Agent Settings Summary. . . . . . . . . . . .47
Scan Settings and TopAccessComposer Agent Settings Summary . . 48
GL-1020 Scan Operator’s Guide 3
Page 4

Scan Settings and Email Agent Settings Summary . . . . . . . . . . . . . . 48
Scan Settings and iFax Agent Settings Summary. . . . . . . . . . . . . . . . 49
Scan Settings and FTP Agent Settings Summary. . . . . . . . . . . . . . . . 49
Working with the Address Book . . . . . . . . . . . . . . . . . . . . . . . . . . . . . . . . 51
Editing the List of Recipients . . . . . . . . . . . . . . . . . . . . . . . . . . . . . . . . 51
Displaying Address Book Groups . . . . . . . . . . . . . . . . . . . . . . . . . . . . 51
Searching the Address Book. . . . . . . . . . . . . . . . . . . . . . . . . . . . . . . . 52
User Search Results Screen . . . . . . . . . . . . . . . . . . . . . . . . . . . . . . . . 53
Scanning Destinations . . . . . . . . . . . . . . . . . . . . . . . . . . . . . . . . . . . . . . . 54
Scanning to TWAIN . . . . . . . . . . . . . . . . . . . . . . . . . . . . . . . . . . . . . . . 54
Scanning to File. . . . . . . . . . . . . . . . . . . . . . . . . . . . . . . . . . . . . . . . . . 54
Scanning to Email . . . . . . . . . . . . . . . . . . . . . . . . . . . . . . . . . . . . . . . . 55
Scanning to Internet-Fax. . . . . . . . . . . . . . . . . . . . . . . . . . . . . . . . . . . 55
Scanning to TopAccessComposer . . . . . . . . . . . . . . . . . . . . . . . . . . . 56
Scanning to FTP . . . . . . . . . . . . . . . . . . . . . . . . . . . . . . . . . . . . . . . . . 56
RETRIEVING DOCUMENTS. . . . . . . . . . . . . . . . . . . . . . . . . . . . . . . . . . . . 57
Retrieving Scanned Documents (TWAIN) . . . . . . . . . . . . . . . . . . . . . . . . 58
Selecting the GL-TWAIN Driver. . . . . . . . . . . . . . . . . . . . . . . . . . . . . . 58
Finding the Document Folder . . . . . . . . . . . . . . . . . . . . . . . . . . . . . . . 59
Retrieving the document Using the GL-TWAIN Driver . . . . . . . . . . . . 59
Viewing Document Details. . . . . . . . . . . . . . . . . . . . . . . . . . . . . . . . . . 60
Updating the Document List . . . . . . . . . . . . . . . . . . . . . . . . . . . . . . . . 60
Deleting a Document. . . . . . . . . . . . . . . . . . . . . . . . . . . . . . . . . . . . . . 60
More Ways to Retrieve Documents . . . . . . . . . . . . . . . . . . . . . . . . . . . . . 60
Retrieving Using Another Application . . . . . . . . . . . . . . . . . . . . . . . . . 60
Retrieving Using TopAccessComposer. . . . . . . . . . . . . . . . . . . . . . . . 61
Dialog Box Reference . . . . . . . . . . . . . . . . . . . . . . . . . . . . . . . . . . . . . . . 62
Folder Setting Dialog Box Reference . . . . . . . . . . . . . . . . . . . . . . . . . 62
Main TWAIN Dialog Box Reference . . . . . . . . . . . . . . . . . . . . . . . . . . 63
Document Information Dialog Box Reference . . . . . . . . . . . . . . . . . . . 65
MONITORING SCAN JOBS . . . . . . . . . . . . . . . . . . . . . . . . . . . . . . . . . . . . 67
Managing Scan Jobs . . . . . . . . . . . . . . . . . . . . . . . . . . . . . . . . . . . . . . . . 68
Viewing Current Scan Jobs . . . . . . . . . . . . . . . . . . . . . . . . . . . . . . . . 68
Viewing the Scan Jobs Log . . . . . . . . . . . . . . . . . . . . . . . . . . . . . . . . . 69
Viewing the Scan Message Log . . . . . . . . . . . . . . . . . . . . . . . . . . . . . 69
Deleting Scan Jobs . . . . . . . . . . . . . . . . . . . . . . . . . . . . . . . . . . . . . . 69
Scan Administration . . . . . . . . . . . . . . . . . . . . . . . . . . . . . . . . . . . . . . 69
BASIC TROUBLESHOOTING . . . . . . . . . . . . . . . . . . . . . . . . . . . . . . . . . . 70
Error Messages . . . . . . . . . . . . . . . . . . . . . . . . . . . . . . . . . . . . . . . . . . . . 71
Twain Driver Errors . . . . . . . . . . . . . . . . . . . . . . . . . . . . . . . . . . . . . . . . . 74
Cannot Find the GL-1020 . . . . . . . . . . . . . . . . . . . . . . . . . . . . . . . . . . 74
Cannot Access TWAIN Folder. . . . . . . . . . . . . . . . . . . . . . . . . . . . . . . 74
TWAIN Driver Dialog Does Not Appear. . . . . . . . . . . . . . . . . . . . . . . . 74
Cannot Acquire Document . . . . . . . . . . . . . . . . . . . . . . . . . . . . . . . . . 74
4 GL-1020 Scan Operator’s Guide
Page 5

B/W Image Reversed. . . . . . . . . . . . . . . . . . . . . . . . . . . . . . . . . . . . . .75
Cannot Acquire Multi-Page Document. . . . . . . . . . . . . . . . . . . . . . . . .75
Cannot Open a Password Protected Folder or Document. . . . . . . . . .75
SCAN TAB REFERENCE. . . . . . . . . . . . . . . . . . . . . . . . . . . . . . . . . . . . . . 76
Scan Jobs Page . . . . . . . . . . . . . . . . . . . . . . . . . . . . . . . . . . . . . . . . . . . .77
Scan Jobs List . . . . . . . . . . . . . . . . . . . . . . . . . . . . . . . . . . . . . . . . . . .77
Controls . . . . . . . . . . . . . . . . . . . . . . . . . . . . . . . . . . . . . . . . . . . . . . . .77
Templates Pages . . . . . . . . . . . . . . . . . . . . . . . . . . . . . . . . . . . . . . . . . . .78
Templates List Page. . . . . . . . . . . . . . . . . . . . . . . . . . . . . . . . . . . . . . .78
New Template Page . . . . . . . . . . . . . . . . . . . . . . . . . . . . . . . . . . . . . . .79
Addresses Popup. . . . . . . . . . . . . . . . . . . . . . . . . . . . . . . . . . . . . . . . .84
Edit Template Page . . . . . . . . . . . . . . . . . . . . . . . . . . . . . . . . . . . . . . .84
Template Groups Pages . . . . . . . . . . . . . . . . . . . . . . . . . . . . . . . . . . . . . .84
Template Groups Page. . . . . . . . . . . . . . . . . . . . . . . . . . . . . . . . . . . . .84
New Template Group . . . . . . . . . . . . . . . . . . . . . . . . . . . . . . . . . . . . . .85
GLOSSARY OF TERMS . . . . . . . . . . . . . . . . . . . . . . . . . . . . . . . . . . . . . . 86
INDEX . . . . . . . . . . . . . . . . . . . . . . . . . . . . . . . . . . . . . . . . . . . . . . . . . . . . . 90
GL-1020 Scan Operator’s Guide 5
Page 6

PREFACE
The Scan Operator’s Guide explains how to use the scanning
functions you can perform with the TOSHIBA e-STUDIO550-810
Electronic Document Processing System. It also provides
instructions for retrieving scanned jobs, and for using the
TopAccess web-based utility to set up and monitor scan jobs.
This preface introduces the scanning functions and defines the
scope and audience of this guide.
GL-1020 Scan Operator’s Guide 6
Page 7

INTRODUCTION
INTENDED AUDIENCE
The TOSHIBA e-STUDIO550-810 Electronic Document
Processing System is a state-of-the-art combination of network
scanner, printer and digital copier with walk-up, email and iFax
capability.
The network scan feature enables you to perform these functions:
n Scan a document from the copier
n Save the scanned image to a file on the GL-1020 controller or
on a file server
n Send the scanned image to one or more Email recipient(s)
n Fax the scanned image to one or more recipients via Internet-
Fax
n Save the scanned image in a TWAIN folder for use by
TWAIN-compliant applications
n Send the scanned image to an FTP server
n Create scan templates to initiate scan jobs
Who Should Read This Guide?
This Scan Operator’s Guide is intended for people using the scan
functions. It provides detailed instructions for end users on:
n using the digital copier’s control panel to scan documents
n configuring and using the GL-TWAIN Driver software
n using TopAccess to set up and monitor scan jobs
For network administrator functions, refer to the Administrator’s
Guide.
This Scan Operator’s Guide is not intended for digital copier
service technicians or operators. For information on using and
maintaining the TOSHIBA e-STUDIO550/650/810 digital copier,
refer to the Toshiba Operator’s Manual for Copying Functions or
contact your Toshiba authorized dealer for support.
Scope
This guide assumes that you are familiar with the software
applications you use to create and modify documents. Document
setup or application-specific functions are not covered in this
manual.
GL-1020 Scan Operator’s Guide 7
Page 8

USING THIS GUIDE
Styles and Conventions
This guide employes several typographic styles to visually
convey information. The following table lists the styles and
illustrates their use.
Styles and Conventions Used In This Guide
STYLE USAGE DESCRIPTION EXAMPLE
SANS
SERIF
FONT, ALL CAPS
All keys, fields, and function
tabs on the copier’s LCD touch
Press ADMIN.
screen.
Bold, sans serif
font, initial caps
Courier
<Brackets
enclosing
variable text>
Italic, blue,
underlined
Light blue and
underline
Names of buttons, controls,
tab, and menu options (items).
Screen messages and text you
type in a field or at the
command line.
Variable text that is to be
replaced with specific text
applicable to your network.
Cross-reference to additional
information.
Indicates text that is linked on
a web page. This text is not
linked in the documentation.
Double-click Properties and click
Services.
From the Start menu, choose
> TOSHIBA
GL-DocMon.
GL-Client Software >
Programs
Type the following command:
setup.exe
Enter GL<device name>, where
device name is the Microsoft
Computer Name assigned to the
GL-1020 controller.
See, Scanning on page 25 for the steps
required to scan images.
Click the Install Software link at the
bottom of the page.
8 GL-1020 Scan Operator’s Guide
Page 9

How this Guide is Organized
Chapter 1, Features and Functions
components of the GL-Scan feature in the TOSHIBA
e-STUDIO550-810 Electronic Document Processing System.
introduces the capability and
Chapter 2, Scanning Overview
and use the GL-Scan feature.
Chapter 3, Setup
Mode) to set up private scan templates, to organize them into
groups, and to configure the scan transfer agents.
Chapter 4, Scanning Documents
using the copier’s control panel.
Chapter 5, Retrieving Documents
retrieving scanned images
Chapter 6, Monitoring Scan Jobs
TopAccess to monitor your scan jobs.
Chapter 7, Basic Troubleshooting
issues you may be experiencing.
Chapter 8, Scan Tab Reference
on each page of the Scan tab in TopAccess.
explains how to use TopAccess (End User
describes in outline how to set up
explains how to scan images
summarizes the procedures for
summarizes how to use
summarizes how to resolve
describes the fields and controls
GL-1020 Scan Operator’s Guide 9
Page 10

Terms and Concepts
The following table defines the key terms and concepts used in
this guide. These terms may be used differently by other
companies or in other product guides. In addition to the
terminology defined here, refer to the Glossary at the end of this
manual, which defines more acronyms and industry terminology.
Key Terms and Concepts Defined
TERM DEFINITION
Electronic Document
Processing System
GL-1020 controller This component of the TOSHIBA e-STUDIO550-810 Electronic
Local operations Those operations that affect the controller’s or digital copier’s
Network printing
Printer driver Software installed on a client workstation, enabling application
This system consists of the TOSHIBA e-STUDIO550/650/810
digital copier connected to the GL-1020 controller. It provides
the convenience of walk-up copying, network printing, and
scanning using the same device.
Document Processing System provides network connectivity
between the client workstations and the digital copier
connected to it. Also referred to as the “controller,”, “printer” or
“device.”
functionality and are performed on the physical device, usually
from the copier’s LCD touch screen. An example of local
operation is releasing a Private Print job by entering its
document identification number at the copier’s control panel.
Printing from a Windows
workstation to the GL-1020 controller, with the output produced
on the connected TOSHIBA e-STUDIO550/650/810 digital
copier.
programs to interact with the printer without having to concern
themselves with specific printer requirements. The GL-1020
printer drivers provide extended document print, layout and
assembly functions that few applications supply.
®
, Macintosh, or Unix client
Remote operations Those operations that affect the controller’s or digital copier’s
functionality, but are performed from a client or administrator
workstation across the network. An example of a remote
operation is printing a document from your workstation that is
output on the digital copier.
Walk-up functions Those operations performed from the control panel of the
digital copier. They include standard copying functions,
monitoring network print jobs and management functions.
10 GL-1020 Scan Operator’s Guide
Page 11

SUPPLEMENTAL REFERENCES
In addition to the information in this guide, the following
reference materials are available to assist you in using and
optimizing your GL-1020 controller:
TOSHIBA Operator’s Manual for Copying Functions
This manual describes the digital copier functions: how to make
copies, maintain the copier and troubleshoot mechanical and
copying problems.
GL-1020 Quick Start Guide
The purpose of this guide is to introduce the GL-1020 controller,
summarize installation and operational procedures, and describe
system requirements and specifications. A printed copy of this
manual ships with the GL-1020 controller.
GL-1020 Administrator’s Guide
You can find the .pdf version of this guide on the e-STUDIO
GL-1020 Admin’s Client CD-ROM. It is intended for the
network administrator and contains detailed information for
installing, configuring, and troubleshooting your GL-1020.
GL-1020 Operator’s Guide (Basic)
This guide provides detailed instructions for installing and using
the GL-1020 printer drivers and the job monitoring utility,
GL-DocMon, to print to TOSHIBA’s e-STUDIO550-810
Electronic Document Processing System. It also describes how to
use the web-based application TopAccess to monitor and manage
print jobs. You can find the .pdf version of this guide on the
e-STUDIO GL-1020 Client CD-ROM
GL-1020 TopAccessComposer Operator’s Guide
You can find the .pdf version of this guide on the e-STUDIO
GL-1020 Admin’s Client CD-ROM and on the e-STUDIO
GL-1020 Client CD-ROM. It contains information on storing,
managing, editing and printing documents using the web-based
tool, TopAccessComposer.
Application-SpecificOnline Help
All of the e-STUDIO550-810 Electronic Document Processing
System software and drivers come with application-specific
online help. Click
Help or choose the Contents and Index options
GL-1020 Scan Operator’s Guide 11
Page 12

from the Help menu. For web-based help in TopAccess, click the
help link.
12 GL-1020 Scan Operator’s Guide
Page 13
FEATURES AND FUNCTIONS
The TOSHIBA e-STUDIO550-810 Electronic Document
Processing System provides network scanning capability with a
wide range of options but requires a minimum of time spent setting
up scan templates.
This chapter describes the functionality of the GL-Scan feature and
its components.
GL-1020 Scan Operator’s Guide 13
Page 14

FEATURES AND FUNCTIONS
The GL-Scan feature allows you to:
n Create scan templates for general purpose and specific use
n Store scanned image data on the controller, and retrieve it via
the network using the GL-TWAIN Driver application
n Transfer scanned image data to a shared folder on the
Windows
as the controller
n Send scanned image data as a file attachment to one or more
recipients using the Email function
n Send scanned image data to one or more recipients using the
Internet-Fax function
n Send scanned image data to an FTP server
n Receive and print Internet-Fax jobs
n Setup and maintain Scan features using the TopAccess web-
based utility
n Access the LDAP server when you initiate Send to Email or
iFax jobs from the copier’s control panel
®
operating system file server on the same network
n Access the LDAP server when you create a template for Send
to Email or iFax jobs
Software Components
The GL-Scan feature uses several utilities that are supplied with
the TOSHIBA e-STUDIO550-810 Electronic Document
Processing System. This system consists of the copier and the
controller, a computer located inside the copier.
Printer Drivers
Printer drivers enable devices, such as the GL-1020 to receive
information for printing from an application program. The
GL-1020 comes with two printer drivers, GL-PCL6 and
GL-PSL3. Each provides document print, layout and assembly
functions that are not available in many applications.
GL-TWAIN Driver
This software component enables you to import scanned images
into TWAIN-compliant applications.
GL-DocMon
14 GL-1020 Scan Operator’s Guide
Page 15

GL-DocMon allows you to monitor all jobs and control your own
current jobs. With the Notification feature enabled, GL-DocMon
saves your time by notifying you of printing events, such as paper
cassette open, before you walk over to the copier and find that
your job did not print. For more information, refer to the
Operator’s Guide (Basic) on the Client CD-ROM.
TopAccess
TopAccess, an embedded web-based device-management tool,
allows you to monitor and manage your print jobs over the
Internet using Netscape Navigator or Internet Explorer.
TopAccess includes TopAccessComposer, which is a web-based
document editor/organizer for the system. It enables you to view,
edit, merge, and store post printed and scanned documents on the
controller. TopAccessComposer provides two predefined system
folders called Department and Public, and creates a private folder
for each user account. For further details, refer to the
TopAccessComposer Operator’s Guide or online Help.
For full details on using TopAccess, refer to the Operator’s Guide
(Basic) on the Client CD-ROM or the Administrator’s Guide on
the Admin’s Client CD-ROM.
SYSTEM COMPONENTS
You can use the network scanner functions within the Windows
operating system network environment.
For scanning images to the network, the copier offers a choice of
scanning modes and scan destinations.
Scanning Modes
There are two modes available for scanning documents:
Public Scan
In this mode, you use scan templates from the public template
group. The administrator sets up and maintains the public
templates. Besides general purpose templates which are available
to all users connected to the GL-1020 controller, the public group
may include password-protected templates for specific purposes.
®
Caution: There are limitations on the number of pages, file size and
resolution imposed by the maximum memory capacity of your
computer. Please refer to the machine’s hardware manual to
confirm these limitations.
GL-1020 Scan Operator’s Guide 15
Page 16

Private Scan
In this mode, you use scan templates that are specific to a
department (Accounting, Human Resources, Research and
Development, etc.) or to a project. You maintain these templates
in private template groups. You can assign a password to the
template group. You can also assign passwords to individual
templates.
Scan Destinations
There are six transfer options:
n Send to TWAIN saves scanned data as a TWAIN-compliant
image on the GL-1020 controller.
n Send to File offers two destinations: you can save to the
controller or to a file server.
n Send to Email automatically sends scanned image data to a
list of designated email addresses.
n Send to iFax automatically faxes scanned image data to a list
of recipients.
n Send to TopAccessComposer saves scanned image data in
folders in the TopAccessComposer storage area.
n Send to FTP sends scanned image data to an FTP server.
SYSTEM REQUIREMENTS
You can use the TopAccess web-based utility from a Windows®,
Macintosh or Unix operating system environment. The following
browsers are supported:
n Internet Explorer 5.0 or higher for Windows
n Netscape Navigator 4.75 or higher for Windows
n Netscape Navigator 4.78 or higher for Macintosh operating
n Netscape Navigator 4.76 or higher for Unix operating
Caution: The network scanner function requires the TCP/IP
protocol to be installed and configured on the network. For further
information, refer to the Administrator’s Guide.
®
operating
systems, Unix or Macintosh operating systems
®
operating
systems
systems
systems
16 GL-1020 Scan Operator’s Guide
Page 17

SCANNING OVERVIEW
The GL-Scan feature of the TOSHIBA e-STUDIO550-810
Electronic Document Processing System enables you to scan
documents and transfer the image file to various destinations. It
also enables you to send Internet faxes (iFax).
This chapter describes in outline how to set up and use the GL-Scan
feature. Subsequent chapters provide detailed instructions for each
task.
GL-1020 Scan Operator’s Guide 17
Page 18

ABOUT SCAN TEMPLATES
Before it can scan a document, the Electronic Document
Processing System needs information about:
n The original document—Are the pages assorted sizes? Does
it contain text or photos or both?
n The scanning process—Do you want single or double-sided
scan? High or low resolution? Do you need to have the image
rotated?
n The image file—What format do you need (for example,
TIFF or PDF)? Where do you want to send the file?
To save entering all this information every time you use the scan
function, you use a predefined scan template.
The administrator creates and maintains a number of scan
templates on behalf of other users. This set of templates is called
the public template group, because it is accessible to all users
who are connected to the GL-1020 controller. Its default name is
Public Scan.
Note: Some of the templates in the public group may have
passwords assigned to them.
In addition, you can define your own scan templates. Like public
templates, these private templates are organized in groups. You
can set a password for the template, for the private template
group, or for both. If you don’t set a password anyone who uses
the system will be able to access your scan template.
Scan Transfer Agents
Each template uses a scan transfer agent to send the scanned
image file to its destination. There are six scan transfer agents:
n Send to TWAIN—Stores the image in a TWAIN folder on
the controller.
n Send to File—Stores the scanned file in a folder on the
controller or a network file server
n Send to Email—Sends the scanned file as an email
attachment to the specified list of recipients
n Send to iFax—Sends the scanned file as an Internet fax
(iFax) to the specified list of recipients
n Send to TopAccessComposer—Stores the scanned file in a
TopAccessComposer folder.
18 GL-1020 Scan Operator’s Guide
Page 19

SETTING UP
n Send to FTP Server—Sends the scanned file to a remote
computer (FTP server)
Before you scan or fax a document, you may need to create a
private template or to install software.
Creating a template
First, check whether a suitable template for your scan job already
exists. You can do this from your workstation using TopAccess,
or at the copier’s control panel.
For the Send to TWAIN and Send to File options, you will almost
certainly find a suitable template in the public group.
For Send to TopAccessComposer and Send to FTP, you may find
a template that is very similar to what you need either in the
public group or in a private group to which you have access. You
can modify the settings at the copier’s control panel when you
scan the document.
Although it’s quicker to make minor changes at the control panel
than to create a new template, such changes are temporary—you
must make them each time you use the template. If you need to
use the same settings periodically, creating a private template will
save time in the long run.
For Send to Email and Send to iFax, you will need to create
private templates because they must include your name and
return email address.
To create private templates and private template groups, use
TopAccess as described in the Setup chapter of this guide.
GL-1020 Scan Operator’s Guide 19
Page 20

SCANNING A DOCUMENT
In outline, the procedure for scanning a document is:
1 Decide where you want to send the image file, since this
2 Place the document in the copier’s Automatic Document
3 Press PRINTER/NETWORK on the control panel.
4 Press SCAN on the LCD touch screen and choose the type of
5 For a public scan job, select the template. For a private scan
6 View the scan settings and make any changes.
7 Press START on the control panel or SCAN! to begin scanning
For more detail, see the Scanning Documents chapter.
Once you have scanned a document, it joins the queue of current
scan jobs waiting to be sent to their specified destinations.
governs your choice of scan template.
Feeder (ADF) or place the first page on the glass.
scan job.
job, select the private template group and then the template.
your document.
SENDING A FAX
Cancelling a Scan Job
Suppose you return to your desk to find an updated version of the
document you just scanned. If the scanned image is still in the
current jobs queue, you can delete it using TopAccess.
1 In TopAccess, select the Scan tab to open the Current Jobs
page.
2 Scroll down the list to find your job.
3 Select the job and click Delete.
For more detail, see the chapter on Managing Scan Jobs.
You can use the GL-Scan feature to send an iFax. The first time
you do this, you need to create a template that contains your name
and return email address.
If you regularly send faxes to one or more groups of people, you
can create a template for each set of recipients. You can add the
subject and covering message for the fax at the control panel.
20 GL-1020 Scan Operator’s Guide
Page 21

If you periodically fax a particular document, such as a progress
report, to the same set of recipients you can create a template for
that document. In this case, you can include the subject and
covering message in the template.
1 Place the document you want to fax in the ADF or on the
glass.
2 At the control panel, press PRINTER/NETWORK, then SCAN and
choose
3 Select the appropriate Send to iFax template.
4 Check the list of recipients and make any changes.
5 Enter or modify the subject line and covering message if
PRIVATE SCAN JOBS.
necessary.
6 Press START or SCAN! to send the fax.
GL-1020 Scan Operator’s Guide 21
Page 22

SETUP
This chapter guides you through setting up the scan functions.
You can use the TopAccess utility to create scan templates that
contain all required scan and distribution information. When these
templates are downloaded to the copier, they facilitate “one-touch
scan and send tasks” from the copier’s control panel.
GL-1020 Scan Operator’s Guide 22
Page 23

Scan templates contain the attributes for scan jobs such as
resolution and paper size. They also specify the scan transfer
agent, which enables you to send scanned documents to the
appropriate destination.
Scan templates are stored in groups. There are up to 200 private
groups and one public group. Each group can contain up to 60
templates.
Templates in the public group are created and maintained by the
administrator. The public group can be accessed by all users, but
some of the templates may be designed for specific purposes and
have passwords assigned to them.
Templates in private groups are based on particular group
profiles. Private groups can be assigned passwords. You can also
assign passwords to individual templates. If it has no password
assigned at either the template or group level, a “private”
template is accessible to all users.
Both end users and administrators can create and edit private
groups and private templates. Only the administrator can delete
password-protected groups.
In practice, you may not need to create templates or groups
yourself. The administrator and other users may have set up all
the templates you need for your work. Before creating any
templates, look on your system to see what templates are
available.
Using Scan Transfer Agents
Scan transfer agents (or scan agents for short) contain the
properties for sending scan jobs to a particular destination. You
use scan transfer agents to:
n Save a scanned image in a folder on the controller or a
network file server.
n Save a scan as a TWAIN-compliant image.
n Send a scanned image as an email attachment.
n Send a scanned image as an Internet fax.
n Save a scanned image to a TopAccessComposer folder.
n Send a scanned image to an FTP server.
GL-1020 Scan Operator’s Guide 23
Page 24

Once the administrator has configured the scan agent properties,
end users can set up the specific details for scan agents when they
create scan templates.
The administrator sets up scan transfer agent properties in
TopAccess under the Administration tab, Scan Agents pages. For
more information, refer to the Administrator’s Guide or online
help.
Setting up Templates
You use TopAccess to set up templates and groups.
If you log on to TopAccess as an administrator, you can create
and manage public templates. Refer to the Administrator’s Guide
for details. You can also create private templates for particular
end users or groups.
If you log on to TopAccess as an end user, you can create and
manage private groups and templates and view basic public
template information.
24 GL-1020 Scan Operator’s Guide
Page 25

USING PUBLIC TEMPLATES
The administrator can create public templates configured for
specific uses. The public group can contain up to 60 public
templates. End users can view and use public templates, but
cannot change them.
Viewing Public Templates
1 In TopAccess, click the
2 Click the Templates submenu.
By default, the Tem pla te s page opens and displays the list of
templates for the public group.
PRIVATE GROUPS AND TEMPLATES
Both administrators and end users can create and maintain private
templates and private template groups.
Creating Private Groups
In TopAccess, you can create a private group in two ways:
n from the Template Groups page
n from the New Template page
Scan tab.
The first method accesses the New Template Group page, the
second accesses the New Template Group popup. Both screens
contain the same fields.
You must enter a group name in order to define a group. The
other fields are optional.
Using the Template Groups page
This is the method you use to create a number of private groups.
1On the
2Click the
Scan tab, click the Templates submenu.
Template Groups link.
The Template Groups page opens, listing all currently
defined groups.
3Click
New.
The New Template Group page opens.
4 Enter the information for the new group. See “
New Template
Group” on page 85 or the TopAccess online help for details.
5Click
OK.
GL-1020 Scan Operator’s Guide 25
Page 26

You return to the Template Groups page and details of the
new group appear in the list of defined groups.
6 Repeat this process to create more groups.
Using the New Template Page
This method allows you to create an ad hoc group while creating
a new template.
1On the
2Click the
Scan tab, click the Templates submenu.
Tem p lates link, if necessary.
The Templates page opens, listing all currently defined
templates for the selected group. By default this is the public
group.
3 If necessary, open the Group listbox and select a private
group to enable the
4Click
New.
New button.
The New Scan Template page opens.
5Click
6 Enter the information for the new group. See “
New Group.
New Template
Group” on page 85 or the TopAccess online help for details.
7Click
OK.
You return to the New Scan Template page and the new group is
added to the drop-down Group list.
Editing Private Group Information
You can change the order in which the information on the
Template Groups page is displayed, and you can change the
details for a group.
To open the Template Groups page:
1On the
2Click the
Changing the Sort Order
Scan tab, click the Templates submenu.
Tem p late Groups link.
By default, the group list is sorted by Group Name in ascending
order (indicated by an up arrow in the column heading). To sort
the list by Owner, click the column heading.
26 GL-1020 Scan Operator’s Guide
Page 27
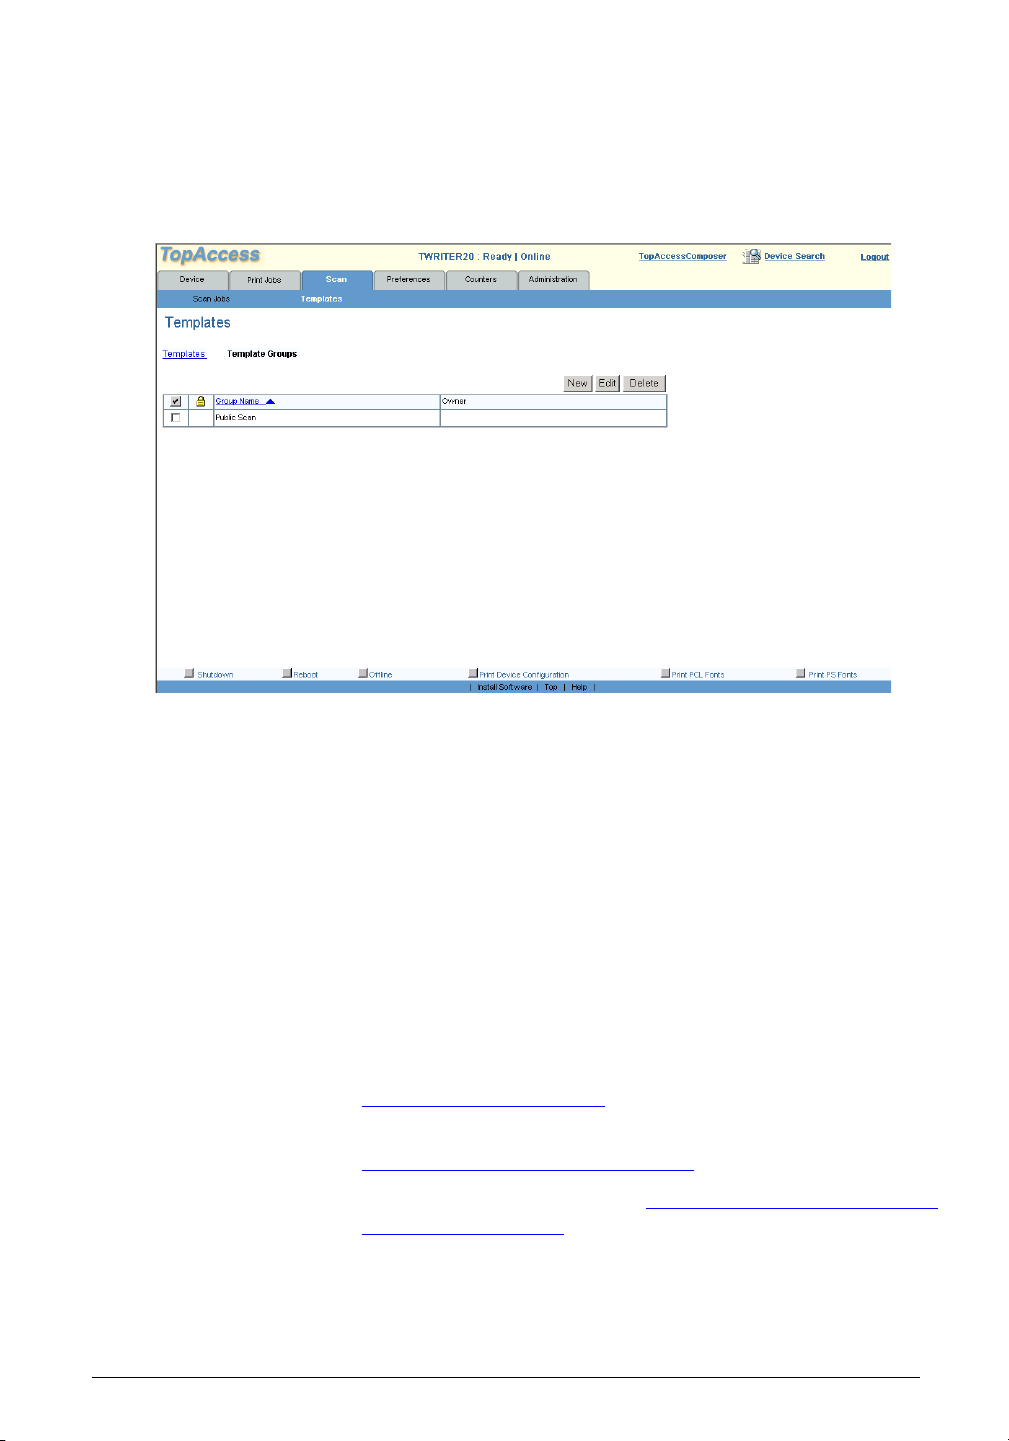
Changing Group Details
The Edit button on the Template Groups page is grayed out until
you select a group.
Sample Template Groups page
1 Select the group you want to modify and click Edit.
2 If the group is password-protected, the Group Password
popup appears. Enter the five-digit password and click
OK.
3 Change the Group Name, Owner, Email Address or Password
as desired.
4Click
OK to apply your changes.
Setting or Changing Passwords for Private Groups
You can apply password protection to your private group, or to
individual templates within the group.
You set the group password when you create the group. See
“
Creating Private Groups” on page 25 for details.
To change the group password, use the Edit procedure. See
Editing Private Group Information” on page 26 for details.
“
For template passwords, refer to “
Setting or Changing Passwords
for Private Templates” on page 30.
GL-1020 Scan Operator’s Guide 27
Page 28

Deleting Private Groups
You can delete multiple groups in one operation provided they
aren’t password protected (don’t have a padlock icon). The
Delete button on the Template Groups page is grayed out until
you select at least one group.
Only the administrator can delete password-protected groups.
1On the
Template Groups link.
Scan tab, click the Templates submenu, then click the
2 On the Template Groups page, select the groups you want to
delete and click
Delete.
3 If the Group Password popup appears, enter the five-digit
password and click
OK.
A confirm deletion popup appears.
4Click
OK to delete the groups, or Cancel to leave the groups
unchanged.
Creating Private Templates
The Templates page enables you to create, edit and delete scan
templates.
You can add a new template to an existing group, or you can
create a new group for your template by clicking
New Group on
the New Template page.
For more detail on the individual fields and options, see “
New
Template Page” on page 79.
1On the
Scan tab, click the Templates submenu.
The Templates page opens, listing all the templates defined
for a selected group. By default, this is the public group. The
New button is disabled until you select a private group (unless
you are logged in as an administrator).
28 GL-1020 Scan Operator’s Guide
Page 29

2 Click the arrow to open the Group listbox, and select a private
group for your new template.
Sample Templates page
3 If the Group Password popup appears, enter the group’s
five-digit password and click
OK.
4Click
New.
The New Template page opens.
5 Enter identification information for the template. See
Template Identification” on page 79 for details.
“
6 Select the scan settings such as resolution and page size. See
“
Scan Settings” on page 80 for details.
7 Click the
Send To drop-down arrow, and select a scan transfer
agent.
8 View and modify the settings for the scan transfer agent. See
“
Agent Settings” on page 81 for details.
9Click
OK.
Editing Private Templates
By default, the Templates page lists the templates in the public
template group. The
Edit button is disabled until you select a
private template group.
GL-1020 Scan Operator’s Guide 29
Page 30

1On the Templates page, select the group containing the
template you need to edit.
2 If the Group Password popup appears, enter the group’s
five-digit password and click
OK.
3 Select the template you want to modify and click
Edit.
4 If the Password popup appears, enter the template’s five-digit
password and click
OK.
The Edit Template page opens displaying the template’s
current settings. For detailed information on the settings, see
“
New Template Page” on page 79.
5 Change the settings as required, then click
OK.
Setting or Changing Passwords for Private Templates
You can assign a password to protect your private template. This
is recommended if the group has no password. A private template
that has neither a group nor a template password is accessible to
all users.
You set the template password when you create the template. See
“
Template Identification” on page 79 or TopAccess online help
for details.
To change the template password, use the Edit procedure. See
Editing Private Templates” on page 29 for details.
“
For group passwords, refer to “
Setting or Changing Passwords
for Private Groups” on page 27.
Deleting Private Templates
You can delete multiple templates in one operation provided they
aren’t password protected (don’t have a padlock icon). The
Delete
button on the Templates page is grayed out until you select at
least one private template.
You must delete password-protected templates one at a time.
1 On the Templates page, open the Group listbox and select the
appropriate group.
2 If the Group Password popup appears, enter the group’s
five-digit password and click
OK.
3 Select the templates you want to delete.
4Click
Delete.
30 GL-1020 Scan Operator’s Guide
Page 31

5 If the Password popup appears, enter the template’s five-digit
password and click
OK.
A confirmation popup appears.
6Click
OK to delete the templates or Cancel to leave them
unchanged.
GL-1020 Scan Operator’s Guide 31
Page 32

CONFIGURING AGENT SETTINGS
The GL-1020 uses various utilities, known as transfer agents, to
send scanned files to different output destinations. The
administrator sets up these agents initially but, in most cases, you
supply additional information when you send a file.
Configuring the Send to File Agent
This agent stores the scanned file on the controller or a file server.
You specify the format and destination folder for the file.
1 Select the file format from Single Page TIFF (G4), MultiPage
TIFF (G4) or PDF.
2 Depending on how the administrator has configured the
destination, either enter the name of the network folder or
choose from a predetermined folder on the network or the
folder in the controller.
Configuring the Send to Email Agent
This agent sends the scanned file as an email attachment to one or
more recipients. You list the recipient addresses, supply the
information to go in the email message and select the file format.
1 Enter your name in the
FROM field.
2 Enter your email address in the
3Click the
To link, to list the addresses of the recipients.
4 Enter the Subject of the message.
5In the
BODY TEXT field, enter the message you wish to send.
RETURN EMAIL ADDRESS field.
32 GL-1020 Scan Operator’s Guide
Page 33

6 Select the Attachment File Format, either MultiPage TIFF
(G4) or PDF.
Note: Maximum Message Size is preconfigured by the
administrator and cannot be modified.
7 Select the message fragmentation.
Configuring the Send to iFax Agent
This agent sends the scanned file as an internet fax. You need to
list the recipient addresses and supply the covering message.
1 Enter your name in the
2 Enter your email address in the
3Click the
To link, to list the addresses of the recipients.
FROM field.
RETURN EMAIL ADDRESS field.
4 Enter the Subject of the message.
5In the
BODY TEXT field, enter the message you wish to send.
6 Accept the File Format, which is TIFF MH.
Note: Maximum Message Size is preconfigured by the
administrator and cannot be modified.
7 Select the message fragmentation.
GL-1020 Scan Operator’s Guide 33
Page 34

Configuring the Send to TopAccessComposer Agent
This agent stores the scanned file in a TopAccessComposer
folder. You specify the name and type of folder. For a Private
folder you need to supply your username and password.
Sample Template Properties page showing the Destination field
1 Enter the name of the destination folder in
TopAccessComposer.
Folder names consist of any ASCII characters except for:
/ \ : * ? " <> | & = # ' % ; . [ ] { } and space. The maximum
size of a folder name is 64 characters. The exact folder path
will be displayed below. If the folder is a Private folder and
the folder name is the same as a user home Private folder, a
new folder with the same name will be created under the
user’s home folder. For example, Private\Toshibauser
\Toshibauser. If the folder name is left blank, no folder will be
created and the scanned files will be stored in the user’s home
folder. For example, Private\Toshibauser.
2 Select the Folder Type —Public, Private or Department.
3 Enter a Login User Name and password if required
depending on the folder type you chose. Confirm the
password.
34 GL-1020 Scan Operator’s Guide
Page 35

4 Enter the name of the scanned document.
Configuring the FTP Agent
This agent uploads the scanned file to an FTP server. You supply
the details for the FTP transfer.
1 Enter the name or IP address of the FTP server.
2 Enter the port number for the FTP transfer.
3 Optionally, enter the user name and password of the FTP
account on the server.
If you leave these fields blank, an anonymous login is
assumed.
4 If you check the option
Retry when FTP transfer fails, select the
number of retries and the time interval between them.
5 If necessary, change the File Path and File Name for storing
the scanned file.
6 Select the File Format.
GL-1020 Scan Operator’s Guide 35
Page 36

SCANNING DOCUMENTS
The scan function of the TOSHIBA e-STUDIO550-810 Electronic
Document Processing System enables you to scan image data and
send it to a variety of destinations.
This chapter tells you how to use the copier’s control panel for
scanning documents and for changing scan settings.
GL-1020 Scan Operator’s Guide 36
Page 37

INTRODUCTION
To scan a document, you must place the originals either in the
Automatic Document Feeder (ADF) or on the glass. Then use
either the Public Scan feature or the Private Scan feature as
appropriate.
PLACING THE ORIGINALS
This section outlines how to place documents for scanning.
Using the Automatic Document Feeder
Using the Automatic Document Feeder
Note: Remove any paper clips or staples from the originals
before placing them on the feed tray.
1 Align the edges of the originals. Set the originals face up on
the feed tray, then align the sliders to the edges of the
originals.
The maximum size of a scan job is 1 GB, but may be less
depending on the available memory in the controller and the
available free space on its hard disk.
The maximum number of originals you can scan at one time
is 100 sheets (200 images if you are using duplex mode).
GL-1020 Scan Operator’s Guide 37
Page 38

Original scale
Placing the Originals on the Glass
1 Lift the Automatic Document Feeder.
2 Place an original on the glass face down with the bottom
toward you and the left side centered against the original
scale.
Printer with Automatic Document Feeder lifted
n Up to 200 sheets (200 images) can be scanned.
38 GL-1020 Scan Operator’s Guide
Page 39

SCANNING PROCEDURES
Two types of scanning are available: public and private scanning.
All users connected to the controller can scan using the Public
Scan feature.
The Private Scan feature allows you to use private groups and
templates with specific parameters and attributes. Private groups
and templates may require a password before you can access
them. If the templates are not password protected, they are
available to all users connected to the controller.
Scanning the Originals
With the originals on the glass or in the Automatic Document
Feeder:
Note: The network administrator maintains the public
templates by using the TopAccess web-based utility. See the
Administrator’s Guide for further information on public
templates.
1Press
PRINTER/NETWORK on the control panel.
The Print Main Menu screen appears.
Print Main Menu
GL-1020 Scan Operator’s Guide 39
Page 40

2Press SCAN.
The Scan Main Menu screen appears.
Scan Main Menu
3Press PUBLIC SCAN JOBS or PRIVATE SCAN JOBS.
For public scanning continue with “
page 41.
Selecting a Group for Private Scanning
When you select private scanning, the Group Number Input
screen appears.
Sample Group Number Input screen
Selecting a Template” on
40 GL-1020 Scan Operator’s Guide
Page 41

1 Either use the numeric keys to enter the 3-digit number in the
GROUP NO. field, or press the arrow key to scroll through the
list and select the group number.
To return to the Scan Main Menu screen, press
2Press
OK.
CANCEL.
When you select a group number that has a password
assigned to it, the Group Password Input screen appears.
If the Group Password Input screen doesn’t appear, the group
number is not password protected.
3 If required to do so, enter the 5-digit password using the
numeric keys.
The copier displays the numbers as asterisks.
To clear or reenter the password, press
To return to the Scan Main Menu screen, press
4Press
OK to display to the Template Selection list.
CLEAR/STOP.
CANCEL.
Selecting a Template
The Template Selection list shows your template options.
Sample Template Selection list
1 Press a template icon.
The copier highlights the selected icon.
Press the up arrow or the down arrow to move to the previous
or next page.
GL-1020 Scan Operator’s Guide 41
Page 42

Press BACK to return to the Group Number Input screen or FC
to return to the Scan Main Menu screen.
If you select a template that has a password assigned to it, the
Template Password Input screen appears.
If the Template Password Input screen does not appear, the
template is not password protected.
2 Enter the 5-digit password using the numeric keys.
The copier displays the numbers as asterisks.
To clear or reenter the password, press
CLEAR/STOP.
To return to the Template Icon Selection List, press
3Press
OK.
The Scan Settings and Agent Settings Summary screen
appears.
Sample Scan Settings and Agent Settings Summary screen
CANCEL.
The scan parameters were set when the template was created. To
change the settings, see “
4Press
START on the control panel or SCAN! to begin scanning
Scan Parameter Settings” on page 45.
your document.
5 Continue with “
ADF Scanning” on page 43 if you are using
the Automatic Document Feeder.
Continue with “
Scanning from the Glass” on page 43, if you
placed the originals on the glass.
42 GL-1020 Scan Operator’s Guide
Page 43

Note: If you are using the Automatic Document Feeder, the
Scan Settings Summary screen displays “ADF” in the scan
settings summary area.
If you are placing the originals on the glass, the Scan Settings
Summary screen displays “Glass” and the auto detected
original size in the scan settings summary area.
Scanning from the Glass
While scanning is in progress, the Glass Scanning Status screen is
displayed.
After the last page is scanned, the Waiting for Next Page screen
appears.
1 Do one of the following:
n To scan another job, press SCAN! or START again after
placing another original on the glass.
n To cancel the job, press CANCEL JOB or FC. The Cancel
Confirm screen appears. Press
prevent cancellation, press
n To change the scan settings in the Scan Parameter Setting
screen, press
“
Scan Parameter Settings” on page 45.
SETTING. For further information, refer to
YES to cancel the Job. To
NO.
2Press
FINISH to end this scanning session.
When scanning is complete, the Template Selection List
screen appears. Scanned image data is saved on the
controller’s hard disk.
ADF Scanning
Follow the steps in this section to use the Automatic Document
Feeder in continuous scan mode.
While scanning is in progress, the ADF Scanning Status screen is
displayed.
1 To scan more originals after the current job ends, press
C
ONTINUE. You can only press this key once. It will not
reappear after the first use. Proceed with the next step.
If you don’t press
CONTINUE, scanned image data is saved on
the controller’s hard disk automatically, and you return to the
Template Selection List screen.
GL-1020 Scan Operator’s Guide 43
Page 44

The Waiting for Continuous Scan screen appears after the last
page is scanned.
2 To scan another job, place the originals on the ADF and press
SCAN! or START.
n To stop the ADF scan during continuous mode, press
CLEAR/STOP.
n To cancel the job, press CANCEL JOB or FC. The Cancel
Confirm screen appears.
n Press YES to cancel the Job. To prevent cancellation,
press N
n To change the scan settings, press SETTING in the
O.
Scanning Parameter Setting screen. For further
information, refer to “
Scan Parameter Settings” on
page 45.
3 To finish scanning, press F
HANDLING PAPER JAMS
In the event of a paper jam, the copier displays procedures on the
control panel to assist you with resolving the problem. When the
jam is cleared, the message
screen.
Continuing after Clearing a Jam
Press
Cancelling a Job after Clearing a Jam
1Press
2Press Y
Error Handling
When you are using the ADF, if the job stops due to an error, such
as Job Overflow, during the continuous scanning of multiple
originals, data being read at the time of the error is canceled.
INISH.
When scanning is complete, the Template Selection List
screen appears. The scanned image data is saved on the
controller’s hard disk.
Jam Recovery appears on the
START or SCAN! to continue the ADF scan.
CANCEL JOB or FC to cancel a job.
The Cancel Confirm screen appears.
ES to cancel the Job. To prevent cancellation, press
N
O.
Data that was read before the error occurred is stored.
44 GL-1020 Scan Operator’s Guide
Page 45

Note: Template settings can be edited with the TopAccess
(End User Mode) web site.
SCAN PARAMETER SETTINGS
A template icon represents each template that was set up using
the TopAccess web utility. Scan parameters, such as resolution,
rotation, and exposure were defined when the templates were
created.
The Scan Settings and Agent Settings Summary screen displays
the settings for the template you selected.
To change these scan parameter settings:
1Press
SETTING to open the Scan Parameter Setting screens
(three screens in total).
2 Select the required single/double-sided scan option:
n Single
n Book
n Tablet
The Book and Tablet double-sided modes are grayed out for
glass scanning.
3 Select the desired rotation.
n No rotation
n Rotate through 90 degrees
n Rotate through 180 degrees
n Rotate through 270 degrees
4Press
NEXT to move to the next page.
5 Select the document type.
n Text
n Text/Photo
n Photo
6 Select the resolution (dpi).
n 600
n 400
n 300
n 200
GL-1020 Scan Operator’s Guide 45
Page 46

n 150
7Press
AUTO to automatically set the exposure. Or press the
right or left arrows to manually lighten or darken the
exposure.
8Press
NEXT to move to the next page.
9 Set the original paper size. Select:
n AUTO detects the size of the first page of the original only
n MIXED ORIGINAL SIZES detects the size of every page of the
original. The combinations of mixed original sizes are
limited and depend on your region.
Region = UC : LD and LT, LG and LT-R
Region = EUR : A3 and A4
n A3, A4, LD, LT, A4-R, A5-R, LT-R, LG, B4, B5, ST-R,
COMP, B5-R, FOLIO, 13"LG, 8.5"SQ
These values specify the page size.
10 Press
OK to save your new settings and return to the Scan
Settings & Agent Settings Summary screen, or press
CANCEL to leave the settings unchanged.
SCAN AGENT SETTINGS IN THE CONTROL PANEL
Each template that has been set up using the TopAccess web
utility has a scan agent assigned to it. The scan agent transfers the
image file to its destination. There are six scan agents: Send to
TWAIN, Send to File, Send to Email, Send to iFax, Send to
TopAccessComposer, and Send to FTP. The administrator defines
the scan agents. You select the scan agent when you create a
template.
Scan and Agent Settings Summary Screens
The scan settings area of each screen displays icons of the
currently selected options for scan type, rotation, document type,
resolution, exposure, ADF or glass, and paper size.
To change any of these settings, press
Parameter Setting screens. For details, see “
SETTING to go to the Scan
Scan Parameter
Settings” on page 45.
46 GL-1020 Scan Operator’s Guide
Page 47

Scan Settings and TWAIN Agent Settings Summary
Sample TWAIN Agent Settings Summary screen
This screen displays settings for the Scan to TWAIN Agent. You
cannot change them.
n Scan agent name—scan to TWAIN
n Folder—the name of the TWAIN data directory folder
n Document—the name of the scanned document
Scan Settings and FileShare Agent Settings Summary
Sample FileShare Agent Settings Summary screen
This screen displays settings for the Scan to File agent.
n Scan agent name and file format
GL-1020 Scan Operator’s Guide 47
Page 48

n Machine name and path to the destination folder for the saved
file
n Document—the name of the saved file
1 To change the filename, press the
DOCUMENT field.
2 Use the alphanumeric screen to enter the new filename of up
to 64 characters.
3Press
SET to save the changes.
Scan Settings and TopAccessComposer Agent Settings Summary
This screen displays the settings for the Scan to
TopAccessComposer agent.
n Scan agent name and TopAccessComposer user ID
n Folder—the name of the TopAccessComposer folder where
the document will be saved
n Document—the filename of the document
1 To change the folder, press the
FOLDER field and use the
alphanumeric screen to enter the new folder name of up to 64
characters.
2 To change the filename, press the
DOCUMENT field and use the
alphanumeric screen to enter the new filename of up to 64
characters.
3Press
SET to save the changes.
Scan Settings and Email Agent Settings Summary
This screen displays the settings for the Scan to Email agent.
n Email to—displays the list of recipients for the Email.
n Subject—displays the Email subject.
n Add Message—displays any message added to the Email
body.
1 To modify the recipient list, press the ellipsis [...] button
adjacent to the list.
The Address Edit screen opens. For information on using this
screen refer to “
Editing the List of Recipients” on page 51.
48 GL-1020 Scan Operator’s Guide
Page 49

2 To change the subject line, press the SUBJECT field and use
the alphanumeric screen to enter the Email subject of up to
256 characters. Press
SET to save the changes.
3 To add or change a message, press the
ADD MESSAGE field
and use the alphanumeric screen to enter the new message of
up to 256 characters. Press
SET to save the changes.
Scan Settings and iFax Agent Settings Summary
This screen displays the settings for the Scan to iFax agent.
n iFax to—displays the list of recipients for the fax.
n Subject—displays the fax subject.
n Add Message—displays any message added to the fax body.
1 To modify the recipient list, press the ellipsis [...] button
adjacent to the list.
The Address Edit screen opens. For information on using this
screen refer to “
2 To change the subject line, press the
Editing the List of Recipients” on page 51.
SUBJECT field and use
the alphanumeric screen to enter the fax subject of up to 256
characters. Press
3 To add or change a message, press the
SET to save the changes.
ADD MESSAGE field
and use the alphanumeric screen to enter the message of up to
256 characters. Press
SET to save the changes.
Scan Settings and FTP Agent Settings Summary
There are two screens for the Scan to FTP agent.
Scan to FTP Settings Summary screen 1
GL-1020 Scan Operator’s Guide 49
Page 50

The first screen displays:
n FTP to—the IP address and port number, or the name, of the
server to which the files will be transferred
n Username—the user ID of the FTP account on the server. If
both this field and the Password field are blank, an
anonymous login is assumed
n Password—the password of the FTP account on the server,
shown as a row of asterisks
Scan to FTP Settings Summary screen 2
The second screen displays:
n File Format—the format in which the file should be created
(Single-page TIFF, Multi-page TIFF, or Multi-page PDF)
n Folder—the file path to the location on the remote machine
where the file will be stored. If left blank, the file is stored in
the working folder.
n Document—the name of the scanned image file.
1 To change any of the FTP server details, press the appropriate
field, then enter the new value on the alphanumeric screen
and press
SET.
2 Press the double-headed arrow key to move to the next
screen.
3 Select the file format by pressing its soft key.
4 To change the file path, press the
value and press
SET.
5 To change the filename, press the
new value and press
SET.
FOLDER key, enter the new
DOCUMENT key, enter the
50 GL-1020 Scan Operator’s Guide
Page 51

WORKING WITH THE ADDRESS BOOK
You can alter the list of recipients defined in a template, update
Email addresses, display address book groups, and search for
entries in the address book.
Editing the List of Recipients
The Address Edit screen displays the total number of recipients
defined in the template and the list of Email addresses. Use the
arrow keys to scroll up and down the list, and the double arrow
keys to move from page to page. The maximum number of
recipients per template is 400.
This screen appears when you press the ellipsis [...] button on the
Scan Settings and Email Agent Settings Summary screen or the
Scan Settings and iFax Agent Settings Summary screen
n To add a recipient to the list, press NEW and use the
alphanumeric screen to enter the new recipient’s Email
address of up to 256 characters. Press
changes.
n To update an Email address, scroll or search for the recipient
then press
EDIT and use the alphanumeric screen to change
the Email address of up to 256 characters. Press
the changes.
SET to save the
SET to save
n To delete a recipient from the list, scroll or search for the
recipient then press the
n To display Address Book groups, press the GROUPS button.
DELETE button twice.
The Group Select screen opens.
n To search for specific recipients in the Address Book, press
the
SEARCH button.
The User Search screen opens.
When finished press
OK to return to the Scan Settings and Email/
iFax Agent Settings Summary screen.
Displaying Address Book Groups
The Group Select screen opens when you press
SEARCH on the
Address Edit screen.
The Group Select screen displays the name of the selected
Directory and the list of all groups in the address book. Use the
arrow keys to scroll up and down the list, and the double arrow
keys to move from page to page.
GL-1020 Scan Operator’s Guide 51
Page 52

n To search for recipients in a group, scroll to the group name
then press the
LIST button.
The User Search Result screen opens.
n To add all members of a group to the recipient list, scroll to
the group name then press the
ADD button.
The Address Edit screen opens and the group members are
added to the recipient list.
To return to the Address Edit screen without adding
recipients, press the
CANCEL button.
Searching the Address Book
The User Search screen appears when you press
SEARCH on the
Address Edit screen. The Directory field displays the name of the
currently selected local address book or LDAP server.
1 To search for recipients in a different Directory Service
(LDAP or GL-1020) press the down-arrow button.
The Address Book and LDAP Server Selection screen opens,
listing the address books and LDAP servers defined in
TopAccess.
2 Using the arrow buttons to scroll through the list, select the
Directory to be searched.
3Press
OK to return to the User Search screen.
4 To search by:
n Recipient name, press the NAME field and use the
alphanumeric screen to enter the name for which to
search (up to 64 characters).
n Email address, press the EMAIL field and use the
alphanumeric screen to enter the address for which to
search (up to 90 characters).
5Press
SEARCH.
The User Search Results screen opens, displaying all address
book entries that match your search string.
To abandon the search and return to the Address Edit screen,
CANCEL.
press
52 GL-1020 Scan Operator’s Guide
Page 53

User Search Results Screen
This screen displays the total number of matching results together
with the list of names or Email addresses.
n To add a person to the recipient list, scroll to the person’s
name or address in the list then press
ADD.
The Address Edit screen appears and the selected person is
added to the recipient list.
n To cancel the process or return to the previous screen, press
CANCEL.
GL-1020 Scan Operator’s Guide 53
Page 54

SCANNING DESTINATIONS
You can scan to six destinations.
Before you specify any template destination settings, the
administrator must configure the scan transfer agents, entering
details such as the SMTP Server IP Address and Controller
Domain Address. Please refer to the Administrator’s Guide or the
TopAccess Web-based help for details.
Scanning to TWAIN
Send to TWAIN saves image data in the \GL_TWAIN folder on
the controller.
At shipment, the domain name for the controller is
“WORKGROUP.”
The directory in which the file is stored follows this convention:
[\\GL<XXXXXXXXXXXX>] – [\GL_TWAIN]
where GL<XXXXXXXXXXXX> represents the Media Access
Control (MAC) address of the network interface card in the
controller.
To retrieve the data from a shared folder on the controller, use a
TWAIN-compliant application on your client workstation.
Scanning to File
Send to File saves image data either in the controller’s
\GL_SHARE folder or in a shared folder on the file server.
You can save scanned images in TIFF or PDF format and retrieve
them from the shared folder on the controller or file server via the
network.
Saving to the Controller
At shipment, the domain name for the controller is
“WORKGROUP.”
The destination names follow these conventions:
[\\GL<XXXXXXXXXXXX>] – [\GL_SHARE] – [\Group
Number – Group Name – Template name]
where: GL<XXXXXXXXXXXX> represents the Media Access
Control (MAC) address of the network interface card in the
controller.
54 GL-1020 Scan Operator’s Guide
Page 55

Note: You can access saved Send to File data regardless of
whether the job is assigned a password.
Saving on a File Server
You can save the scanned image data to a designated file server
®
with the Windows
operating system on the network.
When you use the Scan to Fileserver feature, you should allow
the user account specified in the Agent Settings submenu to
access and write to the destination folder.
For further details, refer to the online Help, or Administrator’s
Guide.
Scanning to Email
Send to Email sends images by email attachment to the list of
email addresses specified in a template. You can:
n Specify the image data format: PDF or Multi Page TIFF
(G4).
n Send the image data by dividing it in smaller blocks
(Fragment Message). Your options are: No fragmentation,
64 KB, 256 KB or 512 KB fragments.
n Create and attach a text message (Body) of up to 1 KB with
the image data.
Note: The maximum size of image data you can send by
email attachment is 20 MB. However, the administrator can
specify a lower limit in the range 2-20 MB if the email client
software is unable to handle fragmentation successfully.
Scanning to Internet-Fax
Send to iFax faxes images via email to the Internet-Fax recipients
specified in a template. You can:
n Specify the image data format. Your only choice, however, is
TIFF-S.
n Send the image data by dividing it in smaller blocks
(Fragment Message). Your options are: No fragmentation,
256 KB, 512 KB, 1024 KB or 2048 KB fragments.
When the file size exceeds the specified limit, the software
sends pages one at a time. Each email message contains a
single page instead of one multipage tif.
Note: The same limitations apply for Send to Email.
GL-1020 Scan Operator’s Guide 55
Page 56

Scanning to TopAccessComposer
Send to TopAccess Composer saves scanned documents in
TopAccessComposer’s storage. The template determines the root
folder. You can select or create a subfolder and specify a
document name. If you do not specify a subfolder, the software
stores the document in the root folder.
Note: When scanning to TopAccessComposer, you must use
600 dpi resolution.
Scanning to FTP
Send to FTP transfers scanned documents to a remote host via an
FTP server. This option provides a convenient way of accessing
scanned documents from a Macintosh or Unix workstation. You
can specify:
n The name or IP address of the FTP server, the port number
for FTP transfer, and the user name and password of the FTP
account on the server. If you omit the user name and
password, an anonymous login is assumed.
n Whether to retry if the FTP transfer fails and, if so, how many
times and the number of minutes between retries.
n The file format: Single Page TIFF (G4), Multi Page TIFF
(G4), or PDF.
n Whether to overwrite an existing file of the same name in the
destination folder.
56 GL-1020 Scan Operator’s Guide
Page 57

RETRIEVING DOCUMENTS
This chapter tells you how to retrieve scanned image data. It
provides step-by-step instructions for retrieving images from
TWAIN, and summarizes the procedure for retrieving images from
a file on the controller or file server. It also provides reference-style
descriptions of the TWAIN dialog boxes.
For retrieving images from TopAccessComposer, see the
TopAccessComposer Operator’s Guide.
GL-1020 Scan Operator’s Guide 57
Page 58

RETRIEVING SCANNED DOCUMENTS (TWAIN)
When scanned data is saved as a TWAIN-compliant image on the
controller, you can retrieve it using a TWAIN-compliant software
application such as “Imaging for Windows,” a Windows
and 2000 operating system accessory. To do this, you must have
the GL-TWAIN Driver installed on your workstation.
Note: Some applications that support TWAIN formats may
not work with the GL-TWAIN Driver. Refer to the
application’s manual or online Help in that case.
®
98, Me,
The Windows NT
®
4.0 operating system does not come with
any TWAIN application software installed; you must obtain
the software separately.
The retrieval process consists of three parts:
1 Select the GL-TWAIN Driver, using your application’s Select
Source dialog box.
2 Find the document folder, using the GL-TWAIN Driver’s
Folder Setting dialog box.
3 Retrieve the document, using the Main TWAIN dialog box.
From this dialog box, you can also:
n Update the document list
n Delete a document
n Access the Document Information dialog box to view
document details
Selecting the GL-TWAIN Driver
You must select the GL-TWAIN Driver before you can retrieve
stored documents for the first time. You don’t need to repeat this
step unless you want to change drivers.
1 From the File menu in the application you are using, click
Select Device. (This option may appear as Select Source,
Scanner Selection or Data Source Selection.)
2 In the Select Source dialog box, select the
TOSHIBA e-STUDIO
GL-TWAIN Driver.
3Click
OK.
58 GL-1020 Scan Operator’s Guide
Page 59

Finding the Document Folder
You use the Folder Setting dialog box to locate the folder
containing the document you want to retrieve. For a detailed
description of this dialog box, see “
Folder Setting Dialog Box
Reference” on page 62.
1 In the application menu, click
Acquire.
The Folder Setting dialog box appears.
2 If the Domain and Machine shown contain the folder you
want, go to step 5.
3 If the Domain shown is not the location of the folder you
want, select the correct name from the drop-down list, or
click
Search to find it.
4 If you have more than one GL-1020 on the network and the
machine shown is not the location of the folder you want,
select the correct name from the drop-down list, or click
Search to find it.
5Click
Show Folders to display a list of all folders at the
location.
6 Click the folder that contains the document you want.
7 If the folder is password protected, enter the 5-digit password
in the Folder Password field.
8Click
OK.
The Main TWAIN dialog box appears showing all the
documents in the folder.
Retrieving the document Using the GL-TWAIN Driver
You use the Main TWAIN dialog box to bring documents into
your application. For a detailed description of this dialog box, see
“
Dialog Box Reference” on page 62.
Note: Some software applications may not be able to retrieve
multi-page scanned images.
1 In the Main TWAIN dialog box, click the document to
retrieve.
2Click
Acquire.
3 If the document is password protected, enter the 5-digit
password to access the folder.
GL-1020 Scan Operator’s Guide 59
Page 60

4Click Yes to remove the file from the folder after retrieval or
No to leave the file to be acquired again at a later time.
5 When you are finished, click
Close to exit the GL-TWAIN
Driver and return to your application.
During image retrieval, this button cancels retrieving the
current document.
Viewing Document Details
1 In the Main TWAIN dialog box, click the document you
want to view.
2Click
Properties.
3 If the document is password protected, enter the 5-digit
password.
The Document Information dialog box opens, displaying
detailed information about the selected document.
Updating the Document List
To update the list of documents and sort them by document name:
In the Main TWAIN dialog box, click
Refresh.
Deleting a Document
1 In the Main TWAIN dialog box, click the document to delete.
2Click
Delete.
3 If the document is password protected, enter the 5-digit
password.
A delete confirmation message appears.
4Click
Yes to delete the document from the folder or click No
to cancel and return to the Main TWAIN dialog box.
MORE WAYS TO RETRIEVE DOCUMENTS
In addition to using the GL-TWAIN Driver to retrieve
documents, you can use:
n Any suitable imaging software application
n TopAccessComposer
Retrieving Using Another Application
When scanned image data is saved in a controller or networkshared folder, you can retrieve it using an imaging application.
60 GL-1020 Scan Operator’s Guide
Page 61

The following instructions use the “Imaging for Windows”
application to illustrate the process.
1 Start the “Imaging for Windows” application.
2 From the File menu, select
Open.
3 Browse for the shared folder in the controller or network.
In the controller, the folder is called GL_SHARE.
4 Select the file and click
Open.
Retrieving Using TopAccessComposer
To learn how to retrieve scanned data stored in
TopAccessComposer, see the TopAccessComposer Operator’s
Guide.
GL-1020 Scan Operator’s Guide 61
Page 62

DIALOG BOX REFERENCE
The following sections describe the contents of each dialog box
used to retrieve, print and view scanned images.
Folder Setting Dialog Box Reference
Sample Folder Setting dialog box
The Folder setting dialog box appears when you select Acquire
from the application menu. Use it to locate the folder containing
your document.
The Folder setting dialog box contains the following buttons and
fields:
Domain—is the name of the workgroup (collection of computers)
or domain to which the GL-1020 belongs. At shipment, the
default is set to: WORKGROUP. Type the name, select it from
the drop-down list (click the down arrow), or click
Search to find
it.
Note: A controller can belong to a workgroup or a domain,
but not to both.
Machine— is the name of the GL-1020. At shipment, the default
is set to: \\GL<XXXXXXXXXXXX> (where
<XXXXXXXXXXXX> represents the Media Access Control
(MAC) address of the controller). Type the controller name,
select it from the drop-down list (click the down arrow), or click
Search to find it.
Show Folders—displays a list of the folders found at the Domain/
GL-1020.
62 GL-1020 Scan Operator’s Guide
Page 63

Scanned documents are stored in folders that correspond to
template groups. The screen ID for the public template group is
“000.”
Folder Password—appears if the folder is password protected. If
it appears, enter the 5-digit password to access the protected
folder.
OK
—opens the Main TWAIN dialog box for the selected
folder, enabling you to retrieve the document.
Cancel
—closes the dialog box and returns to the application. If
you opened the Folder Setting dialog from the Main TWAIN
dialog, you return to the Main TWAIN dialog when you click
Cancel.
Help
—opens online help.
About
—displays version and copyright information.
Main TWAIN Dialog Box Reference
Sample Main TWAIN dialog box
The Main TWAIN dialog box appears when you select a folder
from the Folder Setting dialog box. The Main TWAIN dialog box
contains a list of all the documents in that folder. From here you
can:
n Retrieve a selected document for use in your application
n Update the document list, for example by deleting a
document from the folder
GL-1020 Scan Operator’s Guide 63
Page 64

n View detailed information about the document
n Return to the Folder Setting dialog box
n Specify that the retrieved document remains in the folder
The Main TWAIN dialog box contains the following buttons and
fields:
Folder name—displays the name of the folder containing the
documents.
Change Folder—opens the Folder Setting dialog box, where you
can select another folder.
List box—contains a list of all documents in the selected folder.
Any characters that cannot be used in filenames are replaced with
an underscore “_”.
Document Name—is the name of the document. If the document
is password protected, a padlock icon is displayed in front of the
name.
Click the column heading to sort the list by document name.
Status—shows one of three messages:
n Ready—the document can be retrieved.
n Processing—the document is open. Attempting to retrieve it
may destroy the document.
n An asterisk (*) indicates that the document is password
protected; its status is not displayed.
Click the column heading to sort the list by status.
Pages—is the number of pages in the document. An asterisk (*)
indicates that the document is password protected; the number of
pages is not displayed.
Click the column heading to sort the list by number of pages.
Created—is the date and time the document was scanned or
routed from fax to the controller. The date format depends on
your system date settings.
Click the column heading to sort the list by scan date and time.
This is the default sort.
Refresh—updates the list of documents and sorts them by scan
date.
Delete—removes the selected document.
64 GL-1020 Scan Operator’s Guide
Page 65

Properties—opens the Document Information dialog box, which
gives detailed information about the selected document. If the
document is password protected, enter the 5-digit password to
view the Document Information dialog box.
Acquire—retrieves the selected document for use by your
application. If the document is password protected, enter the
password when prompted.
Close—exits the GL-TWAIN Driver and returns to the
application. You can click this button before or during the
retrieval process.
Help—opens the online Help file.
Status bar—displays three types of information.
n Status Area
n Ready—Document retrieval can begin.
n Retrieving—The selected document is being retrieved.
n Updating—The dialog box information is being updated
(after you click
n Progress Area—Displays a visual representation of the status
Refresh).
of the process being performed.
n Comment Area—While you are retrieving the document, this
area displays the number of pages. It also displays a warning
®
when free storage space is less than 20% (Windows NT
operating system only).
Document Information Dialog Box Reference
The Document Information dialog box appears when you select a
document and click
Properties on the Main TWAIN dialog box.
Use it to view details about the document such as size, location,
and status.
The Document Information dialog box contains two tabs.
General Tab
This tab presents general information about the document:
—the name of the document.
Name
Location
Pages
Status
—where the document is stored.
—the number of pages in the document.
—the condition of the document: Ready or Retrieving.
GL-1020 Scan Operator’s Guide 65
Page 66

Note: The maximum size of image data you can send by
email attachment is 20 MB. However, the administrator can
specify a lower limit in the range 2-20 MB if the email client
software is unable to handle fragmentation successfully.
Created
—the date and time when the document was scanned or
routed from fax to the controller.
Protected—has two options:
n Yes—the document is password protected
n No—the document is not password protected
Pages Tab
This tab describes the configuration of the pages in the document:
—is the page number.
Page
Image Size
—is the resolution of the image in dots per inch.
DPI
—returns to the Main TWAIN dialog box.
OK
HELP
—is the number of pixels in the image on the page.
—opens the online Help file.
66 GL-1020 Scan Operator’s Guide
Page 67

MONITORING SCAN JOBS
You can manage scan jobs using the Scan Jobs page in TopAccess.
This page enables you to view the current scan jobs queue, the scan
jobs log and the scan message log. You can sort the current jobs list
and the scan jobs log by Group, Template, Agent, Status or Time.
You can also cancel a scan job that is waiting to be processed.
Alternatively, you can use the GL-DocMon utility to monitor scan
jobs. See the Operator’s Guide (Basic) for details.
GL-1020 Scan Operator’s Guide 67
Page 68

MANAGING SCAN JOBS
To determine the status of a scan job, you can view the various
scan logs:
n Current Jobs, which lists all scan jobs currently queued for
n Scan Jobs Log, which lists completed scan jobs
n Scan Message Log, which lists system messages related to
Besides viewing these logs, you can delete scan jobs.
Viewing Current Scan Jobs
The Scan Jobs page displays the list of current scan jobs and
provides links to the scan jobs log and scan message log.
The Current Jobs list displays the group, template, agent, status,
number of pages and start time for each scan job.
processing
the scan function.
1Click the
2 If necessary, click
TopAccess Current Scan Jobs page
Scan link.
Scan Jobs to open the Current Jobs page.
3 To sort the current jobs list so that a particular job is easier to
find, click the appropriate table heading. The page refreshes
to display the information in the order you requested.
4 Scroll down the list to see details of the job.
68 GL-1020 Scan Operator’s Guide
Page 69

Viewing the Scan Jobs Log
To view the list of completed scan jobs:
1 On the Scan Jobs page, click Job Log.
2 To sort the log in a particular order, click the appropriate table
heading.
3 Scroll down the list to see details of the job.
4Click the
Refresh icon in the right corner to update the
information on this page.
The Scan Jobs Log displays the group, template, agent and status
for each job.
Viewing the Scan Message Log
To view the list of system messages for scan jobs:
1 On the Scan Jobs page, click
Message Log.
2 To sort the list of messages in a particular order, click the
appropriate table heading.
3 Scroll down the list to locate the messages.
Deleting Scan Jobs
You can cancel any job that is in the Current Jobs queue by
deleting it.
1On the Scan Jobs page, check the box next to the scan job that
you wish to delete or click the Check All heading to select all
jobs.
2Click
Delete.
3Click
OK to confirm the deletion process.
The scan job(s) will be deleted from the queue.
Scan Administration
It is a good idea to perform regular maintenance tasks such as
resetting the scan counter, backing up and restoring the address
book and scan templates, or deleting scan files stored on the
controller.
For information about how to reset scan counters, see “
Resetting
Scan Counters” on page 211.
“Maintenance Functions”
on page 217
GL-1020 Scan Operator’s Guide 69
Page 70

BASIC TROUBLESHOOTING
This chapter is the place to start if you are experiencing difficulties
using the network scan functions. Because the system integrates
hardware, network, and software components, errors do occur and
sometimes it can be difficult to determine their source.
Variations between network configurations and user setup further
complicates the troubleshooting process.
This chapter provides error tables that list controller error messages
and the corrective actions you can take as an end user. It also
describes GL-TWAIN Driver problems and their solutions.
For corrective actions that administrators can take, see the
Administrator’s Guide.
GL-1020 Scan Operator’s Guide 70
Page 71

ERROR MESSAGES
Error Messages Defined
Message Action (End User)
Scan kit Internal Error (SK1) Restart the controller. If the controller is not
restored, contact the Network Administrator
Scan kit Internal Error (SK2) Restart the controller. If the controller is not
restored, contact the Network Administrator.
Select either Public or Private scan.
Private scan may require a password.>
Internal memory used is NN%.
Select either Public or Private scan.
Private scan may require a password. >
Shared memory used is NN%.
Scan Kit Internal Error (SK3) Restart the controller. If the controller is not
Scan Kit Internal Error (SK4) Database access error. Restart the controller.
Scan Kit Internal Error (SK5) Restart both the controller and the copier. If
Scan Kit Internal Error (SK6) Scanning cannot be started due to the copier
Determine the job in progress by reviewing the
Scan Jobs screen in TopAccess. When a job is
present, either wait for it to complete, or delete
it. If the job won’t complete, delete it. If the
error persists, restart the controller. If the error
still persists after restarting the controller,
contact the Network Administrator.
Delete unnecessary data stored on the
controller. Use the GL TWAIN Driver to delete
data from the GL_TWAIN folder, or an
appropriate application to delete data from the
GL_SHARE folder.
restored, contact the Network Administrator.
If the controller is not restored, contact the
Network Administrator.
the controller is not restored after restarting,
contact the Network Administrator.
status. Make sure that the operation on the
copier is correctly set up and then retry
scanning.
Invalid group password Finish glass scan (a document is on the ADF).
To read the original from the ADF, try again
after the glass scan is complete.
GL-1020 Scan Operator’s Guide 71
Page 72

Error Messages Defined
Message Action (End User)
Finish glass Scan (Max page reached) The number of pages has reached the
maximum (100 pages or 200 images if
duplex). Finish scanning.
Finish glass Scan (A document is on ADF) A document on the glass is being scanned.
Wait until the current scan process is complete
before using the ADF scan function.
Finish glass Scan (Job full) Finish scanning, reduce the resolution, or
change the document type to “Text” or “Text/
Photo,” to scan again.
Finish ADF Scan Place an original on the ADF.
100 sheets can be set on the ADF. To
continue, repeat the operation.
Job Overflow. To continue, repeat the
operation.
Job Overflow. Finish ADF scan. The amount of data has reached the
The number of sheets has reached the
maximum. Reduce the number of sheets to
scan again.
The amount of data has reached the
maximum for a scan.
Reduce the amount of data to scan again
using any of the following methods:
1. Reduce the number of pages.
2. Reduce the resolution.
3. Select Text/Photo or Text mode.
maximum for one scanning. Reduce the
amount of data to scan again using any of the
following methods:
1. Reduce the number of pages.
2. Reduce the resolution.
3. Select Text/Photo or Text mode.
When this error occurs during continuous
scanning, data scanned before the error
occurred is stored.
To use the stored data, press the Finish key.
72 GL-1020 Scan Operator’s Guide
Page 73

Error Messages Defined
Message Action (End User)
Scanner Memory full. Job is canceled The scanner memory is full and your request
has not been accepted. Use TopAccess to
determine the job in progress. When any job is
present, either wait for the job to be
completed, or delete it. If the job won’t
complete, delete it. If the error persists, restart
the controller. If the error still persists after
restarting the controller, contact the network
administrator.
GL-1020 Scan Operator’s Guide 73
Page 74

TWAIN DRIVER ERRORS
Cannot Find the GL-1020
Problem Description:
Cannot find the controller using the Search button.
Corrective Action:
Confirm that the user workstation and controller are properly
connected to the NetBIOS network. Make sure that the selected
workgroup name is correct. If the controller is out of the subnet in
which user's workstation exists, enable access to the controller
via NetBIOS over TCP/IP by specifying the controller’s machine
name and IP address in WINS server or lmhosts file in the user's
workstation. Then try entering the controller’s machine name
directly in “Machine Name.”
Cannot Access TWAIN Folder
Problem Description:
Cannot access the \\GL-1020\GL_TWAIN folder from Windows®
Explorer.
Corrective Action:
This network folder contains Scan to TWAIN documents and can
be accessed only using the GL-TWAIN Driver.
TWAIN Driver Dialog Does Not Appear
Problem Description:
Initiated the TWAIN image acquisition mode from an application,
but the GL-TWAIN Driver dialog box does not appear.
Corrective Action:
The GL-TWAIN Driver dialog box may be hidden behind other
windows. Minimize all other windows. If you cannot find the
dialog box, enable the “Show UI” feature of the GL-TWAIN
Driver from the application. See the Scan Readme file for more
detail.
Cannot Acquire Document
Problem Description:
Cannot acquire a document using the GL-TWAIN Driver.
74 GL-1020 Scan Operator’s Guide
Page 75

Corrective Action:
The GL-TWAIN Driver is carefully tested with several TWAINcompliant applications. Some applications need to be configured
to connect to the GL-TWAIN Driver. See the Scan Readme file
for supported applications and configuration tips.
B/W Image Reversed.
Problem Description:
Image is acquired but the black and white areas of the image are
reversed.
Corrective Action:
Some applications may handle Black and White pixilation
incorrectly. Enable the “Reverse Image” option from the
application and try again.
Cannot Acquire Multi-Page Document
Problem Description:
Cannot acquire a multipage document from an application.
Corrective Action:
Some applications do not support multipage scan from TWAIN
I/F, or need to be configured to acquire multipage documents. See
the Readme file on the Scanner Client CD-ROM.
Cannot Open a Password Protected Folder or Document
Problem Description:
A folder or document is password protected and you don't know
which password to apply.
Corrective Action:
The folder password is the same as the corresponding template
group password. Document passwords are the same as the
corresponding template password. If the group password
changes, the corresponding TWAIN folder password changes
also. Document passwords remain the same as the template
password when the document is scanned originally, even if the
template password changes subsequently.
GL-1020 Scan Operator’s Guide 75
Page 76

SCAN TAB REFERENCE
The Scan tab has two submenus:
n Scan Jobs allows you to view the list of current scan jobs, and
to delete jobs from the queue
n Te mp la tes allows you to create, edit and delete scan templates
and template groups.
This chapter describes the fields and controls on each page of these
submenus.
GL-1020 Scan Operator’s Guide 76
Page 77

SCAN JOBS PAGE
When you click the Scan Jobs submenu, the Scan Jobs page
displays the list of current scan jobs and provides controls for:
n Accessing the scan logs
n Refreshing the page
n Deleting scan jobs
Scan Jobs List
This table has eight columns:
Checkmark—check the boxes in this column to select scan jobs.
To select all jobs, click the button in the column heading.
Group—displays the name of the template group for each job.
Template—displays the name of the template for each job.
Agent—displays the scan transfer agent for each job.
Status—displays the status of each job.
Pages—displays the number of scanned pages for each job.
Time—displays the time and date each job started (was scanned).
Detail Status—displays further information about the job.
You can sort the table by Group, Template, Agent, Status or Time.
The default sort sequence is ascending order of Time, indicated
by the up arrow in the column heading. To sort the table on a
different column, click its heading.
Controls
Job Log—click this link to view the log of completed scan jobs.
Message Log—click this link to view scan messages.
Refresh—click this link to update the scan jobs list.
Delete—click this button to cancel the selected scan jobs. A
confirmation message appears. Click
OK to delete the jobs.
GL-1020 Scan Operator’s Guide 77
Page 78

TEMPLATES PAGES
You use these pages to create, edit and delete scan templates. To
access these pages:
1On the Scan tab, click the Templates submenu.
By default, the main Templates page opens listing all
templates in the Public group.
2 If the Templates list doesn’t appear, click the
Templ a tes link.
3 To view the templates in a private group, click the down
arrow to open the
Group listbox and select the group.
Templates List Page
This page contains a table listing all templates in the selected
group and provides controls for:
n Going to the Template Groups pages
n Selecting a different group
n Creating new templates
n Editing existing templates
n Deleting templates
Tem pl a te s Tab le
This table has five columns:
Checkmark—check the boxes in this column to select templates.
Padlock—a padlock icon in this column means the template is
password protected. If you try to edit or delete the template, a
Password popup appears.
Icon—shows the icon displayed for each template on the copier’s
control panel.
Template Name—displays the name of each template.
Agent—lists the scan transfer agent used by each template.
You can sort the table by Template Name or by Agent. The
default sort sequence is in ascending order of Template Name,
indicated by an up arrow in the column heading. To sort by agent,
click the Agent heading.
Controls
To create, edit or delete public templates, you must be logged in
as an administrator. If you are using TopAccess in end-user mode,
78 GL-1020 Scan Operator’s Guide
Page 79

the New, Edit and Delete buttons are hidden for the Public template
group.
Template Groups—click this link to create, edit or delete template
groups. Alternatively, you can create a new group when creating
a new template.
Group—to view templates in another group, click the down
arrow and select the group.
New—click this button to open the New Template page.
Edit—this button is enabled when you select a single template in
the table. Click it to edit the selected template.
Delete—this button is enabled when you select one or more
templates in the table. You can delete multiple templates
provided they aren’t password protected. Templates with
passwords must be deleted one at a time. When you click this
button to delete the selected template(s) a confirmation message
appears.
New Template Page
This page opens when you click
New on the Templates list page. It
has three main parts:
n Entering template identification details and optionally setting
a password
n Selecting the scan settings
n Selecting the transfer agent settings
The first two parts are the same for all templates. The third part
varies according to the scan transfer agent you select.
When you have defined the new template and click
OK, the
template is added to the template table and you return to the
Templates list page.
Template Identification
Caption—enter a name for the template in these fields (up to 11
characters in each). If you use both fields, they are joined by an
underscore to form the template name.
Template Group—displays the group name selected on the
Templates list page. To select a different group, click
return to the Templates list page. To create a group, click
Group
to open the New Template Group popup.
Cancel to
New
GL-1020 Scan Operator’s Guide 79
Page 80

Owner—enter the name of the template’s owner (up to 32
characters).
Padlock symbol—optionally, check
Password protect this template
to enable the Password and Confirm Password fields.
Password—enter a password for the template (5 digits displayed
as asterisks).
Confirm Password—enter the password again.
Template Icon—select an icon to display for this template on the
copier’s control panel.
Scan Settings
Choose the settings for your template from the drop-down list
boxes:
Double Sided Scan—choose from Single (default), Duplex Book,
or Duplex Tablet.
Rotation—choose from No Rotation (default), 90 Right, 90 Left,
or Rotate 180.
Document Type—choose from Text (default), Text/Photo, or
Photo.
Resolution—choose from 150 dpi, 200 dpi (default), 300 dpi, 400
dpi, or 600 dpi.
Note: When scanning to TopAccessComposer, select only
600 dpi. When scanning to iFax, select only 200 dpi.
Exposure—choose Auto (default), or select a specific level if
necessary.
Original Size—Choose:
n Auto (default) for original documents that have the same
page size throughout (copier detects size of first page)
n Mixed Original Sizes if the original document uses more than
one page size (copier detects size of each page)
n A specific size if this template applies to documents that are
always on the same size paper.
Send email—optionally check one or both of these boxes to
receive notification by email. The Email Address box is enabled.
Email Address—enter your email address (up to 90 characters).
80 GL-1020 Scan Operator’s Guide
Page 81

Agent Settings
This part varies according to the scan transfer agent you select.
Send To—open the list box, and select a scan transfer agent.
For the agent delivery details, see:
Send to TWAIN” on page 81
“
Send to File” on page 81
“
Send to Email” on page 81
“
Send to iFax” on page 82
“
Send to TopAccessComposer” on page 82
“
Send to FTP Server” on page 83
“
Send to TWAIN
This transfer agent stores scanned files in a TWAIN folder on the
controller. You can retrieve these files using any TWAINcompliant application.
File Name—displays the name of the TWAIN document,
consisting of the template name and a 3-digit number.
Folder Location—displays the path name of the TWAIN folder,
consisting of <group number>-<group name>.
You cannot change these.
Send to File
This transfer agent stores scanned files on the controller or on a
file server.
Location—click the down arrow and select a location for the
scanned file from the list box. Choices are Controller or Network
Folder.
Path—displays the path for storing the scanned file, consisting of
<group number>-<group name>-<template name>.
File Name—enter a name for the scanned file.
File Format—click the down arrow and choose from Single Page
TIFF (G4), MultiPage TIFF (G4), or PDF.
Send to Email
This transfer agent sends scanned files as email attachments to
specified recipients.
GL-1020 Scan Operator’s Guide 81
Page 82

From—enter your name.
Return Email Address—enter your email address (up to 128
characters).
To—click this link to open the Addresses popup and select
recipients. Alternatively, for one recipient you may prefer to type
the email address in the text box.
Subject—enter the email’s topic (one line).
Body Text—enter any covering message (up to 1 KB).
Attachment File Format—TIFF-S.
Message Fragmentation—click the down arrow and choose from
None (default), 64 KB, 256 KB, 512 KB.
Send to iFax
This transfer agent faxes scanned files to specified email
addresses.
From—the sender’s name.
Return Email Address—the sender’s email address (up to 128
characters).
To—click this link to open the Addresses popup and select
recipients. Alternatively, for one recipient you may prefer to type
the email address in the text box.
Subject—enter the topic of the fax (one line).
Body Text—enter any covering message (up to 1 KB).
Attachment File Format—TIFF-S.
Message Fragmentation—click the down arrow and choose from
None (default) ,256 KB, 512 KB, 1024 KB, 2048 KB.
Send to TopAccessComposer
This transfer agent stores scanned files in a TopAccessComposer
folder.
TopAccessComposer Folder—enter the name of the destination
folder in TopAccessComposer. The exact folder path will be
displayed below. If the folder is a Private folder and the folder
name is the same as a user home Private folder, a new folder with
the same name will be created under the user’s home folder. For
example, Private\Toshibauser \Toshibauser. If the folder name is
left blank, no folder will be created and the scanned files will be
82 GL-1020 Scan Operator’s Guide
Page 83

stored in the user’s home folder. For example,
Private\Toshibauser.
Folder Type—click the down arrow and choose from Public,
Private or Department. If you choose Private, you must enter your
login name and password.
Login Name—enter your TopAccessComposer login name (up to
15 characters).
Password—enter your TopAccessComposer login password (up
to 10 characters).
Confirm Password—enter the password again.
Document Name—enter the name of the scanned document.
Send to FTP Server
This transfer agent sends scanned files to an FTP server, enabling
them to be retrieved from Macintosh or Unix workstations.
FTP Server—enter the name or IP address of the FTP server (up
to 128 characters).
FTP Server Port—enter the port number for the FTP transfer
(default 21).
User Name—enter the user name of the FTP account on the
server (up to 15 characters).
Password—enter the password for the FTP account on the server
(up to 10 characters).
Retry when FTP transfer fails—optionally check this box to
enable the Retry Count and Retry Interval fields.
Retry Count—open the list box and choose the number of retries
to attempt: 1, 2 or 3.
Retry Interval—open the list box and choose the number of
minutes between retries (up to 59 minutes in 1 minute
increments).
File Path—displays the path name for storing the scanned file,
consisting of <group number>-<group name>-<template name>.
File Name—enter a name for the scanned file.
File Format—open the list box and choose from Single Page
TIFF (G4), MultiPage TIFF (G4), or PDF.
Overwrite—check this box if you want the scanned file to
overwrite any file of the same name in the destination folder.
GL-1020 Scan Operator’s Guide 83
Page 84

Addresses Popup
This dialog box opens when you click the
To link for the Scan to
Email or Scan to iFax agent. It enables you to select a list of
recipients for your email or fax.
Check each recipient’s name, then click
Edit Template Page
This page opens when you click
displays the selected template’s current settings. The Template
Group name is read-only. You can change any of the other
settings.
This page has the same fields and controls as the New Template
page with one exception. Edit Template has no
TEMPLATE GROUPS PAGES
You use these pages to create, edit and delete template groups. To
access these pages:
1On the
By default, the main Templates page opens.
2Click the
Template Groups Page
The Template Groups page lists all existing template groups and
provides controls for:
OK.
Edit on the Templates list page. It
New Group button.
Scan tab, click the Templates submenu.
Tem p late Groups link.
n Going to the Templates pages
n Creating new template groups
n Editing existing template groups
n Deleting template groups
Template Groups List
This table has four columns:
Checkmark—check the boxes in this column to select template
groups.
Padlock—a padlock icon in this column means the template
group is password protected. If you try to edit or delete the group,
the Group Password popup appears.
Group Name—displays the name of each template group.
84 GL-1020 Scan Operator’s Guide
Page 85

Owner—lists the owner of each template group.
You can sort the table by Group Name or by Owner. The default
sort sequence is in ascending order of Group Name, indicated by
an up arrow in the column heading. To sort by owner, click the
Owner heading.
Controls
To delete password-protected private template groups, you must
be logged in as an administrator. The Public template group
cannot be deleted.
Templates—click this link to create, edit or delete templates.
New—click this button to open the New Template Group page.
Edit—this button is enabled when you select a single template
group in the table. Click it to edit the selected group.
Delete—this button is enabled when you select one or more
template groups in the table. You can delete multiple groups
provided they aren’t password protected. Groups with passwords
must be deleted one at a time. When you click this button to
delete the selected group(s) a confirmation message appears.
New Template Group
This dialog appears as a page if you click
Groups page, or as a popup window if you click
New on the Template
New Group on the
New Template page.
To define a group, you must give it a name. The other fields are
optional.
Group Name—enter a name for your new group (up to 11
characters).
Owner—enter the name of the group’s owner (up to 20
characters).
Email Address—enter the email address to which error messages
should be sent (up to 90 characters).
Padlock symbol—optionally, check
Password protect this group to
enable the Password and Confirm Password fields.
Password—enter a password for the template (5 digits displayed
as asterisks).
Confirm Password—enter the password again.
GL-1020 Scan Operator’s Guide 85
Page 86

GLOSSARY OF TERMS
Definition of Common Terms
Term Definition
Current Jobs The list of all print and copy jobs currently queued to the selected
GL-1020 controller. You can view it using either the TopAccess or
the GL-DocMon application.
Department folder A TopAccessComposer system folder. The administrator can
store and work with documents in the Department folder.
Registered and unregistered users can view and print documents
in the Department folder, but cannot edit them.
Device Refers to the GL-1020 controller connected to a network digital
copier. Often, the term device is used to refer to the entire
controller/copier system.
DIN Document Identification Number. You must enter this number at
the copier to release private jobs for printing.
GL-1020 Scan Operator’s Guide 86
Page 87

Definition of Common Terms
Term Definition
Document editor /
organizer
Driver See Printer Driver.
Duplex The process of printing on both sides of a sheet of paper. For
Electronic Document
Processing System
Gateway address The IP address of the router that the GL-1020 controller uses to
GL-1020 The TOSHIBA controller used to connect digital copiers to a
Hardware address The unique address assigned by the manufacturer of a network
HTTP HyperText Transfer Protocol. The Internet standard that supports
Refers to the TopAccessComposer application, which enables
you to store, edit, manage and print scanned images using a web
interface.
duplex printing, the copier must have an Automatic Duplex Unit
(ADU) installed. See also Simplex.
This system consists of the TOSHIBA e-STUDIO550/650/810
digital copier connected to the GL-1020 controller. It provides the
convenience of walk-up copying, scanning, and network printing
from the same device.
access devices on other subnets.
network. Also referred to as the device or printer.
interface card. Also known as the Media Access Control (MAC)
address.
information exchange on the World Wide Web (WWW). HTTP
provides users with transparent access to the Internet.
Jobs Log A file that contains a historical record of the jobs submitted to the
GL-1020 controller. The information for each job includes the
document name, size, date and time stamp, and status. You can
filter the Jobs Log to list only the details for specific types of jobs.
Job Type The printing method for a specific job: Normal, Scheduled,
Private, Proof Print, Print to Image Overlay File,
TopAccessComposer or TopAccessComposer Print.
LDAP Lightweight Directory Access Protocol. A network protocol for
extracting information from a hierarchical directory.
MAC Media Access Control. A sublayer of the layer 2 data link protocol.
It deals with network access and collision detection.
GL-1020 Scan Operator’s Guide 87
Page 88

Definition of Common Terms
Term Definition
MAC Address The unique address assigned by the manufacturer of a network
interface card.
Message Log A file that contains a historical record of errors and warnings that
occurred on the GL-1020 controller or the copier. The information
for each message includes the date, subsystem, and message
severity. You can filter the Message Log to list only those
messages that meet specific criteria.
On-demand printing A service designed to cut book and warehousing costs by printing
books at the time of sale.
Orientation The direction in which a document is laid out on a page. Portrait
orientation produces a vertical page layout (i.e., the page height is
greater than the width). Landscape orientation produces a
horizontal page layout (i.e., the page width is greater than the
height).
Printer Driver Software installed on the client workstation that enables printing
to a device. The TOSHIBA printer drivers are on the e-STUDIO
GL-1020 Client CD-ROM. They permit printing to the GL-1020
controller.
Private folder A folder that belongs to a registered user. When you create a new
user account, TopAccessComposer creates a private folder for
you. You must log on to the document editor / organizer in order to
view your private folder.
Properties User-definable attributes or settings. For example, print properties
include page orientation and duplex mode.
Property sheet A dialog box containing properties grouped by category. For
example, all properties that are related to finishing options are
grouped on the GL-1020 drivers’ Setup property page.
Property tab A Properties dialog box typically contains several tabs that allow
you to access property sheets, where options and settings are
grouped by category or function.
Public folder A TopAccessComposer system folder. The administrator and all
registered and unregistered users can edit, view and print
documents in the Public folder. They can also create Public
subfolders.
88 GL-1020 Scan Operator’s Guide
Page 89

Definition of Common Terms
Term Definition
RIP Raster Image Processor. A device that reads the text and
graphics in a document and outputs a bit-mapped image to a
printer. The acronym is used frequently as a verb, as in “The
controller is ripping the print job.”
Scan agent A set of properties for transferring scan jobs to a particular
destination.
Scan template A data structure containing the attributes for scan jobs, such as
single-sided or duplex printing, resolution and paper size. Public
templates are accessible to all users. Private templates are
defined for specific purposes and may be password-protected.
Simplex Printing on only one side of a piece of paper. See also Duplex.
TCP/IP Transmission Control Protocol/Internet Protocol. The TCP part of
TCP/IP provides transport functions, which ensures that the total
amount of bytes sent is received correctly at the other end. The IP
part of TCP/IP provides the routing mechanism. TCP/IP is a
protocol in which the messages transmitted contain the address
of a destination network as well as a destination station.
TWAIN Technology Without An Interesting Name. The de facto standard
interface between software applications and image capturing
devices.
URL Uniform Resource Locator. An address that allows you to access
information on the Internet, such as a web page, FTP or Gopher,
Usenet, or database. URLs can take the following forms: “http://
host.domain/page” and “mailto://username@host.domain”.
GL-1020 Scan Operator’s Guide 89
Page 90

INDEX
A
Acquire, Main TWAIN dialog box 65
Address Book 51
searching 52
Address Edit screen 51
Automatic Document Feeder
using 37
C
Change folder, Main TWAIN dialog box 64
Changing scan parameters 45
Continuous scan mode 43
Controller
scanning to 54
D
Deleting
private groups 28
Deleting a document 60
Destinations 54
Displaying Address Book groups 51
Document
deleting 60
retrieving 59
Document folder
finding 59
Document Information dialog box 65
Document Name, Main TWAIN dialog box 64
Documents
retrieving 60
Domain name, Folder Setting dialog box 62
E
Email
scanning to 55
Email Agent Settings Summary 48
Email attachment limit 55, 66
Error handling 44
Error messages 71
F
File
scanning to 54
GL-1020 Scan Operator’s Guide 90
Page 91

Fileserver
scanning to 55
FileShare Agent Settings Summary 47
Finding a document folder 59
Folder name, Main TWAIN dialog box 64
Folder Password, Folder Setting dialog box 63
Folder Setting dialog box 59, 62
G
General tab on the Document Information dialog
box 65
GL_SHARE folder 54
GL_TWAIN folder 54
GL-DocMon 15
GL-TWAIN Driver, selecting 58
Group Select screen 51
Groups 23
I
iFax Agent Settings Summary 49
Internet-Fax
scanning to 55
J
jobs
deleting 69
viewing 68
L
List box, Main TWAIN dialog box 64
logs
viewing scan jobs log 69
viewing scan message logs 69
M
Machine name, Folder Setting dialog box 62
Main TWAIN dialog box 59, 60, 63, 64
Maximum number of originals 37
O
Originals
placing on the glass 38
P
Pages tab on the Document Information dialog box 66
Pages, Main TWAIN dialog box 64
Password, Folder Setting dialog box 63
Placing originals on the glass 38
Printer drivers 14
Printer Main Menu screen 39
Private groups 23
deleting 28
Private Scan feature 39
Private templates
resetting 30
using 25
Processing options 16
Public groups 23
Public Scan feature 39
Public templates 25
public templates
viewing 25
R
Refresh, Main TWAIN dialog box 64
Resetting
private templates 30
Retrieving a document 59
Retrieving scanned documents (File) 60
Retrieving scanned documents
(TopAccessComposer) 61
Retrieving scanned documents (TWAIN) 62
S
Scan
groups 23
templates 23
scan
administration 69
Scan Agent
configuring 32
settings 46
Scan Agents 23
Scan features 14, 17
scan jobs
deleting 69
managing 68
viewing 68
Scan Main Menu screen 40
Scan parameters 45
changing 45
setting 45
Scan setting 45
Scan to controller 54
Scan to Fileserver 55
Scanned documents
retrieving 60
Scanning
procedures 39
Scanning destinations 54
Scanning modes 15
Scanning originals 39
Scanning overview 17
Scanning Status screen 43
Scanning to email 55
Scanning to file 54
Scanning to Internet-Fax 55
Scanning to TopAccessComposer 56
Scanning to TWAIN 54
Searching the Address Book 52
Selecting the GL-TWAIN Driver 58
Send to Email 55
Send to File 54
Send to iFax 55
GL-1020 Scan Operator’s Guide 91
Page 92

Send to TWAIN 54
Setting scan parameters 45
Show Folders, Folder Setting dialog box 62
Software components 14
Status bar, Main TWAIN dialog box 65
Status, Main TWAIN dialog box 64
System components 15
System requirements 16
T
TCP/IP protocol 16
Templates 23
TopAccess 15
Administrator 24
End User 24
TopAccessComposer 15
scanning to 56
TopAccessComposer Agent Settings Summary 48
TWAIN
scanning to 54
TWAIN Agent Settings Summary 47
U
Updating the Document List 60
User Search Results screen 53
V
Viewing Document Details 60
Viewing Private Templates 29
Viewing public templates 25
W
Waiting for continuous scan screen 44
Waiting for next page screen 43
92 GL-1020 Scan Operator’s Guide
 Loading...