

Page 1
TEC Portable Printer
Table of Contents
B-415 SERIES
Owner’s Manual
Copyright © 2003
by TOSHIBA TEC CORPORATION
All Rights Reserved
570 Ohito, Ohito-cho, Tagata-gun, Shizuoka-ken, JAPAN
Page 2
CE Compliance (for EU only)
This product complies with the requirements of EMC, Low Voltage and
R&TTE Directives including their amendments.
FCC Notice
This equipment has been tested and found to comply with the limits for a Class B digital device,
in accordance to Part 15 of the FCC Rules. These limits are designed to provide reasonable
protection against harmful interference in a residential installation. This equipment generates,
uses, and can radiate radio frequency energy and, if not installed and used in accordance with
the instructions, may cause harmful interference to radio communications.
However, there is no guarantee that interference will not occur in a particular installation. If this
equipment does cause harmful interference to radio or television reception, which can be
determined by turning the equipment off and on, the user is encouraged to try to correct the
interference by one or more of the following measures:
• Redirect or relocate the receiving antenna.
• Increase the separation between the equipment and receiver.
• Connect the equipment into an outlet on a circuit different from that to which the receiver is
connected.
• Consult the dealer or an experienced radio/TV technician for help.
Changes or modifications not expressly approved by manufacturer for compliance could void the
user's authority to operate the equipment.
CAUTION
To avoid injury, be careful not to catch or jam your fingers while opening or closing the cover.
CAUTION
Do not touch moving parts. To reduce the risk that fingers, jewelry, clothing, etc., be drawn into
the moving parts, push the switch in the “O” position to stop movement.
“This Class B digital apparatus meets all requirements of the Canadian Interference-Causing
Equipment Regulations.”
“Cet appareil numérique de la classe B respecte toutes les exigences du Règlement sur le
matériel brouilleur du Canada.”
(for CANADA only)
IrCOMM (9-wire) is a trademark owned by Link Evolution Corporation and is used by TOSHIBA
TEC under license.
IrDA Protocol Stack Deep CoreTM © Link Evolution Corp. All Rights Reserved.
The B-415-GH25-QM is equipped with a wireless communication device, TEC-BTM. Please be
sure to read the enclosed Precautions for Handling of Wireless Communication Devices before
using this product.
VORSICHT:
Schallemission: unter 70dB (A) nach DIN 45635 ( oder ISO 7779)
Die für das Gerät Vorgesehene Steckdose muß in der Nähe des Gerätes und leicht zugänglich sein.
■ For AU EMC
Copyright © 2003
by TOSHIBA TEC CORPORATION
All Rights Reserved
570 Ohito, Ohito-cho, Tagata-gun, Shizuoka-ken, JAPAN
Page 3
Safety Summary
ENGLISH VERSION EO1-33014
The B-415-GH25-QM is equipped with a wireless communication device, TEC-BTM. Please be sure to
read the enclosed Precautions for Handling of Wireless Communication Devices before using this product.
Precautions for Handling of Wireless Communication Devices
Bluetooth® Module: TEC-BTM
Trade Mark
Bluetooth is a trademark owned by Bluetooth SIG, Inc. and used by TOSHIBA TEC CORPORATION
under license from Japan Total Design Communication Co., Ltd.
The B-415-GH25-QM is equipped with a certified wireless communication module (TEC-BTM). The
following cautions are applied to the certified wireless module.
Cautions
General
For all countries and areas
This product is a wireless communication device, and the use of this product is restricted to the following
countries or areas. If the product is used in the countries or areas other than the following, you may be
punished according to the laws of those countries or areas.
Japan, USA, Canada, Austria, Belgium, Denmark, Finland, France, Germany, Greece, Italy, Ireland,
Luxembourg, Portugal, Spain, Sweden, The Netherlands, United Kingdom, Australia, New Zealand,
Mexico, Switzerland, Norway, Iceland, Hungary, Liechtenstein
For Europe
Hereby, TOSHIBA TEC CORPORATION, declares that this TEC-BTM is in compliance with the essential
requirements and other relevant provisions of Directive 1999/5/EC.
This equipment uses a radio frequency band that has not been harmonised throughout all EU and EFTA
countries, and can be used in the following countries.
Austria, Belgium, Denmark, Finland, France, Germany, Greece, Italy, Ireland, Luxembourg, Portugal,
Spain, Sweden, The Netherlands, United Kingdom, Switzerland, Norway, Iceland, Hungary, Liechtenstein
For USA
This device complies with Part 15 of the FCC Rules.
Operation is subject to the following two conditions:
(1) this device may not cause harmful interference, and
(2) this device must accept any interference received, including
interference that may cause undesired operation.
Changes or modification not expressly approved by manufacturer for compliance could void the user’s
authority to operate the equipment.
For Canada
Operation is subject to the following two conditions:
(1) this device may not cause interference, and
(2) this device must accept any interference, including
interference that may cause undesired operation of the device.
(i)
Page 4

Safety Summary
ENGLISH VERSION EO1-33014
To prevent radio interference to the licensed service, this device is intended to be operated indoors and
away from windows to provide maximum shielding. Equipment that is installed outdoors is subject to
licensing.
For safety
Do not use this product in locations where use may be forbidden, for example, in an aeroplane or a hospital.
If you do not know the forbidden areas, please refer to and follow the airline company or medical institution
guidelines.
Flight instrument or medical equipment may be affected, causing a serious accident.
Since this product uses extremely low power compared with mobile phones, it cannot possibly interfere the
pacemakers and defibrillators. However, if the use
of this product should be likely to have affected the pacemaker or defibrillator, immediately stop using the product
and contact your TOSHIBA TEC sales agent.
Do not disassemble, modify, or repair the product. Doing so may cause injury. Also, modification is against
the Laws and Regulations for Radio Equipment. Please ask your TOSHIBA TEC sales agent for repair.
Precaution in use
This product communicates with other devices by radio. Depending on the installation location, orientation,
environment, etc., its communication performance may deteriorate or devices installed near by may be
affected.
Keep away from a microwave.
Communication performance may deteriorate or a communication error may occur due to the radio emitted
from a microwave.
Keep away from wireless LAN.
The product and wireless LAN may interfere with each other, causing a deterioration of communication
performance or a communication error.
Do not use the product on a metal table or near a metal object.
Communication performance may be deteriorated.
Specification
· Bluetooth class 2
· Built-in protocol stack activated by Bluetooth V1.1 serial port profile
· Operating temperature: -5 to 50°C 25% to 85%RH (No condensation)
· Dimensions: 38.1 mm (W) x 25.4 mm (H) x 7 mm (D)
(ii)
Page 5
Safety Summary
ENGLISH VERSION EO1-33014
Safety Summary
Personal safety in handling or maintaining the equipment is extremely important. Warnings and Cautions
necessary for safe handling are included in this manual. All warnings and cautions contained in this
manual and written inside or outside of the printer should be read and understood before handling or
maintaining the equipment.
Do not attempt to effect repairs to this equipment. If a fault occurs that cannot be rectified using the procedures described in this manual, turn off the power, then contact your authorised TOSHIBA TEC representative for assistance.
Safety Precautions
This Owner's Manual and the products (machines) which you have purchased contain indications which
should be observed in order to use the machines safely and prevent harm to yourself and others and
damage to property. The meanings of these indications and symbols are given below.
Read these indications and become familiar with their contents before reading this Owner's Manual.
This indicates that there is the risk of death or serious injury if the
WARNING
machines are improperly handled contrary to this indication.
• If water or any other liquid enters the machine, turn off the power. Continuous use of the machine
under such conditions may cause fire or electric shock.
• If the equipment enclosed is damaged when dropped or subject to shock, turn off the power. Continuous use of the machine under such conditions may cause fire or electric shock.
• Avoid continuous exposure to direct sunlight or high temperature as this may cause fire.
• Do not remove covers or modify the machine by yourself. Doing so may cause fire or electric shock.
• Avoid water, operation with wet hands or cleaning with a moistened cloth. Failure to do this may cause
fire or electric shock.
• Do not wipe the machine with a cloth moistened with thinner or other volatile solvent as this may cause
fire or electric shock.
• Use the specified battery only. Failure to do this may cause fire or electric shock.
• Danger of explosion if the battery is incorrectly replaced. Replace the battery only with 'TOSHIBA TEC
Corporation, Battery Pack Type B-415-BT, 7.2 V 3000 mAh Li-ion'.
Discard used batteries according to the manufacturer's instruction.
• ATTENTION:
II ya denger d'explosion s'il ya remplacement incorrect de la batterrie.
Remplacer uniquement avec une batterie du même type ou d'un type équivalent recommandé par le
constructeur.
Mettre au rebut les batteries usagées conformément aux instructions du fabricant.
• Do not disassemble and modify the battery because it has a protection unit in it. Doing so may break
the protection unit, causing the battery to heat up, burst or burn.
• If the battery gets wet, dry it completely. Using a wet battery may cause fire or electric shock.
• Be aware of the following precautions when using batteries. Otherwise they could heat up, burst or
burn.
■ Do not throw the battery into fire or heat it with a microwave or oven, etc.
■ Do not load the battery with the electrodes reversed.
■ Do not connect the electrodes with metal objects like wire. Do not carry or store the battery along
with metal objects such as necklaces, hairpins, etc.
■ Do not stick a needle into, hammer, step on, or drop the battery.
■ Do not solder the battery.
■ Do not leave the battery where the temperature is more than 60° centigrade, such as inside a car or
in direct sunlight.
(iii)
Page 6
Safety Summary
ENGLISH VERSION EO1-33014
CAUTION
• Keep away from flame or other sources of heat. Failure to do this may cause fire or machine failure.
• Do not drop or shock the machine as this may cause machine failure.
• During lightening, turn off and keep away from the machine because of danger of electric shock and
machine failure.
• Avoid locations subject to rapid change in temperature as this causes condensation, causing electric
shock or machine failure.
• Do not damage the print head, platen or strip roller with a sharp object. Doing so may cause machine
failure.
• Do not touch or contact the print head element with a metal object. Doing so may cause machine
failure.
• Use the specified media only. Failure to do this may cause machine failure.
• Be sure to turn off the machine before replacing the battery, or machine failure may occur.
• Do not charge the battery near flame or under direct sunlight. High temperature may activate or damage the protection unit of the battery, disabling the electric charge or causing it to overheat, burst, or
burn.
• Unload the battery when the machine will not be used for a long time. Failure to do this may cause
machine failure.
• Keep the battery away from flame, a heat source or other locations subject to high temperature. Failure
to do this may cause it to over heat or burn.
• Use the specified battery charger only. Failure to do this may cause the battery to overheat, burst or
burn.
• Do not force the battery into the machine or battery charger. Doing so may cause the battery to overheat, burst or burn. Check for the correct electrode.
• Do not connect the battery to a power outlet or a car cigarette lighter jack as this may cause the battery
to overheat, burst or burn.
• Because the B-415-BT battery is exclusively for the B-415 printer, do not use the battery in other
machines. Doing so may damage the battery or affect the performance and life of the battery.
This indicates that there is the risk of personal Injury or damage to
objects if the machines are improperly handled contrary to this indication.
Precautions
The following precautions will help to ensure that this machine will continue to function correctly.
(1)Try to avoid locations that have the following adverse conditions:
* Temperatures below -5°C and above 50°C
* Direct sunlight
* Excessive vibration
(2)The cover should be cleaned by wiping with a dry cloth or a cloth slightly dampened with a mild deter-
gent solution. NEVER USE THINNER OR ANY OTHER VOLATILE SOLVENT on the plastic covers.
(3)USE ONLY TOSHIBA TEC SPECIFIED media.
(4)DO NOT STORE the consumables/media where they might be exposed to direct sunlight, high tempera-
tures, high humidity, dust, or gas.
(5)Any data stored in the memory of the printer could be lost during a printer fault.
(6)DO NOT open the media or battery covers and battery cover during operation. Doing so will stop printer
operation.
(7)DO NOT scratch the surface of printed labels or receipt with a sharp object.
NOTE:
When the printer is not used for a long period of time, please keep it with the media cover open. Failure to do
this may deform the platen by the print head's pressure.
(iv)
Page 7

ENGLISH VERSION EO1-33014
TABLE OF CONTENTS
Page
1. INTRODUCTION ........................................................................................................E1-1
1.1 Applicable Model ..............................................................................................E1-1
1.2 Accessories ......................................................................................................E1-1
2. SPECIFICATION........................................................................................................ E2-1
2.1 Printer...............................................................................................................E2-1
2.2 IrDA Interface ................................................................................................... E2-1
2.3 Serial Interface (RS-232C) (for GH24 and GH34 models)...............................E2-2
2.4 Radio Interface (for GH34 model) ....................................................................E2-2
2.5 Bluetooth Interface (for GH25 model) .............................................................. E2-2
2.6 External DC Input ............................................................................................. E2-3
2.7 Battery .............................................................................................................. E2-3
2.8 Option...............................................................................................................E2-3
2.9 Media................................................................................................................ E2-4
3. APPEARANCE........................................................................................................... E3-1
3.1 Front/Rear View ...............................................................................................E3-1
3.2 Description of LED Lamp .................................................................................E3-1
3.3 Description of Switch/Button ............................................................................E3-1
4. LOADING AND REMOVING THE BATTERY ...........................................................E4-1
5. ATTACHING THE SHOULDER STRAP.................................................................... E5-1
6. SET UP PROCEDURE............................................................................................... E6-1
6.1 Requirements for Operation............................................................................. E6-1
7. LOADING THE LABEL..............................................................................................E7-1
7.1 How to Load the Liner Backed Label Roll ........................................................ E7-1
7.2 How to Load the Linerless Label Roll...............................................................E7-3
8. ISSUING THE MEDIA ................................................................................................ E8-1
9. SELF-DIAGNOSTIC TEST PRINT............................................................................. E9-1
10. CARE/HANDLING OF THE MEDIA......................................................................... E10-1
11. GENERAL MAINTENANCE .................................................................................... E11-1
11.1 Cleaning .........................................................................................................E11-1
11.2 Covers and Operation Panel .......................................................................... E11-2
11.3 Removing Jammed Media.............................................................................. E11-2
12. LED DISPLAY AND TROUBLESHOOTING ...........................................................E12-1
13. ERROR PROCESS .................................................................................................. E13-1
CAUTION:
1. This manual may not be copied in whole or in part without prior written permission of
TOSHIBA TEC.
2. The contents of this manual may be changed without notification.
3. Please refer to your local Authorized Service representative with regard to any queries
you may have in this manual.
Page 8
1. INTRODUCTION
ENGLISH VERSION EO1-33014
1.1 Applicable Model
1. INTRODUCTION
Thank you for purchasing the TEC B-415 series portable printer.
The B-415 printer displays its high performance with extraordinarily high speed printing up to 50.8 mm/
sec. It has a considerably compact and light body of 111 mm in height, 180 mm* in width and 57 mm in
depth, weighing about 800 g. (*The width of the GH25 model is 170 mm.)
There are three models in the B-415 series depending on the wireless communicatio method: IrDA (for
GH24 model), IrDA + Bluetooth (for GH25 model), and IrDA + minute radio (for GH34 model).
Owing to a low power consumption design and use of a chargeable lithium battery as a power source,
this printer can issue 200 pieces of 63.5-mm pitch labels with a fully-charged battery.
Loading a label roll is very simple; just put a label roll into the printer and close the media cover.
This manual contains general set-up and maintenance information and should be read carefully to help
gain maximum performance and life from your printer. For most queries please refer to this manual
and keep it safe for future reference.
1.1 Applicable Model
• B-415 Series
Model name description
B - 4 1 5 - G H 2 4 - Q M
Destination
GB: Great Britain
QP: Europe
QM: Other countries
Interface
24: IrDA + RS-232C
25: IrDA + Bluetooth
34: IrDA + RS-232C + Radio
Issue Type
H: Batch/Strip
S: Batch
Dot density of the print head
G: 8 dots/mm
NOTE: The B-415-GH34-GB model is for exclusive use in Great Britain.
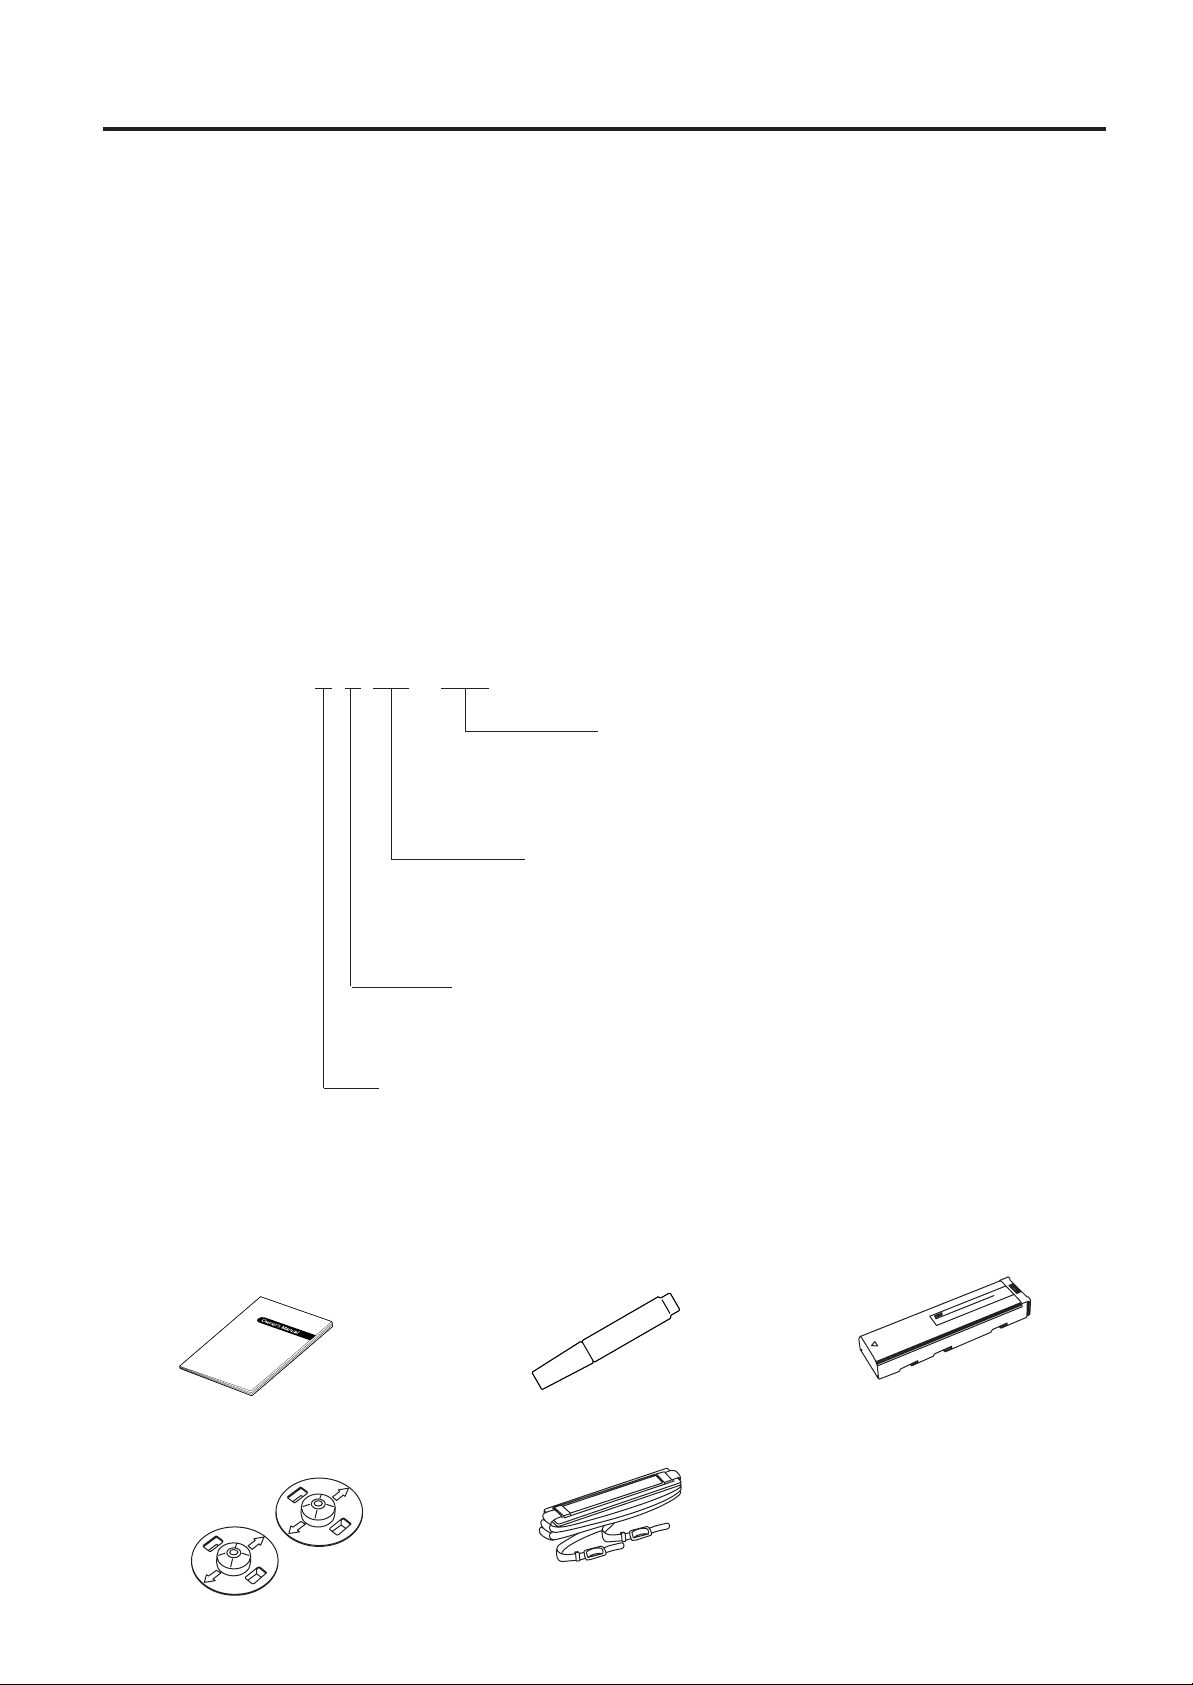
1.2 Accessories
Owner's Manual Print Head Cleaner Lithium ion Battery Pack
(EO1-33014) (24089500013)
THERMAL HEAD CLEANER
Linerless Adapter Shoulder Strap
(2 pcs.)
E1-1
Page 9
2. SPECIFICATIONS
ENGLISH VERSION EO1-33014
2.1 Printer
2. SPECIFICATIONS
2.1 Printer
Item Description
Dimensions GH24/GH34 model: 180 mm (W) x 111 mm (H) x 57 mm (D)
GH25 model: 170 mm (W) x 111 mm (H) x 57 mm (D)
Weight Approximate 800 g (Including a battery)
Operating temperature -5°C ~ 50°C
Operating humidity 25%~ 85% RH (No condensation)
Issue mode Batch mode/Strip mode
Print head Thermal print head
Print method Thermal direct
Print head dot density 8 dots/mm (203 dpi)
Print speed Max. 50.8 mm/sec.
Effective print width Label: ~ 98.6 mm
Receipt: ~ 101.6 mm
Linerless Label: ~ 91.6 mm
Fonts Standard characters and characters under barcodes (1 size), Bold character
(1 size), Price font (2 sizes), Times Roman medium (6 sizes), Helvetica (6
sizes), Presentation (1 size), Letter Gothic (1 size), Prestige Elite (2 sizes),
Courier (2 sizes), OCR (2 types), Gothic725 Black: 6 point, Writable characters (2 sizes), TEC font (2 types), Dutch801 bold, Brush738 regular,
Gothic725 black
Bar code types JAN8, JAN13, EAN8, EAN13, UPC-A, UPC-E, CODABAR (NW7), CODE39,
CODE128, EAN128, Interleave 2 of 5, MSI, Data Matrix, PDF417,
Maxi Code, QR Code, Micro PDF417, Customer Barcode,
Prior Customer Barcode
Interface GH24 model: IrDA + RS-232C
GH25 model: IrDA + Bluetooth
GH34 model: IrDA + RS-232C + Radio
Power source Lithium ion battery 7.2V
3000mAh (official)
* Data MatrixTM is a trademark of International Data Matrix, Inc.
PDF417 is a trademark of Symbol Technologies, Inc.
QR code is a trademark of DENSO CORPORATION.
Maxi code is a trademark of United Parcel Service of America, Inc.
2.2 IrDA Interface
Item Description
Type Physical layer conforming to IrDA-SIR V1.0
Transmission speed 19200 bps
9600 bps (for IrCOMM only)
Communicable distance 0.3 m max.
Peak wavelength of the infrared ray 850 to 900 nm
Communicable angle ±15° degrees max.
Ambient light immunity 1000 lx max. (under a fluorescent lamp or incandescent lamp)
Intensity of emission Min. 36mW/SR (θh, θv ≤ ±15°)
Receivable infrared ray Min. 7µW/cm2 (θh, θv ≤ ±15°)
Protocol Start-stop synchronization, Half duplex transmission
Start bit = 1 bit, Stop bit = 1 bit, 8 bit data, Non parity
Data code JIS 8 code, Packed BCD code, Shift JIS code
Error detection CRC (16 bits),
Generating polynomical X16+X12+X5+1
Transmission protocol TEC Protocol, IrCOMM (9-WIRE)
E2-1
Page 10
2. SPECIFICATIONS
2.3 Serial Interface (RS-232C) (for GH24 and GH34 models)
ENGLISH VERSION EO1-33014
2.3 Serial Interface (RS-232C) (for GH24 and GH34 models)
Item Description
Baud rate 9600 bps
Protocol XON/XOFF, 8 bit data, Even parity, Stop bit = 1 bit
Signals TXD, RXD, RTS, CTS
NOTE: This printer requires an exclusive printer cable. When purchasing it, please contact your
authorized TOSHIBA TEC representative.
2.4 Radio Interface (for GH34 model)
The following specification is applicable only to the GB and QP models.
Item Description
Type FM superhet UHF radio telemetry receiver (Complies with MPT1340*,
ETS300-220**)
Receiving frequency 418 MHz*, 433 MHz**
Communication method Unidirectional (Receive only)
Transmission speed 4800 bps
Protocol 8 bit data, non parity, stop bit = 1 bit
Communicating distance 3 m
*: GB model
**: QP model
NOTE: The RS-232C interface cable must be disconnected when using the radio communication.
2.5 Bluetooth Interface (for GH25 model)
Item Description
Communication method Bluetooth V1.1 (with logo certification)
Supported profile Serial port profile
Communication class Class 2
Communication distance 3m/360 degrees
Service name ZV-AT
Device nickname TOSHIBA TEC BT
Flow control Credit based flow control
Operation mode Slave mode
PIN code Not used.
Receive buffer 2 K bytes
Link break time out 20 sec.
Inquiry control No response to any inquiry can be made in 1 minute after the power is
turned ON.
SR mode at page/inquiry scanning R1 scan interval 1.28 sec.
Scan window 22.5 msec.
E2-2
Page 11

2. SPECIFICATIONS
ENGLISH VERSION EO1-33014
2.6 External DC Input
2.6 External DC Input
Item Description
Conditions Input voltage: DC9V ± 5%
Input current: Max. 8A
Connector specification Printer side: TCP7361-11-0201
Adapter side: TCS7361-01
Connector pin arrangement Pin1: DC9V, Pin2: GND, Pin3: NC
2.7 Battery
Item Description
Battery Lithium ion battery pack 7.2 VDC, 3000 mAh (Official capacity) Charge method Battery charger Charge current 1.0 A Standard charge voltage 8.5 V ± 0.1 V Charge time Approx. 4.0 hours Battery capacity A fully charged battery allows the printer to print about 200 labels
Under the temperature 25°C, it can print 400 to 500 labels.
(Label pitch: 63.5 mm)
Current consumption 3.0 A (when printing bar codes)
Charge and discharge cycle 300 cycles
Protection circuit Overcharge protection circuit (Max. 8.5V)
2.8 Option
Option Name Type Description
Battery Pack B-415-BT Lithium ion battery pack
7.2VDC, 3000mAh (Official capacity)
Battery Charger B-415-CHG A charger which is exclusive for the B-415-BT battery pack
AC 100V to 240V, Charge time: Approx. 4hours
NOTE: To purchase the OPTIONAL KIT, please contact your authorized TOSHIBA TEC representa-
tive or TOSHIBA TEC Head Quarter.
E2-3
Page 12

2. SPECIFICATIONS
G
DF
D
H
I
E
Feed direction
A A
J
Black Mark (on reverse side)
2.9 Media
I
ENGLISH VERSION EO1-33014
2.9 Media
Label Receipt/Linerless
Feed direction
E
H
G
DF
C
BA
(Unit : mm)
Media type Label Receipt Linerless
Item Batch Strip Without black mark With black mark With black mark
A: Label/Receipt Pitch 10 ~ 400 13 ~ 71.5 --- 10 ~ 400 10 ~ 400
B: Label/Receipt length 7 ~ 390 10 ~ 63.5 --- 7 ~ 390 7 ~ 390
C: Width including backing paper 30 ~ 104.6 + 0/ -1 --D: Media width 27 ~ 101.6 30 ~ 104.6 + 0/ -1 30 ~ 94.6 + 0/ -1
E: Gap/Black mark length 3 ~ 8 --- 3 ~ 8
F: Backing paper end 1.5 ~ 7 --G: Effective print width ~ 98.6 ~ 101.6 ~ 91.6
H: Effective print length 7 ~ 390
I: Non print area 6.4
J: Black mark width --- 14
K: Inner diameter of paper core Ø 12.7 (Ø 0.5")
L: Outer diameter of paper core (Ø 16.7)
M: Outer roll diameter (Max.) Ø 42 + 0/ -1
NOTE: Do not use media other than the above to ensure print quality and print head life.
E2-4
Page 13

3. APPEARANCE
3. APPEARANCE
3.1 Front/Rear View
Front View Rear View
ENGLISH VERSION EO1-33014
3.1 Front/Rear View
Power Switch
Status Indicator
000
PRINT BATTERY ERROR
Media Cover
Serial Interface
Connector
(RS-232C)
Media Cover
Release Catch
Fig. 3-1 Fig. 3-2
3.2 Description of LED Lamp
■■
■ PRINT LED (Green)
■■
Lights up for 2 or 3 seconds together with BATTERY and ERROR LEDs when the power is turned
on.
Lights up during the data transmission and the printing.
Extinguishes when no printing is performed.
Feed Button
Battery Cover
IrDA
Interface
window
Shoulder Strap Holder
TOSHIBA TEC CORPORATION
AC Adapter
Terminal
(Inlet)
■■
■ BATTERY LED (Red)
■■
Extinguishes when the battery power is sufficient to perform printing.
Lights up when the battery power becomes insufficient to perform printing due to low-voltage.
(When this LED lights up, printing cannot be performed.)
Flashes for three seconds when the power is turned on to indicate that the battery has reached the
end of its life. (Recommended that you should replace the battery with a new one.)
■■
■ ERROR LED (Red)
■■
Blinks when an error has occurred.
3.3 Description of Switch/Button
■■
■ POWER SWITCH
■■
A slide power switch.
Full appearance of the orange mark indicates power ON.
Fully hidden orange mark indicates power OFF.
■■
■ FEED BUTTON
■■
Each time this button is pressed, the printer re-issues the previous label. When the button is held,
the printer issues labels continuously.
E3-1
Page 14

4. LOADING AND REMOVING THE BATTERY
4. LOADING AND REMOVING THE BATTERY
ENGLISH VERSION EO1-33014
4. LOADING AND REMOVING THE BATTERY
CAUTION:
1. Be sure to turn off the printer before loading the battery.
2. Use the specified battery only. Failure to do this may cause fire or electric shock.
3. In the United States, used lithium ion batteries should be returned to the store where you
bought the machine. (USA only)
4. LITHIUM ION BATTERY
DISPOSE OF PROPERLY
Caution: Do not handle a damaged or leaking lithium ion battery.
• Battery Performance
A fully charged battery can print 200 labels or more. Under the temperature 25°C, it can print 400
to 500 labels. (Label pitch: 63.5 mm)
1. Slide the battery cover to open.
2. Insert the battery as shown below until it goes no further.
3. Slide the battery cover back while pushing the battery, and fully close the cover until it clicks.
4. To remove the battery, gently tilt the printer while supporting with the hand.
NOTE: Care must be taken to tilt the printer. Failure to do this may cause the battery to rush
out.
Battery Cover
Battery
Fig. 4-1
E4-1
Page 15

4. LOADING AND REMOVING THE BATTERY
4. LOADING AND REMOVING THE BATTERY
ENGLISH VERSION EO1-33014
• TO CHARGE THE BATTERY PACK
This printer includes no battery charger. Charging the battery requires an exclusive battery
charger. Please order the following one to your authorized TOSHIBA TEC representative if necessary.
Part Name Lithium Ion Battery Charger
Description B-415-CHG
2
1
3
CHARGE
1 Connect the AC power cord to the charger.
2 Install the battery pack(s).
3 Connect the AC plug to a wall outlet.
The POWER lamp and the CHARGE lamp will light up and charging will begin. The CHARGE
lamp indicates how much the battery pack is charged.
ERROR
POWER
CHARGE
ERROR
CHARGE lamp Charged
Orange on 0% to 90%
Orange flash 91% to 99%
Green on 100%
NOTES: 1. When a fully charged battery pack is installed, the CHARGE lamp will once light up
orange then light up green.
2. Both of the battery charging receptacles are available, however, two of the battery packs
cannot be charged at the same time.
E4-2
Page 16

5. ATTACHING THE SHOULDER STRAP
4. LOADING AND REMOVING THE BATTERY
5. ATTACHING THE SHOULDER STRAP
ENGLISH VERSION EO1-33014
• Charging time
Battery pack Charging time
B-415-BT about 4 hours
The charging time may differ depending on the condition of the battery pack or the temperature of
the environment.
• Using the battery pack at once
Remove the battery pack when required. It can be used even if the charging is not completed. Battery operating time, however, may differ depending on the charging time.
• If the ERROR lamp flashes
Check as follws:
1 Remove the battery pack from this unit, then install the same battery pack again.
2 If the ERROR lamp flashes again: Install another battery pack.
3 If the ERROR lamp flashes again: The problem is with this unit.
Please contact your Authorized TOSHIBA TEC representative in connection with the product with the
problem.
5. ATTACHING THE SHOULDER STRAP
Attach the provided shoulder strap to the shoulder strap holders as Fig.5-1 shows.
E5-1
E4-3
Fig. 5-1
Page 17

6. SET UP PROCEDURE
ENGLISH VERSION EO1-33014
6.1 Requirements for Operation
6. SET UP PROCEDURE
6.1 Requirements for Operation
This machine has the following requirements:
• The host computer must have a serial port.
• To communicate with host, either an exclusive RS-232C cable is required.
RS-232C cable 9 pins
• To print a label format, create the complete program using the interface/communication manual.
■ Interface Cables
NOTE: This printer requires an exclusive printer cable, shielded, 1.5 m maximum length. When
purchasing it, please contact your authorized TOSHIBA TEC representative.
To prevent radiation and reception of electrical noise, the interface cables must meet the following
requirements:
• Fully shielded and fitted with metal or metalised connector housings.
• Kept as short as possible.
■ RS-232C Cable description
The serial data cable used to connect the printer to the host computer should be the following type:
DB-9S
Connector to PC
PIN No.
1
3
2
7
8
4
6
9
5
Signal
CD
TXD
RXD
RTS
CTS
DTR
DSR
CI
GND
DHF-RAA10-213ND
Connector to Printer
PIN No.
1
2
3
4
5
6
7
8
9
10
Signal
P5V
P5V
TXD
RXD
RTS
CTS
TEST
SG1
SG1
SG2
Fig. 6-1
E6-1
Page 18

7. LOADING THE LABEL
7.1 How to Load the Liner Backed Label Roll
ENGLISH VERSION EO1-33014
7. LOADING THE LABEL
NOTES:
1. In the strip issue mode, you should use the printer with the side in which the model name
sticker is attached downward because the backing paper is issued from the bottom of the
printer.
2. In the strip issue mode, you can tear off the backing paper using the edge of the strip cover.
3. In the batch issue mode, you can tear off the backing paper at the perforation.
7.1 How to Load the Liner Backed Label Roll
1. Place the printer on a level surface as shown below.
2. To unlock the media cover, press the two cover release catches in the direction of the arrows.
3. Open the media cover by pushing up the strip cover.
3
Media Cover Release Catch
Media Cover
1
1
2
Strip Cover
4. Fully raise up the release lever, and then slide the paper guide (R) to the right.
Release Lever
Paper Guide (R)
Media Cover
Release Catch
Fig. 7-1
E7-1
Fig. 7-2
Page 19

7. LOADING THE LABEL
7.1 How to Load the Liner Backed Label Roll
ENGLISH VERSION EO1-33014
5. Load the liner backed label roll as Fig.7-3 shows.
6. Slide the paper guide (R) to accommodate the label roll width, and then push the release lever
downward to fix the paper guide (R).
NOTE: Before fixing the paper guide (R), make sure that the label roll rotates smoothly without
moving from side to side.
Label Roll
Paper Guide (R)
Release Lever
Fig. 7-3
7. When printing in strip issue mode, draw out the top of the label roll onto the platen. When printing
in continuous or batch issue mode, insert the top of the label roll into the outlet of the media cover.
NOTE: Batch issue can be performed without the strip module. For removing the strip module, refer
to section 7.2 How to load the linerless label roll.
Strip Issue Batch Issue
Strip Module
Fig. 7-4 Fig. 7-5
E7-2
Page 20

7. LOADING THE LABEL
ENGLISH VERSION EO1-33014
7.2 How to Load the Linerless Label Roll
8. Push down the media cover until the two cover release catches click back into the lock position.
NOTE: If the media cover is open and unlocked, an error will result and the printing will not be
performed.
"Click"
"Click"
Fig. 7-6
9. When printing in strip issue mode, pull out the top of the liner of the label roll to eliminate slack.
[How to remove the liner backed label roll]
1. Open the media cover.
2. Fully raise up the release lever, slide the paper guide (R) to the right, and then remove the liner
backed label roll.
7.2 How to Load the Linerless Label Roll
1. Open the media cover.
2. To remove the strip module from the media cover, press the claws provided for the strip module.
Strip Module
E7-3
Fig. 7-7
Page 21

7. LOADING THE LABEL
3. Attach the linerless adapters to the paper guides.
ENGLISH VERSION EO1-33014
7.2 How to Load the Linerless Label Roll
Paper Guide Linerless Adapter
Paper Guide
Fig. 7-8
4. Loading the linerless label roll is basically the same as described in the liner backed label roll.
However in the case of the linerless label roll, its width may exceed the specified range (104.6
mm, +0/-0.5) due to having been rolled unevenly. In this case, use your finger to press against the
paper holder spring, which allows you to install the linerless label roll between both paper holders.
Fig. 7-9
[How to remove the linerless label roll]
Remove the linerless label roll in the same way as the liner backed label roll.
E7-4
Page 22

8. ISSUING THE MEDIA
ENGLISH VERSION EO1-33014
8. ISSUING THE MEDIA
8. ISSUING THE MEDIA
CAUTIONS:
1. Radio communication between a handy terminal and the B-415 printer is guaranteed when the
handy terminal is in the operator’s hand and the printer is secured at the waist. Proper radio
communication may not be obtained when used in other conditions and in areas subject to
noise and radio interference.
2. Be sure to disconnect the RS-232C interface cable from the printer before performing radio
communication or IrDA.
3. To perform the radio communication or IrDA, the printer must be synchronized with the handy
terminal.
4. IrDA is available on the conditions indicated below. The following performance is obtained
under fluorescent light (max. 1000 lx). Care must be taken to prevent direct sunlight from
entering the IrDA interface window.
Printer
Handy
Terminal
Printer
max. 30 cm
max. 30 cm
Handy
Terminal
1. Turn on the printer.
NOTE: Firmly slide the power switch to the position “ON” or “OFF” until it clicks. If you slide the
power switch in halfway, the printer may not judge the power ON/OFF status.
2. Send data from the handy terminal to the printer. (Regarding the operation of the handy terminal,
please refer to the handy terminal’s operating manual.)
(Radio Communication Sample)
Fig. 8-1
3. Issuing labels
1) The number of labels is specified when issuing labels in batch mode. To re-issue the label,
press the [FEED] button.
This operation differs, depending on the print mode.
2) The printer prints labels one by one in strip mode by pressing the [FEED] button. To issue more
than one label, remove the printed label before issuing the next one.
This operation differs, depending on the print mode.
NOTE:Trim off the backing paper coming from the backing paper outlet.
3) After printing the receipt, press the [FEED] button to feed it to a position where it can be easily
cut. Each time the [FEED] button is pressed, the receipt is fed for 20 mm.
E8-1
Page 23

9. SELF-DIAGNOSTIC TEST PRINT
ENGLISH VERSION EO1-33014
9. SELF-DIAGNOSTIC TEST PRINT
4. Tear off the printed media upward or downward with the cutter.
NOTE: Do not pull the media out of the printer, as this will misalign the print position of the next
label.
Media
Fig. 8-2
9. SELF-DIAGNOSTIC TEST PRINT
1. Turn the power on while pressing the [FEED] button. Three LED lamps light up. After about 5
seconds, they extinguish, then the first label of the test print is issued.
For GH24 and GH34 models
PROGRAM VERSION FMRM0072201 V2.0 2800 (FONT:0200)(BOOT:A900)
PRINTER ID 00123
FORM VERSION 0000000000 0000000000 0000000000 0000000000
SRAM CHECK 512KB
SENSOR CHECK R:2.9V T:0.5V P:1.9V H:+25°C A:+25°C
BATTERY LEVEL 8.3V (OVER 220 LABELS)
TONE ADJUST +00 P A RA ME TER [B-415] [PC-850] [0]
FEED ADJUST +0.0mm MODEL NAME B-415-GH Series
HEAD CHECK OK
PEEL THRESHOLD 2.0V
PRINT MODE TPCL-LE
SERIAL NO. 3S000001
IrDA IrCOMM
For GH25 model
PROGRAM VERSION FMRM0072002 V2.0 2800 (FONT:0200)(BOOT:A900)
PRINTER ID 00123
FORM VERSION 0000000000 0000000000 0000000000 0000000000
SRAM CHECK 512KB
SENSOR CHECK R:2.9V T:0.5V P:1.9V H:+25°C A:+25°C
BATTERY LEVEL 8.3V (OVER 220 LABELS)
TONE ADJUST +00 P A RA ME TER [B-415] [PC-850] [0]
FEED ADJUST +0.0mm MODEL NAME B-415-GH Series
HEAD CHECK OK
PEEL THRESHOLD 2.0V
PRINT MODE TPCL-LE
SERIAL NO. 3S000001
IrDA IrCOMM
0001cc4084fd
E9-1
Page 24

9. SELF-DIAGNOSTIC TEST PRINT
ENGLISH VERSION EO1-33014
9. SELF-DIAGNOSTIC TEST PRINT
2. Pressing the [FEED] button again issues the second label of the test print. Pressing the [FEED]
button once more, issues the second label of the test print again.
3. Regarding the print contents refer to the specifications.
E9-2
Page 25

10. CARE/HANDLING OF THE MEDIA
ENGLISH VERSION EO1-33014
10. CARE/HANDLING OF THE MEDIA
10.CARE/HANDLING OF THE MEDIA
CAUTION:
Be sure to read carefully and understand the Supply Manual. Use only media which meets the
specified requirements. Use of non-specified media may shorten the head life and result in
problems with bar code readability or print quality. All media should be handled with care to avoid
any damage to the media or printer. Read the following guideline carefully.
• Do not store the media for longer than the manufactures recommended shelf life.
• Store media rolls on the flat end, do not store them on the curved sides as this might flatten that
side causing erratic media advance and poor print quality.
• Store the media in plastic bags and always reseal after opening. Unprotected media can get dirty
and the extra abrasion from the dust and dirt particles will shorten the print head life.
• Store the media in a cool, dry place. Avoid areas where they would be exposed to direct sunlight,
high temperature, high humidity, dust or gas.
• The specifications for the thermal paper used for direct thermal printing must not exceed Ca++ 800
ppm, Na+ 800 ppm, K+ 800 ppm and CL- 600 ppm.
• Some ink used on pre-printed labels may contain components which shorten the print head's
product life. Do not use labels pre-printed with ink which contains hard substances such as
carbonic calcium (CaCO3) and kaolin (Al2O3, 2SiO2, 2H2O).
For further information please contact your local distributor or your media manufacturer.
E10-1
Page 26

11. GENERAL MAINTENANCE
ENGLISH VERSION EO1-33014
11.1 Cleaning
11. GENERAL MAINTENANCE
WARNING!
1. Be sure to turn off the printer prior to performing any maintenance.
2. Do not use any tool that may damage the print head.
3. DO NOT POUR WATER directly onto the printer.
11.1 Cleaning
To help retain the high quality and performance of your printer it should be regularly cleaned. The
greater the usage of the printer, the more frequent the cleaning. (i.e. low usage = weekly: high usage
= daily).
1. Turn off the printer.
2. Open the media cover.
3. Remove the media roll from the printer.
4. Clean the print head element with the print head cleaner.
5. Wipe the cutter platen and strip roller with a soft cloth moistened with alcohol. Remove dust or
foreign substances from the internal parts of the printer, if any.
6. Remove paper particles or stains from the feed gap sensor, black mark sensor, and the strip
sensor with a soft cloth.
NOTE: Be sure to use the provided print head cleaner. Please order it to your authorized
TOSHIBA TEC representative if necessary.
Cutter
Print Head Cleaner
Print Head
Black Mark Sensor
Strip Roller
Strip Sensor
Fig. 11-1
Feed Gap Sensor
Platen
E11-1
Fig. 11-2
Page 27

11. GENERAL MAINTENANCE
ENGLISH VERSION EO1-33014
11.2 Covers and Operation Panel
11.2 Covers and Operation Panel
The covers should be cleaned by wiping with a dry cloth or a cloth slightly dampened with a mild
detergent solution.
NOTE: Clean the printer cover with an electrostatic free cleaner for automated office equipment.
CAUTIONS:
1. DO NOT POUR WATER directly onto the printer.
2. DO NOT APPLY cleaner or detergent directly onto any cover or panel.
3. NEVER USE THINNER OR OTHER VOLATILE SOLVENT on the plastic covers.
4. DO NOT clean the covers or the operation panel with alcohol as it may cause them to
discolor, loose their shape or develop structural weakness.
11.3 Removing Jammed Media
1. Turn off the printer.
2. Open the media cover.
3. Remove the media roll from the printer.
4. Remove the jammed media.
NOTE: DO NOT USE any sharp implements or tools as these could damage the printer.
5. Clean the print head and platen, then remove any further dust or foreign substances.
E11-2
Page 28

12. LED DISPLAY AND TROUBLESHOOTING
12. LED DISPLAY AND TROUBLESHOOTING
ENGLISH VERSION EO1-33014
12.LED DISPLAY AND TROUBLESHOOTING
WARNING!
If you cannot solve a problem with the following solutions, do not attempt to repair the printer
yourself. Turn off the printer, then contact your authorized TOSHIBA TEC representative for
assistance.
When a problem occurs during operation, the LED indicator will blink or stay on continuously. Refer to
the following troubleshooting guide and take corrective action.
:LED off, :LED on, :LED blinking
Printer Status
When the power is turned on.
Normal Condition
While the cover is open.
Command Error
Feed jam
Label End
Cover Open Error
Thermal Head Disconnection Error
Thermal Head Abnormal High
Temperature
Flash ROM Data Writing Error
Flash ROM Data Erasing Error
Low-battery
In action
Communication Error
Normal Termination and Label
End
Form entry area in the flash ROM
becomes full.
Normal Termination
Battery Life Error
LED Display
PRINT ERROR
→
(2 or 3 seconds)
(2 or 3 seconds)
→
BATTERY
→
(2 or 3 seconds)
→
(3 sec.)
Condition to clear the
ERROR Status
Close the cover
Close the cover after
installing a label.
Close the cover after
installing a label.
Close the cover
(See NOTE)
Stop issuing labels for
a while.
(See NOTE)
(See NOTE)
Replace the battery,
or charge the battery.
Close the cover
Close the cover after
installing a label.
Form Entry, Area
Format
Replace the battery.
* LED flashing repeats ON and OFF at the interval of 0.1 sec.
* When the printer goes into energy-saving mode, the LED will be extinguished to save energy. How-
ever, when normal operation mode is resumed, the LED will flicker or illuminate again.
* If the printer status changes during an error, the LED display will also change to indicate the latest
status of the printer.
NOTE: Please contact your authorized TOSHIBA TEC representative.
E12-1
Page 29

13. ERROR PROCESS
ENGLISH VERSION EO1-33014
13. ERROR PROCESS
13. ERROR PROCESS
When the printer detects the errors shown below, it will make the ERROR LED flashing (repeat of ON
and OFF at the interval of 0.1 sec.), and wait for a command sent from the host after stopping the
performance. Since the restart process is not performed after clearing the error, it is necessary to send
the command again.
(1) Command Error
1. When one of the following errors is found during the command analysis.
• Error of command length
• Error of command transmission sequence
• Error of command format
• Error of parameter designation
2. If the form No. designated by the data print command has not been entered.
(2) Feed Jam (Paper Feeding Error)
If the printer fails to detect the gap after feeding a label 1.5 times as long as the label pitch designated by the label size setting command. (Only when the feed gap sensor/black mark sensor are
designated.)
(3) Label End
1. If an attempt is made to issue or feed a label when the media has run out.
2. If the printer detects the backing paper continually 18 mm during label issue or feed.
3. If the printer detects the label end detection level continually 1 mm during label issue or feed.
(4) Cover Open Error
1. If the printer detects the cover open continually 5 mm during label issue or feed.
2. If label issue or feed is attempted while the cover is open.
(5) Thermal Head Disconnection Error
1. If an open element is detected during the automatic missing dot check. This is performed when
the power is turned on, or the cover is closed.
2. If an error occurs in the thermal head driver.
(6) Thermal Head Abnormal High Temperature Error
If the thermistor of the thermal head detects high temperature.
(7) Flash ROM Data Writing Error
If an error occurs when the data regarding various entries, etc. is written into the flash ROM.
(8) Flash ROM Data Erasing Error
If an error occurs when the flash ROM is initialized (data erasing).
(9) Normal Termination and Label End
1. If the printer detects the backing paper continually 18 mm after printing the effective print area.
2. If the printer detects the label end detection level continually 1 mm after printing the effective
print area.
(10)Form Entry Area Full in the Flash ROM
When the form entry area in the flash ROM becomes full.
When the data of 4 KB or more is sent when the form entry is performed while the form No. “00” is
designated.
The BATTERY LED is illuminated to indicate that printing is impossible due to low-voltage. It flashes
for 3 sec. (repeat of ON and OFF at the interval of 0.1 sec.) when the battery life error has been
detected. (The battery life error is not detected unless the printer stays in the idle state for several sec.)
However, the performance of the printer is normal even in the battery life error.
When the indefinite order execution error occurs, the printer will be automatically reset.
E13-1
Page 30

Page 31

Page 32

PRINTED IN JAPAN
E
EO1-33014B
 Loading...