

Toshiba 8200 - Tecra - PIII 750 MHz Supplemental Manual

T ecra® 8200
Series
Supplemental Guide
For Systems with Windows® 2000 Professional
Tips for viewing PDFs:
❖ T o use bookmarks, click the Bookmarks tab, then click the plus sign (+)
next to the bookmark icon to display topics in that chapter. Click the
minus (-) sign to collapse again.
❖ T o use thumbnails, click the Thumbnails tab, and double click on the
page number you want to view. (The page will appear on the right side of
your screen.)
❖ T o print, specify a range of pages in the Acrobat Print dialog box, or
specify noncontiguous pages or a particular page before opening the
dialog box. Click the Print button or choose File > Print.
For more information, select Help > Reader Guide from the Adobe Acrobat
window.
C1462-1
If You Need Assistance:
❖ Vi rtualTech
Double-click on the desktop icon or visit the Web site:
http://virtualtech.answerteam.com
❖ InTouchsmCenter
Calling within the United States (800) 457-7777
Calling from outside the United States (949) 859-4273
For more information, see your Tecra
TM
e-support tool
®
8200 Series User’s Guide .
choose freedom
TOSHIBA
TM

2
Compact Disk-Read/Write
The computer system you purchased may include a Compact Disk-Read/Write (CD-RW),
one of the most advanced storage technologies available. As with any new technology, you
must read and fol low all set-up and usage in stru ctio ns in the appl ic able us er g uid es and/ or
manuals enclosed. If you fail to do so, this product may not function properly and you may
lose data or suffer other damage. TOSHIBA AMERICA INFORMATION SYSTEMS
(“TOSHIBA”), ITS AFFILIATES AND SUPPLIERS DO NOT WARRANT THAT
OPERA TION O F THE PRODUCT WILL BE UNINTERRUPTED OR ERROR
FREE. YOU AGREE THA T TOSHIBA, ITS AFFILIATES AND SUPPLIERS
SHALL HAVE NO RESPONSIBILITY FOR DAMAGE TO OR LOSS OF ANY
BUSINESS, PROFITS, PROGRAMS, D AT A OR REMOV ABLE STORAGE
MEDIA ARISING OUT OF OR RESULTING FROM THE USE OF THE
PRODUCT, EVEN IF ADVISED OF THE POSSIBILITY THEREOF.
Protection of Stored Data
For your important data, please make periodic back-up copies of all the data stored on the
hard disk or other storage devices as a precaution against possible failures, alteration, or loss
of the data. IF YOUR DATA IS ALTERED OR LOST DUE TO ANY TROUBLE,
F AILURE OR MALFUNCTION OF THE HARD DISK DRIVE OR OTHER
STORAGE DEVICES AND THE DATA CANNO T BE RECO VERED, TOSHIBA
SHALL NOT BE LIABLE FOR ANY D AMAGE OR LOSS OF DATA, OR ANY
OTHER D AMAGE RESUL TING THE REFR OM . WHEN COPYING OR
TRANSFERRING YOUR DATA, PLEASE BE SURE TO CONFIRM WHETHER
THE DATA HAS BE EN SUCCESSFULLY COPIED OR TRANSFERRED.
TOSHIBA DISCLAIMS ANY LIABILITY FOR THE FAILURE TO COPY OR
TRANSFER THE DATA CORRECTLY .
Critical Applications
The computer you have purchased is not designed for any “critical applications”. “Critical
applications” means life support systems, medical applications, connections to implanted
medical devices, commercial transportation, nuclear facilities or systems or any other
applications where product failure could lead to injury to persons or loss of life or
catastrophic property damage. ACCORDINGLY, TOSHIBA, ITS AFFILIATES AND
SUPPLIERS DISCLAIM ANY AND ALL LIABILITY ARISING OUT OF THE
USE OF THE COMPUTER PRODUCTS IN ANY CRITICAL APPLICATIONS.
IF YOU USE THE COMPUTER PR ODUCTS IN A CRITICAL APP LICATION,
YOU , AND NOT TOSHIB A, ASSUME FULL RESPONSIBILITY FOR SUCH
USE.

Model: T ecra 8200 Series
Copyright
This guide is copyrighted by Toshiba Corporation with all rights reserved. Under
the copyright laws, this guide cannot be reproduced in any form without the prior
written permission of Toshiba. No patent liability is assumed, however, with
respect to the use of the information contained herein.
©2000 by T oshiba Corporation. All rights reserved.
Export Administration Regulation
This document contains technical data that may be controlled under the U.S.
Export Administration Regulations, and may be subject to the approval of the
U.S. Department of Commerce prior to export. Any export, directly or indirectly,
in contravention of the U.S. Export Administration Regulations is prohibited.
Notice
The information contained in this manual, including but not limited to any
product specifications, is subject to change without notice.
TOSHIBA CORPORATION AND TOSHIBA AMERICA
INFORMATION SYSTEMS, INC. (TOSHIBA) PROVIDES NO
WARRANTY WITH REGARD TO THIS MANUAL OR ANY
OTHER INFORMATION CONTAINED HEREIN AND HEREBY
EXPRESSLY DISCLAIMS ANY IMPLIED WARRANTIES OF
MERCHANTABILITY OR FITNESS FOR ANY PARTICULAR
PURPOSE WITH REGARD TO ANY OF THE FOREGOING.
TOSHIBA ASSUMES NO LIABILITY FOR ANY DAMAGES
INCURRED DIRECTLY OR INDIRECTLY FROM ANY
TECHNICAL OR TYPOGRAPHICAL ERRORS OR OMISSIONS
CONTAINED HEREIN OR FOR DISCREPANCIES BETWEEN
THE PRODUCT AND THE MANUAL. IN NO EVENT SHALL
TOSHIBA BE LIABLE FOR ANY INCIDENTAL,
CONSEQUENTIAL, SPECIAL, OR EXEMPLARY DAMAGES,
WHETHER BASED ON TORT, CONTRACT OR OTHERWISE,
ARISING OUT OF OR IN CONNECTION WITH THIS MANUAL
OR ANY OTHER INFORMA TION CONTAINED HEREIN OR THE
USE THEREOF.
3

4
T rademarks
Tecra, Fn-esse, and AccuPoint are registered trademarks and InT ouch is a service
mark of To shiba America Information Systems, Inc. and/or T oshiba Corporation.
MS-DOS, Microsoft, W indo ws, Windows NT, DirectX, DirectDraw , Direct3D,
DirectSound and Direct Animation are registered trademarks of Microsoft
Corporation.
Mediamatics is a registered trademark, and DVDExpress is a trademark of
Mediamatics, Inc.
Intel and Pentium are registered trademarks and SpeedStep is a trademark of Intel
Corporation.
WinD VD is a trademark of I nterVideo, Inc.
OS/2 is a registered trademark of IBM Corporation.
Energy Star is a registered trademark of the U.S. Environmental Protection
Agency .
W orldNet i s a re gistered trademark of AT&T, Inc.
Yahoo! and My Yahoo! are registered trademarks of Yahoo!, Inc.
Other product names and trademarks belong to the individual companies
concerned.
Energy Star Compliance
As an Energy Star®Partner, To shiba ha s d eter min ed that t his pr od uct is Energy
Star compliant.

Contents
Introduction.................................................................................. 7
Safety icons.............................................................................. 7
Chapter 1: Introducing Windows2000 Professional............... 9
Features.................................................................................... 9
Plug and Play..................................................................... 10
Universal Serial Bus.......................................................... 10
Multimedia......................................................................... 11
Connectivity....................................................................... 11
Chapter 2: Getting Started........................................................ 13
Using Windows 2000 Professional for the first time......... 13
Set up steps....................................................................... 13
Registering Windows 2000 Professional....................... 14
Connecting to the Internet.................................................... 15
Setting up your printer.......................................................... 16
Customizing the desktop................ ............... ................ ....... 17
T urning off the computer...................................................... 17
Chapter 3: Learning the Basics................................................ 19
Windows2000 Professional basics.................................... 19
5

6
Windows2000 Professional online Help....................... 20
Exploring the desktop ......... ................. .................... ......... 21
Starting a program................................................................ 25
Starting a program from an icon..................................... 25
Starting a program from the Start menu........................ 26
Starting a program from Explorer................................... 27
Starting a program from the Run dialog........................ 28
Printing................................................................................... 28
Using CDs and DVDs............................................................ 30
Playing an audio CD......................................................... 30
Saving your wo rk...................... ........ ......... ........ .......... ........ . 32
Using the Backup Wizard................................................. 34
Using the Internet.................................................................. 35
Powering down the computer............................................. 35
Shut down command...................................................... 36
Hibernation mode............................................................. 39
Quickly changing your Sh ut down m ode.......... .......... ... 45
Standby command........................................................... 46
Chapter 4: T oshiba Utilities....................................................... 51
Fn-esse................................................................................... 52
T oshiba HW Setup................................................................ 52
Accessing Toshiba HW Setup......................................... 52
Power Saver.......................................................................... 55
Appendix: Hot Keys....................................... ............................ 57
Index........................................................................................... 61

Introduction
Congratulations on your purchase of a Toshiba Te cra 8200 Series
computer.
This supplemental guide explains some basic procedures to get
you started with the Windo ws
system and explains how it works with your computer.
The T ecr a
with your system, contains basic information about your
computer, including troubles hooting advice, detailed information
on using your computer’s hardware, and features of
Microsoft
This supplemental guide refers you to the user’s guide for
functions that work the same under Wi ndows 98 Second Edition
and Windo ws 2000 Professional.
Safety icons
This manual contains safety instructions that must be observed in
order to avoid potenti al hazards that could result in personal
injuries, damage to your equipment or loss of data. The safety
®
2000 Professional operating
®
8200 Series User’s Guide, a separate manual provided
®
Windows98 Second Edition.
7
8
Safety icons
instructions have been classif ied according to the se riousness of
the risk, and are highlighted with icons as follows:
WARNING: This icon indicates the existence of a hazard that
could result in bodily injury if the safety instruction is not
observed.
CAUTION: This icon indicates the existence of a hazard that
could result in da mage t o e quipme nt or prop er ty if t he sa fe ty
instruction is not observed.
NOTE: This icon indi cate s infor matio n that relat es to the safe
operation of the equipment or related items.
TECHNICAL NOTE: This icon highlights technical
information about the computer.
HINT: This icon denotes helpful hints and tips.
DEFINITION: Thi s icon i ndicat es the def inition of a t erm used
in the text.

Chapter 1
Introducing
®
Windows 2000
Professional
Windo ws 2000 Professional deli v ers unprecedented reliabili ty,
power and stability. T ools that increase the system’s ease of use,
such as enhanced configuration and setup wizards and adv anced
security and encryption settings, also enable you to work more
efficiently and secur ely both in and out of the of fice.
Features
The Windows 2000 Profess ional operating system takes f ull
advantage of the Advanced Conf iguration and Po wer Interf ace
(ACPI) specif ication. A CPI is a scheme to optimize power usage
in portable computers. When used with an ACPI-enabled system,
like your notebook computer, W i ndows 2000 Professional
provides features such as: Plug and Play , hot swapping, and po wer
management which helps maximize the time you can run the
computer on battery power .
9

Introducing Windows2000 Professiona l
10
F eatures
Plug and Play
Plug and Play (PnP) is the technology that supports the automatic
configuration of PC hardware and peripheral de vices during
installation. Windo ws 2000 Professional pro vides this benef it
without the need for any manufacturer-spe cific t ools. Plug and
Play support extends to docking devices, enabling you to dock and
undock the computer without rebooting the system.
Universal Serial Bus
With the Uni versal Serial Bus (USB) you c an connect a wide array
of devices to the computer , and daisy chain a number of de vices
together (connect them in a series).
TECHNICAL NOTE: Univ e r sa l S er i al B u s ( U SB ) is a d at a condui t
with a bandwidth of 12 Mbps that can be used to connect up to
127 devices to a portabl e or desktop computer thr ough a si ngle
multipurpose port.
Though T oshiba computers ha ve had USB ports for some time,
previous versions of W i ndows NT
Windo ws 2000 Professional fully support s USB, increasing the
system’s ease of use.
®
did not support them.

Multimedia
Introducing Windows2000 Professio nal
F eatures
11
DirectX® is the multimedia architecture for W indo ws. Such
applications as DirectDraw
Animation
assistance of drivers fr om independent hardware vendors ( IHVs),
Windo ws 2000 Professional will support DirectX v ersion 7.0,
providing outstanding multimedia capabilities.
Windo ws 2000 Professional also supports th e standard 3D
graphics-programming interface, OpenGL 1.2, which is used for
CAD and scientific visualization applications.
Connectivity
An important feature of mobile computers is the ability to safely
connect to a corporate network or the Internet. To do this, you may
need to use a modem and/or Ethernet card, or a wireless
communications adapter . The enhanced Network Connection
Wizard in W indo ws 2000 Professional helps you to eas ily
establish such connections. This wizard walks you through the
creation of all types of network connections, enabling you to:
❖ Create a dial-up connection
❖ Create a V irtual Pri v ate Network (VPN)
®
®
are included in the DirectX package. With the
, Direct3D®, DirectSound® and Direct
❖ Accept incoming calls
❖ Establish a direct connection to another computer
Additionally , W indo ws 2000 Professional tak es into account the
fact that you may use the same portable computer with multiple
networks (for example, the corporate network and your home
network). Because portable computers generally allo w for only
one set of configuration information to be held at one time,
previous versi ons of Windo ws required you to manually conf igure
your system each time you log onto a different network — a time-
consuming process.

12
Introducing Windows2000 Professiona l
F eatures
T o solv e this problem, W indo ws 2000 Professional al lows you to
specify per-connection settings, enabling you to create a dif fer ent
configuration profile for each type of connection you use. When
you are ready to make a connection, you simply select the profile
for the appropriate network.

Chapter 2
Getting Started
This chapter provides some basic information to help you get
started using your computer with Windo ws 2000 Professional. See
the T ecra
turn on your computer.
Using Windows 2000 Professional for the first
®
8200 Series User’s Guide for instructions on how to
time
The first time you turn on the computer , the W indo ws 2000 Setup
Wizard installs the devices i t detects on your system, then guides
you through several essenti al steps for setting up your computer.
Set up steps
Once you turn on the computer, follo w the instructions on the
screen. In most cases, after you fill in the information, you will be
prompted to click Next to continue to the next step.
❖ You will be asked to read and accept the Microsoft W indo ws
2000 Professional License Agreement. After reading the
13

14
Getting Started
Using Windows 2000 Pr of essional for the f irst time
agreement, click the button labeled I accept the agreement,
then click Next to continue.
❖ A box appears prompting you to personalize your copy of
Windo ws 2000 Professional. Type your name and compan y
in the appropriate boxes, then click Next.
❖ You will be asked to name your computer and assign an
Administrator password. You can either type in a name of
your choice or accept the default name that is provided.
The Administrator password is optional. If you assign a
password, you will have to type i t in each time you turn on the
computer. If you choose to skip the password, you can always
assign one later .
❖ You will have the opportunity to set the computer’s time and
date.
When the Setup Wizard fi nishes, click Fin ish to rest art W indo ws
2000 Professional.
Registering Windows 2000 Professional
When the computer starts again, W indows 2000 Professional asks
for your password. If you did not create a password, leav e the
password box empty and click OK.
When you continue, Windows 2000 Professi onal displays the
Getting Started with Windo ws 2000 screen, which has three
options:
❖ Register Now—Click t his option to regist er your copy of the
Windo ws 2000 Professional operating system with Microsoft .
If you prefer, click Register Later and W indo ws 2000
Professional will prompt you at a later time.
❖ Discover W indo ws—Click this option to read and learn more
about Windo ws 2000 Professional.

Connecting to the Internet
❖ Connect to the Internet—Click this option to start the Internet
Connection Wizard.
If you prefer, you can set up your Internet connecti on later.
At the bottom of the Getting Started with Windo ws 2000 screen
there is a box labeled “Sho w this screen at startup.” The check in
the box indicates that this screen will appear each time you start
your system. T o hide this scree n, click the box to remov e the
checkmark.
Connecting to the Internet
Start the Internet Connection Wi zard by clicking eit her:
❖ The Connect to the Internet option on t he Getting Started with
Windo ws 2000 screen
❖ The Connect to the Internet icon on your desktop
The wizard will assist you in setting up the computer to work with
your existing Internet account, if you hav e one, or it will sign you
up for a new Internet account with AT&T WorldNet
you choose to sign up for Internet access with AT&T WorldNet,
you will not be char ged f or the call.
Getting Started
15
®
Service. If
NOTE: Toshiba and Yahoo!® have joined together to offer
you a free account on Yahoo!. To sign up for Yahoo!, you
must have an Internet access account.
Getting Started
16
Setting up your printer
Setting up your printer
If you have a printer , fol low these steps to set it up for the f irst
time. You only need to set up the printer once.
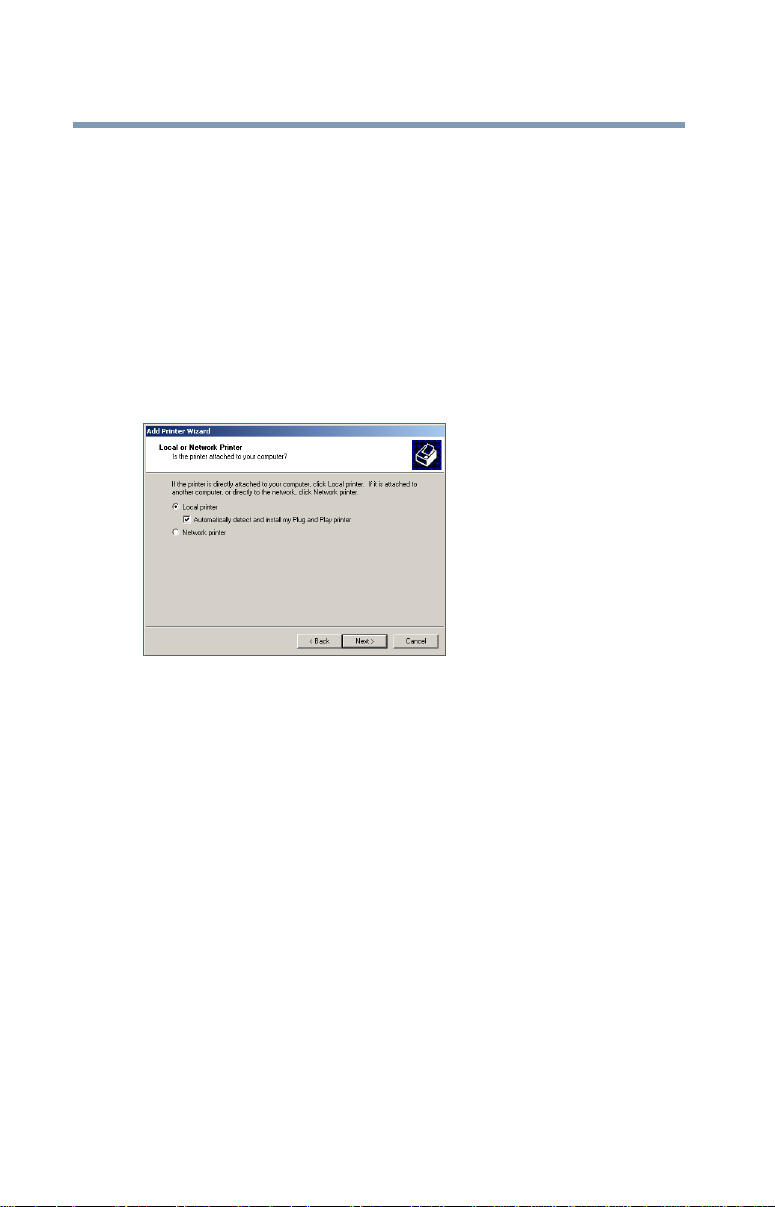
1 Click Start, Settings , then Printers and double-click the Add
Printer icon.
The Add Printer Wizard starts, and guides you through setting
up your printer .
Add Printer Wizard
2 Follow the directions on the sc reen to add your printer.
If your printer is not found, or if you want to install the dri ver
manually , use the printer dri v er that came with the printer to
complete the setup process.
3 Enter a name for your printer , or use the name supplied in the
Printer name text box.
4 If you want to set the printer as the default pri nter for
Windo ws-based programs, click Yes, then click Next.

5 If you want to print a test page, click Yes (recommended),
then click Finish.
TECHNICAL NOTE: Some printers require a specific
installation process. In this case, the Windows2000 Add
Printer Wizard wi ll disp lay an error message. If this ha ppens,
refer to your printer installation guide for further
instructions.
For more information about setting up your printer , see your
®
8200 Series User’s Guide.
Tecra
Customizing the desktop
Set up your computer to suit your needs. If you dislike the colors
or the fonts on the screen, you can change them by clicking a
blank area of the desktop with the secondary button, then clicking
Properties. This causes Windo ws2000 Professional to open the
Display Properties window . On the Appearance tab you can set the
color scheme for the desktop.
Getting Started
Customizing the desktop
17
T urning off the computer
It’s a good idea to turn off your computer when you’re not using it
for a while.
T o shut do wn the computer completely and turn it of f, use the
Windo ws Shut Down command.
1 Click the Start menu, then Shut Down.
The Shut Down Windo ws dialog box appears.

18
Getting Started
Turning of f the computer
Shut Down Windows dialog box
2 Select Shut down and click OK.
The computer shuts down and turns itself off .
There are additional options and features for turning of f your
computer. F or more information, see Powering down the
computer on page 35.

Chapter 3
Learning the Basics
This chapter provides information about using W indo ws2000
Professional with your notebook computer . It will help you
identify the features you see on your desktop and will show you
how to complete some basic procedures, such as creating and
saving a document, using email, and shutting down your
computer. Use this chapter if you’re new to computers.
Windows 2000 Professional basics
T o help you start w ork quickly, this section covers the follo wing
basic functions of the Windo ws2000 Professional operating
system:
❖ Windo ws 2000 Professional online Help
❖ Exploring the desktop
❖ Starting programs
❖ Printing and saving
❖ Using CDs and DVDs
❖ Using the Internet
❖ Powering do wn the computer
19
Learning the Basi cs
20
Windows2000 Professional basics
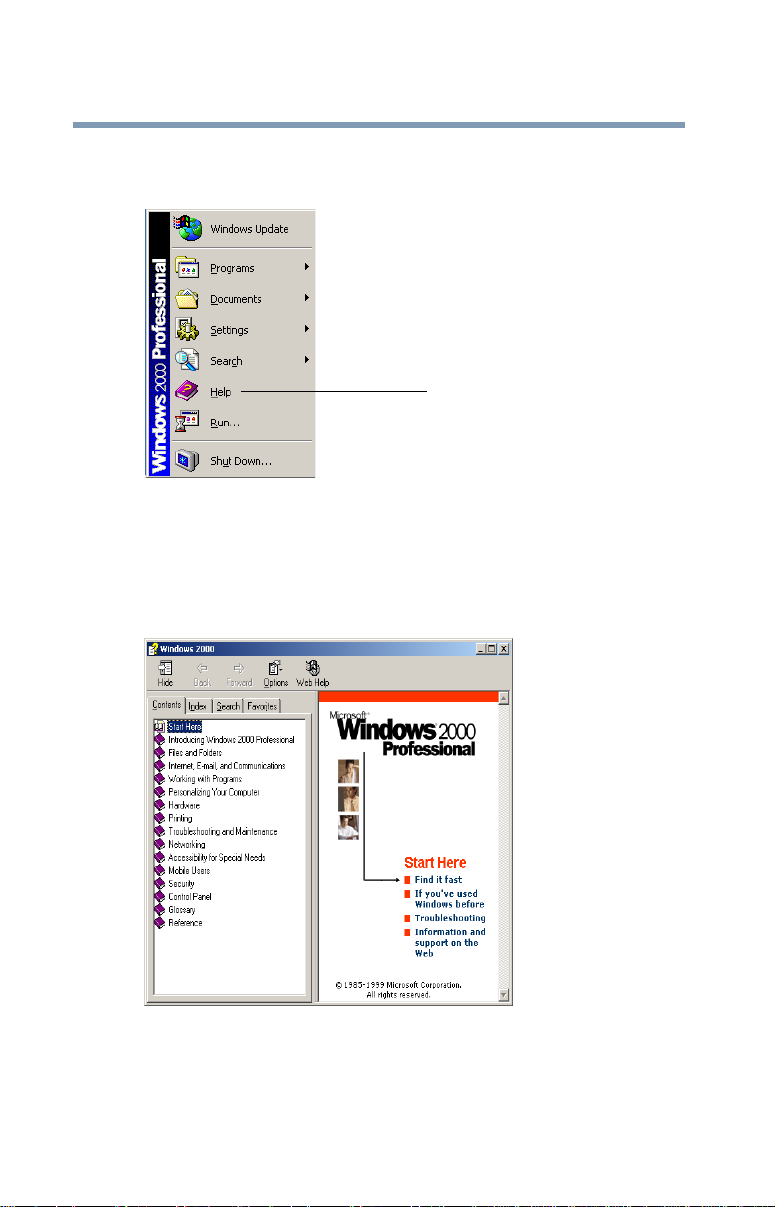
Windows 2000 Professional online Help
Click Help
Windows2000 Professional Start menu
Windo ws 2000 Professional is the computer’s operating system.
For answers to common questions, click Start, then click Help to
open the Windo ws 2000 Professional online Help.
Windows 2000 Professional online Help
Double-click an item on the Contents tab, or use the Index and
Search tabs to locate a specific topic.
 Loading...