

Page 1

DIGITAL PLAIN PAPER COPIER
OPERATOR'S MANUAL
FOR PRINTER FUNCTION
NETWORK PRINTER BOARD GA-1140
USER'S GUIDE
Page 2
FCC NOTICE
This equipment has been tested and found to comply with the limits for a Class A digital device, pursuant to Part 15 of the FCC Rules. These
limits are designed to provide reasonable protection against harmful interference when the equipment is operated in a commercial environment.
This equipment generates, uses, and can radiate radio frequency energy and, if not installed and used in accordance with the instruction
manual, may cause harmful interference to radio communications. Operation of this equipment in a residential area is likely to cause harmful
interference in which case the user will be required to correct the interference at his own expense.
WARNING:
Changes or modification made to this equipment, not expressly approved by Toshiba Tec or parties authorized by Toshiba Tec could
void the user’s authority to operate the equipment.
This Class A digital apparatus complies with Canadian ICES-003.
Cet appareil numérique de la classe A est conformé à la norme NMB-003 du Canada.
For European models only:
WARNING:
This product complies with Class A for network connection. In a domestic environment this product may cause radio interference in
which case the user may be required to take adequate measures.
1. Do not touch the connector terminal when disconnecting the cables of peripheral equipment.
2. Before opening any covers or removing any units from the copier, discharge the static electricity from your body by touching a
metal part of the copier.
This product is carrying the CE-Mark in accordance with the related European Directives. Responsible for CE-marking is TOSHIBA
TEC GERMANY IMAGING SYSTEMS GmbH Carl-Schurz-Str. 7, 41460 Neuss, Germany.
e-mail: customerservice@toshibatec-tgis.com
The software described in this publication is furnished under license and may only be used or copied in accordance with the terms of such license.
This product may be covered by one of more of the following U.S. Patents: 4,500,919, 4,837,722, 5,212,546, 5,343,311, 5,424,754, 5,467,446, 5,506,946,
5,517,334, 5,537,516, 5,543,940, 5,553,200, 5,615,314, 5,619,624, 5,625,712, 5,666,436, 5,760,913, 5,818,645, 5,835,788, 5,867,179, 5,959,867, 5,970,174,
5,982,937, 5,995,724, 6,002,795, 6,025,922, 6,041,200, 6,065,041, 6,112,665, 6,122,407, 6,134,018, 6,141,120, 6,166,821, 6,185,335, 6,201,614, 6,215,562,
6,219,659, 6,222,641, 6,224,048, 6,225,974, 6,226,419, 6,238,105, 6,239,895, 6,256,108, 6,269,190, 6,289,122, 6,292,270, 6,310,697, 6,327,047, 6,327,050,
6,327,052, RE36,947, D406,117, D416,550, D417,864, D419,185, D426,206, D439,851, D444,793
Trademarks
EFI, Fiery, the Fiery logo, Fiery Driven and RIP-While-Print are registered trademarks of Electronics For Imaging, Inc. in the U.S. Patent and Trademark Office and/
or certain other foreign jurisdictions.
The Electronics For Imaging logo, the Fiery Driven logo, Command WorkStation, DocBuilder, DocBuilder Pro, Fiery X3e, Fiery FreeForm, Fiery Scan, Fiery
ScanBuilder, Fiery WebInstaller, Fiery WebScan, Fiery WebSpooler, Fiery WebStatus, Fiery WebTools, NetWise, Velocity, Velocity Balance, Velocity Build, Velocity
Design, Velocity Estimate, and Velocity Scan are trademarks of Electronics For Imaging, Inc.
All other terms and product names may be trademarks or registered trademarks of their respective owners, and are hereby acknowledged.
Legal Notices
APPLE COMPUTER, INC. (“APPLE”) MAKES NO WARRANTIES, EXPRESS OR IMPLIED, INCLUDING WITHOUT LIMITATION THE IMPLIED WARRANTIES OF
MERCHANTABILITY AND FITNESS FOR A PARTICULAR PURPOSE, REGARDING THE APPLE SOFTWARE. APPLE DOES NOT WARRANT, GUARANTEE, OR
MAKE ANY REPRESENTATIONS REGARDING THE USE OR THE RESULTS OF THE USE OF THE APPLE SOFTWARE IN TERMS OF ITS CORRECTNESS,
ACCURACY, RELIABILITY, CURRENTNESS, OR OTHERWISE. THE ENTIRE RISK AS TO THE RESULTS AND PERFORMANCE OF THE APPLE SOFTWARE IS
ASSUMED BY YOU. THE EXCLUSION OF IMPLIED WARRANTIES IS NOT PERMITTED BY SOME STATES. THE ABOVE EXCLUSION MAY NOT APPLY TO
YOU.
IN NO EVENT WILL APPLE, ITS DIRECTORS, OFFICERS, EMPLOYEES OR AGENTS BE LIABLE TO YOU FOR ANY CONSEQUENTIAL, INCIDENTAL OR
INDIRECT DAMAGES (INCLUDING DAMAGES FOR LOSS OF BUSINESS PROFITS, BUSINESS INTERRUPTION, LOSS OF BUSINESS INFORMATION, AND
THE LIKE) ARISING OUT OF THE USE OR INABILITY TO USE THE APPLE SOFTWARE EVEN IF APPLE HAS BEEN ADVISED OF THE POSSIBILITY OF SUCH
DAMAGES. BECAUSE SOME STATES DO NOT ALLOW THE EXCLUSION OR LIMITATION OF LIABILITY FOR CONSEQUENTIAL OR INCIDENTAL DAMAGES,
THE ABOVE LIMITATIONS MAY NOT APPLY TO YOU.
Apple’s liability to you for actual damages from any cause whatsoever, and regardless of the form of the action (whether in contract, tort [including negligence],
product liability or otherwise), will be limited to $50.
Copyright © TOSHIBA TEC Corp. 2002 All Rights Reserved.
Under the copyright laws, this manual cannot be reproduced in any form without prior written permission of TOSHIBA TEC. No patent liability
is assumed, with respect to the use of the information contained herein.
No part of this manual may be copied in whole or part without permission.
The contents of this manual may change without notification.
Page 3

SOFTWARE LICENSE AGREEMENT
YOU SHOULD CAREFULLY READ THE FOLLOWING TERMS AND CONDITIONS BEFORE USING THIS SOFTWARE. IF YOU DO NOT AGREE TO
THE TERMS AND CONDITIONS OF THIS AGREEMENT, DO NOT USE THE SOFTWARE. INSTALLING OR USING THE SOFTWARE INDICATES
THAT YOU AGREE TO AND ACCEPT THE TERMS OF THIS AGREEMENT. IF YOU DO NOT AGREE TO ACCEPT THE TERMS OF THIS
AGREEMENT YOU MAY RETURN THE UNUSED SOFTWARE FOR A FULL REFUND TO THE PLACE OF PURCHASE.
LICENSE
Electronics For Imaging, Inc. grants you a non-exclusive, non-transferable license to use the software and accompanying documentation (“Software”) included with the
controller GA-1140 for TOSHIBA e-STUDIO550/650/810 Series printer you have purchased, including without limitation PostScript® software provided by Adobe
Systems Incorporated.
You may:
a. use the Software solely for your own customary business purposes and solely with the controller GA-1140 for TOSHIBA e-STUDIO550/650/810 Series;
b. use the digitally-encoded machine-readable outline and bitmap programs (“Font Programs”) provided with the controller GA-1140 for TOSHIBA e-
STUDIO550/650/810 Series in a special encrypted format (“Coded Font Programs”) to reproduce and display designs, styles, weights, and versions of letters,
numerals, characters and symbols (“Typefaces”) solely for your own customary business purposes on a monitor used with the controller GA-1140 for TOSHIBA e-
STUDIO550/650/810 Series;
c. use the trademarks used by Electronics For Imaging to identify the Coded Font Programs and Typefaces reproduced therefrom (“Trademarks”); and
d. assign your rights under this Agreement to a transferee of all of your right, title and interest in and to the controller GA-1140 for TOSHIBA e-STUDIO550/650/
810 Series provided the transferee agrees to be bound by all of the terms and conditions of this Agreement.
You may not:
a. make use of the Software, directly or indirectly, to print bitmap images with print resolutions of greater than 600 dots per inch, or to generate fonts or typefaces
for use other than with the controller GA-1140 for TOSHIBA e-STUDIO550/650/810 Series;
b. make or have made, or permit to be made, any copies of the Software, Coded Font Programs, accompanying documentation or portions thereof, except as
necessary for use with the controller GA-1140 for TOSHIBA e-STUDIO550/650/810 Series purchased by you; provided, however, that under no circumstances
may you make or have made, or permit to be made, any copies of that certain portion of the Software which has been included on the controller GA-1140 for
TOSHIBA e-STUDIO550/650/810 Series hard disk drive or ROM. You may not copy the documentation;
c. attempt to alter, disassemble, decrypt or reverse engineer the Software, Coded Font Programs.
d. rent or lease the Software.
PROPRIETARY RIGHTS
You acknowledge that the Software, Coded Font Programs, Typefaces, and Trademarks are proprietary to Electronics For Imaging and its suppliers and that title and
other intellectual property rights therein remain with Electronics For Imaging and its suppliers. Except as stated above, this Agreement does not grant you any right to
patents, copyrights, trade secrets, trademarks (whether registered or unregistered), or any other rights, franchises or licenses in respect of the Software, Coded Font
Programs, Typefaces, or Trademarks. You may not adapt or use any trademark or trade name which is likely to be similar to or confusing with that of Electronics For
Imaging or any of its suppliers or take any other action which impairs or reduces the trademark rights of Electronics For Imaging or its suppliers. The trademarks may
only be used to identify printed output produced by the Coded Font Programs. At the reasonable request of Electronics For Imaging, you must supply samples of any
Typeface identified with a trademark.
CONFIDENTIALITY
You agree to hold the Software and Coded Font Programs in confidence, disclosing the Software and Coded Font Programs only to authorized users having a need to
use the Software and Coded Font Programs as permitted by this Agreement and to take all reasonable precautions to prevent disclosure to other parties.
REMEDIES
Unauthorized use, copying or disclosure of the Software, Coded Font Programs, Typefaces, or Trademarks will result in automatic termination of this license and will
make available to Electronics For Imaging other legal remedies.
LIMITED WARRANTY AND DISCLAIMER
Electronics For Imaging warrants that, for a period of ninety (90) days from the date of delivery to you, the Software under normal use will perform without significant
errors that make it unusable. Electronics For Imaging’s entire liability and your exclusive remedy under this warranty (which is subject to you returning the controller
GA-1140 for TOSHIBA e-STUDIO550/650/810 Series to Electronics For Imaging or an authorized dealer) will be, at Electronics For Imaging’s option, to use
reasonable commercial efforts to attempt to correct or work around errors, to replace the Software with functionally equivalent software, or to refund the purchase price
and terminate this Agreement. Some states/jurisdictions do not allow limitations on duration of implied warranty, so the above limitation may not apply to you.
For warranty service, please contact your authorized service/support center.
EXCEPT FOR THE ABOVE EXPRESS LIMITED WARRANTY, ELECTRONICS FOR IMAGING MAKES AND YOU RECEIVE NO WARRANTIES OR
CONDITIONS ON THE SOFTWARE OR CODED FONT PROGRAMS, EXPRESS, IMPLIED, STATUTORY, OR IN ANY OTHER PROVISION OF THIS
AGREEMENT OR COMMUNICATION WITH YOU, AND ELECTRONICS FOR IMAGING SPECIFICALLY DISCLAIMS ANY IMPLIED WARRANTY
OR CONDITION OF MERCHANTABILITY OR FITNESS FOR A PARTICULAR PURPOSE. Electronics For Imaging does not warrant that the operation of the
software will be uninterrupted or error free or that the Software will meet your specific requirements.
1
Page 4

LIMITATION OF LIABILITY
IN NO EVENT WILL ELECTRONICS FOR IMAGING OR ITS SUPPLIERS BE LIABLE FOR ANY DAMAGES, INCLUDING LOSS OF DATA, LOST
PROFITS, COST OF COVER OR OTHER SPECIAL, INCIDENTAL, CONSEQUENTIAL OR INDIRECT DAMAGES ARISING FROM THE USE OF THE
SOFTWARE, OR CODED FONT PROGRAMS, HOWEVER CAUSED AND ON ANY THEORY OF LIABILITY. THIS LIMITATION WILL APPLY EVEN
IF ELECTRONICS FOR IMAGING OR ANY AUTHORIZED DEALER HAS BEEN ADVISED OF THE POSSIBILITY OF SUCH DAMAGE. YOU
ACKNOWLEDGE THAT THE PRICE OF THE CONTROLLER GA-1140 FOR TOSHIBA e-STUDIO550/650/810 Series REFLECTS THIS ALLOCATION
OF RISK. BECAUSE SOME STATES/JURISDICTIONS DO NOT ALLOW THE EXCLUSION OR LIMITATION OF LIABILITY FOR CONSEQUENTIAL
OR INCIDENTAL DAMAGES, THE ABOVE LIMITATION MAY NOT APPLY TO YOU.
EXPORT CONTROLS
You agree that you will not export or re-export the Software or Coded Font Programs in any form without the appropriate United States and foreign government
licenses. Your failure to comply with this provision is a material breach of this Agreement.
GOVERNMENT USE
Use, duplication or disclosure of the Software by the United States Government is subject to restrictions as set forth in subdivision (c) (1) (ii) of the Rights in Technical
Data and Computer Software clause at DFARS 252.227-7013 or in subparagraphs (c) (1) and (2) of the Commercial Computer Software-Restricted Right Clause at 48
CFR 52.227-19, as applicable.
THIRD PARTY BENEFICIARY
You are hereby notified that Adobe Systems Incorporated, a California corporation located at 345 Park Avenue, San Jose, CA 95110-2704 (“Adobe”) is a third-party
beneficiary to this Agreement to the extent that this Agreement contains provisions which relate to your use of the Fonts, the Coded Font Programs, the Typefaces and
the Trademarks licensed hereby. Such provisions are made expressly for the benefit of Adobe and are enforceable by Adobe in addition to Electronics for Imaging.
GENERAL
This Agreement will be governed by the laws of the State of California.
This Agreement is the entire agreement held between us and supersedes any other communications or advertising with respect to the Software and Coded Font
Programs.
If any provision of this Agreement is held invalid, the remainder of this Agreement shall continue in full force and effect.
If you have any questions concerning this Agreement, please see Electronics For Imaging’s web site at www.efi.com.
Electronics For Imaging
303 Velocity Way
Foster City, CA 94404
2
Page 5

Preface
Thank you for purchasing Toshiba Tec’s GA-1140 Network Printer Controller. This USER’S GUIDE
explains the instructions for users to set up your computer and print to GA-1140 printer. Read this
guide before printing to your e-STUDIO550/650/810 with the GA-1140 Network Printer Board. Keep
this guide within easy reach, and use it to configure quality printing environment and make the best of
your printer’s functions.
3
Page 6

Table of Contents
■■
■ Introduction .................................................................................. 9
■■
About the Documentation ............................................................................. 10
About this Guide ........................................................................................ 10
About Other Manuals ................................................................................. 10
About User Software CD-ROM ..................................................................... 11
Contents of User Software CD-ROM ......................................................... 11
Windows ................................................................................................. 11
Mac OS .................................................................................................. 12
■■
■ Installing User Software on a Windows Computer ................. 13
■■
About User Software for Windows ................................................................. 14
Planning for Installation ............................................................................. 15
When using PCL6 Printer Driver ............................................................ 15
When using PostScript Printer Driver ..................................................... 15
Installing the Printer Driver ............................................................................ 16
About the Installation ................................................................................. 16
Type of Printer Driver .............................................................................. 16
System Requirements ............................................................................ 16
About the Installation Procedure ............................................................ 17
Installing the Printer Driver for Parallel Printing ......................................... 18
Installing the Printer Driver for SMB Printing ............................................. 21
Windows 95/98/Me ................................................................................. 22
Windows NT 4.0/2000/XP ...................................................................... 26
Installing the Printer Driver for LPR Printing .............................................. 31
Windows NT 4.0 ..................................................................................... 32
Windows 2000 and Windows XP ............................................................ 37
Installing the Printer Driver for IPP Printing ............................................... 44
Installing the Printer Driver for Novell Printing ........................................... 49
Windows 95/98/Me ................................................................................. 50
Windows NT 4.0/2000/XP ...................................................................... 55
Configuring the Options ............................................................................. 59
Configuring the Options Manually .......................................................... 59
Configuring the Options Automatically ................................................... 64
Setting the User Information ...................................................................... 66
Copying the Printer Description File for Windows ...................................... 68
Installing the Agfa Monotype Font Manager 2000......................................... 69
4
Page 7

■■
■ Installing User Software on a Mac OS Computer ................... 71
■■
About User Software for Mac OS .................................................................. 72
Planning for Installation ............................................................................. 72
Installing the Printer Driver ............................................................................ 73
About the Installation ................................................................................. 73
System Requirements ............................................................................ 73
Installing the Printer Driver to Mac OS Computer ...................................... 74
Installing the AdobePS 8.7 Printer Driver ............................................... 74
Creating the AdobePS Printer ................................................................ 76
Installing the Fonts ........................................................................................ 79
■■
■ Printing from Windows Computers .......................................... 81
■■
Printing from Application ............................................................................... 82
Setting Print Options Using Profiles........................................................... 84
Creating Saved Settings ......................................................................... 85
Modifying Saved Settings ....................................................................... 86
Deleting Saved Settings ......................................................................... 87
Loading Saved Settings.......................................................................... 87
Exporting Saved Settings ....................................................................... 88
Importing Saved Settings ....................................................................... 89
Setting Up Print Options ............................................................................... 90
Displaying the Printer Properties ............................................................... 93
Setting Initial Values of Print Options ...................................................... 93
Setting Print Options for Each Print Job ................................................. 94
Details of Screen ....................................................................................... 95
Setting the Output Tab ............................................................................... 97
Setting the Cover/Insert Tab .................................................................... 103
Setting the Watermark Tab ....................................................................... 106
Watermark Detail Screen ..................................................................... 107
Setting the Print Quality Tab .................................................................... 109
PCL6 Printer Driver .............................................................................. 109
PostScript Printer Driver ....................................................................... 110
Setting the PS Tab ................................................................................... 112
Setting the Private Tab ............................................................................. 114
Setting the Options Tab ............................................................................ 116
Setting the User Tab ................................................................................ 119
Setting the Settings Tab ........................................................................... 120
Introduction
Installing User
Software on a
Windows Computer
Installing User
Software on a Mac
OS Computer
Printing from
Windows Computer
Printing from Mac
OS Computer
Advanced
Features
Tracking and
Managing Print Jobs
Troubleshooting Appendix
5
Page 8

Setting the Consumables Tab .................................................................. 121
Managing Fonts with Font Manager 2000 ................................................... 122
Searching Fonts....................................................................................... 123
Installing Fonts in Windows...................................................................... 123
Uninstalling Fonts in Windows ................................................................. 123
Removing Fonts from the Computer ........................................................ 124
Preview Fonts .......................................................................................... 124
Creating a Font Group ............................................................................. 124
Sorting Fonts in the List ........................................................................... 125
■■
■ Printing from Mac OS Computers .......................................... 127
■■
Printing from Application ............................................................................. 128
Selecting the GA-1140 in the Chooser .................................................... 128
Setting Options and Printing from Mac OS Computers ........................... 130
Setting Up Print Options for Page Setup Dialog.......................................... 131
Page Attributes ........................................................................................ 131
Watermark ............................................................................................... 133
PostScript Options ................................................................................... 134
Setting Up Print Options for Print Dialog ..................................................... 135
General .................................................................................................... 135
Background Printing ................................................................................ 136
Cover Page .............................................................................................. 136
Layout ...................................................................................................... 137
Error Handling.......................................................................................... 138
PostScript Settings .................................................................................. 138
Printer Specific Options ........................................................................... 139
Tab Printing .............................................................................................. 142
Private...................................................................................................... 143
Appendix for Booklet Printing ...................................................................... 144
Printing a Portrait Booklet ........................................................................ 144
Printing a Landscape Booklet .................................................................. 145
■■
■ Advanced Features .................................................................. 147
■■
Printing a Private Job .................................................................................. 148
Printing a Private Job from Computers .................................................... 148
Creating a Private Job from Windows Computers ................................ 148
Creating a Private Job from Mac OS Computers ................................. 150
6
Page 9

Printing a Private Job from Touch Panel Display ..................................... 152
Printing a Private Job ........................................................................... 152
Printing a Proof of the Private Job ........................................................ 153
Modifying the Print Settings of the Private Job ..................................... 155
Deleting the Private Job ....................................................................... 162
Printing a Stored Job .................................................................................. 164
Printing a Stored Job from Computers .................................................... 164
Creating a Stored Job from Windows Computers................................. 164
Creating a Stored Job from Mac OS Computers .................................. 166
Printing a Stored Job from Touch Panel Display ...................................... 168
Printing a Stored Job ............................................................................ 168
Changing the Stored Name .................................................................. 169
Modifying the Print Settings of the Stored Job ..................................... 170
Deleting the Stored Job ........................................................................ 177
■■
■ Tracking and Managing Print Jobs ........................................ 179
■■
About the Print Job Management Tools ...................................................... 180
Managing the Print Jobs with TopAccess .................................................... 181
About TopAccess ..................................................................................... 181
Requirements ....................................................................................... 181
Accessing the TopAccess ........................................................................ 182
Screen Details ......................................................................................... 183
Checking GA-1140 Copier Status............................................................ 184
Checking and Managing GA-1140 Print Jobs.......................................... 185
Checking and Deleting the Jobs Currently Printing .............................. 185
Checking and Deleting the Private Job................................................. 186
Checking and Printing the Stored Job .................................................. 188
Checking and Deleting the Stored Job ................................................. 189
Checking GA-1140 Printer Settings ......................................................... 191
Displaying the Department Counter ......................................................... 192
Managing the Counter with Master Code ................................................ 194
Registering a New Department Code ................................................... 195
Editing a Department Code .................................................................. 196
Resetting a Department Counter .......................................................... 197
Deleting Department Counter Information ............................................ 198
Exporting Counter Information ............................................................. 199
Introduction
Installing User
Software on a
Windows Computer
Installing User
Software on a Mac
OS Computer
Printing from
Windows Computer
Printing from Mac
OS Computer
Advanced
Features
Tracking and
Managing Print Jobs
Troubleshooting Appendix
7
Page 10

■■
■ Troubleshooting ....................................................................... 201
■■
Troubleshooting for the Installation.............................................................. 202
On a Windows computer .......................................................................... 202
On a Mac OS computer ........................................................................... 203
Troubleshooting for Printing......................................................................... 204
Maintaining optimal system performance ................................................ 204
Troubleshooting........................................................................................ 204
General Printing Problems ................................................................... 204
Problems with Print Quality .................................................................. 206
■■
■ Appendix .................................................................................. 207
■■
Internal PCL Fonts List ............................................................................... 208
Internal PostScript Fonts List ...................................................................... 210
8
Page 11

Introduction
Introduction
9
Page 12

About the Documentation
About this Guide
This manual describes how to install the user software for the TOSHIBA GA-1140 Network Printer
BoardTM, set up printing, and manage print jobs from Microsoft Windows and Apple Mac OS computers.
For information about setting up network servers and clients to use the GA-1140, see
Guide
. For general information on using the copier, your computer, your application software, or your
network, see the manuals that accompany those products.
The term “GA-1140” is used in this manual to refer to the TOSHIBA GA-1140 Network Printer Board.
Convention
indicates features that require the PS3 Upgrade option.
indicates features and functionality for which PS3 Scan & HDD Upgrade option is required.
About Other Manuals
There are also following manuals which are included in the User Documentation CD-ROM:
Administrator’s
Administrator’s Guide
supported platforms and network environments. It is also includes guidelines for setting up Windows
NT/2000 and Novell NetWare servers to provide printing services to clients.
:
Fiery Utilities Guide
Upgrade (GE-1060+GE-1110).
Fiery Utilities Guide
available with the PS3 Scan & HDD Upgrade kit such as the Fiery WebTools, Command
WorkStation, and the DocBuilder Pro.
Scan & E-mail Guide
mail service function which are available with the PS3 Scan & HDD Upgrade kit.
- explains basic configuration and administration of the GA-1140 for the
and
Scan & E-mail Guide
- explains how to use optional software for the GA-1140 which are
- explains basic configuration and operation of the GA-1140 scan and e-
are also included in the PS3 Scan & HDD
10
Page 13
About User Software CD-ROM
Contents of User Software CD-ROM
Windows
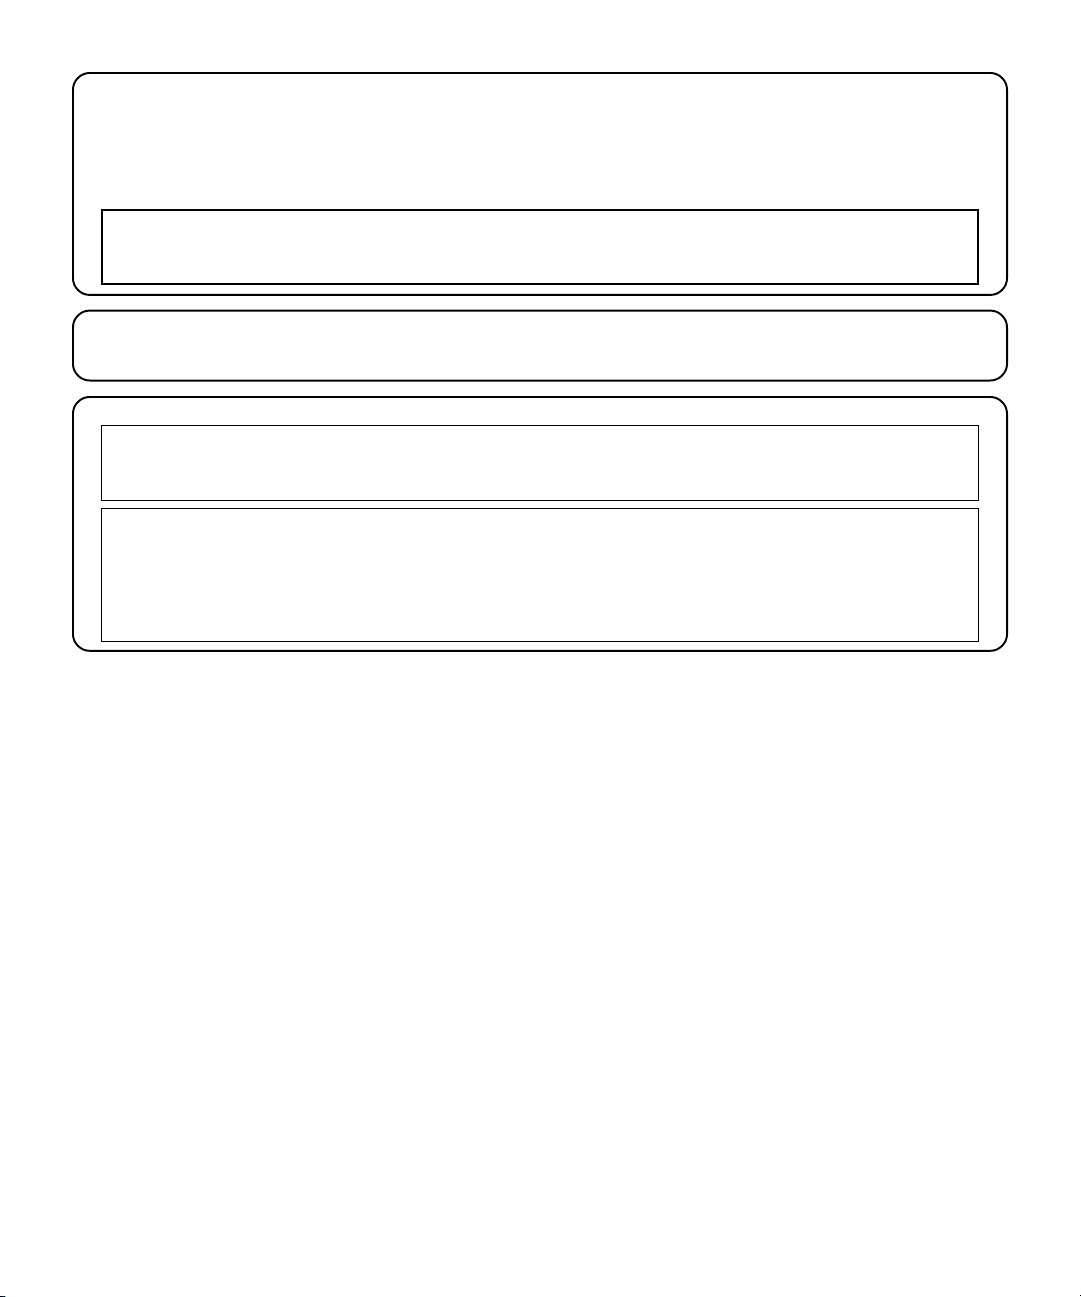
The contents of User Software CD-ROM are:
Introduction
Installr -
printer driver.
[language]\Prntdrvr\Pcl6_drvr\[Windows version]
and other files to install the PCL6 printer driver by Add Printer Wizard.
[language]\Prntdrvr\Ps_drvr\[Windows version]
and other files to install the PostScript printer driver by Add Printer Wizard, and
Printer Description file.
Afm
SUPPLEMENT:
For further information about user softwares for Windows, please refer to “About User Software
for Windows”. P14 “About User Software for Windows”
includes Setup.exe to install the PCL6 printer driver and PostScript
- includes Oemsetup.inf
- includes Oemsetup.inf
- includes Setup.exe to install the Agfa Monotype Font Manager 2000.
11
Page 14
Mac OS
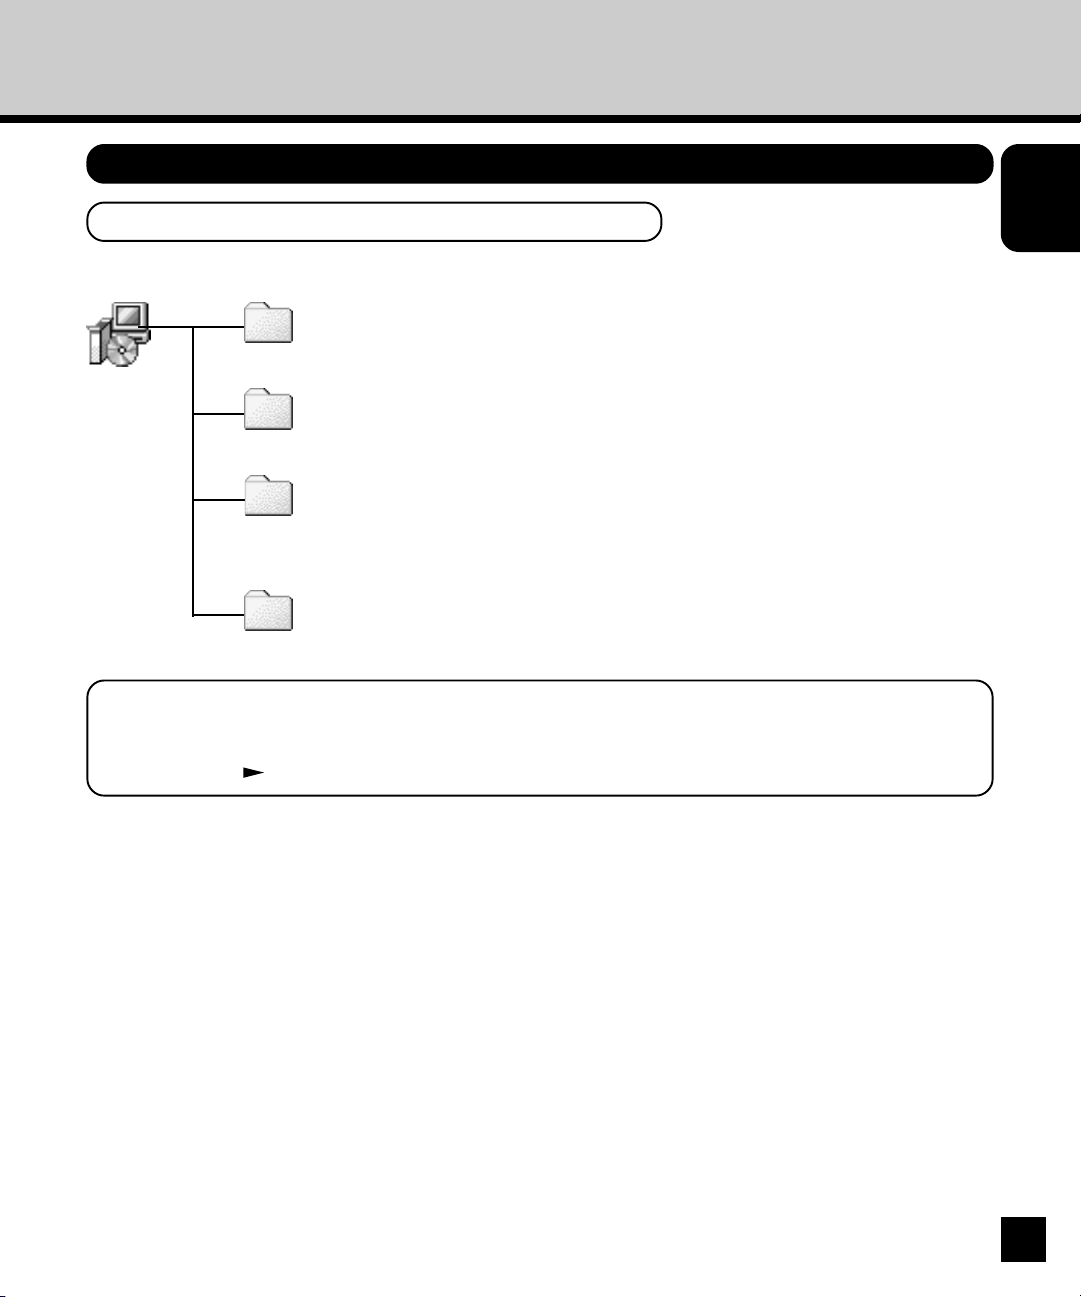
The contents of User Software CD-ROM are:
Fonts
- is an installer for screen and printer fonts.
[language]:Printer Driver
driver and other files such as PPD files under the Printer Description folder.
SUPPLEMENT:
For further information about user softwares for Mac OS, please refer to “About User Software
for Mac OS”. P72 “About User Software for Mac OS”
- includes an installer for AdobePS 8.7.2 printer
12
Page 15

Installing User Software on a
Windows Computer
Installing User
Software on a
Windows Computer
13
Page 16

About User Software for Windows
The following user softwares are included in the User Software CD-ROM:
PCL6 Printer Driver
special GA-1140 PCL6 print features. This printer driver is utilized for printing the document which
uses the TrueType font.
PostScript Printer Driver
special Fiery and PostScript 3 features. This printer driver is utilized for printing the high-graphical
document which uses the PostScript font and graphics. The PS3 Upgrade option or PS3 Scan & HDD
Upgrade option should be installed on the GA-1140 in order to use the PostScript printer driver.
PostScript Printer Description file (PPD)
Print and Page Setup dialog boxes for use with the PostScript printer driver. Some applications require
the PPD file to be copied into specific location to enable printing with the PostScript printer driver. In
this case, copy the PPD file to appropriate location to enable printing from an application.
Agfa Monotype Font Manger 2000
uninstalling, organizing, and previewing TrueType and Type 1 fonts. When you are using the PCL6
printer driver for printing, please install this software because this supports installing fonts that are
compatible to internal PCL fonts on the GA-1140.
- enables you to print to the GA-1140 from Windows computers; supports all
- enables to print to the GA-1140 from Windows computers; supports
- allows the GA-1140 to appear in popular applications’
- enables to manage your fonts on Windows, including installing,
14
Page 17

Planning for Installation
The installation of user softwares on Windows is different depending on what you expect for printing.
The PCL6 printer driver is effective for printing a document which uses TrueType fonts, such as a
Microsoft Word document so on.
The PostScript printer driver is effective for high-graphical document which uses PostScript fonts and
graphics, such as Adobe PageMaker so on.
When using PCL6 Printer Driver
When you want to print using the PCL6 printer driver, install the following softwares:
1. Install the PCL6 printer driver.
P16 “Installing the Printer Driver”
2. Install the Agfa Font Manager 2000.
P69 “Installing the Agfa Monotype Font Manager 2000”
When using PostScript Printer Driver
: The PS3 Upgrade (GE-1020) or PS3 Scan & HDD Upgrade (GE-1060+GE-1110) is required to
use the PostScript Driver.
Installing User
Software on a
Windows Computer
When you want to print using the PostScript printer driver, install the following softwares:
1. Install the PostScript printer driver.
P16 “Installing the Printer Driver”
15
Page 18
Installing the Printer Driver
About the Installation
Before installing the printer driver to your computer, read this section to understand about installation.
Type of Printer Driver
Two types of printer driver are available for the GA-1140:
• PCL6 Printer Driver
The PCL6 printer driver allows you to print to the GA-1140 as a PCL printer.
• PostScript Printer Driver
The PostScript printer driver allows you to print to the GA-1140 as a PostScript Level 3 compatible
printer.
: The PS3 Upgrade (GE-1020) or PS3 Scan & HDD Upgrade (GE-1060+GE-1110) is required to
use the PostScript Printer Driver.
System Requirements
To install the printer drivers on a Windows workstation, the following environments are required.
Hardware: PC/AT compatible with an 80486, AMD, or Pentium processor
OS: Windows 95, Windows 98, Windows Me
Windows NT 4.0 with Service Pack 6 or later
Windows 2000 with Service Pack 2 or later
Windows XP
Memory: 16MB or more for Windows 95
24MB or more for Windows 98
32MB or more for Windows Me
32MB or more for Windows NT 4.0
64MB or more for Windows 2000
64MB or more for Windows XP
16
Page 19
About the Installation Procedure
Please find the installation procedure suited to your environment from the followings:
Step1: Installing the Printer Driver
Installing the printer driver varies depending on how you configure the connection for printing:
For Parallel Printing
P18 “Installing the Printer Driver for Parallel Printing”
For SMB Printing
P21 “Installing the Printer Driver for SMB Printing”
For LPR Printing
P31 “Installing the Printer Driver for LPR Printing”
For IPP Printing
P44 “Installing the Printer Driver for IPP Printing”
For Novell Printing
P49 “Installing the Printer Driver for Novell Printing”
Step2: Configuring the Options
P59 “Configuring the Options”
Step3: Setting the User Information
P66 “Setting the User Information”
Installing User
Software on a
Windows Computer
SUPPLEMENT:
When you want to print from some Windows applications supported the PS printing such as
Adobe PageMaker, you should copy the printer description file to a specific folder.
P68 “Copying the Printer Description Files for Windows”
17
Page 20
Installing the Printer Driver for Parallel Printing
PREPARATION:
Before installing the printer driver for parallel printing, please make sure of the following:
• The GA-1140 printer is connected to your computer and turned on.
To make sure above statement, see Administrator’s Guide to perform the set up for parallel
printing.
REQUIREMENT:
You must log into as a user who has the “Administrators” or “Power Users” privilege when using
Windows NT 4.0, Windows 2000, and Windows XP.
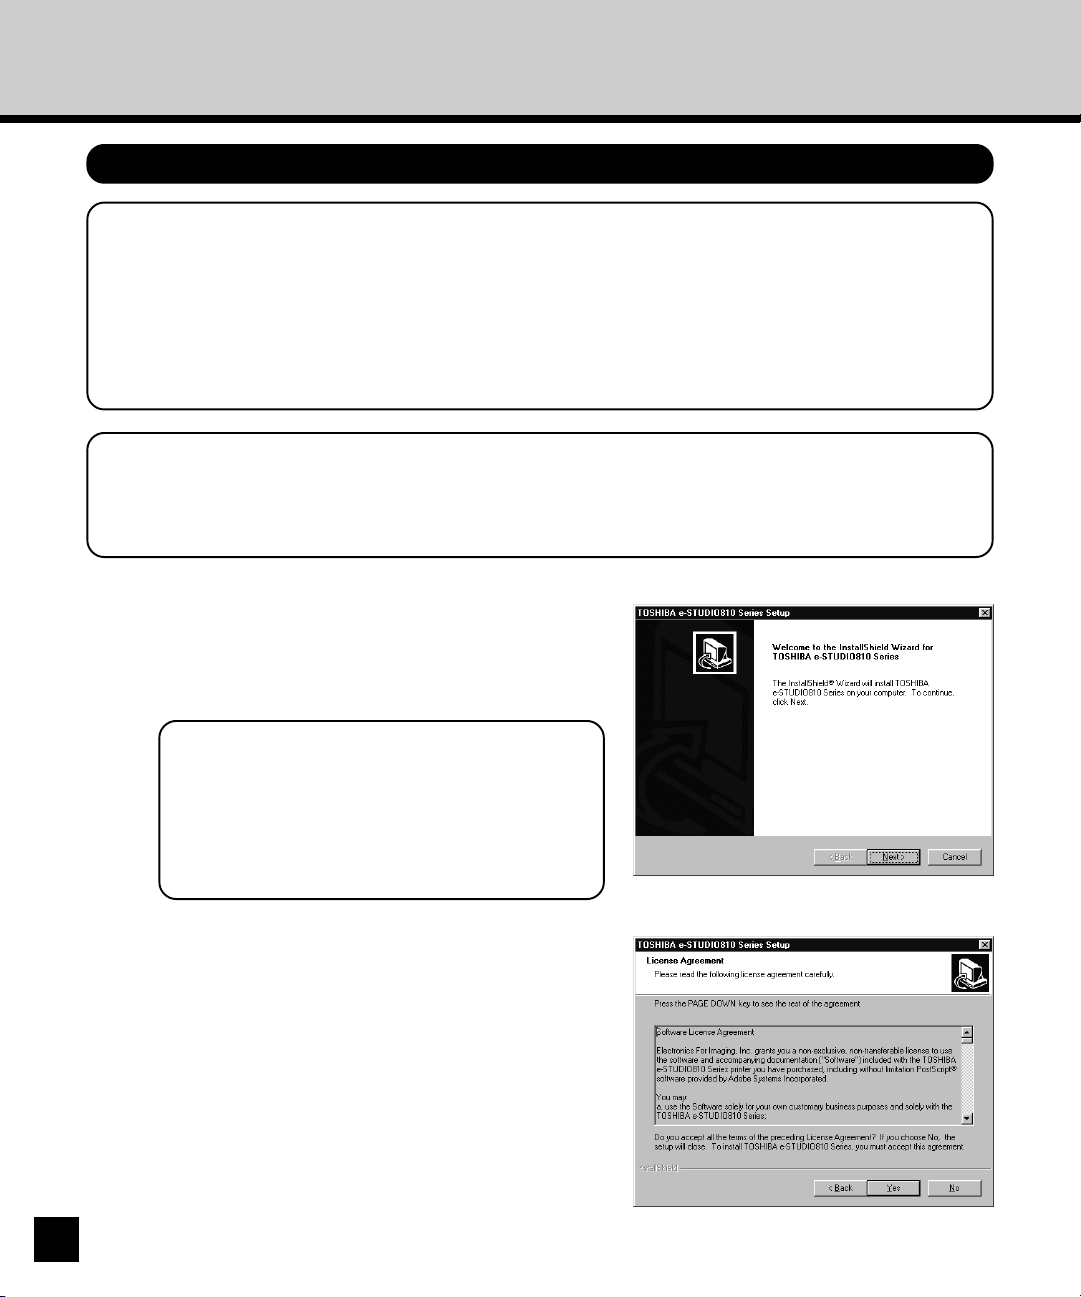
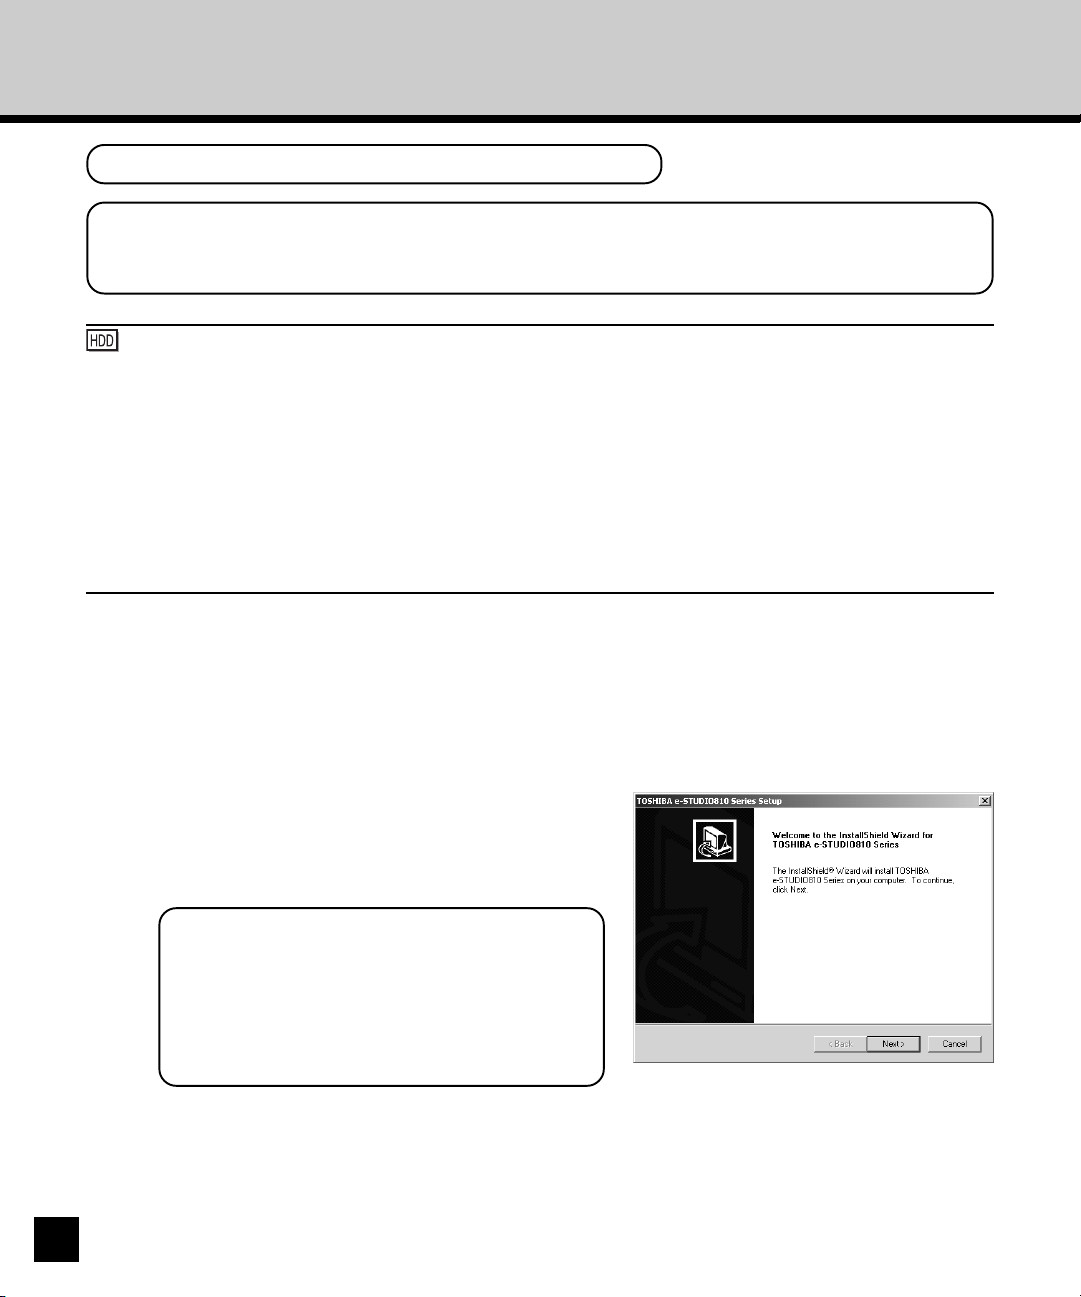
Insert the User Software CD-ROM into the CDROM drive.
1
• The installer automatically starts and the Welcome
dialog box appears.
18
SUPPLEMENT:
When the installer does not automatically
start, double-click on “Setup.exe” in the
“Installr” folder of the User Software CDROM.
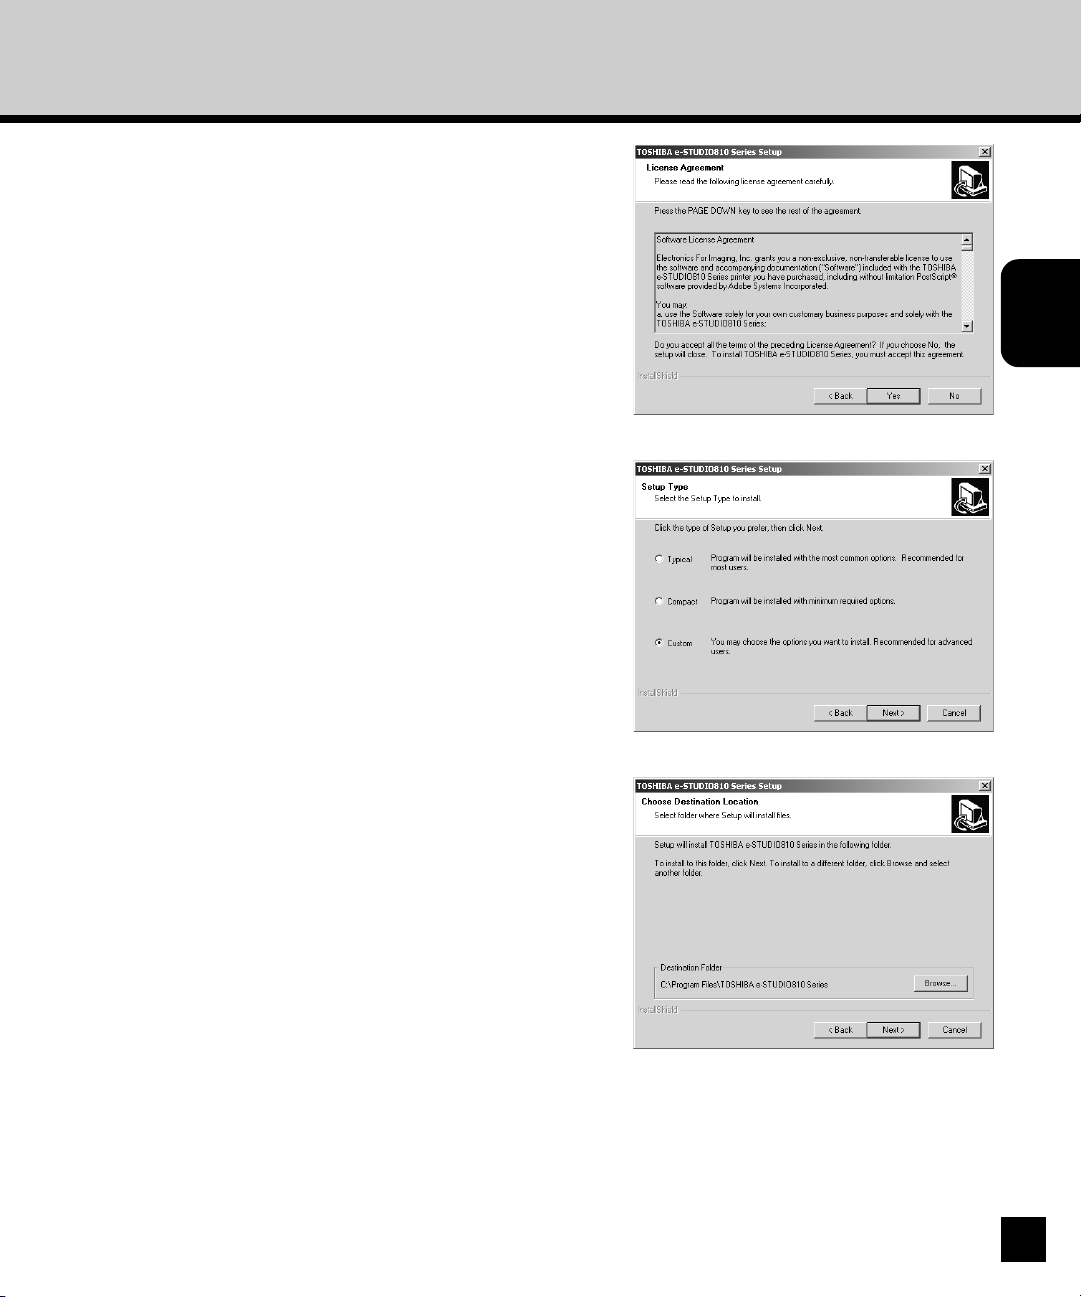
Click on [Next].
• The Software License Agreement dialog box
2
3
appears.
Click on [Yes].
• The Setup Type dialog box appears.
Page 21
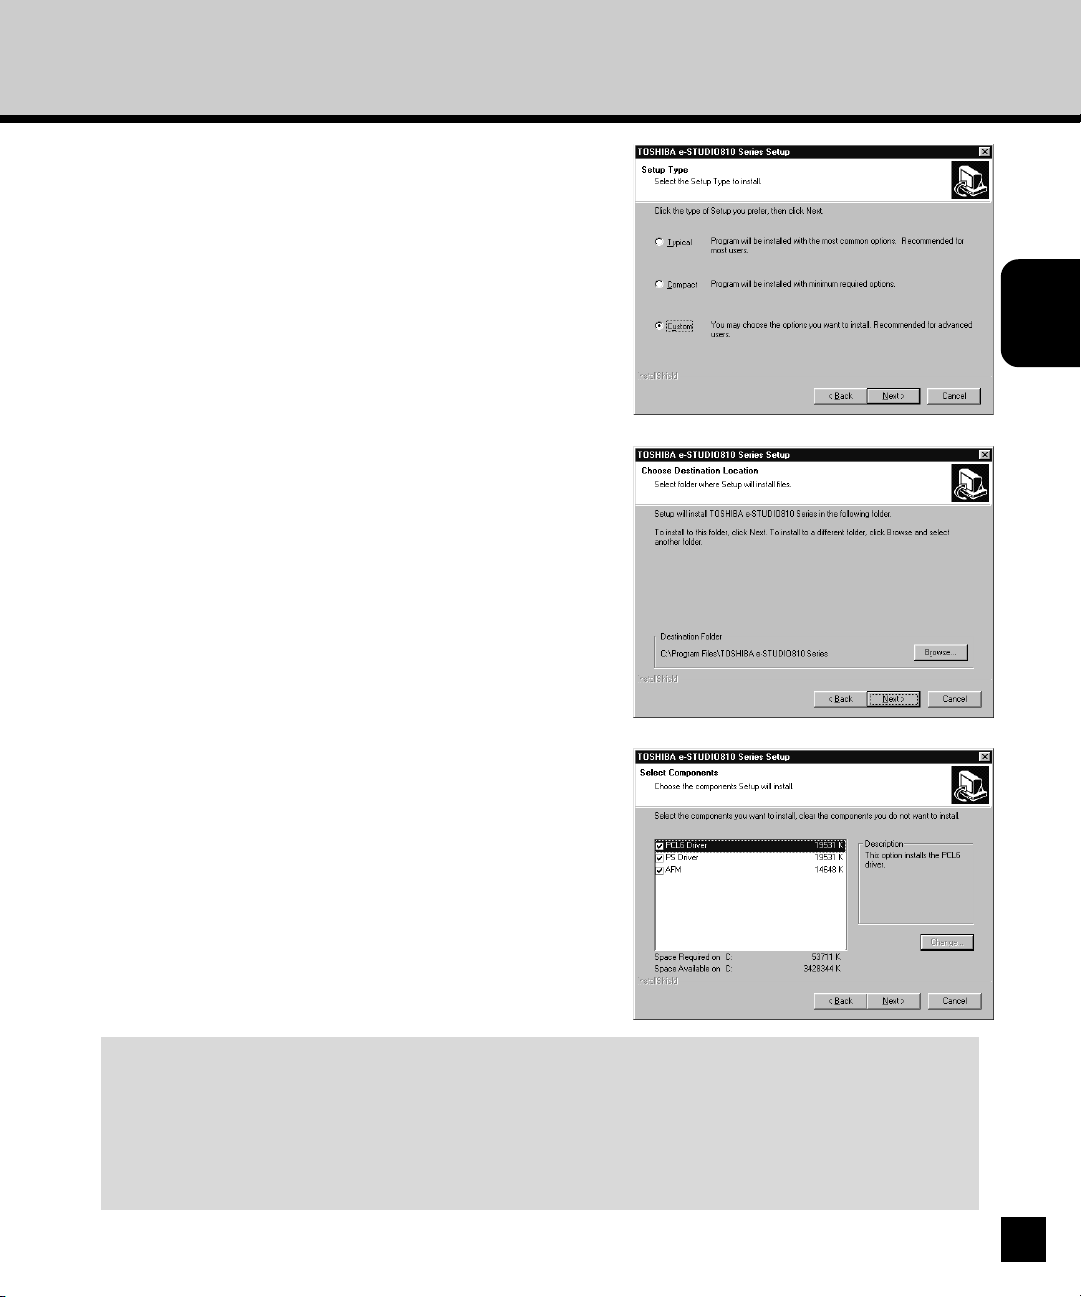
Select “Custom” and click on [Next].
• The Choose Destination dialog box appears.
4
Click on [Next].
• Click on [Browse...] and select the folder only If you
5
want to change the folder which the software will be
installed.
Installing User
Software on a
Windows Computer
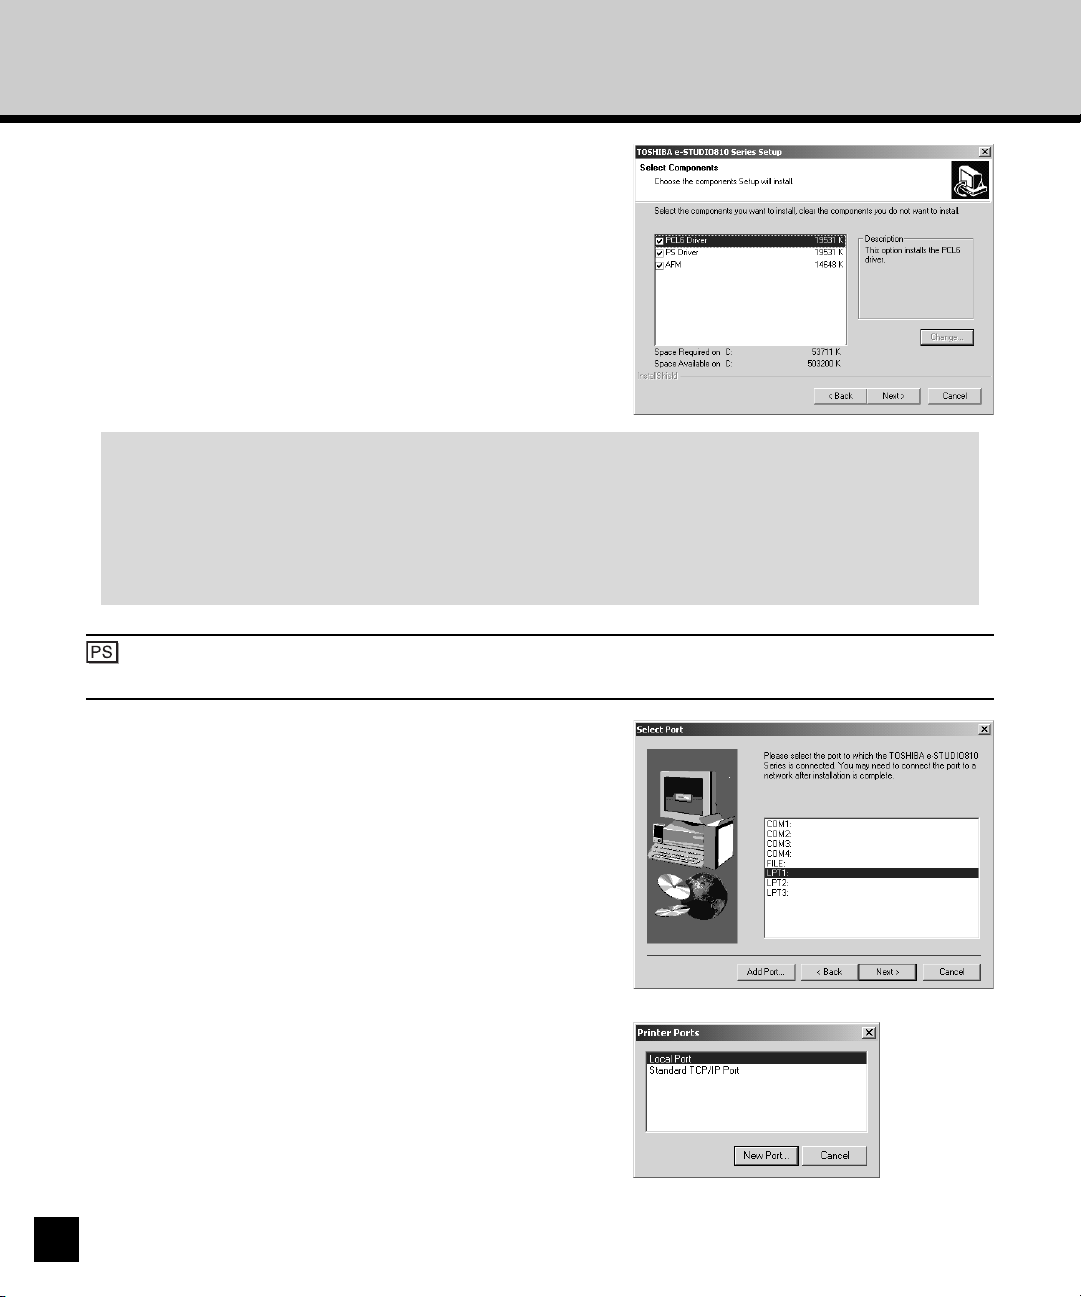
Select the components to be installed and
click on [Next].
6
• The Select Port dialog box appears.
PCL6 Driver
Check this to install the PCL6 printer driver.
PS Driver
Check this to install the PostScript printer driver.
AFM
Check this to install the Agfa Monotype Font Manager 2000.
19
Page 22

: The PS3 Upgrade (GE-1020) or PS3 Scan & HDD Upgrade (GE-1060+GE-1110) is required to
use the PostScript Driver.
Select “LPT1” and click on [Next].
• The Start Copying Files dialog box appears.
7
Click on [Next].
• Start copying files.
8
20
Change the name if desired and click on
[Next].
9
Page 23
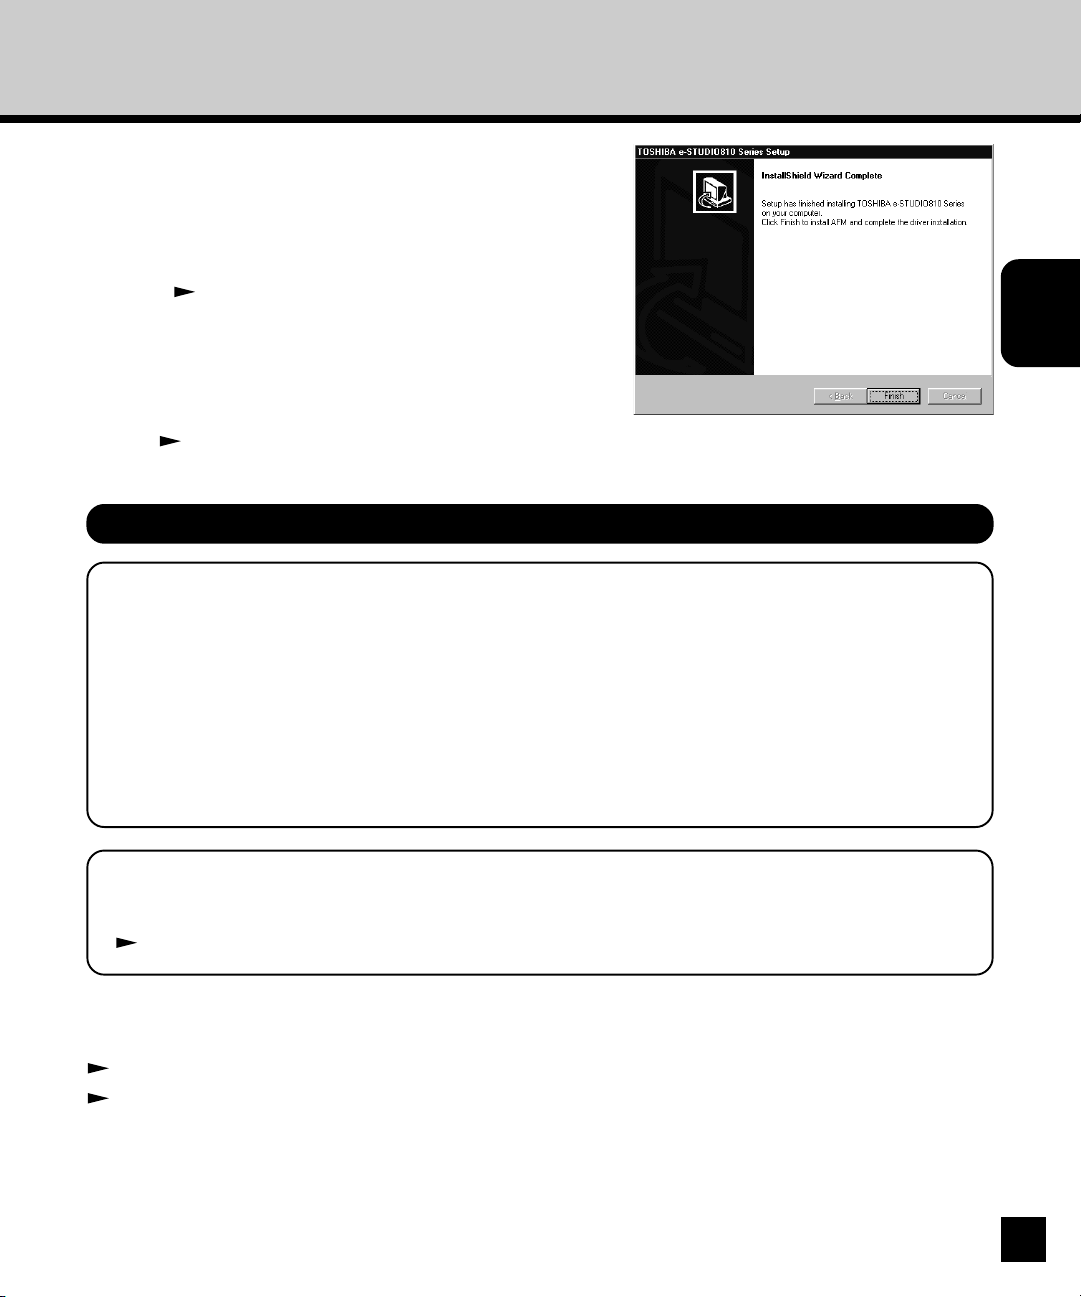
Click on [Finish].
10
11
• The installation is completed.
• When you selected to install the Agfa Monotype Font
Manager 2000, the Welcome dialog box appears. In
this case, continue the installation.
P69 “Installing the Agfa Monotype Font Manager
2000”
Continue the operation to configure the option
settings on the printer driver.
P59 “Configuring the Options”
Installing the Printer Driver for SMB Printing
PREPARATIONS:
Before installing the printer driver for SMB printing, please make sure of the following:
• The GA-1140 printer is connected to the network and turned on.
• The TCP/IP setting is completed correctly.
• The Windows Printing is completed correctly.
Installing User
Software on a
Windows Computer
To make sure above statements, ask your network administrator or see Administrator’s Guide to
perform the set up for SMB printing.
SUPPLEMENT:
When you want to install the Agfa Monotype Font Manager 2000, you should install it separately.
P69 “Installing the Agfa Monotype Font Manager 2000”
The procedure to Install the printer driver for SMB printing is different depending on the version of the
Windows.
P22 “Windows 95/98/Me”
P26 “Windows NT 4.0/2000/XP”
21
Page 24
Windows 95/98/Me
The procedure here describes an installation on Windows 98. The procedures are the same when
other versions of Windows is used.
: When the PS3 Scan & HDD Upgrade (GE-1060+GE-1110) is installed on your GA-1140
printer, a printer driver, which is selected for the SMB Printing option in the TopAccess, is
automatically installed by following the procedure here. If you want to install another printer
driver for SMB printing, right-click the queue and select [Install] to install another printer driver.
When you install both printer drivers by this method, change the emulation of the printer driver
for printing by right-clicking the printer icon in the Printers folder and select [Properties], then
select the desired printer driver in the “Print using the following driver” menu in the Details tab.
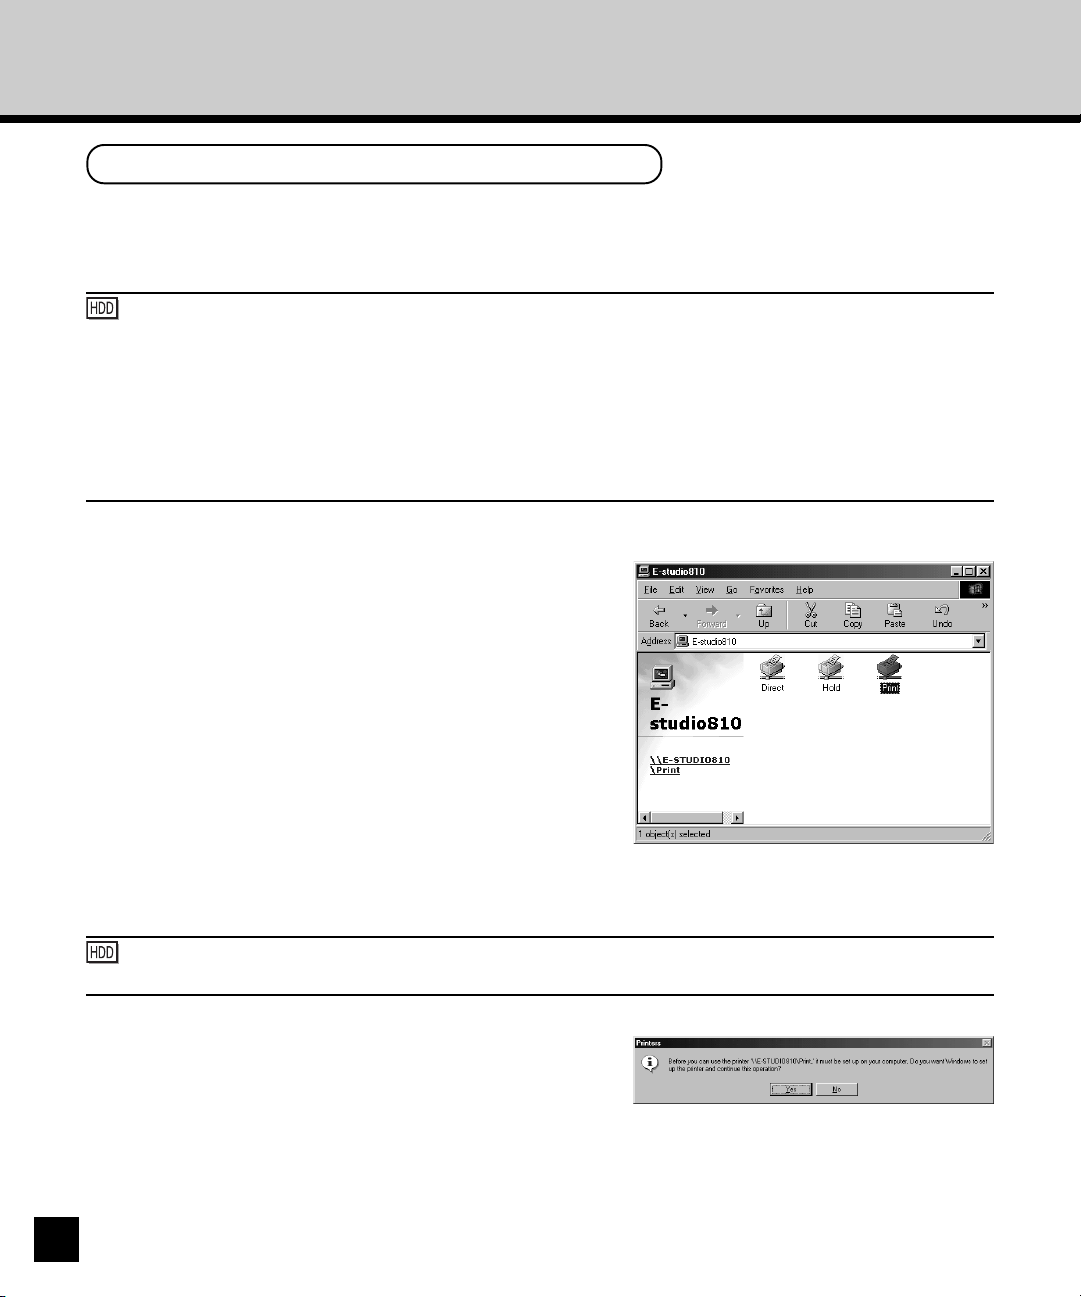
Open the GA-1140 printer in the Network
Neighborhood with the Windows Explorer, and
1
double-click on a queue.
• Select a queue depending on how you want to print.
Direct - print jobs are sent straight to the printer
without spooling.
Hold - print jobs are held until users operate copying
or moving them to the Print queue with the job
management tools.
Print - print jobs are spooled to the hard disk in the
GA-1140 printer and printed out. Use this queue for
general printing.
• The Printers dialog box appears.
22
: The Hold queue and Print queue are only available when the PS3 Scan & HDD Upgrade (GE-
1060+GE-1110) is installed.
Click on [Yes].
• When installing to Windows 95, Windows 98, or
2
Windows Me, the Add Printer Wizard dialog box
appears. Continue to next step.
Page 25
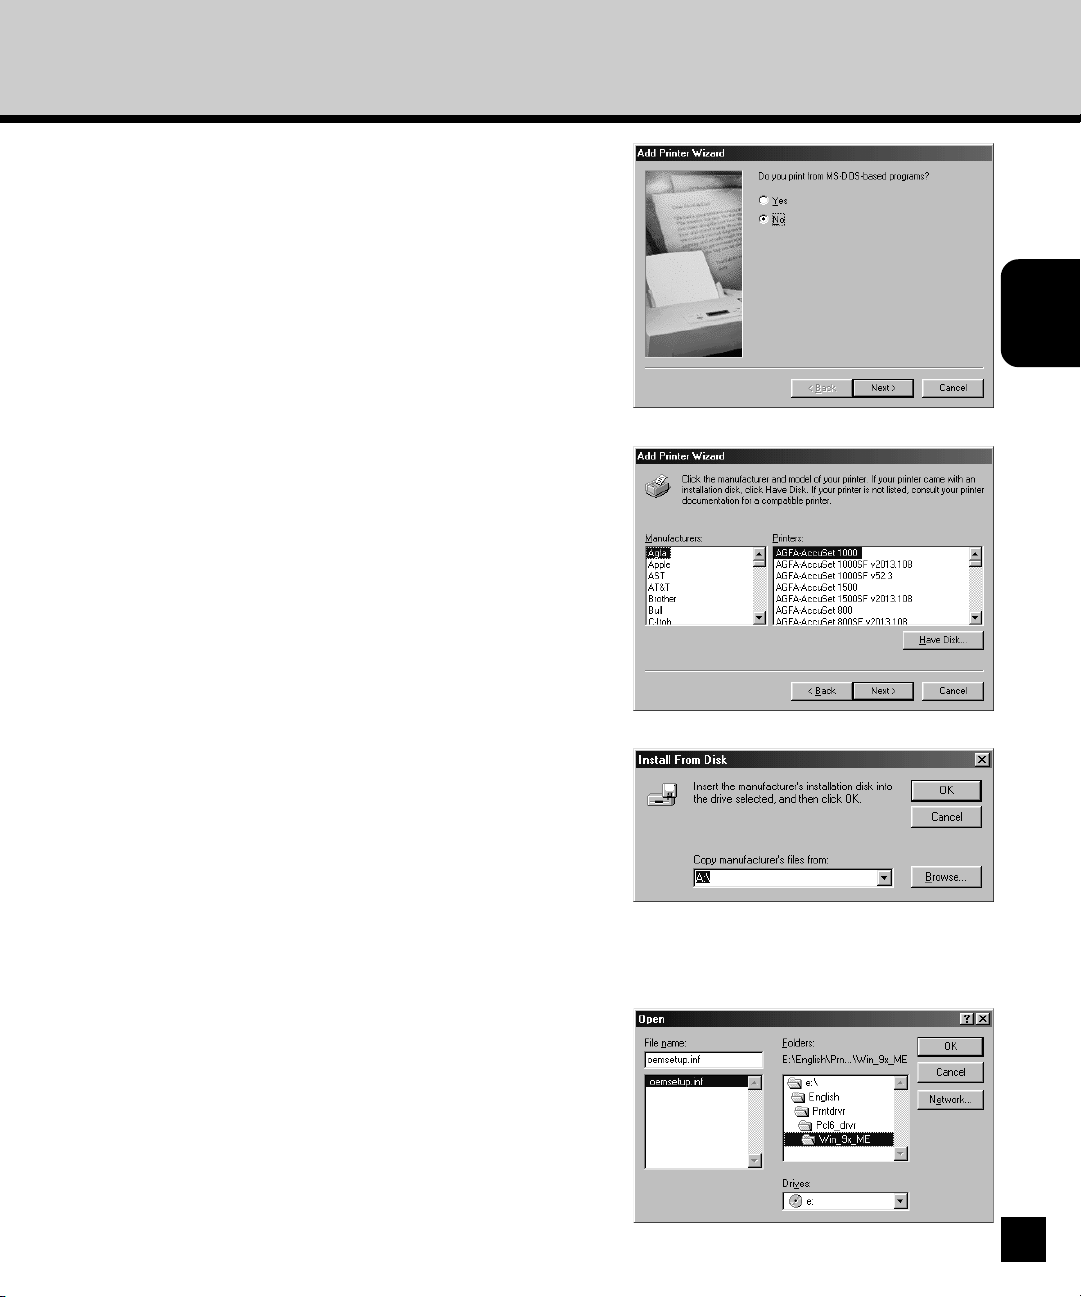
Select whether printing MS-DOS-based
programs and click on [Next].
3
• When the PS3 Scan & HDD Upgrade (GE-1060+GE-
1110) is installed on your GA-1140 printer, go to step
10.
Click on [Have Disk...].
• The Install From Disk dialog box appears.
4
Installing User
Software on a
Windows Computer
Click on [Browse...].
• The Locate File dialog box appears.
5
Insert the User Software CD-ROM into the CDROM drive.
6
• When inserting the User Software CD-ROM, the
installer may automatically start. Click on [Cancel] to
exit the installer and continue the operation.
Locate the directory where the printer driver
for Windows 95/98/Me is located, select the
7
“oemsetup.inf” file, and click on [OK].
• When you want to install the PCL6 printer driver,
locate “[CD-ROM drive]:\English\Prntdrvr\Pcl6_drvr
\Win_9x_ME”.
• When you want to install the PostScript printer driver,
locate “[CD-ROM drive]:\English\Prntdrvr\Ps_drvr
\Win_9x_ME”.
23
Page 26
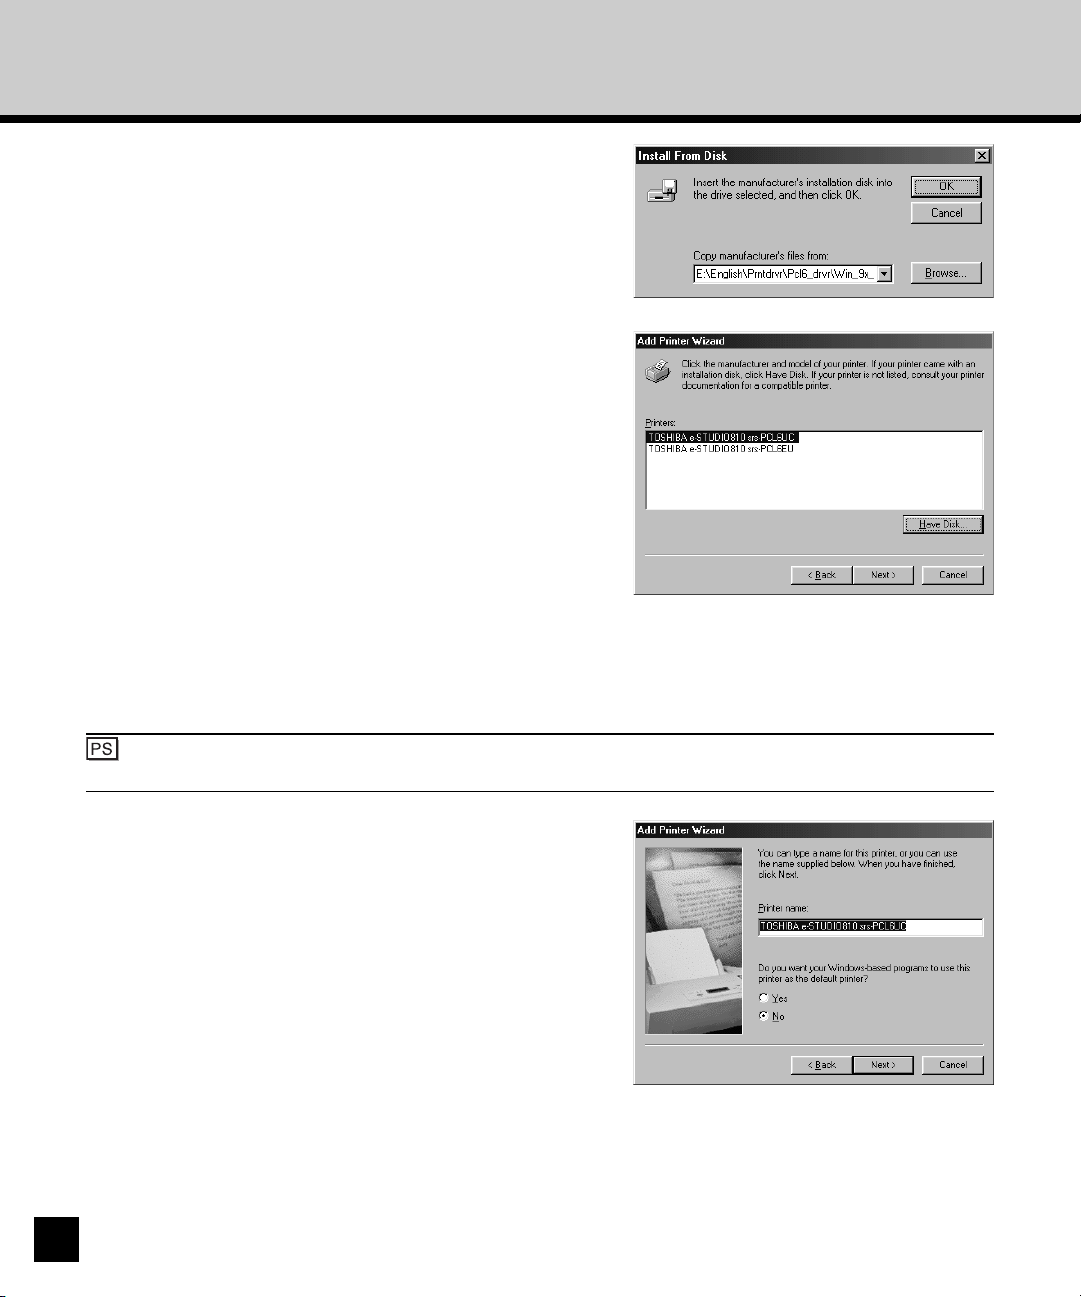
Click on [OK].
8
Select the printer driver that compatible to
your GA-1140 printer and click on [Next].
9
• When the GA-1140 printer is an US version, which
the default paper size type is LT system, select
“TOSHIBA e-STUDIO810 srs-PCL6UC” (when you
install the PCL6 printer driver) or “TOSHIBA eSTUDIO810 srs-PS3UC” (when you install the
PostScript printer driver).
• When the GA-1140 printer is an European version,
which the default paper size type is A4 system, select
“TOSHIBA e-STUDIO810 srs-PCL6EU” (when you
install the PCL6 printer driver) or “TOSHIBA eSTUDIO810 srs-PS3EU” (when you install the
PostScript printer driver).
24
: The PS3 Upgrade (GE-1020) or PS3 Scan & HDD Upgrade (GE-1060+GE-1110) is required to
use the PostScript Driver.
Change the name if desired, select whether
10
using this printer as a default printer, and click
on [Next].
Page 27
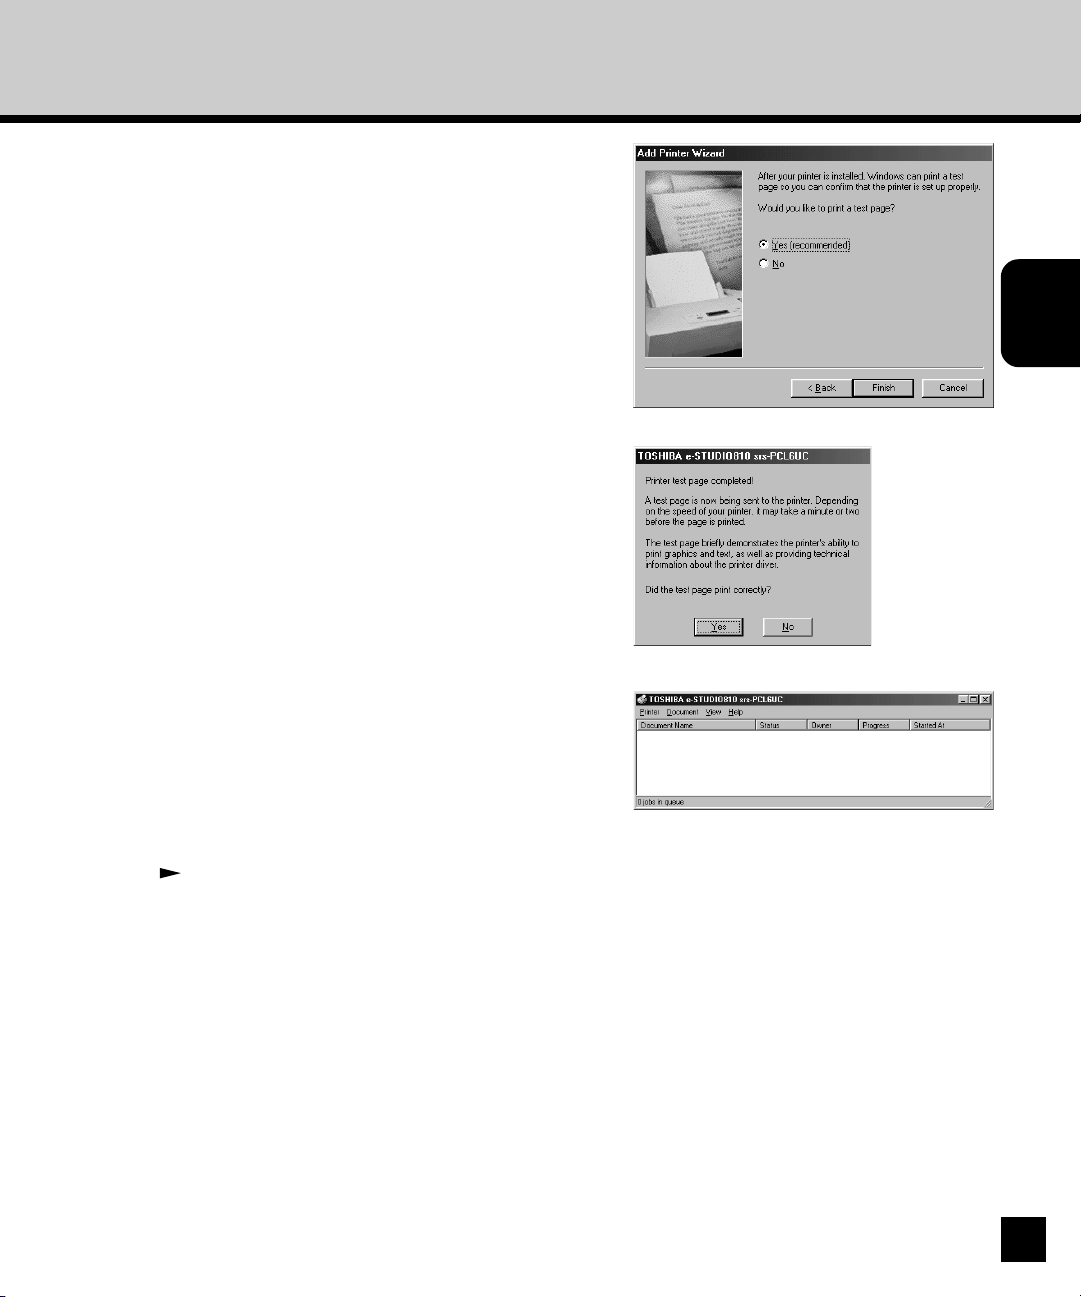
11
12
13
Select “Yes” to print a test page and click on
[Finish].
Make sure a test page is printed successfully
and click on [Yes] to close the dialog box.
The printer driver is installed and the print
queue window appears.
Installing User
Software on a
Windows Computer
14
Continue the operation to configure the option
settings on the printer driver.
P59 “Configuring the Options”
25
Page 28
Windows NT 4.0/2000/XP
REQUIREMENT:
You must log in Windows as a user who has the “Administrators” or “Power Users” privilege.
: When you are installing to the Windows NT 4.0:
When the PS3 Scan & HDD Upgrade (GE-1060+GE-1110) is installed on your GA-1140
printer, you can also install a printer driver for Windows NT 4.0, which is selected for the SMB
Printing option in the TopAccess, by double-clicking on the desired queue displayed in the
Network Neighborhood with the Windows Explorer. If you want to install another printer driver
for SMB printing, right-click the queue and select [Install] to install another printer driver. When
you install both printer drivers by this method, change the emulation of the printer driver for
printing by right-clicking the printer icon in the Printers folder and select [Properties], then
select the desired printer driver in the “Drivers” menu in the Details tab.
To install the printer driver for SMB printing, install the printer driver using the installer in the User
Software CD-ROM.
The procedure here describes an installation on Windows 2000. The procedures are same when
Windows NT 4.0 or Windows XP is used although the some dialog boxes are different.
26
Insert the User Software CD-ROM into the CDROM drive.
1
• The installer automatically starts and the Welcome
dialog box appears.
SUPPLEMENT:
When the installer does not automatically
start, double-click on “Setup.exe” in the
“Installr” folder of the User Software CDROM.
Page 29
Click on [Next].
• The Software License Agreement dialog box
2
appears.
Click on [Yes].
• The Setup Type dialog box appears.
3
Select “Custom” and click on [Next].
• The Choose Destination dialog box appears.
4
Click on [Next].
• Click on [Browse...] and select the folder only If you
5
want to change the folder which the software will be
installed.
Installing User
Software on a
Windows Computer
27
Page 30
Select the components to be installed and
click on [Next].
6
• The Select Port dialog box appears.
PCL6 Driver
Check this to install the PCL6 printer driver.
PS Driver
Check this to install the PostScript printer driver.
AFM
Check this to install the Agfa Monotype Font Manager 2000.
: The PS3 Upgrade (GE-1020) or PS3 Scan & HDD Upgrade (GE-1060+GE-1110) is required to
use the PostScript Driver.
Click on [Add Port...].
• The Printer Ports dialog box appears.
7
28
Select “Local Port” and click on [New Port...].
• The Port Name dialog box appears.
8
Page 31

Enter “\\[Server Name]\[Queue Name]” in the
“Enter a port name” field, and click on [OK].
9
• The [Server Name] of the port name must be the
server name that you entered for the Server Name of
the Windows Printing Service setting on TopAccess.
The default server name of the GA-1140 printer is “eSTUDIO810”.
• The [Queue Name] of the port name must be a queue
name, direct, hold, or print, on the GA-1140 printer.
Enter a queue depending on how you operate the
printing.
direct - print jobs are sent straight to the printer
without spooling.
hold - print jobs are held until users operate copying
or moving them to the Print queue with the job
management tools.
print - print jobs are spooled to the hard disk in the
GA-1140 printer and print out. Use this queue for a
general printing.
: The Hold queue and Print queue are only available when the PS3 Scan & HDD Upgrade (GE-
1060+GE-1110) is installed.
Installing User
Software on a
Windows Computer
10
11
Click on [Close] to close the dialog box.
• The screen returns to the Select Port dialog box.
Select the port that you create and click on
[Next].
• The Start Copying Files dialog box appears.
29
Page 32

12
13
Click on [Next].
• Start copying files.
Change the name if desired and click on
[Next].
30
14
15
Click on [Finish].
• The installation is completed.
• When you selected to install the Agfa Monotype Font
Manager 2000, the Welcome dialog box appears. In
this case, continue the installation.
P69 “Installing the Agfa Monotype Font Manager
2000”
Continue the operation to configure the option
settings on the printer driver.
P59 “Configuring the Options”
Page 33

Installing the Printer Driver for LPR Printing
PREPARATIONS:
Before installing the printer driver for LPR printing, please make sure of the following:
• The GA-1140 printer is connected to the network and turned on.
• The TCP/IP setting is completed correctly.
• The LPD Printing is completed correctly.
To make sure above statements, ask your network administrator or see Administrator’s Guide to
perform the set up for LPR printing.
The LPR printing is available only for Windows NT 4.0, Windows 2000, and Windows XP. The
procedure to Install the printer driver for LPR printing is different depending on the version of the
Windows.
P32 “Windows NT 4.0”
P37 “Windows 2000 and Windows XP”
Installing User
Software on a
Windows Computer
31
Page 34

Windows NT 4.0
REQUIREMENTS:
• The TCP/IP Printing Service is installed and running on your Windows NT 4.0.
• The TCP/IP protocol is installed and configured correctly on your Windows NT 4.0.
• You must log in Windows as a user who has the “Administrators” or “Power Users” privilege.
To install the printer driver for LPR printing, install the printer driver using the installer in the User
Software CD-ROM.
Insert the User Software CD-ROM into the CDROM drive.
1
• The installer automatically starts and the Welcome
dialog box appears.
SUPPLEMENT:
When the installer does not automatically
start, double-click on “Setup.exe” in the
“Installr” folder of the User Software CDROM.
32
Click on [Next].
• The Software License Agreement dialog box
2
3
appears.
Click on [Yes].
• The Setup Type dialog box appears.
Page 35

Select “Custom” and click on [Next].
• The Choose Destination dialog box appears.
4
Click on [Next].
• Click on [Browse...] and select the folder only If you
5
want to change the folder which the software will be
installed.
Installing User
Software on a
Windows Computer
Select the components to be installed and
click on [Next].
6
• The Select Port dialog box appears.
PCL6 Driver
Check this to install the PCL6 printer driver.
PS Driver
Check this to install the PostScript printer driver.
AFM
Check this to install the Agfa Monotype Font Manager 2000.
33
Page 36

34
: The PS3 Upgrade (GE-1020) or PS3 Scan & HDD Upgrade (GE-1060+GE-1110) is required to
use the PostScript Driver.
Click on [Add Port...].
• The Printer Ports dialog box appears.
7
Select “LPR Port” and click on [New Port...].
• When “LPR Port” is not listed, make sure the TCP/IP
8
9
Printing Service is installed on your Windows NT 4.0.
“LPR Port” is not listed unless the TCP/IP Printing
Service is installed.
• The Add LPR compatible printer dialog box appears.
Enter the IP address of the GA-1140 printer in
the “Name or address of server providing lpd”
field and a queue name in the “Name of printer
or print queue on that server” field, and click
on [OK].
• When your network uses DNS or WINS server, enter
the printer name of the GA-1140 provided from DNS
or WINS in the “Name or address of server providing
lpd” field.
• In the “Name of printer or print queue on that server”
field, you have to enter a queue name, direct, hold, or
print, on the GA-1140 printer. Enter a queue
depending on how you want to print.
direct - print jobs are sent straight to the printer
without spooling.
hold - print jobs are held until users operate copying
or moving them to the Print queue with the job
management tools.
print - print jobs are spooled to the hard disk in the
GA-1140 printer and printed out. Use this queue for
general printing.
Page 37

: The Hold queue and Print queue are only available when the PS3 Scan & HDD Upgrade (GE-
1060+GE-1110) is installed.
Click on [Close] to close the dialog box.
10
11
• The screen returns to the Select Port dialog box.
Select the port that you create and click on
[Next].
• The Start Copying Files dialog box appears.
Installing User
Software on a
Windows Computer
12
Click on [Next].
• Start copying files.
35
Page 38

13
14
15
Change the name if desired and click on
[Next].
Click on [Finish].
• The installation is completed.
• When you selected to install the Agfa Monotype Font
Manager 2000, the Welcome dialog box appears. In
this case, continue the installation.
P69 “Installing the Agfa Monotype Font Manager
2000”
Continue the operation to configure the option
settings on the printer driver.
P59 “Configuring the Options”
36
Page 39

Windows 2000 and Windows XP
REQUIREMENTS:
• The TCP/IP protocol is installed and configured correctly on your Windows 2000/XP.
• You must log in Windows as a user who has the “Administrators” or “Power Users” privilege.
To install the printer driver to use LPR printing, configure the LPR port first, and then install the printer
driver using the installer in the User Software CD-ROM.
The procedure here describes an installation on Windows 2000. The procedures are the same when
Windows XP is used.
Insert the User Software CD-ROM into the CDROM drive.
1
• The installer automatically starts and the Welcome
dialog box appears.
SUPPLEMENT:
When the installer does not automatically
start, double-click on “Setup.exe” in the
“Installr” folder of the User Software CDROM.
Installing User
Software on a
Windows Computer
Click on [Next].
• The Software License Agreement dialog box
2
3
appears.
Click on [Yes].
• The Setup Type dialog box appears.
37
Page 40

Select “Custom” and click on [Next].
• The Choose Destination dialog box appears.
4
Click on [Next].
• Click on [Browse...] and select the folder only If you
5
want to change the folder which the software will be
installed.
38
Select the components to be installed and
click on [Next].
6
• The Select Port dialog box appears.
PCL6 Driver
Check this to install the PCL6 printer driver.
PS Driver
Check this to install the PostScript printer driver.
AFM
Check this to install the Agfa Monotype Font Manager 2000.
Page 41

: The PS3 Upgrade (GE-1020) or PS3 Scan & HDD Upgrade (GE-1060+GE-1110) is required to
use the PostScript Driver.
Click on [Add Port...].
• The Printer Ports dialog box appears.
7
Select “Standard TCP/IP Port” and click on
[New Port...].
8
• The Add Standard TCP/IP Printer Port Wizard dialog
box appears.
Click on [Next].
9
Installing User
Software on a
Windows Computer
39
Page 42

10
11
Enter the IP address of the GA-1140 printer in
the “Printer Name or IP Address” field and
click on [Next].
• When your network uses DNS or WINS server, enter
the printer name of the GA-1140 provided from DNS
or WINS in the “Printer Name or IP Address” field.
• In the “Port Name” field, the port name is
automatically entered according to the IP address or
DNS name entered in the “Printer Name or IP
Address” field.
Select “Custom” and click on [Settings...].
• The Configure Standard TCP/IP Port Monitor dialog
box appears.
40
12
Select “LPR” at the “Protocol” option, enter a
queue name in the “Queue Name” field at the
“LPR Settings” option, and then click on [OK].
• In the “Queue Name” field, you have to enter a queue
name, direct, hold, or print, on the GA-1140 printer.
Enter a queue depending on how you want to print.
direct - print jobs are sent straight to the printer
without spooling.
hold - print jobs are held until users operate copying
or moving them to the Print queue with the job
management tools.
print - print jobs are spooled to the hard disk in the
GA-1140 printer and printed out. Use this queue for
general printing.
• The screen returns to the Add Standard TCP/IP
Printer Port Wizard dialog box.
Page 43

: The Hold queue and Print queue are only available when the PS3 Scan & HDD Upgrade (GE-
1060+GE-1110) is installed.
SUPPLEMENT:
If you have enabled the Port 9100 printing at the GA1140 LPD Printing Service options, you can setting up
Port 9100 printing as well. When you want to set up
Port 9100 printing, select “Raw” at the “Protocol”
option, and enter the port number in the “Port Number”
field at the Raw Settings” option. The port number is
different for each print connection as following:
9101 - use direct queue for printing.
9100 (default) or 9102 - use print queue for printing.
9103 - use hold queue for printing.
Click on [Next].
Installing User
Software on a
Windows Computer
13
41
Page 44

14
15
16
Click on [Finish].
• The screen returns to the Printer Ports dialog box.
Click on [Close].
• The screen returns to the Select Port dialog box.
Select the LPR Port that you create and click
on [Next].
• The Start Copying Files dialog box appears.
42
17
Click on [Next].
• Start copying files.
Page 45

18
19
20
Change the name if desired and click on
[Next].
Click on [Finish].
• The installation is completed.
• When you selected to install the Agfa Monotype Font
Manager 2000, the Welcome dialog box appears. In
this case, continue the installation.
P69 “Installing the Agfa Monotype Font Manager
2000”
Continue the operation to configure the option
settings on the printer driver.
P59 “Configuring the Options”
Installing User
Software on a
Windows Computer
43
Page 46

Installing the Printer Driver for IPP Printing
PREPARATIONS:
Before installing the printer driver for IPP printing, please make sure of the following:
• The GA-1140 printer is connected to the network and turned on.
• The TCP/IP setting is completed correctly.
To make sure above statements, ask your network administrator or see Administrator’s Guide to
perform the set up for IPP printing.
SUPPLEMENT:
When you want to install the Agfa Monotype Font Manager 2000, you should install it separately.
P69 “Installing the Agfa Monotype Font Manager 2000”
REQUIREMENTS:
• The TCP/IP protocol is installed and configured correctly on your Windows 2000.
• You must log in Windows as a user who has the “Administrators” or “Power Users” privilege.
IPP printing is available only for Windows 2000 and Windows XP. To install the printer driver to use
IPP printing, install the printer driver by Add Printer Wizard.
The procedure here describes an installation on Windows 2000. The procedures are the same when
Windows XP is used.
Click on [Start] and select [Printers] in
[Settings] (Windows 2000) or select [Printers
1
and Faxes] (Windows XP).
• The Printers folder is opened.
44
Page 47

Double-click on the [Add Printer] icon
(Windows 2000) or click on the “Add a Printer”
2
hyperlink in the “Printer Tasks” (Windows XP).
• The Add Printer Wizard dialog box appears.
Click on [Next].
3
Installing User
Software on a
Windows Computer
Select “Network printer” and click on [Next].
4
45
Page 48

Select “Connect to a printer on the Internet or
on your intranet”, enter “http://[IP address]/
5
ipp/direct” in the “URL” field, and then click on
[Next].
• Enter the IP address of GA-1140 printer instead of [IP
address].
Example: IP address = 192.168.0.20
http://192.168.255.48/ipp/direct
• When your network uses DNS or WINS server, enter
the printer name of the GA-1140 provided from DNS
or WINS instead of [IP address].
Example: Print Server Name = Server-907043
http://Server-907043/ipp/direct
• The Connect to Printer dialog box appears.
: Please enter “ipp/print” instead of the “ipp/direct” for the URL when the PS3 Scan & HDD
Upgrade (GE-1060+GE-1110) is installed.
Click on [OK].
6
46
Click on [Have Disk...].
• The Install From Disk dialog box appears.
7
Insert the User Software CD-ROM into the CDROM drive.
8
• When inserting the User Software CD-ROM, the
installer may automatically start. Click on [Cancel] to
exit the installer and continue the operation.
Click on [Browse...].
• The Locate File dialog box appears.
9
Page 49

10
11
Locate the directory where the printer driver
for your operating system is located, select the
“oemsetup.inf” file, and click on [Open].
• When you want to install the PCL6 printer driver for
Windows 2000:
[CD-ROM drive]:\English\Prntdrvr\Pcl6_drvr\Win_2000
• When you want to install the PostScript printer driver
for Windows 2000:
[CD-ROM drive]:\English\Prntdrvr\PS_drvr\Win_2000
• When you want to install the PCL6 printer driver for
Windows XP:
[CD-ROM drive]:\English\Prntdrvr\Pcl6_drvr\Win_XP
• When you want to install the PostScript printer driver
for Windows XP:
[CD-ROM drive]:\English\Prntdrvr\PS_drvr\Win_XP
Click on [OK].
Installing User
Software on a
Windows Computer
12
Select the printer driver that compatible to
your GA-1140 printer and click on [OK].
• When the GA-1140 printer is a US version, which the
default paper size type is LT system, select
“TOSHIBA e-STUDIO810srs-PCL6UC” (when you
install the PCL6 printer driver) or “TOSHIBA eSTUDIO810srs-PS3UC” (when you install the
PostScript printer driver).
• When the GA-1140 printer is a European version,
which the default paper size type is A4 system, select
“TOSHIBA e-STUDIO810srs-PCL6EU” (when you
install the PCL6 printer driver) or “TOSHIBA eSTUDIO810srs-PS3EU” (when you install the
PostScript printer driver).
47
Page 50

: The PS3 Upgrade (GE-1020) or PS3 Scan & HDD Upgrade (GE-1060+GE-1110) is required to
use the PostScript Driver.
Click on [Finish].
13
14
• The printer driver is installed on Windows 2000.
Continue the operation to configure the option
settings on the printer driver.
P59 “Configuring the Options”
48
Page 51

Installing the Printer Driver for Novell Printing
PREPARATIONS:
Before installing the printer driver for Novell printing, please make sure of the following:
• The GA-1140 printer is connected to the network and turned on.
• The TCP/IP setting is completed correctly. (Required only when you want to use TopAccess
or using the printer with NetWare server 5.x in the TCP/IP network.)
• The IPX/SPX and NetWare settings are completed correctly.
To make sure above statements, ask your network administrator or see Administrator’s Guide to
perform the set up for Novell printing.
SUPPLEMENT:
When you want to install the Agfa Monotype Font Manager 2000, you should install it separately.
P69 “Installing the Agfa Monotype Font Manager 2000”
The procedure to Install the printer driver for Novell printing is different depending on the version of the
Windows.
P50 “Windows 95/98/Me”
P55 “Windows NT 4.0/2000/XP”
Installing User
Software on a
Windows Computer
49
Page 52

Windows 95/98/Me
REQUIREMENTS:
• The NetWare server is configured correctly and running on your network.
• The TCP/IP protocol is installed and configured correctly on your Windows computer.
(Required only when using the NetWare server 5.x in the TCP/IP network.)
• The Client for NetWare Networks and the IPX/SPX-compatible protocol are installed on your
Windows computer. (Required only when using the NetWare server in the IPX/SPX network.)
• The Service for NetWare Directory Services is installed. (Required only when using the
NetWare server in NDS or NDPS mode.
• You have an appropriate privilege to access to the NetWare server.
The procedure here describes an installation on Windows 98. The procedures are same when
Windows 95 or Windows Me is used.
Open the NetWare server (when using in
bindery mode) or NDS directory tree (when
1
using in NDS or NDPS mode) in the Network
Neighborhood with the Windows Explorer, and
double-click on a queue.
• Select a queue depending on how you want to print.
[given name]_direct - print jobs are sent straight to
the printer without spooling.
[given name]_hold - print jobs are held until users
operate copying or moving them to the Print queue
with the job management tools.
[given name]_print - print jobs are spooled to the
hard disk in the GA-1140 printer and printed out. Use
this queue for general printing.
• When using the NetWare 5.x in NDPS mode and the
printer drivers for each Operating System are
installed to a NDPS broker, the printer driver is
automatically installed.
• Unless using the NetWare 5.x in NDPS mode and
printer drivers for each Operating System are
installed to a NDPS broker, the Add Printer Wizard
dialog box appears. Continue to the next step.
50
Page 53

SUPPLEMENT:
The queue names created on the NetWare server should be either “[given name]_direct”, “[given
name]_hold”, “[given name]_print” ([given name] can be any name). Those queues correspond
to the GA-1140 printer’s queues, Direct, Hold, and Print.
: The Hold queue and Print queue are only available when the PS3 Scan & HDD Upgrade (GE-
1060+GE-1110) is installed.
Click on [Yes].
• The Add Printer Wizard dialog box appears.
2
Select whether printing MS-DOS-based
programs and click on [Next].
3
Installing User
Software on a
Windows Computer
Click on [Have Disk...].
• The Install From Disk dialog box appears.
4
Insert the User Software CD-ROM into the CDROM drive.
5
• When inserting the User Software CD-ROM, the
installer may automatically start. Click on [Cancel] to
exit the installer and continue the operation.
51
Page 54

Click on [Browse...].
• The Locate File dialog box appears.
6
Locate the directory where the printer driver
for Windows 95/98/Me is located, select the
7
“oemsetup.inf” file, and click on [OK].
• When you want to install the PCL6 printer driver,
locate “[CD-ROM drive]:\English\Prntdrvr\Pcl6_drvr
\Win_9x_ME”.
• When you want to install the PostScript printer driver,
locate “[CD-ROM drive]:\English\Prntdrvr\Ps_drvr
\Win_9x_ME”.
Click on [OK].
8
52
Select the printer driver that compatible to
your GA-1140 printer and click on [Next].
9
• When the GA-1140 printer is a US version, which the
default paper size type is LT system, select
“TOSHIBA e-STUDIO810srs-PCL6UC” (when you
install the PCL6 printer driver) or “TOSHIBA eSTUDIO810srs-PS3UC” (when you install the
PostScript printer driver).
• When the GA-1140 printer is a European version,
which the default paper size type is A4 system, select
“TOSHIBA e-STUDIO810srs-PCL6EU” (when you
install the PCL6 printer driver) or “TOSHIBA eSTUDIO810srs-PS3EU” (when you install the
PostScript printer driver).
Page 55

: The PS3 Upgrade (GE-1020) or PS3 Scan & HDD Upgrade (GE-1060+GE-1110) is required to
use the PostScript Driver.
NOTE:
When installing the printer driver for Novell printing for Windows 95/98/Me, only one printer driver
can be installed for one print queue by operating the installation in this method. If you want to
install another printer driver for Novell printing, install the printer driver by Add Printer Wizard and
set the NetWare print queue to the printer port.
Change the name if desired, select whether
10
using this printer as a default printer, and click
on [Next].
Installing User
Software on a
Windows Computer
11
Select “Yes” to print a test page and click on
[Finish].
53
Page 56

12
13
14
Make sure a test page is printed successfully
and click on [Yes] to close the dialog box.
The printer driver is installed and the print
queue window appears.
Continue the operation to configure the option
settings on the printer driver.
P59 “Configuring the Options”
54
Page 57

Windows NT 4.0/2000/XP
REQUIREMENTS:
• The NetWare server is configured correctly and running on your network.
• The TCP/IP protocol is installed and configured correctly on your Windows computer.
(Required only when using the NetWare server 5.x in the TCP/IP network.)
• The NWLink IPX/SPX Compatible Transport protocol and NWLink NetBIOS protocol (for
Windows NT 4.0) or NWLink IPX/SPX/NetBIOS Compatible Transport Protocol (for Windows
2000 and Windows XP) are installed on your Windows computer. (Required only when using
the NetWare server in the IPX/SPX network.)
• The Gateway (and Client) Services for NetWare is installed on your Windows computer.
• You have an appropriate privilege to access to the NetWare server.
The procedure here describes an installation on Windows 2000. The procedures are the same when
Windows NT 4.0 or Windows XP is used.
Open the NetWare server (when using in
bindery mode) or NDS directory tree (when
1
using in NDS or NDPS mode) in the Network
Neighborhood with the Windows Explorer, and
double-click on a queue.
• Select a queue depending on how you want to print.
[given name]_direct - print jobs are sent straight to
the printer without spooling.
[given name]_hold - print jobs are held until users
operate copying or moving them to the Print queue
with the job management tools.
[given name]_print - print jobs are spooled to the
hard disk in the GA-1140 printer and printed out. Use
this queue for general printing.
• When using the NetWare 5.x in NDPS mode and the
printer drivers for each Operating System are
installed to a NDPS broker, the printer driver is
automatically installed.
• Unless using the NetWare 5.x in NDPS mode and
printer drivers for each Operating System are
installed to a NDPS broker, the Add Printer Wizard
dialog box appears. Continue to the next step.
Installing User
Software on a
Windows Computer
55
Page 58

SUPPLEMENT:
The queue names created on the NetWare server should be either “[given name]_direct”, “[given
name]_hold”, “[given name]_print” ([given name] can be any name). Those queues correspond
to the GA-1140 printer’s queues, Direct, Hold, and Print.
: The Hold queue and Print queue are only available when the PS3 Scan & HDD Upgrade (GE-
1060+GE-1110) is installed.
Click on [Yes].
2
Click on [OK].
• The Add Printer Wizard dialog box appears.
3
Click on [Have Disk...].
• The Install From Disk dialog box appears.
4
56
Insert the User Software CD-ROM into the CDROM drive.
5
• When inserting the User Software CD-ROM, the
installer may automatically start. Click on [Cancel] to
exit the installer and continue the operation.
Click on [Browse...].
• When you are operating on Windows NT 4.0, the “A:\
6
is not accessible” message may appear. When the
message is displayed, click on [Cancel] and continue
the operation.
• The Locate File dialog box appears.
Page 59

Locate the directory where the printer driver
for your operating system is located, select the
7
“oemsetup.inf” file, and click on [Open].
• When you want to install the PCL6 printer driver for
Windows NT 4.0:
[CD-ROM drive]:\English\Prntdrvr\Pcl6_drvr\Win_NTx
• When you want to install the PostScript printer driver
for Windows NT 4.0:
[CD-ROM drive]:\English\Prntdrvr\PS_drvr\Win_NTx
• When you want to install the PCL6 printer driver for
Windows 2000:
[CD-ROM drive]:\English\Prntdrvr\Pcl6_drvr\Win_2000
• When you want to install the PostScript printer driver
for Windows 2000:
[CD-ROM drive]:\English\Prntdrvr\PS_drvr\Win_2000
• When you want to install the PCL6 printer driver for
Windows 2000:
[CD-ROM drive]:\English\Prntdrvr\Pcl6_drvr\Win_XP
• When you want to install the PostScript printer driver
for Windows 2000:
[CD-ROM drive]:\English\Prntdrvr\PS_drvr\Win_XP
Installing User
Software on a
Windows Computer
Click on [OK].
8
57
Page 60

Select the printer driver that compatible to
your GA-1140 printer and click on [OK].
9
• When the GA-1140 printer is a US version, which the
default paper size type is LT system, select
“TOSHIBA e-STUDIO810srs-PCL6UC” (when you
install the PCL6 printer driver) or “TOSHIBA eSTUDIO810srs-PS3UC” (when you install the
PostScript printer driver).
• When the GA-1140 printer is a European version,
which the default paper size type is A4 system, select
“TOSHIBA e-STUDIO810srs-PCL6EU” (when you
install the PCL6 printer driver) or “TOSHIBA eSTUDIO810srs-PS3EU” (when you install the
PostScript printer driver).
: The PS3 Upgrade (GE-1020) or PS3 Scan & HDD Upgrade (GE-1060+GE-1110) is required to
use the PostScript Driver.
The printer driver is installed and the print
10
queue window appears.
58
Continue the operation to configure the option
11
settings on the printer driver.
P59 “Configuring the Options”
NOTE:
When installing the printer driver for Novell printing for Windows NT 4.0, Windows 2000, or
Windows XP, only one printer driver can be installed for one print queue by operating the
installation in this method. If you want to install another printer driver for Novell printing, install
the printer driver by Add Printer Wizard and set the NetWare print queue to the printer port.
Page 61

Configuring the Options
After you complete the installation of printer drivers, you should configure the option settings on the
printer driver.
There are two methods to configure the options;
• When the GA-1140 printer and your computer is not connected in the TCP/IP network, you can
configure the options manually.
P59 “Configuring the Options Manually”
• When the GA-1140 printer and your computer is connected in the TCP/IP network, you can
configure the options automatically obtaining the settings using the Two-Way Communication.
P64 “Configuring the Options Automatically”
Configuring the Options Manually
The instruction for configuring the options manually varies depending on the printer driver and the
Windows version that you use.
P60 “When configuring options in the PCL printer driver for all Windows version or PostScript printer
driver on Windows 95/98/Me”
P62 “When configuring options in the PostScript printer driver on Windows NT 4.0, Windows 2000,
or Windows XP”
Installing User
Software on a
Windows Computer
59
Page 62

When configuring options in the PCL printer driver for all Windows version or
PostScript printer driver on Windows 95/98/Me
Select the printer driver in the Printers folder and click on [File] and select [Properties]
(for Windows 95/98/Me) or [Document Defaults..] (for Windows NT 4.0) or [Printing
1
References...] (for Windows 2000 and Windows XP).
• The printer drivers properties dialog box appears.
Click on the [Options] tab and click on [Option
Settings].
2
• The Option Settings dialog box appears.
Set the options according to the printer’s
condition and click on [OK].
3
60
SUPPLEMENT:
You can check the optional device
configuration on the GA-1140 using the
TopAccess.
P184 “Checking GA-1140 Copier Status”
Optional Paper Feeder
This sets whether or not the large capacity feeder is installed.
Not installed - Select this when no large capacity feeder is installed.
External LCF - Select this when the Large Capacity Feeder (MP-4003A) is installed.
Finisher
This sets whether or not the finisher is installed.
Not Installed - Select this when no finisher is installed.
Finisher - Select this when the Finisher (MJ-1017) is installed.
Saddle Stitch Finisher - Select this when the Saddle Stitch Finisher (MJ-1018) is installed.
Punch Unit
This sets whether or not the hole punch unit is installed. This can be selected when “Finisher”
or “Saddle Stitch Finisher” is selected at “Finisher”.
Page 63

Not Installed - Select this when no hole punch unit is installed.
2 Hole Punch Unit - Select this when the 2 Hole Punch Unit (MJ-6003E) is installed.
2/3 Hole Punch Unit - Select this when the 2/3 Hole Punch Unit (MJ-6003N) is installed.
4 Hole Punch Unit (F) - Select this when the 4 Hole Punch Unit (F) (MJ-6003F) is installed.
4 Hole Punch Unit (S) - Select this when the 4 Hole Punch Unit (S) (MJ-6003S) is
installed.
Inserter
This sets whether or not the inserter unit is installed.
Not Installed - Select this when no inserter unit is installed.
Installed - Select this when the Inserter (MJ-7001) is installed.
Printer HDD
This sets whether or not the PS3 Scan & HDD Upgrade is installed.
Not Installed - Select this when no HDD unit is installed.
Installed - Select this when the HDD unit is installed.
Click on [OK] to save settings.
4
Continue the operation to set the user
information on the printer driver.
P66 “Setting the User Information”
Installing User
Software on a
Windows Computer
When configuring the options for the PCL printer driver on Windows 2000/XP:
When setting the options on the Windows 2000/XP PCL printer driver, you must set the options
three different ways in the printer driver, otherwise the settings may not work properly. You must
set the features equivalently on the dialog boxes which are displayed by following method:
• From the Printers window, right-click the printer icon and select Printing Preference. Click the
Options tab in the dialog box and set the options.
• From the Printers window, right-click the printer icon, select Properties, and then click the
Printing Preferences button. Click the Options tab in the dialog box and set the options.
• From the Printers window, right-click the printer icon, select Properties, click the Advanced tab,
and then click the Printing Default button. Click the Options tab in the dialog box and set the
options.
61
Page 64

When configuring options in the PostScript printer driver on Windows NT 4.0,
Windows 2000, or Windows XP
Select the printer driver in the Printers folder.
Then click on [File] and select [Properties].
1
• When you are operating on Windows XP, open the
Printers and Faxes folder to access to the printer
driver.
• The printer driver properties screen appears.
Display the [Device Settings] tab and set the
options.
2
• When you are operating on Windows NT 4.0, select
the option under “Installable Options”, and select the
installed option from the list below to change the
settings.
62
• When you are operating on Windows 2000 or
Windows XP, select the option under “Installable
Options”, and select the installed option from the
drop-down list to change the settings.
Page 65

Optional Paper Feeder
This sets whether or not the large capacity feeder is installed.
Not installed - Select this when no large capacity feeder is installed.
External LCF - Select this when the Large Capacity Feeder (MP-4003A) is installed.
Finisher
This sets whether or not the finisher is installed.
Not Installed - Select this when no finisher is installed.
Finisher - Select this when the Finisher (MJ-1017) is installed.
Saddle Stitch Finisher - Select this when the Saddle Stitch Finisher (MJ-1018) is installed.
Punch Unit
This sets whether or not the hole punch unit is installed. This can be selected when “Finisher”
or “Saddle Stitch Finisher” is selected at “Finisher”.
Not Installed - Select this when no hole punch unit is installed.
2 Hole Punch Unit - Select this when the 2 Hole Punch Unit (MJ-6003E) is installed.
2/3 Hole Punch Unit - Select this when the 2/3 Hole Punch Unit (MJ-6003N) is installed.
4 Hole Punch Unit (F) - Select this when the 4 Hole Punch Unit (F) (MJ-6003F) is installed.
4 Hole Punch Unit (S) - Select this when the 4 Hole Punch Unit (S) (MJ-6003S) is
installed.
Inserter
This sets whether or not the inserter unit is installed.
Not Installed - Select this when no inserter unit is installed.
Installed - Select this when the Inserter (MJ-7001) is installed.
Printer HDD
This sets whether or not the PS3 Scan & HDD Upgrade is installed.
Not Installed - Select this when no HDD unit is installed.
Installed - Select this when the HDD unit is installed.
Installing User
Software on a
Windows Computer
Click on [OK] to save settings.
3
63
Page 66

Configuring the Options Automatically
You can configure the options automatically using the Two-Way communication. The instruction for
configuring the Two-way communication varies depending on the printer driver and the Windows
version that you use.
When configuring Two-Way Communication in the PCL printer driver for all Windows
version or PostScript printer driver on Windows 95/98/Me
Select the printer driver in the Printers folder and click on [File] and select [Properties].
• The printer drivers properties dialog box appears.
1
Click on the [Options] tab and click on [Auto
Settings].
2
• The Two-Way Communication dialog box appears.
64
Enter the IP address or DNS Name in the field.
Then click on [Update].
3
• It begins communicating to the GA-1140 printer via
network and obtain the option settings automatically.
Click on [OK] to save settings.
4
Continue the operation to set the user
information on the printer driver.
P66 “Setting the User Information”
Page 67

When configuring Two-way Communication in the PostScript printer driver on
Windows NT 4.0, Windows 2000, or Windows XP
Select the printer driver in the Printers folder and click on [File] and select [Properties].
• The printer drivers properties dialog box appears.
1
Click on the [Configuration] tab.
2
Check the “Two-Way Communication” check
box and enter the IP address or DNS Name in
the field. Then click on [Update].
• It begins communicating to the GA-1140 printer via
network and obtain the option settings automatically.
NOTE:
Please wait until the [Update] button will be
active after clicking on it. The option
settings would not be obtained if you click
[OK] before the [Update] button becomes
active.
Click on [OK] to save settings.
Continue the operation to set the user
3
information on the printer driver.
P66 “Setting the User Information”
Installing User
Software on a
Windows Computer
65
Page 68

Setting the User Information
After you complete the installation of printer driver and configuration of installable optional devices, you
have to enter your user information on the printer driver.
Once you enter the user information such as name and department code, the print jobs sent from your
printer driver can be managed by GA-1140. For example, a network administrator can check the
number of copies to be printed from specific department member. Also users can check who send the
print jobs from using the Touch Panel Display or monitoring tools.
Select the printer driver in the Printers folder.
Then click on [File] and select [Properties] (for
1
Windows 95/98/Me), select [Document
Defaults..] (for Windows NT 4.0), or [Printing
References...] (for Windows 2000 and Windows
XP).
• The printer drivers properties dialog box appears.
66
Click on the [User] tab and enter user name in
the “User Name” field.
2
• Up to 32 alphanumeric characters can be entered for
a user name.
Page 69

Click on [Set Department Code].
• The Set Department Code dialog box appears.
3
NOTE:
The department code does not necessarily
required to be set for using the printer
driver. Please ask your network
administrator for the department code
should be set or not.
Enter the department code each field and click
on [Set].
4
• The department code always must be 5 digit code.
Click on [OK] to save settings.
Installing User
Software on a
Windows Computer
5
When setting the user information for the PCL printer driver on Windows 2000/XP:
When setting the user information on the Windows 2000/XP PCL printer driver, you must set the
user information three different ways in the printer driver, otherwise the settings may not work
properly. You must set the features equivalently on the dialog boxes which are displayed by
following method:
• From the Printers window, right-click the printer icon and select Printing Preference. Click the
Options tab in the dialog box and set the user information.
• From the Printers window, right-click the printer icon, select Properties, and then click the
Printing Preferences button. Click the Options tab in the dialog box and set the user
information.
• From the Printers window, right-click the printer icon, select Properties, click the Advanced tab,
and then click the Printing Default button. Click the Options tab in the dialog box and set the
user information.
67
Page 70

Copying the Printer Description File for Windows
The User Software CD-ROM contains printer description files for popular Windows applications. Adobe
PageMaker do not support automatic installation of printer description files from the Printers Control
Panel. To make the GA-1140 available in the Print and Page Setup dialog boxes of this application,
copy printer description files to the appropriate location.
Location of Printer Description Files in the User Software CD-ROM:
The printer description files for the GA-1140 is located in the following folder in the User Software CDROM:
For Windows 95/98/Me: \English\Prntdrvr\PS_drvr\Win_9x_Me
For Windows NT 4.0: \English\Prntdrvr\PS_drvr\Win_NTx
For Windows 2000: \English\Prntdrvr\PS_drvr\Win_2000
For Windows XP: \English\Prntdrvr\PS_drvr\Win_XP
The extension of printer description file is “.ppd”. Find the files of which extension is “.ppd” and copy
them into the appropriate location.
Location to copy Printer Description Files:
The location to copy the printer description file is different according to applications. Please read the
manual for an application provided from the software vendor.
For example, the location to copy the printer description files of Adobe PageMaker is:
For PageMaker 6.0: \Pm6\Rsrc\Usenglish\PPD4
For PageMaker 6.5: \Pm65\Rsrc\Usenglish\PPD4
For PageMaker 7.0: \Program Files\Adobe\PageMaker 7.0\Rsrc\Usenglish\PPD4
68
Page 71

Installing the Agfa Monotype Font Manager 2000
The Agfa Monotype Font Manager 2000 allows you to install the Internal Fonts to your computer. By
installing the Internal Fonts to your computer, you can displayed the Internal Fonts on your screen.
SUPPLEMENT:
When you checked “AFM” at the prompt of selecting the installed components during the
installation of printer drivers using the installer, or you run “Setup.exe” in the “Afm” folder of the
User Software CD-ROM, the Welcome dialog box appears.
Click on [Next].
• The Select Components dialog box appears.
1
Installing User
Software on a
Windows Computer
Click on [Next].
• Make sure both “Program Files” and “Fonts” are
2
checked before clicking on [Next].
• If you want to change the directory where the
program is installed, click on [Browse...] to change
the directory.
• Start copying files and the Status dialog box appears.
69
Page 72

Click on [OK].
• The Setup Complete dialog box appears.
3
Click on [Finish].
• Check on “Yes, review the Readme file now!” when
4
5
you want to view the Readme file.
Select “Yes, I want to restart my computer
now”, and click on [Finish].
• You must restart your computer to enable the
installed fonts and program.
70
Page 73

Installing User Software on a
Mac OS Computer
Installing User
Software on a Mac
OS Computer
: The PS3 Upgrade (GE-1020) or PS3 Scan & HDD Upgrade (GE-1060+GE-1110) is required
for printing from a Mac OS computer.
71
Page 74

About User Software for Mac OS
The following user softwares are included in the User Software CD-ROM:
AdobePS 8.7 Printer Driver
special Fiery and PostScript 3 features. The PS3 Upgrade option or PS3 Scan & HDD Upgrade option
should be installed on the GA-1140 in order to use the PostScript printer driver.
PostScript Printer Description file (PPD)
from a Mac OS computer. The PPD files are automatically installed on you Mac OS computer by
installing the AdobePS printer driver from the User Software CD-ROM. You can also manually copy
the PPD files in the User Software CD-ROM in case the AdobePS 8.7 printer driver or later has already
installed on your Mac OS computer.
Fonts
- allow to view the fonts that correspond to the 136 built-in PostScript printer fonts on the GA-
1140 on your Mac OS computer.
- enables to print to the GA-1140 from Mac OS computers; supports
- enables the special printing features for the GA-1140
Planning for Installation
The general steps for installing the User Softwares and setting up printing on a Mac OS computer are:
1. Install the AdobePS printer driver and PostScript Printer Description file and set up the GA-1140 in
the Chooser.
P73 “Installing the Printer Driver”
2. Install the printer and screen fonts.
P79 “Installing the Fonts”
72
Page 75

Installing the Printer Driver
About the Installation
Before installing the printer driver to your computer, read this section to understand about installation.
: The PS3 Upgrade (GE-1020) or PS3 Scan & HDD Upgrade (GE-1060+GE-1110) is required
for printing from a Mac OS computer.
System Requirements
To install the printer drivers on a Mac OS computer, the following environments are required.
OS: Mac OS 8.6 to 9.2, MacOS X (Classic Mode only)
Memory: 16MB or more
Protocol: EtherTalk installed
Installing User
Software on a Mac
OS Computer
73
Page 76

Installing the Printer Driver to Mac OS Computer
: The PS3 Upgrade (GE-1020) or PS3 Scan & HDD Upgrade (GE-1060+GE-1110) is required
for printing from a Mac OS computer.
To install the printer driver to Mac OS computer, follow the procedure below:
• Installing the AdobePS 8.7 to your Macintosh computer.
P74 “Installing the AdobePS 8.7”
• Creating the PostScript printer for the GA-1140 printer on your Mac OS computer.
P76 “Creating the AdobePS Printer”
Installing the AdobePS 8.7 Printer Driver
NOTE:
If the AdobePS is already installed on your computer, please make sure the version of AdobePS
is 8.7 or later. To check the version of AdobePS on your computer, select the AdobePS file
located in the “Extensions” folder under the “System Folder”. Then click on [File], select [General
Information] in [Get Info]. The information of the AdobePS file is displayed and you can check
the version of the AdobePS file.
When the version of AdobePS is earlier than 8.7:
If the version of AdobePS is earlier than 8.7, follow the procedure here and install the AdobePS
8.7 printer driver from the User Software CD-ROM.
If the version of AdobePS is later than 8.7,
74
When the version of AdobePS is later than 8.7:
You have to install the printer description files for the GA-1140 although you do not have to
install the AdobePS printer driver from the User Software CD-ROM. To install the printer
description files to your Mac OS computer, simply copy the files located in the “English:Printer
Driver:Printer Descriptions” folder in the User Software CD-ROM into the “System
Folder:Extensions:Printer Descriptions” folder on your Mac OS hard drive.
Insert the User Software CD-ROM into the CDROM drive.
1
• The User Software icon appears on the desktop.
Page 77

Open the “English” folder in the User Software
CD-ROM and double-click on “AdobePS 8.7
2
Installer” included in the “Printer Driver”
folder.
• The AdobePS 8.7 installation begins.
Click on [Yes].
3
Click on [Replace].
• When the old version of AdobePS is already installed
4
on your computer, the message dialog box as shown
at right is displayed. In this case, click on [Replace].
Click on [OK].
Installing User
Software on a Mac
OS Computer
5
Click on [Restart].
6
75
Page 78

Creating the AdobePS Printer
Click on apple menu and select [Chooser].
• The Chooser window appears.
1
Select the AdobePS icon (and select the
AppleTalk zone if configured) and a GA-1140
2
Printer displayed in the list, and click on
[Create].
• Select a GA-1140 printer depending on how you
operate the printing. ([Server Name] is a printer
name of GA-1140.)
[Server Name]_GA-1140_Direct - print jobs are sent
straight to the printer without spooling.
[Server Name]_GA-1140_Hold - print jobs are held
until users operate copying or moving them to the
Print queue with the job management tools.
[Server Name]_GA-1140_Print - print jobs are
spooled to the hard disk in the GA-1140 printer and
printed out. Use this queue for general printing.
76
: The “[Server Name]_GA-1140_Hold” and “[Server Name]_GA-1140_Print” printers are only
available when the PS3 Scan & HDD Upgrade (GE-1060+GE-1110) is installed.
Select a PostScript Printer Description file to
be used and click on [Select].
3
• When the GA-1140 printer is a US version, and the
default paper size type is LT system, select
“TOSHIBA e-STUDIO810srs-PS3UC”.
• When the GA-1140 printer is a European version, and
the default paper size type is A4 system, select
“TOSHIBA e-STUDIO810srs-PS3EU”.
Page 79

Select each option according to the
configuration of the GA-1140 printer and click
4
on [OK].
Optional Paper Feeder
This sets whether or not the large capacity feeder is installed.
Not installed - Select this when no large capacity feeder is installed.
External LCF - Select this when the Large Capacity Feeder (MP-4003A) is installed.
Finisher
This sets whether or not the finisher is installed.
Not Installed - Select this when no finisher is installed.
Finisher - Select this when the Finisher (MJ-1017) is installed.
Saddle Stitch Finisher - Select this when the Saddle Stitch Finisher (MJ-1018) is installed.
Punch Unit
This sets whether or not the hole punch unit is installed. This can be selected when “Finisher”
or “Saddle Stitch Finisher” is selected at “Finisher”.
Not Installed - Select this when no hole punch unit is installed.
2 Hole Punch Unit - Select this when the 2 Hole Punch Unit (MJ-6003E) is installed.
2/3 Hole Punch Unit - Select this when the 2/3 Hole Punch Unit (MJ-6003N) is installed.
4 Hole Punch Unit (F) - Select this when the 4 Hole Punch Unit (F) (MJ-6003F) is installed.
4 Hole Punch Unit (S) - Select this when the 4 Hole Punch Unit (S) (MJ-6003S) is
installed.
Inserter
This sets whether or not the inserter unit is installed.
Not Installed - Select this when no inserter unit is installed.
Installed - Select this when the Inserter (MJ-7001) is installed.
Printer HDD
This sets whether or not the PS3 Scan & HDD Upgrade is installed.
Not Installed - Select this when no HDD unit is installed.
Installed - Select this when the HDD unit is installed.
Installing User
Software on a Mac
OS Computer
77
Page 80

Close the window.
5
Click on [OK].
• The current printer is set to the GA-1140 printer and
6
the GA-1140 printer icon displayed on the desktop.
78
Page 81

Installing the Fonts
The Fonts on the User Software CD-ROM includes screen and printer fonts that correspond to the 136
built-in PostScript printer fonts on the GA-1140. The Font installer copies both kinds of fonts to the
System:Fonts folder on your hard disk. To be available to applications, the screen fonts must remain in
the System:Fonts folder. The printer fonts can be copied to a folder of your choice.
SUPPLEMENT:
In the System:Fonts folder, when displayed by Kind, screen fonts appear as type “Font Suitcase”
and PostScript printer fonts appear as type “PostScript™ font”.
Insert the User Software CD-ROM into the CDROM drive.
1
• The User Software icon appears on the desktop.
Open the User Software CD-ROM and doubleclick on “Fonts”.
2
• The Fonts dialog box appears.
Installing User
Software on a Mac
OS Computer
Click on [Install].
• The Fonts installation begins.
3
Click on [Restart].
• Your Mac OS computer is restarted.
4
79
Page 82

80
Page 83

Printing from Windows Computers
Printing from
Windows Computer
81
Page 84

Printing from Application
Once you have installed the GA-1140 printer driver and set it to the proper port as described in the
section “Installing the Printer Driver” in the chapter “Installing User Software on a Windows Computer”,
you can print directly from most Windows applications. Simply choose the Print command from within
your application.
You can print using the various functions by setting print options on the printer driver .
Open a file and select [Print] from the [File]
menu of the application.
1
• The Print dialog box appears.
Select the GA-1140 printer driver to be used
and Click on [Properties].
2
• The printer properties dialog box appears.
SUPPLEMENT:
The procedures for displaying the properties dialog for the printer driver may be different
depending on the application that you are using. See your application’s manual about displaying
the printer properties dialog box.
82
Setting the Print Options for each tab
according to how you want to print.
3
• Setting the print options varies depending on how you
want to print a document. Please refer to “Setting Up
Print Options” about setting the print options on each
tab.
• You can also set the print options using setting
profiles. P84 “Setting Print Options Using Profile”
P90 “Setting Up Print Options”
Page 85

SUPPLEMENT:
• The interface varies somewhat depending on whether you are using the PCL6 or PostScript
printer driver and the version of Windows operating system.
• Some settings are disabled when the printer properties dialog box is displayed from an
application. P93 “Displaying the Printer Properties”
Click on [Apply] and [OK] to save the settings.
4
Click on [Print] to print a document.
5
Printing from
Windows Computer
NOTE:
Some options listed in the printer driver can also be set from an application (for example,
collation). Using collation in the application may cause problems. In these cases, use the driver
option to perform the function, rather than setting it from the application. But depending on the
application, settings such as the orientation may need to be set in the application, or the printer
driver, or both. The application may not set up the file properly for printing on the GA-1140 and
may also take longer to process. In order to print properly from the application that you are
using, please see the section about printing in the application’s manual.
83
Page 86

Setting Print Options Using Profiles
Print option settings can be saved on your hard disk so you can easily load specifically configured
settings for a particular job. Settings files can also be shared over a network, using the Import and
Export features.
In order to print a document using profiles, you should create saved settings first. You can also modify
or delete the saved settings.
P85 “Creating Saved Settings”
P86 “Modifying Saved Settings”
P87 “Deleting Saved Settings”
Once you create saved settings, you can load the settings for a particular job to print a document.
P87 “Loading Saved settings”
You can also export print settings as a file on your hard disk to share the settings over a network.
P88 “Exporting Saved Settings”
Once you export saved settings on your hard disk, other network clients can import saved settings from
the exported file.
P89 “Importing Saved Settings”
84
Page 87

Creating Saved Settings
Configure the print options on each tab.
• Setting the print options varies depending on how you
1
2
3
want to print a document. Please refer to “Setting Up
Print Options” about setting the print options on each
tab.
Click on [Save] at the Profile group.
• The Profile dialog box appears.
Enter a setting profile name using a maximum
of 16 characters, and click on [OK].
• The name appears in the Profile pop-up menu.
P90 “Setting Up Print Options”
Printing from
Windows Computer
85
Page 88

Modifying Saved Settings
Modify the print options on each tab.
• Setting the print options varies depending on how you
1
2
3
want to print a document. Please refer to “Setting Up
Print Options” about setting the print options on each
tab.
Click on [Save] at the Profile group.
• The Profile dialog box appears.
Confirm that the setting profile to be modified
is highlighted, and click on [OK]
• The Attention message appears.
P90 “Setting Up Print Options”
86
Click on [OK].
• The modified setting is saved.
4
Page 89

Deleting Saved Settings
Click on [Advanced] at the Profile group.
• The Profile List dialog box appears.
1
Select the setting profile you want to delete
and click on [Delete].
2
• The Delete Profile message appears.
Click on [OK].
• The selected setting profile is deleted.
3
Printing from
Windows Computer
Loading Saved Settings
Select the setting profile you want to use.
• The printer driver automatically configured with the
1
saved settings you have selected.
87
Page 90

Exporting Saved Settings
Click on [Advanced] at the Profile group.
• The Profile List dialog box appears.
1
Select the setting profile you want to export
and click on [Export].
2
• The Save As dialog box appears.
Browse to the location where you want to save
the file, enter a file name in the “File name”
3
field, and click on [OK].
• The file name can be up to eight characters long (not
including the extension). The file name does not
have to match the Settings Name.
• The setting profile is saved as a file.
88
SUPPLEMENT:
When several setting profiles are selected, the Save As dialog box appears for saving each
setting profile separately.
Page 91

Importing Saved Settings
Click on [Advanced] at the Profile group.
• The Profile List dialog box appears.
1
Click on [Import].
• The Save As dialog box appears.
2
Browse to the location of the saved settings
file you want to import, select the file, and click
3
on [OK].
• The settings profile is loaded from the file and added
to the Profile pop-up menu.
Printing from
Windows Computer
NOTE:
Importing saved watermark settings is not available.
89
Page 92

Setting Up Print Options
The printer can handle various printing situations by changing the Print Options settings on the Printer
Properties.
To determine which option should be changed to print a document as you desire, refer to the following:
General Settings required for every printing:
Output Tab : Paper Size, Paper Source, Orientation, Media Type, Number of Copies, Destination
P97 “Setting the Output Tab”
Adding the Binding Margin for printing:
Output Tab : Binding Margin
P97 “Setting the Output Tab”
Printing both sides of the paper (Duplex printing):
Output Tab : Duplex
P97 “Setting the Output Tab”
Sort printing/Group printing/Printing with Staples/Printing with Hole Punch:
Output Tab : Finishing
P97 “Setting the Output Tab”
Printing multiple pages per sheet (Layout printing):
Output Tab : Layout
P97 “Setting the Output Tab”
Enlarge/Reduce printing:
Output Tab : Enlarge/Reduce
P97 “Setting the Output Tab”
Inserting a Cover, Back Cover, and sheet between pages:
Cover/Insert Tab : Cover Sheet, Back Cover, Sheet Insertion
P103 “Setting the Cover/Insert Tab”
Printing a watermark:
Watermark Tab : Watermark
P106 “Setting the Watermark Tab”
Adjusting the shade of gray scale (for PCL6 only):
Print Quality Tab : Gray Scale
P109 “Setting the Print Quality Tab”
90
Page 93

Changing how TrueType fonts are printed:
Print Quality Tab : TrueType Options
P109 “Setting the Print Quality Tab”
Printing with Smoothing Function, Toner Save Mode:
Print Quality Tab : Use Smoothing Function, Toner Save Mode
P109 “Setting the Print Quality Tab”
Printing PS Information when an error occurs (for PS only):
PS Tab : Print PS Information
P112 “Setting the PS Tab”
Printing in specific PostScript Print Format (for PS only):
PS Tab : PostScript Output Format
P112 “Setting the PS Tab”
Printing a rotated image (for PS only):
PS Tab : Rotation Printing
P112 “Setting the PS Tab”
Printing a mirror image (for PS only):
PS Tab : Mirror Image Printing
P112 “Setting the PS Tab”
Printing a negative image (for PS only):
PS Tab : Negative Image Printing
P112 “Setting the PS Tab”
Printing a Private Job:
Private Tab : Private Job
P114 “Setting the Private Tab”
Printing a Stored Job:
Private Tab : Stored Job
P114 “Setting the Private Tab”
Printing from
Windows Computer
Setting optional devices:
Options Tab : Option Settings, Auto Settings
P116 “Setting the Options Tab”
91
Page 94

Printing a Tab Sheet (Tab Printing):
Options Tab : Tab Settings
P116 “Setting the Options Tab”
Setting user information:
User Tab : User Name, Department Code
P119 “Setting the User Tab”
Viewing the version information:
User Tab : Version Information
P119 “Setting the User Tab”
Viewing the current settings table:
Settings Tab : Settings
P120 “Setting the Settings Tab”
Viewing the current status of the paper:
Consumables Tab : Paper
P121 “Setting the Consumables Tab”
92
Page 95

Displaying the Printer Properties
There are two ways to display the printer’s properties. Displaying and setting the printer properties
vary according to how the settings take effect for printing. Also the tabs displayed vary depending on
how you display the printer properties.
Setting Initial Values of Print Options
Setting the print options by viewing the printer properties from the Printers folder within the Windows
Start menu will establish the initial values of the print options. For example, the paper size setting you
most commonly use, optional device settings, user information settings, etc, are settings you will not
want to change every time you print. It is convenient to set these print options as initial values.
How to display:
1. Click on [Start], [Settings], and select [Printers] (for Windows 95/98/Me/NT 4.0/2000) or [Printers
and Faxes] (for Windows XP).
2. Select the GA-1140 printer, click on the [File] menu and select [Properties] (for Windows 95/98/Me),
[Document Defaults] (for Windows NT 4.0), or [Printing Preferences] (for Windows 2000/XP).
Tabs are displayed:
• PCL6 Printer Driver
General, Details, Sharing, Output, Cover/Insert, Watermark, Print Quality, Private, Options, User,
Settings, Consumables
• PostScript printer driver
General, Details, Sharing, Output, Cover/Insert, Watermark, Print Quality, PS, Private, Options,
User, Settings, Consumables
Printing from
Windows Computer
SUPPLEMENTS:
• The Color Management tab is additionally displayed for Windows 98, Windows Me.
• For the PCL6 and PostScript printer driver Windows NT 4.0, Windows 2000, and Windows XP,
only the Output, Cover/Insert, Watermark, Print Quality, PS (for PS driver only), Private,
Options, User, Settings, and Consumables tabs are displayed.
93
Page 96

Setting Print Options for Each Print Job
Setting the print options by viewing the printer properties from the Print dialog box within an application
will establish the values for the current print job. The print option settings specific to each print job are
set using this method.
How to display:
1. Click on the [File] menu and select [Print] on an application.
2. Select the GA-1140 printer driver to be used and Click on [Properties].
94
Page 97

Details of Screen
1
2
3
4
5 6 7 8
1
Printer Name
Displays the name given to the printer driver when it is installed, or the name as it is displayed on the icon in the Printer
folder.
2
Menu Tabs
The menu items of the printer driver are displayed as tabs. Clicking on a tab will display the contents of the selected tab.
The tabs displayed vary depending on the way the print properties are displayed.
Printing from
Windows Computer
Output Tab
You can specify the paper size, paper source, number of copies, orientation, binding margin,
media type, destination, duplex printing, sorting, stapling, layout printing, and enlarge/reduce
printing.
P97 “Setting the Output Tab”
Cover/Insert Tab
You can specify the settings for adding the cover sheet or sheet insertion.
P103 “Setting the Cover/Insert Tab”
Watermark Tab
You can specify a watermark to be printed on an image.
P106 “Setting the Watermark Tab”
Print Quality Tab
You can specify how to print drawings, pictures, and fonts.
P109 “Setting the Print Quality Tab”
95
Page 98

PS Tab
You can specify the settings for PS features. This setting tab is available only for the
PostScript printer driver.
P112 “Setting the PS Tab”
Private Tab
You can specify the settings for private printing or stored printing.
P114 “Setting the Private Tab”
Options Tab
You can specify the settings for installed optional devices and Tab print settings.
P116 “Setting the Options Tab”
User Tab
You can display the user information.
P119 “Setting the User Tab”
Settings Tab
You can display the current print settings.
P120 “Setting the Settings Tab”
Consumables Tab
You can display the consumables status.
P121 “Setting the Consumables Tab”
3
Profile
Print option settings can be saved on your hard disk so you can easily load specifically configured settings for a particular
job. Settings files can also be shared over a network, using the Import and Export features.
P84 “Setting Print Options Using Profiles”
4
[Restore Defaults]
Click on this to restore the settings to the original factory defaults.
5
[OK]
Click on this to enter the input settings and complete the print options settings.
6
[Cancel]
Click on this to cancel the input settings and exit the print options settings.
7
[Apply]
Click on this to enter the input settings without closing the print options settings.
8
[Help]
Click on this to browse the HELP for the printer driver.
96
Page 99

Setting the Output Tab
The Output tab permits setting the paper and layout information print options.
5
6
7
8
11
12
1
Paper Size
1
2
3
4
9
10
This selects the size of paper for printing.
• A3 • 8.25x13* • Computer (10-1/8” x 14”)
• A4 • 11x17(LD) • 13inchLG (8-1/2” x 13”)
• A5 • Legal (8-1/2” x 14”) • 8.5SQ (8-1/2” x 8-1/2”)
• B4 • Letter (8-1/2” x 11”) • 8K (390 x 270 mm)
• B5 • Statement (5-1/2” x 8-1/2”) • 16K (270 x 195 mm)
*8.25x13 is same as FOLIO size paper described in the Copier’s Manual.
NOTE:
• The default paper size varies depending on the Windows Regional Setting or the version of printer driver you installed.
It is set to Letter when the Regional Setting of your operating system is English (United States) or installing the printer
driver for US version. It is set to A4 when the Regional Setting is not English (United States) or installing the printer
driver for EU version.
2
Orientation
This sets the paper printing direction.
• Portrait - The document is printed in the portrait direction.
• Landscape - The document is printed in the landscape direction.
3
Paper Source
This selects the source for feeding paper. Please select a paper source that correlates with the printing size.
• Auto Select - Automatically selects the paper set in the printer according to the printed document size.
• Upper Drawer - Paper is fed from the Upper Recording Paper Tray.
• Lower Drawer - Paper is fed from the Lower Recording Paper Tray.
• Tandem LCF - Paper is fed from the Tandem Large Capacity Feeder.
• External LCF - Paper is fed from the External Large Capacity Feeder, which is an option. This cannot be selected when
the External LCF is not installed.
• Bypass (Short Edge) - Paper is fed from the Bypass Tray and fed from the short edge of paper.
• Bypass (Long Edge) - Paper is fed from the Bypass Tray and fed from the long edge of paper.
Printing from
Windows Computer
NOTE:
• The selectable values vary depending on the installable optional devices to be installed on the GA-1140 and configured
on the Options tab.
97
Page 100

• The Attention message is displayed when “Bypass (Short Edge)” or “Bypass (Long Edge)” is selected.
• When you want to perform Tab printing, please specify the Tab Settings option on the Options tab before specifying the
media type and paper source on the Output tab.
P116 “Setting the Options Tab”
4
Media Type
This sets the media type of the paper.
• Plain - Select this when printing on 20 lbs plain paper (64-80 g/m2 pain paper).
• Thick1 - Select this when printing on 24/28/32 lbs thick paper, 60 lbs cover sheet, or 90 lbs index sheet (up to 163 g/m
thick paper).
• Thick2 - Select this when printing on 65 lbs cover sheet or 110 lbs index sheet (up to 209 g/m2 thick paper).
• Transparency - Select this when printing on transparent sheets.
• Tab Paper - This is automatically selected when the Tab Settings for Bypass have been set on the Options tab.
NOTE:
•
The Media Type is only available when “Bypass (Short Edge)” or “Bypass (Long Edge)” is selected under Paper Source.
• When you want perform Tab printing, please specify the Tab Settings option on the Options tab before specifying the
media type and paper source on the Output tab. P116 “Setting the Options Tab”
5
Number of Copies
This sets the number of printed copies.
The setting range varies depending on the type of the printer driver and the Windows versions:
• For PCL6 Printer Driver
Windows 95/98/Me and Windows NT 4.0 : 1 to 9999
Windows 2000 and Windows XP: 1 to 9999
• For PostScript Printer Driver
Windows 95/98/Me and Windows NT 4.0 : 1 to 999
Windows 2000 and Windows XP: 1 to 9999
6
Destination
This selects the destination tray to be outputted.
• Auto Select - Select this to route the output to the tray which is configured for default destination tray on the GA-1140.
• Tray 1 - Select this to route the output to the upper tray of the Finisher. This is available only when the Finisher is
installed and selected on the Option tab.
• Tray 2 - Select this to route the output to the lower tray of the Finisher. This is available only when the Finisher is
installed and selected on the Option tab.
7
Binding Margin
This selects whether or not the Binding Margin is set to the paper to be printed.
• None - Select this to set no gutter on the paper.
• Left - Select this to set the gutter on the left side on the paper. When this is selected, specify the width of the gutter at
the Binding Width option.
• Right - Select this to set the gutter on the right side on the paper. When this is selected, specify the width of the gutter at
the Binding Width option.
• Top - Select this to set the gutter on the top of the paper. When this is selected, specify the width of the gutter at the
Binding Width option.
• Center - This sets the gutter on the center of two sided page. When this is selected, specify the width of the gutter at the
Binding Width option. This is available only when you select the Magazine Sort or Magazine Sort + Saddle Stitch at the
Finishing option.
8
Binding Width
Enter the width of binding margin when you elect to add a binding margin. You can set the width from 0.39 to 2.00 inch in
units of 0.01 inch (10.0 to 50.8 mm in units of 0.1 mm).
2
98
NOTE:
• Only “None” or “Top” is available when “Tablet” is selected for the Duplex option.
• Only “None”, “Left”, or “Right” is available when “Book” is selected for the Duplex option.
 Loading...