

Toshiba 8000, Tecra 8000 Series User Manual

®
Tecra
8000
Series User’s
Guide
If you need assistance
❖ www.pcsupport.toshiba.com
❖ InTouch
Calling within the United States (800) 457-7777
Calling from outside the United States (949) 859-4273
sm
Center
For more information, see Chapter 7 on page 108 in this guide.

ii
®
Model: Tecra 8000 Series
FCC Notice “Declaration of Conformity
Information”
This equipment has been tested and found to comply with the limits for a Class B
digital device, pursuant to Part 15 of the FCC rules. These limits are designed to
provide reasonable protection against harmful interference in a residential
installation.
This equipment generates, uses and can radiate radio frequency energy and, if not
installed and used in accordance with the instructions, it may cause harmful
interference to radio communications. However, there is no guarantee that
interference will not occur in a particular installation. If this equipment does
cause harmful interference to radio or television reception, which can be
determined by turning the equipment off and on, the user is encouraged to try to
correct the interference by one or more of the following measures:
❖ Reorient or relocate the receiving antenna.
❖ Increase the separation between the equipment and receiver.
❖ Connect the equipment to an outlet on a circuit different from that to which
the receiver is connected.
❖ Consult the dealer or an experienced radio/TV technician for help.
NOTE: Only peripherals complying with the FCC Class B limits may be
attached to this computer. Operation with non-compliant peripherals or
peripherals not recommended by Toshiba is likely to result in interference
to radio and TV reception. Shielded cables must be used between the
external devices and the computer's serial port, parallel port, monitor port,
external disk drive port, USB port, PS/2™ port and microphone jack.
Changes or modifications made to this equipment not expressly approved
by Toshiba or parties authorized by Toshiba could void the user
authority to operate the equipment.
This device complies with Part 15 of the FCC Rules. Operation is subject to the
following two conditions:
❖ This device may not cause harmful interference.
❖ This device must accept any interference received, including interference
that may cause undesired operation.
’s

Contact:
Toshiba America information Systems, Inc.
9740 Irvine Blvd.
Irvine, CA 92618-1697
(949) 583-3000
FCC Requirements
The following information is pursuant to FCC CFR 47, Part 68 and refers to
internal modems.
Installation
When you are ready to install or use the modem, call your local telephone
company and give them the following information:
❖ The telephone number of the line to which you will connect the modem.
❖ The FCC registration number of the modem.
❖ The ringer equivalence number (REN) of the modem, which is 0.5B.
The modem connects to the telephone line by means of a standard jack called the
USOC RJ11C.
iii
Type of Service
Your modem is designed to be used on standard-device telephone lines.
Connection to telephone company-provided coin service (central office
implemented systems) is prohibited. Connection to party lines service is subject
to State tariffs. If you have any questions about your telephone line, such as how
many pieces of equipment you can connect to it, the telephone company will
provide this information upon request.
Telephone Company Procedures
The goal of the telephone company is to provide you with the best service it can.
In order to do this, it may occasionally be necessary for them to make changes in
their equipment, operations or procedures. If these changes might affect your
service or the operation of your equipment, the telephone company will give you
notice, in writing, to allow you to make any changes necessary to maintain
uninterrupted service.

iv
If Problems Arise
If any of your telephone equipment is not operating properly, you should
immediately remove it from your telephone line, as it may cause harm to the
telephone network. If the telephone company notes a problem, they may
temporarily discontinue service. When practical, they will notify you in advance
of this disconnection. If advance notice is not feasible, you will be notified as
soon as possible. When you are notified, you will be given the opportunity to
correct the problem and informed of your right to file a complaint with the FCC.
In the event repairs are ever needed on your modem, they should be performed by
Toshiba Corporation or an authorized representative of Toshiba Corporation.
Disconnection
If you should ever decide to permanently disconnect your modem from its
present line, please call the telephone company and let them know of this change.
Fax Branding
The Telephone Consumer Protection Act of 1991 makes it unlawful to use a
computer or other electronic device to send any message via a telephone fax
machine unless such message clearly contains in a margin at the top or bottom of
each transmitted page or on the first page of the transmission, the date and time it
is sent and an identification of the business, other entity or individual sending the
message and the telephone number of the sending machine or such business,
other entity or individual.
In order to program this information into your fax modem, you should complete
the setup for your fax software before sending a message.
Notes for users in Australia and New Zealand
For information on using a modem in Australia and New Zealand, see the
internal modem user’s guide shipped with your computer.
Instructions for IC CS-03 certified equipment
1 NOTICE: The Industry Canada label identifies certified equipment. This
certification means that the equipment meets certain telecommunications
network protective, operational and safety requirements as prescribed in the
appropriate Terminal Equipment Technical Requirements document(s).

v
The Department does not guarantee the equipment will operate to the user’s
satisfaction.
Before installing this equipment, users should ensure that it is permissible to
be connected to the facilities of the local telecommunications company. The
equipment must also be installed using an acceptable method of connection.
The customer should be aware that compliance with the above conditions
may not prevent degradation of service in some situations.
Repairs to certified equipment should be coordinated by a representative
designated by the supplier. Any repairs or alterations made by the user to
this equipment, or equipment malfunctions, may give the
telecommunications company cause to request the user to disconnect the
equipment.
Users should ensure for their own protection that the electrical ground
connections of the power utility, telephone lines and internal metallic water
pipe system, if present, are connected together. This precaution may be
particularly important in rural areas.
Caution: Users should not attempt to make such connections themselves,
but should contact the appropriate electric inspection authority, or
electrician, as appropriate.
2 The user manual of analog equipment must contain the equipment’s Ringer
Equivalence Number (REN) and an explanation notice similar to the
following:
The Ringer Equivalence Number (REN) of this device is 0.2B.
NOTICE: The Ringer Equivalence Number (REN) assigned to each
terminal device provides an indication of the maximum number of
terminals allowed to be connected to a telephone interface. The termination
on an interface may consist of any combination of devices subject only to
the requirement that the sum of the Ringer Equivalence Numbers of all the
devices does not exceed 5.
3 The standard connecting arrangement (telephone jack type) for this
equipment is jack type(s): USOC RJ11C.
Industry Canada Requirement
This Class B digital apparatus complies with Canadian ICES-003.
Cet appareil numérique de la classe B est conformé à la norme NMB-003 du
Canada.
vi
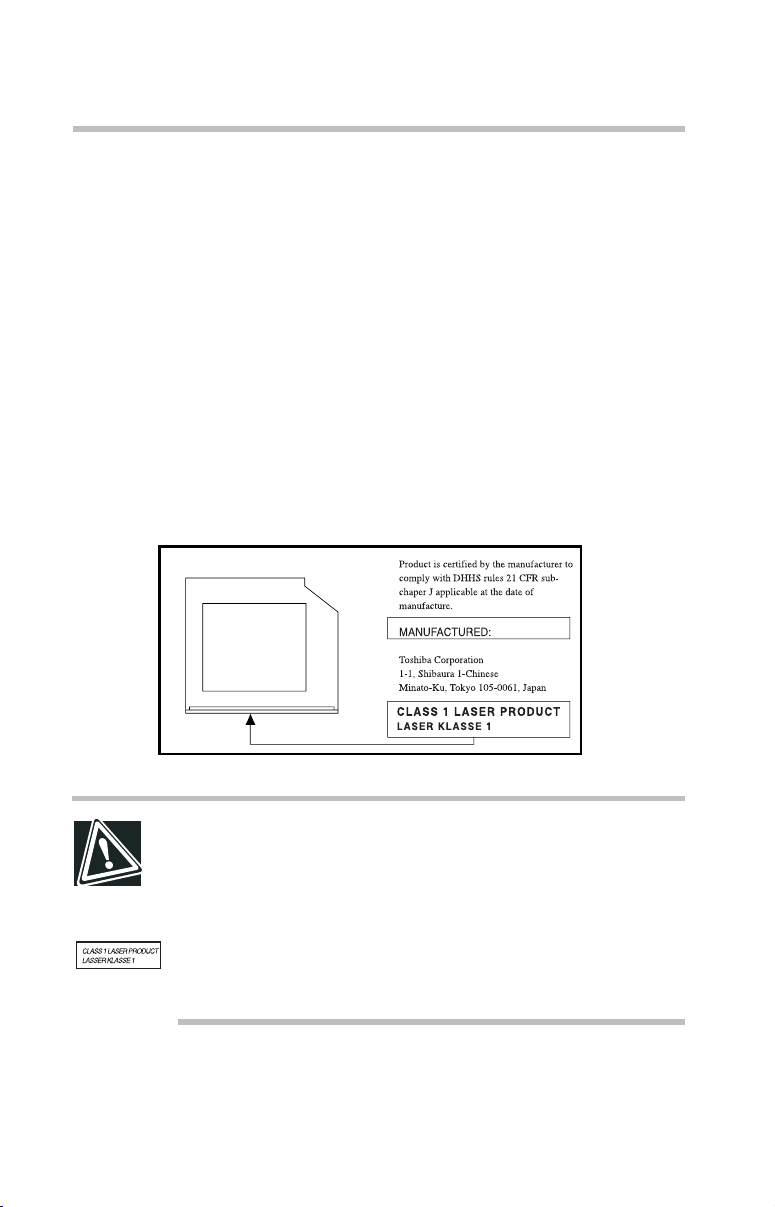
CD-ROM/DVD-ROM Safety Instruction
The CD-ROM/DVD ROM drive employs a laser system. To ensure proper
use of this product, please read this instruction manual carefully and retain
for future reference. Should the unit ever require maintenance, contact an
authorized service location.
Use of controls, adjustments or the performance of procedures other than those
specified may result in hazardous radiation exposure.
To prevent direct exposure to the laser beam, do not try to open the enclosure.
Location of the required label
(A sample is show below. Location of the label and the manufacturing
information may vary.)
CAUTIONS: This appliance contains a laser system and is classified as a
“CLASS 1 LASER PRODUCT.” To use this model properly, read the instruction
manual carefully and keep it for your future reference. In case of any trouble with
this model, please contact your nearest “AUTHORIZED service station.” To
prevent direct exposure to the laser beam, do not try to open the enclosure.
Use of controls or adjustments or performance of procedures other than
those specified in the owner’s manual may result in hazardous radiation
exposure.

Copyright
This guide is copyrighted by Toshiba Corporation with all rights reserved. Under
the copyright laws, this guide cannot be reproduced in any form without the prior
written permission of Toshiba. No patent liability is assumed, however, with
respect to the use of the information contained herein.
© 1999 by Toshiba Corporation. All rights reserved.
Export Administration Regulation
This document contains technical data that may be controlled under the U.S.
Export Administration Regulations, and may be subject to the approval of the
U.S. Department of Commerce prior to export. Any export, directly or indirectly,
in contravention of the U.S. Export Administration Regulations is prohibited.
Notice
The information contained in this manual, including but not limited to any
product specifications, is subject to change without notice.
TOSHIBA CORPORATION AND TOSHIBA AMERICA
INFORMATION SYSTEMS, INC. (TOSHIBA) PROVIDES NO
WARRANTY WITH REGARD TO THIS MANUAL OR ANY OTHER
INFORMATION CONTAINED HEREIN AND HEREBY EXPRESSLY
DISCLAIMS ANY IMPLIED WARRANTIES OF
MERCHANTABILITY OR FITNESS FOR ANY PARTICULAR
PURPOSE WITH REGARD TO ANY OF THE FOREGOING.
TOSHIBA ASSUMES NO LIABILITY FOR ANY DAMAGES
INCURRED DIRECTLY OR INDIRECTLY FROM ANY TECHNICAL
OR TYPOGRAPHICAL ERRORS OR OMISSIONS CONTAINED
HEREIN. IN NO EVENT SHALL TOSHIBA BE LIABLE FOR ANY
INCIDENTAL, CONSEQUENTIAL, SPECIAL, OR EXEMPLARY
DAMAGES, WHETHER BASED ON TORT, CONTRACT OR
OTHERWISE, ARISING OUT OF OR IN CONNECTION WITH THIS
MANUAL OR ANY OTHER INFORMATION CONTAINED HEREIN
OR THE USE THEREOF.
vii

viii
Trademarks
Tecra, NoteDock, Noteworthy, AccuPoint, Fn-esse, and SelectBay are registered
trademarks, SelectServ and SecureSleep are trademarks, and InTouch is a service
mark of Toshiba America Information Systems, Inc. and/or Toshiba Corporation.
RingCentral is a registered trademark of Ring Zero Systems, Inc.
IBM is a registered trademark, and PS/2 is a trademark of IBM Corporation.
MS-DOS, Microsoft, Windows, and Windows NT are registered trademarks of
Microsoft Corporation.
Intel, LANDesk, MMX, Pentium, and ProShare are registered trademarks and
Celeron is a trademark of Intel Corporation.
SoundBlaster Pro is a trademark of Creative Labs, Inc.
CompuServe is a registered trademark of America Online, Inc.
NeoMagic is a registered trademark of the NeoMagic Corporation.
*Manufactured under license from Dolby Laboratories. “Dolby” and “Dolby
Digital” are registered trademarks of Dolby Laboratories.
All other brand and product names are trademarks or registered trademarks of
their respective companies.
Energy Star Compliance
As an Energy Star partner, Toshiba has determined that this product is Energy
Star Compliant.

Contents
Part I: Getting to Know Your Computer
Chapter 1: To Begin...................................................................... 1
Making sure you have everything.......................................... 1
Selecting a place to work........................................................ 1
Keeping the computer comfortable................................... 2
Keeping yourself comfortable............................................ 3
Finding where everything’s located........................................ 6
Front with the display panel closed................................... 6
Left side................................................................................ 7
Back...................................................................................... 8
Right side........................................................................... 10
Underside........................................................................... 11
Keyboard and display features............................................. 11
Front with the display panel open.................................... 12
Indicator panels................................................................. 13
Attaching other components................................................ 15
Preparing the battery............................................................. 15
Turning on the computer...................................................... 15
The operating system....................................................... 17
ix

x
Registering your computer.............................................. 17
When and how to turn off the computer ............................ 17
Chapter 2: Using Your Computer in the Office....................... 21
Using external display devices............................................. 21
Connecting the display device......................................... 22
Directing the display output when you turn on the
computer ........................................................................... 24
Adjusting the quality of the external display................... 25
Video limitations ............................................................... 25
Using an external keyboard.................................................. 26
Making your external keyboard emulate the Fn key...... 26
Using an external mouse...................................................... 27
Setting up a PS/2 mouse to work with the AccuPoint
in Windows 95 and Windows 98.................................... 27
Setting up a PS/2 mouse to work with the Accupoint
in Windows NT ................................................................. 28
Using a docking solution...................................................... 28
Chapter 3: Hardware Features ................................................. 31
Adding memory.................................................................... 31
Memory module sizes...................................................... 32
Installing a memory module............................................ 33
Removing the memory module...................................... 36
Swapping SelectBay modules ............................................. 37
Removing a module from the SelectBay........................ 37
Inserting a module into the SelectBay............................ 39
Using the secondary battery in the SelectBay................ 40
Using PC Card slots.............................................................. 42
Inserting PC Cards............................................................ 42
Removing a PC Card........................................................ 44
Setting up your PC Card for your computer .................. 44
Using a modem..................................................................... 45
Connecting to a telephone line with an internal
modem.............................................................................. 45

xi
Determining your COM port ............................................ 47
Using the computer’s telephony features............................ 48
Using the Internet.............................................................. 48
Using bulletin board services........................................... 49
Discovering Toshiba’s online resources.............................. 49
Recording sounds with a microphone................................ 50
Using an external microphone......................................... 50
Using an external audio input device .............................. 51
Using external speakers or headphones............................. 52
Chapter 4: Using Drives............................................................ 55
Hard disk drive....................................................................... 55
External diskette drive ........................................................... 57
CD-ROM drive ....................................................................... 58
DVD-ROM drive..................................................................... 58
Using the DVD-ROM or CD-ROM drive.............................. 59
Playing CDs ....................................................................... 62
DVD Player overview ............................................................ 63
Setting up the DVD Player................................................ 69
General tab......................................................................... 71
Video tab............................................................................ 73
Language tab..................................................................... 76
Information tab.................................................................. 77
Playing a DVD video.............................................................. 78
Getting the sharpest picture............................................. 78
Choosing a language........................................................ 79
Using the search feature................................................... 80
Chapter 5: Power Management............................................... 85
Running the computer on battery power............................ 85
Charging the batteries....................................................... 86
Monitoring battery power ................................................ 87
Using Hibernation mode (Windows 95 and
Windows 98)......................................................................... 88
What to do when the battery alarm sounds ....................... 89

xii
Starting where you left off .................................................... 90
Changing batteries................................................................ 91
Taking care of your battery................................................... 93
Safety precautions............................................................ 94
Maximizing battery life ..................................................... 94
Disposing of used batteries safely .................................. 94
Conserving power................................................................. 95
The easy way—choosing a power usage mode in
Windows 95 and Windows 98........................................ 96
Additional options for power................................................ 97
Chapter 6: Hot Keys and Function Keys.................................. 99
Hot keys for Windows 95, Windows NT............................ 99
Instant password security................................................ 99
Battery save mode.......................................................... 100
Resume Mode ................................................................ 100
Sound .............................................................................. 100
Power-on display............................................................ 100
Hot keys for the keyboard.............................................. 101
Hot keys for Windows 98................................................... 101
Power mode.................................................................... 101
Resume Mode (Windows 98)....................................... 101
Sound (Windows 98)..................................................... 101
Fn-esse................................................................................. 101
Starting Fn-esse.............................................................. 102
Assigning a key to a program or document................. 103
Viewing existing key assignments ................................ 104
Changing or removing existing key assignments....... 105
Working with the keyboard................................................ 105
Making your keyboard emulate a full-size keyboard... 105
Cursor control overlay.................................................... 106
Numeric keypad overlay................................................. 107
Chapter 7: Troubleshooting Guide......................................... 109
Problems that are easy to fix.............................................. 109

xiii
Problems when you turn on the computer....................... 110
Resolving a hardware conflict............................................ 114
A plan of action................................................................ 115
Resolving hardware conflicts on your own.................. 115
Fixing device-related problems .......................................... 117
Memory card problems ................................................. 118
Power and the batteries.................................................. 119
Keyboard problems ........................................................ 120
AccuPoint problems....................................................... 121
Display problems............................................................ 122
Disk drive problems........................................................ 123
Modem problems ........................................................... 126
Problems with the CD-ROM or DVD-ROM drive......... 127
Sound system problems................................................ 128
Optional devices.............................................................. 129
PC Card problems........................................................... 129
Printer problems............................................................. 133
DVD operating problems–Windows 95/Windows 98..... 134
DVD-ROM error messages............................................ 141
Developing good computing habits.................................. 142
If you need further assistance ............................................ 143
Contacting Toshiba ......................................................... 143
Toshiba's worldwide offices ............................................... 145
Part II: Technical Reference
Chapter 8: System Setup ....................................................... 153
Using TSETUP ..................................................................... 153
Using Hardware Setup........................................................ 154
Using Hardware Setup in Windows 95/98................... 154
Using Hardware Setup in Windows NT 4.0.................. 155
Chapter 9: Keeping Your Files Safe ....................................... 159
Using a password in Windows 95 and Windows 98....... 159

xiv
Setting a user-level password........................................ 160
Power-on password....................................................... 164
Using an instant password............................................ 165
Disabling the password.................................................. 165
Working with supervisor-level passwords................... 165
Setting a hard disk drive password............................... 167
Using an Undock (Eject) password .............................. 174
Using a password in Windows NT Workstation 4.0........ 175
Creating a user-level password ..................................... 175
Protecting against forgetfulness.................................... 176
Using the power-on password...................................... 178
Instant password............................................................ 179
Disabling a user-level password.................................... 180
Using a hard disk drive password................................. 180
Using an Eject Password............................................... 184
Chapter 10: Managing Your Tecra 8000 Series Computer . 187
Industry standard architecture........................................... 187
Wired for Management.................................................. 188
Desktop Management Interface.................................... 188
Advanced Configuration and Power Interface............. 188
Operating system compatibility......................................... 189
System management ......................................................... 189
LANDesk Client Manager v.3.3...................................... 189
Asset management......................................................... 190
Fault management.......................................................... 192
Enterprise management software compatibility.......... 194
Advanced networking features via the Network
Dock................................................................................. 195
Security management ........................................................ 196
System password in Flash, Not CMOS........................ 197
Supervisor password..................................................... 197
Boot String...................................................................... 197
Hard disk drive password.............................................. 198

xv
HDD supervisor level password .................................... 198
Eject password................................................................ 198
Dock prevention lock...................................................... 198
Cable connection............................................................. 199
Part III: Appendixes
Appendix A: Features and Specifications.............................. 203
Appendix B: Power Cable Connectors.................................. 217
Appendix C: System Resources............................................ 219
Appendix D: Video Modes ..................................................... 227
Glossary................................................................................... 231
Index......................................................................................... 259

The documents included with this product . . . . . . . . . . . . . . . . . . . . . . xviii
Safety cautions . . . . . . . . . . . . . . . . . . . . . . . . . . . . . . . . . . . . . . . . . . . . . xviii
Other documentation . . . . . . . . . . . . . . . . . . . . . . . . . . . . . . . . . . . . . . . . . . xx
Service options . . . . . . . . . . . . . . . . . . . . . . . . . . . . . . . . . . . . . . . . . . . . . . . xx

Introduction
Welcome to the world of powerful, portable multimedia
computing. Your new Toshiba Tecra
computer is designed just for you. Because you or your company’s
IT personnel have been given the opportunity to choose among so
many options—display, memory, hard disk drive capacity,
processor speed, CD-ROM or DVD-ROM, and operating
system—you have a computer that truly meets your specific
needs.
The Tecra 8000 Series notebook’s modular design also lets you
add, change, or update additional components at any time, making
this machine one of the most flexible tools you’ve ever owned.
®
8000 Series notebook
xvii

xviii
The documents included with this product
This product comes with a user’s guide in printed form and a
user’s guide in electronic form on your Configuration Builder CD.
The “electronic book” lets you keep your guide with you wherever
you and your computer go. Special indexing features and quick
access to related topics make the electronic book an easy reference
to use.
The printed book lets you peruse the manual in the traditional way.
There are at least three ways you can use this guide:
❖ Read the entire guide from beginning to end.
❖ Skim through the guide and stop when a topic interests you.
❖ Use the tables of contents and the index to find specific
information.
If you’re new to computers or haven’t used a notebook computer
before, you may want to read through the first couple of chapters
to familiarize yourself with the components of the computer and
how to turn it on. After that, feel free to seek out whatever interests
you most.
Safety cautions
This manual contains safety instructions that must be observed in
order to avoid potential hazards that could result in personal
injuries or damage your equipment. The safety instructions have
been classified according to the seriousness of the risk, and the
following icons highlight these instructions as follows:
DANGER: This icon indicates the existence of a hazard that
could result in death or serious bodily injury if the safety
instruction is not observed.
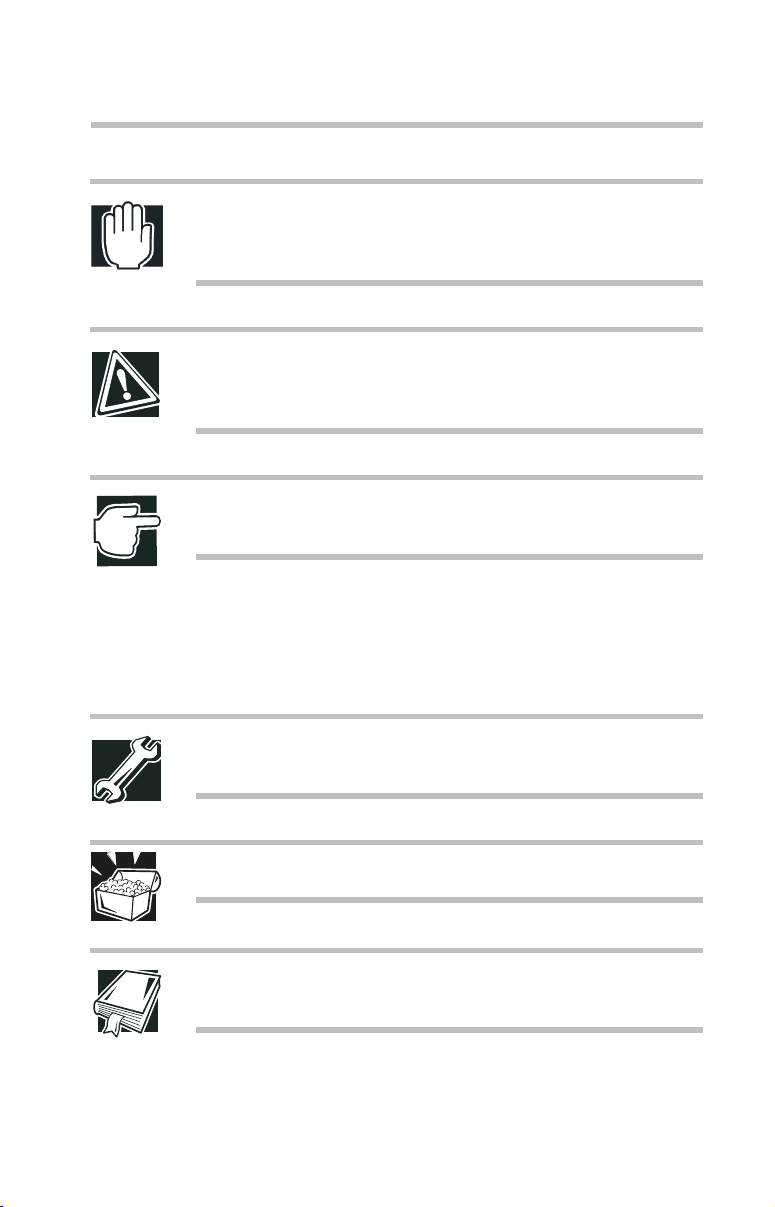
WARNING: This icon indicates the existence of a hazard that
could result in bodily injury if the safety instruction is not
observed.
CAUTION: This icon indicates the existence of a hazard that
could result in damage to equipment or property if the safety
instruction is not observed.
NOTE: This icon indicates information that relates to the safe
operation of the equipment or related items.
Other icons used
Additional icons highlight other helpful or educational
information:
xix
TECHNICAL NOTE: This icon provides technical information
about the unit.
HINT: This icon denotes helpful hints and tips.
DEFINITION: This icon indicates the definition of a term used
in the text.

xx
Other documentation
In addition to this guide, your computer may come with the
following documentation:
❖ The Tos hi b a Companion Diskette Guide explains when to use
the Toshiba Companion Diskette and how to use the programs
on the diskette that are not discussed in this guide.
❖ The Toshiba Configuration Builder CD Instructions explain
how to completely recover, selectively reinstall or custom
configure your system. These are README files on the CD.
❖ The Windows
Microsoft
❖ The Windows 98 documentation explains the features of the
Microsoft Windows 98 operating system.
❖ The Windows NT
the Microsoft Windows NT Workstation 4.0 operating
system.
❖ The LANDesk
software on your Configuration Builder CD to help you
manage your system.
®
95 documentation explains the features of the
®
Windows 95 operating system.
®
®
Client Manager User’s Guide describes
documentation explains the features of
Service options
Toshiba offers a full line of service options built around its
SelectServ™ warranty programs. See the warranty and service
material included with your computer for registration information.

xxi


PART I
GETTING TO KNOW YOUR
COMPUTER
What’s in Part I
This part explains what all the computer’s components are and how to use
them. Don’t hesitate to skip around. Guides, such as this one, don’t need to
be read from cover to cover.

Chapter
Making sure you have everything . . . . . . . . . . . . . . . . . . . . . . . . . . . . . . . . 1
Selecting a place to work . . . . . . . . . . . . . . . . . . . . . . . . . . . . . . . . . . . . . . . 1
Finding where everything’s located . . . . . . . . . . . . . . . . . . . . . . . . . . . . . . . 6
Keyboard and display features . . . . . . . . . . . . . . . . . . . . . . . . . . . . . . . . . . 11
Attaching other components . . . . . . . . . . . . . . . . . . . . . . . . . . . . . . . . . . . . 15
Turning on the computer . . . . . . . . . . . . . . . . . . . . . . . . . . . . . . . . . . . . . . . 15

To BeginBegin
This chapter explains how to set up your computer, gives you tips
on working comfortably, and takes you on a tour of the computer’s
features.
Making sure you have everything
Before you do anything else, consult the Quick Start card (packed
at the top of the box) to make sure you received everything.
If any items are missing or damaged, notify your network
administrator.
Selecting a place to work
Your Tecra 8000 Series computer is portable, designed to be used
in a variety of circumstances and locations. However, by giving
some thought to your work environment, you can protect the
computer and work in comfort
.
1

To Begin
2
Selecting a place to work
Keeping the computer comfortable
Place the computer on a flat surface that is large enough for the
computer and any other items you need to use, such as a printer.
Leave enough space around the computer and other equipment to
give adequate ventilation; otherwise, they may overheat.
Make sure your work area is free from:
❖ Dust, moisture, and direct sunlight.
❖ Liquids and corrosive chemicals.
CAUTION: If you spill liquid into the computer, turn off the
computer, unplug it from the AC power source, and let it dry
out completely before turning it on again.
If the computer does not operate correctly after you turn it
back on, contact your network administrator.
❖ Equipment that generates a strong electromagnetic field, such
as large stereo speakers (other than speakers that are
connected to the computer) or speakerphones.
❖ Extreme heat, cold, or humidity. Operate the computer within
a temperature range of 41 degrees to 95 degrees Fahrenheit (5
degrees to 35 degrees Celsius) and 20 percent to 80 percent
non-condensing humidity.
❖ Rapid changes in temperature or humidity.
❖ Sources of temperature change such as air conditioner vents
or heaters.
Part I: Getting to Know Your Computer

Keeping yourself comfortable
WARNING: Using the computer keyboard incorrectly can
result in discomfort and possible injury. If your hands,
wrists, and/or arms hurt while typing, stop using the
computer and rest. If the discomfort persists, consult a
physician.
This section provides hints on avoiding strain and stress injuries.
For more information, consult books on ergonomics, repetitivemotion injury, and repetitive-stress syndrome.
Placement of the computer
Proper placement of the computer and external devices is
important to avoid stress-related injuries. Consider the following
when placing your computer.
To Begin
Selecting a place to work
3
❖ Place the computer on a flat surface at a comfortable height
and distance.
❖ You should be able to type without twisting your torso or neck
and look at the screen without slouching.
❖ If you use an external monitor, the top of the screen should be
no higher than eye level.
❖ If you use a paper holder, set it at the same height and distance
as the screen.
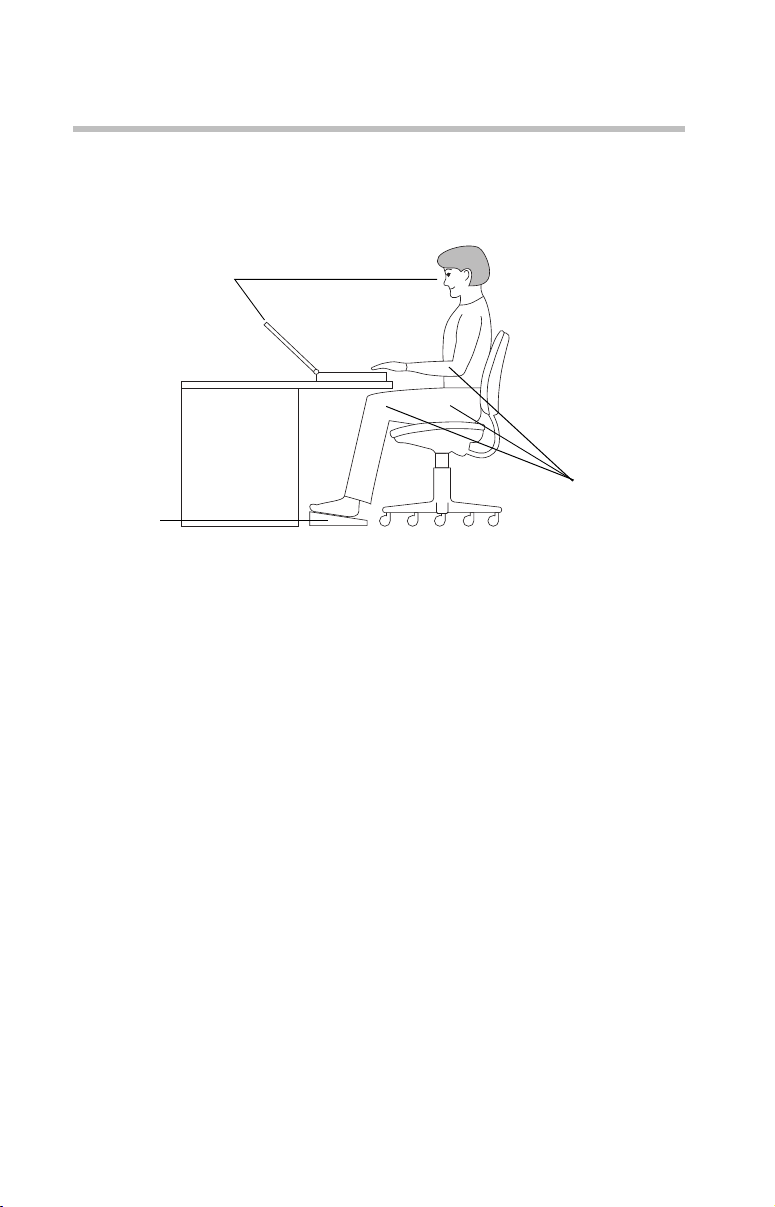
Seating and posture
When using the computer, maintain good posture with your body
relaxed and your weight distributed evenly.
Proper seating is a primary factor in reducing work strain. Some
people find a backless chair more comfortable than a conventional
Part I: Getting to Know Your Computer
4
To Begin
Selecting a place to work
chair. Whichever type you choose, use the following guidelines to
adjust your chair for maximum computing comfort.
Below eye level
Approximately
90° angles
Footrest
Correct posture and positioning of the computer
❖ Position your chair so that the keyboard is at or slightly below
the level of your elbow. You should be able to type with your
shoulders relaxed and your forearms parallel to the floor.
If you are using a conventional chair:
❖ Your knees should be slightly higher than your hips. If
necessary, use a footrest to raise the level of your knees and
ease the pressure on the back of your thighs.
❖ Adjust the back of your chair so that it supports the lower
curve of your spine. If necessary, use a cushion to provide
extra back support. Lower-back support cushions are
available at many office supply stores.
❖ Sit with your back straight so that your knees, hips, and
elbows form approximately 90-degree angles when you
work. Do not slump forward or lean back too far.
Lighting
Proper lighting can improve the readability of the display and
reduce eyestrain.
Part I: Getting to Know Your Computer

To Begin
Selecting a place to work
❖ Position the display panel or external monitor so that sunlight
or bright indoor lighting does not reflect off the screen. Use
tinted windows or shades to reduce glare.
❖ Avoid placing your computer in front of a bright light that
shines directly into your eyes.
❖ If possible, use soft, indirect lighting in your computer work
area.
5
Arms and wrists
❖ Avoid bending, arching, or twisting your wrists. Keep them in
a relaxed, neutral position while typing.
❖ Exercise your hands, wrists, and arms to improve circulation.
Work habits
The key to avoiding discomfort or injury from strain is to vary
your activities. If possible, schedule a variety of tasks into your
working day. Finding ways to break up the routine can reduce
stress and improve your efficiency.
❖ Take frequent, short breaks to change position, stretch your
muscles, and relieve your eyes. A break of two or three
minutes every half hour is more effective than a long break
after several hours.
❖ Avoid performing repetitive activities for long periods.
Intersperse such activities with other tasks.
❖ Focusing your eyes on your computer screen for long periods
can cause eyestrain. Look away from the computer frequently
and focus your eyes on a distant object for at least 30 seconds.
Part I: Getting to Know Your Computer
To Begin
6
Finding where everything’s located
Finding where everything’s located
The next few pages take you on a guided tour of the computer and
its components.
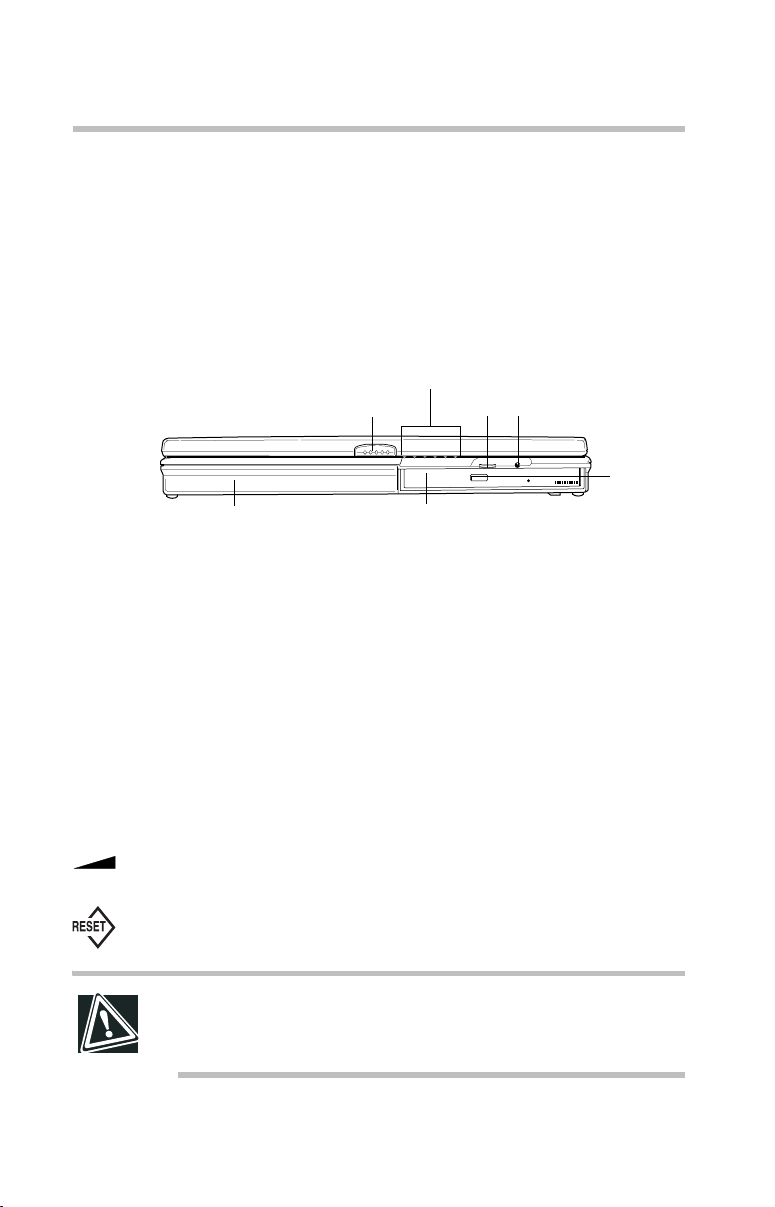
Front with the display panel closed
System indicator panel
Latch
Moving the battery release panel to the left and pulling the battery
module forward when the battery lock is in the unlocked position
allows you to remove the main battery module from the computer.
Volume
Reset button
SelectBay with CD-ROM installedBattery module
CD-ROM
ejection
button
Pressing the display latch opens the computer display panel. To
open the display, see “Keyboard and display features” on page 11.
The system indicator panel is made up of several status lights that
provide information about various system functions. See “System
indicator panel” on page 13 for a description of each of the panel
lights.
The volume control dial lets you adjust the loudness of the system
speakers.
Pressing the reset button restarts the computer. Use this button
only if the system becomes unresponsive or hangs.
CAUTION: Don’t use a pencil to press the reset button.
Pencil lead can break off inside the computer and damage it.
Instead, use a slim object such as a straightened paper clip.
Part I: Getting to Know Your Computer
 Loading...