

Page 1
MULTIFUNCTIONAL DIGITAL SYSTEMS
Printing Guide
Page 2

SOFTWARE LICENSE AGREEMENT
INSTALLING OR OTHERWISE USING THIS SOFTWARE PRODUCT CONSTITUTES YOUR
ACCEPTANCE OF THE FOLLOWING TERMS AND CONDITIONS (UNLESS A SEPARATE LICENSE
IS PROVIDED BY THE SUPPLIER OF APPLICABLE SOFTWARE IN WHICH CASE SUCH SEPARATE LICENSE SHALL APPLY). IF YOU DO NOT ACCEPT THESE TERMS, YOU MAY NOT
INSTALL OR USE THIS SOFTWARE, AND YOU MUST PROMPTLY RETURN THE SOFTWARE TO
THE LOCATION WHERE YOU OBTAINED IT.
THE SOFTWARE INSTALLED ON THIS PRODUCT INCLUDES NUMEROUS INDIVIDUAL SOFTWARE COMPONENTS, EACH HAVING ITS OWN APPLICABLE END USER LICENSE AGREEMENT (“EULA”). INFORMATION RELATING TO THE EULAS MAY BE FOUND IN AN
ELECTRONIC FILE INCLUDED ON THE USER DOCUMENTATION CD-ROM INCLUDED HEREWITH; HOWEVER, ALL SOFTWARE AND DOCUMENTATION DEVELOPED OR CREATED BY OR
FOR TOSHIBA TEC CORPORATION (“TTEC”) ARE PROPRIETARY PRODUCTS OF TTEC AND
ARE PROTECTED BY COPYRIGHT LAWS, INTERNATIONAL TREATY PROVISIONS, AND
OTHER APPLICABLE LAWS.
Grant of License
This is a legal agreement between you, the end-user (“You”), and TTEC and its suppliers. This software,
fonts (including their typefaces) and related documentation (“Software”) is licensed for use with the system
CPU on which it was installed (“System”) in accordance with the terms contained in this Agreement. This
Software is proprietary to TTEC and/or its suppliers.
TTEC and its suppliers disclaim responsibility for the installation and/or use of this Software, and for the
results obtained by using this Software. You may use one copy of the Software as installed on a single System, and may not copy the Software for any reason except as necessary to use the Software on a single System. Any copies of the Software shall be subject to the conditions of this Agreement.
You may not, nor cause or permit any third party to, modify, adapt, merge, translate, reverse compile, reverse
assemble, or reverse engineer the Software. You may not use the Software, except in accordance with this
license. No title to the intellectual property in the Software is transferred to you and full ownership is
retained by TTEC or its suppliers. Source code of the Software is not licensed to you. You will be held
legally responsible for any copyright infringement, unauthorized transfer, reproduction or use of the Software or its documentation.
Term
This license is effective until terminated by TTEC or upon your failure to comply with any term of this
Agreement. Upon termination, you agree to destroy all copies of the Software and its documentation.
You may terminate this license at any time by destroying the Software and its documentation and all copies.
Disclaimer of Warranty
THIS SOFTWARE IS PROVIDED “AS IS” WITHOUT WARRANTY OF ANY KIND, EITHER
EXPRESS OR IMPLIED, INCLUDING, BUT NOT LIMITED TO, THE IMPLIED WARRANTIES OF
MERCHANTABILITY, FITNESS FOR A PARTICULAR PURPOSE, TITLE, AND NON-INFRINGEMENT. TTEC AND ITS SUPPLIERS DISCLAIM ANY WARRANTY RELATING TO THE QUALITY
AND PERFORMANCE OF THE SOFTWARE. IF THE SOFTWARE PROVES DEFECTIVE, YOU (AND
NOT TTEC OR ITS SUPPLIERS) SHALL BE RESPONSIBLE FOR THE ENTIRE COST OF ALL NECESSARY SERVICING, REPAIR OR CORRECTION. TTEC AND ITS SUPPLIERS DO NOT WARRANT
THAT THE FUNCTIONS CONTAINED IN THE SOFTWARE WILL MEET YOUR REQUIREMENTS
OR THAT THE OPERATION OF THE SOFTWARE WILL BE UNINTERRUPTED OR ERROR FREE.
ALL INFORMATION CONTAINED HEREIN THAT IS PROVIDED BY TTEC AND ITS AFFILIATES
PURSUANT TO A EULA IS PROVIDED “AS IS” WITHOUT WARRANTY OF ANY KIND, EITHER
EXPRESS OR IMPLIED.
Limitation of Liability
IN NO EVENT WILL TTEC OR ITS SUPPLIERS BE LIABLE TO YOU FOR ANY DAMAGES,
WHETHER IN CONTRACT, TORT, OR OTHERWISE (EXCEPT PERSONAL INJURY OR DEATH
RESULTING FROM NEGLIGENCE ON THE PART OF TTEC OR ITS SUPPLIERS), INCLUDING
WITHOUT LIMITATION ANY LOST PROFITS, LOST DATA, LOST SAVINGS OR OTHER INCIDENTAL, SPECIAL OR CONSEQUENTIAL DAMAGES ARISING OUT OF THE USE OR INABILITY TO
2 Printing Guide — SOFTWARE LICENSE AGREEMENT
Page 3

USE THE SOFTWARE, EVEN IF TTEC OR ITS SUPPLIERS HAVE BEEN ADVISED OF THE POSSIBILITY OF SUCH DAMAGES, NOR FOR THIRD PARTY CLAIMS.
U.S. Government Restricted Rights
The Software is provided with RESTRICTED RIGHTS. Use, duplication or disclosure by the U.S. Government is subject to restrictions set forth in subdivision (b) (3) (ii) or (c) (i) (ii) of the Rights in Technical Data
and Computer Software Clause set forth in 252.227-7013, or 52.227-19 (c) (2) of the DOD FAR, as appropriate. Contractor/Manufacturer is TOSHIBA TEC Corporation, 2-4-1, Shibakoen, Minato-ku, Tokyo,
105-8524, Japan.
General
You may not sublicense, lease, rent, assign or transfer this license or the Software. Any attempt to sublicense, lease, rent, assign or transfer any of the rights, duties or obligations hereunder is void. You agree that
you do not intend to, and will not ship, transmit (directly or indirectly) the Software, including any copies of
the Software, or any technical data contained in the Software or its media, or any direct product thereof, to
any country or destination prohibited by the United States Government. This license shall be governed by
the laws of Japan or, at the election of a Supplier of TTEC concerned with a dispute arising from or relating
to this Agreement, the laws of the Country designated from time to time by the relevant Supplier of TTEC. If
any provision or portion of this Agreement shall be found to be illegal, invalid or unenforceable, the remaining provisions or portions shall remain in full force and effect.
YOU ACKNOWLEDGE THAT YOU HAVE READ THIS LICENSE AGREEMENT AND THAT YOU
UNDERSTAND ITS PROVISIONS. YOU AGREE TO BE BOUND BY ITS TERMS AND CONDITIONS. YOU FURTHER AGREE THAT THIS LICENSE AGREEMENT CONTAINS THE COMPLETE
AND EXCLUSIVE AGREEMENT BETWEEN YOU AND TTEC AND ITS SUPPLIERS AND SUPERSEDES ANY PROPOSAL OR PRIOR AGREEMENT, ORAL OR WRITTEN, OR ANY OTHER COMMUNICATION RELATING TO THE SUBJECT MATTER OF THIS LICENSE AGREEMENT.
TOSHIBA TEC Corporation, 2-4-1, Shibakoen, Minato-ku, Tokyo, 105-8524, Japan.
Printing Guide — SOFTWARE LICENSE AGREEMENT 3
Page 4

TRADEMARKS AND COPYRIGHT
Trademarks
• The official name of Windows 98 is Microsoft Windows 98 Operating System.
• The official name of Windows Me is Microsoft Windows Me Operating System.
• The official name of Windows 2000 is Microsoft Windows 2000 Operating System.
• The official name of Windows XP is Microsoft Windows XP Operating System.
• The official name of Windows Server 2003 is Microsoft Windows Server 2003 Operating System.
• Microsoft, Windows, Windows NT, and the brand names and product names of other Microsoft prod-
ucts are trademarks of Microsoft Corporation in the US and other countries.
• Apple, AppleTalk, Macintosh, Mac, TrueType, and LaserWriter are trademarks of Apple Computer Inc.
in the US and other countries.
• Postscript is a trademark of Adobe Systems Incorporated.
• Netscape is a trademark of Netscape Communications Corporation.
• IBM, AT and AIX are trademarks of International Business Machines Corporation.
• NOVELL, NetWare, and NDS are trademarks of Novell, Inc.
• Other company names and product names in this manual are the trademarks of their respective compa-
nies.
Copyright
© 2003 TOSHIBA TEC CORPORATION All rights reserved
Under the copyright laws, this manual cannot be reproduced in any form without prior written permission of
TTEC. No patent liability is assumed, however, with respect to the use of the information contained herein.
4 Printing Guide — TRADEMARKS AND COPYRIGHT
Page 5

Preface
Thank you for purchasing e-STUDIO4511 Series, e-STUDIO450 Series, or e-STUDIO280
Series Multifunctional Digital Systems. This guide provides instructions on how to set up your
computer and print to the equipment. Read this guide before printing to your e-STUDIO4511
Series, e-STUDIO450 Series, or e-STUDIO280 Series. Keep this guide within easy reach, and
use it to configure an environment that makes best of the e-STUDIO’s functions.
About This Guide
This manual describes how to install the user software for the printer functions, set up printing,
and manage print jobs from Microsoft Windows, Apple Mac OS, and UNIX computers.
For information about setting up network servers and clients to use the e-STUDIO4511 Series,
e-STUDIO450 Series, or e-STUDIO280 Series, see the Network Administrator’s Guide. For
general information on using the copier, your computer, your application software, or your network, see the manuals that accompany those products.
For e-STUDIO450 Series and e-STUDIO280 Series: This manual applies the equipment
that either the Printer Kit or Printer/Scanner Kit is installed.
Conventions
• The term “this equipment” in this manual refers to the e-STUDIO4511 Series,
e-STUDIO450 Series, or e-STUDIO280 Series.
• The term “e-Filing” in this manual is an abbreviation of “electronic filing”.
About Other Manuals
Other guides are included in the User Documentation CD-ROM provided with this system:
Network Operator’s Guide—explains how to set up and manage network functions using the
TopAccess user functions — such as network job management and template registration — from
client computers via a network.
Network Administrator’s Guide— explains the basic configuration and administration of the
equipment in supported platform and network environments. It also includes guidelines for setting up network servers to provide various network services.
e-Filing Guide—explains how to operate the e-Filing features by using the TWAIN driver, File
Downloader and e-Filing web utility.
Network Fax Guide—explains how to use the network fax features that enable users to operate
fax and internet fax sending from a client computer via network.
Printing Guide — Preface 5
Page 6

Table of Contents
SOFTWARE LICENSE AGREEMENT ........................................................... 2
TRADEMARKS AND COPYRIGHT................................................................ 4
Preface ...........................................................................................................5
About This Guide ....................................................................................................5
Conventions ......................................................................................................5
About Other Manuals..............................................................................................5
Table of Contents ........................................................................................... 6
1. Overview .........................................................................................................13
Features and Functions................................................................................14
About the Client CD-ROM ............................................................................15
For Windows.........................................................................................................15
For Macintosh .......................................................................................................16
For UNIX...............................................................................................................16
2. Installing Client Software ..............................................................................17
Installing Client Software for Windows ......................................................... 18
About Client Software for Windows ......................................................................18
Planning for Installation ........................................................................................18
Before Installing Client Software .....................................................................18
When GL-DocMon Has Been Installed .....................................................18
When TopAccessDocMon Has Been Installed..........................................18
Types of Printer Drivers ..................................................................................19
System Requirements.....................................................................................19
About Installation Procedure ...........................................................................20
Parallel Port Connection............................................................................20
USB Connection........................................................................................21
Local Area Network over TCP/IP ..............................................................21
Internet Connection ...................................................................................23
Novell Printing ...........................................................................................24
Installing the Client Software for Parallel Printing .................................................25
Installation for Parallel Printing Using the Installer..........................................25
Installation for Parallel Printing by Plug and Play............................................31
Windows 98/Me.........................................................................................31
Windows 2000...........................................................................................34
Windows XP/Server 2003 .........................................................................37
Installation for Parallel Printing by Add Printer Wizard....................................40
Windows 98/Me.........................................................................................40
Windows NT 4.0 ........................................................................................44
Windows 2000/XP/Server 2003 ................................................................48
Installing the Client Software for USB Printing .....................................................53
Installation for USB Printing by Plug and Play ................................................54
Windows 98/Me.........................................................................................54
Windows 2000...........................................................................................60
Windows XP/Server 2003 .........................................................................63
Installing the Client Software for LPR Printing......................................................66
Installation for LPR Printing Using the Installer ...............................................66
Windows NT 4.0 ........................................................................................66
Windows 2000/XP/Server 2003 ................................................................69
Installation for LPR Printing by Add Printer Wizard.........................................74
Windows NT 4.0 ........................................................................................75
Windows 2000/XP/Server 2003 ................................................................80
Installing the Client Software for SMB Printing .....................................................89
Installation for SMB Printing Using the Installer ..............................................89
6 Printing Guide — Table of Contents
Page 7

Using the Discovery Functions to Specify the SMB Port...........................95
Installation for SMB Printing by Point and Print ............................................100
Windows 98/Me.......................................................................................101
Windows NT 4.0/2000/XP/Server 2003...................................................103
Installation for SMB Printing by Add Printer Wizard......................................104
Windows 98/Me.......................................................................................104
Windows NT 4.0 ......................................................................................107
Windows 2000/XP/Server 2003 ..............................................................112
Installing the Client Software for Peer-to-Peer Printing ......................................118
Installation and Configuration of Peer-to-Peer Utility ....................................118
Installing the Client Software for IPP Printing .....................................................127
Installation for IPP Printing by Add Printer Wizard........................................127
Installing the Client Software for Novell Printing.................................................132
Installation for Novell Printing Using the Installer..........................................133
Installation for Novell Printing by Point and Print ..........................................140
Windows 98/Me.......................................................................................141
Windows NT 4.0/2000/XP/Server 2003...................................................145
Installation for Novell Printing by Add Printer Wizard....................................148
Windows 98/Me.......................................................................................148
Windows NT 4.0 ......................................................................................151
Windows 2000/XP/Server 2003 ..............................................................156
Uninstalling the Client1 Software ........................................................................162
When Installed Using the Installer.................................................................162
When Installed Using Add Printer Wizard .....................................................167
Installing Client Software for Macintosh .....................................................169
About Client Software for Macintosh ..................................................................169
Planning for Installation ......................................................................................169
System Requirements...................................................................................169
Installing the Printer on Mac OS 8.6/9.x .............................................................169
Installing the Macintosh PPD File .................................................................169
Configuring the Printer on Mac OS 8.6/9.x ...................................................170
Installing the Printer on Mac OS X 10.2.4 or later ..............................................176
Installing the Macintosh PPD File .................................................................176
Configuring the Printer on Mac OS X............................................................177
Configuring the Installable Options ...............................................................182
Installing Client Software for UNIX ............................................................. 185
About Client Software for UNIX ..........................................................................185
Planning for Installation ......................................................................................186
System Requirements...................................................................................186
Installing the Printer on UNIX .............................................................................186
Installing the UNIX Filters..............................................................................186
Configuring the Print Queue..........................................................................187
Creating a Print Queue Using est4511add/estbwadd .............................188
Creating a Print Queue Manually ............................................................188
Changing the Default Values ........................................................................192
Deleting the Print Queue...............................................................................193
Deleting a Print Queue Using est4511rm/estbwrm .................................193
Deleting a Print Queue Manually.............................................................193
Installing the CUPS.......................................................................................195
Other Installation Procedures .....................................................................198
Installing the Client Software from TopAccess ...................................................198
3. Printing..........................................................................................................203
Printing from Windows................................................................................ 204
Printing Guide — Table of Contents 7
Page 8

Before Using the Printer Driver...........................................................................204
Configuring the Options ................................................................................204
Configuring the Options Manually ...........................................................205
Configuring the Options Automatically ....................................................206
Setting the Department Code........................................................................208
Copying the PPD File for Windows ...............................................................210
Printing from Application.....................................................................................211
Considerations and Limitations.....................................................................211
How to Print...................................................................................................211
Setting Up Print Options .....................................................................................212
How to Setup.................................................................................................213
Setting Initial Values of Print Options ......................................................213
Setting Print Options for Each Print Job..................................................213
Setting Print Options Using Profiles ........................................................213
Print Options .................................................................................................216
Setup Tab................................................................................................218
Print Job Tab ...........................................................................................224
Layout Tab - Standard Window...............................................................226
Layout Tab - Booklet Window .................................................................230
Layout Tab - Multiple Pages per Sheet Window .....................................233
Effect Tab ................................................................................................235
Image Quality Tab ...................................................................................239
Font Tab ..................................................................................................244
Configuration Tab....................................................................................246
About Tab................................................................................................249
Printing with Extended Print Functionality ..........................................................249
Printing Various Print Job Types...................................................................249
Printing Scheduled Print Jobs .................................................................249
Printing Private Print Jobs .......................................................................250
Printing Proof Print Jobs..........................................................................251
Creating An Overlay File .........................................................................251
Storing to e-Filing ....................................................................................252
Printing with Various Layout and Finishing Options......................................253
Sort Printing.............................................................................................253
Enlarge/Reduce Printing .........................................................................255
Printing Color Document in Gray scale ...................................................255
Stapling and Hole Punching ....................................................................256
Printing on Both Sides of a Sheet ...........................................................257
Printing or Inserting Sheets from Different Paper Sources .....................258
Interleaving Pages...................................................................................259
Printing Booklets .....................................................................................260
Printing Several Reduced Pages per Sheet ............................................263
Using Watermarks...................................................................................265
Printing with an Overlay File....................................................................267
Printing on a Tab Paper ..........................................................................269
Printing from Macintosh..............................................................................271
Printing from an Application on Mac OS 8.6 to 9.x .............................................271
How to Print from Mac OS 8.6 or 9.x ............................................................271
Selecting the Printer in the Chooser........................................................271
Setting Options and Printing from Macintosh Computers .......................272
Print Options for Page Setup Dialog on Mac OS 8.6/9.x ..............................273
Page Attributes........................................................................................273
Print Options for Print Dialog on Mac OS 8.6/9.x..........................................274
General....................................................................................................274
Background Printing ................................................................................275
8 Printing Guide — Table of Contents
Page 9

Color Matching ........................................................................................276
Cover Page .............................................................................................276
Font Settings ...........................................................................................277
Job Logging.............................................................................................277
Layout......................................................................................................278
Finishing Options.....................................................................................280
Printing Modes ........................................................................................283
Booklet Mode Options .............................................................................284
Watermark Options .................................................................................285
Quality .....................................................................................................286
Printing from Application on Mac OS X 10.2.4 or later .......................................288
How to Print from Mac OS X 10.2.4 or later..................................................288
Setting Options and Printing from Macintosh Computers .......................288
Print Options for Page Setup Dialog on Mac OS X 10.2.4 or later................289
Page Attributes........................................................................................290
Print Options for Print Dialog on Mac OS X 10.2.4 or later ...........................291
Copies & Pages.......................................................................................291
Layout......................................................................................................292
Duplex .....................................................................................................294
Output Options ........................................................................................295
Scheduler ................................................................................................295
Paper Handling........................................................................................296
Cover Page .............................................................................................297
Error Handling .........................................................................................298
Paper Feed..............................................................................................298
Printer Features.......................................................................................299
Printing from UNIX...................................................................................... 309
Printing from an Application................................................................................309
Considerations and Limitations.....................................................................309
Printing using LP Command .........................................................................309
Generic “lp” and “lptap” Options....................................................................309
Copies .....................................................................................................309
Title..........................................................................................................309
General Options............................................................................................310
Print Language ........................................................................................310
Color Mode..............................................................................................310
Stapling ...................................................................................................310
Output Bin ...............................................................................................311
Hole Punching .........................................................................................312
Media Type..............................................................................................312
Paper Source ..........................................................................................313
Duplexing ................................................................................................313
Paper Sizes .............................................................................................313
Printing Modes ........................................................................................314
Department Code ....................................................................................315
Smoothing ...............................................................................................315
Distinguish Thin Lines .............................................................................315
Do not Print Blank Pages ........................................................................316
Toner Save..............................................................................................316
Booklet Modes.........................................................................................316
Page Layout ............................................................................................317
Center Margin..........................................................................................318
Outer Margin ...........................................................................................318
Orientation...............................................................................................318
Font Pitch ................................................................................................319
Printing Guide — Table of Contents 9
Page 10

Page Length ............................................................................................319
Pure Black and Pure Gray.......................................................................319
PCL5e Specific Options ................................................................................320
Text Wrapping .........................................................................................320
Left Margin ..............................................................................................320
Right Margin ............................................................................................320
Top Margin ..............................................................................................321
Text Length .............................................................................................321
Banner Page ...........................................................................................321
PS Specific Options ......................................................................................323
Black Over Print ......................................................................................323
Other Printing Methods............................................................................... 324
FTP Printing........................................................................................................324
Email Printing......................................................................................................325
4. Monitoring Print Jobs ..................................................................................327
Monitoring Print Jobs with TopAccessDocMon ..........................................328
Features and Functions ......................................................................................328
How to Use TopAccessDocMon .........................................................................328
Running TopAccessDocMon.........................................................................328
Starting TopAccessDocMon....................................................................328
Document Monitor Taskbar Menu ...........................................................329
Configuring TopAccessDocMon....................................................................329
Configuring the Start Up Options ............................................................330
Configuring the Notifications ...................................................................330
Changing the Refresh Rate.....................................................................331
Finding the Printer Address.....................................................................333
Monitoring the Printer .........................................................................................333
How to Access the TopAccessDocMon Window ..........................................333
Accessing from the Document Monitor Menu .........................................333
Accessing from the Printers File Menu....................................................334
Searching for a Printer ............................................................................335
TopAccessDocMon Window .........................................................................339
Checking Device Status ..........................................................................341
Changing Monitoring Devices .................................................................342
Adding Devices .......................................................................................342
Monitoring Queues ..................................................................................347
Event Notification ..........................................................................................350
5. Troubleshooting...........................................................................................351
When Printing cannot be Performed .......................................................... 352
Printer Driver Errors.................................................................................... 354
Printer Driver Installation Error Messages ..........................................................354
Setup Needs to Copy Windows NT Files ......................................................354
Client Software CD Now Required................................................................354
File *.DRV on Client CD Count Not Be Found ..............................................354
Location Does Not Contain Information About Your Hardware.....................354
This Port is Currently in Use .........................................................................354
Problem with the Current Printer Setup ........................................................355
Printer Driver General Errors ..............................................................................355
Driver Mapped to Wrong Port .......................................................................355
Command Line Options Not Processed........................................................355
Cannot Remember Document Password......................................................356
Retrieval of Printer Configuration Failed .......................................................356
10 Printing Guide — Table of Contents
Page 11

Cannot Print a Job Using SMB .....................................................................356
Cannot Print a Job as Expected Using PS Printer Driver .............................356
TopAccessDocMon Errors.......................................................................... 357
TopAccessDocMon Error Conditions..................................................................357
The Device is Not Responding......................................................................357
Cannot View Job in TopAccessDocMon Print Queue...................................357
Cannot Interpret TopAccessDocMon Messages/Warnings/Errors................357
TopAccessDocMon Error Messages ..................................................................358
TopAccessDocMon Notification Messages...................................................358
TopAccessDocMon Printer Status Messages...............................................359
Device Status Indicators .....................................................................................364
6. Appendix.......................................................................................................367
Managing Fonts with Font Manager ...........................................................368
Installing Font Manager ......................................................................................368
Searching Fonts..................................................................................................368
Installing Fonts in Windows ................................................................................369
Uninstalling Fonts in Windows............................................................................369
Removing Fonts from the Computer...................................................................369
Displaying Font Preview .....................................................................................370
Creating a Font Group........................................................................................370
Sorting Fonts in the List ......................................................................................371
Sorting by Name ...........................................................................................371
Sorting by Font Type.....................................................................................371
Inverting the alphabetical Order....................................................................371
Internal Fonts List ....................................................................................... 372
Internal PCL Fonts List .......................................................................................372
Internal PS Fonts List .........................................................................................373
7. INDEX ............................................................................................................375
Printing Guide — Table of Contents 11
Page 12

12 Printing Guide — Table of Contents
Page 13

1. OVERVIEW
Printing Guide — 1. Overview 13
Page 14

Features and Functions
For e-STUDIO450 Series and e-STUDIO280 Series:
The printing features are available only when the Printer Kit or Printer/Scanner Kit is installed.
Extensive Client Platform Support
This equipment supports printing from IBM-compatible PC, Macintosh, and Unix workstations.
Not all features are supported on all platforms, however.
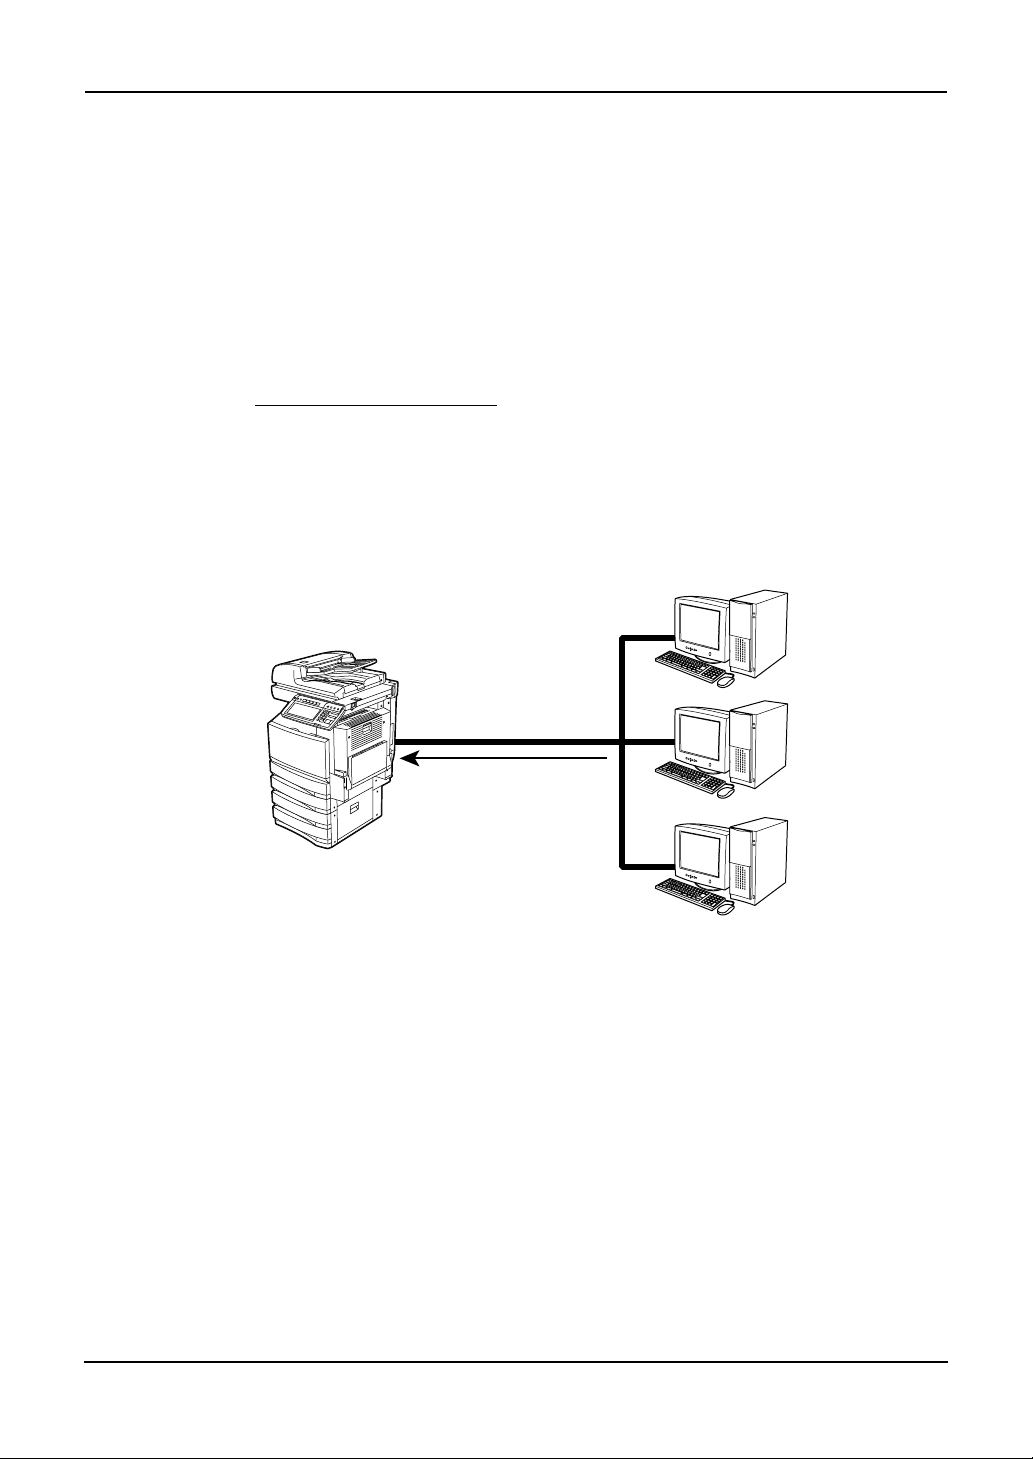
Various Port Options
You can map this equipment to print to a SMB, Peer-to-Peer, IPP, or LPR port.
Multiple Job Types
Job Types refer to the way this equipment handles a print job.
• Normal mode requires no special handling and is the most frequently used printing mode.
• Scheduled Print lets you specify the time and date at which to print a job.
• Private Print mode allows you to hold a job in the print queue until you enter a Document
Identification Number (DIN) at the copier front panel to print the job.
• Proof Print mode prints the first copy of a multi-copy job then awaits your approval before
printing the remaining copies.
• Overlay Image File prints a document element, such as text or graphics, to a file for superim-
posing on other documents.
Professional Finishing Options
Depending on the type of finishing units you have installed on this equipment, you can choose to
sort, group, fold and staple your documents (including saddle-stitching) and punch binding holes
along the top or side edge.
Sophisticated Document Layout and Assembly Options
You can choose whether to print your document as you have set it up in the application, or to
impose printer-driven document layout options such as printing in Book Format or printing Multiple Pages per Sheet.
Additionally, the printer drivers provide the ability to print selected pages on different media.
This includes printing front and back covers, inserting sheets at predefined positions within the
document, or interleaving pages so that every other page is inserted blank or printed on a different type of media.
Watermark and Image Overlay Support
Watermarks are a great way to subtly convey useful information about your printed documents.
Common watermarks are “Confidential,” “Draft,” and “Original.” Several watermarks have
been pre-defined for use with your documents, or you can create and save your own custom
watermarks.
Watermarks consist of text. Image Overlays can be any combination of text, graphics or other
document elements.
Printing watermarks consumes fewer resources than using Image Overlays, so you should use
watermarks wherever possible, particularly when printing speed is an issue.
14 Printing Guide — Features and Functions
Page 15

About the Client CD-ROM
For Windows
The contents of the Client1 CD-ROM:
Client Software Installer
•
[Client1 CD-ROM]:\setup.exe
This is the setup program to install the printer drivers, TopAccessDocMon, and Font Manager on your computer.
For e-STUDIO450 Series and e-STUDIO280 Series:
Font Manager is not provided in the Client1 CD-ROM for e-STUDIO450 Series and
e-STUDIO280 Series. The Font Manager is provided in the Font CD-ROM that comes with
the Printer Kit or Printer/Scanner Kit.
PCL5c Printer Drivers (Color)
•
[Client1 CD-ROM]:\9X_ME\PCL5C\<language>\
This includes the setup files to install the PCL5c printer driver on the Windows 98/Me for
each language version by Add Printer Wizard or Plug and Play.
• [Client1 CD-ROM]:\NT\PCL5C\<language>\
This includes the setup files to install the PCL5c printer driver on the Windows NT 4.0 for
each language version by Add Printer Wizard.
• [Client1 CD-ROM]:\W2K_XP_2003\PCL5C\<language>\
This includes the setup files to install the PCL5c printer driver on the Windows 2000/XP/
Server 2003 for each language version by Add Printer Wizard or Plug and Play.
For e-STUDIO450 Series and e-STUDIO280 Series:
The PCL5c Printer Driver is not available for e-STUDIO450 Series and e-STUDIO280 Series.
PCL6 Printer Drivers (Black/White)
•
[Client1 CD-ROM]:\9X_ME\PCL6\<language>\
This includes the setup files to install the PCL6 printer driver on the Windows 98/Me for
each language version by Add Printer Wizard or Plug and Play.
• [Client1 CD-ROM]:\NT\PCL6\<language>\
This includes the setup files to install the PCL6 printer driver on the Windows NT 4.0 for
each language version by Add Printer Wizard.
• [Client1 CD-ROM]:\W2K_XP_2003\PCL6\<language>\
This includes the setup files to install the PCL6 printer driver on the Windows 2000/XP/
Server 2003 for each language version by Add Printer Wizard or Plug and Play.
PS3 Printer Drivers (PostScript)
•
[Client1 CD-ROM]:\9X_ME\PS\<language>\
This includes the setup files to install the PS3 printer driver on the Windows 98/Me for each
language version by Add Printer Wizard or Plug and Play.
• [Client1 CD-ROM]:\NT\PS\<language>\
This includes the setup files to install the PS3 printer driver on the Windows NT 4.0 for each
language version by Add Printer Wizard.
• [Client1 CD-ROM]:\W2K_XP_2003\PS\<language>\
This includes the setup files to install the PS3 printer driver on the Windows 2000/XP/Server
2003 for each language version by Add Printer Wizard or Plug and Play.
Printing Guide — About the Client CD-ROM 15
Page 16

Peer-to-Peer Utility for Windows 98/Me
•
[Client1 CD-ROM]:\PtoP\
This includes the setup files to install the Peer-to-Peer Utility on the Windows 98/Me.
USB Driver for Windows 98
•
[Client1 CD-ROM]:\USB\<language>\
This includes the setup files to install the USB driver on the Windows 98 for each language
version.
Printer Driver Setup files (Zip Compressed)
•
[Client1 CD-ROM]:\PandP\<language>\
This includes the compressed zip files that contain the setup files to install each printer
driver for each language version.
SUPPLEMENT:
For Macintosh
SUPPLEMENT:
For UNIX
• Further information about user software for Windows is described in next chapter.
P.18 "About Client Software for Windows".
The contents of the Client1 CD-ROM:
Macintosh PPD files
•
[Client1 CD-ROM]:MacPPD:<language>:
This includes the PPD file for Apple LaserWriter8 to enable printing from Macintosh on the
Mac OS 8.6, Mac OS 9.x, and Mac OS X 10.1/10.2 Classic Mode, the PPD file to enable
printing from Macintosh on the Mac OS X 10.2.4 or later.
• Further information about user software for Macintosh is described in next chapter.
P.169 "About Client Software for Macintosh".
The contents of the Admin’s Client CD-ROM:
Solaris Filter
•
[Admin’s Client CD-ROM]/SolarisFilter/<language>/
This includes the Tar file for Solaris v2.6/2.7/7.8/8/9.
HP-UX Filter
•
[Admin’s Client CD-ROM]/HP-UXFilter/<language>/
This includes the Tar file for HP-UX ver.10.20/11.x.
AIX Filter
•
[Admin’s Client CD-ROM]/AIXFilter/<language>/
This includes the Tar file for AIX 4.1.5/4.3.3/5L.
Linux Filter
•
[Admin’s Client CD-ROM]/LinuxFilter/<language>/
This includes the Tar file for Red Hat 6.2/7.1/7.2/7.3/8.0, SuSE Linux 7.0/8.1, Mandrake
Linux 7.1/9 and Turbo Linux 8.
SCO Unix Filter
•
[Admin’s Client CD-ROM]/OpenUnixFilter/<language>/
This includes the Tar file for SCO UnixWare 7 and SCO OpenUnix 8.
SUPPLEMENT: • Further information about user software for Windows is described in next chapter.
P.185 "About Client Software for UNIX".
16 Printing Guide — About the Client CD-ROM
Page 17

2. INSTALLING CLIENT SOFTWARE
Printing Guide — 2. Installing Client Software 17
Page 18

Installing Client Software for Windows
This section provides instructions for configuring the printing systems on Windows computers.
About Client Software for Windows
Printer Drivers
Printer drivers are software components that enable application programs to interact with the
printer. The e-STUDIO4511 Series comes with three printer drivers, PCL5c, PCL6, and PS3
(PostScript) printer drivers, and e-STUDIO450 Series and e-STUDIO280 Series comes with two
printer drivers, PCL6 and PS3 (PostScript) printer drivers. These printer drivers offer document
print, layout and assembly functions that are not available with many applications.
TopAccessDocMon
This utility allows you to monitor all jobs and control your own current jobs. With the notification feature enabled, TopAccessDocMon informs you of copier or printing events, such as
paper-out or drawer open, before you walk to the copier to find your job incomplete or unsuccessful.
Agfa Font Manager
This utility allows you to install and manage the TrueType fonts that are corresponding to the
internal PS fonts on the equipment.
Peer-to-Peer Utility
This utility allows you to create a Peer-to-Peer port on your computer to enable Peer-to-Peer
printing. This utility is only available for Windows 98 and Windows Me.
SUPPLEMENT:
• There is another job monitoring utility, TopAccess, which allows you to monitor and
manage your print jobs over the Internet using either Netscape Navigator or Internet
Explorer. Because TopAccess is an embedded web-based device and job management tool it does not require your installation.
For e-STUDIO450 Series and e-STUDIO280 Series:
Agfa Font Manager is separately provided in the Font CD-ROM that comes with the Printer
Kit or Printer/Scanner Kit.
Planning for Installation
This section will help you to plan an installation suited to your environment. Before installing
the client software, read this section.
Before Installing Client Software
Before installing the client software, confirm the followings to perform an appropriate installation.
— When GL-DocMon Has Been Installed
If the GL-DocMon for GL-1010 or GL-1020 has been installed, uninstall the GL-DocMon to
install the TopAccessDocMon. TopAccessDocMon can be used to monitor the GL-1010 and
GL-1020 controller.
— When TopAccessDocMon Has Been Installed
If the TopAcceessDocMon has been installed from either the e-STUDIO4511 Series Client1
CD-ROM, e-STUDIO450 Series Client1 CD-ROM, or e-STUDIO280 Series Client1 CD-ROM,
you do not have to install it from the other one. TopAccessDocMon can be used to monitor both
devices.
18 Printing Guide — Installing Client Software for Windows
Page 19

If you want to install it from the other CD-ROM, uninstall the TopAccessDocMon then install it.
When you uninstall the TopAccessDocMon, please click [No] at the dialog box that displays the
message to delete the settings for the TopAccessDocMon so that you can restore the settings
after installing new one.
Types of Printer Drivers
• The PCL5c Printer Driver — for printing color documents that use TrueType fonts, such
as a Microsoft Word.
• The PCL6 Printer Driver — for printing gray scale documents that use TrueType fonts,
such as a Microsoft Word.
• The PS3 Printer Driver — for high-graphical-content documents that use PostScript fonts
and graphics, such as Adobe PageMaker.
For e-STUDIO450 Series and e-STUDIO280 Series:
The PCL5c Printer Driver is not available for e-STUDIO450 Series and e-STUDIO280 Series.
System Requirements
To install the printer drivers and other client software on a Windows workstation, the following
is required.
Display Resolution
• 1024 x 768 dots or more
Display Color
• High Color (16bit) or higher is recommended
CPU
• Pentium 133 MHz minimum (Pentium 266 MHz or faster recommended)
Memory
• 64MB for Windows 98
• 96MB for Windows Me and Windows NT 4.0
• 128MB for Windows 2000/XP/Server 2003
The applicable computers depend on the printing systems:
LPR Printing
• Windows NT 4.0 Service Pack 6a
• Windows 2000 Service Pack 4
• Windows XP Service Pack 1
• Windows Server 2003
SMB Printing
• Windows 98 (Windows 98 Second Edition Recommended)
• Windows Me
• Windows NT 4.0 Service Pack 6a
• Windows 2000 Service Pack 4
• Windows XP Service Pack 1
• Windows Server 2003
Peer-to-Peer Printing
• Windows 98 (Windows 98 Second Edition Recommended)
• Windows Me
Printing Guide — Installing Client Software for Windows 19
Page 20
IPP Printing
• Windows 2000 Service Pack 4
• Windows XP Service Pack 1
• Windows Server 2003
About Installation Procedure
Please find the installation procedure suited to your environment from the following:
P.20 "Parallel Port Connection"
P.21 "USB Connection"
P.21 "Local Area Network over TCP/IP"
P.23 "Internet Connection"
P.24 "Novell Printing"
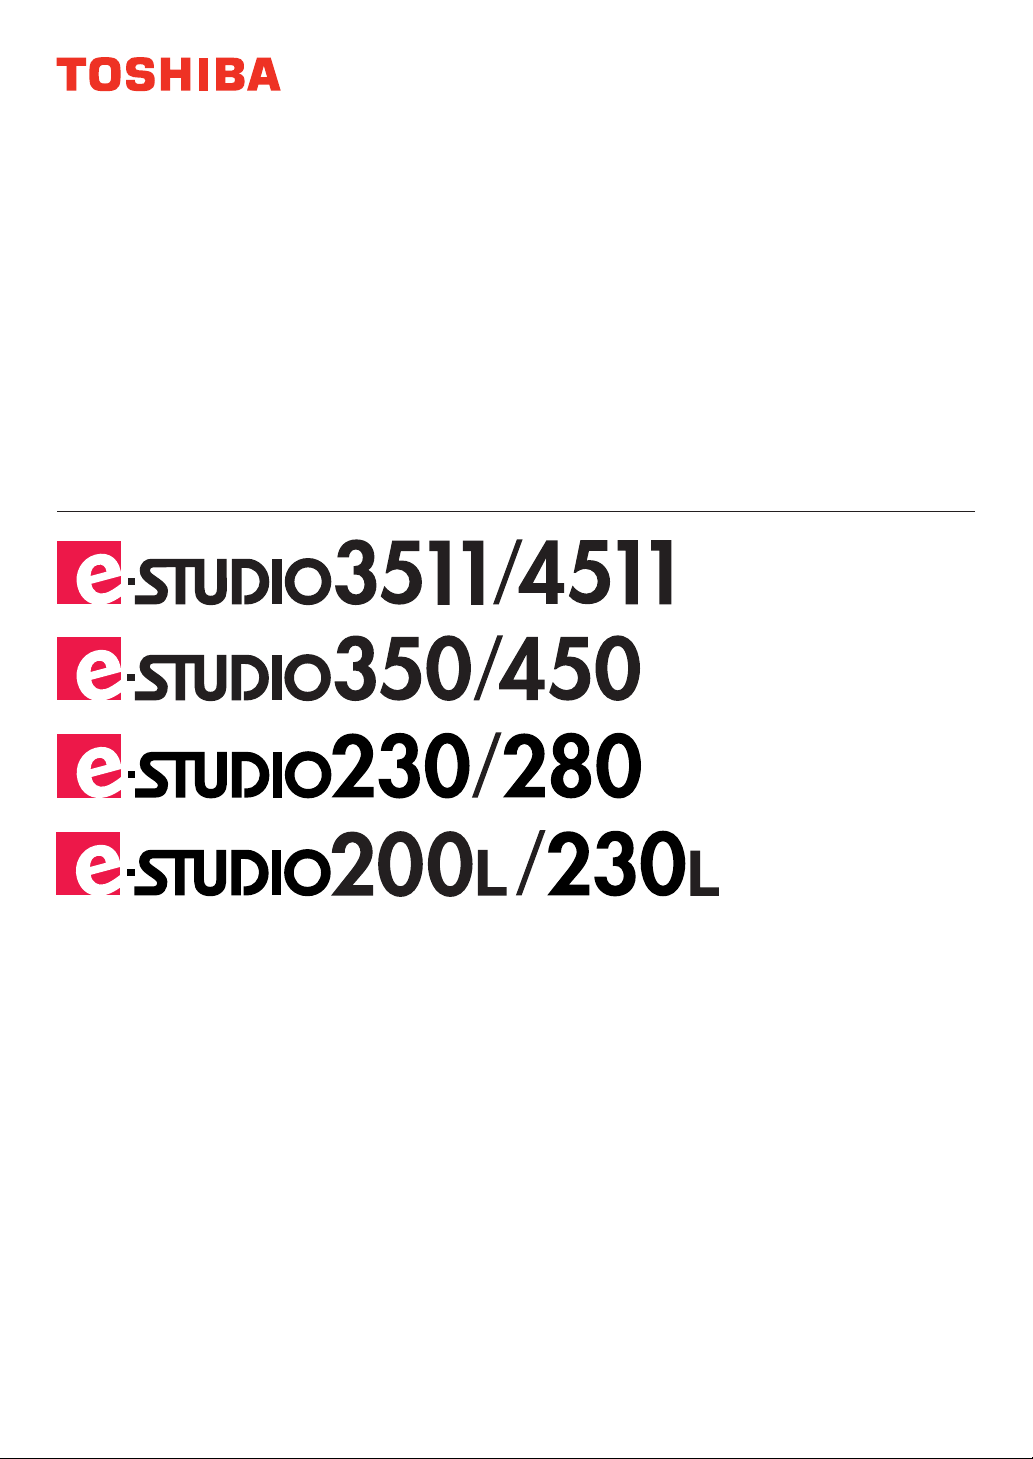
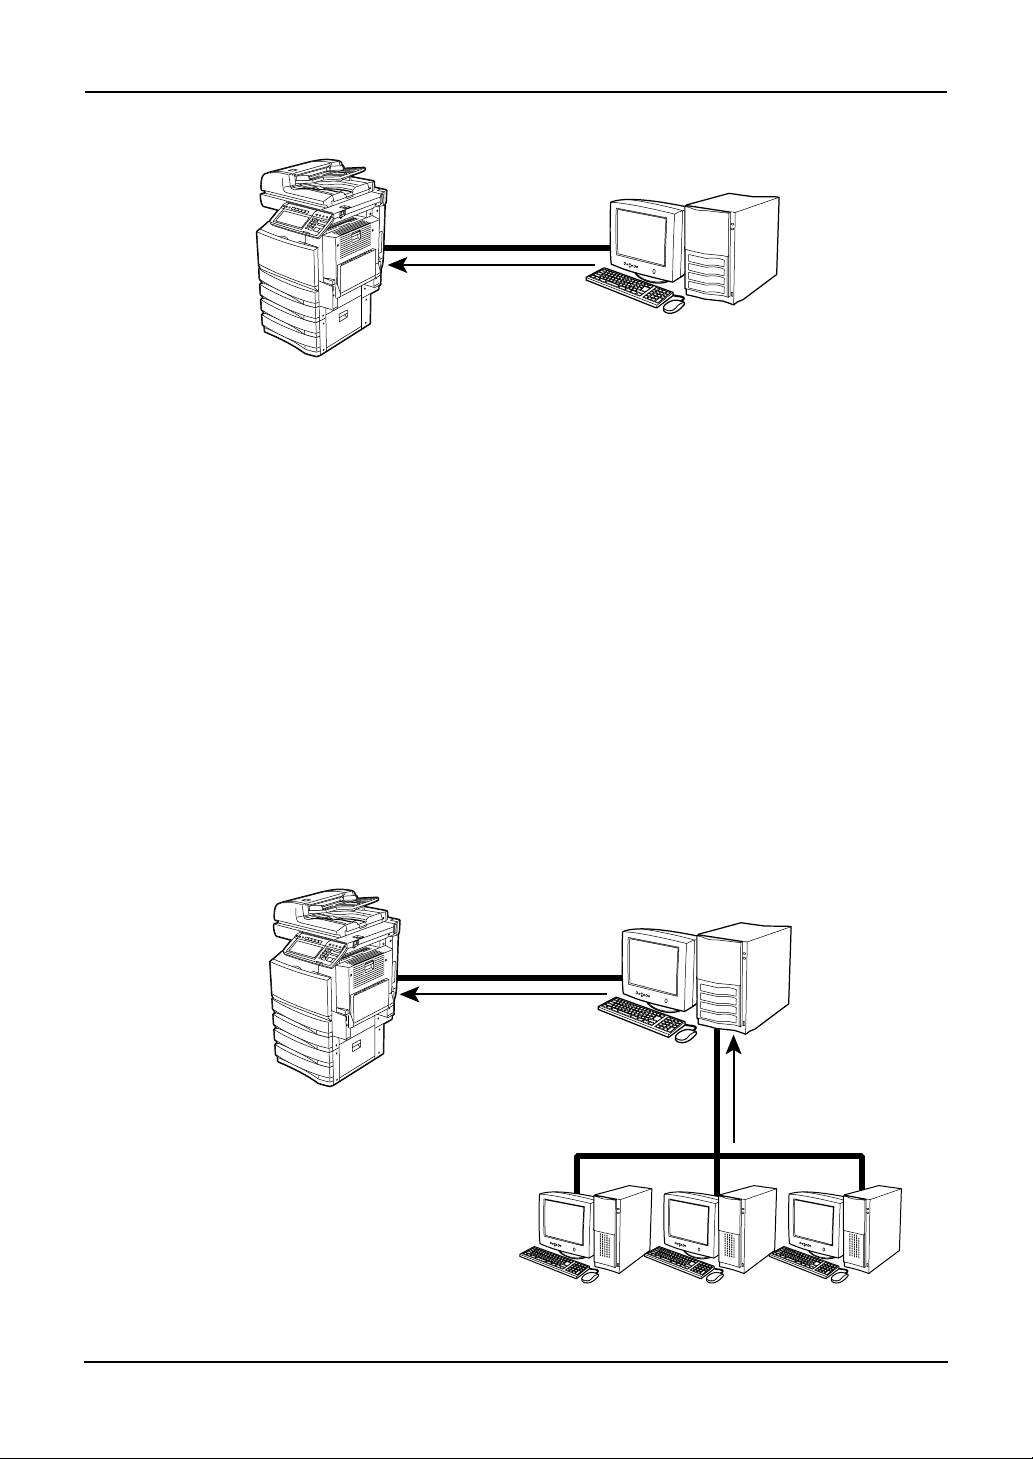
— Parallel Port Connection
Available for:
Windows 98, Windows Me, Windows NT 4.0, Windows 2000, Windows XP,
Windows Server 2003
Connecting with Parallel cable
Windows 98
Windows Me
Windows NT 4.0
Windows 2000
Setting up the LPT1 Printer
Connection
Windows XP
Windows Server 2003
When this equipment is connected to your computer with a printer cable, you can install the
printer drivers from the Client1 CD-ROM and set up the printer connection with LPT1 port.
P.25 "Installing the Client Software for Parallel Printing".
NOTE: • Parallel printing is available only when the Parallel Interface is installed.
20 Printing Guide — Installing Client Software for Windows
Page 21
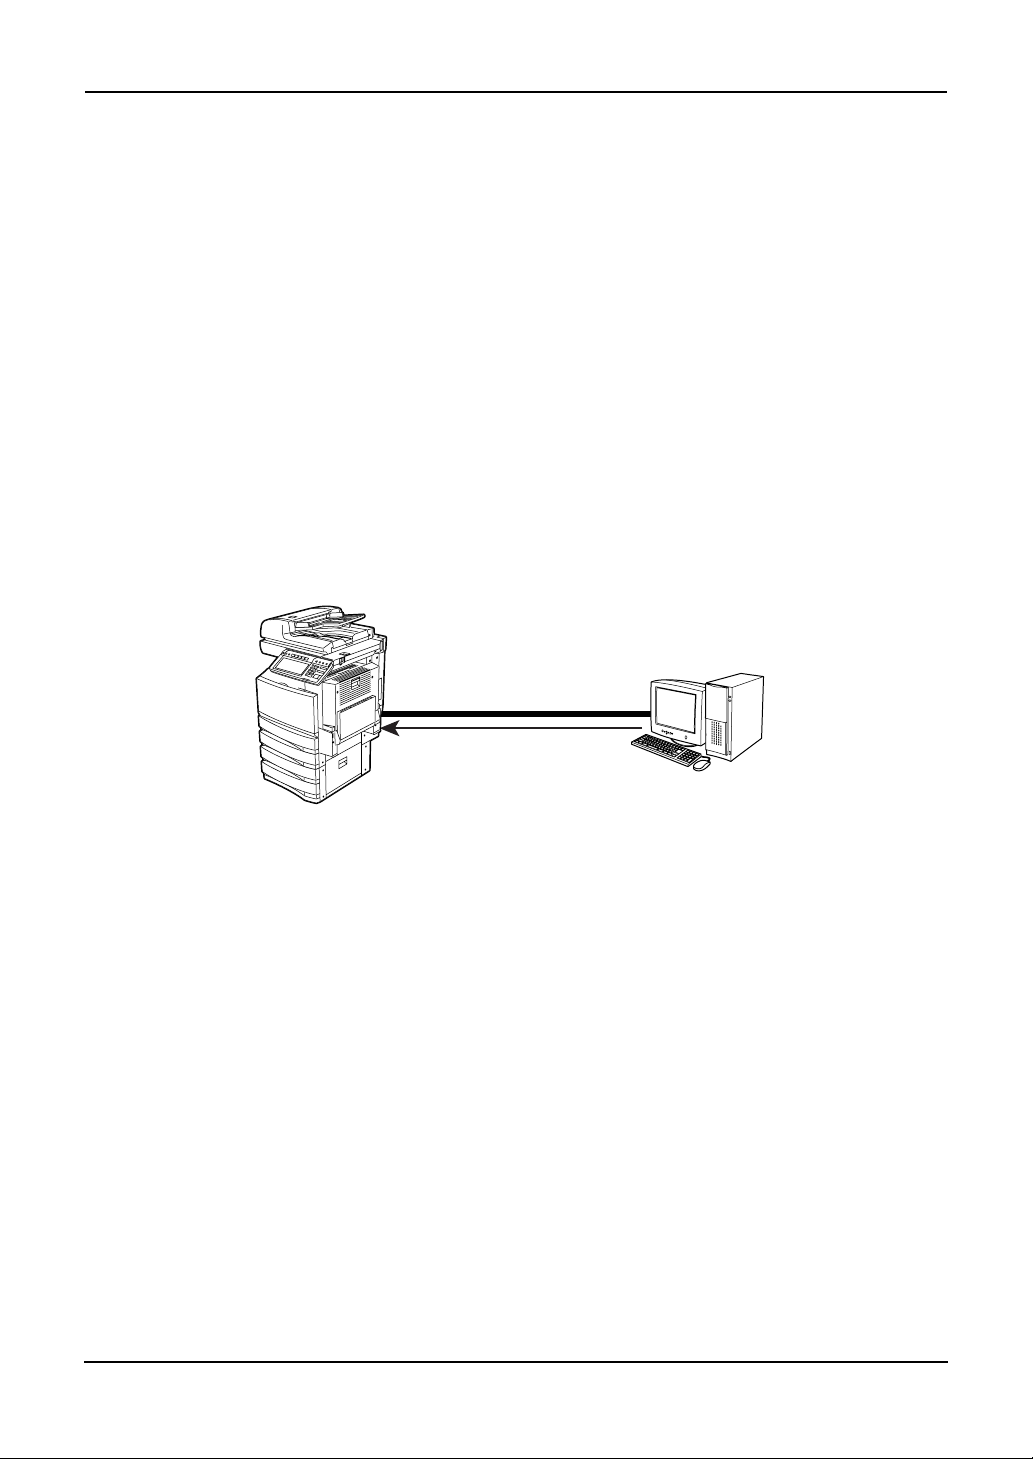
— USB Connection
Available for:
Windows 98, Windows Me, Windows 2000, Windows XP, Windows Server 2003
Connecting with USB
Windows 98
Windows Me
Windows 2000
Setting up the USB Printer
Connection
This equipment supports the USB 2.0 Full Speed connection. When this equipment is connected
to your computer with the USB cable, you must install the printer drivers using the Windows
Plug and Play functions.
Windows XP
Windows Server 2003
P.53 "Installing the Client Software for USB Printing"
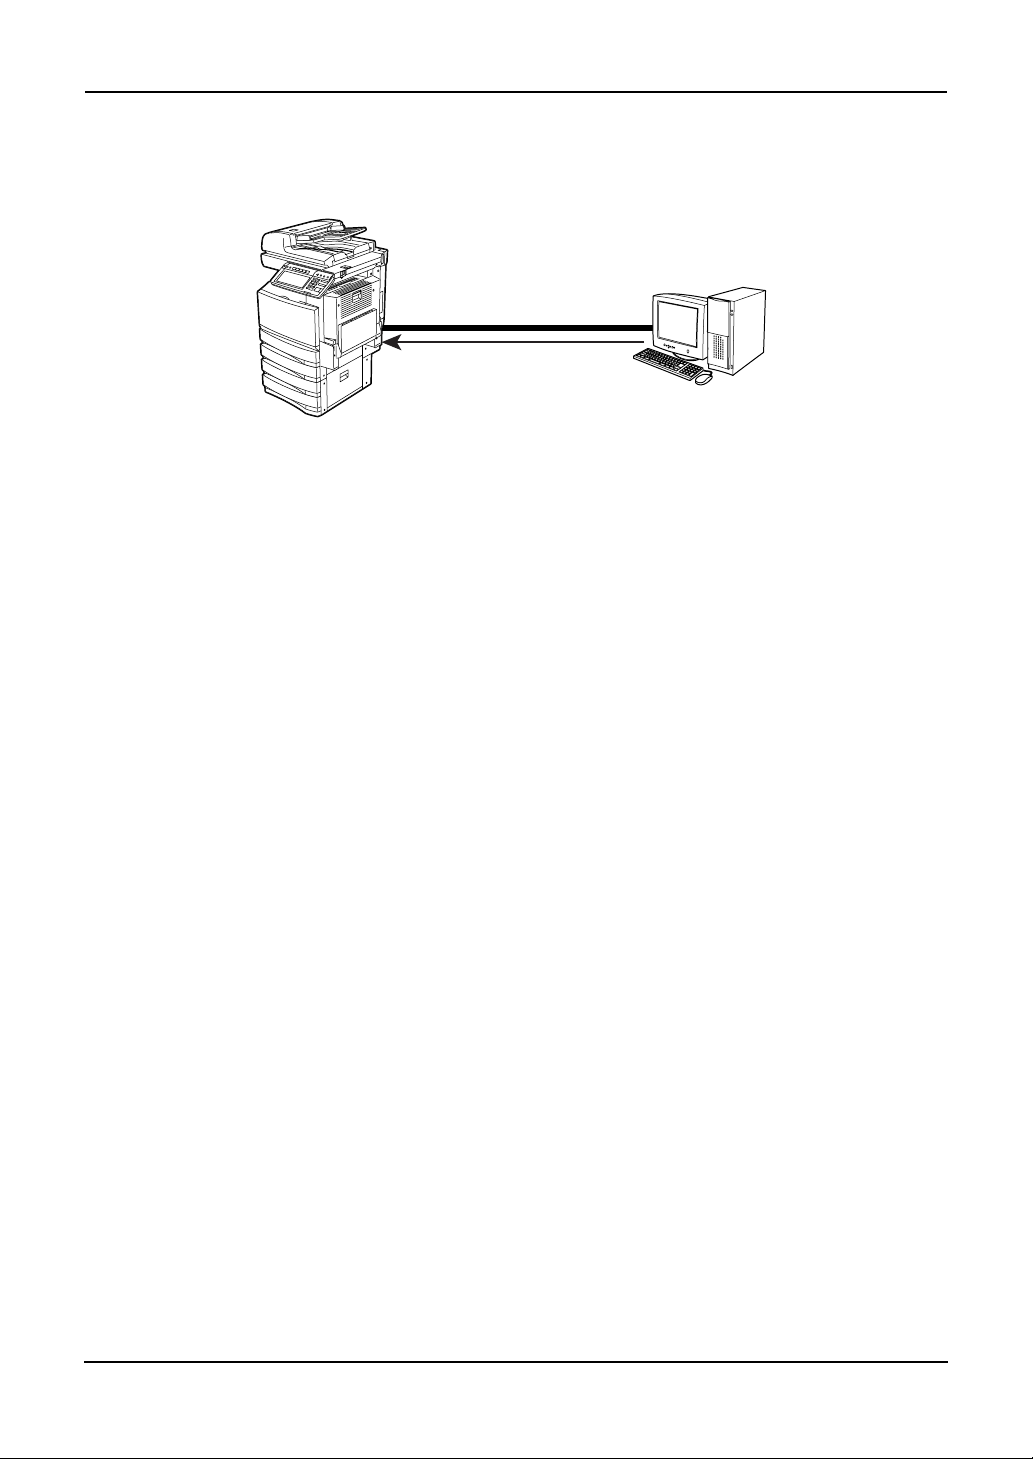
— Local Area Network over TCP/IP
When this equipment is connected to your computer in the local area network over TCP/IP, various printing methods are available such as:
- LPR Printing (only available for Windows NT 4.0/2000/XP/Server 2003)
- SMB Printing
- Using Peer-to-Peer Utility (only available for Windows 98/Me)
Some of them are applicable to your environments, the printing methods generally recommended are decided by the Windows version.
• Windows 98, Windows Me — SMB Printing or Peer-to-Peer Printing
• Windows NT 4.0, Windows 2000, Windows XP, Windows Server 2003 — LPR Printing
If you have no advance for an installation from your administrator, check these printing methods
whether they are suited to your network environments.
NOTE: • It assumes using SMB printing in a small network. If you can use the Windows NT
4.0, Windows 2000, Windows XP, or Windows Server 2003 as a print server, it is
recommended to set up for printing via Windows print server. For further information about setting up printing via a Windows print server, see the Network Adminis-
trator’s Guide.
SUPPLEMENT:
• You can also perform FTP printing over the TCP/IP network. For more information
about FTP printing, please refer to following section.
P.324 "FTP Printing"
Printing Guide — Installing Client Software for Windows 21
Page 22
LPR Printing
NOTE: • LPR printing is available only when the Network Interface Card is installed.
Available for:
Windows NT 4.0, Windows 2000, Windows XP, Windows Server 2003
Connecting over TCP/IP Network
Windows NT 4.0
Windows 2000
Windows XP
Setting up the LPR
printer connection
This equipment allows you to connect using LPR which is available for Windows NT 4.0, Windows 2000, Windows XP, and Windows Server 2003. If you use Windows NT 4.0, Windows
2000, Windows XP, or Windows Server 2003, LPR printing may be most suitable.
P.66 "Installing the Client Software for LPR Printing"
Windows Server 2003
SUPPLEMENT:
NOTE: • SMB printing is available only when the Network Interface Card is installed.
• To print with a LPR connection, this equipment must be configured to enable LPD
Print Service. Ask your administrator if the LPD Print Service is enabled.
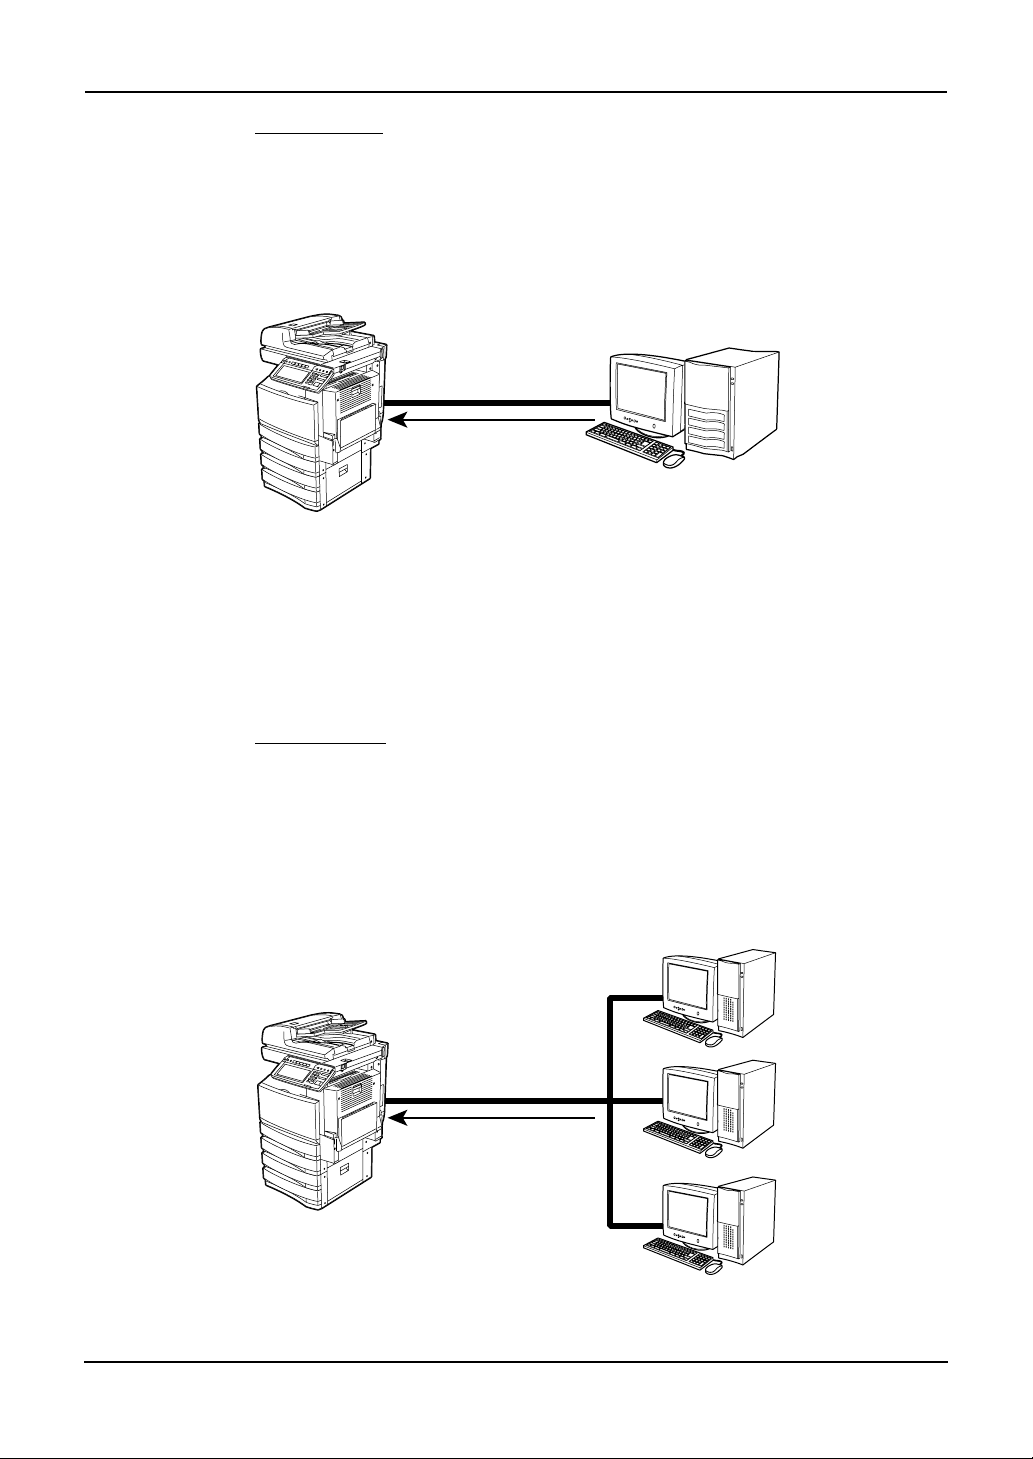
SMB Printing
Available for:
Windows 98, Windows Me, Windows NT 4.0, Windows 2000, Windows XP,
Windows Server 2003
Network Environment over TCP/IP
Setting up SMB Printer
Connection
Windows 98
Windows Me
Windows NT 4.0
Windows 2000
Windows XP
Windows Server 2003
Windows 98
Windows Me
Windows NT 4.0
Windows 2000
Windows XP
Windows Server 2003
Windows 98
Windows Me
Windows NT 4.0
Windows 2000
Windows XP
Windows Server 2003
22 Printing Guide — Installing Client Software for Windows
Page 23
This equipment can be used with an SMB printer connection that allows you to connect to this
equipment using File and Printer Sharing for Microsoft Networks service. SMB printing is the
common method used to set up the printer. However, SMB printing is not suitable for printing a
large amount of documents.
P.89 "Installing the Client Software for SMB Printing".
NOTE:
• It assumes using SMB printing in a small network. If you can use the Windows NT
4.0, Windows 2000, Windows XP, or Windows Server 2003 as a print server, it is
recommended to set up for printing via Windows print server. For further information about setting up printing via a Windows print server, see the Network Adminis-
trator’s Guide.
Using Peer-to-Peer Utility
NOTE: • Peer-to-Peer printing is available only when the Network Interface Card is installed.
Available for:
Windows 98, Windows Me
Connecting over TCP/IP Network
Windows 98
Windows Me
Windows 98
Windows Me
Setting up the TCP/IP
printer connection with
Peer-to-Peer Utility
Windows 98
Windows Me
The Peer-to-Peer Utility allows you to create the peer-to-peer printer connection port by searching this equipment in your network. When your network does not allow Windows shared printer
service, or you cannot see this equipment in your network because it is in another subnet, this
will help you to find the system and create a printer connection.
P.118 "Installing the Client Software for Peer-to-Peer Printing".
— Internet Connection
Available for:
Windows 2000, Windows XP, Windows Server 2003
Printing Guide — Installing Client Software for Windows 23
Page 24
Connecting over Internet
Windows 2000
Windows XP
Windows Server 2003
Setting up the IPP
printer connection
If you print to this equipment over the Internet, you can use IPP printing under Windows 2000,
Windows XP, and Windows Server 2003. This allows you to print to this equipment from anywhere on the Internet.
P.127 "Installing the Client Software for IPP Printing"
SUPPLEMENTS: • To print with an IPP connection, this equipment must be configured to enable the
IPP Print Service and must be connected to the Internet. Ask your administrator if
the IPP Print Service is enabled.
• You can also perform Email printing over the Internet. For more information about
Email printing, please refer to following section.
P.325 "Email Printing"
— Novell Printing
NOTE: • Novell printing is available only when the Network Interface Card is installed.
Available for:
Windows 98, Windows Me, Windows NT 4.0, Windows 2000, Windows XP,
Windows Server 2003
Connecting with a NetWare Environment over TCP/IP or IPX/SPX Network
NetWare 4.x
NetWare 5.x
NetWare 6.x
Setting up the Novell
printer connection
Setting up the SMB
printer connection
to Novell print queue
Windows 98
Windows Me
Windows NT 4.0
Windows 2000
Windows Server 2003
Windows XP
24 Printing Guide — Installing Client Software for Windows
Page 25

When this equipment is configured to manage printing with NetWare 4.x, or 5.x over TCP/IP or
IPX/SPX, you can print through the NetWare print server from Windows 98/Me, Windows NT
4.0, Windows 2000, Windows XP, and Windows Server 2003. In this case, install the printer
driver and set up the SMB printer connection to a print queue created in the NetWare server.
P.132 "Installing the Client Software for Novell Printing"
SUPPLEMENT:
• To print with a Novell connection, the NetWare server must be configured for print-
ing and this equipment must be configured to enable NetWare Print Service.
Installing the Client Software for Parallel Printing
This section describes how to install the client software when this equipment is connected with a
printer cable.
There are three ways to set up the printer drivers for parallel printing:
• Using the installer in the Client1 CD-ROM
When you insert the Client1 CD-ROM into your CD-ROM drive, the installer automatically
starts. You can install printer drivers and other client software using the installer. If you
want to install printer drivers as well as other client software, this method is convenient.
P.25 "Installation for Parallel Printing Using the Installer"
• Using Plug and Play
When this equipment is connected to a parallel port of Windows 98, Windows Me, Windows
2000, Windows XP, and Windows Server 2003 computers, the Plug and Play Wizard automatically starts. While you can install a printer driver using this method, other client software cannot be installed.
P.31 "Installation for Parallel Printing by Plug and Play"
• Using Add Printer Wizard
When you want to install different printer drivers after installing a printer driver using Plug
and Play, or when you want to install the printer drivers without using the installer or Plug
and Play, install the printer drivers using the Add Printer Wizard.
P.40 "Installation for Parallel Printing by Add Printer Wizard"
NOTE:
• Parallel printing is available only when the Parallel Interface is installed.
Installation for Parallel Printing Using the Installer
Installing the client software for parallel printing
The following describes an installation on Windows 2000. The procedure is the same when other
versions of Windows used.
REQUIREMENT:
• You must log into Windows as a user who has the “Administrators” or “Power Users”
privilege when using Windows NT 4.0, Windows 2000, Windows XP, or Windows
Server 2003.
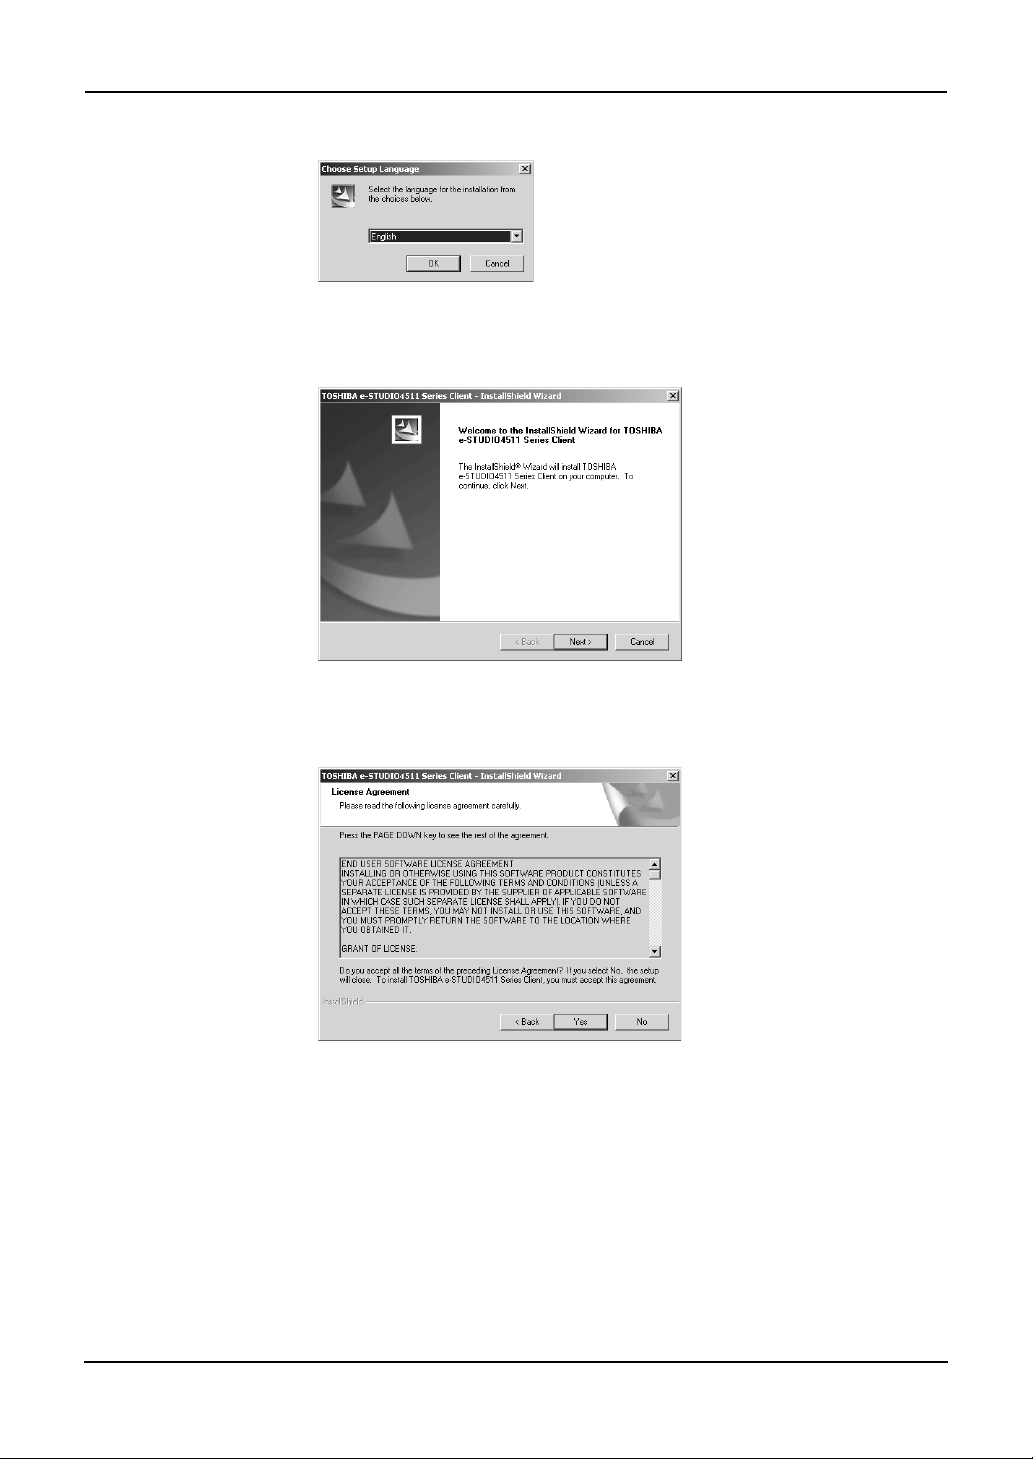
1. Insert the Client1 CD-ROM into the CD-ROM drive.
• The installer automatically starts and the Choose Setup Language
dialog box appears.
• If the installer does not automatically start, double-click “Setup.exe” in
the Client1 CD-ROM.
Printing Guide — Installing Client Software for Windows 25
Page 26
2. Select your language and click [OK].
• The InstallSheild Wizard dialog box appears.
3. Click [Next].
• The License Agreement screen is displayed.
4. Click [Yes].
• The Choose Destination Location screen is displayed.
26 Printing Guide — Installing Client Software for Windows
Page 27
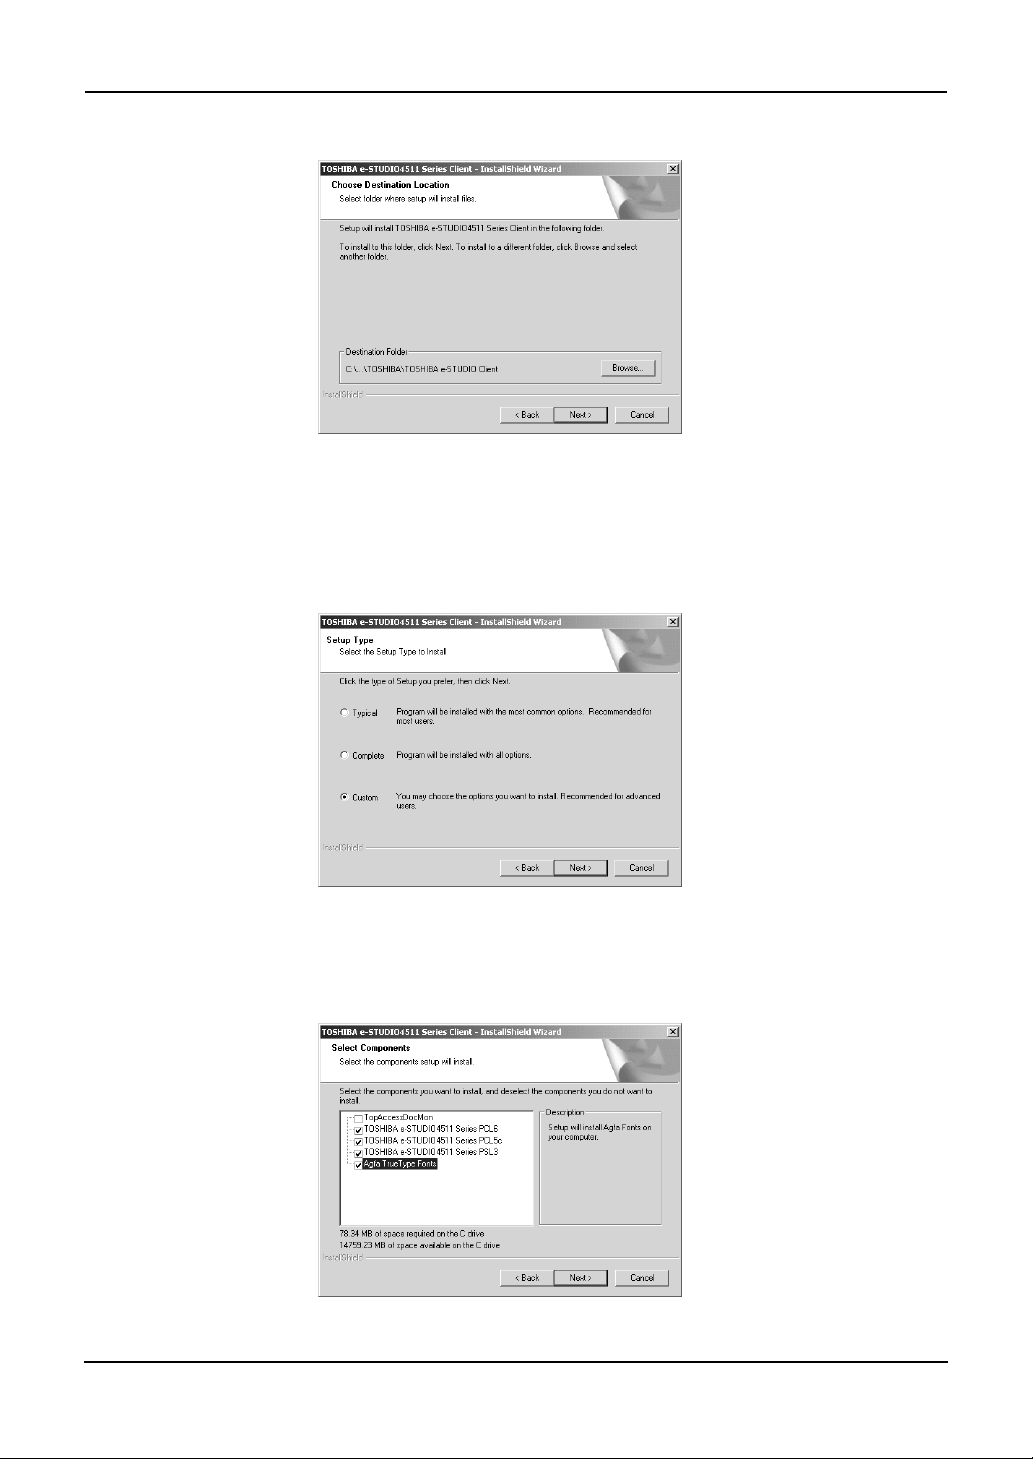
5. Click [Next].
• If you want to change the location where the programs are installed,
click [Browse]. In the dialog box that appears, select the folder and
click [OK].
• The Setup Type screen is displayed.
6. Select “Custom” and click [Next].
• The Select Components screen is displayed.
7. Check the software that you want to install and click [Next].
— For e-STUDIO4511 Series:
TopAccessDocMon — Check this to install the Document Monitor.
Printing Guide — Installing Client Software for Windows 27
Page 28
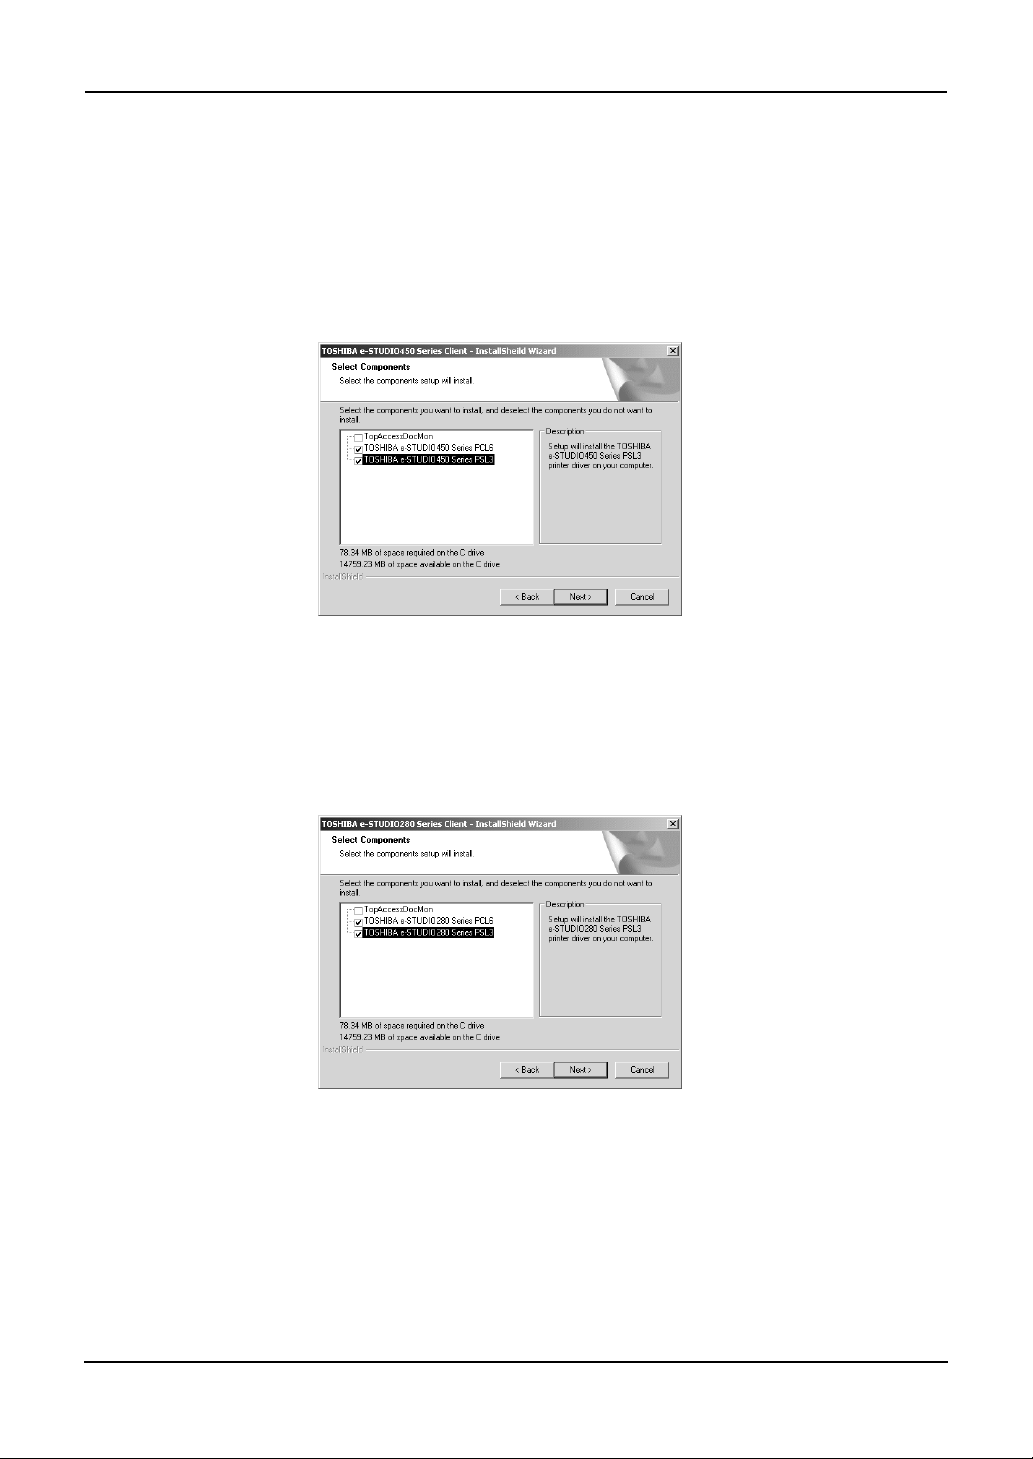
TOSHIBA e-STUDIO4511 Series PCL6 — Check this to install the PCL6 printer
driver.
TOSHIBA e-STUDIO4511 Series PCL5c — Check this to install the PCL5c
printer driver.
TOSHIBA e-STUDIO4511 Series PSL3 — Check this to install the PS3 printer
driver.
Agfa TrueType Fonts — Check this to install Agfa Font Manager and fonts.
— For e-STUDIO450 Series:
TopAccessDocMon — Check this to install the Document Monitor.
TOSHIBA e-STUDIO450 Series PCL6 — Check this to install the PCL6 printer
driver.
TOSHIBA e-STUDIO450 Series PSL3 — Check this to install the PS3 printer
driver.
— For e-STUDIO280 Series
TopAccessDocMon — Check this to install the Document Monitor.
TOSHIBA e-STUDIO280 Series PCL6 — Check this to install the PCL6 printer
driver.
TOSHIBA e-STUDIO280 Series PSL3 — Check this to install the PS3 printer
driver.
• The Select Port dialog box appears.
28 Printing Guide — Installing Client Software for Windows
Page 29
NOTE: • The TopAccessDocMon is not available for parallel printing. Do not check this item.
However, when this equipment and your computer are connected to the TCP/IP
local area network and this equipment is connected to the parallel port of your computer, you can use TopAccessDocMon to monitor your print jobs.
For e-STUDIO450 Series and e-STUDIO280 Series:
• The PCL5c printer driver is not available for e-STUDIO450 Series and e-STUDIO280
Series.
• Agfa Font Manager is not included in the Client1 CD-ROM. You must install it from the
Font CD-ROM that comes with the Printer Kit or Printer/Scanner Kit.
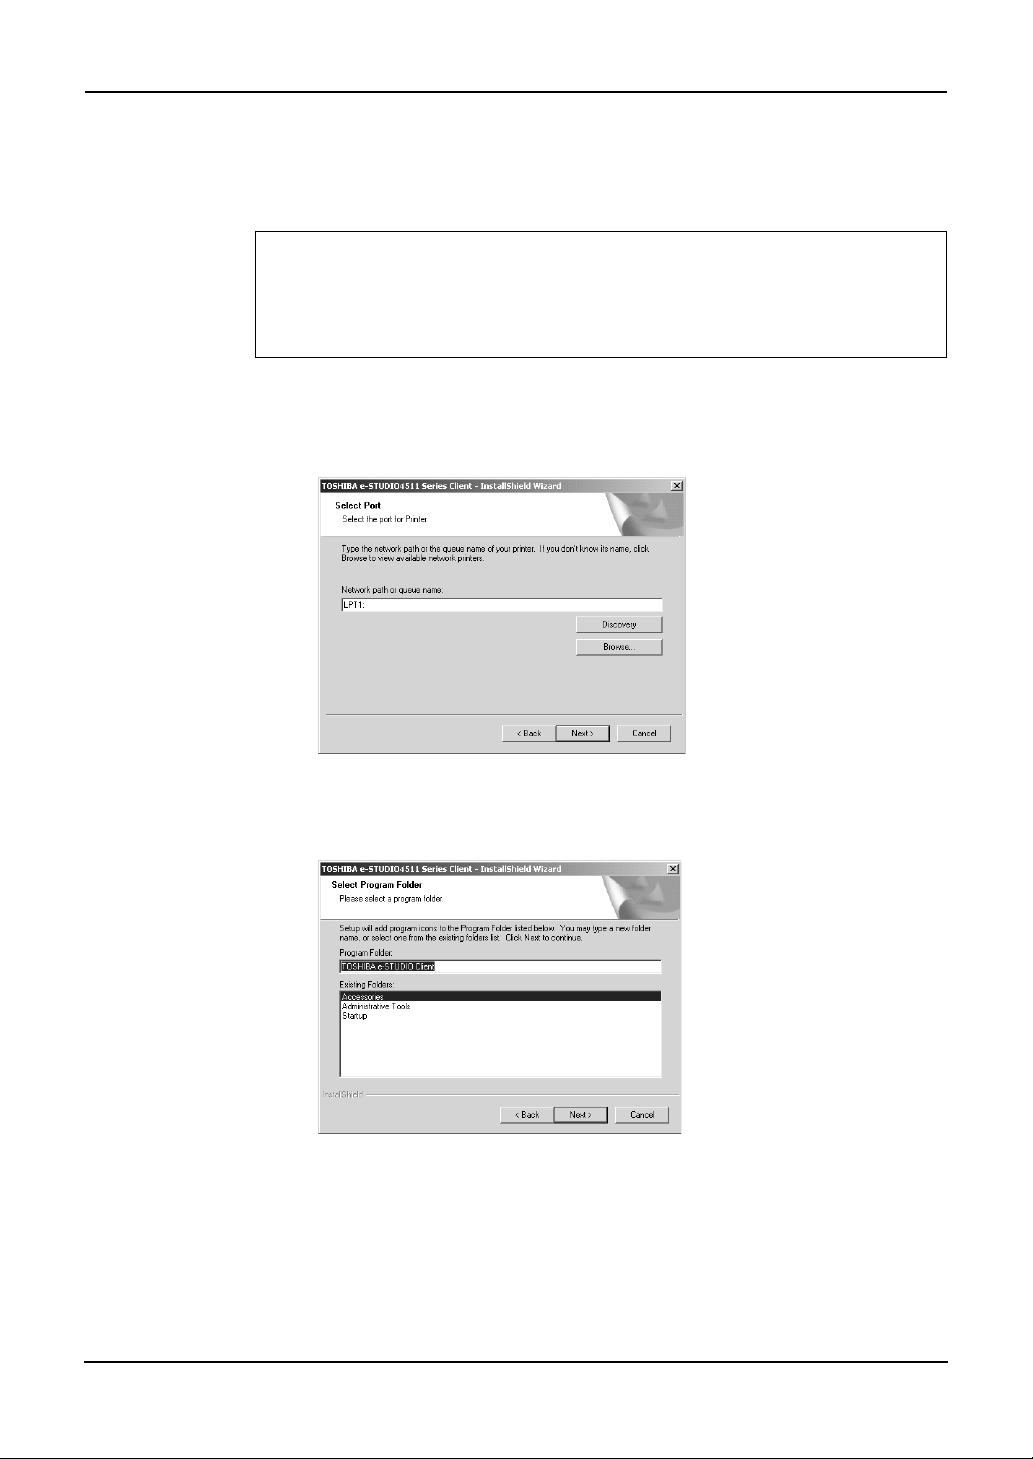
8. Make sure “LPT1:” is displayed in the “Network path or
queue name” field and click [Next].
• The Select Program Folder screen is displayed.
9. Click [Next].
• If you want to change the program folder, rename the folder in the
“Program Folders” field.
• The Starting Copying Files screen is displayed.
Printing Guide — Installing Client Software for Windows 29
Page 30
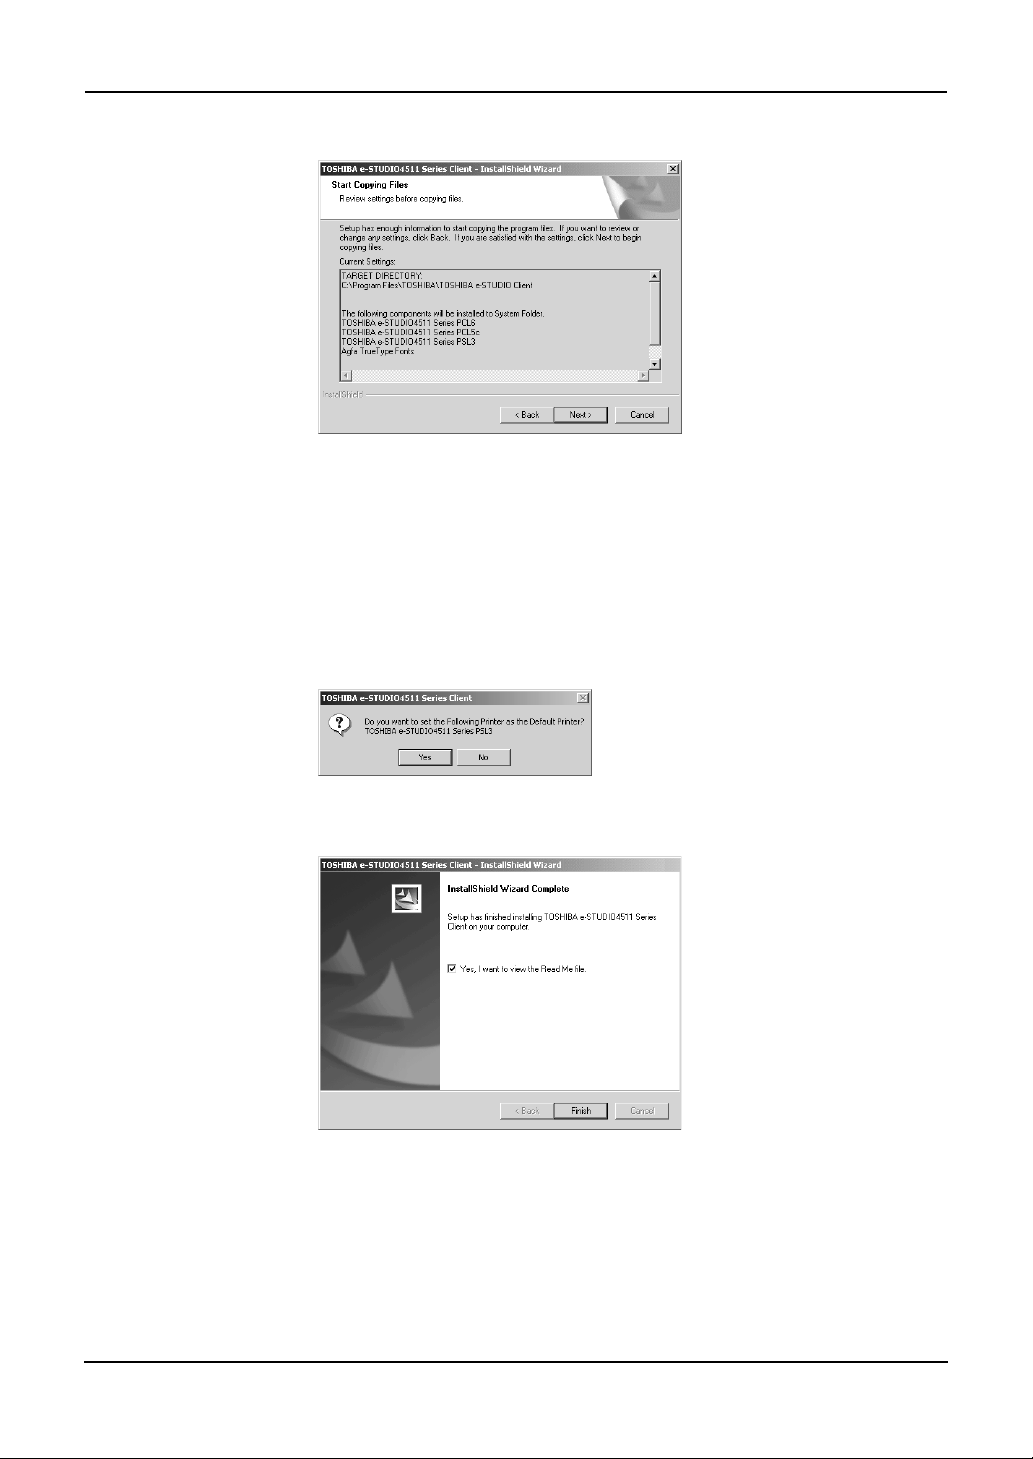
10. Click [Next].
• If any printer drivers have been installed on your computer, the confir-
mation message appears. Continue to next step.
• If no printer driver has been installed on your computer, it starts copying files and the InstallShield Wizard Complete screen is displayed
when copying is completed. Skip to Step 12.
11. If the following message appears, click [Yes] to set the indi-
cated printer driver to be the default printer driver, or click
[No] to not change the default printer driver.
12. Click [Finish].
• If you selected to install TopAccessDocMon during the installation, the
system may ask whether you want to view the Readme file and
launch TopAccessDocMon.
NOTE: • The Installer may ask you to restart your computer. If it does, select “Yes, I want to
restart my computer now.” and click [Finish] to restart your computer.
13. The installation is completed.
30 Printing Guide — Installing Client Software for Windows
Page 31

NOTE: • Before using the printer driver for printing, please configure the installed options of
the equipment and department code (if required) on the printer driver.
P.204 "Before Using the Printer Driver"
Installation for Parallel Printing by Plug and Play
The procedure to install the printer driver for Parallel printing by Plug and Play differs depending on the version of the Windows being used.
P.31 "Windows 98/Me"
P.34 "Windows 2000"
P.37 "Windows XP/Server 2003"
SUPPLEMENTS: • TopAccessDocMon is not available when this equipment is only connected using
the printer cable. However, when this equipment and your computer are connected
to the local area network as well as this equipment is connected to the parallel port
of your computer, you can use TopAccessDocMon to monitor your print jobs. To
install TopAccessDocMon, you must install it from the Client1 CD-ROM separately.
• The Agfa Font Manager is also available to install and manage the TrueType fonts
on your computer. To install the Agfa Font Manager, you must install it from the
Client1 CD-ROM separately.
For e-STUDIO450 Series and e-STUDIO280 Series:
Agfa Font Manager is not included in the Client1 CD-ROM. You must install it from the Font
CD-ROM that comes with the Printer Kit or Printer/Scanner Kit.
NOTE:
• The Plug and Play function is not supported in the Windows NT 4.0.
— Windows 98/Me
Installing the printer driver for parallel printing by Plug and Play
The following describes an installation on Windows 98. The procedure is the same when Windows Me is used.
1. Connect the printer cable to this equipment and your com-
puter, and then power on the equipment and your computer.
• The Add New Hardware Wizard dialog box appears.
2. Click [Next].
Printing Guide — Installing Client Software for Windows 31
Page 32

3. Select "Search for the best driver for your device. (Recom-
mended)" and click [Next].
4. Select “Specify a location” and click [Browse].
• The Browse for Folder dialog box appears.
5. Insert the Client1 CD-ROM into the CD-ROM drive.
• When inserting the Client1 CD-ROM, the installer may automatically
start. Click [Cancel] to exit the installer and continue the operation.
6. Locate the directory where the printer driver for Windows 98/
Me is located and click [OK].
• To install the PCL5c printer driver, locate
"[CD-ROM drive]:\9X_ME\PCL5C\<language>".
• To install the PCL6 printer driver, locate
"[CD-ROM drive]:\9X_ME\PCL6\<language>".
32 Printing Guide — Installing Client Software for Windows
Page 33

• To install the PS3 printer driver, locate
"[CD-ROM drive]:\9X_ME\PS\<language>".
7. Click [Next].
8. Click [Next].
9. Change the name if desired and click [Next].
SUPPLEMENT: • If any printer drivers have installed on the computer, select whether using this
printer as a default printer.
Printing Guide — Installing Client Software for Windows 33
Page 34

10. Select "Yes" to print a test page and click [Finish].
• Start copying files.
11. Click [Finish].
12. The installation is completed.
NOTE: • Before using the printer driver for printing, please configure the installed options of
the equipment and department code (if required) on the printer driver.
P.204 "Before Using the Printer Driver"
— Windows 2000
Installing the printer driver for parallel printing by Plug and Play
REQUIREMENT: • You must log into Windows as a user who has the “Administrators” or “Power Users”
privilege when using Windows 2000.
1. Connect the printer cable to this equipment and your com-
puter, and then power on the equipment and your computer.
• The Found New Hardware Wizard dialog box appears.
34 Printing Guide — Installing Client Software for Windows
Page 35

2. Click [Next].
3. Select "Search for a suitable driver for my device (recom-
mended)" and click [Next].
4. Insert the Client1 CD-ROM into the CD-ROM drive.
• When inserting the Client1 CD-ROM, the installer may automatically
start. Click [Cancel] to exit the installer and continue the operation.
5. Select only “Specify a location” and click [Next].
Printing Guide — Installing Client Software for Windows 35
Page 36

6. Click [Browse].
• The Locate File dialog box appears.
7. Locate the directory where the printer driver for Windows
2000 is located, select a INF file, and click [Open].
• To install the PCL5c printer driver, locate
"[CD-ROM drive]:\W2K_XP_2003\PCL5C\<language>".
• To install the PCL6 printer driver, locate
"[CD-ROM drive]:\W2K_XP_2003\PCL6\<language>".
• To install the PS3 printer driver, locate
"[CD-ROM drive]:\W2K_XP_2003\PS\<language>".
8. Click [OK].
36 Printing Guide — Installing Client Software for Windows
Page 37

9. Check [Next].
• It starts copying files.
10. Click [Finish].
11. The installation is completed.
NOTE: • Before using the printer driver for printing, please configure the installed options of
the equipment and department code (if required) on the printer driver.
P.204 "Before Using the Printer Driver"
— Windows XP/Server 2003
Installing the printer driver for parallel printing by Plug and Play
REQUIREMENT: • You must log into Windows as a user who has the “Administrators” or “Power Users”
privilege when using Windows XP or Windows Server 2003.
1. Connect the printer cable to this equipment and your com-
puter, and then power on the equipment and your computer.
• The Found New Hardware Wizard dialog box appears.
Printing Guide — Installing Client Software for Windows 37
Page 38

2. Select "Install from a list or specific location (Advanced)" and
click [Next].
3. Select “Search for the best driver in these locations.” and
check only the “Include this location in the search” check
box. Then click [Browse].
• The Browse For Folder dialog box appears.
4. Insert the Client1 CD-ROM into the CD-ROM drive.
• When inserting the Client1 CD-ROM, the installer may automatically
start. Click [Cancel] to exit the installer and continue the operation.
38 Printing Guide — Installing Client Software for Windows
Page 39

5. Locate the directory where the printer driver for Windows XP/
Server 2003 is located and click [OK].
• To install the PCL5c printer driver, locate
"[CD-ROM drive]:\W2K_XP_2003\PCL5C\<language>".
• To install the PCL6 printer driver, locate
"[CD-ROM drive]:\W2K_XP_2003\PCL6\<language>".
• To install the PS3 printer driver, locate
"[CD-ROM drive]:\W2K_XP_2003\PS\<language>".
6. Click [Next].
• It starts copying files.
7. Click [Finish].
Printing Guide — Installing Client Software for Windows 39
Page 40

8. The installation is completed.
NOTE: • Before using the printer driver for printing, please configure the installed options of
the equipment and department code (if required) on the printer driver.
P.204 "Before Using the Printer Driver"
Installation for Parallel Printing by Add Printer Wizard
The procedure to install the printer driver for Parallel printing by Add Printer Wizard differs
depending on the version of the Windows being used.
P.40 "Windows 98/Me"
P.44 "Windows NT 4.0"
P.48 "Windows 2000/XP/Server 2003"
SUPPLEMENTS: • TopAccessDocMon is not available when this equipment is only connected using
the printer cable. However, when this equipment and your computer are connected
to the local area network as well as this equipment is connected to the parallel port
of your computer, you can use TopAccessDocMon to monitor your print jobs. To
install TopAccessDocMon, you must install it from the Client1 CD-ROM separately.
• The Agfa Font Manager is also available to install and manage the TrueType fonts
on your computer. To install the Agfa Font Manager, you must install it from the
Client1 CD-ROM separately.
For e-STUDIO450 Series and e-STUDIO280 Series:
Agfa Font Manager is not included in the Client1 CD-ROM. You must install it from the Font
CD-ROM that comes with the Printer Kit or Printer/Scanner Kit.
— Windows 98/Me
Installing the printer driver for parallel printing by Add Printer Wizard
The following describes an installation on Windows 98. The procedure is the same when Windows Me is used.
1. Click [Start], select [Settings], and click [Printers] to open the
Printers folder.
40 Printing Guide — Installing Client Software for Windows
Page 41

2. Double-click the [Add Printer] icon.
• The Add Printer Wizard dialog box appears.
3. Click [Next].
4. Select “Local printer” and click [Next].
Printing Guide — Installing Client Software for Windows 41
Page 42

5. Click [Have Disk...].
• The Install From Disk dialog box appears.
6. Click [Browse...].
• The Open dialog box appears.
7. Insert the Client1 CD-ROM into the CD-ROM drive.
• When inserting the Client1 CD-ROM, the installer may automatically
start. Click [Cancel] to exit the installer and continue the operation.
8. Locate the directory where the printer driver for Windows 98/
Me is located and click [OK].
• To install the PCL5c printer driver, locate
"[CD-ROM drive]:\9X_ME\PCL5C\<language>".
• To install the PCL6 printer driver, locate
"[CD-ROM drive]:\9X_ME\PCL6\<language>".
• To install the PS3 printer driver, locate
"[CD-ROM drive]:\9X_ME\PS\<language>".
42 Printing Guide — Installing Client Software for Windows
Page 43

9. Click [OK].
10. Select the printer driver and click [Next].
11. Select “LPT1:” and click [Next].
12. Change the name if desired and click [Next].
SUPPLEMENT: • If any printer drivers have installed on the computer, select whether using this
printer as a default printer.
Printing Guide — Installing Client Software for Windows 43
Page 44

13. Select "Yes" to print a test page and click [Finish].
• Start copying files.
14. The installation is completed.
NOTE: • Before using the printer driver for printing, please configure the installed options of
the equipment and department code (if required) on the printer driver.
P.204 "Before Using the Printer Driver"
— Windows NT 4.0
REQUIREMENT: • You must log into Windows NT 4.0 as a user who has the “Administrators” or “Power
Users” privilege.
Installing the printer driver for parallel printing by Add Printer Wizard
1. Click [Start], select [Settings], and click [Printers] to open the
Printers folder.
44 Printing Guide — Installing Client Software for Windows
Page 45

2. Double-click the [Add Printer] icon.
• The Add Printer Wizard dialog box appears.
3. Select “My Computer” and click [Next].
4. Select “LPT1:” and click [Next].
Printing Guide — Installing Client Software for Windows 45
Page 46

5. Click [Have Disk...].
• The Install From Disk dialog box appears.
6. Click [Browse...].
• The “A:\ is not accessible” message appears.
7. Click [Cancel].
• The Locate File dialog box appears.
8. Insert the Client1 CD-ROM into the CD-ROM drive.
• When inserting the Client1 CD-ROM, the installer may automatically
start. Click [Cancel] to exit the installer and continue the operation.
9. Locate the directory where the printer driver for Windows NT
4.0 is located and click [Open].
• To install the PCL5c printer driver, locate
"[CD-ROM drive]:\NT\PCL5C\<language>".
46 Printing Guide — Installing Client Software for Windows
Page 47
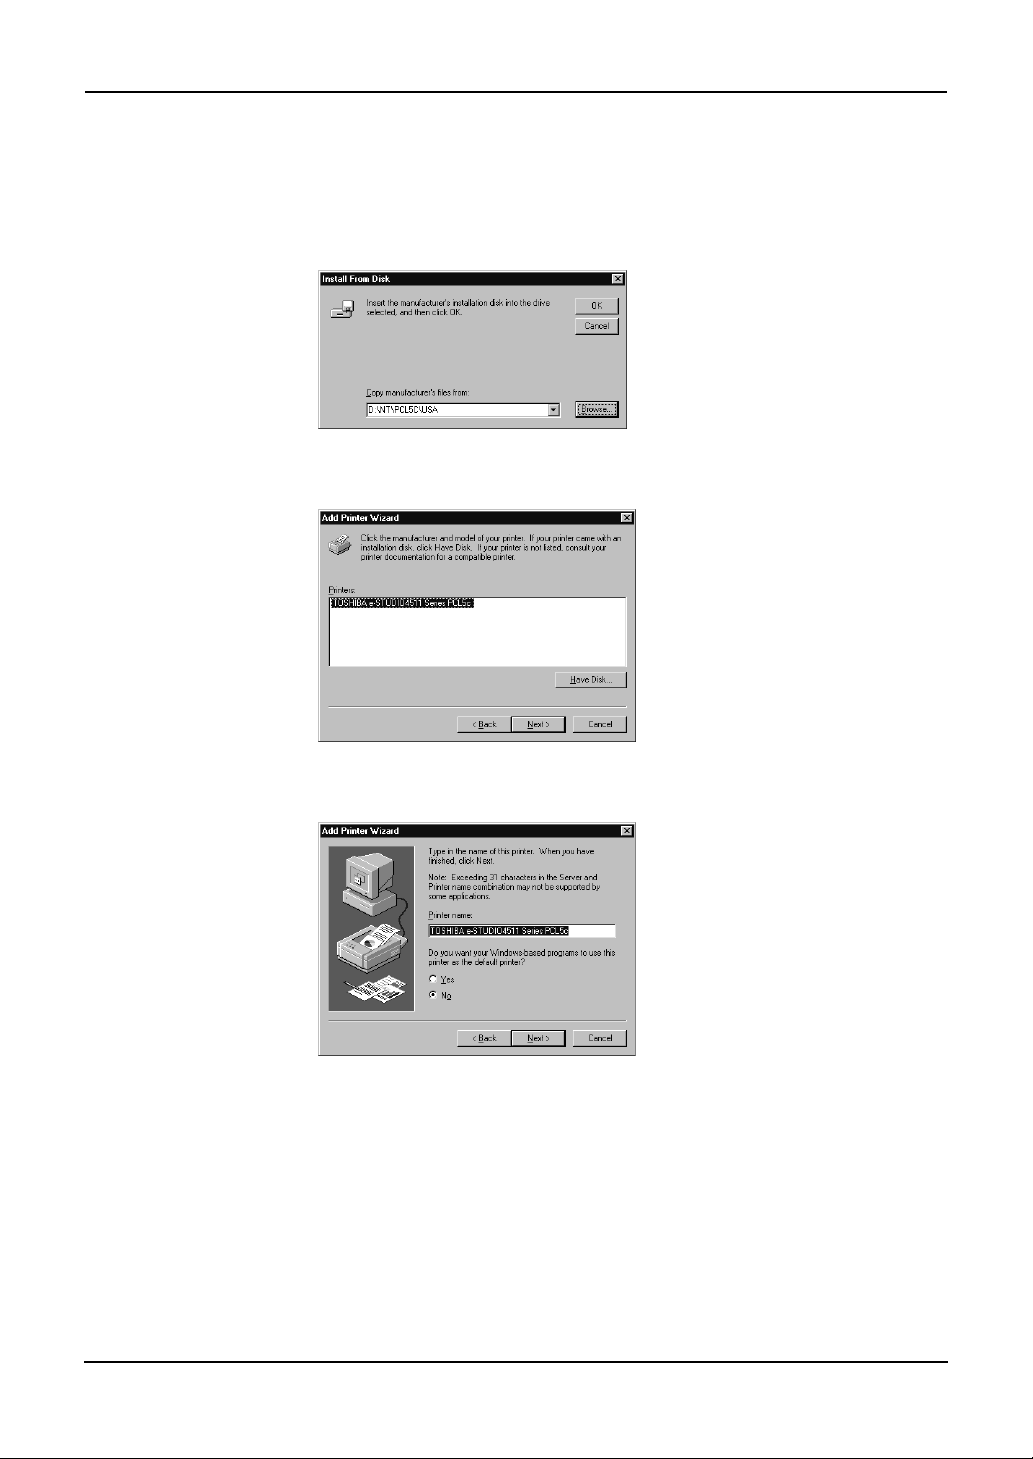
• To install the PCL6 printer driver, locate
"[CD-ROM drive]:\NT\PCL6\<language>".
• To install the PS3 printer driver, locate
"[CD-ROM drive]:\NT\PS\<language>".
10. Click [OK].
11. Select the printer driver and click [Next].
12. Change the name if desired and click [Next].
SUPPLEMENT: • If any printer drivers have installed on the computer, select whether using this
printer as a default printer.
Printing Guide — Installing Client Software for Windows 47
Page 48

13. Select whether this printer is shared or not, and click [Next].
SUPPLEMENT: • When you select “Shared”, you can also select the operating systems of printer driv-
ers that you want to install for clients. If you select any operating systems, repeat
the procedure from Step 5 to 11 to install the printer drivers for selected operating
systems.
14. Select "Yes" to print a test page and click [Finish].
15. The installation is completed.
NOTE: • Before using the printer driver for printing, please configure the installed options of
the equipment and department code (if required) on the printer driver.
P.204 "Before Using the Printer Driver"
— Windows 2000/XP/Server 2003
The following describes an installation on Windows 2000. The procedure is the same when
Windows XP or Windows Server 2003 is used.
REQUIREMENT:
48 Printing Guide — Installing Client Software for Windows
• You must log into Windows as a user who has the “Administrators” or “Power Users”
privilege when using Windows 2000, Windows XP or Windows Server 2003.
Page 49

Installing the printer driver for parallel printing by Add Printer Wizard
1. Click [Start] and select [Printers] in [Settings] (Windows 2000)
or select [Printers and Faxes] (Windows XP/Server 2003).
• The Printers folder is opened.
2. Double-click the [Add Printer] icon.
• When using the Windows XP/Server 2003, click [Add a printer] in the
Printer Tasks menu.
• The Add Printer Wizard dialog box appears.
3. Click [Next].
Printing Guide — Installing Client Software for Windows 49
Page 50

4. Select “Local printer”, uncheck the “Automatically detect and
install my Plug and Play printer”, and click [Next].
5. Select “Use the following port” and select “LPT1:”. Then
click [Next].
6. Click [Have Disk...].
• The Install From Disk dialog box appears.
50 Printing Guide — Installing Client Software for Windows
Page 51

7. Click [Browse...].
• The Locate File dialog box appears.
8. Insert the Client1 CD-ROM into the CD-ROM drive.
• When inserting the Client1 CD-ROM, the installer may automatically
start. Click [Cancel] to exit the installer and continue the operation.
9. Locate the directory where the printer driver for Windows
2000/XP/Server 2003 is located and click [Open].
• To install the PCL5c printer driver, locate
"[CD-ROM drive]:\W2K_XP_2003\PCL5C\<language>".
• To install the PCL6 printer driver, locate
"[CD-ROM drive]:\W2K_XP_2003\PCL6\<language>".
• To install the PS3 printer driver, locate
"[CD-ROM drive]:\W2K_XP_2003\PS\<language>".
10. Click [OK].
Printing Guide — Installing Client Software for Windows 51
Page 52

11. Select the printer driver and click [Next].
12. Change the name if desired and click [Next].
SUPPLEMENT: • If any printer drivers have installed on the computer, select whether using this
printer as a default printer.
13. Select whether this printer is shared or not, and click [Next].
52 Printing Guide — Installing Client Software for Windows
Page 53

14. Select "Yes" to print a test page and click [Next].
15. Click [Finish].
• Start copying files.
16. The installation is completed.
NOTE: • Before using the printer driver for printing, please configure the installed options of
the equipment and department code (if required) on the printer driver.
P.204 "Before Using the Printer Driver"
Installing the Client Software for USB Printing
This section describes how to set up the printer drivers when this equipment is connected with
USB cable.
To set up the printer drivers for USB printing, you must install the printer drivers by Plug and
Play functions instead of installing the client software using the installer in the Client1
CD-ROM.
When this equipment is connected to a USB port of Windows 98, Windows Me, Windows 2000,
Windows XP, or Windows Server 2003 computers, the Plug and Play Wizard automatically
starts. You can install a printer driver using this method but other client software cannot be
installed.
Printing Guide — Installing Client Software for Windows 53
Page 54

SUPPLEMENTS: • TopAccessDocMon is not available when this equipment is connected using only
the USB cable. However, when this equipment and your computer are connected to
the local area network and this equipment is connected to the USB port of your
computer, you can use TopAccessDocMon to monitor your print jobs. To install
TopAccessDocMon, you must install it from the Client1 CD-ROM separately.
• The Agfa Font Manager is also available to install and manage the TrueType fonts
on your computer. To install the Agfa Font Manager, you must install it from the
Client1 CD-ROM separately.
For e-STUDIO450 Series and e-STUDIO280 Series:
Agfa Font Manager is not included in the Client1 CD-ROM. You must install it from the Font
CD-ROM that comes with the Printer Kit or Printer/Scanner Kit.
NOTE: • USB printing is not supported in the Windows NT 4.0.
Installation for USB Printing by Plug and Play
The procedure to install the printer driver for USB printing by Plug and Play differs depending
on the version of Windows used.
P.54 "Windows 98/Me"
P.60 "Windows 2000"
P.63 "Windows XP/Server 2003"
— Windows 98/Me
Installing the printer driver for USB printing by Plug and Play
The following describes an installation on Windows 98. The procedure is the same when Windows Me is used.
1. Power on this equipment and your computer.
2. Insert the Client1 CD-ROM into the CD-ROM drive.
• When inserting the Client1 CD-ROM, the installer may automatically
start. Click [Cancel] to exit the installer and continue the operation.
3. Connect the USB cable to this equipment and your computer.
• The Add New Hardware Wizard dialog box appears.
NOTE: • When you are installing the printer driver for USB printing on Windows Me, the USB
port driver automatically installed. In that case, please skip to step 11.
54 Printing Guide — Installing Client Software for Windows
Page 55
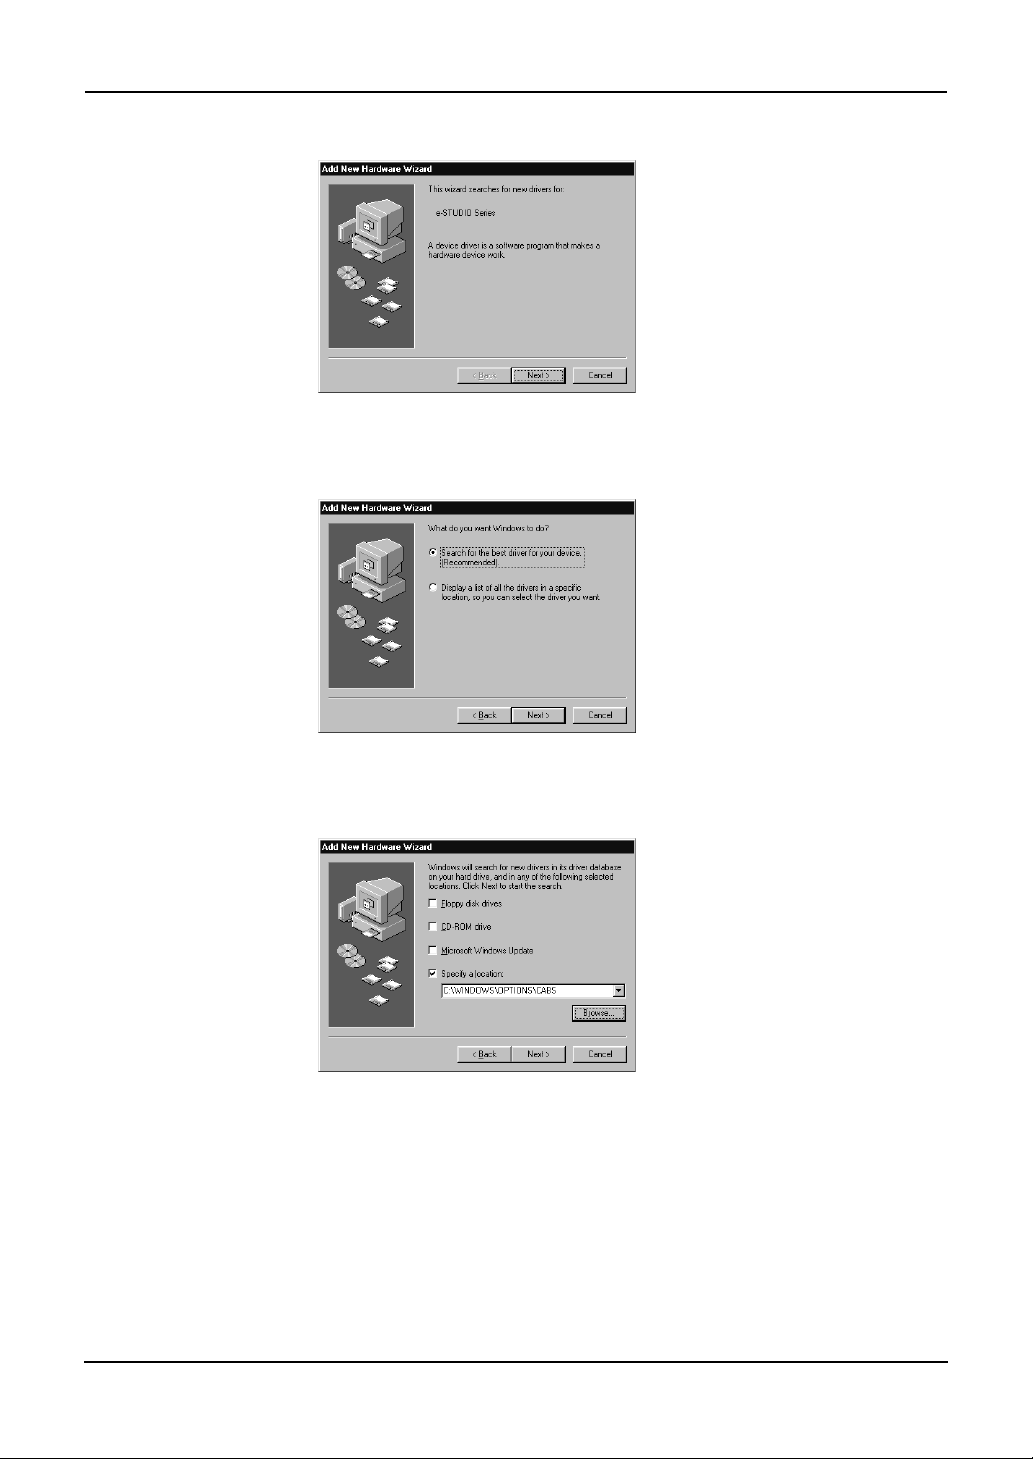
4. Click [Next].
5. Select “Search for the best driver for your device (Recom-
mended)” and click [Next].
6. Check only the “Specify a location” check box and click
[Browse].
• The Browse for Folder dialog box appears.
Printing Guide — Installing Client Software for Windows 55
Page 56

7. Select the “USB” folder in the Client1 CD-ROM and click [OK].
8. Click [Next].
9. Click [Next].
• It starts copying files.
56 Printing Guide — Installing Client Software for Windows
Page 57

10. Click [Finish].
• The USB printer port driver is installed and the Add New Hardware
Wizard dialog box appears again.
11. Click [Next].
12. Select "Search for the best driver for your device (Recom-
mended)" and click [Next].
Printing Guide — Installing Client Software for Windows 57
Page 58

13. Check only the “Specify a location” check box and click
[Browse].
• The Browse for Folder dialog box appears.
14. Locate the directory where the printer driver for Windows 98/
Me is located and click [OK].
• To install the PCL5c printer driver, locate
"[CD-ROM drive]:\9X_ME\PCL5C\<language>".
• To install the PCL6 printer driver, locate
"[CD-ROM drive]:\9X_ME\PCL6\<language>".
• To install the PS3 printer driver, locate
"[CD-ROM drive]:\9X_ME\PS\<language>".
15. Click [Next].
58 Printing Guide — Installing Client Software for Windows
Page 59

16. Click [Next].
17. Change the name if desired and click [Next].
SUPPLEMENT: • If any printer drivers have installed on the computer, select whether using this
printer as a default printer.
18. Select "Yes" to print a test page and click [Finish].
• Start copying files.
Printing Guide — Installing Client Software for Windows 59
Page 60

19. Click [Finish].
20. The installation is completed.
NOTE: • Before using the printer driver for printing, please configure the installed options of
the equipment and department code (if required) on the printer driver.
P.204 "Before Using the Printer Driver"
— Windows 2000
Installing the printer driver for USB printing by Plug and Play
REQUIREMENT: • You must log into Windows as a user who has the “Administrators” or “Power Users”
privilege when using Windows 2000.
1. Power on this equipment and your computer.
2. Connect the USB cable to this equipment and your computer.
• The Found New Hardware Wizard dialog box appears.
3. Click [Next].
60 Printing Guide — Installing Client Software for Windows
Page 61

4. Select "Search for a suitable driver for my device (recom-
mended)" and click [Next].
5. Insert the Client1 CD-ROM into the CD-ROM drive.
• When inserting the Client1 CD-ROM, the installer may automatically
start. Click [Cancel] to exit the installer and continue the operation.
6. Select only “Specify a location” and click [Next].
7. Click [Browse].
• The Locate File dialog box appears.
Printing Guide — Installing Client Software for Windows 61
Page 62

8. Locate the directory where the printer driver for Windows
2000 is located, select a INF file, and click [Open].
• To install the PCL5c printer driver, locate
"[CD-ROM drive]:\W2K_XP_2003\PCL5C\<language>".
• To install the PCL6 printer driver, locate
"[CD-ROM drive]:\W2K_XP_2003\PCL6\<language>".
• To install the PS3 printer driver, locate
"[CD-ROM drive]:\W2K_XP_2003\PS\<language>".
9. Click [OK].
10. Check [Next].
• It starts copying files.
62 Printing Guide — Installing Client Software for Windows
Page 63

11. Click [Finish].
12. The installation is completed.
NOTE: • Before using the printer driver for printing, please configure the installed options of
the equipment and department code (if required) on the printer driver.
P.204 "Before Using the Printer Driver"
— Windows XP/Server 2003
Installing the printer driver for USB printing by Plug and Play
REQUIREMENT:
The following describes an installation on Windows XP. The procedure is the same when Windows Server 2003 is used.
• You must log into Windows as a user who has the “Administrators” or “Power Users”
privilege when using Windows XP or Windows Server 2003.
1. Power on this equipment and your computer.
2. Connect the USB cable to this equipment and your computer.
• The Found New Hardware Wizard dialog box appears.
Printing Guide — Installing Client Software for Windows 63
Page 64

3. Select "Install from a list or specific location (Advanced)" and
click [Next].
4. Select “Search for the best driver in these locations.” and
check only the “Include this location in the search” check
box. Then click [Browse].
• The Browse For Folder dialog box appears.
5. Insert the Client1 CD-ROM into the CD-ROM drive.
• When inserting the Client1 CD-ROM, the installer may automatically
start. Click [Cancel] to exit the installer and continue the operation.
64 Printing Guide — Installing Client Software for Windows
Page 65

6. Locate the directory where the printer driver for Windows XP/
Server 2003 is located and click [OK].
• To install the PCL5c printer driver, locate
"[CD-ROM drive]:\W2K_XP_2003\PCL5C\<language>".
• To install the PCL6 printer driver, locate
"[CD-ROM drive]:\W2K_XP_2003\PCL6\<language>".
• To install the PS3 printer driver, locate
"[CD-ROM drive]:\W2K_XP_2003\PS\<language>".
7. Click [Next].
• It starts copying files.
8. Click [Finish].
Printing Guide — Installing Client Software for Windows 65
Page 66

9. The installation is completed.
NOTE: • Before using the printer driver for printing, please configure the installed options of
the equipment and department code (if required) on the printer driver.
P.204 "Before Using the Printer Driver"
Installing the Client Software for LPR Printing
This section describes how to set up the printer drivers for LPR printing which is available for
the local area network over TCP/IP.
There are Two ways to set up the printer drivers for LPR printing:
• Using the installer in the Client1 CD-ROM
You can set up the printer drivers for LPR printing by installing the printer drivers using the
installer in the Client1 CD-ROM. Then you install and configure the LPR port to configure
the connection.
P.66 "Installation for LPR Printing Using the Installer"
• Using Add Printer Wizard
When you want to install the printer drivers without using the installer, or when you want to
install the same printer driver for another equipment, install the printer drivers using the Add
Printer Wizard.
P.74 "Installation for LPR Printing by Add Printer Wizard"
PREPARATION:
NOTES:
• Before operating the following setup, check with your system administrator to make
sure of the following:
- This equipment is connected to the network and turned on.
- The TCP/IP setting is correct on this equipment and your computer.
• LPR Printing is only available for Windows NT 4.0, Windows 2000, Windows XP,
and Windows Server 2003.
Installation for LPR Printing Using the Installer
Install the client software using the installer in the Client1 CD-ROM first, then configure the
LPR port in each printer driver.
The procedure to configure the LPR port differs depending on the version of Windows used.
P.66 "Windows NT 4.0"
P.69 "Windows 2000/XP/Server 2003"
REQUIREMENT: • You must log into Windows as a user who has the “Administrators” or “Power Users”
privilege when using Windows NT 4.0, Windows 2000, Windows XP, or Windows
Server 2003.
— Windows NT 4.0
Configuring the LPR port for Windows NT 4.0
1. Install the client software using the installer in the Client1
CD-ROM.
66 Printing Guide — Installing Client Software for Windows
Page 67

• Please install the client software following the instruction of the installation for parallel printing.
P.25 "Installation for Parallel Printing Using the Installer"
2. After installing the client software, click [Start], select [Set-
tings], and click [Printers] to open the Printers folder.
3. Select the e-STUDIO4511 Series, e-STUDIO450 Series, or
e-STUDIO280 Series printer driver and select [Properties] in
the [File] menu.
• The printer driver properties dialog box appears.
4. Display the [Ports] tab and click [Add Port].
• The Printer Ports dialog box appears.
Printing Guide — Installing Client Software for Windows 67
Page 68

5. Select “LPR Port” and click [New Port...].
• The Add LPR compatible printer dialog box appears.
NOTE: • If “LPR Port” is not listed, make sure the TCP/IP Printing Service is installed on your
Windows NT 4.0. “LPR Port” is not listed unless the TCP/IP Printing Service is
installed.
6. Enter the IP address of this equipment in the “Name or
address of server providing lpd” field and “Print” in the
“Name of printer or print queue on that server” field, and click
[OK].
• When your network uses DNS or WINS server, enter the printer name
of this equipment provided from DNS or WINS in the “Name or
address of server providing lpd” field.
7. Click [Close] to close the Printer Ports dialog box.
68 Printing Guide — Installing Client Software for Windows
Page 69

8. Make sure the created LPR port is checked in the “Print to the
following port” list and click [OK] to save settings.
NOTE: • Before using the printer driver for printing, please configure the installed options of
the equipment and department code (if required) on the printer driver.
P.204 "Before Using the Printer Driver"
— Windows 2000/XP/Server 2003
Configuring the LPR port for Windows 2000/XP/Server 2003
The following describes an installation on Windows 2000. The procedure is the same when
Windows XP or Windows Server 2003 is used.
1. Install the client software using the installer in the Client1
CD-ROM.
• Please install the client software following the instruction of the instal-
lation for parallel printing.
P.25 "Installation for Parallel Printing Using the Installer"
2. After installing the client software, click [Start], select [Set-
tings], and click [Printers] to open the Printers folder.
Printing Guide — Installing Client Software for Windows 69
Page 70

• If you are using the Windows XP or Windows Server 2003, click
[Start] and [Printers and Faxes] to open the Printers and Faxes folder.
3. Select the e-STUDIO4511 Series, e-STUDIO450 Series, or
e-STUDIO280 Series printer driver and select [Properties] in
the [File] menu.
• The printer driver properties dialog box appears.
4. Display the [Ports] tab and click [Add Port].
• The Printer Ports dialog box appears.
5. Select “Standard TCP/IP Port” and click [New Port...].
• The Add Standard TCP/IP Printer Port Wizard dialog box appears.
70 Printing Guide — Installing Client Software for Windows
Page 71

6. Click [Next].
7. Enter the IP address of this equipment in the “Printer Name
or IP Address” field and click [Next].
• If your network uses a DNS or WINS server, enter the printer name of
this equipment provided from DNS or WINS in the “Printer Name or IP
Address” field.
• In the “Port Name” field, the port name is automatically entered
according to the IP address or DNS name entered in the “Printer
Name or IP Address” field.
Printing Guide — Installing Client Software for Windows 71
Page 72

8. Select “Custom” and click [Settings...].
• The Configure Standard TCP/IP Port Monitor dialog box appears.
9. Select “LPR” at the “Protocol” option, enter “Print” in the
“Queue Name” field at the “LPR Settings” option, and then
click [OK].
• The screen returns to the Add Standard TCP/IP Printer Port Wizard
dialog box.
72 Printing Guide — Installing Client Software for Windows
Page 73

SUPPLEMENT: • If an administrator has enabled the Raw TCP printing on this equipment, you can
set up Raw TCP printing as well. When you want to set up Raw TCP printing, select
“Raw” at the “Protocol” option, and enter “9100” in the “Port Number” field at the
Raw Settings” option.
10. Click [Next].
11. Click [Finish].
• The screen returns to the Printer Ports dialog box.
Printing Guide — Installing Client Software for Windows 73
Page 74

12. Click [Close] to close the Printer Ports dialog box.
13. Make sure the created LPR port is checked in the “Print to the
following port” list and click [Close].
NOTE: • Before using the printer driver for printing, please configure the installed options of
the equipment and department code (if required) on the printer driver.
P.204 "Before Using the Printer Driver"
Installation for LPR Printing by Add Printer Wizard
The procedure to install the printer driver for LPR printing by Add Printer Wizard differs
depending on the version of the Windows being used.
P.75 "Windows NT 4.0"
P.80 "Windows 2000/XP/Server 2003"
SUPPLEMENTS:
74 Printing Guide — Installing Client Software for Windows
• TopAccessDocMon is also available for LPR printing. To install TopAccessDocMon,
you must install it from the Client1 CD-ROM separately.
• The Agfa Font Manager is also available to install and manage the TrueType fonts
on your computer. To install the Agfa Font Manager, you must install it from the
Client1 CD-ROM separately.
For e-STUDIO450 Series and e-STUDIO280 Series:
Agfa Font Manager is not included in the Client1 CD-ROM. You must install it from the Font
CD-ROM that comes with the Printer Kit or Printer/Scanner Kit.
Page 75

— Windows NT 4.0
REQUIREMENT: • You must log into Windows NT 4.0 as a user who has the “Administrators” or “Power
Users” privilege.
Installing the printer driver for LPR printing by Add Printer Wizard
1. Click [Start], select [Settings], and click [Printers] to open the
Printers folder.
2. Double-click the [Add Printer] icon.
• The Add Printer Wizard dialog box appears.
3. Select “My Computer” and click [Next].
Printing Guide — Installing Client Software for Windows 75
Page 76
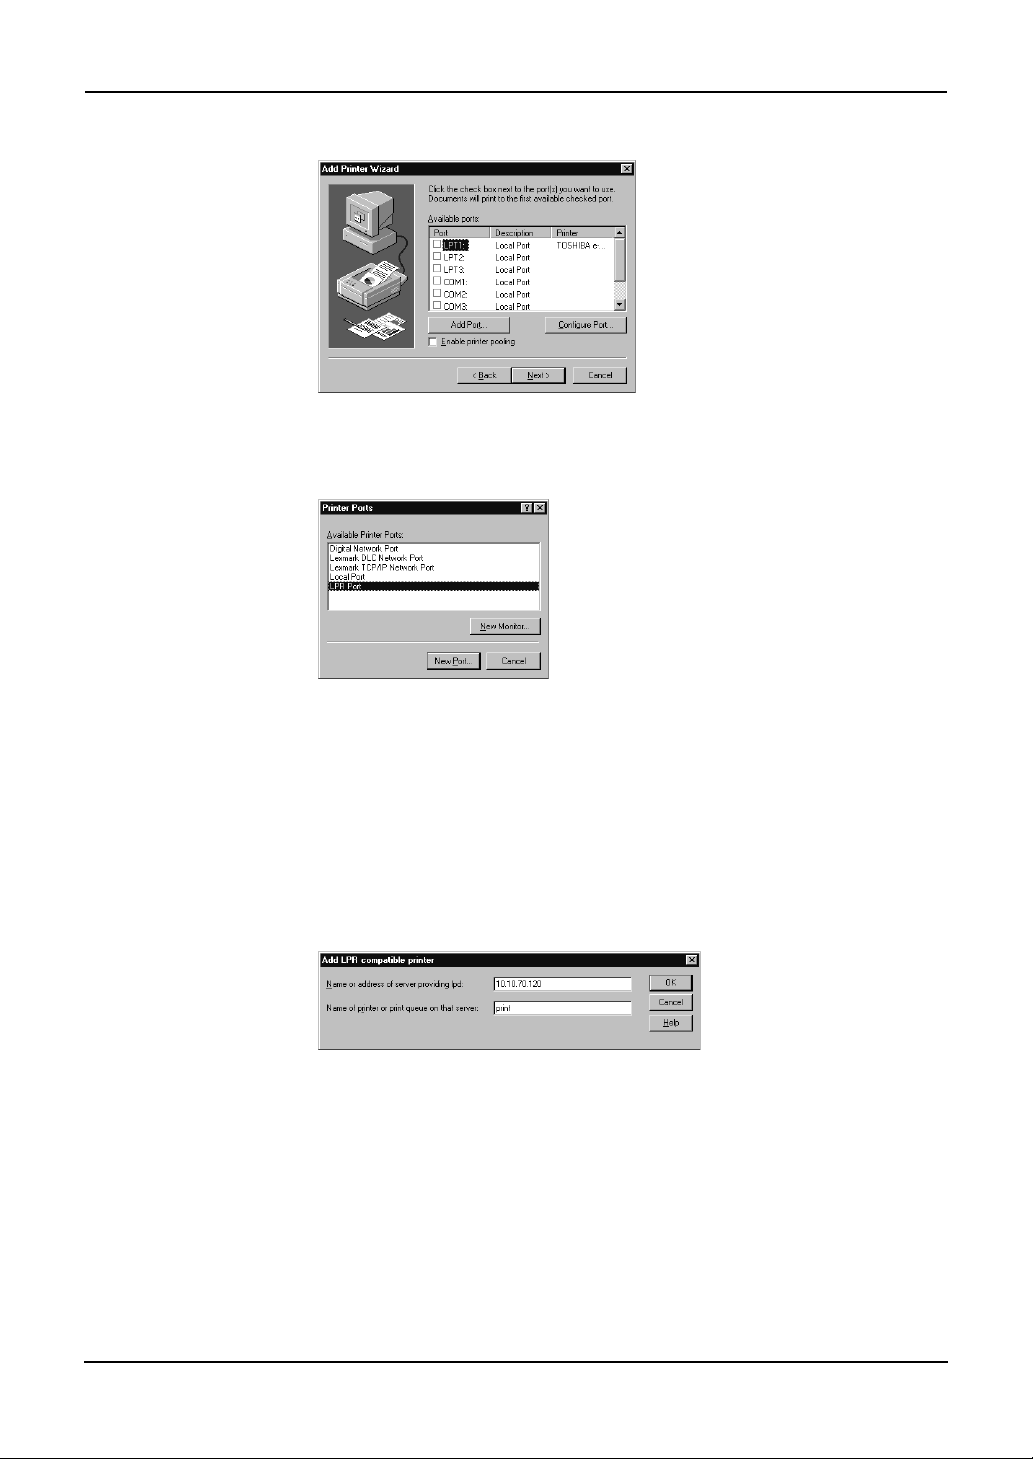
4. Click [Add Port...].
• The Printer Ports dialog box appears.
5. Select “LPR Port” and click [New Port...].
• The Add LPR compatible printer dialog box appears.
NOTE: • If “LPR Port” is not listed, make sure the TCP/IP Printing Service is installed on your
Windows NT 4.0. “LPR Port” is not listed unless the TCP/IP Printing Service is
installed.
6. Enter the IP address of this equipment in the “Name or
address of server providing lpd” field and “Print” in the
“Name of printer or print queue on that server” field, and click
[OK].
• When your network uses DNS or WINS server, enter the printer name
of this equipment provided from DNS or WINS in the “Name or
address of server providing lpd” field.
76 Printing Guide — Installing Client Software for Windows
Page 77

7. Click [Close] to close the Printer Ports dialog box.
8. Make sure that the created LPR Port is selected in the “Avail-
able ports” list and click [Next].
9. Click [Have Disk...].
• The Install From Disk dialog box appears.
10. Click [Browse...].
• The “A:\ is not accessible” message appears.
Printing Guide — Installing Client Software for Windows 77
Page 78

11. Click [Cancel].
• The Locate File dialog box appears.
12. Insert the Client1 CD-ROM into the CD-ROM drive.
• When inserting the Client1 CD-ROM, the installer may automatically
start. Click [Cancel] to exit the installer and continue the operation.
13. Locate the directory where the printer driver for Windows NT
4.0 is located and click [Open].
• To install the PCL5c printer driver, locate
"[CD-ROM drive]:\NT\PCL5C\<language>".
• To install the PCL6 printer driver, locate
"[CD-ROM drive]:\NT\PCL6\<language>".
• To install the PS3 printer driver, locate
"[CD-ROM drive]:\NT\PS\<language>".
14. Click [OK].
78 Printing Guide — Installing Client Software for Windows
Page 79

15. Select the printer driver and click [Next].
NOTE: • If the same printer driver has been installed, the following dialog box appears. If it
appears, select “Replace existing driver” and click [Next].
16. Change the name if desired and click [Next].
SUPPLEMENT: • If any printer drivers have installed on the computer, select whether using this
printer as a default printer.
Printing Guide — Installing Client Software for Windows 79
Page 80

17. Select whether this printer is shared or not, and click [Next].
SUPPLEMENT: • When you select “Shared”, you can also select the operating systems of printer driv-
ers that you want to install for clients. If you select any operating systems, repeat
the procedure from Step 9 to 15 to install the printer drivers for selected operating
systems.
18. Select "Yes" to print a test page and click [Finish].
19. The installation is completed.
NOTE: • Before using the printer driver for printing, please configure the installed options of
the equipment and department code (if required) on the printer driver.
P.204 "Before Using the Printer Driver"
— Windows 2000/XP/Server 2003
The following describes an installation on Windows 2000. The procedure is the same when
Windows XP or Windows Server 2003 is used.
REQUIREMENT:
80 Printing Guide — Installing Client Software for Windows
• You must log into Windows as a user who has the “Administrators” or “Power Users”
privilege when using Windows 2000, Windows XP or Windows Server 2003.
Page 81

Installing the printer driver for LPR printing by Add Printer Wizard
1. Click [Start] and select [Printers] in [Settings] (Windows 2000)
or select [Printers and Faxes] (Windows XP/Server 2003).
• The Printers folder is opened.
2. Double-click the [Add Printer] icon.
• When using the Windows XP/Server 2003, click [Add a printer] in the
Printer Tasks menu.
• The Add Printer Wizard dialog box appears.
3. Click [Next].
Printing Guide — Installing Client Software for Windows 81
Page 82

4. Select “Local printer”, uncheck the “Automatically detect and
install my Plug and Play printer”, and click [Next].
5. Select “Create a new port” and select “Standard TCP/IP Port”
in the “Type” drop down box. Then click [Next].
• The Add Standard TCP/IP Printer Port Wizard dialog box appears.
6. Click [Next].
82 Printing Guide — Installing Client Software for Windows
Page 83

7. Enter the IP address of this equipment in the “Printer Name
or IP Address” field and click [Next].
• If your network uses a DNS or WINS server, enter the printer name of
this equipment provided from DNS or WINS in the “Printer Name or IP
Address” field.
• In the “Port Name” field, the port name is automatically entered
according to the IP address or DNS name entered in the “Printer
Name or IP Address” field.
8. Select “Custom” and click [Settings...].
• The Configure Standard TCP/IP Port Monitor dialog box appears.
Printing Guide — Installing Client Software for Windows 83
Page 84

9. Select “LPR” at the “Protocol” option, enter “Print” in the
“Queue Name” field at the “LPR Settings” option, and then
click [OK].
• The screen returns to the Add Standard TCP/IP Printer Port Wizard
dialog box.
SUPPLEMENT: • If an administrator has enabled the Raw TCP printing on this equipment, you can
set up Raw TCP printing as well. When you want to set up Raw TCP printing, select
“Raw” at the “Protocol” option, and enter “9100” in the “Port Number” field at the
Raw Settings” option.
84 Printing Guide — Installing Client Software for Windows
Page 85

10. Click [Next].
11. Click [Finish].
12. Click [Have Disk...].
• The Install From Disk dialog box appears.
Printing Guide — Installing Client Software for Windows 85
Page 86

13. Click [Browse...].
• The Locate File dialog box appears.
14. Insert the Client1 CD-ROM into the CD-ROM drive.
• When inserting the Client1 CD-ROM, the installer may automatically
start. Click [Cancel] to exit the installer and continue the operation.
15. Locate the directory where the printer driver for Windows
2000/XP/Server 2003 is located and click [Open].
• To install the PCL5c printer driver, locate
"[CD-ROM drive]:\W2K_XP_2003\PCL5C\<language>".
• To install the PCL6 printer driver, locate
"[CD-ROM drive]:\W2K_XP_2003\PCL6\<language>".
• To install the PS3 printer driver, locate
"[CD-ROM drive]:\W2K_XP_2003\PS\<language>".
16. Click [OK].
86 Printing Guide — Installing Client Software for Windows
Page 87

17. Select the printer driver and click [Next].
NOTE: • If the same printer driver has been installed, the following dialog box appears. If it
appears, select “Replace existing driver” and click [Next].
18. Change the name if desired and click [Next].
SUPPLEMENT: • If any printer drivers have installed on the computer, select whether using this
printer as a default printer.
Printing Guide — Installing Client Software for Windows 87
Page 88

19. Select whether this printer is shared or not, and click [Next].
20. Select "Yes" to print a test page and click [Next].
21. Click [Finish].
• Start copying files.
22. The installation is completed.
NOTE: • Before using the printer driver for printing, please configure the installed options of
the equipment and department code (if required) on the printer driver.
P.204 "Before Using the Printer Driver"
88 Printing Guide — Installing Client Software for Windows
Page 89

Installing the Client Software for SMB Printing
This section describes how to set up the client software for SMB printing which is available for
the local area network over TCP/IP.
There are three ways to set up the printer drivers for SMB printing:
• Using the installer in the Client1 CD-ROM
When you insert the Client1 CD-ROM into your CD-ROM drive, the installer automatically
starts. You can install printer drivers and other client software using the installer. If you
want to install printer drivers as well as other client software, this method is convenient.
P.89 "Installation for SMB Printing Using the Installer"
• Using Point and Print
You can install the printer driver by double-clicking network queues on the system. By this
method, printer drivers can be downloaded from the system so that the Client1 CD-ROM is
not required. However, other client software cannot be installed using this method.
P.100 "Installation for SMB Printing by Point and Print"
• Using Add Printer Wizard
When you want to install the printer drivers without connecting to the equipment using Point
and Print, install the printer drivers using the Add Printer Wizard.
P.104 "Installation for SMB Printing by Add Printer Wizard"
PREPARATION: • Before installing the printer driver for SMB printing, check with your system adminis-
trator to make sure of the following:
- This equipment is connected to the network and turned on.
- The TCP/IP setting is correct on this equipment and your computer.
NOTE:
REQUIREMENT:
Installation for SMB Printing Using the Installer
You can install the client software and set up the SMB printing using the installer in the Client1
CD-ROM.
• It assumes using SMB printing in a small network. If you can use the Windows NT
4.0, Windows 2000, Windows XP, or Windows Server 2003 as a print server, it is
recommended to set up for printing via Windows print server. For further information about setting up printing via a Windows print server, see the Network Adminis-
trator’s Guide.
Installing the client software for SMB printing
The following describes an installation on Windows 2000. The procedure is the same when other
versions of Windows are used.
• You must log into Windows as a user who has the “Administrators” or “Power Users”
privilege when using Windows NT 4.0, Windows 2000, Windows XP, or Windows
Server 2003.
1. Insert the Client1 CD-ROM into the CD-ROM drive.
• The installer automatically starts and the Choose Setup Language
dialog box appears.
• If the installer does not automatically start, double-click “Setup.exe” in
the Client1 CD-ROM.
Printing Guide — Installing Client Software for Windows 89
Page 90

2. Select your language and click [OK].
• The InstallSheild Wizard dialog box appears.
3. Click [Next].
• The License Agreement screen is displayed.
4. Click [Yes].
• The Choose Destination Location screen is displayed.
90 Printing Guide — Installing Client Software for Windows
Page 91

5. Click [Next].
• If you want to change the location where the programs are installed,
click [Browse]. In the dialog box that appears, select the folder and
click [OK].
• The Setup Type screen is displayed.
6. Select “Custom” and click [Next].
• The Select Components screen is displayed.
7. Check the software that you want to install and click [Next].
— For e-STUDIO4511 Series:
TopAccessDocMon — Check this to install the Document Monitor.
Printing Guide — Installing Client Software for Windows 91
Page 92

TOSHIBA e-STUDIO4511 Series PCL6 — Check this to install the PCL6 printer
driver.
TOSHIBA e-STUDIO4511 Series PCL5c — Check this to install the PCL5c
printer driver.
TOSHIBA e-STUDIO4511 Series PSL3 — Check this to install the PS3 printer
driver.
Agfa TrueType Fonts — Check this to install Agfa Font Manager and fonts.
— For e-STUDIO450 Series:
TopAccessDocMon — Check this to install the Document Monitor.
TOSHIBA e-STUDIO450 Series PCL6 — Check this to install the PCL6 printer
driver.
TOSHIBA e-STUDIO450 Series PSL3 — Check this to install the PS3 printer
driver.
— For e-STUDIO280 Series:
TopAccessDocMon — Check this to install the Document Monitor.
TOSHIBA e-STUDIO280 Series PCL6 — Check this to install the PCL6 printer
driver.
TOSHIBA e-STUDIO280 Series PSL3 — Check this to install the PS3 printer
driver.
• The Select Port dialog box appears.
92 Printing Guide — Installing Client Software for Windows
Page 93

For e-STUDIO450 Series and e-STUDIO280 Series:
• The PCL5c printer driver is not available for e-STUDIO450 Series and e-STUDIO280
Series.
• Agfa Font Manager is not included in the Client1 CD-ROM. You must install it from the
Font CD-ROM that comes with the Printer Kit or Printer/Scanner Kit.
8. Click [Browse].
• The Browse for Folder dialog box appears.
SUPPLEMENT: • You can also automatically specify the network queue by searching the equipment
in the network.
P.95 "Using the Discovery Functions to Specify the SMB Port"
9. Locate this equipment in your network, select the “print”
queue, and click [OK].
NOTE: • Do not select “pcl5c”, “pcl6”, or “ps3” queue. These queues only accept the print job
in each emulation. If you install several printer drivers and specify one of these
queues, the print job may not be printed properly due to mismatch of the emulations
between the print job and queue.
Printing Guide — Installing Client Software for Windows 93
Page 94

10. Click [Next].
• The Select Program Folder screen is displayed.
11. Click [Next].
• If you want to change the program folder, rename the folder in the
“Program Folders” field.
• The Starting Copying Files screen is displayed.
12. Click [Next].
• If any printer drivers have been installed on your computer, the confir-
mation message appears. Continue to next step.
94 Printing Guide — Installing Client Software for Windows
Page 95

• If no printer driver has been installed on your computer, it starts copying files and the InstallShield Wizard Complete screen is displayed
when copying is completed. Skip to Step 14.
13. If the following message appears, click [Yes] to set the indi-
cated printer driver to be the default printer driver, or click
[No] to not change the default printer driver.
14. Click [Finish].
• If you selected to install TopAccessDocMon during the installation, the
system may ask whether you want to view the Readme file and
launch TopAccessDocMon.
NOTE: • The Installer may ask you to restart your computer. If it does, select “Yes, I want to
restart my computer now.” and click [Finish] to restart your computer.
15. The installation is completed.
NOTE: • Before using the printer driver for printing, please configure the installed options of
the equipment and department code (if required) on the printer driver.
P.204 "Before Using the Printer Driver"
— Using the Discovery Functions to Specify the SMB Port
In the Select Port screen during the installation, you can also obtain the network queue name
automatically by searching the equipment.
There two ways to obtain the SMB printer port from the equipment:
P.96 "Searching the equipment automatically"
P.98 "Specifying the IP address manually"
Printing Guide — Installing Client Software for Windows 95
Page 96

Searching the equipment automatically
1. Click [Discovery].
• The TopAccessDocMon Local Discovery dialog box appears.
2. Click [Start Discovery].
• It starts searching the equipment in the network.
96 Printing Guide — Installing Client Software for Windows
Page 97

SUPPLEMENT: • It searches the equipment within the local subnet in your network. If the equipment
is located in the different subnet from your computer, or you want to specify the IP
address range to be searched, click [Advance]. The Discovery Settings dialog box
appears and you can specify the advanced settings for searching the equipment.
• Devices — You can specify the device models to be searched. This sets to search the
e-STUDIO4511 Series, e-STUDIO450 Series, or e-STUDIO280 Series, so you do
not have to change this options.
• Network - Enable IPX/SPX Search — Check on this to search printers which con-
nect to the IPX/SPX network. This is available only when the IPX/SPX protocol
and Novell Client are installed in your computer, and the computer is connected to
the NetWare server.
• Network - Enable TCP/IP Search — Check on this to search printers which con-
nect to the TCP/IP network. This is available only when the TCP/IP protocol is
installed in your computer. When this is enabled, select how it searches printers in
the TCP/IP network.
Search local subnet
Specify a range — Select this to search printers in specific range of IP addresses.
When this is selected, enter the IP addresses in “From” field and “To” field to specify the range.
— Select this to search printers in local subnet.
3. Select the equipment that you want to connect and click [OK].
Printing Guide — Installing Client Software for Windows 97
Page 98

4. It automatically obtains the network queue in the “Network
path or queue name” field.
NOTE: • It automatically obtains the IP address of the equipment and the queue name speci-
fied by an administrator, in the “Network path or queue name” field in the General
submenu page of the Setup menu in the TopAccess administrator mode. If you cannot obtain the queue name, ask your administrator that the “Network path or queue
name” field is correctly specified.
5. Continue the installation from step 10 on page 94.
Specifying the IP address manually
1. Click [Discovery].
• The TopAccessDocMon Local Discovery dialog box appears.
98 Printing Guide — Installing Client Software for Windows
Page 99

2. Click [Manual Selection].
• The Manual Selection dialog box appears.
3. Enter each item to specify the printer address and click [OK].
IP Address — Enter the IP address of the printer.
IPX Address — Enter the IPX address of the printer. This is available only when
the IPX/SPX protocol and Novell Client are installed in your computer, and the
computer is connected to the NetWare server.
Name — Enter the printer name.
Location — Enter the location of the printer.
NOTE:
Printing Guide — Installing Client Software for Windows 99
• You must enter “Name” and either “IP Address” or “IPX Address”.
Page 100

4. Select the equipment that you want to connect and click [OK].
5. It automatically obtain the network queue in the “Network
path or queue name” field.
NOTE: • It automatically obtains the IP address of the equipment and the queue name speci-
fied by an administrator, in the “Network path or queue name” field in the General
submenu page of the Setup menu in the TopAccess administrator mode. If you cannot obtain the queue name, ask your administrator that the “Network path or queue
name” field is correctly specified.
6. Continue the installation from step 10 on page 94.
Installation for SMB Printing by Point and Print
The procedure to install the printer driver for SMB printing by Point and Print differs depending
on the version of Windows used.
P.101 "Windows 98/Me"
P.103 "Windows NT 4.0/2000/XP/Server 2003"
100 Printing Guide — Installing Client Software for Windows
 Loading...