

Toro 20351 - High Wheel CARB Walk Power Mower, 20351 Dealer Manual

MANUAL

About This Manual
We hope that you find this manual a valuable addition to your service shop. If you have
comments or questions about this manual contact your Distributor Service Manager or us
directly at the following address:
The Toro Company
Consumer Service Department
8111 Lyndale Avenue South
Bloomington, MN 55420-1196
The Toro Company reserves the right to change product specifications or this manual
without notice.
Copyright© - All Rights Reserved
The Toro Company - 2002
Bloomington, MN 55420–1149 - U.S.A.

Table of Contents
Introduction
Manual Purpose. . . . . . . . . . . . . . . . . . . . . . . . . . . . . . . . . . . . . . . . . . . . . . . . . . . . . . . . . . . .1-1
Intended Audience. . . . . . . . . . . . . . . . . . . . . . . . . . . . . . . . . . . . . . . . . . . . . . . . . . . . . . . . . . 1-1
Contents. . . . . . . . . . . . . . . . . . . . . . . . . . . . . . . . . . . . . . . . . . . . . . . . . . . . . . . . . . . . . . . . . . 1-1
Elements of Great Quality of Cut
Overview . . . . . . . . . . . . . . . . . . . . . . . . . . . . . . . . . . . . . . . . . . . . . . . . . . . . . . . . . . . . . . . . . 2-1
Setup . . . . . . . . . . . . . . . . . . . . . . . . . . . . . . . . . . . . . . . . . . . . . . . . . . . . . . . . . . . . . . . . . . . . 2-1
Operator Instruction . . . . . . . . . . . . . . . . . . . . . . . . . . . . . . . . . . . . . . . . . . . . . . . . . . . . . . . . . 2-2
Mower Preparation . . . . . . . . . . . . . . . . . . . . . . . . . . . . . . . . . . . . . . . . . . . . . . . . . . . . . . 2-2
Lawn Preparation . . . . . . . . . . . . . . . . . . . . . . . . . . . . . . . . . . . . . . . . . . . . . . . . . . . . . . . 2-2
Safety . . . . . . . . . . . . . . . . . . . . . . . . . . . . . . . . . . . . . . . . . . . . . . . . . . . . . . . . . . . . . . . . 2-2
Mowing Tips . . . . . . . . . . . . . . . . . . . . . . . . . . . . . . . . . . . . . . . . . . . . . . . . . . . . . . . . . . .2-3
Inspecting and Sharpening the Blade
Overview . . . . . . . . . . . . . . . . . . . . . . . . . . . . . . . . . . . . . . . . . . . . . . . . . . . . . . . . . . . . . . . . . 3-1
Removing the Blade. . . . . . . . . . . . . . . . . . . . . . . . . . . . . . . . . . . . . . . . . . . . . . . . . . . . . . . . .3-1
Inspecting the Blade . . . . . . . . . . . . . . . . . . . . . . . . . . . . . . . . . . . . . . . . . . . . . . . . . . . . . . . . 3-2
Sharpening the Blade . . . . . . . . . . . . . . . . . . . . . . . . . . . . . . . . . . . . . . . . . . . . . . . . . . . . . . . 3-2
Balancing the Blade. . . . . . . . . . . . . . . . . . . . . . . . . . . . . . . . . . . . . . . . . . . . . . . . . . . . . . . . . 3-2
Installing the Blade. . . . . . . . . . . . . . . . . . . . . . . . . . . . . . . . . . . . . . . . . . . . . . . . . . . . . . . . . . 3-3
Checking and Adjusting the Blade Level
Overview . . . . . . . . . . . . . . . . . . . . . . . . . . . . . . . . . . . . . . . . . . . . . . . . . . . . . . . . . . . . . . . . . 4-1
Walk Behind Mower Overview. . . . . . . . . . . . . . . . . . . . . . . . . . . . . . . . . . . . . . . . . . . . . . . . . 4-1
Riding Mower Overview. . . . . . . . . . . . . . . . . . . . . . . . . . . . . . . . . . . . . . . . . . . . . . . . . . . . . .4-2
Checking Blade Level—All Mowers. . . . . . . . . . . . . . . . . . . . . . . . . . . . . . . . . . . . . . . . . . . . .4-2
Preparing the Workspace . . . . . . . . . . . . . . . . . . . . . . . . . . . . . . . . . . . . . . . . . . . . . . . . . 4-2
Measuring Blade Level . . . . . . . . . . . . . . . . . . . . . . . . . . . . . . . . . . . . . . . . . . . . . . . . . . .4-3
Checking and Adjusting Blade Tracking . . . . . . . . . . . . . . . . . . . . . . . . . . . . . . . . . . . . . . . . .4-4
Walk Behind Mowers. . . . . . . . . . . . . . . . . . . . . . . . . . . . . . . . . . . . . . . . . . . . . . . . . . . . . 4-4
Riding Mowers. . . . . . . . . . . . . . . . . . . . . . . . . . . . . . . . . . . . . . . . . . . . . . . . . . . . . . . . . .4-4
Adjusting Blade Level . . . . . . . . . . . . . . . . . . . . . . . . . . . . . . . . . . . . . . . . . . . . . . . . . . . . . . . 4-4
Walk Behind Mowers. . . . . . . . . . . . . . . . . . . . . . . . . . . . . . . . . . . . . . . . . . . . . . . . . . . . . 4-4
Specifications and Tolerances . . . . . . . . . . . . . . . . . . . . . . . . . . . . . . . . . . . . . . . . . .4-4
Adjusting Height of Cut . . . . . . . . . . . . . . . . . . . . . . . . . . . . . . . . . . . . . . . . . . . . . . . . 4-5
Models with Height of Cut Lever on Each Wheel . . . . . . . . . . . . . . . . . . . . . . . . .4-5
Mechanism Descriptions . . . . . . . . . . . . . . . . . . . . . . . . . . . . . . . . . . . . . . . . 4-5
Slipping Height of Cut Adjuster . . . . . . . . . . . . . . . . . . . . . . . . . . . . . . . . . . . 4-5
Wheel Does Not Touch Ground. . . . . . . . . . . . . . . . . . . . . . . . . . . . . . . . . . .4-6
Service Dealer’s Guide to Great Quality of Cut i

Table of Contents
Adjusting Side-to-Side Level. . . . . . . . . . . . . . . . . . . . . . . . . . . . . . . . . . . . . 4-6
Adjusting Front-to-Rear Pitch . . . . . . . . . . . . . . . . . . . . . . . . . . . . . . . . . . . . 4-6
Models with Single Height of Cut Adjustment Lever . . . . . . . . . . . . . . . . . . . . . . 4-7
Wheel Does Not Touch Ground . . . . . . . . . . . . . . . . . . . . . . . . . . . . . . . . . . 4-7
Adjusting Side-to-Side Level. . . . . . . . . . . . . . . . . . . . . . . . . . . . . . . . . . . . . 4-7
Adjusting Front-to-Rear Pitch . . . . . . . . . . . . . . . . . . . . . . . . . . . . . . . . . . . . 4-7
Riding Mowers . . . . . . . . . . . . . . . . . . . . . . . . . . . . . . . . . . . . . . . . . . . . . . . . . . . . . . . . . 4-8
825 Rear Engine Rider . . . . . . . . . . . . . . . . . . . . . . . . . . . . . . . . . . . . . . . . . . . . . . . 4-8
Adjusting Side-to-Side Level . . . . . . . . . . . . . . . . . . . . . . . . . . . . . . . . . . . . . . . . 4-8
Adjusting Front-to-Rear Pitch . . . . . . . . . . . . . . . . . . . . . . . . . . . . . . . . . . . . . . . 4-8
Adjusting Blade Tracking . . . . . . . . . . . . . . . . . . . . . . . . . . . . . . . . . . . . . . . . . . 4-8
32-inch Rear Engine Rider . . . . . . . . . . . . . . . . . . . . . . . . . . . . . . . . . . . . . . . . . . . . 4-8
Adjusting Side-to-Side Level . . . . . . . . . . . . . . . . . . . . . . . . . . . . . . . . . . . . . . . . 4-9
Adjusting Front-to-Rear Pitch . . . . . . . . . . . . . . . . . . . . . . . . . . . . . . . . . . . . . . . 4-9
Adjusting Blade Tracking . . . . . . . . . . . . . . . . . . . . . . . . . . . . . . . . . . . . . . . . . . 4-9
XL Series Front Engine Rider . . . . . . . . . . . . . . . . . . . . . . . . . . . . . . . . . . . . . . . . . . 4-9
Adjusting Side-to-Side Level—All Cutting Units . . . . . . . . . . . . . . . . . . . . . . . . 4-10
Adjusting Front-to-Rear Pitch . . . . . . . . . . . . . . . . . . . . . . . . . . . . . . . . . . . . . . 4-11
32-inch (81.3cm) Cutting Unit . . . . . . . . . . . . . . . . . . . . . . . . . . . . . . . . . . . 4-11
38-inch (96.5cm) Cutting Unit . . . . . . . . . . . . . . . . . . . . . . . . . . . . . . . . . . . 4-12
44-inch (111.7cm) Cutting Unit . . . . . . . . . . . . . . . . . . . . . . . . . . . . . . . . . . 4-13
Adjusting Blade Tracking . . . . . . . . . . . . . . . . . . . . . . . . . . . . . . . . . . . . . . . . . 4-14
32-inch (81.3cm) Cutting Unit . . . . . . . . . . . . . . . . . . . . . . . . . . . . . . . . . . . 4-14
38- and 44-inch (96.5 and 111.7cm) Cutting Units. . . . . . . . . . . . . . . . . . . 4-15
260 Series Tractor . . . . . . . . . . . . . . . . . . . . . . . . . . . . . . . . . . . . . . . . . . . . . . . . . . 4-16
38-inch (96.5cm) Mower . . . . . . . . . . . . . . . . . . . . . . . . . . . . . . . . . . . . . . . . . . 4-16
Adjusting Side-to-Side Level. . . . . . . . . . . . . . . . . . . . . . . . . . . . . . . . . . . . 4-16
Adjusting Front-to-Rear Pitch . . . . . . . . . . . . . . . . . . . . . . . . . . . . . . . . . . . 4-17
42-, 48-, 52-inch (106.6, 121.9, 132.0cm) Mowers . . . . . . . . . . . . . . . . . . . . . . 4-17
Adjusting Side-to-Side Level with Mower Suspended . . . . . . . . . . . . . . . . 4-18
Front-to-Rear Pitch . . . . . . . . . . . . . . . . . . . . . . . . . . . . . . . . . . . . . . . . . . . 4-18
Blade Tracking—All 260 Series . . . . . . . . . . . . . . . . . . . . . . . . . . . . . . . . . . . . 4-18
300-400-500 Series Garden Tractor (Excluding 5xi Series) . . . . . . . . . . . . . . . . . . 4-19
Adjusting Side-to-Side Level . . . . . . . . . . . . . . . . . . . . . . . . . . . . . . . . . . . . . . . 4-19
Adjusting Front-to-Rear Pitch . . . . . . . . . . . . . . . . . . . . . . . . . . . . . . . . . . . . . . 4-19
Adjusting Blade Tracking . . . . . . . . . . . . . . . . . . . . . . . . . . . . . . . . . . . . . . . . . 4-20
ii Service Dealer’s Guide to Great Quality of Cut

Table of Contents
5xi Series Tractors . . . . . . . . . . . . . . . . . . . . . . . . . . . . . . . . . . . . . . . . . . . . . . . . . . 4-20
Adjusting Side-to-Side Level . . . . . . . . . . . . . . . . . . . . . . . . . . . . . . . . . . . . . . .4-20
44-, 48-, 52-inch (111.7, 121.9, 132.0cm) Mowers . . . . . . . . . . . . . . . . . . . 4-20
60-inch (152.4cm) Mower . . . . . . . . . . . . . . . . . . . . . . . . . . . . . . . . . . . . . .4-21
Adjusting Front-to-Rear Pitch. . . . . . . . . . . . . . . . . . . . . . . . . . . . . . . . . . . . . . .4-21
Adjusting Transport Blade Pitch . . . . . . . . . . . . . . . . . . . . . . . . . . . . . . . . . . . . . 4-21
Adjusting Blade Tracking . . . . . . . . . . . . . . . . . . . . . . . . . . . . . . . . . . . . . . . . . .4-22
TimeCutter Z. . . . . . . . . . . . . . . . . . . . . . . . . . . . . . . . . . . . . . . . . . . . . . . . . . . . . . . 4-22
Adjusting Side-to-Side Level . . . . . . . . . . . . . . . . . . . . . . . . . . . . . . . . . . . . . . .4-22
Adjusting Front-to-Rear Pitch. . . . . . . . . . . . . . . . . . . . . . . . . . . . . . . . . . . . . . .4-23
Adjusting Blade Tracking . . . . . . . . . . . . . . . . . . . . . . . . . . . . . . . . . . . . . . . . . .4-23
Troubleshooting Quality of Cut
General Troubleshooting Procedures . . . . . . . . . . . . . . . . . . . . . . . . . . . . . . . . . . . . . . . . . . . 5-1
Specific Quality of Cut Problems and Possible Solutions . . . . . . . . . . . . . . . . . . . . . . . . . . . . 5-1
Blowout . . . . . . . . . . . . . . . . . . . . . . . . . . . . . . . . . . . . . . . . . . . . . . . . . . . . . . . . . . . . . . . 5-1
Clumping . . . . . . . . . . . . . . . . . . . . . . . . . . . . . . . . . . . . . . . . . . . . . . . . . . . . . . . . . . . . . . 5-1
Clogged Chute (Bagging or Side Discharging Only). . . . . . . . . . . . . . . . . . . . . . . . . . . . . 5-2
Dribbling . . . . . . . . . . . . . . . . . . . . . . . . . . . . . . . . . . . . . . . . . . . . . . . . . . . . . . . . . . . . . . 5-2
Ragged Cut . . . . . . . . . . . . . . . . . . . . . . . . . . . . . . . . . . . . . . . . . . . . . . . . . . . . . . . . . . . .5-2
Scalping. . . . . . . . . . . . . . . . . . . . . . . . . . . . . . . . . . . . . . . . . . . . . . . . . . . . . . . . . . . . . . . 5-2
Stair Step or Sawtooth Cut . . . . . . . . . . . . . . . . . . . . . . . . . . . . . . . . . . . . . . . . . . . . . . . .5-2
Stragglers . . . . . . . . . . . . . . . . . . . . . . . . . . . . . . . . . . . . . . . . . . . . . . . . . . . . . . . . . . . . . 5-2
Streaking . . . . . . . . . . . . . . . . . . . . . . . . . . . . . . . . . . . . . . . . . . . . . . . . . . . . . . . . . . . . . . 5-2
Uncut Grass . . . . . . . . . . . . . . . . . . . . . . . . . . . . . . . . . . . . . . . . . . . . . . . . . . . . . . . . . . .5-3
Windrow . . . . . . . . . . . . . . . . . . . . . . . . . . . . . . . . . . . . . . . . . . . . . . . . . . . . . . . . . . . . . . 5-3
Kits to Improve Quality of Cut
Toro Recycler Mulch Plug . . . . . . . . . . . . . . . . . . . . . . . . . . . . . . . . . . . . . . . . . . . . . . . . . . . .6-1
Washout Port Kit P/N 95-3282. . . . . . . . . . . . . . . . . . . . . . . . . . . . . . . . . . . . . . . . . . . . . . . . . 6-1
Cast Deck Height of Cut Notch Repair Kits . . . . . . . . . . . . . . . . . . . . . . . . . . . . . . . . . . . . . . . 6-1
Anti-scalping Roller Kit P/N 93-3898 . . . . . . . . . . . . . . . . . . . . . . . . . . . . . . . . . . . . . . . . . . . . 6-2
Level Assist Kit P/N 94-9780 . . . . . . . . . . . . . . . . . . . . . . . . . . . . . . . . . . . . . . . . . . . . . . . . . .6-2
Level Assist Kit P/N 94-1592 . . . . . . . . . . . . . . . . . . . . . . . . . . . . . . . . . . . . . . . . . . . . . . . . . .6-2
Baffle Kits. . . . . . . . . . . . . . . . . . . . . . . . . . . . . . . . . . . . . . . . . . . . . . . . . . . . . . . . . . . . . . . . . 6-2
Appendices
Glossary. . . . . . . . . . . . . . . . . . . . . . . . . . . . . . . . . . . . . . . . . . . . . . . . . . . . . . . . . . . . . . . . . . 7-1
Special Tools . . . . . . . . . . . . . . . . . . . . . . . . . . . . . . . . . . . . . . . . . . . . . . . . . . . . . . . . . . . . . . 7-7
Mower Quality of Cut Checklist . . . . . . . . . . . . . . . . . . . . . . . . . . . . . . . . . . . . . . . . . . . . . . . . 7-8
Service Dealer’s Guide to Great Quality of Cut iii

This page intentionally left blank.
iv Service Dealer’s Guide to Great Quality of Cut

Introduction
Manual Purpose
This manual describes the setup, operator instruction,
and mowing tips that promote a great quality of cut.
This manual contains material covering Toro and
Lawn-Boy brand rotary mowers built in 2002. This
information also applies to similarly-designed products
produced before or after 2002. The Toro Company has
made every effort to make the information in this
manual complete and correct.
Intended Audience
This manual is written expressly for the Toro and
Lawn-Boy servicing dealer. It assumes the reader has
basic mechanical knowledge and skills.
Contents
This manual contains the following sections:
1. Introduction — This section.
5. Troubleshooting Quality of Cut — This section
describes general quality of cut troubleshooting
procedures and procedures for addressing
specific quality of cut problems.
6. Kits to Improve Quality of Cut — This section
describes kits designed to address specific quality
of cut problems on certain Toro and Lawn-Boy
brand rotary mowers.
7. Appendices — This section contains a glossary of
quality of cut terms and a list of special tools used
in addressing quality of cut problems. It also
contains a Mower Quality of Cut Checklist for use
when troubleshooting quality of cut problems.
2. Elements of a Great Quality of Cut — This section
provides an overview of the setup and operator
instruction that promote a great quality of cut.
3. Inspecting and Sharpening the Blade — This
section describes how to remove, inspect,
sharpen, balance, and install a blade.
4. Checking and Adjusting Blade Level — This
section describes how to check and adjust the
blade level on all types of Toro and Lawn-Boy
brand rotary mowers built in 2002.
Service Dealer’s Guide to Great Quality of Cut 1 - 1

This page intentionally left blank.
1 - 2 Service Dealer’s Guide to Great Quality of Cut
Elements of Great Quality of Cut
Overview
Quality of cut issues are best handled before they
happen. Two factors largely determine quality of cut:
proper mower setup and adequate operator instruction.
This section describes the elements of proper mower
setup. It also describes the elements mower
preparation, lawn preparation, safety procedures, and
mowing tips the operator should know to use the
mower safely to get a great quality of cut.
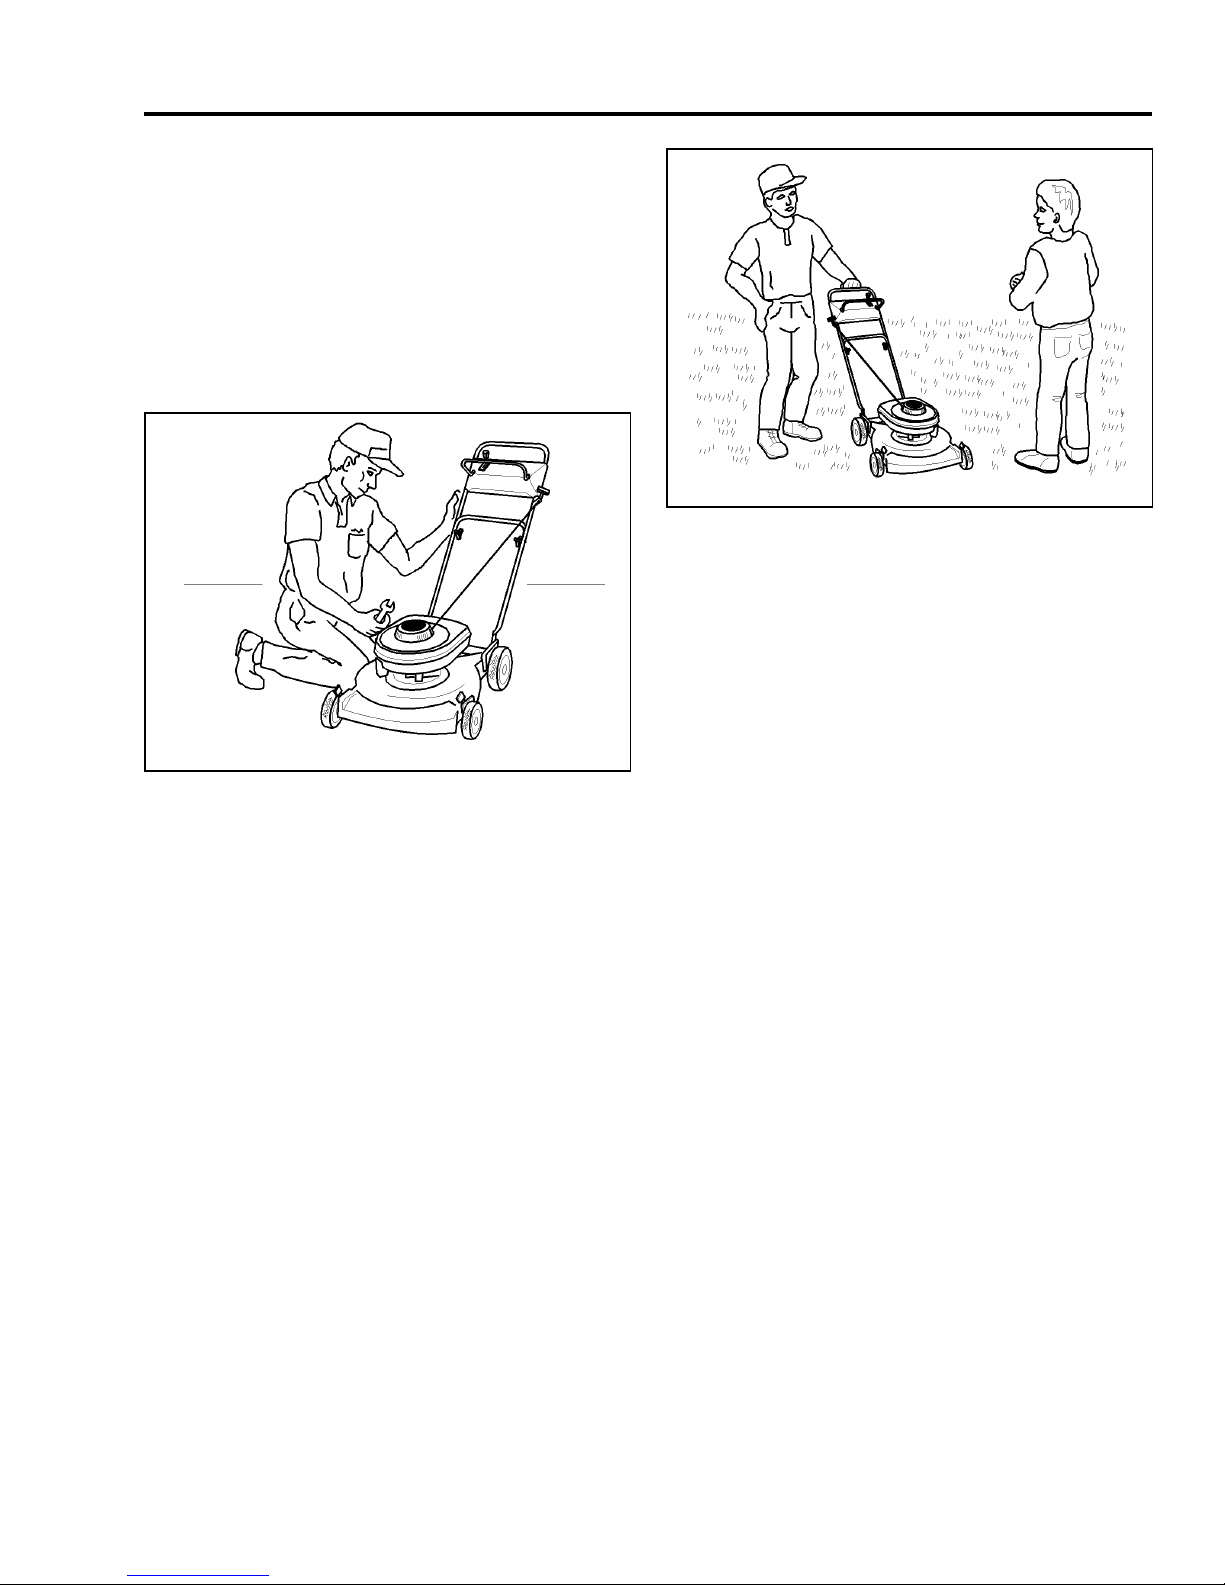
Figure 1
We have found that an improperly set up mower can
start the customer off with a feeling that their new
mower is defective and will never be right. Once an
operator gets the idea that the mower is defective, it
can be very difficult and very time consuming to prove
the machine is performing properly.
Customer education is the other part of the quality of
cut formula. When a customer begins to use a new
machine and it performs improperly, a complaint can
be the result. When the machine is checked,
sometimes no technical problems are found. This may
indicate the customer is not operating the machine
properly for the conditions.
It can be very difficult to convince a customer that a
problem cannot be resolved in the shop, but must be
resolved instead by a change in operating the mower.
Initial customer education is critical in preventing this
situation. If this situation arises after the customer has
taken delivery of the mower, a visit to the customer's
lawn for demonstration of the problem and the
suggested solution may be necessary.
5300.012.TIF
Figure 2
5300.010.TIF
Setup
On all mowers, proper mower setup consists of doing
the following and making any necessary adjustments:
1. Inspect for damage, scratches, dents, and for bent
or crooked parts. Make sure the wheels roll true
and the control cables are undamaged. Repair
any problems before continuing.
2. Fill engine with gas and oil (4 cycle) or fuel mix
(2 cycle).
3. Check that all grease fittings are greased.
4. Check that all key hardware (blade bolt, wheels,
handles, etc.) is tight.
5. Start the engine and check the no-load RPM.
Note: Engine speed typically increases
100–200 RPM during engine break-in. Set the
engine RPM so that a small increase in no-load
speed does not cause it to overspeed.
6. Operate the drive, blade, and traction controls
(gear shift, throttle, choke, engine or blade-stop,
etc.) to make sure they work properly.
7. Height of cut (HOC) adjusting mechanism moves
freely and engages firmly.
8. Blade is sharp, balanced, and tracks properly.
9. Deck is level side-to-side and front-to-rear.
On riding mowers, also do the following and make any
necessary adjustments:
Service Dealer’s Guide to Great Quality of Cut 2 - 1
10. Check the front wheel toe in.

Elements of Great Quality of Cut
11. Check the transmission fluid level. (See owner’s
manual; some models have a sealed
transmission.)
12. Check the tire pressure, where applicable.
Note: Some models require installing the mower
attachment. If the mower is factory-installed, check the
blade pitch and deck level. These two factors are
critical to a great quality of cut.
Operator Instruction
Even experienced operators should review the
operation instructions for an unfamiliar machine. Every
operator’s manual contains safety and operation
information the operator should review before
operating the mower. Refer the operator to the
operator’s manual for details on operating the mower
safely and effectively.
Mower Preparation
When reviewing mower operation procedures with an
operator, do the following:
• Demonstrate for the operator the sound of the
engine operating under a normal load and then
operating in an overloaded condition in which it is
starting to bog down.
• Show the operator how to clean clippings out of
the cutting chamber. Explain that this is important
because clippings can harden and stick to the
cutting chamber. Clippings adhering to the cutting
deck change the airflow under the cutting deck
and affect the quality of cut. They also generally
bond to the deck paint and cannot be removed
without also removing the paint.
Lawn Preparation
Explain to the operator that the operator’s manual
contains information for proper lawn preparation.
Remind the operator of the following:
• The grass must be dry. Cut late in the day, after
the sun has had a chance to dry the grass.
• Clear the area of objects such as rocks, toys, wire,
bones, sticks etc., which could be picked up and
thrown by the blade.
• Identify the location of the air filter and explain
how to check it.
• Describe how often the blade should be checked
and sharpened. Explain that tipping a walk behind
mower the wrong way to check the blade could
cause gasoline to spill or oil to soak the air filter.
• For a mower with a 4 cycle engine, explain how
often the oil should be checked and what type of
oil should be used. For a mower with a 2 cycle
engine, explain the method for mixing fuel and oil
properly. Remind the operator that the instructions
for either of these procedures are in the operator’s
manual.
• Identify the machine’s safety features and explain
how they work and how to use them. Remind the
operator that safety instructions are in the
operator’s manual.
Safety
Explain to the operator that the operator’s manual
contains safety information about the mower, lawn
preparation, operator dress and condition, and mowing
procedures. When followed, this safety information
contributes to a great quality of cut by ensuring that the
operator and bystanders are safe, the mower operates
properly, and the lawn is not damaged during mowing.
The operator should be completely familiar with all
aspects of operating the mower safely.
2 - 2 Service Dealer’s Guide to Great Quality of Cut

Elements of Great Quality of Cut
Mowing Tips
Explain to the operator that the operator’s manual
contains tips for getting a great quality of cut. Remind
the operator of the following:
• The best ground speed is normal walking speed.
However, if the engine bogs down at this speed,
slow down to avoid degrading the lawn
appearance.
• With a mulching mower, it may be necessary to
mow more slowly than with a bagging or side
discharge mower. Compared to bagging or side
discharging, the time spent in mowing more slowly
with a mulching mower is made up for by not
emptying a bag or raking discharged clippings.
• The best height of cut varies with the type of grass
and the season. In the spring and fall, when
temperatures are moderate and rainfall is higher,
height of cut can usually be decreased. In the
summer, when the temperature increases and
rainfall decreases, it is usually better to increase
the height of cut.
• To maintain the health of the grass, turf grass
agronomists recommend cutting no more than 1/3
of the grass height. Most rotary mowers designed
for urban and suburban use work best when set
up to cut no more than 1/3 of the grass height.
• When the height of cut is changed, the lawn takes
a couple of weeks to adjust to the new cutting
height. If the height of cut is increased, the grass
may droop until it adjusts. If the height of cut is
decreased, the lawn may temporarily look less
green and lush.
Service Dealer’s Guide to Great Quality of Cut 2 - 3

This page intentionally left blank.
2 - 4 Service Dealer’s Guide to Great Quality of Cut
Inspecting and Sharpening the Blade
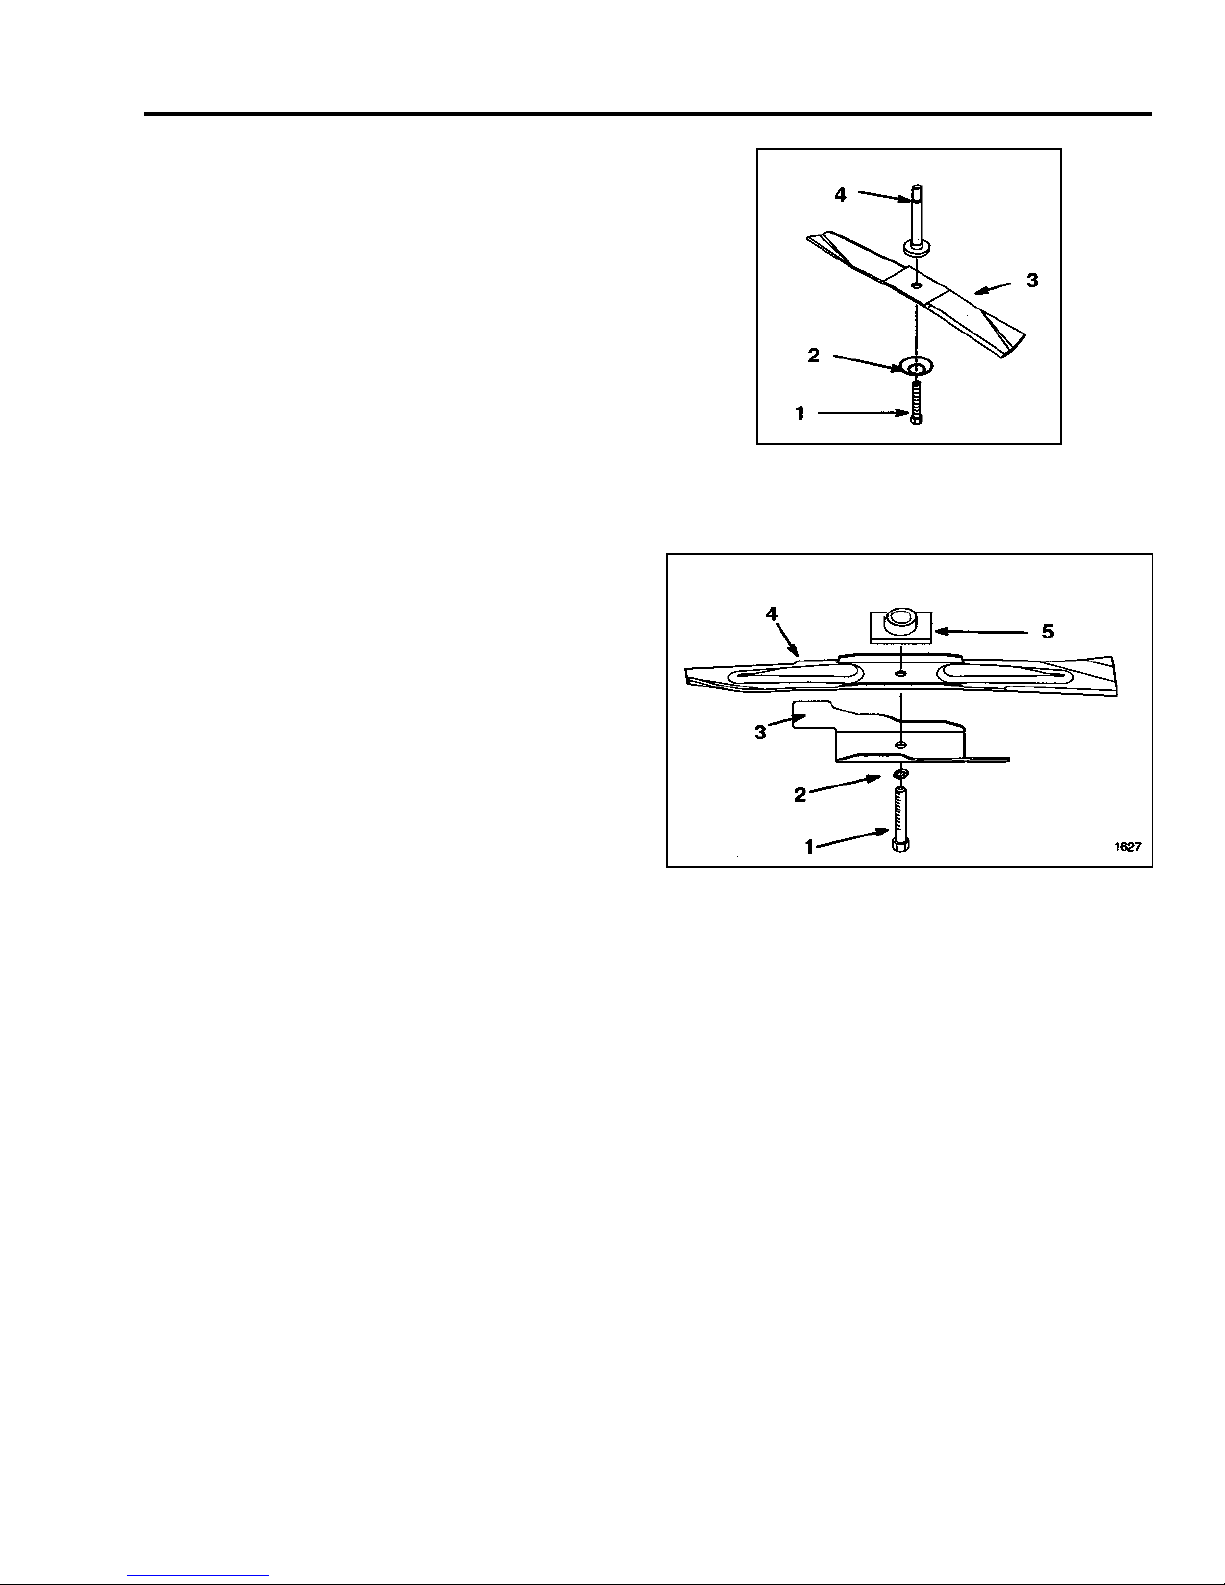
1.Blade bolt
3.Blad
1.Blade bolt
4.Blad
Overview
This section describes how to remove, inspect,
sharpen, balance, and install a blade.
Blade condition is a key factor in quality of cut. The
blade should always be straight and sharp. A sharp
blade produces a clean, neat cut and helps ensure
healthy grass plants. A dull blade tears and shreds
grass, producing a poor quality of cut and damaging
the grass plants.
Note: For best performance, install a new blade before
the cutting season begins. During the year, file down
any small nicks to maintain the cutting edge.
Removing the Blade
Note: On walk behind mowers, while the blade is
attached to the mower, move the blade as little as
possible to avoid future starting problems.
2. Curved washer
Figure 3
4. Spindle shaft
remove1.TIF
e
1. Stop the engine and wait for all moving parts to
stop.
2. Disconnect the wire from the spark plug.
3. Walk behind mowers: Drain the fuel and oil from
the engine. Tip the mower on its side, air filter up.
Riding mowers: Remove the mower attachment,
or raise and block the tractor to allow access to
the underside of the mower.
4. Loosen the blade fastener(s). The blade fasteners
differ from mower to mower. Some mowers use a
bolt and a lock washer; some use a bolt or a nut
with a locking patch or locking material in the
threads. Bolt size varies by mower model and size
of blade. Always use the proper size wrench to
remove the bolt or nut. An adjustable wrench can
easily open and slip.
5. Grasp the end of the blade using a rag or a thickly
padded glove. Remove the blade bolt (or nut) and
the other component (Figure 3 and Figure 4).
2. Lock washer
3. Accelerator
Figure 4
5. Blade driver
remove2.TIF
e
Service Dealer’s Guide to Great Quality of Cut 3 - 1
Inspecting and Sharpening the Blade
1.Sh
thi
2.Maintain th
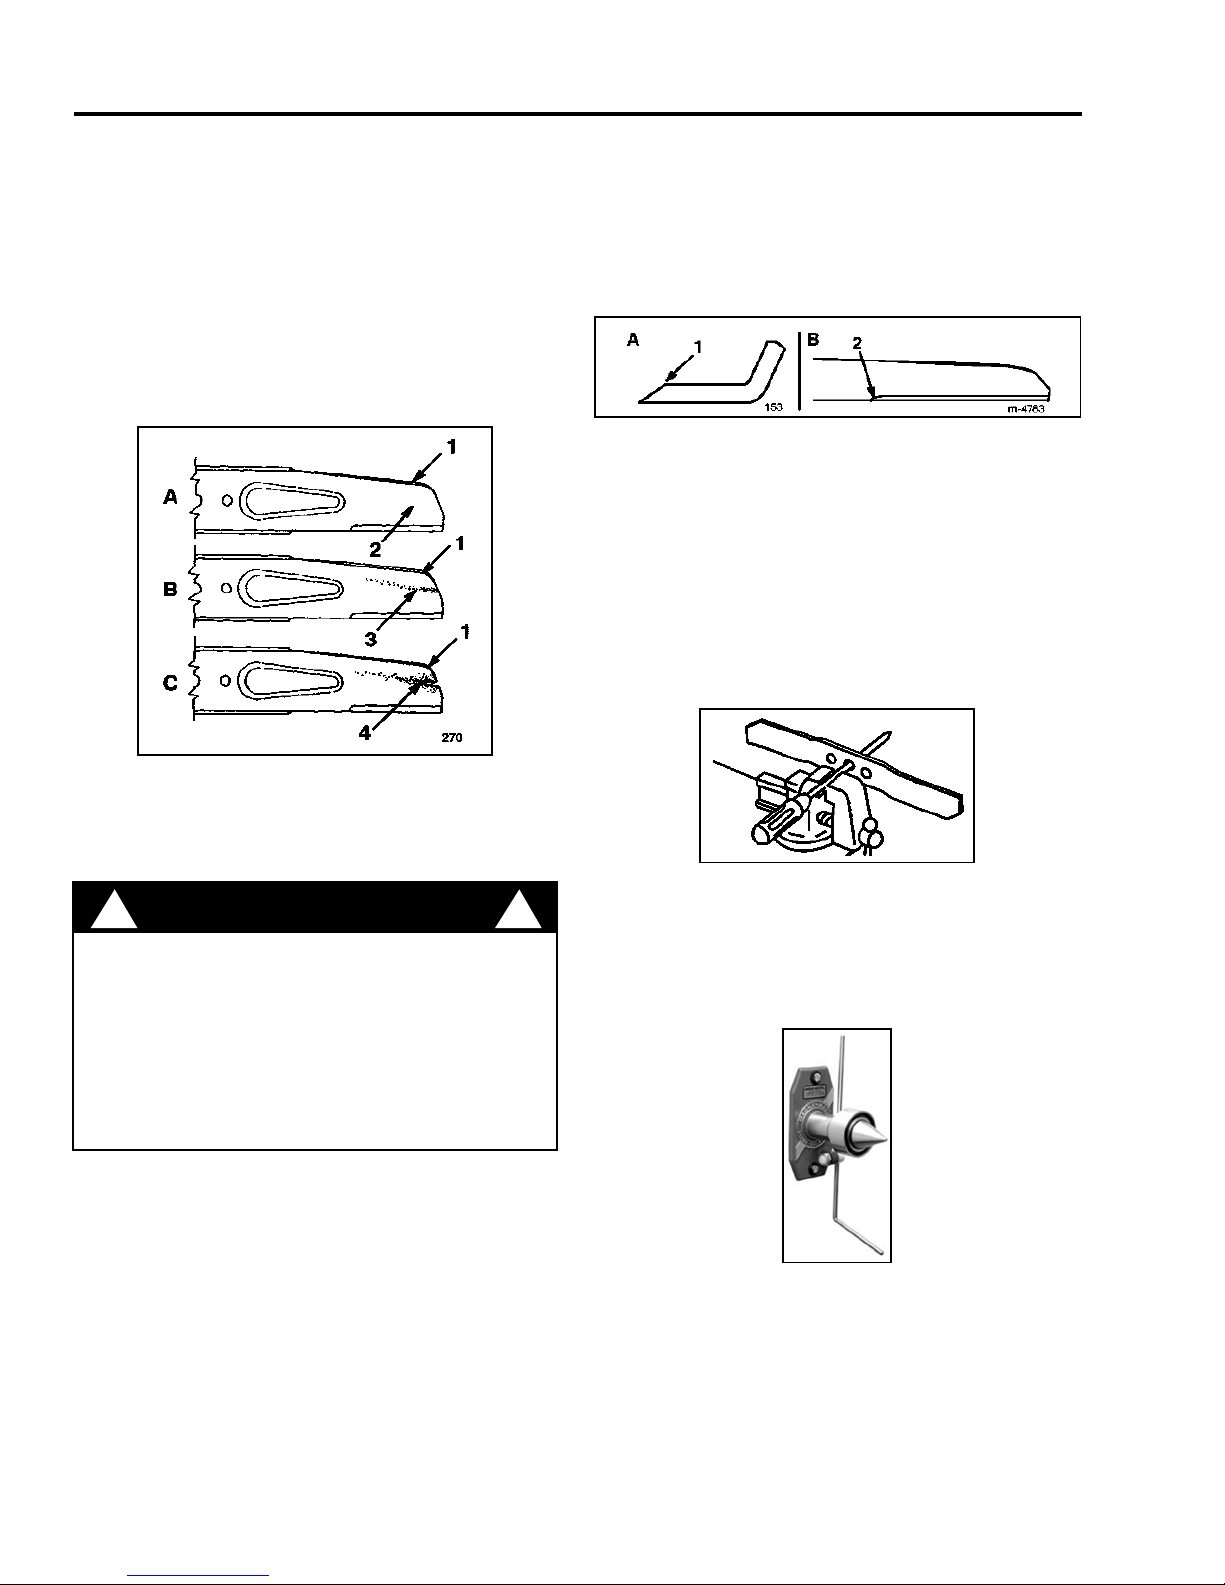
Inspecting the Blade
Carefully examine the blade for sharpness and wear,
especially where the flat and curved parts meet
(Figure 5). The appearance of this part of the blade
varies according to the model and type of blade.
Sand and other abrasive materials can wear away the
metal that connects the flat and curved parts of the
blade. Check the blade before using on the mower. If
you notice a slot or wear, replace the blade.
Sharpening the Blade
File or grind the top of the blade to maintain it's original
cutting angle and inner cutting edge radius. To keep
the blade balanced, remove the same amount of
material from both cutting edges (Figure 6).
arpen at
only.
Figure 6
s angle
radius here.
sharpen.TIF
e original
Balancing the Blade
1. Check the balance of the blade by placing the
center hole of the blade over a nail or a
screwdriver shank clamped horizontally in a vise
(Figure 7).
Figure 5
1. Sail
2. Flat part of blade
!
A worn or damaged blade can break, and a piece
of the blade could be thrown into the operator’s or
bystander’s area, resulting in serious personal
injury or death.
• Inspect the blade periodically for wear or
damage.
• Replace a worn or damaged blade.
Danger
3. Wear
4. Slot formed
bladewear.TIF
!
Figure 7
Note: You can also check the balance using a
commercially-manufactured blade balancer such
as the Magna-Matic MAG-1000 Professional
Blade Balancer (Figure 8).
Figure 8
Photo used with permission.
2. If either end of the blade rotates downward, file
that end (not the cutting edge or the end near the
cutting edge). The blade is properly balanced
when neither end drops.
balance1.TIF
mag1000.jpg
3 - 2 Service Dealer’s Guide to Great Quality of Cut
Inspecting and Sharpening the Blade
Installing the Blade
1. Install the blade onto the spindle or blade driver. If
the blade has curved tips (sails), they should be
pointing towards the mower housing (Figure 9). If
the bolt or nut uses a nylon patch or similar lock
feature, it should be replaced every third time it
has been removed. The patch will wear out with
use. If a lock washer is used, inspect it for damage
and replace if warranted.
Blade Bolt (Nut) Torque Guide for Lawn-Boy, Toro,
and Toro Wheel Horse Mowers built in 2002
Model ft-lbs Nm
Lawn-Boy
21-inch walk behind
mowers
Tor o
21-inch and 22-inch walk
behind mowers with split
washer on blade bolt
Tor o
21-inch and 22-inch walk
behind mowers with
domed or flat washer on
blade bolt
Toro Wheel Horse
25-inch, 32-inch, 38-inch,
44-inch mowers
Toro Wheel Horse
36-inch, 42-inch, 48-inch,
52-inch, 60-inch mowers
47 63
50 68
60 82
45–60 61–81
80–100 109–136
Figure 9
2. Refer to the owner's manual for your particular
unit for proper blade bolt/nut torque. Some
common Toro, Toro Wheel Horse, and Lawn-Boy
torque values are shown in the following table.
MVC-713X.jpg
Service Dealer’s Guide to Great Quality of Cut 3 - 3

This page intentionally left blank.
3 - 4 Service Dealer’s Guide to Great Quality of Cut

Checking and Adjusting the Blade Level
Overview
This section describes how to check and adjust the
blade level on consumer walk behind mowers and
riding mowers. Four factors determine proper blade
level:
• Blade tracking—blade tips staying in a single
plane of rotation as they turn
• Height of cut—height of blade above level surface
• Side-to-side level—each blade tip at the same
height above a level surface when measured on
either side of the mower
• Front-to-rear pitch—angle of blade when one tip
points to the front of the mower and the other to
the rear
Some of the procedures for checking and adjusting
blade level are common to all mowers. Some apply to
walk behind mowers with a given type of height of cut
system. Generally, each riding mower model has its
own specific height of cut, side-to-side, and
front-to-rear pitch adjustment procedures.
Walk Behind Mower
Overview
The method for checking and adjusting blade tracking
is the same for all walk behind mowers. The method for
checking and adjusting the height of cut, side-to-side
level, and front-to-rear pitch depends on the height of
cut system on the mower.
There are three height of cut systems used on
consumer walk behind mowers. For checking and
adjusting the height of cut, side-to-side level, and
front-to-rear pitch on a given mower, see the
subsection that discusses the height of cut system
used on the mower.
Cast deck models (Toro Super Recycler and Lawn-Boy
Gold Series) use notches cast into the mower housing
(Figure 10) and spring arms and pins to engage those
notches.
If you have a walk behind mower, see the following
subsections for blade level adjustment procedures:
• Walk Behind Mower Overview
• Checking Blade Level—All Mowers
• Checking and Adjusting Blade Tracking:
Walk Behind Mowers
• Adjusting Blade Level:
Walk Behind Mowers:
Models with Height of Cut Lever on
Each Wheel
Models with Single Height of Cut
Adjustment Lever
If you have a riding mower, see the following
subsections for blade level adjustment procedures:
• Riding Mower Overview
• Checking Blade Level—All Mowers
• Adjusting Blade Level:
Riding Mowers
and
subsections specific to adjusting your model
Figure 10
P2260001.JPG
Service Dealer’s Guide to Great Quality of Cut 4 - 1
Checking and Adjusting the Blade Level
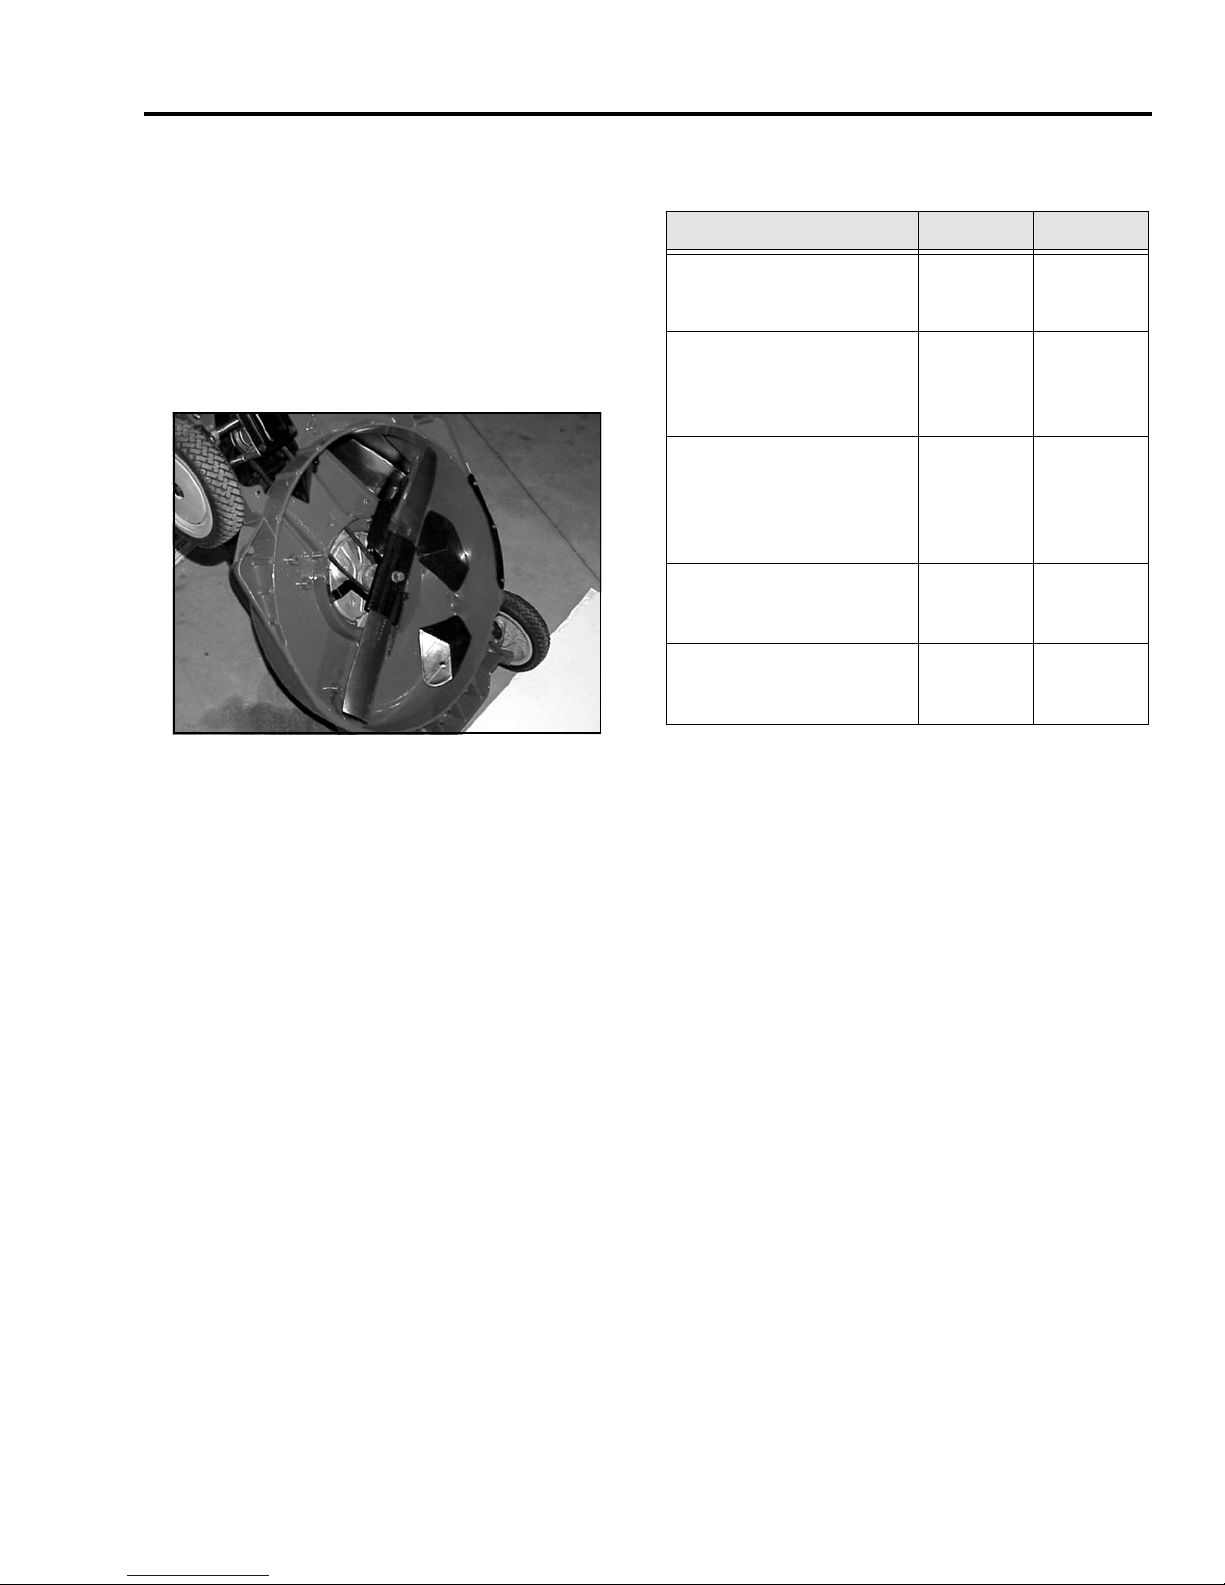
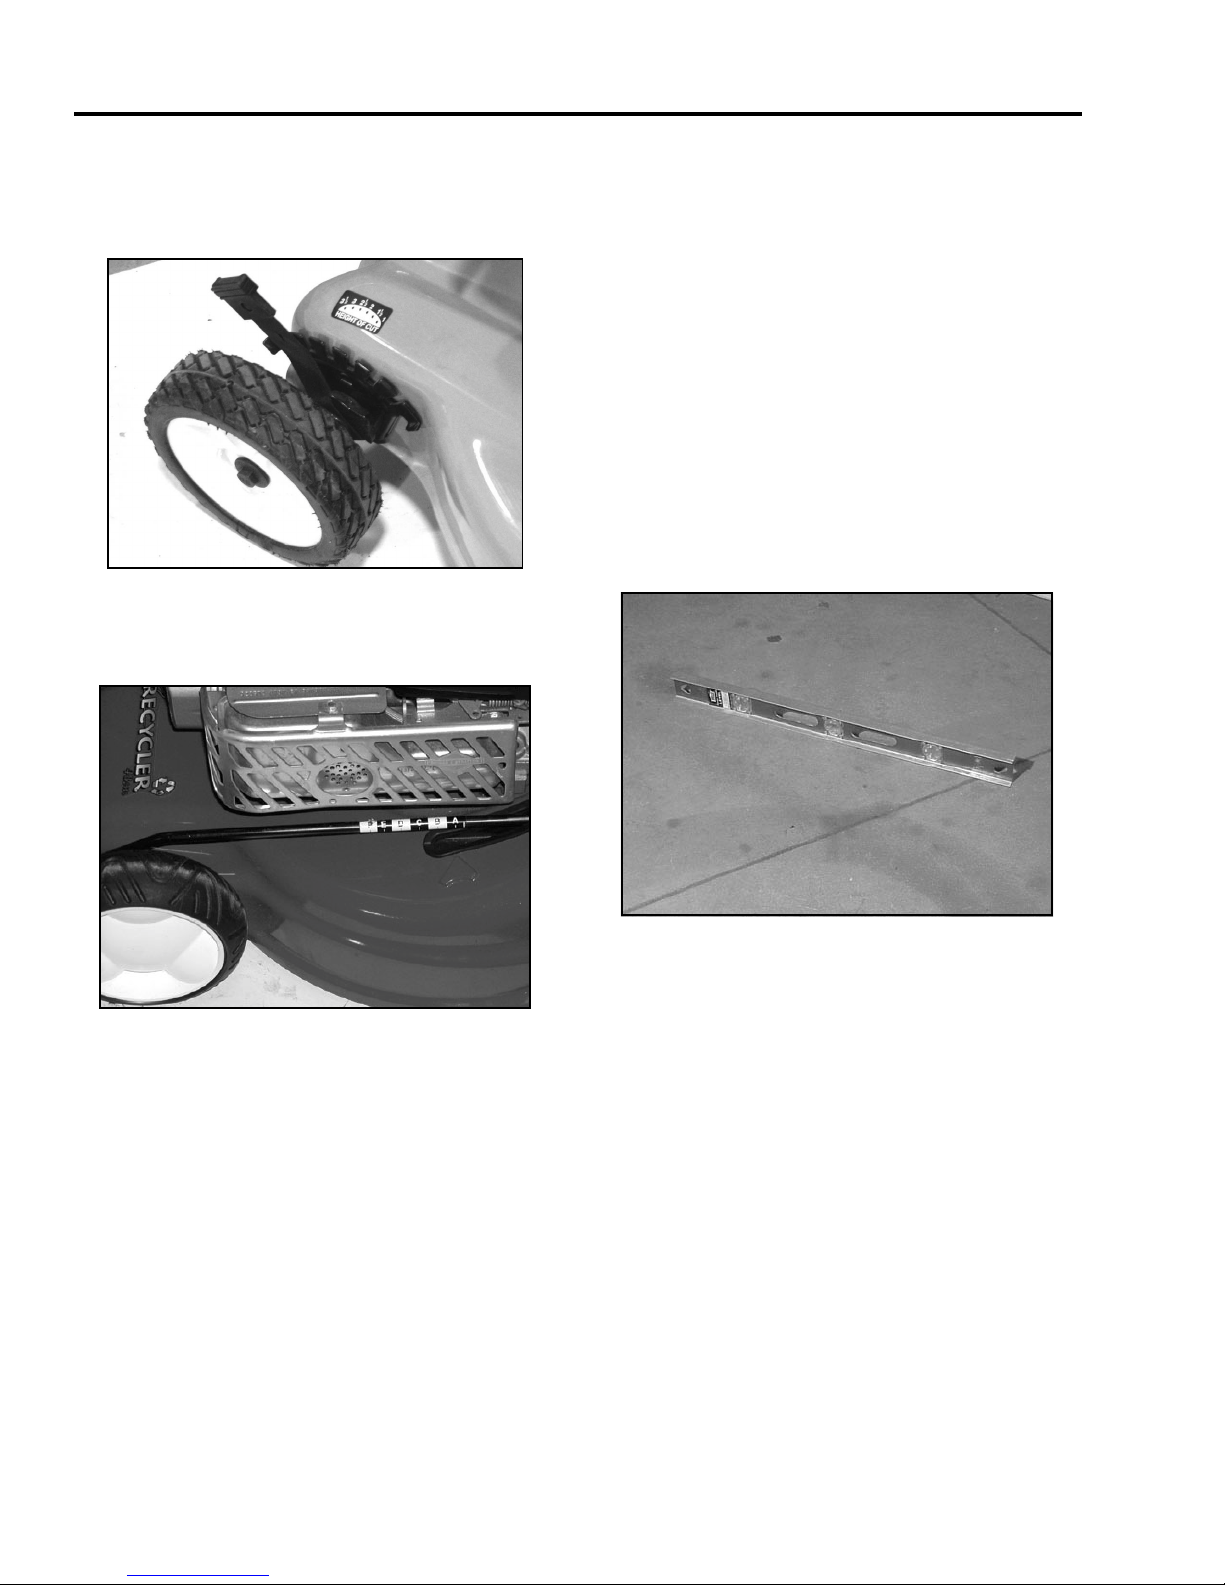
Steel deck models (Toro Recyclers and Lawn-Boy
Silver Series) use spring arms and pins to engage
notches in a plate bolted to the mower housing
(Figure 11).
Figure 11
Some models (43cm and 48cm models sold in Europe)
use a single lever height of cut system (Figure 12).
MVC-402X.jpg
Checking Blade Level—
All Mowers
Checking the blade level involves preparing a suitable
workspace and measuring the distance from one of the
blade tips to a level flat surface at the 12, 3, 6, and
9 o’clock positions.
Preparing the Workspace
Use a straight edge to verify that the workspace is flat.
Do not assume the floor is flat even if it appears to be
so. You will make measurements with a tolerance of
less than 3/16 inch (5mm) (Figure 13). A small dip in a
concrete floor may cause you hours of work trying to
find a problem that isn’t there.
Figure 13
For smaller product a 4 by 8 foot sheet of 3/4 inch
plywood laid on the floor may assure you of a relatively
Figure 12
Riding Mower Overview
Each series of riding mower has it's own method of
suspending the mower assembly. For checking and
adjusting the blade tracking, height of cut, side-to-side
level, and front-to-rear pitch on a given riding mower,
see the subsection that discusses the appropriate
series of riding mower.
4 - 2 Service Dealer’s Guide to Great Quality of Cut
P2260003.JPG
flat surface. It is rigid enough to give you a good
surface to measure from and will serve you for all
mowers up to 48 inches wide and with a wheel base
less than about 84 inches. For larger machines you
may need to find a larger level area to verify the blades
are at the correct level.
MVC-715X.JPG
 Loading...