

Page 1

22inRecycler
ModelNo.20334—SerialNo.316000001andUp
ReplacementpartsareavailablefromanAuthorizedServiceDealeroratwww.shoptoro.com.
®
LawnMower
FormNo.3406-122RevA
Operator'sManual
Introduction
Thisrotary-blade,walk-behindlawnmowerisintendedto
beusedbyresidentialhomeowners.Itisdesignedprimarily
forcuttinggrassonwell-maintainedlawnsonresidential
properties.Itisnotdesignedforcuttingbrushorfor
agriculturaluses.
Readthisinformationcarefullytolearnhowtooperateand
maintainyourproductproperlyandtoavoidinjuryand
productdamage.Youareresponsibleforoperatingthe
productproperlyandsafely.
YoumaycontactT orodirectlyatwww.Toro.comforproduct
andaccessoryinformation,helpndingadealer,ortoregister
yourproduct.
Wheneveryouneedservice,genuineToroparts,oradditional
information,contactanAuthorizedServiceDealerorToro
CustomerServiceandhavethemodelandserialnumbersof
yourproductready.Figure1identiesthelocationofthe
modelandserialnumbersontheproduct.
Thismanualidentiespotentialhazardsandhassafety
messagesidentiedbythesafety-alertsymbol(Figure2),
whichsignalsahazardthatmaycauseseriousinjuryordeath
ifyoudonotfollowtherecommendedprecautions.
Figure2
1.Safety-alertsymbol
Thismanualuses2wordstohighlightinformation.
Importantcallsattentiontospecialmechanicalinformation
andNoteemphasizesgeneralinformationworthyofspecial
attention.
WARNING
CALIFORNIA
Proposition65Warning
Thisproductcontainsachemicalorchemicals
knowntotheStateofCaliforniatocausecancer,
birthdefects,orotherreproductiveharm.
Figure1
1.Modelandserialnumberplate
Writetheproductmodelandserialnumbersinthespace
below:
ModelNo.
SerialNo.
©2016—TheToro®Company
8111LyndaleAvenueSouth
Bloomington,MN55420
Registeratwww.Toro.com.
Theengineexhaustfromthisproduct
containschemicalsknowntotheStateof
Californiatocausecancer,birthdefects,
orotherreproductiveharm.
ItisaviolationofCaliforniaPublicResourceCode
Section4442or4443touseoroperatetheengineonany
forest-covered,brush-covered,orgrass-coveredlandunless
theengineisequippedwithasparkarrester,asdenedin
Section4442,maintainedineffectiveworkingorderorthe
engineisconstructed,equipped,andmaintainedforthe
preventionofre.
ThissparkignitionsystemcomplieswithCanadianICES-002.
Theenclosed
informationregardingtheUSEnvironmentalProtection
Agency(EPA)andtheCaliforniaEmissionControl
Regulationofemissionsystems,maintenance,and
warranty.Replacementsmaybeorderedthroughthe
enginemanufacturer.
Engine Owner's Man ual
OriginalInstructions(EN)
PrintedintheUSA
AllRightsReserved
issuppliedfor
*3406-122*A
Page 2

NetTorque:Thegrossornettorqueofthisenginewas
laboratoryratedbytheenginemanufacturerinaccordance
withtheSocietyofAutomotiveEngineers(SAE)J1940.
Asconguredtomeetsafety,emission,andoperating
requirements,theactualenginetorqueonthisclassofmower
willbesignicantlylower.Gotowww.Toro.comtoview
specicationsonyourmowermodel.
Contents
Safety
ThismachinehasbeendesignedinaccordancewithANSI
B71.1-2012.
GeneralSafety
Thisproductiscapableofamputatinghandsandfeetand
ofthrowingobjects.Alwaysfollowallsafetyinstructionsto
avoidseriouspersonalinjury.
Introduction..................................................................1
Safety...........................................................................2
GeneralSafety.........................................................2
SafetyandInstructionalDecals.................................3
Setup............................................................................5
1AssemblingandUnfoldingtheHandle.....................5
2InstallingtheRecoil-StarterRopeintheRope
Guide.................................................................6
3FillingtheEnginewithOil......................................6
4ChargingtheBattery..............................................7
5AssemblingtheGrassBag......................................7
ProductOverview..........................................................8
Operation.....................................................................8
BeforeOperation.......................................................8
BeforeOperationSafety...........................................8
FillingtheFuelTank................................................9
CheckingtheEngine-OilLevel..................................9
AdjustingtheHandleHeight.....................................9
AdjustingtheCuttingHeight....................................10
DuringOperation.....................................................10
DuringOperatingSafety..........................................10
StartingtheEngine.................................................11
UsingtheSelf-PropelDrive.....................................11
StoppingtheEngine...............................................11
RecyclingtheClippings...........................................12
BaggingtheClippings.............................................12
Side-DischargingtheClippings.................................12
OperatingTips......................................................13
AfterOperation........................................................14
AfterOperatingSafety............................................14
CleaningundertheMachine.....................................14
FoldingtheHandle.................................................14
Maintenance.................................................................16
RecommendedMaintenanceSchedule(s)......................16
MaintenanceSafety.................................................16
PreparingforMaintenance.......................................16
ServicingtheAirFilter............................................17
ChangingtheEngineOil.........................................17
ChargingtheBattery...............................................18
ReplacingtheFuse..................................................18
ReplacingtheBlade................................................19
AdjustingtheSelf-PropelDrive................................20
Storage........................................................................21
PreparingtheMachineforStorage............................21
RemovetheMachinefromStorage............................21
Usingthisproductforpurposesotherthanitsintendeduse
couldprovedangeroustoyouandbystanders.
•ReadandunderstandthecontentsofthisOperator’ s
Manualbeforeyoustarttheengine.Ensurethateveryone
usingthisproductknowshowtouseitandunderstands
thewarnings.
•Donotputyourhandsorfeetnearmovingcomponents
ofthemachine.
•Donotoperatethemachinewithoutallguardsandother
safetyprotectivedevicesinplaceandworkingonthe
machine.
•Keepclearofanydischargeopening.Keepbystandersa
safedistancefromthemachine.
•Keepchildrenoutoftheoperatingarea.Neverallow
childrentooperatethemachine.
•Stopthemachine,shutofftheengine,andremove
theelectric-startbuttonbeforeservicing,fueling,or
uncloggingthemachine.
Improperlyusingormaintainingthismachinecanresult
ininjury.Toreducethepotentialforinjury,complywith
thesesafetyinstructionsandalwayspayattentiontothe
safety-alertsymbol,whichmeansCaution,Warning,or
Danger—personalsafetyinstruction.Failuretocomplywith
theseinstructionsmayresultinpersonalinjuryordeath.
Youcanndadditionalitemsofsafetyinformationintheir
respectivesectionsthroughoutthismanual.
2
Page 3
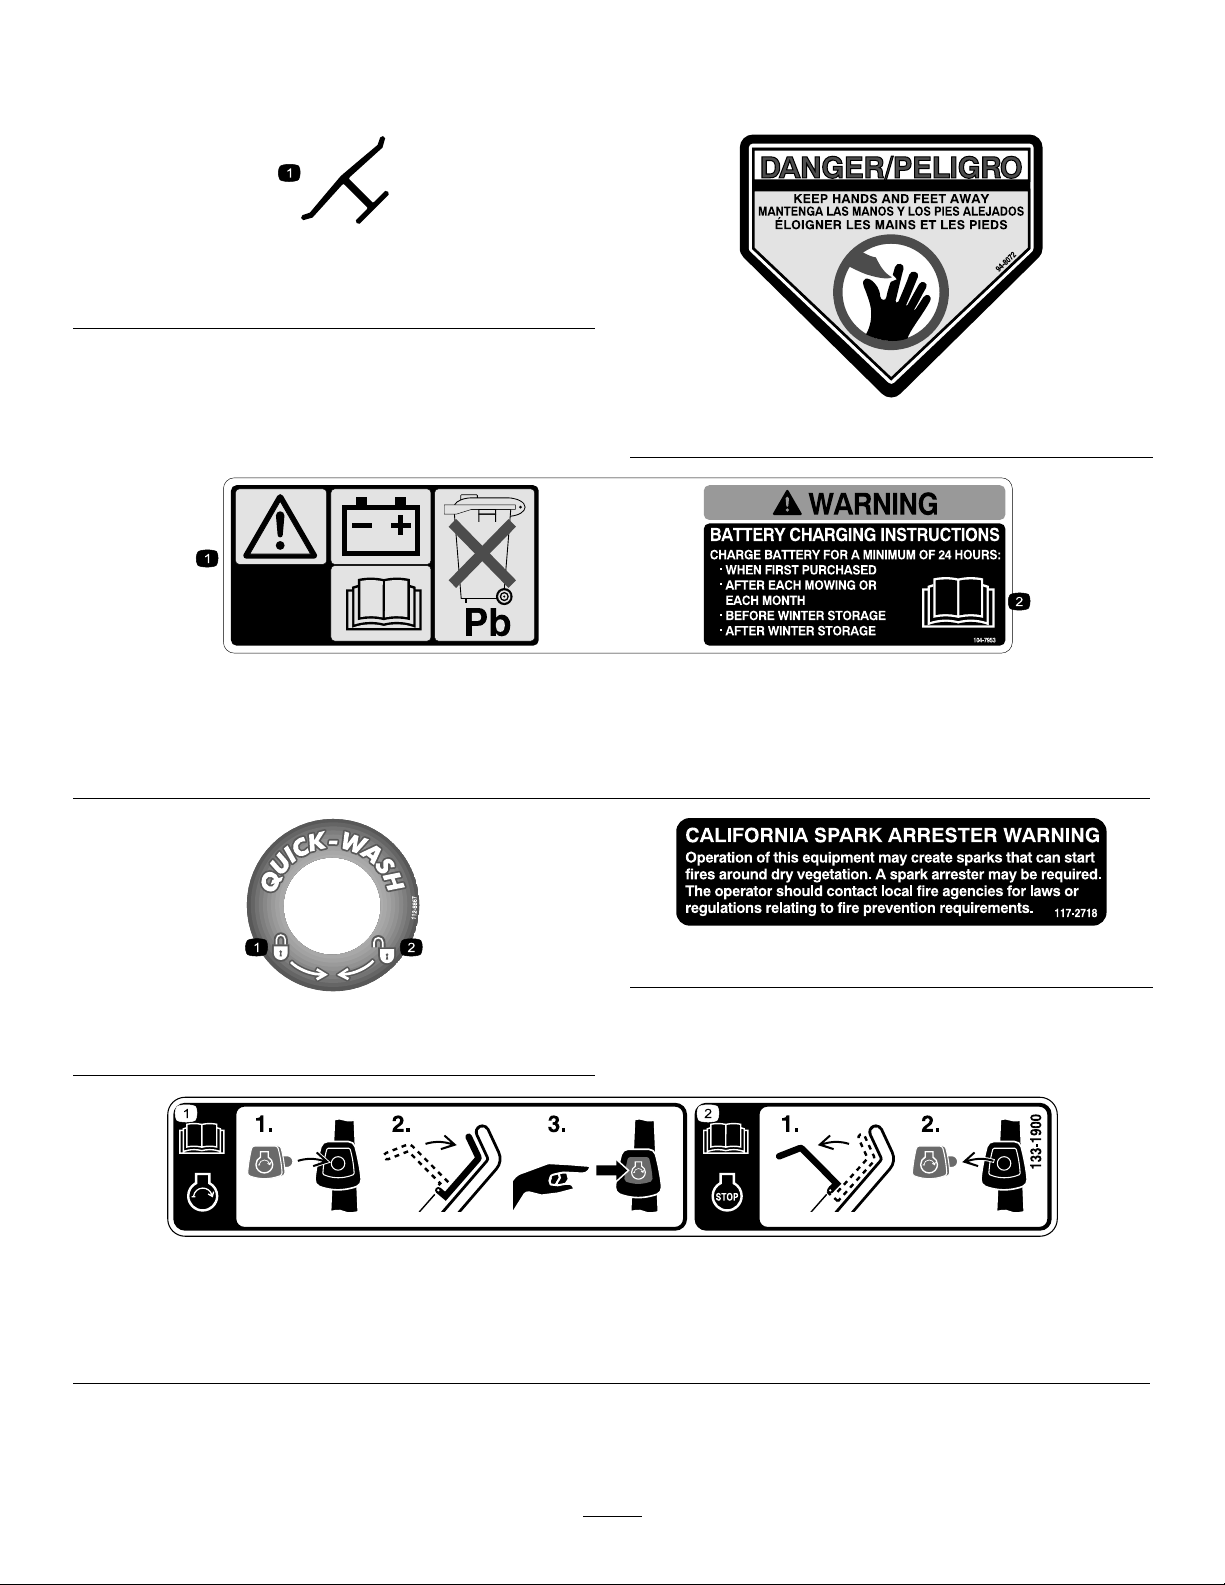
SafetyandInstructionalDecals
Important:Safetyandinstructiondecalsarelocatednearareasofpotentialdanger.Replacedamageddecals.
Manufacturer'sMark
1.Indicatesthebladeisidentiedasapartfromtheoriginal
machinemanufacturer.
94-8072
104-7953
Electric-startmodelonly
1.Warning—readtheOperator'sManualforinformationonchargingthebattery;containslead;donotdiscard.
2.ReadtheOperator'sManual.
112-8867
1.Lock2.Unlock
117-2718
1.ReadtheOperator’sManualformoreinformationonstarting
theengine—1)Inserttheelectric-startbuttonintotheignition;
2)Engagetheblade-controlbar;3)Pushtheelectric-start
buttontostarttheengine.
133–1900
2.ReadtheOperator’sManualformoreinformationonstopping
theengine—1)Releasetheblade-controlbar;2)Removethe
electric-startbuttonfromtheignition.
3
Page 4
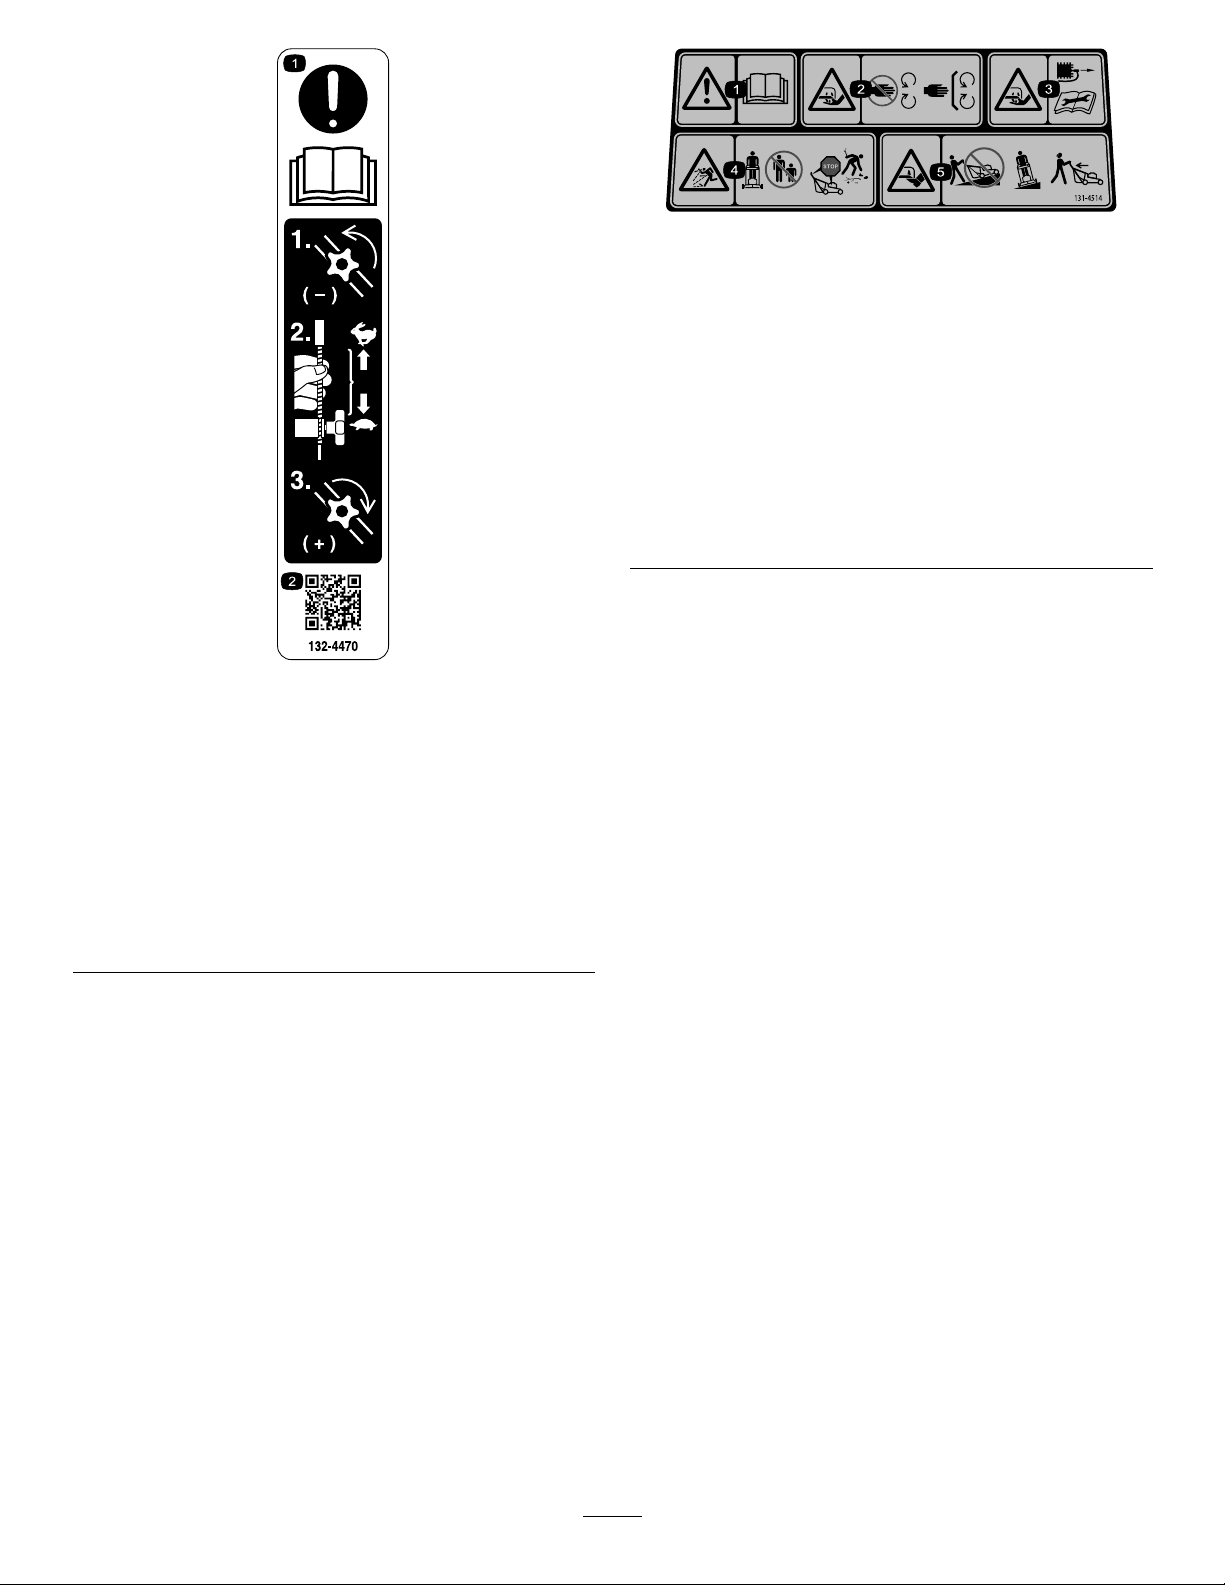
131–4514
1.Warning—readtheOperator'sManual.
2.Cutting/dismembermenthazardofhandorfoot,mower
blade—stayawayfrommovingparts;keepallguardsand
shieldsinplace.
3.Cutting/dismembermenthazardofhandorfoot,mower
blade—disconnectthespark-plugwireandreadthe
instructionsbeforeservicingorperformingmaintenance.
4.Thrownobjecthazard—keepbystandersasafedistance
fromthemachine;stoptheenginebeforeleavingthe
operatingposition;pickupanydebrisbeforemowing.
5.Cutting/dismembermenthazardofhandorfoot,mower
blade—donotoperateupanddownslopes;operatesideto
sideonslopes;lookbehindyouwhenbackingup.
132–4470
TractionAdjustment
1.Attention;readthe
Operator'sManual—1)
Loosentheknobbyturning
itcounterclockwise;2)Pull
thecable(s)awayfrom
theenginetodecrease
thetraction,orpushthe
cable(s)towardtheengine
toincreasethetraction;
3)Tightentheknobby
turningitclockwise.
2.ScantheQRcodefor
moreinformationon
tractionadjustment.
4
Page 5
Setup
Important:Removeanddiscardtheprotectiveplastic
sheetthatcoverstheengineandanyotherplasticor
wrappingonthemachine.
Important:Topreventaccidentalstarting,donotinsert
theelectric-startbuttonintotheelectricstarterswitch
untilyouarereadytostarttheengine.
1
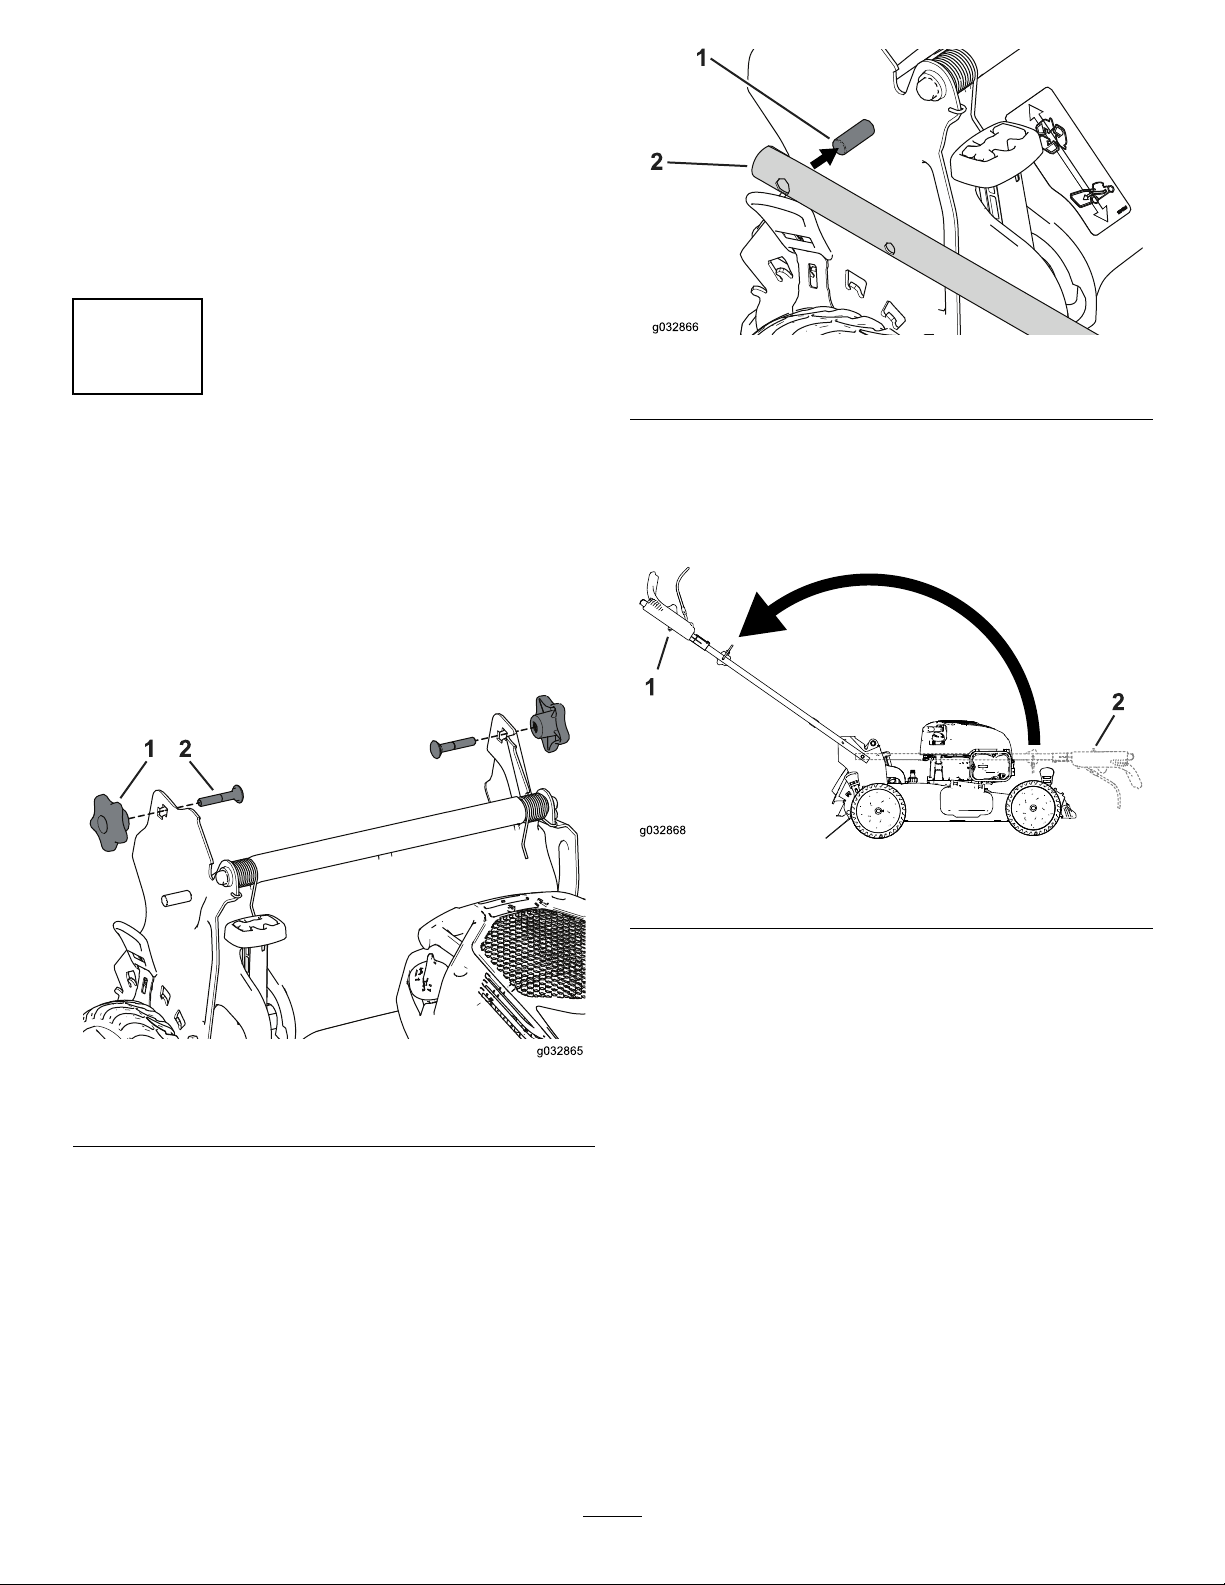
AssemblingandUnfoldingthe Handle
Figure4
1.Pin2.Handleend
Note:Thepinswillnotshowthroughtheholesinthe
handleendswhenthehandleisinthefoldedposition.
NoPartsRequired
Procedure
1.Removeandsavethe2handleknobsand2carriage
boltsfromthehandlebrackets(Figure3).
Figure3
3.Unfoldthehandletotheoperatingpositionbyrotating
itrearward(Figure5).
Figure5
1.Foldedposition
4.Insertthecarriagebolt(withtheboltheadtoward
theinside)throughtheupperorlowersquareholein
handlebracketandtheupperholeinthehandleend
(Figure6).
2.Operatingposition
1.Handleknob
2.Installthehandleendsontothemowerhousingsothat
thepinattachedtoeachhandlebracketisinthelower
holeofitsrelatedhandleend(Figure4).
2.Carriagebolt
5
Page 6
Figure6
1.Handleknob
5.Looselyinstallthehandleknobsontothecarriagebolts.
6.Refertosteps3through5ofAdjustingtheHandle
Height(page9).
2.Carriagebolt
3
FillingtheEnginewithOil
NoPartsRequired
Procedure
Note:Yourmachinedoesnotcomewithoilintheengine,
butitdoescomewithabottleofoil.
Max.ll:0.53L(18oz),type:SAE30detergentoilwithan
APIserviceclassicationofSF,SG,SH,SJ,SL,orhigher.
1.Removethedipstick(Figure8).
2
InstallingtheRecoil-Starter RopeintheRopeGuide
NoPartsRequired
Procedure
Important:Tostarttheenginesafelyandeasily
wheneveryouusethemachine,installtherecoil-starter
ropeintheropeguide.
Holdtheblade-controlbartotheupperhandleandpullthe
recoil-starterropethroughtheropeguideonthehandle
(Figure7).
Figure8
1.Dipstick3.Fullmarker
2.Addmarker
2.Slowlypouroilintotheoil-lltubeuntiltheoillevel
reachestheFulllineonthedipstick(Figure8).Donot
overll.
3.Installthedipsticksecurely.
Figure7
1.Recoil-starterrope2.Ropeguide
6
Page 7
4
g027257
1
2
3
g027258
ChargingtheBattery
NoPartsRequired
Procedure
Electric-StartModelOnly
RefertoChargingtheBattery(page18).
5
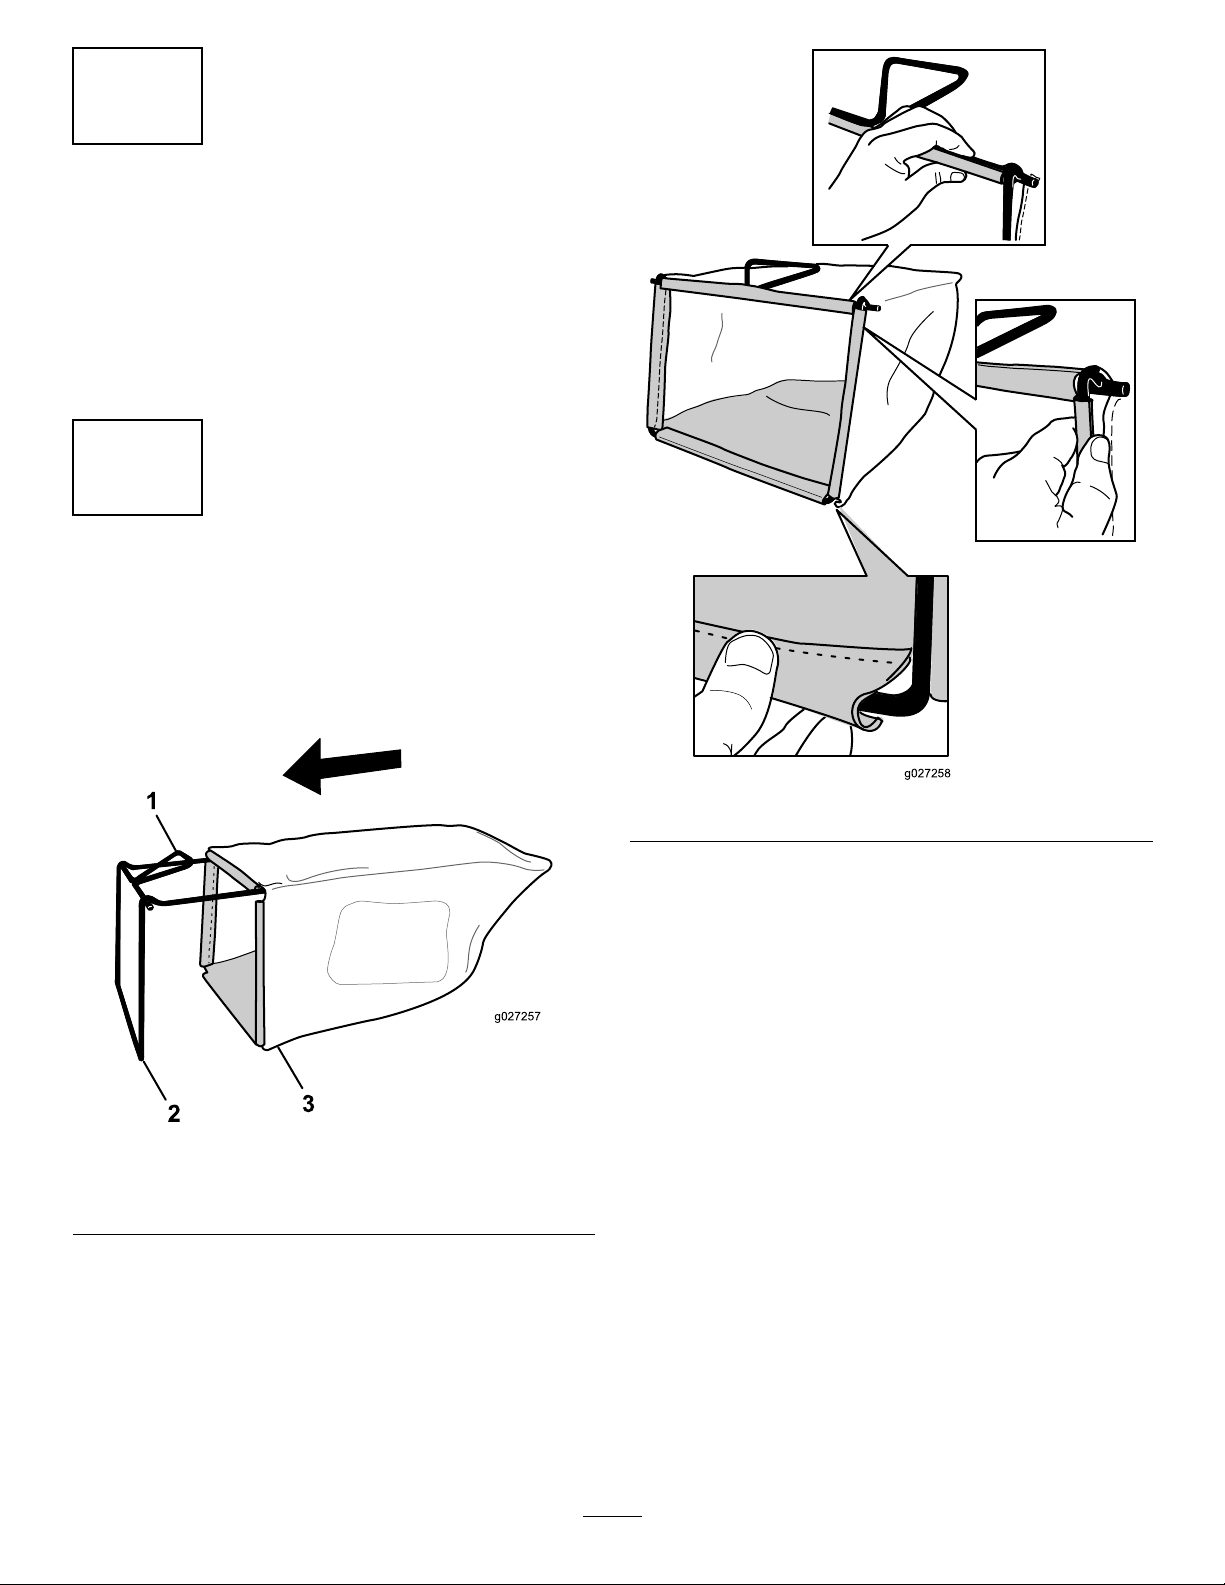
AssemblingtheGrassBag
NoPartsRequired
Procedure
1.SlipthegrassbagovertheframeasshowninFigure9.
Figure9
1.Handle
2.Frame
Note:Donotslipthebagoverthehandle(Figure9).
3.Grassbag
Figure10
3.Hookthetopandsidechannelsofthebagontothetop
andsidesoftheframe,respectively(Figure10).
2.Hookthebottomchannelofthebagontothebottom
oftheframe(Figure10).
7
Page 8
ProductOverview
1.Handle
2.Blade-controlbar
3.Adjustmentknobforthe
self-propeldrive
4.Electric-startbutton
(electric-startmodelonly)
5.Fuel-tankcap
6.Airlter
7.Cutting-heightlever(4)
Figure11
8.Sparkplug
9.Side-dischargedeector
10.Oilll/dipstick
11.Bag-on-demandlever
12.Handleknob(2)
13.Recoil-starthandle
Operation
BeforeOperation
BeforeOperationSafety
GeneralSafety
•Becomefamiliarwiththesafeoperationoftheequipment,
operatorcontrols,andsafetysigns.
•Checkthatallguardsandsafetydevices,suchasdeectors
and/orgrasscatcher,areinplaceandworkingproperly .
•Alwaysinspectthemachinetoensurethattheblades,
bladebolts,andcuttingassemblyarenotwornor
damaged.
•Inspecttheareawhereyouwillusethemachineand
removeallobjectsthatthemachinecouldthrow.
•Adjustingthecuttingheightmaybringyouintocontact
withthemovingblade,causingseriousinjury.
–Shutofftheengine,removetheelectric-startbutton,
andwaitforallmovingpartstostop.
–Donotputyourngersunderthehousingwhen
adjustingthecuttingheight.
FuelSafety
DANGER
Fuelisextremelyammableandhighlyexplosive.
Areorexplosionfromfuelcanburnyouand
othersandcandamageproperty.
•Topreventastaticchargefromignitingthefuel,
placethecontainerand/ormachinedirectlyon
thegroundbeforelling,notinavehicleoron
anobject.
•Fillthefueltankoutdoors,inanopenarea,when
theengineiscold.Wipeupanyfuelthatspills.
•Donothandlefuelwhensmokingoraroundan
openameorsparks.
•Storefuelinanapprovedcontainerandkeepit
outofthereachofchildren.
1.Grassbag
2.Side-dischargechute
Figure12
3.Batterycharger
(electric-startmodelonly)
WARNING
Fuelisharmfulorfatalifswallowed.Long-term
exposuretovaporscancauseseriousinjuryand
illness.
•Avoidprolongedbreathingofvapors.
•Keepyourhandsandfaceawayfromthenozzle
andthefuel-tankopening.
•Keepfuelawayfromyoureyesandskin.
8
Page 9

FillingtheFuelTank
•Forbestresults,useonlyclean,fresh,unleadedgasoline
withanoctaneratingof87orhigher((R+M)/2rating
method).
•Oxygenatedfuelwithupto10%ethanolor15%MTBE
byvolumeisacceptable.
•Donotuseethanolblendsofgasoline,suchasE15
orE85,withmorethan10%ethanolbyvolume.
Performanceproblemsand/orenginedamagemayresult,
whichmaynotbecoveredunderwarranty.
•Donotusegasolinecontainingmethanol.
•Donotstorefueleitherinthefueltankorinfuel
containersoverthewinterunlessfuelstabilizerhasbeen
addedtothefuel.
•Donotaddoiltogasoline.
Important:Toreducestartingproblems,addfuel
stabilizertothefuelallseason,mixingitwithgasoline
lessthan30daysold.
Figure14
1.Dipstick3.Fullmark
2.Addmark
3.Removethedipstickandchecktheoillevel(Figure14).
IftheoillevelisbelowtheAddmarkonthedipstick,
slowlypouroilintotheoillltubetoraisetheoillevel
totheFullmarkonthedipstick.Donotoverll.
4.Installthedipsticksecurely.
Figure13
CheckingtheEngine-OilLevel
ServiceInterval:Beforeeachuseordaily
1.Movethemachinetoalevelsurface.
2.Removethedipstick,wipeitclean,andfullyinstallthe
dipstick(Figure14).
AdjustingtheHandleHeight
Youcanraiseorlowerthehandlein1of2positionsthatis
morecomfortableforyou(Figure15).
Figure15
1.Loosenbothhandleknobsuntilyoucanpushthe
squareedgesofthecarriageboltsoutofthesquare
holesinthehandlebrackets.
2.Pushtheknobsuntiltheyareloose.
3.Movethehandletotheupperorlowerheightposition.
4.Pulltheknobsuntilthesquareedgesofeachcarriage
bolttsintoitsrelatedsquarehole.
5.Tightenthehandleknobsastightasyoucan.
9
Page 10

AdjustingtheCuttingHeight
DuringOperation
WARNING
Adjustingthecuttingheightmaybringyouinto
contactwiththemovingblade,causingserious
injury.
•Stoptheengineandwaitforallmovingparts
tostop.
•Donotputyourngersunderthehousingwhen
adjustingthecuttingheight.
CAUTION
Iftheenginehasbeenrunning,themuferwillbe
hotandcanseverelyburnyou.Keepawayfromthe
hotmufer.
Adjustthecuttingheightasdesired.Setthefrontwheelsto
thesameheightastherearwheels(Figure16).
Note:Toraisethemachine,movethefrontcutting-height
leversrearwardandtherearcutting-heightleversforward.
Tolowerthemachine,movethefrontcutting-heightlevers
forwardandtherearcutting-heightleversrearward.
DuringOperatingSafety
GeneralSafety
•Wearappropriateclothing,includingeyeprotection;
slip-resistant,substantialfootwear;andhearing
protection.Tiebacklonghair,securelooseclothing,and
donotwearjewelry.
•Donotoperatethemachinewhileill,tired,orunderthe
inuenceofalcoholordrugs.
•Thebladeissharp;contactingthebladecanresultin
seriouspersonalinjury.Shutofftheengine,removethe
electric-startbutton,andwaitforallmovingpartstostop
beforeleavingtheoperatingposition.
•Whenyoureleasetheblade-controlbar,theengineshould
shutoffandthebladeshouldstopwithin3seconds.If
not,stopusingyourmachineimmediatelyandcontactan
AuthorizedServiceDealer.
•Operatethemachineonlyingoodvisibilityand
appropriateweatherconditions.Donotoperatethe
machinewhenthereistheriskoflighting.
•Wetgrassorleavescancauseseriousinjuryifyouslipand
contacttheblade.Mowonlyindryconditions.
Figure16
1.Raisethemachine2.Lowerthemachine
•Useextremecarewhenapproachingblindcorners,
shrubs,trees,orotherobjectsthatmayblockyourview.
•Watchforholes,ruts,bumps,rocks,orotherhidden
objects.Uneventerraincouldcauseaslip-and-fall
accident.
•Stopthemachineandinspectthebladesafterstrikingan
objectorifthereisanabnormalvibrationinthemachine.
Makeallnecessaryrepairsbeforeresumingoperation.
•Beforeleavingtheoperatingposition,shutofftheengine,
removetheelectric-startbutton,andwaitforallmoving
partstostop.
•Iftheenginehasbeenrunningthemuferwillbehotand
canseverelyburnyou.Keepawayfromthehotmufer.
•Checkthegrasscatchercomponentsandthedischarge
guardfrequentlyandreplacethemwiththemanufacturer’s
recommendedpartswhennecessary.
•UseaccessoriesandattachmentsapprovedbyTheToro
Companyonly.
SlopeSafety
•Mowacrossthefaceofslopes;neverupanddown.Use
extremecautionwhenchangingdirectiononslopes.
Note:Thecutting-heightsettingsare25mm(1inch);35
mm(1-3/8inches);44mm(1-3/4inches);54mm(2-1/8
inches);64mm(2-1/2inches);73mm(2-7/8inches);83mm
(3-1/4inches);92mm(3-5/8inches);and102mm(4inches).
•Donotmowonexcessivelysteepslopes.Poorfooting
couldcauseaslip-and-fallaccident.
•Donotmowneardrop-offs,ditches,orembankments.
Youcouldloseyourfootingorbalance.
10
Page 11

StartingtheEngine
G020174
1
2
3
1.Holdtheblade-controlbaragainstthehandle(Figure
17).
Figure19
Recoilstart
Note:Ifthemachinedoesnotstartafterseveral
attempts,contactanAuthorizedServiceDealer.
UsingtheSelf-PropelDrive
Figure17
1.Blade-controlbar
2.Pushtheelectric-startbutton(electric-startmodel
only;refertoFigure18)orpulltherecoil-starthandle
(Figure19).
Note:Iftheelectric-startbuttonhasbeenremoved,
insertitintotheelectricstarter;refertoFigure18
(electric-startmodelonly).
Figure18
Electricstart
Tooperatetheself-propeldrive,simplywalkwithyourhands
ontheupperhandleandyourelbowsatyoursides,andthe
machinewillautomaticallykeeppacewithyou(Figure20).
Figure20
Note:Ifthemachinedoesnotfreelyrollbackwardafter
self-propelling,stopwalking,holdyourhandsinplace,and
allowthemachinetorollacoupleofcentimeters(inches)
forwardtodisengagethewheeldrive.Youcanalsotry
reachingjustundertheupperhandletothemetalhandleand
pushthemachineforwardacoupleofcentimeters(inches).
Ifthemachinestilldoesnotrollbackwardeasily ,contactan
AuthorizedServiceDealer.
1.Electricstarter3.Insertedelectric-start
2.Electric-startbutton
Note:Whenyoupulltherecoil-starthandle,pullit
button
StoppingtheEngine
ServiceInterval:Beforeeachuseordaily
Tostoptheengine,releasetheblade-controlbar.
lightlyuntilyoufeelresistance,thenpullitsharply
(Figure19).Allowtheropetoreturntothehandle
slowly.
Note:Removetheelectric-startbuttonwheneveryouleave
themachine(electric-startmodelonly).
11
Page 12

Important:Whenyoureleasetheblade-controlbar,
boththeengineandbladeshouldstopwithin3seconds.
Iftheydonotstopproperly,stopusingyourmachine
immediatelyandcontactanAuthorizedServiceDealer.
RecyclingtheClippings
Yourmachinecomesfromthefactoryreadytorecyclethe
grassandleafclippingsbackintothelawn.
Ifthegrassbagisonthemachineandthebag-on-demand
leverisintheBaggingposition,movethelevertothe
Recyclingpositionbeforerecyclingtheclippings;referto
OperatingtheBag-on-DemandLever(page12).Ifthe
side-dischargechuteisonthemachine,removeitbefore
recyclingtheclippings;refertoRemovingtheSide-Discharge
Chute(page13).
BaggingtheClippings
Usethegrassbagwhenyouwanttocollectgrassandleaf
clippingsfromthelawn.
Iftheside-dischargechuteisonthemachine,removeitbefore
baggingtheclippings;refertoRemovingtheSide-Discharge
Chute(page13).Ifthebag-on-demandleverisinthe
Recyclingposition,moveittotheBaggingposition;referto
OperatingtheBag-on-DemandLever(page12).
InstallingtheGrassBag
1.Raiseandholdupthereardeector(Figure21).
OperatingtheBag-on-DemandLever
Thebag-on-demandfeatureallowsyoutoeithercollector
recyclegrassandleafclippingswhilethegrassbagisattached
tothemachine.
•Forbaggingthegrassandleafclippings,pressthebutton
onthebag-on-demandleverandmovetheleverforward
untilthebuttonontheleverpopsup(Figure22).
Figure22
1.Bag-on-demandlever(inbaggingposition)
•Forrecyclingthegrassandleafclippings,pressthebutton
ontheleverandmovetheleverrearwarduntilthebutton
ontheleverpopsup.
Important:Forproperoperation,removeanygrass
clippingsanddebrisfromthebag-on-demanddoorand
thesurroundingopening(Figure23)beforeyoumove
thebag-on-demandleverfrom1positiontoanother.
Figure21
1.Reardeector3.Grass-bagpin(2)
2.Notches(2)
2.Installthegrassbag,ensuringthatthepinsonthebag
restinthenotchesonthehandle(Figure21).
3.Lowerthereardeector.
RemovingtheGrassBag
Toremovethebag,reversethestepsinInstallingtheGrass
Bag(page12).
Figure23
1.Cleanhere
Side-Dischargingthe Clippings
Usethesidedischargeforcuttingverytallgrass.
Ifthegrassbagisonthemachineandthebag-on-demand
leverisintheBaggingposition,movethelevertothe
Recyclingposition;refertoOperatingtheBag-on-Demand
Lever(page12).
12
Page 13

InstallingtheSide-DischargeChute
Liftupthesidedeectorandinstalltheside-dischargechute
(Figure24).
•Forbestperformance,installanewbladebeforethe
cuttingseasonbegins.
•ReplacethebladewhennecessarywithaToro
replacementblade.
CuttingGrass
•Cutonlyaboutathirdofthegrassbladeatatime.Donot
cutbelowthe54mm(2-1/8inch)settingunlessthegrass
issparseoritislatefallwhengrassgrowthbeginstoslow
down.RefertoAdjustingtheCuttingHeight(page10).
•Whencuttinggrassover15cm(6inches)tall,mowatthe
highestcuttingheightsettingandwalkslower;thenmow
againatalowersettingforthebestlawnappearance.If
thegrassistoolong,themachinemayplugandcause
theenginetostall.
•Mowonlydrygrassorleaves.Wetgrassandleavestend
toclumpontheyardandcancausethemachinetoplug
ortheenginetostall.
•Beawareofapotentialrehazardinverydryconditions,
followalllocalrewarnings,andkeepthemachinefree
ofdrygrassandleafdebris.
Figure24
RemovingtheSide-DischargeChute
Toremovetheside-dischargechute,liftupthesidedeector,
removetheside-dischargechute,andlowertheside-discharge
deector.
OperatingTips
GeneralMowingTips
•Cleartheareaofsticks,stones,wire,branches,andother
debristhatthebladecouldhit.
•Avoidstrikingsolidobjectswiththeblade.Never
deliberatelymowoveranyobject.
•Ifthemachinestrikesanobjectorstartstovibrate,
immediatelystoptheengine,disconnectthewirefromthe
sparkplug,removetheelectric-startbutton,andexamine
themachinefordamage.
•Alternatethemowingdirection.Thishelpsdispersethe
clippingsoverthelawnforevenfertilization.
•Ifthenishedlawnappearanceisunsatisfactory,try1
ormoreofthefollowing:
–Replacethebladeorhaveitsharpened.
–Walkataslowerpacewhilemowing.
–Raisethecuttingheightonyourmachine.
–Cutthegrassmorefrequently .
–Overlapcuttingswathsinsteadofcuttingafullswath
witheachpass.
–Setthecuttingheightonthefrontwheelsanotch
lowerthantherearwheels.Forexample,setthefront
wheelsat54mm(2-1/8inches)andtherearwheels
at64mm(2-1/2inches).
CuttingLeaves
•Aftercuttingthelawn,ensurethathalfofthelawnshows
throughthecutleafcover.Y oumayneedtomakemore
thanasinglepassovertheleaves.
•Iftherearemorethan13cm(5inches)ofleavesonthe
lawn,setthefrontcuttingheight1or2notcheshigher
thantherearcuttingheight.
•Slowdownyourmowingspeedifthemachinedoesnot
cuttheleavesnelyenough.
13
Page 14

AfterOperation
AfterOperatingSafety
GeneralSafety
•Cleangrassanddebrisfromthemachinetohelpprevent
res.Cleanupoilorfuelspills.
•Allowtheenginetocoolbeforestoringthemachinein
anyenclosure.
•Neverstorethemachineorfuelcontainerwherethereis
anopename,spark,orpilotlight,suchasonawater
heateroronotherappliances.
5.Attachagardenhosethatisconnectedtoawater
supplytothewashoutport(Figure25).
Figure25
HaulingSafety
•Removetheelectric-startbuttonbeforeloadingtheunit
forhauling.
•Usecarewhenloadingorunloadingthemachineintoa
trailerortruck.
•Usefull-widthrampsforloadingthemachineintoa
trailerortruck.Donotexceeda15°anglebetweenthe
rampandthetrailerortruck.
•Tiethemachinedownsecurelyusingstraps,chains,cable,
orropes.Bothfrontandrearstrapsshouldbedirected
downandoutwardfromthemachine.
CleaningundertheMachine
ServiceInterval:Beforeeachuseordaily
WARNING
Themachinemaydislodgematerialfromunderthe
machine.
•Weareyeprotection.
1.Washoutport
6.Turnthewateron.
7.Starttheengineandrunituntiltherearenomore
clippingsthatcomeoutfromunderthemachine.
8.Stoptheengine.
9.Shutoffthewateranddisconnectthegardenhose
fromthemachine.
10.Starttheengineandrunitforafewminutestodrythe
undersideofthemachinetopreventitfromrusting.
11.Allowtheenginetocoolbeforestoringthemachine
inanenclosedarea.
FoldingtheHandle
WARNING
Foldingorunfoldingthehandleimproperlycan
damagethecables,causinganunsafeoperating
condition.
•Stayintheoperatingposition(behindthe
handle)whentheengineisrunning.
•Donotallowbystandersinthearea.
Forbestresults,cleanthemachinesoonafteryouhave
completedmowing.
1.Movethemachineontoaatpavedsurface.
2.Stoptheengineandwaitforallmovingpartstostop
beforeleavingtheoperatingposition.
3.Lowerthemachinetoitslowestcutting-heightsetting;
refertoAdjustingtheCuttingHeight(page10).
4.Washouttheareaunderthereardeectorwherethe
clippingsgofromthehousingtothegrassbag.
Note:Washouttheareawiththebag-on-demandin
boththefullyforwardandfullyrearwardpositions.
•Donotdamagethecableswhenfoldingor
unfoldingthehandle.
•Ifacableisdamaged,contactanAuthorized
ServiceDealer.
1.Removetheelectric-startbutton(Figure26).
14
Page 15

Figure28
Figure26
1.Electricstarter2.Electric-startbutton
2.Removeandsavethe2handleknobsand2carriage
boltsfromthehandlebrackets(Figure27).
Important:Routethecablestotheoutsideofthe
handleknobsasyoufoldthehandle.
1.Operatingposition
2.Foldedposition
4.Insertthecarriagebolt(withtheboltheadtowardthe
inside)throughthehandlebracketandtheupperhole
inthehandleend.Ensurethatthesquareedgesofeach
carriagebolttsintotheupperorlowersquareholein
itsrelatedhandlebracket(Figure29).
Figure27
1.Handleknob
2.Carriagebolt
3.Foldthehandlebyrotatingitforward(Figure28).
Figure29
1.Handleknob
2.Carriagebolt
5.Looselyinstallthehandleknobsandcarriageboltson
thehandlebrackets.
6.Tounfoldthehandle,referto1Assemblingand
UnfoldingtheHandle(page5).
15
Page 16

Maintenance
Note:Determinetheleftandrightsidesofthemachinefromthenormaloperatingposition.
RecommendedMaintenanceSchedule(s)
MaintenanceService
Interval
Beforeeachuseordaily
Every25hours
Yearly
Yearlyorbeforestorage
Important:Refertoyourengineowner’smanualforadditionalmaintenanceprocedures.
Note:ReplacementpartsareavailablefromanAuthorizedServiceDealer(gotowww.toro.comtondthenearestdealer)
oratwww.shoptoro.com.
MaintenanceSafety
•Disconnectthespark-plugwirefromthesparkplugand
removetheelectric-startbuttonbeforeperformingany
maintenanceprocedure.
•Wearglovesandeyeprotectionwhenservicingthe
machine.
MaintenanceProcedure
•Checktheengine-oillevel.
•Ensurethattheenginestopswithin3secondsafterreleasingtheblade-controlbar.
•Cleangrassclippingsanddirtfromunderthemachine.
•Replacetheairlter;replaceitmorefrequentlyindustyoperatingconditions.
•Chargethebatteryfor24hours(electric-startmodelonly).
•Replacethebladeorhaveitsharpened(morefrequentlyiftheedgedullsquickly).
•Cleantheair-coolingsystem;cleanitmorefrequentlyindustyoperatingconditions.
Refertoyourengineowner’smanual.
•Refertoyourengineowner’smanualforanyadditionalyearlymaintenance
procedures.
•Chargethebatteryfor24hours(electric-startmodelonly).
•Emptythefueltankbeforerepairsasdirectedandbeforeyearlystorage.
PreparingforMaintenance
1.Stoptheengine,removetheelectric-startbutton,and
waitforallmovingpartstostop.
2.Disconnectthespark-plugwirefromthesparkplug
(Figure30).
•Thebladeissharp;contactingthebladecanresultin
seriouspersonalinjury.Weargloveswhenservicingthe
blade.
•Nevertamperwithsafetydevices.Checktheirproper
operationregularly.
•Tippingthemachinemaycausethefueltoleak.Fuelis
ammableandexplosive,andcancausepersonalinjury.
Runtheenginedrytoremovethefuelwithahandpump;
neversiphonthefuel.
Figure30
3.Afterperformingthemaintenanceprocedure(s),
connectthespark-plugwiretothesparkplug.
Important:Beforetippingthemachinetochange
theoilorreplacetheblade,allowthefueltankto
rundrythroughnormalusage.Ifyoumusttip
themachinepriortorunningoutoffuel,usea
16
Page 17

handfuelpumptoremovethefuel.Alwaystipthe
machineontoitsside,withthedipstickdown.
ServicingtheAirFilter
ServiceInterval:Every25hours
1.Upclipthetopoftheair-ltercover(Figure31).
Figure32
1.Dipstick3.Fullmarker
2.Addmarker
3.Tipthemachineontoitssidewiththeairlterupto
draintheusedoiloutthroughtheoil-lltube(Figure
33).
Figure31
1.Clip3.Airlter
2.Air-ltercover
2.Removetheairlter(Figure31).
3.Inspecttheairlter.
Note:Iftheairlterisexcessivelydirty,replaceitwith
anewlter.Otherwise,gentlytaptheairlterona
hardsurfacetoloosendebris.
4.Installtheairlter.
5.Usethecliptoinstalltheair-ltercover.
ChangingtheEngineOil
Changingtheengineoilisnotrequired,butifyoudesire
tochangetheoil,usethefollowingprocedure.
Note:Runtheengineafewminutesbeforechangingthe
oiltowarmit.Warmoilowsbetterandcarriesmore
contaminants.
Max.ll:0.53L(18oz),type:SAE30detergentoilwithan
APIserviceclassicationofSF,SG,SH,SJ,SL,orhigher.
Figure33
4.Slowlypouroilintotheoil-lltubeuntiltheoillevel
reachestheFulllineonthedipstick(Figure32).Do
notoverll.
5.Installthedipsticksecurely.
6.Disposeoftheusedoilproperlyatalocalrecycling
center.
1.RefertoPreparingforMaintenance(page16).
2.Removethedipstick(Figure32).
17
Page 18

ChargingtheBattery
ServiceInterval:Every25hours
Yearlyorbeforestorage
Electric-StartModelOnly
•Agreenlightindicatesthatthechargerisfullychargedor
thechargerisdisconnectedfromthebattery.
•Aashinglightthatalternatesbetweenredandgreen
indicatesthatthebatteryisnearlyfullycharged.Thisstate
lastsonlyafewminutesuntilthebatteryisfullycharged.
WARNING
CALIFORNIA
Proposition65Warning
Batteryposts,terminals,andrelated
accessoriescontainleadandleadcompounds,
chemicalsknowntotheStateofCalifornia
tocausecancerandreproductiveharm.
Washhandsafterhandling.
Chargethebatteryfor24hoursinitially,thenmonthly(every
25starts)orasneeded.Alwaysusethechargerinasheltered
area,andchargethebatteryatroomtemperature(about70°
F,or22°C)wheneverpossible.
1.Connectthechargertothemachinewiringharness
locatedbelowtheelectric-startbutton(Figure34).
ReplacingtheFuse
Electric-StartModelOnly
Note:Ifthebatterydoesnotchargeortheenginedoesnot
runwiththeelectricstarter,thefusemaybeblown.Replace
itwitha40Aplug-intypefuse.
1.RefertoPreparingforMaintenance(page16).
2.Raisethereardeectorandlocatethebattery
compartment(Figure35).
Note:Thereisanadhesive-backedcoveringthat
protectsthebatterycompartment.
Figure34
2.Plugthechargeintoawalloutlet.
Note:Whenthebatterynolongerholdsacharge,
recycleordisposeofthelead-acidbatteryaccording
tolocalcodes.
Note:Yourbatterychargermayhavea2-colorLEDdisplay
thatindicatesthefollowingstatesofcharging:
•Aredlightindicatesthatthechargerischargingthe
battery.
Figure35
1.Reardeector
2.Screw
3.Wipeawayanydebrisinthebatterycompartmentarea
andremovetheadhesive-backedcovering.
4.Removethescrewthatsecuresthebattery
compartment,pulloutthebattery,andlocatethefuse
(Figure35andFigure36).
3.Battery
4.Batterycompartment
18
Page 19

1
2
3
g030022
2
g030053
1
ReplacingtheBlade
ServiceInterval:Yearly
Figure36
1.Batterycover3.Fuseholder
2.Fuse
5.Replacethefuseinthefuseholder(Figure36).
Note:Yourmachinecomeswithasparefuseattached
tothebattery-chargerbox(Figure37).
Important:
blade pr oper l y .
uncomfortableperformingthisprocedure,contactan
AuthorizedServiceDealer.
Examinethebladewheneveryourunoutofgasoline.Ifthe
bladeisdamagedorcracked,replaceitimmediately.Ifthe
bladeedgeisdullornicked,haveitsharpenedandbalanced,
orreplaceit.
Y ou will need a torque wr ench to install the
Ifyoudonothaveatorquewrenchorare
WARNING
Thebladeissharp;contactingthebladecanresult
inseriouspersonalinjury.
Weargloveswhenservicingtheblade.
1.RefertoPreparingforMaintenance(page16).
2.Tipthemachineontoitssidewiththedipstickdown.
3.Useablockofwoodtoholdthebladesteady(Figure
38).
1.Batterycompartment2.Battery-chargerbox
Figure37
6.Installthebatterycompartmentwiththescrewthat
youremovedinstep4.
7.Installthecoveringoverthebatterycompartment.
8.Lowerthereardeector.
Figure38
4.Removetheblade,savingallmountinghardware
(Figure38).
5.Installthenewbladeandallmountinghardware
(Figure39).
19
Page 20

AdjustingtheSelf-PropelDrive
g027709
Wheneveryouinstallanewself-propelcableorifthe
self-propeldriveisoutofadjustment,adjusttheself-propel
drive.
1.Turntheadjustmentknobcounterclockwisetoloosen
thecableadjustment(Figure40).
Figure40
Figure39
Important:Positionthecurvedendsoftheblade
topointtowardthemowerhousing.
6.Useatorquewrenchtotightenthebladeboltto82
N∙m(60ft-lb).
Important:Abolttorquedto82N∙m(60ft-lb)is
verytight.Whileholdingthebladewithablock
ofwood,putyourweightbehindtheratchetor
wrenchandtightentheboltsecurely.Thisboltis
verydifculttoovertighten.
1.Handle(leftside)3.Self-propel-drivecable
2.Adjustmentknob
2.Adjustthetensiononthecable(Figure40)bypullingit
backorpushingitforwardandholdingthatposition.
Note:Pushthecabletowardtheenginetoincrease
thetraction;pullthecableawayfromtheengineto
decreasethetraction.
3.Turntheadjustmentknobclockwisetotightenthe
cableadjustment.
Note:Tightentheknobrmlybyhand.
20
Page 21

Storage
3.Installthesparkplugandtightenitwithatorque
wrenchto20N∙m(15ft-lb).
Storethemachineinacool,clean,dryplace.
PreparingtheMachinefor Storage
WARNING
Gasolinevaporscanexplode.
•Donotstoregasolinemorethan30days.
•Donotstorethemachineinanenclosurenear
anopename.
•Allowtheenginetocoolbeforestoringit.
1.Onthelastrefuelingoftheyear,addfuelstabilizerto
thefuelasdirectedbytheenginemanufacturer.
2.Disposeofanyunusedfuelproperly.Recycleit
accordingtolocalcodes,oruseitinyourautomobile.
Note:Oldfuelinthefueltankistheleadingcauseof
hardstarting.Donotstorefuelwithoutstabilizermore
than30days,anddonotstorestabilizedfuelmorethan
90days.
4.Performanymaintenanceprocedures;referto
Maintenance(page16).
5.Checktheengine-oillevel;refertoCheckingthe
Engine-OilLevel(page9).
6.Fillthefueltankwithfreshgasoline;refertoFillingthe
FuelTank(page9).
7.Connectthewiretothesparkplug.
8.Chargethebatteryfor24hours(electric-startmodel
only);refertoChargingtheBattery(page18).
3.Runthemachineuntiltheenginestopsfromrunning
outoffuel.
4.Starttheengineagain.
5.Allowtheenginetorununtilitstops.Whenyoucan
nolongerstarttheengine,itissufcientlydry.
6.Disconnectthewirefromthesparkplugandremove
theelectric-startbutton.
7.Removethesparkplug,add30ml(1oz)ofoilthrough
thespark-plughole,andpullthestarterropeslowly
severaltimestodistributeoilthroughoutthecylinder
topreventcylindercorrosionduringtheoff-season.
8.Looselyinstallthesparkplug.
9.Tightenallnuts,bolts,andscrews.
10.Chargethebatteryfor24hours,thenunplugthe
batterychargeranstorethemachineinanunheated
area.Ifyoumuststorethemachineinaheatedarea,
youmustchargethebatteryevery90days(electric-start
modelonly).
RemovetheMachinefrom Storage
1.Checkandtightenallfasteners.
2.Removethesparkplugandspintheenginerapidly
bypullingtherecoil-starthandleorusingtheelectric
starter(electric-startmodelonly)toblowtheexcess
oilfromthecylinder.
21
Page 22

Notes:
22
Page 23

Notes:
23
Page 24

TheToroWarranty
A2-Y earFullWarranty(45DayLimitedWarrantyforCommercialUse)20inMulcher/Bagger
22inRecycler
®
TheToroGTSStartingGuarantee
A3-YearFullWarranty(NotApplicableforCommercialUse)
ConditionsandProductsCovered
TheToroCompanyanditsafliate,T oroWarrantyCompany,pursuantto
anagreementbetweenthem,jointlypromisetorepairtheToroProduct
listedbelowifusedforresidentialpurposes*;ifitisdefectiveinmaterials
orworkmanshiporifitstopsfunctioningduetothefailureofacomponent;
oriftheToroGTS(GuaranteedtoStart)enginewillnotstartontherstor
secondpull,providedtheroutinemaintenancerequiredintheOperator's
Manualhavebeenperformed.
Thiswarrantycoversthecostofpartsandlabor,butyoumustpay
transportationcosts.
Thefollowingtimeperiodsapplyfromtheoriginaldateofpurchase:
ProductsWarrantyPeriod
22inRecyclerand20in
Mulcher/BaggerandAttachments
GTS(GuaranteedtoStart)3-yearfullwarranty
Engine
Battery
LimitedWarrantyforCommercialUse*
Gas-poweredT oroProductsusedforcommercial,institutional,orrental
use,arewarrantedfor45daysagainstdefectsinmaterialsorworkmanship.
Componentsfailingduetonormalweararenotcoveredbythiswarranty.
TheT oroGTS(GuaranteedtoStart)StartingGuaranteedoesnotapply
whentheproductisusedcommercially*.
InstructionsforObtainingWarrantyService
IfyouthinkthatyourToroProductcontainsadefectinmaterialsor
workmanship,orifanormal,able-bodiedadultcannolongerstartyour
product'sengineinoneortwopulls,followthisprocedure:
1.ContactanyAuthorizedToroServiceDealertoarrangeserviceat
theirdealership.Tolocateadealerconvenienttoyou,accessourweb
siteatwww.Toro.com.Youmayalsocallthenumberslistedinitem#3
tousethe24-hourT oroDealerlocatorsystem.
2.Bringtheproductandyourproofofpurchase(salesreceipt)tothe
ServiceDealer.Thedealerwilldiagnosetheproblemanddetermineif
itiscoveredunderwarranty.
3.IfforanyreasonyouaredissatisedwiththeServiceDealer’s
analysisorwiththeassistanceprovided,contactusat:
TheT oroCompany
CustomerCareDepartment,RLCDivision
811 1LyndaleAvenueSouth
Bloomington,MN55420-1196
Tollfreeat866-214-9807(U.S.customers)
Tollfreeat866-214-9808(Canadiancustomers)
OwnerResponsibilities
YoumustmaintainyourT oroProductbyfollowingthemaintenance
proceduresdescribedintheOperator'sManual.Suchroutinemaintenance,
whetherperformedbyadealerorbyyou,isatyourexpense.
2-yearfullwarranty
3-yearfullwarranty
1-yearfullwarranty
WalkPowerMowers
ItemsandConditionsNotCovered
Thereisnootherexpresswarrantyexceptforspecialemissionsystem
coverageandenginewarrantycoverageonsomeproducts.Thisexpress
warrantydoesnotcoverthefollowing:
•Costofregularmaintenanceserviceorparts,suchaslters,fuel,
lubricants,oilchanges,sparkplugs,airltersbladesharpeningorworn
blades,cable/linkageadjustments,orbrakeandclutchadjustments
•Anyproductorpartwhichhasbeenalteredormisusedorneglected
orrequiresreplacementorrepairduetoaccidentsorlackofproper
maintenance
•Pickupanddeliverycharges
•RepairsorattemptedrepairsbyanyoneotherthananAuthorizedT oro
ServiceDealer
•Repairsnecessaryduetofailuretofollowrecommendedfuel
procedure(consultOperator'sManualformoredetails)
–Removingcontaminantsfromthefuelsystemisnotcovered
–Useofoldfuel(morethanonemonthold)orfuelwhichcontains
morethan10%ethanolormorethat15%MTBE
–Failuretodrainthefuelsystempriortoanyperiodofnon-use
overonemonth
•Repairsoradjustmentstocorrectstartingdifcultiesduetothe
following:
–Failuretofollowpropermaintenanceproceduresorrecommended
fuelprocedure
–Rotarymowerbladestrikinganobject
•Specialoperationalconditionswherestartingmayrequiremorethan
twopulls:
–Firsttimestartsafterextendedperiodofnon-useoverthree
monthsorseasonalstorage
–Cooltemperaturestartssuchasthosefoundinearlyspringand
lateautumn
–Improperstartingprocedures-ifyouarehavingdifcultystarting
yourunit,pleasechecktheOperator'sManualtoensurethat
youareusingthecorrectstartingprocedures.Thiscansavean
unnecessaryvisittoanAuthorizedT oroServiceDealer.
GeneralConditions
AllrepairscoveredbythesewarrantiesmustbeperformedbyanAuthorized
ToroServiceDealerusingToro-approvedreplacementparts.Repairbyan
AuthorizedToroServiceDealerisyoursoleremedyunderthiswarranty.
NeitherTheToroCompanynorToroWarrantyCompanyisliablefor
indirect,incidental,orconsequentialdamagesinconnectionwiththe
useoftheToroProductscoveredbythesewarranties,includingany
costorexpenseofprovidingsubstituteequipmentorserviceduring
reasonableperiodsofmalfunctionornon-usependingcompletionof
repairsunderthesewarranties.
Somestatesdonotallowexclusionsofincidentalorconsequential
damages,sotheaboveexclusionsmaynotapplytoyou.
Thiswarrantygivesyouspeciclegalrights,andyoumayalsohaveother
rightswhichvaryfromstatetostate.
CountriesOtherthantheUnitedStatesorCanada
ThiswarrantyisnotvalidinMexico.CustomerswhohavepurchasedT oroproductsexportedfromtheUnitedStatesorCanadashouldcontacttheirToro
Distributor(Dealer)toobtainguaranteepoliciesforyourcountry,province,orstate.IfforanyreasonyouaredissatisedwithyourDistributor'sserviceor
havedifcultyobtainingguaranteeinformation,contacttheT oroimporter.Ifallotherremediesfail,youmaycontactusatT oroWarrantyCompany.
AustralianConsumerLaw:AustraliancustomerswillnddetailsrelatingtotheAustralianConsumerLaweitherinsidetheboxoratyourlocalT oro
Dealer.
*Residentialpurposesmeansuseoftheproductonthesamelotasyourhome.Useatmorethanonelocation,orinstitutionalorrentaluse,isconsidered
commercialuse,andthecommercialusewarrantywouldapply.
374-0254RevF
 Loading...