

Page 1
READ AND SAVE THESE INSTRUCTIONS
WARNING: A risk of fire and electrical shock exists in all electrical
appliances and may cause personal injury or death. Please follow
all safety instructions.
Fast Brew
Cordless Percolator
USE AND CARE GUIDE FOR
MODEL MEP10C AND MEP10CCAN
Page 2

IMPORTANT SAFEGUARDS
When using electrical appliances, basic safety precautions should
always be followed to reduce the risk of fire, electric shock and
injury to persons, including the following:
• Read all instructions before using percolator.
• Do not touch hot surfaces.Use handle.
• Do not immerse cord, plug, power base, or percolator in water
or other liquid. See instructions for cleaning.
• This percolator is not for use by children.
• Close supervision is necessar y when any appliance is used near
children.
• Unplug from outlet when not in use. Unplug and allow to cool
before cleaning and attaching parts. Use oven mitts when
removing parts.
• Do not operate a damaged percolator .Do not operate with a damaged cord or plug or after the percolator malfunctions, or has been
dropped or damaged in any manner. Retur n percolator to the nearest authorized service center for examination, repair, electrical, or
mechanical adjustment.
• Use attachments only if recommended by manufacturer.
• Do not use outdoors or while standing in a damp area.
• Do not let cord hang over edge of table or counter or touch hot
surfaces.
• Do not place on or near a hot gas or electric burner, or in a
heated oven.
•To disconnect, press power switch to OFF position and remove
plug from wall outlet.
• In replacing the cover, make sure that it is seated all around the
rim of the body.To remove, use oven mitt to grasp knob and lift
off.
• Scalding may occur if the cover is removed during the brewing
cycles.
• Do not operate without water in percolator.
• Use percolator only as indicated in these instructions.
SA VE THESE INSTRUCTIONS
CAUTION: A short power supply cord is provided to reduce the
risk of personal injury resulting from becoming entangled in or
tripping over a longer cord. Extension cords are available from
local hardware stores and may be used if care is e x ercised in their
use. If an extension cord is required, special care and caution is
2
Page 3
necessary. Also the cord must be: (1) marked with an electrical
1.
2.
3.
4.
10.
7.
6.
5.
8.
9.
rating of 125 V, and at least 13 A, 1625 W, and (2) the cord must be
arranged so that it will not drape over the counter top or tabletop
where it can be pulled on by children or tripped over accidentally.
POLARIZED PLUG: This appliance has a polarized plug, (one
blade is wider than the other). As a safety feature to reduce the
risk of electrical shock, this plug is intended to fit in a polarized
outlet only one way. If the plug does not fit fully in the outlet,
reverse the plug. If it still does not fit, contact a qualified
electrician. Do not attempt to defeat this safety feature.
ELECTRIC POWER:If the electric circuit is overloaded with other
appliances your appliance may not operate proper ly. It should be
operated on a separate electrical circuit from other appliances.
This product is for household use only.
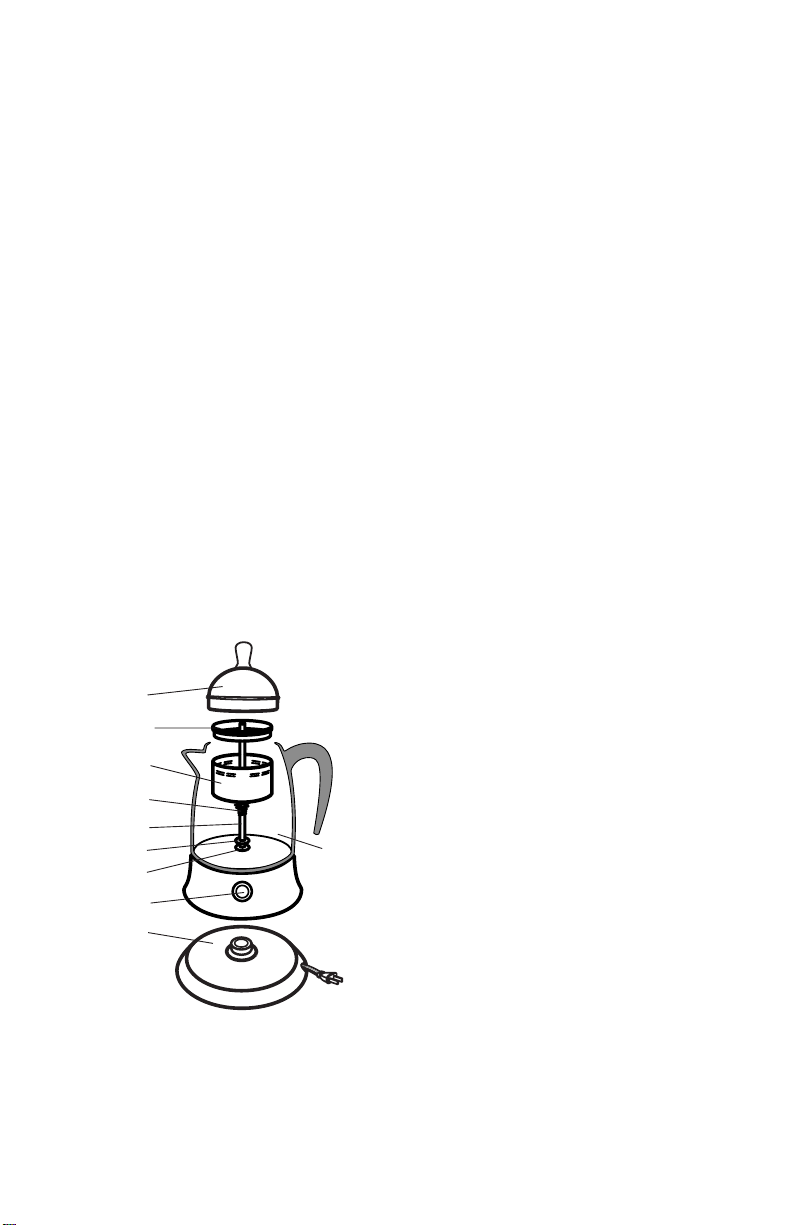
GETTING TO KNO W
YOUR PERCOLATOR
1. Cover 7. Center Well
2. Spreader 8. Power ON/OFF
3. Basket Switch
4. Spring 9. Power Base
5. Pump T ube w/Pow er Cord
6.Washer 10. Body
The illustration in this Use and Care
Guide is for informational purposes
USING Y OUR PERCOLA TOR
CAUTION: DO NOT IMMERSE PERCOLATOR, POWER BASE,
OR CORD IN WATER OR ANY OTHER LIQUID OR PUT IN
only.You may find your percolator and
parts look different, however, the
steps for operation are the same.
DISHWASHER TO CLEAN.
3
Page 4

1. Wash the inside of the percolator and basket assembly thor-
oughly before using for the first time. Do not wash power base.
See CLEANING INSTRUCTIONS.
2. Place power base on a level countertop.The base must be dry
before placing percolator on base. Make sure switch is positioned to left (off position).
3. Remove Cover, Basket, Spreader and Pump Tube. Use cold,
fresh tap water to fill Percolator. The automatic brewing cycle is
timed to begin with a cold water start. Fill according to markings
on inside of Percolator for number of cups desired.
NOTE:The bottom of the Pump Tube Spring marks the maximum capacity of the Percolator.
4. Wet Coffee Basket to help keep small particles of coffee from
sifting through. Place Basket on Pump Tube. Add desired
amount of coffee to Basket.
The following chart suggests amount of coffee for different brew
strengths; amounts can be varied to suit personal taste and particular coffees.
STANDARD COFFEE MEASURES
CUPS TO USE
TO B E 1 standard coffee measure = 2 level tablespoons
BREWED
MILD MEDIUM STRONG
10 579
8 468
6 346
4 2-1/4 3 4
1 cup brewed coffee = 5 fluid ounces
5. Place Pump Tube into Percolator. Place spreader on top of
basket and snap cover onto Percolator. Place Percolator on
power base and plug into 120 V ~60 Hz outlet. Place switch to
right (on position). Light will come on. Rapid Brewing begins
within seconds and continues at approximately one cup-aminute speed.
6. When coffee brewing is complete, percolating will stop. The
Percolator automatically switches to KEEP WARM setting to
preserve fresh-tasting coffee at hot, ready-to-serve temperature. Power light remains on. For best flavor, using oven mitts
carefully remove Coffee Basket, Spreader and Pump Tube
when brewing is completed. Remove Percolator from power
base to serve coffee, light will go off. Replace on base to keep
warm and light will come back on.
4
Page 5
7. When finished, press switch to left (off position), unplug and
allow to cool, see CLEANING INSTRUCTIONS.
REMOVE PARTS CAREFULLY: PERCOLATOR AND PARTS
WILL BE HOT!
CAUTION: DO NOT IMMERSE PERCOLATOR, POWER
BASE OR CORD IN WATER OR ANY OTHER LIQUID OR
PUT IN DISHWASHER TO CLEAN.
CLEANING INSTRUCTIONS
After Each Use: Always make sure switch is in the off position.
Unplug from wall outlet, allow to cool.Unless previously removed
prior to serving, remove Coffee Basket, Spreader and Pump Tube
carefully. Grounds and remaining coffee may still be war m.
Do not immerse power base or Percolator in water or other liquid.
Wash inside of Percolator with water and detergent.
The Cover, Basket, Spreader, and Pump Tube (with spring) may
be placed in the dishwasher.
Rinse all parts thoroughly and dry.
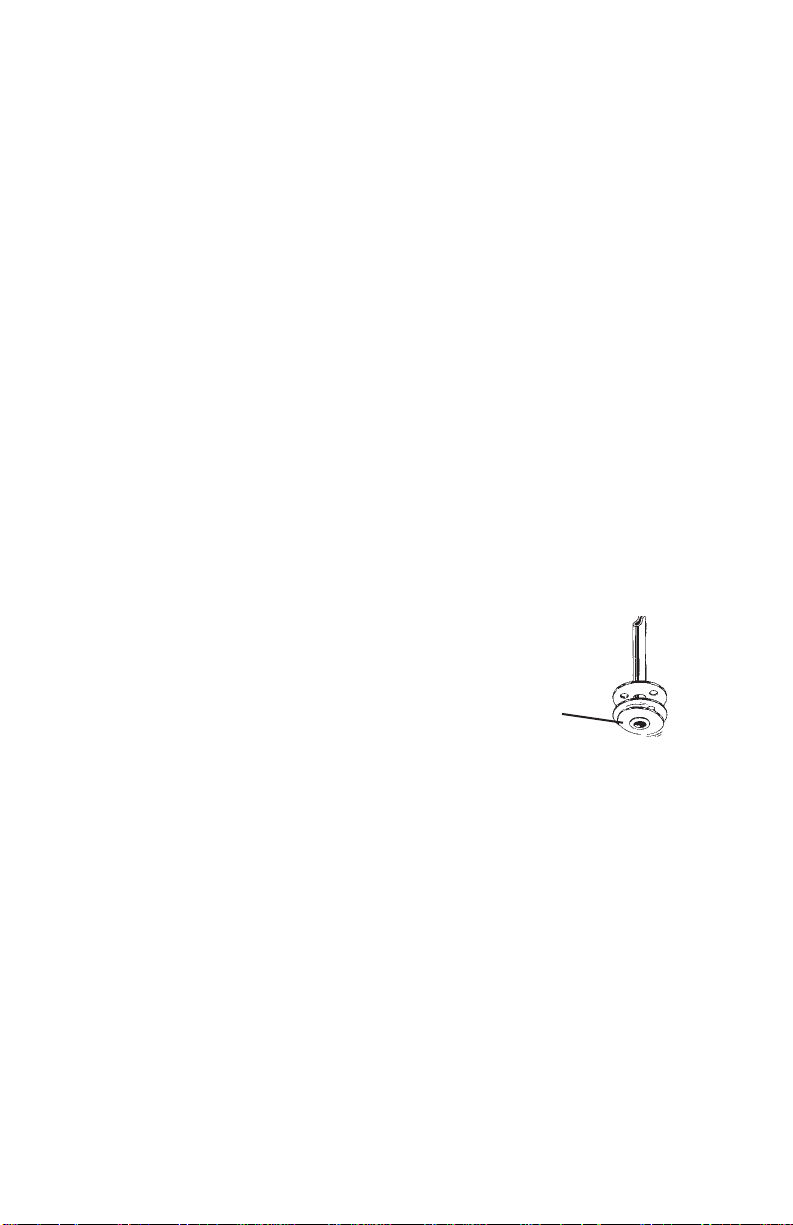
Store with Cover off. Make sure the
Washer at bottom of Pump Tube
remains loose. If coffee grounds lodge
in this area, remove by placing it under
running water or with a wooden pick.
Washer
Clean stainless steel exterior with a damp soapy cloth, wipe
clean and dry thoroughly.You may also use an all purpose glass
cleaner to polish the exterior.
After Repeated Use: Remove accumulation of oil and coffee
stains that may cause a bitter taste with a special cleanser, such
as “Dip-It
inches from top.Be sure to r inse well.
Any servicing requiring disassembly other than the above
cleaning must be performed by an authorized service center.
®
”. Follow package directions, filling with water to 1-1/2
5
Page 6

IMPORTANT NOTICE
If any parts are missing or defective,
DO NO
Please call our Customer Service Depar tment for assistance.
800-233-9054 Monday - Fr iday 9:00 am - 5:00 pm CST
T return this product.
Thank You
6
Page 7

LIMITED ONE-YEAR WARRANTY
Warranty Coverage: This product is warranted to be free from defects in
materials or workmanship for a period of one (1) year from the original purchase date. This product warranty is extended only to the original consumer purchaser of the product and is not transferable. For a period of
one (1) year from the date of original purchase of the product, our Repair
Center will, at its option, either (1) repair the product or (2) replace the
product with a reconditioned comparable model. These remedies are the
purchaser's exclusive remedies under this warranty.
Warranty Service: To obtain warranty service, you must call our warranty
service number at 1-800-233-9054 for return instructions on how to deliver
the product, in either the original packaging or packaging affording an
equal degree of protection to the Repair Center specified below. You must
enclose a copy of your sales receipt or other proof of purchase to demonstrate eligibility for warranty coverage.
To return the appliance, ship to:
ATTN: Repair Center
708 South Missouri Street
Macon, MO 63552 USA
What Is Not Covered: This warranty does not cover damage resulting
from misuse, accident, commercial use, improper service or any other
damage caused by anything other than defects in material or workmanship
during ordinary consumer use. This warranty is invalid if the serial number
has been altered or removed from the product. This warranty is valid only
in the United States and Canada.
LIMITATION ON DAMAGES: THERE SHALL BE NO LIABILITY FOR ANY
INCIDENTAL OR CONSEQUENTIAL DAMAGES FOR BREACH OF ANY
EXPRESS OR IMPLIED WARRANTY OR CONDITION ON THIS PRODUCT.
To contact us, please write to, call, or email:
Consumer Relations Department
PO Box 7366
Columbia MO 65205-7366 USA
1-800-233-9054
E-mail:
consumer_relations@toastmaster.com
DURATION OF IMPLIED WARRANTIES: EXCEPT TO THE EXTENT
PROHIBITED BY APPLICABLE LAW, ALL IMPLIED WARRANTIES AND
CONDITIONS, INCLUDING, WITHOUT LIMITATION, IMPLIED WARRANTIES AND CONDITIONS OF MERCHANTABILITY AND FITNESS
FOR A PARTICULAR PURPOSE OR USE ON THIS PRODUCT ARE LIMITED IN DURATION TO THE DURATION OF THIS WARRANTY.
Some jurisdictions do not allow the exclusion or limitation of incidental or
consequential damages, or allow limitations on how long an implied warranty lasts, so the above limitations or exclusions may not apply to you.
This warranty gives you specific legal r ights and you may have other rights
under the laws of your jurisdiction.
For more information on our products, visit our website: www.maxim-toastmaster.com.
7
 Loading...