

Page 1
READ AND SAVE THESE INSTRUCTIONS
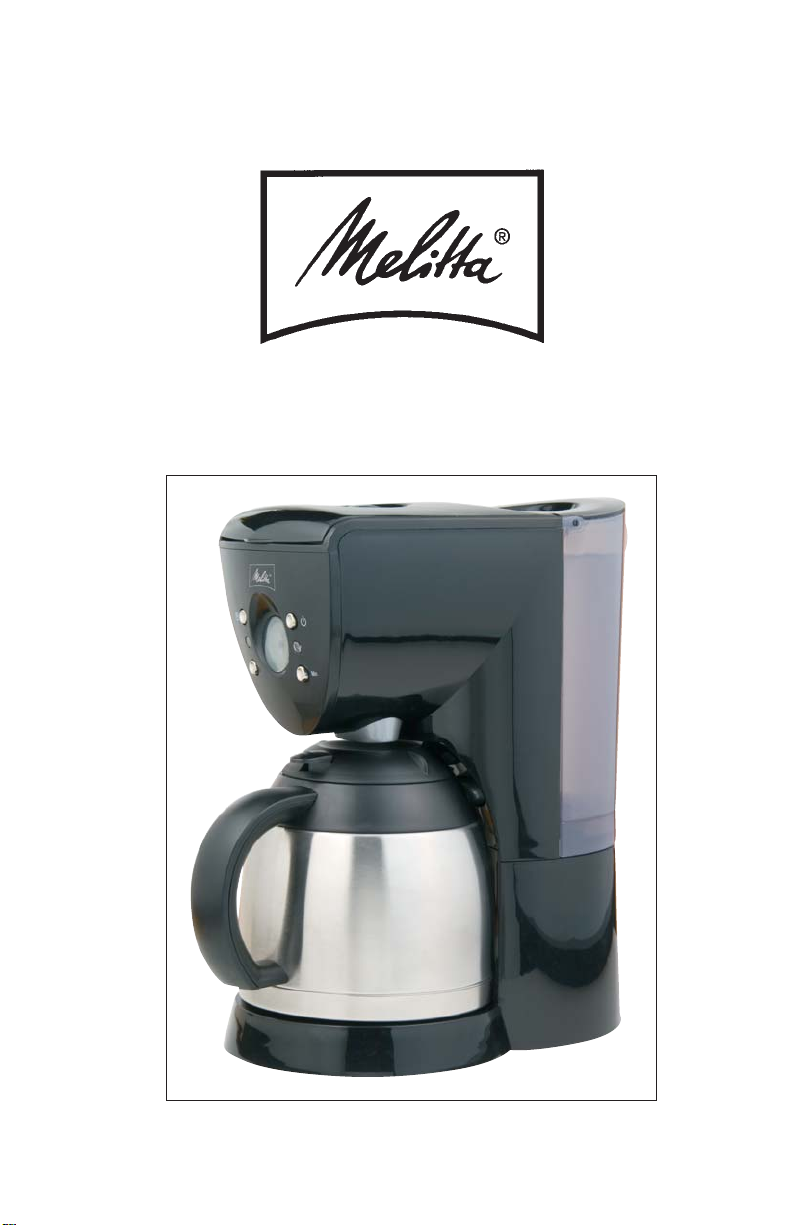
Thermal Coffeemaker
MODEL ME10DTB
USE AND CARE GUIDE FOR
Page 2

Page 3

IMPORTANT SAFEGUARDS
When using electrical appliances, basic safety precautions should
always be followed, including the following:
• Read all instructions.
• Do not touch hot surfaces. Use handles or knobs.
•To protect against electric shock, do not place cord, plugs or
appliance in water or other liquid.
• Close supervision is necessary when any appliance is used by
or near children.
•Unplug from outlet when not in use and before cleaning. Allow
to cool before putting on or taking off parts, and before
cleaning the appliance.
• Do not operate any appliance with a damaged cord or plug or
after the appliance malfunctions, or has been damaged in any
manner. Contact Consumer Service for examination, repair or
adjustment.
• The use of an accessory not evaluated for use with this
appliance may cause injuries.
• Do not use outdoors.
• Do not let cord hang over edge of table or counter, or touch
hot surfaces.
• Do not place on or near a hot gas or electric burner, or in a
heated oven.
•To disconnect, press the ON/OFF/AUTO Button, ( ) then
remove plug from wall outlet.
• Do not use appliance for other than intended use.
•Be certain Lids are securely in place before operating
appliance.
• Scalding may occur if the Lids are removed during the
brewing cycles.
SAVE THESE INSTRUCTIONS
THIS PRODUCT IS FOR HOUSEHOLD USE ONLY.
2
Page 4

ADDITIONAL IMPORTANT
SAFEGUARDS
WARNING: This appliance generates heat and escaping
steam during use. Proper precautions must be taken to
prevent the risk of burns, fires, or other injury to persons or
damage to property.
• All users of this appliance must read and understand this Use
and Care Guide before operating or cleaning this appliance.
• The cord to this appliance should be plugged into a 120V AC
electrical outlet only.
• Use water only in this appliance! Do not put any other liquids or
food products in this appliance. Do not mix or add anything to
the water placed in this appliance, except as instructed in the
User Maintenance Instructions to clean the appliance.
• DO NOT attempt to move an appliance containing hot liquids.
Allow appliance to cool completely before moving.
• Keep appliance at least 4 inches away from walls or other
objects during operation. Do not place any objects on top of
appliance while it is operating. Place the appliance on a surface
that is resistant to heat.
• If this appliance begins to malfunction during use, immediately
unplug the cord. Do not use or attempt to repair the
malfunctioning appliance.
• If this appliance falls or accidentally becomes immersed in
water or any other liquid, unplug it immediately. Do not reach
into the water! Do not use this appliance after it has fallen
into or has become immersed in water. Contact Consumer
Service for examination and repair.
• Do not leave this appliance unattended during use.
• The appliance must be left to cool down sufficiently before
adding more water to avoid splattering.
• Always use fresh, cool water in your appliance. Warm water or
other liquids, except as listed in cleaning section, may cause
damage to the appliance.
• DO NOT put Carafe into a microwave.
• DO NOT lift Hinged Water Reservoir Lid or the Filter Holder Lid
until brewing is complete, and all parts have cooled.
• The Carafe is designed for use with this appliance. It must never
be used on a range top.
• Do not use a damaged Carafe or a Carafe having a loose or
weakened handle.
• CAUTION: To prevent injury when utilizing Pause and Pour
(drip-stop) feature, replace Carafe within 1 minute of removing
during brewing process.
3
Page 5

POLARIZED PLUG: This appliance has a polarized plug, (one
blade is wider than the other). To reduce the risk of electric
shock, this plug is intended to fit into a polarized outlet only one
way. If the plug does not fit fully in the outlet, reverse the plug. If
it still does not fit, contact a qualified electrician. Do not attempt
to modify the plug in any way.
SHORT CORD INSTRUCTIONS: A short power supply cord is
provided to reduce the risk resulting from becoming entangled in
or tripping over a longer cord.
Do not use an extension cord with this product.
ELECTRIC POWER: If the electric circuit is overloaded with
other appliances, your appliance may not operate properly. It
should be operated on a separate electrical circuit from other
appliances.
WARNING: TO REDUCE THE RISK OF FIRE OR ELECTRIC
SHOCK, DO NOT REMOVE THE BOTTOM COVER. NO USERSERVICEABLE PARTS INSIDE. REPAIR SHOULD BE DONE BY
AUTHORIZED SERVICE PERSONNEL ONLY.
CAUTION: To prevent Plasticizers from migrating from the finish
of the countertop or tabletop or other furniture, place NON-
PLASTIC coasters or placemats between the appliance and the
finish of the countertop or tabletop.
Failure to do so may cause the finish to darken, permanent
blemishes may occur or stains can appear.
4
Page 6

Removable
Permanent
Filter Basket
(P/N 31208)
Removable
Filter Holder
(P/N 31202)
Your product may vary slightly from illustration.
Parts Identification
Filter
Holder
Lid
Filter
Holder
Front
Ta b
24 Hour LCD
Clock/Timer
Auto Pause
and Pour Assembly
Cord Storage
(Not Shown)
Thermal
Carafe Lid
Only
(P/N 31203)
Lid Lever
Thermal
Carafe
with Lid
(P/N 31204)
5
Removable
Water
Reservoir
(P/N 31207)
Polarized
Plug
Base Plate
FIGURE 1
Page 7

Water Reservoir Lid
Water
Brew Strength
Control Dial
FIGURE 2
Reservoir
Handle
Removable
Water
Reservoir
(P/N 31207)
Water
Reservoir
Nozzle (not
shown)
Center Water
Hole
Control Panel
ON/OFF/AUTO Button. Use this Button to turn the unit ON and
to start the brewing process. Press the ON/OFF/AUTO Button
to activate the AUTO Timer. Turn the unit OFF by pressing this
Button when the brewing cycle is complete.
The blue BREW Light, below the ON/OFF/AUTO Button will
illuminate when the Coffeemaker is brewing.
Hour Button. Use this Button to advance the hour hand to the
correct hour when setting the time.
Minute Button. Use this Button to advance the minute hand to
the correct minute when setting the time.
SET TIMER Button. Press this Button to program your
Coffeemaker to start brewing at a specified time.
The amber SET TIMER Light, below the SET TIMER Button
will flash as the Coffeemaker is being set; the Light will
illuminate steadily to indicate AUTO Program has been
activated.
SET TIMER
Button
Amber
SET TIMER Light
HOUR Button MINUTE Button
FIGURE 3
ON/OFF/AUTO
Button
Blue
BREW Light
6
Page 8

Before Using Your
Programmable Coffeemaker
WARNING: To reduce risk of fire or electric shock, do not
immerse cord, plug or appliance in water or any other liquid.
1. Before preparing coffee in your new Coffeemaker, thoroughly
clean the Removable Water Reservoir, Thermal Carafe,
Carafe Lid, Removable Filter Holder and Permanent Filter
Basket in warm, soapy water. Rinse and dry thoroughly.
Replace clean disassembled parts.
NOTE: Do not dry the inside of the Removable Water
Reservoir with a cloth because this will leave a residue of
lint and may clog your Coffeemaker.
2. To replace the Removable Filter Holder into the Coffeemaker’s
Cavity, rotate the front tab so that it faces the front right of the
Coffeemaker. The Pause and Pour Lever, located on the
bottom of the Filter Holder, sits down into the back of the
Cavity; the single clip will be at the front of the unit. Press the
Filter Holder down into place. The Lid will be fully closed when
properly assembled.
3. Clean the inside of the Coffeemaker by brewing 2 full Carafes
of clean, cool water (see Brewing Instructions). Do not place
the Permanent Filter Basket or coffee in the Removable Filter
Basket for this initial cleaning.
NOTE: At the end of the first brewing cycle, press the
ON/OFF/AUTO Button to turn the Coffeemaker OFF and
wait 10 minutes for the appliance to cool. Empty Carafe and
replace onto Base Plate. Add fresh cool water to the Water
Reservoir. Press the ON/OFF/AUTO Button twice to turn the
Coffeemaker ON. The blue BREW Light will illuminate; brew a
second Carafe. Discard water. Your Coffeemaker is now ready
for use.
7
Page 9

Permanent Filter Basket
Your Coffeemaker comes with a Permanent Filter Basket,
eliminating the need for disposable paper filters. After daily use,
the Removable Permanent Filter should be washed in hot,
sudsy water. Rinse thoroughly.
Brewing Instructions
1. Place the Thermal Coffeemaker on a flat, level surface.
2. Open the Filter Holder Lid using the lip located on top of the
Coffeemaker. (See Figure 1).
3. If the Removable Filter Holder is not already in position,
replace following the instructions outlined in step 2 in the
“Before Using Your Programmable Coffeemaker” section of
this Use and Care Guide. Place the Permanent Filter Basket
into the Filter Holder. The notched cutout of the Permanent
Filter Basket will face the right side of the Holder as it slips
into position. Fold the Handle down.
4. Add 1/2 to 1 tablespoon of drip or regular grind coffee for
each cup of coffee desired into the Filter Basket.
5. You may choose to brew your coffee with a stronger BREW
STRENGTH. To do so, turn the Brew Strength Control Dial
located on the top of the unit. The
arrows indicate a stronger or lighter
brew strength. (See Figure 4.)
NOTE: Additionally, to further brew a
stronger or milder coffee, adjust
amount of coffee to suit your taste.
NOTE: We recommend using coffee
ground specifically for automatic drip
coffeemakers.
6. Close the Filter Holder Lid. Make sure it fits snugly and shuts
fully against the Coffeemaker.
7. The Removable Water Reservoir is transparent so you can
monitor the water level. Grasp the Handle on the back of the
Water Reservoir and pull out and then up to remove it from
the Base.
8. Add fresh, cool water to the Removable Water Reservoir.
Close the Water Reservoir Lid and replace the Water
Reservoir onto the Base. Fit the Water Reservoir’s extended
water nozzle over and down and into the large center
FIGURE 4
8
Page 10

Brewing Instructions (Continued)
opening at the back of the Base. The Water Reservoir will
snap into place as you press it firmly against the body of the
machine. Make sure the Removable Water Reservoir is
correctly positioned and in place before starting.
9. To replace the Carafe Lid, twist it until the Lid Lever is
opposite the Spout and sits directly over the Handle of the
Carafe. Make sure the Carafe Lid is properly secured onto
the Carafe. Place the Carafe onto the Base.
IMPORTANT: Always use fresh, cool water in your appliance.
Warm water or other liquids, except as listed in the Care and
Cleaning Instructions, may cause damage to the appliance.
NOTE: The amount of brewed coffee will always be less than the
amount of water placed into the Coffeemaker, since about
10% is absorbed by the coffee grounds and filter.
10. Locate the Cord Storage area at the bottom back of the unit.
Extend cord, fitting it into the bottom cord notch, and plug
the unit into a 120V, AC electrical outlet. The second hand
and AM/PM display on the bottom of the blue-lit analog
Clock will begin to flash. (See Figure 3.) Set the Clock
following the instructions below.
Setting the Clock
1. When you plug the unit in, the second hand and AM/PM
display will flash until the time of day is set.
2. To set the Clock, press the HR Button. Release the Button
when the correct AM/PM is displayed and the hour hand is at
the correct position. The second hand will begin sweeping
across the face of the clock to keep the time. Press the MIN
Button until the correct minutes are displayed.
Setting the AUTO Timer
1. Press the SET TIMER Button. The amber SET TIMER
Light will flash. Press the HR and MIN Buttons as described
in “Setting the Clock” section above, until the AUTO Timer is
set to the correct future brewing time.
2. Press the ON/OFF/AUTO Button to activate the AUTO
Timer. The Clock will revert back to show the time of day.
The amber Light will glow steady to indicate the AUTO Timer
is ON.
9
Page 11

To Start Brewing Coffee Immediately
1. For optimal holding temperature, rinse the inside of Thermal
Carafe with warm water before brewing; empty and make sure
the Carafe Lid Lever is at the back of the Carafe and the Lid is
properly secured. Place Carafe onto Base Plate, making sure it
is firmly set against the silver Auto Pause and Pour Assembly
of the Coffeemaker. (See Figure 1.)
2. Check to make sure the Removable Water Reservoir is filled;
correctly positioned and in place before starting.
3. Press the ON/OFF/AUTO Button. The blue BREW Light will
illuminate as the Coffeemaker begins brewing. Once the brewing cycle is complete, the Coffeemaker will turn itself OFF.
To Start Brewing Coffee at the
Programmed Time
1. At the programmed time, the Coffeemaker will turn itself ON
automatically. The blue BREW Light will illuminate as the
Coffeemaker begins brewing. Coffee will begin flowing into
the Thermal Carafe. Once the brewing cycle is complete, the
Coffeemaker will turn itself OFF.
NOTE: The amount of coffee in the Carafe may be slightly less
than the amount of water placed in the Water Reservoir, since
some of the water is absorbed by the coffee grounds.
Auto Pause and Pour Feature
1. To pour a cup of coffee before the brew cycle is complete,
simply remove the Carafe from the Base Plate and pour.
Brewing will continue but dripping will automatically pause.
Return the Carafe to the Base Plate within 1 minute; dripping
will resume.
NOTE: The Thermal Carafe must be placed and centered onto the
Base Plate, the Carafe should rest firmly against the silver Auto
Pause and Pour Assembly of the Coffeemaker (see Figure 1) to
allow proper operation of the Auto Pause and Pour Feature.
2. Remove the Thermal Carafe from the Base Plate. Always keep
the Carafe Lid on the Carafe when pouring the coffee. Depress
the Thumb Lever and pour.
CAUTION: To avoid injury when using the Auto Pause and
Pour Feature while the Coffeemaker is still brewing, the
Thermal Carafe with Lid must be replaced on the Base
Plate, under the Filter Holder within 1 minute to prevent
the Filter Basket from overflowing.
10
Page 12

To Brew a Second Pot of Coffee
1. To brew a second pot of coffee, wait 10 minutes and allow
the Coffeemaker to cool. Empty used coffee grounds and
repeat steps for brewing coffee.
CAUTION: Failure to allow Coffeemaker to cool may cause
water to overheat and spray hot steam. The hot steam can
cause severe burns.
User Maintenance Instructions
This appliance requires little maintenance. It contains no user
serviceable parts. Do not try to repair it yourself. Refer it to a
qualified appliance repair technician if servicing is needed.
WARNING: Unplug from wall outlet before cleaning.
Care And Cleaning Instructions
1. Always make sure the Coffeemaker is OFF, the BREW
Light is off, and the unit is completely cool before cleaning.
2. After daily use, the Removable Filter Basket, Carafe and
Carafe Lid should be washed in warm, soapy water.
3. If necessary, wipe the outside of the Coffeemaker with a soft,
damp cloth and wipe dry. Do not use abrasive cleansers,
scouring pads or steel wool.
Storage Instructions
Unplug unit; store in its box or in a clean, dry place. Never
store it while it is hot or still plugged in. Cord should be fed into
the Cord Storage area. Never wrap cord tightly around the
appliance. Do not put any stress on the cord where it enters
the unit, as it could cause the cord to fray and break.
11
Page 13

Descaling
We recommend that you descale your Coffeemaker once a
month because mineral deposits can form a coating in the
Coffeemaker, causing slower brewing time and possibly an off
flavor in the coffee. Use a cleaner recommended for coffeemakers or the solution described below. To descale your unit:
1. Remove and fill the Water Reservoir using 1/4 white vinegar
and 3/4 fresh, clean, cold water. Replace Water Reservoir
following the instructions outlined in the “Brewing
Instructions” section of this Use and Care Guide.
2. Place the clean Permanent Filter Basket into the Removable
Filter Basket Holder, then close the Lid. Place empty Carafe
on Base Plate.
3. Wait 2 hours before proceeding. This will allow the vinegar
time to break down the lime and mineral deposits.
4. After 2 hours, following the “Brewing Instructions,” outlined,
brew the vinegar/water descaling solution through the
Coffeemaker and discard the brewed solution.
NOTE: While performing this procedure do not use a filter or
coffee grounds.
5. Repeat the 10 cup brewing process at least 4 times with
fresh, clean, cold water to ensure that the vinegar in the
Water Chamber and Thermal Carafe has been flushed.
NOTE: An easy way to determine if all the vinegar has been
rinsed out is to sprinkle a small amount of baking soda into
the water in the Carafe after it has completed the brewing
cycle. The baking soda will react with the vinegar. A gentle
fizzing indicates that there is still vinegar in the water and the
procedure should be repeated. If there is no reaction then it
means that all of the vinegar has been rinsed clean.
12
Page 14

LIMITED ONE-YEAR WARRANTY
Warranty Coverage: This product is warranted to be free from defects in
materials or workmanship for a period of one (1) year from the original purchase
date. This product warranty is extended only to the original consumer purchaser
of the product and is not transferable. For a period of one (1) year from the date
of original purchase of the product, our Repair Center will, at its option, either
(1) repair the product or (2) replace the product with a reconditioned comparable
model. These remedies are the purchaser's exclusive remedies under this
warranty.
Warranty Service: To obtain warranty service, you must call our warranty
service number at 1-800-233-9054 for return instructions on how to deliver the
product, in either the original packaging or packaging affording an equal degree
of protection to the Repair Center specified below. You must enclose a copy of
your sales receipt or other proof of purchase to demonstrate eligibility for
warranty coverage.
To return the appliance, ship to: To contact us, please write to, call, or email:
ATTN: Repair Center Consumer Relations Department
708 South Missouri Street PO Box 7366
Macon, MO 63552 USA Columbia MO 65205-7366 USA
1-800-233-9054
E-mail:consumer_relations@toastmaster.com
What Is Not Covered: This warranty does not cover damage resulting from
misuse, accident, commercial use, improper service or any other damage
caused by anything other than defects in material or workmanship during
ordinary consumer use. This warranty is invalid if the serial number has been
altered or removed from the product. This warranty is valid only in the United
States and Canada.
LIMITATION ON DAMAGES: THERE SHALL BE NO LIABILITY FOR ANY
INCIDENTAL OR CONSEQUENTIAL DAMAGES FOR BREACH OF ANY
EXPRESS OR IMPLIED WARRANTY OR CONDITION ON THIS PRODUCT.
DURATION OF IMPLIED WARRANTIES: EXCEPT TO THE EXTENT
PROHIBITED BY APPLICABLE LAW, ALL IMPLIED WARRANTIES AND
CONDITIONS, INCLUDING, WITHOUT LIMITATION, IMPLIED WARRANTIES
AND CONDITIONS OF MERCHANTABILITY AND FITNESS FOR A PARTICULAR
PURPOSE OR USE ON THIS PRODUCT ARE LIMITED IN DURATION TO THE
DURATION OF THIS WARRANTY.
Some jurisdictions do not allow the exclusion or limitation of incidental or
consequential damages, or allow limitations on how long an implied warranty
lasts, so the above limitations or exclusions may not apply to you. This warranty
gives you specific legal rights and you may have other rights under the laws of
your jurisdiction.
For more information on our products, visit our website:
www.maxim-toastmaster.com.
©2005 All rights reserved. P/N 61670
Made in China 4/05
 Loading...