

Page 1
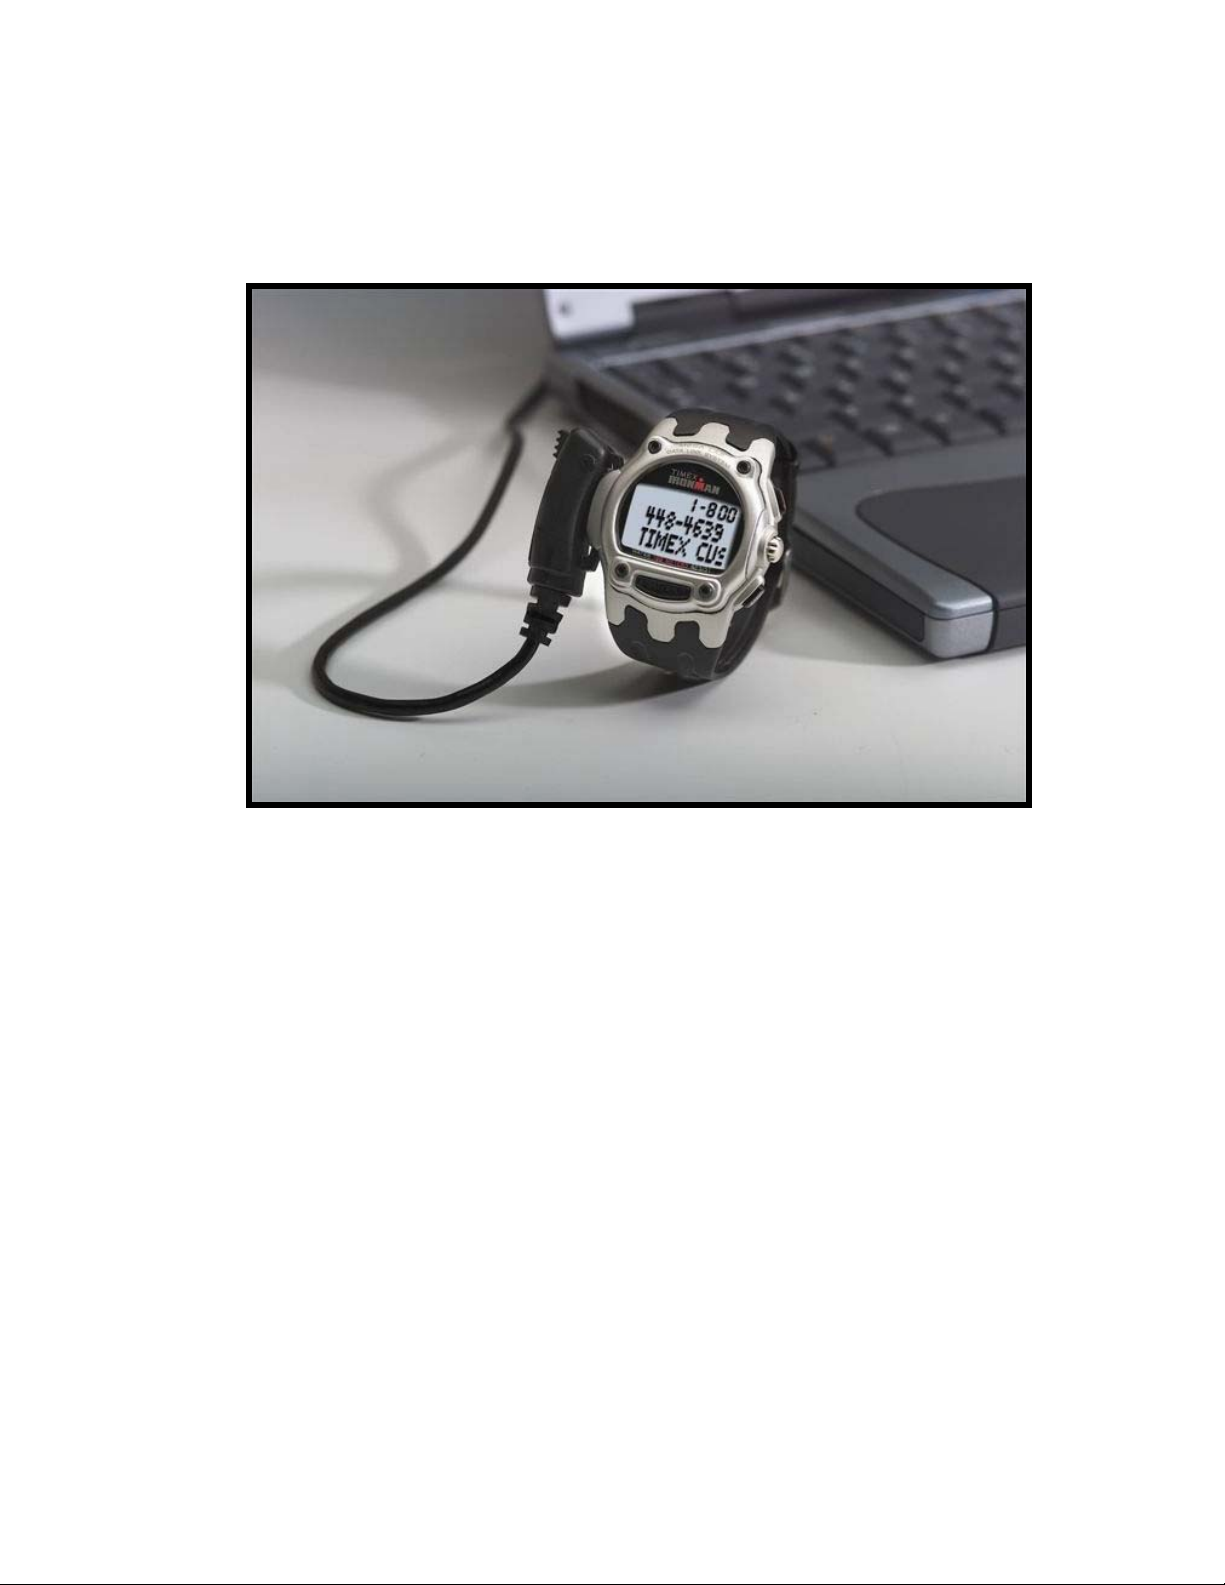
Timex Data Link USB
Watch User’s Guide
Timex Corporation
timex.com
Page 2

Note: If you are viewing this guide on your computer with Acrobat, you can easily navigate
through it with the imbedded hyperlinks. In the body of the guide, any text in blue or that is
surrounded by a blue box is a link. Simply click on it (your cursor will change to a pointing
finger when placed over the link) to jump to the referenced section of the guide. You can return
to your original location by then clicking on the heavy left-pointing arrow in the top menu bar.
Also, all the entries in the Table of Contents function as hyperlinks, even though they are not in
color.
In addition, if you select
Window : Show Bookmarks from the menu bar, a separate pane will
open to the left of the main document window with all the Table of Contents entries. You can
click on any of these to jump to the corresponding page in the guide from any other point in the
guide.
Timex, Data Link, and NIGHT-MODE are registered trademarks of Timex Corporation.
INDIGLO is a registered trademark of Indiglo Corporation in the U.S. and other countries.
Copyright 2003 Timex Corporation. All rights reserved.
Page 3

Table of Contents
Overview
Watch Display...........................................................................................................................1
Controls ....................................................................................................................................1
MODE Button .......................................................................................................................1
Crown ...................................................................................................................................2
INDIGLO® and NIGHT-MODE ........................................................................................2
Setting ..............................................................................................................................2
Modes
Time..........................................................................................................................................4
Time Zones........................................................................................................................... 4
Next Appointment/Occasion.................................................................................................4
Setting Time of Day Features............................................................................................... 5
Timeline ................................................................................................................................ 7
Chronograph.............................................................................................................................7
Basic Operations ..................................................................................................................7
Start the Chronograph .....................................................................................................7
Take a Split ......................................................................................................................8
Stop the Chronograph......................................................................................................8
Restart the Chronograph .................................................................................................8
Store a Workout ...............................................................................................................8
Recall a Workout..............................................................................................................9
Reset the Chronograph....................................................................................................9
Clear Stored Workouts.....................................................................................................9
Exit the Chronograph ..................................................................................................... 10
Memory............................................................................................................................... 10
Formats ..............................................................................................................................10
Countdown Timer ...................................................................................................................11
Basic Operations ................................................................................................................11
View the List of Timers...................................................................................................11
Start the Timer ...............................................................................................................11
Stop the Timer................................................................................................................12
Resume the Countdown ................................................................................................12
Stop the Alert .................................................................................................................12
Reset the Timer..............................................................................................................12
Exit the Timer .................................................................................................................12
Setting a Timer ...................................................................................................................12
Halfway Reminder ..............................................................................................................13
Interval Timer..........................................................................................................................13
Synchronized Timer................................................................................................................14
Basic Operation .................................................................................................................. 14
Stoppage time ................................................................................................................14
Setting ................................................................................................................................14
Schedule.................................................................................................................................15
Changing Schedules ..........................................................................................................15
Alarm ......................................................................................................................................15
Basic Operations ................................................................................................................15
Viewing the List of Alarms..............................................................................................15
Arming or Disarming an Alarm.......................................................................................16
Deleting an Alarm...........................................................................................................16
Setting Alarms ....................................................................................................................16
Alarm Alert with Backup .....................................................................................................17
Appointments..........................................................................................................................17
i
Page 4

Basic Operations ................................................................................................................17
Viewing the List of Appointments................................................................................... 17
Arming or Disarming an Appointment............................................................................17
Deleting an Appointment................................................................................................18
Setting Appointments .........................................................................................................18
Appointment Alert with Backup ..........................................................................................19
View the Next Appointment ................................................................................................ 19
Occasions ...............................................................................................................................19
Timeline .............................................................................................................................. 20
View the Next Occasion .....................................................................................................20
Contact ...................................................................................................................................20
Phone Number Format.......................................................................................................20
Message Scrolling ..............................................................................................................21
Note ........................................................................................................................................21
Basic Operations ................................................................................................................21
View the List of Notes ....................................................................................................21
Message Scrolling.......................................................................................................... 21
Delete an Entry ..............................................................................................................21
Setting Notes ...................................................................................................................... 22
Options ...................................................................................................................................22
NIGHT-MODE ....................................................................................................................22
Setting NIGHT-MODE....................................................................................................22
Chime ................................................................................................................................. 23
Setting the Chime...........................................................................................................23
Button Beep........................................................................................................................23
Setting Button Beep ....................................................................................................... 23
Wrist Apps ..............................................................................................................................24
Communication
Connecting the USB Cable.....................................................................................................25
Communication Error..............................................................................................................25
Custom Settings
Melodies .................................................................................................................................27
Character Set..........................................................................................................................27
Password Protection...............................................................................................................27
...........................................................................................................................................28
Tips
Technical Information
Battery ....................................................................................................................................29
Water Resistance ...................................................................................................................29
Compliance.............................................................................................................................29
FCC Notice ......................................................................................................................... 29
Industry Canada Notice......................................................................................................29
Technical Support...................................................................................................................29
ii
Page 5
Timex Data Link USB Watch User Guide
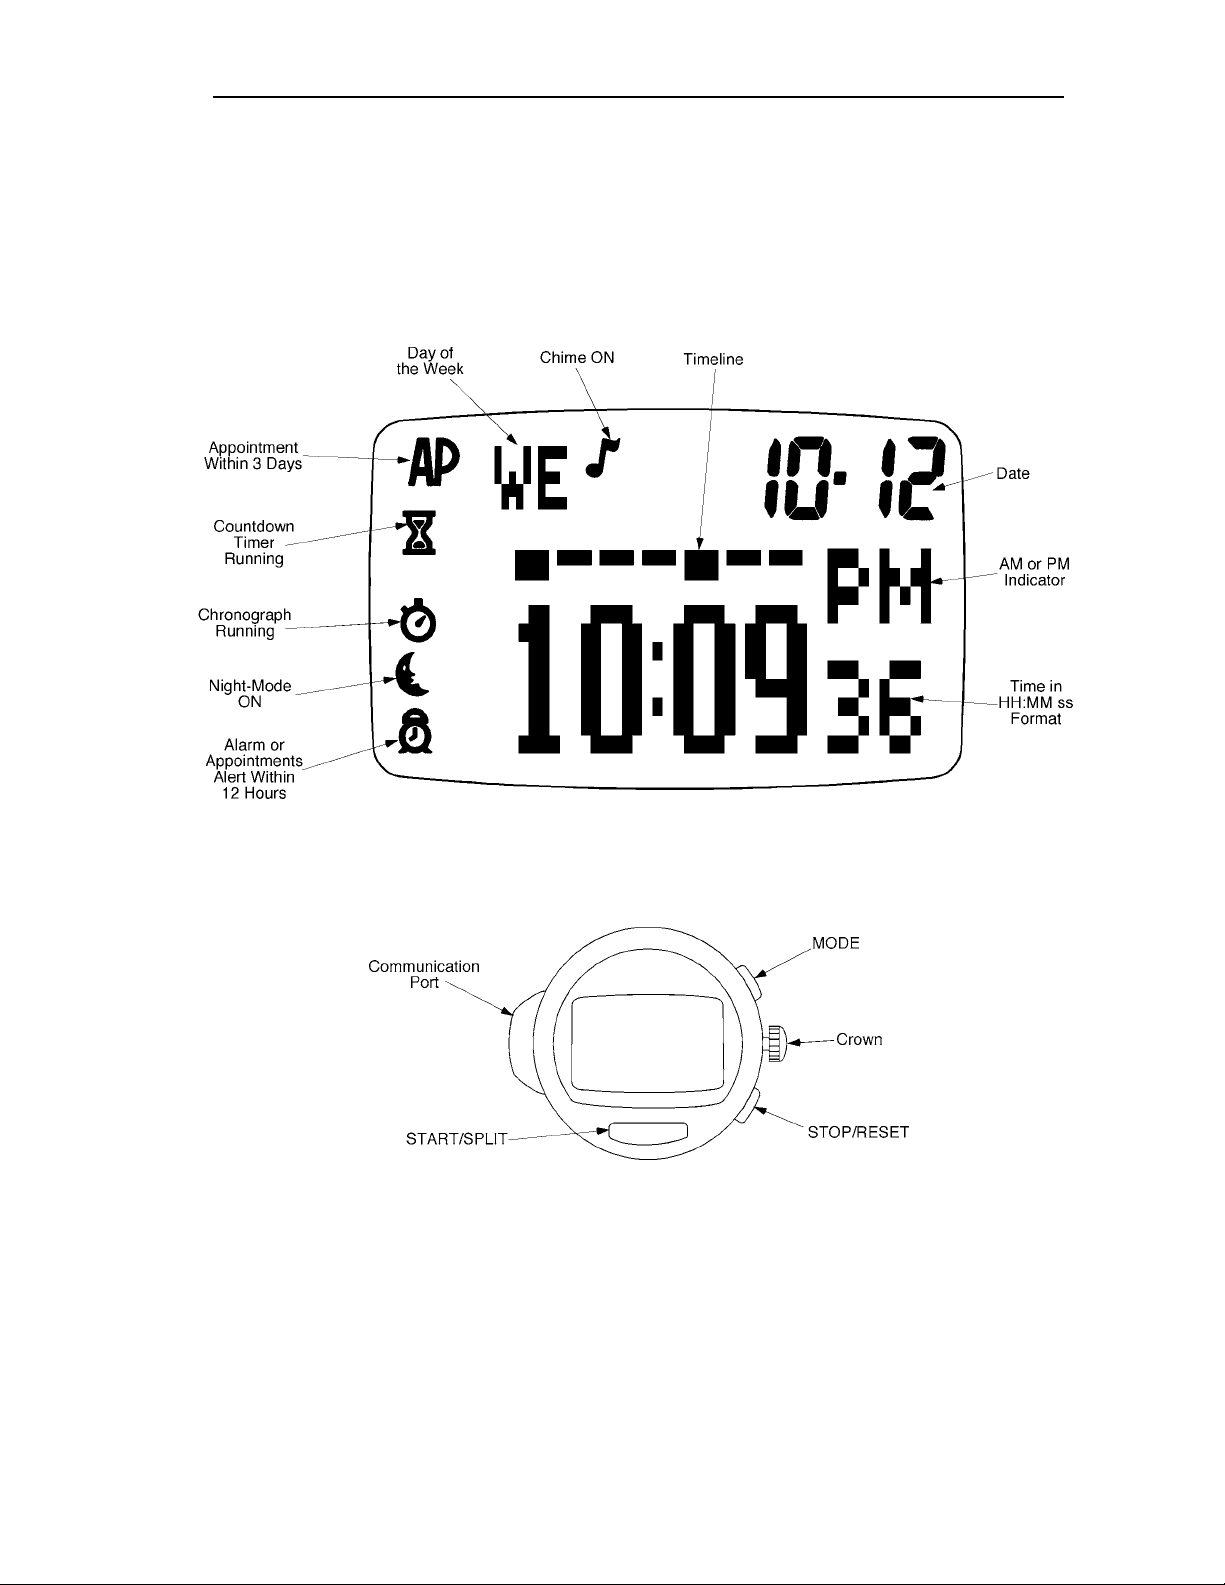
Watch Display
The watch display in the Time of Day mode is illustrated below. The format can be changed, as
described in Setting Time of Day Features. Click on the name of an icon for a description of
that function.
Overview
Controls
The figure below illustrates the locations of the watch controls.
MODE Button
When the watch is displaying time of day, press the MODE button to display the other
available modes. Press the button repeatedly until the desired mode is shown. (The mode names
and display order can be customized with the PC software.) Whenever the watch has been in
one mode for more than 6 seconds, pressing MODE returns the watch to the Time-of-Day
display.
1
Page 6
Timex Data Link USB Watch User Guide
Crown
In any mode other than Time of Day, turn the Crown to scroll through the entries. Each click of
the Crown displays the next entry; when the end of the list is reached, the next click returns to
the first entry. Turn the Crown clockwise to more forward through the entries or
counterclockwise to move in reverse.
INDIGLO® and NIGHT-MODE
To activate the INDIGLO night-light in any mode (except when the Crown is pulled out for
setting), press the Crown. Holding the Crown in for 4 seconds turns on NIGHT-MODE. In
NIGHT-MODE, any button press causes the night-light to come on for 3 seconds. To
deactivate NIGHT-MODE, hold the Crown in for 4 seconds.
The NIGHT-MODE feature can be customized or disabled in the PC software. See the
Software Help for more information.
Setting
The following procedure describes the general process for setting the watch manually.
However, it is generally easier to perform most setting operations using the PC software. In
fact, some watch functions can only be set with the software.
Manual Procedure – The normal setting procedure is as follows:
1. Pull the Crown out to set.
2. Turn the Crown to change the value of the flashing item.
3. Press MODE to advance to the next item to change, or press STOP/RESET to go in
reverse order.
4. Push the Crown in to save your changes and return to the normal display for that mode.
Entering Text – In any mode that allows text entry, when the first character position is flashing
turn the Crown to display the available characters (letters, numbers, and punctuation). When
the desired character is reached, press MODE to advance to the next character position or
STOP/RESET to return to a previous position. Use START/SPLIT as a shortcut to enter a
space.
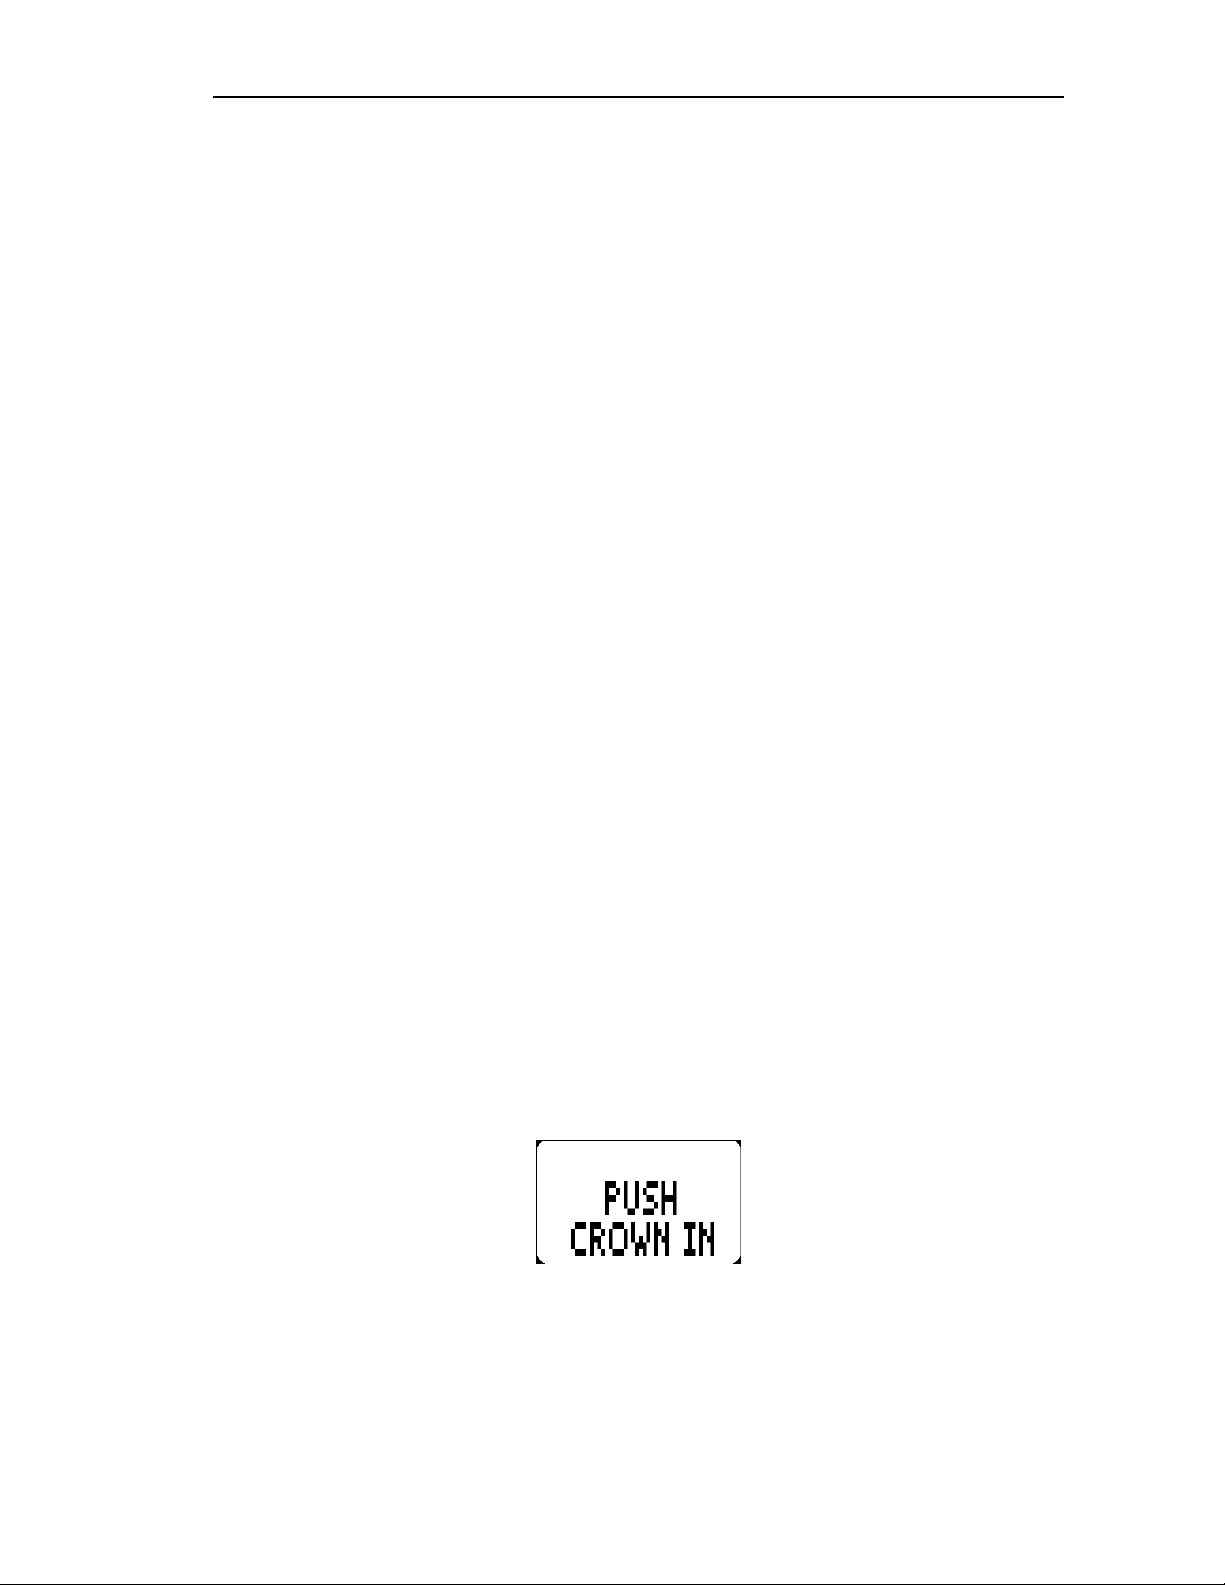
Crown Out – Whenever the Crown is left out for an extended period with no entries being made
(either button presses or Crown rotation), an alert sounds and the following message appears on
the display to warn you to push the Crown in. Push the Crown in to return to the normal display
for the current mode.
2
Page 7

Timex Data Link USB Watch User Guide
You Rock! – If you pull the Crown out in any mode that does not allow manual changes, the
following message is displayed.
3
Page 8
Timex Data Link USB Watch User Guide
This section describes each of the standard watch modes, including basic operations and items
that can be set manually.
If a mode is not present, it will not appear and no operations will be possible. If a mode is
password protected (see Password Protection), you must enter the password before it can be
accessed.
Time
Following are the operations that can be performed in Time of Day mode.
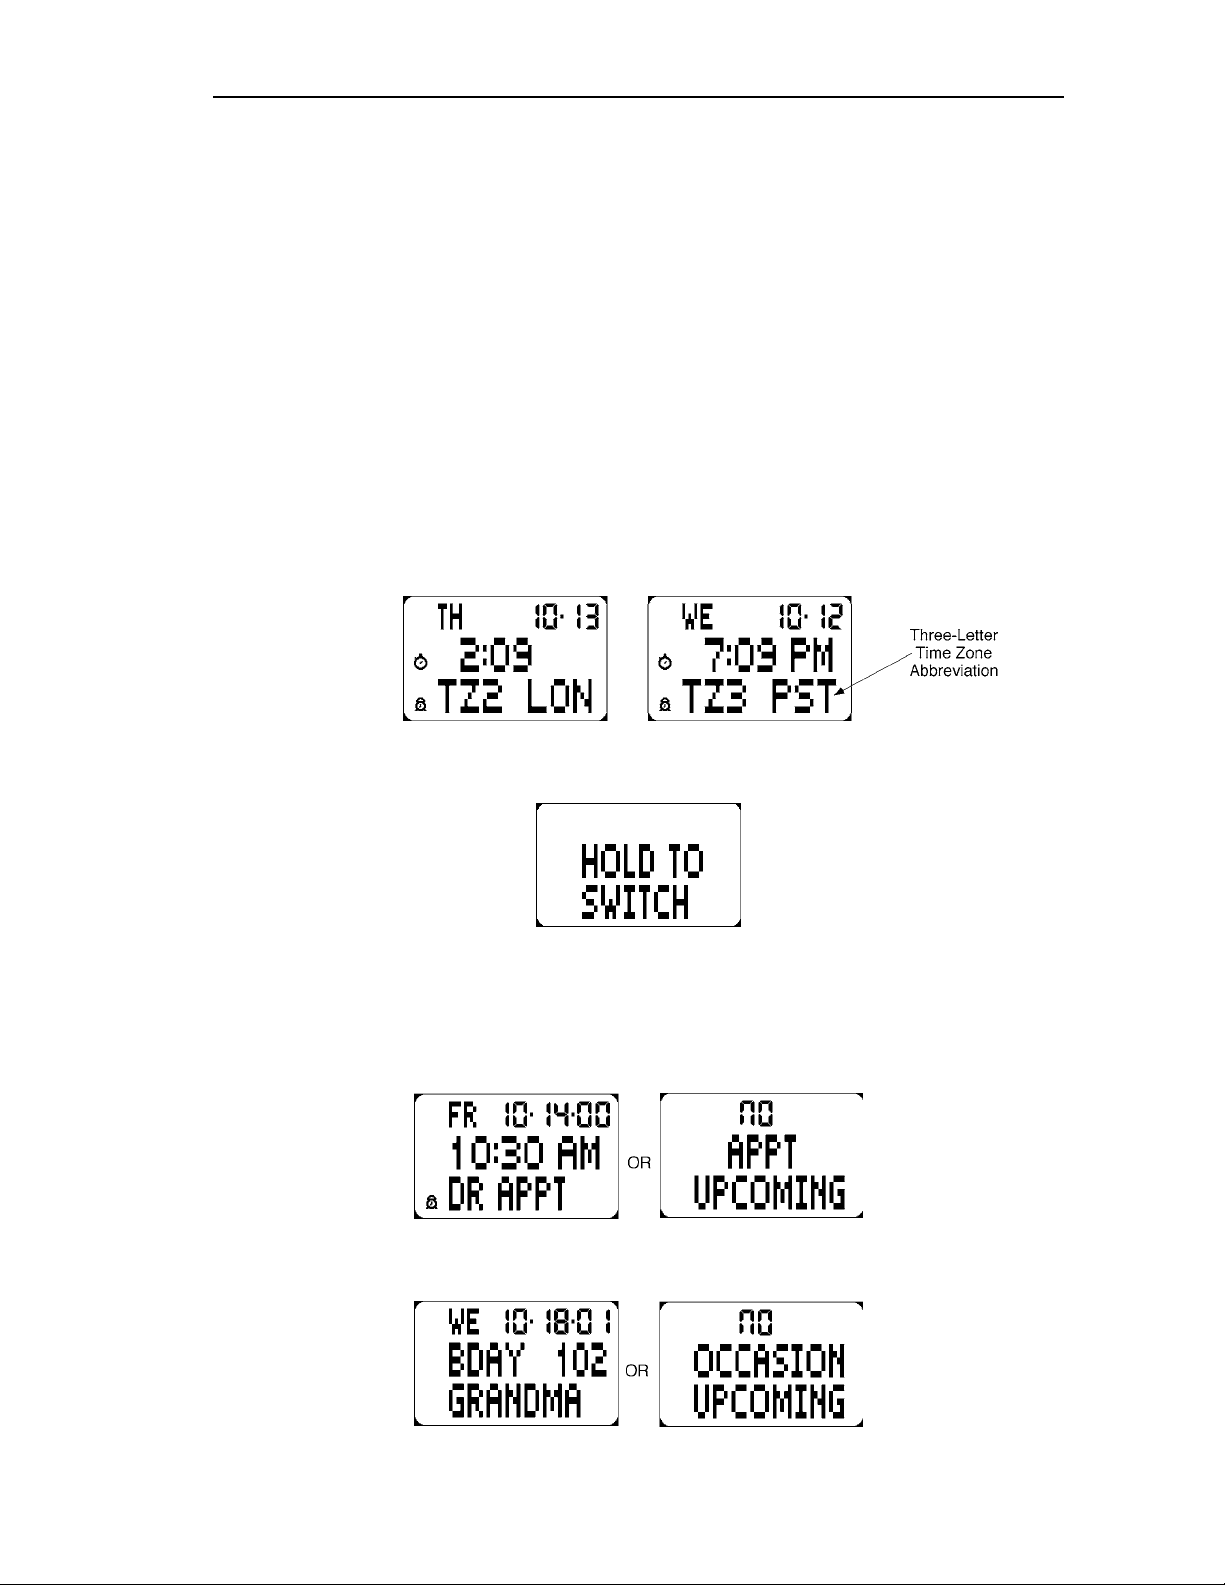
Time Zones
Press STOP/RESET once and hold it in to display the time in the second time zone; press twice
and hold to display the time in the third time zone. Following are two examples of alternate
time zone displays that appear after one or two presses of STOP/RESET.
Modes
Hold the button in while the desired time zone is displayed to switch to that time zone as the
default for the time display. To manually set any of the time zones, you must switch first to it.
Next Appointment/Occasion
Press START/SPLIT once and hold it in to display the next Appointments entry that is
scheduled to occur (armed or not), as in the sample. If no appointments are scheduled, the
second message appears.
Press START/SPLIT twice and hold it in to display the next Occasions entry that is scheduled
to occur, as in the sample. If no occasions are scheduled, the second message appears.
4
Page 9
Timex Data Link USB Watch User Guide
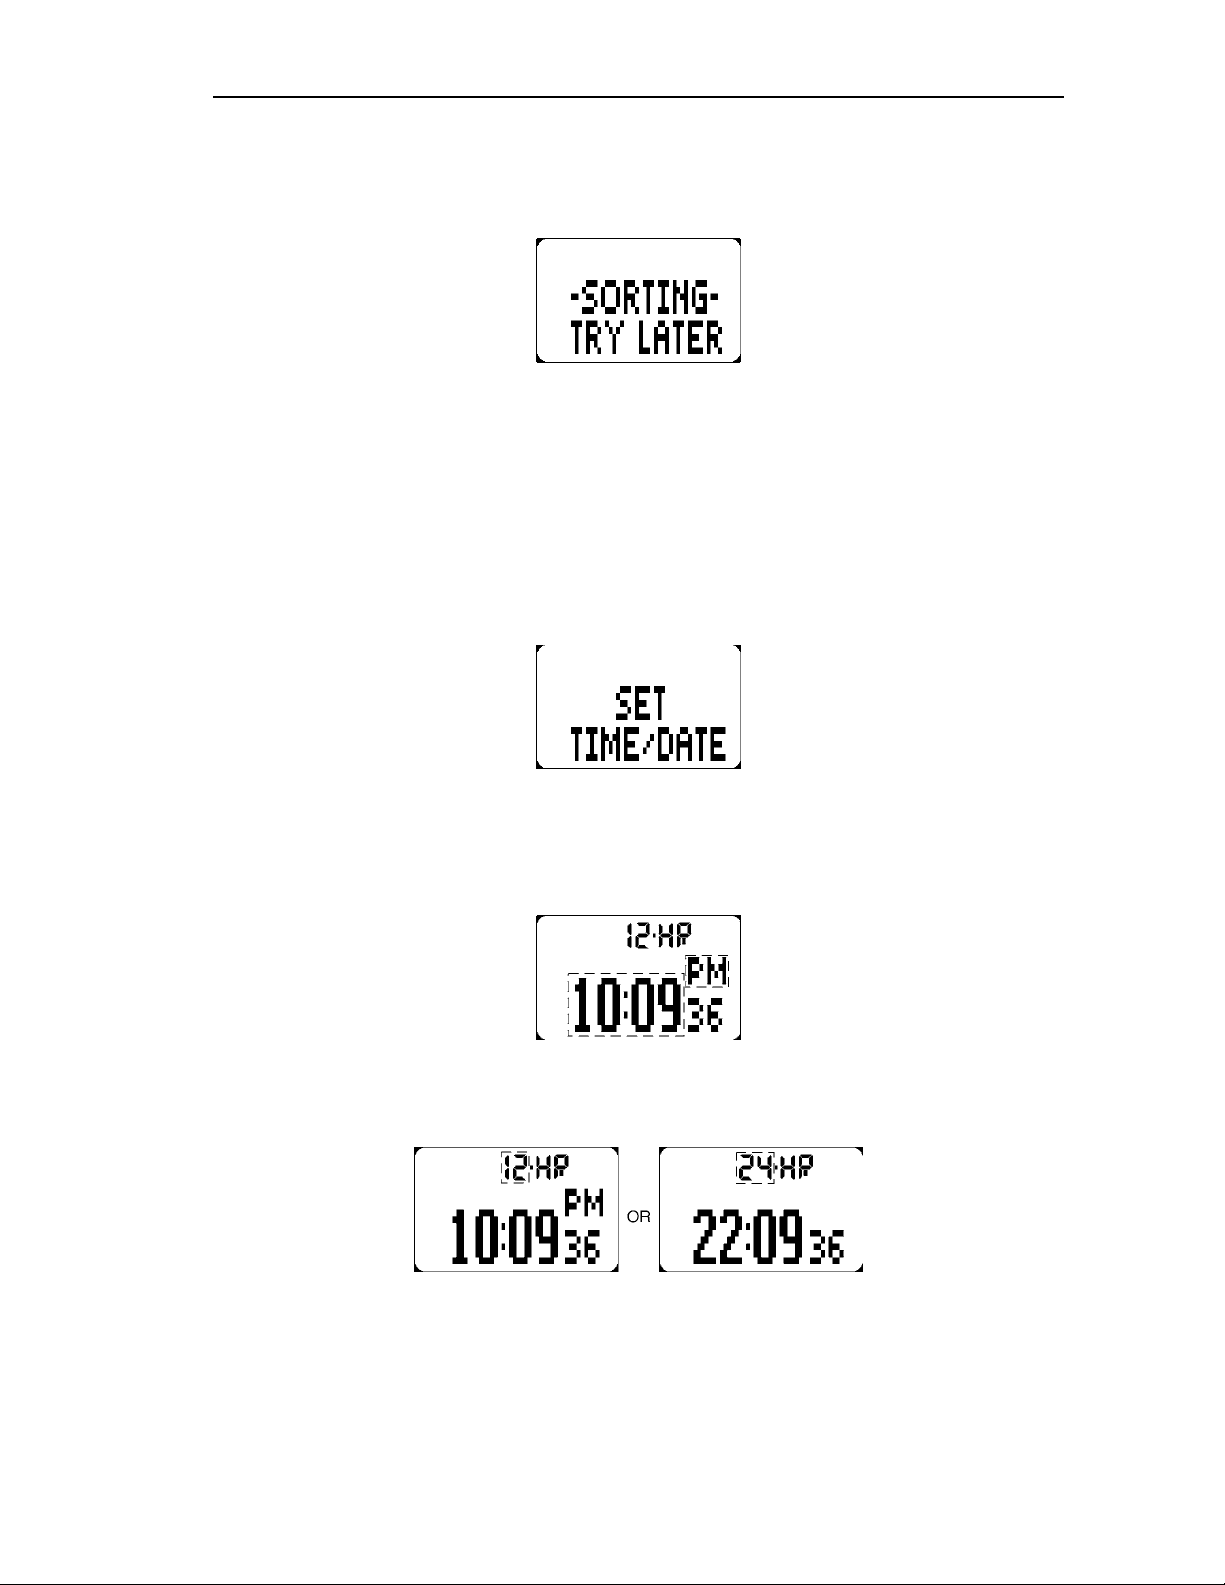
Note that if you recently made changes to the Appointment and/or Occasion entries, the watch
may need to sort them before they can be viewed. If this is the case, the following message
appears on the display:
Setting Time of Day Features
As with most watch functions, Time of Day can be set easily with the PC software. The
following procedure describes how to do this manually at the watch.
When the Crown is pulled out in Time of Day mode, the following message is shown. After
each item is set by turning the Crown, press MODE to advance to the next item or
STOP/RESET to return to a previous one. Push the Crown in to save your changes and return
to the normal time display. In the display examples that follow, the flashing item is indicated by
a dashed box.
After this message appears, each of the items on the Time of Day display may be set in the
following sequence.
1. Time – The current time is the first item to set. After setting hours and minutes, you can
reset the seconds to zero by pressing START/SPLIT.
2. Time Format – This may be either 12-hour format, which displays AM or PM with the
time, or 24-hour, with no AM or PM indication, as shown in the following two
examples:
5
Page 10
Timex Data Link USB Watch User Guide
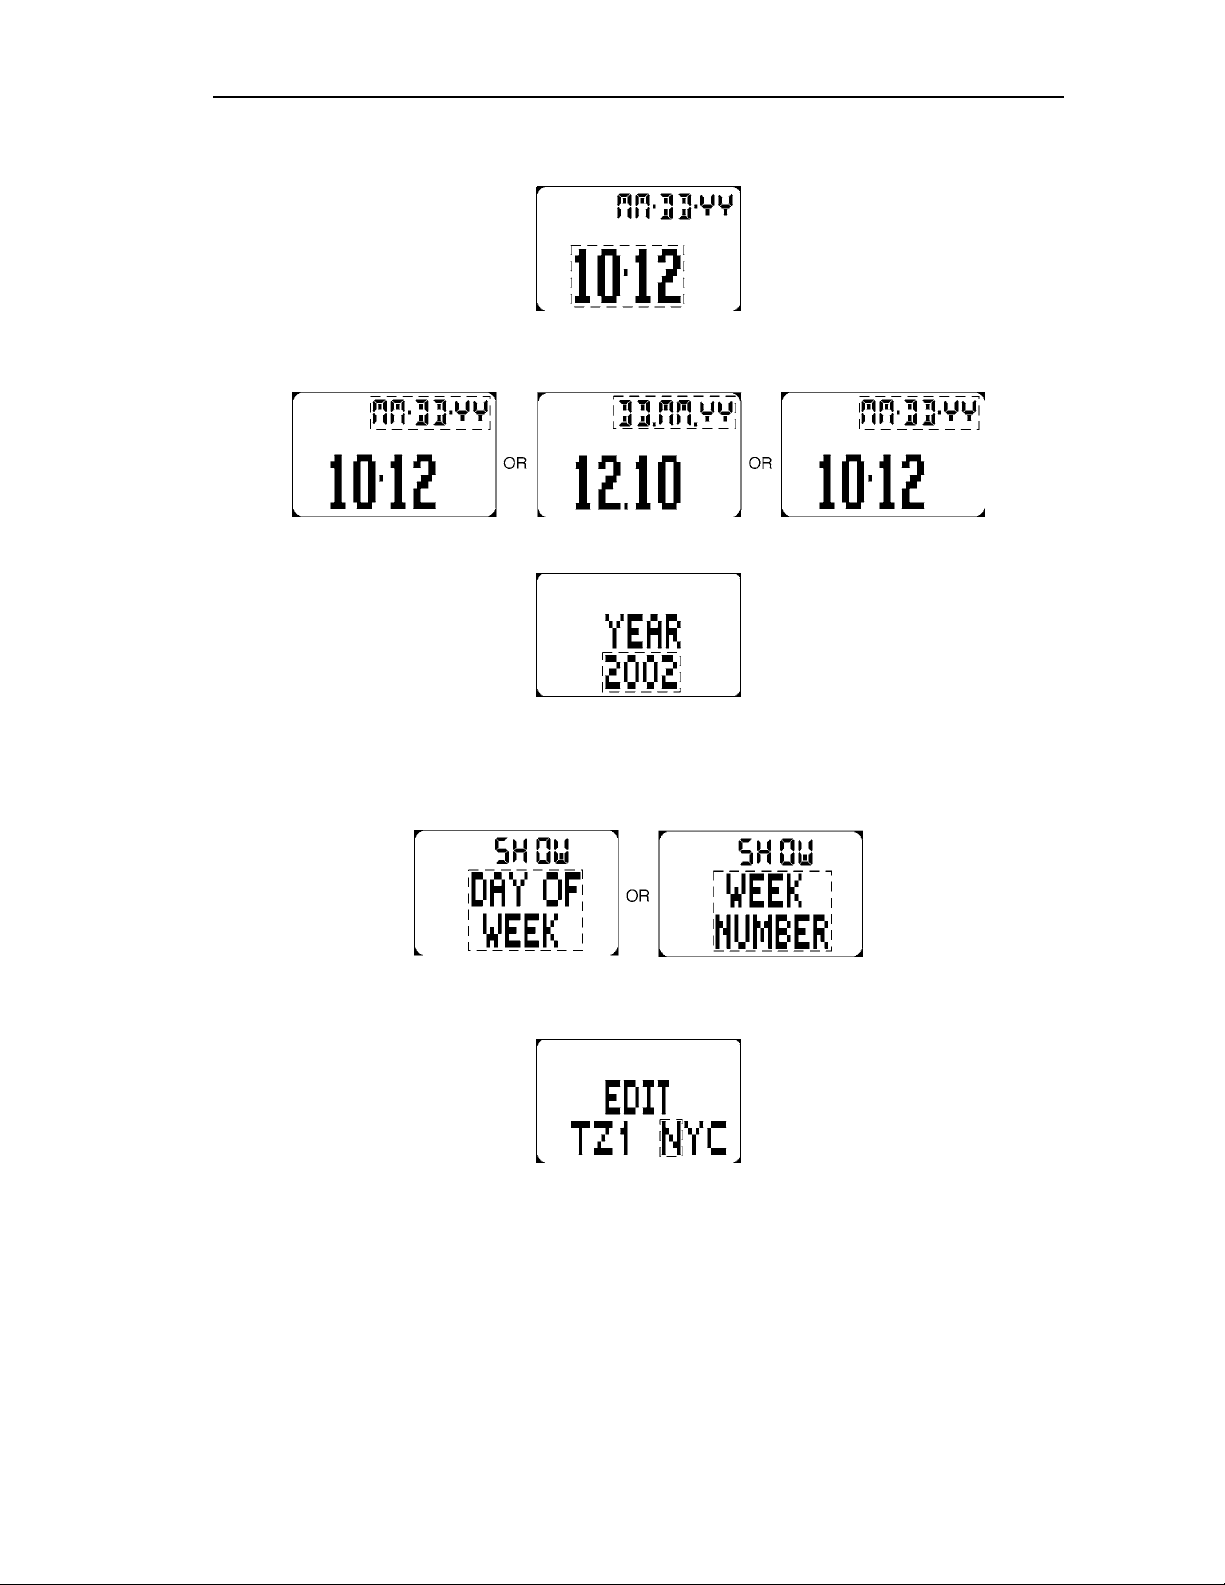
3. Date – Set the month and day:
4. Date Format – The format for the date display can be set to mmddyy, ddmmyy, or
yymmdd.
5. Year – The year is set as shown:
6. Day or Week Number – In this step, you select whether to display the day (in two-letter
format) or the week number. The week number is calculated using either Sunday or
Monday as the first day of the week, as determined in the software and downloaded
(see the Software Help for more information).
7. Time Zone Name – The last item to set in the Time-of-Day display is the time zone
name. The first letter of the name is set first, then each of the others in turn.
To set the second and third time zones, you must first switch to them manually (see
Time Zones).
6
Page 11

Timex Data Link USB Watch User Guide
Timeline
The timeline feature, which is activated with the PC software (see the Software Help for more
information), displays a row of seven dashes above the time. The first dash on the left indicates
the current day, with the others representing the following six days. A block indicates that an
Occasion is set for that day. In the example, today and the fourth day from today have
occasions.
Chronograph
This mode allows you to record the elapsed time of an event. The duration of an individual lap
(lap time) and the total time for a number of laps (split time) can be displayed, stored in
memory, and recalled.
When this mode is entered, the display shows the number of laps that can be stored in the
remaining Memory; if none is available, the second message appears.
Then the display shows the current state of the chronograph, which can be either reset (shown),
stopped, or running.
Basic Operations
The functions you can perform while in Chronograph mode are as follows.
Start the Chronograph
To start timing a new workout, with the display reset, press START/SPLIT. The chronograph
icon blinks continuously as long as the chronograph is running. The total time is displayed as
shown, as MM.SS hh (minutes, seconds, hundredths of a second) for times less than 1 hour and
as HH:MM SS (hours, minutes, seconds) for times greater than an hour, up to 100 hours.
7
Page 12

Timex Data Link USB Watch User Guide
Take a Split
Press START/SPLIT to take a split, which means to stop timing one part of a workout (such as
a lap) and to start timing the next part. The display then freezes for 10 seconds, as shown, after
which it resumes with the next lap. Press MODE to immediately display the next lap timing.
After a split is taken, the lap number shows in the upper left part of the display.
There are four formats available for displaying lap and split times, as described here [see
Formats]. Note that you may continue to take splits, even after the watch’s memory is filled. In
this case, the workout date is saved, along with as many of the first splits as will fit.
Stop the Chronograph
Press STOP/RESET to stop the chronograph at any time. The display will remain at whatever
lap and split times were reached at that point, as in the example.
Restart the Chronograph
Press START/SPLIT again to restart the chronograph. The times will resume from where they
were previously stopped.
Store a Workout
To store a completed workout, turn the Crown one click in either direction. A message will tell
you that the workout was stored, then the amount of free memory left (or MEMORY FULL, if
appropriate), followed by a return to the chronograph reset display.
8
Page 13

Timex Data Link USB Watch User Guide
Recall a Workout
You can recall any workout that has been saved, completed (but not saved), or currently
running.
When the chronograph is reset, turn the Crown to scroll through the stored workouts. The
workout information appears with the day of the week and date the workout was started, the
total time, and the number of laps:
When you have reached the workout that you want to view, pull out the Crown. If no splits
were recorded for that workout, the display goes to the format setting step [see Formats].
Otherwise, the display shows the first split stored. Continue turning the crown to view all splits
for that workout. Following the splits, the best lap time is shown, followed by the lap average.
Push the Crown in to return to chronograph mode.
To view the details for a workout that was completed but not stored or for a workout that is
currently running, pull out the Crown. The sequence of displays is the same as for stored
workouts.
Reset the Chronograph
To clear the current workout and reset the chronograph, press and hold STOP/RESET. When
you have held it long enough, the watch beeps to confirm that the chronograph is reset. It then
displays the status of Memory, followed by the reset chronograph.
Clear Stored Workouts
To clear the stored workout being viewed, press and hold STOP/RESET. To clear all stored
workouts, start with the Chronograph in reset, then press and hold STOP/RESET. The display
shows one of the first two messages, as appropriate, followed by the memory status and the
reset chronograph after the clear operation is complete.
9
Page 14

Timex Data Link USB Watch User Guide
Exit the Chronograph
You can leave Chronograph mode at any time by pressing MODE to return to Time of Day.
If the Chronograph was running, it will continue to run and the Watch Display will show in the
Time of Day display. When you return to Chronograph mode, the currently running workout is
displayed.
Memory
The amount of memory allocated to storing lap times in Chronograph mode is set using the PC
software (see the Software Help for information on this function). You may allocate 5–200 laps
of memory. Each workout reduces the free memory by one for each split plus one more for the
workout itself.
The amount of free memory available is displayed when Chronograph mode is started and also
when a workout is stored or deleted. You can make more memory available by deleting stored
workouts.
Formats
There are four formats available for displaying lap and split times during a workout or when a
workout is recalled from memory. To set the format, pull out the Crown; the message
RECALL/FORMAT appears on the display. If you pull out the Crown when the display is reset
or if the current workout had no splits taken, the format-setting step appears immediately.
Otherwise, the watch enters workout recall, at which point you can press MODE to go to the
format-setting step.
The four workout display formats are as follows, with the setting display shown first, followed
in each case by an example of that format displaying workout data. Note that formats that
include the lap time only apply after a split has been taken.
10
Page 15

Timex Data Link USB Watch User Guide
Countdown Timer
This feature allows you to set a time from which the watch counts down to zero, then sounds an
alert to warn you that the time has elapsed. Entries may be set in the PC software and
downloaded (see the Software Help for more information) or manually with the watch controls.
When this mode is entered, the display shows the current state of the timer, which can be either
reset, stopped, or running.
Basic Operations
The functions you can perform while in Countdown Timer mode are as follows.
View the List of Timers
To view the timers stored in the watch, turn the Crown.
Start the Timer
Press START/SPLIT to start the countdown timer. The starting time is displayed in the top line,
with the middle line showing the current time remaining. After the count has progressed for 10
seconds, the format changes to show the time remaining in large numerals.
If the timer has been set to repeat, the repetition number is shown in the top line as well.
11
Page 16

Timex Data Link USB Watch User Guide
Stop the Timer
To stop the timer at any point in the countdown, press STOP/RESET. The display will hold the
count where it left off and the timer icon will stop flashing.
Resume the Countdown
To resume an interrupted countdown, press START/SPLIT. The countdown will continue from
the stop point and the timer icon will resume flashing.
Stop the Alert
When the watch has reached the end of the countdown, it beeps and Indiglo flashes. To silence
the alert, press any button or the Crown. If the watch is in another mode when the timer alert
display pops up, you can press any button to return to that mode or wait for the watch to do so
automatically.
Reset the Timer
To reset the timer (return to the starting time) while it is stopped, press and hold STOP/RESET.
Exit the Timer
You can leave Timer mode at any time by pressing MODE to return to Time of Day.
If the Timer was running, it will continue to run and the timer icon will show in the Time-ofDay display. When you return to Timer mode, the currently running timer is displayed.
Setting a Timer
To set a timer, pull out the Crown. Turn the Crown to set the hours and minutes. Press MODE
to then set the seconds.
After the time has been set, press MODE again to choose the action to occur at the end of the
countdown, as follows:
• STOP –The timer simply stops when it reaches zero.
• REPEAT – The timer automatically repeats the countdown. This continues until the
timer is stopped when you press STOP/RESET.
• CHRONO – The chronograph is started when the timer reaches zero. Note that if the
chronograph was already running, the timer instead acts as if STOP had been selected.
12
Page 17

Timex Data Link USB Watch User Guide
Push the Crown when done.
You can also set a message (up to nine characters) for each timer to indicate its function.
However, this feature is only available from the PC software (see the Software Help for more
information).
Halfway Reminder
You can set the watch to remind you when the halfway point of the countdown has been
reached by pressing STOP/RESET while the timer is reset. When the halfway point is reached,
the watch will play a short tune, while the countdown is continuing. To disable the halfway
reminder, press STOP/RESET again. Note that you cannot set the halfway reminder unless the
timer is set for at least 1 minute.
Interval Timer
This feature allows you to link a sequence of countdown timers. When the timer is started, it
begins by counting down the first interval, then continues with the next interval until it reaches
an interval with a zero set time. At this point, the timer stops, repeats, or goes to chronograph
mode, depending on which option was set.
All operational functions are performed as in Countdown Timer mode. During Setting, press
START/SPLIT to set an interval. This feature is particularly useful for interval training, in
which the intensity of the workout varies over different intervals. Set the timer message to
identify each interval.
13
Page 18

Timex Data Link USB Watch User Guide
Synchronized Timer
This function keeps track of the total time since starting and, optionally, the stoppage time for
any events using the Chronograph, Countdown Timer, or Interval Timer. You can use this
feature to keep track of how long you’ve been jogging, including stops at street corners, or how
long you’ve been doing your interval training.
Basic Operation
The synchronized timer is started whenever the Chronograph, Countdown Timer, or Interval
Timer is started from reset. The synchronized timer responds only to the chronograph or timer
that caused it to start, until a new start from reset occurs. Either the chronograph or timer icon
is displayed to indicate which function started the synchronized timer. If this icon is flashing,
that function is currently running; if not, it is stopped.
Stoppage time
When you stop the chronograph or timer, the synchronized timer’s total time continues running
and the stoppage timer starts. When you reset the chronograph or timer, both the total and
stoppage times of the synchronized timer stop. They are reset to zero at the next start of the
chronograph or timer from reset.
Setting
Pull out the Crown and turn it to display the three available display formats. Push in the Crown
at the desired format to save your choice and return to reset mode.
14
Page 19

Timex Data Link USB Watch User Guide
Schedule
This feature allows you to view schedules entered with the PC software and downloaded to the
watch (see the Software Help for more information). It may be used to view such data as the
sports team schedules, sunrise and sunset times, and tide tables.
When you enter this mode, the display shows the first entry that occurs after the current date
and time for the current schedule, or END OF LIST if there is no entry. To view other entries in
the schedule, turn the Crown.
Changing Schedules
To view the schedule for a different member of the schedule set, if there are any, pull out the
Crown. Turn it to select the desired schedule, then push the Crown in.
Alarm
This feature allows you to set one or more alarms to go off on a preset schedule. Entries may be
set in the PC software and downloaded (see the Software Help for more information) or
manually with the watch controls. When you enter this mode, the display shows the last entry
viewed.
Basic Operations
Following are descriptions of the basic functions that can be performed with the watch controls.
Viewing the List of Alarms
To view the alarms stored in the watch, turn the Crown. After the end of the list of alarms has
been viewed, a message appears giving the number of unused entries (if any), followed by the
end of list message. Turn the Crown once more to return to the beginning of the list.
15
Page 20

Timex Data Link USB Watch User Guide
Arming or Disarming an Alarm
To arm (turn on) or disarm the displayed Alarm entry, press START/SPLIT. The Alarm icon
appears when the alarm is armed. Note that when the watch has returned to Time of Day mode,
the alarm icon appears when an alarm alert is set to sound within the next 12 hours.
Deleting an Alarm
To delete the displayed Alarm entry, press and hold STOP/RESET. When an alarm is deleted,
it is added to the collection of unused entries.
Setting Alarms
To set an alarm, turn the Crown to display either an existing alarm that you want to change or
an unused entry to create a new alarm. Pull out the Crown to enter setting mode. The first step
is to set the alarm time. Turn the Crown to change the alarm time. Press START/SPLIT to
change between 5-minute and 1-minute resolution.
Press MODE to move to the second step, choosing the day or days on which to generate the
alarm. Turn the Crown to display the choices of, in order, DAILY (every day), WKDAYS
(Monday through Friday), WKENDS (Saturday and Sunday), or WEEKLY (one day per week;
choose SU through SA). Turn the Crown to move through the sequence until the desired setting
is reached.
Press MODE to move to the final step, at which you can set a message for the alarm. As the
first character position flashes, turn the Crown to choose the letter or number to appear, then
press MODE to advance to the next character, or STOP/RESET to return to the previous
character. Press START/SPLIT as a shortcut for entering a space. When you are done setting
the alarm, push the Crown in. Note that you may edit only as many characters as there were in
the original message. Messages may contain up to 100 characters.
16
Page 21

Timex Data Link USB Watch User Guide
Alarm Alert with Backup
When the day and time for an armed alarm are reached, the watch sounds an alert and displays
the alarm entry. You can silence the alert by pressing any button. The alarm message then
scrolls, if necessary. If the alarm is not silenced before the alert melody is finished, a backup
alert will be generated one more time in 5 minutes.
If the watch is in another mode when the alarm display pops up, you can press any button to
return to that mode or wait for the watch to do so automatically.
Appointments
This feature allows you to set the watch to remind you of upcoming appointments. Entries may
be set in the PC software and downloaded (see the Software Help for more information) or
manually with the watch controls. When you enter this mode, the display shows the last entry
viewed.
Basic Operations
Following are descriptions of the basic functions that can be performed with the watch controls.
Viewing the List of Appointments
To view the appointments stored in the watch, turn the Crown. After the end of the list of
appointments has been viewed, a message appears listing the number of unused entries (if any),
followed by the end of list message. Turn the Crown once more to return to the beginning of
the list.
Arming or Disarming an Appointment
To arm (turn on) or disarm an appointment, scroll through the list of appointments by turning
the Crown until the desired one is reached. Press START/SPLIT to turn the appointment alert
on or off, as indicated by whether or not the alarm icon appears in the display.
17
Page 22

Timex Data Link USB Watch User Guide
Deleting an Appointment
To delete an appointment, scroll through the list of appointments by turning the Crown until the
desired one is reached. Press and hold STOP/RESET. After the appointment is deleted, the next
entry in the list (if any) is displayed or the number of unused entries.
Note that when the watch is in Time of Day mode, the alarm icon appears when an appointment
alert is set to sound within 12 hours. The AP symbol appears when an appointment is scheduled
for the current day or the next three days, whether it is armed or not.
Setting Appointments
To set an appointment, turn the Crown to display an existing appointment that you want to
change, or display an unused entry to create a new appointment. Pull out the Crown to enter
setting mode. The first step is to set the appointment time. Turn the Crown to change the
appointment time. Press START/SPLIT to change between 5-minute and 1-minute resolution.
Press MODE to move to the second step, choosing the frequency of the appointment. Turn the
Crown to display the choices of, in order, 1-DAY (occurs only once), DAILY (every day),
WKDAYS (Monday through Friday), WKENDS (Saturday and Sunday), WEEKLY (every
week on the chosen day), MNTHLY (every month on the chosen day of the month), or
YEARLY (every year on the chosen date).
Press MODE to move to the third step. If the selection in the previous step was 1-DAY, then
this step determines the date of the appointment. For any other choice of frequency, this step
determines the first occurrence of the appointment. Turn the Crown to choose the date. Thus,
either of the following two displays appears.
18
Page 23

Timex Data Link USB Watch User Guide
Press MODE to move to the fourth step, which determines how long before the appointment
time the alert will sound, as long as the appointment is armed. Turn the Crown to choose from
the available settings: 0 MINS, 5 MINS, 10 MINS, 15 MINS, 30 MINS, 60 MINS, 2 HRS, 3
HRS, 4 HRS, 5 HRS, 6 HRS, 8 HRS, 10 HRS, 12 HRS, 24 HRS, and 48 HRS.
Press MODE to move to the fifth step, at which you can set the message for the appointment.
As the first character position flashes, turn the Crown to choose the letter or number to appear,
then press MODE to advance to the next character, or STOP/RESET to return to the previous
character. Press START/SPLIT as a shortcut for entering a space. When you are done setting,
push the Crown in. Note that you may edit only as many characters as were in the original
message. Messages may contain up to 100 characters.
Appointment Alert with Backup
When the day and time for an armed appointment are reached, the watch sounds an alert and
displays the appointment entry. You can silence the alert by pressing any button. The
appointment message scrolls, if necessary. If the appointment alert is not silenced before the
alert melody is finished, a backup alert will be generated one more time in 5 minutes.
If the watch is in another mode when the appointment display pops up, you can press any
button to return to that mode or wait for the watch to do so automatically.
View the Next Appointment
Whenever the watch is in Time of Day mode, you can view the next appointment by pressing
and holding START/SPLIT. See Next Appointment/Occasion for details.
Occasions
This feature allows you to download dates for specific occasions (such as birthdays,
anniversaries, and holidays) into the watch. Occasion entries may be created only in the PC
software (see the Software Help for more information). When you enter this mode, the watch
displays the next entry to occur.
19
Page 24

Timex Data Link USB Watch User Guide
You can view the complete list of occasions by turning the Crown. Recurring entries repeat
every year. If there are no recurring entries, then END OF LIST appears when all the occasions
have been viewed.
If you enter the original year of an anniversary or birthday, the watch will display the number
of the anniversary or birthday.
Timeline
The timeline feature, which is activated with the PC software (see the Software Help for more
information), displays a row of seven dashes above the time. The first dash on the left indicates
the current day, with the others representing the following six days. A heavy dash indicates that
an occasion is set for that day. In the example, today and the fourth day from today have
occasions. The timeline updates each day; thus, the blocks representing upcoming occasions
will move from right to left in the timeline display.
View the Next Occasion
Whenever the watch is in Time of Day mode, you can view the next appointment by pressing
START/SPLIT twice and holding it in. See Next Appointment/Occasion for details.
Contact
This feature allows you to keep a list of names with phone numbers and other contact
information in the watch. Contact information can only be entered or changed with the PC
software (see the Software Help for more information). When you enter this mode, the display
shows the last entry viewed. Turn the Crown to scroll through the list of contacts.
Phone Number Format
The phone number type (such as H for “home”) appears in the upper left of the watch display.
The phone number begins in the top row of the display, with the area code or country code, if
appropriate, followed by the rest of the number in the middle row. The bottom row contains the
contact’s name and other information you choose, limited to 100 characters.
20
Page 25

Timex Data Link USB Watch User Guide
If the phone number is longer than 14 digits, an arrow appears after the first part of the number
to indicate that it is continued in the next entry.
Message Scrolling
If the bottom-row message is too long for the display, it begins to scroll forward. To stop the
scrolling, press START/SPLIT. You can then scroll through the message manually, forward or
backward, by turning the Crown. Press START/SPLIT again to resume automatic scrolling.
Note
This feature allows you to enter and view messages of up to 100 characters. Notes can be
entered either with the PC software (see Software Help for more information) or manually
using the watch controls. When you enter this mode, the display shows either the last entry
viewed.
Basic Operations
View the List of Notes
Entries appear in the order selected in the PC software. Turn the Crown to scroll through the
list of notes. At the end of the list, a message tells you the number of unused entries, if any,
before the END OF LIST message.
Message Scrolling
If the message is too long for the display, it begins to scroll forward. To stop the scrolling, press
START/SPLIT. You can then scroll through the message manually, forward or backward, by
turning the Crown. Press START/SPLIT again to resume automatic scrolling.
Delete an Entry
To delete a note, scroll through the list of notes by turning the Crown until the desired one is
reached. Press and hold STOP/RESET. After the note is deleted, the next entry in the list (if
any) is displayed or the number of available entries.
21
Page 26

Timex Data Link USB Watch User Guide
Setting Notes
To set a note, turn the Crown to display either an existing note that you want to change or an
unused entry to create a new note. Pull out the Crown to enter setting mode. A cursor will flash
over the first character. Turn the Crown to choose the desired character. Press MODE to
advance to the next position, or STOP/RESET to return to a previous position. Press
START/SPLIT as a shortcut to enter a space. When you are done setting, press the Crown in.
Note that you may edit only as many characters as there were in the original message.
Messages may contain up to 100 characters.
Options
Three additional features – NIGHT-MODE, Chime, and Button Beep – are available through
the Options mode. When you enter this mode, the last feature viewed is displayed. Turn the
Crown to view the other two features.
NIGHT-MODE
When this feature is activated, the INDIGLO light is turned on whenever a button is pressed. It
can be set to OFF, ON, or AUTO. When turned ON, NIGHT-MODE is active for 8 hours.
AUTO activates NIGHT-MODE during preset times.
Setting NIGHT-MODE
From the display showing the current state of NIGHT-MODE, press either START/SPLIT or
STOP/RESET. The sequence of settings is OFF–AUTO–ON–AUTO–OFF. This allows you to
set the current state as either ON or OFF and also turn on AUTO, if desired. When NIGHTMODE is ON, its icon appears in the display, as shown.
22
Page 27

Timex Data Link USB Watch User Guide
If AUTO is active, pull out the Crown to set the start and stop times. Turn the Crown to change
the ON time, then press MODE to go to the OFF time. Press the Crown in to save the setting.
When you select AUTO or change the ON or OFF time, the change takes effect when the ON
or OFF time is next reached.
Chime
When this feature is activated, the watch chimes at every hour. It can be set to OFF, ON, or
AUTO. When set to AUTO, the chime is active only during preset times.
Setting the Chime
From the display showing the current state of Chime mode, press either START/SPLIT or
STOP/RESET. The sequence of settings is OFF–AUTO–ON–AUTO–OFF. This allows you to
set the current state as either ON or OFF and also turn on AUTO, if desired. When chime mode
is ON, its icon appears in the display, as shown
If AUTO is active, pull out the Crown to set the start and stop times. Turn the Crown to change
the ON time, then press MODE to go to the OFF time. Press the Crown in to save the setting.
When you select AUTO or change the ON or OFF time, the change takes effect when the ON
or OFF time is next reached.
The chime sounds at both the ON and OFF times and at each hour between. If the ON and OFF
times are the same, the watch chimes only once.
Button Beep
When this feature is activated, the watch beeps whenever any button is pressed. It can be set to
OFF or ON.
Setting Button Beep
From the display showing the current state of Button Beep mode, press either START/SPLIT or
STOP/RESET to change the setting.
23
Page 28

Timex Data Link USB Watch User Guide
Wrist Apps
Other modes can be downloaded to the watch with the PC software. See the Software Help for
information on using this feature.
24
Page 29

Timex Data Link USB Watch User Guide
Communication
To initiate communication between your watch and the Timex software in your PC, attach the
USB cable between the watch and PC. The software will automatically start up.
Connecting the USB Cable
Connect the USB cable to your watch as follows:
1. Insert the rectangular end of the cable into an open USB port on your PC.
2. Hook the bottom of the connector on the other end of the cable to the left side of the
watch below the contacts.
3. Pull the connector lever open and hook the upper end of the connector to the watch.
4. The software automatically reads the watch’s data.
When you have completed downloading information from the PC, remove the connector from
the watch by pulling the lock lever open and moving the connector toward the bottom of the
watch, then unplug the connector from your PC.
Communication Error
When the USB cable is connected to the watch and the Crown is in normal position, the display
contains the message COMM READY. If data are being received or transmitted by the watch,
the symbol on the display appears as shown:
If communication is interrupted, such as by removal of the USB cable, the watch may sound an
error melody and display the message COMM ERROR. If the watch cannot recover from the
error, it returns to Time of Day mode and reverts to its standard set of modes. Try reconnecting
the USB cable to try to reestablish communication and download again. If you are unable to get
the download to work, check with Timex Technical Support (see Technical Support).
25
Page 30

Timex Data Link USB Watch User Guide
26
Page 31

Timex Data Link USB Watch User Guide
Melodies
Various watch functions generate melodies to alert you to a specific condition, including hourly
chime, button beep, and alarm alert. You can change these melodies using the PC software; see
the Software Help for more information on customizing watch melodies.
Character Set
If you wish to enter international characters manually on the watch, you may enable this feature
in the PC software. See the Software Help for more information.
Password Protection
You may activate password protection to restrict access to any of the following modes: Alarm,
Appointment, Contact, Occasion, and Schedule. The two-character password is selected in the
software and downloaded to the watch, along with the choice of which modes to protect. The
same password applies to all protected modes.
Custom Settings
Whenever the watch enters a protected mode, it displays the message PASSWORD NEEDED.
Pull the Crown to enter the password. Turn the Crown to select the first character, then press
MODE to move to the second character. Turn the Crown to select the second character, then
push the Crown in. If the password is correct, it enters the protected mode; if not, it displays the
message PASSWORD INVALID. You may pull the Crown out to try again. When you leave a
protected mode, it is again protected. An example sequence of watch displays is shown.
If you forget your password, simply look in the PC software, where it was set.
27
Page 32

Timex Data Link USB Watch User Guide
Tips
Following are some ideas for using the various features of your watch.
• You can always check the current time, no matter which mode you are currently using,
by pressing and holding the MODE button (as long as you’ve been in the mode for at
least a few seconds). The Time of Day display remains as long as you hold the button,
then the display returns to your previous mode when you release the button.
• When entering messages in any of the modes that allow them, such as Contact, Note, or
Occasion, try to use the first eight or nine characters to identify the content. This
eliminates the need for scrolling through a long message to remember what you meant
and allows you to save memory by specifying a shorter message size.
• Use one of the two other available time zones for daylight savings time or to present
the time in a different format (12-hour or 24-hour).
• For an appointment on the last day of every month, make an appointment for the first
day of the month with 24-hour advance notification.
• Timers can be used to notify you when to add ingredients or change temperatures when
cooking or to remind you of when to take medications.
• Notes can be used to store account numbers and passwords.
• Schedule mode can be used to store sports schedules, class schedules, times of sunrise
and sunset or high and low tides.
• You can download more than one version of a mode. For instance, you can have
separate modes for personal and business contacts and give them different names.
• Use the watch memory wisely. Longer text fields take up more memory, so that fewer
total entries can be stored. If you want the watch to hold more entries, specify the text
fields as short as possible.
28
Page 33

Timex Data Link USB Watch User Guide
Battery
When installed at the factory, the battery is estimated to last two years. However, battery life
may vary, depending on your actual usage. When the watch's battery is low, the message LO
BATT is displayed in place of the date, at the beginning of each day. The reminder disappears
when you change the display. You should replace the battery as soon as possible. While the
watch will continue to run, a low battery may cause communication problems.
To avoid the possibility of permanently damaging the watch, Timex strongly recommends
taking your watch to a retailer or jeweler to have the battery replaced.
Water Resistance
This watch is rated as water resistant as marked on the watch. A 100 m water-resistant watch
withstands pressure to 172 p.s.i. (equals immersion to 330 feet or 100 meters below sea level).
A 50 m water-resistant watch withstands pressure to 86 p.s.i. (equals immersion to 165 feet or
50 meters below sea level).
Do not press the watch buttons while under water, as the watch will not remain water resistant.
Technical Information
Compliance
FCC Notice
Tested To Comply With FCC Standards FOR HOME OR OFFICE USE.
This device complies with Part 15 of the FCC Rules. Operation is subject to the following two
conditions: (1) this device may not cause harmful interference, and (2) this device must accept
any interference received, including interference that may cause undesired operation. Caution:
Any changes or modifications not expressly approved by Timex Corporation could void the
user’s authority to operate this equipment.
Industry Canada Notice
This Class B digital apparatus complies with Canadian ICES-003.
Cet appareil numérique de la classe B est conforme à la norme NMB-003 du Canada.
Technical Support
If you have any questions about your watch that are not answered by the Watch Help or
Software Help, you can get assistance from Timex Technical Support. The following options
are available:
• The Timex web site at www.timex.com. Live help is available between 9 a.m. and 5
p.m. Eastern time or you can send questions by email. You can also download PDF
copies of watch instructions.
• Toll-free technical support line in the US and Canada: 1-800-328-2677.
• Technical support line for international queries: 1-501-370-5775.
29
 Loading...