

Page 1
16GB 25.65cm (10.1”) Touch Screen Tablet PC
Model No.: MID1002
User Manual
Please read this instruction manual carefully before connecting or operating
the product. Save it for future reference.
Page 2

Contents
Important Safety Precautions...............................................................................................1
Attention: ..............................................................................................................................2
Important Notice ...................................................................................................................2
Caution .................................................................................................................................3
Charge the Built-in Battery ...................................................................................................3
Installing a Micro SD Memory Card(not included) ..........................................................4
Connecting to the Earphone ................................................................................................5
1. Brief introduction for Tablet............................................................................................6
1.1 Diagram of Tablet .................................................................................................6
1.2 PACKAGE CONTENTS .........................................................................................7
1.3 Tablet state and notice ...........................................................................................8
2. Quick start ......................................................................................................................9
2.1 Button function......................................................................................................9
2.2 Starting up and turning off ....................................................................................9
2.3 Unlocking and closing of the screen ................................................................. 10
2.4 Homepage interface .......................................................................................... 10
2.5 Access to application program .......................................................................... 13
2.6 USB connection ................................................................................................. 14
2.7 Memory card ...................................................................................................... 15
2.8 Character input .................................................................................................. 16
2.9 Application Technique ....................................................................................... 17
3. Connection Establishment .......................................................................................... 20
3.1 Wi-Fi Connection ............................................................................................... 20
3.2 3G Dongle Connection ...................................................................................... 21
4. Communication ........................................................................................................... 22
4.1 E-mail................................................................................................................. 22
5. Multi-media ................................................................................................................. 26
5.1 Supported File Format ....................................................................................... 26
5.2 Music ................................................................................................................. 26
5.3 Camera .............................................................................................................. 28
5.4 HDMI Connection ( HDMI cable is not supplied ) ............................................. 29
6. Internet ........................................................................................................................ 30
6.1 Browser.............................................................................................................. 30
7. Other Applications....................................................................................................... 33
7.1 Alarm clock ........................................................................................................ 33
7.2 Calculator .......................................................................................................... 33
7.3 File Management ............................................................................................... 34
8. Basic Settings ............................................................................................................. 35
8.1 Sound and Display ............................................................................................ 35
8.2 Security and Location ........................................................................................ 39
8.3 Storage .............................................................................................................. 40
8.4 Date and Time ................................................................................................... 40
Page 3

8.5 Language and Input Method ............................................................................. 41
8.6 About Tablet PC ................................................................................................ 41
9. Installation and Management of Programs ................................................................. 42
9.1 Installation ......................................................................................................... 42
9.2 Management and Uninstall................................................................................ 42
10. Other applications ....................................................................................................... 43
10.1 Clock .................................................................................................................. 43
10.2 Getjar ................................................................................................................. 44
10.3 Google Settings ................................................................................................. 44
10.4 Peoples .............................................................................................................. 45
10.5 Play Store .......................................................................................................... 45
10.6 Reboot Manger .................................................................................................. 46
10.7 Voice Search ..................................................................................................... 46
10.8 Sound Recorder................................................................................................. 46
10.9 YouTube ............................................................................................................ 47
11. Troubleshooting .......................................................................................................... 49
12. Specification ................................................................................................................ 50
Page 4

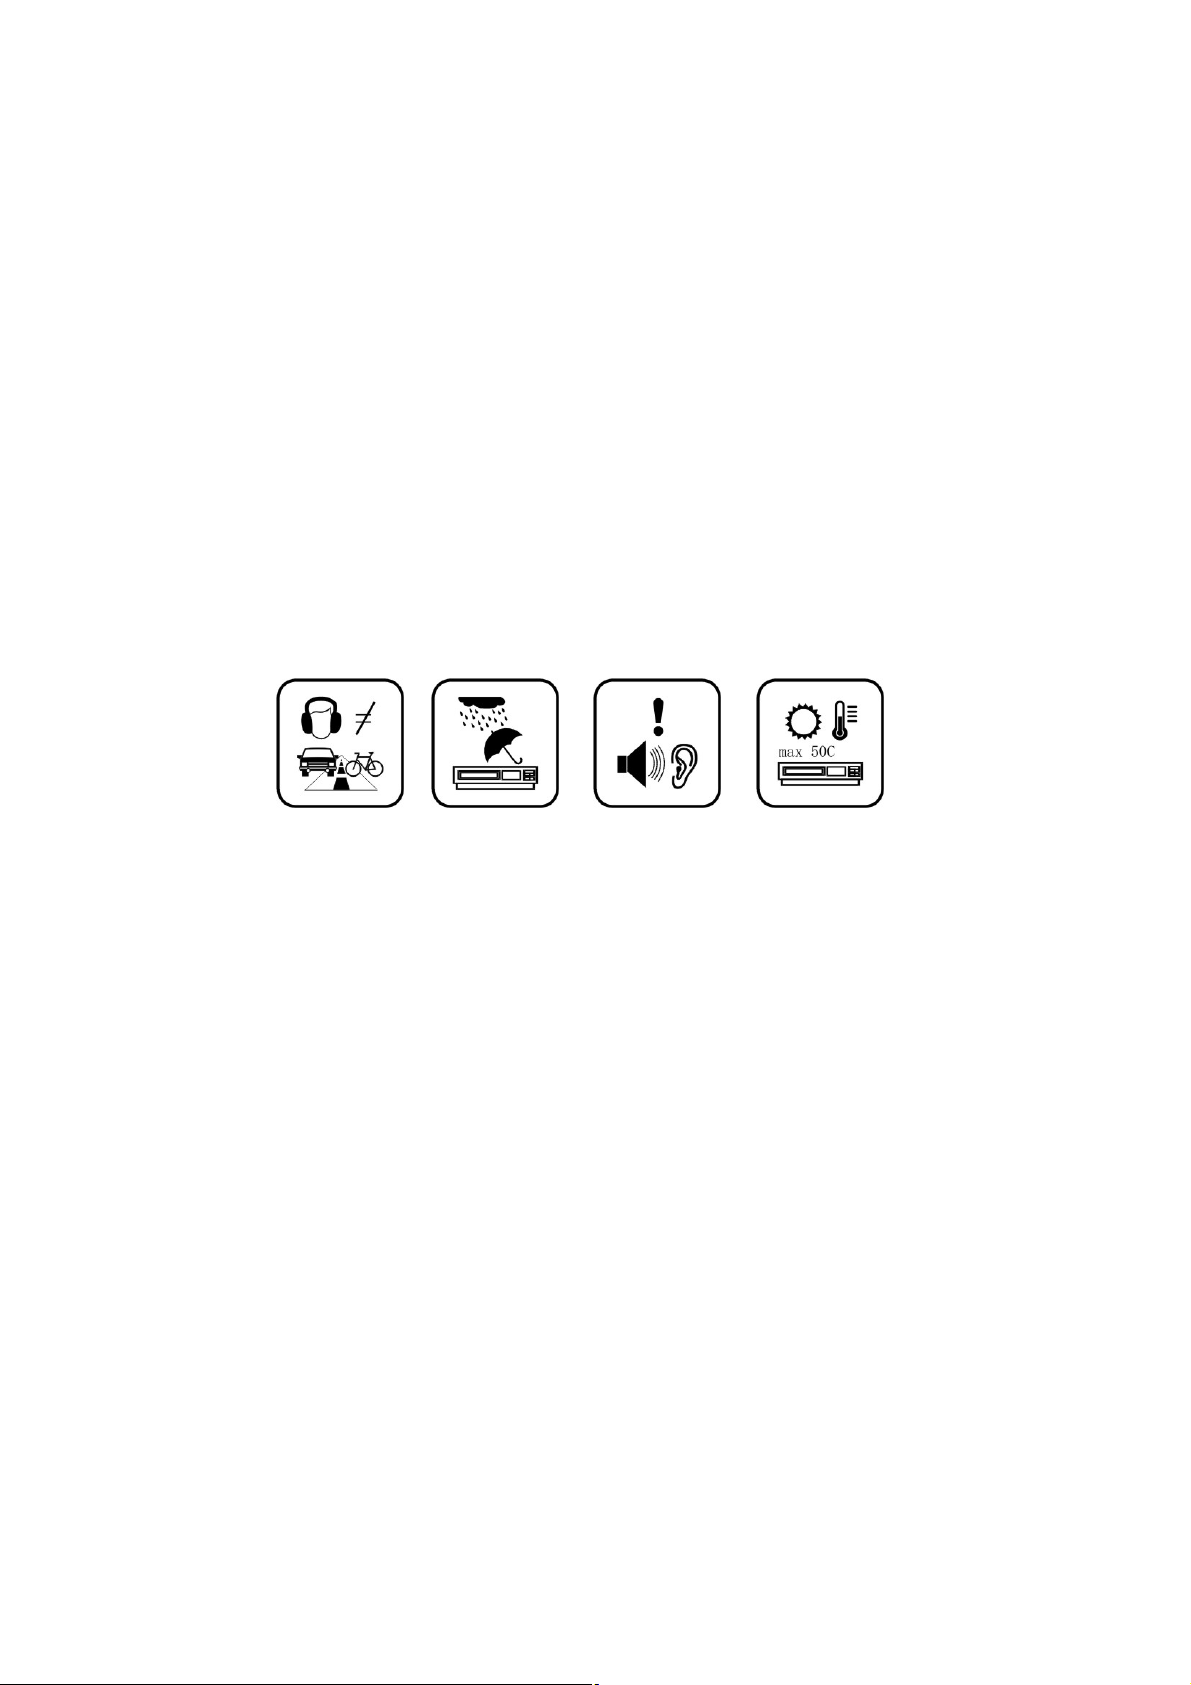
Important Safety Precautions
- The product shall not be exposed to dripping or splashing and no objects filled with
liquids, such as vases, shall be placed over the product. Dry location used only.
- No naked flames sources, such as candles, should be placed over or near the product.
- Never use the device while driving or when operating any vehicle as this could cause
accidents. It is also against the law in many areas. Take care when using the player
outdoors, especially when crossing the street.
- Earphone cables may be hazardous to young children. Store the product carefully
when it is not in use for a long period time.
- Listen at a moderate volume. Do not listen to music at very high volumes using the
earphones as thiscan permanently damage your hearing.
- To establish a safe volume level. Set your volume control at a low setting. Slowly
increase the sound until you can hear it comfortably and clearly, without distortion.
- Listen for reasonable periods of time: Prolonged exposure to sound can also cause
hearing loss, be sure to use your equipment reasonably and take appropriate breaks.
- Keep the device clean and never store it next to a heat source or in dirty, humid or wet
places. Keep it out of direct sunlight.
-Do not put the device in high temperature places (over 40ºC), especially not in a car
with the windows closed in summer.
- Keep the device away from strong magnetic fields.
- Press the device’s buttons gently. Pressing them or the screen too hard can damage
the device.
- Do not use the device in an electronics-prohibited area, such as in an airplane.
- Do not use the device in an extremely dry environment as this can lead to static
discharge, which can damage the device.
- Do not subject the product to harsh impacts. Do not drop the appliance. This may result
in damage to the product.
- Do not attempt to dismantle or repair this unit yourself. Repairs should only be
performed by qualified personnel.
- Ensure that your earphones are inserted into the device before it is switched on.
Inserting them afterwards can potentially damage the earphones and the device.
1
Page 5
- Do not allow your device to be submerged in water. Do not expose headphone socket
or the device to water, as water entering the set may cause major damage.
- Active mobile phones in the vicinity may cause interference.
- We will not be responsible for any memory loss caused by product damage, repairs or
other reasons. Please operate the unit correctly as stated in this manual.
- Disconnect the appliance from the power source when cleaning.
- In order to prevent program failure, never disconnect the device suddenly from a PC
during file transfers.
- Use a slightly dampened lint-free cloth to clean this appliance. Do not dismantle the
device or use alcohol, thinners or benzene to clean the surface of the device.
- The supplier or retailer accepts no liability for lost, corrupted or damaged data. It
remains the responsibility of the user to ensure that they perform consistent data
backups during the use of this product.
- This product is not intended for commercial use. It is for household use only.
Attention:
- We have done our best to produce a complete and accurate manual. However, we
cannot ensure that there are no errors or omissions during the printing process.
- We cannot take responsibility for any damages caused by unauthorised attempts to
upgrade software or for any data corruption while the product is being repaired.
- The stated memory capacity includes operating system software.
Important Notice
- If the device is non-responsive or an application is frozen hold the power button for
7 seconds to perform a reset.
- When the performance of the device is slow after using some applications, it is
recommended to close running applications via the Settings menu.
2
Page 6

Caution
- Only use the approved power adaptor with the output power (DC5V 2A) that is provided
with the device. Using a different power adaptor may cause damage to the device.
- The device is equipped with a high performance processor. It may produce heat in the
cabinet if used for long periods.
Charge the Built-in Battery
Before using the device for the first time or when the battery has been unused for an
extended period, you must full charge the built in battery. It will take about 3.5 hours to
fully charge the battery with the adaptor provided. After the first charge the device may be
used whilst charging.
There are no User serviceable parts, including the battery, within the device.
Use only approved chargers and cables. Unapproved chargers or cables may cause
batteries to explode or damage your device.
When the battery is low the device will emit a warning tone and show a low battery
message. Recharge your battery to continue using your device. During the battery
charging, user can operate the Tablet, but the charging time will be longer.
If the battery is completely discharged the device may not turn on for several minutes,
even while it is charging. Allow a depleted battery to charge for at least a few minutes
before you try to turn on the device. The playback time of the battery is approx 3 hours
when the product is playing video files and using the headphones, which depends on the
volume level and played files. Using WIFI will also affect battery running time.
! Connecting the power adaptor improperly may cause serious damage to the
device or power adapter. Any damage caused by misuse is not covered by the
warranty.
- Plug the power adaptor into a power outlet after connecting the tablet with your power
adaptor.
- If the device receives an unstable power supply while charging, the touch screen may
not function. If this happens, unplug the power adaptor from the device.
3
Page 7

- The device may heat up while charging. This is normal and should not affect your
device’s lifespan or performance.
- When the battery is fully charged, first turn off the power at the electrical socket, unplug
the power adaptor from the device and then unplug the power adapter from the electrical
socket.
To save energy always turn off the power at the electrical socket, and then unplug the
power adaptor when it is not in use.
Battery Indicator
The Battery icon in the Status Bar indicates the battery power level. When the level is at
15% or less the device will give a warning to charge the battery. Continuing to operate the
device without recharging will result in the device powering off.
Reduce the battery consumption
Your device provides options that help you save battery power. By customizing these
options and deactivating features in the background, you can use the device longer
between charges:
- When you are not using your device, switch to sleep mode by pressing the Power key.
- Close unnecessary applications with the task manager.
- Deactivate the Wi-Fi feature.
- Deactivate auto-syncing of applications.
- Decrease the backlight time.
- Decrease the brightness of the display.
Installing a Micro SD Memory Card(not included)
- You can extend the memory capacity of your device by adding a micro SD memory card.
Insert the micro SD card into the slot as shown in the illustration.
- The player is compatible up to a 32GB Micro SD card. Do not force the memory card into
the slot. Insert the memory card with the contacts facing the front (screen side) of the
player. Lightly press the card end inwards again to eject the card.
- Do not remove the card when the player is transferring or playing files. To prevent loss of
data or damage to the memory card un-mount the card before removing it from the device.
- Some micro SD memory card brands may not be fully compatible with your device.
4
Page 8

Connecting to the Earphone
Insert your earphone (not included) into the device 3.5mm earphone jack on the side of
the unit. Power ON the device, select your favorite music or video and adjust the volume to
a comfortable listening level.
Note:
1. When headphone/earphone is connected to the earphone jack,
the main speakers will be automatically muted.
2. Be sure that your device is set at a low volume level before connecting the
headphone/earphone.
3. Increase the volume gradually for comfortable listening.
Caution: Listening at high volumes for a long period could cause hearing loss.
5
Page 9

1. Brief introduction for Tablet
1.1 Diagram of Tablet
Front view:
Front camera
Side view:
HEADPHONES
Micro SD
card slot
RESET
DC JACK
HDMI
Micro USB
MIC
6
Page 10

Power on/off
M1002 underside view
Volume +
Volume
-
Rear camera
Speaker
1.2 PACKAGE CONTENTS
Check your product box and make sure the below items are included, the supplied items
are designed only for your device and may not be compatible with other devices, other
accessories may not be compatible with your device.
Tablet PC
AC Adaptor
USB cable
User Manual
7
Page 11

1.3 Tablet state and notice
Icon Descriptions
The following are icons in the status bar:
Mail notice
Gmail notice
Computer and Tablet are
connected through USB line
Events waiting to be done
Alarm clock opening
Playing music
In data synchronism
Without SD card
Uploading/Downloading
Downloading finished
General notice (for example:
synchronous error)
3G Dongle SIM card
information, wandering, no
Connecting 3G Dongle
Internet service, data
Mute
signal
exchanging
Insufficient space of SD card
WIFI service is connected,
Notice panel
Notice icons will show when receiving new message, setting the alarm clock as well
as inserting Micro SD card, you can open the notice panel to check detailed
information
Unlock notice panel
When new notice icon shows on the notice column, please press the notice column
with your finger, then slide downwards to unlock the notice panel.
network is available
Airplane mode
GPS positioning
More
Battery symbol
Charging
8
Page 12

2. Quick start
2.1 Button function
Descriptions for button function:
l Press this key for a long time to start up the Tablet
l During normal operation, press this key for a long time to pop
up the shutdown option
Power key
Volume + l Press this key to increase the volume
Volume - l Press this key to decrease the volume
Reset l Press this key when the Tablet is freezed or need to be restart
l During normal operation, press this key to turn off the screen
l During normal operation or when breakdown appears, press
the power key for 7 seconds to make your device enter into
shutdown state
2.2 Starting up and turning off
Starting up
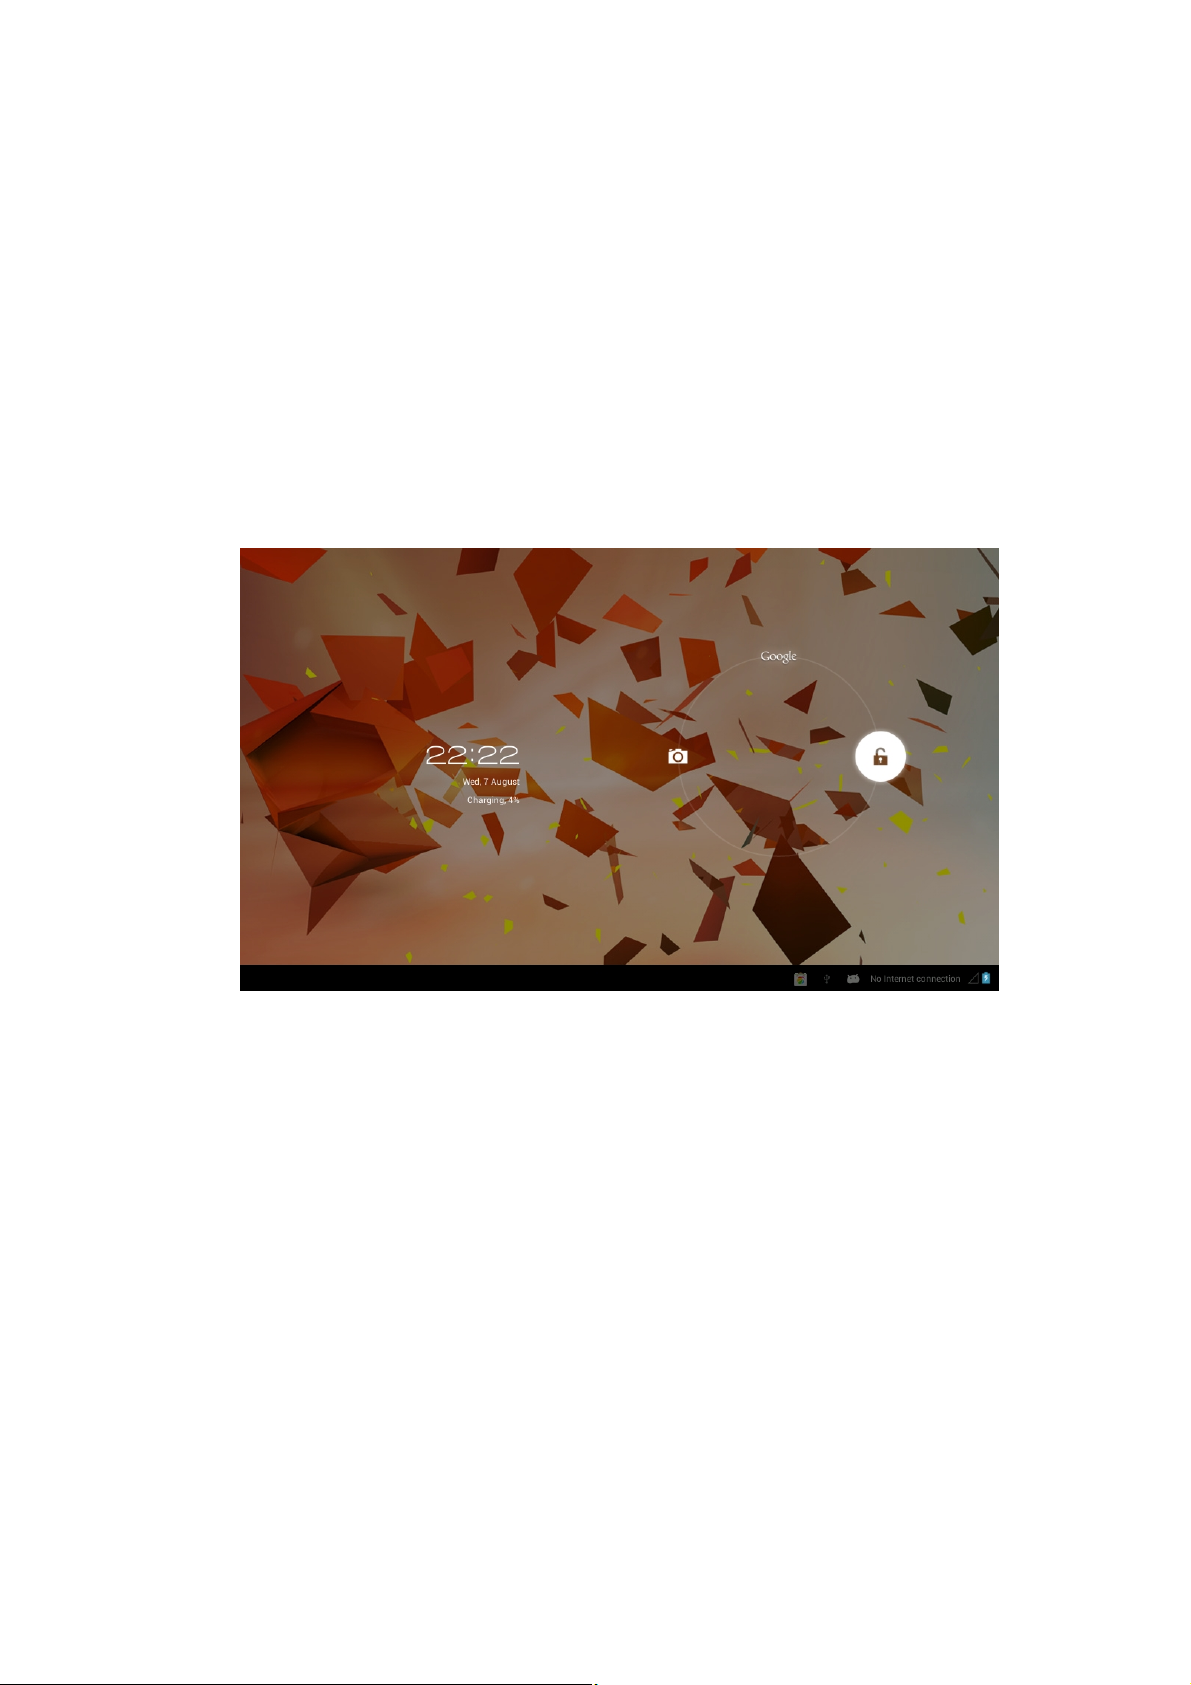
Press the power key for at least 3 seconds, and you can see the Android start up
picture. After the system has booted up, the machine enters into screen lock state,
please unlock by swiping the lock key to the left or right.
Turning off
1. Press the power key for 2 seconds, the shutdown option will pop up.
2. Click OK.
9
Page 13
2.3 Unlocking and closing of the screen
The machine will close automatically when the screen is left unused
1.After the screen has been left unused for a period of time, the machine will turn the
screen off automatically, so as to save battery power.
2. Under screen on state, press the power key once, the screen will close
immediatley.
Turninng on under screen off state
If the screen is in off state, you can unlock the screen by pressing the power key for a
short time. After opening, the screen will enter lock state, press “lock” icon with your
finger and slide towrads the right, the screen will be unlocked, press “lock” icon and
slide leftwards, you can enter the camera function.
2.4 Homepage interface
All selected application programs on the machine will be displayed on the main menu
screen. You may use other application programs, shortcuts and widgets to set the
wallpaper of your homepage interface.
10
Page 14
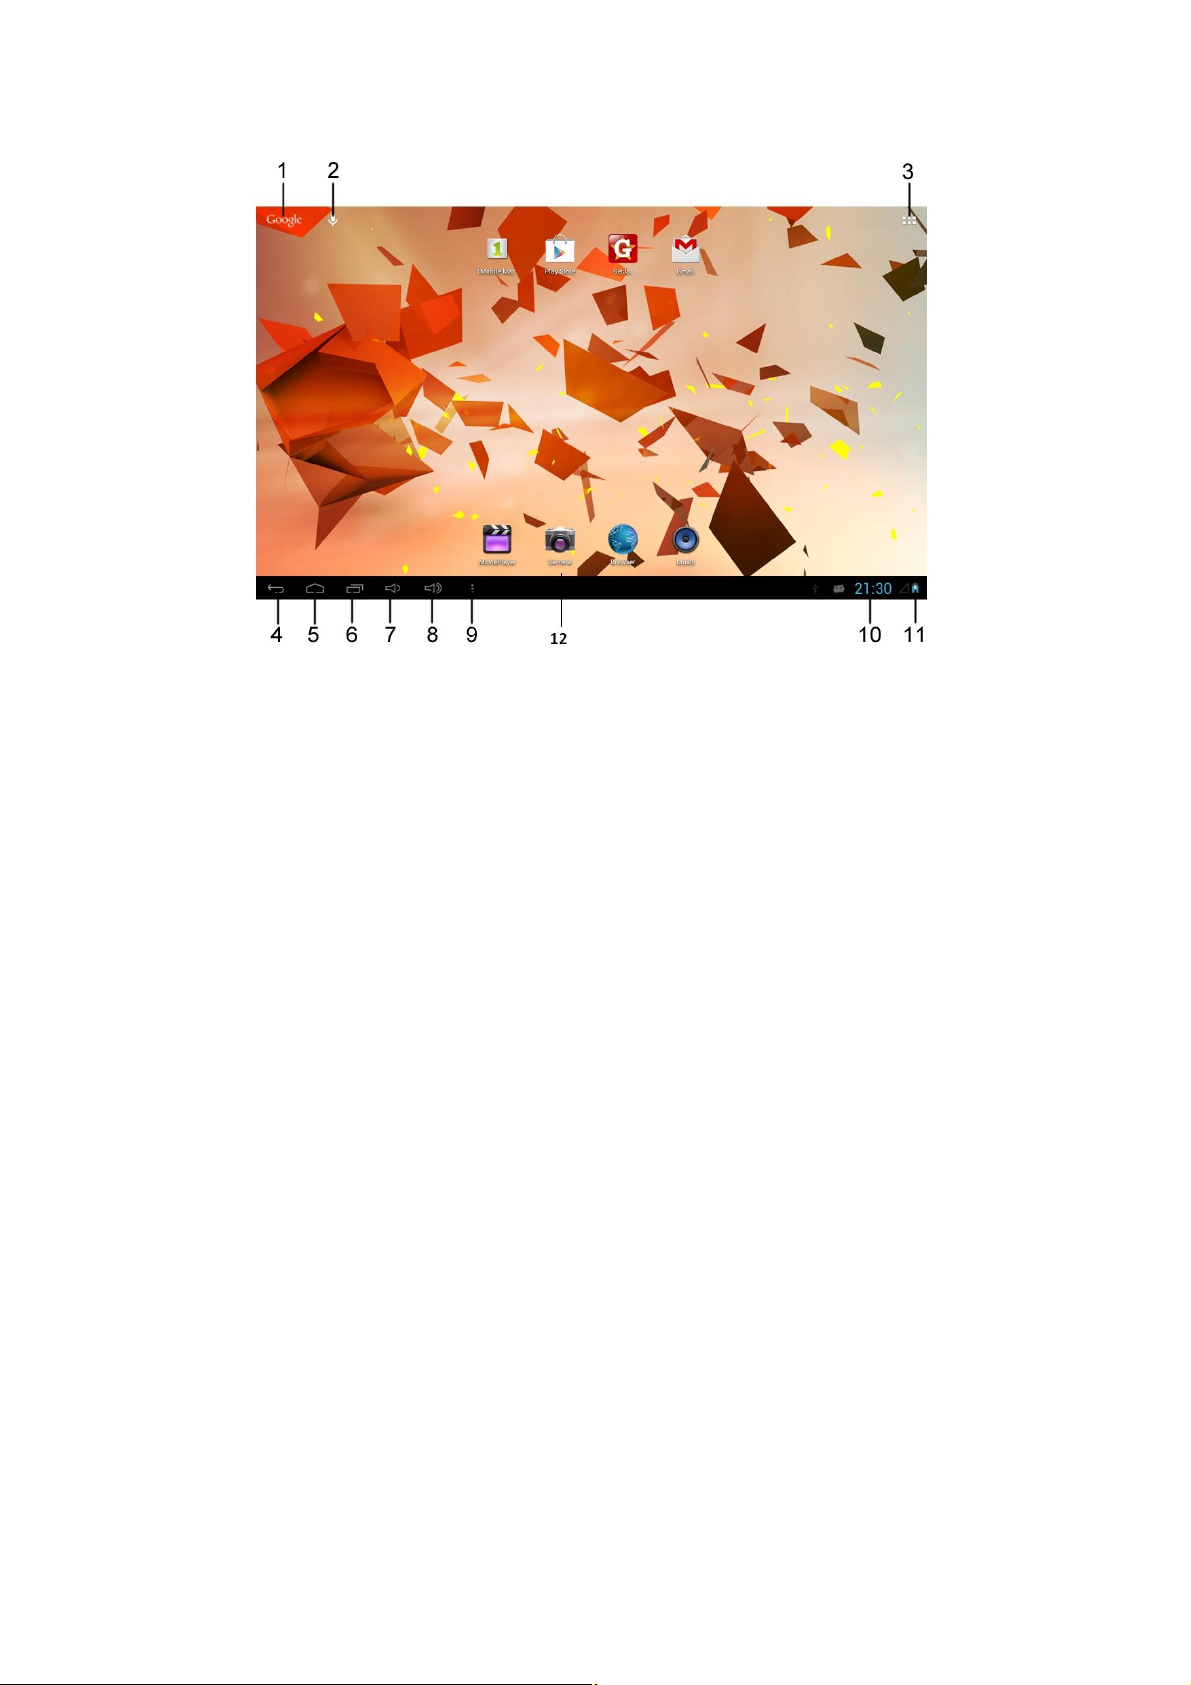
1. Access to Google search engine 7. Vol-
2. Voice search 8. Vol+
3. Access to applications 9. Menu
4. Go back last page 10.Time display
5. Access to Home page 11. Battery Indicator
6. Recent applications menu 12. Main screen applications
Note: In any application programs, you can press Home Page key to return to
the homepage interface.
Outstretched homepage interface
Homepage interface may extend beyond the width of the screen, so as to provide
more space, so that you can place the newly increased shortcuts, widgets, etc. Press
a blank area on the homepage interface, then slide left or right quickly in a horizontal
direction with your finger to jump screens outside of the main homepage. There are
more than 2 stretched pictures on the homepage interface.
11
Page 15
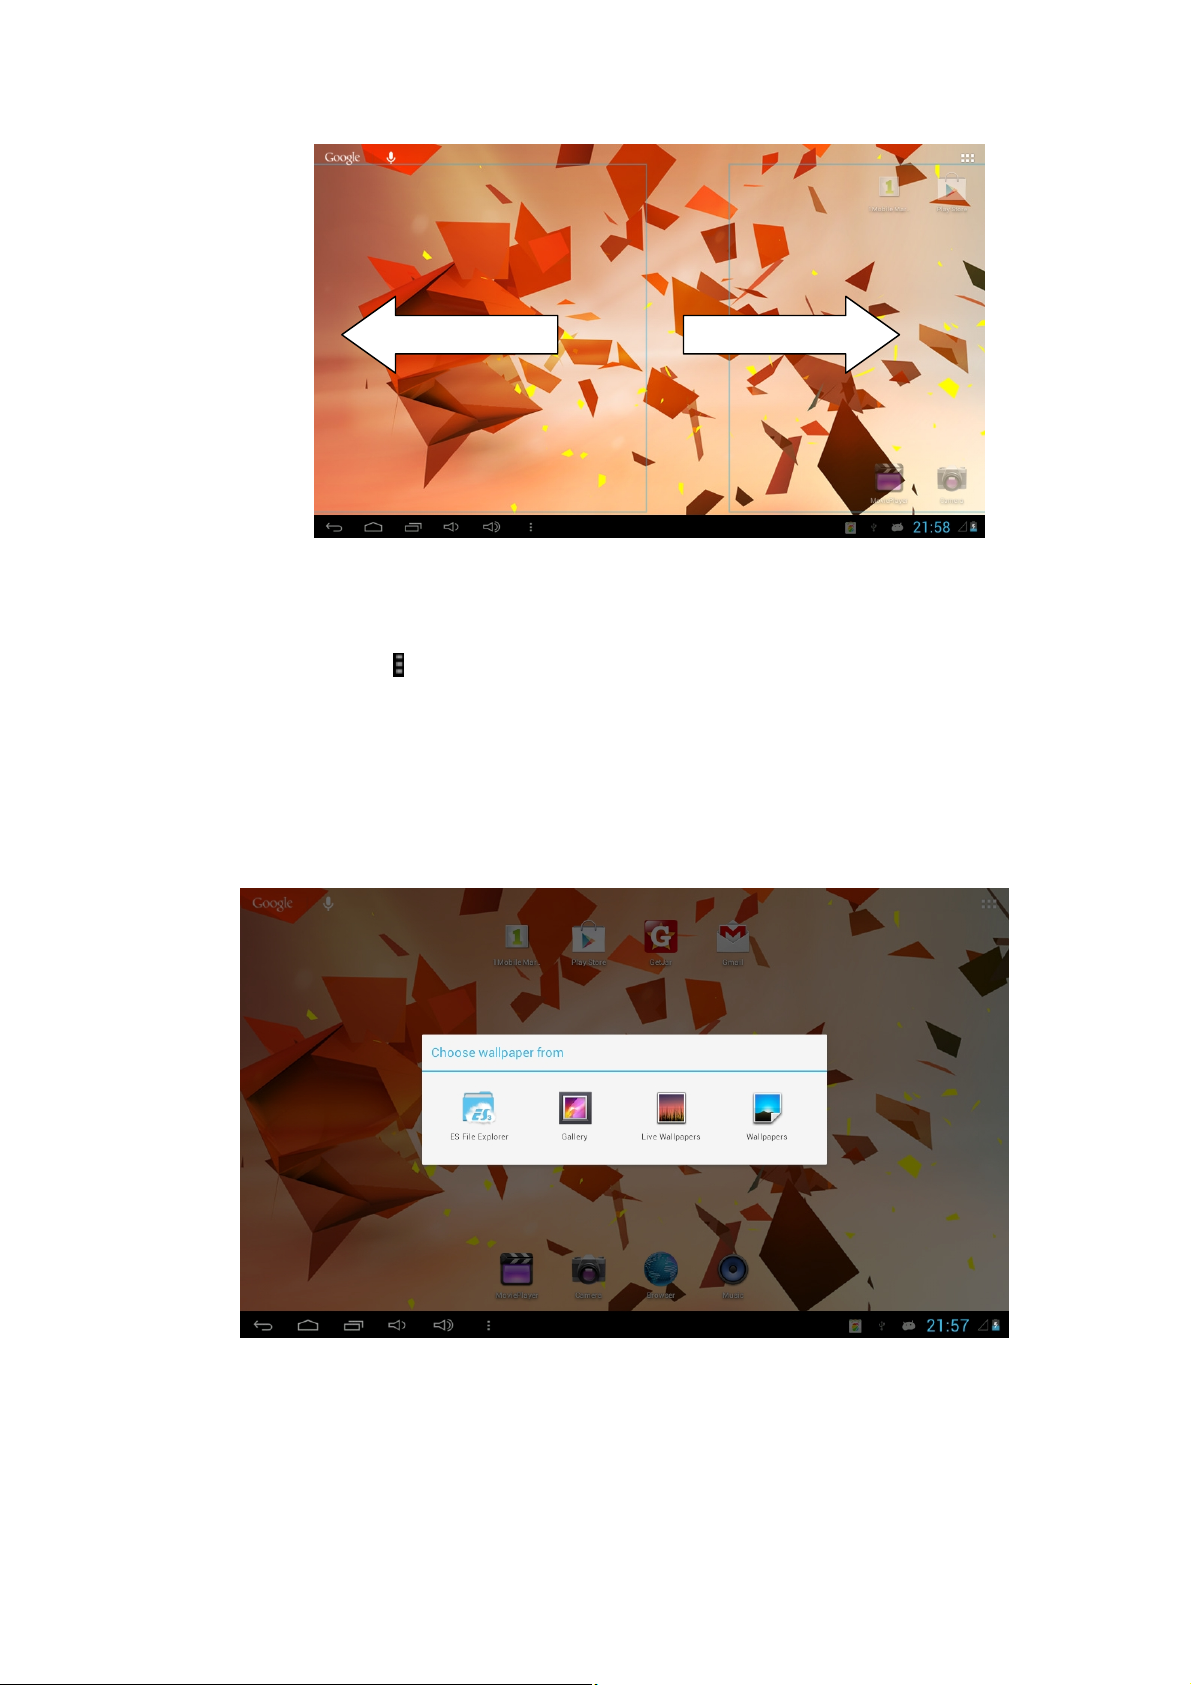
Custom homepage interface
Change desktop wallpaper
1. Tap the icon in the homepage interface to pop up the submenu Wallpaper,
Mange Apps and System settings. You can also select the wallpaper setting in
system setting.
2. When the menu pops up, choose the source of the wallpaper you want to
change.
3. After clicking the source of the wallpaper, click the picture you want, and then
select “set wallpaper”.
Add widgets
1. Please click the application program menu.
2. After entering the application program menu, click the “WIDGETS” button on the
top left of interface.
12
Page 16

3. Select the desktop widget you want and hold to drag the widget into the
homepage screen., The system will return back to the main interface.
Widgets
Application
program
2.5 Access to application program
How to visit an aplication program on the Tablet:
1. Please click the application program menu.
2. Select the application program you want to visit.
3. If you want to exit the program interface, press the return key on the bottom left of
the screen, or press the homepage key to return directly to the homepage
interface directly.
Widget
13
Page 17

2.6 USB connection
Storage setting of the Tablet
Before transferring documents, you must set the storage mode on your Tablet firstly:
1. Connect the Tablet with a computer by using a USB lead. The Notice bar will
show the USB prompt.
2. A screen will pop up automatically. If it doesn’t click on the USB icon in the status
bar.
3. Click to choose “Turn on USB storage”
4. At this time, USB has been connected.
Copy the document to storage card
1. Connect Tablet and computer together with USB cable.
2. Open your computer, in my computer, examine content in “Tablet”.
3. Find the document you want to copy, copy it to “Tablet”.
4. After completion of copying, click “safely remove hardware” in the taskbar of your
computer to unload.
Content of Tablet storage device
1. NAND FLASH storage device, is the area for the Tablet to store documents itself.
2. External SD card is a removable memory card or SD card.
3. The two above-mentioned storage devices both can be viewed through
connection with your computer with USB.
Attention: When your Tablet is connected to a computer with a USB cable, you
cannot visit the memory card through the Tablet. If you want to visit
memory card in the Tablet, disconnect the USB cable.
14
Page 18

2.7 Memory card
Copy the document to storage card
You can transmit documents between your Tablet and a computer, such as music
and pictures, etc. If you want to see the documents in the Tablet, click the file browser
to look through the content in the SD card.
Delete documents on the storage card of Tablet
1. Find the document you want to delete using file browser .
2. Press the document name you need to delete, press the button then a
file menu will pop up.
3. Click delete.
You can also Cut, Copy, Paste, Rename and Share the selected files by using the
above procedures.
Removing the storage card when the Tablet is in the starting up state
Do not remove the storage card under starting up state of the Tablet, you must unload
the storage card firstly, for fear of failure or damage to the storage card.
1. In the homepage interface, press the menu key, then click settings.
2. Pull the setting menu downwards, then click storage.
3. Click External SD card setting.
4. Click to Unmount SD card.
5. Click OK to confirm.
15
Page 19

2.8 Character input
Use screen keyboard
When you start a program or select the text edit box which needs to input characters
or numbers, a screen keyboard will show. The following input methods are provided
for the keyboard to select.
1. Android keyboard
2. Input method of a third party (user can install them by themself)
Select the input method you need to use
According to factory presets, the Tablet will display Android keyboard when you want
to inut characters.
1. Press menu key in homepage interface, then click Settings
2. Click Language and input.
3. All of the input methods already installed on your Tablet will be listed in the text
setting region.
4. Select the input method you want..
Use and switch input method
On the keyboard screen you can select between input methods using the input key.
16
Page 20

1
5
4
2
3
1
2
3
4
5 Click and press on to delete characters on the left of the
Switch input capital and small letters
Switch to input option
Click to insert space
Click to execute carriage return
cursor
2.9 Application Technique
Open the application procedure recently in use.
Click the third button under the lower left side of the screen at any time to pop up the
procedure windows on the screen, the application procedures that were used recently
will appear on the screen.
17
Page 21

Application procedure used
recently
Add a widget to the desktop
On the application menu, click “WIDGETS”button and enter into the interface. The
icon and name for added WIDGETS can appear on this interface, such as: music,
photo frame, clock and searching. Press and hold the selected widget and drag to the
desktop.
Switch the Input Language
When the keyboard screen is in use, press the sub-menu key at the bottom left and
enter language options.
Rapidly shut off the procedure
Click the Back Key to return to the previous interface, or click the Homepage key to
return to the homepage interface.
Factory Default
When your Tablet produces a major error, the Factory Default can be employed to
return to the ex-factory status. There are two kinds of methods of setting the Factory
Default:
1. On the homepage interface, click the menu key and pop up the setting menu.
2. Click and select Settings
3. Click and select the Backup and Reset
4. Click and select the Factory data reset
5. Click and select the Reset tablet
6. Press the Erase everything to confirm
7. Wait for system resetting
Note: For a full reset you can also check the box “erase storage” before pressing
“Reset tablet”. The files will be erased completely if you select this function.
18
Page 22

Please backup your files before operating this function.
Alternatively you can press the reset button on the side of your tablet, please refer to
Side View Diagram on page 6.
Rapid Screenshot
When you are located on such any interface such as Games or Movies and want to
save the picture in memory, the desired pictures can be saved only by pressing the
Volume Down key and Power key simultaneously. The saved image can be found in
the local Disk / Picutres.
Quick Menu
Click the status bar on the lower right corner of the screen.
A quick menu will appear with basic settings such as WIFI / VOLUME / BRIGHTNESS
19
Page 23

Tap the icon to switch off the pop up window or tap the screen to exit.
3. Connection Establishment
3.1 Wi-Fi Connection
Your Tablet can be connected onto a Wi-Fi network to connect to the internet:
1. On the homepage interface, click and select the meun key and pop up the menu
setting;
2. Click and select the System Settings;
3. Click Wi-Fi and turn on Wi-Fi switch;
4. After openingWi-Fi, the available Wi-Fi networks can be scanned automatically
from the window on the right.
5. Select the Wi-Fi network required to be connected, if the password is added, pop
up the password input window and input the corresponding password.
6. Click the Connection
20
Page 24

In 3G network connection
Click here and select Wi-Fi
network
Advanced Wi-Fi setting
3.2 3G Dongle Connection
1. Under the shutdown status, insert corresponding 3G Dongle
2. Start the machine and enter into the main interface to click and select Menu Key;
3. Click and select Setting;
4. Click and select 3G dongle option, open 3G switch, within 45 seconds, observe
that the SIM signal icon on the notice board is on.
5. After waiting for 5 seconds, connect 3G network;
Icon of 3G network signal
21
Page 25

Please enable the “Airplane mode” if need to disable the WiFi and 3G Dongle Data.
4. Communication
4.1 E-mail
Setting for E-mail
The E-mail application procedure is attached with the setting guide for E-mail, the
external POP3 or IMAP E-mail account for common Web E-mail service provider
( such as: Yahoo, Gmail, Hotmail etc., ) can be added.
22
Page 26

Setting guide for E-mail
1. After clicking and selecting the E-mail icon in the applicationmenu, the produced
E-mail setting guide will help you perfom the setting;
2. Click and select Next button;
3. Input E-mail address and password of your E-mail account; If you enter an
invalid email address it will not allow you to proceed to the next step.
4. Click and select Next button and follow the on screen prompts.
5. Input the name of the account and display the name of your E-mail to be sent,
and then, click and select OK.
6. If the E-mail is available it automatically enters into your inbox.
Delete the E-mail account
You can delete the email account
Click and select the E-mail;
1. Enter into your inbox;
2. Click the menu key on the right hand corner of the screen
3. Click and select Settings;
4. Select remove account
5. Click OK to remove it.
Send E-mail information
1. Click and select the E-mail to show your inbox.
2. Click inbox to enter, automatically refresh the new e-mail, click and read it.
3. Press down the menu key and pop up the sub menu.
4. Click and select the mail icon to enter into the new E-mail interface;
5. Input the E-mail address of your recipient in the recipient bar;
6. Input the subject;
7. If want to add a attachment, press the paper clip icon.
8. Click and select your Attachment.
9. Select the attachment that you will send ( such as: picture and video).
23
Page 27

10. Click “ Send”, send out the E-mail.
Notice: If you have more than one account and hope to send out a E-mail in a
certain account, prior to clicking the main menu and composing the
E-mail, click that account name in advance.
Learn to send or view email messages via the Google Mail™ webmail service.
- This feature may be unavailable depending on your region or service provider.
- This feature may be labeled differently depending on your region or service
provider.
Send E-mail by Gmail:
1. Click to select Gmail function in the application list
2. Enter Existing Google Account username and password if you have, otherwise
press the New to create a Google account.
3. After confirm the Terms & Conditions, you can start to use the Gmail to send email.
Send an email message
1. In the application list, select Gmail → .
2. Click the to compose a email
2. Select the recipient field and enter an email address.
3. Select the subject field and enter a subject.
4. Select the text field and enter your email text.
5. Select and attach a file.
6. To send the message, select SEND.
24
Page 28

If you are offline or outside your service area, the message will be held in the
message thread until you are online and inside your service area.
View an email message
1. In the application list, select Gmail.
2. Select to update the message list.
3. Select an email message.
From the message view, use the following options:
- To move to the next or previous message, scroll right or left.
- To reply to the message, select the .
- To reply to the message and include all recipients, select the .
- To forward the message to others, select the .
- To add the message to the favourites list, select the .
- To delete the message, select the .
- To add a label to the message, select the .
- To mark the message as unread, select the
- To manage label in Gmail, select → Change Label
- To mark the message as unimportant, select → Mark important.
- To add the message to the spam list, select → Report spam.
- To add the message to the phishing list, select → Report phishing
- To refresh the message, select → Refresh
- To change the email settings, select → Settings.
- To provide info you want to know, select → Help
- To report a problem or suggestion to google, select → Send feedback
The options available may vary depending on the email account or device’s
orientation.
25
Page 29

5. Multi-media
5.1 Supported File Format
Your Tablet can play the following formats by the Movie Player
Multimedia File Support:
Ÿ AVI(H.264,DIVX,DIVX,XVID),
Ÿ RM, RMVB
Ÿ MKV(H.264,DIVX,DIVX,XVID), WMV,
Ÿ MOV,
Ÿ MP4(H.264,MPEG,DIVX,XVID),
Ÿ MPG,
Ÿ FLV(H.263,H.264)
Picture File Supported:
Ÿ JPG, JPEG,
Ÿ GIF,
Ÿ BMP,
Ÿ PNG
5.2 Music
Click on the music icon on your homepage or in the apps menu.
Your music can be divided into such 4 types as Artist, Special Edition, Songs, Play
List and Playing. Select a classification to view the contents in the list. For example,
if you select Artist classification, you will see the name list of artists ranked according
to A-Z sequence. If you select an artist, the songs of that artist and song list will be
presented in the list.
26
Page 30

Remaining
Check current play list
Artist
Special edition
Music
The cycle has been opened
Replay all songs
Played time
Visit and play the music
1. Click and select the music;
2. Click and select the songs, click and select the Artist, Special Edition and
Song List.
3. Select one of the songs to play.
Add songs onto the new play list
1. Click and select the music;
2. Click and select the songs,
3. Press and hold the songs that you will add onto the play list ;
4. A Pop up setting menu will appear, click and select add onto the play list.
Delete the play list
1. Click and select the music;
2. Click and select the songs,
time
Play progress bar
3. Press and hold the songs that you will add onto the play list until the pop up menu
appears.
4. Pop up the music setting menu, click and select Delete.
27
Page 31

5.3 Camera
Camera functions
1. Click and select the camera icon in main menu.
2. The system enters into the camera interface;
3. Click and select the Photo button and easily take the photos;
4. Click the to set the White Balance and Exposure . Click the
to set the wether to Store Location information onto the file.
5. Click the to go back to Photo / Video taking mode.
6. Tap the icon to zoom in or zoom out of the picture you want to take.
7. After taking a photo, there is a preveiw display that will show your picture.
Note: On the main camera screen you can also select between the front or rear
camera by tapping the icon. The rear camera will have a higher resolution.
Front/rear
Camera menu
Panorama
function
Photo function
Videotape function
To exit the Camera function, click the bar at the bottom and select to exit
or to go to Home screen.
Videotape function
1. Click the videotape icon in camera mode and convert it to video recorder
mode;
2. Click and select the red videotape button to take video ;
28
Page 32

3. Click and select the video recording button, end the video recording, and observe
the previewed video which located at the right top corner.
4. Click the to set the White Balance and Exposure .
5. Click the to set the wether to Store Location information onto the file.
6. Click the to go back to Photo / Video taking mode.
Panorama function:
1. Click the to go the Panorama function. Press the Green button once
and keep moving slowly ( either from left hand side to right hand side or start from
right hand side to left hand side ) to take panorama.
5.4 HDMI Connection ( HDMI cable is not supplied )
HDMI High-definition video interface
The Tablet and the high-definition television can be connected by a Mini HDMI to
HDMI cable.
1. Tablet is in the boot status.
2. The Tablet and television are connected by HDMI cable.
3. The system interface on Tablet is automatically synchronized with the TV screen.
4. After connected HDMI cable, a HDMI icon will be appeared on the bottom right
side, enter into HDMI setting → Display →resolution adjustment.
5. In the system setting, set the HDMI in desired Auto switch on or off
29
Page 33

You can also click the from Apps to set the HDMI switch when connected to
TV.
6. Internet
Note: Before using the internet, you must first establish a stable WIFI connection.
Please refer to section 3.1
6.1 Browser
Enter Homepage
The browser always opens the last web page that the user has visited, and the home
page will appear after clicking the browser.
Change your Home Page
1. Click Browser.
2. Press the Main menu button to pop up browser setting menu.
30
Page 34

3. Click Settings.
4. Click Set Home page.
5. Enter URL at the Address bar and Click OK.
Address bar
Browser menu options
Visit web page
1. Click Browser.
2. Enter your URL in the address bar.
3. Click Start or Go on the soft keyboard.
Input the contents
that you want to
search
Click here to add a web
page as bookmark
Click here to edit
your browser
Browse the webpage
Click here to
enter the URL
When the page finishes loading, you can slide your finger to browse and view other
parts of the page.
Zoom in or zoom out webpages
The webpage can be zoomed in or out by double-clicking the screen or by dragging
through two fingers.
Find texts within the webpage
1. While browsing the web, press the Menu key to pop up the menu options.
2. Click Find on page.
3. Enter the item you want to search.
4. The matched texts are highlighted in green while inputting the characters.
5. Click left-to-right arrow before the search bar to move to the previous or the next
matched word.
31
Page 35

l Set web page bookmark
l Open bookmark
l Edit bookmark
Bookmarks
Manage bookmarks
1. Go to a certain web page in the browser interface.
2. Click the icon ‘Click here to add a web page as bookmark’, and a
Bookmark this page window pops up, click OK to set the page you want as
the bookmark.
1. Enter the interface by clicking the icon ‘Click here to edit your browser’ in the
browser interface.
2. Click the bookmark that you want to open the web page.
1. Enter the interface just like opening the bookmark in the browser interface.
2. Click the bookmark you want to open or edit.
3. Click the STAR icon to Edit bookmark and click OK.
History
Saved
Enter setup menu
Using browser windows
l Open a new browser window
1. In the browser window, press the Menu key in the top right hand corner of
the screen and click New tab or simply click the + at the top of the address
bar to open a new window.
l Switch browser window
1. In the browser window, the pages you have visited appear above the
address bar.
2. Click the window that you want to switch to the page you want.
l Set browser
In the browser interface, press the Menu key and click Settings to set the
browser.
32
Page 36

7. Other Applications
7.1 Alarm clock
1. Click the clock icon in the apps menu.
2. Click set alarms.
3. Click the time periods or settings to set up the alarm..
4. After setup, click Done on the corresponding clock.
5. Set the right date & time in system setting before using the Alarm clock.
7.2 Calculator
1. Click Calculator from the apps menu.
2. Enter the basic operations of the calculator to operate.
33
Page 37

7.3 File Management
Browse files
Click the ES File Explorer from the apps menu.
You can use the file browser to view, manage, edit and delete the files and folders.
Cut and copy files
1. In the file browser, press and select the file you want to operate.
2. Pop up operating menus, including Cut, Copy, Delete, Rename, Move to, Copy
to, Play music, Select all, Set home directory and Attributes, etc.
3. Click Cut or Copy file or folder.
4. Click into the folder you want to paste, and pop up menu by pressing the Menu
key.
5. Click Operate and then click Paste.
Delete files
1. In the file browser, press the file you want to delete.
2. Click Delete.
3. Click OK to delete file.
Folder setup
1. In the file browser, pop up menu by pressing the Menu key.
2. Click Create.
3. Click Folder.
4. Click pop-up window and input the name of the new folder in the text box.
5. Click OK to create the folder.
Quick search
1. In the toolbar of the file browser
2. Click Search icon.
34
Page 38

3. Pop up the search panel and enter the keywords you need to find.
4. Click OK and the search progress bar will appear in the notification bar.
5. When the search is completed, pop up the dialog box to confirm whether to show
the results.
6. Click OK to show the search results.
8. Basic Settings
8.1 Sound and Display
Volume setting
1. Click the application icon to enter the settings application on the Homepage.
2. Click Sound.
3. Click Volume to control the volume of the music, video, games & media, alarm
clock and notification.
4. Pop up volume setup panel, and control it by dragging the progress bar to left or
to right.
5. Click and select Silient Mode, in order to mute the sound for Music, video,
games & other media, notifications.
Screen key tone and screen lock alert tone
You can set the Tablet to emit sound when you use the soft keyboard or touch screen
as well as lock the screen.
1. Click the application icon to enter the settings application on the Homepage.
35
Page 39

2. Click Sound.
3. Click the Screen key tone and screen lock alert tone.
Display settings
l Adjust screen brightness
1. Click the application icon to enter the settings application on the Homepage.
2. Click Display.
3. Click Brightness.
4. Pop up the brightness setup panel, and drag the brightness bar to left or to right
to adjust the brightness.
l About how to calibrate the touch screen:
1. Touch the “Settings” on the menu.
2. Touch the “Display” in the setting
3. Touch “Gravity Calibration Utility” to test.
36
Page 40

4. As per the instruction on the top of the display.
----
5. Result for test, you can find the result of “Calibration success, kType=1”
6. Quit it when it test ok
37
Page 41

l Set Wallpaper
1. Click the Wallpaper under the Display setting,
2. Select the Wallpaper souce, It will shows the available wallpaper
3. Click the desired wallpaper, it will preview the related wallpaper
4. Click the Set Wallpaper to confirm to use the selected wallpaper
l Gravity Calibration Utility
Select this utility if reset or calibrate the Gravity is needed.
l Adjust screen standby time
1. Click the application icon to enter the settings application on the Homepage.
2. Click Display.
3. Scroll down the screen and then click Sleep.
4. Pop up screen standby time settings and choose the standby time you want.
l Font size
Select the Font size from this setting, default setting is Normal
38
Page 42

a) Security and Location
1. Set unlock pattern
You can set your own unlock pattern (equivalent to the password) to protect the
privacy of your Tablet
1. Click the application icon to enter the settings application on the Homepage.
2. Click Security.
3. Click Set screen lock.
4. Click Pattern.
5. Pop up unlock pattern panel with 9 contacts, at least four of which are connected
vertically, horizontally or diagonally. Place your fingers away from the screen
upon completion and the system will record the pattern you set.
6. Click Next.
7. Draw the screen unlock pattern again when the prompt appears and click OK.
Tips: If you do not want the unlock graphics display on the screen while
unlocking, please clear the check box of Use visible pattern.
Important note: Once you set your own unlock pattern or password it is very
inportant you do not forget your changes otherwise the tablet will become
un-useable.
In this case you will be required to contact the warranty department for
further assistance and this may attract a service fee as forgetting passwords
is not covered by manufacturer warranty.
39
Page 43

2. Other settings
In the security settings, functions such as encryption setup, equipment management
and credential storage can be added to the tablet PC.
b) Storage
View storage settings
1. Click the application icon to enter the settings application on the Homepage.
2. Click Storage.
3. View storage space of internal SD card.
4. View storage space of external SD card.
5. View USB storage.
Safe uninstall of SD card or USB storage
Safe removal of the Micro SD card or USB storage can effectively protect and prolong
the service life of the SD card.
1. Click the application icon to enter the settings application on the Homepage.
2. Click Storage.
3. Click Unmount SD card or USB storage
4. The system prompts that the SD card or USB storage is safely removed.
c) Date and Time
Adjust the date, time and time zone
1. Click the application icon to enter the settings application on the Homepage.
2. Scroll down the screen and then click the Date and time settings.
3. Click Select time zone to select the one you want. Scroll down the list to see
more time zones.
40
Page 44

4. Click Set date, then click the up button or the down button to adjust the date,
month and year, and click Done when finished.
5. Click Set time, then click the up button or the down button to adjust hours and
minutes, click AM or PM to change between morning and afternoon. Click done
when complete.
6. Select 24-hour check box to switch between 12-hour and 24-hour. Selected time
format will be applied to the alarm clock.
7. Click Select date format and then select the date format to be displayed on the
Tablet.
8. You can choose Automatically determine date and time, which automatically
uses the time from the network, so effective network is required.
Note: Manual adjustment of time and date are not possible if “automatically determine
date and time” is checked and enabled.
d) Language and Input Method
Select language for the device
1. Press the Apps key to pop up application menu.
2. Click Settings.
3. Click Language and Input Method
4. Click Select language areas and choose the language you need.
Keyboard and input method
The default input keyboard is the Android keyboard, and you can select your favorite
keyboard and input method by installing third-party software.
e) About Tablet PC
View Tablet status
1. Click the application icon to enter the settings application on the Homepage.
2. Click Settings then About Tablet.
3. Click Status to view the Battery status, Network status, Serial number and
Running time, etc.
View system version
1. Click the application icon to enter the settings application on the Homepage.
2. Click About Tablet.
3. View Tablet model, Android version, Kernel version and Build-in version,
etc.
41
Page 45

7. Installation and Management of Programs
a) Installation
Install third-party applications
Additional third-party Android applications are available from the Internet. Download
and copy 3rd party applications to the Micro SD card and insert into the Tablet.
Method 1:
1. Download the .apk folder from the internet onto your computer.
2. Connect the tablet to your computer and transfer the .apk file to the tablet. You
can do this using the File manager on the tablet and place the file in a folder of
your choice.
3. Open the file where you saved it and install the application.
Method 2:
Connect the device to the internet, run the “Play Store”. You can download and install
your favorite third-party software directly to the tablet. Open the application screen.
Click on play store or Getjar icon. Select and download your app. Note: You will have
to open a Gmail account prior to performing this task.
Note: When installing applications you may only download adult applications if you
are at least 18 years of age, or at least the age of maturity in the area that you reside
or from which you downloaded the adult application. If you do not meet these
requirements, then you do not have permission to download adult applications.
In case of any problems including legal issues from breach by end users own
decision, the manufacturer shall not be liable.
Special note: Please check any applications downloaded carefully beforehand as any
issue with the tablet arising from problematic applications will not be covered by
warranty.
b) Management and Uninstall
Management of applications
You can enter the applications directly and select one of many options to Force stop,
Clear data, Uninstall, and Remove.
Uninstall applications
1. Click the application icon to enter the settings application on the Homepage.
2. Click the Apps.
3. Click the applications installed in the system which you going to unistall.
4. Click Uninstall.
5. Click OK to complete uninstall.
42
Page 46

8. Other applications
10.1 Clock
Set and control alarms for important events.
Set an alarm:
1. In the application list, select Clock.
2. Select . To set the alarm.
3. Select to set and add alarm.
4. Set the details of the alarm.
5. When you are finished, select Ok.
To deactivate an alarm, select the clock icon next to the alarm. To delete an alarm,
enter the alarm and select Delete.
Stop an alarm
When the alarm sounds,
- To stop the alarm, select Dismiss.
- Select Snooze to sleep for 10 more minutes.
43
Page 47

10.2 Getjar
Your device’s functionality can be extended by installing additional applications.
Getjar provides a quick and easy way to shop for mobile applications.
- This feature may be unavailable depending on your region or service provider.
- Your device will save user files from downloaded applications to the internal
memory.
Download an application
1. In the application list, select Getjar
2. Search for an application and download it to the device. When the download is
complete, the device will install the application automatically.
10.3 Google Settings
Click the to set various option of your Google acount realated option.
44
Page 48

10.4 Peoples
Manage your Google account contact by click the Peoples
10.5 Play Store
Your device’s functionality can be extended by installing additional applications. Play
Store provides a quick and easy way to shop for mobile applications.
- This feature may be unavailable depending on your region or service provider.
- Your device will save user files from downloaded applications to the internal
memory.
Download an application
1. In the application list, select Play Store.
2. Search for an application and download it to the device. When the download is
complete, the device will install the application automatically.
45
Page 49

10.6 Reboot Manger
Click and select the from the Apps, you can select Reboot, Recovery or Power
off the unit ( Recovery mode is not suggested to use for end user in normal situation )
10.7 Voice Search
Search for information by voice
This feature may be unavailable depending on your region or service provider.
1. In the application list, select Voice Search
2. Say a keyword into your device’s microphone. The device searches for web pages
related to the keyword.
3. Select a search result.
10.8 Sound Recorder
1. In the application list, select the Sound Recorder .
46
Page 50

2. Click the to start recording.
3. Click the to stop recording.
4. Select to listen to the recording message.
5. Click Done to save the recording message in the File Manager, click Discard.to
discard the recording message and exit the recording mode automatically.
10.9 YouTube
Learn to view and upload videos via the YouTube™ video sharing service.
This feature may be unavailable depending on your region or service provider.
Play a video
1. In the application list, select YouTube.
2. Select a video.
3. Control playback with the following keys:
47
Page 51

Pause or resume playback.
Scan forwards or backwards in the file by dragging the bar.
Play the video on the full screen.
Upload a video
1. In the application list, select YouTube.
2. Select your Google account if it is linked to YouTube. Alternatively, you can select
Sign in and set up an account to sign in to YouTube.
3. Select → a category → a video
If you are uploading a video for the first time, select a network type to upload a video.
4. Enter the details of the upload and select Upload.
48
Page 52

11. Troubleshooting
Important : If you are experiencing any problems with this device you must veiw the
troubleshooting list below first and then visit our web site on www.thomson-electronics.com for
more detailed information. If you have tried the troubleshooting and visited the web site and
still have a question then for further assistance please contact the help line.
1. Slow initial boot for Tablet
After system upgrade of Tablet, initial boot needs installation of the pre-installed
software applications, and for after 2-3 minutes, it runs faster.
2. Tablet can not connect to WIFI network
l Ensure WiFi is enabled on the tablet.
l Ensure that the wireless router providing the network services works properly.
l Ensure the Tablet and the wireless router is kept within close distance, and
without too many obstacles.
l Ensure the user name and the password are correct
3. Tablet feels hot
When multiple applications are running at the same time, or the screen is adjusted
to maximum brightness, or it is recharging, this situation is normal.
4. System is disordered and does not work properly
l Installation of some third-party applications may lead to system failure, and you
can press the reset button (next to the power port) to reset the system.
l Check battery power. Low battery can cause random functions.
Note: Slow running tablets or corrupted tablets caused by consumer installed
software are not covered by warranty.
5. Unable to create e-mail or register applications
l Ensure your network is properly connected to the Internet.
l Ensure the e-mail is set up correctly.
l Ensure your system time and the local time is consistent.
Note: When installing applications you may only download adult applications if you are
at least 18 years of age, or at least the age of maturity in the area that you reside or
from which you downloaded the adult application. If you do not meet these
requirements, then you do not have permission to download adult applications.
In case of any problems including legal issues from breach by end users own decision,
the manufacturer shall not be liable.
49
Page 53

12. Technical Specification
Type Details Descriptions
Model MID1002
CPU type Amlogic AML8726-MX, Dual Cortex-A9
CPU speed 1.5GHz
DDR 1GB
Basical
parameter
Product
appearance
Application
NAND
FLASH
Operating
system
version
Network
connections
USB
interface
HDMI
interface
Battery Lithium-ion polymer battery, 3.7V/5000mAh
Power
adapter
External
memory
card
Product
form
LCD 10.1 inch (16:9), 1024*600
Dimensions 262.6mm*159.8mm*12mm
Weight 674g
Multimedia
Video
Games Support to the third party programs
Input
method
photos Support JPG, JPEG, GIF, BMP, PNG
Office
software
16GB (the stated flash memory capacity includeds the
operating software.)
Andriod 4.1.1
WIFI802.11b/g/n
Micro USB
HDMI 1.4a
Input: AC 100V-240V; output: DC 5V~ 2A
Support SDHC/SDXC ( Maximum 32GB )
Straight plate
AVI(H.264,DIVX,XVID),rm,rmvb,MKV (H.264, DIVX, XVID),
WMV, MOV, MP4 (H.264, MPEG, DIVX, XVID), MPG,
FLV(H.263,H.264)
Andriod keyboard
Support reading and editing office files;Support browsing
PDF
50
 Loading...