


VCR
THOMSON multimedia vous propose ce Manuel d’Utilisation en ligne, à titre informatif, dans le but de vous
permettre un accès rapide aux instructions d’utilisation des produits Thomson. Néanmoins ce Manuel d’Utilisation
en ligne ne saurait remplacer le Manuel d’Utilisation original disponible dans l’emballage des produits Thomson.
T
HOMSON multimedia provides you with this on line Instruction Manual for information purposes only in order to allow
you easy access to Thomson’s products operating instructions. This on line Instruction Manual does not replace the
original Instruction Manual available in the packaging of Thomson products.
THOMSON multimedia le ofrece este Manual de Instrucciones en línea con carácter meramente informativo para
facilitarle el acceso a las instrucciones de uso de los productos Thomson. Sin embargo, este Manual de
Instrucciones en línea no sustituye en modo alguno al Manual de Instrucciones disponible en el embalaje de los
productos Thomson.
Um Ihnen einen schnellen und einfachen Zugang zu den Gebrauchsanweisungen unserer Produkte zu
verschaffen, hat THOMSON diese hier “on-line” gestellt. Diese “on-line” Gebrauchsanweisungen dienen allerdings
lediglich zu Informationszwecken und ersetzen selbstverständlich nicht die den Produkt-Verpackungen
beiliegenden Gebrauchsanweisungen.
THOMSON multimedia vi propone, a titolo informativo, il seguente Manuale di Utilizzazione “on-line”, al fine di
permettervi un accesso rapido alle istruzioni per l’utilizzo dei prodotti THOMSON. Ciononostante, il Manuale di
Utilizzazione “on-line” non costituisce un sostituto al Manuale di Utilizzazione originale, fornito nell’imballaggio dei
prodotti THOMSON.
THOMSON multimedia tillhandahåller denna “on line” manual för information endast för att ge dig enkel tillgång till
Thomson-produkternas bruksanvisningar. Manualen ersätter inte originalbruksanvisningen som bifogas med
Thomson-produkterna.
THOMSON multimedia coloca à sua disposição o Manual de Instruções on line com carácter meramente
informativo para lhe facilitar o acesso às instruções de utilização dos produtos Thomson. No entanto, este Manual
de Instruções não substitui o Manual de Instruções original, disponível na embalagem dos produtos Thomson.

Votre garantie Your guarantee
France,Belgique, Luxembourg,Suisse (F,B, L, CH)
Cher Client,
Vous avez choisi un produit THOMSON multimedia. Nous vous remercions
d’avoir fait confiance à notre marque. Votre appareil a été soumis à tous les
essais requis et remplit toutes les exigences de sécurité applicables.
Si toutefois des défauts dus à un vice, soit de fabrication soit du matériau,
devaient apparaître, THOMSON multimedia prendrait en charge la réparation
(pièces et main d'oeuvre) de chaque produit THOMSON multimedia
(hormis accessoires et pièces consomptibles) ou, si le produit n'est pas
considéré comme réparable par THOMSON multimedia, l’échange du
produit ou sa pièce défectueuse, pendant un an à partir de la date d’achat
(date de facture originale) si le produit a été acheté dans un des pays suivants : F, I, E, P, GB, IRL, D, CH, A, B, L, NL(Territoire) ou dans un magasin Duty-free situé dans l’un des pays pré-cités.
Pour la mise en oeuvre de cette garantie, vous aurez à présenter votre facture originale ou le bon de caisse précisant la date d’achat et le nom de votre
revendeur ainsi que la carte de garantie indiquant le type de produit et
numéro de série. La prise en charge de la garantie sera refusée en cas de
modification ou altération des documents ci-dessus ou s'ils ont été rendus illisibles.
Cette garantie n’est pas exclusive de l’application de la garantie légale du
pays dans lequel vous avez effectué l’achat (c’est-à-dire pour la France visà-vis de votre vendeur).
La garantie ne couvre pas les cas suivants:
1. Dommages causés par une cause extérieure à l’appareil et notamment
par une chute du produit, foudre, incendie, dégâts des eaux etc.
2. Frais d' acheminement aller et/ou retour ainsi que tout dommage en cours
de transport, directement ou indirectement liés à la mise en jeu de cette
garantie.
3. Dommages causés par négligence, utilisations impropres, contre-indiquées
ou non prévues dans la notice d’utilisation, installations défectueuses,
interventions impropres etc.
4. Modifications ou adaptations de l'appareil pour le mettre en adéquation
avec des normes techniques et/ou de sécurité, autres que celles en
vigueur dans le pays pour lequel l’appareil à été conçu et fabriqué à
l'origine ou si un dommage résulte d’une telle adaptation.
Merci de bien vouloir vous adresser à votre revendeur ou une Station
Technique Agréée en cas de dysfonctionnement. Avant toute demande,
nous vous conseillons toutefois de lire attentivement le mode d’emploi du
produit.
En cas de besoin de renseignements et/ ou de services, notamment en matière de garantie, dans un des pays du Territoire différent de celui dans lequel
vous avez acheté votre appareil, veuillez contacter le service consommateurs THOMSON multimedia le plus proche.
Pour tout renseignement complémentaire, n’hésitez pas à appeler notre service consommateurs :
THOMSON multimedia THOMSON multimedia
Marketing France (Suisse) S.A
Service Relations Seewenweg 5
Consommateurs 4153 Reinach
46 Quai Alphonse Le Gallo Suisse
92100 Boulogne Billancourt Tel. 061 716 96 50
Tel : 08 03 82 14 42 Fax. 061 716 96 55
Minitel : 3615 THOMSON TV
http://www.thomson-europe.com
http://www.thomson.fr
http://www.thomson-europe.com
UK and Ireland (GB + IRL)
Dear Customer,
Thank you for purchasing this THOMSON multimedia product and for your
confidence in our company. This product meets applicable safety requirements
and has undergone stringent testing during manufacture.
However, should there occur a defect, the product or its defective part(s)
(excluding accessories and consumables) will be repaired free of charge
(labor and parts) or, at THOMSON multimedia’s discretion, exchanged
for a similar item, provided that it has been returned within 12 (twelve)
months from the date of original purchase (date of receipt), is defective in
materials and/or workmanship and has been bought in any of the following countries: F, I, E, P, GB, IRL, D, CH, A, B, L, NL(Territory) or in
a Duty-free shop in the named countries.
This guarantee will be granted only upon presentation of the original invoice or cash receipt, indicating the date of purchase and dealer’s name, and of
this guarantee card with the product type and serial number. The benefits of
this guarantee may be refused if the invoice, cash receipt or guarantee card
has been altered in any way, deleted or made illegible after the original purchase.
This guarantee does not apply to any of the following:
1. Damage caused by accidents including, but not limited to, lightning,
fire, water;
2. Transport costs between the home and place of service and other costs
and risks of transport relating directly or indirectly to this guarantee;
3. Damage to the product resulting from neglect, misuse, including but
not limited to, failure to use, repair and/or install the product for its
normal domestic purposes and/or in accordance with the operating
instructions on its proper installation and use;
4. Modifications, adaptations and alterations of the product to operate in
a country other than that for which it was originally designed and
manufactured, or any damage resulting from such modifications;
These statements do not affect your statutory rights as a consumer under
applicable national legislation in force, nor your consumer’s rights against
the dealer from whom you bought the product.
If you need service, whether or not under guarantee, please approach the
dealer who sold you the product.
In your own interest we advise you to read the instruction booklet for your
THOMSON multimedia product carefully before contacting your dealer or
service center.
If you need service while in a country (within the named Territory) other
than the one where you bought your product, please contact the nearest
THOMSON multimedia InfoCenter.
Should you have any questions which your dealer is unable to answer,
please contact:
THOMSON InfoCenter (UK,IRL)
THOMSON multimedia Sales UK Ltd.,
30 Tower View
Kings Hill
West Malling
Kent ME19 4NQ
tel.44 (0) 173 252 0920
fax. 44 (0) 173 252 0921
http://www.thomson-europe.com

Deutschland,Österreich, Schweiz (D,A,CH)
Sehr geehrter Kunde,
Sie haben sich für den Kauf eines THOMSON multimedia - Gerätes
entschieden. Vielen Dank für das Vertrauen, das Sie uns damit entgegengebracht haben.
Ihr Kauf ist eine gute Wahl gewesen. Sollte sich dennoch ausnahmsweise
ein Grund zur Beanstandung ergeben, wird THOMSON multimediaausdrücklich zusätzlich zu den Ihnen gesetzlich zustehenden
Gewährleistungsansprüchen - innerhalb von 12 Monaten ab Ersterwerb
(Datum des Kaufbeleges, siehe unten) alle von uns als garantiepflichtig
anerkannten Material- und Verarbeitungsfehler an THOMSON multimediaGeräten oder Geräteteilen (Zubehör ausgenommen), ohne Berechnung
von Lohn-und Materialkosten, entweder reparieren oder, falls notwendig,
das Gerät austauschen. Hierzu muß das Gerät in einem der folgenden
Länder: F, I, E, P, GB, IRL, D, CH, A, B, L, NLoder dort in einem DutyFree Shop gekauft worden sein.
Die genannten Garantieleistungen werden erbracht bei Vorlage der
Originalrechnung bzw. des Kassenbeleges, auf dem Kaufdatum, Name und
Anschrift des Händlers sowie Typen- und Seriennummer des Gerätes
vermerkt sind. Garantieleistungen können nicht erbracht werden, wenn nach
dem Ersterwerb des Gerätes diese Angaben entfernt oder geändert worden
sind.
Unsere Garantie deckt keinen der folgenden Punkte:
a. Ausseneinwirkungen auf das Gerät durch z. B. Feuer, Blitz Wasser etc.
b. Transport-, Fahrtkosten und -risiken, die unmittelbar oder mittelbar mit der
Garantie zusammenhängen;
c. Schäden, die durch nicht bestimmungsgemässen Gebrauch, fehlerhafte
Installation, unsachgemäss durch-geführte Reparaturen sowie allgemein
infolge einer Nichtbeachtung der Bedienungsanleitung entstanden sind;
d. Anpassungen und/oder Veränderungen des Gerätes an geltende nationale
technische und/oder sicherheitstechnische Anforderungen eines Landes,
für das das Gerät nicht ursprünglich entwickelt und hergestellt worden ist.
Von dieser Garantie bleiben die gesetzlichen Bestimmungen zur
Gewährleistung im Land des Kaufes unberührt.
Durch eine Inanspruchnahme unserer Garantie wird die ursprüngliche
Garantiefrist weder verlängert noch wird eine neue Garantiefrist in Gang
gesetzt.
Sollten Sie also eine Beanstandung haben, wenden Sie sich bitte an Ihren
Händler oder an eine autorisierte Werkstatt oder Annahmestelle. In Ihrem
eigenen Interesse sollten Sie allerdings zuvor die Bedienungsanleitung
sorgfältig lesen.
Falls Ihr Händler eine Frage nicht beantworten kann oder Sie sich zur Zeit
der Beanstandung in anderen als den o. g. Ländern aufhalten sollten können
Sie sich, darüberhinaus selbstverständlich an Ihr nächstgelegenes
THOMSON multimedia InfoCenter wenden.
THOMSON InfoCenter (D) THOMSON multimedia (Schweiz) AG
THOMSON multimedia Seewenweg 5
Sales Germany GmbH & Co. OHG 4153 Reinach
Karl-Wiechert-allee 74 Schweiz
D - 30625 Hannover Tel. 061 716 96 50
Tel. 00-49-(0)1805 257486 Fax. 061 716 96 55
http://www.thomson.de http://www.thomson-europe.com
http://www.thomson-europe.com
Italia e Svizzera (I,CH)
Caro Cliente,
Vi ringraziamo di aver acquistato questo prodotto Thomson multimedia e della
fiducia riposta nella nostra azienda. Questo prodotto risponde alle norme di sicurezza ed è stato sottoposto a severi controlli durante la produzione.
Tuttavia, se dovesse presentarsi un difetto, entro 12 mesi dalla data d’acquisto,
il prodotto o la sua parte non funzionante (escluso accessori e parti soggette a
usura), verrà riparato gratuitamente (manodopera e ricambi) o, a discrezione di THOMSON multimedia, sostituito con un articolo simile, previa restituzione dell’apparecchio difettoso e a condizione che sia stato acquistato in una delle seguenti nazioni: F, I, E, P, GB, IRL, D, CH, A, B, L, NL
(territorio) o in un Duty-free shop nei paesi citati.
Questa garanzia è riconosciuta solo dietro presentazione della fattura o della
ricevuta fiscale originali, indicanti la data d’acquisto, il nome del rivenditore e inoltre solo se la cartolina di garanzia riporta il modello e il
numero di serie del prodotto. La garanzia può essere rifiutata se la fattura, la ricevuta fiscale o il certificato di garanzia sono stati alterati,
cancellati o resi illeggibili dopo l’acquisto.
Questa garanzia non copre:
1. Danni accidentali che includano, ma non limitati a: fulmine, fuoco,
acqua.
2. I costi di trasporto tra l’abitazione e il punto assistenza e altri costi e rischi di
trasporto riferiti direttamenteo indirettamente a questa garanzia.
3. Danni al prodotto risultanti da negligenza o uso scorretto, che includano ma
non limitati a riparazione e/o installazione del prodotto per i normali
fini domestici, secondo le istruzioni d’uso circa la sua installazio
ne e uso propri.
4. Modifiche, adattamenti e alterazioni del prodotto per operare in un paese
diverso da quello per il quale è stato originariamente concepito e costruito, o qualunque danno risultante da tali modifiche.
Quanto sopra non incide nè sui Vostri diritti come consumatori in base alla
legislazione nazionale in vigore, nè sui diritti dei consumatori rispetto al
rivenditore, dal quale è stato acquistato il prodotto.
Se avete bisogno di assistenza tecnica, sia in garanzia sia fuori garanzia,
contattate il rivenditore che Vi ha venduto il prodotto, o meglio, il centro
assistenza autorizzato THOMSON multimedia ; se Vi trovate in un paese tra
quelli citati, diverso da quello in cui avete acquistato il prodotto, contattate
il centro informazioni THOMSON multimedia più vicino. Nel Vostro
interesse, Vi consigliamo di leggere attentamente il libretto istruzioni del
Vostro prodotto THOMSON multimedia prima di contattare il rivenditore o
il centro assistenza tecnica.
In caso di domande a cui il Vostro rivenditore non è in grado di rispondere,
contattate:
THOMSON multimedia THOMSON multimedia
Sales Italy S.p.A. (I) (Svizzera) AG (CH)
Via L. Da Vinci, 43 Seewenweg 5
20090 Trezzano sul Naviglio (MI) 4153 Reinach
Tel. 02/484141 Svizzera
http://www.thomson.it Tel. 061 716 96 50
http://www.thomson-europe.com Fax. 061 716 96 55
http://www.thomson-europe.com
Ihre Garantie La vostra garanzia

España (E)
Apreciado Cliente:
Nuestro agradecimiento por comprar este producto THOMSON multimedia y por
su confianza en nuestra marca. Este producto cumple todas las normas de seguridad y ha superado rigurosas pruebas durante su proceso de fabricación.
No obstante, si a pesar de ello apareciese algún defecto, el producto o la
pieza defectuosa (excluyendo accesorios y piezas con desgaste normal por
el uso), serán reparados gratuitamente (mano de obra y piezas) o, a discreción
de THOMSON multimedia, cambiado por otro artículo similar. Para ello
deberá ser verificado que está dentro de los 12 (doce) meses a contar desde
la fecha de compra original (fecha de la factura), que existe una pieza defectuosa y/o anomalía en el proceso de fabricación y que ha sido comprado en
cualquiera de los siguientes países: F, I, E, P, GB, IRL, D, CH, A, B, L, NL, o
en las tiendas libres de impuestos en los citados países.
Esta garantía solamente tendrá validez si va acompañada de la factura original
de compra o recibo de caja, indicando la fecha de compra y el nombre del
distribuidor, así como el modelo del producto y su número de serie indicados
en la propia tarjeta de garantía. La garantía puede ser rechazada si la factura de
compra, recibo de caja o tarjeta de garantía han sido alteradas en cualquier
sentido, borradas o hechas ilegibles.
Esta garantía no tendrá validez en cualquiera de los siguientes casos:
1. Daños provocados por accidentes incluyendo, aunque no limitando,
descargas eléctricas, fuego, agua.
2. Costes de desplazamiento y transporte entre el domicilio y el taller y
viceversa así como otros costes y riesgos de transporte relacionados
directa o indirectamente con esta garantía.
3. Daños en el producto resultantes de negligencia y/o mal uso, incluyendo
fallos de utilización, reparación o instalación del producto para su uso
doméstico normal, de acuerdo con lo indicado en su libro de instrucciones.
4. Modificaciones, adaptaciones y alteraciones en el producto para funcionar
de un país a otro para el que originalmente fué diseñado y fabricado,o cualquier daño resultante de tales modificaciones.
Estas declaraciones no afectan a sus derechos legales como usuario bajo la
legislación nacional vigente, ni a sus derechos como cliente ante el
distribuidor en el que Vd. compró el producto.
Si Vd. necesita de asistencia técnica, en garantía o fuera de ella, por favor
diríjase a la Red de Servicios Técnicos Oficiales THOMSON multimedia o
al distribuidor donde lo compró.
En su propio interés le recomendamos que lea detenidamente el libro de instrucciones de manejo de su producto THOMSON multimedia antes de
contactar con el Servicio Técnico Oficial o Distribuidor.
Si Vd. necesita de asistencia técnica en un país (dentro de los citados)
distinto de aquél en el cual Vd. compró el producto, contacte por favor con
la oficina de THOMSON multimedia más próxima.
Si tiene Vd. preguntas que su distribuidor no sea capaz de responder, por
favor diríjase a :
THOMSON multimedia
Avenida de Burgos 8A
28036 - Madrid
http://www.thomson.es
http://www.thomson-europe.com
Portugal (P)
Estimado Cliente,
Agradecemos-lhe por ter adquirido este produto THOMSON multimedia e pela
sua confiança na nossa marca. Este produto está conforme com todas as normas
de segurança e foi submetido a testes rigorosos durante o seu fabrico.
Contudo, no caso de ocorrer alguma avaria, o produto ou a(s) peça(s) defeituosa(s),
com excepção de acessórios ou peças de desgaste, será reparado sem nenhum custo (peças e mão de obra), ou, se a THOMSON multimedia assim o
entender, eventualmente substituido por um produto igual ou similar. Para isso
dever-se-á verificar que esteja dentro dos 12 (doze) meses a contar da data de
compra original, que exista uma peça defeituosa e/ou uma anomalia no processo de fabrico e o produto tenha sido adquirido num dos seguintes países: F,
I, E, P, GB, IRL, D, CH, A, B, L, NL(território) ou numa loja Duty-free em
qualquer destes citados países.
Esta garantia será exclusivamente dada contra a apresentação da factura de
compra ou recibo de caixa respectivo, indicando a data de compra e a
identificação da identidade vendedora, assim como, deste certificado de
garantia com o correspondente modelo e o número de série do aparelho. A
garantia poderá ser recusada no caso da factura, recibo de caixa ou certificado de garantia tiverem sido de qualquer forma alterados, apagados ou
tornados não legível após a compra original.
Esta garantia não será válida nos seguintes casos:
1. Danos causados por acidentes incluindo mas não limitados a descargas
eléctricas, fogo ou danos causados por água;
2. Custos de transporte do local do domicilio para o centro de assistência técnica e vice-versa, bem como outros custos ou riscos de transporte relacionados directa ou indirectamente com esta garantia;
3. Danos ocasionados no produto resultantes de negligência, uso indevido
mas não limitado a falha de uso, reparação e/ou instalação do produto, para
os seus normais usos domésticos e/ou de acordo com o manual de instruções e a sua instalação e uso adequados;
4. Modificações, adapatações e alterações efectuadas para funcionar num
país diferente daquele para o qual foi origináriamente desenhado e
fabricado ou qualquer dano resultante das referidas modificações.
Estas condições não alteram de forma alguma os seus direitos estatutários
como consumidor, sobre a legislação nacional aplicável em vigor, nem os
seus direitos como consumidor para com a empresa a quem adquiriu o produto.
No caso de necessitar da prestação do serviço de assistência técnica quer
seja ao abrigo da garantia ou fora dela, por favor contacte com o agente onde
adquiriu o aparelho.
No seu próprio interesse aconselhamos a leitura atenta do manual de intruções do
seu aparelho THOMSON multimedia, antes de contactar o agente ou o serviço técnico.
No caso de necessitar da prestação de um serviço de assistência técnica
num país (dos já mencionados atrás como território) que não aquele em
que adquiriu o seu aparelho, por favor contacte o THOMSON multimedia
InfoCenter mais próximo.
Se tem perguntas às quais o seu fornecedor não está habilitado a responder por favor dirija-se à :
THOMSON multimedia
Av. da Boavista,
3521 - Porto
Telef. 618.76.41 / 618.76.59
Fax. 618.76.65
http://www.thomson-europe.com
Su garantía A sua garantia

Nederland (NL)
Geachte Klant,
Dank U voor het kopen van dit THOMSON multimedia produkt en voor het
vertrouwen dat U stelt in onze onderneming.
Het onderhavige produkt beantwoordt aan de van toepassing zijnde veiligheidseisen en heeft tijdens het productieproces strikte tests ondergaan.
Mocht er toch een gebrek optreden dan wordt het produkt of het (de) defecte onderdeel (-delen) ervan (met uitzondering van accessoires en verbruiksonderdelen) zonder kosten (i.h.b. arbeidskosten en/of kosten van
onderdelen) gerepareerd ofwel, op besluit van THOMSON multimedia,
geruild tegen een vergelijkbaar product. Dit laatste onder voorwaarde dat het
produkt is teruggebracht binnen 12 (twaalf) maanden vanaf de datum van
oor-spronkelijke aankoop, (datum van ontvangst), een produktie of materiaalgebrek vertoont en is teruggebracht in een van de ondergenoemde landen:
F, I, E, P, GB, IRL, D, CH, A, B, L, NL(territorium) of een Duty Free shop
in een van de genoemde landen.
Deze garantie wordt uitsluitend verleend op vertoon van:
- de originele faktuur of een bewijs van contante betaling welke de datum
van aankoop en de naam van de dealer vermeldt, alsmede
- deze garantiekaart met daarop vermeld het produkt type alsmede het
serienummer.
De garantie kan worden geweigerd indien de faktuur, het bewijs van contante
betaling of het garantiebewijs op enigerlei wijze zijn vernietigd, gewijzigd
of onleesbaar gemaakt na de oorspronkelijke aankoop.
Deze garantie is niet van toepassing in de volgende gevallen:
1. Schade veroorzaakt door ongevallen, o.a.: blikseminslag, brand,
waterschade, etc.;
2. Kosten voor transport tussen het huisadres alsmede andere kosten en risico’s van het transport welke direct of indirect verband houden met de
onderhavige garantie;
3. Productschade ten gevolge van verwaarlozing of verkeerd gebruik,
o.a.: nalaten het produkt te gebruikente repareren en / of te installeren met
het oog op zijn normale huishoudelijke gebruik en / of overeenkomstig de
gebruiksaanwijzing betreffende zijn juiste installatie en gebruik;
4. Wijzigingen en / of aanpassingen van het produkt teneinde te worden
gebruikt in een ander land dan dat waarvoor het produkt oorspronkelijk
was ontworpen en gefabriceerd, of enige schade voortvloeiend uit
dergelijke wijzigingen.
Bovenstaande bepalingen raken noch aan Uw statutaire rechten als
consument onder de toepasselijke en van kracht zijnde nationale wetgeving,
noch aan de rechten welke U als consument geldend kunt maken ten opzichte van
de dealer van wie U het product heeft gekocht.
Indien U service, al dan niet gedekt door de onderhavige garantie behoeft,
gelieve contact op te nemen met de dealer welke U het produkt heeft verkocht.
In Uw eigen belang adviseren wij U om de gebruiksaanwijzing bij Uw
THOMSON multimedia produkt zorgvuldig door te lezen alvorens contact op
te nemen met Uw dealer of het Service Centrum.
Indien U service behoeft tijdens verblijf in een ander land ( binnen het genoemde
territorium ) dan hetwelk waar U het produkt heeft gekocht, gelieve dan contact op
te nemen met het dichtstbijzijnde THOMSON multimedia InfoCenter.
Mocht U nog vragen hebben waarop Uw dealer U niet kan antwoorden
neemt U dan contact op met:
THOMSON InfoCenter
Elesco Alkmaar
Robbenkoog 13
1822 BAAlkmaar
Tel. 072 562 85 37
Tel. 0800 - 022 67 61
http://www.thomson-europe.com
Poland (PL)
1. Niniejsza gwarancja dotyczy Produkt—w elektronicznych powszechnego
uýytku wyprodukowanych przez zak¸ady wchodzˆce w sk¸ad koncernu THOMSON multimedia, zakupionych w sklepach na terytorium Rzeczypospolitej
Polskiej. TCE gwarantuje sprawne dzia¸anie tych Produkt—w, zgodnie z
warunkami technicznymi i eksploatacyjnymi opisanymi w ich instrukcji obs¸ugi.
2. Okres gwarancji wynosi 24 miesiˆce gwarancji od daty zakupu Produktu
przez klienta dla odbiornik—w telewizyjnych i dwanaæcie miesi«cy dla
innych produkt—w. Wady ujawnione w tym okresie b«dˆ usuwane bezp¸atnie
przez Autoryzowane Jednostki Serwisowe THOMSON (ãAJS").
3. Warunkiem wykonania us¸ugi gwarancyjnej jest przedstawienie AJS przez klienta :
-czytelnie i poprawnie wype¸nionej Karty Gwarancyjnej
-dowodu zakupu wadliwego Produktu
-wadliwego Produktu
-opakowania fabrycznego
AJS moýe odm—wi• wykonania us¸ugi jeýeli przedstawiona Karta
Gwarancyjna nosi• b«dzie widoczne ælady przer—bek, jeýeli numery
Produktu okaýˆ si« inne od numer—w wpisanych w Karcie, jeýeli plomba
umieszczonana obudowie zostanie naruszona bˆd• zerwana, a takýe w przypadku stwierdzenia dokonywania napraw lub zmian konstrukcyjnych przez
osoby nieuprawnione.
4. Wprzypadku odbiornik—w telewizyjnych o przekˆtnej ekranu co najmniej 20
cali nie jest konieczne dostarczenie odbiornika do AJS. Naprawa zostanie
wykonana u klienta po wczeæniejszym uzgodnieniu terminu.
Wprzypadku, gdy naprawa musi by• wykonana w AJS, zak¸ad us¸ugowy
odbierze Produkt i dostarczy po naprawie w¸asnym transportem. Wpozosta¸ych przypadkach warunkiem wykonania us¸ugi jest dostarczenie
Produktu do AJS. Ryzyko uszkodzenia w czasie transportu spoczywa w
takich przypadkach na Kliencie.
5. TCE Poland oraz AJS do¸oýˆ wszelkich staraÄ aby okres wykonywania
us¸ugi gwarancyjnej by¸ moýliwie jak najkr—tszy. Nie powinien on
przekroczy• 21 dni od daty przyj«cia Produktu do naprawy lub - w
przypadku wskazanym w punkcie poprzednim - od daty przyj«cia przez
AJS zg¸oszenia uszkodzenia Produktu. Wrazie gdyby naprawa wiˆza¸a si«
z koniecznoæciˆ sprowadzenia cz«æci z zagranicy, termin usuni«cia wady
moýe by• przed¸uýony do 30 dni. Okres gwarancji ulega przed¸uýeniu o
czas trwania naprawy.
6. Niniejsza gwarancja nie obejmuje :
-sznur—w przy¸ˆczeniowych, sieciowych, s¸uchawek, gniazd antenowych itd.
-uszkodzeÄ mechanicznych, termicznych, chemicznych, spowodowanych
wy¸adowaniem atmosferycznym,
przepi«ciem w sieci energetycznej, dzia¸aniem lub zaniechaniem
uýytkownika lub dzia¸aniem si¸y wyýszej
-celowego uszkodzenia produktu lub czynnoæci konserwacyjnych
-uszkodzeÄ powsta¸ych na skutek nadmiernej eksploatacji (uýywanie
sprz«tu w celach profesjonalnych)
- czynnoæci z zakresu bieýˆcej eksploatacji opisanych w instrukcji
obs¸ugi (instalacja, programowanie itp.)
7. Klientowi przys¸uguje prawo wymiany Produktu na nowy, jeýeli :
-w okresie gwarancji AJS dokona 4 napraw, a Produkt w dalszym ciˆgu
b«dzie wykazywa¸ wady (potwierdzone przez AJS) uniemoýliwiajˆce
uýywanie go zgodne z przeznaczeniem.
-AJS stwierdzi na piæmie, ýe usuni«cie wad jest niemoýliwe. Wymiana
Produktu moýe odby• si« wy¸ˆcznie w punkcie jego sprzedaýy.
8. Czynnoæci wykonywane przez punkt serwisowy polegajˆce na :
-wymianie bezpiecznik—w i zar—wek
-czyszczeniu g¸owic i rolek przesuwu taæmy (dla sprz«tu audio i video) nie
sˆ obj«te zakresem us¸ug gwarancyjnych i nie sˆ zaliczane do limitu napraw,
stanowiˆcych podstaw« do wymiany sprz«tu na nowy.
THOMSON CONSUMER ELECTRONICS POLAND
ul. Gen. L. Okulickiego 7/9, 05-500 Piaseczno
http://www.thomson-europe.com
Uw garantie Warunki gwarancji

Czech (CZ)
1. Spole‹nost THOMSON multimedia Czech s.r.o. poskytuje v souladu s ¤ 620
- ¤ 627 z‡kona ‹. 40/1964 Sb. ve znžn’ pozdžjä’ch novel (Ob‹anskù
z‡kon’k) kupuj’c’mu, uvedenŽmu v tomto ãZ‡ru‹n’m listžÒ, z‡ruku za
podm’nek n’ìe uvedenùch.
2. Tato z‡ruka se vztahuje na vùrobky spotÞebn’ elektroniky zna‹ky THOMSON, kterŽ byly vyrobeny v tov‡rn‡ch,kterŽ patÞ’ ke koncernu THOMSON
multimedia Group, za podm’nky, ìe vùäe uvedenŽ vùrobky byly zakoupeny
v obchodn’ s’ti na œzem’ ‰eskŽ republiky (d‡le jen vùrobek). Spole‹nost
THOMSON multimedia Czech s.r.o. ru‹’ za œ‹innù provoz tžchto vùrobkó
v souladu s technickùmi a provozn’mi podm’nkami, uvedenùmi v n‡vodech
pro obsluhu pÞedmžtnŽho vùrobku.
3. Z‡ru‹n’ doba ‹in’ 24 (dvacet ‹tyÞi) mžs’có u barevnùch televizn’ch pÞij’ma‹ó a 12 (dvan‡ct) mžs’có pro ostatn’ vùrobky spotÞebn’ elektroniky zna‹ky THOMSON multimedia. Opr‡vnžnŽ a v‹as uplatnžnŽ vady zjiätžnŽ
bžhem z‡ru‹n’ doby budou bezplatnž opraveny autorizovanùmi servisy
zna‹ky THOMSON multimedia (d‡le jen ãAS Ò).
4. Z‡ru‹n’ oprava bude poskytnuta ãASÒ pouze v tom pÞ’padž, pokud z‡kazn’k
osobnž pÞedloì’ ãASÒ Þ‡dnž a ‹itelnž vyplnžnù z‡ru‹n’ list, platnù prodejn’
doklad s vyzna‹enùm datem zakoupen’ vùrobku a vadnù vùrobek.
5. ãASÒ odm’tne poskytnout z‡ru‹n’ opravu, pokud na pÞedloìenŽm
ãZ‡ru‹n’m listžÒ byly provedeny zmžny œdajó, je- li na vùrobku uvedeno
jinŽ vùrobn’ ‹’slo neì v ãZ‡ru‹n’m listžÒ a tehdy, pokud je vùrobek nebo
kter‡koliv jeho ‹‡st opravov‡na, seÞizov‡na nebo vymžËov‡na jinùm
subjektem neì ãASÒ.
6. Seznam ãASÒ je pÞiloìen k vùrobku pÞi jeho zakoupen’, d‡le je moìnŽ tento
seznam obdrìet v prodejnž, kde byl vùrobek zakoupen nebo pÞ’mo u
spole‹nosti THOMSON multimedia Czech s.r.o.
7. Tato z‡ruka se nevztahuje na pÞedmžty kr‡tkodobŽ spotÞeby a na vady a
poruchy zpósobenŽ mimoÞ‡dnùmi ud‡lostmi, zejmŽna na:
- propojovac’ äËóry, s’éovŽ nap‡jec’ äËóry, sluch‡tka, antŽnn’ z‡suvky,
baterie, ì‡rovky, balen’, s‡‹ky a dalä’
pÞ’sluäenstv’ vùrobku, opotÞebenŽ bžìnùm uì’v‡n’m,
- mechanickŽ, tepelnŽ, chemickŽ a dalä’ poäkozen’ zpósobenŽ ‹innost’ uìivatele,
- vady zpósobenŽ ìivelnou katastrofou,
- vady zpósobenŽ opravou nebo zmžnami, kterŽ byly provedeny uìivatelem
nebo jinou nepovolanou osobou,
- œmyslnŽ poäkozen’ pÞ’stroje a nespr‡vnou œdrìbu,
- nadmžrnŽ pÞetžìov‡n’ pÞ’stroje (napÞ. pouìit’ vùrobku v profesion‡ln’m
provozu atd.)
- nespr‡vnou ‹innost vùrobku, kter‡ byla zpósobena ‹innost’, jeì nen’
uvedena v n‡vodž na obsluhu vùrobku (napÞ. instalace, programov‡n’ atd.)
- poäkozen’ zpósoben‡ bžhem pÞepravy vùrobku ke kupuj’c’mu a od kupuj’c’ho
- technickŽ parametry vùrobku, pokud jsou v souladu s technickùmi œdaji
vztahuj’c’mi se k pÞedmžtnŽmu vùrobku
8. Tato z‡ruka je nepÞenosn‡ a bude poskytnuta pouze kupuj’c’mu v
ãZ‡ru‹n’m listžÒ uvedenŽm.
9. Nespln’- li kupuj’c’ nžkterou z podm’nek pro poskytnut’ z‡ruky vùäe uvedenùch, bude tato z‡ruka zruäena.
10. Podm’nky pro poskytov‡n’ z‡ruky uvedenŽ v tomto ãZ‡ru‹n’m listžÒ plat’
takŽ pro dalä’ vùrobky koncernu THOMSON Group, a to zna‹ky Telefunken,
Saba a Nordmende.
11. Pokud nebyly vady vùrobku reklamov‡ny v souladu s vùäe uvedenùmi
podm’nkami pro poskytov‡n’ z‡ruky, nem‡ kupuj’c’ pr‡vo vùrobek vr‡tit.
THOMSON multimedia Czech s.r.o.
ul. Doprav‡kó 3
184 00 Praha 8
http://www.thomson-europe.com
Россия (RUS)
Уважаемый клиент!
Благодарим за покупку продукции THOMSON и доверие к нашей
компании. Эта продукция изготовлена в соответствии со
спецификациями THOMSON, отвечает действующим нормам
безопасности и прошла в процессе изготовления тщательные
испытания.
Eсли в приобретенной вами продукции окажется неисправность,
она или неисправные части (исключая принадлежности и
расходные материалы) будет бесплатно (без оплаты трудозатрат и
частей) отремонтирована, а если ремонт технически невозможен,
заменена аналогичным товаром (или заменены неисправные
части) при условии возврата в течение 12 (двенадцати) месяцев с
даты покупки (даты получения), если обнаружены дефекты
материалов и/или изготовления.
Данная гарантия действует только по предъявлении оригинала
счета-фактуры или кассового чека и настоящего гарантийного
талона с указанием даты покупки, названия дилера, типа и
серийного номера товара. B выполнении гарантийных
обязательств может быть отказано, если счет-фактура, кассовый
чек или гарантийный талон подвергся каким-либо изменениям,
стерся или стал неразборчивым со времени покупки.
Hастоящая гарантия не распространяется на:
1. Повреждения, вызванные несчастными случаями, включая, но
не ограничиваясь этим, нарушения энергоснабжения, молнию,
пожар, наводнение;
2. Pасходы на доставку от дома до места обслуживания и другие
транспортные расходы и риски, прямо или косвенно связанные
с настоящей гарантией;
3. Повреждения товара в результате небрежности,
неправильного использования, включая, но не ограничиваясь
этим, использование, ремонт и/или применение товара не в
обычных бытовых целях и/или не в соответствии с
инструкциями по его правильной установке и использованию;
4. Mодификации, адаптации и изменения товара для
эксплуатации в иной стране, нежели та, для которой он был
первоначально разработан и изготовлен, или повреждение в
результате таких модификаций.
5. Повреждения товара, вызванные попаданием внутрь изделия
посторонних предметов, насекомых, веществ, жидкостей.
Изложенные оговорки не ущемляют ваши законные права
потребителя по действующему государственному
законодательству, равно как ваши потребительские права в
отношении дилера, у которого приобретен товар.
Eсли вы нуждаетесь в гарантийном или ином обслуживании,
обращайтесь к дилеру, который продал вам товар или в один из
aвторизованных cервисных центров THOMSON.
Cоветуем вам внимательно прочесть инструкцию по эксплуатации
товара THOMSON, прежде чем обращаться к дилеру или в
сервисный центр.
По всем вопросам, на которые не может ответить ваш дилер,
обращайтесь письменно в информационный центр THOMSON
(Pоссия) по факсу No (095) 258-09-25.
http://www.thomson-europe.com
Podmínky záruky
Ваша Гарантия

Hungary (H)
1. E garancia a THOMSON multimedia Csoporthoz tartozó üzemekben elõállított
THOMSON multimedia márkájú, a THOMSON multimédia Hungary Kft. által
importált azon fogyasztói elektronikai termékekre érvényes, amelyeket
magyarországi üzletekben vásároltak. ATHOMSON multimédia Hungary
Kft. jótáll e termékek mûködéséért, az azok Felhasználói Útmutatóiban felsorolt mûszaki és üzemeltetési feltételeknek megfelõen.
2.Agarancia idõszak a THOMSON multimedia fogasztói elektronikai termékekre általában
tizenkét (12) hónap, melyet a termék megvásárlásától számítanak. Az ezen idõszak
folyamán felmerült hibákat a THOMSON multimedia felhatalmazott szervízei térítésmentesen megjavítják. Színes televíziók esetében a THOMSON multimédia Hungary Kft.
további tizenkét (12) hónapra átvállalja a gyártó hibájából elvégzett javítások során felmerült munka és alkatrész költségeket. Agaranciális szervízek listája a garanciajegyhez van mellékelve.
3.A garanciális szolgáltatások nyújtására csak akkor kerülhet sor, ha a Vevõ
bemutatja az alábbi dokumentumokat:
- a helyesen és olvashatóan kitöltött garanciajegyet;
- a termék érvényes vásárlási blokkját, melyen fel van tüntetve a vásárlás idõpontja;
- a meghibásodott terméket.
4. E garancia nem terjed ki a következõkre:
- mechanikai, hõhatásra bekövetkezett és minden egyébb rendeltetésellenes használat következménye, vagy mulasztás folytán elõállt hiba, vagy “vis major”;
- felhasználó vagy más, a THOMSON multimédia Hungary Kft. felhatalmazásával
nem rendelkezõ személy, vagy szervíz által végzett, a felhasználói útmutatóban
leírtaktól eltérõ beavatkozások és egyéb javítások esetében. Ebben az esetben a
garancia azonnali hatállyal megszûnik.
- a készülék szándékos rongálása és a karbantartás hiánya;
- túlzott igénybevétel (pl. a készülék professzionális célokra való használata).
5.A vevõ cserekészülékre (vagy vételár visszatérítésre) válik jogosulttá, ha a felhatalmazott
szervíz írásban tanúsítja, hogy a termék nem javítható meg, vagy a használó a
terméket a hiba vagy annak folyamatos ismétlõdése miatt nem tudja használni. Ebben
az esetben a felhatalmazott szervíz által kiállított tanúsítvány képezi a
cserekészülékhez, vagy a vételár visszatérítéshez szükséges csereutalványt. Acserét
(vagy a vételár visszatérítését) az az eladószerv teljesíti, amely az illetõ terméket eladta.
6.A garanciára vonatkozó jogszabályok: Polgári Törvénykönyv 306. és 307. cikkelye, valamint a 117/1991. (IX.10.) Kormányrendelet.
FONTOS FIGYELMEZTETÉS
Acsereigényt a kereskedõnél lehet bejelenteni a vásárlás idejétõl számított három (3)
napon belül, ha a termék ebben az idõszakban hibásodott meg (kivéve a beépített
biztonsági elelmek hibáját, pl. biztosíték). Ha a THOMSON multimedia garanciális feltételekben felsorolt kizáró okok egyike sem áll fenn, a terméket a Vevõ kérésére egy másik, ugyanolyan típusú termékre kell kicserélni. Ha a csere nem lehetséges,
a vételárat vissza kell téríteni, vagy más típusú terméket kell kiszolgálni a Vevõ választása szerint, a vételár különbözetének elszámolásával.
Avásárlás idõpontjától számított három (3) napot követõen a garanciális igényeket a
garanciajegyhez mellékelt listán szereplõ egyik szervízünknél lehet bejelenteni. A
hivatkozott jogszabályok szerint a Vevõ a következõ jogokkal rendelkezik:
- AVevõ jogosult a termék javítását, vagy a vételár arányos leszállítását igényelni
- Ha a Vevõ javítást igényel, e javítást a bejelentéstõl számított 15 napon belül kell
elvégezni, úgy hogy a termék értéke és használhatósága ne csökkenjen az ugyanilyen
idõn át rendeltetésszerûen használt termékhez képest
- Javítás esetén új alkatrészeket építenek be. Ha ezen alkatrészek fõdarabnak minõsül-
nek, a garancia ezen fõdarabok tekintetében újra kezdõdik a javítás befejezésekor. Az
új határidõt és a kicserélt fõdarab megnevezését a garanciajegyen fel kell tüntetni.
- Ha a szervíz a javítás idejére cserekészüléket ad, a javítás határideje 30 napra hosszabodik.
- Ha a javítást a jelzett határidõn belül nem lehetséges elvégezni, vagy csak úgy, hogy
az értékcsökkenéssel vagy a Vevõ érdekeinek sérelmével jár, vagy ha a szervíz elutasítja vagy nem végzi el a javítást a határidõn belül a terméket ki kell cserélni.
- A javítást az üzemeltetés helyén kell elvégezni, a fix bekötésû vagy 10 kg-nál
nagyobb tömegû készülékeknél. Ha a javítás a helyszínen nem végezhetõ el, a
szervíz gondoskodik a szállításról, valamint a termék fel és leszerelésérõl.
- Afenti bekezdés hatálya alá nem tartozó készülékeknél a Vevõnek kell a terméket a
kijelölt szervízbe beszállítania.
Ha vita merül fel a hiba jellegével kapcsolatban (pl. javítható, vagy nem, értékcsökkenés mértéke), a garanciára kötelezettnek a jogszabályban erre felhatalmazást kapott
független minõségvizsgálati szerv szakvéleményét kell beszereznie. Ha a garanciára
kötelezett e szakvéleményt nem szerzi be, a Vevõ maga is jogosult e szervet megkeresni.
Aszakvélemény kiadása ingyenes. Aszakvélemény beszerzésekor a Vevõ és a szervíz
véleményét egyaránt meg kell adni, a hiba jellegére és okára vonatkozóan , valamint
a Vevõ és a szervíz részérõl e véleményt alá kell írni. Aterméket a minõségellenõrzõ
intézet számára az említett nyilatkozattételt követõen három (3) napon belül el kell
juttatni. AVevõ a garanciára alapozott jogainak érvényesítésére vonatkozó nyilatkozatát a kereskedõhöz, vagy a szervízhez intézheti. ATHOMSON multimédia
Hungary Kft. a 74/1987. (XII.10.) MT. számú rendelettel módosított 35/1978. (VII.6.)
MT. számú rendelet értelmében az általa kibocsájtott termékekhez biztosítja az alkatrészeket, illetve gondoskodik a termékek javításáról. Atermék kereskedelmi értékesítését megelõzõ minõségvizsgálat e garanciális feltételekre is kiterjedt.
...........................................................................................................................
* A117/1991 (XI.10.) sz. Korm. rendelet szerint fõdarabnak minõsül a képcsõ és a
szerelt alaplap.
THOMSON Multimédia Hungary Kft
1137 Budapest, Radnóti Miklós u. 2.
http://www.thomson-europe.co
Slovak (SK)
1. Firma THOMSON multimedia Czech s.r.o. poskytuje v sœlade s
ustanoveniami ¤ 619 a nasl. Ob‹ianskeho z‡konn’ka kupujœcemu,
uvedenŽmu v tomto Z‡ru‹nom liste, dodato‹nœ z‡ruku pod¾a a za
podmienok uvedenùch v “aläom.
2. T‡to z‡ruka sa vzéahuje na vùrobky spotrebnej elektroniky so zna‹kou
Thomson multimedia, vyrobenŽ v tov‡rËach, ktorŽ patria k Thomson
multimedia Group, a zakœpenŽ v obchodnej sieti na œzem’ Slovenskej
republiky. Firma Thomson multimedia Czech s.r.o. ru‹’ za œ‹innœ
prev‡dzku tùchto vùrobkov v sœlade s technickùmi a prev‡dzkovùmi
podmienkami, pop’sanùmi v n‡vodoch na obsluhu tùchto vùrobkov.
3. Z‡ru‹n‡ doba pokrùva obdobie 24 /dvadsaéätyri/ mesiacov prefarebnŽ
telev’zne prij’ma‹e a 12 /dvan‡sé/ mesiacov pre ostatnŽ vùrobky
spotrebnej elektroniky so zna‹kou Thomson multimedia. Z‡ru‹n‡
doba za‹’na dËom zakœpenia vùrobku z‡kazn’kom. Chyby zistenŽ
po‹as tohoto obdobia budœ bezplatne odstr‡nenŽ v autorizovanùch
servisoch /“alej len AS/ firmy Thomson multimedia.
4. Z‡ru‹n‡ oprava je poskytnut‡ len na z‡klade predloìenia nasledujœcich
dokladov z‡kazn’kom:
- Riadne a ‹itate¾ne vyplnenù Z‡ru‹nù list.
- Platnù predajnù doklad s vyzna‹enùm d‡tumom zakœpenia vùrobku.
- Vadnù vùrobok.
5. AS odmietne poskytnœé servisnŽ sluìby uvedenŽ v z‡ru‹nùch podmienkach
vtedy, ak predloìenù z‡ru‹nù list nesie zjavnŽ znaky prevedenia zmien
œdajov, ak je na vùrobku odliänŽ vùrobnŽ ‹’slo od uvedenŽho v
Z‡ru‹nom liste, a vtedy ak je vùrobok alebo ktor‡ko¾vek jeho ‹asé
opravovan‡, upravovan‡ alebo vymenen‡ inùm subjektom ako AS firmy
Thomson multimedia.
6. Chybnù vùrobok je treba dodaé najbližäiemu AS. Zoznam stred’sk AS
firmy Thomson multimedia je sœ‹aséou pr’sluäenstva vùrobku, alebo je
moìnŽ ho z’skaé v predajni kde bol vùrobok zakœpenù, alebo priamo od
firmy Thomson multimedia Czech s.r.o. Za pr’padnŽ poäkodenie
vùrobku nesie zodpovednosé z‡kazn’k.
7. T‡to z‡ruka sa nevzéahuje na :
- Prepojovacie k‡ble, sieéovŽ nap‡jacie k‡ble, sluch‡tka, antŽnne z‡suvky, batŽrie, ìiarovky, balenie a “aläie pr’sluäenstvo opotrebovanŽ
beìnùm pouì’van’m.
- MechanickŽ, tepelnŽ, chemickŽ poäkodenie a väetky “aläie sp›sobenŽ
‹innoséou uì’vate¾a.
- Chyby sp›sobenŽ ìivelnou udaloséou /napr.poìiar, povodeË a pod./.
- Chyby sp›sobenŽ opravou, alebo zmenami prevedenùmi zo strany
uì’vate¾a, alebo inou nepovolanou osobou.
- ñmyselnŽ poäkodenie pr’stroja a nespr‡vnu œdrìbu.
- NadmernŽ preéaìovanie pr’stroja /napr. nasadenie pr’stroja do profesion‡lnej prev‡dzky/.
Z‡ruka sa nevzéahuje na nespr‡vnu ‹innosé pr’stroja, sp›sobenœ ‹innoséou inou ako predp’sanou n‡vodom na obsluhu /napr. inätal‡cia a
pod./.
Z‡ruka sa nevzéahuje na poìiadavky na technickŽ parametre vùrobku za
predpokladu, ìe sœ v sœlade s œdajmi danùmi odpovedajœcim vùrobkom.
Z‡ruka sa nevzéahuje na poäkodenia sp›sobenŽ po‹as dopravy vùrobku
od a ku kupujœcemu.
8. V pr’pade, ìe nebude ktor‡ko¾vek z podmienok tu uvedenùch zo strany
kupujœceho riadne splnen‡, bude t‡to z‡ruka zruäen‡.
9. Podmienky z‡ruky sa vzéahujœ aj na ostatnŽ zna‹ky koncernu THOMSON
- Telefunken, Saba, Nordmende.
Pozn‡mka: Bez zjavnùch d›vodov, ktorŽ sœ v sœlade so z‡rukou, nem‡
uì’vate¾ pr‡vo vùrobok vr‡tié.
THOMSON multimedia Czech s.r.o.
ul. Doprav‡kó 3
184 00 Praha 8
http://www.thomson-europe.com
Garanciális feltételek Podmienky záruky

Danmark (DK)
Kære kunde!
Tak fordi De valgte dette THOMSON multimedia produkt. Produktet
opfylder gældende sikkkerhedskrav og har gennemgået udførlige test i
løbet af fremstillingsperioden.
Såfremt der alligevel viser sig fabrikationsfejl eller materialefejl ved produktet,
bedes De henvende Dem i den butik, hvor De har købt apparatet.
Medbring garantibevis med modelbetegnelse og serienummer samt original
fakturaen eller bonen, hvor købsdatoen er angivet.
Såfremt der forekommer rettelser i fakturaen, bonen eller på garantibeviset,
eller disse er uklare eller ulæselige, kan garantien afvises. Garantivilkår og
garantiens varighed gælder ifølge overenstemmelse med garantireglerne i
det land produktet er købt eller ifølge overenskomst med Deres forhandler, såfremt en sådan er indgået.
Norway (N)
Kære kunde!
Takk for at du valgte å kjøpe dette THOMSON multimedia produktet.
Produktet oppfyller alle sikkerhetskrav og har gjennomgått inngående
tester under produksjonen. Om det på tross av dette skulle vise seg at
produktet har noen feil som følge av fabrikasjon eller materielle feil, ber
vi deg kontakte den butikken du har kjøpt produktet i.
Ta med dette garantiseddel, modellbetegnelse og serienummer sammen
med originalfaktura eller kassekvittering der innkjøpsdato fremgår.
Hvis faktura, kassekvittering eller garantibeviset på noen måte er forandret eller gjort uleselig etter innkjøpet kan garanti nektes. Garantivilkår
og garantitid for ditt produkt gjelder lovstiftede garantiregler i det land
der innkjøpet er gjort, etter en overenskomst med din handler.
Sverige (S)
Bäste kund!
Tack för att du har köpt denna THOMSON multimedia-produkt.
Produkten uppfyller tillämpliga säkerhetskrav och har genomgått ingående
tester under tillverkningen. Om det trots detta skulle uppträda fel på produkten orsakade av fabrikations- eller materialfel ber vi dig kontakta den
butik där du har köpt produkten. Ta med denna garantisedel med modellbeteckning och serienummer tillsammans med originalfaktura eller kassakvitto där inköpsdatum framgår. Om fakturan, kassakvittot eller garantisedeln har ändrats på något sätt eller har gjorts oläslig efter inköpet kan
garanti nekas. Garantivillkor och garantitid för din produkt gäller enligt
lagstadgade garantiregler i det land där inköpet har gjorts och, om så
skett, enligt överenskommelse med din handlare.
Ελληνικά (GR)
Αγαπητέ αγοραστή,
Ευχαριστούµε για την επιλογή και την εµπιστοσύνη που
δείχνετε στα προϊντα τησ THOMSON multimedia.
Τα προϊντα τησ εταιρείασ µασ πληρούν λεσ τισ απαιτήσεισ
ασφαλείασ και περνούν απ αυστηρούσ ποιοτικούσ ελέγχουσ
κατά την διάρκεια τησ κατασκευήσ τουσ στα εργοστάσια τησ
THOMSON multimedia. Ακµη µωσ και στην περίπτωση
εµφάνισησ βλάβησ που έχει προκληθεί απ εργοστασιακ
σφάλµα ή ελαττωµατικά υλικά παρακαλούµε να επικοινωνήσετε
µε το κατάσφει τον τύπο τησ συσκευήσ και να προσκοµίσετε
αυτή τη κάρτα που αναγράφει τον τύπο τησ συσκευήσ τον
σειριακ αριθµ κατασκευήσ τησ συσκευήσ,καθώσ επίσησ και
την απδειξη αγοράσ.Η εγγύηση µπορεί να µην ισχύσει αν η
απδειξη (τιµολγιο) ή η κάρτα τησ εγγύησησ έχουν
τροποποιηθεί ή αλλοιωθεί.Οι ροι και η περίοδοσ ισχύοσ τησ
εγγύησησ τησ συσκευήσ σασ διέπονται απ τισ ανάλογεσ
νοµοθετικέσ διατάξεισ που αφορούν εγγυήσεισ συσκευών,στην
χώρα που έγινε η αγορά και απ την συµφωνία που έγινε πριν
απ την αγορά µε το κατάστηµα (εισαγωγέα).
Others countries
Dear Customer,
Thank you for purchasing this THOMSON multimedia product and for
your confidence in our company.
This product meets the applicable safety requirements and has undergone
stringent testing during manufacture. However, in the event of defects
occurring as a result of faulty workmanship or materials, please approach
the dealer who sold you the product concerned and present this guarantee card, with the product type and serial number, as well as the original invoice or cash receipt indicating the date of purchase. The benefits of
this guarantee may be refused if the invoice, cash receipt or guarantee
card has been altered in any way, deleted or made illegible after the
original purchase. The guarantee terms and period for your product are
governed by the statutory guarantee regulations as effective in the country where the purchase took place, and, as the case may be, by the agreement reached with your dealer.
Your guarantee

Data zg¸oszenia usterki \
Ajavit‡si igŽny
bejelentŽsŽnek d‡tuma \
Datum pÞevzet’ do opravy \
Дата поступления в ремонт
Data wydania sprz«tu \
Amegjav’tott termŽk elkŽszŸl-
tŽnek Žs / vagy visszaad‡s‡nak
d‡tuma \ Datum opravy \
Дата окончания ремонта
Abejelentett hiba oka \
Bид неисправности и
замена запасных частей
Ajavit‡s m—dja,
KicserŽlt fÎdarabok
megnevezŽse,
Uj garanci‡lis hat‡ridÎ
Numer KIG \
Javit‡si munkalap
sz‡ma
Piecz«• serwisu \
Szerviz bŽlyegzÎje \
Raz’tko servisn’ho
stÞediska \
Фамилия мастера и штамп
сервисного центра
Your guarantee
1
Important
GB
GB
ON THIS USER MANUAL: This user manual being common to several VCR models, some
functions or settings may not be available on the model you have bought.
J
Before you start . . . . . . . . . . . . . . . . . .2
Making the connections . . . . . . . . . . . .3
Initial Set-up . . . . . . . . . . . . . . . . . . . . .4
Automatic channel search
Sorting the channels - Clock setting
New or encoded channels
Modulator . . . . . . . . . . . . . . . . . . . . . . .6
Settings to be made on the video recorder
Settings to be made on the television
Satellite/cable receiver . . . . . . . . . . . . .7
Recommended connection scheme
Video recorder settings
Othersets . . . . . . . . . . . . . . . . . . . . . . .9
Sockets
AV1 / AV 2 / AV3 / AV4
Using the remote control . . . . . . . . . .10
Controlling the video recorder - Controlling the
television set - Programming the remote control
with the TVcode
Controlling the operation . . . . . . . . . .11
On the display - On the screen
Viewing a tape
. . . . . . . . . . . . . . . . . . . . . .12
Playing a tape - Accelerated play
Still image - Pause - Variable slow motion - Stop
Rewind or Fast forward - Ejection of the tape
Jog shuttle - Index search
Recording
. . . . . . . . . . . . . . . . . . . . . . . . . .13
Recording - Recording with a NexTView Link
television set - S.O.S. record - Mark a scene with
an index
Programming a recording . . . . . . . . .14
With the ShowView codes - Without the
ShowView codes - When the video recorder is
programmed - Deleting a programmed recording
Recording programmed by an external unit
connected - Error messages likely to occur when
programming - Storage of the programme
numbers with the ShowView feature
Tape control . . . . . . . . . . . . . . . . . . . .16
Clear index - Go to a particular position - Return
to a particular position - Non-standard tape
Adjusting the picture . . . . . . . . . . . . .17
Tracking and stability in the play mode
Format - Colour systems supported
Adjusting the sound . . . . . . . . . . . . . .18
Adjusting the sound in the play mode
Setting the type of sound to be recorded
Preferences . . . . . . . . . . . . . . . . . . . . .19
Eco mode- Auto LP- Auto clock - ShowView
+10 mn - VPS/PDC - External timer - Beep
sound - Language
Otherfunctions . . . . . . . . . . . . . . . . . .20
Electronic key - Continuous play / recording
Resetting the counter - Playing NTSC tapes
More information . . . . . . . . . . . . . . . .21
TVcode list - Concerning video tapes
Technical features . . . . . . . . . . . . . . . .22
The type and production number of your appliance are printed on the
guarantee certificate delivered with your video recorder. Keep this
certificate as well as the invoice. These documents are indispensable for
claiming your guarantee rights. All repairs during the guarantee period
must be carried out by an authorised technician representing our brand. If
this condition is not met, your rights will no longer be valid. Never open
the appliance yourself, since this may be dangerous for you or damage the
equipment. Thomson Multimedia is not liable if the television is used
other than in accordance with this manual.
Guarantee
SETTINGUP - Ensure that the mains supply in your house complies with
that indicated on the identification sticker located on the back of your
appliance. Install the video recorder horizontally, away from any source of
heat (fireplace) or appliances creating strong magnetic or electric fields.
The components of this video recorder are sensitive to heat. The
maximum ambient temperature should not exceed 40°Celsius. Leave
sufficient space around the video recorder to allow adequate ventilation:
10 cm on either side and at the rear, as well as 7 cm above the top are
minimum requirements. The humidity of the room should not exceed
80%. If you have to use the video recorder outdoors, do not expose it to
waterfrom rain or splashing. Moving it from a cold atmosphere into a
warm one is likely to cause condensation on some components inside the
video recorder. Let the condensation disappear by itself before turning the
video recorder on again.
USE - If your appliance, or a cassette, has been stored in a very cold
atmosphere for a certain amount of time (transported during winter for
example), wait approximately 2 hours before using your video recorder.
The openings located on the top and the bottom are for ventilation
purposes. They should not be obstructed. During thunder storms, we
recommend that you disconnect the video recorder from the mains and
aerial so that it is not affected by electrical or electromagnetic surges that
could damage it. For this reason, keep the mains socket and aerial socket
accessible so they can be disconnected. When the unit is on standby,
some components remain connected to the mains. To fully disconnect
your set, you have to unplug the mains connector from the mains socket.
Immediately disconnect the video recorder if you notice it giving off a
smell of burning or smoke. Under no circumstances whatsoever must
you open the video recorder yourself. You risk electrocution if you do so.
CLEANING– Use a soft, dry and clean cloth. Regularly dust the vents at the
back or sides. Using solvents, abrasive or alcohol based products risks
damaging the set. If an object or liquid enters inside the appliance, unplug
it immediately and have it checked by an authorised technician. To avoid
deterioration of your video recorder’s heads, never use a cleaning tape.
Precautions Contents
Set-up
Use
Priorto using your video recorder, you'll have to follow the set-up
procedure and make the settings described on pages 2 to 9.
10 cm
7 cm
10 cm
10 cm
7 cm

2
Set-up
Before you start
JJ
Thank you for purchasing one or our videos. Unpack
the set completely and tear off the protection films.
To respect the environment, we have printed
this document on unbleached recycling paper.
-
+
SIZE AA 1,5 V 0%MERCURY
G
R
E
E
N
E
L
L
E
X
T
R
A
H
E
A
V
Y
D
U
T
Y
-
+
S
I
Z
E
A
A
1
,
5
V
0
%
M
E
R
C
U
R
Y
G
R
E
E
N
E
L
L
E
X
T
R
A
H
E
A
V
Y
D
U
T
Y
VCR
Coaxial cable (75 Ω)
Powercord
2 non-rechargeable batteries, type AA
Video recorder
Remote control of the video recorder
orof the television set, depending on
the selection oreither VCR orTV.
Scart cable (12 pins connected) depending
on the video recordermodel
Please respect the environment and prevailing regulations. Before you dispose of batteries
or accumulators, ask your dealer whether they are subject to special recycling and it they
will accept them for disposal.
Set-up and usermanual

GB
GB
3
Set-up
Making the connections
Other possible connection schemes are shown on page 7 and 9
JJ
1 Disconnect the aerial cable from your TV set and reconnect it to the IN socket of your
video recorder.
2 By means of the coaxial cable supplied, connect the video recorder's OUT socket to the
television's aerial socket
gg
.
3 With the SCART cable supplied, connect the video recorder's AV1 socket
(audio/video 1) to the television's SCARTsocket (AV 1, EXT 1,AUX 1
depending on the make).
4 Connect the video recorder to the mains with the power cord supplied by first plugging
in the connector at the video recorder rear.
AV1
EXT1
AUX1
AV1
IN
OUT
220V/240V - 50Hz
1
2
3
4
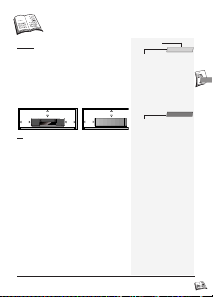
JJ
Connecting the video recorder and television set with this
cable simplifies set-up and subsequent use, and considerably
improves the picture and sound reproduction quality. If your
television set has no SCART socket, you'll have to adjust the
modulator of the video recorder and assign a channel
number to the video recorder on the television set (refer to
page 6).

4
Set-up
1 Switch on the television.
2 Press key VCR (1) on your remote control.
3 Switch on your video recorder, making use either of the remote control key
B (3) or of
the appropriate key (ON) on the video recorder front side.
ðWhen switching on the video recorder for the first time, a language selection menu
comes up. Should it not appear, press key MENU (15).
4 With key CC(13) or BB(11) select the language you prefer to display the menus in on
the screen.
5 Validate your choice with the OK (10) key.
ðThe
COUNTRYmenu comes up.
6 Press key CC(13) or BB(11) to select the country where you usually live.
7 Validate with the OK (10) key.
JJ
Your video recorder comes with the NexTView Link feature. This function simplifies the channel
set-up procedure, as the channels already set up on a TVset fitted with the NexTView Link or
similar feature (Easy Link, Smart Link, Megalogic, etc.) can be downloaded to the video
recorder. The channels downloaded this way to the video recorder preserve the same properties
as on your TVset (same number, same name, etc.).
ðIf your TV set is fitted with the NextView Link function or similar, the video
recorder automatically initiates channel download once you have selected the
country. You can view channel download on the video recorder display (Pr1, Pr2,
Pr3…). On completion of download, the video recorder switches over to standby.
Channel set-up is achieved.
ðWhen your television set is not fitted with the NextView Link or any similar feature,
a message tells you that your video recorder is searching and storing the channels
you can receive in your region. Keep patient until a message informs you that your
channels are stored.
8 Press key
BB
(11) to sort your channels.
ðThe
ORGANISERmenu comes up.
Automatic channel search
JJ
The automatic channel set-up assigns the numbers to the channels in a predefined order. These
numbers may therefore not match the actual channel numbers. Should this be the case, change
these numbers by carrying out the instructions below. For easy channel identification, we suggest
that you have a TVmagazine at hand.
9a If the proposed channel number matches the displayed picture, press
BB
(11) to pass on
to the next channel.
9b If the proposed channel number does not correspond to the picture that you see, select
the Swap with Pr.line with key
WW
(12).
Sorting the channels
When the picture of a channel is of poor quality or encoded, try out the fine tuning feature.
Refer to page 5 (section New or encoded channel, step 9).
LL
Initial Set-up
JJ
If you have not connected the television set to the video recorder with the SCART cable, you must
first make the modulator and then the television settings (refer to page 6) before you start the
automatic channel set-up. The video recorder was not pre-set to receive the channels of your
region. Thus, you'll have to set them up yourself, by carrying out the automatic channel set-up
procedure described below. Your video recorder will automatically perform channel search and
store each of the channels found with its own channel number.

GB
GB
5
Set-up
10 With the number keys, enter the correct channel number or select it with keys CC(13) or
BB
(11).
11 Validate your choice with key OK (10).
12 If the channel name is incomplete or does not correspond to the channel’s actual name,
select the Name line, and choose an available name with keys CC/ BB(13) / (11) or use
keys 1 and 2 and then CC/ BB(13) / (11) to store a new one.
13 To delete a channel, select the Delete program. line and press OK(10) twice.
14 When all channels are organised, press EXIT (14) to leave the menus.
JJ
Did you insert the batteries in the remote control? For detailed instructions,
see inside the cover
-
+
S
I
Z
E
A
A
A
1
,
5
V
0
%
M
E
R
C
U
R
Y
GREENELL
E
X
T
R
A
H
E
A
V
Y
D
U
T
Y
-
+
S
I
Z
E
A
A
A
1
,
5
V
0
%
M
E
R
C
U
R
Y
G
R
E
E
N
E
L
L
E
X
T
R
A
H
E
A
V
Y
D
U
T
Y
JJ
Your video recorder is fitted with an automatic clock setting feature that detects the clock setting
signals sent by some channels. If your video recorder clock is not right, you can set it right by
carrying out the steps below.
1 Press key VCR (1) on your remote control.
2 With key MENU (15) call up the
SUMMARYmenu.
3 With key
WW
(12), select the Installation line and confirm with OK (10).
ðThe
INSTALLATIONmenu comes up.
4 With key
WW
(12), select the Clock set line and confirm with OK (10).
ðThe
CLOCKSET menu comes up.
5 If the displayed time is incorrect or was not transmitted, set the clock with the number
keys 0 to 9 (19). Press key
BB
(11), then enter time and date in the following order:
hour, minute, day, month, year.
6 Store with OK (10).
7 Quit with EXIT (14).
Clock setting
JJ
To complete the set-up of your video recorder when the automatic channel set-up has not stored all
of the channels or when you wish to store a new channel.
1 Press key VCR (1) on your remote control.
2 With key MENU (15) call up the
SUMMARYmenu.
3 With key
WW
(12), select the Installation line and confirm with OK (10).
ðThe
INSTALLATIONmenu comes up.
4 The Manual installation line is already selected. Press OK (10).
ðThe M
ANUALINSTALLATION menu comes up.
5 The Standard line is already selected. Press
C(13) or B (11) to select the reception
standard (L: France, BG: Western Europe, DK: Eastern Europe).
6 Select the Reception line with
W (12) and choose Aerial (for the channels received via
your roof aerial) or cable (for the cable network channels) with C(13) or B (11).
7 Press W (12) to select the Autosearch line.
8 Press C (13) or B (11) several times to search for the channel of a programme (you
may also directly enter a number with keys 0 to 9 (19).
ðWhen a channel is found, the pictures come up on the screen.
9 When the picture is poor, try the Fine tuning (</>) with W (12), then C (13) or B (11).
10 If the channel is encoded (and you have a decoder connected to socket AV2), set the
cursor on
DECODERwith W (12), and check the box with key OK (10).
11 Position the cursor on Store on Pr and assign a channel number by means of the
number keys 0 to 9 (19)(example: 0, 1 for Pr1).
12 Press OK (10) to store this number.
13 If you wish to continue with TV channel set-up, repeat the steps 3 to 9.
Otherwise press EXIT(14).
New or encoded channel

6
Set-up
IN
OUT
Modulator
JJ
If your television set is not fitted with a SCART socket
(i.e. the television is connected to the video recorder via
the aerial sockets IN/OUT or gg), you will have to
make the settings of the video recorder modulator and
then, on the television, assign a channel number to the
video recorder.
1 Switch the video recorder on by pressing key
BB
(ON) on its front side.
2 Press key VCR (1) on the remote control.
3 Hold down key MENU (15) on the remote control until SY 1, 2 or 3 comes up on the
video recorder display.
4 Press key
BB
(11) to select the TVstandard of your country.
SY1: Standard L (France
SY2: Standard BG (Western Europe)
SY3: Standard DK (Eastern Europe)
5 Validate your choice with the OK (10) key.
ðPlease wait: the video recorder is searching for a channel, within the range 21 to 69,
available for transmitting its pictures to the television via the coaxial cable. After a
while, the video recorder display indicates the channel that will be used for this
purpose. Note down the number here .
6 Continue with the steps below.
Settings to be made on the video recorder (modulator)
JJ
Take the user manual of your television and carry out the steps below.
7 Switch on your television set.
8 Select an available channel number (a channel which has no picture).
9 Follow the instructions of your television user manual to find the video channel of the
video recorder (the one you noted down above).
ðOnce the television has found the video channel of the video recorder, the following
message will be displayed on the screen (VCR,
CC
CH 60
BB
).
JJ
If the picture is poor (snowy, torn), change the communication channel of the video
recorder with keys
CC /BB
(11/13).
10 Store channel and its number on the television set.
JJ
From now on, to watch the video recorder pictures or menus, you'll have to switch on the
television on the channel assigned to the video recorder, i.e. the channel number chosen in
step 8.
11 Press the OK (10) key.
12 Go back to page 4 and resume automatic channel set-up starting with step 4.
Settings to be made on the television (video channel number)
The sound from a TVchannel or a cassette transmitted via the coaxial cable is monophonic. To
make the television reproduce stereo sound, you must use a SCART cable.
JJ

GB
GB
7
Set-up
Satellite/cable receiver
JJ
The connection schemes you may adopt for your
satellite receiver depend on the available sockets and
cables in your possession. Prior to connecting your
satellite receiver to the video recorder, make sure that
the former is capable of properly receiving the cable
programmes.
Recommended connection scheme
To give the video recorder priority over the satellite receiver, connect your satellite receiver
to the AV2 of the video recorder by means of a SCARTcable.
JJ
Position the satellite receiver on top of the video recorder
and see that you leave the infrared windows uncovered.
AV2
TV
JJ
For the other possible connection schemes, refer to the set-up manual of your satellite receiver.

8
Set-up
1 Switch on your satellite / cable receiver and select channel 1.
2 Press key VCR (1) on your remote control.
3 With key MENU (15) call up the
SUMMARYmenu.
4 With key
WW
(12), select the Installation line and confirm with OK (10).
ðThe
INSTALLATIONmenu comes up.
5 With key
WW
(12), select the Satellite and cable box line and confirm with OK (10).
ðThe S
ATELLITEAND CABLEBOX menu comes up. Depending on the connection
scheme chosen, you must tell the video recorder to which socket your satellite
receiver is connected.
6 Scroll through the different options with C (13) or B (11) and validate with OK (10).
- either RFor Coax (mono sound); in this case, you must start the search for the
communication channel of your satellite receiver. Press C(13) or B (11), confirm with
OK (10)on completion of the search,
- either AV1 or AV2; validate with OK (10) then select No decoder when prompted by
the video recorder (the other options available are rarely used in Europe).
7 Now you must enter your satellite code (see the code table at the end of this user
manual).
JJ
If the make or model of your satellite / cable receiver is not on the list, try out other model
numbers.
8 Validate your choice with OK (10).
ð Via the infrared window, the video recorder transmits a signal to your satellite
receiver. Aconfirmation menu comes up while the satellite receiver positions itself on
channel 12 (check whether channel 12 is indicated by the display of the satellite
receiver, even if there is no image to be seen on the television screen).
JJ
The display of channel 12 by the decoder is not always effective. During the test (example:
TPS), you'll have to watch your decoder's display until it briefly indicates the number 12.
9a Should the satellite receiver not use channel 12, select No with key EXIT(14). Your
video recorder then starts a new search (depending on the make of your satellite
receiver, several attempts are possible).
JJ
If no code works, repeat the procedure described on this page by entering the 00 into the
first screen. The video recorder then tries out all the codes stored in its memory (about
150). This procedure may require a fairly long time.
9b If the satellite receiver uses the channel 12, select Yes with the OK (10) key.
10 Press key OK (10) again.
ðWait for quite a long time (up to 15 minutes), until a message tells you that storage
of your satellite channels is completed.
11 Press EXIT (14) to leave.
ðYour video recorder now controls your satellite receiver.
12 Refer to page 5 to sort your satellite channels and check their names.
JJ
Some satellite receiver models cannot be controlled by your video recorder. In that case, you'll
have to programme both sets separately for timer-controlled recording.
Video recorder settings
JJ
When connecting the video recorder to a television set with integrated satellite receiver, you
must select the socket AV1 during set-up.

GB
GB
9
Set-up
Other sets
JJ
Connect your camcorder to the sockets AUDIO L(left), AUDIO R
(right), VIDEO and CAM/PAUSE (if your camcorder is fitted with
such a socket). Select Au 3 on your video recorder.
JJ
With compatible camcorders, the PAUSE socket facilitates copying
by triggering the recording mode of the video recorder as soon as
the camcorder switches over from PAUSE to PLAY. The video
recorder must be switched on Record Pause.
JJ
Press the STATUS key to call up the control screen and
select the socket AV1, AV2, AV3 or AV4 with key AVof
the remote control.
Video disk player
DVD
Camcorder
Camcorder
Satellite receiver
Other video recorder
TVset
The pictures from another set operating in the play mode and
connected to AV2 are conveyed to the socket AV1. When your
television is connected to this socket, you can watch the pictures
from the set connected.
Sockets AV1 / AV2 / AV3 / AV4
“DOLBY”, “Prologic” and the double-D symbol are trademarks of DOLBYLaboratories
Licensing Corporation.
Audio/Video or Dolby Pro
Logic amplifier
The two cinch sockets
AUDIO OUT(red and
white) and the cinch socket
VIDEO OUT(yellow)
enable you to connect your
video recorder to an
Audio/Video amplifier.
Hi-Fi system
The two cinch sockets
AUDIO OUT(red and
white) enable you to
connect your video
recorder to the Hi-Fi
stereophonic system. Thus,
you'll be able to reproduce
all the sound effects of
your tapes (musicals,
films…) on your Hi-Fi
system.
AV2
AV3
(depending on
the model)
AV4AV1 / AV2
Decoder

10
Use
Using the remote control
JJ
Your remote control enables you to operate the video
recorder or television set without leaving your seat. All
you have to do is to press either key VCR for the video
recorder or TVfor the television. For the television set,
you'll have to programme the remote control as
explained below.
Other makes: see page 21
The main functions of your remote control can be found on the VCR frontside.
JJ
to
and
To navigate through the menus
and validate with OK.
Controlling the television set
Press key VCR to control your video
recorder.
To exit a menu at any time.
1
Press key TVto control your television set.
To switch your television on* or off.
To zoom
in / zoom+
To zoom
out / zoom-
The last two functions are
only available on television
sets of our make.
These keys have the same functions as the
corresponding keys of the remote control of
your television set (when the latter is of our
make).
to
To switch over to another channel.
To adjust the sound volume.
Mute.
To switch the television set on*
or to select another channel.
To select a SCARTsocket and watch the
pictures of the set connected to this socket.
*
key(s) for switching the television on and off depending on the model.
2
18
17
19
23
16
3
11
13
4
15
19
23
24
25
26
20
21
22
27
28
29
3
4
5
6
7
14
15
9813
To switch your video recorder on and off.
To select the decoderfunction.
To call up the SHOWVIEWmenu.
To display the information screen.
inactive.
To call up the
SUMMARYmenu.
18
To switch over to another channel.
Rewind.
Play.
Fast forward.
To mark an index.
Counter reset.
To double the recording time with LP.
Stop.
Pause / Still image.
Recording.
To select a channel.
For 2-digit channels, first press 0/--
(0, 1, 2for Pr12).
To select the units connected to the
Audio/Video sockets (AV1, AV2, AV3, AV4)
Controlling the video recorder
Programming the remote control with the TV code
1 Press key TV on the remote control.
2 Hold down key MENU (15) and enter the three-digit code corresponding to the make of
your television set (see the code table below).
3 Release key MENU (15) and try to control the television set.
JJ
The codes depend on the television model. Should a given code not work, try another. When you
replace the batteries of the remote control, you have to programme it again
JJ
Your remote control can be used to control some functions of most television sets. To this end, you
must programme it with one of the codes provided in the table below or on page 21 of this user
manual.
BRANDT . . . . . . . . . . .001-000-010-020
FERGUSON . .001-003-004-000-010-020
NORDMENDE . . . . . . .001-010-020-000
SABA . . . . . . .001-000-005-010-019-020
TELEFUNKEN . . .001-002-000-010-020
THOMSON . . . . . .001-000-002-010-020
Brand of yourTV set Brand code

GB
GB
11
Use
Controlling the operation
With key STATUS (6), you can display the information concerning video
recorder operation (tape type, time remaining before end of tape, type of
sound, image format, tape speed, channel, time, etc.).
Press this key repeatedly to visualise:
ðthe television pictures, the pictures of the video recorder including
display of the operating status, the video recorder pictures, the
television pictures, etc.
On the display
On the screen
0h56m12s
0h56m12s
1h03m
1h03m
E120
E120
ll
ll
SP
SP
12:32
12:32
Pr1 Pictures and sound of a TVchannel.
Au1-2 AV1-AV2 - Pictures and sound of a unit
connected to one of the SCARTsockets
(AUDIO/VIDEO) at the rear of the video
recorder.
Au3 AV3 - Pictures and sound of a unit
connected to the video recorder front
side.
0 23 SA Pictures and sound of a satellite channel.
01H15M35S Tape counter.
09:53 Time.
SP Play/recording at standard speed
(Standard Play).
LP Play/recording at half speed (Long Play).
SLP (Super Long Play).
VIDEO The video recorder transmits the pictures
and the sound to the television set.
VPS The current telecast is in the VPS mode.
PDC The current telecast is in the PDC mode.
HIFI Hi-Fi sound
ii
Stereo
1 Left channel
2 Right channel
LL
Mono track
The sound type available
on the channel or the tape.
Display of clock or time: the time elapsed from the beginning of the tape in play or record mode,
the time remaining (r) before end of tape on STOP.
JJ
- Play.
- Accelerated play
(forward or backward).
- Pause.
- Variable slow motion
(forward or backward).
- Tape stopped.
- Presence of a tape in the
video recorder.
- Stop.
- Fast forward.
- Rewind.
- Record Pause (flashing).
- Recording under way.
- Programmed recording.

12
Use
Viewing a tape
JJ
To view a tape and explore the recordings, to view a
still image and retrieve particular scenes in the
accelerated play mode, to rewind to the beginning or
wind fast forward to the end of a tape.
1 Load a tape.
2 Press key PLAY (25).
JJ
When the picture is poor, adjust the phase (page 17). If the colour is not reproduced
properly, try another standard (PAL, SECAM or MESECAM) selectable in the PICTURE
menu (page 17).
JJ
The inner knurled knob JOG and the outer ring SHUTTLE fitted to the front of some video recorder
models facilitate sequence and image by image retrieval. Use the outer ring for accelerated forward
or backward play and the inner knurled knob to explore a given sequence image by image,
backward or forward.
Playing a tape
Press key REW. (24) or FWD. (26) repeatedly to change the speed and direction of
accelerated play.
Accelerated play
Press key PAUSE (28) repeatedly to wind forward image by image.
Still image - Pause
1 Press key PAUSE (28).
2 Press key REW. (24) or FWD. (26) repeatedly to change the speed and direction of slow
motion.
Variable slow motion
1 Press key STOP (27).
2 Press key REW. (24) or FWD. (26).
1 Switch the video recorder to STOP.
2 Press key STOP/EJECT on the video recorder front.
Rewind or Fast forward
Press key STOP(27).
Stop
Ejection of the tape
Jog Shuttle
JJ
Indices allow you to mark particular tape sections (beginning of films, sequences, etc.) to retrieve
them quickly. At the beginning of every recording, the video recorder automatically marks an index
on the tape. To find the following or previous index:
1 Switch the video recorder to STOP.
2 Press key C (13) or B (11).
ðThe video recorder immediately rewinds up to the searched index and starts to play if
you have ended your entry by pressing PLAY(25).
Index search
The remote control
doesn't work?
Press key VCR.

GB
GB
13
Use
Recording
JJ
You can record the pictures and the sound of the TV
programmes or the pictures and the sound of a unit
connected to one of the available AVsockets.
You can't mark or retrieve any index? Check whether the protection tab of the tape is not
broken. Should this be the case, cover the opening with a piece of thick adhesive tape.
Is recording impossible? Check whether the video recorder is switched to Record Pause
(indicated on its display) or to Play.
LL
JJ
key INDEX MARK (20) of the remote control allows you to mark a scene by setting an invisible
electronic index while recording or playing a tape.
1 Start playing with key PLAY (25) or recording (as above).
2 Press the INDEX MARK (20) key to add an index.
JJ
To erase the indices refer to page 16.
Mark a scene with an index
1 Load a tape and position it to the desired section with keys REW., FWD.,STOP, PLAY
(24, 26, 27, 25).
2 Select the programme to be recorded (Pr or SA) either with key PR+ / PR- (18) or keys
1,2, …9 (19), or else select the AV socket to which the unit is connected with key AV
(23).
JJ
For 2-digit channels, first press 0/-- (19) (0, 1, 2for PR 12).
3 Select standard play (SP) or long play (LP) with key SP/LP (22).
JJ
LPdoubles the length of your tape (240 minutes in SP become 480 minutes, i.e. 8 hours in LP).
4a Simple recording
Press key REC(29).
ðthe video recorder switches on Record Pause.
Press key PLAY(25).
ðthe video recorder starts the recording.
4b Recording with automatic stop
Press key REC(29) twice.
ðthe video recorder starts recording for a 30-minute period.
Press key REC(29) again to increase the recording by another 30-minute period: press
once for 30 minutes, press twice for 60 minutes, and so on.
5 Interrupt recording with key PAUSE (28) ; resume recording with PLAY(25) or end
with STOP(27).
"S.O.S. record (Snap On-Screen)"
JJ
You may record at any time the TVprogramme you are watching, provided that your television set is
fitted with the function NexTView Link (or similar) and that you have a tape loaded in the video
recorder.
1 Press key REC (29).
ðThe video recorder goes on, automatically changes over to the same channel as the
television set and switches to Record Pause.
JJ
To record another programme than the one currently chosen on the television set, change the
programme of the video recorder with its remote control.
2 Trigger the recording with keys PLAY (25) or
REC(29)
as explained in the sections 4a
or 4b above.
Recording with a NexTView Link television set
The remote control
doesn't work?
Press key VCR.

14
Use
Programming a recording
JJ
You can programme a recording with the ShowView
codes indicated in your TV magazine or by means of
timer programming if you don't know these codes. Your
video recorder has 8 programming memories. Thus,
you'll be able to programme 8 recording over a 1-year
period.
ShowView codes
With the ShowView codes
Without the ShowView codes
With a tape loaded, on the display confirms your successful programming.
1
6
.2
5
16.25
F
U
N
N
Y
T
I
M
E
S
FUNNY TIMES
f
ilm
film
D
r
a
m
a
-
c
o
m
e
d
y
5
8
6
2
4
58624
T
U
E
S
D
A
Y
1 Call up the SHOWVIEW menu with key PROG. (5).
2
Enter the code of the programme with the number keys
(19).
3 Confirm with OK (10).
ð The
TIMERmenu comes up.
ð The Stop line is selected.
ð You can complete your programming by selecting the following options: recording
triggered by VPS or PDC signals, daily repeated recording of a television serial, long play.
JJ
When programming for the first time, the cursor positions itself on Prog. number; confirm or enter
the desired programme number. For a channel received via the satellite / cable decoder,
select SA---.
4a Validate your programming by pressing OK (10),
4b or leave the
TIMERmenu with key EXIT (14).
5 Switch the video recorder on standby with key BB(3).
ðThe indication appears on the display of your video recorder to tell you that your
programming was successful.
JJ
If you don't know the ShowView code of the telecast you wish to record, you'll have to use
the
TIMERmenu.
1 Display the SUMMARY menu with key MENU(15).
2
Select Timerwith key
WW
(12).
3 Confirm with OK (10).
ðThe
TIMERmenu comes up.
4 Make use of the number keys (19) to enter the channel number or select the
corresponding AVsocket if you want to record a satellite and / or encoded programme.
5 Type in the following information by selecting the corresponding line with the
key
WW
(12) :
• start time of the programme,
• end time of the programme,
• the date, if the recording is not to take place on the same day.
ðYou can complete your programming by selecting the following options: recording
triggered by VPS or PDC signals, daily repeated recording of a television serial, long play.
6 Switch the video recorder on standby with key BB(3).
ðThe indication appears on the display of your video recorder to tell you that your
programming was successful.
JJ
Agreat number of satellite receivers, among them all digital models, need to be left on to make sure
that they properly perform timer-programmed recordings.
JJ
Load a tape and position it to the desired section with keys REW.,FWD., STOP,PLAY
(24, 26, 27, 25).

GB
GB
15
Use
JJ
NO TIMER AVAILABLE.
You need to free one of the memories in order to programme again.
JJ
When you programme 2 or more recordings with overlapping time periods, the menu Timer review
comes up along with an error message (the programmed recordings are flashing).
Delete the programmed recordings with key 0000(21).
Error messages likely to occur when programming
Storage of the programme numbers with the ShowView feature
JJ
When the video recorder is on standby, waiting for the time at which the recording shall be
triggered, a special indication ( ) is to be seen on its display. Then you can't operate the video
recorder any longer unless you quit this mode by pressing key B(3).
When the video recorder is programmed
1 Display the SUMMARY menu with key MENU(15),
select Timerwith key
WW
(12) and
confirm with OK (10).
2 Select the Timer review line
with key
W (12) and confirm with OK (10).
3 With keys W (12) and V(9) select the programming to be deleted.
Press key 0000(21).
ð The programming is now deleted.
Deleting a programmed recording
JJ
The recording of a programme can be triggered by a satellite receiver or any other unit supporting
this feature and connected to socket AV1 or AV2 by means of a SCARTcable. This connection
scheme prevents you from having to programme both units.
1a Programming by EXTERNAL TIMER:tick off the External timer box in the menu
PREFERENCES(page 19) to trigger the recording via socket AV1.
1b Programming by the menu RECORD TIMER:programme the connected unit and, in the
video recorder
RECORDTIMER menu, only select either socket AV1 or AV2.
2 Switch the video recorder to standby with key B (3).
Recording programmed by a connected external unit
ShowView is a registered trademark of Gemstar Development Corporation.
The ShowView system is manufactured under licence from Gemstar Development Corporation.
JJ
JJ
To spare yourself from having to enter the corresponding programme number in addition to the
ShowView code, the video recorder automatically stores the numbers of the channels you have
chosen to record with the ShowView feature.
This is to say that on your FIRSTselection of a channel (Pr- - or SA- -) to programme a recording
with the ShowView feature, the video recorder will prompt you to confirm or enter the channel
number. When programming your next ShowView recording, the video recorder will automatically
identify the channel concerned.

16
Use
Tape control
JJ
When you want to erase an index.
1 Select the Clear index line
with key
W (12).
2 Search the tape for the index mark to be erased with key C (13) or B (11).
ðThe video recorder then stops before the index mark.
3 Press OK (10) to clear the index.
Clear index
JJ
Thanks to the time counter, you can access a particular position within a sequence.
1 Select the Go to counter line
with key
W (12).
2 Enter the time. Example: type in 0135 with the number keys (19) to view the sequence
located at 1h:35min from the beginning of the tape or the counter reset.
3 Confirm with OK (10).
ðThe video recorder immediately rewinds to the required position (and starts to play at
this point if you have ended your entry by pressing PLAY(25)).
JJ
Thanks to the time counter, you can position the tape by entering the remaining time desired
1 Select the Go to remaining line
with key
W (12).
2 Enter the time. Example: type in 135 with the number keys (19) to position the tape at
1h:35min before the end of tape.
3 Confirm with OK (10).
ðThe video recorder immediately rewinds to the required position. You may then start
the recording of a film that will not be incomplete due to insufficient tape length
remaining.
Go to a particular position
Return to a particular position
JJ
The video recorder detects the type of any standard tape loaded (E60, E120, E180, E240 for 60,
120, 180 and 240 minutes of recording time). For all other tapes (hired films), you must enter the
cassette type. The video recorder will then be able to accurately calculate and display the elapsed
and remaining time of your tape.
1 Select the Cassette type line
with key
W (12).
2 Example: for a E210 tape, type in 210 with the number keys (19).
Non-standard tape
JJ
The tape control functions enable you to erase an index,
or to go or return to a particular tape position. Tape
control also informs you of the overall length of the tape
and remaining time.
It's impossible to use the index marks? Check whether the protection
tab of the tape is not broken. Should this be the case, cover the opening
with a piece of thick adhesive tape.
LL
00
00
H
H
00
00
M
M
01
01
S
S
--
--
H
H
--
--
M
M
E
E
---
---
COUNTER
COUNTER
REMAIN
REMAIN..
TTAPE CONTR
APE CONTR
OLS
OLS
Clear inde
Clear indexx C
I
B
Go to counter
Go to counter
--H--M
--H--M
Go to r
Go to r
emaining
emaining
--H--M
--H--M
Cassette type
Cassette type
E---
E---
OK :
OK :
Confirm
Confirm
1 Load a tape.
2 Display the
SUMMARYmenu with key MENU (15), then
select Tape controls
with key WW(12).
3 Confirm with OK (10).
ðThe
TAPECONTROLS menu comes up.
VHS
The remote control
doesn't work?
Press key VCR.
A

GB
GB
17
Use
Adjusting the picture
JJ
The menu PICTURE allows you to adapt, adjust or
parameterise the video recorder for a better picture, the
proper format, a particular colour system detection or
recording
JJ
The pictures of some tapes (hired or other) may flicker, show interference lines on the bottom of the
screen or be altered by other undesirable effects. The tracking and stability adjustment provided in
the PICTUREmenu will enable you to get rid of or at least to reduce these faults.
1 Load a tape.
2 Either start playing with key PLAY (25) or switch into slow motion with PAUSE(28)
and F.FWD. (26) or else, press PAUSE(28).
ðIn the play
or slow motionmode TRACKING comes up.
3a Adjust with key
C
(13) or B(11).
4a Restore the standard setting with key 0000 (21) or select Autowith
C
(13)
or
B
(11).
ðWhile in pause
mode, STABILITYreplaces TRACKING.
3b Adjust with key
C
(13) or B(11).
4b Restore the standard setting with key 0000 (21).
JJ
In the other modes, TRACKING or STABILITYare not displayed.
Tracking and stability in the play mode
Format
1 Select the Colour system line
with key
W (12).
2 Select the desired option with key
C
(13) or B(11).
JJ
Your video recorder comes with an automatic colour standard detection system (PAL/ SECAM - PAL
/MESECAM) that works in both play and record mode.
• When playing a tape causes problems (scrambled pictures or black and white), you'll have to force
the play mode by selecting one of the available options (PAL, SECAM, MESECAM).
• If you wish to record a tape in a particular colour standard, choose one of the options displayed
(PAL, SECAM, MESECAM).
Example: If you want to exchange tapes with people living in the Middle East, you must record and
play in MESECAM.
Colour systems supported
PICTURE
PICTURE
TTracking
racking
I
B
FForma
ormatt
4/3
4/3
Colour system
Colour systemPP
AL/ME
AL/ME
OK :
OK :
Confirm
Confirm
1 Select the Format line
with key
W (12).
2 Select the desired option with key
C
(13) or B(11).
JJ
Auto: for automatic recognition of the 16:9 recording format
16:9: to record or play in 16:9 (D2 MAC, Visiopass, PAL+ decoder, digital television, DVBS) from
the AV2 or AV1 socket (the video recorder display must not indicate Video).
4:3: to record or view in another picture format.
1 Display the SUMMARY menu with key MENU(15), then
select Picture
with key WW(12).
2 Confirm with OK (10).
ð The
PICTUREmenu comes up.
The remote control
doesn't work?
Press key VCR.

18
Use
Adjusting the sound
JJ
Your video recorder receives and records the digital
NICAM sound broadcast by some channels in Europe.
This sound remains compatible with the analogue
stereo sound system broadcast in the other European
countries.
JJ
The broadcast sound types are different from channel to channel. The current sound type is indicated
by the display. It can be: mono (L), stereo (i), bilingual (12).
Your video recorder uses 3 tracks to record the sound:
- two Hi-Fi tracks for stereo or bilingual sound (track 1 and 2),
- one normal track for mono sound or track 1 for a bilingual telecast.
Depending on the actual sound type of the TVchannel (stereo, NICAM or mono), the video recorder
will distribute the sound on these different tracks.
1 Load a tape and press REC (29).
2 Display the
SUMMARYmenu with key MENU (15), then
select HiFi controls
with key WW(12).
3 Confirm with OK (10).
ðThe
HIFICONTROLS menu comes up.
4 With key WW(12), select the sound modeline, then chose either Stereo or Mono or else,
Sound 1 or Sound 2.
5 Set the cursor on Level line, then adjust with key C (13) or B(11).
JJ
To obtain optimum sound quality, set the level so that the number of red bars lit remains as small
as possible when the sound reaches the highest intensity.
1 Load a tape and press PLAY (25).
2 Display the
SUMMARYmenu with key MENU (15), then
select HiFi controls
with key WW(12).
3 Confirm with OK (10).
ðThe
HIFICONTROLS menu comes up.
4 With key
C
(13) or B(11) select the sound track(s):
- STEREO: stereo sound of the Hi-Fi tracks,
- MONO: mono sound of the linear track,
- TRACK 1: sound of the left track,
- TRACK 2: sound of the right track,
- MIX: sound of the mixed Hi-Fi and mono tracks.
ðIf the tape was recorded in Dolby Surround or Dolby Pro Logic Surround, connection
of a special audio/video amplifier will allow you to reproduce these sound effects.
JJ
When viewing a HI-FI STEREO tape, you may select the sound tracks with key AV(23).
Adjusting the sound in play mode
Setting the type of sound to be recorded
HIFI CONTR
HIFI CONTR
OLS
OLS
L
L
IIIIIIIIIIIIIIIIIIII
IIIIIIIIIIIIIIIIIIII
IIIIIIIIIIIIIII
IIIIIIIIIIIIIII
R
R
IIIIIIIIIIIIIIIIIIII
IIIIIIIIIIIIIIIIIIII
IIIIIIIIII
IIIIIIIIII
LeLevvel
el
CB
IIIIIIII
IIIIIIII
IIIIIIIIIIIIIII
IIIIIIIIIIIIIII
Sound mode
Sound mode
Ster
Stereoeo
CB Adjust
The remote control
doesn't work?
Press key VCR.

GB
GB
19
Use
Preferences
JJ
With the functions provided in the menu
PREFERENCES, you may customise your control of
the video recorder, automate some functions, complete
your programming or modify settings.
JJ
Your video recorder can save energy thanks to its ECO feature, that decreases power consumption
(down to approx. 3 W) when switched on standby, by only leaving a red indicator on (on some
models only). With this mode activated, time is no longer displayed.
Eco mode
JJ
Your video recorder comes with the Auto LongPlay feature: if you have programmed a recording the
length of which exceeds the recording time remaining on the tape, the video recorder automatically
switches over into long play mode (LP).
Auto LP
JJ
When the automatic daily clock setting feature does not match the time of your region or if it does
not work properly, deactivate this function and set your video recorder clock manually.
Auto clock
JJ
Select this option to add 10 minutes to the end time of your Showview recordings. Thus you will
avoid defective recordings due to programme time shifting or programmes exceeding the scheduled
time (within the 10-minute limit).
ShowView + 10
JJ
Select VPS / PDC to start recording at the exact beginning of the programme, provided that the
channel broadcasts VPS or PDC signals (this information is available on the video recorder control
screen). Some channels telecast their programmes with VPS (Video Programme System) or PDC
(Programme Delivery Control) signals. These signals allow accurate triggering and stop of a
recording, whatever the delay of the programmes. Your video recorder detects these signals.
VPS / PDC
1 Display the SUMMARY menu with key MENU(15), then
select
Preferences
with key
WW
(12). Confirm with OK(10).
2 Select a line with W (12).
3 With keys C (13) and B(11) tick off a box or remove the tick to activate or deactivate a
function (þ) or to choose an option.
PREFERENCES
Eco mode CIB
þ
Auto LP
þ
Auto clock
þ
ShowView +10
o
VPS/PDC
o
External timer
o
Beep sound
þ
Language English
External timer
JJ
To change the language of the OSD menus (French, English, German, Italian... depending on the
model).
JJ
With this function activated, you may obtain a beep sound any time you press a key (of the remote
control or video recorder).
Language
Beep sound
JJ
Recording of a programme can be triggered by a satellite receiver (or another programmed unit).
Activate this function so that you only have to programme the unit connected to the socket AV1 of
the video recorder.

20
Use
JJ
When playing a tape, the counter indicates the time elapsed in hours, minutes and seconds in the
menu STATUS, with key STATUS(6), and on the video recorder display. Counting starts form the
loading of the tape or resetting of the counter to 00h00m00s.
1 Load a tape.
2 Press key PLAY (25).
ð The video recorder starts playing.
3 Press key STATUS (6).
ð The menu STATUS comes up on the screen with the counter indication.
4 All you have to do is press key 0000 (21)to reset the counter to 00h00m00s.
Resetting the counter
Other functions
JJ
To prevent the video recorder from being used, keys on the front can be locked.
1 Press key B (3) on the remote control until the indication CL comes up on the video
recorder display.
2 Store your remote control in a safe place.
3 Unlock the video recorder with key B (3) on the remote control.
Electronic key
JJ
You can permanently play or record a tape. When the end of the tape is reached, it is automatically
rewound until the beginning and play or recording is resumed. This function, used in combination
with the LPfeature, provides you with a recording of 8 hours when using an E240 tape.
Continuous play: press PLAY(25) for 6 seconds.
Continuous recording: press REC(29) and then PLAY (25) for 5 seconds.
ð The display of the video recorder indicates .
Continuous play / recording
JJ
The functions explained on this page enable you to lock
the video recorder, play or record continuously, play
NTSC tapes, and counter reset.
JJ
NTSCis the colour television standard used in the United States, in Japan and other countries. Your
video recorder is capable of playing VHS-NTSC tapes, but you must have a television set compliant
with the PALstandard. Most of the PALtelevision sets provide proper reproduction of the pictures
from NTSC tapes.
SLPon the display of your video recorder tells you that the tape was recorded in the Super
LongPlay mode.
Playing NTSC tapes
The remote control
doesn't work?
Press key VCR.

GB
GB
21
Use
More information
JJ
To avoid erasing one of your tapes by accident, we recommend that you to protect them by breaking
the security tab. To reuse a protected tape, just stick a piece of adhesive tape on this place.
Tapes are sensitive to utilisation and storage conditions. Keep them away from dust, humidity or
excessive heat. Do not place them next to appliances producing strong magnetic or electrical fields
(electro-magnet, motor, etc.). Tapes may vary in quality. The difference in quality not only concerns
the tape itself but also the different mechanical elements of the video cassette. Apoor quality tape
can damage your video recorder. You should therefore use quality brand tapes.
Concerning video tapes
BRAND OF
YOUR TVSET
BRAND CODE
BRAND OF
YOUR TVSET
BRAND CODE
TV code list
KNEISSEL . . . . . . . . . . . . . . . . . .020-025
LOEWE . . . . . . . . . . . . . . . . . . . . . . .020
LOEWEOPTA . . . . . . . . . . . . . . .019-020
LUXOR . . . . . . . . . . . . . . . . . . . . . . .005
METZ . . . . . . . . . . . . . . . . . .013-019-023
MITSUBISHI . . . . . . . . . . . .017-018-020
MIVAR . . . . . . . . . . . . . . . . . . . . . . . .016
NOKIA . . . . . . . . . . . . . . . . . . . . . . . .005
NORDMENDE . . . . . . .001-010-020-000
ORION . . . . . . . . . . . . . . . . . . . .005-020
PANASONIC/national . . . . . .012-005-026
PHILIPS . . . . . . . . . . . . . . . .019-020-021
PHONOLA . . . . . . . . . . . . . .019-020-021
PIONEER . . . . . . . . . . . . . . . . . .001-005
POLYTRON . . . . . . . . . . . . .020-027-029
RADIOLA . . . . . . . . . . . . . .019-020-021
RADIOMARELLI . . . . . . . . . . . . . . . .019
REX . . . . . . . . . . . . . . . . . . . . . . . . . .005
SABA . . . . . . .001-000-005-010-019-020
SALORA . . . . . . . . . . . . . . . . . . . . . .005
AKAI . . . . . . . . . . . . . . . . . . . . . .008-020
AKARI . . . . . . . . . . . . . . . . . . . . . . . .028
BANG & OLUFSEN . . . . . . . . . .009-019
BLAUPUNKT . . . . . . . . . . . . . . . . . .023
BRANDT . . . . . . . . . . .001-000-010-020
BRIONVEGA . . . . . . . . . . . . . . . . . . .019
BLUESKY . . . . . . . . . . . . . . . . . . . . .020
CGE . . . . . . . . . . . . . . . . . . . . . . . . . .016
CONTINENTALEDISON . . . . . . . . .004
DAEWOO . . . . . . . . . . . . . . . . . .020-025
ELBE . . . . . . . . . . . . . . . . . .005-015-023
FERGUSON . .001-003-004-000-010-020
FINLUX . . . . . . . . . . . . . . . .020-024-019
FISHER . . . . . . . . . . . . . . . . . . . . . . .008
FORMENTI . . . . . . . . . . . . . . . . . . . .019
GOLDSTAR . . . . . . . . . . . . . . . . . . . .020
GRUNDIG . . . . . . . . . . . . . .023-024-016
HITACHI . . . . . . . . . . . . . . . . . . . . . .007
IMPERIAL . . . . . . . . . . . . . . . . . . . . .016
JVC . . . . . . . . . . . . . . . . . . . . . . . . . . .013
BRAND OF
YOUR TVSET
BRAND CODE
SAMSUNG . . . . . . . . . . . . . . . . .020-030
SANYO . . . . . . . . . . . . . . . . . . . .008-018
SCHAUB-LORENZ . . . . . . .005-016-020
SCHNEIDER . . . . . . . . . . . .019-020-021
SELECO . . . . . . . . . . . . . . . . . . . . . . .005
SHARP . . . . . . . . . . . . . . . . . . . .022-018
SIEMENS . . . . . . . . . . . . . . . . . . . . . .023
SINGER . . . . . . . . . . . . . . . .001-002-019
SINUDYNE . . . . . . . . . . . . . . . . . . . .019
SONITRON . . . . . . . . . . . . . . . . . . . .008
SONY . . . . . . . . . . . . . . . . . . . . .014-018
TELEAVIA . . . . . . . . . . . . . .001-010-020
TELEFUNKEN . . .001-002-000-010-020
THOMSON . . . . . .001-000-002-010-020
TOSHIBA . . . . . . . . . . .006-018-024-016
WEGA . . . . . . . . . . . . . . . . . . . . . . . .019
YOKAN . . . . . . . . . . . . . . . . . . . .020-025
YOKO . . . . . . . . . . . . . . . . . . . . . . . . .020
JJ
Your remote control is a MULTI BRAND TVmodel suitable for a great number of television sets.
Before you start to control the functions of your television set, check out the 3-digit code matching
the make of your television set and carry out the steps described in the section "Programming the
remote control with the TVcode" on page 10.
JJ
The information contained in this page is to be seen in
connection with the instructions given on page 10 and
13, relating to remote control programming and
recording.
VHS
VHS
VHS
Unprotected Protected re-recordable

22
Technical data
Use
Mains supply 200 to 240 V±10% - 50/60 Hz
Consumed power 23 Wwhen ON
3 Wwatts in the eco mode
Clock autonomy approx. 30 minutes
Weight approx. 4.0 kg
Functioning conditions +5°C à + 40°C
Surrounding humidity: 80 % maximum
Tape heads video - 4 rotary heads
audio - 2 rotary heads (HiFi)
1 fixed head (mono linear track)
HiFi pass-band 20 to 20 000 Hz
Dynamic 80 dB
Tuner PLL, VPS/PDC Type
Reception band I-III-IV Hertzian (aerial)
Inter-band (cable network)
Hyper-band (cable network)
Frequency ranges 45 to 855,25 MHz
ColourTV standards PAL- SECAM - MESECAM or PAL - MESECAM
(depending on the model)
Playing of an NTSC tape on TVPAL 60Hz
Reception standards LL’- BG - DKK' or BG - DKK'
(depending on the model)
Numberof storable channels 99
Modulator UHF - Channel 21 to 69
Pre-set at the factory on channel 60
Standards L/ G / K
Remote control Infrared 33 Khz - Batteries 2 x 1,5 V(AA)
Menu language French - English - German - Italian - Spanish
Swedish - Danish - Dutch - Polish - Czech
Hungarian - Russian… (depending on the model)
Automatic functions On (using any key)
Play (with protected tape)
Rewinding (at the end of the tape)
Long Play (LP) - Super Long Play (SLP)
Tapes VHS format
Rewinding time: 130s with E 180
R9000 - Pack 2 / GB- EP / RST - BEI / 01-2000
JJ
In our efforts to improve the quality of our products, we
reserve the right to change their features. The
information contained in these instructions are
therefore liable to change and are not contractual.
Conception : Marc Rensonnet - Réalisation : Vincent Morell / Nicolas Morvan / Sabine Arbogast

THOMSON multimedia
46 quai A. Le Gallo
92648 Boulogne
Cedex France
RCS NANTERREB 322 019 464
http://www.thomson-multimedia.com
© Copyright THOMSONmultimedia
 Loading...