

Page 1
ENGLISH
Safety Precautions
Before using this device, please read the following carefully.
• The apparatus shall not be exposed to dripping or splashing.
• No objects filled with liquids, such as vases, shall be placed on the apparatus.
• Power Requirements: AC 100 - 240V ~, 50/60Hz
• Disassemble!: Do not attempt to disassemble the product since opening the cabinet may cause
a malfunction or electric shock.
• Overloading: Do not place anything heavy on the ventilation openings, connection cord and
power adapter to prevent electric shocks and fire hazards.
• Humidity : Do not install the equipment in an overly humid place.
• Liquids : Keep liquids away from the DSR
• Small Object: : Coin or the small object must be kept away from the DSR as they can fall into
the ventilation opening of the DSR and cause serious damage
• Ventilation : Do not block the DSR’s ventilation openings to protect it from overheating, which
may cause malfunction. Install the equipment on a firm and flat surface. Avoid extreme heat and
direct sunlight.
• Location : Locate the DSR on a firm and flat surface. Avoid extreme heat and direct sunlight
• Do not install this equipment in a confined space such as a book case or similar unit.
• Replacement Parts: Do not use parts and accessories that have not been provided by the
manufacturer. Unauthorized substitutes may cause electrical damage to the DSR
• In case your set switches off suddenly following a short circuit in the LNB connection unplug your
receiver. Wait some minutes for the rearming of the electronic protection and then plug your set
into the mains.
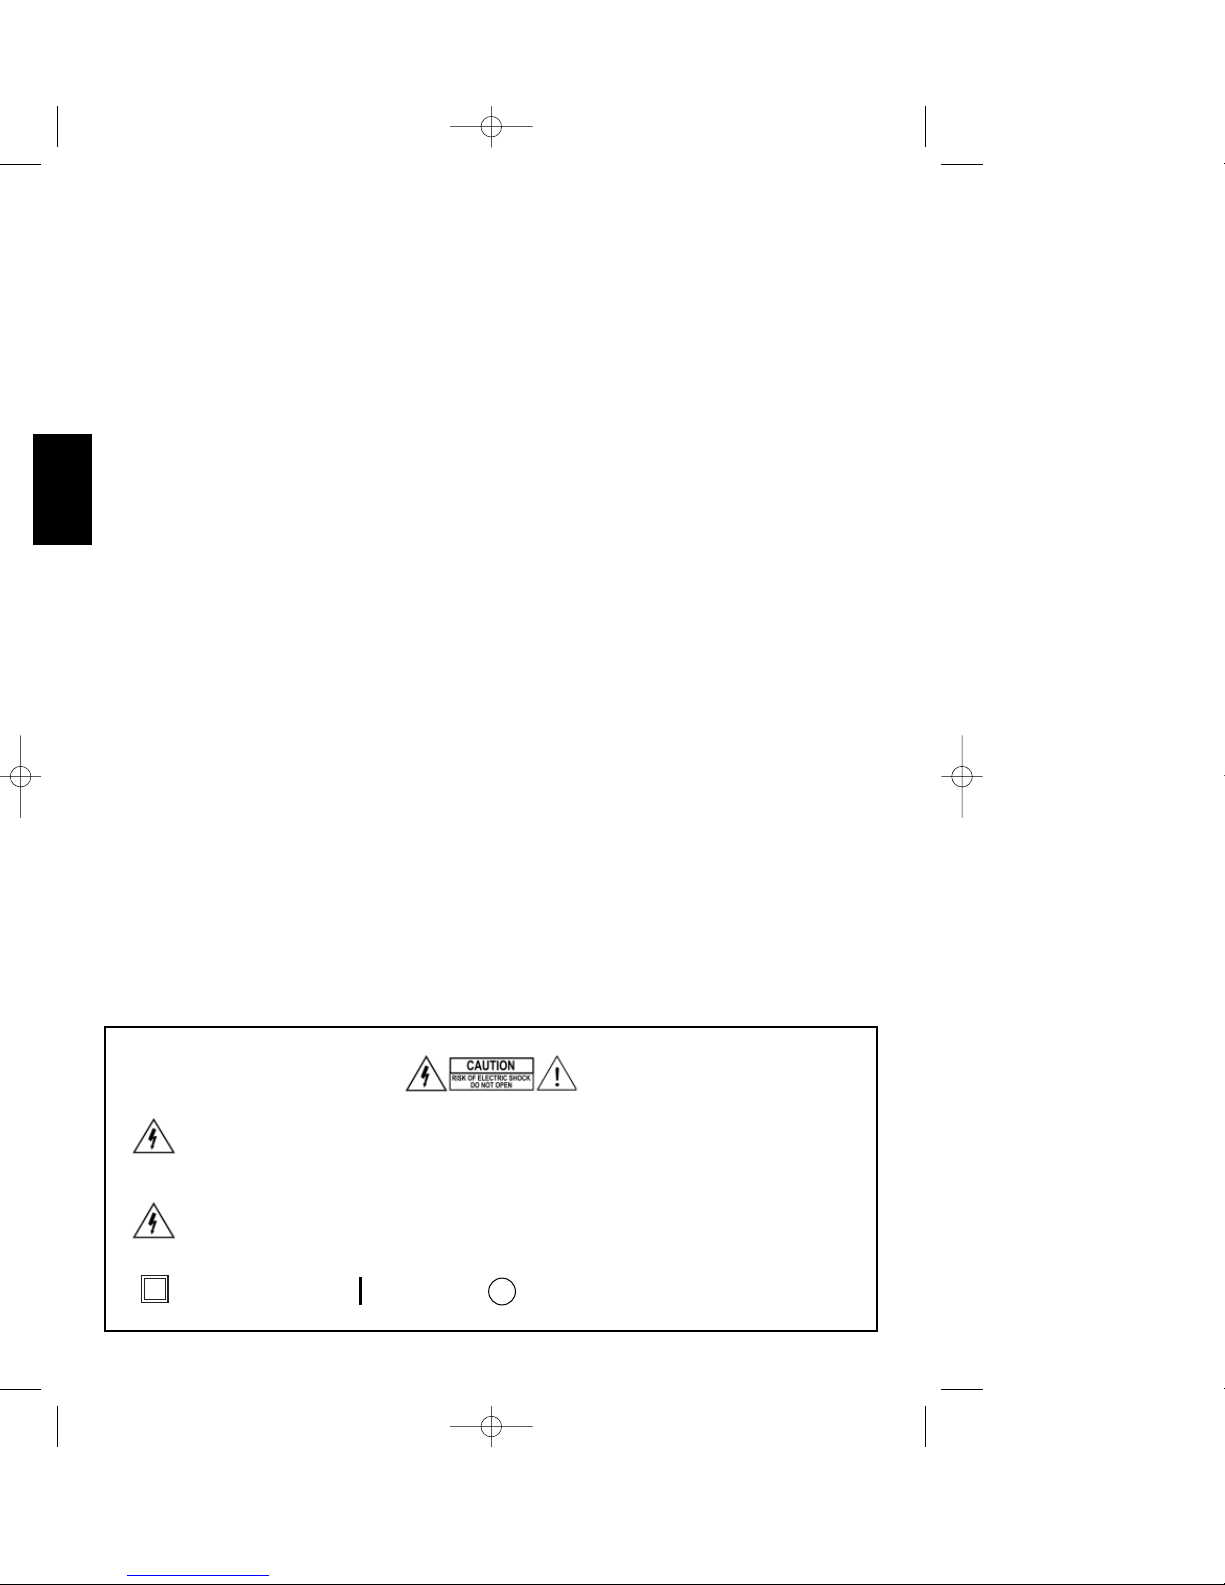
This Simbol indicates “dangerous voltage” inside the product that present a
risk of electric shock or personal injury
This symbol indicates important instructions accompanying the product
Double Insulator , Power ON , Power OFF
DSR 100 T GB 1/09/2000 16:29 Page 1
Page 2

ENGLISH
I. Before Start 1
1. Preface 1
2. Product Characteristics 1
3. Unpacking 2
4. DSR Front & Rear Panel 3
4-1. Front Panel 3
4-2. Rear Panel 4
5. Remote Control Unit (RCU) 5
II. Installation 7
1. Installation 7
2. Connection Method 8
III. Getting Started 9
1. Basic Usage of the DSR 9
1-1. TV/Radio Channel 9
1-2. Volume 10
1-3. Mute 10
1-4. Audio 10
1-5. Audio Language Selection 10
1-6. How to use “Favorite TV/RADIO Channel” List 11
1-7. Electronic Program Guide (EPG) 11
1-8. Last Channel Auto-Saving and Recall 13
1-9. TELETEXT Function 18
1-10. Previous Channel Recall 13
1-11. Screen Pause 13
1-12. Channel / satellite Name Edit Function 14
2. Flow Chart of Menu 15
Contents
DSR 100 T GB 1/09/2000 16:29 Page 2
Page 3

ENGLISH
IV. Menu 16
1. Main Menu 16
2. Channel Manager 16
2-1. TV Channel Manager 17
3. Timer 19
4. Installation 20
4-1. Antenna Setup 20
4-2. Auto CH Search 23
4-3. TP Setup 25
4-4. Parental Lock 27
4-5. Options 28
4-5-1. OSD Language 29
4-5-2. Set Local Time 29
4-5-3. Summer Time 29
4-5-4. Screen Format 29
4-5-5. TV Type 29
4-5-6. Video Output 29
4-6. Data Transfer 30
4-7. Factory Default 31
5. Receiver Info 32
V. Trouble shootings 33
VI. Specifications 34
DSR 100 T GB 1/09/2000 16:29 Page 3
Page 4

I. Before Start
1. Preface
A Digital Satellite Receiver is a convenient product that allows you to view a variety
of programs provided through satellite. This user's manual covers the installation of
the DSR and the necessary steps to implement various features. This also explains
special features available only in this DSR in detail, which will allow you to make full
use of these features.
To install the DSR or before using it after installation, be sure to read this user's manual
and keep it handy for future reference.
• User's Manual Contents
Before start - Please read through these instructions thoroughly.
Installation - Explains the installation of the DSR to VCR and TV.
Getting started - Explains the basic concept of how to use this DSR.
Menu - Detailed explanation of the DSRs extensive feature list.
Trouble shootings - Description of solutions to common problems.
Specifications
2. Product Characteristics
• Provide high quality video and sound
• Provide easy-to-use menu system
• Convenient remote control unit
• Channel moving, locking, favorite, rename, deleting and 5 sorting functions
• Automatic digital satellite signal detecting function
• Various sorting function of EPG (Electronic Program Guide)
• Provide various switch types, various LNB types and NTSC/PAL Monitor types
• User programmable Transponder Information
• Automatic support for PAL/NTSC system
• Parental control facilities
1
ENGLISH
DSR 100 T GB 1/09/2000 16:29 Page 1
Page 5

• Last channel auto-saving and recall function
• Preprogrammed transponders from many satellites
• Channel name change function
• Hi-speed software upgrade through RS-232
• Favorite Channel list
• Automatically search for newly added transponders
• Antenna Positioning Help feature
• 4 digits LCD display
• Selectable Video output – CVBS, RGB
• “Timer” function, automatically turns receiver on
• TELETEXT function
• DSR to DSR Data Transfer and software upgrade function
• Time Display function
3. Unpacking
After purchasing the DSR, unpack it and check to make sure that all of the following
items are included in the packaging.
• 1 x Remote Control Unit (RCU)
• 2 x AAA batteries
• 1 x User manual
• 1 x DSR
2
ENGLISH
DSR 100 T GB 1/09/2000 16:29 Page 2
Page 6
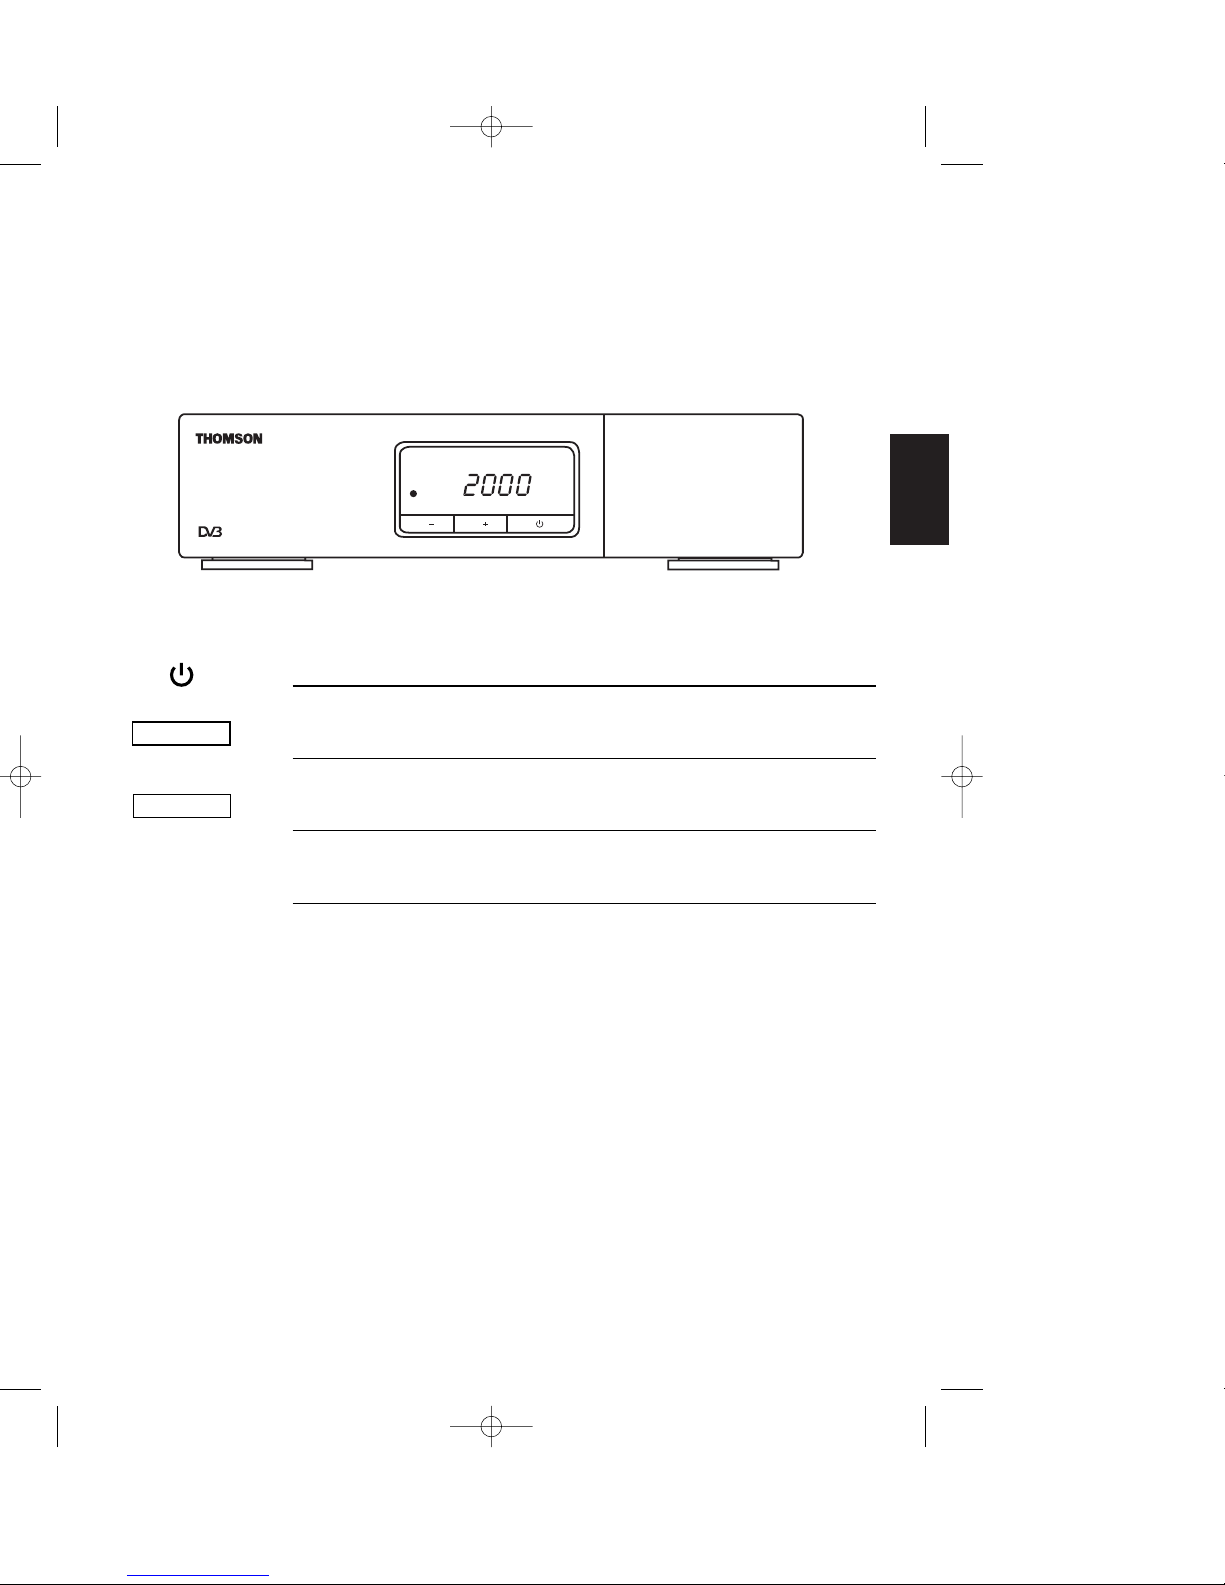
4. DSR Front & Rear Panel
4-1. Front Panel
Key Function
Turns on and off the power of the receiver.
When watching, changes to the next channel, or in the
menu, moves to the upper item.
When watching, changes to the previous channel,
or in the menu, moves to the lower item.
When watching shows the current channel number,
or in stand-by mode, shows the current time.
Digital Satellite Receiver
DSR100T
PR
PR
3
ENGLISH
PR +
PR
-
LCD
DSR 100 T GB 1/09/2000 16:29 Page 3
Page 7
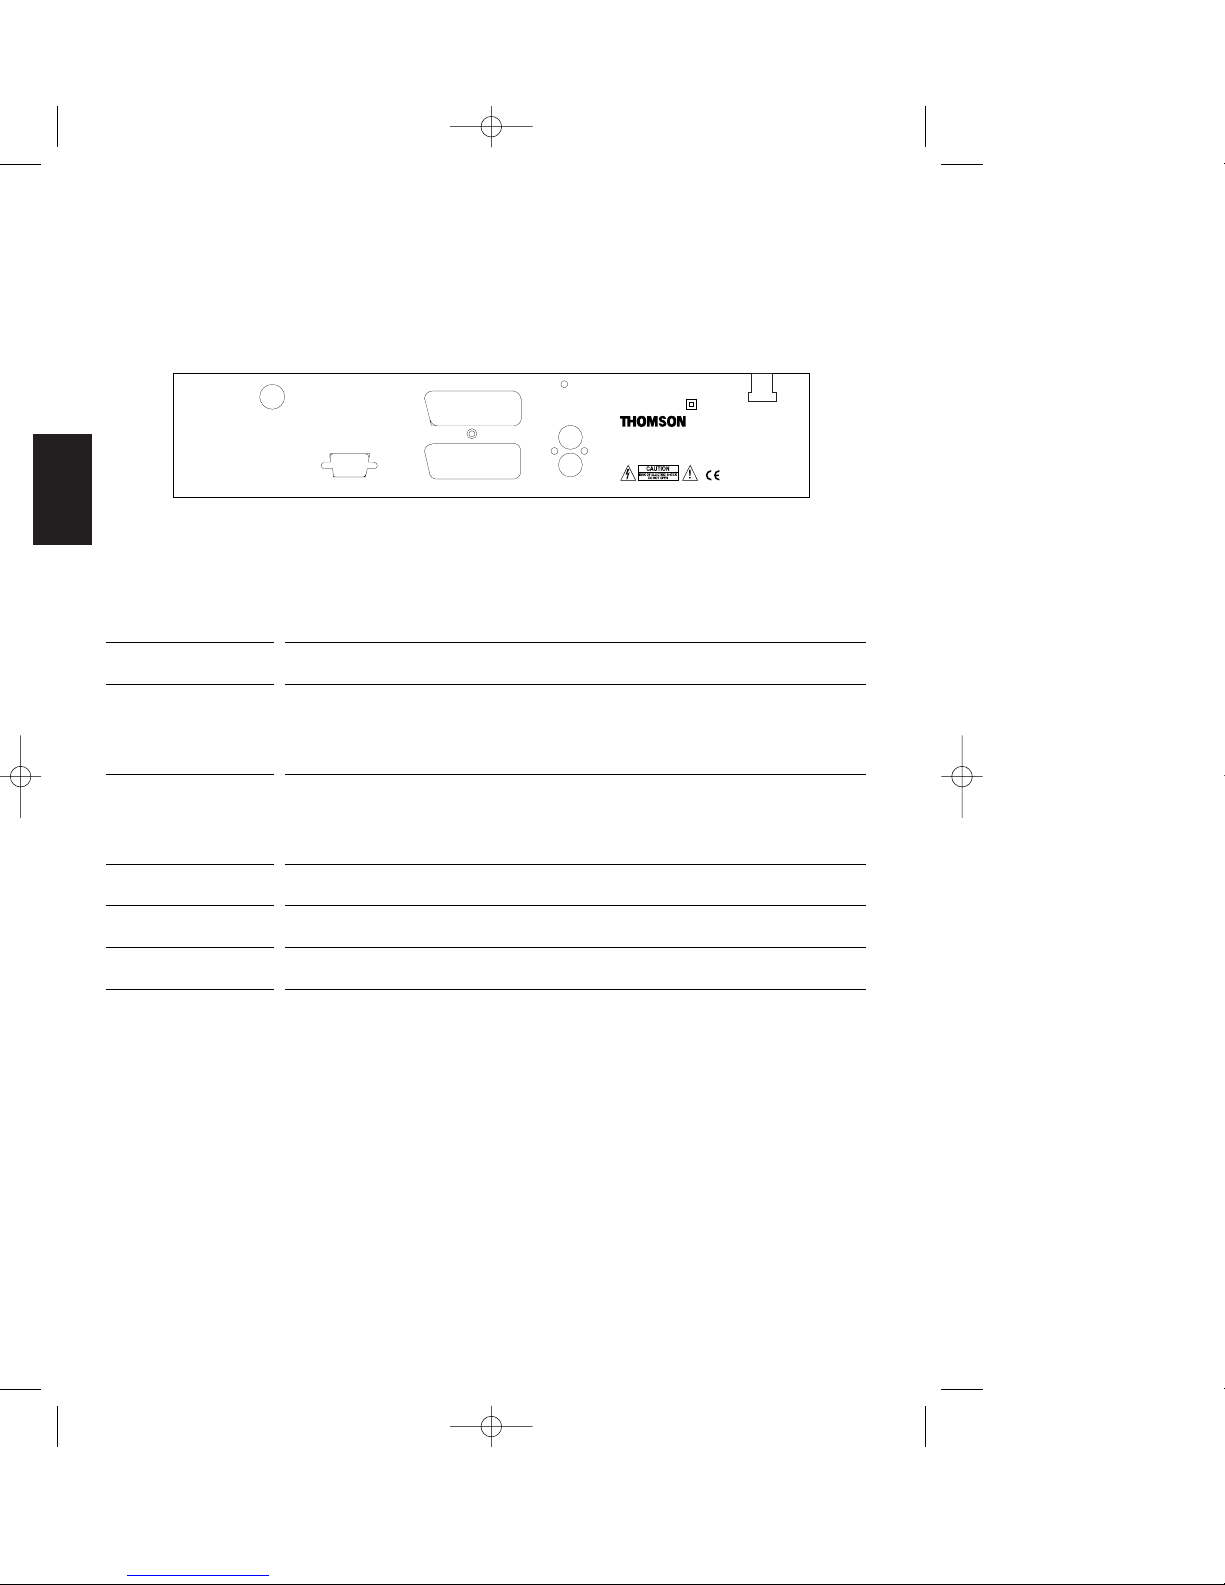
4-2. Rear Panel
Name Function
Connect the receiver to a TV using a SCART cable.
Connect the receiver to a VCR using a SCART cable.
Connect the AUDIO R output jack to the TV AUDIO R input
or the AUDIO R input of an audio amplifier.
Connect the AUDIO L output jack to the TV AUDIO L input
or the AUDIO L input of an audio amplifier.
Connect to PC or another DSR for software upgrades.
Connect to satellite antenna.
Connect to the main AC Power.
TV
VCR
AUDIO R
AUDIO L
RS 232
LNB IN
AC100-240 V
LNB IN
950 - 2150 MHz
max. 400 mA
AUDIO L
AUDIO R
TV
VCRRS232
100-240V ~ 50/60Hz - 35W
DSR100T
ACHTUNG ! Das Gerät darf nur vom Fachmann geöffnet wer den.
WARNING ! This set must not be opened except by a qualified technician.
ATTENZIONE ! No aprire prima di aver tolto la tensione
ATTENTION ! L'appareil ne doit être ouvert que par un spécialiste.
ATENCION ! Este aparato solo puede ser abierto por un técnico especializado.
4
ENGLISH
DSR 100 T GB 1/09/2000 16:29 Page 4
Page 8
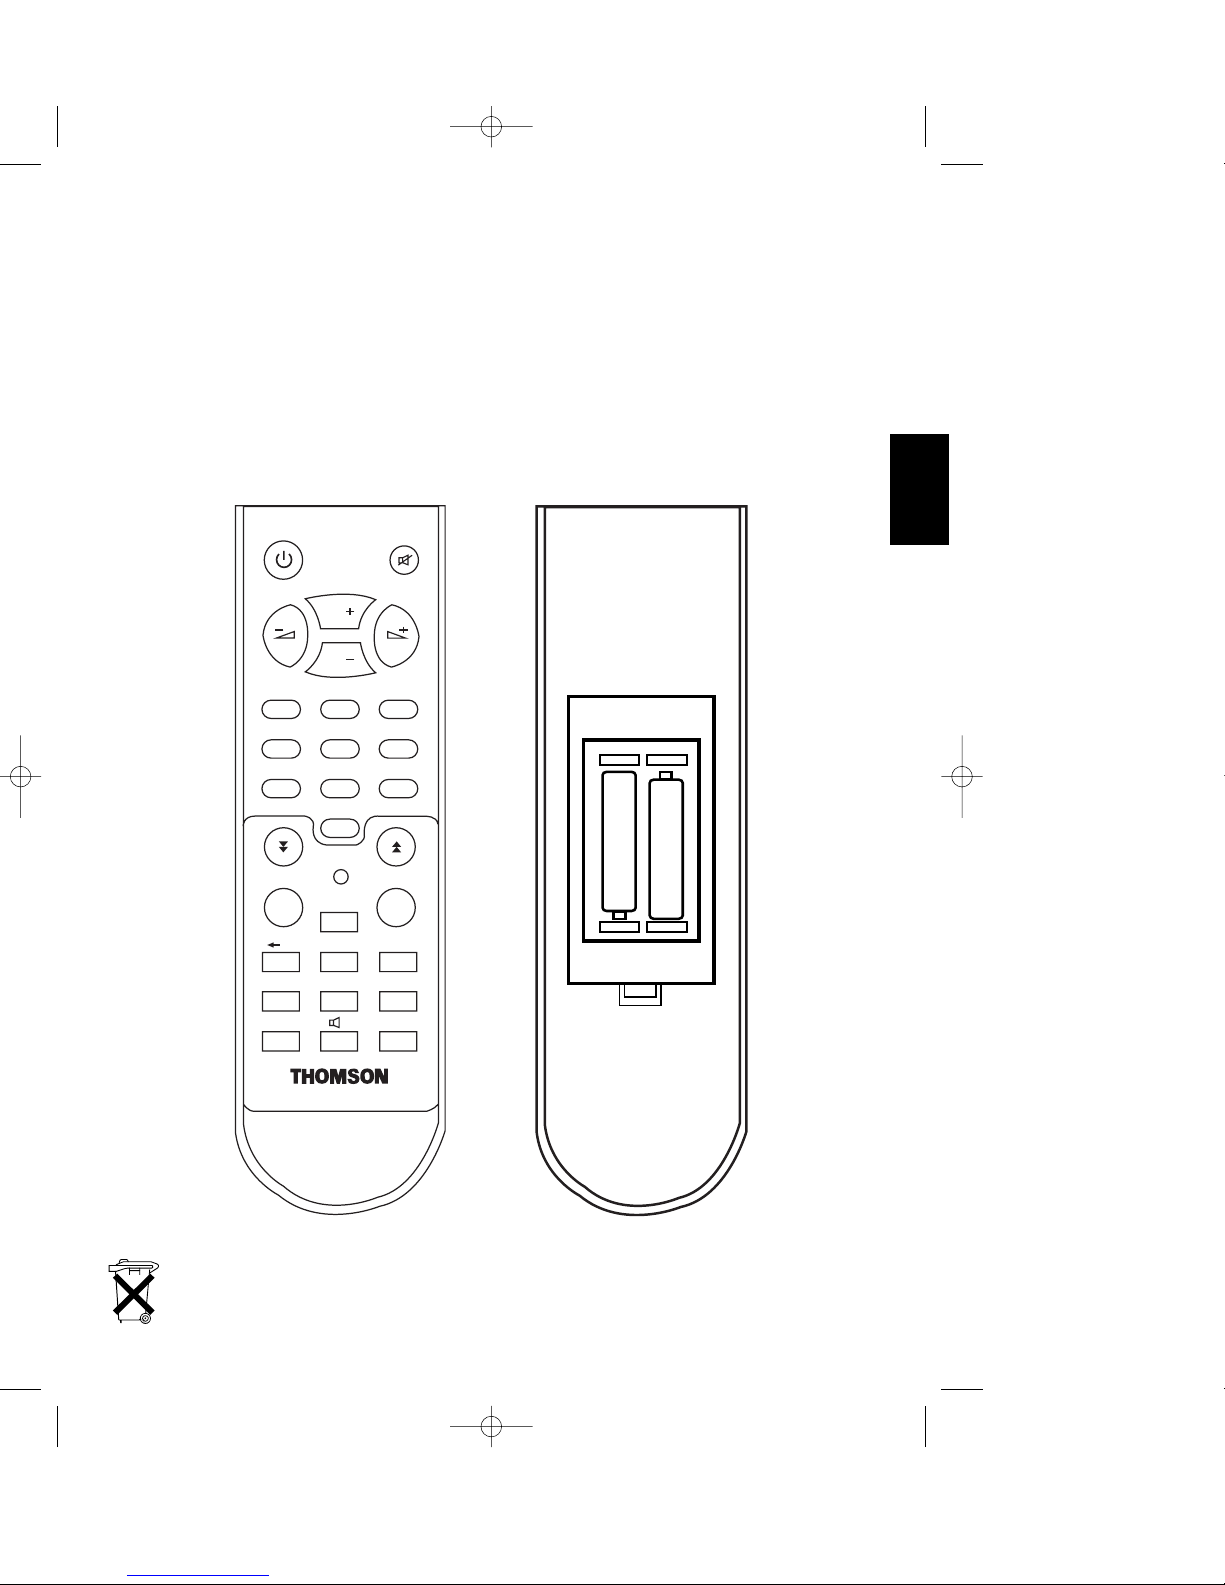
5. Remote Control Unit (RCU)
To use various features of the DSR, use the remote control unit for faster and more
convenient usage. Insert batteries before using the RCU.
• Remote Control Unit
+
-
+
-
PR
PR
L
R
PR
TV/AV
TV/RADIO
PAUSE
TXT
EPG
INFO
ALT
MENU
EXIT
FUNC
OK
DSR100T
1
23
456
7809
5
ENGLISH
Batterie: Remove the lid at the back of the remote control and insert two 1,5 V batteries TYPE LR03 (AAA) or equivalent.
“Please respect the environment! Before throwing any batteries away, consult your distributor who may be able to take
them back for specific recycling.”
DSR 100 T GB 1/09/2000 16:29 Page 5
Page 9

• RCU Key and their Function
Key Function
Turns power ON/OFF of the DSR.
Press this key one time to run menu screen.
Returns to the previous menu on the menu screen.
Moves up a page in the channel list and menu list.
Moves down a page in the channel list and menu list.
Executes the selected item in the menu screen, or enters the desired value in
any input mode or show the program list menu when watching.
When watching, changes channels, or moves to the next higher or lower
item in the menu.
When watching, adjust the volume, or move to the left or right item in menu.
Enter number of the required menu item or select a channel number to
watch.
To edit satellite name in Antenna Setup menu.
Switches back to previous channel.
Switches between TV or AV mode.
Pause screen when watching.
Calls up the EPG (Electronic Program Guide).
Switches to the Teletext mode.
Shows information of the current channel.
Switches between TV and Radio mode or switches between “All List” and
“Favorite List” in the program list menu.
Selects the different audio modes.
When watching a channel, switches the audio languages.
When watching a channel, mutes the sound.
6
ENGLISH
MENU
EXIT
OK
09
FUNC
PR
TV/AV
PAUSE
EPG
TXT
INFO
TV/RADIO
L
R
ALT
PR
PR
DSR 100 T GB 1/09/2000 16:29 Page 6
Page 10

II. Installation
1. Installation
This section explains the installation of the DSR. Refer to the manuals supplied with the
equipment for the installation of outdoor equipment such as the dish antenna. When
adding new equipment, be sure to refer to the related parts of the manual for the
installation.
1. Install an antenna and point it in the exact direction of the satellite. Then connect
the DSR to the antenna cable.
2. Connect the DSR to your TV and if applicable to other peripheral equipment.
3. Setup the Installation menu items of the DSR in accordance with the peripheral
equipment used in the installation.
4. Tune to the required broadcast channels. Now, the DSR is ready to use.
7
ENGLISH
TV
DSR
DSR 100 T GB 1/09/2000 16:29 Page 7
Page 11
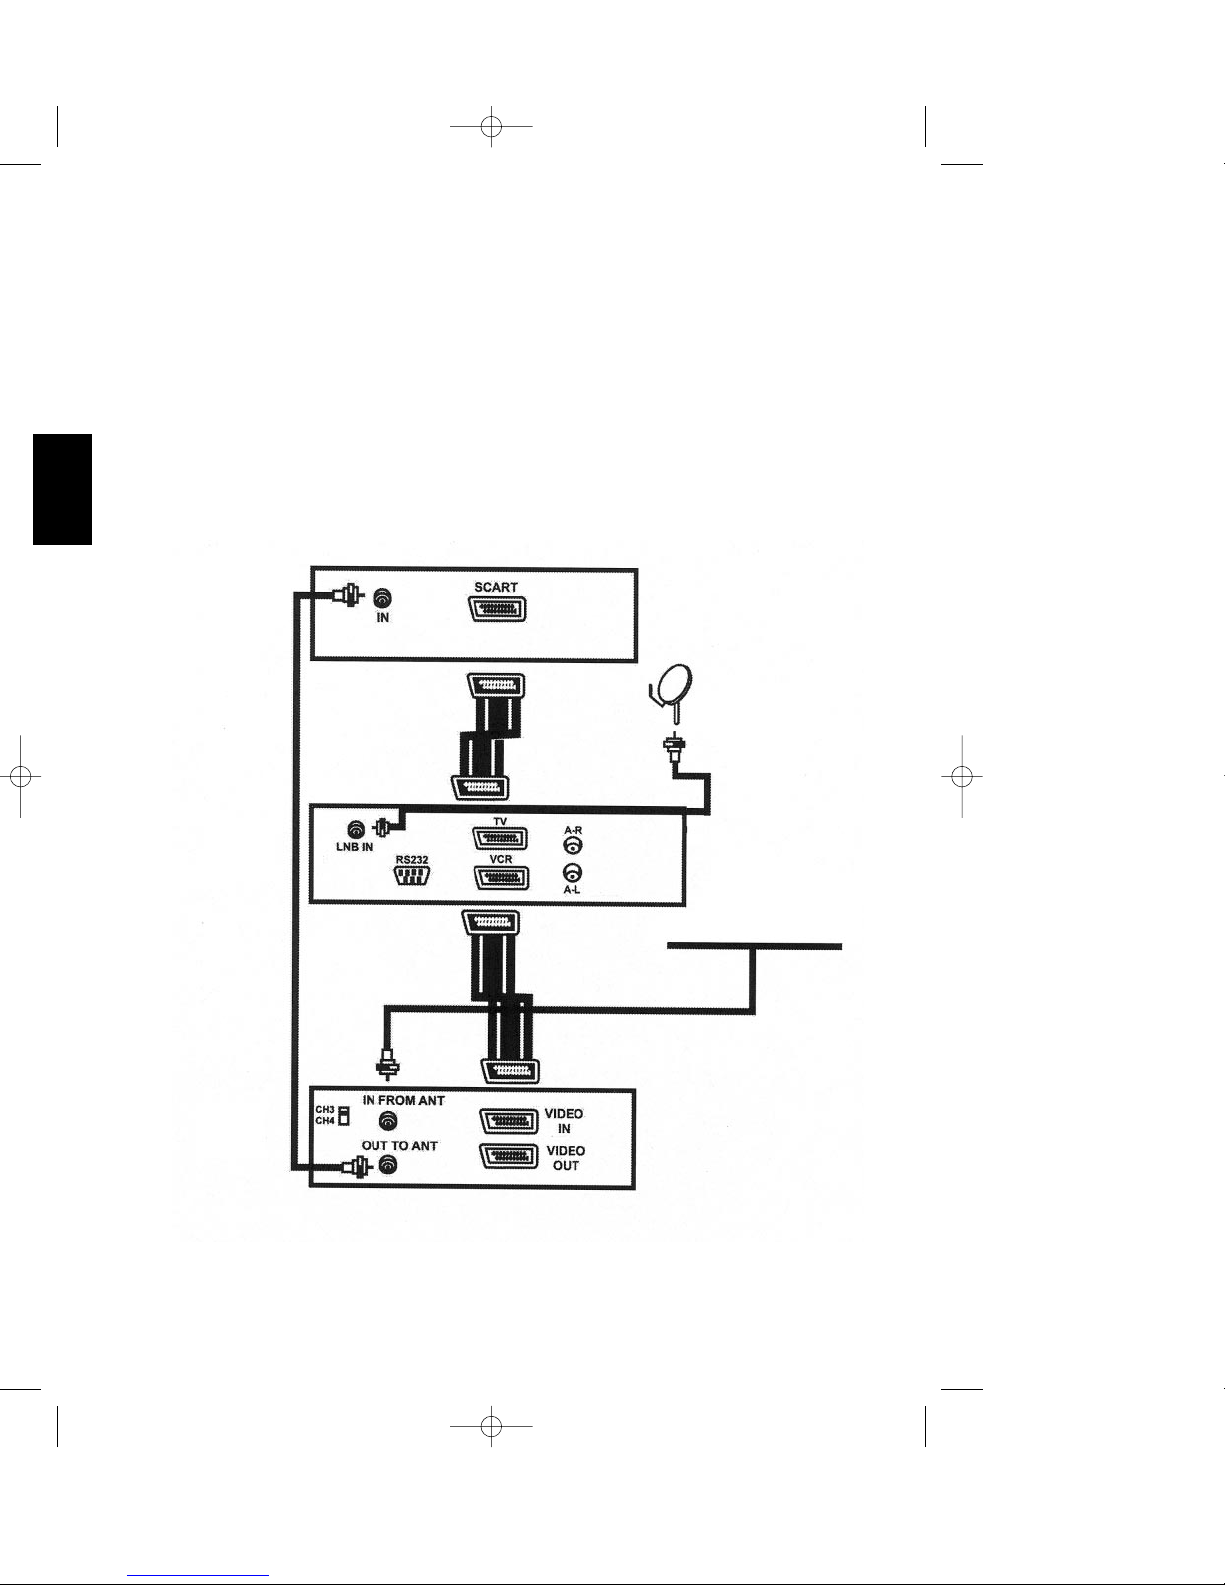
2. Connection Method
This section explains how to connect peripheral equipment to your DSR during the
installation of the unit. The DSR can be used in connection with a VCR, TV and other
equipment as shown in the diagram below.
1. Connecting to the DSR to a TV using SCART support.
TV
DSR
SATELLITE
DISH
CABLE
OR
OFF-AIR ANTENNA
VCR
8
ENGLISH
DSR 100 T GB 1/09/2000 16:29 Page 8
Page 12
III. Getting Started
1. Basic Usage of the DSR
1. Turn on the TV and connect the peripheral equipment to the system.
2. Set the TV mode to A/V. Please consult the Operating Manual of the TV for more
information on how to do this.
3. Turn on the DSR by pressing the key. On the front panel, time is replaced by
the programme number, indicating that it is on.
4. Select TV/Radio mode.
1-1. TV/Radio Channels
1. Press the
TV/RADIO
key to select TV or Radio mode.
2. When watching, press
PR +
key to select the next channel and pressPR-
key
to select the previous channel.
When a channel is selected, the channel information will be shown at the bottom
of the screen. At the right hand side of the screen, audio selection box and
language alternation box will turn up.
R
Language 1/2
1. Astra
INFO
41. MCM
TP 30
))
9
ENGLISH
DSR 100 T GB 1/09/2000 16:29 Page 9
Page 13

1-2. Volume
1. To increase the volume, press the key, and to decrease volume, press the key.
2. The 33 steps of volume level can be identified by the volume level indicator on the
screen.
1-3. Mute
1. Press the key to mute the sound when watching.
2. To bring back the sound, press the key once more. The sound returns to the same
volume level as before.
1-4. Audio
1. Press the key repeatedly to select one of three possible settings (Left, Right,
Stereo).
1-5. Audio Language Selection
1. Press the
ALT
key repeatedly to select the desired audio type. This is part of the
transmission. Only selected services have implemented this feature.
L
R
10
ENGLISH
TV
DSR 100 T GB 1/09/2000 16:29 Page 10
Page 14

1-6. How to use “Favorite TV/RADIO Channels” List
When watching, you can easily select favorite TV/RADIO channels through the
“Favorite TV/RADIO Channel” list. This list shows only the TV/RADIO channels which
are selected to be favorites in the main channel list. (See 2-1, “CHANNELS
MANAGER” for more information).
1. When watching TV or when listening to a radio channel, press the
OK
key to see
the “Favorite TV/RADIO Channels” list.
2. Press the
TV/RADIO
key repeatedly to see the “Favorite TV Channel” or “Favorite
RADIO Channel”.
3. Select any channel you want and press the
OK
key to go to that channel.
4. Press the
EXIT
key to escape from the channel list.
1-7. Electronic Program Guide (EPG)
The DSR receives and stores the current TV and Radio channel information. This
channel information includes detailed information on the next scheduled program.
The EPG is an easy-to-use function to see this information on screen. EPG information
is made up of Channel No, Program Name, Channel Name, Date and Broadcasting
Time (start and end time).
1 Das Erste
2 ZDF
3 RTL Telev
4 ProSieben
5 KiKa
6 DSF
7 3sat
8 WDR FERNS
9 Star Movie
10 MCM
11
ENGLISH
DSR 100 T GB 1/09/2000 16:29 Page 11
Page 15

1. Press
EPG
key when watching TV or listening Radio or press the
OK
key after
selection of “Program Guide” in the main menu. Then, EPG box will turn up on the
screen.
2. Press the
TV/RADIO
key to switch between TV or Radio EPG information.
3. EPG data is transmitted together with the signals provided by the program
provider. A “No data available” message will be shown if the selected channel
does not provide EPG data.
• For reference : For correct EPG time, please set your local time with reference
to the UTC (See 4-5-2. Time offset).
• For reference : The time of the receiver is derived from the currently selected
channel, so it sometimes may not be correct on particular channels.
1 Das Erste
Apr.20 12 : 32
Far and away
Music Heaven
Magic & music
Magic Video Collection
2 ZDF
3 RTL Telev
4 ProSieben
5 KiKa
6 DSF
7 3sat
8 WDR FERNS
9 Star Movie
10 MCM
12 : 00 -
13 : 00 -
14 : 00 -
15 : 00 -
16 : 00 -
Program Guide
12
ENGLISH
DSR 100 T GB 1/09/2000 16:29 Page 12
Page 16

1-8. Last Channel Auto-Saving and Recall
If there is an interruption of AC power caused by pulling out the main plug of the DSR
or brown-outs (power interruptions), once AC power is reapplied the previous TV
channel appears without having to press the key. To memorize the current channel
automatically regardless AC power interruptions, press the key twice (changes
from “OFF” to “ON”) or watch that channel for more than 10 minutes.
1-9. TELETEXT Function.
Only TELETEXT supported TV users can use this function.
Press the
TXT
key of the RCU. If the channel have TELETEXT service, “TELETEXT ON”
will be displayed. Press
TXT
key one more time, “TELETEXT OFF” will come up the
TELETEXT service will be stopped.
If the channel does not have TELETEXT service, “NO TELETEXT” will be displayed.
After selection of “TELETEXT ON”, operate the TELETEXT function of TV set to watch
the TELETEXT service.
• For reference : In the case of a channel is reserved for future TELETEXT service
but actual TELETEXT data are not transmitted, then there is no teletext service even
though “TELETEXT ON” is on the screen.
1-10. Previous Channel Recall
If you want to watch the previous channel when watching, press key.
1-11. Screen Pause
If you want to have still picture on the screen when watching, press
PAUSE
key once.
Press
PAUSE
key one more time to watch the channel again.
PR
13
ENGLISH
DSR 100 T GB 1/09/2000 16:29 Page 13
Page 17

14
ENGLISH
1-12. Channel/Satellite Name Edit Function
1. Channel Name Edit
- After selection of a channel in the Rename of ‘TV/Radio Channel Organizer’ menu,
press OK key to call up the following character table and take the following steps to
change name.
2. Satellite Name Edit
- After selection of a satellite in the ‘Antenna/Satellite’ field of ‘Antenna Setup’ menu, press
FUNC. key to call up the following character table and take the following steps to change
name.
- Enter the name by selecting the characters using the
PR +, PR - andt key
following by the OK key on the RCU.
- Selection of “ B ” key on the table will delete character.
- After changing channel or satellite name, select ‘OK’ to save the new name or ‘CANCEL’
not to change the entered name.
NO
1
2
3
4
5
6
7
D
FL
M
R
T
T
D
U
0 1 2 3 4 5 6 7 8 9
As_
ABCDEFGHIJ
KLMNOPQRST
UVWXYZabcd
opqrstuvwx
efghi jklmn
OK CANCEL
DSR 100 T GB 1/09/2000 16:29 Page 14
Page 18

2. Flow Chart of Menu
15
ENGLISH
CHANNELS MANAGER
Program Guide
Timer
Factory Default
Receiver Info
User Installation Antenna Setup
Auto Search Antenna Select Search Option Start
TP Setup Antenna Select Transponder TP Data
Parental Lock Password ON/OFF
Option OSD Language English, German, French
Time Offset
Data Transfer User Data Transfer
Software Transfer
-12h00 ~ +12h00
Summer Time ON/OFF
LNB Power ON/OFF
Screen Format 4:3, 16:9
Video Output RGB, CVBS
TV Type PAL, NTSC, PAL & NTSC
Check Signal
Start
Set PID
Delete TP
Antenna, Satellite, LNB, 0/12V, 14/18V, 22KHz, DiSEqC
Signal level
Go to Auto Search
Positioning Help
Turn ON
Turn OFF
Favorite
Move
Lock
Rename
Delete
Sort Favorite,… , Ch. Name
TV Channels
RADIO Channels
DSR 100 T GB 1/09/2000 16:29 Page 15
Page 19

IV. Menu
1. Main Menu
1. When watching TV, press
MENU
key on the RCU. The main menu will appear
on the screen.
2. Select an item on the menu and press the
OK
key to execute.
3. Press the
EXIT
key to exit from the current menu and return to the previous menu
step by step.
2. Channels Manager
Channels Manager consists of TV channel and Radio channel. Channel editing
function can be performed in the channel manager. Favorite, Move, Lock, Rename,
Delete and Sort are all possible. Especially, there are five ways of sorting functions.
CHANNELS MANAGER
TV Channels
Radio Channels
Program Guide
Timer
USER INSTALLATION
Antenna Setup
Auto Search
TP Setup
Parental Lock
Options
Data Transfer
Factory Default
Receiver information
Menu
16
ENGLISH
DSR 100 T GB 1/09/2000 16:29 Page 16
Page 20

• For reference : The TV or Radio channel list is empty before searching channel.
Be sure to search channels automatically or manually before you use Channel
Manager.
2-1. TV Channels Manager
Favorite
Move
Lock
Rename
Delete
Sort
TV Channel Manager
1
2
3
4
5
6
7
8
9
10
Das Erste
3sat
WDR FERNS
Star Movie
MCM
S
S
S
S
ASTRA
ASTRA
ASTRA
ASTRA
ASTRA
ASTRA
ASTRA
ASTRA
ASTRA
ASTRA
TP2
TP3
TP4
TP4
TP5
TP1
TP1
TP1
TP1
TP1
Favorite
Lock
Scramble
SAT Name
CH Name
Favorite
Move
Lock
Rename
Delete
Sort
TV Channel Manager
1
2
3
4
5
6
7
8
9
10
Das Erste
ZDF
RTL Telev
ProSieben
KiKa
DSF
3sat
WDR FERNS
Star Movie
MCM
S
S
S
S
S
ASTRA
ASTRA
ASTRA
ASTRA
ASTRA
ASTRA
ASTRA
ASTRA
ASTRA
ASTRA
TP2
TP3
TP4
TP4
TP5
TP1
TP1
TP1
TP1
TP1
17
ENGLISH
DSR 100 T GB 1/09/2000 16:29 Page 17
Page 21

1. Select TV or Radio channels in the main menu and press
OK
key to call up “TV/Radio
Channel Manager”.
2. Press the
OK
key on any one function you want in the “Control Menu”at the left side
of the “CHANNELS MANAGER”. You can move from left to right or up and down by
using
,,
PR +, PR -
key.
3. Editing Functions
- Favorite: When a channel is selected to be a Favorite, “ ” sign will appear.
Selected channel will be found in the “Favorite TV/Radio Channel”. (When you
are watching TV or Radio you can use “Favorite TV/Radio Channel” list by
pressing
OK
key followed by
TV/RADIO
key.)
- Move: When a channel is selected the color of “NO” column will be changed to
be yellow. Move the selected channel to the preferred place. Press
OK
key on the
place you want to move.
- Lock: When a channel is selected to be locked, “ ” sign will appear. Selected
channel will be locked and you have to know the password to watch the locked
channel.
- Rename: If you want to change the name of a channel, please take steps as
follows. Select a channel which you want to change name then, press
OK
key to
call up the alphanumeric charcter table. Enter the name by selecting the
characters using
,,
PR +, PR -
keys followed by
OK
key. Press the “ ”
character to delete characters. Press ok column to confirm the changed name.
Press
EXIT
key to save the changed name and then it will return to the previous
menu.
- Delete: When a channel selected to be deleted, the color of “NO” column will
be changed to be yellow. Selected channel will be deleted on the channel list.
Press
EXIT
key then the dialog box will come up. Select “OK” or “CANCEL”.
- Sort: There are five ways to sort the channels. When you select any one sort, the
channels will be sorted accordingly.
· Favorite: It will place the favorite channels at the top of the list.
· Lock: It will place the locked channels to the last at the list.
· Scramble: It will place scrambled channels to the last of the list.
· Sat Name: It will rearranged the channels by satellite names in alphabetical
order from A to Z.
· Ch. Name: It will rearranged the channels by name in alphabetical order from
A to Z.
18
ENGLISH
DSR 100 T GB 1/09/2000 16:29 Page 18
Page 22

4. After finishing channel editing, press
EXIT
key then the dialog box will come up.
Select “Yes” or “No”, if your select “No” it will come back to the condition before
editing and if you select “Yes”, changed attributions will be saved.
5. There are 5 ways to sort the channels. When you select any one sort, the channels
will be sorted accordingly.
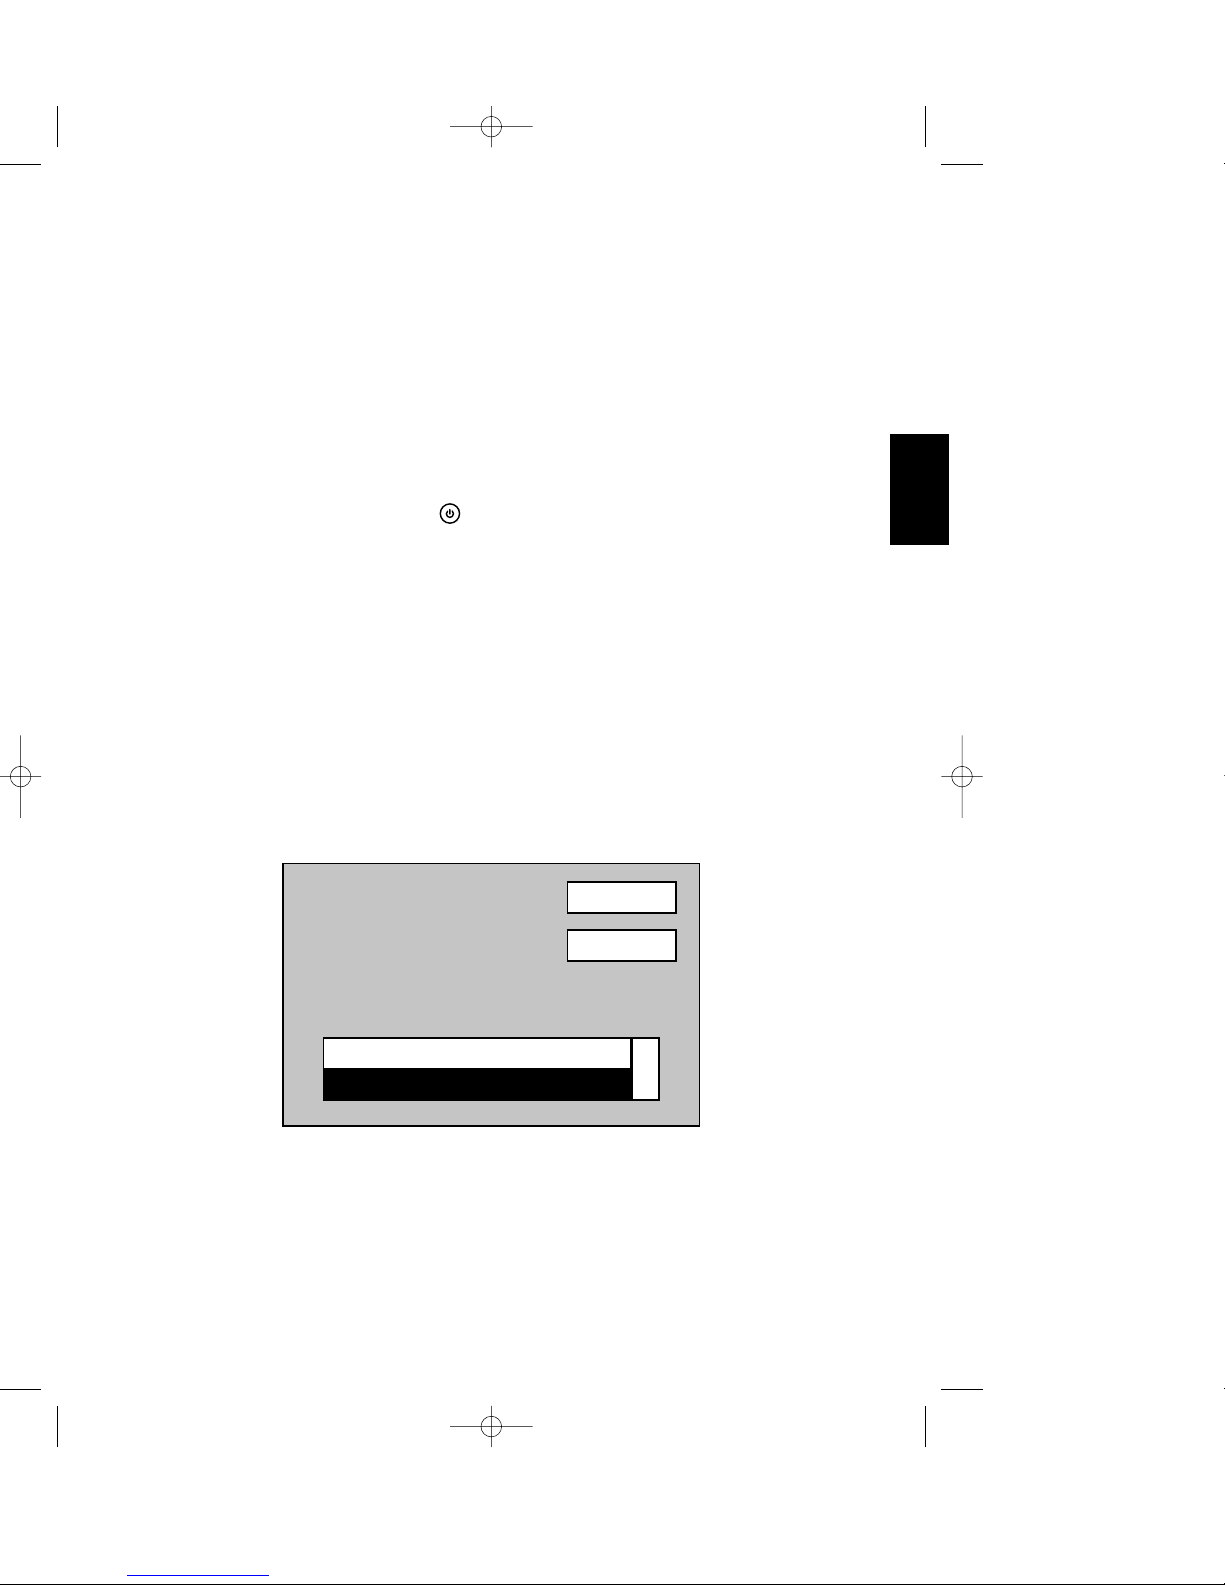
3. Timer
The “Timer” function allows you to program when the receiver switches on and off.
1. To activate the “Turn On Time” and/or the “Turn Off Time”, press the
OK
key on
the “Timer” in the main menu.
2. You can enter the required time by pressing numeric key.
Turn ON
Timer
NO
Turn On Time
00 : 00
Turn OFF
NO
Turn Off Time
00 : 00
19
ENGLISH
DSR 100 T GB 1/09/2000 16:29 Page 19
Page 23

4. Installation
4-1. Antenna Setup
You can assign satellites, LNBs and switches to 16 antennas in this “Antenna Setup”
menu.
1. Select any one antenna among 16 antennas.
2. Assign satellite, LNB and switch to the selected antenna.
· Satellite: Select any one satellite among 31 satellites preprogrammed.
· Universal LNB: Select the LNB to be universal or not.
· LNB1/LNB2: Input the High/Low local frequencies.
· 14/18V switch: Select any one out of “NONE”, “14V” or “18V”.
· 22KHZ switch : Select any one out of “NONE”, “0KHz” or “22KHz”
· DiSEqC switch: Select any one out of “NONE”, “Port A”, “Port B”, “Port C” or
“Port D”.
Antenna
Antenna Setup
1
Signal Level
Go to Auto Search
Positioning Help
Satellite
ASTRA
Univ. LNB
YES
LNB Freq. 1
9750
LNB Freq. 2
10600
0/12 Volt
None
14/18 Volt
None
22KHz tone
None
DiSEqC
Port A
20
ENGLISH
DSR 100 T GB 1/09/2000 16:29 Page 20
Page 24

• For reference
• In the case of using switch, please keep in mind the combination
of antenna and each switch ports.
• In the case of selecting 14/18V switch, all of the polarization of
transponders in a satellite will be fixed as Vertical (14V) and
Horizontal (18V).
• It is not allowed to use 22KHZ tone switch and DiSEqC switch at
the same time because the attributes of both switches are utilizing
the same 22KHZ tone.
• In the case you want to use a “Tone burst” switch even though
there is no “Tone burst” switch selection in the menu, you can use
by selecting “DiSEqC” switch and connect A port of Tone burst
switch to port A or port C of DiSEqC switch and connect B port to
port B or D.
3. Signal Level.
When you select the “Signal Level”, you can check the strength of an antenna
connected satellite.
Press EXIT to return to Antenna Setup menu
4. Go to Auto Search
When you select “Go to Auto Search”, you can go to “Auto Search” menu.
Antenna
Antenna Setup
1
Signal Level
Go to Auto Search
Positioning Help
Satellite
ASTRA
Univ. LNB
YES
LNB Freq. 1
9750
Signal Level
Unlocked
TP1
0
21
ENGLISH
DSR 100 T GB 1/09/2000 16:29 Page 21
Page 25

5. Positioning Help
When you install the dish antenna, the receiver can calculate the elevation angle and
the azimuth angle for you and display this information on the screen.
· Input the position of the satellite you want to direct your antenna to the “Satellite
Position” field.
· Input the longitude and latitude where the antenna is installed in “Your Longitude”
and “Your Latitude” fields respectively.
· Select “Compute” to show the result of the elevation angle and azimuth angle.
Antenna Setup
Positioning Help
Satellite
ASTRA
19.2°
EAST
Longitude
000.0°
EAST
Latitude
00.0°
Compute
North
Elevation angle : 00.0°
Azimuth angle : 000.0°
22
ENGLISH
DSR 100 T GB 1/09/2000 16:29 Page 22
Page 26

4-2. Auto CH Search
All of the channels can be searched supposed that the selected satellite is properly
assigned to antenna in the “Antenna Setup” menu.
If no satellite is assigned to the selected antenna, “You must select a satellite in the
“ANTENNA SETUP” menu!” message will come up.
1. When you place the cursor on an antenna, the related information will be
displayed automatically. Then, select antenna as many as necessary from 1 to 16
to search channels by pressing
OK
key.
2. Select any one search option
Antenna Select
Information
Auto Search
1 9
2 10
3 11
4 12
5 13
6 14
7 15
8 16
Search Option
Start
Satellite
Univ. LNB
LNB Freq. 1
LNB Freq. 2
0/12 Volt
14/18 Volt
22 KHz
ASTRA
Antenna 1
YES
10600
9750
0 Volt
14 Volt
Not Used
DiSEqC Port A
23
ENGLISH
DSR 100 T GB 1/09/2000 16:29 Page 23
Page 27

· New TP: This will search only for newly added transponders in the selected satellite.
· Free Only: This will search all channels except scrambled channels in the selected
satellite.
· Scrambled/Not scrambled: This will search all channels in the selected satellite and
place scrambled channels to the last of the list.
- NIT ON : This will compare NIT to the current TP lists to find and store newly created TPs and
their channels.
- Fast Scan ON : This will search all the channels with the shortened time spending.
3. Select “Start” and press
OK
key to start searching channels.
Antenna Select
Information
Auto Search
1 9
2 10
3 11
4 12
5 13
Start
Satellite
Univ. LNB
ASTRA
Antenna 1
YES
DiSEqC Port A
1. ASTRA TP20/56Searching
Found The Following channel(s)
28%
Antenna Select
Information
Auto Search
1 9
2 10
Search Option
Start
Satellit
Univ. L
LNB Fr
LNB Fr
0/12 Vo
14/18 V
22 KHz
Antenn
Not Used
DiSEqC Port A
New TP
Free Only
Scrambled/Not scrambled
NIT ON
Fast Scan ON
OK
Search Option
24
ENGLISH
DSR 100 T GB 1/09/2000 16:29 Page 24
Page 28

4. When you start to search channels, the following will be shown on the screen.
· The name of satellite being searched.
· The number of transponder being searched.
· The percentage of searching progress.
· The name of channels found.
• For reference : The number of transponders can be bigger than the
preprogrammed because this DSR utilizes the NIT information transmitted by
satellite to add up channels automatically without searching.
5. If you want stop the searching during “Auto Searching”, press
EXIT
key on the RCU,
then, “Please wait for closing” message will turn up on the screen.
3. When searching is completed, the numbers of channels found will be displayed on the
screen.
4. When you go out of the “Auto Ch. Search” menu by pressing
EXIT
key, “Please wait
for saving data” message will turn up on the screen to save the found channels in the
list.
4-3. TP Setup
“TP Setup” can be used to search channels in a transponder or add up, change and
delete transponder on an existing satellite.
Antenna
TP Setup
1
Transponder
TP1
Frequency
11720
Symbol Rate
27500
Polarization
HOR
FEC
3/4
22KHz
OFF
Check Signal
Start
Set PID
Delete TP
Satellite
Univ. LNB
LNB Freq. 1
LNB Freq. 2
0/12 Volt
14/18 Volt
DiSEqC
ASTRA
YES
10600
9750
0 Volt
14 Volt
22KHz None
Port A
25
ENGLISH
DSR 100 T GB 1/09/2000 16:29 Page 25
Page 29

1. Place cursor in the “Antenna” field. Select an antenna by pressing
,
key or
press
OK
key for pull down menu.
2. Select a transponder in the “Transponder” box by pressing
,
key or by
pressing
OK
key.
3. “Frequency”, “Symbol Rate”, “Polarization”, “FEC”, and “22KHZ” of the selected
transponder will be displayed in each field. When you want to change the value
of each field, press numeric keys, left and right arrow keys and
OK
key as
needed.
4. To check the signal level of the active transponder, select “Check Signal” field and
press
OK
. Then, the signal level will be displayed.
• Lock: This means that the antenna and transponder data are properly set and the
DSR can search channels by selecting “Start”.
• Unlock: This means that the antenna and transponder data are not properly set,
therefore, the DSR is not in the condition to search channels.
• For reference : Please check the following points when the signal level message
is “Unlock”. Adjust the position of antenna until the signal level to be “Lock”.
Change the settings of transponder data up to be “Lock”.
Press EXIT to return to TP Setup menu.
5. Selection of “Start” will show the followings on the screen.
•The name of satellite/transponder searched.
•The name of channels found.
6. Upon completing the “Searching”, number of channels found will be shown on
the screen. When the number is “0”, the searching is failed.
7. In the “Set PID”, you can enter the video PID, audio PID and PCR PID of a certain
transponder and search channels of this transponder.
Each PID can be entered as decimal value. When the PID search is finished, the
following will be shown.
Signal Level
Unlocked
0
26
ENGLISH
DSR 100 T GB 1/09/2000 16:29 Page 26
Page 30

8. When you select “Delete TP”, then, a dialog box which is confirming that you want
to delete the active transponder or not. Select “Yes” for deletion, “No” for cancel
9. When you go out of the “TP Setup” menu by pressing
EXIT
key, it will return to the
previous menu.
4-4. Parental Lock
If you would like to restrict access to some channels, you can set a “Parental Lock” on
these channels. And then you can prevent your children from watching channels,
which are unsuitable for them. Only the person who knows the password can watch
the locked channels.
The Password is made up of 4 digits, which are not shown on the screen. Only
asterisks appear as you key in the password.
1. In order to set “Parental Lock”, key in the current password. The factory default
password is “0000”.
2. Select “On” or “Off” of the “Parental Lock” using , key.
3. Enter the new password when you want to change passwords
4. Confirm the password by entering the same password a second time in the
“Confirm Password” field, if the password do not match the message “Password
not matched!” appears.
Current Password
Parental Lock
New Password
Confirm Password
OFF
Parental Lock
27
ENGLISH
DSR 100 T GB 1/09/2000 16:29 Page 27
Page 31

When you select the “Parental Lock” to be on, almost all of the functions can be
accessed only after keying in the correct password.
When you select a locked channel in the “Favorite TV/Radio” or “TV/Radio Channel
Manager”, the message “Password” will be shown. Enter the current password to
watch or listen to the selected channel.
An “Access denied” message will be shown on the screen when you key in the wrong
password.
• For reference : Once you have entered the correct password in the channel list,
there is no need to enter the password again, unless you switch off the receiver.
• For reference : When you forget your password, please enter the master
password. Master password is “1250”.
4-5. Options
The “Options” menu allows the user to customize to his/her personal preference and
location.
OSD Language
Options
English
English German French
Time Offset
0 : 00
Summer Time
OFF
Screen Format
16 : 9
Video Output
RGB
TV Type
PAL
28
ENGLISH
DSR 100 T GB 1/09/2000 16:29 Page 28
Page 32

4-5-1. OSD Language
Select the appropriate language (English, German, French).
When you select language, the string of displayed language will be shown at the
bottom of screen.
4-5-2. Time Offset
Local time can be adjusted within +/- 12 hours referring to UTC.
For your reference, when you adjust the time, the name of cities in the same time zone
will be shown at the bottom of screen.
4-5-3. Summer Time
Summer Time can be set to “ON” or “OFF” depending on your location and season of
a year.
4-5-4. Screen Format
Screen Ratio can be changed from “4 : 3” to “16 : 9” as per the preference of the user.
4-5-5. TV Type
Three monitor types are supported: “PAL”, “NTSC” and “PAL & NTSC”.
4-5-6. Video Output
Two video output modes are supported: “CVBS” and “RGB”.
29
ENGLISH
DSR 100 T GB 1/09/2000 16:29 Page 29
Page 33

4-6. Data Transfer
DSR to DSR software upgrade and data transfer are possible through RS-232 cable.
1. Connect TV with the master DSR.
2. Select “Data Transfer” of the master DSR.
3. Connect slave DSR (should be in stand-by mode) with master DSR using RS-232
cable when “Please connect both receivers using RS-232 communication cable,
Select OK to continue” message is on the screen and select OK.
4. In the menu of “Data Transfer”, please place “ ” mark on the item as needed.
If you want to transfer both “User Data” and “Software”, please check both of
them at one time.
• User Data Transfer: This will upgrade the Satellite, Transponder and Channel
data.
• Software Transfer: This will upgrade software of DSR.
Please Connect Both Receivers
Using RS-232 Communication Cable
Select OK to Continue
OK CANCEL
30
ENGLISH
DSR 100 T GB 1/09/2000 16:29 Page 30
Page 34

5. Start the data transfer by selecting “Start” button and pressing OK.
6. The following message will turn up on the screen.
• Connecting … : This means connecting both receivers by RS-232 cable.
• Connecting … complete: Connecting is successful.
• Uploading….blocks x/x : Shows the numbers of blocks uploading.
• Writing…data (In the software transfer menu.): This is writing the uploaded
software into the flash ROM of slave DSR.
• Data Transfer Complete: Data transfer is completed
• Precaution : Please be sure to prevent from interrupting power in the process of
“Writing … Data”. In case of power interruption, the slave DSR will lose the
software.
7. If you want to stop data transfer during the User Data Transfer or Software Transfer,
select “Stop” and press OK key. Then, the previous menu will come up.
8. Upon the completion of Data Transfer, the power of the slave DSR will be Off and
On.
4-7. Factory Default
This function will reset all of the parameters to the factory default values. If you select
and press OK key on the “Load Factory”, the following will happen:
• All data for each transponder will be changed to the factory default value.
Data Transfer
User Data Transfer
Software Transfer
Start
31
ENGLISH
DSR 100 T GB 1/09/2000 16:29 Page 31
Page 35

• All channels in the list will be deleted.
• User installed options will be changed to their factory default value.
When this menu is selected, the message “Warning! All channels will be DELETED!
And All TP data will be INITIALIZED!” will be shown on the screen.
5. Receiver Info
“Receiver Info” section has a brief introduction of the DSR.
Receiver Information
Product : DSR100T
SW Version : 2.14h (102F)
HW Version : 100T-110-L
ROM Version : T1.16
Thomson multimedia
46 Quai A. Gallo
92648 Boulonge
France
Warning !
All Channel will be DELETED
And all Data will be INITIALIZED
YES NO
32
ENGLISH
DSR 100 T GB 1/09/2000 16:29 Page 32
Page 36

V. Troubleshooting
If you run into problems with the DSR, please use the following table to troubleshoot
the problem before requesting technical support.
Symptom Check points
The unit does not power up Make sure the power cord is connected correctly to the
mains supply.
Video is on, but no audio Make sure the A/V cables are connected securely.
Make sure Mute is not on. Increase volume.
No satellite TV channels Check if the direction of the antenna is correct. Check
if the antenna cable is connected securely. Make sure
channel searching has been done correctly and that
there are channels in the channel list
Poor video or audio Check if the signal level is strong enough. Check if the
satellite antenna is damaged. Adjust the height and
direction of the antenna.
Remote control unit Make sure the batteries are inserted correctly and not
does not work empty. Make sure the remote sensor is not blocked.
33
ENGLISH
DSR 100 T GB 1/09/2000 16:29 Page 33
Page 37

VI. Specifications
• System capabilities
Fully DVB compliant
• Demodulator
Waveform QPSK
Symbol rate 1-45Msps
• Video decoder
MPEG-2 Main Profile @ Main Level
Data Rates up to 15Mbits/s
Video formats 4:3, 16:9
• LCD in the front panel
Dynamic 7 Segment 4 Digit
• Audio decoder
MPEG-1 layer I & II (Musicam Audio)
Mono, Dual, Stereo, Joint stereo
• Application system resources
Processor STi 5500
RAM memory 2MByte
Flash memory 1MByte
Graphic display 720 x 576 (PAL)
720 x 480 (NTSC)
34
ENGLISH
DSR 100 T GB 1/09/2000 16:29 Page 34
Page 38

• Connector summary
I x LNB input (F-type)
2 x RCA jacks (AUDIO L/R)
2 x Scart ports (TV, VTR)
1 x RS232 (9-pin D-sub)
• TV Scart
RGB, CVBS, Audio L/R
• VCR Scart
CVBS IN/OUT, Audio L/R IN/OUT
• Hi-Fi quality audio output
Connector 2 x RCA (L/R)
35
ENGLISH
DSR 100 T GB 1/09/2000 16:29 Page 35
Page 39

• Serial data interface
Connector 9-pin D-sub
Signals RS232 max. 19.2K baud
• LNB / Tuner input
Connector 1 x F-type
Input frequency 950 - 2150MHz
LNB Supply 13/18V, Max.400mA
Band switch control 22KHz
SCPC & MCPC capable
C & KU band capable
• Input voltage
AC l00V-240V, 50-60Hz
• Power consumption
35W
• Dimension (W x D x H)
250 x 188 x 66 mm
• Weight
2.5Kg
36
ENGLISH
DSR 100 T GB 1/09/2000 16:29 Page 36
 Loading...