

Page 1

Thomson multimedia
46/47 quai A. Le Gallo
92648 Boulogne Cedex
FRANCE
RCS nanterre
B 322 019 464
5581737A
www.thomson-multimedia.com
Page 2

u s e r m a n u a l
DPL909VD
Page 3

Safety Information
CAUTION – INVISIBLE LASER RADIATION
WHEN OPEN AND INTERLOCKS FAILED OR
DEFEATED. AVOID EXPOSURE TO BEAM.
ATTENTION –
RAYONNEMENT LASER INVISIBLE
DANGEREUX EN CAS D'OUVERTURE ET LORSQUE
LA SECURITE EST NEUTRALISEE.
EXPOSITION DANGEREUSE AU FAISCEAU.
Thomson Information
CAUTION!
Invisible laser radiation when open. Avoid exposure to beam.
Class 1 laser product. This system must be opened only by
qualified technicians to prevent accidents caused by the laser
beam.
LASER λ = 780nm, P max=5 mW
Rating Information : At the bottom of the unit.
This unit complies with the existing requirements.
In accordance with the rating plate of the unit, this unit complies with current standards concerning electrical safety and
electromagnetic compatibility.
In accordance with the rating plate of
the unit, this unit complies with current
standards concerning electrical safety
and electromagnetic compatibility.
Please respect the environment!
Before throwing any batteries away, consult your distributor who may be able to
take them back for specific recycling.
Have a Blast-Just Not in your eardrums
Make sure you turn down the volume on
the unit before you put on headphones.
Increase the volume to the desired level
only after headphone are in place.
ADVARSEL!
USYNLIG LASERSTRÅLNING VED ÅBNING NAR
SIKKERHEDSAFBR
UNGDÅ UDSAETTELSE FOR STRÅLNING.
VORSICHT!
UNSICHTBARE LASERSTRALUNG
WENN ABDECKUNG GEÖFFNET UND SICHERHEITS–
VERRIEGELUNG ÜBERBRÜCKT.
NICHT DEM LASERSTRAHL AUSSETZEN!
VARNING–
OSYNLIG LASERSTRÅLNING NÄR DENNA DEL
ÄR ÖPPNAD OCH SPÄRRAN ÄR URKOPPLADE.
BETRAKTA EJ STRÅLEN.
VARO!
AVAT TAESSA JA SOUJALUKITUS OHITETT
OLET AL
LASERSÄTEILYLLE ÄLÄ KATSO SÄTEESEEN.
CLASS 1 LASER PRODUCT
LASER KLASSE 1
APP
LUOKAN 1 LASERLAITE
KLASS 1 LASERAPPARAT
YDERE ER UDE AF FUNKTION.
TTIINA NÄKYMÄTTÖMÄLLE.
AREIL
A LASER
DE CLASSE 1
AESSA
FOR UNITED KINGDOM VERSION ONLY
CONNECT THE MAIN LEAD INTO A MAINS POWER
SOCKET
POWER SUPPLY 230V ~ 50 Hz. It must not be connected to
D.C. mains.
Note: The mains lead of the sets is fitted with a moulded plug.
If the mains sockets are not compatible or if for any reason
the plug is removed please follow the directions below. The
moulded plug cannot be rewired and if removed must be disposed of safely.
Do NOT under any circumstances plug the severed plug into
any mains socket as this could result in electric shock.
Important: If the plug is removed rewire the new plug as
follows:
The wires in the mains plug are coloured in accordance with
the following code:
BLUE = NEUTRAL / BROWN = LIVE
As the colours of the wires in the mains lead of this apparatus
may not correspond with the coloured markings identifying
the terminals in your plug, proceed as follows:
BLUE wire to the terminal coded N (Neutral) or coloured black.
BROWN wire to the terminal coded L (Live) or coloured red.
Do NOT make any connection to the
terminal in the plug which is marked
by the letter E or by the earth symbol
or coloured green or green and yellow.
A fused plug must be fitted with
a 3A fuse approved by ASTA or
BSI to BS1362 and fuse covers
must be always be securely replaced. If your set does not
work, the fuse may be blown.
CA UTION
RISK OF ELECTRIC SHOCK
DO NOT OPEN
THE LIGHTNING
FLASH AND ARROWHEAD WITHIN THE
TRIANGLE IS A
WARNING SIGN
ALERTING YOU OF
"DANGEROUS
VOLTAGE" INSIDE
THE PRODUCT.
CAUTION: TO REDUCE THE
RISK OF ELECTRIC SHOCK,
DO NOT REMOVE COVER
(OR BACK). NO USERSERVICEABLE PARTS INSIDE. REFER SERVICING
TO QUALIFIED SERVICE
PERSONNEL.
SEE MARKING ON BOTTOM / BACK OF PRODUCT
WARNING:
TO PREVENT FIRE
SHOCK HAZARD,
DO NOT EXPOSE THIS PRODUCT
TO RAIN OR MOISTURE.
THE EXCLAMATION
POINT WITHIN THE
TRIANGLE IS A
WARNING SIGN
ALERTING YOU OF
IMPORTANT
INSTRUCTIONS
ACCOMPANYING
THE PRODUCT.
OR ELECTRICAL
Page 4

Table of Content
Table of Contents
General Information
Features ........................................................... 2
DVD region codes ........................................... 2
Disc can be playbacked ................................... 2
Glossary of disc term ....................................... 2
Conventions about this manual ..................... 2
Notes on disc ................................................... 3
Accessory ......................................................... 3
Inserting batteries into the remote control .. 3
Function Overview
Front panel ...................................................... 4
Back panel ....................................................... 4
Display ............................................................. 5
Remote control ............................................... 6
Connections
Connecting to speakers .................................. 7
Connecting to AM / FM antenna ................... 7
Connecting to TV and additional components
......................................................................... 8
Other Function
Tuning to radio stations ............................... 18
Preseting radio stations ................................ 18
Listening to preset radio stations ................ 18
Listening to an external source .................... 18
Sleep timer setting ........................................ 18
Troubleshooting........................................ 19
Specifications ............................................ 20
Cares and Maintenance............................ 21
Language codes ........................................ 22
Basic Setup
Setting up the Digital Home Theater system
......................................................................... 9
General setup ................................................ 10
Audio setup ................................................... 11
Setting the language .................................... 12
Setting the parental...................................... 12
Setting the password .................................... 12
Set as defaults ............................................... 12
Playing Discs
General operation......................................... 13
Basic playback ............................................... 13
Using the menu for DVD .............................. 13
Playing mp3 music files and displaying JPEG
files................................................................. 15
Using the menu for VCD.............................. 16
Using the menu for CD ................................. 17
Playing video CDs with PBC .......................... 17
1
Page 5

General Information
Features
• DVD player built-in Dolby Digital*2 / DTS*1 decoder.
• Digital amplifier.
•Tuner (AM/FM) receiver.
• Conforming DVD, SVCD, VCD1.1, VCD2.0, MP3, CDR,
CDRW and CD-DA discs.
• DVD navigation and SVCD, VCD 2.0 PBC controlling
functions.
• VFD front panel display and OSD menu display.
• Full function remote control.
*1
Manufactured under license from Digital Theater
Systems, Inc. US Pat. No. 5,451,942, 5,956,674,
5,974,380, 5,978,762 and other world-wide patents
issued and pending. "DTS" and "DTS Digital Surround" are registered trademarks of Digital
Theater Systems, Inc. Copyright 1996, 2000 Digital
Theater Systems, Inc. All Rights Reserved.
*2
Manufactured under license from Dolby Laboratories. “Dolby” and the double-D symbol are trademarks of Dolby Laboratories. Confidential Unpublished Works.
DVD region code
DVD players and discs are designed with region numbers
which dictate the region (printed on the rear panel). If the
region number of the DVD does not match with the region
number of the DVD player, you will not be able to play the
disc. If you try to play the DVD, the message “WRONG
REGION” will appear on OSD.
The region number for this DVD player is 2.
About CDR, CDRW, Audio mp3, Compact Disk Audio (CDA), DVD Video
This model is compatible to play CDR, CDRW, DVD+/- R, DVD
+/- RW, mp3 audio, Compact Disk Audio (CDDA), Video
Compact Disk (VCD), Dolby digital track, JPEG pictures.
While your disc player is compatible with the largest number
of discs possible, it cannot be guaranteed that you will be
able to play discs which might not be compatible with audio
CD, VCD and SVCD standards.
Glossary of disc terms
•Title (DVD)
The longest sections of a picture or a music piece on a
DVD; a movie, etc., for a picture piece on a video software; or an album, etc., for a music piece on and audio
software. Each title is assigned a title number enabling
you to locate the title you want.
• Chapter (DVD)
Sections of a picture or a music piece that are smaller
than titles. A title is composed of several chapters. Each
chapter is assigned a chapter number enabling you to
locate the chapter you want. Depending on the disc, no
chapters may be recorded.
•Track (Video or audio CD)
Sections of a picture or a music piece on a VIDEO or a CD.
Each track is assigned a track number enabling you to
locate the track you want.
Conventions about this manual
• Instructions in this manual describe the controls on the
system. You can also use the controls on the remote
control if they have the same or similar names as those
on the system.
• The types of functions and operations that can be used
for a particular disc vary depending on the features of
that disc. In some cases, these functions and operations
may differ from the descriptions given in this Operations
Manual. In that case, follow the instructions given on the
screen. This Operations Manual only covers basic disc
operations.
• For some operations, a icon may appear on the the
screen. This indicates that the operation described in this
Operations Manual is not permitted for the current disc.
• The drawings about the TV screen and front panel
display used in this Operations Manual are purely for the
purposes of explanation. The actual displays may differ
slightly from what are shown here.
ATTENTION
This unit is incompatible with the following disc formats:
DVD-ROM, DVD RAM, CDV, SACD, DVD Audio (High resolution tracks). Data part of CD Extra, disc with non standard
shape (e.g. heart), disc with region code different from the
one specified on the back of the unit.
2
Page 6
General Information
Notes on disc
Disc handling precautions
•To keep the disc clean, handle the disc by its edge. Do
not touch the surface.
• Do not stick paper or tape on the disc.
If there is glue (or a similar substance) on the disc, remove
the glue completely before using the disc.
n
D
o
s
i
g
m
i
t
o
a
h
l
T
V
c
i
s
d
i
e
D
o
• Do not expose the disc to direct sunlight or sources
such as hot air ducts, or leave it in a car parked in
direct sunlight as there can be considerable rise in
temperature inside the car.
• After playing, store the disc in its case.
• Do not write on the label side with a ball-point pen or
other writing utensils.
• Be careful not to drop or bend the disc.
Disc cleaning precautions
• Before playing, clean the disc with a cleaning cloth.
Wipe the disc from the center out.
Accessary
Check that you have the following items:
• Main unit (1)
• Subwoofer (1)
• Speakers (5)
• Remote control (1)
• AAA batteries (2)
•Video cable (1)
• Speaker cords (6)
• AM loop antenna (1)
• FM pigtail antenna (1)
• Operations Manual (1)
Inserting Batteries into the Remote
Control
You can control the system using the supplied remote.
Insert two batteries by matching the + and - on the
batteries. When using the remote, point it at the remote
sensor on the front panel of this system.
Note
• Do not leave the remote in an extermely hot or humid
place.
• Do not use a new battery with an old one.
• Do not drop any foreign object into the remote casing.
particularly when replacing the batteries.
• Do not expose the remote sensor to direct sunlight or
lighting apparatuses. Doing so may cause a malfunction.
• If you will not use the remote for an extended period
of time, remove the batteries to avoid possible damage from battery leakage and corrosion.
EN
• Do not use solvents such as benzine, thinner,
commerically avaiable cleaners or anti-static spray
intended for viny1 LPs.
Disc installing precautions
• Do not install more than 1 disc on disc tray.
• Do not place the disc on the tray up-side down.
• Do not try to close the disc tray when the disc is not
installed properly.
3
Page 7

Function Overview
Front panel
1
1. STANDBY/ON
Switch the main power on /off.
2. OPEN/CLOSE
Press to open /close disc tray.
3. SOURCE
Press to select source: DVD/CD, FM, AM, AUX1,
AUX2.
4. SELECT
Press to toggle between BASS, TREBLE and Speaker’s
level setting, and use PREVIOUS or NEXT to change
setting.
2 5 6 7 8 9 103 4 9
6. STOP
Press to stop playback
7. PREVIOUS (TUNING -)
In Disc mode, press to skip to the previous track.
In tuner mode, press to tune down the radio frequency.
8. NEXT (TUNING +)
In Disc mode, press to skip to the next track .
In tuner mode, press to tune up the radio frequency.
9. VOL
Increase or decrease the master volume level.
5. PLAY/PAUSE
Press to start or stop playback temporarily.
Back panel
1 2
1. AM / FM ANTENNA
Connect to AM loop antenna or FM antenna.
2. S-VIDEO OUT
Connect to TV with S-video input.
3. SPEAKER
Connect to the supplied speakers.
4. SCART OUT
Connect to TV with SCART input.
5
10. PHONE
Connect the headphone.
3
8
5. VIDEO OUT
Connect to the TV video input.
6. AUDIO OUT
Connect to the audio input of an external recording
device or amplifier.
7. AUDIO IN (AUX 1 / AUX 2)
Connect to audio output of TV, VCR or any audio
device.
8. S-VIDEO / SCART OUTPUT SELECTOR
Select either S-video or SCART video output.
487 6
4
Page 8

Display
Function Overview
EN
1. Speaker Icons - Indicates which of the six speakers is
operating.
2. Status Bar - Shows the operating information.
3. Frequency Unit Indicator - In AM mode, “KHz” lights up.
In FM mode, “MHz” lights up.
4. VCD indicator - Shows when VCD is playing.
5. Dolby Pro Logic - Shows when the playing disc is recorded
in Dolby Pro Logic format.
6. Dolby Digital indicator - Shows when the playing disc is
recorded in Dolby Digital format.
7. DVD indicator - Shows when a DVD is playing.
8. PAUSE indicator - Shows when playback is paused.
9. PLAY indicator - Arrow icon is lit during playback.
10. Title indicator - Shows the title number.
11. Track Indicator - Shows the track number on CD.
12. Preset indicator - Shows the preset station.
13. Chapter indicator - Shows the chapter number.
14. Program indicator - Shows when programming is in
progress.
15. Sleep indicator - Shows when the sleep timer is activated.
16. Repeat indicator - Shows when the repeat function is
activated.
17. A-B indicator - Shows when the repeat AB function is
activated.
18. DTS indicator - Shows when the playing disc is recorded
in DTS format.
19. STEREO indicator - Shows when the playing disc is
recorded in STEREO format.
20. CD indicator - Shows when playing CD.
21. mp3 indicator - Shows when playing mp3 disc.
5
Page 9

Function Overview
Remote Control
Please be sure you have inserted the batteries into the
remote control (see relevant section on page 3.) You can test
it by pressing any button.
22
2
4
5
21
17
19
15
13
6
10
14
18
1. ON-OFF
• To turn on or turn off the receiver and other auxiliary components.
2. Source Buttons
• To turn on and select various audio / video sources.
3. CH+, CH- (Channel Buttons)
• To select programmed stations in TUNER mode.
• To skip to the next / previous chapter, track or image in DVD, CD , mp3
and JPEG mode.
4. VOL+, VOL- (Volume Buttons)
• To adjust the volume level.
5. MUTE
• To mute / un-mute all audio outputs.
6. INPUT
• Press to select VCR or TV input.
1
3
11
9
7
20
16
8
12
2
7. Adjustment Buttons
• When the display shows the general setup page, press the arrow buttons
to select the option you want to change, and press the up and down
buttons to make changes, then press OK to finalize your choice.
8. Number Buttons
• In Tuner mode, press to select a preset station.
• In DVD/CD mode, enable pull down menu by INFO•RDS key (Button 15),
then press the OK key to select field to be adjusted. Press the Number
Buttons to direct input the settings (e.g. CD track)
9. MENU
• In Tuner mode:
- Press TUNER to select band.
- Press to store desired frequency in memory. The flashing word PROG will
appear on display. Input your desired channel number while the word is still
flashing and the frequency will be stored.
• In DVD mode, press for menu setup for DVD title.
10. Operation Buttons
• Press TUNER on the remote to enter tuner mode. In TUNER mode, you can
press TUNER to select band, and press TUNER + or TUNER - buttons to tune
down or up the radio frequency.
• In CD/DVD mode
- press the PLAY button to start playback.
- press the STOP button to stop playback.
- press the PAUSE button to pause playback.
- press the REVERSE/FORWARD buttons to search backward/foward through
the disc.
•
In DVD mode
- press the PAUSE button to pause playback and then press REV or FWD
buttons to make a backward and forward slow motion playback. A number
of speeds can be selected by toggling REVERSE or FORWARD buttons.
Reverse slow motion will be available at the same step as Forward play for
DVD only. Only 3 different speeds are available in VCD/SVCD forward play.
11. RETURN
• Press to go back to previous menu or exit setup menu completely
12. AUDIO
• Press to select the audio channel you like.
Mono Right)
•
In SVCD mode, press to toggle 4 different audio channels (if
available).
• In Tuner mode, press this button to switch from ST to MONO mode and
vice-versa.
• In DVD mode, press to select different audio channel (if available).
13. ANGLE (DVD only)
• Press to select different screen display angles.
14. ZOOM
• During VCD/SVCD/DVD/JPEG files playback, press ZOOM key and then
press UP/DOWN/LEFT/RIGHT to pan the image.
15. INFO-RDS
• In DVD/CD mode, press to display playback information.
• In TUNER mode, press to display RDS information.
16.TITLE-GUIDE
• Press to go to the title menu at DVD mode.
17. DSP
• Press to change the surround sound settings. The display will toggle
among Dolby Digital, DTS and Stereo.
18. PLAYMODE
• Press to enter repeat mode selection.
19. EQUALIZER
• Press to toggle between BASS, TREBLE and speaker’s level setting, then
press LEFT/RIGHT to change the setting.
20. BASS
• To adjust BASS / TREBLE, press this button once to choose either bass or
treble, then press LEFT/RIGHT to adjust level. (Bass/ treble adjustment is not
allowed for DTS source)
21. CLEAR / SLEEP
• Press once to enter or quit SLEEP mode.
22. TV
• Press to enable the remote to control a RCA TV.
• Press DVD, TUNER, AUX1 or AUX2 buttons to return to the appropiate
mode.
(VCD/SVCD/DVD/JPEG file)
(e.g. Stereo / Mono Left /
6
Page 10

Connections
RIGHT
-
+
Black
Red
White
Black
+
-
FR
FL
8 ohm
Black
REAR
-
C
+
Grey
SR
LEFT
-
+
SL SW
6 ohm
Black
REAR
-
+
Blue
CENTER
-
+
Black
Purple
Black
Green
EN
-
+
Connecting to AM / FM antenna
• Connect the supplied AM loop antenna to the AM jack.
Position the loop antenna to receive the clearest sound.
• Connect the supplied FM antenna to the FM jack. Move
the antenna in various direction until the clearest signal
is received.
Note
• Keep the antenna as far away as possible from the TV,
VCR or any radiation source to prevent unwanted noise.
If you have poor FM reception
For better FM reception, use a 75 ohm coaxial cable (not
supplied) to connect the system to an outdoor FM antenna
as shown.
AM
Connecting to Speakers
Connect the supplied speakers ,using the supplied speaker
wires to match the colors of the jacks and speaker wires.
• Connect the supplied speaker wire its corresponding
terminal jacks.
To avoid short-circuiting the speakers
• Short-circuiting of the speakers may damage the system.
To prevent this, make sure to take the following precautions when connecting the speakers.
• Make sure the stripped end of each speaker cord does
not touch another speaker terminal or the stripped end
of another speaker cord.
Note
• Be sure to match the speaker cord correctly.
• For optimal sound performance, use the supplied speakers.
• Do not connect speakers with an impendence lower than
the speakers supplied.
Examples of poor conditions of the speaker cord
• Stripped speaker cord is touching another speaker
terminal.
• Stripped cords are touching each other due to excessive removal of insulation.
FM 75
Ω
7
Page 11

Connections
Connecting to TV and additional components
• Use the supplied audio cables to connect AUDIO IN
jacks to the corresponding AUDIO OUT jacks on the
TV, VCR or other audio/visual components.
• Use the audio cables to connect AUDIO OUT jacks to
the corresponding AUDIO IN jacks on the TV, CD or
TAPE recorder.
VCR
TO AUDIO IN (VCR)
TO AUDIO OUT (VCR)
• Connect the S-VIDEO OUT jack to the S-Video input
jack on the TV using a S-Video cable. (not included)
• Connect the VIDEO OUT jack to the Video input jacks
on the TV using a video cable.
• Connect the AUX2 jacks to any audio/video device
using Audio/Video cables
• Connect the SCART out jack to the TV with corresponding input (if available).
TO VIDEO IN (VCR)
TV
S-VIDEO IN
SCART IN (TV)
(TV)
(If available)
L
1
TO AUDIO OUT (SAT)
2
VIDEO IN (TV)
S-VIDEO
S-video provides a better connection for the video portion of the signal
SAT
than composite video (yellow color terminal). When connecting S-video
cable, a Composite video cable (yellow RCA connector) must also be
used. S-video provides video output for DVD playback only.
SCART video output
SCART video terminal provides the best quality for video signal. If there is no SCART socket is available on your TV set,
check whether your TV has another Video socket (Composite, S-Video) that you can use to connect your player.
Setup Video output
You can select either S-video or SCART as your video output, then you must turn off and on the unit to validate selection.
When S-video output is selected, only S-video and composite output will function properly.
When SCART output is selected, only composite output will function properly.
8
Page 12

Basic Setup
Setting up the Digital Home Theater system
You must connect all the speakers and setup the system
properly in order to enjoy the Cinema experience at home.
You will have the feeling of being in the middle of the
action, because sound is coming from everywhere around
you. The subwoofer can enhance the bass performance of
your system dramatically.
1 Press the EQUALIZER button to select a channel. The
level of the channel will appear on the front panel
display. (FL, FR, C, SL, SR, SUB, TRE, BASS change cyclically)
TRE (Treble level) and BAS (Bass level) adjustable range: 10 dB to +10 dB, at 2 dB/step.
2 Use the TUNER+ and TUNER- buttons to adjust the
selected channel’s level.
The value will be stored in the system automaticallywhen
you release the TUNER+ or TUNER- buttons for a few
seconds.
3 Press the DSP key, the surround mode will show on VFD.
Note
• The optional items vary with the change of listening
mode.
To adjust the volume of all the speakers (Master
Volume) at one time
Use the VOL+ and VOL- buttons in normal mode.
Enter Setup Menu
1 Press STOP to enter SETUP MENU when a DVD/VCD/CD
disc is playing. Press Info twice after press STOP when a
mp3 disc is playing.(If there is no disc in the disc tray,
system will enter SETUP MENU automatically)
2 Use
3 Press OK to confirm a highlighted selection.
4 To exit setup menu, return to the main menu and select
/ / / to select your preferred option.
Play.
General setup
EN
1. Setting the TV display
You can select the aspect ratio of the TV display.
• 4x3 Standard
If you have a conventional TV set
and your DVD is not formatted for
widescreen viewing, use this
setting. A wide picture is displayed
on the whole TV screen with a
portion automatically cut off.
• 4x3 Letterbox
If you have a conventional TV set
and your DVD is formatted for
widescreen viewing, use this
setting. Wide bands will be
displayed on the upper and lower
portions of the TV screen.
• 16x9 Widescreen
If you have a widescreen TV
set, use this setting (you
must also set your
widescreen TV to “full size”)
2. Selecting the language for OSD
This function allows you to select the desired language.
The default setting is English.
Option: English, French, German, Italian, Spanish.
9
Page 13

Basic Setup
Audio Setup
Downmix
This function can process a multi-channel audio source to
a two channel stereo signal. The options are Stereo and
Off.
2 Test tone
• This function is available to DVD mode only.
• When setting TEST TONE on, the unit will give signals
to each speaker respectively, so you can decide if any
fine-tuning is needed for that speaker.
• The test tone function can be activated even when
there is no disc in the tray.
Dynamic range setting
In many listening situations, it is not recommended to set
the volume too high, and thus the loudest sound must
be compressed downwards in level. Likewise, the very
quiet sounds would be inaudible and must be brought
upwards in level to be heard. Dolby Digital satisfies these
needs through the dynamic range controlling.
Selects the dynamic range compression to fit the individual listening situation of the audience. The variable
range is Softer, Soft and OFF.
• Softer: Audio with highly compressed dynamic range.
• Soft: Audio with partially compressed dynamic range.
• OFF: Audio without compressed dynamic range.
Note: Dynamic range is only applicable on Dolby
Digital soundtrack.
Speaker setup
1 Distance setup
In order to make the surround sound more effective and suit the
accoustic conditions in your listening room, you may need to delay
the signal coming from some of the speaker by setting the distance
between the speakers and the listening position.
• This function is to set the distance of the front
speaker, center speaker and rear speaker.
• The distance range is from 1.5m to 9.2m.
10
Page 14

Basic Setup
Play mode setup
Setting the Program
You can use this functon to play follow the program list
you edit.
Preferences setup
EN
Setting the TV type
You can setup the colour system of this unit to match up
your connected TV set. If the colour system of this unit is
different from that of the TV set, the images can not be
displayed normally on the screen. The default setting is
PAL.
• Use
• Select Add to add new chapter to the program list.
• Select Delete to delete chapter from the program list.
• Select Play to play the program list.
• Select Done to save the changing.
/ / / keys to select the Title / Chapter.
• MULTI
If the connected TV is multi system, select this mode.
The output format will change in accordance with the
video signal of the disc.
• NTSC
If the connected TV is NTSC system, select this mode. It
will change the video signal of a PAL disc and output in
NTSC format.
• PAL
If the connected TV is PAL system, select this mode. It
will change the video signal of a NTSC disc and output
in PAL format. (Default setting)
WARNING: Do not change the setting unless you have a
NTSC TV set imported from other countries.
11
Page 15

Basic Setup
Setting the language
This is to select the audio language, subtitle language and
the language used on TV screen menus or DVD menus that
will always be used for every disc to be played. The default
setting is ENGLISH.
• AUDIO: Select the desired audio language.
• SUBTITLE: Select the desired subtitle language
• DISC MENU: Select the desired disc menu language.
Setting the Parental
This function allows to set playback limitation level. Playing
some DVD discs can be limited depending on the age of the
user.
Explanation of Ratings Limits
The Rating Limits feature lets you determine what types of
discs can be played in the player, and what types of discs will
require a password to override the rating limit that you’ve
set. In the United States of America (USA), the ratings
feature is based on the ratings set up by the MPAA (Motion
Pictures Association of America) such as R, PG, G, etc. Some
countries use a different rating system.
The system ranks the ratings from 1 to 8 in order to accommodate the ratings systems used in other countries (1 is
considered material that is least offensive and 8 is considered the most offensive).
Note: In order for the Ratings Limits to be enforced, the
DVD Player must be locked and the disc you’re playing must
contain a movie (or a title) that is rated.
Lock setup
Lock player/Unlock player
If you choose Lock player, you have to input the pass-
word you set before enter the Lock setup menu the next
time. Choose Unlock player to exit Lock player mode.
Change password
To change password, you should Lock player first.
Reset as Defaults
Select the RESET and press OK, all settings in DVD/CD mode
will be reset to default setting.
Note :If you forget the NEW password
• Input the default password 3308 to enter the Lock
setup menu.
• Choose Unlock player
• Go to Lock player and enter your new code.
12
Page 16

Playing Discs
General operation
1 When you complete all the connections, plug the AC
power cord of the player and subwoofer.
2 Press STANDBY/ON to switch ON the main power.
3 Press SOURCE to select the input source.
4 Press OPEN/CLOSE to open the disc tray, press again
to close the disc tray.
5 Press VOL +/- to increase or decrease the volume level.
6 Press MUTE to shut off the sound. To restore the
volume, press it again.
Basic playback
Start playback
• Press PLAY / PAUSE ll on the front panel.
To interrupt playback, press ll again .
Note
• Some discs will start playing automatically, and others
will display the menu on the TV screen. use the / /
/ to select the track, or press the number keys (0 ~
9) to go to the desired track/chapter.
Stop playback
• Press STOP .
Skip to another track/chapter
• Press l / l repeatedly during playback to skip to next or
previous track/chapter.
Fast search
• For DVD / mp3 discs
FF(fast forward) : FF 2x, FF 4x, FF 6x, FF 8x.
FR(fast reverse) : FR 2x, FR 4x, FR 6x, FR 8x.
• For VCD / CD discs
FF(fast forward) : FF 1x, FF 2x, FF 3x, FF 4x.
FR(fast reverse) : FR 1x, FR 2x, FR 3x, FR 4x.
• To resume normal playback, press PLAY .
Using the menu for different types
of discs
Using the On-screen banner display
Title
Time Display
1 Press INFO while playing a DVD disc.
The on-screen banner display appears on the TV screen.
2 Use the / buttons to select the item you want to
change. And use the
tings.
Depending on the disc, you can use the number buttons
(0~9 ) to select the item.
3 Use the number buttons (0~9) to input the time you
want to access.
4 Press INFO again to exit.
Chapter
Time Display (all Info Displays)
This feature displays the elapsed time during playback. For
DVD discs, the time displayed refers to the current title and
acts as a Time Search feature. You can skip right to any
scene.
Highlight the Time Display, and use the number buttons on
the remote to enter the elapsed time you want to go to.
You must use two digits for each field. For example, if you
enter 01: 35: 12, playback will start at 1 hour, 35 minutes,
and 12 seconds.
Note: For Audio CDs, the time displayed refers to the track
that’s playing.
Title/ Track Icon (all Info Displays)
Some DVD discs contain more than one title. Each title is
divided into chapters. CDs are divided into separate tracks.
To select a title/ track: After you highlight the Title/ Track
icon, use the number button( s) on the remote to enter the
title number (track number) and press OK, or press the
buttons to scroll through the titles/ tracks.
Note: Many discs only have one title.
Audio Playmode
Subtitles
/ buttons to change the set-
Angle
EN
/
13
Page 17

Playing Discs
Subtitles Icon (DVD Info Display)
By default, subtitles are off. To turn subtitles on:
1. While a disc is playing, press INFO (the Info Display
appears).
2. Use the
3. To change the subtitle language, press the
repeatedly to see what subtitle languages are available (the
subtitle language options appear in the box at the bottom
of the Info Display).
4. Press OK.
Notes: Changing the subtitle language with the Info Display
will only affect the disc you are currently playing. When the
disc is removed or the player is turned off, the subtitle
language will revert to the language setting specified
through the DVD player’s main menu.
If the disc doesn’t contain the language you select, the disc’s
default language is automatically selected.
Some discs are programmed to allow access to the subtitle
feature through the disc’s menu only. During playback, press
MENU to access the disc’s menu.
button to scroll to the Subtitle icon.
/ button
Audio Language Icon (DVD Info Display)
If the disc was created with different language tracks
(recorded in different languages), you can change the
language while you’re playing the disc.
1. While a disc is playing, press INFO (the Info Display
appears).
2. Press the button until the Audio icon is highlighted.
3. Press the
available audio languages.
4. When the language you want to use is highlighted, press
the OK button (the dialog plays in the language you selected).
Notes: The language feature only works if the disc was
created with multiple language tracks. If the disc doesn’t
contain the language you selected, the disc will play in the
default language.
When you choose an audio language during disc playback,
you only override the audio language setting in the DVD
Player’s main menu temporarily.
The audio language can also be changed through the DVD
player menu. During playback, press MENU to access the
disc’s menu.
button on the remote to scroll through the
Play Mode Icon (DVD, CD Info Displays)
The Play Mode options available depend upon the type of
disc you’re playing. The default play mode (standard play)
plays the disc’s contents in the order in which the disc was
created (i. e., track 1 plays first, followed by track 2, etc.)
Repeat
By default the Repeat feature is Off. The options available
depend upon the type of disc you’re playing.
• With DVD discs you can repeat the title, chapter or use AB
repeat.
• With Audio CDs you can repeat the disc, a track, or create
a program that plays repeatedly.
Repeating Discs, Titles, Chapters, or Tracks
1. While a disc is playing, press INFO (the Info Display
appears).
2. Press the button until the Play Mode icon is highlighted.
3. Press the
options until you see the repeat option you want to use (the
options appear at the bottom of the Info Display). Press OK
to select and activate.
4. To turn off the Repeat feature, press the
repeatedly until Play Mode: Repeat Off appears.
/ button to scroll through the different
/ button
Camera Angle Icon (DVD Info Display)
Some discs contain multiple angles of a particular scene. If
the disc has only one angle, this feature won’t work.
1. While a disc is playing, press ANGLE on the remote. If the
disc wasn’t created with multiple angles, (the invalid symbol) appears. If the disc contains multiple angles, the Angle
icon appears with the current angle number and the
number of angles available. For example, 1/ 4 indicates
that Angle 1 is displayed and there are 4 different angles
available.
2. Press the ANGLE button again to go to the second
camera angle. Press ANGLE again to go to the third angle,
etc.
3. To resume normal playback, scroll through the camera
angles until you get to Angle Off .
Picture Zooming
14
This function allows you to enlarge the picture on the TV
screen and to pan through the enlarged image.
1 Press ZOOM repeatedly to select a zoom factor as
below:
Changes as Play, Zoom x 1.5, Zoom x 2, Zoom x 3 cyclically.
2 To pan though the enlarged image, press
buttons to move the zoomed picture left, right, up or
down.
/ / /
Page 18

Playing Discs
Playing mp3 music files and displaying
JPEG files
This unit is able to play mp3 files and view JPEG image files.
Please read the following for detailed procedures.
1. Open the tray by pressing the OPEN•CLOSE button.
2. Place the disc with the printed side facing up.
3. If the AutoPlay option in the Play Mode menu is enabled,
the disc’s contents are displayed, otherwise press the PLAY
button to display them.
4. Select a folder using the
remote control, then press OK to display the list of files or
press PLAY to start playing all the files contained in the
folder.
5. Select a file using the
then press PLAY to start playback.
6. To display the Info menu, press the INFO button when
playback is stopped.
..
BUT SERIOUS
/ / / buttons on the
/ / / buttons in stop mode,
SMART NAVI
..
PHIL COLLIN 1
MP3
PHIL COLLIN 2
MP3
PHIL COLLIN 3
MP3
PHIL COLLIN 4
MP3
PHIL COLLIN 5
MP3
mp3 recommendation
• Use .mp3 as the extension when converting audio files
into mp3 for saving onto CD-R(W) or CD-ROM, e.g.
Rocky08.mp3. Do not use any other extension e.g. .doc, .pdf.
• Do not use the .mp3 extension for other text or non-audio
data files as this may result in serious malfunction and
harmful noise interference.
• Most commonly available CD creation software can make
files compatible for the system but do not forget to finalize
your disc after creation. This set cannot read DirectCD
recordings.
•In order to get audio CD quality, you need to record your
mp3 CD at 128 kbps. You can record up to 256 kbps. Beyond 256 kbps, the unit might not read the CD.
• Do not combine CD Audio and mp3 tracks onto a CD-R(W)
or CD-ROM. The player will only playback CD audio tracks
from mixed CD formats.
EN
PLAYMODE
* mp3 file: use the / buttons to select folder/file/
playmode in the SMART NAVI menu, then use the
buttons to choose your desired folder/file/playmode.
* mp3 playmode: there are 5 playmodes totally such as
Normal, Disc Repeat, Folder, Folder Repeat and Track.
* JPEG file: During the slide show you can use the ZOOM
button to magnify the picture and then press
pan the image.
7. When the player has played all the music or JPEG files, the
disc’s contents appear.
8. Press STOP to end playback at any time.
Note: The time taken for the contents of the disc to be
displayed varies according to the size and number of JPEG
files on the disc. If nothing is displayed after a few minutes,
it is likely that certain files are too large. Tr y
reducing the files’ resolution and write another disc.
Displaying JPEG files or playing mp3 files
Before inserting a disc, check that it is compatible with the
player.
NORMAL
/
/ / / to
15
Page 19

Playing Discs
Using the VCD menu
1 Press INFO while playing a VCD disc.
The VCD menu appears on the TV screen. The contents
of the menu vary from disc to disc.
2 Use the / buttons to select the item you want to
change. And use the
tings.
Depending on the disc, you can use the number buttons
(0~9 ) to select the item.
3 Press the INFO again to exit.
Item 1: Select VCD Track
Use the / buttons to select the track you want to play.
Depending on the disc, you can use the number buttons
(0~9 ) to select the track.
Note
• This function is no use when at PBC ON mode.
Item 2: Set PBC ON/OFF
Use the / buttons to set PBC ON/OFF
Item 3: Select VCD Audio Channel
Use the / buttons to select Audio Channel, the options
are: Stereo, Mono right, Mono left.
In SVCD mode,press “AUDIO” to toggle 4 different audio
channels ( if available )
/ buttons to change the set-
Playing Video CDs with PBC
When playing Video CDs (Version 2.0) with PBC functions,
you can enjoy simple interactive operations, operations
with search functions, etc.
PBC playback allows you to play Video CDs interactively,
following the menu on the TV screen.
1 Press INFO to set PBC function on.
2 Start playing a Video CD with PBC functions, the system
will enter PBC playback automatically. The menu appears
on the TV screen.
3 Use the number keys (0 ~ 9) to select the item you want.
For some discs, you can only select the items using the
number buttons.
4 Press OK to execute your selection.
5 Follow the instructions on the menu screen for interac-
tive operations.
Refer to the instructions supplied with the disc, as the
operating procedure may differ according to the Video
CD.
To go back to the menu screen
• Press RETURN to go to the main menu when PBC on.
• Press STOP when playing a VCD disc with PBC on/off.
To cancel PBC playback function and play a Video CD
with PBC functions in Continuous Play mode.
• Press INFO and set PBC OFF. If a disc is playing, the
playback will not stop.
• Press PLAY to start playing the disc in Continuous Play
mode.
16
Page 20

Playing Discs
Using the CD menu
1 Press the INFO while playing a CD disc.
The CD menu appears on the TV screen. The contents of
the menu vary from disc to disc.
2 Use the
change. And use the
Depending on the disc, you can use the number buttons
(0~9 ) to select the item.
3 Press the INFO again to exit.
Item 1: Select CD Track
Use the
play.
Depending on the disc, you can use the number buttons
(0~9 ) to select the track.
/ buttons to select the item you want to
/ buttons to change the settings.
/ buttons to select the track you want to
Item 2: Select CD Program Mode
Use the
Normal play: Plays tracks in normal order.
Shuffle on: Plays tracks in random order.
Item 3: Repeat
The repeat modes are: Repeat A-B, Repeat all, Repeat
track and Repeat Off.
Item 4: CD Intro Mode
If you set this function on, it will play the front segments
of each tracks for about 10 seconds, in order to give you
a brief introduction of all the tracks.
/ buttons to select CD Program Mode.
EN
17
Page 21

Other Function
Tuning to radio stations
1 Press POWER to switch on the system.
2 Press SOURCE repeatedly until “FM” or “AM” appears
on the front panel display.
You can press the TUNER button to select FM or AM
directly.
The last received station is tuned in.
3 Press and hold TUNER - (
remote control or TUNING UP/DOWN on the front
panel until the frequency indication starts to change.
The system will search the station automatically.
• For manual tuning, press TUNER- ( ) or TUNER+ ( ) on
the remote control or TUNING UP/DOWN on the front
panel repeatedly.
) or TUNER+ ( ) on the
Preseting radio stations
You can preset up to 40 stations for FM or AM randomly.
1. Tune to your desired radio station.
2. Press MENU, “PROG” will flash on display.
3. Press Up/Down to select a preset station
4. Press OK to store the station.
You can search for stations using one of the
following program types:
RDS NEWS (news), AFFAIRS ( news and documentaries), INFO
(weather, medical), SPORT (sports), EDUCATE (education),
DRAMA (series and plays), CULTURE (religion), SCIENCE
(science and technology), VARIED (miscellaneous), POP M
(pop music), ROCK M (rock music), MOR M (middle-of-the
road music), LIGHT M (light music), CLASSICS (classical
music), OTHER M (unclassified music).
Listening to an external source
• Press SOURCE on the front panel to select AUX1 or AUX2
or press AUX1/AUX2 buttons on the remote directly.
Sleep timer setting
The sleep timer enables the system to switch to standby
mode automatically at a preset time.
1 Press SLEEP repeatedly to select a preset time:
• 120 (minutes)
50 40 30 20 10 00 (OFF) 120 ...
To cancel the sleep timer
• Press SLEEP repeatedly until “0FF” appears.
110 100 90 80 70 60
5. To preset another stations,repeat steps 1-4
Listening to preset radio stations
1. In tuner mode, press CH+/- or number keys (0 ~ 9) to
select the desired preset stations.
Tuning to a RDS station
Tip: RDS stations broadcast on FM only.
1. Follow steps under “Tuning to a Station” to tune
to the desired radio station or follow steps under
“Using Presets” to tune to a preset station.
2. If RDS station is found, station name will show on the
display.
Displaying RDS Station Information
Press PLAY/RDS on the main unit or INFO.RDS on the
remote to display the frequency, station name (PS), station
type (PTY) or radio text (RT) in radio mode.
Searching by Program Type (PTY)
1. Press TITLE-GUIDE/PTY to enter PTY selection
2. Press TITLE-GUIDE/PTY repeatedly to select a PTY
mode.
3. Within 5 seconds, press SKIP BACKWARD / SKIP FORWARD on the main unit or TUNING - or + on the remote
control to search for a station broadcasting the selected
type of program.
18
Page 22

Troubleshooting
If you experience any of the following difficulties while
using the system, use this troubleshooting guide to help you
remedy the problem. Should any problem persist, consult
your nearest service center.
No power
• Is the power cord firmly plugged into the power outlet?
• One of the safety mechanisms may be operating. In this
event, unplug the player from the power outlet briefly
and then plug it in again.
No picture
• Check that the system is connected securely.
• The video connecting cord is damaged. Replace it with a
new one.
• Make sure you connect the system to video input connector on the TV.
• Make sure you turn on the TV.
• Make sure you select the video input on the TV so that
you can view the pictures from this system.
The picture noise appears
• Clear the disc.
• If video from this system has to go through your VCR to
get to your TV, the copy-protection applied to some DVD
programs could affect picture quality. If you still experience problems after checking your connections, please
try connecting your DVD system directly to your TV’s SVideo input, if your TV is equipped with this input.
The aspect ratio of the screen cannot be changed even
though you set “TV DISPLAY” in the SETUP menu when you
play a wide picture.
• The aspect rate is fixed on your DVD disc.
• If you connect the system with the S-Video cable, connect
directly to the TV. Otherwise, you may not change the
aspect rate.
• Depending on the TV, you may not change the aspect
rate.
There is no sound or only a very low-level sound is
heard.
• Check that the speakers and components are connected
securely.
• Make sure that you have selected the correct source on
the system.
• The protective device on the system has been activated
because of a short circuit. Turn off the system, eliminate
the short-circuit problem and turn on the power again.
• The audio connecting cord is damaged. Replace it with a
new one.
• The system is in pause mode or in slow-motion play
mode, or fast forward or fast reverse is performed. Press
PLAY
• Check the speaker settings
The left and right sounds are unbalanced or reversed
• Check that the speakers and components are connected
correctly and securely.
• Adjust front balance parameter using SELECT and
VOLUME +/-.
to return to normal play mode.
Severe hum or noise is heard
• Check that the speakers and components are connected
securely.
• Check that the connecting cords are away from a
transformer or motor, and at least 3 meters away from a
TV set or fluorescent light.
• Move your TV away from the audio components.
• The plugs and jacks are dirty. Wipe them with a cloth
slightly moistened with alcohol.
• Clear the disc.
The sound loses stereo effect when you play a Video
CD or a CD
• Set the Audio mode to “STEREO” in the SETUP menu.
• Make sure you connect the system appropriately.
The surround effect is difficult to hear when you are
playing a Dolby Digital sound track
• Check the speaker connections.
• Depending on the DVD disc, the output signal may not
be the entire 5.1 channel but monaural or stereo even if
the sound track is recorded in Dolby Digital format.
The sound comes from the center speaker only
• Depending on the disc, the sound may come from the
center speaker only.
No sound is heard from the center speaker
• You may set the listening mode to Dolby Pro Logic
Phantom .
• Adjust the speaker volume.
No sound or only a very low-level sound is heard
from the rear speakers
• Adjust the speaker volume.
The language for the subtitles cannot be changed
when you play a DVD
• Multilingual subtitles are not recorded on the DVD.
• Changing the language for the subtitles is prohibited on
the DVD.
The subtitles cannot be turned off when you play a
DVD
• Depending on the DVD, you may not be able to turn the
subtitles off.
The angles cannot be changed when you play a DVD
• Multi-angles are not recorded on the DVD.
• Change the angles when the angle mark appears on the
TV screen.
• Changing the angles is prohibited on the DVD.
The system does not operate properly
• Static electricity, etc., may affect the system’s operation.
Press the STANDBY/ON button to turn off, then press
again to turn on. Or you can try to unplg the power
cord and plug it on again.
EN
19
Page 23

Specifications
Tuner section
Tuning range................................................................................................................... FM 87.5 - 108 MHz (0.0.5MHz steps)
......................................................................................................................................... AM 552 - 1620 kHz ( 9 kHz steps)
Amplifier section
Output power ................................................................................................................. 5 x 30 W / each channel
Total harmonic distortion ............................................................................................... 10% at rated power (1 kHz)
Stereo power................................................................................................................... 2 x 30W, 2 channel driven at
10%THD, 8 ohms, 1kHz
2 x 28W, 2 channel driven at
1%THD, 8 ohms, 1kHz
Subwoofer power ........................................................................................................... 1 x 50W, at 10%THD, 6 ohms, 100Hz
Frequency response ........................................................................................................ 30 Hz - 20 kHz
Signal-to-Noise ratio ....................................................................................................... > 65 dB (CCIR)
General
Power supply ................................................................................................................... 230V / 50 Hz
Power consumption ........................................................................................................ 88 W
Dimension ....................................................................................................................... 2.4”H x 16.9” W x 13.6” D
Speaker
System.............................................................................................................................. 1-way shielded
Impendance..................................................................................................................... 8 ohm, subwoofer 6 ohm
Dimension ....................................................................................................................... 5.3”H x 3.5” W x 4.1” D
Specifications subject to change without prior notice
20
Page 24

Care and Maintenance
Disconnect the audio system from the power source before
performing any maintenance.
Cleaning
Clean the exterior of the system using a soft dust cloth.
The player
CAUTION! This system operates with a laser. It must only be
opened by a qualified technician.
• Never move the player during playback.
• Never put more than one disc on a tray or put a disc
slipping out of the guide area.
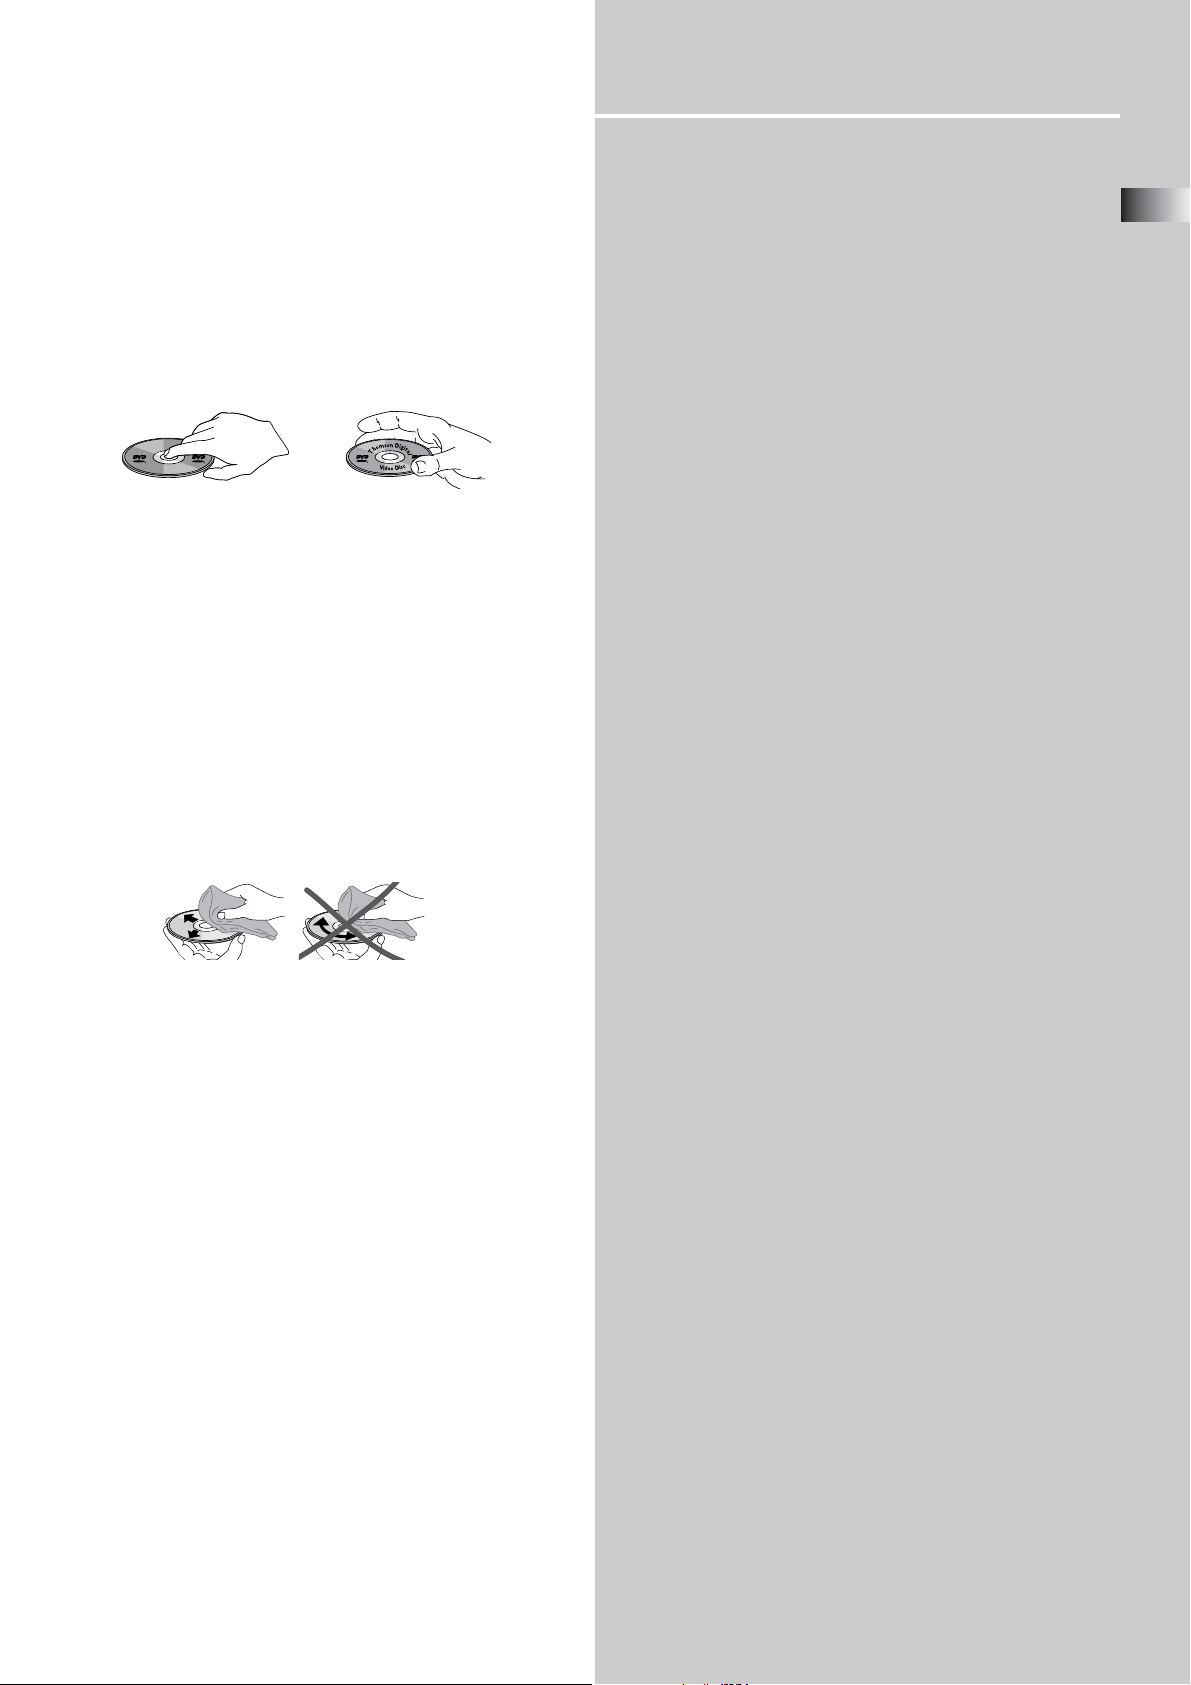
Handling discs
• Do not touch the
signal surfaces.
• Hold discs by the
edges, or by one edge
and the hole.
• Do not affix labels or adhesive tapes to the label surfaces.
• Do not scratch or damage the label. Discs rotate at high
speeds inside the player.
• Do not use damaged (cracked or warped) discs.
n
D
o
s
i
g
m
i
t
o
a
h
l
T
V
c
i
s
d
i
e
D
o
Cleaning discs
• Dirty discs can cause poor
sound and visual quality.
Always keep discs clean by
wiping them gently with a
soft cloth from the inner
edge toward the outer
perimeter. Never wipe the disc in a circular motion since
circular scratches are likely to occur and could cause noise
during playback.
• If a disc becomes dirty, wet a soft cloth in water, wring it
out well, wipe the dirt away gently, and then remove any
water drops with a dry cloth.
• Do not use record cleaning sprays or antistatic agents on
discs. Also, never clean discs with benzene, thinner, or other
volatile solvents which may cause damage to disc surface
Transportation information
• Unplug the unit when the STANDBY LED is on while in
STANDBY mode.
Safety precautions
• Never open the cabinet under any circumstances. Any
repairs or internal adjustments should be made only by a
trained technician.
• Never operate this product with the cabinet removed.
• Do not touch the player with wet hands. If any liquid
enters the player cabinet, take the player to a trained
technician for inspection.
• This player uses a laser to read the data on the disc. The
laser mechanism corresponds to the cartridge and stylus of a
record player. Although this product incorporates a laser
pick-up lens, it is completely safe when operated according
to directions.
• Discs rotate at high speed inside the player. Do not use
damaged, warped, or cracked discs.
• Do not touch the pick-up lens which is located inside the
disc compartment. Also, to keep dust from collecting on the
pick-up lens do not leave the compartment door open for
an extended period of time. If the lens becomes dirty, clean
it with a soft brush, or use an air blower brush designed for
camera lenses.
• The apparatus shall not be exposed to dripping or splash-
ing and that no objects filled with liquids, such as vases,
shall be placed on the apparatus.
Headset safety
• Do not play your headset while the sound is at high
volume levels. Hearing experts warn against extended highvolume play.
• If you experience a ringing in your ears, reduce volume or
discontinue use.
• You should use extreme caution or temporarily discontinue
use in potentially hazardous situations.
• Even if your headset is an open-air type designed to let
you hear outside sounds, don’t turn up the volume so high
that you are unable to hear what is around you.
EN
Disc lens care
• When your disc lens gets dirty it can also cause the system
to output poor sound and visual quality. To clean the lens
you will need to purchase a disc lens cleaner which can
maintain the output sound and visual quality of your
system. For instructions on cleaning the disc lens, refer to
the ones accompanying the lens cleaner.
Important battery information
• Remove the batteries to avoid leakage if you do not use
your remote control for more than one month.
• Discard leaky batteries immediately as leaking batteries
may cause skin burns or other personal injuries.
• Dispose of batteries in the proper manner, according to
provincial and local regulations.
• Any battery may leak electrolyte if mixed with a different
battery type, if inserted incorrectly, if all batteries are not
replaced at the same time, if disposed of in fire, or if an
attempt is made to charge a battery not intended to be
recharged.
Don’t infringe
This product should only be used for the purposes for which
it is sold, that is, entertainment, violating no copyright law.
Any attempts to use this product for which it is not intended
is unlawful and therefore not condoned by Thomson.
The descriptions and characteristics given in this document are given as a general
indication and not as a guarantee. In order to provide the highest quality product
possible, we reserve the right to make any improvement or modification without prior
notice. The English version serves as the final reference on all products and operational
details should any discrepancies arise in other languages.
21
Page 25

Language Codes
Abkhazian 6566
Afar 6566
Afrikaans 6570
Albanian 8381
Amehanie 6577
Arabic 6582
Armenian 7289
Assamese 6583
Aymara 6588
Azerbaijani 6590
Bashkir 6665
Basque 6985
Bengali, Bangla 6678
Bhutani 6890
Bihari 6672
Bislama 6673
Breton 6682
Bulgarian 6671
Burmese 7789
Byelorussian 6669
Cambodian 7577
Catalan 6765
Chinese 9072
Corsican 6779
Croatian 7282
Czech 6783
Danish 6865
Dutch 7876
English 6978
Esperanto 6979
Estonian 6984
Faeroese 7079
Fiji 7074
Finnish 7073
French 7082
Frisian 7089
Galiean 7176
Georgian 7565
German 6869
Greek 6976
Greenland 7576
Guarani 7178
Gujarati 7185
Hausa 7265
Hebrew 7387
Hindi 7273
Hungarian 7285
Icelandic 7383
Indonesian 7378
Interlingua 7365
Interlingue 7369
Inupiaic 7375
Irish 7165
Italian 7384
Japanese 7465
Javanese 7487
Kannada 7578
Kashmiri 7583
Kazakh 7575
Kanyarwanda 8287
Kirghiz 7589
Kirundi 8278
Korean 7579
Kurdish 7585
Laothian 7679
Latin 7665
Latvian, Leltish 7684
Lingala 7678
Lithuanian 7684
Macedonian 7775
Malagasy 7771
Malay 7783
Malayalam 7776
Maltese 7784
Maori 7773
Marathi 7782
Moldavian 7779
Mongolian 7778
Naru 7865
Nepali 7869
Norwegian 7879
Occitan 7967
Oriya 7982
Oroma (Atan) 7977
Punjabi 8065
Pashto, Pushao 8083
Persian 7065
Polish 8075
Portuguese 8084
Quechua 8185
Ahaero- Romance 8277
Romanian 8279
Russian 8285
Samoan 8377
Sangbo 8371
Sanskrit 8365
Sents Gaelic 7168
Serbian 8382
Servo-Croatian 8372
Sesotho 8384
Setswana 8478
Sindhi 8368
Singhalese 8373
Siswati 8383
Slovak 8375
Slovenian 8376
Somali 8379
Spanish 6983
Sudanese 8385
Swahili 8387
Swedish 8386
Tagalog 8476
Tajik 8471
Tamil 8465
Tatar 8484
Telugu 8469
Thai 8472
Tibetan 6679
Tigrinya 8473
Tonga 8479
Tsonga 8483
Turkish 8482
Turkmen 8475
Twi 8487
Ukrainian 8575
Urdu 8582
Uzbek 8590
Vietnamese 8673
Volapuk 8679
Welsh 6789
Wolaf 8779
Xhosa 8872
Yiddish 7473
Yoruba 8979
Zulu 9085
22
 Loading...