

Page 1
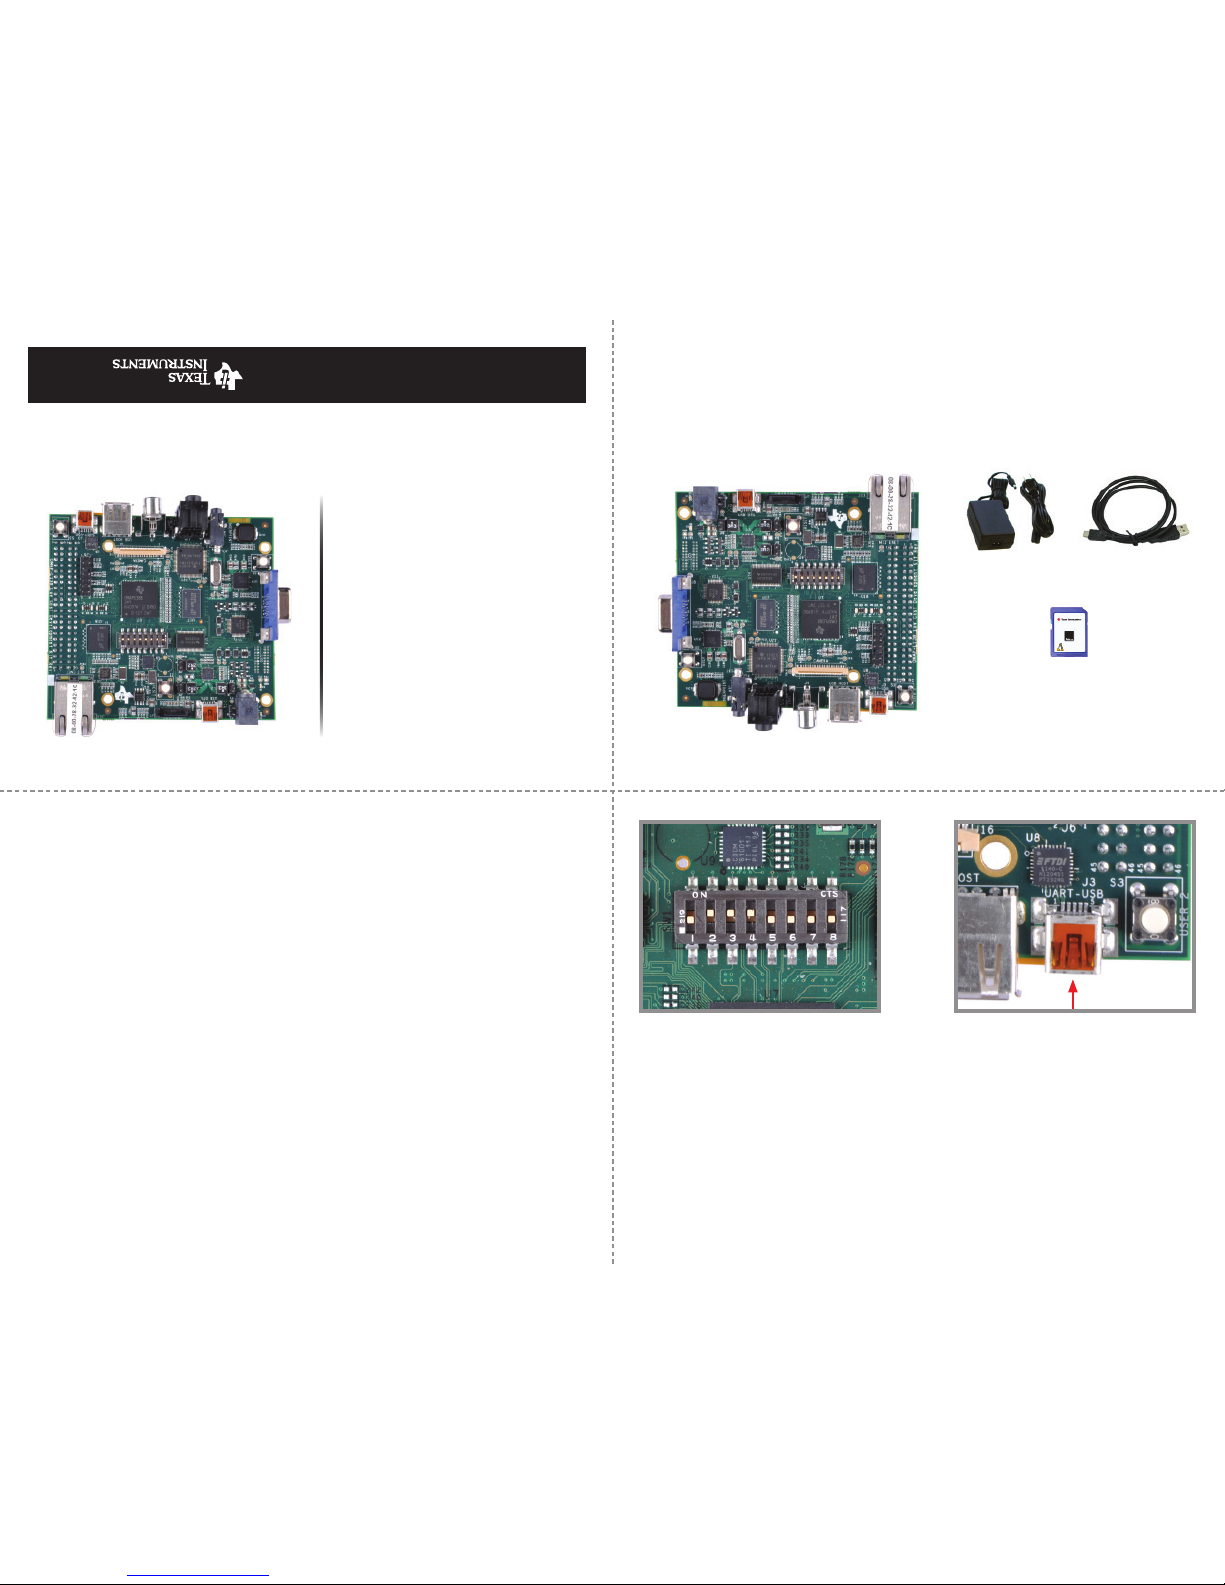
1 Set the DIP switch with 2, 3, 4 ON
and 1, 5, 6, 7, 8 OFF.
Congratulations on purchasing the OMAP-L138 DSP+ARM9™ Development Kit (LCDK)
and welcome to the Quick Start Guide. This guide is designed to help you through
the initial set up of your development kit. The kit provides hardware and software that
allows you to quickly and easily evaluate TI’s OMAP-L138 applications processor.
The following items will be used in this Quick Start Guide.
1
7
Troubleshooting
If you do not have the USB-to-UART driver installed on your PC, download it from
www.ftdichip.com/Products/ICs/FT232R.htm
For community support, please visit:
www.ti.com/e2e
The online LCDK User’s Guide is available at
processors.wiki.ti.com/index.php/LCDK_User_Guide
The TI Embedded Processors Wiki can be found at:
processors.wiki.ti.com
For more information on the TI OMAP-L138 applications processor or to download
the latest TI software, visit:
www.ti.com/omapl138
SPRW234
All trademarks are the property of their respective owners.
2
Power supply
and cord
Mini USB cable
2 Connect the supplied mini USB
cable to J3 on the UART-USB port
on the LCDK. Connect the other end
of the cable to a USB port on your
host computer.
OMAP-L138
DSP+ARM9
™
Development
Kit
(LCDK)
Quick Start Guide
Single-Core DSP
Your World. Real-Time. DSP
For more information:
www.ti.com/omapl138
OMAP-L138 Development Board
microSD Card + Adapter
Linux™ SDK
Linux fi le system
BIOS C6SDK
Code Composer Studio™ IDE v5
Code Gen Tools 7.3.1
OMAP-L138
DSP+ARM9
™
4GB SD
OMAP-L138
Application
Processor
Linux 3.1
™
Page 2
4
5
6
3
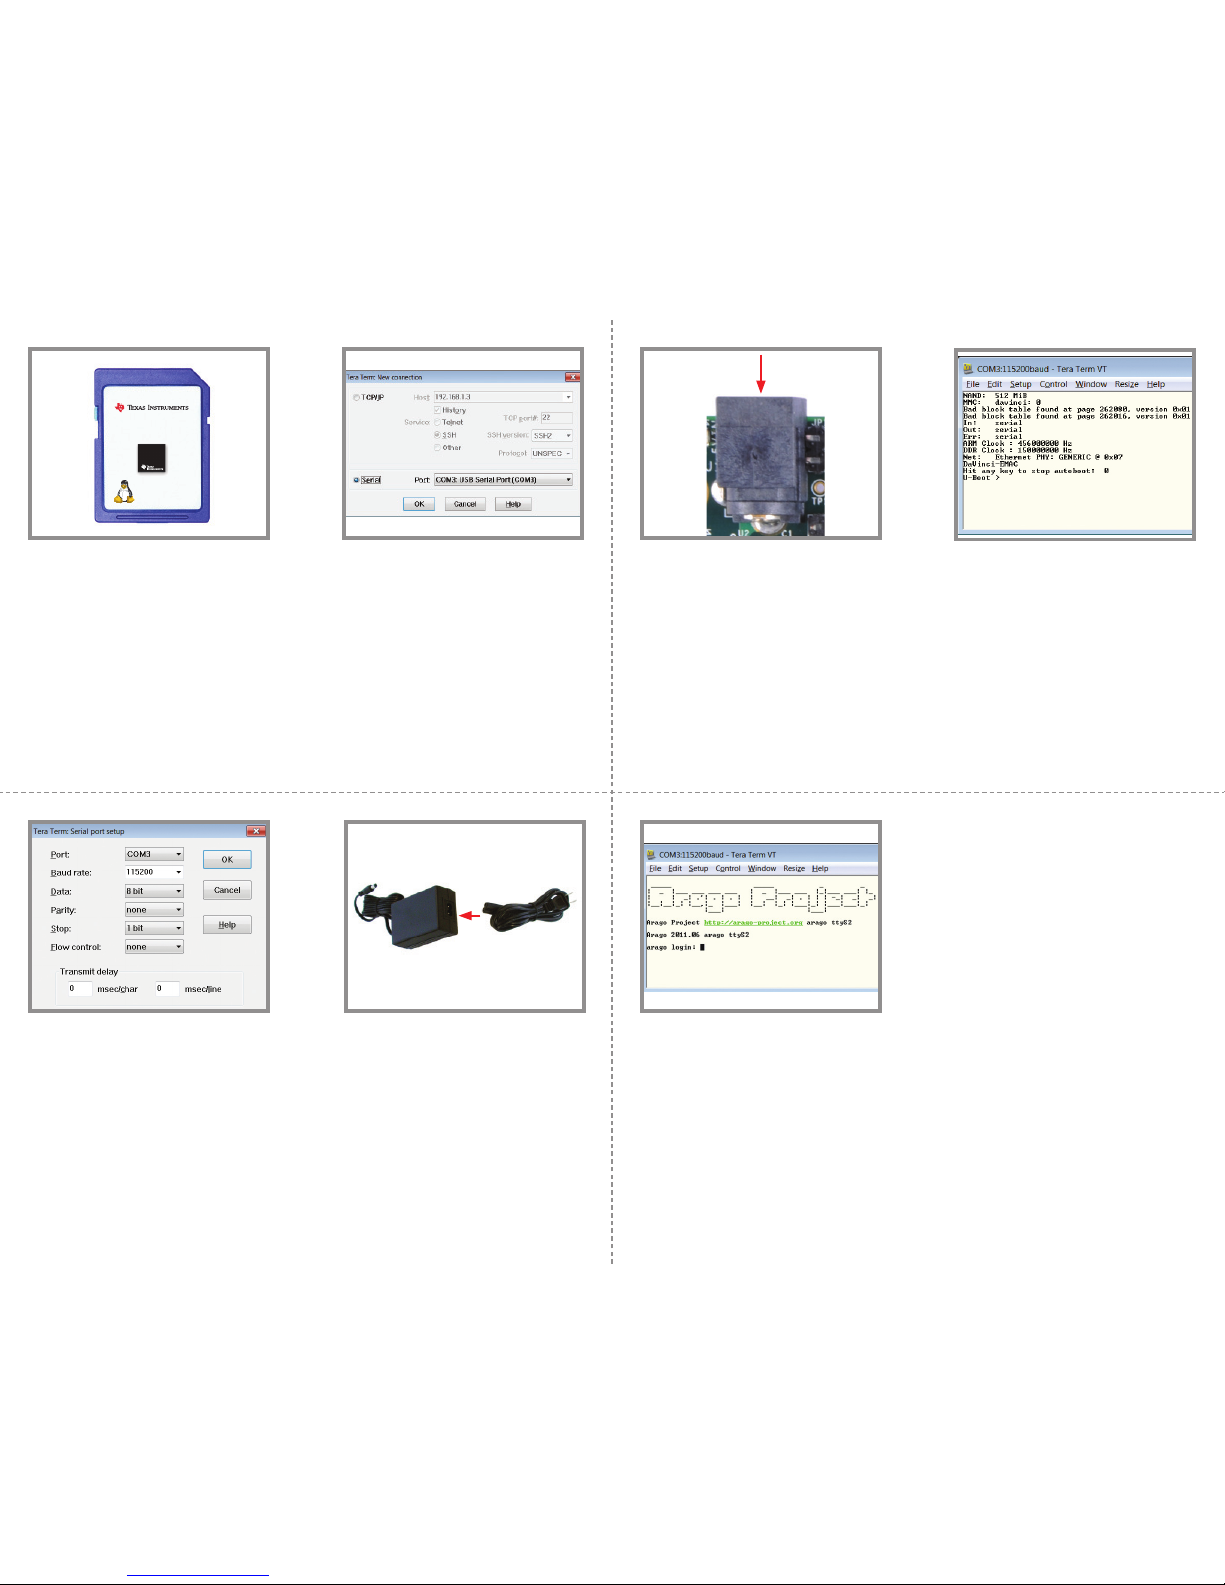
3 Insert the microSD card to the SD
slot.
4 On the host computer, open a serial
port terminal (like Tera Term or
Hyperterminal for Windows
®
OS and
minicom for Linux™ OS) and select
the connection to the USB serial port.
5 Set the baud rate to 115200, 8-bit
data, no parity, 1 stop bit, no fl ow
control. Note: To do this in Tera Term,
go to Setup -> Serial port and set the
Baud rate as 115200 from the dropdown menu.
7 Connect the power cord and supply.
8 Connect power to the board and
electric outlet.
9 Once the board is powered, you
should see U-Boot messages on the
serial console window. U-Boot will
pause for a few seconds before booting Linux™ to give you the opportunity to stop and modify the booting
process. The above screen shows a
TeraTerm serial console at this U-Boot
pause phase. Hitting enter at this
point will stop the booting process.
If you do not hit enter, U-Boot will
proceed with booting Linux.
10 Once booting continues, the serial
console will display additional
start-up messages until a Linux
login prompt is shown. At this
point, Linux is up and running with
a complete fi le system loaded from
the SD card and you are ready to
begin developing.
OMAP-L138
DSP+ARM9
™
4GB SD
OMAP-L138
Application
Processor
Linux 3.1
™
 Loading...