


VERY KOOL
Dual Band GSM Fixed Wireless Phone
REV.1

WELCOME
Congratulations on your purchase of an VERY COOL product!
1. SAFETY INFORMATION
SAFETY INFORMATION FOR FIXED PHONES
IMPORTANT INFORMATION ON SAFE AND EFFICIENT OPERATION.
READ THIS INFORMATION BEFORE USING YOUR PHONE.
EXPOSURE TO RADIO FREQUENCY (RF) ENERGY
Your phone contains a transmitter and a receiver. When it is ON, it receives and also
sends out radio frequency (RF) signals. When you communicate with your phone, the
system handling your call controls the power level at which your phone transmits.
Your Motorola phone is designed to comply with local regulatory requirements in your
country concerning ex posure of human beings to RF energy.
OPERATIONAL PRECAUTIONS
To assure optimal phone performance and make sure human exposure to RF energy is
within the guidelines set forth in the relevant standard s; always adhere to the following
procedures.
EXTERNAL ANTENNA CARE
Use only the supplied BRIGHSTAR approved antenna. Unauthorized antennas,
modifications, or attachments could damage the phone.
Do NOT hold the antenna when the phone is IN USE. Holding th e antenna affects call
quality and may cause the phone to operate at a higher power level than needed. In
addition, use of unauthorized antennas may result in non-compliance with the local
regulatory requirements in yo ur country.
PHONE OPERATION

When placing or receiving a phone call, hold your phone as you would a wireline
telephone.
To maintain compliance with RF energy exposure guidelines, ensure the phone and its
antenna is at least 1 inch (2.5 centimeters) from your body when transmitting.
DATA OPERATION
When using any data feature of the phone, with or without an accessory cable, position
the phone and its antenna at least 1 inch (2.5 centimeters) from your body.
APPROVED ACCESSORIES
Use of accessories not approved by BRIGHTSTAR, including but not limited to batter ies
and antennas, may cause your phone to exceed RF energy exposure guidelines.
RF ENERGY INTERFERENCE / COMPATIBILITIES
Note: Nearly every electronic device is susceptible to RF energy interference from
external sources if in adequately shielded, designed, or otherwise configured for RF
energy compatibility. In some circumstances your phone may cause interference.
MEDICAL DEVICE
Pacemakers
Pacemaker manufacturers recommend that a minimum separation of 6 inches (15
centimeters) be maintained between a handheld wireless phone and a pacemaker.
Persons with pacemakers should:
• Always keep the phone more than 6 inches (15 centimeters) from your pacemaker
when the phone is turned ON.
• Not carry the phone in the breast pocket
• Use the ear opposite the pacemaker to minimize the potential for interference.
• Turn OFF the phone immediately if you have any reason to suspect that interference
is taking place.
Hearing Aids
Some digital wireless phones may interfere with some hearing aids. In the event of such
1
interference, you may want to consult your hearing aid manufacturer to discuss
alternatives.
Other Medical Devices
If you use any other personal medical device, consult the manufacturer of your device to
determine if it is adequately shielded from RF energy. Your physician may be able to
assist you in obtaining this information.
BATTERIES
Batteries can cause property damage and / or bodily injury such as burns if a conductive
material such as jewelry, keys, or beaded chains touches exposed terminals. The
conductive material may comple te an electrical circuit (short circuit) and become quite
hot. Exercise care in handling any charg ed battery, particularly when placing it in side a
pocket, purse or other container with metal objects. Use only original batteries and
chargers.
Your battery or phone ma y co nta in symbols, defined as fol lows.
Symbol Definition
Seizures / Blackouts
Some people may be susceptible to epileptic seizures or blackouts when exposed to
flashing lights, such as when watching television or playing video games. These seizures
or blackouts may occur even if a per son never had a previous seizure or blackout.
Important safety information will follow
Your battery or phone should not be disposed of in a fire
Your battery or phone may require recycling in accordance
with local laws. Contact your local regulatory authorities for
more information.
Your battery or phone should not be thrown in the trash
2

If you experienced seizures or blackouts, or if you have a family history of such
occurrences, please consult with your doctor.
2. PREPARING YOUR PHONE FOR USE
2.1. Installing the coiled cord.
• Connect the coiled cord to both the handset and the base.
2.2. Plugging the AC/DC adaptor
z Connect the adaptor to the AC Wall outlet.
(Picture added)
2.3 Back up Battery
• Remove the battery door
• Insert the rechargeable battery pack into the battery compartment.
• Place the battery door
(Picture added)
Note: Battery pack is a backup for emergency case of power failure. Do not operate
the phone without the AC/DC Adaptor connec ted.
Be sure to carefully match the positive and negative terminals as shown in the
battery.
Caution:
• SIM card for this Fixed Wireless Phone is prohibited to use in other GSM mobile
phones. Once SIM pin number is entered, SIM pin is automatically changed so
initial PIN is no longer valid. Therefore, it is highly recommended NOT to take
out the SIM card once it is installed in this product.
• DO NOT bend or scratch your SIM card, and avoid exposing it to static
electricity, water, or dirt.
3

3. FEATURE HIGHLIGHTS
z Dial tone generation
z Desktop Form factor
z Auto Dialing
z Voice mail
z Short Message Service
z Long Message Service up to 450 characters
z Emergency call
z Call logs
z Call restriction
z Caller ID
z Clock with alarm
z Calculator
z Graphic bigger display
z Blue back light for LCD and keypad
z Multi ring tone
z Speakerphone
z Multi language (English, Spanish, Portuguese)
z 200 phone book memory (100 phone book in the phone, 100 in SIM card)
z Rechargeable battery
z TNC antenna connector (50ohms) for charging external antenna
z Wall mount (Optional)
4. ABOUT THE PHONE
This phone operates in a different band. It supports dual band (850 MHz / 1900MHz) or
dual band (900MHz / 1800MHz)
4

4.1 Key functions
4.1.1 Name key / Menu / Selection
• Press the right key to perform the function (menu) indicated by the text on the
screen above the key.
• Press the left key (name) to directly enter to the phone book list.
4.1.2
• Press to make a call to a name / number shown on t he screen.
• Press to answer a call.
• Press and hold for 2 seconds to enter to the list of recently dialed numbers.
4.1.3
• Press to end a call.
• Press once to exit a function and to return to the start screen.
4.1.4
• Use for entering numbers and letters.
• Press and hold
• Press
• Press
Send key
End key
~ ,
to call the voice mailbox.
to toggle between upper cas e, lower case and numeric modes.
to toggle between letters and symbols.
4.1.5
• Press to increase the earpiece and ring volume.
• Press to decrease the earpiece and ring volume.
4.1.6 Using the selection keys
The functions of the selection keys depend on the guiding texts shown above the
keys.
Scroll keys
5

For example, when the text MENU is above the left selection key, press left
key enters the menu functions. Similarly, pressing the right selection right key
under the text NAME accesses the phone book functions.
4.1.7 Using the scroll keys
The phone has two scroll keys,
located just below the screen.
The scroll keys have up and down arrows on them; press these to scroll through the
phone’s menus.
4.1.8
Speaker button
z Turn on and off the speaker in the conversation mode.
4.3 About display indicators and icons
The display indicators and icons inform about the op eration of the phone.
4.2.1 Start screen
The start screen displays when the phone is turned on. Several features can be used
only when the phone is at the Start Screen.
4.2.2 Scroll bar
When you access the phone’s menu, there is a scroll bar at the far right of the screen.
This bar indicates user’s location in the menu: each “tab” on the bar represents a
different menu item.
4.3 Indicators and icons
On your phone, you have two types of identifiers: indicators and icons. Icons are
graphical representations of a specific item or situation. For example, an icon appears
6
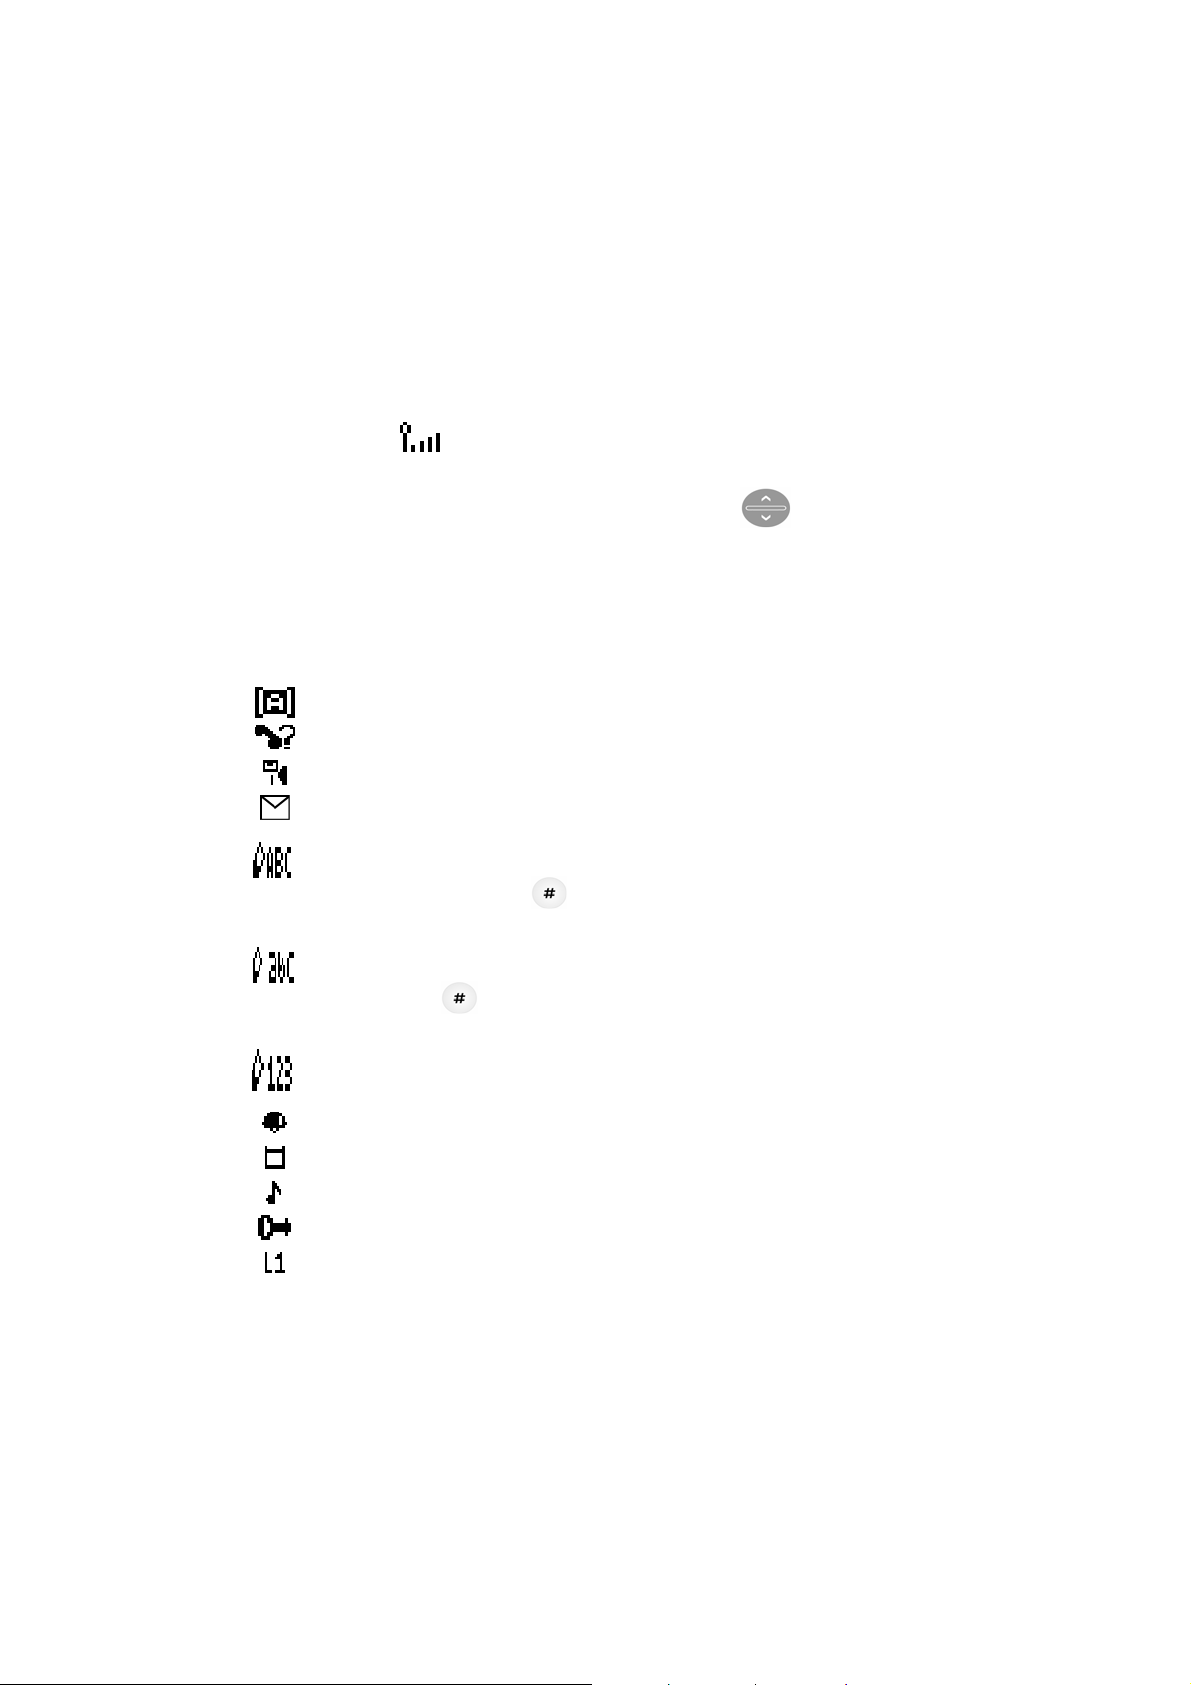
when you have a voice message waiting to be heard.
Indicators show the status of something. The phone uses three types of indicators:
z Signal strength indicator: This indicator shows the signal strength of the
wireless network at your current loc ation. The higher the bar, the str o n ger
signal.
z Ringer volume indicator : When you press upper key once during
stand by, you are able to enter the ringer volume adjustment. Scrolling up
and down the key adjusts the ringer volume higher or lower.
The list below shows what each icon means.
You have an active call.
You have a missed call.
You have one or more new voice m essages waiting.
You have one or more unread text messages waiting.
Any alpha characters you enter will be uppercase (capital
letters). Press
to switch to lowercase.
Any alpha characters you enter will be lowercase.
Press
to switch to numeric mode.
You are in numbers mode. After switching to this numbers mode,
you cannot enter any alpha characters. You can enter only numbers.
The alarm clock is set.
Battery indicator
Ring
Keypad lock
Line switch. Line 1
7

5. BASIC OPERATIONS
5.1 Switching the phone ON and OFF
Case 1:
z To turn the phone on, plug in the power cable to the phone.
z To reset the phone, press and hold the
5.2 Making a call
Case 1:
• Pick up the handset and dial tone is generated.
• Enter the phone number including the area code and press
• Press
to end the call or to cancel the call attempt. If handset is placed in a
base, call is automatically terminated.
Note: The phone may generate heat during longer calls.
Case 2
• Enter the phone number with the handset on the base.
• Press
• Press
. The phone enters speaker mode.
to end the call or to cancel the call attempt. If speaker button, is
pressed call is automatically terminated.
Note: The number is automaticall y dialed 6 seconds later you press the number without
pressing
.
8

5.3 Answering a call.
Case 1:
• When the handset is resting in its base, lift the ha n dse t.
• The ringing will stop and talk icon
Case 2:
• When the phone rings, press send button.
mode.
will appear in the display.
The phone will be in speaker
5.4 Speaker mode.
You can make or answer a phone call by pressing when the handset is on the base.
To make a call:
• Press
• If you hear the dial tone, press the nu mber you want to connect to.
• Press
Note: The call is automatically made without pressing
to turn on the speaker phone mode.
.
8 seconds you press the
number.
To answer a call:
• When the phone rings, press
to turn on the speaker phone mode.
5.5 Adjusting the Volume
5.5.1 Adjust the ring volume
You can adjust the ring tone vo l ume by pressing the scroll keys o n the phone.
1. Press upper
to go into ring volume control screen
9

2. Press upper
to decrease the volume.
3. Press down
5.5.2 Adjust earpiece volume
You can adjust the earpiece volume during a call by pressing the scroll keys on the
phone.
1. Press
2. Press
Note: You can also adjust speaker volume with
mode.
to increase the volume.
upper to decrease the volume.
down to increase the volume.
when you are in speaker
5.6 Redial the last-dialed number
The phone stores up to 10 recently dialed numbers. Stored numbers may be up to 20
digits long.
1. Press
2. Press
3. Press
Note: If no recently dialed numbers are stored, you are not able to use this function.
for about two seconds to find the most recently dialed numbers.
to scroll to the number you wish to dial.
once.
5.7 Caller ID
Caller ID is a network service that identifies incoming calls. Contact your service
provider to find out how to get this feature.
When Caller ID is active, your phone shows the caller’s phone number during an
incoming call, as long as this number is a part of your service provider’s wireless network.
10

The wireless network lets you know if it does not recognize the caller’s pho ne number.
The wireless network will also let you know if the calling party has blocked the Caller ID
feature.
If you have stored the name and number of the calling party in your phone book and that
number are supported by the wireless network, the caller’s name can also appear.
5.8 SMS and Voice Mail
A new SMS or Voice mail arrives,
• The back light of keypad is ON and the disp lays show “New Message(s)” on the
screen.
• The backlight is off if you lift up the handset from the base.
6. USING PHONE MENUS
6.1 Navigate menus
A menu is a list of choices you can make. Your phone menu has 8 sub menus. Each sub
menu contains options that allow you to use the phone book, change the ringing tone, and
so on. You can use menus and submenus in two ways: by scrolling or by using shortcuts.
6.1.1 Scroll through menus
• From the Start screen, press MENU, an d then scroll through th e menus using the
• Use the scroll and selection keys to navigate the submenus and to return to the
Start screen.
6.1.2 Use a shortcut
• From the Start screen, press the down arrow in the arrow keys
through the shortcuts.
You can use a shortcut to get to options directly without scrolling through lists.
and scroll
11

To change one of the shortcuts, press the left soft key and select from a list of
different options, once you select the option desired, press the left soft key (OK) to
assign the new shortcut.
6.1.3 Exit menu levels
• To return to the previous menu level, press CANCEL.
• To return to the Start screen, press
. No menu setting changes are saved.
6.2 List of Menus
Your phone’s menu may differ from the following list, depending on the network
services to which you have subscribed and the accessories you are using. If you have any
questions, call your service provider.
1. Message
1.1. Inbox (Read)
1.2. Outbox
1.3. Write Message
1.3.1 Save
1.3.2 Send
1.3.3 Save & Send
1.3.4 Send to Many
1.4. Message Settings
1.4.1 Profile Settings
1.4.2 Memory Status
1.4.3 Template
1.5. Broadcast Message
1.5.1 Receive Mode
1.5.2 Read
1.5.3 New Broadcast
1.5.4 Cha nnels
12

1.6. Voicemail
1.6.1 Connect to Voice Mail
1.6.2 Set Voice Mail
2. Phonebook
2.1. Search Entry
2.2. Add New Entry
2.2.1. Save To SIM
2.2.2. Save To Phone
2.3. Delete All
2.3.1. From SIM
2.3.2. From Phone
2.4. Owner Number
2.5. Memory Status
3. Call History
3.1. Missed Calls
3.2. Received Calls
3.3. Dialed Calls
3.4. Call Timers
4. Call Setup
4.1 Call Forward
4.2 Call Waiting
4.3 Call Barring
4.4 Caller ID
4.5 Network Selection
4.6 GPRS
5. Call Setup
5.1 Language
13

5.2 Tone Setup
5.3 Time and Date
5.4 Call Time Reminder
5.5 Auto Redial
5.6 Display
6. Organizer
6.1 To do List
6.2 Alarm
6.3 Calculator
7. Security Setup
7.1 Phone Lock
7.2 Auto Keypad Lock
7.3 Fixed Dial (FDN)
7.4 PIN
7.5 PIN2
8. Shortcuts
9. STK
7. ENTERING LETTERS AND NUMBERS
You can ente r letters, as well as numbe rs, when storing information into your phone by
using your phone’s keyp ad. To enter letters, press the key associated with the letter you
wish to enter until it appears on the screen (numbers also appear).
7.1 Entering Letters
When you want to add new names or when you view names in the phone book, your
phone automatically switches to the ABC mode and displays the ABC icon.
14

Key Characters Key Characters
? ! : ; 1 P Q R S 7
A B C 2 T U V 8
D E F 3
G H I 4
J K L 5
M N O 6 Change letter case
W X Y Z 9
. ,+ - = 0
. , ? ! :
Press a key once or several times to enter the letter(s) you want. For example, press
three times to enter the letter C. The selection displays.
7.1.1 Edit name or phone number
To edit a name already stored in the phone book:
z From the phonebook list, select the name you want to edit.
z To edit, press the left softkey ‘option’.
z Select ‘change’ then previo us phone number appears.
z Then edit the number and click left softkey ‘OK’
z Then consequently previous name appears and follow same step as above.
7.1.2 Changing case of letters and numbers
You can switch the mode among uppercase and lowercase letters and numbers by
pressing
.
15

8. USING THE PHONE BOOK
8.1 About the phone book
New entries can be stored in the SIM card or in your handset.
You can store up to 100 entries in the phone and an additional 100 in th e SIM depending
on SIM limitations.
Entries stored in the Phone allow numbers of up to 30 digits, and names of up to 16
characters.
In standby mode, you can press left
When the number is found pressing Name, you can select it and choose to View, Edit,
Delete, Copy, Move and Send message.
8.2 Use phone book menus
The phone book has five menus to select from. These menus appear when you press
to enter immediately Phone Book List.
Names and select number. Press left option to select menu. Use to scroll to
the menu you want to use.
z Send Message View name and number you selected.
z Change Edit name and number you selected.
z Details View the number and name as well as where it was stored
between SIM and Phone.
z Call Number
z Copy
z Move Move name and number to the phone
z Delete Delete the complete entry of the selected name.
8.3 Search Entry – by name
From the Phonebook menu, select Search Entry and press Left Select.
Enter the first 1 or 2 letters of the na me you need and Then similar names appear.
16

Select name using
to scroll and press Left option t o select Options.
8.4 Add a new phone book Entry
To create a phonebook entry:
1. Press Menu > Phonebook.
2. Scroll to [Add New Entry] and press Select.
3. Press Save to SIM or Save to phone depending on where you want to store the
phone entry.
4. Press left
5. Add Name and Number
6. Press left
Edit to chose Name and Number
Ok to complete input
8.5 Delete All
You can delete all phone book entries:
1. Press Menu > Phonebook
2. Scroll to [Delete all] and press Ok.
3. Press SIM or Phone where you want to delete all phone book entries.
4. Press Ok to confirm the delete of all phone book entries.
Caution: Note that this action cannot be undone once you perform this feature; all the
stored information in your phoneb oo k i s de leted.
8.6 Owner Number
You can check, edit, eras e an d save your Owner Number:
1. Press Menu > Phonebook
2. Scroll to Owner number and press Select.
3. Scroll
4. Press option to chose Edit or Erase
and choos e Consult or Add new entry.
8.8 Check Memory Status
17

You can check out memory status for phone book:
1. Press Menu > Phonebook
2. Scroll to Memory status and Press Select
3. Check the memory status. For example , if you se e “36/100 ”, it mean s th e capacity
is 100 entries and there are 36 entries saved in SIM or Phone.
4. Press Back to return to phone book menu.
9. SENDING AND RECEIVING TEXT MESSAGES
You can send or receive text messages with your phone. Text messages that you receive
can contain ring tones that you can store on your phon e. It supports 450 characters and
you can insert Use Template (already installed in your phone) to shorten the editing time.
After complete a message’s contents, you can choose to send it out right away , or to save
it as a draft.
z Inbox
z Outbox
z Write Message
z Message Settings
z Broadcast Message
z Voice Mail
9.1 Sending a Text Message
You can send a text message to one or more recipients. You can manually enter each
recipient’s phone number, or you can select the numbers from the phonebook.
Note: The maximum length of a text message differs depending on the capabilities of
the network from which it originated. Also, text messag es may appear different
at different times because messages can originate in networks other than your
own.
Contact your service provider for more information about this feature.
18

1. Press MENU > Messages .
2. Scroll to the Write Message and press Select.
3. You can create the message.
4. When you press OPTIONS, you can scroll to one of the following message options:
¾ Save Save a message as a draft
¾ Send Send message to only one number
¾ Save & Send Save and send message to only one number.
¾ Send to many Send message to maximum 10 numbers.
¾ Use Template Use stored message.
9.2 View Inbox / Outbox
When a message arrived, a pop-up message is displayed and a new message icon
appears. You can read it immediately, or read it later in your Inbox.
Outbox stores messages se nt a nd sa ved.
1. Press MENU > Messages
2. Scroll to the Inbox or the Outbox and press Select.
3. From the list, highlight the one you need and press Select.
4. When you press Options, you can scroll to one of the following message o ptions:
¾ Delete Delete the chosen message.
¾ Reply Reply the chosen message.
¾ Edit Edit the chosen message.
¾ Forward Forward the chosen message.
¾ Use Number(Call Number) Extract and then dial or save the number(s)
embedded in the message.
¾ Delete All Delete all Inbox or Outbox messages.
9.3 Message Settings
The configure settings of message include: Profile Setting, Me mory status and Template.
1. Press MENU > Messages
2. Scroll to the Message Settings and press Select.
3. From the list, select one option you need an d pre ss Select.
19

z Profile Setting Each p rofile has a unique set of settings: Profile Name, Message
Center (network service), Validity (Set the duration that your message is stored at the
message center. Select 1 hour, 12 hours,1 day, 1 week or maximum).
9 MSC(Message Service Center) phone number : The SMS Center
Number is required to send messages. Ask your service provider fo r this
number.
9 Validity: Set the period of time the message is stored in the service
center. You can set the period for 1 hour, 12 hours, 1 day, 1 week,
maximum. Wh en the set period expires, the service center will delete all
messages, even if the user does not receive the message.
• Memory Status Check out memory status in the SIM and in
Phone. It shows percentage for used memory. For example, SIM: 30%
means 30% used in SIM card out of 100%.
• Template Check out the list of template and you can edit or erase
the template you want change or eliminate .
Note: After SMS memory in SIM card is full, the phone start s using memory in the
phone.
9.5 Broadcast Message (Network Service)
You can receive broadcast message regularly from your service provider.
• Press MENU > Messages
• Scroll to the Broadcast Message and press Ok.
• From the list, select one option you need and press Ok or Change
¾ Receive Mode On/Off.
¾ Read You can see the CB list.
¾ New Broadcast You can either Select, Add, Edit or Delete
broadcast
¾ Channels You can see the Channel lists.
20

9.6 Use Voicemail (Network Service)
You can listen to your voicemail messages by calling your network voicemail phone
number. Voicemail messages are stored on the network voicemail box, not on your phon e.
1.Press MENU > Messages
2.Scroll to the [Voice mail] and press Select.
3.From the list, select one option you need and press Ok
z Connect to Voice Mail Dial the network service number and c on ne c ts you to the
voice mail service.
z Set Voicemail Enter or modify the network service number.
z Note: Press and hold to call the voice mailbox. If there is no voice mail,
“No Number to dial” message pops up.
10. USING CALL HISTORY
The Call History keeps track of:
z Missed Calls
z Received Calls
z Dialed Calls
z Call Timers
Note: Your phone can store up to 30 call numbers including missed, received and
dialed call.
When you miss a call(s), the message Missed calls icon appears on your phone’s
screen. You can press Read to view Missed Calls list or press Back to ignore the
message and go back to Standby. The rec o rds will be stored in Call History.
You are notified of missed ca lls only when your phone is turned on in the service area
from which the missed call originated.
21

10.1 Check Missed / Received / Dialed Calls
z Press MENU > Call History
z Select Missed Calls or Received Calls or Dialed Calls and press Select.
z From the list of records, select one that you need and press Options.
z Press Select for the following options.
¾ Save Save the chosen record.
¾ Send Message Send message to the chosen record.
¾ Edit Edit the number and then save it to the Phone Book or SIM card.
¾ You can chose to save this entry t o the SIM card or to the Phone.
¾ Delete Delete the chosen record.
¾ Delete All Delete all records.
10.2 Call Timers
You can choose Last Call Time, Total Receive, Total Sent and Reset all.
Press MENU > Call History
z Select Last call time, Total receive, Total sent, Reset all and press Select.
z When pop-up asks you to select OK or Reset showing time data, you can press OK
just for seeing and going back or ca n press reset to reset the record.
z You can also reset all with selection Rest All.
Caution: Note that this action cannot be undone once you perform this feature, all the
stored information in your log is deleted.
11. CALL SETTINGS
Setting menu includes:
z Call Forward
z Call Waiting
z Call Barring
22

z Caller ID
z Network Selection
z GPRS
11.1 Call Forward
Call Divert is a network or subscription dependent service. It allows you to forward a
call to another number, base d o n different conditions.
1. Press MENU > Call Setup
2. Press Select
3. Press Call Forward
4. Select one of options below and then press Select.
¾ No Service
¾ If Busy
¾ If No Answer
¾ If Unreachable .
¾ All Voice Calls
¾ All Data Call
5. Select Voice, Fax or Data and press Select.
¾ Set Insert the number you want to designate.
¾ Cancel Cancel to set the number.
11.2. Call waiting
Call Waiting is a network or subscription dependent service.
If set to Activate, Call Waiting feature enables the network to remind you other
incoming calls during a call in progress.
1. Press MENU > Call Setup
2. Press Select
3. Press Call Waiting and Press Select.
4. Select Activate, or Deactivate or Query Status and then press Select.
¾ Activate Activate Call Waiting function.
¾ Deactivate Deactivate Call Waiting function.
¾ Query Status Check current Call Waiting setting status.
23

11.3. Call Barring (Network Service)
Call Barring is a network or subscr iption dependent service.
This feature allows you to restrict or bar certain or all types of calls to and from
your phone.
1. Press MENU > Call Setup
2. Press Select
3. Press Call Barring and Press Select
4. Select One of options below and then press Select.
Outgoing Calls :
z Activate Activate all outgoing calls.
z Deactivate Deactivate all outgoing calls.
z Query Status Check current Call Waiting setting status.
Incoming Calls:
z Activate Activate all incoming calls.
z Deactivate Deactivate all incoming calls.
z Query Status Check current Call Waiting setting status.
When roaming:
z Activate Activate all roaming calls.
z Deactivate Deactivate all roaming calls.
z Query Status Check current Call Waiting setting status.
Cancel All Bars : Cancel all barred calls.
Change Barring Password : Change Barring Password.
11.4. Caller ID
You can choose to send/hid e your phone number to/from the calling party.
1. Press MENU > Call Setup
2. Press Select
24

3. Press Caller ID and Press Select
4. Toggle Set by Network or Hide Id or Send Id and then press Select.
5. Toggle On or Off.
¾ Set By Network Accept the default value set by Network.
¾ Hide Id Not to show your phone number to the calling party.
¾ Send Id Show your phone number to the calling party.
11.5. Network Selection
Line Switching is a network or subscripti o n de pendent service
This feature allows you to switch different lines base on your needs.
1. Press MENU > Call Setup
2. Press Select
3. Press Network Selection and Press Select
4. Select Automatic or Manual
5. Toggle Line 1 , Line 2 or etc. and press Select to switch different lines.
11.6 GPRS
1. Press MENU > Call Setup
2. Press Select
3. Press GPRS and Press Select
4. Toggle one of options like Attach, Detach, Data Count and SMS and then press
Select.
12. PHONE SETTINGS
12.1. Language
You can select the language you need. The phones currently support three languages
(English, Spanish, and Portuguese)
1. Press MENU > Phone Settings
2. Press Language and Press Sel ect
3. Select Language and then press Select.
25

12.2. Tone Setup
You can select the language you need. The phones currently support three languages
(English, Spanish, and Portuguese)
1. Press MENU > Phone Settings
2. Press Tone Setup and Press Select
3. Select One of options below and then press Select.
Ringer
z Melody Choose desired melody in the list
z Volume Choose the volume from 0 to 7
SMS Tone
z Melody Choose desired melody in the list
z Volume Choose the volume from 0 to 7
Alarm
z Melody Choose desired melody in the list
z Volume Choose the volume from 0 to 7
Keypad Tones
z Click Press Click to set keypad tones.
z DTMF Press DTMF to set DTMF tone.
Volume : Choose the volume from 0 to 7.
12.3. Set Time and Date
This menu guides you to set Time/Date.
• Time and Date Set the correct date and time to ensure the Alarm is working
correctly.
• Time Format Set time format as 12hours or 24hours.
12.4. Call Time Reminder
26

This menu guides you the method of Call time reminding.
• Single
• Periodic
• Off
12.5. AutoRedial
You can set AutoRedial function by on/off menu.
12.6. Display
In Display menu, you can set your favorite Display Characteristic to show Date and
time or Owner Number.
Show T im e and Dat e:
You can choose whether to display da te and time in Standby screen or not.
1. Press MENU > Phone Settings
2. Press Select
3. Select Display and then press Select. Toggle Show Date and Time and press
Select.
Show Owner Number :
You can choose whether to display your phone number (or name) in Standby screen
or not.
1. Press MENU > Phone Settings
2. Press Select
3. Select Display and then press Select.
4. Toggle Show Owner Number and press Select
Greeting T e xt :
You can choose whether to display your phone number (or name) in Standby screen
or not.
27

13. ORGANIZER
13.1. To Do List
1. Press MENU > Organizer
2. Press Select
3. Select Task 1,2 and 3 and then press Select.
4. Toggle Add, Edit, Delete and Delete All for adding task, editing task, deleting
task and deleting all task.
13.2. Alarm
1. Press MENU > Organizer
2. Press Select
3. Select Status and then press Select.
4. Toggle Off, Once and Everyday for setting alarm option.
13.3. Calculator
1. Press MENU > Organizer
2. Press Select
3. Select Calculator and then press Select.
14. SECURITY SETUP
There are 4 options available:
z Phone Lock Prevent unauthorized use of the phone.
z Auto Keypad Lock Prevent accidentally pressing the keypad in Standby.
z Fixed Dial The phone can dial out and send message only to those
numbers set in Fixed Dial list.
Caution: You should know PIN2 to use the Fixed Dial function. If pIN2 is entered
28

incorrectly three consecut ive time s in a row, you cannot use this function.
z PIN Change PIN, PIN2 or Phone Lock passwords.
14.1 Phone Lock
The default password is “0000”.
1. Press MENU > Security Setup
2. Press Security Setup and Press Select
3. Press Phone Lock and Press Select
4. Toggle On or Off to lock or unlock phone.
5. Enter 4~8 digits password and press Select.
14.2 Auto Key Lock
If you don’t press the key for a certain period of time (default time or set by the user),
keys are automatically locked i n order to prevent accidentally pressing keys.
1. Press MENU > Security Setup
2. Press Security Setup and Press Select
3. Press Auto KeyLock and Press Select
4. Toggle None to deactivate Au to Keypad Lock; or select timer duration: 5 sec.,
30 sec., 1 min. or 5 min and Press Select
Note: When the key is locked, screen shows “unlock” in left bottom side. To unlock
press the Unlock soft key; then the message “Press # to unlock” appears.
Press # to unlock.
14.3 Fixed Dial
Fixed Dial is a network or subscriptio n dependent feature.
1. Press MENU > Security Setup
2. Press Security Setup and Press Select
3. Press Fixed Dial Press Select
4. Select Mode and toggle Yes or No to activate or deactivate Fixed Dial feature.
5. Enter PIN2 code and press Select.
6. Select Fixed Dial List and press Select.
7. Screen shows FDN List. Press Add and then Edit to create new entries in FDN list.
29

Note: Please get PIN2 code from your Network Service Provider.
14.5 PIN
This feature allows you to change the PIN code, PIN2 code or Phone Lock password.
1. Press MENU > Security Setup
2. Press Security Setup and Press Select
3. Press PIN Press Select
4. Select the option you need ( Status, Activate, Deactivate and Change) and press
Select
5. Enter the old and new codes and press Select.
You can directly enter the menu that you want to use using shortcut functio n.
Maximum 10 menus can be selected in shortcut list.
How to use:
Press down arrow key
1. Shortcut list shows in the screen
2. Select the menu you want and Press Select
3. You can continue to follow p rocedure after entering to the menu you selected.
How to edit :
1. Press MENU > Shortcut and Press Select
2. Total 10 shortcuts are shown in the screen
3. Select the one you wish to edit or delete and Press Edit
15. SHORTCUTS
4. Screen changes to show total 25 lists.
5. Select the one you want to add in the shortcut list and Press Select
30

16. SIM TOOL KIT (NETWORK PROVIDER OPTION)
SIM Application Toolkit has been agreed and incorporated within the Global System for
Mobiles (GSM) standard.
SIM Application Toolkit is designed as service application. Some services that the
customer can have: Phone banking, information service, stock trading, mobile data and fax,
etc.
Further details please contac t with your network service provider.
17. TECHNICAL INFORMATION
17.1 Specific Absorption Rate Data
This wireless phone meets the government’s requirements for exposure to radio waves.
Your wireless phone is a radio transmitter and receiver. It is designed and manufactured not
to exceed limits for exposure to radio frequency (RF) energy set by the Federal
Communications Commission (FCC) of the U.S. Government. These limits are part of
comprehensive guidelines and establish permitted levels of RF energy for the general
population. The guidelines are based on standards that were developed by independent
scientific organizations through periodic and thorough evaluation of scientific studies. The
standards include a substantial safety margin designed to assure the safety of all persons,
regardless of age or health.
The exposure standard for wireless fixed phone employs a unit o f measurement known as
the Specific Absorption Rate, or SAR. The SAR limits set by the FCC are 1.6W/kg. Tests
for SAR area conducted using standard operating positions accepted by the FCC with the
phone transmitting as its highest certified power level in all tested frequency bands.
Although the SAR is determined at the highest certified power level, the actual SAR level
of the phone while operating can be well b elow the maximum value. This is because the
phone is designed to operate at multiple power levels so as to use only the power required
to reach the network. In general, the closer you are to a wi reless base station, the lower the
output power.
Before a phone model is available for sale to the public in the U.S. and Canada, it must be
31

tested and certified to the FCC that it does not exceed the limit established by each
government for safe exposure. The tests area performed in positions and location (near
body) reported to the FCC. The highest SAR values for this model phone when t ested for
use on near the body were 1.06 W/kg ( GSM band 850 MHz), and 0.442 W/kg (PCS band
1900 MHz).
While there may be differences between the SAR levels of various phones and at various
positions, they all met the governmental requirements for safe exp osure. Please note that
improvements to this product model could cause differences in the SAR value for later
products; in all cases, products are designed to be within the guidelines.
Near-Bod y Operat ion
To maintain compliance with FCC RF exposure requirements, maintain a 2.5cm(0.98 inc h),
separation distance between the user' s body a nd the phone, including the antenna, whether
extended or retracted.
Weight
Size (H x W x D)
Wireless Networks
Frequency Range
Back up Battery
Handset : 142.0grams(0.31 lbs)
Base : 612.0grams(1.34 lbs)
Handset
48.8mm(W) x 200.0mm(L) x 45.5(H)
1.92”(H) x 7.87”(W) x 1.79”(T)
Base
158.0mm(W) x 214.0mm(L) x 69.0(H)
(Antenna adds 18.0mm to the width)
6.22”(H) x 8.42”(W) x 2.71”(T)
(Antenna adds 0.71“ to the width)
GSM 850 & 1900
824 ~849MHz
1850 ~1910MHz
Rechargeable batt ery pack
32
 Loading...