

Page 1

marked with an exclamation point in front of it. The following is a list of message prioritization:
Very Urgent
Urgent
Normal
Bulk
Messages not specifying a priority shall be assumed to be normal.
1.1.1 Send Options for a message
The Outbox Details menu has several sub menus from which you can choose. These menus appear when you
press Soft
Send and Discard
Send and Save
Save
Set Urgency
Delivery Report
SELECT
Key. Use the scroll keys to move to the menu you want to use.
1.1.2 Delivery report
If you want to know your message was delivered, you can turn on the
Scroll to
Press ON.
If you do not want to use
Delivery Report
Delivery Report
.
, you can turn them off by switching to
Delivery Report
OFF
options.
.
1.2 Receive a text message
When you receive a text message, the phone sounds a message alert tone and the text message icon appears, along
with one of the following messages:
New Message
page, the appropriate number is listed before this message
: Indicates that you have an unread message or page. If you have more than one message or
Page 2

1.2.1 Read a text message
Press
Scroll to the message, then press
Scroll to the Details, and press
Press
Press
READ
OPTIONS
SELECT
.
OPTIONS
SELECT
for a list of choices you have while reading the message.
when the option you want is highlighted.
.
.
1.2.2 Choose options for a message
When you press Options while reading a message, the following choices are available.
Details
New Message
New From Template
Takes the user to the detailed view for the
message.
Allows the user to create a new SMS message.
Allows the user to create a new SMS message
based on a predefined list of messages, such
as “Meeting cancelled” or “Call me please”.
Delete
Delete the message being viewed. The user
will be asked to confirm the deletion.
Delete All
Deletes all received SMS messages. The user
will be asked to confirm the deletion.
1.2.3 Read options for a message
The Inbox Details menu has several sub menus from which you can choose. These menus appear when you
press Soft
Reply
Forward
Delete
SELECT
Key. Use the scroll keys to move to the menu you want to use.
Provides a screen where you can write a reply.
Forwards the call to another person. That person
must have the appropriate message service.
Delete the message being viewed. The user will be
asked to confirm the deletion.
Page 3

Lock
Call Number
Lets you lock your received messages to phone.
Calls the person who sent you the text message, if
their phone number is included in the message.
1.2.4 Call Number
Calls the person who sent you the text message, if their phone number is included in the message.
You can also press
If more than one number is on the screen, the numbers appear in a list. Scroll to the phone number you want
to call and press
while the message is displayed to dial the number.
.
1.3 When your phone’s memory is full
When your phone’s message memory is full, one or more messages of the lowest priority are automatically
deleted. These messages are usually deleted from your phone’s outbox.
If after deleting messages the memory is still full, your phone shows the message error “No space: Message
waiting” appear.
1.4 Delete a message
While reading a message, press
Scroll
Press OK.
Delete
Your phone asks you to confirm that you want to delete the message.
, then press
OPTIONS
SELECT
1.5 USE VOICE MAIL
Voice mail is a network services feature. Colleagues who miss you when they call
can leave a voice message, which you can retrieve later.
.
.
1.5.1 When you have a message
Page 4

Your phone beeps when you receive a voice message. Also, the message
New voice message
appears on your phone’s screen, along with the
icon.
Note: To use voice mail, you need to learn the voice mail system’s various
greetings, passwords, and prompts. Your service provider can provide
instructions.
1.5.2 Set up your voice mailbox
As part of your network’s voice mail feature, your service provider gives you a
voice mailbox phone number. Save this number in your phone to make getting
your voice messages quick and convenient.
Press
Enter your mailbox phone number.
Press
MENU 3
ENTER
> 6 > 2 (
.
Messages
>
Voice Mail
>
Voice mail Num
).
Your voice mailbox number can be up to 20 digits long and is used until it’s
changed. Therefore, if your phone number changes, you may need to change
your voice mailbox number along with it.
1.5.3 Listen to your voice messages
Note: The way you listen to your voice messages may vary depending upon your service provider. Call your
service provider if you have any questions.
When your phone alerts you to new voice messages, press
on the phone.
If you’d rather listen to your messages later, press
To Listen to your voice messages at a later time:
Press and hold the 1 key.
OR
Press
MENU 3
> 6 > 1 (
Messages
EXIT
>
Voice Mail
LISTEN
.
>
and follow the instructions given
Call Voicemail
).
Page 5

2. Send and receive e-mail messages
You can use your phone to send and receive e-mail messages. This means you no longer need to be at your computer to
send or receive messages.
2.1 Send an e-mail address
You can add an e-mail address to a name you’ve already saved in the phone book. Or, you can add a name and
address as a new entry.
2.1.1 Save an e-mail address for an existing name
At the Start screen, press
Enter the first one letters of the name or scroll to the name you want and press
Scroll to
Press
If
The associated name appears.
Press
Press
Enter the address, and then press
Details
OPTIONS
Edit
is not highlighted, scroll to it and press
SELECT
SELECT
NAMES
, then press
.
. The associated number appears.
. The E-mail address entry screen appears.
or press
SELECT
ENTER
MENU
to view the number.
SELECT
to save the new e-mail address.
> 1 (
.
2.1.2 Add a new e-mail address
At the Start screen, press
Enter the name and press
The Number entry screen appears.
NAMES
ENTER
, press
.
OPTIONS
, scroll to
Phonebook
New
).
OPTIONS
and press
.
SELECT
.
Enter the phone number and press
The E-mail address entry screen appears.
Enter the address, using the special characters screen to insert the “dot(.)” and @ signs.
Press
ENTER
.
ENTER
.
Page 6

The message
Entry written
appears briefly, confirming your action.
2.1.3 Add a new e-mail address
Follow steps through in “Save an e-mail address for an existing name” (earlier in this section) to find
the name whose e-mail address you want to edit.
Enter any changes, using the scroll keys to move the insertion point backward and forward in the address.
When the address is the way you want it, press
The message
Entry written
appears briefly, confirming your action.
ENTER
2.2 Send an e-mail message
At the Start screen, press
Scroll to
Enter the e-mail address.
Write E-mail
If you press
find the name. The address appears in the Recipient address box. Press
The phone finds only names with e-mail address and lets you know if it doesn’t find any. If no names with
e-mail address are found, you are returned to the Recipient address box.
If you enter the e-mail address, press
SEARCH
MENU
and then, at
, and press
, enter the first few letters of the name you want and press
Messages
SELECT
ENTER
.
when you’ve finished.
.
, press
SELECT
ENTER
.
ENTER
.
when you
The
Subject:
Enter a subject and press
When the message contents screen appears, enter your message.
When you’ve finished the message, press
Save
, and press
A status message tells you the mail is being sent.
opens.
ENTER
ENTER
.
.
ENTER
, select
Send and Discard
or
2.2.1 Other options for a completed message:
Save
Save the message in the saved folder until you send it.
Send and
Page 7

Quit
Erase the message and returns you to the Recipient address box.
Page 8

3. USE ADVANCED CALLING FEATURE
3.1 Set in-call options
Your phone allows you to use a number of features during a
call. These features are known as in-call options.
Note: Many in-call options are network services features.
To use these options, you must contact your service
provider.
You cannot use all these options at all times. This section tells you when you can
use a certain option.
To access an option during a call, press
Choose from some or all of the following options:
Drop
Allows you to end the call.
Voice Privacy
Main Menu
Allows you to access the Voice Privacy.
Allows you to access the
OPTIONS
MENU
.
.
3.2 Use call waiting
If you have call waiting, your phone beeps during a call to let you know that someone else is calling you.
Depending on your caller ID setup, the phone can also display the number of the
incoming call.
Note: Call waiting may not be available in all wireless systems. Contact your service provider for details and
availability.
Before you can use call waiting, you must first store its feature code. Then you must activate the call waiting
feature.
3.2.1 Store the call waiting feature code
Press
MENU 4
> 4 > 5 (
Settings
>
Network services
>
Feature Code Set
).
Page 9

The
Feature code
field appears.
Enter the feature code your service provider gave to you and press
Scroll to
Make sure that
Call waiting
Activate
and press
is highlighted and press
SELECT
.
SELECT
ENTER
.
.
3.2.2 Activate call waiting
Press
Use or to scroll to
Your phone calls the network to confirm the feature code you entered. After the network confirms the feature
code, call waiting is activated.
MENU 4
> 4 > 3 (
Settings
Activate
>
Network services
and press
SELECT
>
Call waiting
.
).
3.2.3 Manage calls
Call waiting works with both local and long distance calls.
To answer an incoming call, press .
To switch from one call to another, press .
To end both calls, press .
3.3 Use call forwarding
While call forwarding, you can forward incoming calls to another number. This
way, if you are unable to receive calls on your phone, all calls going to that phone
can be forwarded to another phone. You never have to miss an important call.
Note: The call forwarding feature might not be available in all wireless systems.
3.3.1 Store the call forwarding feature code
Press
MENU 4
> 4 > 5 (
Settings
>
Network services
>
Feature Code Set
).
Page 10

The Feature code field appears.
Enter the feature code your service provider gave you and press
Use or to scroll to
Call forwarding
ENTER
and press
SELECT
3.3.2 Activate call forwarding
Press
Scroll to the desired call forwarding option, as described in the following table, and press
MENU 4
All Calls
If Busy
If Not Answered
If Out Of Reach
Forwards calls only when you’re one your phone and do not have
> 4 > 2 (
Forwards all incoming calls.
Settings
Forwards calls if you don’t answer. This option is handy if you want
Forwards calls if you are out of the home wireless network, or if your
>
Network services
voice mail.
to give your phone to someone for a short period of time, but you
don’t want this person to answer the phone.
phone is turned off.
>
Call forwarding
.
.
).
SELECT
.
Cancel All Fwd
Highlight
Scroll to
calls forwarded.
Press
Your phone calls the network to confirm the feature code that you entered in
network confirms the feature code, call forwarding is activated.
Activate
Other Number
ENTER
Cancels all forwarding options that are currently active.
and press
.
SELECT
and press
.
SELECT
, and then enter the number to which you want your
MENU 4
> 4 > 5. After the
3.4 Redial automatically
Automatic redial enables your phone to continue trying to call a number that was
busy due to wireless network problems.
When you call a number and get a busy signal because of network problems, your
phone redials this number up to 3 times. If you want to stop this process prior to
the last attempt, press
. This stops the automatic redialing.
Page 11
Before you can use the Automatic Redial feature, you must activate it.
Press
Press
MENU 4
ON
.
> 1 > 4 > (
Settings
>
Call Settings
>
Auto Redial
3.5 Use a calling card
You can use a calling card when you dial long distance calls. First you must store
your calling card information in the phone. Your phone can store information about
a maximum of four calling cards.
3.5.1 Save calling card information
Press
Scroll to the
MENU 4
Options.
> 1 > 2 (
Card A, Card B, Card C
Settings
>
Call Settings
, or
None
calling card and press
>
Calling card
).
).
Scroll to
Enter your
Press
Use
in the following table.
Dialing sequence Use for cards that require you to
Access no.
+ phone no.
+ card no
Access no.
+ card no.
+ phone no.
Prefix
+ phone no.
+ card no.
Edit
and press
Security code
SELECT
or to scroll through the list of dialing sequences, as described
.
OK
.
and press
Dial 1-800 access number, then
phone number, then card number (+
PIN if required).
Dial 1-800 access number, then card
number (+ PIN if required), then
phone number
Dial the prefix (any numbers that
must precede the phone number) and
phone number you want to dial, then
card number )+ PIN, if required).
OK
.
Associated
cards
MCI,
Sprit Canada,
Unitel
Network MCI,
WorldPhone MCI,
AT&T
GTE, PacBell,
AT&T, Stentor
Page 12

Calling cards shown here are frequently used with the dialing sequences
listed in the first column. However, this information could vary and it is
subject to change by the phone companies’.
Press
SELECT
.
3.5.2 Choose a calling card to use
If you have more than one calling card, you’ll need to choose one before
making a call.
Press
Scroll to the desired card and press
Press or to highlight
Enter your security code and press
MENU 4
The
Security code
The message
> 1 > 2 (
Card ready for use
Settings
SELECT
field appears.
>
Call Settings
OPTIONS
and press
OK
.
appears.
>
Calling card
.
OK
.
).
3.5.3 Make a calling card call
To make a calling card call:
Enter the phone number, including any prefix (such as 0 or 1) your calling
card might require when you make a calling card call. See your calling card
for instructions.
Press and hold
Wait for tone and press OK
again.
When you hear the tone from your calling card service, press
Note: This procedure might not apply to all the calling card options that
are programmed into your phone. Check the back of your calling card
for more information, or contact your long distance company.
until your phone displays the message
, and then
Wait for tone and press OK
Card call
OK
, then
.
Page 13

3.6 Send your own number in caller ID
You can determine, for each call you make, whether your telephone number
appears on another phone’s caller ID.
In most service areas, when you call others, your name is presented to their caller
ID (if they subscribe). With Send Own Number, you can block (or not) the display
of your number to others’ caller ID when you call them.
Note: Send Own Number might not be available in all wireless systems. Contact
your service provider for details and availability. Also note that this feature
is effective only when you call a number that is equipped with caller ID.
Before you can use Send Own Number, you must first store its feature code.
Otherwise, this feature will not appear on your phone’s menu.
3.6.1 Store the Send Own Number feature code
Press
Enter the feature code your service provider gave you and press
Use or to scroll to
Scroll to
Press
Your phone calls the network to confirm the feature code that you entered in
MENU 4
Number is activated.
Set
).
Then
MENU 4
Feature Code
YES
SELECT
> 4 > 5. After the network confirms the feature code, Send Own
> 4 > 5 (
or
NO
.
Settings
field appears
Send Own Number
.
>
Network services
>
and press
Feature Code
SELECT
3.6.2 Set whether or not your number will appear
ENTER
.
.
Press
Scroll to
Press
Enter the number you wish to call, and press
MENU 4
Number
SELECT
).
YES
> 4 > 4 (
or
NO
.
.
Settings
>
Network services
ENTER
>
Send Own
.
Page 14

Page 15
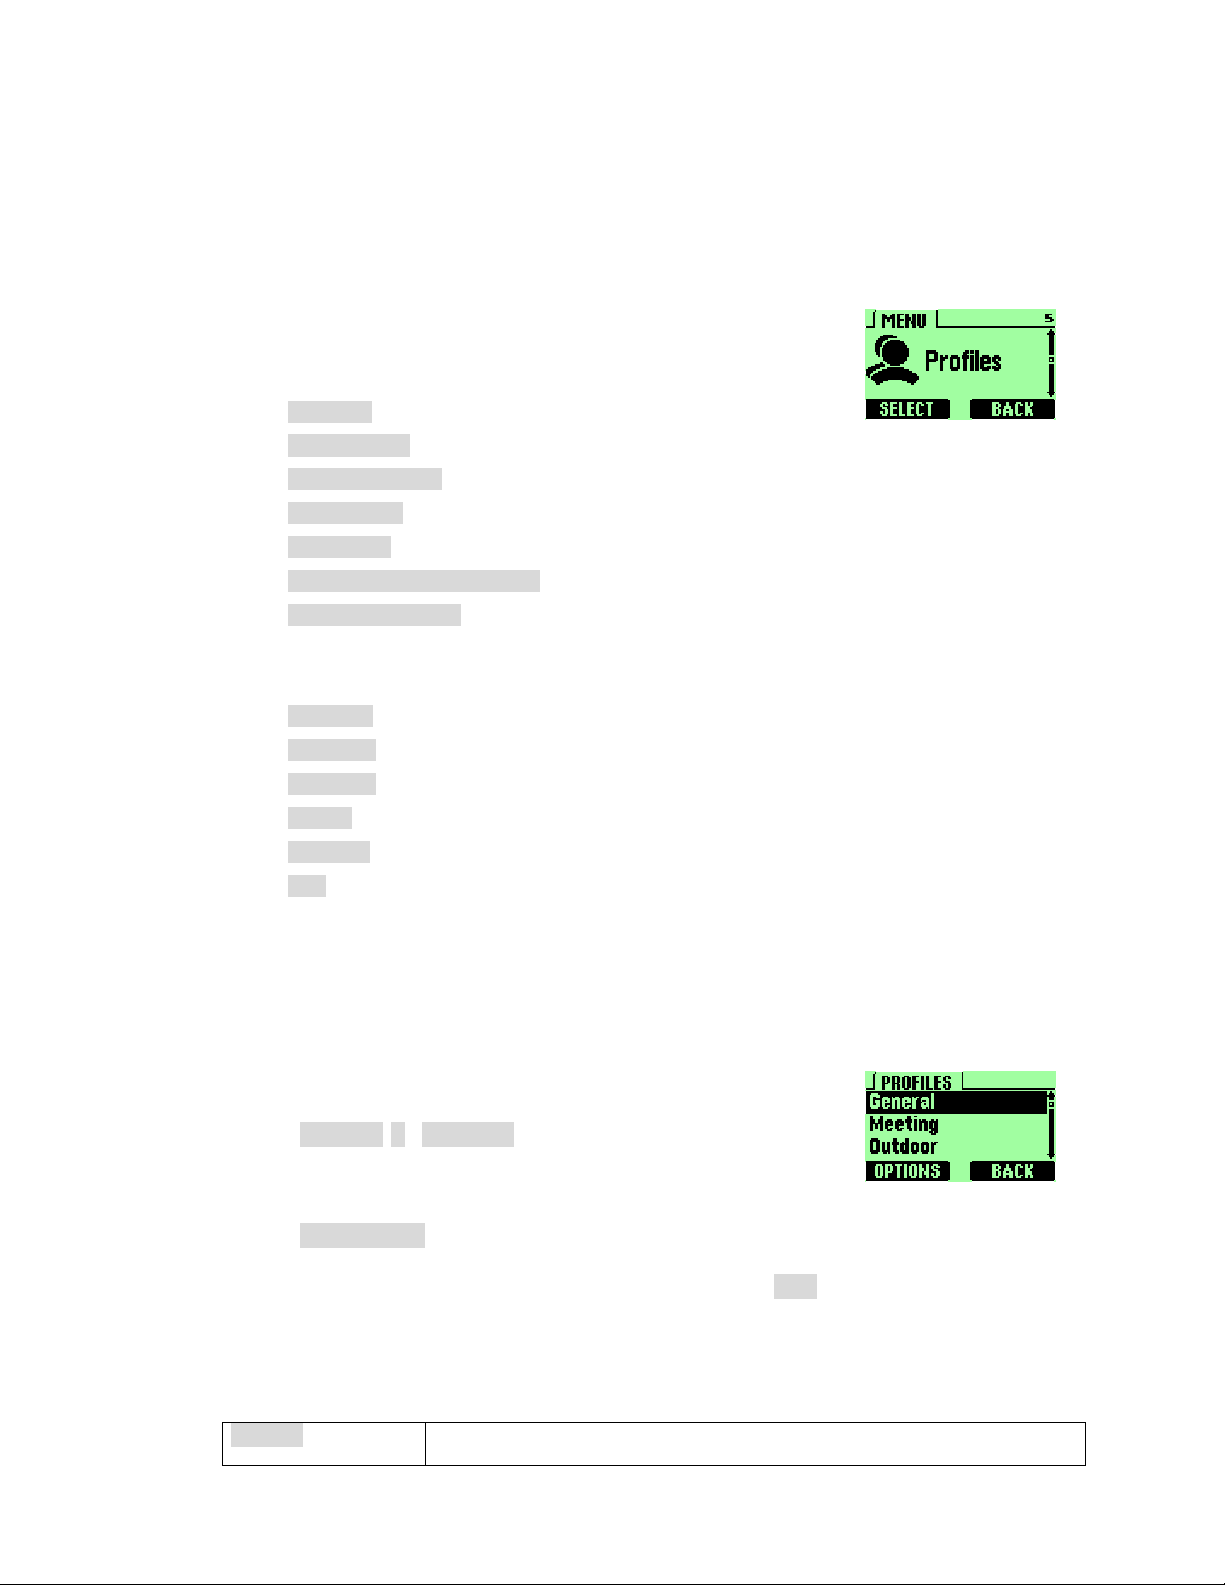
4. Customize your phone
4.1 What is a profile?
A profile is a “set of settings” you can use to customize the way your phone works.
You can set your own preferences for these items:
Volume
Ring Tone
Message Tone
Ring Style
Vibration
Warning & Game-Tone
Keypad Volume
Your phone comes with seven profiles:
General
Meeting
Outdoor
Silent
Custom
Car
You can customize any of the profiles. If at any time you want to return to the original settings, you can do so.
4.2 Customize a profile
Press
Scroll to the desired profile in the list.
Press
Select one of the following options, and then press
Select
MENU 5 (Profiles
OPTIONS
to view the options for the selected profile.
Activates the currently highlighted profile.
).
OK
.
Page 16
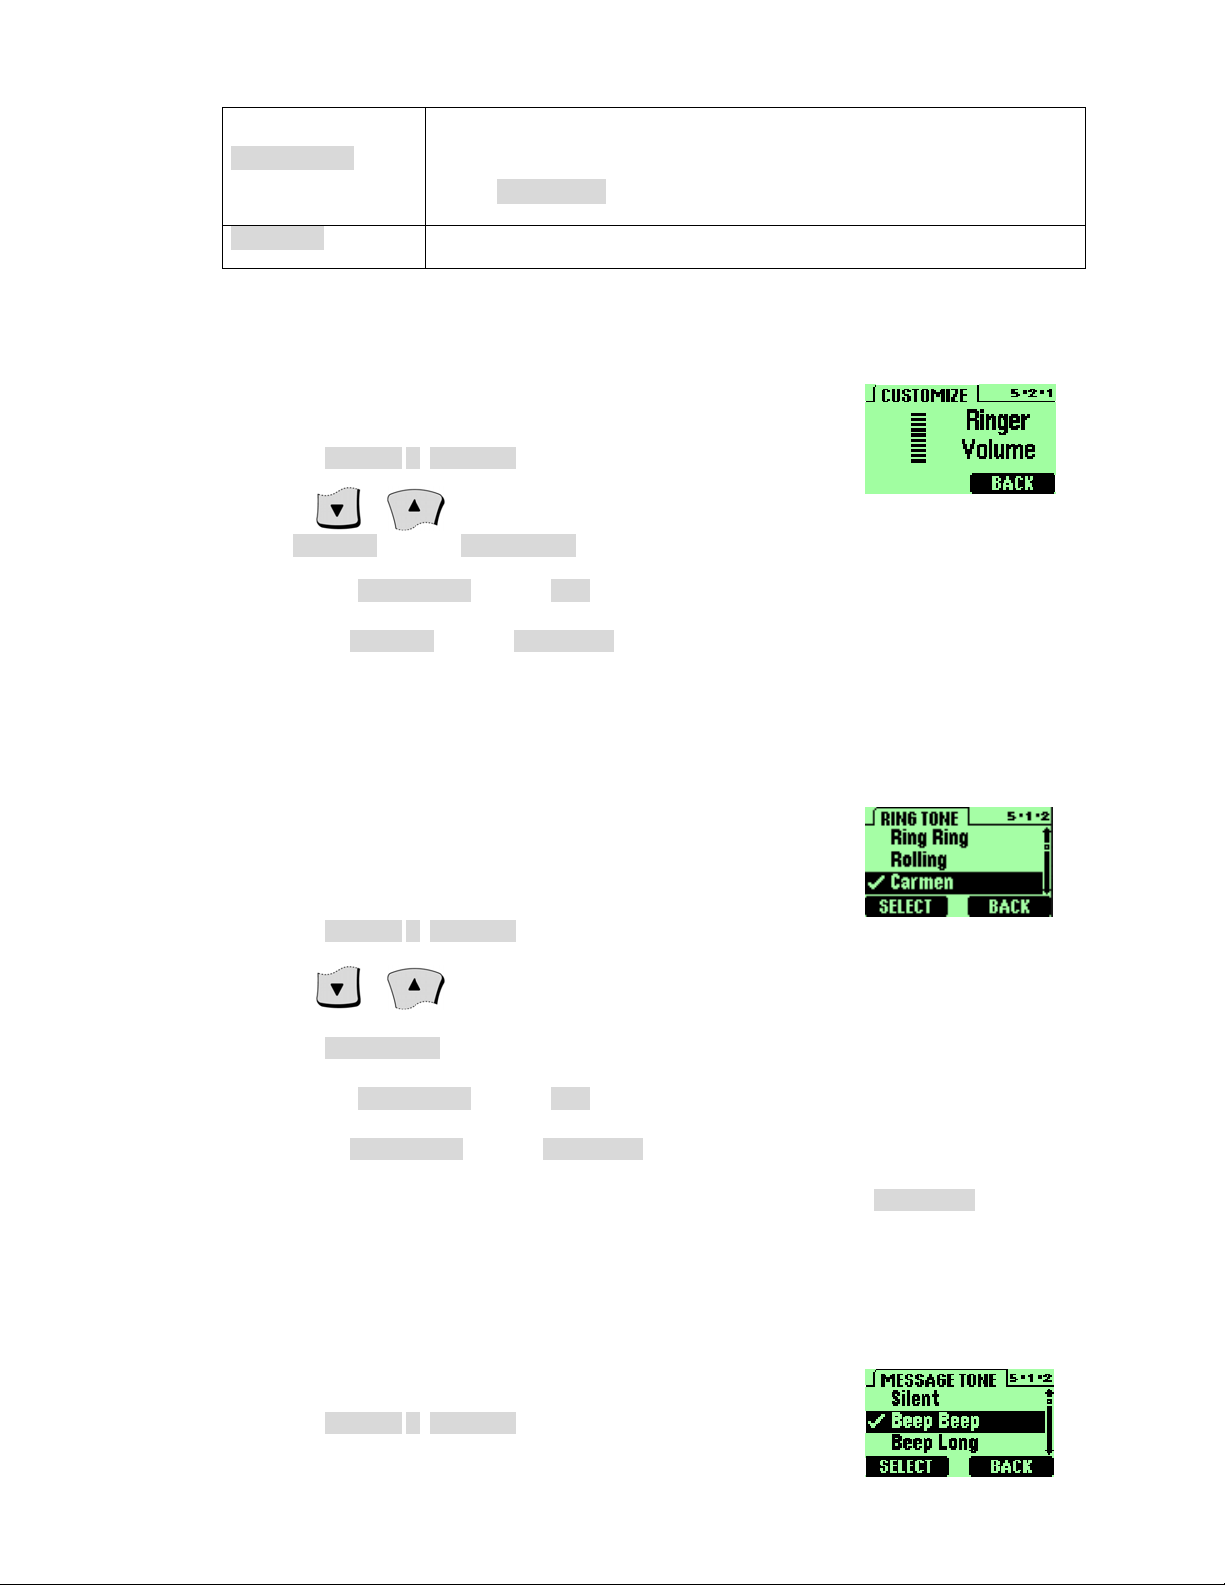
Customize
Enables you to customize a profile by changing the current
settings.
Rename
Press
Enables you to rename the profile.
SELECT
to choose from several lists.
4.2.1 Set the ringer volume
You can set the default ringing volume for incoming voice calls and message
alert tones.
Press
Use
Highlight
Scroll to
MENU 5 (Profiles
or to scroll to the profile for which you want to set the
Volume
, and press
Customize
Volume
OPTIONS
and press OK.
and press
).
.
SELECT
.
4.2.2 Set the ring tone
You can set your phone’s ring tone to a specific sound-or tune- for incoming
voice calls.
Note: If you have already chosen a ringing option of either Silent or Beep
once, the ring tones are already turned off.
Press
Use
Press
Highlight
Scroll to
Scroll through the options, and, when you hear the tone you want to use, press
MENU 5 (Profiles
or to scroll to the profile for which you want to set the ringing tones.
OPTIONS
Customize
Ring Tone
.
).
and press OK.
and press
SELECT
.
4.2.3 Set the message alert tone
You can set your phone to use a certain tone to indicate an incoming text
message.
SELECT
.
Press
MENU 5 (Profiles
).
Page 17
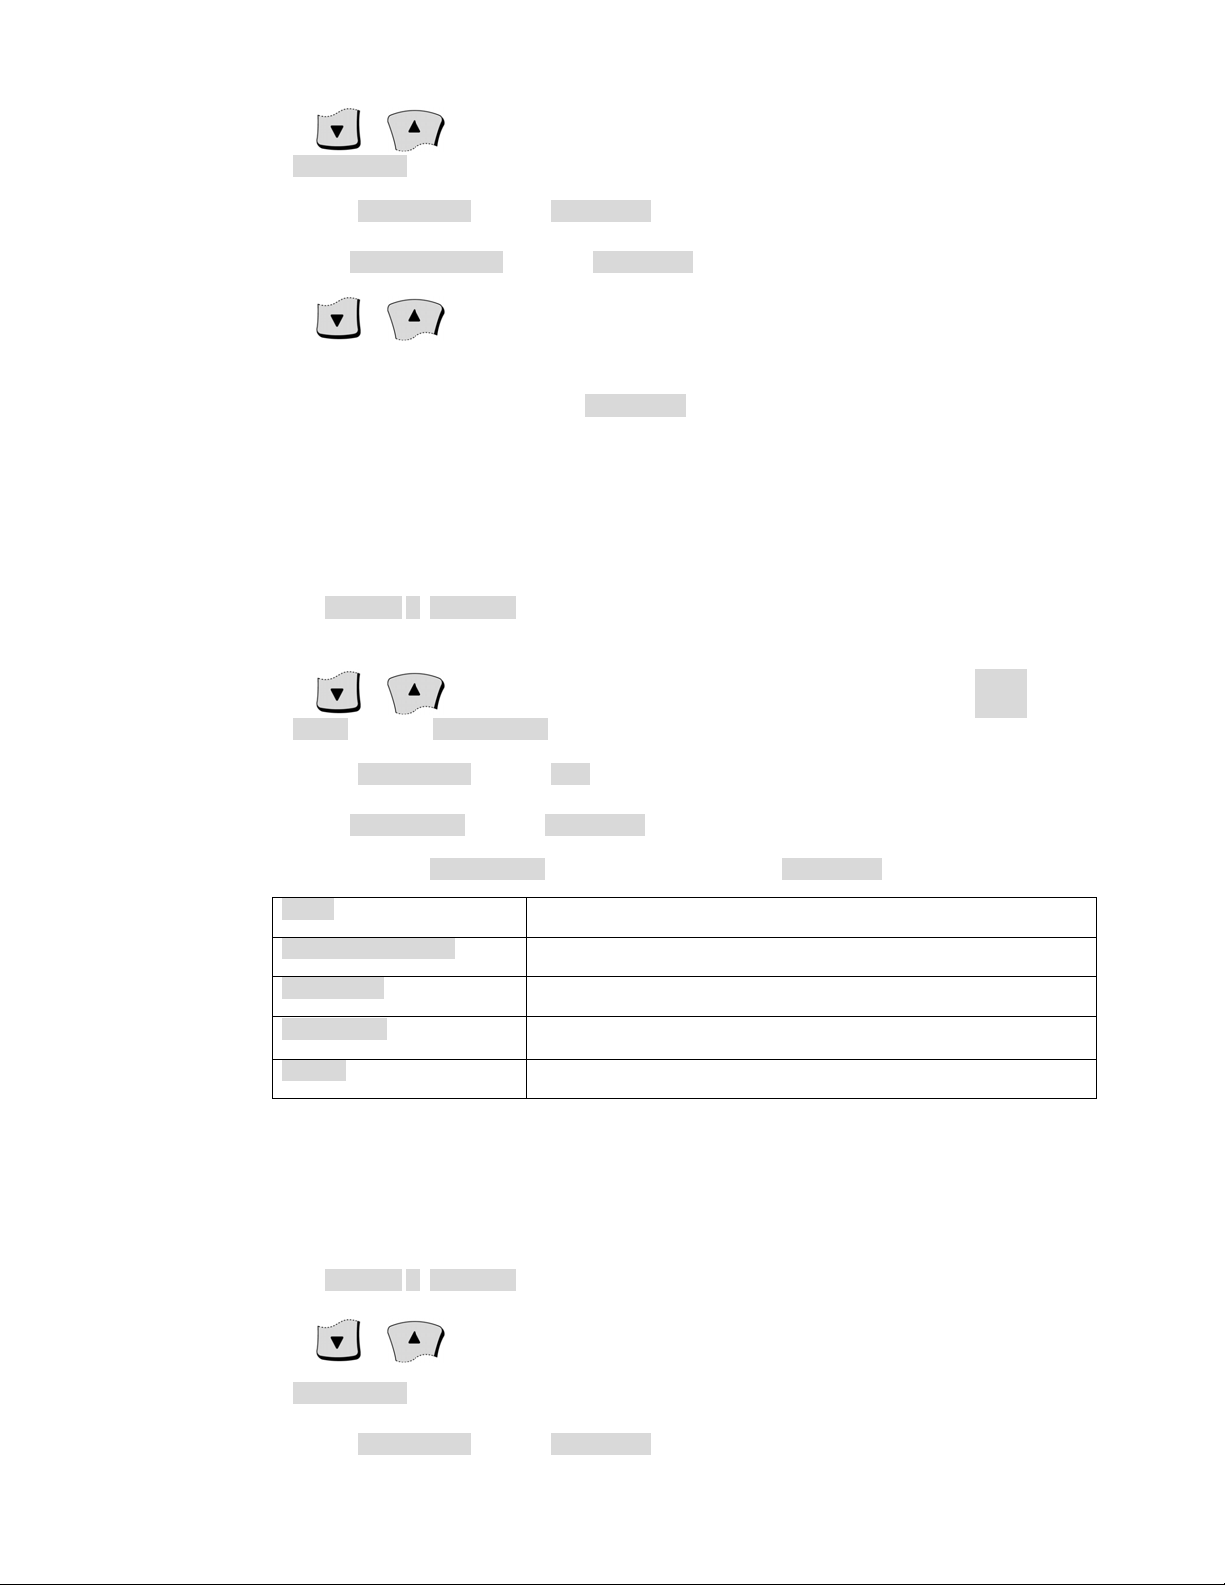
Use or to scroll to the profile for which you want to set the message alert tone, and press
OPTIONS
.
Highlight
Scroll to
Use
The phone plays samples of each choice as you scroll to it.
When you find the tone you want, press
Customize
Message Tone
or to scroll through your choices.
and press
, then press
SELECT
SELECT
SELECT
.
.
.
4.2.4 Set ring style
You can choose the tone that your phone uses to notify you of an incoming call. This setting does not affect
any incoming text message alert tones.
Press
Use or to scroll to the desired profile in the list for which you want to set the
Highlight
MENU 5 (Profiles
Your phone lists each profile.
Style
, and press
Customize
OPTIONS
and press OK.
).
.
Ring
Scroll to
Scroll to one of the
Ring
Ring Ascending
One Ring
One Beep
Silent
Ring Style
The phone rings until it is answered.
The phone rings once to indicate an incoming call.
The phone makes no sound.
and press
Ring Style
Ringing volume increases (gets louder) if the phone is not answered.
SELECT
, as described below, and press
.
SELECT
The phone beeps once to indicate an incoming call.
4.2.5 Set a vibration
Instead of choosing to have your phone ring, you can have it vibrate to indicate an incoming call.
Press
Use
MENU 5 (Profiles
or to scroll to the profile for which you want to set the vibration, and press
OPTIONS
.
).
.
Highlight
Customize
and press
SELECT
.
Page 18

Scroll to
Vibration
and press
SELECT
again.
Press the
The phone does not vibrate when it is connected to or placed in any changing device.
SELECT
key to switch the ON or
OFF
.
4.2.6 Set warning and game tones
You can set warning tones and the tones used for the games in your phone.
Warning tones include the sounds your phone makes during error conditions, during confirmations, when a
battery is low, and when you need to recharge the battery.
Press
Use
Highlight
Scroll to
MENU 5 (Profiles
or to scroll to the profile for which you want to set the warning tone, and press
OPTIONS
.
Customize
Warn&GameTon
).
and press
, then press
SELECT
SELECT
.
.
Press the
If you do not want to use warning or game tones, you can turn them off by switching to
SELECT
key to switch the ON or
OFF
.
4.2.7 Set keypad volume
Keypad volume set the volume of the tone you hear when you press your phone’s keys.
Press
Use
Highlight
Scroll to
MENU 5 (Profiles
or to scroll to the profile for which you want to set the keypad volume, and press
OPTIONS
.
Customize
Keypad Volume
).
and press
and press
SELECT
SELECT
.
.
OFF
.
Use or to scroll to one of the levels and press
If you chose the
Silent
profile in step , the keypad volume is turned off.
SELECT
.
Page 19

4.3 Rename profiles
Press
Use or to scroll to the desired profile and press
Scroll to
Enter the new name and press OK again.
MENU 5 (Profiles
Rename
and press
).
SELECT
OPTIONS
.
.
4.4 Restore defaults settings
You can change the default settings for your phone. Later, you can return them to the original settings when
needed.
Note: The memory, timers, language selection, security code, and lock code are not reset. However, any profiles
you have modified are reset when you restore the default settings.
Press
Press OK.
MENU 4
> 2 > 7 (
Settings
>
Phone Settings
>
Restore Defaults
).
4.5 Set the display language
You can set your phone to display a certain language.
Press
Use or to scroll to the language you want to use and press OK.
You can choose from
MENU 4
Languages
> 2 > 4 (
).
English, Mexico Spanish, Canada French
Settings
>
Phone Settings
4.6 Set and display the clock
Your phone has an internal clock that you can set to appear on the phone’s screen.
The clock is connected to an alarm clock.
>
and
Brazil Portuguese
.
Page 20

4.6.1 Set the clock
To set the clock to the appropriate time:
Press
Use or to scroll to
Enter the time using a
Use or to scroll to
MENU 4
The Time field appears.
For example, to set your clock to 9:30, enter 09:30.
> 2 > 1 (
xx:xx
Settings
format and press OK.
>
Phone Settings
Set Time
AM
or PM and press
and press
>
Date and Time
SELECT
SELECT
.
.
4.6.2 Set the clock to be updated by the network
You can set your phone’s clock to be updated by the network, if available.
Turn on the network date and time update
Press
Scroll to ON or
MENU 4
press
SELECT
> 2 > 3 (
.
Confirm
Settings
, and then press
>
Phone Settings
SELECT
.
>
AutoDate & Time
).
), and then
If you choose
the phone’s clock is updated. Select OK to accept the update or
Turn off the network date and time update
Press
Scroll to
MENU 4
press
Confirm
SELECT
OFF
, and then press
, you will receive the message
> 2 > 3 (
.
Settings
SELECT
>
Phone Settings
.
4.7 Add a welcome note
You can set your phone to display a welcome note each time you switch on your
phone. This note could say, for example: Hello. It could include your name, a
reminder, or more. The maximum lengths of this note 20 characters.
Press
MENU 4
> 2 > 5 (
Settings
>
Phone Settings
Really Update date and time?
CANCEL
>
>
Welcome
AutoDate & Time
to reject it.
), and then
).
Before
Enter the text of the welcome note.
Page 21

As you enter characters, they appear to the left of the cursor. Press
CLEAR
to delete characters to the left
of the cursor. Press
Press
ENTER
.
or to move the cursor right or left.
4.8 Set the answer
4.8.1 Set your phone to answer automatically
You can set your phone to answer incoming voice calls after one ring. This feature can be used only when
your phone is connected to a headset or to an approved handsfree car kit that is equipped with the ignition
sense option, with the ignition on.
Press
Scroll to
Use
MENU 4
Auto Answer
automatically, and press
> 3 > 1 (
or to scroll to the phone setting for which you want to set your phone to answer
Settings
and press
SELECT
>
Answer Settings
SELECT
.
.
>
Auto Answer
).
4.8.2 Set your phone to answer by pressing any key
This feature allows you to answer an incoming call by pressing any key except the END key. The default
setting for this feature is OFF.
To enable Any Key answer:
Press
Press ON.
Repeat the steps above except, in step , press
MENU 4
> 3 > 2 (
Settings
>
Answer Settings
OFF
.
>
Any Key Answer
4.9 Emergency calls
Before attempting any emergency calls, see “18.1 Emergency Calls” for important
safety information.
).
If the phone is not on, switch it on
Page 22

Press the key to ready the phone for calls.
(Press it twice if there are still digits on the display.)
Key in the emergency number for your present location (e.g. 911 or other
official emergency number). Emergency numbers vary by location.
Press
IMPORTANT!
This phone, like any cellular phone, operates using radio signals, cellular and
landline networks, as well as user-programmed functions which can not guarantee
connection in all conditions. Therefore, you should never rely solely upon any
cellular phone for essential communications (e.g., medical emergencies).
Remember, to make or receive any calls, the phone must be switched on and in a
service area with adequate cellular signal strength.
Emergency calls may not be possible on all cellular phone networks or when
certain network services and/or phone features are in use. Check with local
cellular service providers.
If certain features are in use (keyguard, restrict calls, etc.), you may first need to
turn those features off before you can make an emergency call. Consult this
document and your local cellular service provider.
When making an emergency call, remember to give all the necessary information
as accurately as possible. Remember that your cellular phone may be the only
means of communication at the scene of an accident - do not cut off the call until
given permission to do so.
.
4.10 Use emergency key 9
When the emergency key feature is turned on, the phone attempts to make an
emergency call when you press 9 and
number preprogrammed into your phone.
Note: If you have activated the emergency key 9 feature, you can also dial an
emergency call by pressing and holding 9 until the phone indicates it is
attempting to make an emergency call. This method does not work,
however, when Keyguard is active.
. The phone dials the emergency
Page 23

4.10.1 Activate the emergency key 9
Before you can use the emergency key feature, you must first activate it.
Press
Press ON.
Repeat the steps above except, in step , press
MENU 4
> 1 > 1 (
Settings
>
Call Settings
OFF
.
>
Emergency Key 9
Warning: Official emergency numbers vary by location. Only one emergency
number is programmed into your phone, and this is the number
that is dialed when you press key 9. However, this might not be the
proper number in all circumstances.
4.10.2 Make an emergency call
Press 9 and .
).
Page 24

5. Security
Your phone is equipped with a versatile security system that prevents the
unauthorized use of the phone.
You cannot activate or use certain phone features without having first successfully entered your phone’s security code.
When entering the security code, a * appears on the screen each time you press a number key. This prevents others from
seeing your code.
If you incorrectly enter a security code five times in a row, your phone won’t accept any entries for the next 5 minutes.
However, if you realize that you’ve entered the code incorrectly before pressing OK, you can use
the code, digit by digit, beginning with the last digit.
When this guide describes an action that requires the entry of your security code, each step necessary to this action is
provided.
CLEAR
to erase
5.1 Change your security code
Press
Enter the default security code and press
At the message
At the message
MENU 4
Sec Code
The Security code field appears.
> 5 > 2 > 4 (
).
New Secu Code
Verify Secu Code
Settings
>
Security Settings
ENTER
, enter your new security code and press
, enter your new security code again and press
.
>
Access Codes
ENTER
>
.
ENTER
Change
.
The message
If you have changed your security code and don’t remember the new code, contact your service provider. Once you
have changed your security code, the default setting is no longer valid.
Security Code has been changed
appears.
5.2 Protect your phone with the lock code
The lock code enables you to activate and deactivate your phone. When the lock code is on, you cannot access most
of your phone’s memory or menu features. Also, you cannot make phone calls without first entering the lock code.
Note: If you save the unlocked phone number, you can make calls without entering the lock code. Refer to “Store
an unlocked phone number”.
Page 25

With the lock code on, your phone locks when you switch it off. The next time you switch your phone on, it asks
you for a lock code when you press either
Note: If you enter an incorrect lock code five times in a row, your phone prompts you for the security code.
The default lock code is 12345.
MTD-3500 recommends that you change this code immediately.
NAMES
or
MENU
.
5.2.1 Turn on the phone lock
Press
Enter the lock code and press
When your phone is locked, it will be possible to place a call to the emergency number programmed into
your phone, such as 911 or any other official emergency number. You can either dial this emergency number
or press the emergency key 9 (if you have activated the 9 key to act as an emergency key).
You can also store a number in the Unlocked phone number location. This allows you to call the number
even though your phone is locked.
MENU 4
Lock
> 5 > 2 > 1 (
).
Settings
ENTER
>
Security Settings
.
>
Access Code
>
Phone
5.2.2 Store an unlocked phone number
Press
Enter the lock code and press
Enter the unlock code and press
Press OK.
MENU 4
Phone No.
The
Enter Unlock Num
> 5 > 2 > 2 (
).
Settings
ENTER
field appears.
ENTER
>
Security Settings
.
.
5.2.3 Change your lock code
Press
MENU 4
Lock Code
> 5 > 2 > 3 (
).
Settings
>
Security Settings
>
Access Code
>
Access Code
>
Unlock
>
Change
Enter the lock code and press
ENTER
.
Page 26
Only numeric characters are accepted.
Enter the new lock code and press
Verify the new lock code, and press
When you change your lock code, make sure you store it in a safe place, away form your phone. Avoid
entering access codes similar to emergency number to prevent accidental emergency calls.
ENTER
ENTER
.
.
5.2.4 Turn off the lock code
Press
Enter the lock code and press
With the lock code feature turned off, you can use your phone without having to enter the lock code each
time you turn your phone on.
MENU 4
Lock
> 5 > 2 > 1 (
).
Settings
ENTER
>
Security Settings
.
>
Access Code
>
Phone
5.3 Lock the keypad
When you lock the keypad, you prevent accidental key pressesfor example, when
your phone is in a pocket or purse. This feature is called keyguard.
5.3.1 Active keyguard
There are three different ways to activate the keyguard:
At the Start screen:
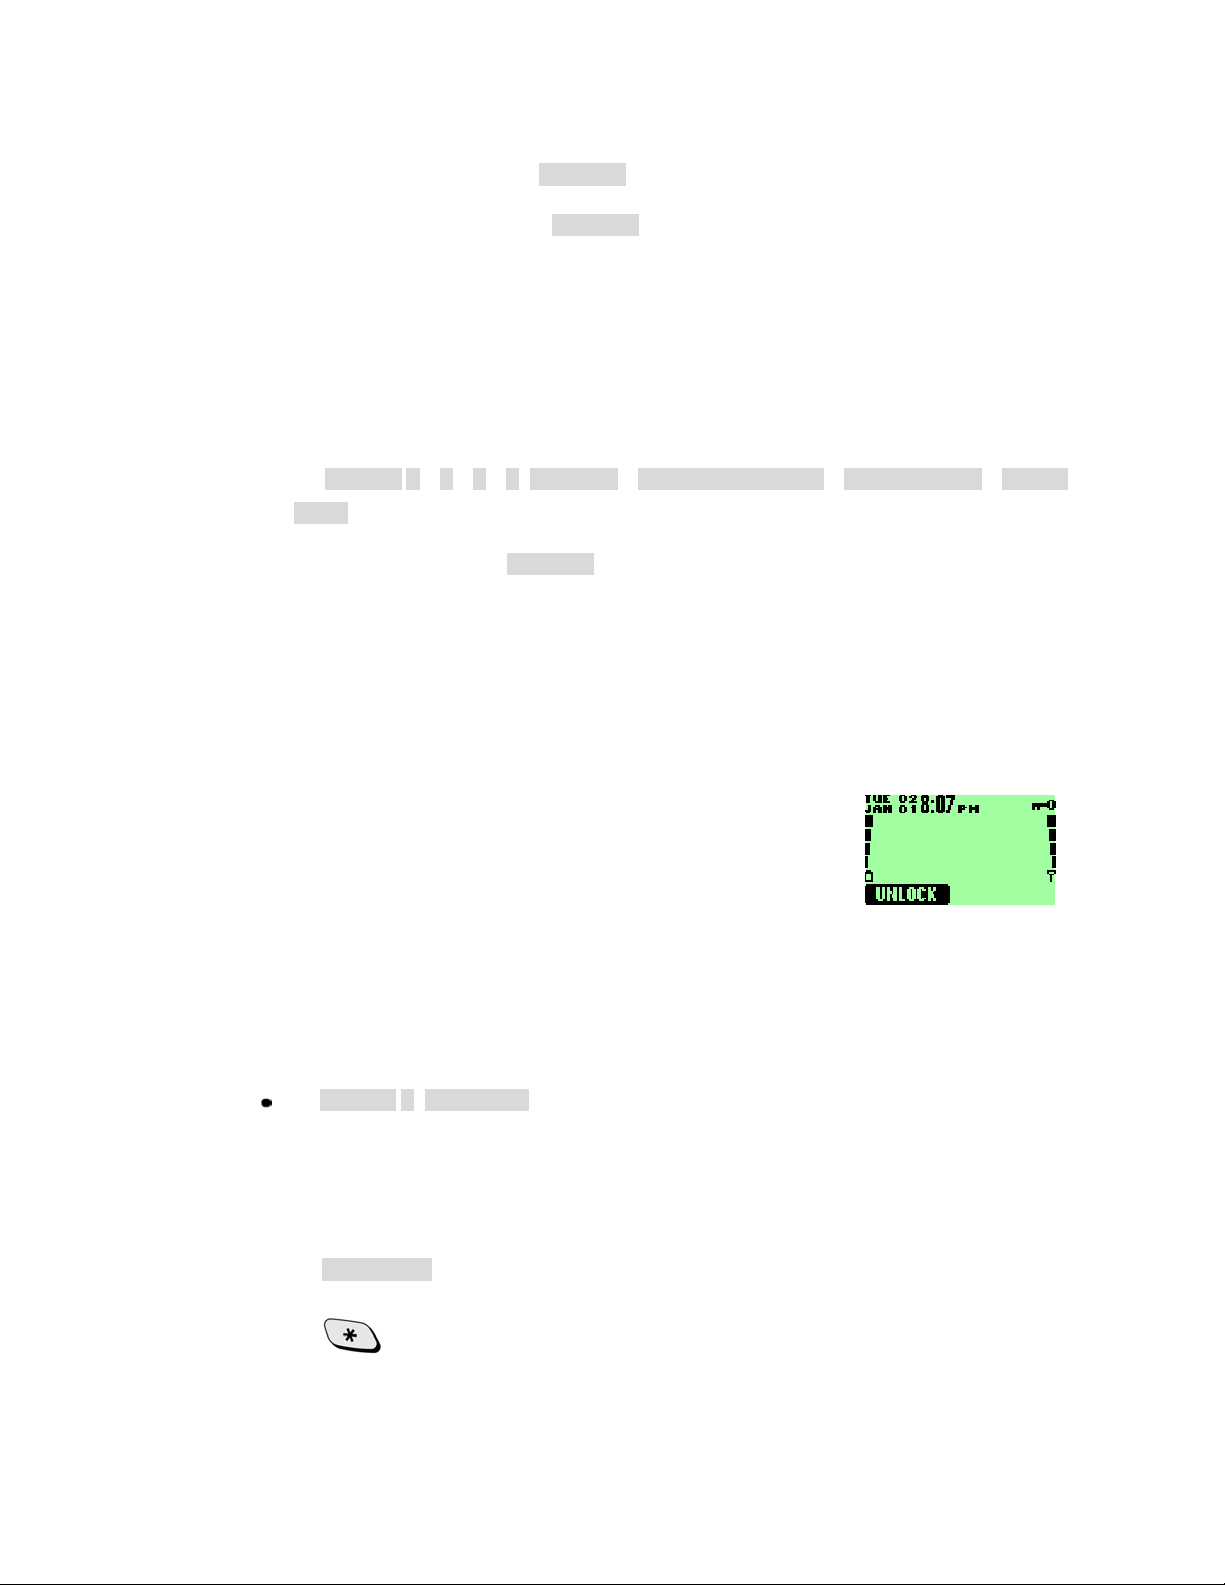
Press
MENU 0 (Keyguard
5.3.2 Deactivate keyguard
Press
Press
UNLOCK
.
.
).
Page 27

5.3.3 Answer a call while keyguard is active
During an incoming call, the keypad automatically unlocks.
Press any key to answer the call.
After you end the call, keyguard automatically becomes active again.
5.4 Restrict calls
You can restrict incoming and outgoing calls. To restrict outgoing calls, you create a list of restrictions and apply
the appropriate restriction.
Before you define restrictions for outgoing calls, only one restriction option is
available:
Add restriction
number of call restrictions you can define is ten.
Delete
Delete any existing outgoing call restriction.
, which enables you to create your own list of outgoing call restrictions. The maximum
Delete All
Edit
Allows you to edit an existing outgoing call restriction.
Restrict All
When calls are restricted, you will be able to make calls to the emergency number that is programmed into your
phone. For example, you could dial 911 and press
on the type of restriction you choose.
Delete all existing outgoing call restriction.
Allows you to activate all outgoing call restrictions.
. However, emergency key 9 might not work, depending
5.4.1 Restrict incoming calls
To restrict incoming calls:
Press
Use or to scroll to
MENU 4
> 5 > 1 (
Settings
Incoming
>
Security Settings
and press
SELECT
>
Call Restriction
.
).
Enter your security code and press
Scroll to
Press
Restrict All
OFF
to remove an already-set restriction.
and press ON.
ENTER
.
Page 28

5.4.2 Restrict outgoing calls
Press
Use or to scroll to
Enter your security code and press
Press
Scroll to
Enter the number you want to restrict and press
MENU 4
OPTIONS
Add Restriction
> 5 > 1 (
.
Settings
Outgoing
SELECT
and press
>
Security Settings
SELECT
and press
.
ENTER
SELECT
.
.
>
Call Restriction
.
).
Page 29

6. Set network services features
The following network services can be obtained from your service provider:
Voice Privacy
Call Forwarding
Call Waiting
Send Own Number
When you subscribe to any of these services, your service provider gives you a
feature code that activates each service. Deactivation codes are used to deactivate
each service.
After you store the appropriate code in your phone, the code is sent to the network to verify that you’re using the correct
feature code. The voice privacy feature does not require you to store a feature code before using it.
After you store a feature code, the respective service appears as a menu option on your phone’s screen. You can use
these menus to activate and deactivate the network services.
6.1 Set up how your phone selects a system
Your phone is capable of working in residential, private, and public systems (such
as your home system). You can choose how your phone selects a network to use.
Press
MENU 6
You see the following three options:
Automatic
chooses the appropriate one. Every time you turn on your phone, it resets to
Automatic
Manual
the possible networks on your phone’s screen. Next to each network, one of
the following appears:
designated as
New Search
systems. When it finds the best system available, your phone displays it on its
screen. You can then select this system or start another search by pressing
NEXT
.
: Your phone automatically searches for available networks and
.
: The phone searches for networks and then displays a listing of all of
Available
Not available
: Your phone begins a new search for both private and residential
.
or
Not available
, you cannot use it.
. If a network is
Page 30

Use or to scroll through the choices, and press
SELECT
see the one you want.
6.2 Roaming
The term roaming is used to indicate when your phone is not in its home area. Calls made or received while you
are roaming are usually more expensive than calls made in your home area.
While roaming in some systems outside your home area, your phone may not be recognized by the host system,
which is the system in which you’re traveling. You may not be able to place a call.
Contact your service provider for more specific information on how roaming works with your phone and for
information about coverage limitations.
6.3 NAM selection
when you
The service provider programs your phone with the phone number and system information into your phone’s
memory when your phone is first activated. This is called a Number Assignment Module (NAM).
For example, your phone can be activated in up to 2 different service areas (e.g. one in Chicago or New York, and
maybe one more in New York), each giving your phone a different phone number or account.
Only one number can be active at a time. When you select a phone number, you’re also selecting which system
you’re using as your home system. The first phone number displayed with this menu is the currently selected
number.
Note: It may not be necessary to have three NAMs for your phone if your service provider has service or roaming
agreements for each area in which you wish to use your phone. Contact your service provider for details.
6.3.1 Selecting the NAM for your phone
Press
Highlight the phone number you want to use and press OK.
MENU 4
> 4 > 6 (
Settings
>
Network Services
>
NAM Selection
)
Note: You need at least one active number to make calls. You cannot change from one NAM to another
during a call.
Page 31
7. USE YOUR PERSONAL ASSISTANT
Your phone can be your personal assistant. It can wake you up in the morning and
remind you of meetings, birthdays, and tasks. You can check the current time,
calculate a tip at dinner, and convert currencies.
With a calendar, clock, alarm clock, and phone book, you have everything you need to
keep track of your life.
7.1 Use the calendar
The calendar application allows you to enter appointments
and reminders into the phone.
Your phone must be switched on for the calendar to work. Do
not switch on the phone, however, where wireless phone use
is prohibited or where the use of the phone could cause interference or danger.
7.1.1 View the calendar
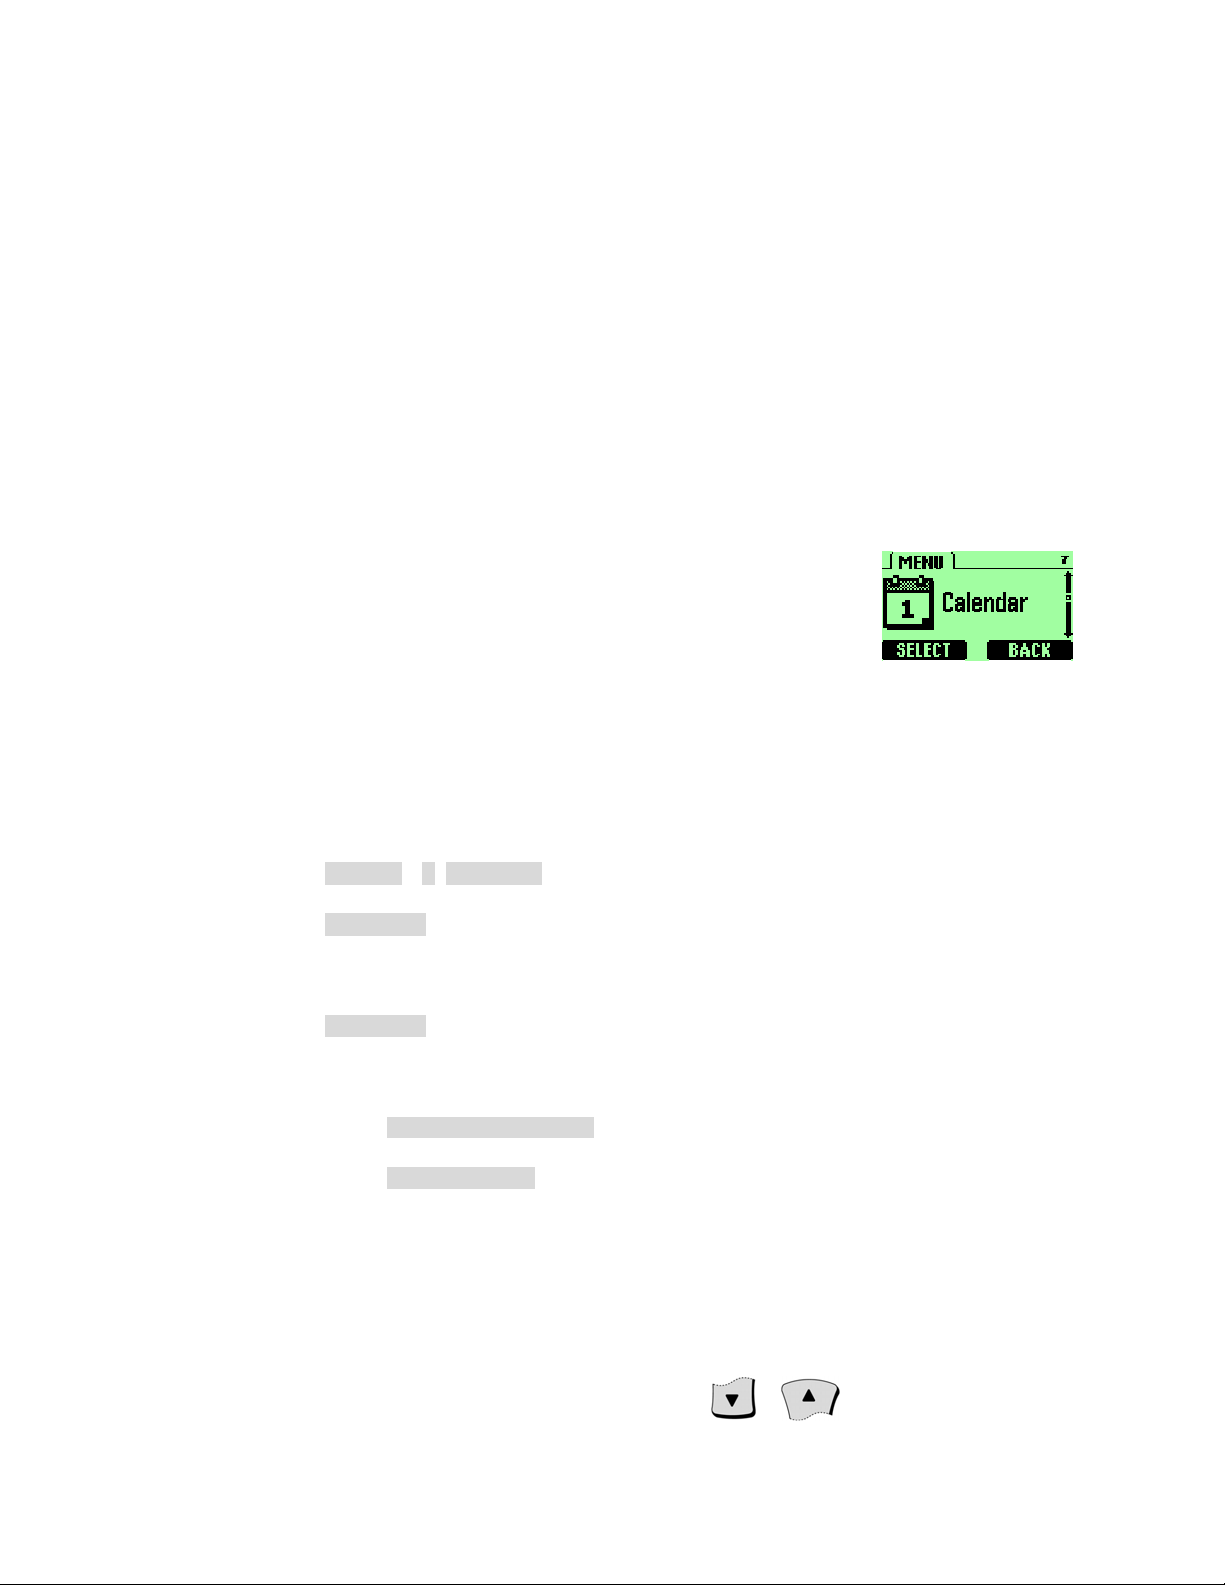
Press
Press
Press
If you select the
If you select the
MENU
SELECT
Today’s day and date appear.
SELECT
You can select the Current day’s notes or all notes list.
> 7 (
Calendar
.
.
Current Day Select
All List View
).
, you can view the all notes of the entire calendar.
, you can view the notes of the day currently on display.
7.1.2 Move from day to day
After you set the date, whenever you press Menu 7, your phone displays the current date and day.
To move forward or backward through the calendar, use
or .
Page 32

When you reach the date you want, press
SELECT
and scroll to highlight the select you want.
7.1.3 Add a calendar note
This option enables you to add a note. You can also set an alarm for any calendar note.
Go to the day you want, then press
The list of note appears.
Press
Enter the information and press
Enter the time when you need to make this call using the hh:mm format and press OK. Select AM or
Select either
ADD
.
The
NOTE:
The current date appears.
If you do not want to change the date, just press OK.
The
If you want to change the date for this note, do so and press OK.
PM
and press
Time:
No Alarm
field appears.
field appears.
SELECT
or
SELECT
ENTER
.
Set Alarm
.
.
and press
SELECT
.
If you don’t want to set an alarm, select
If you select
Enter the date on which you want the alarm to sound and press
The alarm time field appears.
Enter the time at which you want the alarm to sound using the hh:mm format and press OK.
Select either AM or PM and press
Set Alarm
, the alarm date field appears.
No Alarm
SELECT
.
OK
.
.
7.1.4 View the day’s notes
You can review notes you’ve written for certain days.
To review notes for a certain day, open the calendar and scroll to the day you want.
Press
SELECT
, scroll to note list and press
SELECT
.
Page 33

The following options are available:
Details
Add Entry
Edit Entry
Delete Entry
Delete All For Day
Delete All Entries
7.2 Alarm clock
You can set the alarm clock to ring at any time. The alarm clock’s volume is
determined by the current ringing volume and tone settings.
If you have selected the
clock quietly beeps once.
Silent
or
One Beep
ringing tone, then your alarm
7.2.1 Set the alarm clock
Press
The Set alarm clock message appears.
Enter the time for which you want to set the alarm using the hh:mm format and press OK.
Any existing numbers are replaced with the newly entered numbers.
Select either AM or PM and press
MENU 4
> 2 > 2 (
Settings
SELECT
>
Phone settings
.
>
Set Alarm Clock
7.2.2 Turn off the alarm clock when it rings
When the alarm clock rings:
).
Press
Press
OK
to turn it off.
SNOOZE
to set the alarm to go off again in 5 minutes.
Page 34
If you let the alarm ring for 1 minute or more without pressing a key, it
stops ringing, waits 5 minutes, and then rings again. This continues until
you press Stop.
7.2.3 Turn off the alarm clock altogether
If you decide that you don’t want the alarm to ever go off, you can turn it completely off.
Press
Press
If you have selected the
when using the alarm clock is
original settings.
MENU 4
OFF
.
> 2 > 2 (
Silent
General
Settings
or
Meeting
>
Phone settings
profile, your alarm beeps only once. The best profile to use
or
Outdoor
7.3 Calculator
Your phone’s calculator adds, subtracts, multiplies, divides, and converts
currencies.
7.3.1 Use the calculator
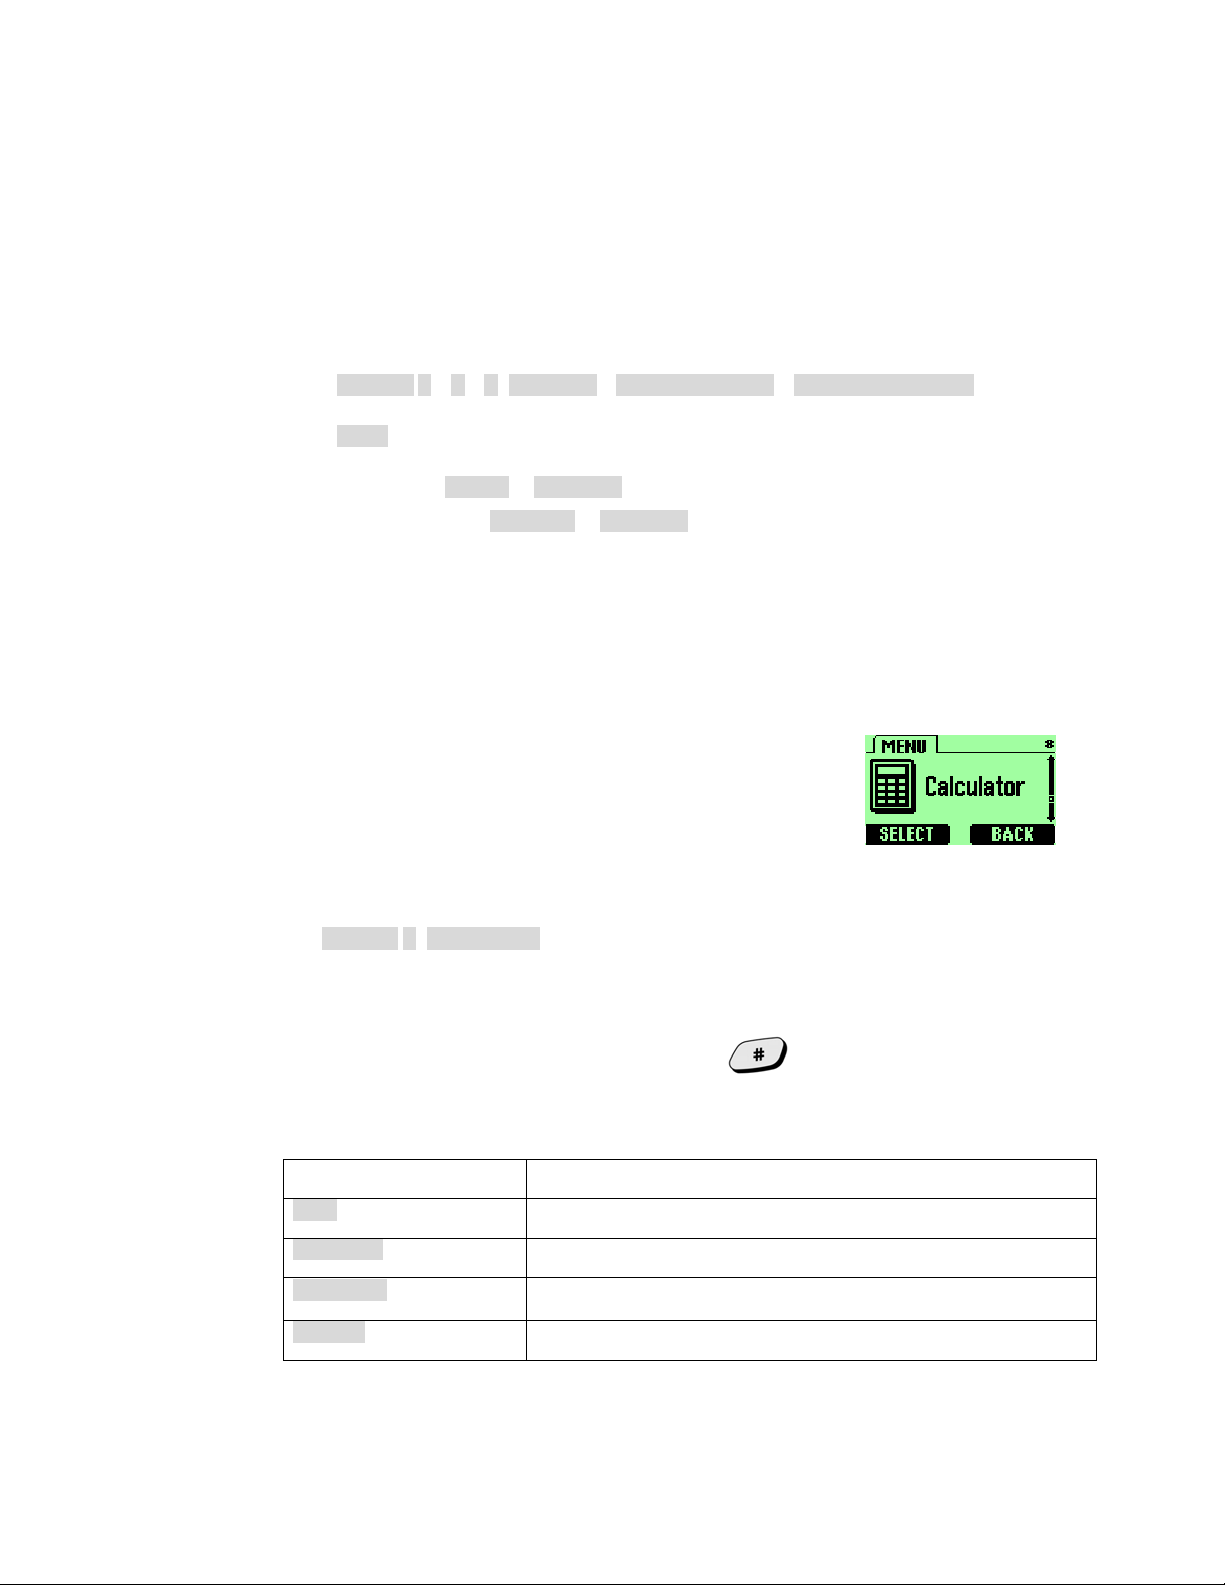
Press
MENU 8 (Calculator
).
>
Set Alarm Clock
, unless these profiles have been modified from their
).
Enter the first number in the calculation.
If you need to enter a number with a decimal point, press
Then, based on the type of calculation that you need to perform, use one of the following actions:
If you want to… Then…
Add
Press * (for + symbol)
Subtract
Multiply
Divide
Press ** twice (for – symbol)
Press **** (for / symbol)
Press *** (for * symbol)
to indicate it.
Page 35

Or, you can press Options, then use or to scroll to:
Equals, Add, Subtract
,
Multiply, Divide
Enter the second number in the calculation and press
Use or to scroll to
, or
Exit
Equals
. Then press
and press
SELECT
Options
SELECT
.
.
.
Note: Repeat steps and as many times as necessary.
Press
Clear
to erase any mistakes.
Page 36
8. GAMES
You phone includes for exciting games that you can play whenever the phone is
turned on:
Breakout
Snake
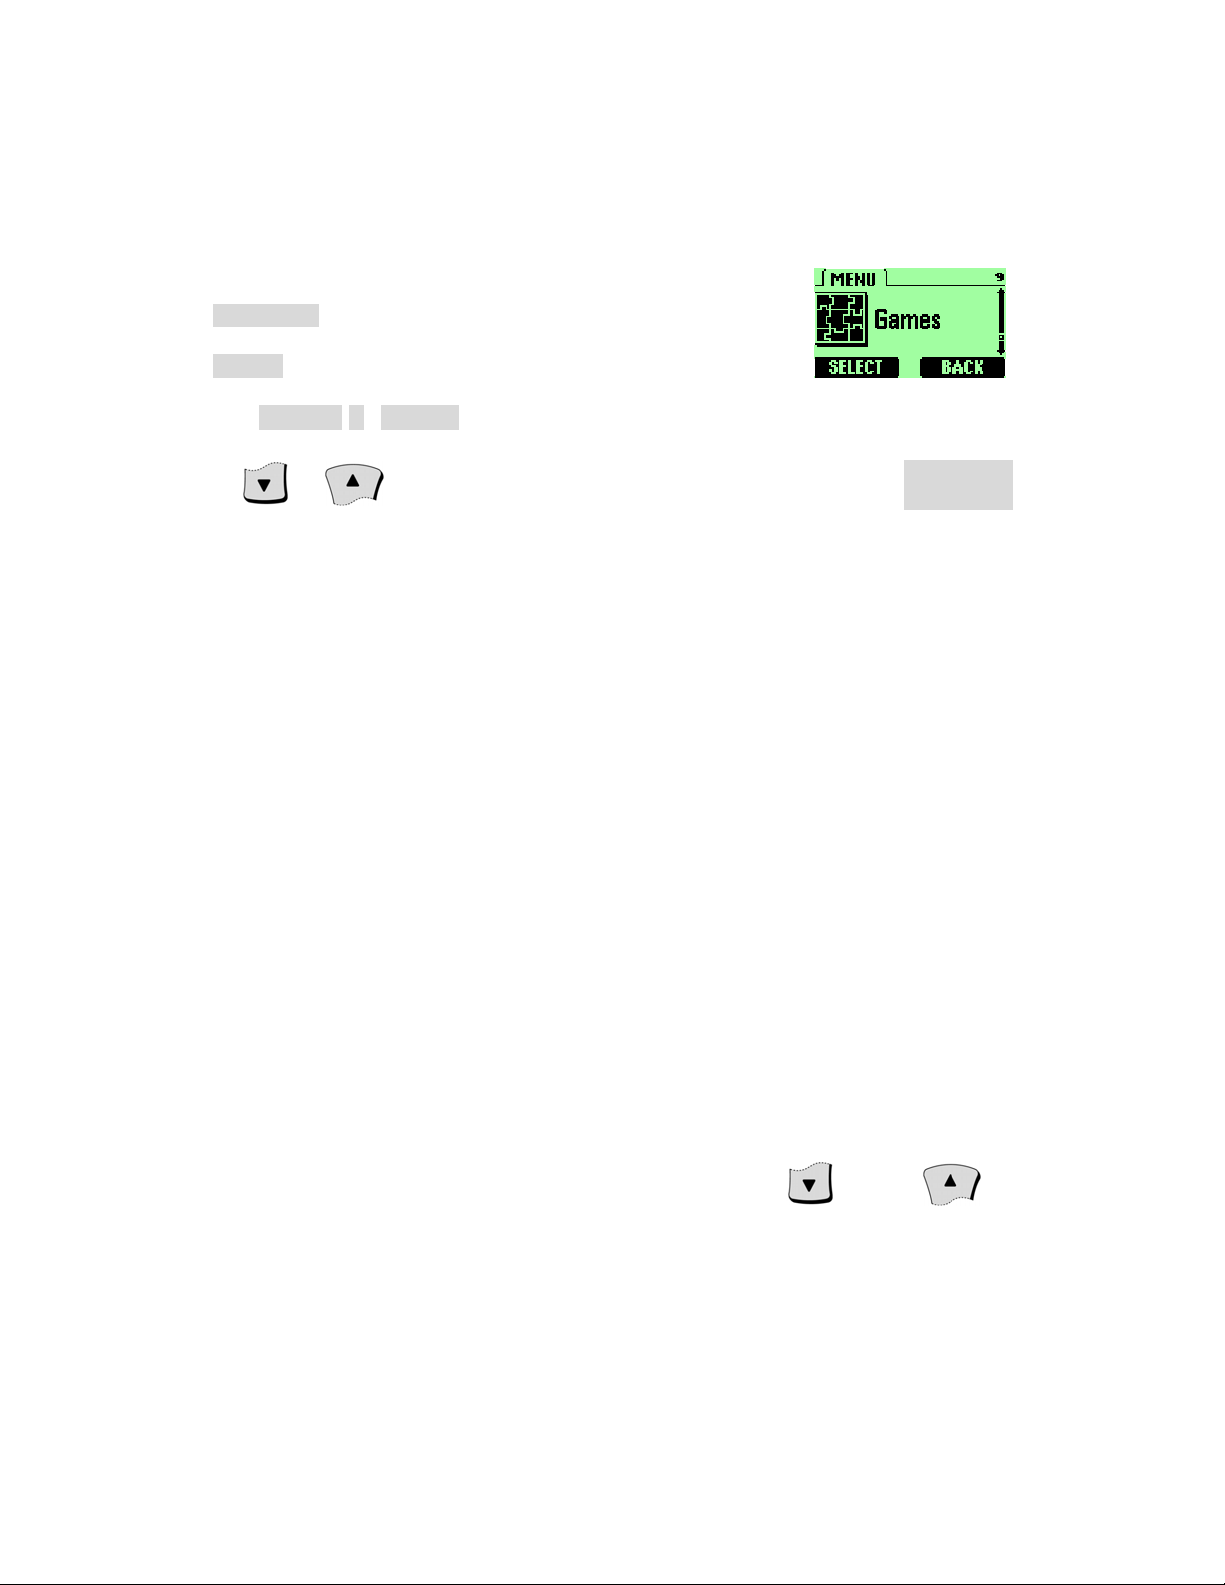
Press
Use or to scroll to the game you want to play and press
MENU 9 (Games
) to display the listing of these games.
SELECT
8.1 Snake
This game places an object, which represents a piece of food, in the middle of the
screen. At the bottom of the screen is a line that represents the snake.
Use the following keys as cursors: 2 (up), 4 (left), 6 (right), and 8 (down).
Move the snake toward the food and watch the snake grow.
The longer the snake’s tail grows, the higher the score. If the snake hits its own
tail or the surrounding wall, the game is over.
.
8.2 Breakout
This game places an object, which represents a ball, in the middle of the screen.
At the right of the screen are the blocks. At the left of the screen is a bar.
Use the following keys as cursors to move the bar:
Bounce the ball using bar, and break the block.
The more blocks are broken, the higher the score. If the ball hits the left wall
instead of the bar, the game is over.
(down), (up)
Page 37

9. REFERENCE INFORMATION
9.1 Emergency Calls
IMPORTANT!
This phone, like any wireless phone, operates using radio signals, wireless and
landline networks, and user-programmed functions. Because of this, connections
in all conditions cannot be guaranteed. Therefore, you should never rely solely on
any wireless phone for essential communications (e.g. medical emergencies).
Remember, to make or receive any calls, the phone must be switched on and be
used in a service area that has adequate signal strength. Emergency calls might
not be possible on all wireless phone networks or when certain network services
and/or phone features are in use. Check with local service providers.
Always ensure that your phone is properly charged before attempting any
emergency calls. If you allow your battery to become empty, you will be unable to
receive or make calls, including emergency calls. You must then wait a few
minutes after the charging begins to place any emergency calls.
9.1.1 Make an emergency call
If the phone is not on, switch it on.
Enter the emergency number for your present location (for example, 911 or
any other official emergency number—emergency numbers vary by
location).
Press
If certain features are in use (Keyguard, fixed dialing, restrict calls, and so
on), you might first need to turn those features off before you can make an
emergency call. Consult this guide and your local cellular service provider.
When making an emergency call, remember to give all of the necessary
information as accurately as possible. Remember that your wireless phone
might be the only means of communication at the scene of an accident—do
not terminate the call until given permission to do so.
.
Page 38

9.2 Troubleshooting
9.2.1 No service
If you’re outside the wireless service area, No service will display on your
phone. No calls can be made or received, however, emergency 911 calls may
still be possible.
9.2.2 What if the call doesn’t go through?
Your phone can make and receive calls only when it’s switched on and in the
wireless network’s service area.
No service
calls can be made or received.
This number is restricted.
call are restricted (see “Restrict calls”).
means that you’re probably outside the wireless service area. No
means calls to the phone number you tried to
Page 39
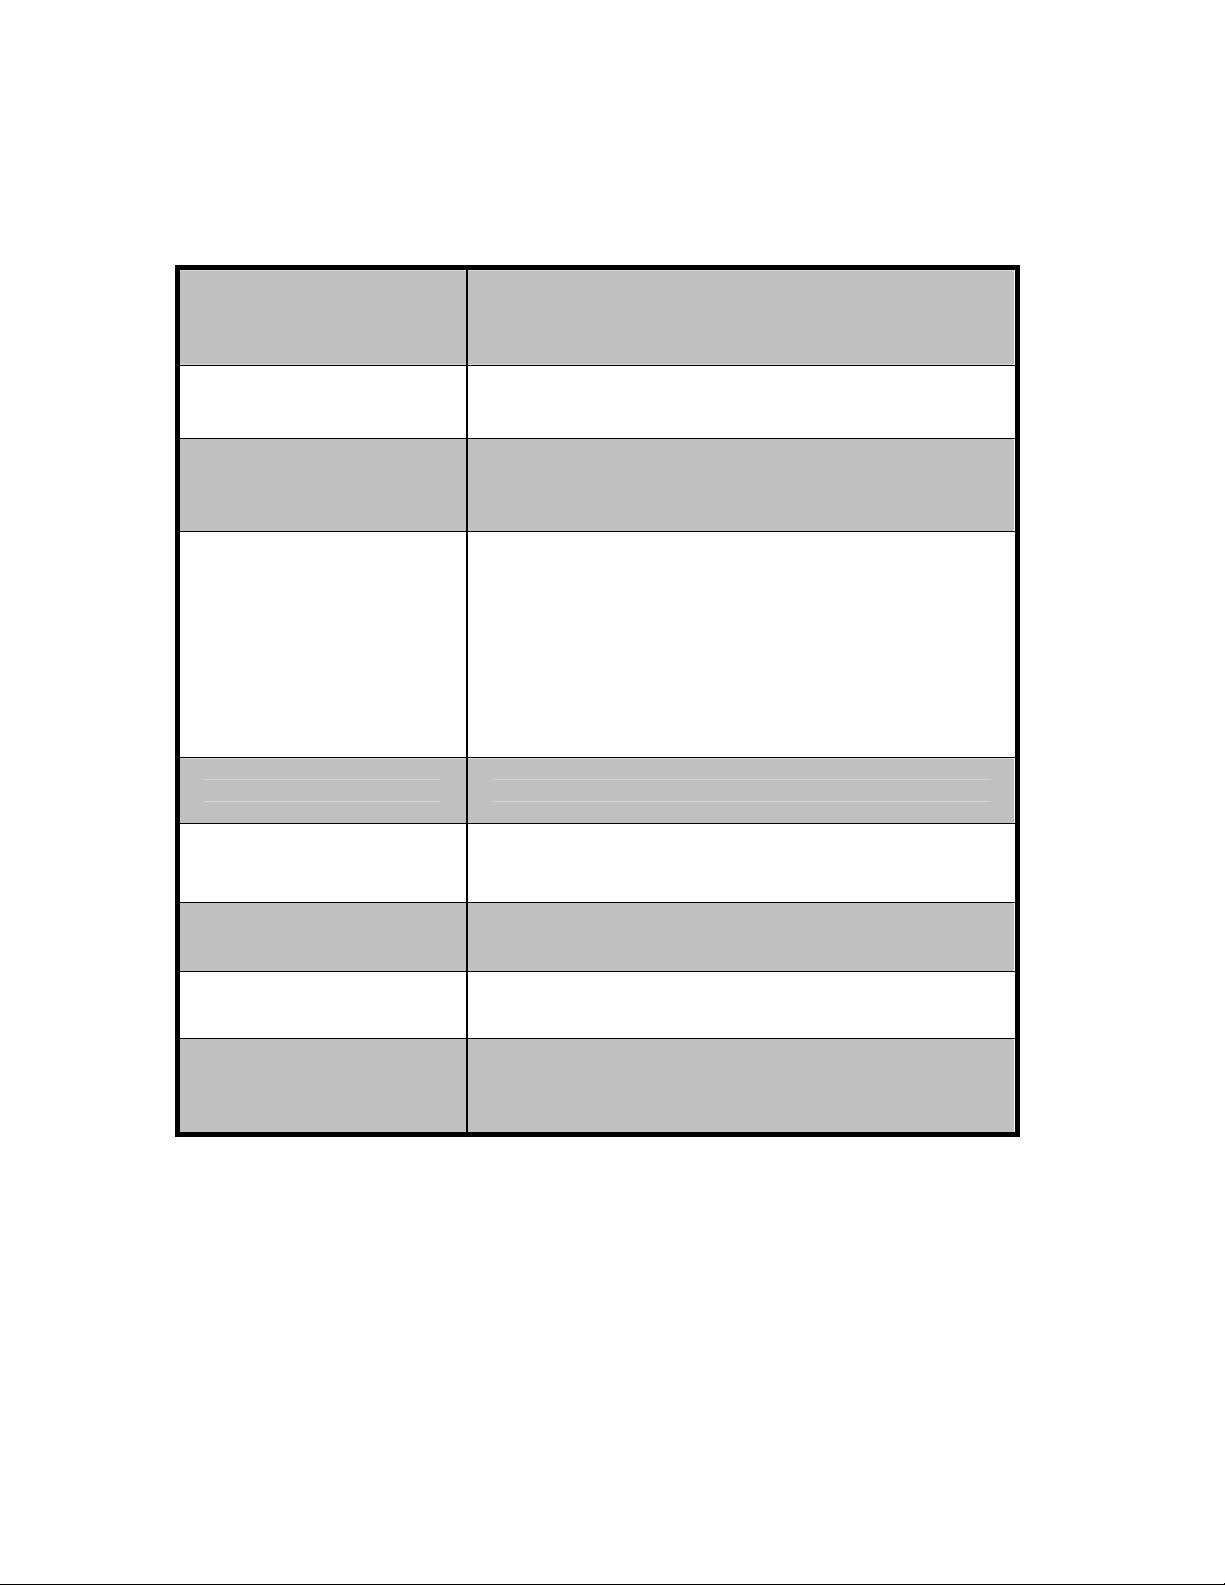
10. TECHNICAL INFORMATION
Weight
Size (H x W x D)
Wireless Networks
Frequency Range
Battery Voltage
Number of
Channels
84.0g with 790 mAh
Li–ion Battery
112.0 x 45.6 x 21.4 mm
TDMA800
AMPS
824.04-848.97 MHz (TX)
869.04-893.97 MHz (RX)
3.7V nominal
832
Number of NAMs
Memory Locations
Memory Capacity
2
100
Alpha: 15 digits per location
Numeric: 32 digits per location
 Loading...