

Page 1
Telex
Operating Instructions
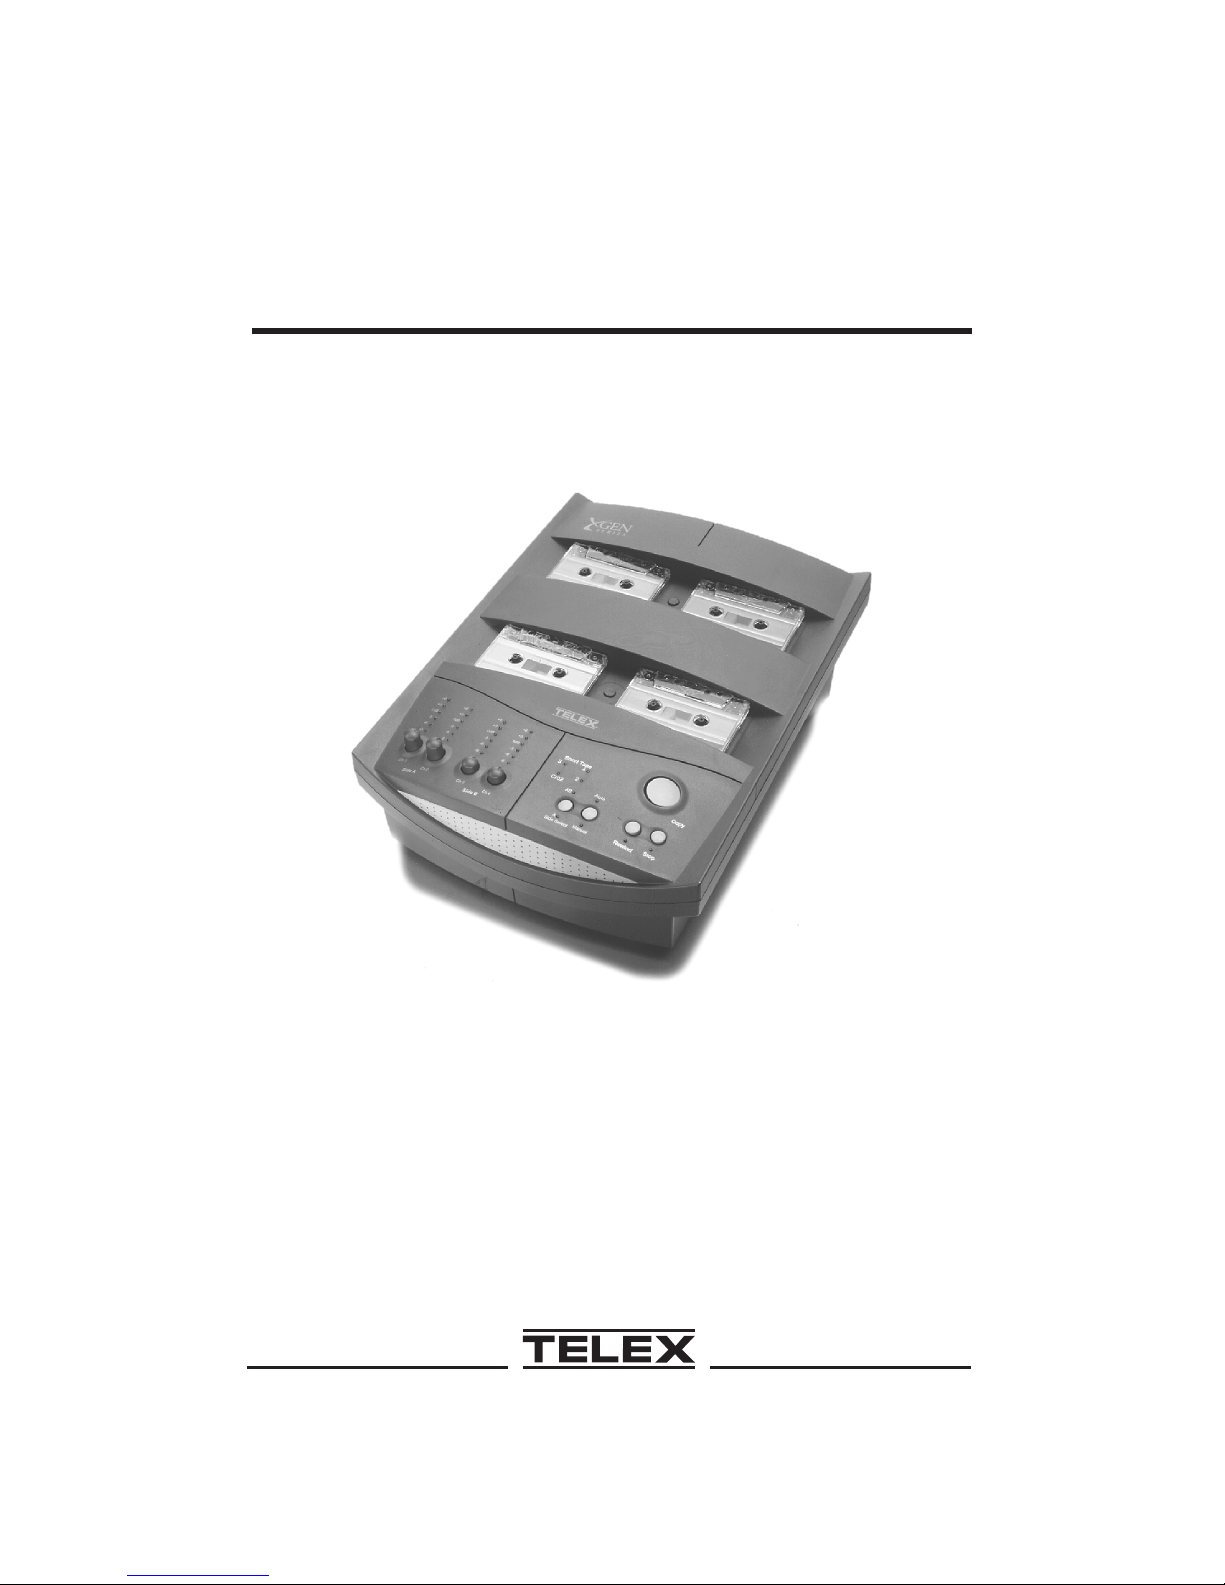
X-GEN
CASSETTE DUPLICATING
SYSTEM
®
Page 2

LIMITED WARRANTY - VALID IN UNITED STATES AND CANADA ONLY
Telex Communications, Inc. (“Telex”) warrants to the user who originally
purchased the product, that the product will be free from defects in material and
workmanship for the following periods after such date of purchase: Material 24
months, workmanship 24 months. In Addition, Telex warrants the product
against head failure due to manufacture defects for a period of: Standard heads
– 12 months, XL and Ferrite Heads – 24 months, from the date of purchase.
Telex will repair or replace tape heads which fail due to these conditions during
the warranty period. Telex will at its option repair or replace free of charge such
defective products subject to the following conditions:
1) Delivery of the product or parts postage prepaid to the Telex dealer
authorized service facility or factory.
2) Determination by Telex that a defect exists and is covered by limited
warranty. Defects due to alteration, repair by unauthorized person, Insertion
of non-Telex parts, misuse, accidental damage, use of the equipment for
purposes other than those for which It was designed, and the like are not
covered by this limited warranty and repairs thereof will be subject to normal
service charges.
3) Repairs and replacement parts are covered under this limited warranty only
for the unexpired term of the original limited warranty.
4) Products purchased from unauthorized dealers are not warranted.
5) You must fill out and return the enclosed warranty registration card within 10
days after such purchase or this limited warranty is void.
THIS LIMITED WARRANTY IS EXPRESSLY IN LIEU OF ANY EXPRESS OR
IMPLIED WARRANTY, INCLUDING ANY IMPLIED WARRANTY OF
MERCHANTABILITY OR FITNESS FOR A PARTICULAR PURPOSE WHICH
EXTENDS BEYOND THE TERM HEREOF. THE REMEDIES PROVIDED BY
THIS LIMITED WARRANTY ARE THE ONLY REMEDIES AVAILABLE TO ANY
PERSON. NO PERSON HAS ANY AUTHORITY TO BIND TELEX TO ANY
REPRESENTATION OR WARRANTY OTHER THAN THOSE PROVIDED BY
THIS LIMITED WARRANTY. TELEX SHALL NOT BE LIABLE FOR ANY
INCIDENTAL OR CONSEQUENTIAL DAMAGES CAUSED BY FAILURE OR
OTHERWISE OF THE PRODUCT.
Some states do not allow exclusions or limitations of incidental or consequential
damages or limitations on how long an implied warranty lasts, so the limitations
or exclusions herein may not apply to you. This warranty gives you specific legal
rights, and you may also have other rights which vary from state to state.
Page 3

Introduction
Thank you for selecting the Telex X-Gen to meet your high-speed
cassette duplicating needs. Please take the time to read this booklet and
become familiar with your new duplicating equipment before using the
equipment.
Table of Contents
Introduction . . . . . . . . . . . . . . . . . . . . . . . . . . . . . . . 1
Recommended Tape Usage . . . . . . . . . . . . . . . . . . . . . . . 3
Warranty Exclusion . . . . . . . . . . . . . . . . . . . . . . . . . . . 3
Important Safety Instructions . . . . . . . . . . . . . . . . . . . . . . 4
Controls and Indicators . . . . . . . . . . . . . . . . . . . . . . . . . 5
Tape Types . . . . . . . . . . . . . . . . . . . . . . . . . . . . . 6
Operating Mode . . . . . . . . . . . . . . . . . . . . . . . . . . . 6
X-Gen Channel Descriptions . . . . . . . . . . . . . . . . . . . . 7
Connecting Your X-Gen Modules . . . . . . . . . . . . . . . . . . . . 7
Copying With X-Gen . . . . . . . . . . . . . . . . . . . . . . . . . . . 8
Setting Up the X-Gen for Copying . . . . . . . . . . . . . . . . . . 8
Manual Copying . . . . . . . . . . . . . . . . . . . . . . . . . . 10
Automatic Copying . . . . . . . . . . . . . . . . . . . . . . . . . 10
Special Copying Applications . . . . . . . . . . . . . . . . . . . 11
Maintaining X-Gen . . . . . . . . . . . . . . . . . . . . . . . . . . . 13
Maintenance Cautions and Warnings . . . . . . . . . . . . . . . 13
Cleaning the Tape Head, Capstan, and Pressure Roller . . . . . 13
Replacing the Fuse. . . . . . . . . . . . . . . . . . . . . . . . . 15
Common Problems and Their Solutions . . . . . . . . . . . . . . 16
Service Information . . . . . . . . . . . . . . . . . . . . . . . . . . . 17
1
Page 4
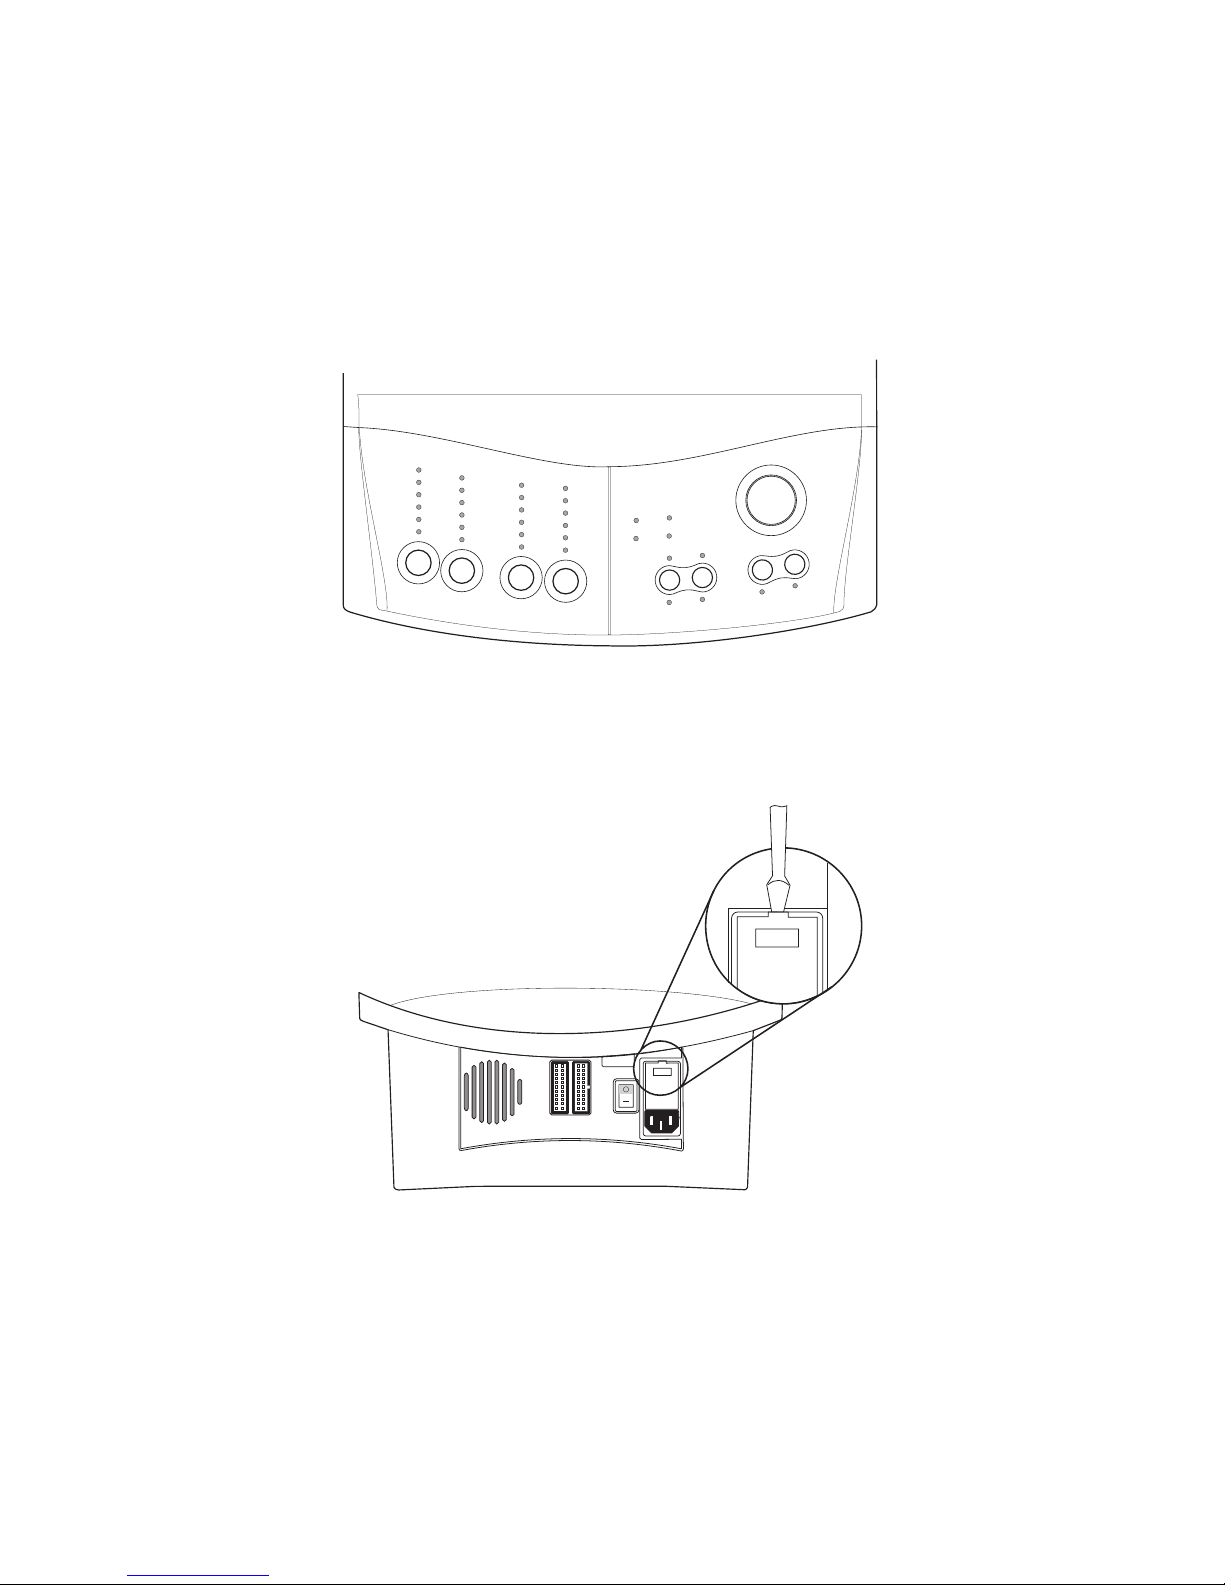
REFERENCE VIEWS
Telex
+6
+6
+3
+3
0dB
0dB
-3
-3
-6
-6
-9
-9
Ch 1
Side A
+6
+6
+3
+3
0dB
0dB
-3
-3
-6
-6
-9
-9
Ch 2
Ch 3
Ch 4
Side B
3
F/C
Short Tape
4
2
AB
A
Side Select
Auto
Manual
Rewind
Copy
Stop
TOP VIEW
FUSE HOLDER
REMOVAL
BACK VIEW
2
120Vac
120Vac
Page 5

Recommended Tape Usage
Use only high-quality cassette tapes with your X-Gen system. Some
inexpensive tapes can cause poor-quality recordings and premature
head wear. For X-Gen Stereo, Ferrite or XL models, you can use either
normal bias 120 ms (Type I) or high-bias (70 ms CrO2/Type II) types of
tape. For Standard model X-Gen duplicators, only normal bias (Type I)
tapes can be used. You can use C-30, C-60 or C-90 cassettes, but
C-120 cassettes are likely to break and thus are not recommended.
NOTE
Metal (Type IV) tapes are not recommended.
Warranty Exclusion
Telex does not warrant or quarantee the performance of the X-Gen tape
duplication products in configuration with any hardware that is not the
standard. If you have any questions on this matter, please feel free to
contact Telex Communications, Inc.
3
Page 6

Important Safety Instructions
Read instructions - All the safety and operating instructions should
·
be read before the product is operated.
Retain instructions - These safety and operating instructions should
·
be retained for future reference.
Heed warnings - All warnings on the product and in the operating
·
instructions should be followed .
Follow instructions - All operating and use instructions should be
·
followed.
Cleaning - Unplug the product from the wall outlet before cleaning
·
any exterior surface. Follow the cleaning instructions in this manual.
Water and Moisture - Do not use this product near water - for
·
example, near a bathtub, washbowl, kitchen sink, laundry tub, in a
wet basement, or near a swimming pool, etc.
Ventilation - Slots and openings in the cabinet are provided for
·
ventilation, to ensure reliable operation of the product and to prevent
it from overheating. These slots and openings must not be blocked
or covered in any manner.
·
Power Cord Protection - Power supply cords should be routed so
that they are not likely to be walked on or pinched by items placed
upon or against them. Pay particular attention to cords at wall
outlets, convenience receptacles, and the points where they exit
from the module.
·
Lightning - For added protection for this product during a lightning
storm, or when it is left unattended and unused for long periods of
time, unplug it from the wall outlet. This will prevent damage to the
product due to lightning and power-line surges.
·
Overloading - Do not overload wall outlets, extension cords, or
integral convenience receptacles as this can result in a risk of fire or
electric shock.
·
Object and Liquid Entry - Care should be taken so that objects do not
fall and liquids are not spilled onto the product, as they may touch
dangerous voltage points or short out parts that could result in fire or
electric shock.
·
Servicing - Do not attempt to service the product beyond that
described in the operating instructions, as opening or removing
covers may expose you to dangerous voltages. All other servicing
should be referred to qualified service personnel.
4
Page 7

Controls and Indicators
Control/Indicator Function
For each channel, displays the level of signal obtained
Record Level
indicator
Record Level control
Short Tape
indicators
Power indicator
from the master cassette and sent to the copy
cassette. For channel assignments, see X-Gen
Channel Descriptions on page 7.
Your X-Gen is calibrated to produce copies at
recording levels approximately equal to the master
copy when the Record Level control is set to the
middle of its range. To adjust a control, rotate the
knob to raise or lower the recording level (for copy
cassette characteristics or incorrectly recorded master
cassettes). To prevent your setting from being
accidentally disturbed, press the knob into the down
position.
During a Copy cycle, lights red if a copy cassette
reaches its end before the master cassette finishes.
This might indicate a too-short copy cassette or a tape
jam. Lights green in Standby mode or when a Copy
cycle was successfully completed.
Lights red when the duplicator is switched on and
equalized for ferric oxide (Type I) cassettes. Lights
green when the duplicator is switched on and
equalized for copying onto chromium dioxide (Type II,
chrome bias) cassettes.
Sets the duplicating system to copy either both sides
Side Select switch
Auto/Manual switch
Copy button
Rewind button Rewinds all cassettes to their beginnings.
Stop button Stops the Copy or Rewind functions.
of the master cassette simultaneously (AB) or to copy
one side only (A). Press and hold to change the
setting.
Sets the duplicator to either Automatic or Manual
mode. Works with the Copy button (see below).
Depends upon the position of the Auto/Manual switch.
Manual mode.
and moves all cassettes forward until end-of-tape.
Auto mode.
cassettes to beginning, starts copying cassettes, stops
when tapes end, and rewinds tapes to beginning.
Copy
starts motors, engages heads,
Copy
starts a sequence which rewinds
5
Page 8

Tape Types
The X-Gen stereo model with either XL or Ferrite heads is capable of
using Type II (chrome) tape or Type I (Normal Bias) tape. The table
below describes the sequence needed to set the X-Gen to the tape type
that you are using. When the X-Gen is shut off, it will “remember” the
tape type mode that you selected.
NOTE
The X-Gen is shipped in the Normal Bias mode.
TAPE TYPE SETUP INDICATION
Type I (Normal Bias)
Type II (CrO2)
Press and hold
then press
Press and hold
then press
Stop
Rewind
Stop
Rewind
,
Power
light turns red
,
light turns green
Power
Operating the Control Module as a Copy Module
An X-Gen control module can be used as a copy module when attached
to another X-Gen control module.
To use the X-Gen Control Module as a Copy Module:
Stop
Press and hold
The
Stop
light will flash between red and green.
button, then press
To return the module to a Control Module the power must be shut off.
When the unit is powered up again it will be restored as a Control
Module.
Side Select
button.
6
Page 9

X-Gen Channel Descriptions
The tables below show the X-Gen’s channel assignments, monitored by
the Control module’s four Recording Level indicators.
Mono X-Gen Models
Channel 1
Channel 2
Side A of copy positions in
all X-Gen modules
Side B of copy positions in
all X-Gen modules
Stereo X-Gen Models
Channel 1 Left channel of side A
Channel 2 Right channel of side A
Channel 3 Right channel of side B
Channel 4 Left channel of side B
Connecting Your X-Gen Modules
1. Position your Control and Copy modules in a row, with the Control
module at the far left.
2.
Starting with the Control module: Connect a cable between one of
the two 20-pin connectors on the back of the Control module and
one 20-pin connector on the back of the first Copy module. (You can
use either connector on a module). To connect a second Copy
module, connect a cable between the first Copy module and the
second Copy module. To connect other Copy modules, connect
each module to the previous Copy module until all modules are
connected.
NOTE:
Refer to the table on page 6 to use a second Control module as a
Copy module and connect the second Control module as if it were a
Copy module, but do not put a cassette in its
Master
well or attempt
to operate the controls of the second Control module. All functions
will now be controlled by the Control module that contains the master
cassette.
3. Plug a power cord into the universal power cord receptacle on each
module and into an AC wall outlet or power strip.
7
Page 10

Copying With X-Gen
Before you perform any copying task with your X-Gen, follow the steps
described below in
Set Up the X-Gen for Copying
Setting Up the X-Gen for Copying
Use this procedure to prepare the X-Gen system for copying in Manual
mode, Automatic mode, or for any specialized copying tasks.
1. Switch the X-Gen modules on.
2. If you purchased an XL or Ferrite Stereo Model and will be copying
with chromium dioxide (CrO2) tape, refer to table on page 6.
3. Insert the cassette you wish to copy from into the Master well as
shown in Figure 1.
.
Never run your master (original) cassette in any of the
X-Gen’s
4. Insert the cassettes you wish to copy onto in the
Control module and Copy modules.
Cop
Figure 1. Cassette Insertion
CAUTION
y wells or the recorded information will be lost.
Copy
wells of the
8
Page 11

CAUTION
If you are using high-bias (CrO2) tape for recording on an XL or
Ferrite model of X-Gen, bulk erase each cassette that you place into
Copy
a
automatically erases previously recorded material.
5. If you want the copy from one side of the master cassette only, press
and hold the
automatically copying both sides of the master cassette, toggle
(press and hold) the
6. Set the recording levels for each channel, by performing the
following steps.
well. If you are recording on normal bias cassettes, X-Gen
Side Select
switch to set it to A. To change back to
Side Select
switch back to AB.
a. Set the
b. Press
c. Monitor the recording levels for each channel.
d. For each channel that needs adjustment, rotate its knob as
needed. Adjust each channel to stay as close as possible to the
0 dB indicator. Occasional peaks of +3 are acceptable, but
peaks of +6 produce poor copies. After the adjustment for each
channel is correct, press the knob down, to prevent your setting
from being accidentally disturbed.
e. Repeat step 6d for each channel.
7. Press
beginnings. To begin copying, go to one of the following procedures:
Manual Copying,Automatic Copying
Applications
Auto/Manual
Copy
Stop
and then
switch to
.
Rewind
.
Manual
to rewind all cassettes to their
.
, or
Special Copying
9
Page 12

Manual Copying
Use this procedure to copy cassettes in Manual mode. Manual mode
requires you to rewind cassettes, using the
Rewind
button.
1. Set up the X-Gen for copying, as described in the procedure
Up the X-Gen for Copying
2. Set the
3. Set the
(both sides of the master will be copied at the same time) or to the A
position (copy one side only), press and hold the
4. Press the
5. Monitor the copying process. Copying will stop when a copy
cassette reaches its end. Use the
needed, to stop copying or to rewind the cassettes to their
beginnings.
6. After a Copy cycle, check the
well. A
stopped copying before the master tape reached the end, so the
copy tape in that well might be incomplete or defective.
Auto/Manual
Side Select
Copy
button to begin copying.
Short Tape
switch as desired. To change to theABposition
indicator lighted red means that the copy tape
on page 8.
switch to
Manual
.
Stop
Short Tape
Side Select
and
Rewind
indicators for each
buttons as
Setting
switch.
Copy
Automatic Copying
Use this procedure to copy in Automatic mode. In Automatic mode, the
X-Gen rewinds all cassettes to their beginnings both before copying and
after copying.
1. Set up the X-Gen for copying, as described in the procedure
Up the X-Gen for Copying
2. Set the
3. On each X-Gen module, press and hold the
the module to the
copied at the same time.)
Auto/Manual
on page 8.
switch to
Auto
.
Side Select
AB
position. (Both sides of the original will be
10
Setting
switch to set
Page 13

4. Press the
copying will begin. After copying finishes, all tapes will rewind to
their beginnings, the
will sound. To stop copying at any time, press
Copy
button. First, all tapes will automatically rewind, then
Stop
indicator will light, and a one-second tone
Stop.
5. After a Copy cycle, check the
well. A
stopped before the master tape reached the end, so the copy tape in
the corresponding well might be incomplete or defective.
Short Tape
indicator lighted red means that the copy tape
Short Tape
indicators for each
Copy
Special Copying Applications
Single-Side Copying
Use this procedure to copy onto one side of a cassette (or cassettes)
only.
1. Set up the X-Gen for copying, as described in the procedure
.
Side Select
on page 8.
Auto
. If you are going to
switch to theAposition.
Copy
button to begin the
Up the X-Gen for Copying
2. To set X-Gen to automatically rewind the cassettes before and after
copying, set the Auto/Manual switch to
copy from a different master onto the second sides of the copy
tapes, select
3. Set (press and hold) the
4. If you selected Auto mode, press the
copying cycle. If you selected Manual mode, press the
button; then after all tapes are rewound to their beginnings, press the
Copy
button.
Manual
Setting
Rewind
5. After a Copy cycle finishes, check the
Copy
well. A
tape stopped before the master tape reached the end, so the copy
tape in that well might be incomplete or defective.
Short Tape
Short Tape
indicator lighted red means that the copy
11
indicators for each
Page 14

Copying Multiple Short Originals Onto Longer Copies
Use this procedure to copy short segments from various master
cassettes onto a single, longer cassette.
Stop
Setting
button to
Copy
1. Set up the X-Gen for copying, as described in the procedure
Up the X-Gen for Copying
2. Set the
3. Set (press and hold) the
4. Verify that the master cassette is inserted with the side to be copied
facing up. Verify that the copy cassettes are inserted with the side to
be copied onto facing up.
5. Press the
6. After all tapes are rewound, press
the original segment that you are recording, press the
prevent long blank spaces between programs on the copy cassettes.
7. Insert the next master cassette with the side to be copied facing up.
8. The tape in the master must be in the proper position. If it is
necessary to rewind the master to the proper position, first remove
all copy cassettes from all
the proper position and replace the copy cassettes into the
wells.
9. Press
original segment on the master.
Auto/Manual
Rewind
Copy
button.
again and then press
on page 8.
switch to
Side Select
Copy
Manual
.
switch toA.
Copy
. Immediately at the end of
wells. Then rewind the master to
Stop
immediately at the end of the
10. Repeat steps 6 through 9, to copy from other master cassettes.
12
Page 15

Maintaining X-Gen
Maintenance Cautions and Warnings
Do not use soap and water, cleaning solvents, or furniture wax
·
on the modules. To keep modules free of dirt and dust, cover the
modules when not in use. Clean the modules periodically by
wiping with a dry, lint-free cloth.
For cleaning parts that come into contact with cassette tape, use
·
only isopropyl alcohol (at least 90% pure) or a high-quality liquid
head cleaner. Using other fluids can cause damage.
Never touch the tape heads with any hard or sharp objects, stiff
·
brushes, or anything made of metal.
Do not exert pressure on heads or realignment may be needed.
·
Cleaning the Tape Head, Capstan, and Pressure
Roller
To ensure the best copy quality, clean all cassette tape contact points
regularly, as described and shown below. The frequency of cleaning
required depends on frequency of use, type of tape being used, and
environmental conditions (for example, a dusty room).
It is especially important to keep the tape heads clean, because improper
tape contact with the tape heads causes dropouts, fading, and a
noticeable loss in high-frequency response on the copies.
1. Remove all cassettes from the
2. While pressing and holding the Control module’s
the
Copy
button. The heads and rollers will engage (but the spindles
won’t move) to allow cleaning.
Control
13
and
Copy
modules.
Stop
button, press
Page 16

3. Use a cotton swab or a soft, lint-free cloth lightly dampened (not
saturated) with isopropyl alcohol to clean the tape heads, pressure
roller, and capstan in each well. When cleaning the pressure roller
and capstan, place the cotton swab in contact with the surface
farthest away from the tape head as shown in Figure 2.
PRESSURE
ROLLER
CAPSTAN
TAPE
HEADS
Figure 2. Tape Head, Capstan and Pressure Roller Cleaning
4. After you finish, press the
mode.
Stop
button to exit from the cleaning
14
Page 17

Replacing the Fuse
Use a small flat-blade screwdriver to pop out the fuse holder. Replace
the fuse only with the type and rating shown on the label.
Replacement Fuses:
Rating Part Number Used On
1.25 A/250 Vac 56676-113 110 Volt Unit
0.8 A/250 Vac 56676-006 220 Volt Unit
If the module repeatedly blows fuses, the module should be returned for
servicing.
FUSE HOLDER
REMOVAL
120Vac
120Vac
Figure 3. Fuse Replacement
15
Page 18

Common Problems and Their Solutions
Prior to returning any modules for servicing, examine the following list of
common malfunctions. It may be possible to correct a problem on your own.
No power, motor not operating . . .
Check electrical outlet for power.
·
Check fuses.
·
Check that power switch is on.
·
Check for a tape jam.
·
Copies are weak . . .
Readjust recording level controls. See page 9, step 6.
·
Check that X-Gen is set for the bias type of tape being used (normal
·
or CrO2). See the table on page 6.
Inspect/clean tape heads. See page 13.
·
Use a better grade of tape.
·
Only side “A” copied . . .
Check
·
one pass, the switch must be in the
Loss of high frequencies on copies (too much bass) . . .
·
Clean tape heads. See page 13.
·
Check that X-Gen is set for the bias type of tape being used (normal
or CrO2). See the table on page 6.
·
Try different tape (better grade).
Ticking or buzzing noise recorded . . .
·
Do not use a 2-prong cord adapter.
·
Try another recording location. Power outlets may be improperly
grounded or light dimmers, etc., may be causing a problem.
Copy tape stops before original tape finishes . . .
·
Tape may be jammed or broken.
·
Copy tape is short.
Tape wraps around capstan or pressure roller . . .
·
Turn power off, remove damaged tape from capstan and pressure roller,
and clean capstan and pressure roller. See page 13.
Side Select
switch position. If both sides are to be recorded in
AB
position.
16
Page 19

Service Information
Service Information
In the interest of promptness (if service is required), it is recommended
that you first contact the dealer from whom the equipment was
purchased. If modules are to be returned to the dealer or factory, they
should be shipped in the original packing material or carefully packed in
some other container with sufficient packing material to prevent damage.
Technical assistance and the location of local repair services is available
from the Telex Customer Service Department at:
Telex Communications, Inc.
12000 Portland Avenue South
Burnsville, Minnesota 55337 USA
Telephone: (952) 884-4051
(800) 828-6107
Return equipment for factory repair to:
Service Department
Telex Communications, Inc.
West First Street
Blue Earth, MN 56013 USA
ãCopyright 2001
Telex Communications, Inc.
12000 Portland Ave. S.
Burnsville, MN 55337
All rights reserved.
17
Page 20

38109-771 Rev J 7/01
 Loading...