

Page 1
Programming the Spectrum PLUSTM SP550
Speakerphone Telephone
The Users Quick Program Guide for the Spectrum PLUSTM Telephone
The Spectrum PLUSTM Quick Programming Guide is a summary list of set up options.
Additional detailed instructions are provided in the manual.
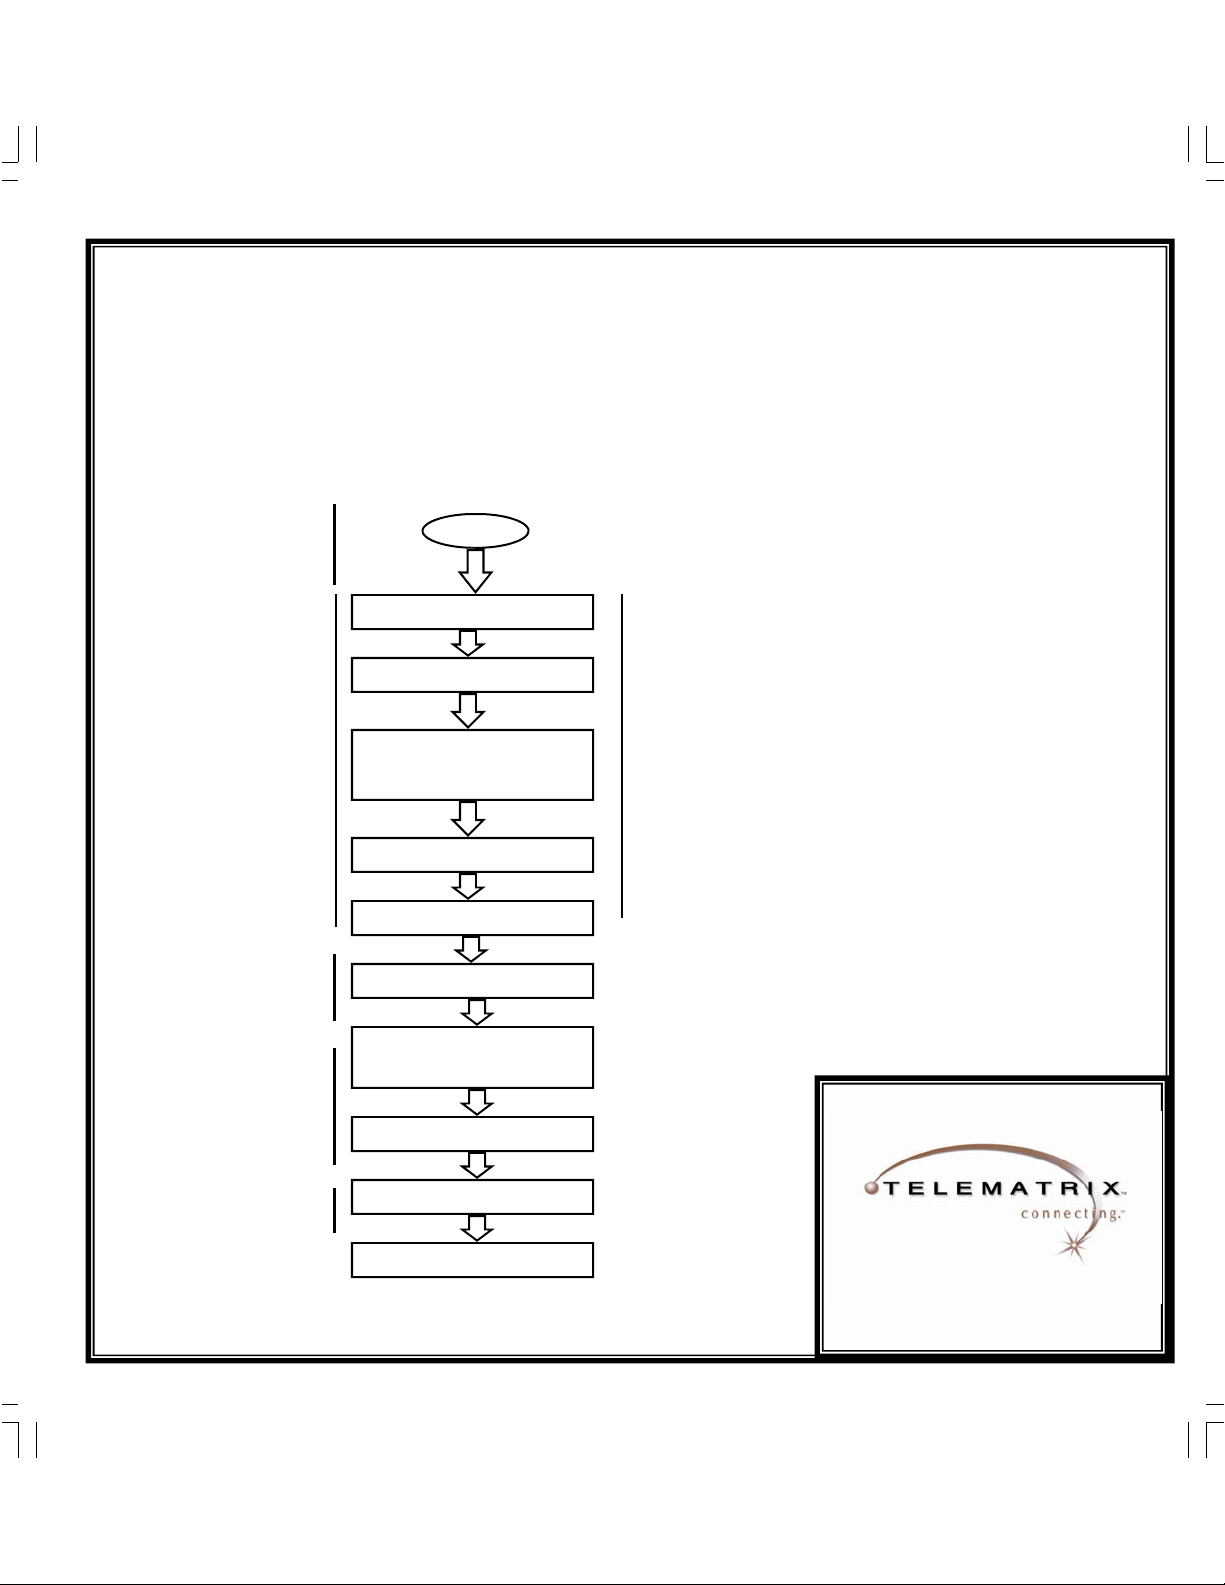
One Line Caller ID
Programming is initiated
by quickly pressing the
“STORE” key.
Set up date and time
Set up language
Set up ringing options of
ring tone (4 tones) and ring
volume (8 steps). Press
keypad number for sample
of ringing tone or volume.
STORE
SETUP MONTH:01
SETUP DAY:01
SETUP TIME MODE
PRESS 1=12 2=24
AM=1 PM=2
SETUP HOUR:01
SETUP MINUTE:01
-1- -2- -3-
ENG FRA ESP
RING TONE 1 - - 4
Note: the date and time
will automatically set if
your telephone line is
equipped with Caller ID.
The date and time will be
set by an incoming ring.
Set up is complete.
RING VOLUME 1 - - 8
ALL SETUP OK
Page 2
Administrator and User Set Up Of the Spectrum PLUSTM Telephone
The Spectrum PLUSTM requires simple initial programming to set up the telephone. The program is designed for
one Administrator and one or more users. Administrato r programming features separate critical operating set up
information from the user telephone functions.
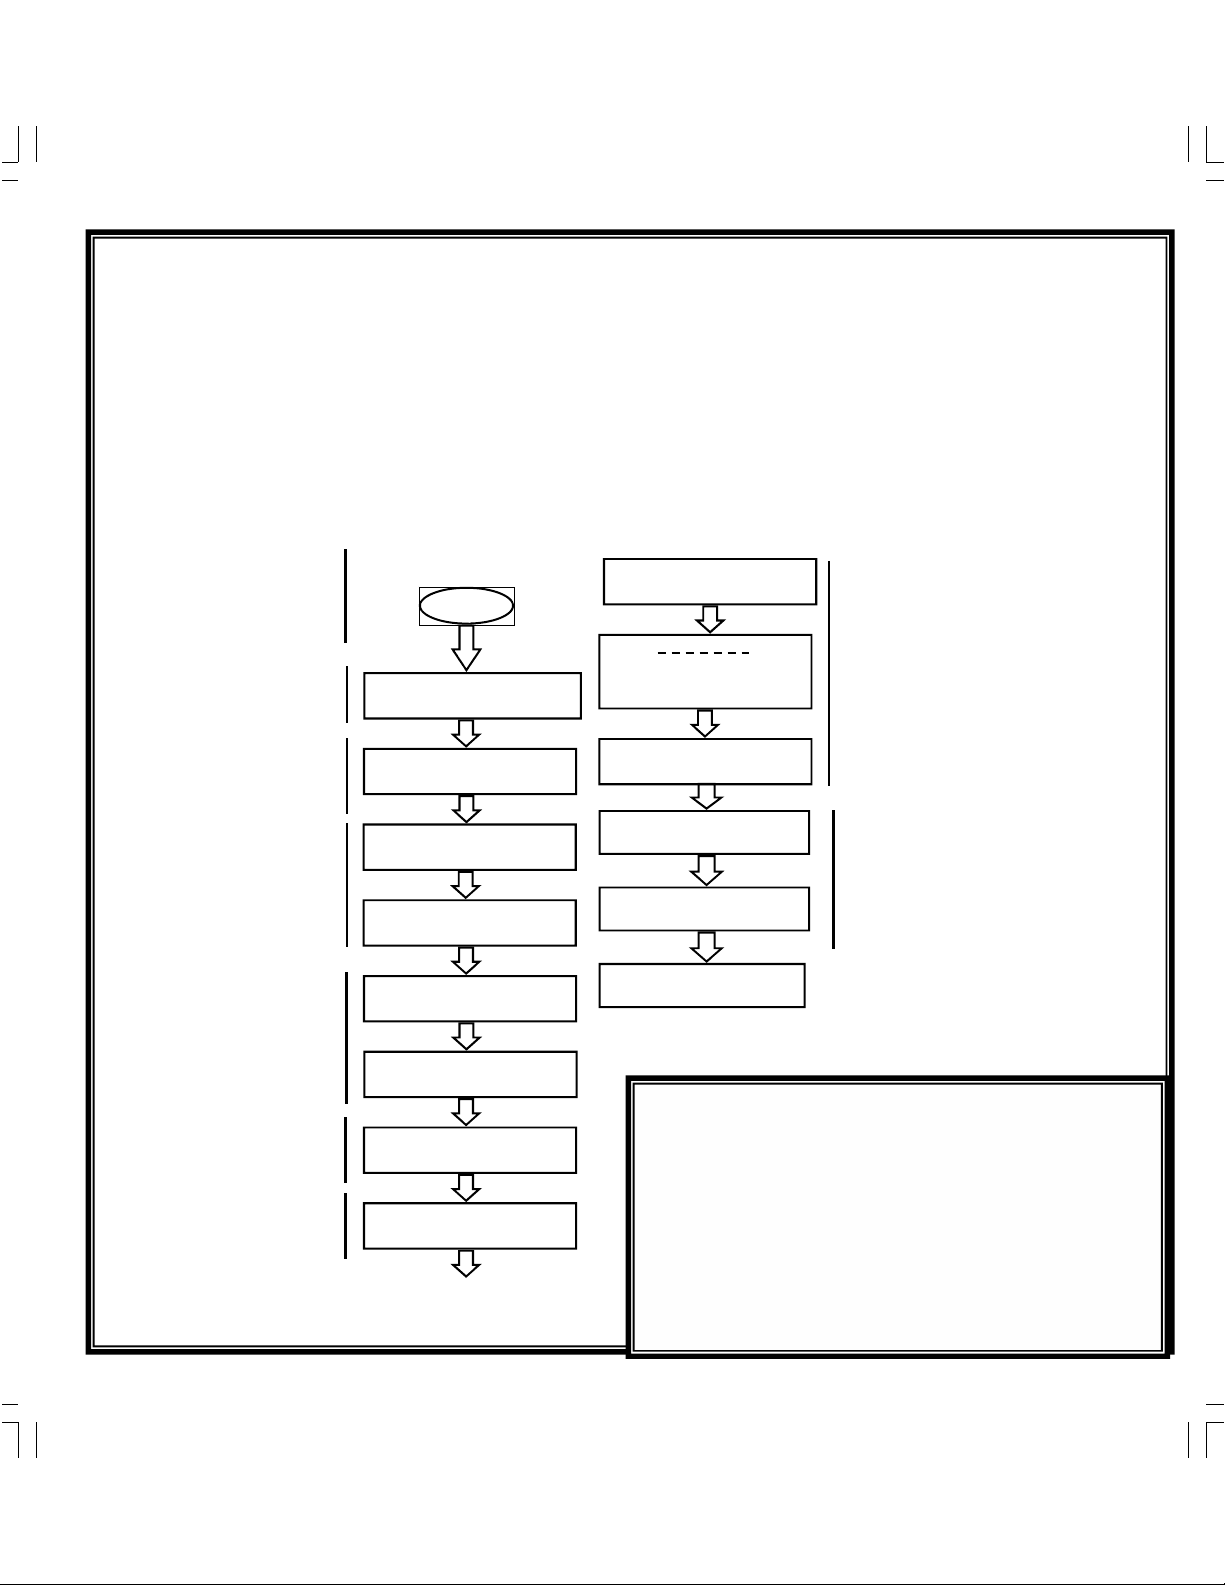
The Administrator Quick Program Guide for the Spectrum PLUSTM Telephone
The Spectrum PLUSTM Quick Programming Guide is a summary list of set up options.
Programming is initiated
by holding down the
“STORE” key for six
seconds.
Set up pre-dialing number
sequence, i.e. outside line.
Set up local area code to
recognize local incoming
calls.
Set up either using keypad
dialing with automatic
speaker activation, or
using key pad dialing,
pressing dial key to activate.
Long distance restriction.
Restrict any outgoing
number dialing that begins with a “1” .
Set up flash timing
100mS to 1000mS. Default 600mS.
Set up pause timing 1.0S
to 5.0S. Default 3.6S.
STORE
ENTER ACCESS NO.
ENTER AREA CODE
LIVE DIALPAD XXX
PRESS 1=ON 2= OFF
RESTRICT 1+
PRESS 1=YES 2= NO
FLASH TIME SET
PAUSE TIME x.x S
VOICE MAIL NO.
PIN NUMBER
SECOND OF WAIT?
CID RECORDS LOG
1 = TOTAL 2 = EACH
ALL SETUP OK
To print a complete manual,
see www.telematrixusa.com.
Click Download Documents.
Select Product User Guide s.
Click on your model number.
Set up voice mail number.
Add your PIN with seconds
of wait time to get access to
messages.
PIN number characters will
not be displayed on the
LCD.
Set up the Caller Log record
display to show same caller
separately logged or show
same caller in one line
display with number of
incoming total calls.
Page 3

Programming Voice Mail Dialing
1. Press and hold the “STORE” key for six seconds to activate Administrator mode.
2. Press the “STORE” key multiple times until “VOICE MAIL NO.” is displayed on the LCD screen (figure 1).
3. Enter the voice mail number. The area code is not required if AREA CODE is programmed into memory.
4. Press the “STORE” key to store the voice mail number into the VOICE MAIL memory key.
5. Enter the “PIN NUMBER”, up to 8 digits. The PIN characters will not be displayed (figure 2).
6. Enter the “SECONDS OF WAIT?”, up to 99 seconds (figure 3).
7. To exit the program mode, press “DISC” key or continue to the end of programming by pressing the “STORE” key multi-
ple times until the display reads “All Setup OK”.
Testing the programming……...After programming voice mail, test the program by placing a voice mail into the voice mail
messaging system. Then, wait for the light to illuminate. Press the voice mail button located on the base unit (when in OFF
HOOK position) and it will dial the pre-programmed numbering sequence. The “SECONDS OF WAIT” may need to be
increased if the voice mail was not retrieved. Note: This feature must be turned on by your service provider.
12/01 PM 12:00
555-1212
VOICE MAIL NO.
Figure 1 Figure 2 Figure 3 Voice Mail Button
Phonebook Programming (Manual Programming of Phonebook Records)
12/01 PM 12:00
________
PIN NUMBER
12/01 PM 12:00
05
SECOND OF WAIT?
The SpectrumPLUSTM Telephone Phonebook Feature allows for 100 name and number records for frequently dialed calls.
To Program a Phonebook Record Manually
1. Press the “STORE” key. The words “SETUP MONTH:01.” will appear (figure 1).
2. Press the “PHONEBOOK” key. Th e words “ENTER NUMBER.” will appear (figure 2).
3. Next, press the numbers on the dial pad to enter th e number pattern to be stored. It is recommended to enter th e local
area code in the numbering s equence. Local area code dialing will not occur when the AREA CODE is programmed into
setup (See your Administrator). Using the keypad, enter the name associated with the num ber being programmed and include the Flash, and/or Pause, when needed.
4. Press the “STORE” key again and the display will read “ENTER NAME” (figure 3).
5. Using the dial pad, enter the name of the person to be stored. See the chart on the next page for character entries.
6. After entering the name, press the “STORE” key. The display will read “P LEASE W AIT” ( figure 4). The m emory functi on
is now storing the entry. If the record is already in memory, the display will read “REPEAT PHBOOK”.
7. To store another record manually, repeat line item 1 through 6.
Note:
To exit the program mode without saving, press the “DISC” key.
12/01 PM 12:00
SET UP MONTH:01
Figure 1 Figure 2 Figure 3
12/01 PM 12:00
ENTER NUMBER
12/01 PM 12:00
05
ENTER NAME
12/01 PM 12:00
PLEASE WAIT
Figure 4
Page 4

Spectrum PLUSTM SP550 Telephone Key Fea-
1. Speed Dial Feature Keys ……… Eleven (11) one-touch keys used for speed dialing.
2. Disconnect Key …………………… Used to disconnect the line or place a new call.
3. Store Key …………………………… Used to program user features.
4. Pause Key ................................ Used to place a timing delay when dialing.
5. Redial Key ......................……... Redials the last number dialed.
6. Flash Key ..................………….. Provides a timed line break
7. Mute Key …………………………… Disables the handset and speaker phone microphones.
8. Numeric Dial Pad ………………. Used for dialing.
(13)
Contrast
Volume
9. Hold Key …………………………… Lighted key used for placing callers on hold.
10. Headset ON/OFF Key ………… Lighted key used to turn the headset ON or OFF.
11. Speaker Key .………………......... Used to turn the speakerphone ON or OFF.
(10)
(12)(9)
12. Volume Bar …………………..…… Adjusts the loudness of the handset receiver, the headset, and/or the speaker.
13. Handset ……………………………. Hearing-aid compatible handset.
14. Dial Key ..………................……. Used to automatically dial the number displayed on the LCD.
15. Delete Key ………………………… Deletes stored Caller ID records and Phonebook (PhBook) records.
16. Up and Down Scroll Key ..….. Used to scroll Caller ID and Phonebook (PhBook) records.
17. Touchlite
TM
Key ...……………… Message Waiting Lamp (LED indicator) that blinks to indicate a new message in the
user’s voice mail box (user must be subscribed to a messaging syste m).
18. LCD Display ...............……...... Large adjustable back-lit display that shows Caller ID, number of calls received, date
and time, and call log.
19. Phonebook (PhBook) Key …… Used to access names and numbers in the Phonebook (PhBook) directory.
Programming Speed Dial Keys
(18)
(16)
(19)
(15)
(14)
(17)
(2)
(3)
(4)
(5)
(6)
(8)
(7)
(1)
(11)
Programming Procedure for Spectrum PLUStm Speed Dial Features
The Spectrum PLUSTM SP550 has eleven (11) one-touch speed dial locations used for dialing frequently called numbers.
• Speed dial programming must be done with the telephone plugged into the telephone line.
• Programming is performed with the telephone on-hook only.
• A maximum of 32 digits can be entered into ENTER NUMBER and 12-characters into ENTER NAME.
To Program Speed Dial Locations
1. Press and hold the “STORE” key quickly. The words “SET UP MONTH: 01” appear (figure 1).
2. Next, press the speed dial location key where the desired location will be. The display will read “Mxx NO CONTENT”. If the
display shows a record, then there is a stored name and number in that location (figure 2).
3. Press the “STORE” key again and the display will read “ENTER NUMBER” (figure 3 ).
4. Using the dial pad, enter the number. Note that the local area code is not required if AREA CODE is pre-programmed into memory.
5. After entering the number, press the “STORE” key. The display will read “ENTER NAME” (figure 4).
6. Using the keypad, enter the name associated with the number being programmed and include the Flash, and/or Pause, when needed.
7. Press the “STORE” key to store the entry.
8. Program other speed dial locations, repeat 2 to 7.
9. To exit the program mode, press “DISC”.
12/01 PM 12:00
SET UP MONTH: 01
Figure 1 Figure 2 Figure 3
12/01 PM 12:00
M01 NO CONTENT
12/01 PM 12:00
ENTER NUMBER
12/01 PM 12:00
ENTER NAME
Figure 4
 Loading...