

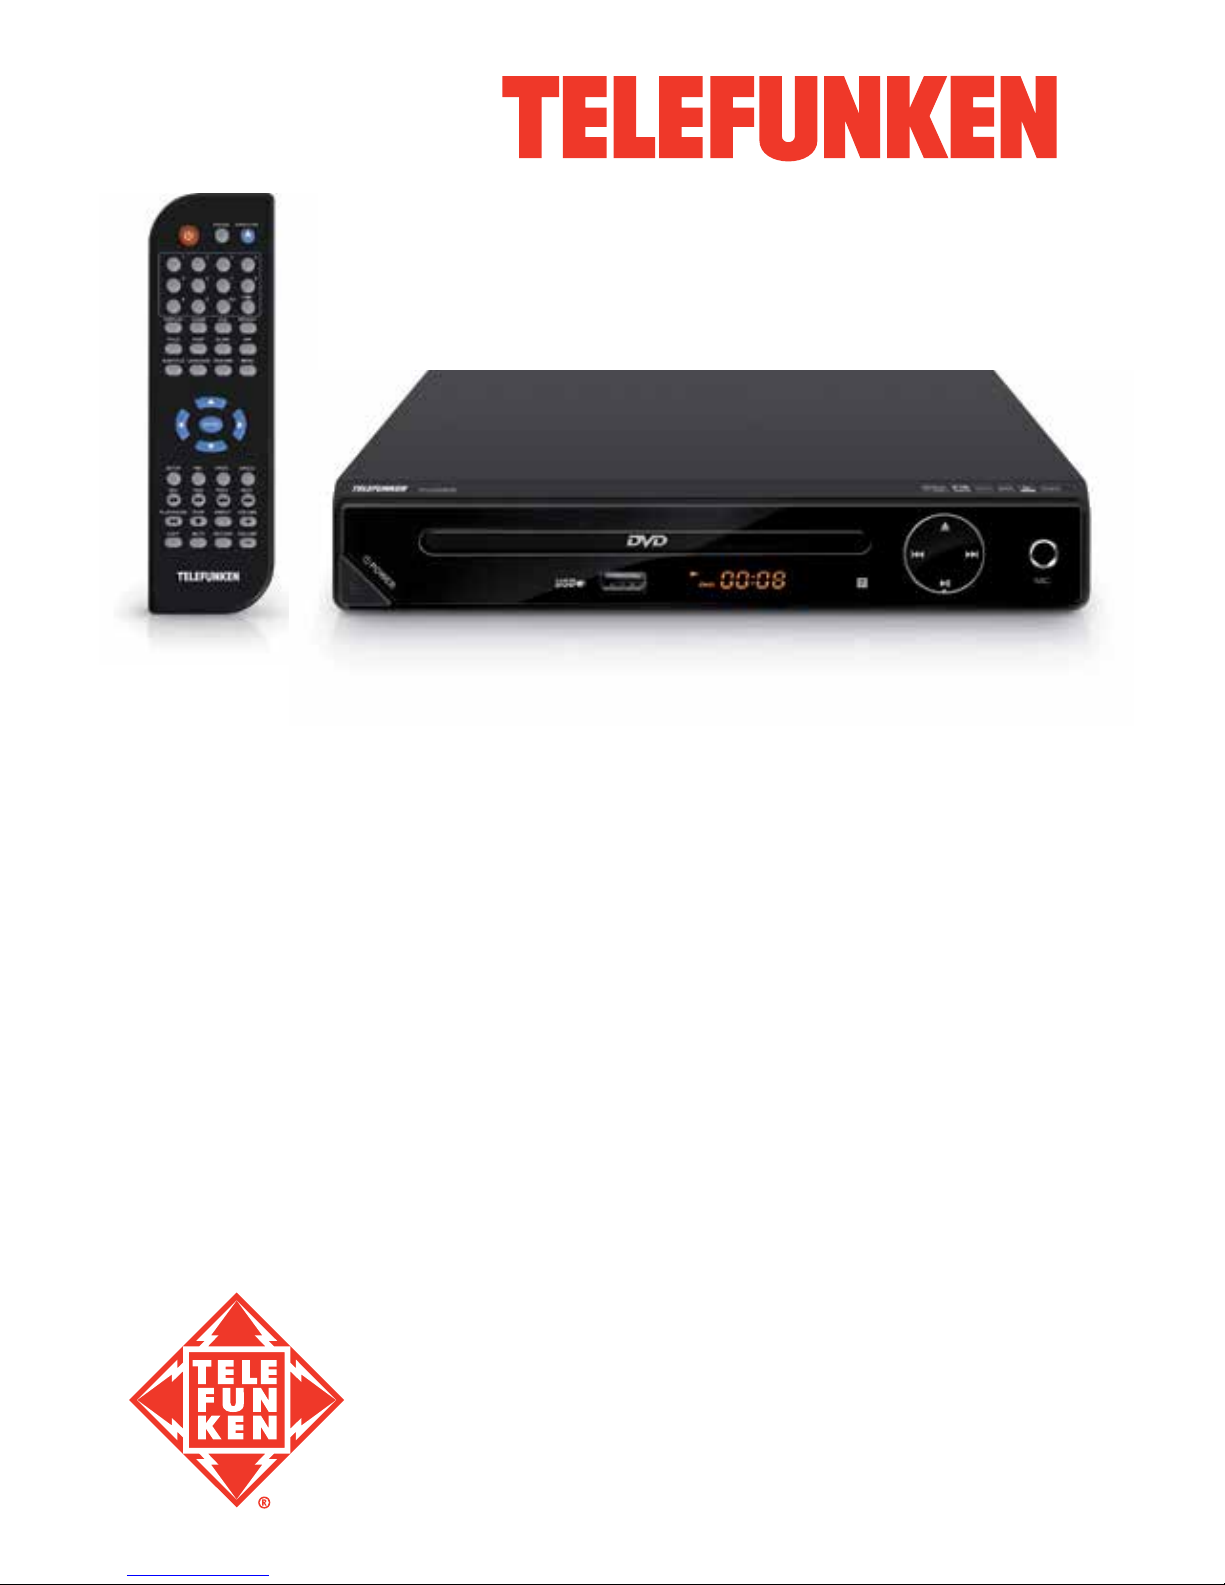
Telefunken TF-DVD5028 Instruction Manual
DVD PLAYER/
DVD-ПРОИГРЫВАТЕЛЬ
TF-DVD5028
Instruction manual
Руководство по
эксплуатации
Table of contents
Table of contents
2
Dear customer!
Thank you for purchasing our product. For safety, it is strongly recommended to read this
manual carefully before connecting, operating and/or adjusting the product and keep the
manual for future reference.
8
8
8
8
8
9
9
9
9
10
10
10
11
11
11
11
12
12
13
13
13
13
13
14
15
Table of contents
Before you start
Utilization of the product
Important safeguards
Supported formats
Video/audio system connection
Operation
Front panel
Rear panel
Remote controller
Changing the battery
Button functions
Open/Close
Power
Title
Subtitle
Angle
L/R
Menu
Play/Pause
Cursor buttons
Enter
Stop
Forward
Rewind
Previous/Next
Slow
VOL+/Setup
N/P
Prog
Repeat
A - B
Language
Zoom
Mute
OSD
Time
2
3
3
3
4
4
5
5
5
6
6
7
7
7
7
7
7
7
7
7
7
7
7
7
7
7
7
7
8
8
8
8
8
8
8
8
8
8
Copy
DVD/USB
Remain
Retain
Video
PBC
System setup
General setup
Audio setup
Dolby Digital setup
Video setup
Preference setup
Playback operations
USB operation
Karaoke
Ripping
MP3/JPEG/Compressed video
Copying data
Deleting data from USB
General information
Handling digital discs
Cleaning discs
Accessories
Troubleshooting
Specifications
Before you start
Before you start
3
If you want to dispose of this product, do not mix it with general household waste. There
is a separate collection system for used electronic products in accordance with legislation
that requires proper treatment, recovery and recycling.
Please contact your local authorities for the correct method of disposal. By doing so, you
will ensure that your disposed product undergoes the necessary treatment, recovery and
recycling and thus prevent potential negative effects on the environment and human health.
Utilization of the product
Important safeguards
Alerts the user to the presence
of dangerous voltage within the
product’s enclosure.
Alerts the user to the presence
of important operating
instructions.
To reduce the risk of electric shock
or fire, do not open the cover. Refer
servicing to qualified service
personnel.
This mark indicates this unit belongs
to class 1 laser product.
• To prevent the risk of fire or electric
shock, do not let water come into contact with
the device and don’t use the device in high
humidity conditions.
• The device is equipped with high voltage
components and a laser system, hence you
should not open the device and repair it by
yourself. The laser beam is dangerous to eyes
when the housing is removed. Do not look at it!
• When the device is moved from cold
premises to the warm room or vice versa,
condensate may form on the laser head and
the device may not operate properly. In this
case please turn the device on for 1-2 hours
without a disc before playback to heat it to a
proper operating temperature.
• Don’t try to manually open or close the
disc tray to load discs.
• Turn off the receiver only when there is no
disc inside.
• If you are not going to use the device for a
long time unplug it from the wall outlet.
• Before turning the device on, please make
sure you have connected it properly, adjust the
volume of speakers and amplifiers of your audio
system to the minimum. Adjust the volume
as necessary only after normal playback has
started to avoid damage of your audio system.
• Use power sources of rated voltage,
otherwise the unit may not function or may be
damaged.
• Place the unit on a horizontal surface.
Keep the unit ventilated. Don’t block the heat
hole. Overheat may cause malfunction.
• Do not place any objects on the unit cover,
this may make it function improperly (incorrect
playback).
• Please place the device in a dry and
well-aired area. Do not place it near heating
units or expose it to direct sunlight, mechanical
vibration, humidity or excessive dust.
• Never use liquid detergents, abrasives or
organic compounds (alcohol, gasoline, etc) to
clean the unit body.
• All repairs and technical service should
be carried out by qualified service center
personnel.
All images provided herein are schematic
drawings and may differ from real world
objects.
Warning
RISK OF ELECTRIC SHOCK
DO NOT OPEN
Connection
4
Connection
4
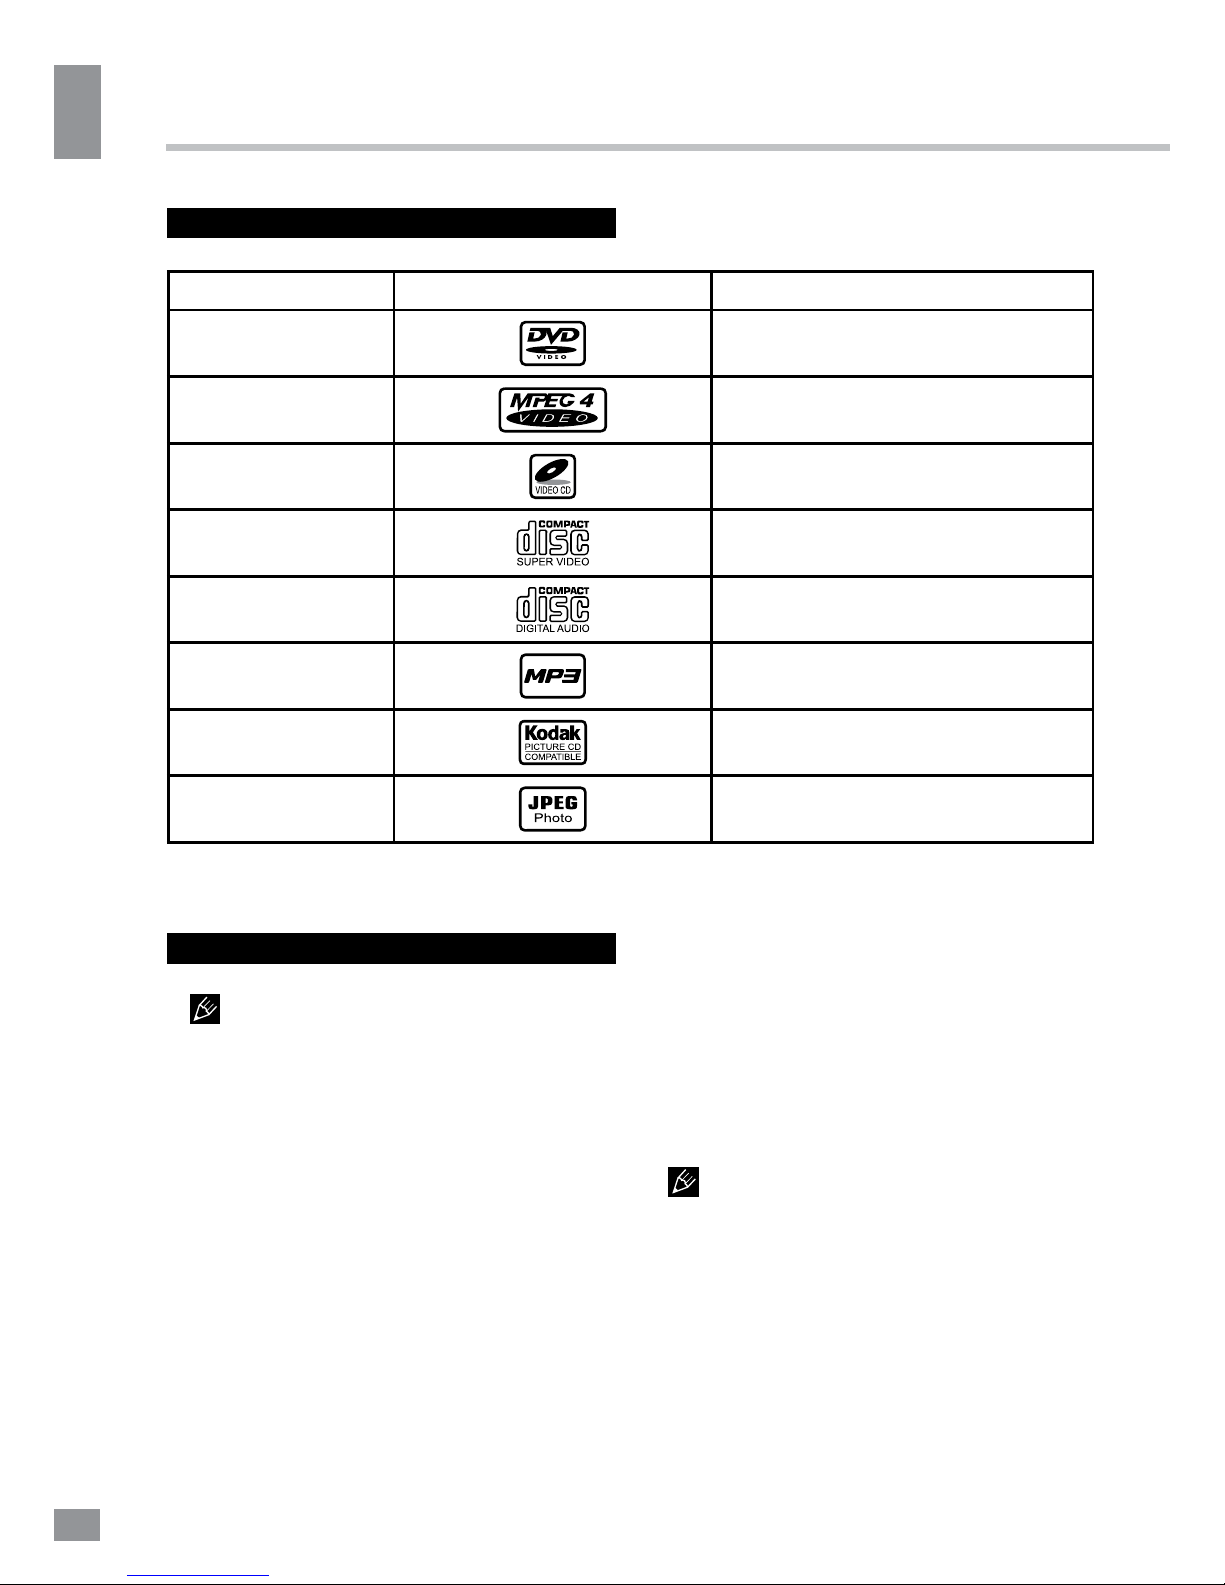
Supported formats
Disc types
Symbol Contents
DVD
Compressed digital audio - video
MPEG4 (DivX)
Compressed digital audio - video
Video-CD (VCD)
Compressed digital audio - video
Super-VCD (SVCD)
Compressed digital audio - video
CDDA
Digital audio
MP3
Compressed digital audio
Kodak Picture CD
Compressed digital static image
JPEG
Compressed digital static image
Video/audio connection
Before you connect any external
devices, make that power of the unit is
switched off.
Following outputs are available in this unit.
Composite video
Use the yellow plug of an AV cable to
connect the composite video output of this unit
to the video input of a TV/monitor.
Stereo audio
Use a pair of AV cables (red for right/white
for left) to connect the stereo audio outputs of
this unit to the TV or a stereo input of power
amplifier.
Coaxial digital audio
Use a special coaxial cable to connect the
coaxial output of this unit to the coaxial input of
a power amplifier.
MIC jack
MIC jack is used to connect a microphone
(not included) to this unit.
• The type of connection depends on
the TV/monitor input terminals. Do not make all
the connections at the same time; otherwise the
produced picture will be affected.
• Settings parameters should be adjusted
according to the type of connection of the
external device.
Operation
5
Operation
5
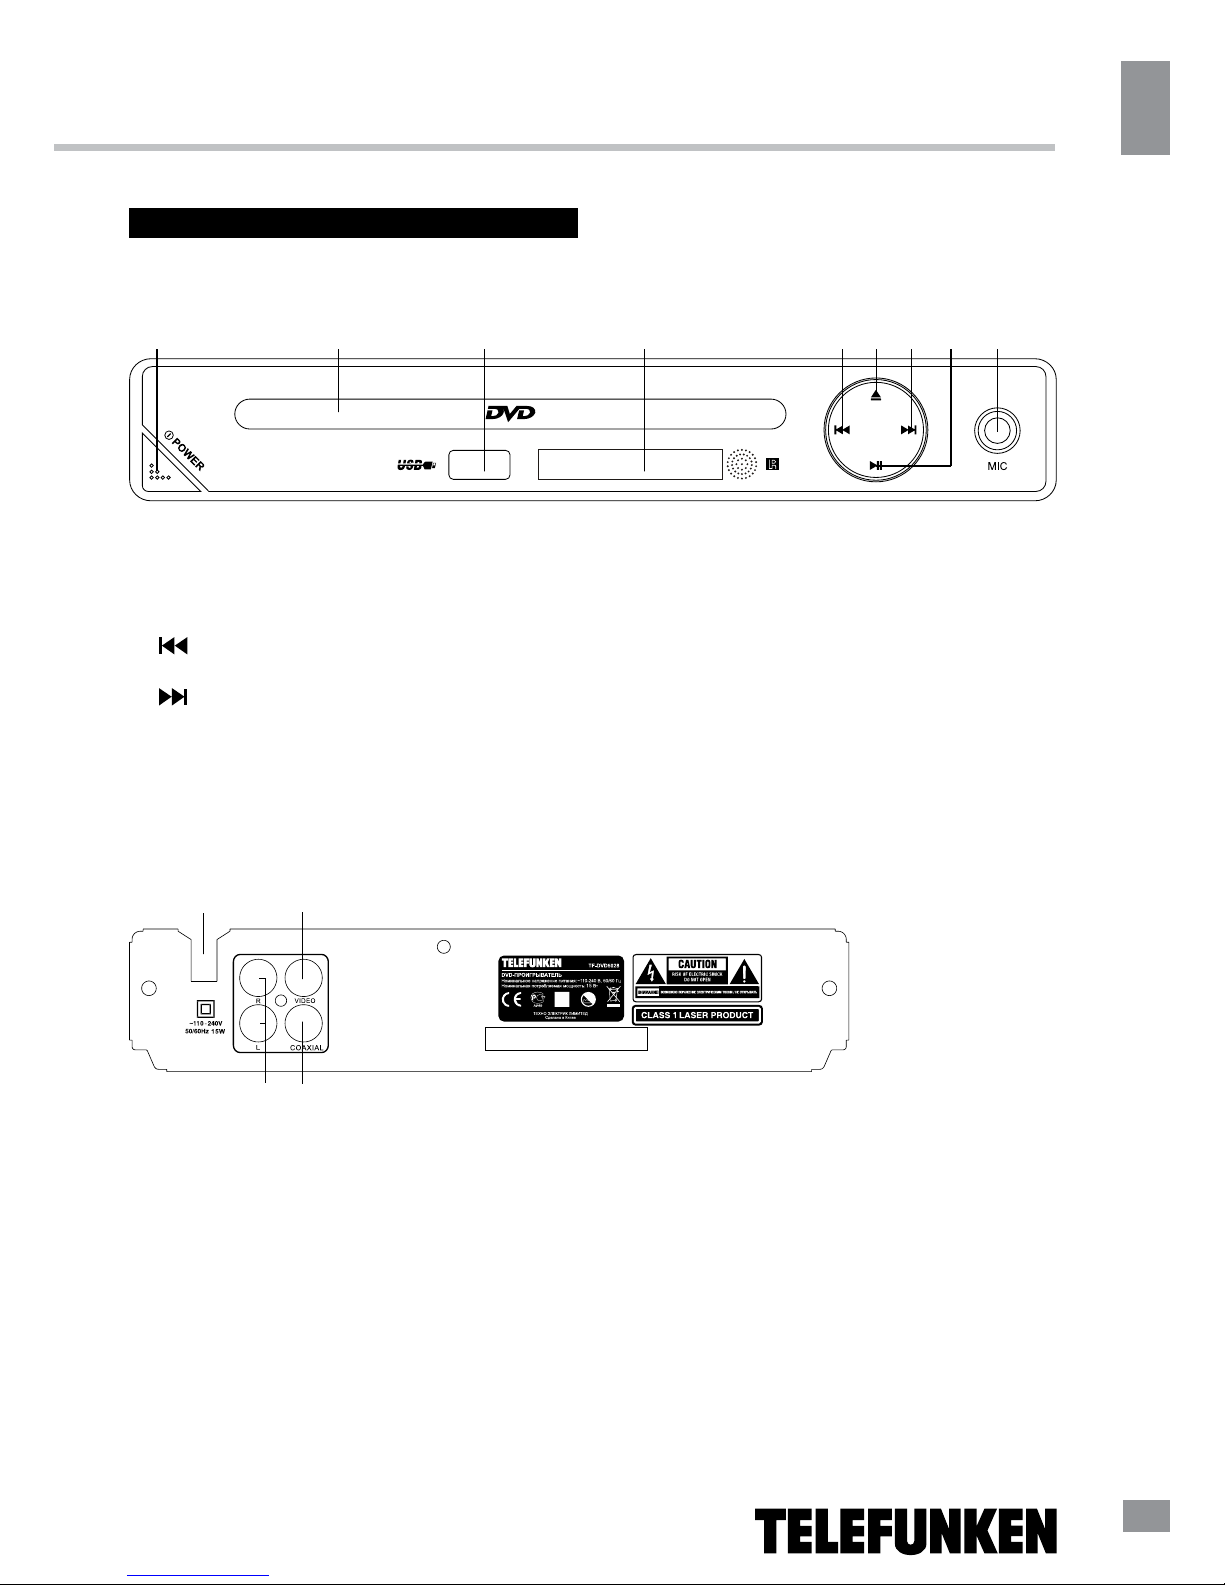
Control elements
Front panel
1 2 3 4 5 6 7 8 9
1. POWER button
2. Disc slot
3. USB port
4. Display
5.
(PREVIOUS) button
6. OPEN/CLOSE button
7. (NEXT) button
8. PLAY/PAUSE button
9. MIC jack
Rear panel
1
2
43
1. Power cord
2. Composite video output
3. Mixed L/R audio output
4. Coaxial digital audio output
Operation
6
Operation
6
Remote controller (RC)
1
2
3
4
5
6
7
8
9
10
11
12
13
14
15
16
17
18
19
20
21
22
23
24
25
26
27
28
29
30
31
32
33
34
1. (OPEN/CLOSE) button
2. OSD button
3. Number buttons
4. SUBTITLE button
5. TITLE button
6. MENU button
7. Cursor (
/ / / ) buttons
8.
/ (REWIND/FORWARD) buttons
9. VOL- button
10. REMAIN button
11.
(STOP) button
12. DVD/USB button
13. RESUME button
14. L/R button
15. N/P button
16. PROG button
17. VIDEO button
18. POWER button
19. TIME button
20. ANGLE button
21. LANGUAGE button
22. SETUP button
23. ENTER button
24.
/ (PREVIOUS/NEXT) buttons
25. (PLAY/PAUSE) button
26. VOL- button
27. ZOOM button
28. (MUTE) button
29. RETURN button 32. SLOW button
30. PBC button 33. A-B button
31. REPEAT button 34. COPY button
Changing the battery
1. Remove the battery compartment cover
on the back of the RC.
2. Insert two AAA/1.5V batteries into the
battery compartment making sure that the
correct polarity is observed.
3. Install the cover back.
• The RC should be pointed at remote
sensor within 8 meters and within 30 degrees
at the left or the right side.
• Take the battery out of the RC if it is not
used for a long time.
• Do not mix new and used batteries or
different types of batteries. Weak batteries can
leak and severely damage the RC.
1 2 3
Operation
7
Operation
7
Button functions
(OPEN/CLOSE)
Press the (OPEN/CLOSE) button when
power is on, the disc tray is ejected. Put the
disc on the tray with the title faced up. Press
the (OPEN/CLOSE) button again to close
the disc tray and wait for the disc to start
playing automatically.
POWER
When playing, press the POWER button to
turn off the unit and activate the standy mode;
Press the button again to turn on the unit and
resume playback.
TITLE
When playing a DVD disc, press the TITLE
button to go to the title menu of the disc.
SUBTITLE
When playing a DVD with multi-language
subtitles, press the SUBTITLE button
continually to circle through the subtitle
languages.
ANGLE
When playing a disc with the multi-angle
feature, press the ANGLE button to select a
view angle.
L/R (
)
When playing Super-VCD, VCD, CD discs
with multi-channel audio, press the L/R button
to select left channel/right channel/stereo/mix
audio output.
MENU
When playing a DVD disc, press the MENU
button once to return to the main menu of the
disc.
(PLAY/PAUSE)
When playing a disc, press the (PLAY/
PAUSE) button once to pause; press the
(PLAY/PAUSE) button again to return to normal
playback.
Cursor buttons
Press cursor buttons to navigate in various
menus.
ENTER
Press the ENTER button to confirm chosen
options.
(STOP)
When playing DVD, SVCD, VCD, CD discs,
press STOP once, the unit will memorize the
previous ending point. Press
(PLAY/PAUSE)
to resume the playback. Press
(STOP)
for the second time to stop the playback
completely.
(FORWARD)
Press this button for quick forward search.
Search speed will increase with each pressing:
2X => 4X => 8X => 16X => 32X => normal.
(REWIND)
Press this button for quick rewind search.
Search speed will increase with each pressing:
2X => 4X => 8X => 16X => 32X => normal.
/ (PREVIOUS/NEXT)
• When playing a DVD disc, press
(PREVIOUS) to go to the previous chapter.
• When playing SVCD, VCD, CD discs,
press (PREVIOUS) to go to the previous
track.
• When playing a DVD disc, press
(NEXT) to go to the next chapter.
• When playing SVCD, VCD, CD discs,
press (NEXT) to go to the next track.
SLOW
Press the SLOW button repeatedly to slow
playback speed as follows: X2 => X4 => X8 =>
X16 => normal.
VOL+/-
Press VOL+ to adjust volume up. Press
VOL- to adjust volume down.
Operation
8
Operation
8
SETUP
Press SETUP to enter or exit the system
setup menu.
N/P
Press the N/P button to select between PAL/
Multi/NTSC video modes.
PROG
• If a disc contains 2 or more tracks,
chapters or titles, set up the playing order to
your preference. Press PROG to enter the
programming menu.
• Press number buttons to input the number
of the track, title or chapter. If programmed
tracks are over ten, select
and press
ENTER to go on programming. Maximum 20
programmable items are possible. Use cursor
buttons to move the cursor to START item.
Press ENTER to start program playback. Press
the PROG button to cancel programming.
This function is not available for MP3
dicsc.
REPEAT
Press the REPEAT button to repeat a title,
chapter, track or the whole disc.
• When playing a DVD disc, press REPEAT
continually to repeat chapter =>title => all =>
repeat off.
• When playing SVCD, VCD, CD discs,
press the REPEAT button continually to repeat
track => all=> repeat off.
• When playing an MP3 disc, press REPEAT
continually to play folder => single => repeat
track => repeat folder.
A - B
• Press the A-B button at the start point (A)
and at the ending point (B) to select the repeat
fragment.
• Press A-B for the third time to cancel the
fragment repeat and return to normal playback.
LANGUAGE
When playing a DVD with more than one
audio stream, press the LANGUAGE button to
select the needed language.
ZOOM
When playing DVD, SVCD, VCD discs, press
ZOOM to zoom in or out of the picture.
In zoom in mode, press cursor buttons
to move the picture for viewing. The picture
cannot be moved in zoom out mode.
(MUTE)
Press
(MUTE) to turn off the sound. Press
the
(MUTE) button again to turn the sound
back on.
OSD
Press the OSD button to display the elapsed
playback time of title/chapter/track.
TIME
Press the TIME button to input chapter/
title number or disc time. Playback will start in
accordance with the input data.
COPY
• When playing an MP3 disc with a USB
drive connected, press this button to access
the Copy menu.
• When playing a CD disc with a USB drive
connected, press this button to enter the
Ripping menu.
DVD/USB
Press this button to access the media menu
in which you can select Disc or USB playback
with cursor buttons.
REMAIN
Press this button to display various info
on the current playback: title/chapter, time
elapsed, etc.
RETURN
Press this button to return to the disc menu
while playing. Press again to resume playback.
Operation
9
Operation
9
VIDEO
Press VIDEO to select the video output
mode.
PBC
Press this button to turn on or off the
Playback Control (PBC) function (for VCD
discs supporting PBC function).
System setup
1. Press the SETUP button to enter the
setup menu. In setup mode, press SETUP
again to quit the setup menu.
2. Use the
/ cursor buttons to choose a
setup page: General setup page, Audio setup
page, Dolby Digital setup, Video setup page,
Preference page.
3. Press the
cursor button to enter the
setup page selected.
4. Use the / cursor buttons to select the
option you want to adjust.
5. Press the
cursor button to enter the
adjustment list. Use the
/ cursor buttons
to select the adjustment and press ENTER to
confirm and return to options list.
6. To return to setup page list press the
cursor button in the options list.
The items in gray cannot be adjusted.
The setup is memorized and kept after power
is off.
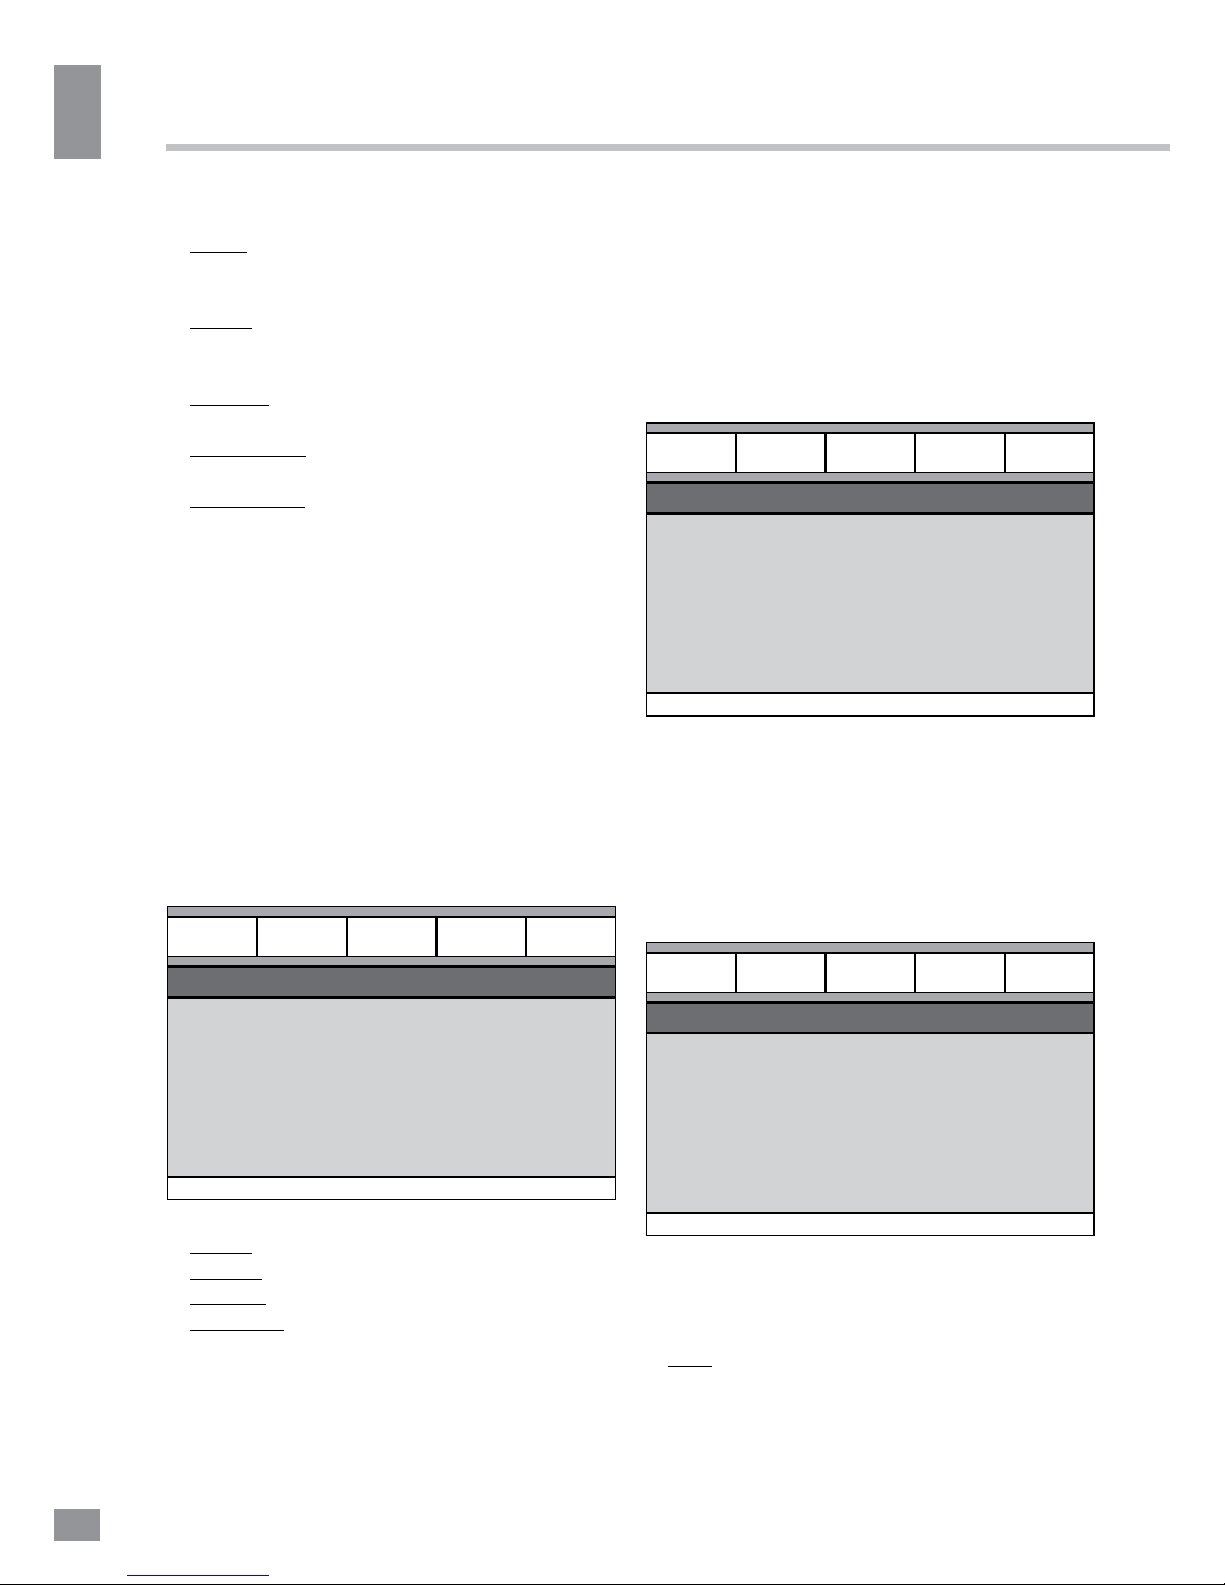
General setup
General
General setup page
TV display
Angle mark
OSD lang
Captions
Screen saver
Last memory
Audio Dolby Video Preference
• TV DISPLAY
Normal/PS: When the device is connected
to a regular TV set, the wide-screen image is
shown on the screen but some part is cut off.
Normal/LB: When the device is connected
to a regular TV set, the wide-screen image is
shown and black bars appear at the top and
the bottom of the screen.
Wide: Use this option when the device is
connected to a wide-screen TV set.
• ANGLE MARK
If switched on, it will show the angle mark
when playing DVD discs with a multi-angle
view feature.
• OSD LANGUAGE
Select on-screen display language.
• CAPTIONS
This function doesn’t work if the disc has
no captions. If the caption is OFF, press
SUBTITLE button on the RC to switch captions
on. The default setup is ON.
• SCREEN SAVER
If Screen saver is set to ON and the device
is switched on without a disc playing for several
minutes, a moving picture will appear on the
screen, and the device will go to standby mode
after 20 minutes. Press the POWER button on
the RC to wake it up.
• LAST MEMORY
When this function is on, the unit can
memorize the time elapsed from the last time
you played the disc. Then, next time, it will
resume playback from the memorized point.
Audio setup
General
Audio setup page
Speaker setup
Spdif setup
MIC
Equalizer
Reverb mode
Audio Dolby Video Preference
Operation
10
Operation
10
When watching high dynamic range films or
programs at night, by selecting this mode you
can reduce the volume to a very low level while
keeping the quality and fine details of sound.
In this case, you won’t disturb your family and
keep the high quality sound.
Video setup
General
Video setup page
Component
Sharpness
Brightness
Contrast
Audio Dolby Video Preference
• COMPONENT: Cvbs
• SHARPNESS, BRIGHTNESS,
CONTRAST: You can set sharpness,
brightness and contrast according to your
preference.
Preference setup (available when
playback is fully stopped)
General
Preference page
TV Type
Audio
Subtitle
Disc menu
Parental
Password
Default
Audio Dolby Video Preference
• TV TYPE
This device is compatible with all kinds of TV
systems. You can select between PAL, NTSC
or Auto.
Auto: the TV system is selected
automatically according to the disc system.
• SPEAKER SETUP: Downmix
LT/RT: The audio out is set to Left and Right
channels format even if the original sound is in
the 5.1CH format.
Stereo: The audio out format is stereo even
if the original sound is 5.1CH format.
• SPDIF SETUP: Spdif output
Spdif off: no digital signal out (optical or
coaxial output off), only analog audio output.
SPDIF/RAW: no decoding on the amplifier
digital signal input.
SPDIF/PCM: the amplifier must be supported
by PCM decoding or Dolby digital decoding
function.
• MICROPHONE
You can switch the microphone on or off,
adjust the microphone volume and echo.
• EQUALIZER
Several EQ modes are available. You can
select one according to your preference and
the disc content.
• REVERB MODE
You can select the appropriate reverberation
mode: off, Concert, Living room, Hall,
Bathroom, Cave, Arena, Church.
Dolby Digital setup
General
Dolby Digital Setup
Dual mono
Dynamic
Audio Dolby Video Preference
• DUAL MONO
Stereo: stereo output signal,
L-Mono: left output signal,
R-Mono: right output signal,
Mix-Mono: left and right output average
signal.
• DYNAMIC

Operation
11
Operation
11
NTSC: the system used in USA, Taiwan,
Japan, etc.
PAL: the system used in China, Europe,
Hong Kong, etc.
• AUDIO, SUBTITLE, DISC MENU
LANGUAGE SETUP
These parameters can be preset according
to your preference. If your settings are
supported by the disc, the content will be
played according to them. Otherwise default
settings will apply.
• PARENTAL
This setting is for parents to control their
children from viewing inappropriate content
such as violence and erotic. The disc with the
control level higher than the set one will not be
played.
• PASSWORD
This setting allows you to change the
password. The initial factory password is 0000.
You can set your own password. If you forget
your own password, you can use 0000 as the
master password.
• DEFAULT
Reset to the initial factory settings.
Pictures of OSD menu are for reference
only and may differ from the real-world OSD.
Playback operation
USB operation
Insert a USB-drive into the USB slot in the
device. The process of data reading should
start immediately. The file menu will appear,
you can select and play files using the cursor
buttons and the ENTER button.
Supported USB file systems: FAT,
FAT32. USB 2.0 is supported; maximum
supported storage capacity is 32 GB. For
correct and satisfactory operation, use licensed
USB drives of well-known brands. Playback of
some file formats cannot be supported.
Karaoke
• Karaoke disc is a DVD or VCD disc with
music and lyrics, guiding the singer when to
sing this or that part. Microphone is required
(not included).
• Connect a microphone to the MIC jack on
the front panel.
• Enter system setup menu on the Karaoke
page and adjust settings according to your
preference.
• Put a Karaoke disc into the DVD-player
and wait for the playback to start.
Ripping
This unit has the Ripping function making it
handy to quickly copy audio files (i.e. music)
from CDs. RIPPING is converting from the
CDDA format to the compressed MP3 format
onto a USB drive. While copying files, ID3 tags
are automatically generated in Russian and
English, depending on the source. If the disc
does not contain such information in CD-text
format, ID3 tags will be labeled as “Unknown
artist” and “Unknown album”.
Create ID3 Yes
The RIPPING function has a simple and
intuitive menu. To display the Ripping menu,
press COPY on the RC while a CD is being
played. A USB-drive should be inserted in the
device. For navigation in the menu use cursor
buttons and press ENTER to confirm your
choice. In the “Options” column you may set
speed and bitrate for ripping. In “Track” you
may select tracks for ripping (press ENTER to
select a highlighted track). Besides, you can
select all tracks (“Select all”) or cancel your
choice (“Select none”). To start converting,
 Loading...