

Teledyne Slocum G2 Operator Training Manual
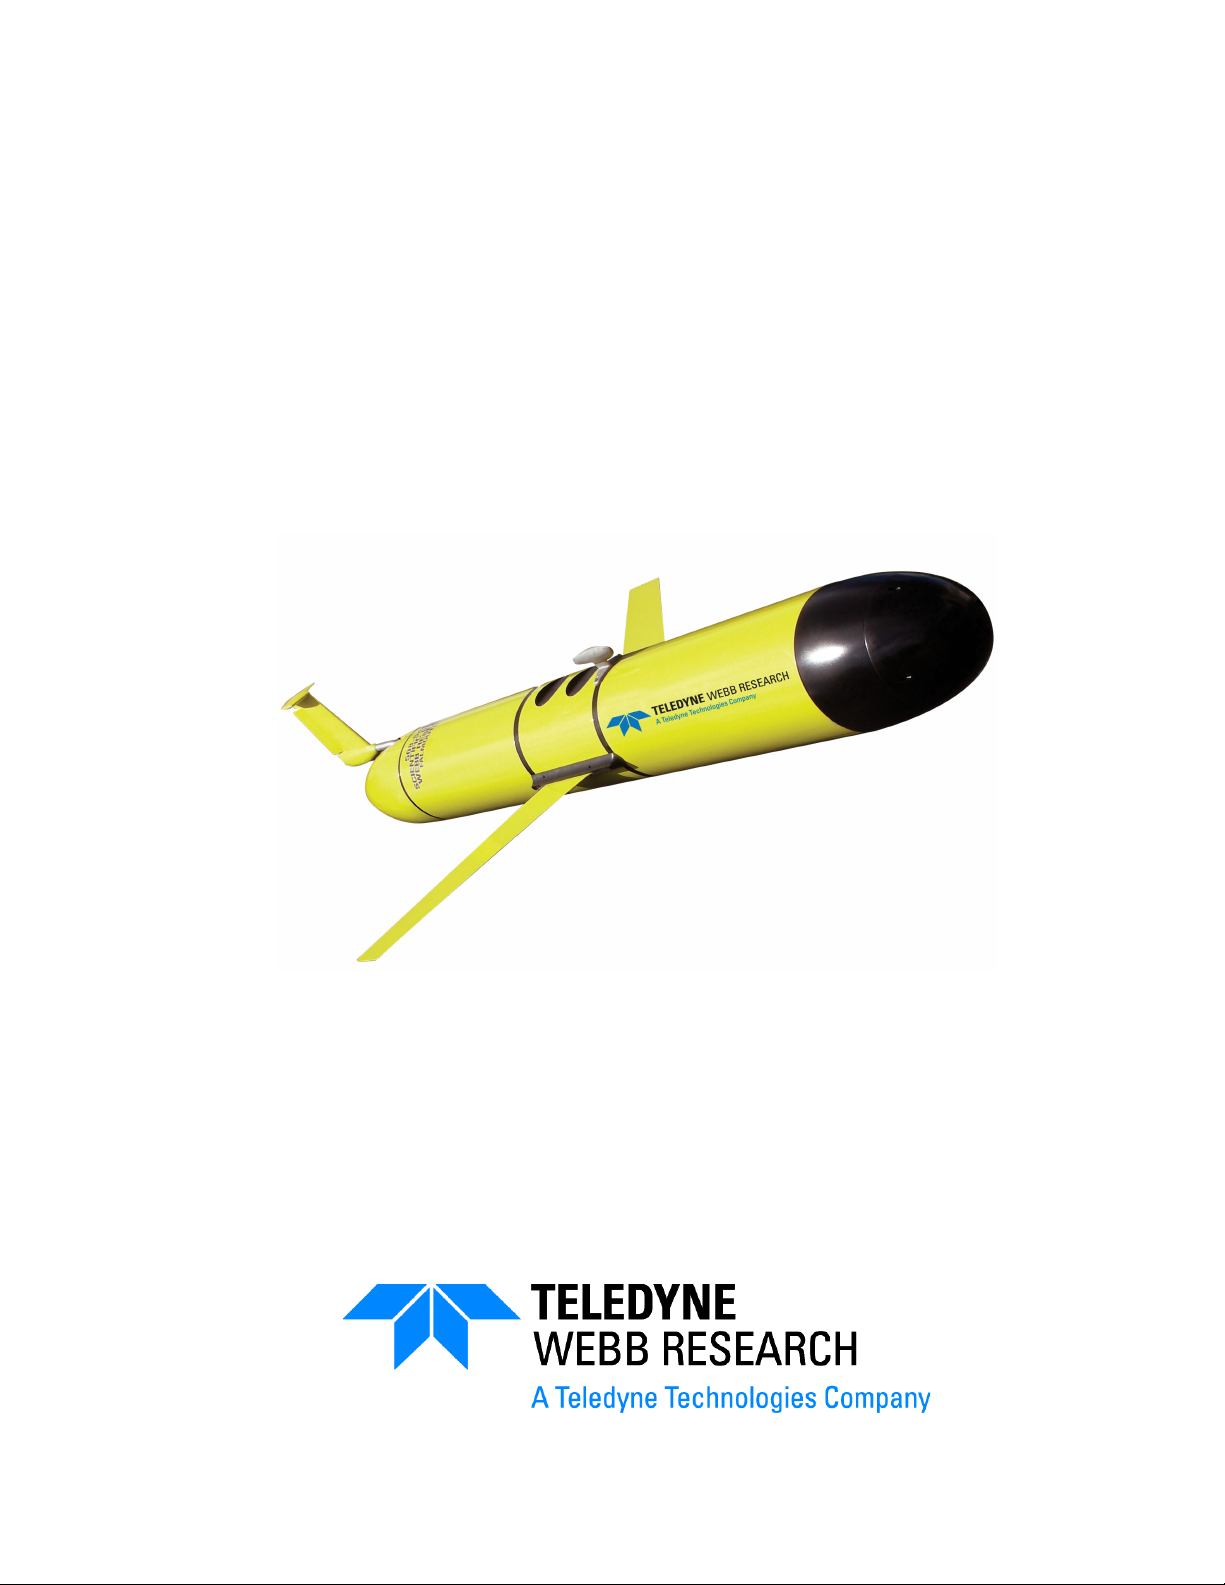
Slocum G2 Glider
Operators Training Guide
Revised June 2012
Teledyne Webb Research
82 Technology Park Drive
East Falmouth, MA 02536
USA
+1 (508) 548-2077 (phone)
+1 (508) 540-1686 (fax)
www.webbresearch.com

Training date: ___________________________________
Book owner: ___________________________________
Notes:
© Copyright 2012
Teledyne Webb Research
The material in this document is for information purposes only and is subject to change without notice. Teledyne Webb
Research assumes no responsibility for any errors or for consequential damages that may result from the use or
misrepresentation of any of the material in this publication.
FreeWave is a registered trademark of FreeWave Technologies. Iridium is a registered trademark of Iridium Communications
Inc. Persistor and PicoDOS are registered trademarks of Persistor Instruments, Inc. Instant Ocean is a registered trademark
of Instant Ocean

Contents
Introduction . . . . . . . . . . . . . . . . . . . . . . . . . . . . . . . . . . . . . . . . . . . . . . . 1
Notes for Ballasting and Lab Tests . . . . . . . . . . . . . . . . . . . . . . . . . . . . 4
Common Lab Commands . . . . . . . . . . . . . . . . . . . . . . . . . . . . . . . . . . . . . . . 8
Pre-mission Checkouts . . . . . . . . . . . . . . . . . . . . . . . . . . . . . . . . . . . . . . 9
On the Beach, Deck and/or outside at the Lab . . . . . . . . . . . . . . . . . . . . . . . 9
Science Sensor Checkout . . . . . . . . . . . . . . . . . . . . . . . . . . . . . . . . . . . . . . 10
Transporting the glider . . . . . . . . . . . . . . . . . . . . . . . . . . . . . . . . . . . . . . . . . 11
In the Water . . . . . . . . . . . . . . . . . . . . . . . . . . . . . . . . . . . . . . . . . . . . . . . . . 11
Deploying the Glider . . . . . . . . . . . . . . . . . . . . . . . . . . . . . . . . . . . . . . . 13
Large Ship Deployment . . . . . . . . . . . . . . . . . . . . . . . . . . . . . . . . . . . . . . . . 15
Slocum G2 Glider Operators Training Guide
Glider Operation and Maintenance Training. . . . . . . . . . . . . . . . . . . . . . . 1
Internet Resources . . . . . . . . . . . . . . . . . . . . . . . . . . . . . . . . . . . . . . . . . . 1
Recovering the Glider . . . . . . . . . . . . . . . . . . . . . . . . . . . . . . . . . . . . . . 16
Packing the Glider . . . . . . . . . . . . . . . . . . . . . . . . . . . . . . . . . . . . . . . . . 17
Dockserver . . . . . . . . . . . . . . . . . . . . . . . . . . . . . . . . . . . . . . . . . . . . . . . 18
Glider Terminal . . . . . . . . . . . . . . . . . . . . . . . . . . . . . . . . . . . . . . . . . . . . . . . 18
Glmpc Terminal . . . . . . . . . . . . . . . . . . . . . . . . . . . . . . . . . . . . . . . . . . . . . . 19
Data Visualizer . . . . . . . . . . . . . . . . . . . . . . . . . . . . . . . . . . . . . . . . . . . . . . . 19
Dockserver Java FTP Utility . . . . . . . . . . . . . . . . . . . . . . . . . . . . . . . . . . . . . 20
Configure Communications with the Terminal Program (ProComm Plus)
21
Surface Dialog . . . . . . . . . . . . . . . . . . . . . . . . . . . . . . . . . . . . . . . . . . . . 22
File Manipulation . . . . . . . . . . . . . . . . . . . . . . . . . . . . . . . . . . . . . . . . . . 23
Transferring Files to and from the Glider . . . . . . . . . . . . . . . . . . . . . . . . . . . 23
Transferring Files from the Glider. . . . . . . . . . . . . . . . . . . . . . . . . . . . . . . . . 23
Transferring Files to the Glider . . . . . . . . . . . . . . . . . . . . . . . . . . . . . . . . . . . 23
Glider Do’s and Don’ts. . . . . . . . . . . . . . . . . . . . . . . . . . . . . . . . . . . . . . 24
Do’s . . . . . . . . . . . . . . . . . . . . . . . . . . . . . . . . . . . . . . . . . . . . . . . . . . . . 24
Don’ts . . . . . . . . . . . . . . . . . . . . . . . . . . . . . . . . . . . . . . . . . . . . . . . . . . . 24
Mission Files (.mi and .ma) . . . . . . . . . . . . . . . . . . . . . . . . . . . . . . . . . . 25
Appendix A: Glider Commands . . . . . . . . . . . . . . . . . . . . . . . . . . . . . . 35
Appendix B: Worksheets. . . . . . . . . . . . . . . . . . . . . . . . . . . . . . . . . . . . 39
TELEDYNE WEBB RESEARCH 1
Rev. 06/12

Slocum G2 Glider Operators Training Guide
Glider Operations Mission Planning Overview Worksheet. . . . . . . . . . . . . . .40
Pre-mission Seal Checklist (Final Seal) . . . . . . . . . . . . . . . . . . . . . . . . . . . . .42
Post-seal Checklist. . . . . . . . . . . . . . . . . . . . . . . . . . . . . . . . . . . . . . . . . . . . .43
Shipping Checklist . . . . . . . . . . . . . . . . . . . . . . . . . . . . . . . . . . . . . . . . . . . . .44
2 TELEDYNE WEBB RESEARCH
Rev. 06/12

Introduction
This document is a field guide and reference documentation for use in preparing and
deploying Teledyne Webb Research’s Slocum G2 Gliders.
Please also refer to the complete Slocum Glider Operators Manual at:
ftp://ftp.glider.webbresearch.com/glider/windoze/production/src/doco/MANUAL/
The site above is an authorized user restricted site. To request access, contact:
glideraccess@webbresearch.com
For technical glider assistance, contact:
glidersupport@webbresearch.com
Slocum G2 Glider Operators Training Guide
Glider Operation and Maintenance Training
Only trained and qualified personnel should operate and maintain the glider.
Teledyne Webb Research conducts regular training sessions several times a year.
Glider users should attend a training session and understand basic glider concepts
and terminology. Contact glidersupport@webbresearch.com for information about
training sessions. Our company’s policy is to fully support only properly trained
individuals and groups.
Only personnel who have attended a Teledyne Webb Research training session
should use this document.
Internet Resources
Sign into access restricted glider documentation at:
https://dmz.webbresearch.com
Slocum glider users forum
https://datahost.webbresearch.com/
Software distribution:
ftp://ftp.glider.webbresearch.com/glider/
Slocum Glider Operators Manual:
ftp://ftp.glider.webbresearch.com/glider/windoze/production/src/doco/MANUAL/
TELEDYNE WEBB RESEARCH 1
Rev. 06/12
Slocum G2 Glider Operators Training Guide Introduction
GMC Users Guide (Dockserver Manual):
ftp://ftp.glider.webbresearch.com/glider/windoze/production/src/
gliderMissionControl/Documentation/gmcUserGuide.pdf
Windows executables (In the URL below, access the Linux files by replacing
windoze with linux.):
ftp://ftp.glider.webbresearch.com/glider/windoze/production/windoze-bin/
Glider service bulletins:
ftp://ftp.glider.webbresearch.com/glider-service-bulletins/
Updated glider code procedure:
ftp://ftp.glider.webbresearch.com/glider/windoze/production/src/doco/softwarehowto/updating-all-glider-software.txt
Masterdata:
ftp://ftp.glider.webbresearch.com/glider/windoze/production/src/code/masterdata
Notes and Warnings
Where applicable, special notes and warnings are presented as follows:
NOTE A referral to another part of this manual or to another reference; a
recommendation to check that certain criteria are met before proceeding
further in a step or sequence; or general information applicable to the
setup and operation of the Teledyne Webb Research Slocum G2 Glider.
CAUTION A reminder to follow certain precautions in order to prevent
damage to equipment or injury to personnel.
WARNING A reminder that dangerous or damaging consequences could
result if certain recommended procedures are not followed.
2 TELEDYNE WEBB RESEARCH
Rev. 06/12

Slocum G2 Glider Operators Training Guide
Format Notes
Glider sensors and commands will be denoted in the Courier font throughout this
document, as shown in the example below:
Typing Report ++ m_roll will report measured roll (m_roll) every CPU cycle.
When this handout is displayed on a PC, some areas will be hyperlinked to
information available on the Internet, such as:
http://www.webbresearch.com/
and protected documents by permission:
http://www.glider.webbresearch.com/
Many of the links and the code mentioned in this manual require access by prior
arrangement. Please contact glidersupport@webbresearch.com to inquire about
access to these protected documents.
Customer Service
We welcome your comments and suggestions for improving our products,
documentation, and service of the glider system. Please contact Glider Support
should you have any comments or suggestions about this manual, the glider
system, or if you require service or support.
Please contact us at:
82 Technology Park Drive
East Falmouth, MA 02536
Telephone: +1 (508) 548-2077
Fax: +1 (508) 540-1686
E-mail: glidersupport@webbresearch.com
www.webbresearch.com
TELEDYNE WEBB RESEARCH 3
Rev. 06/12
Slocum G2 Glider Operators Training Guide Notes for Ballasting and Lab Tests
Notes for Ballasting and Lab Tests
The glider must be sealed with an appropriate vacuum before power can be applied
to it. To do this, pull the glider together with the tie rod using the provided 24” Thandle hex wrench until the hulls have come together. Set the torque to 15 in-lbs
using the provided torque handle and extension. With the vacuum tool, torque
handle, and extension, put a vacuum on the glider. For shallow gliders, your target
is 6" Hg (1000m gliders require a vacuum of 7” Hg), ±0.2” Hg, but it is best to target
a vacuum higher than this as you can bleed some off when the glider is powered on.
CAUTION Experience glider users will regularly power the glider without
the cowling installed. There is a risk of overinflating the air bladder if the
cowling is not in place during the start up sequence. The air pump must
be turned off before the this happens. It is suggested that until users are
familiar with the start up sequence and gaining control of the glider that
they install the aft cowling before power up.
Once the vacuum has been pulled and the MS plug is in place, you may apply
power. The glider will go through its normal start up routine. When you see
SEQUENCE: About to run initial.mi on try 0
you must type ctrl-C within 120 seconds to terminate the sequence. This will give
you a GliderDOS prompt. From the GliderDOS prompt, follow these
instructions:
1.
Type callback 30. This will hang up the Iridium phone for 30 minutes. You
can enter any value for callback from 1 to 30. Alternately you can type use -
iridium to take the iridium out of service until you are done with your testing.
NOTE If the iridium phone is disabled by typing use – iridium,
remember to type use + iridium when the ballasting procedure is
complete.
4 TELEDYNE WEBB RESEARCH
Rev. 06/12
Slocum G2 Glider Operators Training Guide
2.
Type lab_mode on. This puts the glider in lab mode and will prevent the
glider from trying to run its default mission.
NOTE The 1000m pump can take several minutes to retract from fully
displaced to 0 cc displacement. If a user would like to monitor the retract
of the deep pump type report ++ m_de_oil_vol.
3.
Type ballast. This deflates the air bladder, sets the pitch motor and
buoyancy pump to zeroed positions.
4.
Type report ++ m_vacuum. This displays the vacuum inside the glider
every time the sensor updates. If the vacuum is already at 6" Hg (7" Hg for
1000m), ±0.2” Hg, you are done. If not, you need to adjust the vacuum.
5.
Type report clearall. This stops outputting the vacuum value.
6.
Put the aft cowling on the glider. If the glider is connected to an external power
supply, it will be necessary to power down by typing exit and disconnect the
power supply before installing the cowling.
7.
Repower, if necessary, and follow steps 1-3. You are now ready to put the glider
into the ballast tank.
WARNING Do not place the glider in the ballast tank unless either a red
stop plug or a green go plug has been installed.
NOTE If any device is removed from service during the time the glider is
in the ballast tank the glider will move the buoyancy engine to full
displacement. This will result in incorrect ballasting. The most common
reason for this is the attitude sensor being taken out of service due to
local magnetic fields. A user should periodically check that all devices
are in service by typing use. f a device is out of service the user should
determine if it is critical for ballasting and type ballast again when
satisfied that the required devices are in service.
8.
You will need to get CTD data from the glider so that you can calculate the
weight adjustment necessary to go from the ballast tank to target water
conditions. To do this, turn on all sensors in the science bay by typing
TELEDYNE WEBB RESEARCH 5
Rev. 06/12

Slocum G2 Glider Operators Training Guide Notes for Ballasting and Lab Tests
loadmission sci_on.mi (if available), or type the individual commands
listed below:
•
put c_science_all_on 0 (off = -1). Tells the science computer to
sample all science sensors as fast as possible.
•
put c_science_on 3 (off = 1). Displays that data to the screen.
•
put c_science_send_all 1 (off = 0). Sends science data to the flight
Persistor.
9.
Make a note of the water temperature and conductivity. Enter this data in the
tank conditions section on the Ballast sheet of the GBPSH (Glider Ballasting
Procedure Spreadsheet). To ballast for tank conditions, copy the values from
the tank conditions section into the target conditions section. Type
loadmission sci_off.mi to turn off the science sensors or use the three
commands indicated above.
10.
Attach a suspended scale to the glider 1” from the forward edge of the forward
hull and another suspended scale 1” from the aft edge of the aft hull. Let the
glider settle in the tank before taking readings from the forward and aft scales.
NOTE If the glider does not sink in the tank, it may be necessary to
remove it so that more weight can be added internally. Advanced users
can use external weights and scale factors to account for the density of
the weights in water.
11.
Enter the scale weights from step 9 in the “Scale Readings” section of the
correct sheet of the GBPSH, i.e., G1 Shallow, G1 Deep, or G2 Deep & Shallow.
Use the Weight Adjustment section of that sheet to determine what weight
changes must be made in the glider. Remove the glider from the water and type
exit to turn off the glider. Dry thoroughly before opening to make weight
changes.
CAUTION TWR recommends Instant Ocean® for providing an ocean
equivalent conductivity. Note that other methods of adding salt/salinity
will not provide a correct conductivity and can result in incorrectly
ballasted gliders
6 TELEDYNE WEBB RESEARCH
Rev. 06/12
Slocum G2 Glider Operators Training Guide
12.
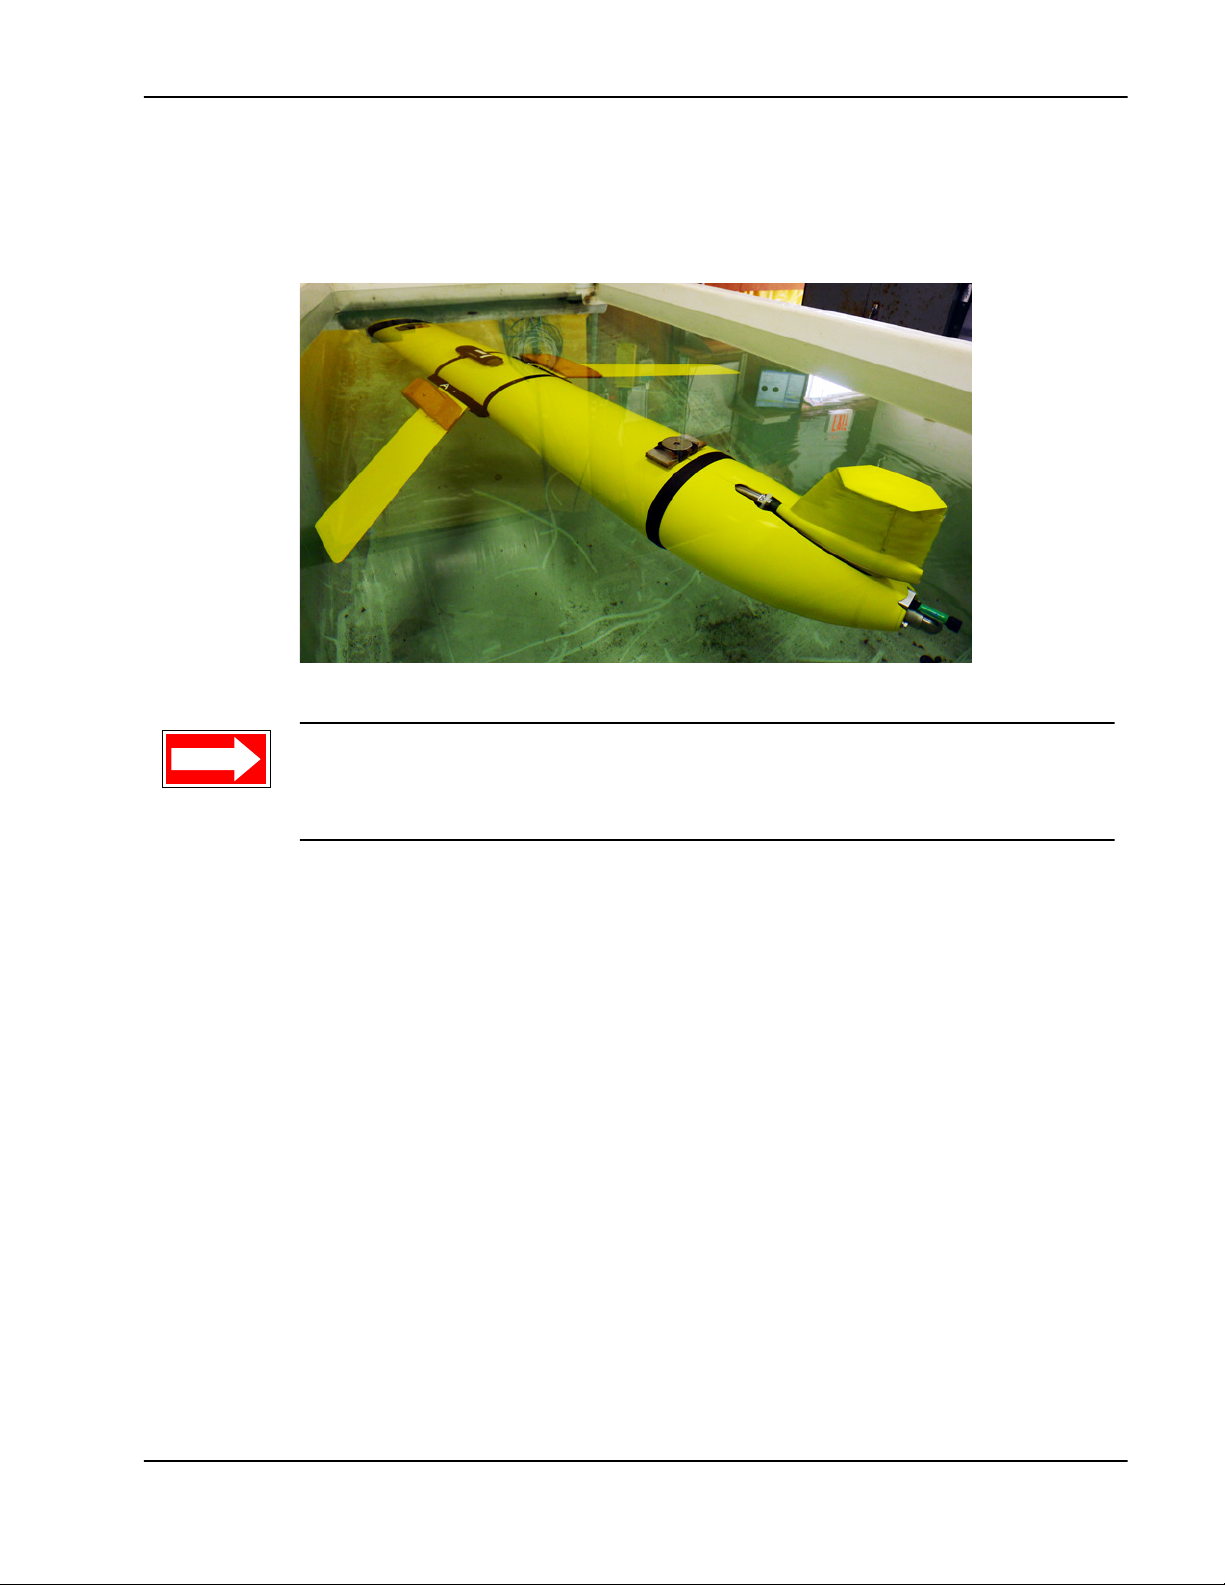
Repeat steps 10-11 until the glider is perfectly ballasted in the tank. The fin
should be just breaking the surface at this point. The image below illustrates a
glider perfectly ballasted for the tank.
NOTE It is only necessary to calculate the H-moment if substantial
changes have been made to the glider’s ballasting since its H-moment
was previously calculated.
13.
To calculate the H-moment with the glider neutral in the tank, type report ++
m_pitch m_battpos. This displays the pitch and the position of the pitch
battery of the glider in radians and inches respectively every time the sensor
updates. Follow instructions for calculating the H-moment in the Calculating HMoment (Pitch Battery Method) section of the Ballast sheet. When done type
report clearall.
14.
Enter the temperature, density and salinity for your target location in the Target
Water section of the Ballast sheet to get your total weight change from tank
conditions to target water conditions. Use the appropriate sheet, i.e., G1
Shallow, G1 Deep, or G2 Deep & Shallow, from the GBPSH to determine the
necessary internal weight change.
15.
Open glider to adjust the internal weight for the target water conditions.
16.
Once final weight adjustments are made, the 4095-FCP functional test
procedure should be performed on the glider to confirm that all components are
operating normally. Please contact glidersupport@webbresearch.com and
request the newest revision of this test procedure.
TELEDYNE WEBB RESEARCH 7
Rev. 06/12

Slocum G2 Glider Operators Training Guide Notes for Ballasting and Lab Tests
Common Lab Commands
To do this: Type this:
Exit lab mode While in lab_mode on, type lab_mode off.
NOTE: Never launch the glider in lab_mode.
Zero motors and deflate the air bladder ballast
NOTE: Never launch the glider in ballast.
Stop Iridium phone calls Use - iridium or callback 30
NOTE: Never type use - iridium when in water
Report a sensor as fast as possible Report ++ (any_masterdata_sensor)
Report ++ m_battery
Change a sensor Put (any_masterdata_sensor)
Example: Put c_fin 0 zeroes the fin after a wiggle.
Turn off all reporting report clearall
Exercise the ballast pump, pitch motor,
and fin motor
Stop exercising the motors wiggle off
Tell the science computer to sample all
science sensors as fast as possible
Display that data to the screen put c_science_on 3 (off = 1)
Send science to the flight Persistor put c_science_send_all 1 (off = 0)
Apply power to the glider in an open state
(no vacuum)
Cycle default settings Exit reset
Remove green plug or power supply;
install red plug
wiggle on
put c_science_all_on 0 (off = -1)
Follow these steps before powering down and opening the glider:
• Type exit pico. This will bring you to a PicoDOS prompt.
• Type boot pico to set the glider to boot into PicoDOS.
If the ballast pump is already all the way forward or the pump is unplugged
the application can run on the bench without a vacuum. Running the ballast
pump without a vacuum can damage the forward rolling bellafram.
• Type app -lab from PicoDOS to enter straight into lab_mode on.
When you are finished, close the glider, apply the vacuum, and type boot
app to set the glider to boot the application. You must always make sure the
glider is set to boot app before doing any in the water tests.
Exit and wait for the prompt
8 TELEDYNE WEBB RESEARCH
Rev. 06/12

On the Beach, Deck and/or outside at the Lab Slocum G2 Glider Operators Training Guide
Pre-mission Checkouts
These procedures should be followed to qualify a glider so that it can be launched
for a mission. TWR can provide current Functional Check Out Procedure and Predeployment test procedure by request to glidersupport@webbresearch.com
On the Beach, Deck and/or outside at the Lab
NOTE When a glider is qualified on the beach, deck, and/or at a lab, it
must be outside with a clear view of the sky.
1.
Power on the glider.
2.
When prompted, type control-C to exit to GliderDOS.
3.
From the GliderDOS prompt, type callback 30 to hang up the Iridium phone.
4.
Type Lab_mode on.
5.
Type put c_gps_on 3.
6.
Confirm the GPS.
In the string like the following the highlighted A should turn from a V to and A.
gps_diag(2)cyc#:538|GPRMC,161908,A,5958.3032,N,
7000.5568,W,0.000,343.9,190808,0.3,W|
After a number of A responses, type put c_gps_on 1 to stop the screen
display.
NOTE For best possible timing accuracy a user may choose to issue the
command sync_time.
7.
Type wiggle on and run for 3-5 minutes for shallow pumps to check for any
device errors or other abnormalities. For deep pumps report ++
m_de_oil_vol and ensure full retraction and extension (+/- 260 cc). Type
wiggle off to stop wiggling.
8.
Type Report ++ m_vacuum. (Remember, the vacuum can fluctuate with the
temperature.)
TELEDYNE WEBB RESEARCH 9
Rev. 06/12

Slocum G2 Glider Operators Training Guide Pre-mission Checkouts
9.
Type Report ++ m_battery.
10.
Type report clearall.
11.
If no errors are found, type lab_mode off to return to the GliderDOS prompt.
NOTE Make sure that the glider is not simulating or in boot Pico or lab
mode before deployment.
12.
Purge the log directory, and send the logs over FreeWave or dellog all on
both glider and science persistor. (This can take a long time if there are a large
number of files and they will be lost, so the best practice is to purge and archive
the log files in the lab.)
13.
Type run status.mi and confirm that all sensors are being read. The
mission should end with this message: “mission completed normally.”
NOTE The following sensor may not update during running status.mi
(this is OK): surface_2: Waiting for sensors to report. ERROR
behavior surface_2: Timed out waiting for input
sensors:ERROR behavior surface_2: Sensor NOT reporting:
m_raw_altitude
14.
Let the glider connect to the Dockserver and send .sbd over Iridium, If not
connected, type Callback 1 to force the Iridium to call in one minute once
connected.
Here is an example of forcing Iridium while the FreeWave is present:
GliderDOS I -3 >send -f=irid *.sbd -num=2 (This sends the two most
recent .sbd files over Iridium. Be patient, because the Iridium is slow, and
currently there is no positive feedback over FreeWave).
Science Sensor Checkout
1.
Type loadmission sci_on.mi and loadmission sci_off.mi if available or
follow the individual commands below
•
Type put c_science_all_on 0 (off = -1). This tells the science
computer to sample all science sensors as fast as possible.
10 TELEDYNE WEBB RESEARCH
Rev. 06/12

Transporting the glider Slocum G2 Glider Operators Training Guide
•
Type put c_science_on 3 (off = 1). This displays that data to the
screen.
•
Type put c_science_send_all 1 (off = 0) to send science to the
flight Persistor.
2.
Verify that science output seems reasonable for all sensors installed. TWR can
provide check out procedure for many sensors by request to
glidersupport@webbresearch.com
Transporting the glider
1.
Ensure that all of the cart and crate straps and locks are used, and/or load the
glider into the boat and proceed to the first waypoint or deployment location.
See the sections, "Deploying the Glider" on page -13 and "Recovering the
Glider" on page -16. Just prior to deployment install wings and ensure green
plug is seated well and tucked into cowling
In the Water
1.
Attach a 10 meter line, preferably neutrally buoyant line, with a buoy to the
glider before putting it in the water. If you have great confidence in the glider's
ballasting you may choose to not test on the line.
2.
Once the glider is in the water, type run status.mi again.
3.
Run ini0.mi per below. If further evaluation is required run one or more of the
following missions while on station until satisfied that the glider is ballasted and
operating normally.
•
Run Ini0.mi—Does a single yo to a maximum depth of 3 meters and a
minimum depth of 1.5 meters. This uses a fixed pitch battery and fin
position.
NOTE The glider pilot should be evaluating the data from ini missions to
ensure that glider ballasting looks correct and that the system is
functioning normally. Proper ballasting has symmetrical dive and climb
profiles. When possible it is recommended that the deployment crew stay
on location and wait for confirmation from the pilot that the data looks ok.
Strong winds or less than neutral line attached to a buoy can skew the
dive and climb profile results, for this reason an ini0.mi is usually run on
and off the buoy
TELEDYNE WEBB RESEARCH 11
Rev. 06/12
 Loading...