

Page 1

Printed Help Document
Report Generator for TDSPWR3
www.tektronix.com
Page 2

Copyright and Version Information
Copyright © Tektronix, Inc. All rights reserved. Licensed software products are
owned by Tektronix or its suppliers and are protected by United States copyright
laws and international treaty provisions.
Use, duplication or disclosure by the Government is subject to restrictions as set
forth in subparagraph (c)(1)(ii) of the Rights in Technical Data and Computer
Software clause at DFARS 252.227-7013, or subparagraphs (c)(1) and (2) of the
Commercial Computer Software - Restricted Rights clause at FAR 52.227-19, as
applicable.
Tektronix products are covered by U.S. and foreign patents, issued and pending.
Information in this documentation supercedes that in all previously published
material. Specifications and price change privileges reserved.
Tektronix, Inc. P.O. Box 500, Beaverton, OR 97077
TEKTRONIX, TEK, and TEKPROBE are registered trademarks of Tektronix,
Inc.
MATLAB is a trademark of The MathWorks, Inc
Report Generator Printed Help Document Version 1.0.1
Page 3

Table of contents
REPORT GENERATOR........................................................................................................................... 1
USING REPORT GENERATOR .............................................................................................................. 1
Shortcut Keys for Report Generator ...................................................................................................................... 1
ABOUT TEMPLATE EDITOR.................................................................................................................. 3
Template Editor Window....................................................................................................................................... 4
View> Palette Toolbar ........................................................................................................................................... 4
Native Fields .......................................................................................................................................................... 5
Rectangle ............................................................................................................................................................... 6
Oscilloscope Fields ................................................................................................................................................ 8
Template Editor | File menu .................................................................................................................................. 9
Template Editor | Edit menu .................................................................................................................................. 9
Template Editor | View menu ................................................................................................................................ 9
Template Editor | Object menu ............................................................................................................................ 10
Template Editor | Window menu......................................................................................................................... 10
Template Editor | Help menu............................................................................................................................... 11
Standard Toolbar View > Toolbar > Standard..................................................................................................... 11
Align/Size View > Toolbar > Align/Size............................................................................................................. 11
Layout Toolbar View > Toolbar > Layout .......................................................................................................... 12
Action toolbar ...................................................................................................................................................... 12
Status bar.............................................................................................................................................................. 12
Template Editor | Edit menu ................................................................................................................................ 12
Using Template Editor......................................................................................................................................... 13
Creating Custom Groups-Edit > Create Custom Group ...................................................................................... 13
Editing Custom Groups- Edit > Edit Custom Group ........................................................................................... 14
Delete Custom Groups -Edit > Edit Custom Group ............................................................................................ 15
Change Template Size -Edit > Change Template Size ........................................................................................ 16
Select All -Edit > Select All ................................................................................................................................ 17
Find -Edit > Find.................................................................................................................................................. 17
Replace -Edit > Replace ...................................................................................................................................... 18
Bring To Front -Object > Bring To Front............................................................................................................ 18
Send To Back Object > Send To Back ................................................................................................................18
Show/Hide Text -Object > Show/Hide Text........................................................................................................ 18
Position Caption-Object > Position Caption to the Left, or on Top .................................................................... 18
Editing Caption -Object > Edit Caption............................................................................................................... 18
Change Font Object > Change Font..................................................................................................................... 19
Align Fields -Object > Align Fields..................................................................................................................... 19
Make Same Size Object > Make Same Size ........................................................................................................ 20
REPORT LAYOUT EDITOR .................................................................................................................. 21
Report Layout Editor Default Settings ................................................................................................................ 22
Report Layout Editor Window............................................................................................................................. 22
List of Templates pane......................................................................................................................................... 22
Report Generator Reference Manual i
Page 4

Report Layout pane.............................................................................................................................................. 23
Report Layout Editor | File menu......................................................................................................................... 25
Report Layout Editor | Edit menu ........................................................................................................................ 25
Report Layout Editor | View menu ...................................................................................................................... 25
Report Layout Editor | Layout menu....................................................................................................................26
Report Layout Editor | Page menu .......................................................................................................................26
Report Layout Editor | Help menu .......................................................................................................................26
Report Layout Editor | Standard toolbar .............................................................................................................. 26
Report Layout Editor | Layout toolbar .................................................................................................................27
Report Layout Editor | Page toolbar..................................................................................................................... 27
Report Layout Editor | Action toolbar..................................................................................................................27
Using Report Layout Editor................................................................................................................................. 28
Configure Page..................................................................................................................................................... 29
Go To Page...........................................................................................................................................................30
Change Report Layout ......................................................................................................................................... 30
Header/Footer Definition .....................................................................................................................................31
Insert Pages .......................................................................................................................................................... 32
REPORT VIEWER ................................................................................................................................. 33
Report Viewer Window ....................................................................................................................................... 33
Report Viewer | File menu ...................................................................................................................................33
Report Viewer | Edit menu................................................................................................................................... 34
Report Viewer | View menu................................................................................................................................. 34
Report Viewer | Object menu...............................................................................................................................34
Report Viewer | Help menu.................................................................................................................................. 35
Report Viewer | Standard Toolbar .......................................................................................................................35
Report Viewer | Align or Size bar........................................................................................................................ 35
Report Viewer | Status bar ...................................................................................................................................36
Report Viewer | Separators ..................................................................................................................................36
Using Report Viewer ...........................................................................................................................................36
Export to RTF ......................................................................................................................................................37
Find ...................................................................................................................................................................... 37
Replace.................................................................................................................................................................37
Bring To Front .....................................................................................................................................................38
Send To Back ....................................................................................................................................................... 38
Show/Hide Text ...................................................................................................................................................38
Position Caption...................................................................................................................................................38
Edit Caption .........................................................................................................................................................38
Change Font .........................................................................................................................................................39
Make Same Size...................................................................................................................................................40
Align Fields.......................................................................................................................................................... 40
USING REPORT GENERATOR ............................................................................................................ 41
Create or edit a test template................................................................................................................................41
Define or edit a report layout ............................................................................................................................... 42
Generate, print or view a report ...........................................................................................................................43
ii Report Generator Reference Manual
Page 5

Report Generator
The Report Generator enables you to generate and print reports directly from the
oscilloscope. It enhances the TDSPWR3 application capabilities by simplifying
the process of creating and maintaining reports.
The Report Generator automates the process of compiling the test results and
generating the reports. It allows you to set up the template layout using the
factory default templates or custom templates. The Report Generator allows you
to save files in the custom file formats such as .rgt, .rpl, or .rpt. The generated
reports can also be saved as an .rtf file. The Report Generator is integrated with
the TDSPWR3 application.
Using Report Generator
Report > Report Generator
You can generate and print reports directly from the oscilloscope.
Figure 1-1:Report Generator Screen
Perform the following steps to generate a report:
1. Create a new or edit an existing test template.
2. Define a new or edit an existing report layout.
3. Generate, print, or view a report.
Click here to go back to the TDSPWR3 Printed Help Document.
Report Generator Reference Manual 1
Page 6

Report Generator
Short cut Keys for Report Generator
Table 3-31 lists the shortcut keys for report generator
Table 3-31: Shortcut keys for report generator
Action / common keys Shortcut keys
Open Ctrl+O
Save Ctrl+S
Template editor
New Ctrl+N
Find Ctrl+F
Replace Ctrl+H
Print Ctrl+P
Cut Ctrl+X
Copy Ctrl+C
Paste Ctrl+V
Delete Del
Select all Ctrl+A
Bring to front Ctrl+Plus
Send to Back Ctrl+Minus
Edit Text Alt+Enter
Report layout
New Ctrlr+N
GoTo Ctrl+G
Refresh Template List F5
Report viewer
Find Ctrl+F
Select All Ctrl+A
Del Del
GoTo Ctrl+G
Bring to front Ctrl+Plus
Send to Back Ctrl+Minus
Edit Text Alt+Enter
2 Report Generator Reference Manual
Page 7
About Template Editor
The Report Generator allows you to create templates apart from providing you
with factory default templates. Use the Template Editor to create and edit
templates in the .rgt format (report generator template). A template stores the
fields and their positions. You can save the templates and reuse them in any
number of reports or report layouts. You can cut, copy, and paste across
templates. Once the report is generated, the application fills in the fields of the
template using the acquired data from the oscilloscope.
The Template Editor has a palette list that displays the following groups of fields:
the TDSPWR3 Fields, Oscilloscope Fields, and Native Fields as shown in Figure.
The template editor provides you with the option to create custom groups; these
groups once created, appear in the palette list. The fields are listed according to
the group selected. You can use these fields to design and create a template.
About Template Editor
You can place the fields in the template, and then move and size them
appropriately. Multiple fields can be selected and placed in the template. You can
select more than one field and make the following changes: cut, copy, paste,
align, delete, size, edit font, and change caption of the fields.
Once a template is defined and saved, either click Done to close the template
editor, or use the Layout icon to directly go to the report layout editor.
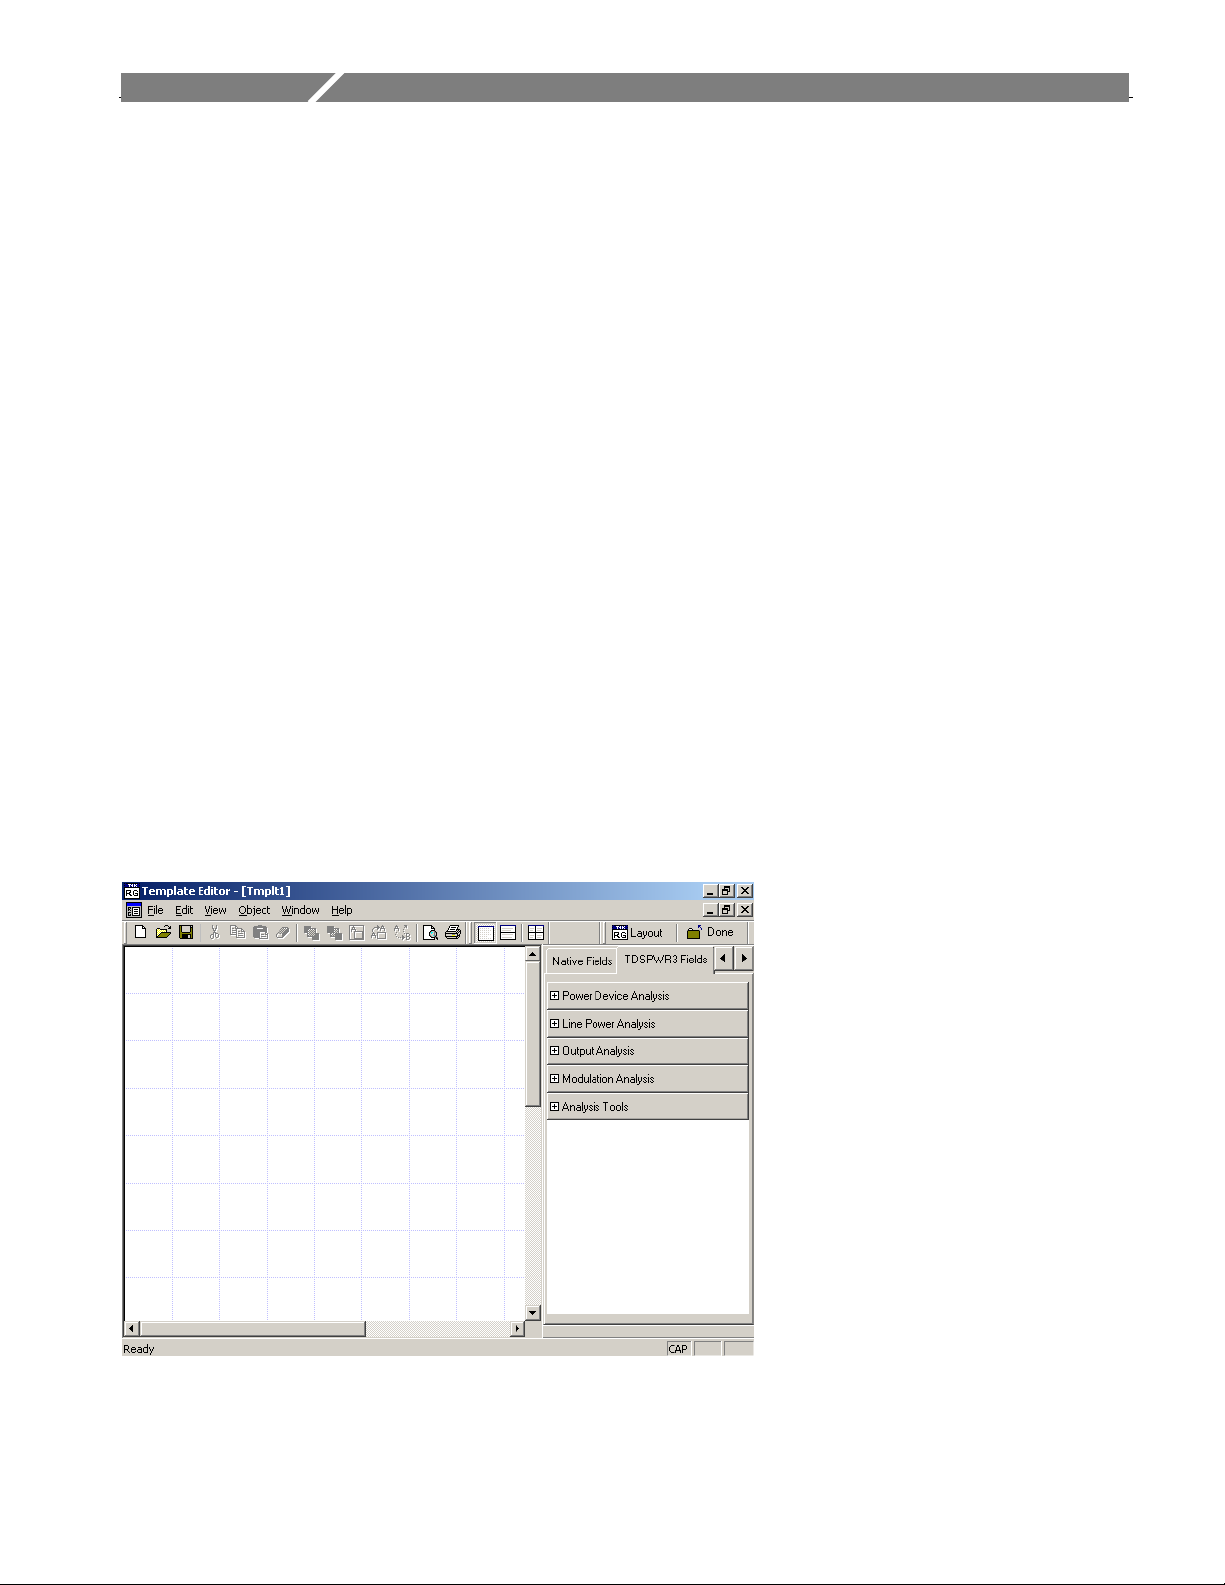
Figure 2-1:Template Editor Window
Report Generator Reference Manual 3
Page 8

About Template Editor
Table 3-32: Template Editor Default Settings
Parameter Selection Default setting
Page Size
Palette List None
Static Text Static Text Inserts My Static Text.
Fields None
Change Template
Size
8.5x11inches
Displays application fields by default. If there are no
application fields, the oscilloscope fields are displayed.
The default size of the field dragged into the template is
200 X 300 pixels.
Template Editor Window
The Template Editor window comprises a menu bar, a toolbar, a client area, a
palette list, and a status bar. When you select the New Template button in your
application, the client area in the Template Editor Window is empty. When you
select the Edit Template button in your application, the client area displays the
selected template.
See the following topics for more information about each of these interface
elements:
View> Palette Toolbar
The Palette List is a floating toolbar that has a list of Native Fields, TDSPWR3
fields, and oscilloscope fields grouped logically. You can drag and drop fields
from the palette list into the template. The palette toolbar is displayed by default;
you can show or hide the toolbar by selecting View> Palette Toolbar.
4 Report Generator Reference Manual
Page 9
Index
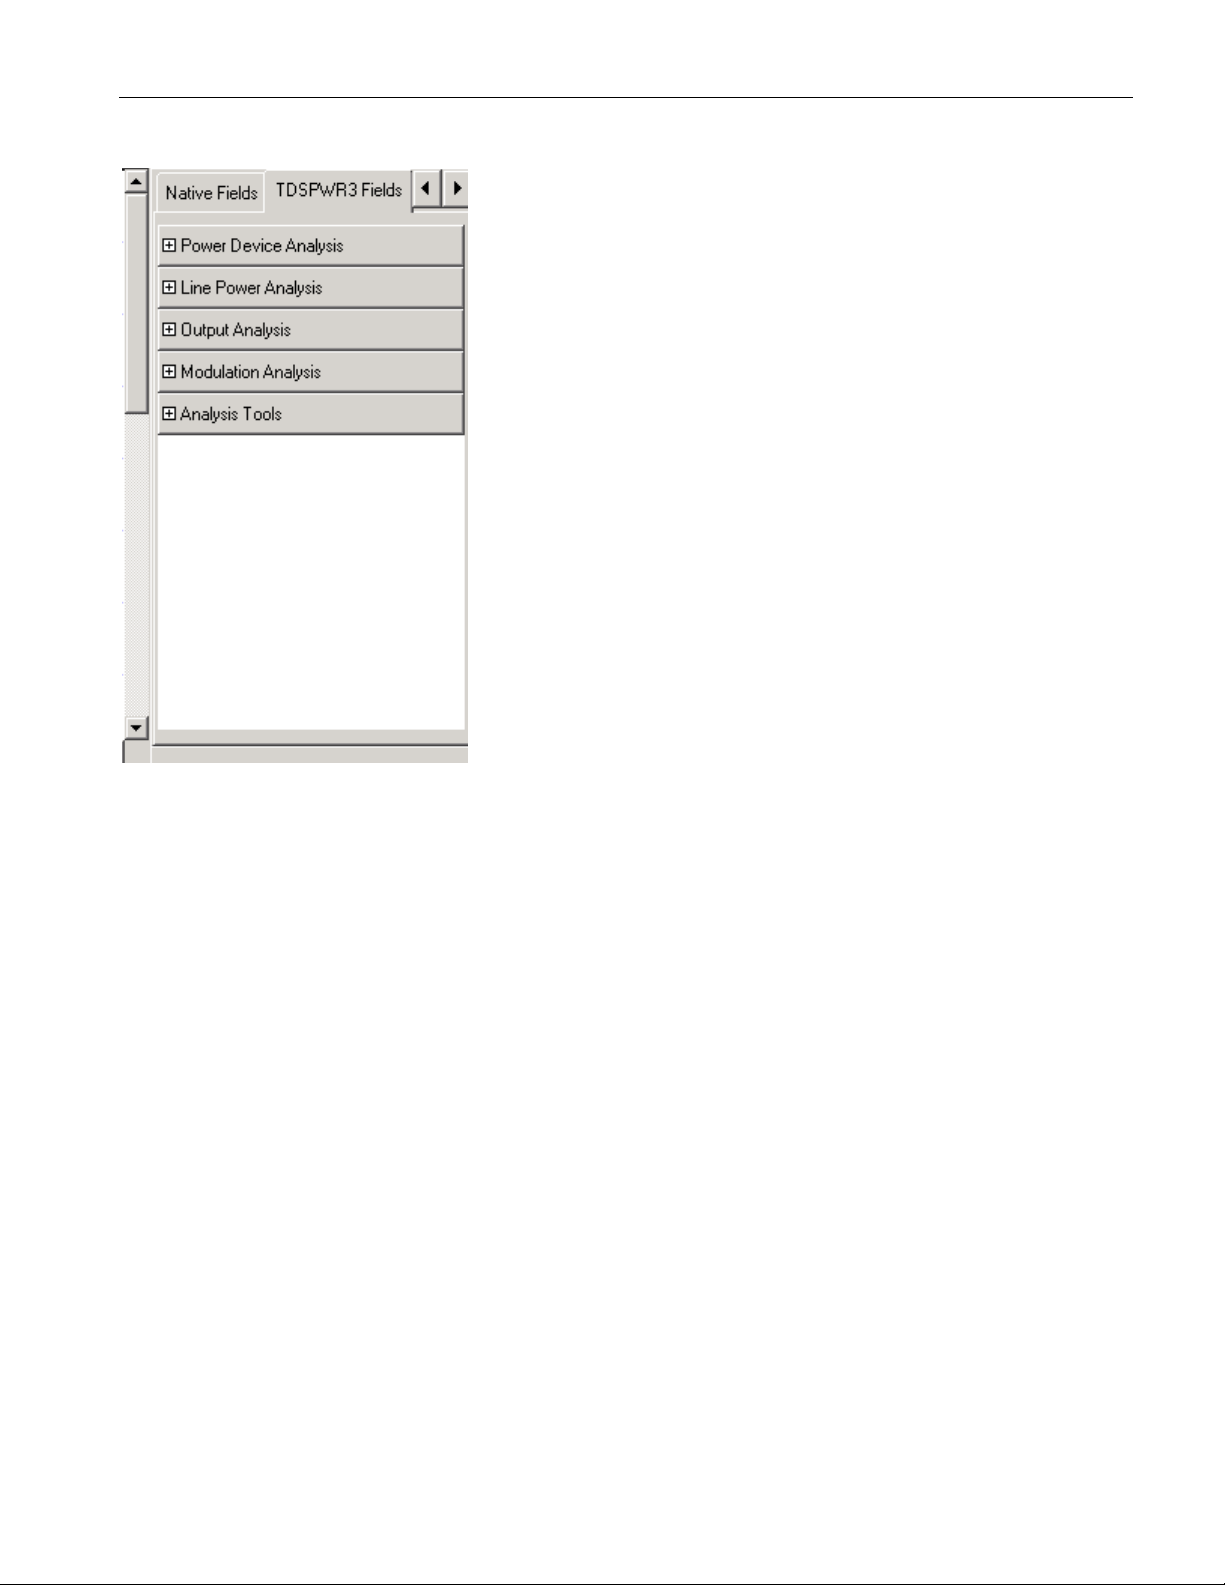
Figure 2-2:Palette List
The Palette list groups the fields into the following categories:
Native fields — Static Text, Rectangle, Line, Logo, Table, Date and Time.
<Application> fields — fields related to the application. The <Application>
is replaced with the application from which you opened Report Generator.
As you have opened Report Generator from TDSPWR3, the <Application>
field is displayed as TDSPWR3 fields.
Oscilloscope fields — Groups of fields related to the data acquired from the
oscilloscope.
Custom groups — custom groups created.
Native Fields
You can enhance the report using the following parameters from the Native fields
— Static Text, Rectangle, Line, Logo, Table, Date, and Time.
You can drag any fields from the Native field and drop it in the active template.
Report Generator Reference Manual 5
Page 10
About Template Editor
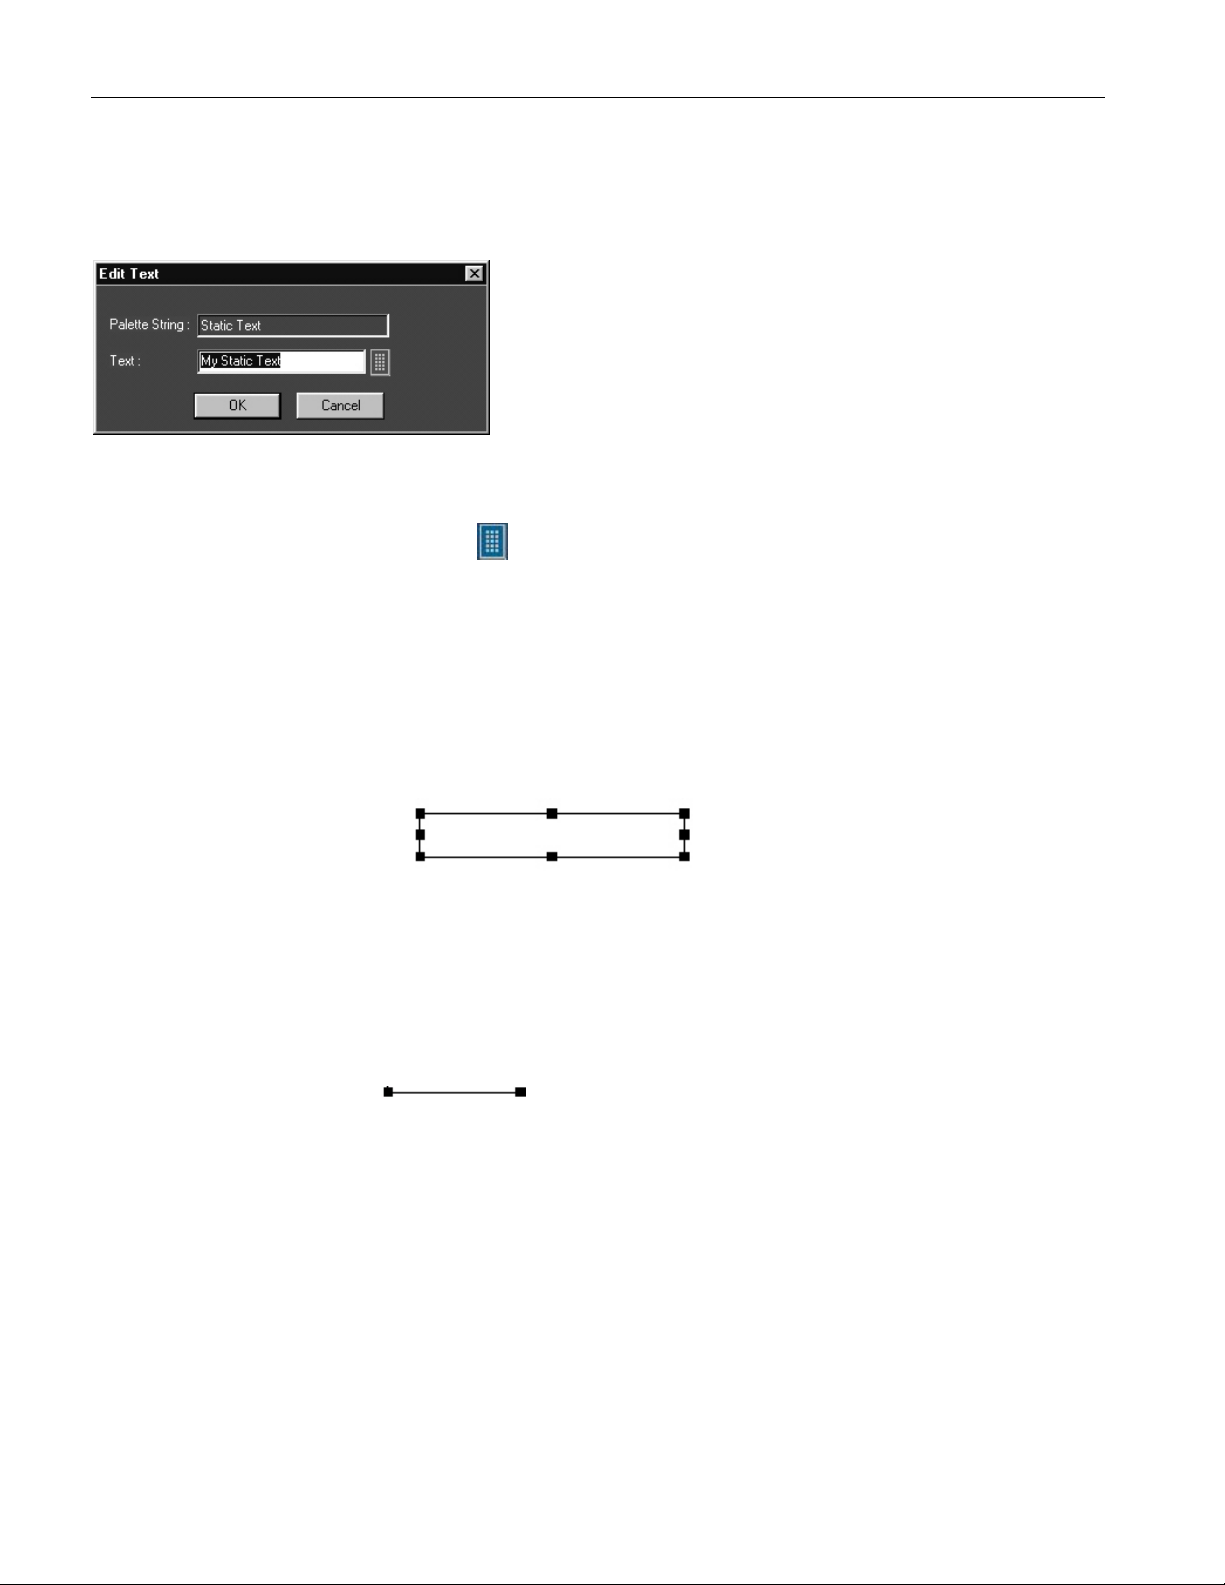
Figure 2-3:Edit Text
Static Text
From the Native fields, drag and drop the static text.
1. In the Edit Text dialog box,
Click .
In the Virtual Keyboard, select the text and select Enter.
2. Click OK.
Rectangle
From the Native Fields, drag and drop the Rectangle into the Active Template.
The black squares that appear at the corners of the rectangle allow you to
increase the size.
Line
From the Native Fields, drag and drop the Line into the Active Template.
The black squares that appear at the corners of the line allow you to increase the
size.
Logo
1. From the Native Fields, drag and drop the Logo into the Active Template.
6 Report Generator Reference Manual
Page 11
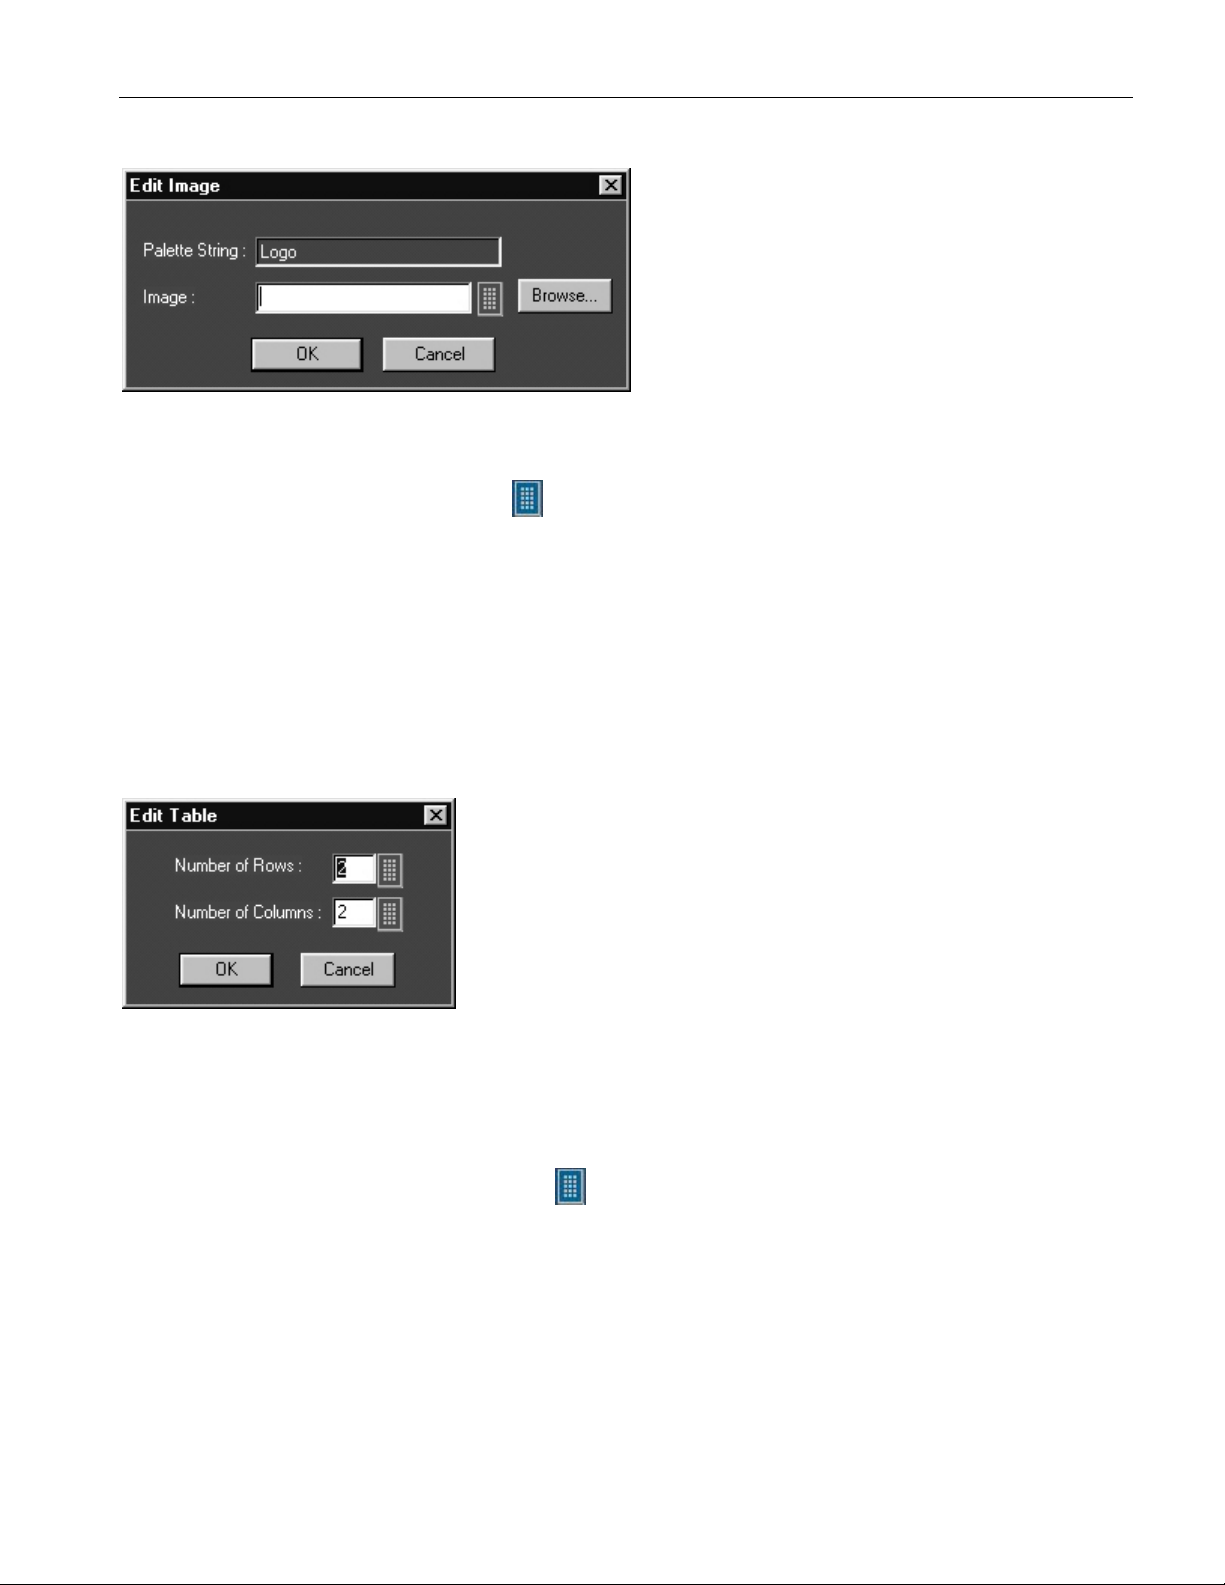
Figure 2-4:Edit Image
2. In the Edit Image dialog box,
Select .
In the Virtual Keyboard, enter the path and filename and select Enter.
Or
Select Browse to navigate to the location where the image is available.
Index
3. Click OK.
Table
1. From the Native Fields, drag and drop the Table into the Active Template.
Figure 2-5:Edit Table dialog
2. In the Edit Table dialog box, you can select the number of rows and
columns.
Select next to Number of Rows and Number of Columns to edit the
number.
In the Virtual Keypad, enter the number and select Enter.
3. Click OK.
Date and Time
From the Native fields, drag and drop the Date and Time.
Report Generator Reference Manual 7
Page 12

About Template Editor
Oscilloscope Fields
These fields are grouped into ten different groups:
1. Fields
Waveform Group: The Waveform group has all the active live
channels and independent channels (only CH1 to CH4) waveforms in
both jpeg and bmp. These waveforms are generated to smoothen out
the stair-step effect seen on the display.
Vertical Group: The Vertical group has all vertical related fields such
as the vertical scale, position, offset, and others.
Horizontal Group: The Horizontal group has all horizontal related
fields such as the horizontal divisions, scale, record length, position,
sample rate, and others.
Math Group: The Math group has all the math related fields such as
the math definition for a specified math channel, magnitude, spectral
gate, spectral phase, spectral window, spectral frequencies of the math
channel, and others.
Trigger Group: The Trigger group has all trigger related fields such as
the trigger type, mode, level, and various fields related to different
trigger types.
Measurement Group: The Measurement group has all the
measurements such as the eight automated measurements and the
immediate measurements.
Acquisition Group: The Acquisition group has all acquisition related
fields such as the acquisition mode, acquisition state, repetitive mode,
fast acquisition mode, and others.
Cursor Group: The Cursor group has all the cursor related fields such
as the cursor mode, source, state and type of the cursor, H Bars, V Bars,
and others.
Zoom Group: The Zoom group has all zoom related fields such as the
zoom horizontal position, horizontal scale, and others.
Histogram Group: The Histogram group has all histogram fields such
as the co-ordinates of histogram box. mode, size, source, and others.
Screen snapshot: The Screen Snapshot group has two variations: one
in color and the other in black-and-white. For these screenshots, the
attributes are graticule, ink-saver, and jpeg.
8 Report Generator Reference Manual
Page 13

Template Editor | File menu
Table 3-33 lists the File menu descriptions.
Table 3-33: File menu descriptions
Menu selection Description
New Creates a new template.
Open Opens a template file.
Close Closes the active template.
Save Saves changes to the file.
Save As Saves the template to a different file name
using the Save as dialog box.
Print Prints all or part of the contents of the active
template.
Print preview Displays a sample view of the active template
as it would be printed.
List of recent templates Opens a previously (recent) opened template.
Exit Closes the Template Editor.
Index
Template Editor | Edit menu
The available Edit menu selections depend on whether a template is active or not.
In other words, the client area is empty or has a template open.
Table 3-34 lists the Edit menu descriptions.
Table 3-34: Edit menu description
Menu selection Description
Cut Cuts the selected fields.
Copy Copies the selected fields.
Paste Pastes the clipboard content.
Delete Deletes the selected fields.
Select All Selects all the fields.
Edit Custom Group Edits the custom group.
Change Template Size Changes the template size.
Find Finds the data matching the search criteria.
Replace Replaces the data matching the search criteria with the specified data.
Template Editor | View menu
A tick mark (
) appears next to the selected menu item.
Report Generator Reference Manual 9
Page 14

About Template Editor
Table 3-35:View menu descriptions
Menu selection Description
Toolbar Displays/Hides the toolbars selected such as Standard, Align Size,
Status Bar Displays/Hides the Status bar.
Palette Bar Displays/Hides the Palette Bar.
Grid Lines Displays/Hides the Grid Lines in the client area.
Table 3-36 Object menu descriptions
Menu selection Description
Bring To Front Brings the selected fields to front.
Send To Back Sends the selected fields to back.
Hide Text / Show Text Shows or hides the caption of the selected parameter.
Position Caption on Top/to
the Left
Edit Caption Allows you to edit the caption of the selected parameter.
Change Font Allows you to change the font of the selected parameter or the
Align Fields Aligns fields to top, bottom, left, or right.
Make Same Size Resizes the selected objects to the same size by height, width, or
Table 3-35 lists the View menu descriptions.
Layout, and Action.
Template Editor | Object menu
The available object menu selections depend on whether a parameter in the client
area is selected or not.
Table 3-36 lists the Object menu descriptions.
Positions the caption of the selected parameter to left or on top.
caption using the Change Font dialog box.
both.
Template Editor | Window menu
Table 3-37 lists the Window menu descriptions.
Table 3-37: Window menu description
Menu selection Description
New Window Opens a new window duplicating the current active window.
Cascade Arranges the open templates in the client area from the upper, left
side to lower right side so that they overlap one another.
Tile Arranges the open templates horizontally and vertically in the
application client area without overlapping.
Arrange Icons Arranges the icons of any templates you have minimized to the
bottom-left of the window.
List of open templates. Allows you to jump to another open template.
10 Report Generator Reference Manual
Page 15
Template Editor | Help menu
The available Edit menu selections depend on whether a template is active or not.
In other words, the client area is empty or has a template open. Table 3-38 lists
the Help menu descriptions.
Table 3-38:Help menu descriptions
Menu selection Description
Help Topics Displays the online help.
About Template Editor Displays version and copyright information.
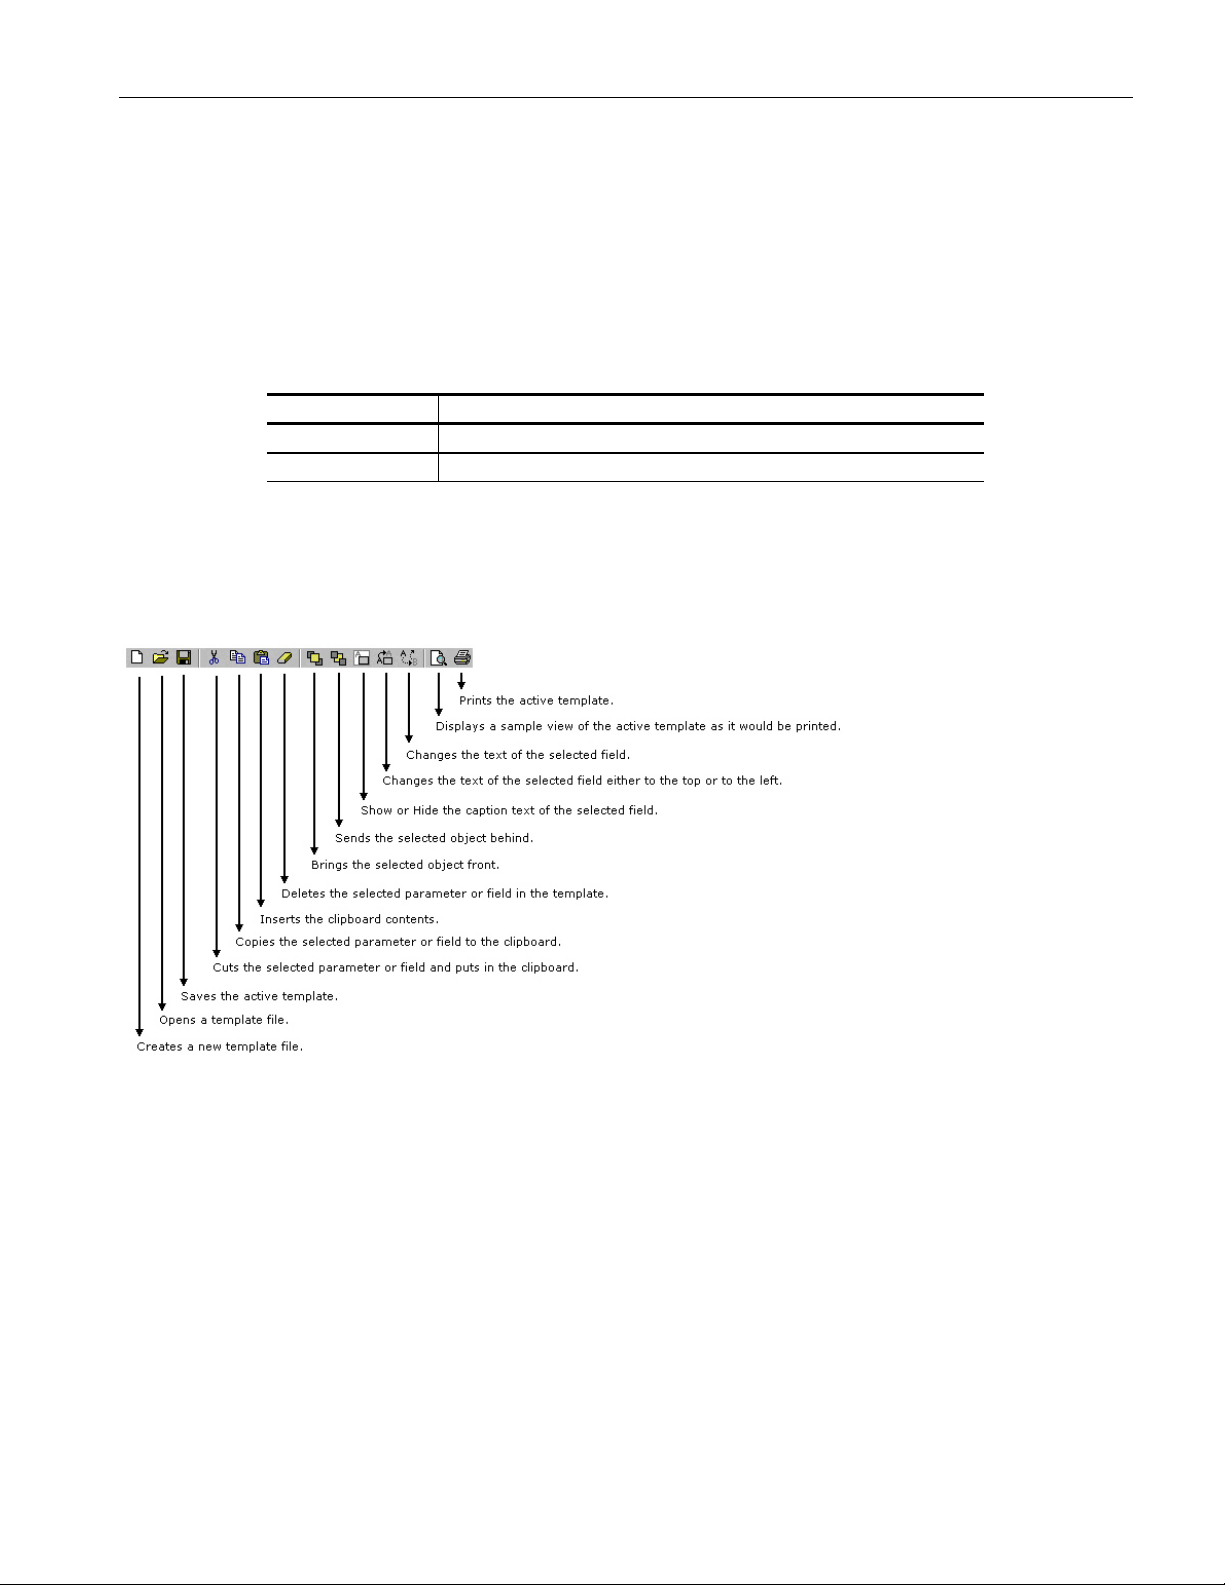
Standard Toolbar View > Toolbar > Standard
Enable the Standard Toolbar by selecting it in the View >Toolbar menu.
Index
Align/Size View > Toolbar > Align/Size
Enable the Align/Size Toolbar by selecting it in the View >Toolbar menu.
Report Generator Reference Manual 11
Page 16

About Template Editor
Layout Toolbar View > Toolbar > Layout
Enable the Layout Toolbar by selecting it in the View >Toolbar menu.
Action toolbar
View > Toolbar > Action
Enable the Action Toolbar by selecting it in the View >Toolbar menu.
The Layout button also prompts to save documents.
Status bar
The Status bar displays the status of the application and tool tips for selected
options
Template Editor | Edit menu
The available Edit menu selections depend on whether a template is active or not.
In other words, the client area is empty or has a template open.
12 Report Generator Reference Manual
Page 17

Using Template Editor
To create a template:
1. From the Palette List, drag and drop the fields that you want in the
report.
2. If you drag and drop a group from the Palette List, all the fields within
the group are placed in the active template.
3. Organize the fields as you want them to appear in the report.
4. After you have finished creating the template, select File > Save.
To edit an existing template:
1. Organize the fields as you want them to appear in the report.
2. From the Palette List, drag and drop the fields that you want in the
report.
Index
3. If you drag and drop a group from the Palette List, all the fields within
the group are placed in the active template.
4. Organize the fields as you want them to appear in the report.
5. After you have finished editing the template, select File > Save.
You can create custom group, edit custom group, and change
template size.
You can also edit caption, change font, align fields, and make
selected fields same size.
For more information on application interface of the Template Editor, refer to
Template Editor Window.
Creating Custom Groups-Edit > Create Custom Group
You can create custom groups using any fields from the Palette List.
1. Select Edit > Create Custom Group.
Figure 2-6:Create Custom group
Report Generator Reference Manual 13
Page 18

About Template Editor
2. In the Create Custom Group dialog box, enter the group name. You can enter
the group name using the Virtual Keyboard.
3. Click Next. The Select Fields dialog box displays all the fields of the Palette
List.
Figure 2-7:Select fields
4. Using Add>>, Add All, <<Remove, or Remove All, you can select the fields
you want to include in the new group.
5. Click Finish.
Editing Custom Groups- Edit > Edit Custom Group
You can edit custom groups.
1. Select Edit > Edit Custom Group.
Figure 2-8:Edit Custom group
14 Report Generator Reference Manual
Page 19

2. In Edit Custom Group dialog box, select a group to edit.
3. Click Next.
Index
Figure 2-9:Select Fields
4. In Select Fields dialog box, select the fields you want to add or remove from
the group using Add>>, Add All, <<Remove, or Remove All.
5. Click Finish.
Delete Custom Groups -Edit > Edit Custom Group
You can delete custom groups.
1. Select Edit > Edit Custom Group.
Figure 2-10:Edit Custom Group
Report Generator Reference Manual 15
Page 20

About Template Editor
2. In Edit Custom Group dialog box, select a group to delete.
3. Click Delete. A message box appears asking you to confirm your choice.
4. Select Yes to delete.
Change Template Size -Edit > Change Template Size
You can change the size and page setup for a template.
1. Select Edit> Change Template Size.
Figure 2-11: Change Template Size
2. In the Change Template dialog box,
Select the Template Size as 1/4 page, 1/2 page, or Full page.
If the printer is not available, select the Page Size as Default (8.5" x
11"); otherwise, select Configure Page.
16 Report Generator Reference Manual
Page 21

Figure 2-12: Page Setup
In Page Setup dialog box, select the paper size, source, orientation, and
margins.
Index
Click OK to return to Change Template Size dialog box.
3. Click OK.
Note: Do not reduce the template size beyond the content filled in the template.
You may lose information.
Select All -Edit > Select All
To cut, copy, or delete the fields from the active template, you need to select the
fields. You can also select the fields from the active template by clicking CTRL+
selecting the fields.
Find -Edit > Find
You can search for text in the active template.
1. Select Edit > Find.
Figure 2-13: Find
2. In Find dialog box, enter the search string using the Virtual Keyboard.
Report Generator Reference Manual 17
Page 22

About Template Editor
Figure 2-14: Find
3. Select Find Next until you find the required search string.
Replace -Edit > Replace
You can search and replace the text in the active template.
1. Select Edit > Replace.
2. In Replace dialog box, enter the search string using the Virtual Keyboard in
the Find what field.
3. In Replace with field, using the Virtual Keyboard, enter the replacement
string.
4. Select Find Next until you find the required search string.
5. Select Replace to replace one instance of the string.
or
Select Replace All to replace all instances of the string.
6. Click Cancel after you have replaced the strings.
Bring To Front -Object > Bring To Front
You can bring the selected fields to the front.
Send To Back Object > Send To Back
You can send the selected fields to the back.
Show/Hide Text -Object > Show/Hide Text
You can show or hide the captions for the selected fields.
Position Caption-Object > Position Caption to the
Left, or on Top
You can position the caption of the selected fields on either the left or on the top.
Editing Caption -Object > Edit Caption
You can edit the caption of the selected parameter or object.
1. Select Object > Edit Caption.
18 Report Generator Reference Manual
Page 23

Figure 2-15: Edit Caption
2. In Edit Caption dialog box, select to enter the caption using the Virtual
3. Click OK.
Change Font Object > Change Font
You can change font for the selected field in the template.
1. Select the fields or fields in the active template.
Index
Keyboard.
2. Select Object > Change Font or right click the field to display the options.
Figure 2-16: Change Font
3. In the Font dialog box, choose the font size, color and style, and effects.
4. Click OK.
Align Fields -Object > Align Fields
You can align the fields to top, bottom, left, or right.
1. Select the fields in the active template.
Report Generator Reference Manual 19
Page 24

About Template Editor
2. Select Object > Align Fields > Top, Bottom, Left, or Right to align the fields
accordingly.
Make Same Size Object > Make Same Size
You can set the selected fields to same height, width, or both.
1. Select the fields in the active template.
2. Select Object > Make Same Size > Height, Width, or Both to make the
selected fields the same size.
20 Report Generator Reference Manual
Page 25

Report Layout Editor
The Report Layout Editor helps you define the report layout for generating
reports. The report layout, once created can be reused for generating multiple
reports.
You can select the number of test templates per page and position the templates
in the report. The report can have multiple pages with different template sizes.
Each template is a sub report with a unique test title. This unique test title helps
you select the required template when generating a report. You can define
headers and footers for the report layout.
To display the Report Layout Editor, select Define Report Layout > New Report
Layout.
Index
Figure 3-1: Report Layout Window
The Report Layout Editor window has two panes:
List of Templates: Displays a list of templates, template sizes, template
folders, and buttons that allow you to clear or place a template in a
report layout tile and to create new templates.
Report Layout: Displays the selected report layout and the header,
footer definition.
Report Generator Reference Manual 21
Page 26

Report Layout Editor
Table 3-39 Report Layout Editor Default Settings
Parameter Selection Default setting
Report Layout Layout Four tests per page
Page Size Page Setup 8.5 X 11inches
Layout Editor None One page
Go to Edit Displays the current page number in the page
Font None Arial > Regular 9
Default Margin Size None Margin size on all sides of the paper is 0.8 inches
Report Layout Editor Default Settings
Table 3-39 lists the Report Layout Editor Default Settings.
layout
Report Layout Editor Window
The Report Layout Editor window comprises a menu bar, a tool bar, a list of
templates pane, and a report layout pane.
Figure 3-2: Report Layout Window
List of Templates pane
The List of Templates pane displays the path of the template, templates in the
folder, file names, and template sizes. You can select the template from this list
and place it in the Report Layout pane.
22 Report Generator Reference Manual
Page 27

Index
Figure 3-3 List of Templates
In the List of Templates pane, you can do the following:
Select a different path where you have saved the customized templates by
using the Virtual Keyboard or clicking the Directory button that displays a
Browse for Folder window.
Create a new template by selecting New. The Template Editor Window is
displayed, where you can create a new template.
Drag and drop the Template File into the report layout pane's tile or select
the template file and click Place on Tile >>.
Clear the selected tile in the report layout pane by clicking << Clear Tile.
Report Layout pane
Depending on the number of tests selected per page, the Report Layout pane
appears as shown by the following figure
Report Generator Reference Manual 23
Page 28

Report Layout Editor
Figure 3-4 Report Layout Pane
In the Report Layout pane, you can do the following:
Specify a title for each test.
Define or modify the header and footer.
Navigate between pages of the report layout.
24 Report Generator Reference Manual
Page 29

Report Layout Editor | File menu
Table 3-40 lists the File menu descriptions.
Table 3-40:File menu descriptions
Menu selection Description
New Creates a new report layout.
Open Opens a report layout file.
Save Saves changes to the file.
Save As Saves the report layout to a different file name using the Save as dialog
box.
Page Setup Prints all or part of the contents of the active template.
Configure Page Configures the paper size, source, orientation, and margins using the Page
Setup dialog box.
Default (8.5" X 11") Configures the page setup to default — 8.5" X 11"
Layout Preview Displays a sample view of the active report layout as it would be printed.
List of recent report
layouts
Exit Closes the Report Layout Editor.
Opens a previously (recent) opened report layouts.
Index
Report Layout Editor | Edit menu
Table3-41 lists the Edit menu description
Table3-41: Edit menu description
Menu selection Description
Go To Goes to the page entered in the Go To Page dialog box.
Report Layout Editor | View menu
A tick mark (
) appears next to the menu item selected.
Table 3-42 lists the View menu descriptions
Table 3-42: View menu descriptions
Menu selection Description
Toolbar Displays or Hides the selected toolbars such as Standard, Page,
Layout, and Action.
Status Bar Displays or Hides the Status bar.
Refresh Template List Refreshes the Template list in the List of Templates pane.
Report Generator Reference Manual 25
Page 30

Report Layout Editor
Report Layout Editor | Layout menu
A tick mark (
) appears next to the menu item selected.
Table3-43 lists the Layout menu description
Table3-43: Layout menu descriptions
Menu selection Description
One Test Per Page Changes the report layout to fit one test per page.
Two Tests Per Page Changes the report layout to fit two tests per page.
Four Tests Per Page Changes the report layout to fit four tests per page.
Report Layout Editor | Page menu
Table 3-44 lists the Page menu descriptions
Table 3-44: Page menu descriptions
Menu selection Description
Insert Blank
Before Current Page Inserts a blank page before the current page.
After Current Page Inserts a blank page after the current page.
Insert Copy
Before Current Page Inserts a copy of the current page before the current page.
After Current Page Inserts a copy of the current page after the current page.
Delete Deletes the current page.
Report Layout Editor | Help menu
Table 3-45 lists the Help menu descriptions
Table 3-45: Help menu descriptions
Menu selection Description
Help Topics Displays the online help.
About Template Editor Displays version and copyright information.
Report Layout Editor | Standard toolbar
View > Toolbars > Standard
Enable the Standard Toolbar by selecting it in the View >Toolbars menu
26 Report Generator Reference Manual
Page 31

Index
Report Layout Editor | Layout toolbar
View > Toolbars > Layout
Enable the Layout Toolbar by selecting it in the View >Toolbars menu
Report Layout Editor | Page toolbar
View > Toolbars > Page
Enable the Page Toolbar by selecting it in the View >Toolbars menu.
Report Layout Editor | Action toolbar
View > Toolbars > Action
Enable the Action Toolbar by selecting it in the View >Toolbars menu.
Report Generator Reference Manual 27
Page 32

Report Layout Editor
Using Report Layout Editor
To define a report layout, perform the following steps
1. Set the report layout.
Select Layout > One Test Per Page / Two Tests Per Page / Three Tests
Per Page. The Report Layout pane displays tiles depending on the
selected number of tests per page.
2. Add the templates.
The List of Templates pane displays the templates in the default
directory —
C:\TekApplications\TDSPWR3\ReportGenerator\Templates.
From the List of Templates pane, drag and drop the templates into the
tiles in the Report Layout pane. You can use the Place on Tile and
Clear Tile buttons to move the templates to the tiles and to clear the
tiles.
If you want to define a new template, select New in the List of
Templates pane.
To browse for a different folder other than the default templates, select
Directory to display Browse for Folder dialog box. Navigate to the
folder where you have the templates stored and select OK.
3. Define Header and Footer.
4. Save the report layout.
Select File> Save to display the Save dialog box. Enter the report
layout name and select Save.
The report layout is saved in the .rpl format.
To edit an existing report layout, perform the following steps:
1. Change the report layout.
Select Layout > One Test Per Page / Two Tests Per Page / Three Tests
Per Page. The Report Layout pane displays tiles depending on the
selected number of tests per page.
28 Report Generator Reference Manual
Page 33

The application displays an alert message — All the Test(s)
information in the current page will be lost. Do you want to continue?
Select Yes to continue or No to stop.
2. Add or Remove the templates.
In the Report Layout pane, select the tile to which you want to add or
remove the template.
To remove a template from the Report Layout, complete the following
steps:
In the List of Templates pane, select Clear Tile .
The application displays an alert message — The test is already filled
with data. Do you want to remove it?
Select Yes to continue or No to stop.
3. To add a template to the Report Layout, complete the following steps:
Index
The List of Templates pane displays the templates in the default
directory —
C:\TekApplications\TDSPWR3\ReportGenerator\Templates.
From the List of Templates pane, drag and drop the templates into the
tiles in the Report Layout pane. Select the Place on Tile button to move
the template to the selected tile.
If you want to define a new template, select New in the List of
Templates pane.
To browse for a different folder other than the default templates, select
Directory to display the Browse for Folder dialog box. Navigate to the
folder where you have the templates stored and select OK.
4. Modify Header and Footer.
5. Save the report layout.
Select File> Save to display the Save dialog box. Enter the report
layout name and select Save.
The report layout is saved in the .rpl format.
Note: Each report can only have up to five pages.
Configure Page
File> Page Setup> Configure Page
You can configure the paper size, source, orientation, and margins.
Report Generator Reference Manual 29
Page 34

Report Layout Editor
Figure 3-5 Page Setup
Figure 3-6 Go To Page
After you have configured the page setup, select OK.
Go To Page
Edit> Go To
You can go to different pages in the report layout using the Go To Page dialog
box.
1. In the Enter Page Number field, enter the page number or select to
display the Virtual keyboard.
2. Select Go To. The Report Layout pane displays the relevant page.
Change Report Layout
You can change the report layout to fit one, two or four tests per page.
Layout > One Test Per Page / Two Tests Per Page / Four Tests Per Page
30 Report Generator Reference Manual
Page 35

Header/Footer Definition
To modify Header Definition, do the following
Figure 3-7 Header/Footer Definition
Index
1. In the Report Layout pane, click Header - Click to Modify
2. In the Header/Footer Definition dialog box, select the header position Header Left, Header Center, or Header Right.
3. Enter the Header definition in the text box.
Select
to display the Virtual Keyboard. In the Virtual Keyboard, select
the text and select Enter.
or
To insert the special text, select the Insert Special Text button to display a
sub menu. Select Date, File Name, Author, Page X of Y, Page X, or Logo.
4. Select Set Font to change the font style, size, effects, color, and script for
each field separately, then select OK.
5. In the Header/Footer Definition dialog box, select OK.
To modify Footer Definition, do the following:
1. In the Report Layout pane, click Footer - Click to Modify.
Figure 3-8 Header/Footer Definition
Report Generator Reference Manual 31
Page 36

Report Layout Editor
2. In the Header/Footer Definition dialog box, select the footer position - Footer
Left, Footer Center, or Footer Right.
3. Enter the Footer definition in the text box.
Select
the text and select Enter.
or
To insert the special text, select the Insert Special Text button to display a
sub menu. Select Date, File Name, Author, Page X of Y, Page X, or Logo.
4. Select Set Font to change the font style, size, effects, color, and script for
each field separately, then select OK.
5. In the Header/Footer Definition dialog box, select OK.
Insert Pages
1. Select Page> Insert Blank > Before Current Page / After Current Page to
insert a new page before the current page or after the current page
to display the Virtual Keyboard. In the Virtual Keyboard, select
2. Select Page> Insert Copy > Before Current Page / After Current Page to
insert copy of the current page before the current page or after the current
page.
Note: When you insert a copy of a page before or after the current page, the
layout of the current page is the same layout as the new page.
32 Report Generator Reference Manual
Page 37

Report Viewer
The Report Viewer allows you to view the generated report.
Under the Generate Report tab, select Load Report or Generate Report to display
the Report Viewer and browse for the report that you want to view or generate.
Report Viewer Window
The Report Viewer window comprises a menu bar, a toolbar, an align/size bar,
and a client area
Report Viewer | File menu
Index
Table 3-46 lists the File menu descriptions.
Table 3-46:File menu descriptions
Menu selection Description
Open Opens a template file.
Save Saves changes to the file.
Save As Saves the template under a different file name using the Save as dialog
box.
Print Prints all or part of the contents of the active template.
Print Preview Displays a sample view of the active template as it would be printed.
Print Setup Prompts you to set up the Printer.
Export to RTF Exports the report in .rtf (rich text format).
List of recent
templates
Exit Closes the Report Viewer.
Opens a previously (recent) opened template.
Report Generator Reference Manual 33
Page 38

Report Viewer
Report Viewer | Edit menu
The available edit menu selections depend on whether a field is selected or not.
Table 3-47 lists the Edit menu descriptions
Table 3-47: Edit menu Descriptions
Menu selection Description
Cut Cuts the selected fields and places it on the clipboard.
Copy Copies the selected fields to the clipboard.
Paste Pastes the clipboard content.
Delete Deletes the selected fields.
Select All Selects all the fields.
Add Text Field Adds a text field to the report.
Find Finds the data matching the search criteria entered.
Replace Replaces the data matching the search criteria with the specified data.
Go To Goes to the page number specified in the Go To Page dialog box.
Report Viewer | View menu
A tick mark (
) appears next to the menu item selected.
Report Viewer | Object menu
The available object menu selections depend on whether a field in the client area
is selected or not
Table3-49 lists the Object menu descriptions
Table3-49 -Object menu Descriptions
Menu selection Description
Bring To Front Brings the selected field to front.
Send To Back Sends the selected field to back.
Hide Text / Show Text Shows or hides the caption of the selected field.
Position Caption on Top/to
the Left
Edit Text Allows you to edit the text in the selected field.
Change Font Allows you to change the font of the selected field or the caption
Align Fields Aligns fields to the top, bottom, left, or right.
Make Same Size Resizes the selected fields to the same size by height, width, or both.
Positions the caption of the selected field to left or on top.
using the Change Font dialog box.
34 Report Generator Reference Manual
Page 39

Report Viewer | Help menu
Table3-50 lists the Help menu description
Table3-50:Help menu Descriptions
Menu selection Description
Help Topics Displays the online help.
About Report Viewer Displays version and copyright information.
Report Viewer | Standard Toolbar
View > Toolbar
Enable the Standard Toolbar by selecting it in the View >Toolbar menu.
Index
Report Viewer | Align or Size bar
View > Align/Size bar
Enable the Align/Size Toolbar by selecting it in the View >Align/Size bar menu.
Report Generator Reference Manual 35
Page 40

Report Viewer
Report Viewer | Status bar
The Status bar displays the status of the application and tool tips for selected
options
Report Viewer | Separators
View > Separators
Shows or hides the template separators.
Using Report Viewer
Click on each of these link to use the Report Viewer:
To view a report
1. Select File> Open. The Open dialog box displays all the reports in the
default directory —
C:\TekApplications\TDSPWR3\ReportGenerator\Reports.
2. Select the report that you want to view and select Open.
3. The Report Viewer displays the selected report.
To edit text
1. Select Edit > Add Text Field. The Edit Text dialog box appears.
2. In the Text field, enter the text or click
keyboard. In the Virtual Keyboard, enter the text and select Enter.
3. In the Edit Text dialog box, select OK.
to display the Virtual
To find text
1. Select Edit > Find. The Find dialog box appears.
2. In the Find what field, enter the text or click to display the Virtual
keyboard. In the Virtual Keyboard, enter the text and select Enter.
3. In the Find dialog box, select Find Next until you find that text that you
are searching for.
To replace text
1. Select Edit > Replace. The Replace dialog box appears.
2. In the Find what field, enter the text or click
keyboard. In the Virtual Keyboard, enter the text and select Enter.
36 Report Generator Reference Manual
to display the Virtual
Page 41

Index
3. In the Replace with field, enter the text or click
keyboard. In the Virtual Keyboard, enter the text and select Enter.
4. In the Replace dialog box,
Select Find Next to find the text that you are searching for.
Select Replace to replace one instance of the text that you want to
replace.
Select Replace All to replace all instances of the text that you want to
replace.
Select Cancel to cancel the operation and close the dialog box.
You can select some objects and bring to front or send to back. You can
show/hide text, position caption to the left, or on top. You can edit text, or
change font. You can align selected fields or make the selected fields to same
size. You can export a report as an rtf.
Export to RTF
File> Export to RTF
You can export a report as an .rtf (rich text format) file.
to display the Virtual
Figure 4-3: Find
Find
Edit > Find
You can search for text in the report.
Select Edit > Find.
In Find dialog box, enter the search string using the Virtual Keyboard.
Select Find Next until you find the required search string.
Replace
Edit > Replace
You can search and replace the text in the report.
Report Generator Reference Manual 37
Page 42

Report Viewer
Figure 4-4: Find
1. Select Edit to replace.
2. In Replace dialog box, enter the search string using the Virtual Keyboard in
the Find what field.
3. In Replace with field, using the Virtual Keyboard enter the replacement
string.
4. Select Find Next until you find the required search string.
5. Select Replace to replace one instance of the string.
or
Select Replace All to replace all instances of the string.
6. Click Cancel after you have replaced the strings.
Bring To Front
Object > Bring To Front
Send To Back
Object > Send To Back
You can send the selected fields to the back.
Show/Hide Text
Object > Show/Hide Text\
You can show or hide the captions for the selected fields.
Position Caption
Object > Position Caption to the Left, or on Top
You can position the caption of the selected fields on either the left or on the top
Edit Caption
Object > Edit Caption
You can edit the caption of the selected parameter or object.
38 Report Generator Reference Manual
Page 43

Figure 4-5: Edit Caption
Index
1. Select Object > Edit Caption.
2. In Edit Caption dialog box, select to enter the caption using the Virtual
Keyboard.
3. Click OK.
Change Font
Object > Change Font
You can change font for the selected field in the report.
1. Select the fields or fields in the report.
2. Select Object > Change Font or right-click on the field to display the options
Figure 4-6: Change Font
Report Generator Reference Manual 39
Page 44

Report Viewer
3. In the Font dialog box, choose the font size, color, style, and effects.
4. Click OK.
Make Same Size
Object > Make Same Size
You can make the selected fields the same height, width, or both.
1. Select the fields in the report.
2. Select Object > Make Same Size > Height, Width, or Both to make the
selected fields to the same size.
Align Fields
Object > Align Fields
1. Select the fields in the report.
2. Select Object > Align Fields > Top, Bottom, Left, or Right to align the fields
accordingly.
40 Report Generator Reference Manual
Page 45

Using Report Generator
Create or edit a test template
Report > Report Generator > Define Test Template
You can create a new test template or edit an existing template.
To create a new test template:
Under the Define Test Template tab, select New Test Template.
1. The Template Editor window appears with an empty client area.
2. Create the template using the Palette list.
Index
3. After you have completed creating a new test template, select Done.
See Template Editor for more information about Template Editor.
To edit an existing test template:
1. Under the Define Test Template tab, select Browse.
2. The open window displays the existing factory default templates and
customized templates in
C:\TekApplications\TDSPWR3\ReportGenerator\Templates.
Report Generator Reference Manual 41
Page 46

Using Report Generator
Figure 5-1: Open Window
3. Select the template that you want to use and select Open.
4. In the Define Test Template tab, select Edit Template.
5. The Template Editor window appears with client area displaying the selected
template.
6. Edit the template using the Palette list.
7. After you have completed editing an existing test template, select Done.
See Template Editor for more information about Template Editor.
Define or edit a report layout
Report > Report Generator > Define Report Layout
You can create a new report layout or edit an existing report layout.
To create a new report layout:
1. The Report Layout Editor window appears with an empty report layout area.
2. Create the report by defining the report layout and dragging and dropping
the templates to the report layout area.
3. After you have completed creating a new report layout, select Done.
See Report Layout Editor for more information about Report Layout Editor.
42 Report Generator Reference Manual
Page 47

Figure 5-2: Open window
Index
To edit an existing report layout:
1. Under the Define Report Layout tab, select Browse.
2. The Open window displays the existing factory default report layout and
customized report layouts in
C:\TekApplications\TDSPWR3\ReportGenerator\Layouts.
3. Select the report layout that you want to use and select Open.
4. In the Define Report Layout tab, select Edit Layout.
5. The Report Layout Editor window appears with report layout area displaying
the customized report layout and selected template files.
6. Edit the report layout using the List of Templates and defining the Report
Layout.
After you have completed editing an existing report layout, select Done.
See Report Layout Editor for more information about Report Layout Editor.
Generate, print or view a report
Report > Report Generator > Generate Report
You can generate, print, or view a report.
To generate a report
Under the Generate Report tab, select Browse.
Report Generator Reference Manual 43
Page 48

Using Report Generator
Figure 5-3: Open window
1. The Open window displays the existing reports in
C:\TekApplications\TDSPWR3\ReportGenerator\Reports.
2. Select the report that you want to generate and select Open.
3. Under the Generate Report tab, select Generate Report.
4. In the Assign Data to Report dialog box, select a test template in this report
to assign the current data from your measurement application.
5. Select Assign. The Report Viewer displays the report with current data from
the application. You can choose to export to the report in an rtf format.
To print a report
Under the Generate Report tab, select Browse.
44 Report Generator Reference Manual
Page 49

Figure 5-4: Open window
Index
1. The Open window displays the existing reports in
C:\TekApplications\TDSPWR3\ReportGenerator\Reports.
2. Select the report that you want to print and select Open. The Report Viewer
displays the selected report with current data from the application.
3. If the page settings do not match the page settings for the Report, a Page Size
Mismatch message box displays a message — The current page settings do
not match the page settings for the Report. Do you want to continue?
Click Yes to continue.
Click No to stop printing the report.
If the printer is available, the report is printed.
Report Generator Reference Manual 45
Page 50

Using Report Generator
Menu selection Description
Toolbar Displays/Hides the Standard toolbar.
Align/Size Bar Displays/Hides the Align/Size toolbar.
Status Bar Displays/Hides the Status bar.
Separators Displays/Hides the separators.
Table 3-48 lists the View menu descriptions
Table 3-48: View menu Descriptions
46 Report Generator Reference Manual
Page 51

Index
Edit menu, 35
Help menu, 11
Layout toolbar, 12
Object menu, 35
Report Generator, 1
Shortcut Keys, 2
Starting, 1
Report Generator, 1, 2
Report Layout Editor Parameters, 22
Report Layout pane, 24
E
H
L
O
R
Report Viewer Window, 34
RLE_File menu, 25
RLE_Help menu, 26
RLE_Page menu, 26
S
Separators, 37
Shortcut Keys
Report Generator, 2
Shortcut Keys, 2
Size bar, 36
Standard Toolbar, 36
Starting
Report Generator, 1
Starting, 1
Status bar, 37
V
View menu, 9
Report Generator Reference Manual 47
 Loading...