


HS-725/HS-724/HS-710
Guía de Uso
Guia de Utilização
Instructions for Use
Guide d’Utilisation
Bedieningsanleitung
3172802-002 EPIFA 13/01/15 12:31 Página 1
www.teka.com

3172802-002 EPIFA 13/01/15 12:31 Página 2

3
ESPAÑOL
1 Frente de Mandos
2 Junta de Horno
3 Resistencia de Grill
4 Soporte Cromado
5 Parrilla
6 Bandeja Profunda
7 Bisagra
8 Puerta
9 Salida de aire
de refrigeración
10 Fijación al mueble
11 Pantalla de Grill
12 Salida de Humos
13 Lámpara
14 Panel Trasero
15 Turbina
2
3
5
6
7
8
4
10
9
11
13
12
14
15
1
HS-725/HS-724/HS-710
21 3
1 Selector de funciones.
2 Reloj electrónico programador.
3 Selector de temperaturas.
Modelo HS-725/HS-724/HS-710
Frontal de Mandos
3172802-002 EPIFA 13/01/15 12:31 Página 3

4
Funciones del Horno
Desconexión del horno
Grill y Solera
Especial para asados. Puede usarse para cualquier pieza, independiente de su tamaño.
Grill
Gratinado y asado superficial. Permite el dorado de la capa exterior sin afectar al interior
del alimento. Indicado para piezas planas
como bistec, costillas, pescado, tostadas.
Atención
Durante el uso de la función Grill, MaxiGrill o
MaxiGrill con Turbina la puerta debe mantenerse cerrada.
ECO
Permite el cocinado de alimentos en su horno
con un mínimo consumo energético. Mediante
un calentamiento por convección forzada, el
horno desconecta su funcionamiento unos minutos antes de finalizar el cocinado permitiendo aprovechar el calor residual que existe
dentro de la cavidad y obteniendo un acabado
perfecto del alimento. Indicado para pescados
y asados de todo tipo de carnes.
Solera
Calor sólo desde la parte inferior. Apropiado
para calentar platos o levantar masas de repostería y afines.
Solera con Turbina
Distribuye el calor que proviene de la parte inferior del horno. Ideal para pasteles con relleno de mermelada o fruta, los cuales sólo
requieren un aporte de calor inferior. Siempre
es necesario un precalentamiento anterior.
Turbo
La turbina reparte el calor que proviene de una
resistencia situada en la parte trasera del
horno. Por la uniformidad de la temperatura
que se produce, permite cocinar en 2 alturas
al mismo tiempo.
Descongelación
Esta función es apropiada para descongelaciones suaves de alimentos. En especial aquellos que son consumidos sin calentar, por
ejemplo cremas, pastas, tartas, pasteles, etc.
Nota
La lámpara permanece encendida en cualquier
función de cocinado.
3172802-002 EPIFA 13/01/15 12:31 Página 4

5
ESPAÑOL
Atención
Su reloj electrónico incorpora tecnología TouchControl. Para manejarlo es suficiente con tocar
los símbolos del cristal con su dedo.
La sensibilidad del Touch-Control se adapta continuamente a las condiciones ambientales. Al
conectar el horno a la red tenga la precaución
que la superficie del cristal del frontal de mandos esté limpia y libre de cualquier obstáculo.
Si al tocar el cristal, el reloj no responde correctamente entonces es necesario que desconecte el horno de la red eléctrica y tras un
instante vuelva a conectarlo. De esta forma los
sensores se habrán ajustado automáticamente
y reaccionarán de nuevo al tocar con el dedo.
Puesta en Hora del Reloj Electrónico
Al conectar su horno, observará que en el reloj
aparece parpadeando la indicación 12:00.
Pulsando las teclas ó pondrá el reloj en
hora; a continuación escuchará 2 beep seguidos como confirmación de la hora elegida.
Si desea modificar la hora, pulse las teclas ó
hasta que parpadee la hora actual. A conti-
nuación pulse la tecla . Pulsando las teclas
ó podrá modificar la hora. Finalmente
escuchará 2 beep seguidos como confirmación
del cambio realizado.
Funcionamiento Manual
Tras poner el reloj en hora, su horno está listo
para cocinar. Seleccione una función de cocinado y una temperatura.
Durante el cocinado observará que el símbolo
se ilumina para indicar la transmisión de
calor al alimento. Este símbolo se apaga cuando se alcanza la temperatura seleccionada.
Para apagar el horno, ponga los mandos en
posición .
Funciones del Reloj Electrónico
Avisador: Genera una señal acústica al cabo
del tiempo, para ello no es necesario que el
horno esté cocinando.
Duración del Cocinado: Permite cocinar durante un tiempo seleccionado, a continuación el
horno se apagará de forma automática.
Hora de Finalización del Cocinado: Permite
cocinar hasta una hora establecida, a continuación el horno se apagará de forma automática.
Duración y Fin del Cocinado: Permite programar la duración y la hora de finalización del
cocinado. Con esta función el horno se pondrá
en marcha de forma automática a la hora
necesaria para cocinar durante el tiempo
seleccionado (Duración) y finalizando de forma
automática a la hora que le hayamos indicado
(Fin del Cocinado).
Función Seguridad Niños. Esta función bloquea el reloj electrónico, evitando la manipulación por parte de niños pequeños.
Programación del Avisador
1 Pulse la tecla hasta que el símbolo
se ilumine. A continuación pulse la tecla .
2 Seleccione el tiempo tras el cual desea que
el reloj avise, pulsando las teclas ó .
3 Posteriormente sonarán 2 beep seguidos y el
símbolo permanecerá iluminado, indicando que el avisador ya está programado.
4 Transcurrido el tiempo programado, sonará
una señal acústica y el símbolo empezará a parpadear.
5 Pulse cualquier tecla para detener la señal
acústica, en ese momento el símbolo
se apagará.
En cualquier momento usted puede visualizar
el tiempo restante, pulsando las teclas ó
hasta que el símbolo parpadee y pulsando luego la tecla .
En ese momento usted puede modificar el
tiempo seleccionado pulsando las teclas ó
. A continuación escuchará 2 beep segui-
dos como confirmación del cambio.
Manejo del Horno
3172802-002 EPIFA 13/01/15 12:31 Página 5

6
Programación de la Duración del Cocinado
1 Pulse las teclas ó hasta que el sím-
bolo se ilumine. A continuación pulse
la tecla .
2 Seleccione la duración, pulsando las teclas
ó.
3 Posteriormente sonarán 2 beep seguidos y
el símbolo permanecerá iluminado,
indicando que su horno se apagará de forma
automática.
4 Seleccione una función y una temperatura
de cocinado.
5 Transcurrida la duración del cocinado, el
horno se desconectará, sonará una señal
acústica y el símbolo parpadeará.
6 Pulse cualquier tecla para detener la señal
acústica, encendiéndose el horno de nuevo.
7 Ponga los mandos en posición para apa-
gar el horno.
En cualquier momento usted puede visualizar
el tiempo restante de cocinado, pulsando las
teclas ó hasta que el símbolo
parpadee y pulsando luego la tecla . En
ese momento usted puede modificar el tiempo
seleccionado pulsando las teclas ó . A
continuación escuchará 2 beep seguidos
como confirmación del cambio.
Programación de la Hora de Finalización del
Cocinado
1 Pulse las teclas ó hasta que el sím-
bolo se ilumine. A continuación pulse
la tecla .
2 Seleccione la hora de finalización del coci-
nado, pulsando las teclas ó .
3 Posteriormente sonarán 2 beep seguidos,
se mostrará la hora actual y el símbolo
permanecerá iluminado, indicando que su
horno se apagará de forma automática.
4 Seleccione una función y una temperatura
de cocinado.
5 Alcanzada la hora seleccionada el horno se
desconectará, sonará una señal acústica y
el símbolo parpadeará.
6 Pulse cualquier tecla para detener la señal
acústica, encendiéndose el horno de nuevo.
7 Ponga los mandos en posición para apa-
gar el horno.
En cualquier momento usted puede visualizar
la hora de finalización del cocinado, pulsando
las teclas ó hasta que el símbolo
parpadee y pulsando luego la tecla .
En ese momento usted puede modificar la
hora de finalización seleccionada pulsando las
teclas ó . A continuación escuchará 2
beep seguidos como confirmación del cambio.
Puede emplear esta función aunque usted ya
esté cocinando con su horno. Para ello siga
las instrucciones indicadas salvo la número 4.
Programación de la Duración y Fin del
Cocinado
1 Pulse las teclas ó hasta que el
símbolo se ilumine. A continuación
pulse la tecla .
2 Seleccione la duración, pulsando las teclas
ó.
3 Posteriormente sonarán 2 beep seguidos y
el símbolo permanecerá iluminado.
4 Pulse las teclas ó hasta que el
símbolo se ilumine. A continuación
pulse la tecla .
5 Seleccione la hora de finalización del coci-
nado, pulsando las teclas ó .
6 Posteriormente sonarán 2 beep seguidos,
se mostrará la hora actual y el símbolo
permanecerá iluminado.
7 Seleccione una función y una temperatura
de cocinado.
8 El horno permanecerá desconectado, que-
dándose iluminados los símbolos y
. Su horno está programado.
9 Cuando se alcance la hora de comienzo
del cocinado, el horno se pondrá en marcha y se realizará el cocinado durante el
tiempo seleccionado.
10 Alcanzada la hora de finalización que se
había programado, el horno se desconec-
3172802-002 EPIFA 13/01/15 12:31 Página 6

7
ESPAÑOL
tará, sonará una señal acústica y el símbolo parpadeará.
11 Pulse cualquier tecla para detener la señal
acústica, encendiéndose su horno de
nuevo.
12 Ponga los mandos en posición para apa-
gar el horno.
Si usted desea modificar la hora de finalización, pulse las teclas ó hasta que se
ilumine el símbolo y pulse la tecla .
En ese momento usted puede modificar la
hora seleccionada pulsando las teclas ó
. A continuación escuchará 2 beep segui-
dos como confirmación del cambio.
Función Seguridad niños
Esta función se puede seleccionar en cualquier momento durante el uso del horno.
Para activar la función, toque a la vez los sensores y de forma prolongada hasta que
escuche 1 beep sonoro y vea la indicación
en la pantalla. El reloj está bloqueado.
Si el horno está apagado y activa la seguridad
niños, el horno no cocinará aunque seleccione
una función de cocinado.
Si mientras cocina con el horno activa esta función, sólo bloqueará la manipulación del reloj
electrónico.
Para desactivar la función, toque a la vez los
sensores y de forma prolongada hasta
que escuche 1 beep sonoro.
Atención
En caso de un corte de suministro eléctrico, se
borrará toda la programación de su reloj electrónico y aparecerá parpadeando la indicación
12:00 en el reloj. Deberá ponerlo en hora y
programarlo de nuevo.
3172802-002 EPIFA 13/01/15 12:31 Página 7

8
1 Painel de Comandos
2 Junta do Forno
3 Resistência do Grill
4 Suporte Cromado
5 Grelha
6 Bandeja para Assados
7 Dobradiça
8 Porta
9 Saída de ar
da Refrigeração
10 Fixação ao Móvel
11 Ecran do Grill
12 Saída de Fumos
13 Lâmpada
14 Painel do Fundo
15 Turbina
1 Selector de funções.
2 Relógio electrónico.
3 Selector de temperatura.
Painel de Comandos
21 3
Modelo HS-725/HS-724/HS-710
2
3
5
6
7
8
4
10
9
11
13
12
14
15
1
HS-725/HS-724/HS-710
3172802-002 EPIFA 13/01/15 12:31 Página 8

9
PORTUGUÉS
Desligar o forno
Grill e Resistência Inferior
Especial para assados. Pode ser usado para
qualquer peça, independentemente do seu tamanho.
Grill
Gratina e assa superficialmente. Permite alourar a camada exterior sem afectar o interior
do alimento. Indicado para peças planas como
bifes, entrecosto, peixe, torradas.
Atenção
Durante o uso da função Grill, MaxiGrill ou
MaxiGrill com Turbina deve-se manter a porta
fechada.
ECO
Permite cozinhar alimentos no forno com um
consumo energético mínimo. Mediante um
aquecimento por convecção forçada, o forno
desliga o seu funcionamento alguns minutos
antes de finalizar o cozinhado permitindo aproveitar o calor residual que existe no interior da
cavidade e obtendo um acabamento perfeito
do alimento. Indicado para peixe e assados de
todo o tipo de carne.
Resistência Inferior
Calor somente na parte inferior. Apropriado
para aquecer pratos ou levantar massas de
confeitaria e semelhantes.
Resistência Inferior com Turbina
Distribui o calor que provém da parte inferior
do forno. Ideal para pastéis com recheio de
geleia ou fruta, os quais só necessitam de
calor na parte inferior. É sempre necessario realizar um pré-aquecimento.
Turbo
O ventilador reparte o calor que provém de
uma resistência situada na parte de atrás do
forno. Devido à uniformidade da temperatura
produzida permite cozinhar em 2 alturas ao
mesmo tempo.
Descongelação
Esta função é apropriada para a descongelação leve de alimentos. En especial alimentos
sem aquecer, por exemplo, cremes, natas,
pastas, tartes, biscoitos, frutas...
Nota
A lâmpada permanece acesa em qualquer função de cozinhado.
Funções do Forno
3172802-002 EPIFA 13/01/15 12:31 Página 9
10
Atenção
O seu relógio electrónico incorpora tecnologia
Touch-Control. Para o controlar basta tocar nos
símbolos do vidro com o dedo.
A sensibilidade do Touch-Control adapta-se continuamente às condições ambientais. Ao ligar o
forno à corrente, deve-se ter o cuidado de garantir que a superfície do vidro da parte da frente
dos comandos está limpa e livre de qualquer
obstáculo.
Se ao tocar no vidro, o relógio não responder correctamente, então é necessário desligar o forno
da rede eléctrica e após um instante voltar a
ligá-lo. Desta forma os sensores ajustar-se-ão
automaticamente e reagirão novamente ao
toque.
Acerto do Relógio Electrónico
Ao ligar o forno, observará que, no relógio,
aparece a piscar a indicação 12:00. Premindo
as teclas ou acertará o relógio; a
seguir ouvirá 2 beeps seguidos como confirmação da hora seleccionada.
Se desejar alterar a hora, prima as teclas
ou até a hora actual começar a piscar. A
seguir prima a tecla . Premindo as teclas
ou poderá modificar a hora. Finalmente,
ouvirá 2 beeps seguidos como confirmação da
alteração realizada.
Funcionamento Manual
Depois de acertar o relógio, o forno está pronto para cozinhar. Seleccione uma função de
cozinhado e uma temperatura.
Durante o cozinhado, o símbolo iluminase indicando que o forno está a transmitir
calor ao alimento, e desliga-se quando é atingida a temperatura seleccionada.
Para desligar o forno, coloque os comandos na
posição .
Funções do Relógio Electrónico
Avisador: Gera um sinal acústico ao fim de
algum tempo, para tal, não é necessário que o
forno esteja a cozinhar.
Duração do Cozinhado: Permite cozinhar
durante um tempo seleccionado; de seguida,
o forno desligar-se-á de forma automática.
Hora de Finalização do Cozinhado: Permite
cozinhar até a uma hora estabelecida, de
seguida, o forno desligar-se-á de forma automática.
Duração e Fim do Cozinhado: Permite programar a duração e a hora de finalização do cozinhado. Com esta função, o forno colocar-se-á
em funcionamento de forma automática à
hora necessária para cozinhar durante o
tempo seleccionado (Duração), finalizando de
forma automática à hora anteriormente indicada. (Fim do Cozinhado).
Função Segurança Crianças. Esta função bloqueia o relógio electrónico, evitando a manipulação por parte de crianças pequenas.
Programação do Avisador
1 Prima a tecla até o símbolo ilumi-
nar-se. A seguir prima a tecla .
2 Seleccione o tempo após o qual deseja que o
relógio avise, premindo as teclas ou .
3 Posteriormente, soarão 2 beeps seguidos e
o símbolo permanecerá iluminado, indicando que o avisador já está programado.
4 Decorrido o tempo programado, soará um
sinal acústico e o símbolo começará a
piscar.
5 Prima qualquer tecla para parar o sinal acús-
tico, o símbolo desligar-se-á.
Em qualquer momento, pode visualizar o
tempo restante, premindo as teclas ou
até o símbolo piscar, e premindo de
seguida a tecla . Neste momento, pode
alterar o tempo seleccionado premindo as
teclas ou . A seguir ouvirá 2 beeps
seguidos como confirmação da alteração.
Uso do Forno
3172802-002 EPIFA 13/01/15 12:31 Página 10

11
PORTUGUÉS
Programação da Duração do Cozinhado
1 Prima as teclas ou até o símbolo
iluminar-se. De seguida prima a tecla
.
2 Seleccione a duração, premindo as teclas
ou .
3 Posteriormente soarão 2 beeps seguidos e
o símbolo permanecerá iluminado,
indicando que o forno desligar-se-à de forma
automática.
4 Seleccione uma função e uma temperatura
de cozinhado.
5 Decorrida a duração do cozinhado, o forno
desligar-se-á, soará um sinal acústico e o
símbolo piscará.
6 Prima qualquer tecla para parar o sinal acús-
tico, ligando-se o forno de novo.
7 Coloque os comandos na posição para
desligar o forno.
A qualquer momento, pode visualizar o tempo
restante de cozinhado, premindo as teclas
ou até o símbolo piscar, e premindo
de seguida a tecla . Neste momento, pode
modificar o tempo seleccionado premindo as
teclas ou . A seguir ouvirá 2 beeps
seguidos, como confirmação da alteração.
Programação da Hora de Finalização do
Cozinhado
1 Prima as teclas ou até o símbolo
iluminar-se. De seguida prima a tecla .
2 Seleccione a hora de finalização do cozinha-
do, premindo as teclas ou .
3 Posteriormente soarão 2 beeps seguidos,
será mostrada a hora actual e o símbolo
permanecerá iluminado, indicando que
o forno desligar-se-à de forma automática.
4 Seleccione uma função e uma temperatura
de cozinhado.
5 Alcançada a hora seleccionada, o forno des-
ligar-se-á, soará um sinal acústico e o símbolo piscará.
6 Prima qualquer tecla para parar o sinal acús-
tico, ligando-se o forno de novo.
7 Coloque os comandos na posição para
desligar o forno.
A qualquer momento pode visualizar a hora de
finalização do cozinhado, premindo as teclas
ou até o símbolo piscar, e premindo de seguida a tecla . Neste momento, pode modificar a hora de finalização seleccionada premindo as teclas ou . A
seguir ouvirá 2 beeps seguidos, como confirmação da alteração.
Pode usar esta função mesmo que já esteja a
utilizar o forno. Para tal, siga as instruções
indicadas, excepto a número 4.
Programação da Duração e Fim do Cozinhado
1 Prima as teclas ou até o símbolo
iluminar-se. De seguida prima a tecla
.
2 Seleccione a duração, premindo as teclas
ou .
3 Posteriormente soarão 2 beeps seguidos e
o símbolo permanecerá iluminado.
4 Prima as teclas ou até o símbolo
se iluminar. A seguir prima a tecla
.
5 Seleccione a hora de finalização do cozi-
nhado, premindo as teclas ou .
6 Posteriormente soarão 2 beeps seguidos,
será mostrada a hora actual e o símbolo
permanecerá iluminado.
7 Seleccione uma função e uma temperatura
de cozinhado.
8 O forno permanecerá desligado, ficando ilu-
minados os símbolos e . O seu
forno está programado.
9 Quando alcançar a hora de início do cozi-
nhado, o forno entrará em funcionamento
e realizar-se-á o cozinhado durante o
tempo seleccionado.
10 Alcançada a hora final que tinha sido pro-
gramada, o forno desligar-se-á, soará um
sinal acústico e o símbolo piscarã.
3172802-002 EPIFA 13/01/15 12:31 Página 11

12
11 Prima qualquer tecla para parar o sinal
acústico, ligando-se o seu forno de novo.
12 Coloque os comandos na posição para
desligar o forno.
Se desejar modificar a hora de finalização,
prima as teclas ou até se iluminar o
símbolo , e prima a tecla . A partir
deste momento, pode modificar a hora seleccionada premindo as teclas ou . A
seguir ouvirá 2 beeps seguidos, como confirmação da modificação.
Função Segurança Crianças
Esta função pode seleccionar-se a qualquer
momento durante a utilização do forno.
Para activar a função, toque em simultâneo
nos sensores y de forma prolongada
até ouvir 1 beep e ver a indicação no
visor. O relógio está bloqueado.
Se o forno estiver apagado e activar a função
segurança de crianças, o forno não funcionará
mesmo que seleccione uma função de cozinhado.
Se enquanto cozinha com o forno, activar esta
função, só bloqueará a manipulação do relógio
electrónico.
Para desactivar a função, toque simultaneamente nos sensores e de forma prolongada até ouvir 1 beep.
Atenção
No caso de um corte de fornecimento eléctrico, será eliminada toda a programação do relógio electrónico e aparecerá a indicação 12:00
a piscar no relógio. Deverá acertá-lo e programá-lo de novo.
3172802-002 EPIFA 13/01/15 12:31 Página 12

13
ENGLISH
1 Control Panel
2 Oven Seal
3 Grill element
4 Chrome Support
5 Grid
6 Roasting Tray
7 Hinge
8
Door
9 Air Outlet
10 Fixing to Unit
11 Grill Screen
12 Smoke Outlet
13 Light
14 Rear Panel
15 Fan
1 Function selector.
2 Electronic clock.
3 Temperature selector.
Model HS-725/HS-724/HS-710
Control Panel
21 3
2
3
5
6
7
8
4
10
9
11
13
12
14
15
1
HS-725/HS-724/HS-710
3172802-002 EPIFA 13/01/15 12:31 Página 13

14
Switch off oven
Grill and Lower element
Special for roasts. It can be used for any
piece, whatever its size.
Grill
For preparing dishes with superficial roasting.
It allows the outer layer to be browned without
affecting the inside of the food. Ideal for flat
food, such as steaks, ribs, fish, toast.
Caution
While using the Grill, MaxiGrill or MaxiGrill with
fan, the door must be kept closed.
ECO
This programme allows you to cook food with
minimal energy consumption. Using a forced
convection heating process, the oven switches
off a few minutes before the food is fully cooked thus making use of the residual heat within the oven and giving perfect results.
Suitable for fish and all types of oven-roasted
meats.
Lower element
Heats only from beneath. Suitable for heating
dishes and raising pastry and similar.
Lower element with fan
It distributes the heat from the lower part of
the oven and is ideal for cakes with jam or fruit
filling, which only require heating from
beneath. Pre-heating is always necessary.
Turbo
The fan distributes the heat produced by an
element located at the rear of the oven. Due to
the uniform heat distribution, it allows roasting
and baking to take place at two heights at the
same time.
Defrosting
This cooking mode is suitable for gently
defrosting of food. In special food to be
consumed unwarmed, e.g.: cream, custard,
pastry, tarts, cakes, fruit,...
Note
The light remains on when performing any cooking function.
Oven Functions
3172802-002 EPIFA 13/01/15 12:31 Página 14

15
ENGLISH
Caution
The electronic clock features Touch-Control
technology. To operate, simply touch the glass
control symbols with your fingertip.
The touch control sensitivity continuously
adapts to ambient conditions. Make sure the
glass surface of the control panel is clean and
free of obstacles when plugging in the oven.
If the clock does not respond correctly when
you touch the glass, unplug the oven for a few
seconds and then plug it in again. Doing this
causes the sensors to adjust automatically so
that they will react once more to fingertip control.
Setting the time on the Electronic Clock
When the oven is connected to the power supply,
the indication 12:00 flash on the display. Press
or to set the time on the clock. The clock
beeps twice to confirm the selected time.
If you wish to modify the time, press or
until the current time flash on the screen.
Press . Then press or to modify
the time. The clock beeps twice to confirm the
modification.
Manual Operation
The oven is ready to be used when the clock
has been set. Select a cooking function and a
temperature.
When you begin cooking, symbol lights
up to indicate that the oven is heating the contents; the symbol goes out when the
selected temperature is reached.
Set the controls to to turn the oven off.
Functions of the Electronic Clock
Alarm: Creates an alarm signal when the peri-
od of time finishes; the oven does not need to
be in use in order to use this function.
Cooking Time: To cook for a selected length of
time; the oven turns itself off automatically
when the time finishes.
End Cooking Time: To cook until a set time;
the oven turns itself off automatically when the
time finishes.
Cooking time and End Cooking Time: To cook
for a selected length of time and end at a set
time. When this function is set, the oven
comes on automatically at the time required in
order to cook for the set length of time
(Cooking time) and end automatically at the
indicated time (End Cooking Time)
Child Safety Function. This function locks the
electronic clock, preventing small children from
playing with it.
Programming the Alarm
1 Press until symbol lights up. Press
.
2 Set the period of time after which you wish
the alarm to sound by pressing or .
3 The clock beeps twice and symbol
lights up permanently to indicate that the
alarm has been set.
4 When the set period of time comes to an
end, the alarm sounds and symbol
starts to flash.
5 Press any button to stop the alarm; symbol
goes out.
You can consult the remaining time at any
moment by pressing or until symbol
flashes and then pressing . You can
also modify the set time at this point by pressing or . The clock beeps twice to confirm the change.
Setting the Cooking Time
1 Press or until symbol lights up.
Press .
2 Select the period of time you wish to cook
for by pressing or .
3 The clock beeps twice and symbol
lights up permanently to indicate that the
oven will turn itself off automatically.
4 Select a cooking function and temperature.
Use of the Oven
3172802-002 EPIFA 13/01/15 12:31 Página 15

16
5 When the cooking time comes to an end, the
oven turns itself off, the alarm sounds and
symbol flashes.
6 Press any button to stop the alarm and turn
the oven back on again.
7 Set the controls to to turn the oven off.
You can consult the remaining cooking time at
any moment by pressing or until symbol flashes and then pressing . You
can also modify the set time at this point by
pressing or . The clock beeps twice to
confirm the change.
Setting the End Cooking Time
1 Press or until symbol lights up.
Press .
2 Select the time you wish the cooking
process to finish at by pressing or .
3 The clock beeps twice, the current time is
displayed and symbol lights up permanently to indicate that the oven will turn
itself off automatically.
4 Select a cooking function and temperature.
5 When the set time is reached, the oven
turns itself off, the alarm sounds and symbol
flashes.
6 Press any button to stop the alarm and turn
the oven back on again.
7 Set the controls to to turn the oven off.
You can consult the end cooking time at any
moment by pressing or until symbol
flashes and then pressing . You can
also modify the end cooking time at this point
by pressing or . The clock beeps twice
to confirm the change.
This function can be used even when you are
already using the oven. To do this, follow the
instructions indicated above except point
number 4.
Setting the Cooking Time and the End
Cooking Time
1 Press or until symbol lights
up. Press .
2 Select the period of time you wish to cook
for by pressing or .
3 The clock beeps twice and symbol
lights up permanently.
4 Press or until symbol lights
up. Press .
5 Select the time you wish the cooking
process to finish at by pressing or .
6 The clock beeps twice, the current time is
displayed and symbol lights up permanently.
7 Select a cooking function and temperature.
8 The oven remains off with symbols
and lit up. Your oven is set.
9 When the time to start cooking is reached,
the oven starts up and cooks for the set
period of time.
10 When the set end cooking time is reached,
the oven turns itself off, the alarm sounds
and symbol flash.
11 Press any button to stop the alarm and
turn the oven back on again.
12 Set the controls to to turn the oven off.
You can modify the end cooking time by press-
ing or until symbol lights up and
then pressing . You can now modify the
end cooking time by pressing or . The
clock beeps twice to confirm the change.
Child Safety Function
This function can be selected at any time while
using the oven.
To activate the function, press the and
sensors at the same time for several seconds.
3172802-002 EPIFA 13/01/15 12:31 Página 16

17
ENGLISH
You will hear a beep and the display will show
the word . The clock is locked.
If the oven is off and you activate the child
safety function, it will not work even if a cooking function is selected.
If a clock sensor is touched while the child safety
function is on, the word will appear on the
display. The clock is locked.
To disable the function, press the and
sensors at the same time for several seconds
until you hear a beep.
Important
In the event of a power cut, all the electronic
clock settings are deleted and the indication
12:00 flashes on the display. It is necessary to
set the time and programme the clock again.
3172802-002 EPIFA 13/01/15 12:31 Página 17

18
1 Panneau de Commande
2 Joint de Four
3 Résistance du Grill
4 Support Chromé
5 Grille
6 Plateau pour Rôtis
7 Charnière
8 Porte
9 Sortie de l’air
de Réfrigération
10 Fixation au Meuble
11 Ecran du Grill
12 Sortie des Fumées
13 Lampe
14 Panneau du Fond
15 Turbine
1 Sélecteur de fonctions.
2 Horloge électronique.
3 Sélecteur de températures.
Modèle HS-725/HS-724/HS-710
Panneau Frontal de Commande
21 3
2
3
5
6
7
8
4
10
9
11
13
12
14
15
1
HS-725/HS-724/HS-710
3172802-002 EPIFA 13/01/15 12:31 Página 18

19
FRANÇAIS
Arrêt du four
Grill et résistance inférieure
Spécial pour les rôtis. Peut être utilisé pour
toutes sortes de morceaux, indépendamment
de leur volume.
Grill
Pour gratiner et rôtir superficiellement. Permet
de dorer la couche extérieure sans affecter
l'intérieur de l'aliment. Indiqué pour les
morceaux plats tels que les beefsteaks, les
côtelettes, les poissons, les toasts.
Attention
Quand on utilise la fonction Grill, MaxiGrill ou
MaxiGrill avec Turbine, la porte doit rester fermée.
ECO
Ce programme permet la cuisson des aliments
dans votre four avec une consommation énergétique minimale. Grâce à un réchauffement
par convection forcée, le four s'éteint
quelques minutes avant la fin de la cuisson, ce
qui permet de récupérer la chaleur résiduelle
présente dans la cavité et d'obtenir un résultat
optimal. Indiqué pour les poissons et les rôtis
de tout type de viandes.
Résistance inférieure
La chaleur provient seulement de la partie
inférieure. Approprié pour réchauffer des plats
ou faire lever des pâtes pour pâtisseries et
analogues.
Résistance inférieure avec Turbine
Elle distribue la chaleur qui provient de la
partie inférieure du four. Idéal pour les gâteaux
fourrés avec de la confiture ou des fruits, qui
requièrent seulement un apport de chaleur
inférieur. Il est toujours nécessaire de
préchauffer.
Turbo
La turbine répartit la chaleur qui provient d’une
résistance située à la partie arrière du four.
Grâce à l’uniformité de la chaleur produite, on
peut cuisiner à 2 hauteurs en même temps.
Décongeler
Cette fonction permet de décongeler
doucement des mets. Spécialement mets qui
ne doivent pas être chauffés, comme p.ex.
crème chantilly, crème vanille, pâtes, gâteaux,
fruits,...
Remarque
La lumière reste allumée pendant toutes les
fonctions de cuisson.
Fonctions du Four
3172802-002 EPIFA 13/01/15 12:31 Página 19

20
Mise en garde
L’horloge électronique est équipée de la technologie Touch-Control. Pour la manipuler, il suffit d’appuyer sur les symboles représentés sur
la vitre.
La sensibilité du Touch-Control s’adapte
constamment aux conditions ambiantes.
Lorsque vous branchez le four sur le secteur
électrique, veillez à ce que la surface vitrée du
tableau de commande soit propre et sans
aucun obstacle.
Si l’horloge ne répond pas correctement
lorsque vous touchez la vitre avec le doigt, il
faut débrancher le four du secteur et de le rebrancher après un court instant. Ceci permet
de régler automatiquement les capteurs qui réagiront de nouveau lorsque vous toucherez les
commandes tactiles.
Mise à l’heure de l’horloge électronique
Lorsque vous branchez votre four, vous observez que l’indication 12:00 clignotent dans
l’horloge. Mettez l’horloge à l’heure à l’aide
des touches ou . Vous entendrez 2 bips
consécutifs comme confirmation de la mise à
l’heure.
Si vous souhaitez modifier l’heure, appuyez sur
les touches ou jusqu’à ce que l’heure
actuelle se mettent à clignoter. Appuyez ensuite
sur la touche . À l’aide des touches ou
, vous pouvez alors modifier l’heure.
Vous entendrez 2 bips consécutifs comme
confirmation de la modification réalisée.
Fonctionnement manuel
Une fois l’horloge mise à l’heure, votre four est
prêt à fonctionner. Sélectionnez une fonction
de cuisson et une température.
Lors de la cuisson, le symbole s allume
indiquant que le four est en train de transmettre
de la chaleur à l’aliment et s éteint lorsque la
température sélectionnée est atteinte.
Pour éteindre le four, mettez les commandes
sur la position .
Fonctions de l’horloge électronique
Avertisseur: génère un signal acoustique à un
moment donné; pour ce faire, il n’est pas
nécessaire que le four soit allumé.
Durée de cuisson: permet de cuire pendant
une durée sélectionnée, le four s’éteignant de
façon automatique.
Heure de fin de cuisson: permet de cuire jusqu’à une heure définie, le four s’éteignant de
façon automatique.
Durée et fin de cuisson: permet de programmer la durée et l’heure de fin de cuisson. Avec
cette fonction, le four se mettra en marche de
façon automatique à l’heure indiquée pour
cuire pendant la durée sélectionnée (Durée) et
s’éteindre de façon automatique à l’heure indiquée (Fin de cuisson).
Fonction de sécurité enfants: cette fonction
permet de verrouiller l’horloge électronique, interdisant ainsi sa manipulation par des enfants en bas âge.
Programmation de l’avertisseur
1 Appuyez sur la touche jusqu’à ce que le
symbole s’allume. Appuyez ensuite sur
la touche .
2 Sélectionnez le temps au bout duquel vous
souhaitez que l’horloge vous avertisse en
appuyant sur les touches ou .
3 Vous entendrez alors 2 bips consécutifs et
le symbole s’allumera, indiquant que
l’avertisseur est programmé.
4 Une fois le temps programmé écoulé, un
signal acoustique sonnera et le symbole
commencera à clignoter.
5 Appuyez sur n’importe quelle touche pour
arrêter le signal acoustique, à ce moment le
symbole s’éteindra.
Vous pouvez afficher le temps restant à tout
moment en appuyant sur les touches ou
jusqu’à ce que le symbole clignote,
puis en appuyant sur la touche . Vous
pouvez alors modifier le temps sélectionné en
Maniement du Four
3172802-002 EPIFA 13/01/15 12:31 Página 20

21
FRANÇAIS
appuyant sur les touches ou . Vous
entendrez 2 bips consécutifs comme confirmation de la modification.
Programmation de la durée de cuisson
1 Appuyez sur la touche ou jusqu’à ce
que le symbole s’allume. Appuyez
ensuite sur la touche .
2 Sélectionnez la durée en appuyant sur les
touches ou .
3 Vous entendrez alors 2 bips consécutifs et
le symbole s’allumera, indiquant que
votre four s’éteindra de façon automatique.
4 Sélectionnez une fonction et une températu-
re de cuisson.
5 Une fois la durée de cuisson écoulée, le four
se déconnectera, un signal acoustique sonnera et le symbole clignotera.
6 Appuyez sur n’importe quelle touche pour
arrêter le signal acoustique; le four s’allumera de nouveau.
7 Mettez les commandes sur la position
pour éteindre le four.
Vous pouvez afficher le temps de cuisson restant à tout moment en appuyant sur les
touches ou jusqu’à ce que le symbole
clignote, puis en appuyant sur la touche
. Vous pouvez alors modifier le temps
sélectionné en appuyant sur les touches
ou . Vous entendrez 2 bips consécutifs
comme confirmation de la modification.
Programmation de l’heure de fin de cuisson
1 Appuyez sur la touche ou jusqu’à ce
que le symbole s’allume. Appuyez
ensuite sur la touche .
2 Sélectionnez l’heure de fin de cuisson en
appuyant sur les touches ou .
3 Vous entendrez alors 2 bips consécutifs,
l’heure actuelle sera affichée et le symbole
s’allumera, indiquant que votre four
s’éteindra de façon automatique.
4 Sélectionnez une fonction et une températu-
re de cuisson.
5 Une fois l’heure sélectionnée atteinte, le
four se déconnectera, un signal acoustique
sonnera et le symbole clignotera.
6 Appuyez sur n’importe quelle touche pour
arrêter le signal acoustique; le four s’allumera de nouveau.
7 Mettez les commandes sur la position
pour éteindre le four.
Vous pouvez afficher l’heure de fin de cuisson
à tout moment en appuyant sur les touches
ou jusqu’à ce que le symbole clignote, puis en appuyant sur la touche .
Vous pouvez alors modifier l’heure de fin
sélectionnée en appuyant sur les touches
ou . Vous entendrez 2 bips consécutifs
comme confirmation de la modification.
Vous pouvez utiliser cette fonction même si
vous êtes déjà en train d’utiliser votre four.
Pour ce faire, suivez les instructions indiquées
sauf la numéro 4.
Programmation de la durée et de la fin de
cuisson
1 Appuyez sur la touche ou jusqu’à
ce que le symbole s’allume. Appuyez
ensuite sur la touche .
2 Sélectionnez la durée en appuyant sur les
touches ou .
3 Vous entendrez alors 2 bips consécutifs et
le symbole s’allumera.
4 Appuyez sur la touche ou jusqu’à
ce que le symbole s’allume. Appuyez
ensuite sur la touche .
5 Sélectionnez l’heure de fin de cuisson en
appuyant sur les touches ou .
6 Vous entendrez alors 2 bips consécutifs,
l'heure actuelle sera affichée et le symbole s’allumera.
7 Sélectionnez une fonction et une tempéra-
ture de cuisson.
8 Le four restera déconnecté, et les sym-
boles et seront allumés. Votre
four est alors programmé.
9 Lorsque l’heure de début de cuisson est
atteinte, le four se mettra en marche et la cuisson se fera pendant le temps sélectionné.
3172802-002 EPIFA 13/01/15 12:31 Página 21

22
10 Une fois l’heure de fin programmée attein-
te, le four se déconnectera, un signal
acoustique sonnera et le symbol se
mettront à clignoter.
11 Appuyez sur n’importe quelle touche pour
arrêter le signal acoustique; le four s’allumera de nouveau.
12 Mettez les commandes sur la position
pour éteindre le four.
Si vous souhaitez modifier l’heure de fin, appuyez
sur les touches ou jusqu’à ce que le symbole s’allume, puis appuyez sur la touche
. Vous pouvez alors modifier l’heure sélectionnée en appuyant sur les touches ou .
Vous entendrez 2 bips consécutifs comme confirmation de la modification.
Fonction de sécurité enfants
Cette fonction peut être sélectionnée à tout
moment pendant l’utilisation du four.
Pour activer la fonction, appuyez de façon simultanée et prolongée sur les capteurs et
, jusqu’à ce qu’un bip sonore retentisse et
que l’indication s’affiche à l’écran. Ce
message indique que l’horloge est verrouillée.
Si la fonction de sécurité enfants est activée
lorsque le four est éteint, l’appareil ne fonctionne pas même si une fonction de cuisson
est sélectionnée.
Si cette fonction est activée pendant que vous
cuisinez avec le four, seule la manipulation de
l’horloge électronique sera verrouillée.
Pour désactiver la fonction, maintenez les capteurs et , enfoncés jusqu’à ce qu’un
bip sonore retentisse.
Attention
En cas de coupure de l’alimentation électrique,
toute la programmation de votre horloge électronique sera effacée et l’indication 12:00 clignotera dans l’horloge. Vous devrez la mettre à
l’heure et la programmer à nouveau.
3172802-002 EPIFA 13/01/15 12:31 Página 22

23
DEUTSCH
1 Frontteil mit
Bedienelementen
2 Herddichtung
3 Schwenkbaren Grill
4 Verchromte Halterung
5 Rost
6 Backbleche
7 Scharnier
8 Tür
9 Kühlluftaustritt
10 Befestigung am
Küchenmöbel
11 Grillschale
12 Abzug
13 Beleuchtung
14 Beschichtete
Rückwand
15 Lüfter
1 Funktionswahl.
2 Elektronische Schaltuhr.
3 Temperaturregler.
Modell HS-725/HS-724/HS-710
Bedienfeld
21 3
2
3
5
6
7
8
4
10
9
11
13
12
14
15
1
HS-725/HS-724/HS-710
3172802-002 EPIFA 13/01/15 12:31 Página 23

24
Ausschalten des Herds
Grill und Unterhitze
Besonders geeignet zum Braten. Kann für
Stücke mit beliebiger Größe eingesetzt werden.
Grill
Gratinieren und Anbräunen. Gestattet das
Anbräunen der Außenschicht, ohne das Innere
der Nahrungsmittel zu beeinflussen. Geeignet
für flache Stücke wie Beefsteak, Rippchen,
Fisch, Toastbrot.
Achtung
Bei Benutzung der Funktionen Grill, MaxiGrill
oder MaxiGrill mit Umluft muß die Herdtür
geschlossen sein.
ECO
Ermöglicht das Garen von Lebensmitteln in
Ihrem Ofen bei minimalem Energieverbrauch.
Dank der Heißluftfunktion schaltet sich der
Backofen einige Minuten vor Ende der Garzeit
ab und nutzt die Restwärme im Ofeninneren,
um die Speisen fertig zu garen. Geeignet für
Fisch und Braten aller Art.
Unterhitze
Es wird nur von der Unterseite Wärme
zugeführt. Geeignet zum Anwärmen von
Tellern, zum Aufgehen von Teigmassen oder für
ähnliche Anwendungen.
Unterhitze mit Umluft
Verteilt die im Unterteil des Herds erzeugte
Wärme. Ideal für Gebäck mit Marmeladen-oder
Obstfüllung, bei denen eine Erwärmung von
unten erfolgen muß. Der Herd muß immer
vorgeheizt werden.
Turbo
Der Lüfter verteilt die von einem an der
Rückseite des Herds angeordneten
Heizwiderstand erzeugte Wärme. Auf Grund
der erzeugten gleichmäßigen
Temperaturverteilung ist ein Garen in 2 Etagen
gleichzeitig möglich.
Auftauen
Ideal für schonendes Auftauen von feinen
Speisen, die kalt verwendet werden, wie z. B.
Sahne, Vanillesoße, Teig, Kuchen, Obst...
Hinweis
Die Lampe bleibt während aller Garfunktionen
eingeschaltet.
Funktionen des Herds
3172802-002 EPIFA 13/01/15 12:31 Página 24

25
DEUTSCH
Achtung
Ihre elektronische Uhr verfügt über TouchControl-Technologie. Zur Bedienung reicht es
aus, die Symbole auf dem Glas mit dem Finger
zu betätigen.
Die Empfindlichkeit der Touch-Control passt sich
fortwährend den Umgebungsbedingungen an.
Beim Anschließen des Backofens an das
Stromnetz achten Sie bitte darauf, dass die
Glasoberfläche der Vorderseite der
Bedienelemente sauber und frei von evtl.
Hindernissen ist.
Wenn die Uhr beim Berühren des Glases nicht
richtig reagiert, muss der Backofen vom
Stromnetz getrennt und nach einem kurzen
Moment wieder angeschlossen werden.
Dadurch haben sich die Bedienfelder
automatisch justiert und reagieren wieder auf
die Fingerberührung.
Stellen der elektronischen Schaltuhr
Nach dem Einschalten des Herds zeigt die
elektronische Schaltuhr 12.00 an. Durch
Betätigen der Tasten oder wird die Uhr
gestellt; anschließend werden zwei kurze
Signaltöne zur Bestätigung der eingestellten
Uhrzeit abgegeben.
Zur Veränderung der eingestellten Uhrzeit
betätigen Sie die Taste oder so oft, bis
die aktuelle Uhrzeit blinken. Drücken Sie
anschließend die Taste . Jetzt können Sie
die Uhrzeit mit den Tasten oder
einstellen. Nach Abschluss der Einstellung
werden die Änderungen mit zwei kurzen
Signaltönen bestätigt.
Manueller Betrieb
Nach dem Stellen der Uhr ist der Herd
betriebsbereit. Wählen Sie Garfunktion
aus und stellen Sie die gewünschte
Temperatur ein.
Zum Abschalten des Herds bringen Sie alle
Bedienelemente in Stellung .
Funktionen der elektronischen Schaltuhr
Signalgeber: Sendet ein akustisches Signal
nach Ablauf der eingestellten Zeit aus, der Herd
muss hierzu nicht eingeschaltet sein.
Dauer des Garvorgangs: Gestattet das Garen
während der eingestellten Zeit, anschließend
wird der Herd automatisch abgeschaltet.
Endzeit des Garvorgangs: Gestattet das Garen
bis zu der eingestellten Zeit, anschließend wird
der Herd automatisch abgeschaltet.
Dauer und Ende des Garvorgangs: Mit Hilfe
dieser Funktion können Sie die Dauer des
Garvorgangs und die Uhrzeit einstellen, zu
welcher dieser abgeschlossen sein soll. Mit
dieser Funktion wird der Herd zum erforderlichen
Zeitpunkt automatisch eingeschaltet, bleibt für
die gewählte Dauer in Betrieb und schaltet sich
automatisch zu der gewählten Endzeit aus (Ende
des Garvorgangs).
Kindersicherung Diese Funktion sperrt die
elektronische Uhr und verhindert somit deren
Betätigung durch Kleinkinder.
Programmierung des akustischen Signals
1 Betätigen Sie die Taste bis das Symbol
aufleuchtet. Drücken Sie anschließend
die Taste .
2 Stellen Sie mit den Tasten oder die
Zeit ein, nach der die Schaltuhr das Signal
abgeben soll.
3 Anschließend ertönen zwei kurze Signale
und das Symbol leuchtet und zeigt an,
dass der Signalgeber programmiert ist.
4 Nach Ablauf der eingestellten Zeit ertönt ein
akustisches Signal und das Symbol
blinkt.
5 Das akustische Signal wird durch Betätigen
einer beliebigen Taste abgeschaltet und das
Symbol verlischt.
Sie können die Restzeit anzeigen, indem Sie
die Taste oder so oft betätigen, bis das
Symbol blinkt, anschließend bestätigen
Sie mit der Taste . Jetzt können Sie die
gewählte Restzeit mit den Tasten oder
verändern. Nach Abschluss der Einstellung
Bedienung des Herds
3172802-002 EPIFA 13/01/15 12:31 Página 25

26
werden die Änderungen mit zwei kurzen
Signaltönen bestätigt.
Programmierung der Garzeiten
1 Betätigen Sie die Taste oder bis das
Symbol aufleuchtet. Drücken Sie
anschließend die Taste .
2 Stellen Sie mit den Tasten oder die
gewünschte Dauer ein.
3 Anschließend ertönen zwei kurze Signale
und das Symbol leuchtet und zeigt an,
dass der Herd nach Ablauf der eingestellten
Zeit automatisch abgeschaltet wird.
4 Wählen Sie eine Garfunktion aus und stellen
Sie die gewünschte Temperatur ein.
5 Nach Ablauf der eingestellten Garzeit
schaltet sich der Herd ab, es ertönt ein
akustisches Signal und die Kontrolleuchte
beginnt zu blinken.
6 Betätigen Sie eine beliebige Taste zum
Abstellen des Signaltons, hierdurch wird der
Herd erneut eingeschaltet.
7 Zum Abschalten des Herds bringen Sie alle
Bedienelemente in Stellung .
Sie können die restliche Garzeit anzeigen, indem
Sie die Taste oder so oft betätigen, bis
das Symbol blinkt, anschließend
bestätigen Sie mit der Taste . Jetzt können
Sie die gewählte Restzeit mit den Tasten
oder verändern. Nach Abschluss der
Einstellung werden die Änderungen mit zwei
kurzen Signaltönen bestätigt.
Programmierung der Uhrzeit für das Ende des
Garvorgangs.
1 Betätigen Sie die Taste oder bis das
Symbol aufleuchtet. Drücken Sie
anschließend .
2 Stellen Sie die gewünschte Uhrzeit für die
Beendigung des Garvorgangs mit den Tasten
oder ein.
3 Anschließend ertönen zwei kurze Signale, es
wird die aktuelle Uhrzeit angezeigt und das
Symbol leuchtet und zeigt an, dass der
Herd nach Ablauf der eingestellten Zeit
automatisch abgeschaltet wird.
4 Wählen Sie eine Garfunktion aus und stellen
Sie die gewünschte Temperatur ein.
5 Bei Erreichen der eingestellten Endzeit
schaltet sich der Herd ab, es ertönt ein
akustisches Signal und das Symbol
beginnt zu blinken.
6 Betätigen Sie eine beliebige Taste zum
Abstellen des Signaltons, hierdurch wird der
Herd erneut eingeschaltet.
7 Zum Abschalten des Herds bringen Sie alle
Bedienelemente in Stellung .
Sie können die Endzeit des Garvorgangs
anzeigen, indem Sie die Taste oder so
oft betätigen, bis das Symbol blinkt,
anschließend bestätigen Sie mit der Taste
. Jetzt können Sie die gewählte Endzeit mit den
Tasten oder verändern. Nach
Abschluss der Einstellung werden die
Änderungen mit zwei kurzen Signaltönen
bestätigt.
Sie können die Funktion nutzen, auch wenn Sie
bereits mit dem Herd kochen. Befolgen Sie
hierzu die Anweisungen mit Ausnahme von
Punkt 4.
Programmierung der Dauer der Garzeit und
der Uhrzeit für dessen Beendigung
1 Betätigen Sie die Taste oder bis
das Symbol aufleuchtet. Drücken Sie
anschließend .
2 Stellen Sie mit den Tasten oder die
gewünschte Dauer ein.
3 Anschließend werden zwei kurze
Signaltöne abgegeben und das Symbol
leuchtet.
4 Betätigen Sie die Taste oder bis
das Symbol aufleuchtet. Drücken Sie
anschließend .
5 Stellen Sie die gewünschte Uhrzeit für die
Beendigung des Garvorgangs mit den
Tasten oder ein.
6 Anschließend werden zwei kurze
Signaltöne abgegeben, es wird die aktuelle
Uhrzeit angezeigt und das Symbol
leuchtet.
7 Wählen Sie eine Garfunktion aus und
stellen Sie die gewünschte Temperatur ein.
8 Der Herd bleibt abgeschaltet, die Symbole
und leuchten weiterhin. Damit
ist Ihr Herd programmiert.
3172802-002 EPIFA 13/01/15 12:31 Página 26

27
DEUTSCH
9 Bei Erreichen der Uhrzeit für den Beginn
des Garvorgangs schaltet sich der Herd ein
und führt den Garvorgang während der
eingestellten Zeitdauer aus.
10 Nach Erreichen der programmierten
Endzeit wird der Herd abgeschaltet, es
ertönt ein akustisches Signal und das
Symbol blinkt.
11 Betätigen Sie eine beliebige Taste zum
Abstellen des Signaltons, hierdurch wird
der Herd erneut eingeschaltet.
12 Zum Abschalten des Herds bringen Sie alle
Bedienelemente in Stellung .
Wenn Sie während des Garvorgangs die
Endzeit verändern möchten, betätigen Sie die
Taste oder bis das Symbol
aufleuchtet und bestätigen Sie mit der Taste
. Jetzt können Sie die gewählte Endzeit mit
den Tasten oder verändern. Nach
Abschluss der Einstellung werden die
Änderungen mit zwei kurzen Signaltönen
bestätigt.
Kindersicherung
Diese Funktion kann jederzeit während des
Backofeneinsatzes gewählt werden.
Um die Funktion zu aktivieren, berühren Sie die
Sensoren und gleichzeitig, bis 1
akustisches Signal ertönt und das Wort
auf der Anzeige erscheint. Die Uhr ist nun
blockiert.
Ist der Backofen ausgeschaltet und die
Kindersicherung aktiviert, lässt sich der
Backofen auch nach Auswahl einer Garfunktion
nicht einschalten.
Wird die Kindersicherung während des
Backofenbetriebs aktiviert, wird nur die
Änderung der elektronischen Uhr blockiert.
Um die Funktion zu deaktivieren, berühren Sie
die Sensoren und gleichzeitig, bis 1
akustisches Signal ertönt.
Achtung
Bei einem Ausfall der elektrischen
Stromversorgung wird die gesamte
Programmierung der elektronischen Schaltuhr
gelöscht, als Uhrzeit wird 12:00 blinkend
angezeigt. Sie müssen diese anschließend
stellen und erneut programmieren.
3172802-002 EPIFA 13/01/15 12:31 Página 27
Nuestra aportación a la protección del medio-ambiente: utilizamos papel reciclado.
A nossa contribução para a protecção do ambiente: utilizamos papel reciclado.
Our contribution to enviromental protection: we use recycled paper.
Notre contribution à la protection de l’environnement : nous utilisons du papier recyclé.
Unser Beitrag zum Umweltschutz: wir verwenden umweltfreundliches Papier.
Cod.: 83172802/3172802-002
3172802-002 EPIFA 13/01/15 12:31 Página 28
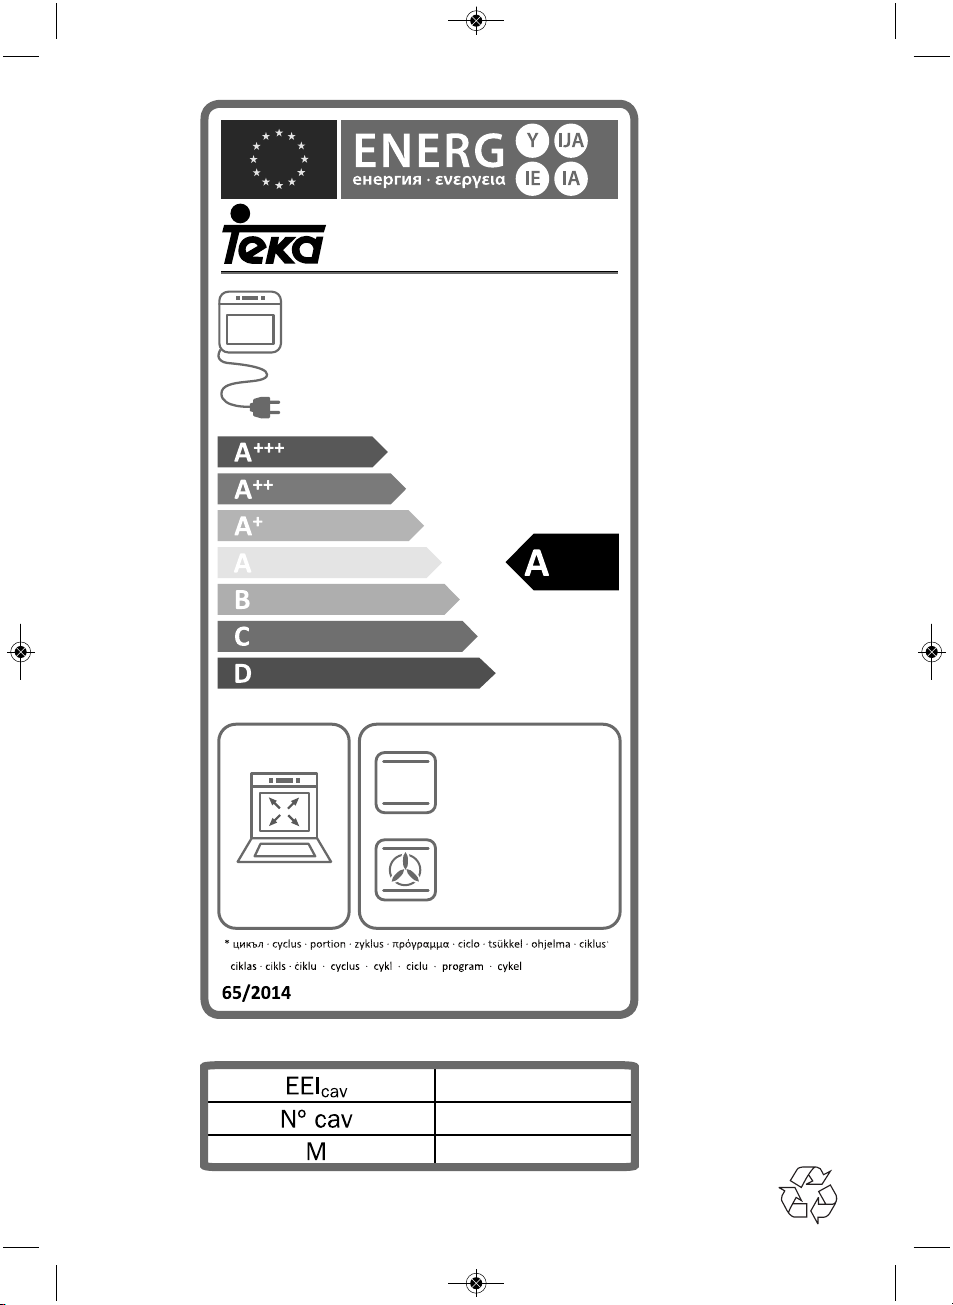
HS-724/HS-710
HS-725
57
0.83
L
0.73
kWh/cycle*
kWh/cycle*
92,4
1
31 kg
 Loading...