

Page 1
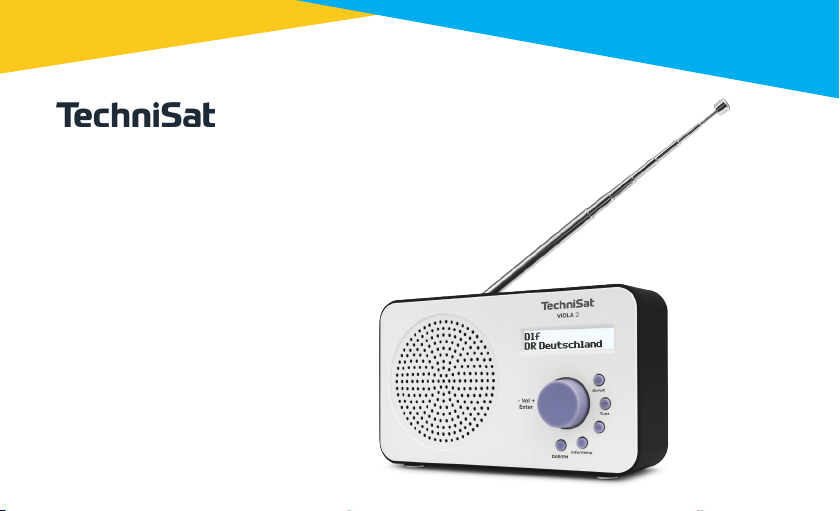
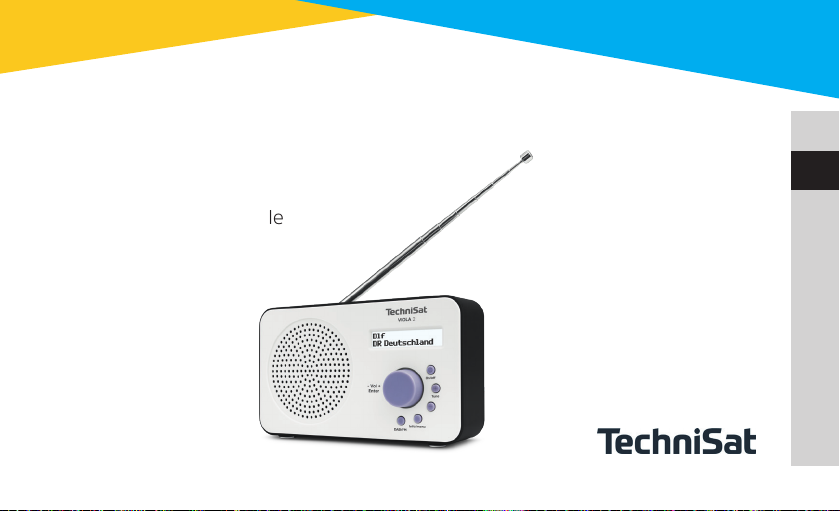
VIOLA 2
Portable DAB+/FM radio
Page 2

CONTENTS
ENGLISH ........................................................................................... 3-64
FRANÇAIS ................................................................................... 65-126
ITALIANO .................................................................................... 127-188
NEDERLANDS ......................................................................... 189-250
NORSK .........................................................................................251-312
DANSK ........................................................................................ 313-374
POLSKE ..................................................................................... 375-436
ČEŠTINA .................................................................................... 437-498
SLOVENSKÉ ............................................................................499-560
Page 3
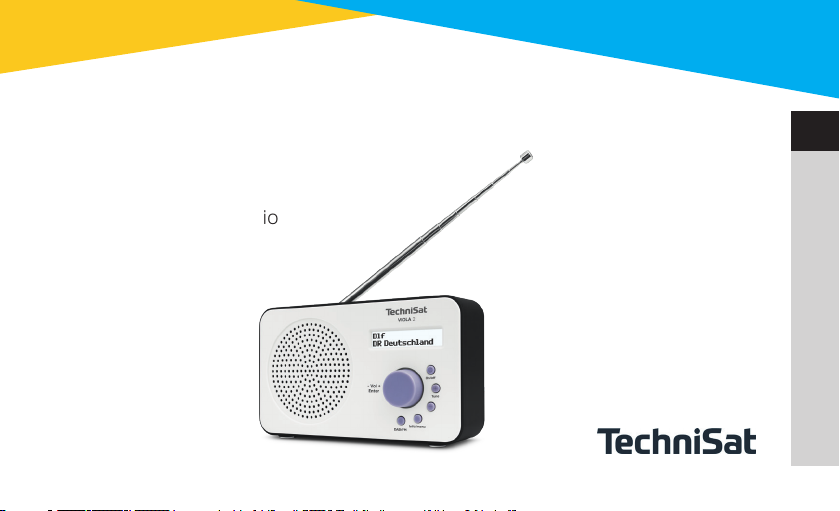
Instruction Manual
VIOLA 2
EN
FR
Portable DAB+/FM radio
IT
NL
NW
DK
PL
CZ
SK
Page 4

Contents
1 Illustrations ................................................................................................................. 8
1.1 View from the rear ................................................................................................................... 10
2 Foreword ....................................................................................................................11
2.1 Target group for this instruction manual ........................................................................ 11
2.1.1 Intended use ................................................................................................................................ 11
2.2 Important information ............................................................................................................. 11
2.2.1 Safety ...............................................................................................................................................13
2.2.2 Disposal ........................................................................................................................................ 20
2.2.3 Legal notices .............................................................................................................................. 24
2.2.4 Service instructions ..................................................................................................................26
3 Seing up the device .............................................................................................28
4 Description of the Viola 2 ......................................................................................31
4.1 Scope of delivery ........................................................................................................................31
4.2 Special features of the Viola 2.............................................................................................31
4
Page 5

4.3 Preparing the Viola 2 for operation .................................................................................32
4.3.1 Inserting the baeries ............................................................................................................32
4.3.2 Connecting the power supply unit ...................................................................................33
4.3.3 Aligning the telescopic antenna ........................................................................................34
4.3.4 Using headphones ...................................................................................................................35
4.4 General device functions .......................................................................................................36
4.4.1 Switching on the device ........................................................................................................36
4.4.2 Switching o the device ........................................................................................................37
4.4.3 Adjusting the volume ..............................................................................................................37
4.4.4 Retrieving displays ....................................................................................................................38
4.4.5 Changing between DAB+/FM mode ................................................................................39
5 Menu operation .......................................................................................................39
6 DAB+ (digital radio) function ............................................................................... 41
6.1 What is DAB+? ........................................................................................................................... 41
6.1.1 Data compression ..................................................................................................................... 41
6.1.2 Audio stream .............................................................................................................................. 42
6.2 DAB+ (digital radio) reception ............................................................................................43
EN
FR
IT
NL
NW
DK
PL
CZ
SK
5
Page 6

6.2.1 Performing a complete scan ..............................................................................................43
6.2.2 Selecting stations ..................................................................................................................... 44
6.2.3 Signal intensity .......................................................................................................................... 44
6.2.4 Manual seing ............................................................................................................................45
6.2.5 Volume adjustment (DRC) ................................................................................................... 46
6.2.6 Deleting inactive stations ..................................................................................................... 46
7 FM mode .................................................................................................................... 47
7.1 Switching on FM radio mode ..............................................................................................47
7.2 Automatic station scan ......................................................................................................... 48
7.3 Manual station scan ................................................................................................................ 49
7.4 Scan seing ................................................................................................................................ 50
7.5 Audio seings ..............................................................................................................................51
8 System seings ........................................................................................................ 52
8.1 Time and date seings ...........................................................................................................52
8.1.1 Manually seing the time/date ..........................................................................................52
8.1.2 Time update ................................................................................................................................54
8.1.3 Seing the time format ..........................................................................................................55
6
Page 7

8.1.4 Seing the date format .........................................................................................................56
8.2 Display brightness ....................................................................................................................57
8.3 Language ...................................................................................................................................... 58
8.4 Factory seing ............................................................................................................................59
8.5 Soware version ....................................................................................................................... 60
9 Cleaning ..................................................................................................................... 61
10 Troubleshooting ......................................................................................................62
11 Technical specifications / manufacturer's instructions ................................64
EN
FR
IT
NL
NW
DK
PL
CZ
SK
7
Page 8
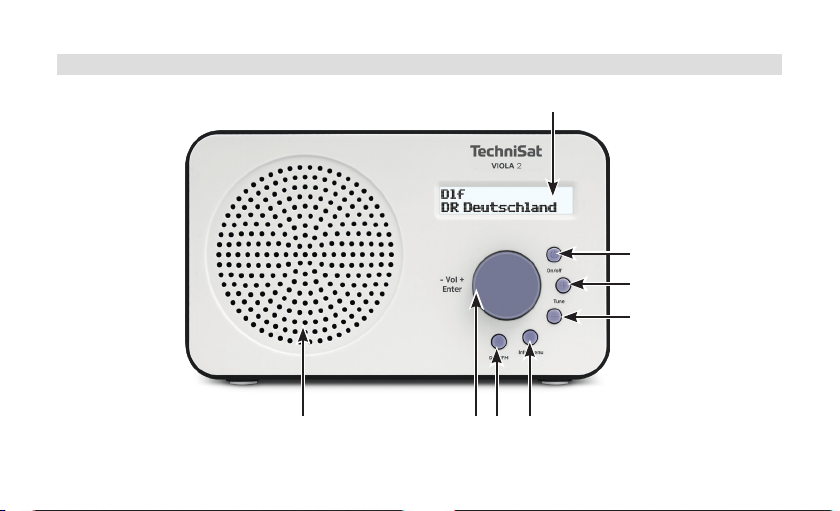
1 Illustrations
Display
4
5
6
Speaker
8
1 2 3
Page 9

1 Volume +/- (rotate)/Enter (press)
2 DAB/FM buon for switching modes
3 Info/Menu to change the display/retrieve main menu
4 On/O (Standby)
5 Tune + Increase value/menu selection
6 Tune - Decrease value/menu selection
EN
FR
IT
NL
NW
DK
PL
CZ
SK
9
Page 10
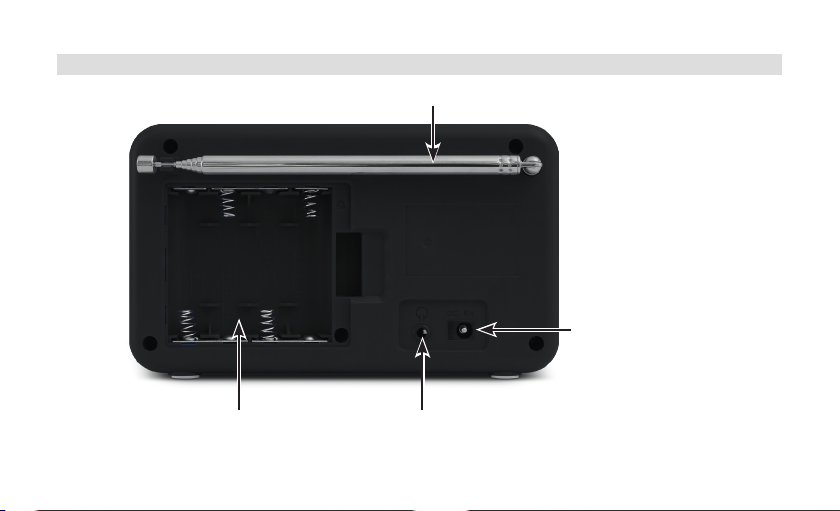
1.1 View from the rear
Telescopic antenna
Power supply
unit connection
10
Baery compartment
Headphone jack
Page 11

2 Foreword
This instruction manual will help you to use your radio device, hereinaer referred to as
DIGITRADIO or device, as intended and safely.
2.1 Target group for this instruction manual
The instruction manual is intended for anyone who is installing, operating, cleaning or
disposing of the device.
2.1.1 Intended use
The device has been designed to receive DAB+/FM radio programmes. The device has
been designed for private use and not for commercial purposes.
2.2 Important information
Please take note of the following information to minimise safety risks, to prevent
damage to the device and to make a contribution to environmental protection.
EN
FR
IT
NL
NW
DK
PL
CZ
SK
11
Page 12

Please read all the safety information carefully and keep it for future reference. Always
follow all the warnings and instructions in this instruction manual and on the rear of the
device.
Caution - This identifies important information that must be observed to prevent
device defects, data loss/misuse or undesired operation.
Tip - This identifies information relating to the described function, as well as to
another related function that may have to be taken into account, with reference
to the corresponding section in the manual.
12
Page 13
2.2.1 Safety
For your own protection you should read the safety precautions carefully before
switching on yourViola 2. The manufacturer accepts no liability for damage caused by
inappropriate handling, or by non-compliance with the safety precautions.
EN
Do not open the device under any circumstances!
Touching live parts poses a danger to life!
Any necessary repairs to the receiver should only be carried out by qualified
personnel.
The device must only be operated in an appropriate climate.
FR
IT
NL
NW
DK
PL
CZ
SK
13
Page 14
In the event of extended transportation in the cold and subsequent moving to
warm rooms, do not switch on immediately; wait for the temperature to equalise.
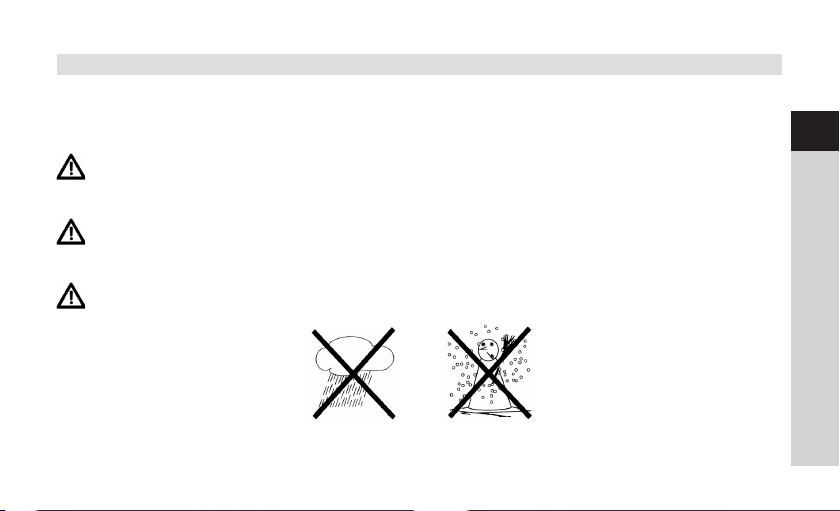
Do not expose the device to dripping or splashing water. If water has penetrated
the device, switch it o and inform the Service department.
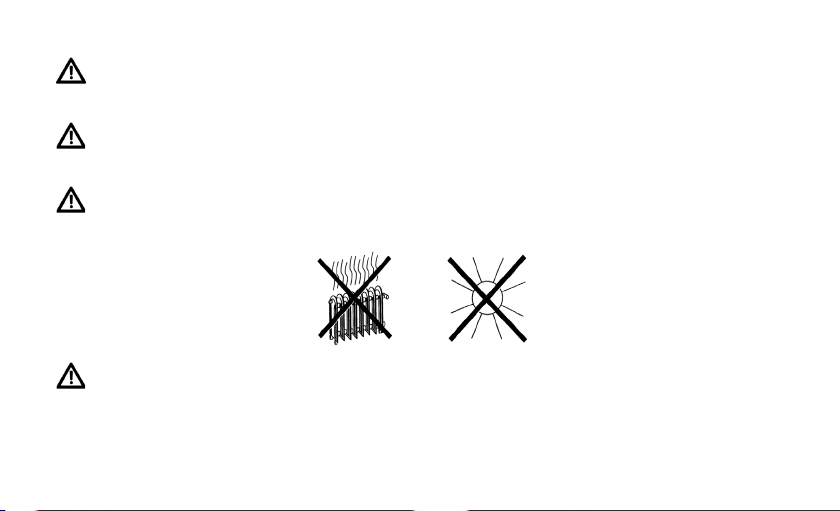
Do not expose the device to heat sources that will heat it up more than normal
use.
In the event of a thunderstorm, disconnect the device from the mains.
Overvoltage can damage the device.
14
Page 15

If you detect a device defect, odour or smoke, considerable malfunctions, or
damage to the housing, switch o the device and inform the Service department.
With the power supply unit, the device may only be connected to a mains
voltage of 100V-240V~, 50/60 Hz.
EN
FR
Never try to operate the device with another voltage.
The power supply unit must not be connected until the installation has been
completed according to regulations.
Do not operate the device if the power supply unit is defective or if the device is
damaged in any other way.
When removing the power supply unit from the power outlet, pull on the plug,
not the cable.
IT
NL
NW
DK
PL
CZ
SK
15
Page 16

Do not put the device into operation in the vicinity of baths, swimming pools or
splashing water.
Never try to repair a faulty device yourself. Always contact one of our customer
service locations.
Foreign bodies, e.g. nails, coins, etc. must not be allowed to fall inside the device.
Do not touch the connection contacts with metal objects or fingers. This could
lead to short-circuits.
Do not place any open flames, such as burning candles, on the device.
Never allow children to use the device unsupervised.
16
Page 17

Even when switched o and on standby, the device is still connected to the
mains power supply. If you do not intend to use the device for a prolonged
period, remove the mains plug from the power outlet. Only pull on the plug, not
on the cable.
Do not listen to music or the radio at high volume. Doing so can cause
permanent hearing impairment.
EN
FR
IT
This device is not intended to be used by people (including children) with
limited physical, sensoryormental capacities or lackof experienceand/or
knowledge,unless they are supervised by a person responsible for their safety or
they have been instructed by them as to how to use the device.
Children must be supervised to ensure that they do not play with the device.
It is forbidden to carry out modifications to the device.
NL
NW
DK
PL
CZ
SK
17
Page 18

Damaged devices or damaged accessories must not continue to be used.
Using the baeries
Ensure that the baeries are kept out of the reach of children. Children could
put the baeries into their mouths and swallow them. This could lead to serious
injuries. Seek medical advice immediately if this occurs! Therefore ensure that the
baeries are out of reach of young children.
Only operate the device using the baeries approved for this device.
Normal baeries may not be charged. Baeries may not be reactivated using
other means, disassembled, heated or disposed of in an open fire (explosion
hazard!).
Clean the baery contact and device contacts prior to inserting them.
18
Page 19
There is an explosion hazard if a baery is inserted incorrectly.
Only replace baeries with the correct type of baeries and the correct model
number.
Caution! Do not expose baeries to extreme conditions.
Do not place them on radiators, or expose them to direct sunlight.
Leaking or damaged baeries can cause burns if they come into contact with the
skin. In this case use suitable protective gloves. Clean the baery compartment
with a dry cloth.
If the device is not being used for a prolonged period, remove the baeries.
19
EN
FR
IT
NL
NW
DK
PL
CZ
SK
Page 20
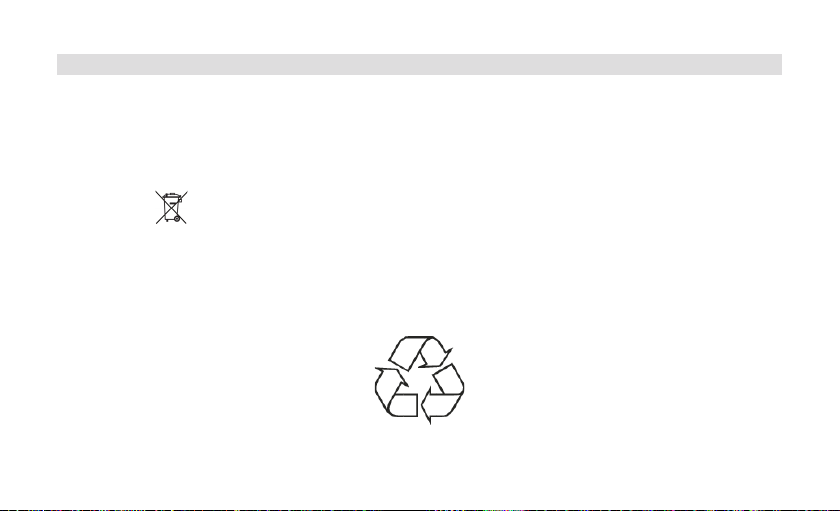
2.2.2 Disposal
The device packaging is exclusively comprised of recyclable materials. Please sort these
and take them to the "Dual System." At the end of its service life, this device must not be
disposed of with your regular household waste. It must be taken to a recycling collection
point for electrical and electronic equipment.
This is indicated by the symbol on the product, the instruction manual or the
packaging.
The materials are recyclable according to their identification.
An important contribution is made to our environment by recycling, recovery of
materials or other kinds of recycling for old devices.
Please ask local authorities for the location of the relevant disposal point. Ensure that
used baeries/rechargeable baeries as well as electronic waste are not disposed of
20
Page 21

with domestic waste, but are properly disposed of (returned to the specialist shop,
hazardous waste).
Baeries/rechargeable baeries may contain poisonous substances which cause harm
to health and the environment. Baeries/rechargeable baeries are subject to European
Directive 2006/66/EC. They must not be disposed of with normal domestic waste.
Disposal instructions:
Disposal of packaging:
Your new device was protected by packaging on its way to you. All materials
used are environmentally friendly and recyclable. Please collaborate and dispose
of the packaging in an environmentally-friendly way.
21
EN
FR
IT
NL
NW
DK
PL
CZ
SK
Page 22
Ask for information from your dealer regarding current disposal means or
regarding your local disposal facility.
Risk of suocation! Do not give packaging and parts thereof to children. Risk of
suocation by films and other packaging materials.
Device disposal:
Old devices constitute valuable waste. Valuable raw materials can be recovered
through environmentally-friendly disposal. Consult your town or local authority as
to the possibilities for environmentally-friendly and proper disposal of the device.
Prior to disposal of the device, remove the baeries/rechargeable baeries
contained therein.
This device is identified in accordance with the Waste Electrical and Electronic
Equipment (WEEE) Directive2012/19/EU.
At the end of its service life, this device must not be disposed of with your
22
Page 23

regular household waste. It must be taken to a recycling collection point for
electrical and electronic equipment. The symbol on the product, the operating
manual or the packaging indicates this. The materials are recyclable according
to their identification. An important contribution is made to our environment by
recycling, recovery of materials or other kinds of recycling for old devices.
Important information for the disposal of baeries/rechargeable baeries:
Baeries/rechargeable baeries may contain poisonous substances which harm
the environment. Therefore you must always comply with applicable statutory
provisions when you dispose of baeries/rechargeable baeries. Never dispose
of baeries in normal household waste. Used baeries/rechargeable baeries
can be disposed of at your specialist retailer or at special disposal sites free of
charge.
EN
FR
IT
NL
NW
DK
PL
CZ
SK
23
Page 24
2.2.3 Legal notices
TechniSat herewith declares that the radio system model Viola 2 complies with
Directive 2014/53/EU. The complete text of the EU declaration of conformity is
available at the following website:
hp://konf.tsat.de/?ID=11765
TechniSat accepts no liability for product damage as a result of external
influences, wear or improper handling, unauthorised repairs, modifications or
accidents.
Changes and printingerrors reserved. Version 01/18.
Copy and reproduction are subject to the publisher's consent. The respective
current version of the manual can be obtained in PDF format in the
download area of the TechniSat homepage at www.technisat.de.
24
Page 25
VIOLA 2 and TechniSat are registered trademarks of:
TechniSat Digital GmbH
TechniPark
Julius-Saxler-Straße 3
D-54550 Daun/Eifel, Germany
www.technisat.de
EN
FR
IT
NL
NW
DK
PL
CZ
SK
25
Page 26
2.2.4 Service instructions
This product is quality-tested and provided with the legal warranty period of
24 months as from the date of purchase. Please keep your receipt as proof of
purchase. In the event of warranty claims please contact the product dealer.
Note!
Should you experience a problem with this device, or for queries and information,
our Technical Hotline is available:
Mon. - Fri. 8:00 am - 8:00 pm on tel.:
+49 (0) 3925 9220 1800.
26
Page 27

If the device needs to be sent back, please use the following address only:
TechniSat Digital GmbH
Service-Center
Nordstr. 4a
39418 Staßfurt, Germany
EN
FR
IT
NL
NW
DK
The names of the companies, institutions or makes referred to are trademarks or
registered trademarks of the respective owners.
PL
CZ
SK
27
Page 28

3 Seing up the device
> Place the device on a firm, secure and horizontal base. Make sure the area is well
ventilated.
Caution!
> Do not place the radio on so surfaces such as carpets and blankets or near to
curtains and wall hangings. These could obstruct the ventilation openings. The
necessary flow of air could be interrupted as a result. This could potentially lead
to fire in the device.
> Do not place the device near to sources of heat, such as radiators. Avoid direct
sunlight and very dusty environments.
28
Page 29

> Do not select a location for the device with high air humidity, e.g. a kitchen or
sauna, as the precipitation of condensation water could damage the device. The
device is intended for use in a dry environment and in a moderate climate and
must not be exposed to dripping or splashing water.
> Please note that the device footings could leave coloured marks on some types
of furniture surfaces in certain situations. Place a protective layer between your
furniture and the device.
> Keep the Viola 2 away from devices which emit intense magnetic fields.
> Do not place any heavy objects on the device.
> If you move the device from a cold environment to a hot environment, moisture
could accumulate inside the device. In this case, wait approximately one hour
before puing it into operation.
> Lay the mains cable in such a way that nobody can trip over it.
EN
FR
IT
NL
NW
DK
PL
CZ
SK
29
Page 30

> Ensure that the mains cable or the power supply unit are always easily accessible
so that the device can be quickly disconnected from the power supply.
> The power outlet should be as close to the device as possible.
> Insert the plug fully into the socket to ensure connection to the mains.
> Use a suitable, easy-to-access mains connection and avoid using multiple socket
strips.
> Do not touch the mains plug with wet hands; electric shock hazard.
> In the event of a malfunction or the detection of smoke or odour from the
housing, remove the plug from the power outlet immediately.
> Remove the plug if the device is not going to be used for a prolonged period,
e.g. before going away on a long trip.
> If the device is not to be used for a long time, remove the baeries if required.
> Excessive volume, in particular when using headphones, can damage hearing.
30
Page 31

4 Description of the Viola 2
4.1 Scope of delivery
Before start-up, please check whether everything has been delivered.
1 x Viola 2
1 x power supply unit
1 x instruction manual
4.2 Special features of the Viola 2
The Viola 2 is comprised of a DAB+/FM receiver with the following functions:
- The radio receives on the FM 87.5–108 MHz (analogue) frequencies and
DAB+ 174.9–239.2 MHz (digital).
- The device has a time and date display.
EN
FR
IT
NL
NW
DK
PL
CZ
SK
31
Page 32

4.3 Preparing the Viola 2 for operation
4.3.1 Inserting the baeries
> Open the baery compartment on the device rear by pushing the baery
compartment lid in the direction of the embossed arrow. Then remove the lid.
> Insert 4 x AA baeries, taking into account their alignment. The polarity of the
baeries is embossed on the base of the baery compartment.
> Place the baery compartment lid on the baery compartment and close it until
it audibly engages.
Promptly change baeries that are losing power.
32
Page 33

4.3.2 Connecting the power supply unit
> To do this, connect the plug on the power supply unit included with supply to
the jack labelled with DC 6V on the rear of the Viola 2. Then connect the power
supply unit to the mains supply.
Ensure that the operating voltage of the power supply unit matches the mains
voltage before you insert it into the wall socket.
EN
FR
IT
When you connect the device to the mains for the first time,
"Welcome to Digital Radio" appears on the display. This will then be followed by
a station scan via DAB+. Please refer to the information in Section 4.4.1.
NL
NW
DK
PL
CZ
SK
33
Page 34

4.3.3 Aligning the telescopic antenna
The number and quality of the stations to be received depend on the reception
conditions at the installation location. Excellent reception can be achieved with the
telescopic antenna.
> Align the telescopic antenna and extend it.
The exact alignment of the telescopic antenna is oen important, in particular on
the outskirts of the DAB+ reception area. You can quickly find the location of the
nearest transmission mast on the Internet at, for example, www.digitalradio.de.
Start the first scan at a window in the direction of the transmission mast.
When the weather conditions are poor, DAB+ reception may be limited.
Do not touch the telescopic antenna during station playback. This could
compromise the reception and lead to sound dropouts.
34
Page 35

4.3.4 Using headphones
Hearing impairment!
Do not listen to the radio at high volume with headphones. Doing so can cause
permanent hearing impairment. Turn down the radio volume to the lowest volume
before using headphones.
Only use headphones with a 3.5 mm jack plug.
> Insert the headphone plug into the headphone jack on the rear of the device.
Sound will now only be heard via the headphones, the speaker is switched to
mute.
> If you would like to use the speakers again, unplug the headphones from the
headphone jack on the radio.
EN
FR
IT
NL
NW
DK
PL
CZ
SK
35
Page 36

4.4 General device functions
4.4.1 Switching on the device
> In order to guarantee good DAB+/FM reception, please fully extend the antenna
located on the rear of the device. To do so, please refer to Section 4.3.3.
> First prepare the Viola 2 for operation as described in Section 4.3.1 and 4.3.2.
> Switch on the Viola 2 by pressing the On/O buon.
Aer switching on for the first time, the device automatically performs a
complete scan in DAB mode. While scanning, the display information shows
the progress, as well as the number of digital radio stations detected. Aer
completing the station scan the first DAB+ channel is played.
36
Page 37

4.4.2 Switching o the device
With mains operation:
> By briefly pressing the On/O buon you can switch the device to standby
mode. [Standby] appears briefly on the display. The date and time are shown on
the display. The display brightness in standby mode can be adjusted by following
the instructions in Section 8.2.
With baery operation:
> With baery operation the device is switched to enhanced standby mode by
pressing the On/O buon. In this case, there is no date and time display.
4.4.3 Adjusting the volume
> Adjust the volume using the Vol +/- knob. The set volume is shown on the
display by way of a bar chart. Also refer to Section 4.3.4 for operation when
headphones are connected. To increase the volume, turn the knob to the right; to
lower it, turn to the le.
EN
FR
IT
NL
NW
DK
PL
CZ
SK
37
Page 38

4.4.4 Retrieving displays
> Briefly press the Info/Menu buon to scroll through the available display options:
In DAB+ mode:
[Running text] (continuous text with additional information provided by
broadcasters etc.), [Signal intensity], [Channel type], [Ensemble], [Frequency],
[Signal quality], [Bit rate and Codec], [Time] and [Date].
In FM mode (the selected function is identified with an “*”):
[Radio text] (if transmied), [Channel type] (PTY), [Ps] (Programme Service
Name or Station Name or Frequency), [Audio Information], [Time] and [Date].
> Press the Info/Menu buon to exit the seing again and to return to the
playback view.
38
Page 39

4.4.5 Changing between DAB+/FM mode
> Using the DAB/FM buon, it is possible to switch between DAB+ (Digital Radio)
and FM.
5 Menu operation
You can access all functions and seings for the Viola 2 via the menu. Menu navigation
takes place using the Info/Menu, Tune +/- and Enter buons.
The menu is divided into submenus and, depending on the mode (DAB+ or FM),
contains dierent menu items or functions which can be enabled. To open the menu,
simply keep the Info/menu buon briefly depressed. To move to submenus, first press
the Tune + or Tune - buons to display a submenu and then press the Enter buon to
retrieve the submenu. An asterisk (*) highlights the current selection.
Close menu: press the Info/Menu buon repeatedly (depending on which
submenu you are in), or wait until the current radio channel is displayed again.
EN
FR
IT
NL
NW
DK
PL
CZ
SK
39
Page 40

Seings are not saved until the Enter buon has been pressed. If the Info/
Menu is pressed instead, the seings are not confirmed or saved (the Info/Menu
buon in this case acts as a “Back” buon).
The functions and buons to be pressed are shown in bold in this instruction
manual. Displays in [square brackets].
Some text (e.g. menu items, station information) may be too long to show on the
display. These will be then shown as running text shortly thereaer.
40
Page 41

6 DAB+ (digital radio) function
6.1 What is DAB+?
DAB+ is a new digital format through which crystal clear sound with no noise can
be heard. In contrast to conventional analogue radio stations, DAB+ can be used to
broadcast multiple stations on one and the same frequency. This is referred to as an
ensemble or multiplex. An ensemble is comprised of the radio station, as well as several
service components or data services, which are broadcast individually by the radio
stations. There is information at www.digitalradio.de or www.digitalradio.ch, for example.
6.1.1 Data compression
With this, digital radio takes advantage of the properties of human hearing. The human
ear does not perceive sounds which are found under a specific minimum volume. Data
which are found under the so-called audibility threshold can, therefore, be filtered
out. This is possible because, in a digital data stream, the relevant relative volume for
other units is saved for every unit of information. Moreover, in an audio signal, the
quieter parts are superimposed by louder ones at a specific limit value. All the sound
information below the threshold of hearing in a piece of music can be filtered out of
41
EN
FR
IT
NL
NW
DK
PL
CZ
SK
Page 42

the signal to be broadcast. This leads to a reduction of data in the data stream to be
transmied, with no perceptible dierence in sound for the listener (HE AAC v2 process
as a supplementary codification process for DAB+).
6.1.2 Audio stream
With digital radio, audio streams are continuous data streams which contain the MPEG 1
audio layer 2 frames and thereby represent acoustic information. This enables standard
radio channels to be broadcast and listened to on the receiver side. Digital radio
provides you not only with excellent sound quality radio but also additional information.
This may refer to the programme being broadcast or be independent information (e.g.
news, weather, trac, tips).
42
Page 43

6.2 DAB+ (digital radio) reception
> Press the DAB+/FM buon until [DAB] is shown on the display.
If DAB+ is being started for the first time, a complete scan will be performed.
Aer ending the scan, the first station in alphanumeric order will be played.
6.2.1 Performing a complete scan
The automatic scan (Complete scan) scans all DAB+ band III channels and
thereby finds all stations being broadcast within the reception area.
Aer ending the scan, the first station in alphanumeric order will be played.
> In order to perform a complete scan, open the menu by holding down the Info/
Menu buon and use the Tune +/ - and Enter buons to select the menu item
[Complete Scan].
EN
FR
IT
NL
NW
DK
PL
CZ
SK
43
Page 44

> [Scanning...] appears on the display.
During the scan a progress bar and the number of stations found is displayed.
If no station is detected, check the telescopic antenna and, if required, change
the installation location (Section 4.3.3 / 2.2.1).
6.2.2 Selecting stations
> To select a DAB+ station, press the Tune + or Tune - buons and confirm the
station selection with Enter.
6.2.3 Signal intensity
> Briefly press the Info/Menu buon repeatedly until the signal intensity is shown
on the display by way of a bar chart.
Current signal intensity
Minimum signal intensity
44
Page 45

Stations with a signal intensity below the required minimum signal intensity
are not transmiing a strong enough signal. Align the telescopic antenna as
described in Section 4.3.3 if required.
6.2.4 Manual seing
This menu item is used to check the reception channels and can be used to position the
antenna.
> Hold down the Info/Menu buon, use the Tune + or Tune - buons to select the
[Manual seing] item and press the Enter buon.
> Select a channel (5A to 13F) using the Tune + or Tune - and Enter buons. The
signal intensity will now be shown on the display. If a DAB+ station is being
received on a channel, the station ensemble name is displayed.
EN
FR
IT
NL
NW
DK
Stations with a signal intensity below the required minimum signal intensity are
not transmiing a strong enough signal.
PL
CZ
SK
45
Page 46

6.2.5 Volume adjustment (DRC)
With the Volume Adjustment menu item, the compression rate is set which balances
the dynamic variations and thereby the accompanying volume variations.
> Hold down the Info/menu buon, use the Tune + or Tune - buons to select the
[Volume adjustment] item and press the Enter buon.
> Select the compression rate with Tune + or Tune -:
DRC high - High compression
DRC low - Low compression
DRC o - Compression switched o.
> Press the Enter buon to confirm.
6.2.6 Deleting inactive stations
This menu item is for removing old stations and those no longer being received from
the station list.
46
Page 47

> Hold down the Info/Menu buon and use the Tune + or Tune - buons to select
the [Delete inactive stations] item.
> Press the Enter buon.
The prompt [Clear?] appears as to whether the inactive stations are to be deleted.
> Using Tune + or Tune -, select the [Yes] item and confirm by pressing the Enter
buon.
7 FM mode
7.1 Switching on FM radio mode
> Change to FM mode by pressing the DAB/FM buon.
> [FM] is shown on the display.
When switching on for the first time, the frequency 87.5 MHz is set.
47
EN
FR
IT
NL
NW
DK
PL
CZ
SK
Page 48

If you have already set or saved a station, the radio plays the last station set.
In the case of RDS stations, the station name appears.
In order to improve the reception, align the telescopic antenna (Section 4.3.3).
FM reception with RDS information
RDS is a procedure for broadcasting additional information via FM stations. Broadcasters
with RDS broadcast their station name or the programme type, for example. This is
shown on the display. The device can show the RDS information RT (Radio text), PS
(Station name), PTY (Programme type).
7.2 Automatic station scan
> Hold down the Tune + or Tune - buons for longer (2 to 3 sec.) in order to
automatically search for the next station with sucient signal intensity.
48
Page 49

If a FM station with sucient signal intensity is found, the scan stops and the
station is played. If an RDS station is being received, the station name appears
and, possibly, radio text.
Please use the manual station scan for seing weaker stations.
7.3 Manual station scan
> Press the Tune + or Tune - buons repeatedly to set the desired stations or
frequency.
EN
FR
IT
NL
The display shows the frequency in steps of 0.05 MHz.
NW
DK
PL
CZ
SK
49
Page 50

7. 4 Scan seing
In this menu item it is possible to set the sensitivity of the scan.
> Hold down the Info/Menu buon and use the Tune + or Tune - buons to select
the [Scan seing] item. Press the Enter buon.
> Select whether the scan should only stop for stations with a strong signal
[Strong Stations Only] or for all stations (including stations with a weak signal)
[All Stations].
With the All Stations seing the scan stops automatically upon detecting each
available station. This can result in weak stations being played with background
noise. When using for the first time, and aer carrying out the factory seings,
the [Strong stations only] menu item is preset.
50
Page 51

7.5 Audio seings
> Hold down the Info/Menu buon and use the Tune + or Tune - buons to select
the [Audio seing] item.
> Press the Enter buon.
> Using the Tune + or Tune - buons, select the [Stereo available] or [Mono only]
item in order play back in stereo (only available via headphones) or only in mono
sound when the FM reception is weak.
> Press the Enter buon to confirm.
51
EN
FR
IT
NL
NW
DK
PL
CZ
SK
Page 52

8 System seings
All the seings referred to under this item are equally applicable in DAB+ and FM mode.
8.1 Time and date seings
8.1.1 Manually seing the time/date
Depending on the seing for time updates (section 8.1.2), the time and date have to be
set manually.
> Hold down the Info/Menu buon and use the Tune + or Tune - buons to select
the [System] item.
> Press the Enter buon.
> Using the Tune + or Tune - buons, select the [Time] item and press Enter.
> Using the Tune + or Tune - buons, select the [Set time/date] item and press
Enter.
52
Page 53

> The first time digits (hours) flash and can be changed using the Tune + or Tune -
buons.
The Tune + increases the value, the Tune - buon reduces the value.
> Press Enter to confirm the seing.
> The next time digits (minutes) start to flash and can again be changed as
described above.
> Press Enter aer every other seing in order to go to the next seing.
> To set the date, proceed in the same way as described above.
> Aer all seings have been done and the Enter buon pressed, [Time Saved]
appears on the display.
53
EN
FR
IT
NL
NW
DK
PL
CZ
SK
Page 54

8.1.2 Time update
In this submenu, you can determine whether the time update should be done
automatically via DAB+ or FM, or whether you wish to enter it manually (Section 8.1.1).
> Hold down the Info/Menu buon and use the Tune + or Tune - buons to select
the [System] item.
> Press the Enter buon.
> Using the Tune + or Tune - buons, select the [Time] item and press Enter.
> Using the Tune + or Tune - buons, select the [Autom. update] item and press
Enter.
54
Page 55

> Select the following options using the Tune + or Tune - and Enter buons:
[Update all] (Update via DAB+ and FM)
[Update from DAB] (Update via DAB+ only)
[Update from FM] (Update via FM only)
[No update] (Time/date must be entered manually, see Section 8.1.1).
EN
FR
8.1.3 Seing the time format
In the Set 12/24 hrs. submenu you can activate the 12- or 24-hour format.
> In the System > Time submenu, select the [Set 12/24 hrs.] item.
> Press the Enter buon.
> Using the Tune + or Tune - buons, select one of the following options:
[Set 24 hrs.]
[Set 12 hrs.]
> Press the Enter buon to confirm.
IT
NL
NW
DK
PL
CZ
SK
55
Page 56

8.1.4 Seing the date format
In the Set Date Format submenu you can determine the format for displaying the date.
> In the System > Time submenu, select the [Set date format] item.
> Press the Enter buon.
> Using the Tune + or Tune - buons, select one of the following options:
[DD-MM-YYYY] (day, month, year)
[MM-DD-YYYY] (month, day, year)
> Press the Enter buon to confirm.
56
Page 57

8.2 Display brightness
It is possible to set the display brightness both for operation and standby.
> Hold down the Info/Menu buon and use the Tune + or Tune - buons to select
the [System] item.
> Press the Enter buon.
> Using the Tune + or Tune - buons, select the [Backlight] item and press Enter.
> Select one of the following options using the Tune + or Tune - buons and then
press the Enter buon:
[Operation] regulates brightness in a normal, operating status. Here, you can
choose from among the brightness intensities [High], [Middle], [Low] and [O].
Using the Tune + or Tune - buons, select a brightness intensity and press the
Enter buon to save.
57
EN
FR
IT
NL
NW
DK
PL
CZ
SK
Page 58

[Standby] regulates the brightness in standby mode. Here, you can chose
between the brightness intensities [Low] and [O]. Using the Tune + or Tune -
buons, select a brightness intensity and press the Enter buon to save.
8.3 Language
> Hold down the Info/Menu buon and use the Tune + or Tune - buons to select
the [System] item.
> Press the Enter buon.
> Using the Tune + or Tune - buons, select the [Language] item and press Enter.
> Using the Tune + or Tune - buons, select one of the available languages and
confirm the selection by pressing the Enter buon.
58
Page 59

8.4 Factory seing
If you change the location of the device, e.g. when moving house, it is possible that
the saved stations can no longer be received. In this case you can reset the device to
factory seings to delete all the saved stations and then launch a new scan.
> Hold down the Info/Menu buon and use the Tune + or Tune - buons to select
the [System] item.
> Press the Enter buon.
> Using the Tune + or Tune - buons, select the [Factory seing] item and press
Enter.
> Using the Tune + or Tune - buons, select the [Yes] item to run the factory
seing and press the Enter buon.
All previously stored stations and seings will now be deleted. The device is now
in the same status as when delivered.
59
EN
FR
IT
NL
NW
DK
PL
CZ
SK
Page 60

> [Restart...] appears on the display while the device is on standby. Aer switching
on the device, the digital radio automatically performs a complete scan in DAB
mode. While scanning, the display information shows the progress, as well as the
number of digital radio stations detected. Aer completing the station scan the
first DAB+ channel is played.
8.5 Soware version
Under SW version you can retrieve the currently installed soware version.
> Hold down the Info/Menu buon and use the Tune + or Tune - buons to select
the [System] item.
> Press the Enter buon.
> Using the Tune + or Tune - buons, select the [SW version] item and press
Enter.
> The current soware version is displayed.
60
Page 61

9 Cleaning
To prevent the risk of an electric shock, you may not clean the device using a
wet cloth or under running water. Prior to cleaning, pull out the mains plug and
switch o the device.
You may not use scouring pads, scouring powder and solvents such as alcohol or
petrol.
EN
FR
IT
Do not use any of the following substances: salt water, insecticides, chlorine or
acid-based solvents (ammonium chloride).
Clean the housing using a so, moist cloth. Do not use spirit, thinners, etc.; you
could damage the surface of the device.
Only clean the display with a so, coon cloth. If required, use a coon cloth with
small amounts of non-alkaline, diluted, water or alcohol-based soap solution.
Gently clean the surface using the coon cloth.
61
NL
NW
DK
PL
CZ
SK
Page 62

10 Troubleshooting
If the device does not operate as intended, check the following table for information.
Symptom Possible cause/remedy
The device cannot be switched on. The device is not being supplied with power.
Connect the power supply unit correctly to the
socket and to the device. Use new baeries and
check for the correct polarity.
No sound can be heard. Increase the volume.
The display does not switch on. Disconnect the device from the mains supply/
briefly remove the baeries and reconnect the
device to the mains.
Poor reception via DAB+/FM. Extend the antenna. Adjust the position of the
antenna or of the Viola 2.
62
Page 63

Symptom Possible cause/remedy
The device cannot be operated. Disconnect the device from the mains supply/
briefly remove the baeries and reconnect the
device to the mains.
Display backlight flickers. Baery voltage too low. Replace the baeries or
connect the power supply unit.
EN
FR
IT
If the malfunction has not been resolved, even aer performing the checks described,
please contact the Technical Hotline.
NL
NW
DK
PL
CZ
SK
63
Page 64

11 Technical specifications / manufacturer's instructions
Subject to technical changes and errors.
Reception channels DAB/DAB+, FM
Power supply AC Input: 100-240V, 50/60Hz
DC Output: 6V, 1A
Baery: 4 x AA 1.5V
Operating temperature 0 - 45°C
Frequencies FM: 87.5-108MHz
DAB/DAB+: Band III 174-240MHz
Audio output performance 1W RMS
Weight 334g (without baeries)
Dimensions (W x H x D) 155mm x 90mm x 45mm
64
Page 65
Mode d'emploi
VIOLA 2
EN
FR
Radio DAB+/FM portable
IT
NL
NW
DK
PL
CZ
SK
Page 66

Sommaire
1 Illustrations ...............................................................................................................70
1.1 Vue de dos ...................................................................................................................................72
2 Avant-propos ............................................................................................................ 73
2.1 Groupe cible de ce mode d’emploi ..................................................................................73
2.1.1 Utilisation conforme.................................................................................................................73
2.2 Consignes importantes ..........................................................................................................73
2.2.1 Sécurité .......................................................................................................................................... 75
2.2.2 Élimination ....................................................................................................................................82
2.2.3 Mentions légales ........................................................................................................................86
2.2.4 Consignes d'entretien .............................................................................................................88
3 Installation de l’appareil .......................................................................................90
4 Description de la Viola 2 .......................................................................................93
4.1 Contenu de la livraison ...........................................................................................................93
4.2 Caractéristiques spécifiques de la Viola 2 ....................................................................93
66
Page 67

4.3 Préparation de la Viola 2 pour le fonctionnement .................................................. 94
4.3.1 Insertion des piles.................................................................................................................... 94
4.3.2 Branchement du bloc d’alimentation .............................................................................95
4.3.3 Orientation de l’antenne télescopique .......................................................................... 96
4.3.4 Utilisation des écouteurs .......................................................................................................97
4.4 Fonctions générales de l’appareil .....................................................................................98
4.4.1 Mise en marche de l’appareil ..............................................................................................98
4.4.2 Arrêt de l’appareil .................................................................................................................... 99
4.4.3 Réglage du volume ................................................................................................................. 99
4.4.4 Ouverture de l’achage à l’écran .................................................................................. 100
4.4.5 Commutation mode DAB+/FM ......................................................................................... 101
5 Commande du menu ............................................................................................ 101
6 Fonction DAB+ (radiodiusion numérique) ..................................................103
6.1 Qu'est-ce que le DAB+ ? ......................................................................................................103
6.1.1 Compression des données .................................................................................................103
6.1.2 Flux audio .................................................................................................................................. 104
6.2 Réception DAB+ (radiodiusion numérique) ............................................................105
EN
FR
IT
NL
NW
DK
PL
CZ
SK
67
Page 68

6.2.1 Exécution d'une recherche complète ...........................................................................105
6.2.2 Choix de la station ................................................................................................................. 106
6.2.3 Puissance du signal .............................................................................................................. 106
6.2.4 Réglage manuel .......................................................................................................................107
6.2.5 Adaptation du volume (DRC) ........................................................................................... 108
6.2.6 Suppression des stations inactives ................................................................................ 108
7 Mode FM ..................................................................................................................109
7.1 Mise en marche du mode radio FM .............................................................................. 109
7.2 Recherche automatique des stations ........................................................................... 110
7.3 Recherche manuelle des stations .................................................................................... 111
7.4 Réglage de la recherche ...................................................................................................... 112
7.5 Réglage audio ............................................................................................................................113
8 Réglages système ................................................................................................. 114
8.1 Réglages de l’heure et de la date ................................................................................... 114
8.1.1 Réglage manuel de l'heure et de la date .................................................................... 114
8.1.2 Actualisation de l’heure........................................................................................................ 116
8.1.3 Réglage du format de l’heure ............................................................................................117
68
Page 69

8.1.4 Réglage du format de la date ...........................................................................................118
8.2 Luminosité de l’écran ............................................................................................................ 119
8.3 Langue ........................................................................................................................................ 120
8.4 Réglage d’usine........................................................................................................................ 121
8.5 Version logicielle ..................................................................................................................... 122
9 Neoyage ................................................................................................................ 123
10 Dépannage ..............................................................................................................124
11 Données techniques/consignes du fabricant ...............................................125
EN
FR
IT
NL
NW
DK
PL
CZ
SK
69
Page 70

1 Illustrations
Écran
4
5
6
70
Haut-parleur
1 2 3
Page 71

1 Volume +/- (rotation)/Entrée (pression)
2 DAB/FM Touche de changement de mode
3 Info/Menu pour changer l'achage à l'écran/Accès au menu principal
4 Mise en marche/Arrêt (veille)
5 Tune + Augmenter la valeur/Sélection du menu
6 Tune - Diminuer la valeur/Sélection du menu
EN
FR
IT
NL
NW
DK
PL
CZ
SK
71
Page 72

1.1 Vue de dos
Compartiment à piles Prise casque
72
Antenne télescopique
Raccord du bloc
d'alimentation
Page 73

2 Avant-propos
Ce mode d’emploi vous aide à utiliser votre poste de radio, ci-après nommé DIGITRADIO
ou appareil, de manière sûre et conforme à sa destination.
2.1 Groupe cible de ce mode d’emploi
Ce mode d’emploi s’adresse à toutes les personnes qui installent, utilisent, neoient ou
meent l’appareil au rebut.
2.1.1 Utilisation conforme
L’appareil est conçu pour la réception de stations de radio FM/DAB+. L’appareil est
conçu pour un usage privé et ne convient pas à des fins commerciales.
2.2 Consignes importantes
Veuillez observer les indications ci-dessous afin de réduire tout risque en matière de
sécurité, d’éviter toute détérioration de l’appareil et de contribuer à la protection de
l’environnement.
73
EN
FR
IT
NL
NW
DK
PL
CZ
SK
Page 74

Lisez aentivement l'ensemble des consignes de sécurité et conservez-les pour toute
question ultérieure. Respectez toujours l'ensemble des avertissements et consignes de
ce mode d’emploi, ainsi que ceux au dos de l’appareil.
Aention - désigne une indication importante à lire aentivement, afin d’éviter
toute perturbation de l’appareil, toute perte/mauvaise utilisation des données ou
tout fonctionnement indésirable.
Astuce - désigne une indication relative à la fonction présentée, ainsi qu’une
autre fonction liée et éventuellement à respecter, avec ses références dans le
manuel.
74
Page 75

2.2.1 Sécurité
Pour votre sécurité, vous devez lire aentivement les consignes de sécurité avant
de mere en service votre Viola 2. Le fabricant décline toute responsabilité pour les
dommages résultant d’une utilisation inappropriée de l’appareil et du non-respect des
dispositions de sécurité.
N’ouvrez jamais l’appareil!
Tout contact avec des pièces conductrices de tension peut entraîner la mort!
EN
FR
IT
Les interventions éventuellement nécessaires doivent être uniquement eectuées
par du personnel qualifié.
Cet appareil doit uniquement être utilisé dans des régions à climat tempéré.
75
NL
NW
DK
PL
CZ
SK
Page 76

Lors d’un transport prolongé dans le froid et d'un passage dans des locaux
chaués, ne pas le mere en marche immédiatement; aendre l’équilibrage des
températures.
N’exposez pas l’appareil à des goues d’eau ou des éclaboussures. Si de l’eau
pénètre dans l’appareil, arrêtez-le et contactez l’assistance technique.
N'exposez pas l'appareil à des sources de chaleur qui peuvent faire chauer
l'appareil au-delà de son utilisation normale.
En cas d’orage, il est conseillé de débrancher l’appareil du secteur. Une
surtension peut endommager l’appareil.
76
Page 77

Si l’appareil semble défectueux, s’il produit des odeurs ou fumées, s’il présente
des dysfonctionnements importants, si le boîtier est endommagé, arrêtez
immédiatement l’appareil et contactez l’assistance technique.
L’appareil doit être uniquement branché avec le bloc d’alimentation à une
tension secteur de 100V - 240V~, 50/60Hz.
N’essayez jamais de faire fonctionner l’appareil sous une autre tension.
Le bloc d’alimentation doit uniquement être branché une fois l’installation
terminée.
EN
FR
IT
NL
NW
Si le bloc d’alimentation est défectueux, ou si l’appareil présente des dommages,
il ne faut alors pas le mere en marche.
Lors du débranchement du bloc d’alimentation hors de la prise secteur, tirez sur
la fiche et non pas sur le câble.
77
DK
PL
CZ
SK
Page 78

Ne meez pas l’appareil en marche à proximité d’une baignoire, d'une piscine ou
de projections d’eau.
N’essayez jamais de réparer vous-même un appareil défectueux. Adressez-vous
toujours à l'un de nos centres de service après-vente.
Les corps étrangers, tels que des aiguilles, pièces de monnaie etc., ne doivent
en aucun cas tomber à l’intérieur de l’appareil. Les contacts de branchement ne
doivent pas entrer en contact avec des objets métalliques ou avec les doigts.
Cela peut entraîner des courts-circuits.
Aucune flamme nue, p. ex. une bougie allumée, ne doit être placée sur l’appareil.
Ne laissez jamais les enfants utiliser cet appareil sans surveillance.
78
Page 79

L’appareil reste branché au réseau électrique même s'il est éteint/en veille.
Débranchez la fiche de la prise secteur si vous n’utilisez pas l’appareil pendant
une longue période. Tirez seulement sur la fiche et pas sur le câble.
N’écoutez pas la musique ou la radio à plein volume. Cela peut entraîner des
lésions auditives permanentes.
Cet appareil n’est pas destiné à être utilisé par des personnes (y compris les
enfants) dont les capacités physiques, sensorielles ou mentales sont limitées ou
manquant d’expérience et/ou de connaissances, sauf si elles sont surveillées par
une personne responsable de leur sécurité ou si elles ont reçu les instructions
nécessaires à l’utilisation de l’appareil.
Les enfants doivent être surveillés afin de s’assurer qu’ils ne jouent pas avec
l’appareil.
Il est interdit de procéder à des transformations sur l’appareil.
EN
FR
IT
NL
NW
DK
PL
CZ
SK
79
Page 80

Les appareils ou accessoires endommagés ne doivent plus être utilisés.
Manipulation des piles
Veillez à ce que les piles ne tombent pas entre les mains des enfants. Les enfants
peuvent les mere dans la bouche et les avaler, ce qui peut entraîner de graves
problèmes de santé. Dans ce cas, contactez immédiatement un médecin!
Conservez de ce fait les piles hors de portée des enfants en bas âge.
Utilisez l’appareil uniquement avec les piles homologuées pour cet appareil.
Les piles normales ne doivent pas être rechargées. Les piles ne doivent pas être
réactivées avec d’autres moyens, ni être démontées, chauées ou jetées au feu
(risque d’explosion !).
Neoyez les contacts de la pile et les contacts de l’appareil avant la mise en
place.
80
Page 81

Il y a un risque d’explosion si les piles ne sont pas mises correctement en place!
Ne remplacez les piles que par des piles de type correct portant le bon numéro
de modèle.
Aention! N’exposez pas les piles à des conditions extrêmes.
Ne les placez pas sur des radiateurs et ne les exposez pas au rayonnement direct
du soleil!
Les piles ayant fui ou endommagées peuvent provoquer des brûlures en cas
de contact avec la peau. Dans ce cas, utilisez des gants de protection adaptés.
Neoyez le compartiment à piles avec un chion sec.
Retirez les piles quand l'appareil n'est pas utilisé pendant une période prolongée.
81
EN
FR
IT
NL
NW
DK
PL
CZ
SK
Page 82
2.2.2 Élimination
L’emballage de votre appareil est exclusivement composé de matériaux recyclables.
Merci de les mere au rebut en respectant les consignes de tri sélectif. Une fois arrivé
en fin de vie, ce produit ne doit pas être mis au rebut avec les déchets ménagers
ordinaires. Il doit être déposé dans un point de collecte pour le recyclage des appareils
électriques et électroniques.
Le symbole figurant sur le produit, dans le manuel d’utilisation ou sur l’emballage
l'indique.
Les matériaux peuvent être recyclés conformément à leur marquage.
Le recyclage, la réutilisation des matériaux et toute autre forme de réutilisation
des appareils usagés contribuent de manière importante à la protection de notre
environnement.
Veuillez contacter votre municipalité pour connaître le lieu de mise au rebut adapté.
82
Page 83

Veillez à ce que les piles/baeries vides ainsi que les déchets électroniques ne soient
pas jetés avec les ordures ménagères, mais qu’ils soient éliminés de façon adaptée
(reprise par les détaillants spécialisés, déchets spéciaux).
EN
FR
IT
Les piles/baeries peuvent contenir des substances toxiques nocives pour la santé et
l’environnement. Les piles/baeries sont soumises à la directive européenne 2006/66/
CE. Celles-ci ne doivent pas être éliminées avec les déchets ménagers ordinaires.
Consignes pour la mise au rebut :
Mise au rebut de l’emballage:
Votre nouvel appareil a été protégé par son emballage lors de son expédition. Tous
les matériaux utilisés sont écologiques et recyclables. Merci d’apporter votre concours
au respect de l’environnement en éliminant l’emballage de manière adaptée.
NL
NW
DK
PL
CZ
SK
83
Page 84

Informez-vous auprès de votre revendeur ou des services communaux de
collecte des déchets au sujet des points de collecte actuels.
Risque d’étouement! Ne laissez pas l'emballage ou ses éléments à des enfants.
Risque d’étouement dû aux films et aux autres matériaux d’emballage.
Mise au rebut de l’appareil:
Les appareils usagés ne sont pas des déchets sans aucune valeur. Grâce à une
mise au rebut respectueuse de l’environnement, des matières premières précieuses
peuvent être récupérées. Renseignez-vous auprès des services administratifs de
votre ville ou communauté de communes pour connaître les possibilités d’une mise
au rebut conforme de votre appareil dans le respect de l’environnement. Avant de
mere l’appareil au rebut, les piles/baeries doivent être retirées.
Cet appareil est marqué conformément à la directive 2012/19/UE relative aux
appareils usagés électriques et électroniques.
84
Page 85

Une fois arrivé en fin de vie, ce produit ne doit pas être mis au rebut avec les
déchets ménagers ordinaires. Il doit être déposé dans un point de collecte
pour le recyclage des appareils électriques et électroniques. C’est ce qu’indique
le symbole figurant sur le produit, la notice d’utilisation ou l’emballage. Les
matériaux peuvent être recyclés conformément à leur marquage. Le recyclage,
la réutilisation des matériaux et toute autre forme de réutilisation des
appareils usagés contribuent de manière importante à la protection de notre
environnement.
Consigne importante relative à la mise au rebut des piles/baeries : les piles/
baeries peuvent contenir des substances toxiques pour l'environnement. Vous
devez donc les mere au rebut conformément aux dispositions légales en
vigueur. Ne jetez jamais les piles/baeries avec les autres déchets ménagers.
Vous pouvez mere les piles/baeries gratuitement au rebut auprès de votre
revendeur ou aux points de collecte spéciaux.
EN
FR
IT
NL
NW
DK
PL
CZ
SK
85
Page 86

2.2.3 Mentions légales
Par la présente, TechniSat déclare que l’installation radioélectrique Viola 2
est conforme à la directive 2014/53/UE. Le texte intégral de la déclaration de
conformité européenne est disponible à l’adresse suivante:
hp://konf.tsat.de/?ID=11765
La société TechniSat ne peut être tenue pour responsable des dommages causés
au produit dans le cas d’influences extérieures, d’une usure, d’une utilisation
inappropriée, d’une réparation non autorisée, de modifications ou d’accidents.
Sous réserve de modifications et d’erreurs typographiques. Dernière mise à jour
01/18.
Toutes copies et reproductions sont soumises à l’autorisation de l’éditeur. Vous
pouvez télécharger une version actuelle du manuel au format PDF dans
l'espace de téléchargement du site Internet TechniSat sur www.technisat.de.
86
Page 87

VIOLA 2 et TechniSat sont des marques déposées de:
TechniSat Digital GmbH
TechniPark
Julius-Saxler-Straße 3
54550 Daun/Eifel, Allemagne
www.technisat.de
EN
FR
IT
NL
NW
DK
PL
CZ
SK
87
Page 88

2.2.4 Consignes d'entretien
La qualité de ce produit est contrôlée et garantie pendant la période de garantie
légale de 24mois à compter de la date d’achat. Veuillez conserver la facture
comme preuve d'achat. Veuillez vous adresser au revendeur du produit pour
toute demande relevant de la garantie.
Remarque!
Notre assistance technique téléphonique est joignable pour toute question et
complément d'informations, ou en cas de problème avec l’appareil:
du lundi au vendredi de 8h00 à 20h00 au numéro suivant :
+49 (0) 39 25 92 20 18 00.
88
Page 89

En cas d'éventuel retour de l'appareil, merci d'adresser votre colis uniquement à
l'adresse suivante :
TechniSat Digital GmbH
Service-Center
Nordstr. 4a
39418 Staßfurt, Allemagne
Les noms de sociétés, institutions ou marques citées sont des marques ou des marques
déposées de leurs propriétaires respectifs.
89
EN
FR
IT
NL
NW
DK
PL
CZ
SK
Page 90

3 Installation de l’appareil
> Posez l’appareil sur une surface solide, sûre et horizontale. Assurez une
circulation d'air susante.
Aention ! :
> N’installez pas l’appareil sur des surfaces souples telles que des tapis, couvertures
ou à proximité de rideaux et de tentures, sous peine d’obstruer les orifices de
ventilation. La circulation nécessaire de l’air serait alors interrompue. Cela risque
d’entraîner un incendie au niveau de l’appareil.
> N’installez pas l’appareil à proximité d’une source de chaleur comme un radiateur.
Évitez les rayons directs du soleil et les endroits avec énormément de poussière.
90
Page 91

> L’emplacement ne doit pas se situer dans des locaux où règne une forte
humidité de l’air, p. ex. dans la cuisine ou un sauna, la condensation risquant
d’entraîner la détérioration de l’appareil. L’appareil est prévu pour une utilisation
dans un environnement sec à climat tempéré et ne doit pas être exposé à des
goues ou projections d’eau.
> Tenez compte du fait que les pieds de l’appareil risquent de laisser des traces
colorées sur certaines surfaces de meubles. Utilisez une protection entre vos
meubles et l’appareil.
> Tenez la Viola 2 éloignée d’appareils produisant des champs magnétiques
puissants.
> Ne posez pas d'objets lourds sur l'appareil.
> Si vous passez l'appareil d'un environnement froid à un environnement chaud, de
l'humidité peut apparaître à l'intérieur de l'appareil. Dans ce cas, patientez env.
une heure avant de la mere en marche.
> Placez le câble d'alimentation de manière à ce que personne ne puisse trébucher
dessus.
91
EN
FR
IT
NL
NW
DK
PL
CZ
SK
Page 92

> Assurez-vous que le câble secteur ou le bloc d’alimentation soit toujours
facilement accessible, de manière à pouvoir débrancher l’appareil rapidement de
l’alimentation électrique!
> La prise secteur doit se situer le plus près possible de l’appareil.
> Introduisez entièrement la fiche dans la prise secteur.
> Utilisez une prise secteur adaptée facilement accessible et évitez d’utiliser des
multiprises!
> Ne saisissez pas la fiche avec les mains mouillées, risque de décharge électrique!
> En cas de pannes ou de formation de fumée et d’odeur en provenance du
boîtier, débranchez immédiatement la fiche de la prise secteur !
> Lorsque l’appareil ne doit pas être utilisé pendant une période prolongée, p. ex.
avant de partir en voyage, débranchez la fiche.
> Retirez les piles quand l'appareil n'est pas utilisé pendant une période prolongée.
92
Page 93

> Un volume trop élevé, en particulier avec les écouteurs, peut entraîner des
lésions auditives.
4 Description de la Viola 2
4.1 Contenu de la livraison
Avant la mise en service, veuillez contrôler si le contenu de la livraison est complet :
1 x Viola 2
1 x bloc d’alimentation
1 x mode d’emploi
4.2 Caractéristiques spécifiques de la Viola 2
La Viola 2 se compose d’un récepteur FM/DAB+ doté des fonctions suivantes:
- La radio capte les fréquences FM 87,5 - 108MHz (analogiques) et
DAB+ 174,9 - 239,2MHz (numériques).
- L’appareil est équipé d’un achage de l’heure et de la date.
EN
FR
IT
NL
NW
DK
PL
CZ
SK
93
Page 94

4.3 Préparation de la Viola 2 pour le fonctionnement
4.3.1 Insertion des piles
> Ouvrez le compartiment à piles à l'arrière de l'appareil en appuyant sur le
couvercle du compartiment à piles en direction de la flèche représentée. Retirez
ensuite le couvercle.
> Insérez 4 x piles AA en respectant l'orientation. La polarité des piles est indiquée
dans le fond du compartiment à piles.
> Placez le couvercle du compartiment des piles sur le compartiment et fermez-le
jusqu’à ce qu’il s’enclenche de manière audible.
Remplacez à temps les piles dont la charge devient faible.
94
Page 95

4.3.2 Branchement du bloc d’alimentation
> Pour ce faire, branchez la fiche du bloc d'alimentation fourni à la prise CC 6V
indiquée à l'arrière de la Viola 2. Reliez ensuite le bloc d'alimentation au réseau
électrique.
Assurez-vous que la tension de fonctionnement du bloc d'alimentation
corresponde à la tension réseau locale avant de le brancher dans la prise secteur
murale.
Suite au premier branchement au secteur, l'indication
«Bienvenue dans la radio numérique» s'ache à l’écran. Une première
recherche de stations est alors eectuée via DAB+. Observez ici aussi la consigne
donnée au point 4.4.1.
EN
FR
IT
NL
NW
DK
PL
CZ
SK
95
Page 96

4.3.3 Orientation de l’antenne télescopique
Le nombre et la qualité des stations reçues dépendent des conditions de réception à
l’endroit où est placé l’appareil. L’antenne télescopique permet d’obtenir une excellente
réception.
> Orientez l’antenne télescopique et dépliez-la.
L’orientation précise de l’antenne télescopique est souvent importante, en
particulier dans les zones de réception DAB+ périphériques. Sur Internet, par
exemple sur « www.digitalradio.de », il est possible de trouver rapidement la
localisation du pylône émeeur le plus proche.
Lancez la première recherche près d’une fenêtre en direction du pylône émeeur.
Par mauvais temps, la réception DAB+ peut être limitée.
Ne touchez pas l’antenne télescopique durant la lecture d’une station. Cela
pourrait entraîner des problèmes de réception et des coupures du son.
96
Page 97

4.3.4 Utilisation des écouteurs
Risque de lésions auditives !
N'écoutez jamais la radio avec des écouteurs à plein volume. Cela peut entraîner des
lésions auditives permanentes. Avant d'utiliser des écouteurs, réglez le volume de
l’appareil sur le volume minimal.
Utilisez uniquement des écouteurs dotés d'une prise jack de 3,5mm.
> Branchez la fiche des écouteurs dans la prise casque à l'arrière de l’appareil.
L’émission du son se fait maintenant exclusivement dans les écouteurs, le haut-
parleur est mis en sourdine.
> Si vous souhaitez écouter à nouveau le son en passant par les haut-parleurs,
débranchez la fiche des écouteurs de la prise casque de l’appareil.
EN
FR
IT
NL
NW
DK
PL
CZ
SK
97
Page 98

4.4 Fonctions générales de l’appareil
4.4.1 Mise en marche de l’appareil
> Pour garantir une bonne réception FM/DAB+, déployez entièrement l’antenne
située au dos de l’appareil. Pour ce faire, reportez-vous aussi au point 4.3.3.
> Préparez d’abord la Viola 2 au fonctionnement comme décrit aux points 4.3.1 et
4.3.2.
> En appuyant sur la touche On/o, vous meez la Viola 2 en marche.
Après la première mise en marche, l’appareil eectue automatiquement une
recherche complète en mode DAB. Durant la recherche, l’écran ache la
progression, ainsi que le nombre de stations de radio numériques détectées. Une
fois la recherche de stations terminée, la première station DAB+ est diusée.
98
Page 99

4.4.2 Arrêt de l’appareil
Fonctionnement sur secteur :
> En appuyant brièvement sur la touche On/o vous pouvez mere l’appareil en
mode veille. L’indication [Veille] apparaît brièvement à l’écran. La date et l’heure
s’achent à l’écran. Vous pouvez modifier la luminosité de l’écran en mode veille
comme décrit au point 8.2.
Fonctionnement sur piles :
> Lorsqu'il fonctionne sur piles, l'appareil est placé en mode veille étendu en
appuyant sur la touche On/o. Il n’y a ici pas d’achage de la date ni de l’heure.
4.4.3 Réglage du volume
> Réglez le volume à l’aide du bouton rotatif Vol +/-. Le volume réglé s’ache à
l’écran sous la forme d’un diagramme à barres. Observez également le point
4.3.4 pour un fonctionnement avec des écouteurs branchés. Pour augmenter
le volume, tournez le bouton vers la droite, pour le diminuer, tournez-le vers la
gauche.
EN
FR
IT
NL
NW
DK
PL
CZ
SK
99
Page 100

4.4.4 Ouverture de l’achage à l’écran
> Appuyez brièvement sur la touche Info/menu pour parcourir les options
d'achage disponibles :
En mode DAB+ :
[Défilement de texte] (défilement de texte avec des informations
supplémentaires mises à disposition par l'émeeur dans certaines circonstances),
[Puissance du signal], [Type de programme], [Ensemble], [Fréquence],
[Qualité du signal], [Débit binaire et codec], [Heure] et [Date].
En mode FM (la fonction sélectionnée est marquée d’un «*»):
[Texte radio] (si diusé), [Type de programme] (PTY), [Ps] (Programm Service
Name ou nom de la station ou fréquence), [Informations audio], [Heure] et
[Date].
> Appuyez sur la touche Info/Menu pour quier à nouveau le réglage et revenir à
la vue lecture.
100
 Loading...