

Copies of the I/B. Please reproduce them without any
changes except under special instruction from Team
International BELGIUM. The pages must be reproduced
and folded in order to obtain a booklet A5 (+/- 148.5 mm
width x 210 mm height). When folding, make sure you
keep the good numbering when you turn the pages of
the I/B. Don’t change the page numbering. Keep the
Fax +32 2 359 95 50
Dampfbügeleisen
Ferro da stiro a vapore
language integrity.
Steam Iron
Fer à Vapeur
Stoomstrijkijzer
Plancha a vapor
Ferro a Vapor
Żelazko parowe
Fier calcat cu aburi
Naparovacia žehlička
TKG SI 1002
I/B Version
121024
Front cover page (first page)
Assembly page 1/44
230V~ 50Hz 1600W
Copies of the I/B. Please reproduce them without any
changes except under special instruction from Team
International BELGIUM. The pages must be reproduced
and folded in order to obtain a booklet A5 (+/- 148.5 mm
width x 210 mm height). When folding, make sure you
keep the good numbering when you turn the pages of
the I/B. Don’t change the page numbering. Keep the
Fax +32 2 359 95 50
language integrity.
2
Assembly page 2/44
TKG SI 1002 - 121024
Fax +32 2 359 95 50
Copies of the I/B. Please reproduce them without any
changes except under special instruction from Team
International BELGIUM. The pages must be reproduced
and folded in order to obtain a booklet A5 (+/- 148.5 mm
width x 210 mm height). When folding, make sure you
keep the good numbering when you turn the pages of
the I/B. Don’t change the page numbering. Keep the
language integrity.
D
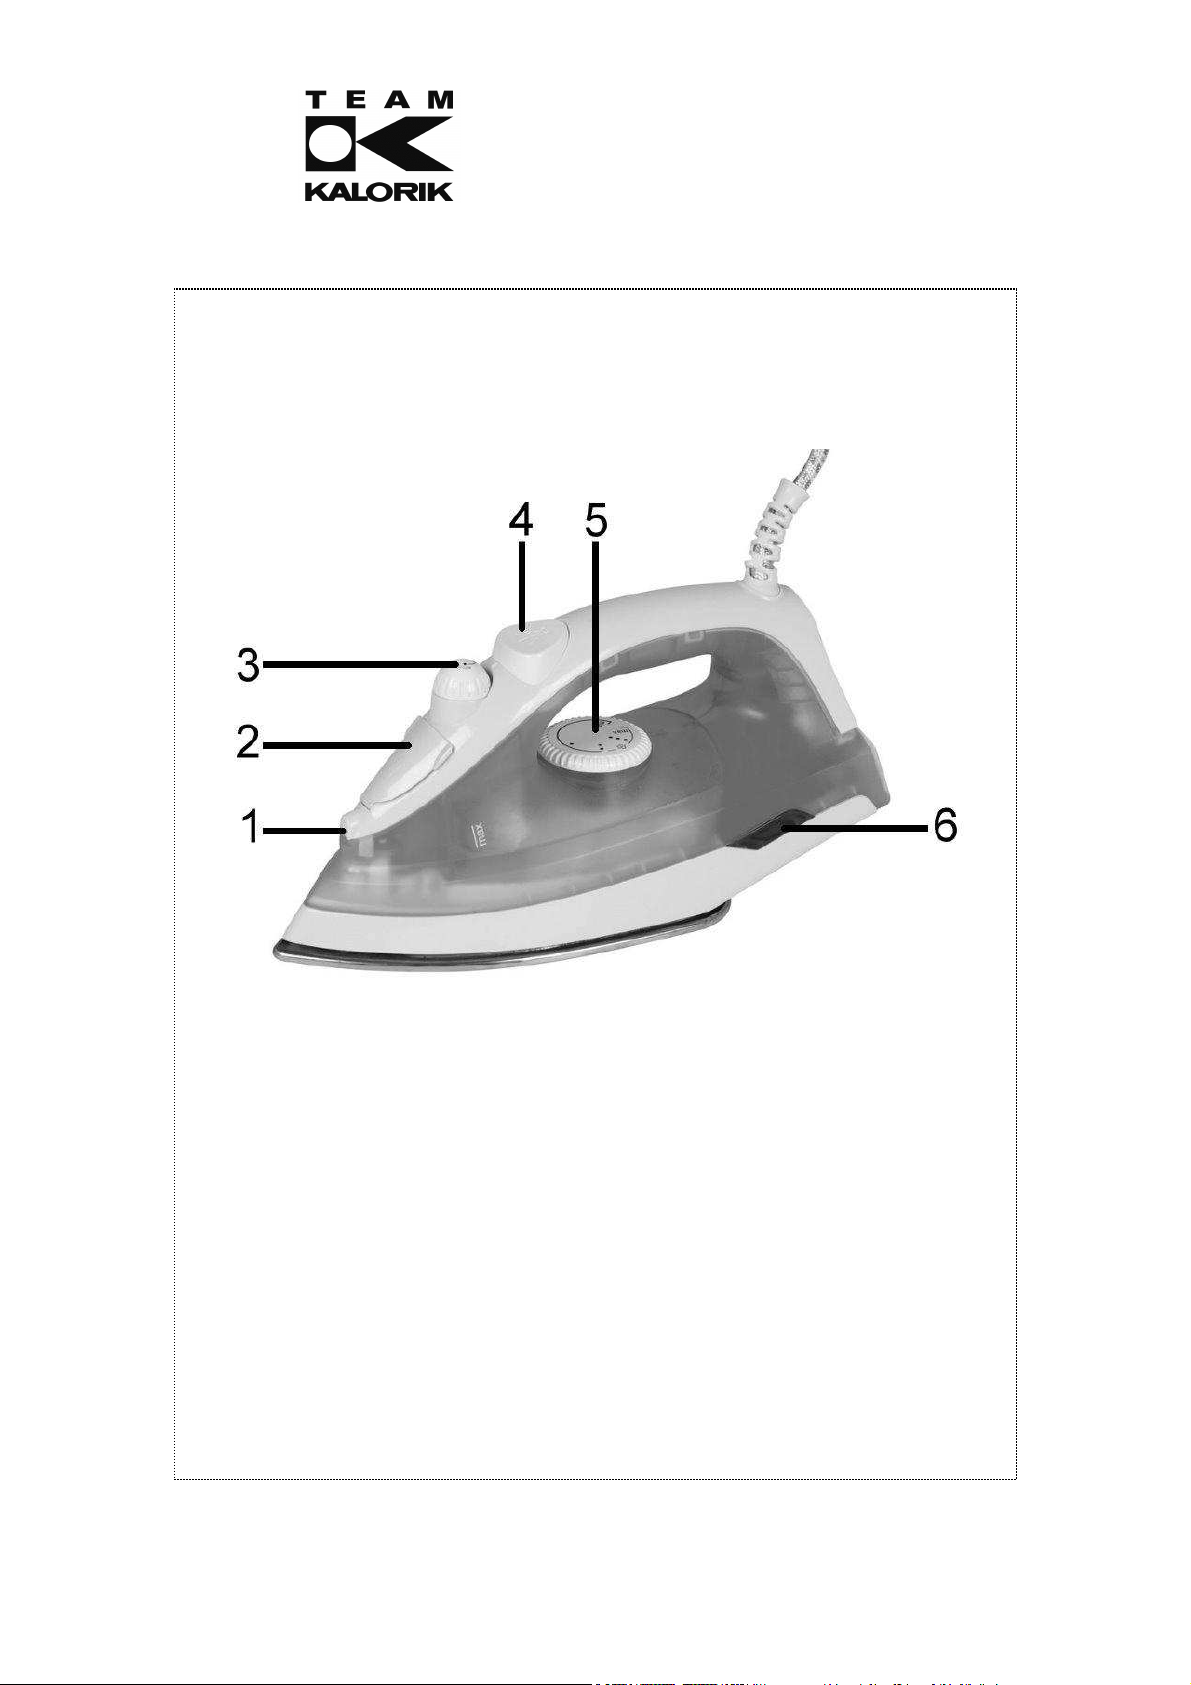
1. Spray-Düse
2. Deckel der Einfüllöffnung
3. Dampfregler
4. Sprayknopf
5. Stoffwahlschalter
6. Kontrollleuchte (Temperatur)
GB
1. Spray nozzle
2. Lid of the filling opening
3. Variable steam/dry dial
4. Spray button
5. Fabric selector switch
6. Temperature indicator
FR
1. Gicleur
2. Couvercle de l'orifice de remplissage
3. Régulateur sec/vapeur
4. Bouton spray
5. Bouton de sélection de vêtements
6. Témoin de chauffe
NL
1. Sproeier
2. Deksel van de vulopening
3. Stoom-/Droogregelaar
4. Sprayknop
5. Stofkeuzeschakelaar
6. Controlelampje (temperatuur)
SP
1. Vaporizador
2. Orificio de entrada de agua
3. Regulador seco/vapor
4. Botón spray
5. Botón de elección de ropa
6. Testigo luminoso (temperatura)
P
1. Borrifador
2. Tampa da entrada da água para o depósito
3. Regulador vapor/seco
4. Botão spray
5. Botão Fabric/regulador da temperatura
6. Luz indicadora da temperatura
I
1. Spruzzatore
2. Coperchio per il serbatoio dell' acqua
3. Regolatore vapore/secco
4. Manopola spray
5. Manopola per selezionare il tipo di tessuto da
stirare
6. Spia luminosa (di temperatura)
PL
1. Dysza spryskiwacza
2. Pokrywa wlewu wody
3. Regulacja pary
4. Przycisk spryskiwacza
5. Pokrętło temperatury
6. Lampka kontrolna temperatury
RO
1. Duza de stropire
2. Orificiu de umplere
3. Selector pentru calcare uscata/aburi
4. Buton pentru pulverizare (spray)
5. Buton selectare temperatura calcare
6. Indicator de temperatura
SK
1. Sprejová dýza
2. Veko otvoru na plnenie
3. Regulator pary
4. Tlačidlo spreja
5. Termostat
6. Prevádzková svetelná kontrolka (teplota)
3
TKG SI 1002 - 121024
Assembly page 3/44
Copies of the I/B. Please reproduce them without any
changes except under special instruction from Team
International BELGIUM. The pages must be reproduced
and folded in order to obtain a booklet A5 (+/- 148.5 mm
width x 210 mm height). When folding, make sure you
keep the good numbering when you turn the pages of
the I/B. Don’t change the page numbering. Keep the
Fax +32 2 359 95 50
WICHTIGE SICHERHEITSVORSCHRIFTEN
Lesen Sie aufmerksam die Gebrauchsanleitung, bevor Sie Ihr Gerät benutzen, und befolgen Sie
immer die Sicherheitsvorschriften und die Gebrauchsanweisung.
Wichtig: Personen (einschließlich Kinder), die aufgrund ihrer physischen, sensorischen oder
geistigen Fähigkeiten oder ihrer Unerfahrenheit oder Unkenntnis nicht in der Lage sind, das
Gerät sicher zu benutzen, sollten dieses Gerät nicht ohne Aufsicht oder Anweisung durch eine
verantwortliche Person benutzen. Kinder sollten beaufsichtigt werden, um sicherzustellen, dass
sie nicht mit dem Gerät spielen.
Kontrollieren Sie, ob die Netzspannung mit der auf dem Gerät vermerkten Spannung
übereinstimmt, bevor Sie das Gerät benutzen.
Lassen Sie Ihr Gerät niemals beim Gebrauch unbeaufsichtigt.
Überprüfen Sie regelmäßig, dass das Gerät nicht beschädigt ist. Bei Beschädigung der
Anschlussleitung oder des Gerätes, letzteres nicht benutzen, sondern von einem
Fachmann(*) überprüfen bzw. reparieren lassen. Eine beschädigte Anschlussleitung muss
von einem Fachmann(*) ausgewechselt werden, damit jede Gefahr gemieden wird.
Benutzen Sie das Gerät nur zu Haushaltszwecken, wie in der Bedienungsanleitung
angegeben.
Tauchen Sie das Gerät niemals in Wasser oder andere Flüssigkeiten ein, weder zum
Reinigen, noch zu einem anderen Zweck. Stellen Sie das Gerät niemals in die
Spülmaschine.
Benutzen Sie das Gerät nicht in der Nähe einer Wärmequelle.
Entfernen Sie den Stecker aus der Steckdose, bevor Sie das Gerät reinigen.
Warten Sie, bis das Gerät vollständig abgekühlt ist, bevor Sie es reinigen, wegstellen oder
mit Wasser füllen.
Benutzen Sie das Gerät nicht im Freien und bewahren Sie es an einem trockenen Platz auf.
Benutzen Sie nur Zubehör, welches vom Lieferanten empfohlen wurde. Anderes Zubehör
stellt eine Gefahr für den Benutzer dar und das Gerät könnte dadurch beschädigt
werden.
Ziehen Sie niemals an der Anschlussleitung, um das Gerät zu bewegen. Achten Sie darauf,
dass die Anschlussleitung nicht zufälligerweise irgendwo hängen bleibt und dies zum Fall
des Gerätes führen könnte. Wickeln Sie die Anschlussleitung nicht um das Gerät herum
und knicken Sie sie nicht.
Während des Gebrauchs können zugängliche Teile des Gerätes eine sehr hohe
Temperatur erreichen. Berühren Sie diese Teile nicht, sondern verwenden Sie den Griff.
Achten Sie darauf, dass die Anschlussleitung keine heißen Teile berührt.
Vor dem ersten Gebrauch sollten Sie alle Etiketten und Schmutzteilchen von der Sohle
entfernen und Letztere sorgfältig reinigen.
Wenn Sie den Tank mit Wasser füllen möchten, ziehen Sie erst den Stecker aus der
Steckdose (Modell mit Spray- bzw. Dampffunktion).
Lassen Sie das Gerät nie waagerecht stehen, sondern stellen Sie es lieber senkrecht.
Vergewissern Sie sich, dass die Sohle des Gerätes niemals entflammbare Stoffe (z.B. Plastik)
berührt.
Wenn Sie eine spezielle hitzebeständige Unterlage besitzen, sollten Sie nicht vergessen den
Dampfregler auf 0 zu stellen.
Schalten Sie das Bügeleisen aus, wenn Sie es nicht (mehr) benutzen.
Das Bügeleisen muss auf einer stabilen, flachen Ebene benutzt und hingestellt werden.
Benutzen Sie das Bügeleisen nicht, wenn es gefallen ist oder irgendwelche sichtbaren
Schäden aufweist oder leckt.
(*) Fachmann: Anerkannter Kundendienst des Lieferanten oder des Importeurs, der für
derartige Reparaturen zuständig ist. Wenden Sie sich für eventuelle Reparaturen an diesen
Kundendienst.
language integrity.
4
TKG SI 1002 - 121024
Assembly page 4/44

Copies of the I/B. Please reproduce them without any
changes except under special instruction from Team
International BELGIUM. The pages must be reproduced
and folded in order to obtain a booklet A5 (+/- 148.5 mm
width x 210 mm height). When folding, make sure you
keep the good numbering when you turn the pages of
the I/B. Don’t change the page numbering. Keep the
Fax +32 2 359 95 50
! Wenn Sie das Gerät zum ersten Mal benutzen, entfernen Sie die Schutzfolie von der
Bügeleisensohle und reinigen Sie Letztere mit einem weichen Tuch.
EINFÜLLEN DES WASSERS
Benutzen Sie demineralisiertes Wasser. Wenn Sie die Spray- bzw. Dampffunktion wählen, füllen
Sie den Wassertank folgendermaßen:
1) Ziehen Sie den Netzstecker, und lassen Sie das Bügeleisen abkühlen. Stellen Sie das
Bügeleisen auf eine ebene Fläche.
2) Stellen Sie den Temperaturregler auf "MIN" und den Dampfregler auf "0".
3) Öffnen Sie den Deckel der Einfüllöffnung. Gießen Sie Wasser in den Wassertank mit Hilfe
eines Messbechers oder eines anderen angemessenen Behälters, ohne die MaxMarkierung zu überschreiten.
4) Während des Bügelns, ziehen Sie den Netzstecker und füllen Sie den Wassertank, ohne das
Bügeleisen auf die heiße Sohle zu stellen, es sei denn, dass Sie eine speziell dazu geeignete
Unterlage besitzen.
TEMPERATURREGLER
• Wählen Sie die richtige Temperatur je nach dem zu bügelnden Stoff.
• Stecken Sie den Stecker in eine Steckdose. Wählen Sie die korrekte Temperatur zum
Bügeln, indem Sie den Stoffwahlschalter drehen. Die Temperaturkontrollleuchte leuchtet
auf. Sobald die gewünschte Temperatur erreicht ist, erlischt die Temperaturkontrollleuchte.
TROCKENBÜGELN
• Drehen Sie den Dampfregler auf Position "0".
• Stecken Sie den Stecker in die Steckdose.
• Wählen Sie die gewünschte Temperatur, je nach dem zu bügelnden Stoff. Überprüfen Sie
das Etikett im zu bügelnden Stoff, bevor Sie den Knopf auf die richtige Position einschalten.
• Stellen Sie das Bügeleisen aufrecht und warten Sie bis die Kontrollleuchte erlischt.
DAMPFBÜGELN
Textilart Temperaturskala Dampfbügeln
Nylon
Synthetik (z.B. Azetat,
Acrylic, Viskose,
Polyamide, Polyester…)
Seide
Wolle
Baumwolle
Leinen
Reinigung
• Füllen Sie den Wassertank und stellen Sie den Dampfregler auf "0".
language integrity.
MIN
|
|
|
|
|
|
MAX
|
|
0
----->
SELF CLEAN
5
TKG SI 1002 - 121024
Assembly page 5/44
Copies of the I/B. Please reproduce them without any
changes except under special instruction from Team
International BELGIUM. The pages must be reproduced
and folded in order to obtain a booklet A5 (+/- 148.5 mm
width x 210 mm height). When folding, make sure you
keep the good numbering when you turn the pages of
the I/B. Don’t change the page numbering. Keep the
Fax +32 2 359 95 50
• Schließen Sie das Bügeleisen ans Stromnetz an.
• Wählen Sie die gewünschte Temperatur.
• Dann den Dampfregler zwischen 0 und stellen je nach der gewünschten
Dampfmenge.
• Stellen Sie das Bügeleisen aufrecht und warten Sie bis die Kontrollleuchte erlischt.
Achtung: Stellen Sie die Temperatur ein innerhalb des Dampfbereichs (' ' oder ' '). Wenn
die Temperatur zu niedrig eingestellt ist, kann Wasser aus der Sohle entweichen.
Überprüfen Sie das Etikett im Stoff, bevor Sie den Stoff bügeln. Gewisse Stoffe können durch
Dampf oder Wasser beschädigt werden.
SPRAY
• Erleichtert das Bügeln von dickeren Stoffen und schwer zu bügelnden Stellen. Den
Sprayknopf fest drücken, um einen feinen Sprühnebel zu erzeugen.
• Der Sprayknopf kann immer benutzt werden, unabhängig von der Dampf- und
Temperatureinstellung.
ENTKALKUNG
Um das Gerät zu entkalken, verwenden Sie dazu geeignete Produkte, die Sie im Handel finden
können, und lesen Sie deren Bedienungsanleitung aufmerksam.
REINIGUNG UND PFLEGE
• Ziehen Sie den Stecker aus der Steckdose, und lassen Sie das Gerät abkühlen, bevor Sie es
reinigen.
• Reinigen Sie das Gehäuse des Bügeleisens mit einem feuchten Tuch.
• Verwenden Sie keine Schleifmittel um die Sohle zu reinigen, sondern verwenden Sie
speziell dazu geeignete Produkte, die Sie im Handel finden.
LEERUNG UND AUFBEWAHRUNG
• Den Temperaturregler auf "MIN" und den Dampfregler auf "0" stellen und das Bügeleisen
vom Stromnetz trennen.
• Kippen Sie das Bügeleisen nach vorn, so dass das restliche Wasser herauslaufen kann.
• Das Bügeleisen aufrecht stellen und abkühlen lassen, so dass Restfeuchtigkeit verdunsten
kann.
SELBSTREINIGUNG
Es ist wichtig, die “Selbstreinigung” regelmäßig (zumindest jeden zweiten Monat) anzuwenden
um Unreinheiten usw. zu entfernen.
Je härter das Wasser, desto öfter sollte man das Dampfbügeleisen mit der Selbstreinigung
reinigen.
1. Öffnen Sie die Einfüllöffnung und füllen Sie den Wassertank bis zur
Maximummarkierung. Schließen Sie dann mit Vorsicht die Einfüllöffnung.
2. Stellen Sie den Temperaturregler auf MAX.
3. Stecken Sie den Stecker in die Steckdose.
4. Stellen Sie das Bügeleisen aufrecht und warten Sie bis die Kontrollleuchte erlischt.
Stellen Sie dann den Temperaturregler auf MIN.
language integrity.
6
TKG SI 1002 - 121024
Assembly page 6/44
Copies of the I/B. Please reproduce them without any
changes except under special instruction from Team
International BELGIUM. The pages must be reproduced
and folded in order to obtain a booklet A5 (+/- 148.5 mm
width x 210 mm height). When folding, make sure you
keep the good numbering when you turn the pages of
the I/B. Don’t change the page numbering. Keep the
Fax +32 2 359 95 50
5. Halten Sie das Bügeleisen waagerecht über einem Waschbecken, und entfernen Sie
dann den Dampfregelknopf, damit die Selbstreinigung anfangen kann.
6. Die Löcher in der Sohle werden kochendes Wasser, Dampf und Unreinheiten
ausstoßen. Bewegen Sie das Bügeleisen von vorne nach hinten und von hinten nach
vorne, so dass jedes Loch gereinigt wird.
7. Stellen Sie den Dampfregler auf "0" sobald der Wassertank leer ist.
8. Falls es noch Unreinheiten gibt, wiederholen Sie diesen Vorgang.
9. Ziehen Sie den Stecker aus der Steckdose, und lassen Sie das Gerät abkühlen, bevor
Sie es wegräumen.
UMWELTSCHUTZ - RICHTLINIE WEEE 2002/96/EG
Zum Schutz unserer Umwelt und unserer Gesundheit sind Elektro- und Elektronik-Altgeräte nach
bestimmten Regeln zu entsorgen. Dies fordert den Einsatz sowohl des Herstellers bzw.
Lieferanten als auch des Verbrauchers.
Aus diesem Grund darf dieses Gerät, wie das Symbol auf dem Typenschild bzw. auf der
Verpackung zeigt, nicht in den unsortierten Restmüll gegeben werden. Der Verbraucher hat
das Recht, dieses Gerät über kommunale Sammelstellen zu entsorgen; von dort aus wird die
spezifische Behandlung, Verwertung bzw. das Recycling gem. den Erfordernissen der Richtlinie
sichergestellt.
language integrity.
7
TKG SI 1002 - 121024
Assembly page 7/44
Copies of the I/B. Please reproduce them without any
changes except under special instruction from Team
International BELGIUM. The pages must be reproduced
and folded in order to obtain a booklet A5 (+/- 148.5 mm
width x 210 mm height). When folding, make sure you
keep the good numbering when you turn the pages of
the I/B. Don’t change the page numbering. Keep the
Fax +32 2 359 95 50
IMPORTANT SAFEGUARDS
Please read these instructions carefully before using the appliance, and always follow the
safety and operating instructions.
Important: People (including children) who are not able to use the appliance in a safe way,
due to their physical, sensorial or mental capacity or their lack of experience or knowledge,
must never use the appliance except if they are supervised by a person responsible for their
safety or if they previously received instructions concerning the safe use of the appliance.
Close supervision is necessary to prevent children from using the appliance as a toy.
Check that your mains voltage corresponds to that stated on the appliance.
Never leave the appliance unsupervised when in use.
From time to time check the appliance for damages. Never use the appliance if cord or
appliance shows any signs of damage. In that case, repairs should be made by a
competent qualified electrician(*). Should the cord be damaged, it must be replaced by
a competent qualified electrician(*) in order to avoid all danger.
Only use the appliance for domestic purposes and in the way indicated in these
instructions.
Never immerse the appliance in water or any other liquid for any reason whatsoever.
Never place it into the dishwasher.
Never use the appliance near hot surfaces.
Before cleaning, always unplug the appliance from the power supply.
Never use the appliance outside and always place it in a dry environment.
Never use accessories that are not recommended by the producer. They could constitute
a danger to the user and risk to damage the appliance.
Never move the appliance by pulling the cord. Make sure the cord cannot get caught in
any way. Do not wind the cord around the appliance and do not bend it.
The temperature of the accessible surfaces may be very high when the appliance is in
use. Never touch these surfaces, always use the handle.
Make sure the cord does not come into contact with the hot parts of the appliance.
Before using the appliance for the first time, remove all labels and remainders from the
sole plate and carefully wipe it dry.
Always let the appliance cool down before cleaning, storing or filling it (model with spray
and/or steam).
To fill the tank it is absolutely necessary to unplug the cord (model with spray and/or
steam).
Never put your appliance in horizontal position, but preferably in vertical position.
Make sure its soleplate does not touch inflammable materials (e.g. plastic, textile) during
use.
If you have a special heat-resistant base, make sure you put the steam dial in 0 position.
Always unplug the iron when not in use.
The iron shall be used and placed on a stable level surface.
Do not use the iron if it has fallen, if it shows any visible signs of damage or if it leaks.
(*) Competent qualified electrician: after-sales department of the producer or importer or any
person who is qualified, approved and competent to perform this kind of repairs in order to
avoid all danger. In case of need you should return the appliance to this electrician.
! BEFORE USING THE IRON, remove any labels from the soleplate and wipe any manufacturing
residue from the soleplate using a soft cloth.
language integrity.
8
TKG SI 1002 - 121024
Assembly page 8/44
Copies of the I/B. Please reproduce them without any
changes except under special instruction from Team
International BELGIUM. The pages must be reproduced
and folded in order to obtain a booklet A5 (+/- 148.5 mm
width x 210 mm height). When folding, make sure you
keep the good numbering when you turn the pages of
the I/B. Don’t change the page numbering. Keep the
Fax +32 2 359 95 50
FILLING THE WATER TANK
Use preferably demineralised water. If you want to use the steam dial, fill the water tank as
follows:
1) Unplug the iron from the outlet to let it cool down and set it horizontally on a stable level
surface.
2) Put the temperature dial to "MIN" and the variable steam dial to the 0 setting.
3) To fill the water tank, open the lid of the filling opening and pour water using a measuring
cup. Never exceed the MAX mark indicated on the appliance.
4) When ironing, unplug the appliance before refilling. Fill the water tank by holding the
appliance in horizontal position without putting down the hot soleplate, unless you have a
heat-resistant base.
TEMPERATURE SETTINGS
• You can choose the temperature setting depending on the cloth to iron.
• Plug in the iron. Choose the correct ironing temperature by turning the fabric selector
switch. The temperature indicator lights up. Once the desired temperature has been
reached, the temperature indicator lamp will go out.
DRY PRESSING
• Turn the variable steam dial to position 0.
• Plug in the iron.
• Set the temperature dial for the desired fabric. Always check the label of the garment
before choosing the temperature setting.
• Set the iron on its heel rest and wait until the temperature indicator light goes out.
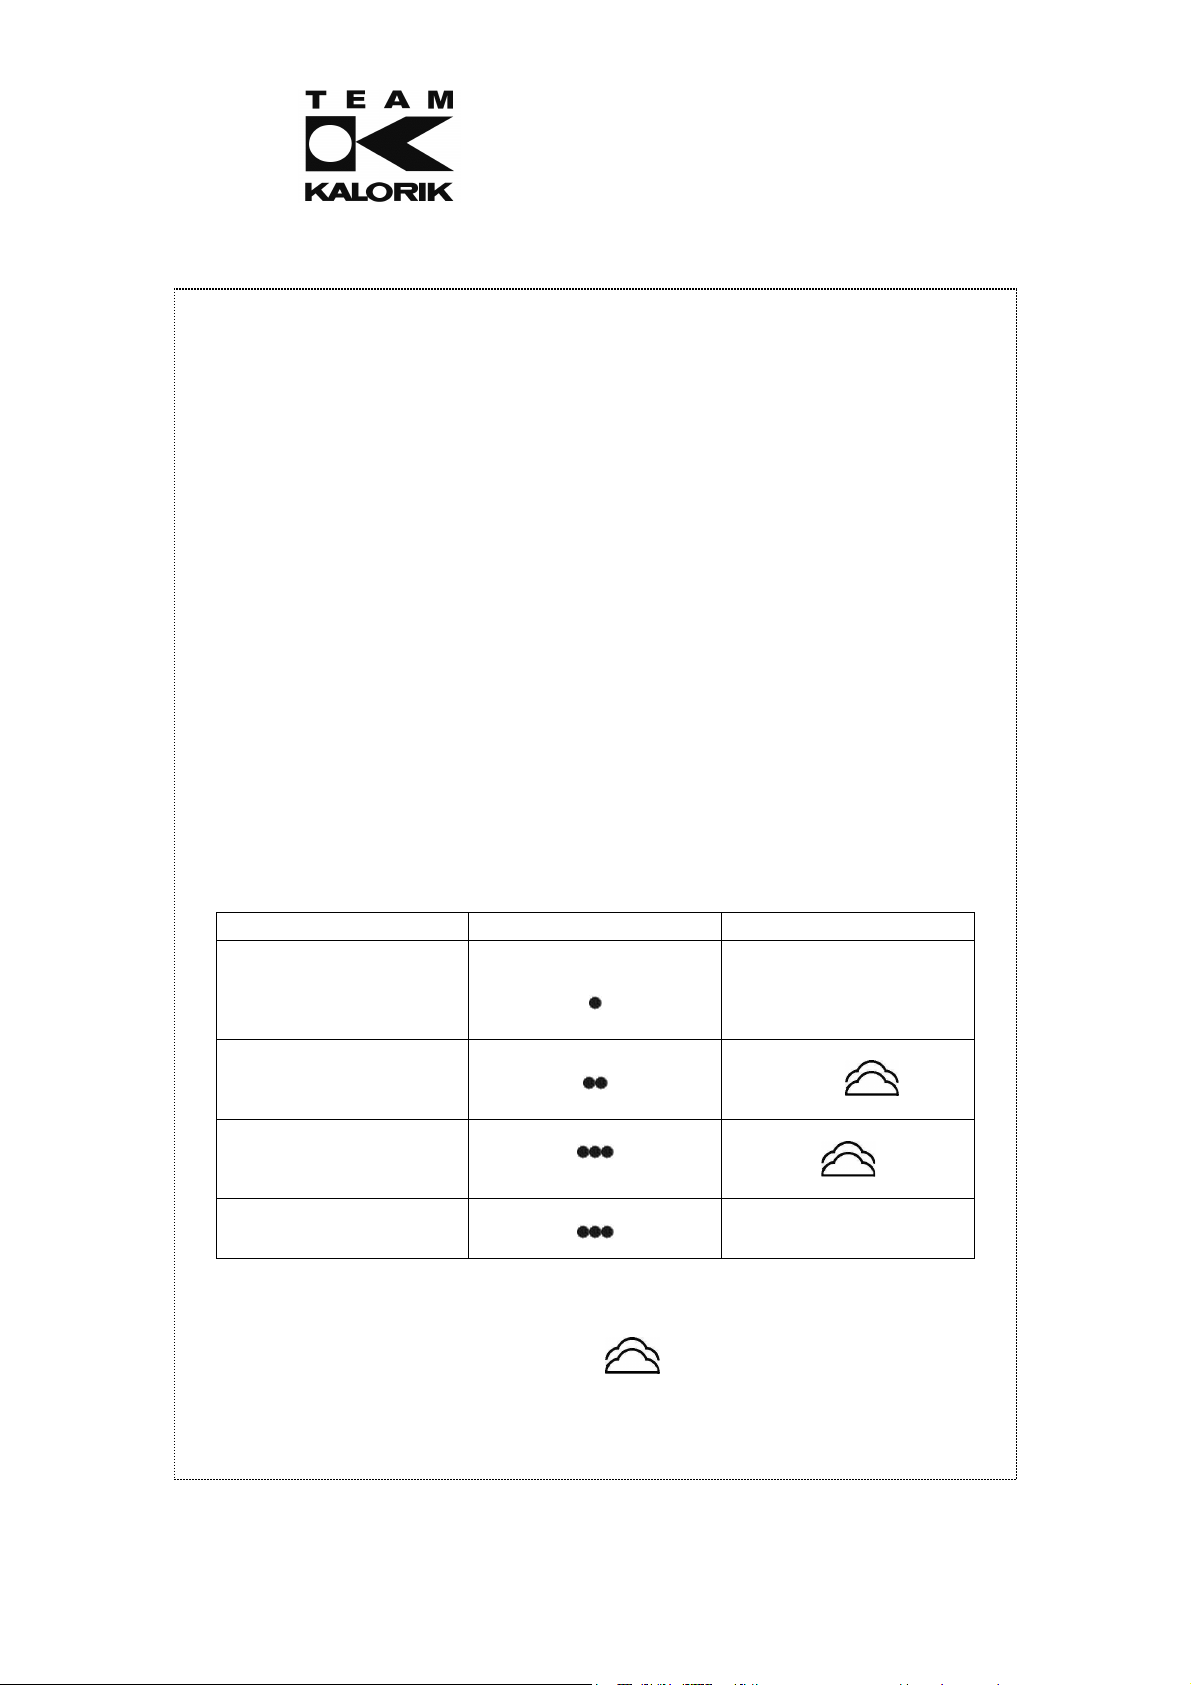
STEAM PRESSING
Kind of textile Temperature dial Steam ironing
Nylon
Synthetic (e.g. acetate,
acrylic, viscose, polyamide,
polyester, …)
Silk
Wool
Cotton
Linen
Care and cleaning
• Fill the water tank (variable steam dial on 0 position).
• Put the plug of the appliance into the power socket.
• Choose the desired temperature.
language integrity.
MIN
|
|
|
|
|
|
MAX
|
|
0
----->
SELF CLEAN
• Turn the variable steam dial between 0 and according to the desired amount of
steam.
9
TKG SI 1002 - 121024
Assembly page 9/44
Copies of the I/B. Please reproduce them without any
changes except under special instruction from Team
International BELGIUM. The pages must be reproduced
and folded in order to obtain a booklet A5 (+/- 148.5 mm
width x 210 mm height). When folding, make sure you
keep the good numbering when you turn the pages of
the I/B. Don’t change the page numbering. Keep the
Fax +32 2 359 95 50
• Set the iron on its heel and wait until the temperature indicator goes out.
Caution: Set the temperature dial within the steam range (' ' or ' '). If the temperature
setting is too low, water may drip from the soleplate.
Check the garment label before ironing because some clothes may be damaged when
exposed to steam or water.
SPRAY
• Produces a mist for removing stubborn creases.
• Spray can be used at any temperature setting and during either dry or steam pressing.
Press down the spray button to spray.
DESCALING
To descale your appliance, use products made especially for this purpose that you will find in
shops and follow their instruction manual carefully.
CARE AND CLEANING
• Always unplug the appliance and let it cool down before cleaning.
• To clean the plastic parts of the iron, use a damp cloth.
• To clean the soleplate, make sure you use a product made especially for this purpose.
Never use abrasive products.
WHEN YOU HAVE FINISHED IRONING
• Turn the temperature dial to "MIN" and the steam dial to "0" and unplug the iron from the
electrical outlet.
• With the soleplate facing away from you, turn the iron upside down to empty the water.
• Then store the hot iron on its heel rest so that any remaining moisture will evaporate.
SELF CLEANING
It is important to apply “self-cleaning” at least every two months to remove impurities, etc.
The harder the water, the more the iron should be self-cleaned.
1. Open the filling opening and fill the water tank up to the MAX level, then gently close
the filling opening.
2. Set the temperature dial to MAX.
3. Insert the mains plug into the wall socket.
4. Put the iron heel up until the temperature indicator light goes out. Then set the
temperature dial to position MIN.
5. Hold the appliance horizontally over a sink, then remove the steam control knob
enabling the iron to self clean.
6. Boiling water, steam and impurities will be ejected from the holes in the sole plate.
Move the iron forwards and backwards while doing so, so that every hole of the sole
plate is cleaned.
7. Set the steam dial to position "0" as soon as the water tank is empty.
8. Do not hesitate to repeat the operation of self-cleaning if impurities still remain.
9. Unplug the iron and let it cool down completely before storing it.
language integrity.
10
TKG SI 1002 - 121024
Assembly page 10/44
Copies of the I/B. Please reproduce them without any
changes except under special instruction from Team
International BELGIUM. The pages must be reproduced
and folded in order to obtain a booklet A5 (+/- 148.5 mm
width x 210 mm height). When folding, make sure you
keep the good numbering when you turn the pages of
the I/B. Don’t change the page numbering. Keep the
Fax +32 2 359 95 50
PROTECTION OF THE ENVIRONMENT – DIRECTIVE 2002/96/EC
In order to preserve our environment and protect human health, the waste electrical and
electronic equipment should be disposed of in accordance with specific rules with the
implication of both suppliers and users. For this reason, as indicated by the symbol on the
rating label or on the packaging, your appliance should not be disposed of as unsorted
municipal waste. The user has the right to bring it to a municipal collection point performing
waste recovery by means of reuse, recycling or use for other applications in accordance with
the directive.
language integrity.
11
TKG SI 1002 - 121024
Assembly page 11/44
Copies of the I/B. Please reproduce them without any
changes except under special instruction from Team
International BELGIUM. The pages must be reproduced
and folded in order to obtain a booklet A5 (+/- 148.5 mm
width x 210 mm height). When folding, make sure you
keep the good numbering when you turn the pages of
the I/B. Don’t change the page numbering. Keep the
Fax +32 2 359 95 50
•
POUR VOTRE SECURITE
Lisez attentivement cette notice avant toute utilisation, et respectez bien à la fois les consignes
de sécurité et d'usage.
Important: Votre appareil n’est pas prévu pour être utilisé par des personnes (y compris les
enfants) dont les capacités physiques, sensorielles ou mentales sont réduites, ou des personnes
dénuées d’expérience ou de connaissance, sauf si elles ont pu bénéficier, par l’intermédiaire
d’une personne responsable de leur sécurité, d’une surveillance ou d’instructions préalables
concernant son utilisation en toute sécurité.
Il convient de surveiller les enfants pour s’assurer qu’ils ne jouent pas avec l’appareil.
Avant d'utiliser l'appareil, vérifiez que la tension du réseau correspond bien à celle de
l'appareil.
Ne laissez jamais votre appareil sans surveillance lorsque celui-ci est en fonctionnement ou
sous tension.
Vérifiez régulièrement l’état de votre appareil et s’il est endommagé de quelque façon
que ce soit, ne l'utilisez pas mais faites-le vérifier et réparer par un service qualifié
compétent(*). Si le câble est endommagé, il doit être obligatoirement remplacé par un
service qualifié compétent(*) afin d’éviter tout danger.
N’utilisez l'appareil que pour des usages domestiques et de la manière indiquée dans la
notice.
Ne plongez jamais l'appareil dans l'eau ou dans tout autre liquide ni pour son nettoyage ni
pour toute autre raison. Ne le mettez jamais au lave-vaisselle.
N'utilisez pas l'appareil près de sources de chaleur.
La fiche doit être débranchée avant de remplir le réservoir de votre appareil, de le
nettoyer et de le ranger. De plus, vérifiez que la semelle est totalement refroidie avant son
rangement.
Veillez à ne pas utiliser l'appareil à l'extérieur et entreposez-le dans un endroit sec.
Ne pas utiliser des accessoires non recommandés par le fabricant, cela peut présenter un
danger pour l’utilisateur et risque d’endommager l’appareil.
Ne déplacez jamais l’appareil en tirant sur le cordon d’alimentation. Veillez à ce que ce
dernier ne puisse être accidentellement accroché et ce, afin d’éviter toute chute de
l’appareil. Evitez d’enrouler le cordon autour de l’appareil et ne le tordez pas.
La température des surfaces accessibles peut être élevée lorsque l'appareil fonctionne.
Ne touchez pas ces surfaces, mais faites usage de la poignée.
Veillez à ce que le cordon n’entre pas en contact avec des surfaces chaudes de
l’appareil.
Ne laissez jamais votre appareil en position horizontale mais placez-le de préférence sur
son talon.
Veillez à ce que la semelle de l’appareil n’entre pas en contact avec des matériaux
inflammables (textiles, plastiques, etc.) pendant son usage.
Si vous possédez un support spécial permettant de poser le fer sur sa semelle chaude,
placez au préalable le bouton de réglage de la vapeur sur sa position 0.
Toujours débrancher votre fer lorsqu’il n’est pas en utilisation.
Le fer à repasser doit être utilisé et reposé sur une surface stable.
N'utilisez pas le fer à repasser s'il a subi une chute, s’il a des signes visibles de dommages
ou s’il fuit.
(*) Service qualifié compétent: service après-vente du fabricant ou de l'importateur ou une
personne qualifiée, reconnue et habilitée à faire ce genre de réparation afin d'éviter tout
danger. Dans tous les cas, veuillez retourner l'appareil auprès de ce service.
language integrity.
12
TKG SI 1002 - 121024
Assembly page 12/44
Copies of the I/B. Please reproduce them without any
changes except under special instruction from Team
International BELGIUM. The pages must be reproduced
and folded in order to obtain a booklet A5 (+/- 148.5 mm
width x 210 mm height). When folding, make sure you
keep the good numbering when you turn the pages of
the I/B. Don’t change the page numbering. Keep the
Fax +32 2 359 95 50
! Avant la première utilisation, ôtez toutes les étiquettes et les résidus qui pourraient se trouver
sur la semelle et essuyez-la soigneusement.
POUR REMPLIR LE RESERVOIR
Vous pouvez soit utiliser de l’eau distillée soit de l’eau du robinet. Si vous voulez utiliser la
fonction spray ou vapeur, remplissez le réservoir comme suit:
1) Débranchez l’appareil de façon à le laisser refroidir et posez-le sur sa semelle sur une
surface plane.
2) Placez le bouton de réglage des températures sur "MIN" et le bouton de réglage du débit
vapeur sur la position "0".
3) Ouvrez le couvercle de l'orifice de remplissage et versez de l’eau par l’orifice de
remplissage en utilisant un récipient adapté sans dépasser le niveau maximal indiqué sur
l’appareil.
4) En cours de repassage, débranchez votre appareil et remplissez le réservoir en
maintenant le fer horizontalement, sans le poser sur sa semelle sauf si vous disposez d’une
surface capable de supporter la température de la semelle sans dommage (la grille
métallique de votre table à repasser, par exemple).
BOUTON DE REGLAGE DES TEMPERATURES
• Il vous permet de sélectionner la température en fonction de la nature du tissu à repasser.
• Branchez l’appareil. Choisissez ensuite la température en tournant le bouton de sélection
de vêtements. Le témoin lumineux s’allume. Une fois que la température désirée sera
atteinte, le témoin lumineux s’éteindra.
REPASSAGE A SEC
• Positionnez le bouton de réglage du débit vapeur sur sa position "0".
• Branchez l’appareil.
• Choisissez la température en fonction de la nature du tissu.
• Posez votre fer verticalement et attendez que le témoin lumineux s'éteigne.
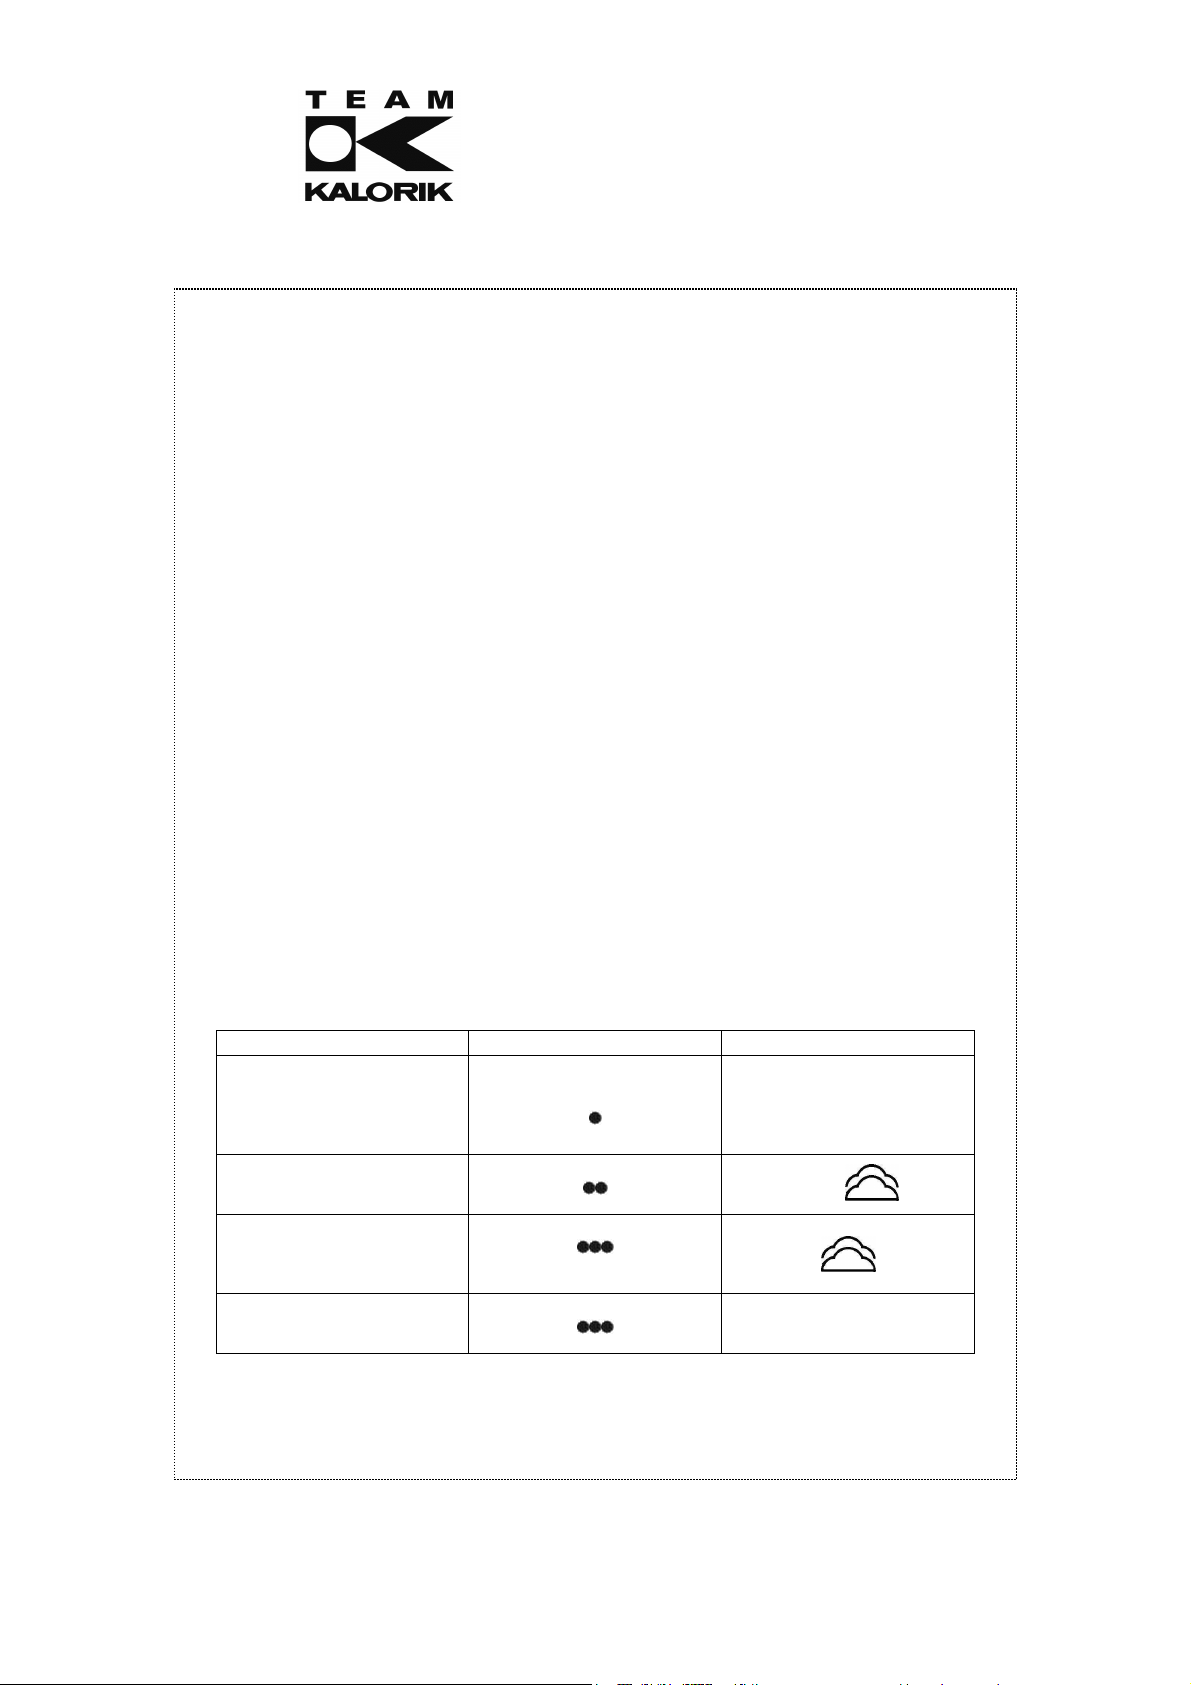
REPASSAGE AVEC VAPEUR
Type de textile Réglage de température Réglage de la vapeur
Nylon
Synthétique (ex. acétate,
acrylique, viscose,
polyamide, polyester, ...)
Soie
Laine
Coton
Lin
Nettoyage
• Remplissez le réservoir (bouton de réglage du débit vapeur sur 0).
language integrity.
MIN
|
|
|
|
|
|
MAX
|
|
0
----->
SELF CLEAN
13
TKG SI 1002 - 121024
Assembly page 13/44
Copies of the I/B. Please reproduce them without any
changes except under special instruction from Team
International BELGIUM. The pages must be reproduced
and folded in order to obtain a booklet A5 (+/- 148.5 mm
width x 210 mm height). When folding, make sure you
keep the good numbering when you turn the pages of
the I/B. Don’t change the page numbering. Keep the
Fax +32 2 359 95 50
• Branchez l’appareil.
• Choisissez la température souhaitée.
• Positionnez le bouton de réglage du débit vapeur entre 0 et selon la quantité de
vapeur désirée.
• Posez le fer verticalement et attendez que le témoin lumineux soit éteint.
Attention: Placez le thermostat sur ' ' ou ' '. Si la température est trop basse, de l’eau peut
couler de la semelle.
Vérifiez l’étiquette du vêtement avant de le repasser. Certains tissus peuvent s’abîmer au
contact de la vapeur ou de l’eau.
BOUTON SPRAY
• La fonction SPRAY aide à faire disparaître les plis tenaces en les humidifiant.
• Elle peut être utilisée quelle que soit la température du fer, avec ou sans vapeur.
DETARTRAGE
Pour le détartrage, faites usage de produits spécifiques aux fers à repasser que vous trouverez
dans le commerce et suivez notamment leur mode d’emploi pour le dosage.
NETTOYAGE ET ENTRETIEN
• Débranchez l'appareil et laissez-le refroidir avant de le nettoyer.
• Pour nettoyer les parties plastiques, faites usage d’un chiffon doux légèrement humide.
• Pour nettoyer la semelle, n’utilisez aucun produit ou tampon abrasif mais faites usage de
nettoyants spéciaux que vous trouverez dans le commerce.
AVANT DE RANGER VOTRE FER A REPASSER
• Placez le bouton du thermostat sur la position "MIN" et le bouton de réglage du débit de
vapeur sur "0" et débranchez la fiche de la prise de courant.
• Videz le réservoir en tenant le sommet vers le bas et en évitant de mettre la semelle face
à vous.
• Ensuite placez-le en position verticale sur son talon de façon à le laisser refroidir et ainsi
laisser l'humidité s'évaporer librement pour éviter toute forme de moisissure. Une fois la
semelle totalement froide, vous pouvez ranger votre fer.
AUTONETTOYAGE
Il est important de procéder à l’auto-nettoyage de l’appareil au minimum tous les deux mois
et ce afin d’enlever les impuretés. Plus l’eau utilisée pour le repassage contient du calcaire,
plus le fer devra être "auto-nettoyé" fréquemment.
1. Ouvrez l’orifice de remplissage et remplissez le réservoir jusqu’au repère "MAX",
refermez ensuite l’orifice de remplissage.
2. Mettez le bouton de réglage des températures sur "MAX".
3. Branchez le fer sur une prise de courant.
4. Posez le fer sur sa base jusqu'à ce que le témoin de chauffe s'éteigne. Alors mettez le
bouton de réglage des températures sur "MIN".
5. Maintenez le fer horizontalement au-dessus d'un évier et enlevez le bouton de
réglage du débit de vapeur pour démarrer l’auto-nettoyage.
language integrity.
14
TKG SI 1002 - 121024
Assembly page 14/44

Copies of the I/B. Please reproduce them without any
changes except under special instruction from Team
International BELGIUM. The pages must be reproduced
and folded in order to obtain a booklet A5 (+/- 148.5 mm
width x 210 mm height). When folding, make sure you
keep the good numbering when you turn the pages of
the I/B. Don’t change the page numbering. Keep the
Fax +32 2 359 95 50
6. De l'eau bouillante, de la vapeur ainsi que des impuretés sortiront des trous de la
semelle de l'appareil. Pendant cette opération, secouez légèrement l'appareil afin
que chaque trou de la semelle soit nettoyé.
7. Positionnez le bouton de contrôle du jet de vapeur sur "0" une fois le réservoir vidé.
8. N'hésitez pas à répéter l'opération d'auto-nettoyage si des impuretés subsistent.
9. Débranchez l'appareil et laissez-le refroidir complètement avant de le ranger.
PROTECTION DE L’ENVIRONNEMENT – DIRECTIVE 2002/96/CE
Afin de préserver notre environnement et notre santé, l’élimination en fin de vie des appareils
électriques et électroniques doit se faire selon des règles bien précises et nécessite
l’implication de chacun, qu’il soit fournisseur ou utilisateur. C’est pour cette raison que votre
appareil, tel que le signale le symbole apposé sur sa plaque signalétique ou sur
l'emballage, ne doit en aucun cas être jeté dans une poubelle publique ou privée destinée
aux ordures ménagères. L'utilisateur a le droit de déposer l'appareil dans des lieux publics de
collecte procédant à un tri sélectif des déchets pour être soit recyclé, soit réutilisé pour
d’autres applications conformément à la directive.
language integrity.
15
TKG SI 1002 - 121024
Assembly page 15/44

Copies of the I/B. Please reproduce them without any
changes except under special instruction from Team
International BELGIUM. The pages must be reproduced
and folded in order to obtain a booklet A5 (+/- 148.5 mm
width x 210 mm height). When folding, make sure you
keep the good numbering when you turn the pages of
the I/B. Don’t change the page numbering. Keep the
Fax +32 2 359 95 50
BELANGRIJKE VEILIGHEIDSVOORSCHRIFTEN
Lees de gebruiksaanwijzing aandachtig alvorens u uw toestel gebruikt, en respecteer altijd de
veiligheids- en de gebruiksvoorschriften.
Belangrijk: Personen (kinderen inbegrepen) die wegens hun fysieke, sensoriële of mentale
capaciteiten, of wegens hun gebrek aan ervaring of kennis, het toestel niet veilig kunnen
gebruiken, mogen dit toestel niet zonder toezicht of instructies van een verantwoordelijke
persoon gebruiken. Houd kinderen goed in het oog om te vermijden dat ze met het toestel
spelen.
Controleer of de netspanning overeenkomt met deze van het toestel vooraleer u het
gebruikt.
Laat uw toestel tijdens het gebruik nooit zonder toezicht.
Controleer regelmatig of het toestel of het snoer niet beschadigd is. Gebruik het toestel
niet indien het snoer of het toestel zelf enige beschadiging zouden vertonen maar laat het
in dit geval nakijken en herstellen door een bekwame gekwalificeerde dienst(*) om ieder
gevaar te vermijden.
Gebruik het toestel enkel voor huishoudelijk gebruik en op de wijze zoals vermeld in de
gebruiksaanwijzing.
Dompel het toestel nooit onder in water of in enige andere vloeistof, noch om het te
reinigen, noch om welke andere reden ook. Steek het nooit in een afwasmachine.
Gebruik het toestel niet in de nabijheid van warmtebronnen.
Wacht tot het toestel volledig is afgekoeld alvorens het te reinigen, op te bergen of te
vullen (model met spray en/of stoom).
Verwijder de stekker uit het stopcontact vooraleer u het toestel reinigt.
Gebruik het toestel niet buiten en berg het op in een droge ruimte.
Gebruik geen toebehoren die niet door de fabrikant werden aanbevolen. Dit kan
gevaarlijk zijn voor de gebruiker en het toestel beschadigen.
Trek nooit aan het snoer om het toestel te verplaatsen. Zorg dat het elektriciteitssnoer
nergens kan achterhaken en daardoor de val van het toestel veroorzaken. Draai het
snoer niet rond het toestel en plooi het niet.
Wanneer het toestel in werking is, kunnen toegankelijke onderdelen ervan een zeer hoge
temperatuur bereiken. Raak deze onderdelen niet aan, maar gebruik het handvat.
Zorg dat het snoer niet in aanraking komt met de warme onderdelen van het toestel.
Vooraleer het toestel voor de eerste maal te gebruiken, dient u de etiketten en de restjes
vuil weg te halen die zich op de zool zouden kunnen bevinden en de zool zorgvuldig te
reinigen.
Om het reservoir te vullen is het absoluut noodzakelijk om de stekker uit het stopcontact te
trekken (model met spray en/of stoom).
Laat het toestel tijdens het gebruik nooit horizontaal, maar plaats het liever verticaal.
Zorg ervoor dat de zool nooit in contact komt met ontvlambare stoffen (bv. plastic of
textiel) tijdens het gebruik.
Indien u een hittebestendige onderlegger bezit, kunt u de warme zool erop leggen, maar
zorg ervoor dat u eerst de stoomregelaar op stand 0 zet.
Schakel het strijkijzer uit als het niet in gebruik is en trek de stekker uit het stopcontact.
Het strijkijzer moet gebruikt en geplaatst worden op een stabiel oppervlak.
Gebruik het strijkijzer niet wanneer het gevallen is of wanneer het zichtbare schade
vertoont of lekt.
(*) Bekwame gekwalificeerde dienst: klantendienst van de fabrikant of de invoerder, die
erkend en bevoegd is om dergelijke herstellingen te doen zodat elk gevaar vermeden wordt.
Gelieve het toestel bij problemen naar deze dienst terug te brengen.
language integrity.
16
TKG SI 1002 - 121024
Assembly page 16/44

Copies of the I/B. Please reproduce them without any
changes except under special instruction from Team
International BELGIUM. The pages must be reproduced
and folded in order to obtain a booklet A5 (+/- 148.5 mm
width x 210 mm height). When folding, make sure you
keep the good numbering when you turn the pages of
the I/B. Don’t change the page numbering. Keep the
Fax +32 2 359 95 50
! Voor u uw apparaat voor het eerst gebruikt, moet u de beschermfolie op de strijkzool
verwijderen. Veeg de strijkzool vervolgens schoon met een vochtige doek.
VULLEN VAN HET WATERRESERVOIR
Het is aan te raden gedestilleerd water te gebruiken. Indien u de stoom- of sproeifunctie wilt
gebruiken, vul het waterreservoir dan als volgt:
1) Trek de stekker uit het stopcontact, zet het apparaat op een voldoende stabiel werkvlak
en wacht tot het toestel volledig is afgekoeld alvorens het strijkijzer met water te vullen.
2) Zet de thermostaat op "MIN" en de stoomregelaar op "0".
3) Open het deksel van de vulopening en vul het reservoir met water met behulp van een
maatbeker. Overschrijd de maximumaanduiding MAX niet.
4) Om het waterreservoir tijdens het strijken te vullen, moet u eerst de stekker uit het
stopcontact verwijderen. Houd het toestel dan horizontaal zonder de warme strijkzool
neer te leggen, tenzij u een hittebestendige onderlegger bezit.
TEMPERATUUR BIJ HET STRIJKEN
•
Kies de temperatuur in functie van het weefsel. Controleer het etiket van het kledingstuk
alvorens de knop in te stellen.
•
Steek de stekker in het stopcontact. Kies de juiste strijktemperatuur door de
stofkeuzeschakelaar te draaien. Het strijkijzerlampje licht op. Zodra de gewenste
temperatuur voor het strijken is bereikt, gaat het controlelampje uit.
DROOGSTRIJKEN
• Bij droogstrijken moet de stoomregelaar op stand 0 staan.
• Steek de stekker in het stopcontact.
• Kies de temperatuur naargelang de stof. Controleer het etiket alvorens de stand in te
stellen.
• Plaats het strijkijzer verticaal totdat het lichtje uitgaat.
STOOMSTRIJKEN
Weefseltype Regeling van de temperatuur Stoomregeling
Nylon
Synthetisch (Acetaat, Acrylic,
Viscose, Polyamide, Polyester)
Zijde
Wol
Katoen
Linnen
Onderhoud en reiniging
• Vul het apparaat met water (zet de stoomregelaar op 0).
• Steek de stekker in het stopcontact.
language integrity.
MIN
|
|
|
|
|
|
MAX
|
|
0
----->
SELF CLEAN
17
TKG SI 1002 - 121024
Assembly page 17/44

Copies of the I/B. Please reproduce them without any
changes except under special instruction from Team
International BELGIUM. The pages must be reproduced
and folded in order to obtain a booklet A5 (+/- 148.5 mm
width x 210 mm height). When folding, make sure you
keep the good numbering when you turn the pages of
the I/B. Don’t change the page numbering. Keep the
Fax +32 2 359 95 50
• Kies de gewenste temperatuur.
• Draai de stoomregelaar naar een stand van 0 tot , afhankelijk van de gewenste
hoeveelheid stoom.
• Plaats het strijkijzer verticaal totdat het controlelampje uitgaat.
Opgelet: zet de thermostaat binnen het stoombereik (' ' of ' '). Als u stoom gebruikt op
een te lage temperatuur, dan kan het strijkijzer lekken.
Controleer ook het etiket van de stof. Sommige stoffen mogen niet in contact komen met
stoom of met water.
SPRAYFUNCTIE
• Dit vergemakkelijkt het strijken van dikkere stoffen en moeilijk te strijken plaatsen.
• De sprayknop kan op elk gewenst moment gebruikt worden, ongeacht de stand
waarop het strijkijzer ingesteld staat.
ONTKALKING
Gebruik voor de ontkalking van het toestel enkel daarvoor aangewezen producten die u in
de winkel vindt en lees hun gebruiksaanwijzing aandachtig.
ONDERHOUD EN REINIGING
• Trek de stekker uit het stopcontact en laat het toestel volledig afkoelen vooraleer u het
reinigt.
• Reinig de buitenkant met een licht vochtige doek. Gebruik geen schuurmiddelen.
• Gebruik geen schuurmiddelen om de strijkzool te reinigen maar gebruik speciaal daarvoor
geschikte producten die u in de handel vindt.
VÓÓR HET OPBERGEN
• Zet hiervoor de thermostaat op stand "MIN", de stoomregelaar op "0" en haal de stekker
uit het stopcontact.
• Alvorens het toestel op te bergen, maakt u best het waterreservoir leeg. Keer het toestel
ondersteboven met de strijkzool weg van u.
• Plaats daarna het strijkijzer verticaal en laat het resterende water verdampen. Wanneer
het toestel volledig is afgekoeld, mag u het opbergen.
ZELFREINIGING
Het is belangrijk om de “zelfreiniging” minstens om de twee maanden uit te voeren om
onzuiverheden… te verwijderen.
Hoe harder het water, des te vaker moet het strijkijzer de zelfreiniging doormaken.
1. Open de vulopening en vul het waterreservoir tot aan het maximumpeil (MAX). Sluit
dan voorzichtig de vulopening.
2. Zet de thermostaat op MAX.
3. Steek de stekker in het stopcontact.
4. Plaats het strijkijzer verticaal totdat het controlelampje uitgaat. Zet dan de
thermostaat op MIN.
5. Houd het toestel horizontaal boven een lavabo en verwijder dan de stoomregelaar
zodat het strijkijzer zichzelf kan reinigen.
language integrity.
18
TKG SI 1002 - 121024
Assembly page 18/44

Copies of the I/B. Please reproduce them without any
changes except under special instruction from Team
International BELGIUM. The pages must be reproduced
and folded in order to obtain a booklet A5 (+/- 148.5 mm
width x 210 mm height). When folding, make sure you
keep the good numbering when you turn the pages of
the I/B. Don’t change the page numbering. Keep the
Fax +32 2 359 95 50
6. De gaatjes in de zool van het strijkijzer stoten kokend water, stoom en vuil uit. Zorg
ervoor dat elk gaatje schoongemaakt wordt door het strijkijzer heen en weer te
schudden.
7. Zet de stoomregelaar op stand 0 zodra het waterreservoir leeg is.
8. Herhaal dit proces indien er nog vuil achtergebleven is.
9. Trek de stekker uit het stopcontact en laat het toestel volledig afkoelen vooraleer u
het opbergt.
MILIEUBESCHERMING – RICHTLIJN 2002/96/EG
Om ons milieu en onze gezondheid te beschermen, moet afgedankte elektrische en
elektronische apparatuur in overeenstemming met welbepaalde regels weggegooid worden.
Dit vergt zowel de inzet van de leveranciers als van de gebruikers. Om deze reden mag uw
apparaat, zoals op het typeplaatje of op de verpakking aangegeven door het symbool ,
niet met het gewone huisvuil weggegooid worden. De gebruiker heeft het recht het toestel
naar een gemeentelijk centrum van gescheiden inzameling te brengen waar het
overeenkomstig de richtlijn hergebruikt, gerecycleerd of voor andere doeleinden gebruikt zal
worden.
language integrity.
19
TKG SI 1002 - 121024
Assembly page 19/44

Copies of the I/B. Please reproduce them without any
changes except under special instruction from Team
International BELGIUM. The pages must be reproduced
and folded in order to obtain a booklet A5 (+/- 148.5 mm
width x 210 mm height). When folding, make sure you
keep the good numbering when you turn the pages of
the I/B. Don’t change the page numbering. Keep the
Fax +32 2 359 95 50
CONSEJOS DE SEGURIDAD
Lea detenidamente el modo de empleo antes de utilizar el aparato, y siempre siga las
medidas de seguridad y el modo de funcionamiento.
Importante: Las personas (incluidos niños) con incapacidades físicas, sensoriales o mentales, o
sin experiencia o conocimiento nunca deben utilizar el aparato, salvo si están bajo la
vigilancia de una persona responsable de su seguridad o si recibieron previamente
instrucciones con respecto al uso seguro del aparato.
Es necesario vigilar a los niños para que no jueguen con el aparato.
Antes de utilizar el aparato, compruebe que el voltaje de la red eléctrica coincide con el
del aparato.
No deje nunca su aparato sin vigilancia cuando esté en marcha.
Compruebe de vez en cuando que el aparato no esté dañado y no utilice su aparato si el
cable o el aparato están dañados por el motivo que sea. Cualquier reparación debe ser
realizada por un servicio cualificado competente(*). Si el cable está dañado, debe ser
reemplazado por un servicio cualificado competente(*) para evitar cualquier tipo de daño.
Utilice el aparato sólo para usos domésticos y de la manera indicada en el modo de
empleo.
No sumerja nunca el aparato en el agua o en cualquier otro líquido ni para su limpieza ni
por cualquier otra razón.
No utilice el aparato cerca de fuentes de calor.
La clavija eléctrica debe ser desenchufada antes de llenar el depósito de agua, limpiar o
guardar el aparato. Compruebe que la suela está del todo enfriada antes de recoger el
aparato.
Procure no utilizar el aparato en el exterior y colóquelo en un sitio seco.
No utilice accesorios no recomendados por el fabricante, ello puede conllevar un riesgo
para el usuario y dañar el aparato.
No mueva nunca el aparato estirando del cable. Procure que el cable no se enganche
en alguna parte, a fin de evitar posibles caídas del mismo. Evite enrollar el cable
alrededor del aparato y no lo tuerza.
Las superficies accesibles pueden volverse muy calientes durante el funcionamiento. No
toque las superficies calientes del aparato, utilice el asa.
Procure que el cable no entre en contacto con las superficies calientes del aparato.
No deje nunca su aparato en posición horizontal, póngalo preferentemente en su base
anterior.
Compruebe que la suela del aparato no entre en contacto con materiales inflamables
(tejidos, plásticos, etc.) durante el funcionamiento.
Si posee un suporte especial para colocar la plancha sobre su suela caliente, ponga
primero el botón de ajuste de vapor en la posición 0.
Apague la plancha siempre que no lo utilice.
La plancha debe ser utilizada y puesta en una superficie estable.
La plancha no debe ser utilizada si cayó, si lleva señales visibles de daños o si el agua se
sale de la plancha.
(*) Servicio técnico cualificado: servicio técnico del fabricante o del importador o una
persona cualificada, reconocida y habilitada a fin de evitar cualquier peligro. En cualquier
caso devuelva el aparato al servicio técnico.
! Antes de utilizar la plancha, quite las etiquetas y residuos que podría encontrar en la suela y
séquela con cuidado.
language integrity.
20
TKG SI 1002 - 121024
Assembly page 20/44

Copies of the I/B. Please reproduce them without any
changes except under special instruction from Team
International BELGIUM. The pages must be reproduced
and folded in order to obtain a booklet A5 (+/- 148.5 mm
width x 210 mm height). When folding, make sure you
keep the good numbering when you turn the pages of
the I/B. Don’t change the page numbering. Keep the
Fax +32 2 359 95 50
LLENADO DEL DEPÓSITO
Puede utilizar agua destilada o agua del grifo. Para utilizar la función vaporizador o de vapor,
llene el depósito como abajo indicado:
1) Desenchufe el aparato para dejarlo enfriar y colóquelo sobre su base anterior en una
superficie plana.
2) Coloque el botón de ajuste de las temperaturas en la posición MIN y el botón de ajuste
del vapor en la posición "0".
3) Abra la tapa del orificio de llenado y llene el depósito sin sobrepasar el nivel máximo
indicado en el aparato.
4) Durante el planchado, desenchufe el aparato y llene el depósito manteniendo la
plancha en posición horizontal. No lo ponga en la suela excepto si dispone de una
superficie resistente a la temperatura de la suela (la rejilla metálica de la mesa de
planchar, por ejemplo).
BOTÓN DE AJUSTE DE LAS TEMPERATURAS
• Permite seleccionar la temperatura en función del tipo de tejido que quiere planchar.
• Enchufe el aparato. Después elija la temperatura girando el botón de selección de ropa.
La luz indicadora de la temperatura se encenderá. Una vez alcanzada la temperatura
deseada, el testigo luminoso de la temperatura desaparecerá.
PLANCHADO EN SECO
• Coloque el botón de ajuste del vapor en la posición "0".
• Conecte el aparato a la red.
• Elija la temperatura en función del tipo de tejido.
• Coloque la plancha vertical y espere a que se apague el testigo luminoso.
PLANCHADO A VAPOR
Tipo de tejido
Nylon
Sintético (e.g. acelato,
acrílico, viscosa, poliamida,
poliéster...)
Seda
Lana
Algodón
Lino
LIMPIEZA
• Llene el depósito de agua (botón de ajuste del vapor en la posición "0").
• Conecte el aparato a la red.
• Elija la temperatura deseada.
language integrity.
Regulación de la
temperatura
MIN
|
|
|
|
|
|
MAX
|
|
Regulación del vapor
0
----->
SELF CLEAN
• Coloque el botón de ajuste del vapor entre 0 y según la cantidad de vapor
deseada.
• Coloque la plancha vertical y espere a que se apague el testigo luminoso.
21
TKG SI 1002 - 121024
Assembly page 21/44

Copies of the I/B. Please reproduce them without any
changes except under special instruction from Team
International BELGIUM. The pages must be reproduced
and folded in order to obtain a booklet A5 (+/- 148.5 mm
width x 210 mm height). When folding, make sure you
keep the good numbering when you turn the pages of
the I/B. Don’t change the page numbering. Keep the
Fax +32 2 359 95 50
ATENCIÓN: Coloque el termostato en “ ” o “ ”. Si la temperatura está demasiado baja,
agua puede salir por la suela.
Compruebe la etiqueta de la prenda antes de plancharla. Algunos tejidos pueden estar
dañados por el vapor o el agua.
BOTÓN PULVERIZADOR
• La función PULVERIZADOR sirve para eliminar las arrugas.
• Puede ser utilizada con cualquier temperatura y con o sin vapor.
DESINCRUSTACIÓN
Desincrustar el aparato con regularidad alarga la vida de su aparato. Para ello utilice
cualquier producto que venden en el mercado para este fin y siga sus instrucciones.
LIMPIEZA
• Tras el empleo y antes de su limpieza, desenchufe el aparato y déjelo enfriar.
• Limpie las partes plásticos con un paño suave humedecido.
• Nunca utilice productos abrasivos para limpiar la suela. Utilice productos especiales que
venden en el mercado y siga sus instrucciones.
ANTES DE GUARDAR SU PLANCHA
• Coloque el botón del termostato en la posición "MIN" y el regulador de vapor en la
posición "0" y desenchufe el cable de su enchufe.
• Vacíe el depósito poniendo el sumidero hacia abajo y evitando poner la suela hacia Vd.
•
Coloque la plancha en posición vertical y déjela enfriar, así la humedad se evaporará.
AUTO-LIMPIEZA
1. Abre el orificio de entrada de agua y llene el tanque hasta el "MAX", después cierre
el orificio.
2. Ponga el control de la temperatura en "MAX".
3. Enchufe el aparato.
4. Ponga el aparato en su base (cabeza hacia arriba) hasta que se apague el testigo
luminoso de temperatura. Después ponga la temperatura a la posición "MIN".
5. Mantenga el aparato horizontalmente arriba de una pila y quite el mando del
control de vapor para su auto limpieza.
6. Agua hirviente, vapor y impurezas van a salir de los agujeros de la suela. Mueva el
aparato ligeramente para que sean limpios todos los agujeros de la suela.
7. Ponga el control de vapor en "0" en cuanto sea vacía el tanque.
8. No dude en repetir la operación de auto-limpieza en caso de que hayan todavía
impurezas.
9. Desenchufe el aparato y déjelo enfriar completamente antes de arreglarlo en su
PROTECCIÓN DEL MEDIO AMBIENTE – DIRECTIVA 2002/96/CE
Para poder preservar nuestro medio ambiente y proteger la salud humana, los residuos
eléctricos y equipos electrónicos deberían ser destruidos de acuerdo con unas normas
especificas con la implicación de ambos proveedores y consumidores. Por esta razón, como
sitio.
language integrity.
indica el símbolo en la placa de datos técnicos, su aparato no debería ser tirado en un
contenedor municipal sino que debería ser devuelto a la tienda, o dejado en un punto de
recolección para ser reciclado o usado para otras aplicaciones conforme a la directiva.
22
TKG SI 1002 - 121024
Assembly page 22/44

Copies of the I/B. Please reproduce them without any
changes except under special instruction from Team
International BELGIUM. The pages must be reproduced
and folded in order to obtain a booklet A5 (+/- 148.5 mm
width x 210 mm height). When folding, make sure you
keep the good numbering when you turn the pages of
the I/B. Don’t change the page numbering. Keep the
Fax +32 2 359 95 50
language integrity.
PARA A SUA SEGURANÇA
Antes de utilizar o aparelho leia com sentido de responsabilidade as instruções de
funcionamento e respeite sempre as orientações de segurança e de utilização dadas no
manual das instruções.
Importante: As pessoas (incluídas as crianças) com incapacidades físicas, sensoriais ou
mentais, ou sem experiência ou conhecimento não devem utilizar o aparelho excepto se
estiverem a ser vigiadas por uma pessoa responsável pela sua segurança ou se receberam
previamente instruções relativas ao uso seguro do aparelho.
Convém vigiar as crianças para que elas não brinquem com o aparelho.
Antes de ligar a ficha do cabo da alimentação à tomada eléctrica certifique-se que esta
é igual à indicada na placa sinalética do aparelho.
Mantenha o aparelho sob vigilância quando em funcionamento.
Verifique com regularidade o estado do aparelho e em caso de danos leve-o a um
serviço técnico competente para o analisar e reparar(*). Se o cabo da alimentação
estiver danificado este tem de ser obrigatoriamente substituído pelo que deve levar o
aparelho a um serviço técnico competente(*) a fim de evitar qualquer perigo.
Utilize o aparelho unicamente para os fins domésticos e de acordo com as instruções de
utilização.
O aparelho nunca deve ser mergulhado na água ou em qualquer outro líquido seja para
a limpeza ou por qualquer outra razão.
Não ponha o aparelho próximo de fontes de calor.
Retire a ficha do cabo da alimentação da tomada eléctrica antes de encher o depósito
da água, de limpar ou guardar o aparelho. Verifique se a base está completamente
arrefecida antes de guardar o aparelho.
O aparelho não deve ser utilizado ao ar livre e deve ser guardado em locais secos.
Use sempre os acessórios recomendados pelo fabricante ou pelos serviços técnicos
competentes(*).
Nunca retire a ficha do cabo da alimentação da tomada eléctrica puxando pelo cabo.
Verifique se o cabo da alimentação se encontra preso em alguma coisa. Evite as quedas
do aparelho. Não enrole o cabo da alimentação à volta do aparelho e não o torça.
Com o aparelho em funcionamento as superfícies ficam com temperaturas elevadas
pelo que não pode tocar nestas partes. Utilize sempre os punhos de plástico.
Não deixe que o cabo da alimentação toque nas partes quentes do aparelho.
Nunca deixe o seu aparelho em posição horizontal e coloque-o de preferência na
traseira do corpo.
Certifique-se que a base do aparelho não entra em contacto com materiais inflamáveis
(plásticos, etc.) durante o funcionamento.
Se possuir um suporte especial para colocar o ferro na base, ponha primeiro o botão da
regulação do vapor na posição 0.
Logo que utilize o aparelho, retire a ficha do cabo da alimentação da tomada eléctrica.
O ferro deve ser utilizado e colocado numa superfície estável.
O ferro não deve ser utilizado se caiu, se tem sinais visíveis de danos ou se água fugir pela
base.
(*) Serviço técnico habilitado: serviço técnico do fabricante ou do importador, ou uma
pessoa qualificada, reconhecida e habilitada para evitar qualquer perigo. Em qualquer caso
devolva o aparelho ao serviço técnico.
! Antes da primeira utilização, retire as etiquetas e os resíduos que podem encontrar-se na
base e seque-a com cuidado.
23
TKG SI 1002 - 121024
Assembly page 23/44

Copies of the I/B. Please reproduce them without any
changes except under special instruction from Team
International BELGIUM. The pages must be reproduced
and folded in order to obtain a booklet A5 (+/- 148.5 mm
width x 210 mm height). When folding, make sure you
keep the good numbering when you turn the pages of
the I/B. Don’t change the page numbering. Keep the
Fax +32 2 359 95 50
ENCHIMENTO DO DEPÓSITO DA ÁGUA
Use de preferência água destilada.
Para utilizar o spray ou o vapor encha o depósito da água da seguinte forma:
1) Com o aparelho desligado da tomada fornecedora da corrente eléctrica, deixe que ele
arrefeça e ponha-o horizontalmente em cima de uma superficie plana.
2) Desligue o botão regulador da temperatura para a posição "MIN" e o regulador do vapor
para a posição "0".
3) Utilize um copo graduado e encha o depósito da água através do orificio de
enchimento.
4) Durante a passagem, retire a ficha do cabo da alimentação e encha o reservatório da
água mantendo o ferro horizontalmente. Pode poisar o ferro na base só se tiver uma
superfície resistente à temperatura da base (a grelha metálica da tábua de passar a
ferro por exemplo).
BOTÃO REGULADOR DA TEMPERATURA
• Permite a escolha da temperatura, de acordo com a etiqueta dos tecidos a passar a
ferro.
• Coloque a ficha do cabo da alimentação na tomada da corrente eléctrica. Escolha a
temperatura, de acordo com a temperatura indicada na etiqueta dos tecidos, rodando
o botão da selecção da temperatura. O sinalizador luminoso que assinala o
aquecimento da base do ferro acencer-se-à. Uma vez que a temperatura escolhida seja
alcançada o sinalizador do aquecimento da base do ferro apagar-se-à.
PASSAGEM A SECO
• Rode o regulador do vapor para a posição 0.
• Coloque a ficha do cabo da alimentação na tomada da corrente eléctrica.
• Escolha a temperatura exigida pelo tecido a passar – indicada na etiqueta da roupa.
• Ponha o ferro na vertical, assente pela trazeira, e espere que a luz vermelha se apague.
PASSAGEM A VAPOR
Tipo de tecido Regulação da temperatura Regulação do vapor
Nylon
Sintetico (cetim, acrilico,
viscose, polymide ou
polyester)
Seda
Lã
Algodão
Linho
Limpeza
• Encha o depósito da água (regulador do vapor na posição 0, i.e. desligado).
language integrity.
MIN
|
|
|
|
|
|
MAX
|
|
0
----->
SELF CLEAN
24
TKG SI 1002 - 121024
Assembly page 24/44

Copies of the I/B. Please reproduce them without any
changes except under special instruction from Team
International BELGIUM. The pages must be reproduced
and folded in order to obtain a booklet A5 (+/- 148.5 mm
width x 210 mm height). When folding, make sure you
keep the good numbering when you turn the pages of
the I/B. Don’t change the page numbering. Keep the
Fax +32 2 359 95 50
• Coloque a ficha do cabo da alimentação na tomada da corrente eléctrica.
• Escolha a temperatura desejada.
• Rode o regulador do vapor entre a posição 0 e , atendendo à quantidade de
vapor desejada.
• Ponha o ferro na vertical e espere que a luz vermelha se apague.
Atenção: Regule o botão da temperatura para a posição '' ou ''. Se a temperatura é
demasiado baixa a água pode escapar-se pela base. Deixe que o sinalizador da
temperatura se apague.
Antes de passar a ferro os tecidos veja sempre a etiqueta dos tecidos. Alguns tecidos podemse danificar em contacto com a água ou o vapor.
BOTÃO DO SPRAY
• O spray humidifica a roupa ajundando a desfazer os fincos.
• O spray pode ser utilizado em qualquer temperatura escolhida com ou sem vapor.
! Leia atentamente a etiqueta do vestuário antes de passar. Alguns tecidos danificam-se em
contacto com o vapor ou água.
DESCALCIFICAÇÃO
Para suprimir os depósitos de calcário utilize descalcificantes apropriados seguindo as
instruções dos mesmos.
LIMPEZA
• Antes de limpar o ferro verifique se este está frio, desligado e com o cabo da
alimentação retirado da tomada eléctrica.
• Para limpar as partes plásticas utilize um esfregão macio e ligeiramente húmido.
• Para limpar a base não utilize produtos abrasivos mas sim produtos aconselhados para
esse fim e que se encontram nas lojas de venda dos electrodomésticos.
CUIDADOS A TER QUANDO TERMINA A PASSAGEM A FERRO
• Rode o botão da temperatura para a posição "MIN", ponha o regulador do vapor na
posição "0" e retire o cabo de alimentação da tomada fornecedora da corrente
eléctrica.
• Vire o ferro com cuidado e tome cuidado para não se queimar na base. Deixe sair a
água que ainda se encontra no depósito.
• Pouse o ferro na vertical assente pela traseira e deixe que ele arrefeça. Tome cuidado
com as quedas do aparelho.
AUTOLIMPEZA
É importante proceder à auto limpeza do ferro a vapor, no mínimo dois em dois meses, para
eliminar as impurezas. A água também tem calcário pelo que a «auto limpeza» se deve fazer
com mais frequência.
1. Abra o orifício do enchimento da água e ponha água no ferro até ao nível máximo
"MAX". Feche a tampa do orifício da entrada da água.
2. Ponha o botão da regulação da temperatura na posição máxima "MAX".
3. Coloque a ficha do cabo da alimentação na tomada eléctrica.
language integrity.
25
TKG SI 1002 - 121024
Assembly page 25/44

Copies of the I/B. Please reproduce them without any
changes except under special instruction from Team
International BELGIUM. The pages must be reproduced
and folded in order to obtain a booklet A5 (+/- 148.5 mm
width x 210 mm height). When folding, make sure you
keep the good numbering when you turn the pages of
the I/B. Don’t change the page numbering. Keep the
Fax +32 2 359 95 50
4. Deixe o ferro assente pela base no local apropriado até que a luz do aquecimento
se apague. Em seguida, coloque o regulador de temperatura na posição "MIN".
5. Coloque o ferro horizontalmente sobre o lava loiça, depois tire o botão de controle
que permita ao ferro de vapor a auto-limpeza.
6. A água a ferver, o vapor e as impurezas sairão pelos orifícios da base do ferro.
Durante esta operação sacuda ligeiramente o aparelho para melhor limpeza dos
orifícios da base do ferro.
7. Ponha o botão que regula a carga da saída do vapor na posição "0" assim que o
depósito da água ficar vazio.
8. Repita a autolimpeza se as impurezas persistirem.
9. Retire a ficha do cabo da alimentação da tomada eléctrica e deixe arrefecer o
ferrototalmente antes de o guardar.
PROTECÇÃO DO MEIO AMBIENTE – DIRECTIVA 2002/96/CE
Para a preservação do ambiente e da nossa saúde, a eliminação no fim da vida útil dos
aparelhos elétricos e eletrônicos, deve-se efetuar no cumprimento das legislações em vigor e
pela participação de todos quer sejam produtores ou utilizadores. É por esta razão que o
language integrity.
vosso aparelho tem na placa sinalética o símbolo , informando que em caso algum o
aparelho deve ser colocado no caixote do lixo camarário ou privado para que não vá para
as lixeiras comuns mas sim devolvido ao revendedor ou depositado nos locais apropriados e
identificados para a recolha destes aparelhos para que uma vez recolhidos sejam reciclados,
reutilizados ou lhe sejam dados outras aplicações.
26
TKG SI 1002 - 121024
Assembly page 26/44

Copies of the I/B. Please reproduce them without any
changes except under special instruction from Team
International BELGIUM. The pages must be reproduced
and folded in order to obtain a booklet A5 (+/- 148.5 mm
width x 210 mm height). When folding, make sure you
keep the good numbering when you turn the pages of
the I/B. Don’t change the page numbering. Keep the
Fax +32 2 359 95 50
AVVERTENZE
Vi invitiamo a leggere attentamente le istruzioni prima di utilizzare l’apparecchio, e vi
preghiamo di seguire sempre attentamente le istruzioni di sicurezza e di utilizzo.
Importante: Le persone (inclusi i bambini) che non sono in grado di utilizzare l’apparecchio, sia
per incapacità fisiche, sensoriali o mentali, sia per mancanza di esperienza o di conoscenze,
non devono utilizzare l’apparecchio a meno che siano sorvegliati da una persona
responsabile per la loro sicurezza o abbiano precedentemente ricevuto istruzioni relative
all’uso sicuro dell’apparecchio.
Sorvegliare i bambini perché non utilizzino l’apparecchio come un giocattolo.
Prima di mettere in funzione l’apparecchio, controllare che la tensione sia conforme a
quella dell’apparecchio.
Non lasciare l’apparecchio incustodito durante il funzionamento.
Verificare regolarmente che l'apparecchio non sia danneggiato. Non accendere
l’apparecchio qualora il cavo o l’apparecchio stesso dovessero presentare un qualsiasi
danneggiamento. Tutte le riparazioni devono essere eseguite da un servizio qualificato(*). Un
cavo danneggiato deve essere sostituito da un servizio qualificato(*) per evitare qualsiasi
pericolo.
Quest'apparecchio dovrà essere destinato solo all’uso domestico e nella maniera
indicata in queste istruzioni.
Non immergere l'apparecchio in acqua o in altro liquido, né per pulirlo né per qualsiasi
altra ragione.
Non usare l’apparecchio in prossimità di sorgenti di calore.
Staccare la spina dalla presa elettrica prima di riempire il serbatoio o di pulire o riporre
l'apparecchio. Controllare che la piastra sia completamente raffreddata prima di riporre
l'apparecchio.
Non usare l’apparecchio all’aperto e riporlo sempre in un luogo asciutto.
Non utilizzare accessori se non quelli consigliati dal fabbricante; l’utilizzo di accessori
diversi potrebbe essere pericoloso per l’utente ed inoltre potrebbe danneggiare
l’apparecchio.
Non tirare il cavo per spostare l’apparecchio. Assicurarsi che il cavo elettrico non possa
impigliarsi per evitare eventuali cadute dell'apparecchio. Non avvolgere il cavo intorno
all’apparecchio e non storcerlo.
La temperatura delle parti accessibili può essere molto alta durante l’uso. Non toccare le
parti calde dell’apparecchio, usare le maniglie.
Tenere il cavo elettrico a debita distanza dalle parti calde dell’apparecchio.
Non lasciare mai il ferro in posizione orizzontale e posizionarlo preferibilmente sul tallone.
La piastra non deve entrare in contatto con materiali infiammabili (tessuti, plastici, ecc.)
durante l'uso.
Se possiede un supporto speciale per porre il ferro sulla piastra calda, posizionare
previamente il regolatore di vapore sulla posizione 0.
Staccare la spina dalla presa di corrente quando il ferro non è in funzione.
Il ferro da stiro deve essere utilizzato e riposato in una superficie stabile.
Il ferro da stiro non deve essere utilizzato se è caduto, visibilmente danneggiato o se
perde acqua.
(*) Servizio assistenza qualificato: servizio assistenza tecnica del fabbricante o dell’importatore
o una persona qualificata, riconosciuta ed autorizzata ad effettuare riparazioni. Rivolgere in
ogni caso l’apparecchio a questo servizio.
language integrity.
27
TKG SI 1002 - 121024
Assembly page 27/44

Copies of the I/B. Please reproduce them without any
changes except under special instruction from Team
International BELGIUM. The pages must be reproduced
and folded in order to obtain a booklet A5 (+/- 148.5 mm
width x 210 mm height). When folding, make sure you
keep the good numbering when you turn the pages of
the I/B. Don’t change the page numbering. Keep the
Fax +32 2 359 95 50
! Prima di utilizzare l'apparecchio per la prima volta, ritirare tutte le etichette e i residui che
potrebbero trovarsi sulla piastra e asciugarla attentamente.
PER RIEMPIRE IL SERBATOIO
Utilizzare solamente acqua distillata. Se si vuole utilizzare la funzione spray o vapore, riempire il
serbatoio come segue:
1) Scollegare l'apparecchio in modo da lasciarlo raffreddare e posarlo orizzontalmente su
una superficie piana.
2) Regolare la manopola che seleziona la temperatura nella posizione "MIN" e il regolatore
di vapore nella posizione "0".
3) Far scivolare il coperchio e riempire con l’ausilio di un misurino il serbatoio del ferro,
prestando attenzione a non superare il livello massimo (MAX).
4) Durante la stiratura, staccare la spina dalla presa di corrente e riempire il serbatoio
mantenendo il ferro in posizione orizzontale, senza porlo sulla piastra, tranne se dispone di
una superficie resistente alla temperatura della piastra (la griglia metallica del tavolo da
stiro per esempio).
MANOPOLA PER LA REGOLAZIONE DELLA TEMPERATURA
• Questa manopola permette di scegliere la temperatura del ferro da stiro in funzione della
natura del tessuto da stirare.
• Inserire la spina nella presa di corrente. Impostare la temperatura corretta per stirare il
tessuto desiderato girando la manopola fabric select: si veda la tabella qui sotto. La spia
rossa si accenderà. Raggiunta la temperatura desiderata la spia rossa si spegne.
STIRATURA A SECCO
• Ruotare il regolatore di vapore sulla posizione 0.
• Accendere l'apparecchio.
• Scegliere la temperatura in funzione del tipo di tessuto da stirare. Prima di posizionare la
manopola, verificare l'etichetta dell'indumento.
• Tenere il ferro in posizione verticale ed attendere che la spia luminosa si accenda.
STIRATURA A VAPORE
Tipo di tessile
Nylon
Sintetico
(es. acetato, acrilico, viscosa,
poliammide, poliestere, …)
Seta
Lana
Cotone
Lino
Pulizia
language integrity.
Regolazione della
temperatura
MIN
|
|
|
|
|
|
MAX
|
|
Regolazione del vapore
0
----->
SELF CLEAN
28
TKG SI 1002 - 121024
Assembly page 28/44

Copies of the I/B. Please reproduce them without any
changes except under special instruction from Team
International BELGIUM. The pages must be reproduced
and folded in order to obtain a booklet A5 (+/- 148.5 mm
width x 210 mm height). When folding, make sure you
keep the good numbering when you turn the pages of
the I/B. Don’t change the page numbering. Keep the
Fax +32 2 359 95 50
• Riempire il serbatoio (regolatore di vapore su 0).
• Accendere l'apparecchio.
• Impostare la temperature.
• Ruotare il regolatore di vapore fra 0 e secondo la quantità e di vapore idonea.
• Tenere il ferro in posizione verticale ed attendere che la spia luminosa si accenda.
Attenzione: Regolare la manopola della temperatura (' ' o ' '). Se la temperatura è
troppo bassa, l'acqua può colare dalla piastra.
Controllare l'etichetta del vestito prima di stirare; certi tessuti possono rovinarsi a contatto con il
vapore o con l'acqua.
MANOPOLA SPRAY
• La funzione Spray serve a far scomparire le pieghe più tenaci.
• Tale funzione può essere utilizzata qualunque sia la temperatura del ferro, stiratura a
secco o a vapore.
DISINCROSTAZIONE
Per rimuovere eventuali incrostazioni (calcare,…), utilizzare prodotti concepiti apposta per
questo scopo. Assicurarsi che siano prodotti compatibili con oggetti in plastica.
PULIZIA
• Prima di pulire l’apparecchio, scollegare la spina e lasciarlo raffreddare.
• Pulire il rivestimento esterno unicamente con un panno morbido e asciutto.
• Pulire la piastra unicamente con prodotti concepiti apposta per questo scopo.
QUANDO SI HA FINITO DI STIRARE
• Mettere il termostato in posizione "MIN" e il regolatore di vapore in posizione "0" e staccare
la spina dalla presa di corrente.
• Svuotare l’acqua dal serbatoio, tenendo il ferro a testa in giù senza orientare la piastra
verso di sé.
• Sistemare il ferro da stiro verticalmente in modo da lasciarlo raffreddare e da consentire
all’umidità di evaporarsi, e così evitare che il ferro ammuffisca.
PULIZIA AUTOMATICA
E’ importante che si esegua la “pulizia automatica” almeno ogni due mesi per rimuovere le
impurità, ecc.
Più dura è l’acqua più il ferro da stiro dovrà essere pulito.
1. Aprire il serbatoio e riempirlo d’acqua fino al livello massimo. Richiuderlo.
2. Posizionare la temperatura sul livello "MAX".
3. Inserire la presa nella spina della corrente.
4. Appoggiare il ferro verticalmente sulla base e attendere lo spegnimento della spia
che indica la temperatura. Mettere il termostato in posizione "MIN".
5. Tenere il ferro orizzontalmente sopra il lavandino e rimuovere il tasto vapore per
consentire al ferro da stiro a vapore di auto pulirsi.
language integrity.
29
TKG SI 1002 - 121024
Assembly page 29/44

Copies of the I/B. Please reproduce them without any
changes except under special instruction from Team
International BELGIUM. The pages must be reproduced
and folded in order to obtain a booklet A5 (+/- 148.5 mm
width x 210 mm height). When folding, make sure you
keep the good numbering when you turn the pages of
the I/B. Don’t change the page numbering. Keep the
Fax +32 2 359 95 50
6. L’acqua, il vapore e le impurità saranno espulse dai fori della piastra. Spostare il ferro
in avanti e dietro in modo da pulire ogni foro.
7. Quano il serbatoio è vuoto posizionare il regolatóre di vapore su "0".
8. Ripetere l’operazione se necessario.
9. Disinserire l’apparecchio e lasciarlo raffreddare completamente prima di riporlo.
DIRETTIVA 2002/96/CE PER LO SMALTIMENTO DELLE APPARECCHIATURE ELETTRICHE ED
ELETTRONICHE
Per preservare l'ambiente e la nostra salute, i vecchi apparecchi elettrici e elettronici non più
utilizzati devono essere smaltiti secondo la direttiva sopra citata che impone l'obbligo al
costruttore, al commerciante e all'utilizzatore di consegnare gli apparecchi ai centri di
raccolta specializzati, i quali saranno in grado di smaltire e riciclare i vecchi prodotti come la
legge prescrive.
Per questa ragione troverete apposto sulla targhetta identificativa o sull'imballaggio il simbolo
language integrity.
che indica di non gettare il vecchio apparecchio in pattumiera o nel cassonetto delle
immondizie.
Per eliminare il vecchio apparecchio non più utilizzato, potete consegnarlo al rivenditore il
cambio di quello nuovo acquistato, o direttamente nei centri di raccolta specializzati messi a
disposizione dal vostro comune di residenza.
30
TKG SI 1002 - 121024
Assembly page 30/44

Copies of the I/B. Please reproduce them without any
changes except under special instruction from Team
International BELGIUM. The pages must be reproduced
and folded in order to obtain a booklet A5 (+/- 148.5 mm
width x 210 mm height). When folding, make sure you
keep the good numbering when you turn the pages of
the I/B. Don’t change the page numbering. Keep the
Fax +32 2 359 95 50
ZASADY BEZPIECZNEGO UŻYTKOWANIA
Zanim zaczniesz używać urządzenie przeczytaj uważnie instrukcję i postępuj wyłącznie z jej
wskazaniami.
Ważne: Osoby (w tym dzieci), które ze względów zdrowotnych lub innych mających wpływ na
bezpieczne użytkowanie urządzenia, nie mogą należycie obsługiwać urządzenia nie powinny
go użytkować. Użytkowanie urządzenia może stanowić dla niech niebezpieczeństwo
skaleczenia. Szczególnie dotyczy to dzieci, które mogą uznać urządzenie za zabawkę.
Zanim włączysz urządzenie sprawdź czy napięcie sieciowe zgadza się z parametrami
podanymi na tabliczce znamionowej urządzenia.
Podczas użycia nie zostawiaj urządzenia bez nadzoru.
Regularnie sprawdzaj czy kabel zasilający nie jest uszkodzony. Nie używaj urządzenia z
uszkodzonym kablem zasilającym. Wszelkie naprawy powinny być dokonane przez
wykwalifikowanego elektryka(*). Jeżeli przewód jest uszkodzony, musi zostać zastąpiony
przez wykwalifikowanego elektryka(*) w celu uniknięcia niebezpieczeństwa.
Urządzenie służy tylko do użytku domowego i powinno być używane zgodnie ze
wskazaniami niniejszej instrukcji.
Nie zanurzaj żelazka w wodzie ani żadnym innym płynie.
Nie umieszczaj w zmywarce do naczyń.
Nie używaj w pobliżu źródeł ciepła.
Przed czyszczeniem lub przechowywaniem wyłącz urządzenie z sieci i pozostaw aż
całkowicie ostygnie.
Nie używaj na zewnątrz, zadbaj aby urządzenie pracowało w suchym otoczeniu.
Nigdy nie używaj urządzeń ani części nie posiadających rekomendacji producenta
ponieważ może to być niebezpieczne dla użytkownika. Mogą one również wpłynąć na
wadliwe działanie urządzenia lub jego uszkodzenie.
Nigdy nie ciągnij, nie podnoś itp. urządzenia za kabel ani nie wyłączaj wtyczki z sieci w ten
sposób. Nie owijaj kabla wokół urządzenia, nie zginaj go, nie skręcaj.
Temperatura powierzchni niektórych części urządzenia może być bardzo wysoka. Nie
dotykaj ich podczas użycia. Używaj wyłącznie uchwytu.
Zadbaj aby przewód zasilający nie stykał się z gorącymi powierzchniami.
Przed pierwszym użyciem zdejmij naklejki i wszystkie materiały, w które zapakowane jest
urządzenie. Przetrzyj stopę żelazka miękką ściereczką.
Przed czyszczeniem lub przechowywaniem wyłącz urządzenie z sieci i pozostaw aż
całkowicie ostygnie.
Podczas napełniania zbiornika wodą konieczne jest wyłączenie urządzenia z sieci.
Upewnij się, że stopa żelazka nie styka się z łatwopalnymi materiałami (np. plastik).
Jeśli posiadasz specjalną żaroodporną podstawkę ustawiaj na niej urządzenie tylko po
przekręceniu pokrętła w pozycję 0.
Zawsze wyłączaj urządzenie z sieci jeśli nie jest używane.
Urządzenie powinno być używane i przechowywane na równej, stabilnej powierzchni.
Nie używaj urządzenia jeśli zauważysz widoczne oznaki zniszczenia np. po upadku.
(*) Uprawniony elektryk: Osoba wskazana przez dział sprzedaży producenta lub importera lub
każda osoba posiadająca niezbędne kwalifikacje umożliwiające dokonywanie tego typu
napraw bez stwarzania zagrożenia. W każdym przypadku urządzenie należy przekazywać tym
osobom.
! PRZED UŻYCIEM ZDEJMIJ NAKLEJKI I WSZYSTKIE MATERIAŁY, W KTÓRE ZAPAKOWANE JEST
URZĄDZENIE. PRZETRZYJ STOPĘ ŻELAZKA MIĘKKĄ ŚCIERECZKĄ.
language integrity.
31
TKG SI 1002 - 121024
Assembly page 31/44

Copies of the I/B. Please reproduce them without any
changes except under special instruction from Team
International BELGIUM. The pages must be reproduced
and folded in order to obtain a booklet A5 (+/- 148.5 mm
width x 210 mm height). When folding, make sure you
keep the good numbering when you turn the pages of
the I/B. Don’t change the page numbering. Keep the
Fax +32 2 359 95 50
NAPEŁNIANIE ZBIORNIKA WODY
Zalecamy stosowanie wody zdemineralizowanej.
1) Wyłącz urządzenie z sieci i pozostaw aż ostygnie. Ustaw w pozycji poziomej na stabilnej
powierzchni.
2) Przekręć pokrętło temperatury w pozycji "MIN" oraz inne ustawienia w pozycji 0.
3) Odchyl niewielką pokrywę wlewu i za pomocą miarki wlej czystą wodę. Nie przekraczaj
poziomu MAX zaznaczonego na urządzeniu.
4) Przy napełnianiu podczas prasowania odłącz urządzenie z sieci. Trzymaj w pozycji
poziomej, ale nie dotykaj stopą żadnej powierzchni.
USTAWIENIA TEMPERATURY
• Przed prasowaniem sprawdź wskazania producenta na metce ubrania.
• Podłącz żelazko do prądu. Ustaw temperaturę dla określonego materiału przy pomocy
pokrętła. Zaświeci się lampka kontrolna. Po osiągnięciu oczekiwanej temperatury lampka
się wyłączy.
PRASOWANIE NA SUCHO
• Ustaw regulator pary w pozycji 0.
• Włącz żelazko do sieci.
• Ustaw pokrętło temperatury w pozycji odpowiedniej dla prasowanego materiału. Przed
prasowaniem sprawdź wskazania producenta na metce ubrania.
• Poczekaj aż lampka temperatury zgaśnie sygnalizując gotowość urządzenia do
prasowania.
PRASOWANIE PARĄ
Rodzaj tkaniny Temperatura Prasowanie parą
Nylon
Syntetyczne (np. akryl,
wiskoza, poliamid,
poliester,…)
Jedwab
Wełna
Bawełna
Len
Czyszczenie
• Napełnij zbiornik wodą (regulacja pary w pozycji 0).
• Włącz urządzenie do sieci.
• Wybierz odpowiednią temperaturę.
language integrity.
MIN
|
|
|
|
|
|
MAX
|
|
0
----->
SELF CLEAN
• Ustaw regulację pary pomiędzy 0 i w zależności od żądanej ilości wydobywającej
się pary.
• Poczekaj aż urządzenie osiągnie ustawiona temperaturę.
32
TKG SI 1002 - 121024
Assembly page 32/44

Copies of the I/B. Please reproduce them without any
changes except under special instruction from Team
International BELGIUM. The pages must be reproduced
and folded in order to obtain a booklet A5 (+/- 148.5 mm
width x 210 mm height). When folding, make sure you
keep the good numbering when you turn the pages of
the I/B. Don’t change the page numbering. Keep the
Fax +32 2 359 95 50
Uwaga: Ustaw regulator temperatury zgodnie z żądanym zakresem pary ('' lub''). Jeśli
ustawiona temperatura jest zbyt niska, woda może kapać z żelazka. Przed prasowaniem
sprawdź etykietę ubrania, ponieważ niektóre tkaniny mogą być uszkodzone pod wpływem
pary wodnej lub wody.
SPRYSKIWACZ
• Pomaga usunąć uporczywe zagniecenia.
• Spryskiwacz może być używany przy każdej temperaturze oraz przy prasowaniu parą.
Naciśnij przycisk spryskiwacza.
ODKAMIENIANIE
Do odkamieniania urządzenia, używaj dostępnych w sklepach produktów przeznaczonych
specjalnie do tego celu. Zawsze zapoznaj się wcześniej, starannie z instrukcją obsługi.
CZYSZCZENIE I KONSERWACJA
• Przed czyszczeniem wyłącz urządzenie z sieci i pozostaw aż ostygnie.
• Plastikowe części urządzenia przetrzyj wilgotną ściereczką.
• Stopę żelazka czyść za pomocą specjalnych preparatów. Nie używaj preparatów
ściernych ani ostrych narzędzi.
PO ZAKOŃCZENIU PRASOWANIA
• Ustaw pokrętło temperatury w pozycji "MIN" a pokrętło pary w pozycji "0" i wyłącz
urządzenie z sieci.
• Nie kierując stopy w swoja stronę obróć stopa do góry, aby opróżnić zbiornik wody.
• Pozostaw aż wszelkie pozostałości wilgoci odparują.
FUNKCJA SAMOOCZYSZCZANIA
Ważne, aby funkcja "samooczyszczania" była używana co najmniej raz na dwa miesiące, w
celu usunięcia wszelkich zanieczyszczeń itd. Im twardsza jest woda używana do prasownia tym
częściej powinna być stosowana funkcja "samooczyszczania".
1. Otwórz pokrywę wlewu i napełnij zbiornik wodą do poziomu "MAX", potem delikatnie
zamknij pokrywę wlewu.
2. Ustaw pokrętło temperatury w pozycji MAX.
3. Włącz urządzenie do sieci.
4. Podnieś żelazko stopą do góry aż wskaźnik temperatury zgaśnie. Następnie ustaw
pokrętło temperatury w pozycji "MIN".
5. Trzymaj urządzenie poziomo nad zlewem, a następnie wyciągnij delikatnie przycisk
pary, umożliwiając samooczyszczanie.
6. Zanieczyszczenia zostaną usunięte przez otwory w stopie żelazka. Przesuń żelazko do
przodu i do tyłu, taka by każdy otwór w stopie został oczyszczony.
7. Jeżeli zbiornik z wodą jest pusty, upewnij się, że regulator pary jest w pozycji "0".
8. Nie wahaj się powtórzyć funkcję samooczyszczania, jeżeli zanieczyszczenie
całkowicie nie ustąpiło.
9. Odłącz żelazko z sieci i pozwól aby całkowicie ostygło przed odłożeniem na miejsce.
language integrity.
33
TKG SI 1002 - 121024
Assembly page 33/44

Copies of the I/B. Please reproduce them without any
changes except under special instruction from Team
International BELGIUM. The pages must be reproduced
and folded in order to obtain a booklet A5 (+/- 148.5 mm
width x 210 mm height). When folding, make sure you
keep the good numbering when you turn the pages of
the I/B. Don’t change the page numbering. Keep the
Fax +32 2 359 95 50
OCHRONA ŚRODOWISKA NATURALNEGO
Symbol na tabliczce znamionowej urządzenia oznacza, że produktu nie wolno wyrzucać
razem z innymi odpadami z gospodarstw domowych. Polskie prawo zabrania pod karą
grzywny łączenia zużytego sprzętu elektrycznego i elektronicznego wraz z innymi odpadami.
Dbając o pozbycie się produktu w należyty sposób, można zapobiec potencjalnym
negatywnym skutkom dla środowiska naturalnego i zdrowia ludzkiego, jakie mogłyby wyniknąć
z niewłaściwego postępowania z odpadami powstałymi ze zużytego sprzętu elektronicznego.
System zbierania zużytego sprzętu jest zgodny z obowiązującymi na terenie Rzeczpospolitej
Polskiej normami prawnymi, (Ustawa z dnia 29 lipca 2005, Dziennik Ustaw Nr 180 poz.1494 i
1495) obowiązki wynikające z ustawy przejęła w imieniu przedsiębiorcy Organizacja Odzysku.
Gospodarstwo domowe pełni istotną rolę w przyczynianiu się do ponownego użycia i odzysku,
w tym recyklingu, zużytego sprzętu elektrycznego. Przestrzeganie zasad selektywnej zbiórki
sprzętu ma zapewnić właściwy poziom ochrony zdrowia ludzkiego i środowiska naturalnego.
Waga netto urządzenia - 1.13 kg
language integrity.
34
TKG SI 1002 - 121024
Assembly page 34/44

Copies of the I/B. Please reproduce them without any
changes except under special instruction from Team
International BELGIUM. The pages must be reproduced
and folded in order to obtain a booklet A5 (+/- 148.5 mm
width x 210 mm height). When folding, make sure you
keep the good numbering when you turn the pages of
the I/B. Don’t change the page numbering. Keep the
Fax +32 2 359 95 50
MĂSURI DE SIGURANŢĂ
Vă rugăm citiţi cu atenţie aceste instrucţiuni înainte de a folosi aparatul si intotdeauna urmati
instructiunile de siguranta si operare.
Important: persoanele (inclusiv copii) care nu sunt capabile sa folosească produsul in
siguranţa, datorita capacitaţii lor fizice, senzoriale sau mentale, sau datorita lipsei de
experienţa sau cunoaştere, nu trebuie niciodată sa folosească produsul decât daca sunt
supravegheaţi de o persoana responsabila cu siguranţa lor sau daca ei anterior au primit
instrucţiuni privind folosirea aparatului.
Supravegherea îndeaproape este necesara pentru a împiedica copiii sa folosească aparatul
ca pe o jucărie.
Verificati daca tensiunea la care conectati aparatul corespunde cu tensiunea
recomandata.
Nu lasati niciodata aparatul nesupravegheat in momentul folosirii.
Verificaţi din când în când starea cablului de alimentare. Nu porniţi aparatul atunci când
cablul de alimentare sau aparatul este avariat. În cazul în care cablul de alimentare se
deteriorează trebuie să fie înlocuit la o unitate de service specializată(*). Reparaţiile de
orice tip vor fi efectuate numai într-o unitate de service competentă(*) in scopul de a
evita orice pericol.
Utilizati aparatul numai in scopuri casnice si conform cu instructiunile de folosire.
Nu lasati aparatul pe sau in apropierea suprafetelor incinse sau surselor de caldura ce pot
deteriora carcasa, elementele din plastic ale carcasei sau cablul de alimentare.
Inainte de curatare sau spalare deconectati aparatul de la retea.
Nu utilizati aparatul in exterior.
Dupa folosire depozitati-l intr-un loc ferit de umezeala.
Nu utilizati accesorii care nu sunt recomandate de producator, deoarece pot fi
periculoase pentru dvs sau pot deteriora aparatul.
Nu deconectati tragand de firul de alimentare. Verificati inainte cordonul sa nu fie rasucit
sau indoit.
In timpul folosirii, anumite parti ale aparatului se incing mai tare, asadar folositi cu atentie,
tinand numai de maner.
Atentie, cand folositi fierul de calcat, nu atingeti cu talpa incinsa cablul de alimentare.
Deconectati de la retea aparatul atunci cand nu il folositi.
Inainte de a folosi aparatul pentru prima oara, indepartati toate etichetele si instructiunile
de pe talpa de calcat si curatati-o cu o carpa umeda.
Lasati intodeauna aparatul sa se raceasca inainte de a-l curat, depozita sau umple cu
apa.
Cand alimentati rezervorul cu apa este necesar sa deconectati aparatul de la retea.
Nu puneti aparatul in pozitie orizontala pe masa de calcat si nici pe pozitia de calcare cu
aburi.
Fiti atent ca in timpul folosirii sa nu atingeti cu talpa materiale inflamabile (de ex. plastic,
textile).
Daca aveti o rezistenta speciala de caldura, asigurati-va ca rotita pentru reglaj aburi sa
fie in pozitia “0”.
Intotdeauna scoateti fierul de calcat din priza daca nu-l folositi.
Firul de calcat va si folosit si amplasat pe o suprafata plana si stabila.
Nu folositi fierul de calcat daca a cazut pe jos, daca prezinta semen de stricaciuni sau
curge.
(*) Electrician calificat: departmental de vanzari al producatorului sau imporatorului sau orice
persoana care este calificata, competenta si aprobata de acestia sa execute astfel de
reparatii in scopul de a evita orice fel de pericol. In orice caz trebuie sa returnati aparatul
acestui electrician.
language integrity.
35
TKG SI 1002 - 121024
Assembly page 35/44

Copies of the I/B. Please reproduce them without any
changes except under special instruction from Team
International BELGIUM. The pages must be reproduced
and folded in order to obtain a booklet A5 (+/- 148.5 mm
width x 210 mm height). When folding, make sure you
keep the good numbering when you turn the pages of
the I/B. Don’t change the page numbering. Keep the
Fax +32 2 359 95 50
INAINTE DE PRIMA FOLOSIRE, indepartati orice fel de eticheta a produsului de pe talpa de inox,
apoi curatati cu o carpa moale, umeda pentru indepartarea murdariei.
UMPLEREA REZERVORULUI CU APA
Puteti folosi apa demineralizata. Daca doriti sa folositi abur/uscat, umpleti rezervorul cu apa,
respectand urmatorii pasi:
1) Deconectati aparatul de la retea, lasati-l sa se raceasca si asezati-l in pozitie orizontala,
pe o suprafata dreapta si stabila.
2) Puneti selectorul de temperatura pe pozitia "MIN" si selectorul de vapori pe pozitia "0".
3) Pentru a umple rezervorul de apa, faceti sa culiseze capacul orificiului de umplere si
turnati apa cu ajutorul recipientului gradat. Nu depasiti marcajul MAX!
4) Cand calcati in modul uscat, deconectati aparatul inaintea reumplerii rezervorului.
Umpleti tinand in pozitie orizontala, fara ca talpa sa atinga masa, sau asezati pe un suport
sau o baza speciala termorezistenta.
ALEGEREA TEMPERATURII
• Puteti alege temperatura dorita in functie de materialul ce urmeaza a fi calcat.
• Conectati fierul. Alegeti temperature corecta rotind butonul de selectie. Indicatorul de
temperatura v alumina. Odata ce temperatura dorita va fi atinsa, lampa indicatoare se va
stinge.
PENTRU CALCARE USCATA
• Rotiti selectorul de aburi in pozitia "0".
• Porniti aparatul introducandu-l in priza.
• Selectati temperatura dorita, dupa ce consultati tabelul cu temperaturile recomandate
diferitelor materiale. Verificati etichetele produsului.
• Asezati aparatul in pozitie verticala pe masa si asteptati sa se stinga indicatorul luminos,
care inseamna ca este incins si se poate incepe operatiunea.
PENTRU CALCARE CU ABURI
Felul materialului Indicator de temperatura Indicator de vapori
Nylon
Sintetic
(ex. acetat, acrilic, vascoza,
poliamida, poliester…)
Matase
Lana
Bumbac
Panzeturi
Curatare
• Umpleti rezervorul cu apa (selectorul de abur pe pozitie 0).
• Conectati la retea.
language integrity.
MIN
|
|
|
|
|
|
MAX
|
|
0
----->
SELF CLEAN
36
TKG SI 1002 - 121024
Assembly page 36/44

Copies of the I/B. Please reproduce them without any
changes except under special instruction from Team
International BELGIUM. The pages must be reproduced
and folded in order to obtain a booklet A5 (+/- 148.5 mm
width x 210 mm height). When folding, make sure you
keep the good numbering when you turn the pages of
the I/B. Don’t change the page numbering. Keep the
Fax +32 2 359 95 50
• Alegeti temperature dorita.
• Rotiti butonul reglare aburi intre 0 si in concordanta cu volumul de aburi dorit.
• Asezati aparatul in pozitie verticala pe suprafata stabila si asteptati sa se stinga indicatorul
luminos.
Atentie:
Selectati temperatura incepand de la pozitia sau , altfel exista posibilitatea ca din
cauza temperaturii insuficiente sa picure apa din talpa.
Verificati tot timpul etichetele imbracamintei, deoarece anumite materiale pot fi deteriorate la
aburi sau chiar la pulverizare cu apa.
FUNCTIA SPRAY
• Se foloseste pentru a inlatura dungile persistente (sifonate).
• Poate fi folosit la orice nivel de temperatura, si indiferent daca se calca in modul uscat
sau cu aburi. Apasati butonul de spray pentru spray.
DETARTRAREA
Pentru detartare va rugam sa folositi produse speciale pentru detartaj.
INTRETINERE SI CURATARE
• Deconectati intotdeauna aparatul si latati-l sa se raceasca inainte de curatare.
• Pentru curatarea partilor de plastic ale fierului de calcat folositi o carpa umeda.
• Pentru curatarea talpii asigurativa ca folositi un produs special pentru aceasta. Nu folositi
niciodata produse abrazive.
CAND ATI TERMINAT DE CALCAT
• Comutati in pozitia "MIN" selectorul de temperatura si deconectati de la retea aparatul.
• Goliti aparatul de apa, tinand in pozitie inversa umplerii.
• Lasati aparatul in pozitie verticala pentru ca picaturile de apa ramase sa se evapore.
AUTO-CURATAREA
Este important sa folositi "auto-curatarea" la cel putin doua folosiri pentru a indeparta
impuritatile, etc. Cu cat apa este mai dura cu atat fierul de calcat trebuie curatat mai des.
1. Deschideti orificiul de umplere si umpleti rezervorul cu apa pana la nivelul "MAX", apoi
inchideti orificiul.
2. Setati temperatura la nivel "MAX".
3. Conectati aparatul la priza.
4. Pozitionati fierul de calcat vertical pana cand lumina indicatorului de temperatura se
stinge. Apoi reglati temperatura de la butonul termostatului pe pozitia "MIN".
5. Puneti aparatul in pozitie orizontala deasupra chiuvetei, apoi scoateti butonul de
reglare aburi pentru autocuratare.
6. Apa fiarta, aburul si impuritatile vor fi evacuate prin gaurile talpii. Miscati fierul de
calcat inainte si inapoi, astfel incat toate gaurile talpii sa fie curatate.
7. Fixati discul de abur in pozitia "0" imediat ce rezervorul de apa s-a golit.
8. Nu ezitati sa repetati operatia de auto-curatare daca mai raman impuritati.
9. Deconectati fierul de calcat si lasati-l sa se raceasca inainte de a-l depozita.
language integrity.
37
TKG SI 1002 - 121024
Assembly page 37/44

Copies of the I/B. Please reproduce them without any
changes except under special instruction from Team
International BELGIUM. The pages must be reproduced
and folded in order to obtain a booklet A5 (+/- 148.5 mm
width x 210 mm height). When folding, make sure you
keep the good numbering when you turn the pages of
the I/B. Don’t change the page numbering. Keep the
Fax +32 2 359 95 50
PROTECTIA MEDIULUI – DIRECTIVA 2002/96/EC
Simbolul de pe tăbliţa cu datele tehnice înseamnă că produsul nu se poate arunca
împreună cu alte reziduuri menajere. Legea pedepseşte cu amendă persoanele care aruncă
aparatele electrice şi electronice împreună cu alte reziduuri.
Debarasarea corespunzătoare a produselor uzate previne formarea unor efecte negative
pentru mediul natural şi sănătatea umană, care pot fi produse de manipularea nepotrivită a
reziduurilor rămase din uzarea aparatelor electronice.
language integrity.
38
TKG SI 1002 - 121024
Assembly page 38/44

Fax +32 2 359 95 50
Copies of the I/B. Please reproduce them without any
changes except under special instruction from Team
International BELGIUM. The pages must be reproduced
and folded in order to obtain a booklet A5 (+/- 148.5 mm
width x 210 mm height). When folding, make sure you
keep the good numbering when you turn the pages of
the I/B. Don’t change the page numbering. Keep the
language integrity.
POKYNY NA OBSLUHU
DÔLEŽITÉ BEZPEČNOSTNÉ UPOZORNENIA
Pred používaním zariadenia si pozorne prečítajte tieto pokyny, a vždy dodržujte bezpečnostné
a prevádzkové pokyny v návode.
Dôležité: Osoby (vrátane detí), ktoré nie sú schopné používať zariadenie bezpečným
spôsobom kvôli fyzickým, zmyslovým alebo duševným schopnostiam alebo kvôli nedostatku
skúseností alebo vedomostí, nesmú nikdy používať toto zariadenie, ak nie sú pod dohľadom
osoby zodpovednej za ich bezpečnosť alebo ak predtým nedostali pokyny týkajúce sa
bezpečného používania zariadenia.
Na deti je potrebné dôsledne dohliadať, aby nepoužívali toto zariadenie ako hračku.
Skontrolujte, či sa napätie v elektrickej sieti zhoduje s napätím uvedeným na zariadení.
Zariadenie nikdy nenechávajte bez dozoru, keď sa používa.
Z času na čas skontrolujte, či kábel nie je poškodený. Zariadenie nikdy nepoužívajte, ak
Zariadenie používajte iba na domáce účely a spôsobom, aký je uvedený v týchto
Zariadenie nikdy a zo žiadneho dôvodu neponárajte do vody alebo do akejkoľvek
Zariadenie nikdy nepoužívajte v blízkosti horúcich plôch.
Zariadenie vždy pred čistením alebo uskladnením odpojte od elektrického napájania.
Zariadenie nikdy nepoužívajte vonku a vždy ho umiestňujte do suchého prostredia.
Nikdy nepoužívajte príslušenstvo, ktoré neodporúča výrobca. Môže predstavovať
Zariadenie nikdy nepremiestňujte ťahaním za kábel. Ubezpečte sa, že kábel sa žiadnym
Nedotýkajte sa teplých častí prístroja, vždy použite uchopenie.
Dávajte pozor na to, aby šnúra neprišla do kontaktu s teplými časťami prístroja.
Predtým ako použijete prístroj prvýkrát, odstráňte všetky nálepky zo žehliacej platne a
Skôr ako prístroj začnete čistiť, plniť (model s funkciou sprej a parný náraz) alebo ho
Pred plnením nádrže je nutné, aby ste odpojili zástrčku zo zásuvky (model s funkciou
Prístroj nepokladajte do horizontálnej polohy, uprednostňujte vertikálnu polohu.
Uistite sa, že sa žehliaca platňa nedotýka počas použitia vzplanuteľných materiálov (napr.
Ak máte špeciálnu teplu odolnú podložku, uistite sa, že pred položením žehličky je
Keď prístroj nepoužívate vždy ho odpojte od zásuvky.
6ehličku položte na rovnú, stabilnú plochu, vhodnú na žehlenie.
Žehličku nepoužívajte, ak Vám spadla a vykazuje viditeľné znaky poškodenia alebo
(*) Kompetentný kvalifikovaný elektrikár: popredajné oddelenie výrobcu alebo dovozca alebo
akákoľvek osoba, ktorá je kvalifikovaná, schválená a kompetentná na vykonávanie takýchto
opráv s cieľom predchádzania akýmkoľvek nebezpečenstvám. V každom prípade by ste mali
vrátiť zariadenie takémuto elektrikárovi.
kábel alebo samotné zariadenie vykazujú akékoľvek príznaky poškodenia. Všetky opravy
by mal vykonávať kompetentný, kvalifikovaný elektrikár(*) aby sa predišlo
nebezpečenstvu.
pokynoch.
kvapaliny. Zariadenie nikdy nevkladajte do umývačky riadu.
nebezpečenstvo pre používateľa a riziko poškodenia spotrebiča.
spôsobom nemôže niekde zachytiť. Neomotávajte kábel okolo zariadenia ani ho
nezohýbajte.
opatrne ju očistite.
uschováte, nechajte ho vždy ochladiť.
sprej/parný náraz).
plasty, textílie).
regulátor pary v polohe 0.
vyteká voda.
39
TKG SI 1002 - 121024
Assembly page 39/44

Copies of the I/B. Please reproduce them without any
changes except under special instruction from Team
International BELGIUM. The pages must be reproduced
and folded in order to obtain a booklet A5 (+/- 148.5 mm
width x 210 mm height). When folding, make sure you
keep the good numbering when you turn the pages of
the I/B. Don’t change the page numbering. Keep the
Fax +32 2 359 95 50
! Pred použitím žehličky odstráňte výrobné nálepky na žehliacej platni a očistite túto suchou
handričkou.
Naplnenie nádržky na vodu
Používajte uprednostnene destilovanú vodu. Ak chcete použiť funkciu sprej a parný náraz,
naplňte nádrž nasledovným spôsobom:
1) Odpojte prístroj od siete a nechajte ho ochladiť na rovnej stabilnej podložke
v horizontálnej polohe.
2) Regulátor teploty nastavte na "MIN" a regulátor pary do polohy 0.
3) Na naplnenie vodou otvorte veko na plnenie a použite odmerku a nalejte vodu do
určeného otvoru. Nikdy neprekročte značku MAX na nádrži.
4) Keď žehlíte, odpojte najprv prístroj od siete, skôr ako doplníte vodu. Napĺňajte nádrž
držaním žehličky v horizontálnej polohe bez toho, aby ste sa horúcou žehliacou plochou
dotýkali podložky (iba ak by ste mali teplu odolnú podložku určenú na žehlenie).
Nastavenie teploty
• Podľa druhu textílie môžete nastaviť teplotu žehličky.
• Zapojte žehličku do el. siete. Zvoľte požadovanú teplotu na žehlenie otočením spínača pre
voľbu textílie. Indikátor teploty sa rozsvieti. Po dosiahnutí nastavenej teploty, indikátor
zhasne.
Žehlenie na sucho
• Regulátor pary dajte do polohy 0.
• Zapojte prístroj do el. siete.
• Nastavte teplotu podľa požadovanej textílie. Vždy skontrolujte štítok na oblečení pred
voľbou teploty.
• Postavte žehličku na pätu/podstavec a počkajte, kým zhasne kontrolka teploty.
Parný náraz
Druh textílie Voľba teploty Žehlenie parou
Nylón
Syntetika (napr. viskóza,
polyester, …)
Hodváb
Vlna
Bavlna
Ľan
Čistenie
• Naplňte nádrž vodou (regulátor pary v polohe 0).
• Zapojte prístroj do el. siete.
• Zvoľte požadovanú teplotu.
language integrity.
MIN
|
|
|
|
|
|
MAX
|
|
0
----->
SELF CLEAN
40
TKG SI 1002 - 121024
Assembly page 40/44

Copies of the I/B. Please reproduce them without any
changes except under special instruction from Team
International BELGIUM. The pages must be reproduced
and folded in order to obtain a booklet A5 (+/- 148.5 mm
width x 210 mm height). When folding, make sure you
keep the good numbering when you turn the pages of
the I/B. Don’t change the page numbering. Keep the
Fax +32 2 359 95 50
• Nastavte regulátor pary do polohy medzi 0 a podľa želaného množstva pary.
• Postavte žehličku na pätu/podstavec a počkajte, kým zhasne kontrolka teploty.
Pozor: Nastavte teplotu v rozmedzí parného nárazu (' ' alebo ' '). Ak je nastavená teplota
príliš nízka, môže ako následok kvapkať voda zo žehliacej platne. Skontrolujte štítok na oblečení
skôr ako začnete žehliť, keďže niektoré textílie môžu byť poškodené vystavením pare alebo
vode.
SPREJ
• Uľahčuje žehlenie hrubších látok a ťažko dostupných miest. Stlačte pevne tlačidlo spreja.
• Tlačidlo sprej môžete použiť nezávisle od nastavenia teploty alebo pary.
ODSTRÁNENIE VODNÉHO KAMEŇA
Pre odvápnenie prístroja použite vhodné čistiace prostriedky, ktoré sú bežne dostupné
v obchode a doržujte predpisy dané výrobcom prostriedku na odvápňovanie.
ČISTENIE A ÚDRŽBA
• Odpojte prístroj od siete a nechajte ho ochladiť skôr ako začnete prístroj čistiť.
• Obal prístroja očistite s vlhkou handričkou a dôkladne ho osušte.
• Nikdy nepoužívajte abrazívne čistiace prostriedky na čistenie žehliacej plochy, ale použite
vhodné prostriedky, bežne dostupné v obchode.
VYPRÁZDNENIE A USCHOVANIE
• Nastavte regulátor teploty na "MIN" a regulátor pary na "0" a odpojte prístroj od siete.
• Preklopte prístroj dopredu, aby zvyšná voda z nádrže vytiekla.
• Žehličku postavte zvisle a nechajte ju ochladiť, tak aby mohla zvyšková para uniknúť.
Samočistenie
Je dôležité zapnúť funkciu čistenia aspoň každé dva mesiace, aby sa vyčistili nečistoty a vodný
kameň. Čím tvrdšia voda vo Vašom regióne, tým častejšie by ste mali funkciu zapínať.
1. Otvorte veko na naplnenie a naplňte vodou po značku MAX a následne zavrite
jemne veko. .
2. Nastavte regulátor teploty na "MAX".
3. Zapojte prístroj na el. sieť.
4. Postavte žehličku zvisle a počkajte kým indikátor teploty nezhasne. Potom nastavte
regulátor teploty na "MIN".
5. Držte prístroj nad umývadlom, otvorte gombík regulátora pary, čím umožníte
samočistenie prístroja.
6. Voda a para budú vychádzať zo žehliacej platne teraz. Špina a usadeniny budú
vytlačené cez žehliacu platňu. 6ehličku pohybujte dopredu a dozadu, čím sa vyčistí
každá dierka žehliacej plochy.
7. Ako náhle je nádrž prázdna, nastavte regulátor pary do polohy "0".
8. Neváhajte tento čistiaci proces zopakovať ak ostanú zvyšky nečistôt.
9. Pred uskladnením odpojte prístroj od siete a nechajte ho ochladiť.
language integrity.
41
TKG SI 1002 - 121024
Assembly page 41/44

Fax +32 2 359 95 50
Copies of the I/B. Please reproduce them without any
changes except under special instruction from Team
International BELGIUM. The pages must be reproduced
and folded in order to obtain a booklet A5 (+/- 148.5 mm
width x 210 mm height). When folding, make sure you
keep the good numbering when you turn the pages of
the I/B. Don’t change the page numbering. Keep the
language integrity.
OCHRANA ŽIVOTNÉHO PROSTREDIA – SMERNICA 2002/96/ES
Kvôli ochrane nášho životného prostredia a ľudského zdravia by sa mal odpad z elektrických
a elektronických zariadení likvidovať v súlade so špecifickými pravidlami so zapojením sa
dodávateľov aj používateľov. Z tohto dôvodu, ako signalizuje symbol na štítku s
menovitými údajmi alebo na obale, by ste toto zariadenie nemali vyhadzovať spolu s
netriedeným komunálnym odpadom. Používateľ má právo priniesť výrobok na zberné miesto
komunálneho odpadu, ktoré vykonáva recykláciu odpadu prostredníctvom opätovného
použitia, recyklácie alebo použitia na iné účely v súlade so smernicou.
42
TKG SI 1002 - 121024
Assembly page 42/44

Copies of the I/B. Please reproduce them without any
changes except under special instruction from Team
International BELGIUM. The pages must be reproduced
and folded in order to obtain a booklet A5 (+/- 148.5 mm
width x 210 mm height). When folding, make sure you
keep the good numbering when you turn the pages of
the I/B. Don’t change the page numbering. Keep the
Fax +32 2 359 95 50
language integrity.
Návod na použitie, záručné vyhlásenie a servis
Vážený zákazník,
aby Vám Váš elektrospotrebič slúžil čo najlepšie, pozorne si pred jeho prvým uvedením do prevádzky
prečítajte celý návod na použitie.Tento elektrospotrebič bol riadne preskúšaný. Predávajúci Vám poskytuje
záručnú dobu v trvaní 2 rokov od dátumu jeho zakúpenia. V tejto dobe odstránime bezplatne všetky závady
a nedostatky, ktoré podstatne obmedzujú jeho funkciu a ktoré prekázateľne vznikli vadou materiálu alebo
nedostatkami pri výrobe. Závady odstránime podľa nášho uváženia opravou alebo výmenou vadnej časti
prístroja. Záruka sa nevzťahuje na závady spôsobené nedodržaním návodu na použitie,nesprávnym
zapojením, neprimeraným zaobchádzaním, normálnym opotrebovaním a na nedostatky, ktoré sú pre
vlastnú funkciu prístroja nepodstatné a vznikli napríklad na krehkých dieloch elektrospotrebiča, napr.ľahko
rozbitné diely zo skla, umelých hmôt a žiarovky. Záruka stráca platnosť zásahom do prístroja inou osobou,
ako osobou nami poverenou servisom. Ak sa vyskytne na Vašom prístroji závada, zašlite alebo odovzdajte
elektrospotrebič s kompletným príslušenstvom s uvedením Vašej adresy a tel. čísla a popisom závady na
adresu servisu.
Oprava v záručnej dobe Vám bude vykonaná bezplatne iba vtedy, ak priložíte k spotrebiču doklad o
zakúpení prístroja (pokladničný blok, faktúra) a toto záručné vyhlásenie, kde sú servisné záznamy.
Nárok na záruku zaniká, ak je porucha spôsobená:
- mechanickým poškodením (vrátane poškodenia v priebehu prepravy),
- nešetrným a nesprávnym používaním v nesúlade s návodom, nepozornosťou, znečistením
a zanedbanou údržbou,
- vonkajšou udalosťou (prepätie v sieti, živelná pohroma a pod.),
- pripojením výrobku na iné sieťové napätie, aké je preň určené,
- pri nepredložení originálneho dokladu o zakúpení.
Nárok zaniká takisto v prípade, keď ktokoľvek vykonal modifikácie alebo adaptácie na rozšírenie funkcií
výrobku oproti zakúpenému vyhotoveniu alebo kvôli možnosti jeho prevádzkovania v inej krajine, ako pre
ktorú bol navrhnutý. Nárok nebude uznaný na časti, podliehajúce bežnému opotrebeniu, ktoré je v priebehu
prevádzky nutné meniť kvôli správnej funkcii výrobku (napr. filtre, sáčky, gumové tesnenia, odvápňovacie
tyčinky, batérie, žiarovky, obaly a pod.)
Servisné záznamy:
Dodávateľ výrobku pre Slovensko spol. s r.o.
Centrum 1746 / 265, 017 01 Považská Bystrica, tel.: 042/4330791, fax: 042/4260610, www.brel.sk, brel@brel.sk
Organizácia poverená servisom výrobkov:
Brel, spol. s r.o., Centrum 1746/265, 017 01 Považská Bystrica
Tel.: 042/4340193, fax: 042/4260610, mobil: 0910/357277, brel@brel.sk,
www.brel.sk
43
TKG SI 1002 - 121024
Assembly page 43/44

Copies of the I/B. Please reproduce them without any
changes except under special instruction from Team
International BELGIUM. The pages must be reproduced
and folded in order to obtain a booklet A5 (+/- 148.5 mm
width x 210 mm height). When folding, make sure you
keep the good numbering when you turn the pages of
the I/B. Don’t change the page numbering. Keep the
Fax +32 2 359 95 50
Deutsch 4
language integrity.
TKG SI 1002
English 8
Français 12
Nederlands 16
Español 20
Português 23
Italiano 27
Polski 31
Română 35
Slovenský 39
Back cover page (last page)
Assembly page 44/44
 Loading...