

Page 1
Z
CQX1A1335Z
PD
-
H380
Compact Disc Player
OWNER’S MANUAL
MANUEL DU PROPRIÉAIRE
MANUAL DEL USUARIO
ENGLISH
ENGLISH
FRANÇAIS
ESPAÑOL
Page 2
2
< Do not expose this apparatus to drips or splashes.
< Do not place any objects filled with liquids, such as vases, on the
apparatus.
CAUTION: TO REDUCE THE RISK OF ELECTRIC SHOCK, DO NOT
REMOVE COVER (OR BACK). NO USER-SER VICEABLE PARTS
INSIDE. REFER SERVICING TO QUALIFIED SERVICE PERSONNEL.
Th e li ght nin g fl ash wit h ar rowhead symbol, within an
equila teral triangle, is inten ded to alert the user to the
presence of uninsu lated “dangerous voltage” within the
product’s enclosure that may be of sufficient magnitude to
constitute a risk of electric shock to persons.
The exclamation point withi n an equilater al tri angle is
intended to alert the user to the presence of important
operating and maintenance (servicing) instructions in the
literature accompanying the appliance.
IMPORTANT SAFETY INSTRUCTIONS
1) Read these instructions.
2) Keep these instructions.
3) Heed all warnings.
4) Follow all instructions.
5) Do not use this apparatus near water.
6) Clean only with dry cloth.
7) Do not block any ventilation openings. Install in accordance with
the manufacturer’s instructions.
8) Do not install near any heat sources such as radiators, heat
registers, stoves, or other apparatus (including amplifiers) that
produce heat.
9) Do not defeat the safety purpose of the polarized or groundingtype plug. A polarized plug has two blades with one wider than
the other. A grounding type plug has two blades and a third
grounding prong. The wide blade or the third prong are provided
for your safety. If the provided plug does not fit into your outlet,
consult an electrician for replacement of the obsolete outlet.
10) Protect the power cord fro m being walk ed on or pinche d
par ticularly at plugs, convenience receptacles, and the point
where they exit from the apparatus.
11) Only use attachments/accessories specified by the manufacturer.
12) Use only with the cart, stand, tripod, bracket,
or table specified by the manufacturer, or
sold with the apparatus. When a cart is used,
use caution when moving the cart/apparatus
combination to avoid injury from tip-over.
13) Unplug this appara tus dur ing lightning
storms or when unused for long periods of time.
14) Refer all servicing to qualified service personnel. Servicing is
required when the apparatus has been damaged in any way, such
as power-supply cord or plug is damaged, liquid has been spilled
or objects have fallen into the apparatus, the apparatus has been
exposed to rain or moisture, does not operate normally, or has
been dropped.
< Do not install this apparatus in a confined space such as a book
case or similar unit.
< The apparatus draws nominal non-operating power from the AC
outlet with its POWER switch in the standby position.
< The apparatus should be located close enough to the AC outlet so
that you can easily grasp the power cord plug at any time.
< An apparatus with Class ! construction shall be connected to an
AC outlet with a protective grounding connection.
< Batteries (battery pack or batteries installed) shall not be exposed
to excessive heat such as sunshine, fire or the like.
< Excessive sound pressure from earphones and headphones can
cause hearing loss.
< The main plug is used as the disconnect device, the disconnect
device shall remain readily operable.
WARNING: TO PREVENT FIRE OR SHOCK HAZARD,
DO NOT EXPOSE THIS APPLIANCE TO RAIN OR
MOISTURE.
CAUTION
< DO NOT REMOVE THE EXTERNAL CASES OR CABINETS TO EXPOSE
THE ELECTRONICS. NO USER SERVICEABLE PARTS ARE WITHIN!
< IF YOU ARE EXPERIENCING PROBLEMS WITH THIS PRODUCT,
CONTAC T TEAC FOR A SERVICE REFERRAL. DO NOT USE THE
PRODUCT UNTIL IT HAS BEEN REPAIRED.
< USE OF CONTROLS OR ADJUSTMENTS OR PERFORMANCE OF
PROCEDURES OTHER THAN THOSE SPECIFIED HEREIN MAY RESULT
IN HAZARDOUS RADIATION EXPOSURE.
Page 3

Contents
Before use
Thank you for choosing TEAC. Read this manual carefully to
get the best performance from this unit.
Before Use . . . . . . . . . . . . . . . . . . . . . . . . . . . . . . . . . . . . . . . . . . . . . . . . . . . . . . . 3
Discs . . . . . . . . . . . . . . . . . . . . . . . . . . . . . . . . . . . . . . . . . . . . . . . . . . . . . . . . . . . . 4
MP3 and WMA . . . . . . . . . . . . . . . . . . . . . . . . . . . . . . . . . . . . . . . . . . . . . . . . . . . 5
Remote Control Unit . . . . . . . . . . . . . . . . . . . . . . . . . . . . . . . . . . . . . . . . . . . . . 5
Connection . . . . . . . . . . . . . . . . . . . . . . . . . . . . . . . . . . . . . . . . . . . . . . . . . . . . . . 6
Identifying the Parts . . . . . . . . . . . . . . . . . . . . . . . . . . . . . . . . . . . . . . . . . . . . . . 8
Playback (disc) . . . . . . . . . . . . . . . . . . . . . . . . . . . . . . . . . . . . . . . . . . . . . . . . . . 10
Playback (USB device) . . . . . . . . . . . . . . . . . . . . . . . . . . . . . . . . . . . . . . . . . . . 11
Basic Playback . . . . . . . . . . . . . . . . . . . . . . . . . . . . . . . . . . . . . . . . . . . . . . . . . . 12
Folder Search . . . . . . . . . . . . . . . . . . . . . . . . . . . . . . . . . . . . . . . . . . . . . . . . . . . 13
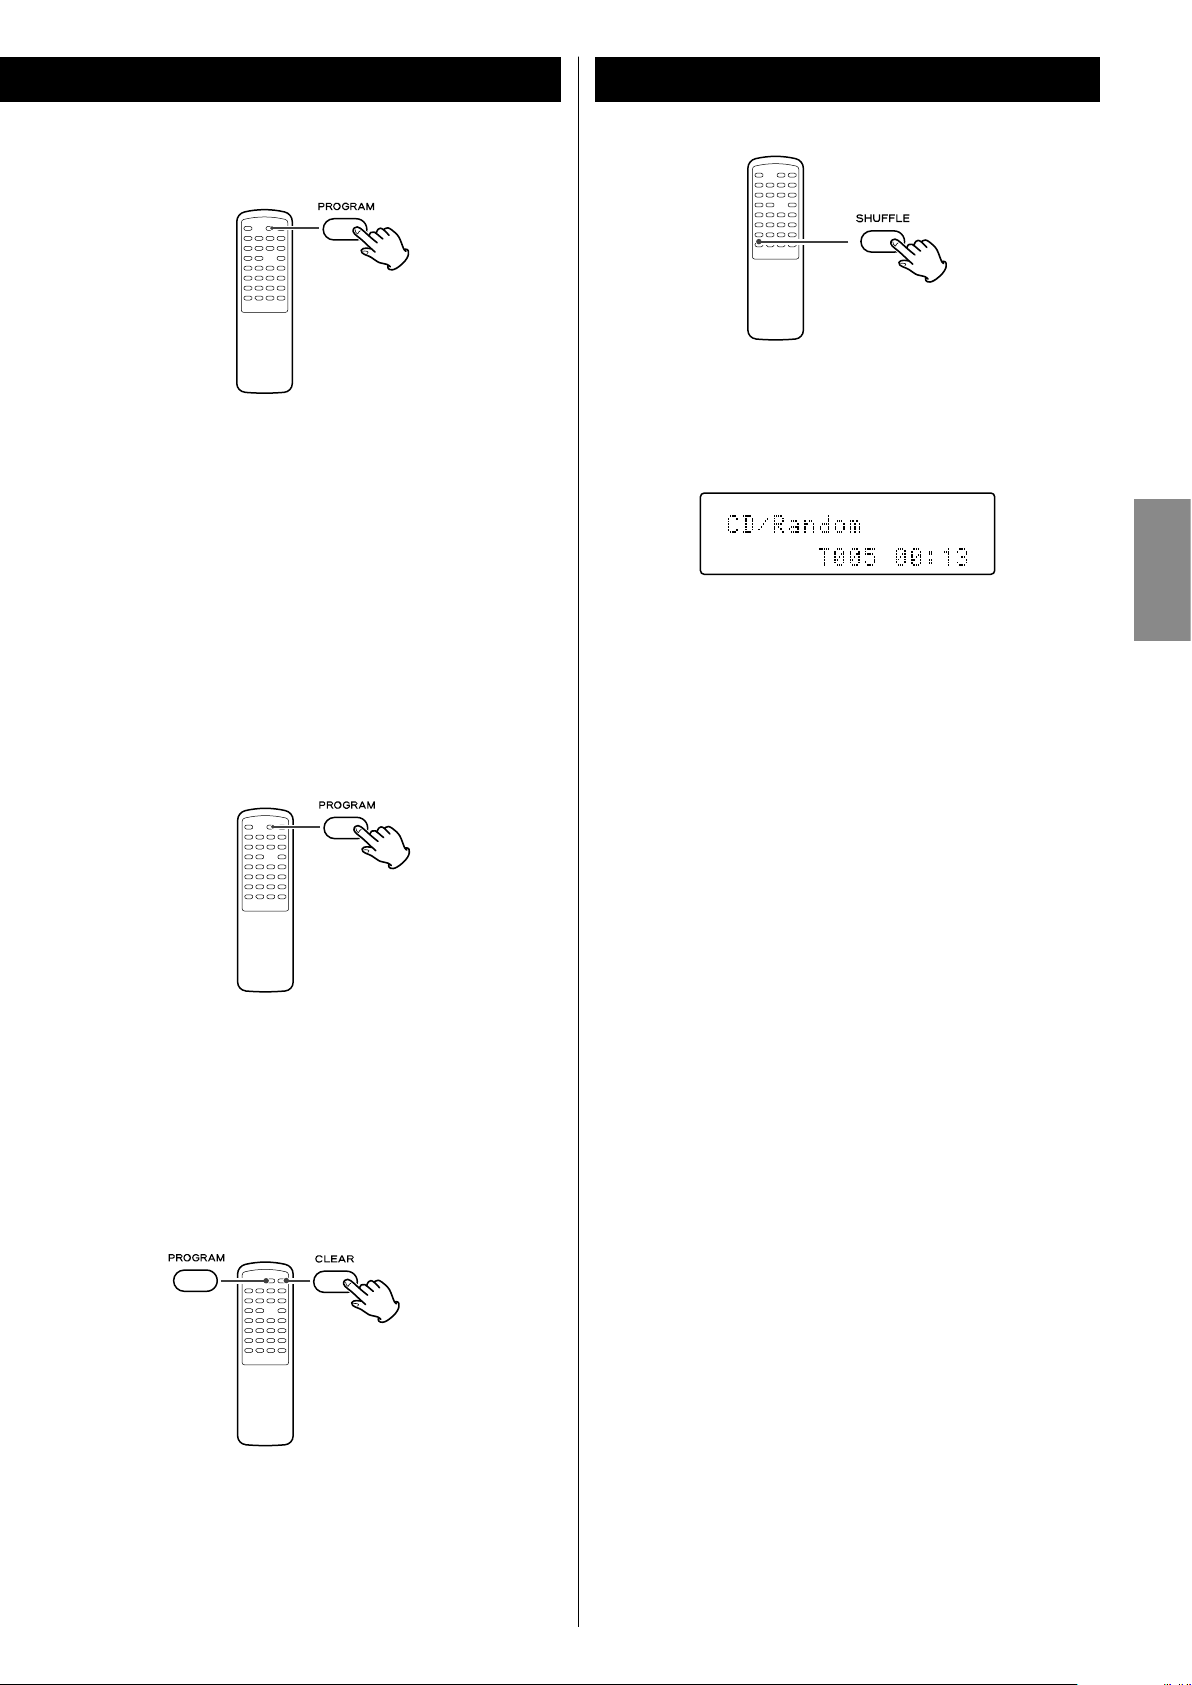
Programmed Playback . . . . . . . . . . . . . . . . . . . . . . . . . . . . . . . . . . . . . . . . . . 14
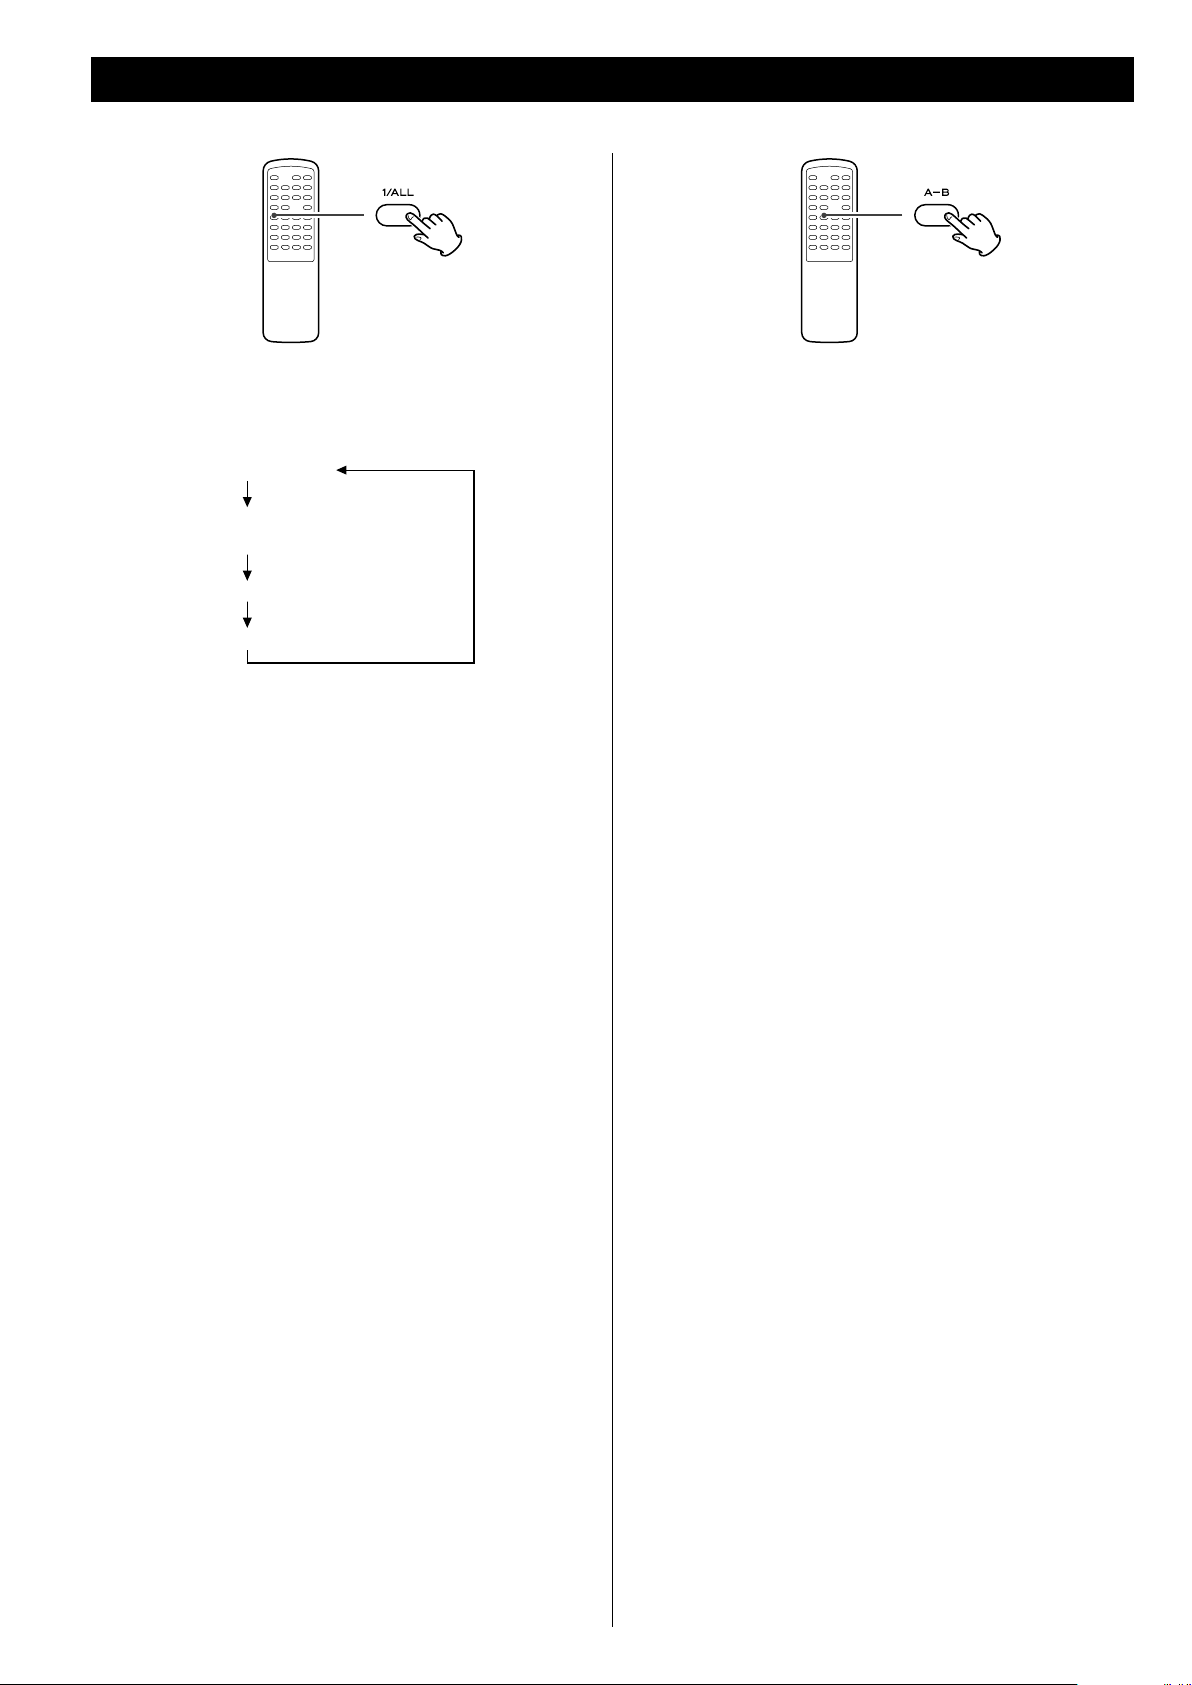
Shuffle Playback. . . . . . . . . . . . . . . . . . . . . . . . . . . . . . . . . . . . . . . . . . . . . . . . . 15
Repeat Playback . . . . . . . . . . . . . . . . . . . . . . . . . . . . . . . . . . . . . . . . . . . . . . . . 16
Time Display . . . . . . . . . . . . . . . . . . . . . . . . . . . . . . . . . . . . . . . . . . . . . . . . . . . . 17
Display (MP3/WMA) . . . . . . . . . . . . . . . . . . . . . . . . . . . . . . . . . . . . . . . . . . . . . 17
Specifications . . . . . . . . . . . . . . . . . . . . . . . . . . . . . . . . . . . . . . . . . . . . . . . . . . . 18
Troubleshooting . . . . . . . . . . . . . . . . . . . . . . . . . . . . . . . . . . . . . . . . . . . . . . . . 18
Read this before attempting any operations
< As the unit may become warm during operation, always leave
sufficient space around the unit for ventilation.
< The voltage supplied to the unit should match the voltage as
printed on the rear panel. If you are in any doubt regarding this
matter, consult an electrician.
< Choose the installation location of your unit carefully. Avoid
placing it in direct sunlight or close to a source of heat. Also
avoid locations subject to vibrations and excessive dust, heat,
cold or moisture.
< Do not place the unit on the amplifier/receiver.
ENGLISH
< Do not open the cabinet as this might result in damage to the
circuitry or electrical shock. If a foreign object should get into the
unit, contact your dealer or service company.
< When removing the power plug from the wall outlet, always pull
directly on the plug, never yank the cord.
< To keep the laser pickup clean, do not touch it, and always close
the disc tray.
< Do not attempt to clean the unit with chemical solvents as this
might damage the finish. Use a clean, dry cloth.
< Keep this manual in a safe place for future reference.
DO NOT MOVE THE UNIT DURING PLAYBACK
During playback, the disc rotates at high speed. Do NOT lift or
move the unit during playback. Doing so may damage the disc
or the unit.
WHEN MOVING THIS UNIT
When changing places of installation or packing the unit for
moving, be sure to remove the disc and return the disc tray to
its closed position in the player. Then, press the power switch to
turn the power off, and disconnect the power cord. Moving this
unit with the disc loaded may result in damage to this unit.
3
Page 4
Discs
Discs which can be played on this unit:
M Conventional audio CDs bearing the COMPACT DISC DIGITAL
AUDIO logo on the label:
M Properly finalized CD-R and CD-RW discs
M MP3 CDs
Note:
< Depending on the quality of the disc and/or the condition of the
recording, some CD-R/CD-RW discs may not be playable.
< Copy-protected discs and other discs which do not conform to
the CD standard may not play back correctly in this player. If you
use such discs in this unit, TEAC Corporation and its subsidiaries
cannot be responsible for any consequences or guarantee the
quality of reproduction. If you experience problems with such
non-standard discs, you should contact the producers of the disc.
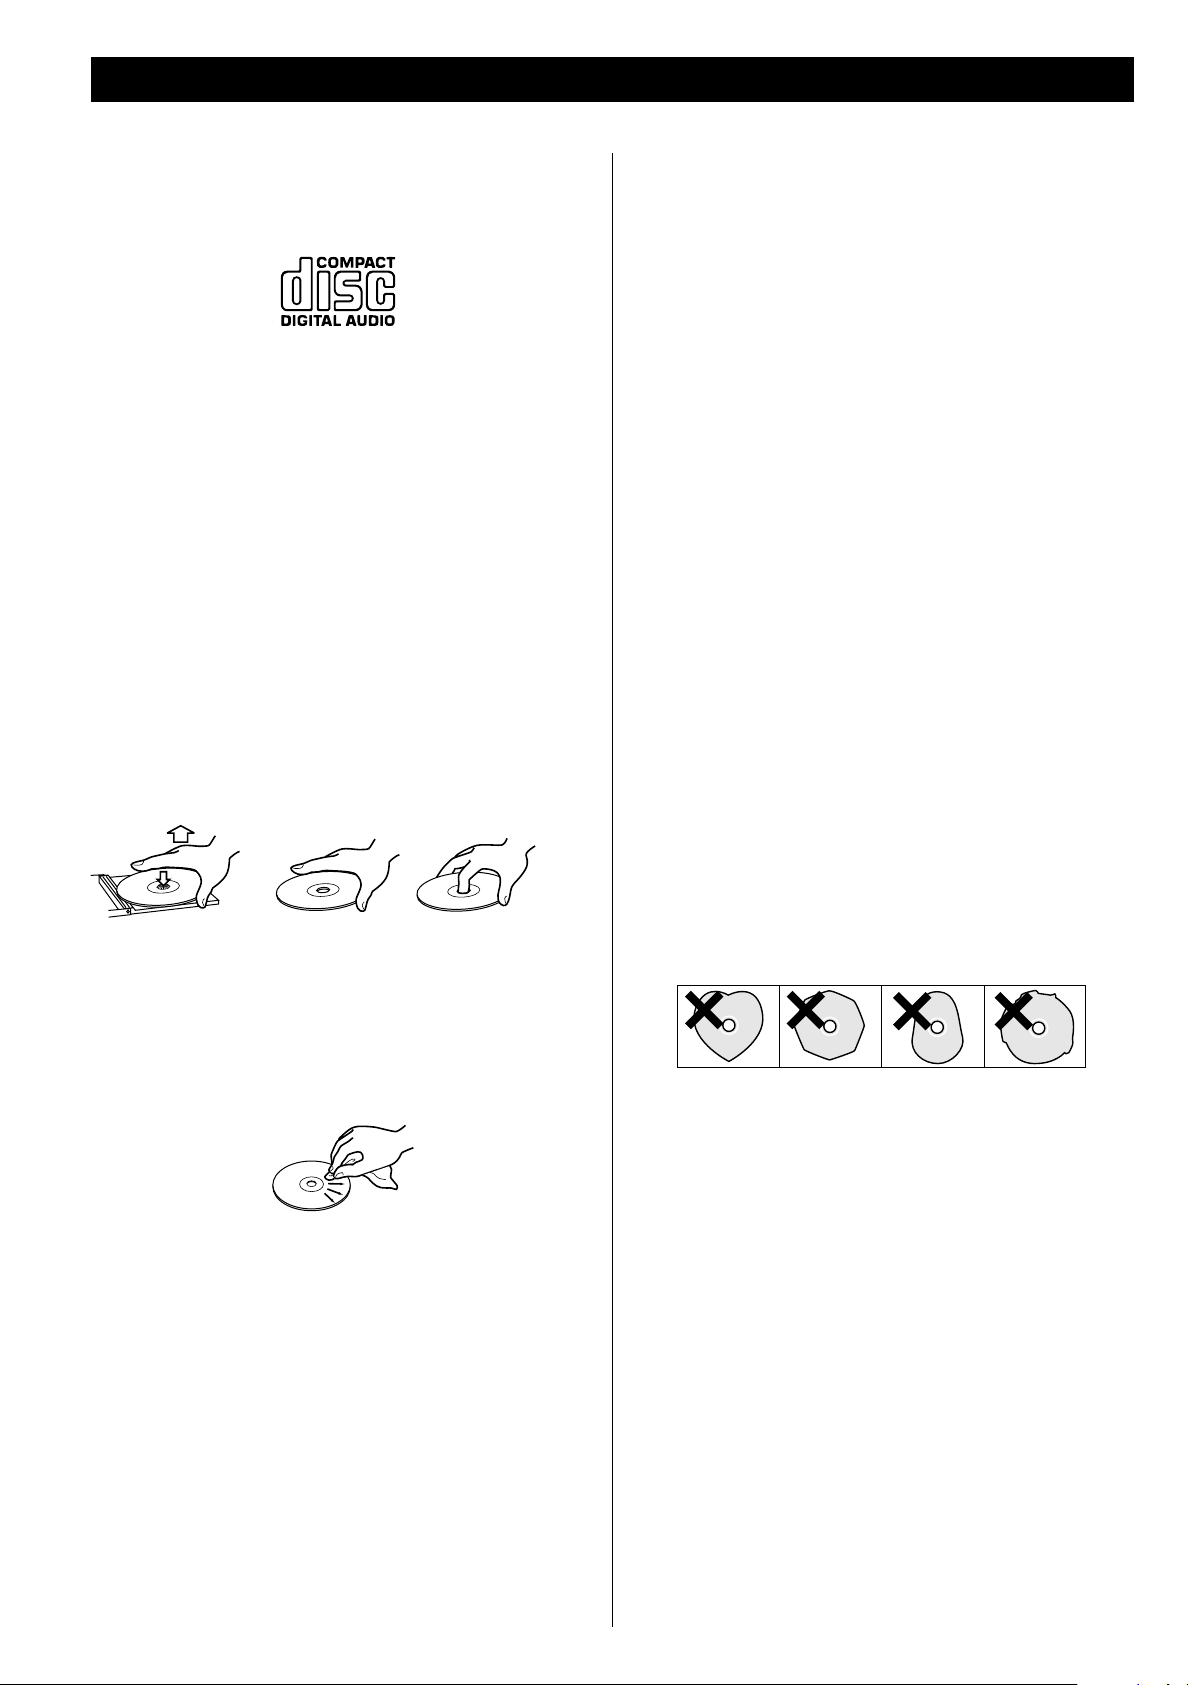
< Always place the disc on the disc tray with the label side
uppermost. (Compact discs can be played or recorded only on
one side.)
< To remove a disc from its storage case, press down on the center
of the case and lift the disc out, holding it carefully by the edges.
< Discs should be returned to their cases after use to avoid dust and
scratches that could cause the laser pickup to ”skip”.
< Do not expose discs to direct sunlight or high humidity and
temperature for extended periods. Long exposure to high
temperatures will warp the disc.
< Do not play any disc that is warped, deformed or damaged.
Playing such discs may cause irreparable harm to the playing
mechanisms.
< CD-R and CD-RW discs are more sensitive to the effects of heat
and ultraviolet rays than ordinary CDs. It is important that they
are not stored in a location where direct sunlight will fall on
them, and which is away from sources of heat such as radiators or
heat-generating electrical devices.
< Printable CD-R and CD-RW discs aren’t recommended, as the label
side might be sticky and damage the unit.
< Do not stick papers or protective sheets on the discs and do not
use any protective coating spray.
< Use a soft oil-based felt-tipped pen to write the information on
the label side. Never use a ball-point or hard-tipped pen, as this
may cause damage to the recorded side.
< Should the disc become dirty, wipe the surface radially (from the
center hole outward towards the outer edge) with a soft, dry
cloth:
< Never use such chemicals as record sprays, antistatic sprays or
fluid, benzine or thinner to clean the discs. Such chemicals will do
irreparable damage to the disc’s plastic surface.
< Never use a stabilizer. Using commercially available CD stabilizers
with this unit will damage the mechanisms and cause them to
malfunction.
< Do not use irregular shape CDs (octagonal, heart shaped, business
card size, etc.). CDs of this sort can damage the unit:
< If you are in any doubt as to the care and handling of a CDR/CD-
RW disc, read the precautions supplied with the disc, or contact
the disc manufacturer directly.
4
Page 5
Remote Control UnitMP3 and WMA
< This unit can play MP3 and WMA files recorded on a CD-R, CD-RW
or USB storage device.
< File names of MP3 or WMA should be alphanumeric characters.
This unit cannot display symbols and full-size or double-byte
characters (such as Japanese, Chinese, etc.) correctly. Also, be
sure to use the file extension. (”.mp3” for MP3 files, ”.wma” for
WMA files.)
< MP3 files are mono or stereo MPEG-1 Audio Layer 3 format. This
unit can play MP3 files with a sampling frequency of 44.1 kHz or
48 kHz and a bit-rate of 320 kbps or less.
< This unit can play WMA files with a sampling frequency of 44.1
kHz and a bit-rate of 192 kbps or less.
< Audio encoded at 128 Kbps should sound close to regular audio
CD quality. Although this player will play lower bit-rate MP3
tracks, the sound quality deteriorates noticeably at lower bitrates.
Discs
< The disc must be finalized in order to play.
The provided Remote Control Unit allows the unit to be operated
from a distance.
When operating the remote control unit, point it towards the
REMOTE SENSOR on the front panel of the unit.
< Even if the remote control unit is operated within the effective
range, remote control operation may be impossible if there are
any obstacles between the unit and the remote control.
< If the remote control unit is operated near other appliances which
generate infrared rays, or if other remote control devices using
infrared rays are used near the unit, it may operate incorrectly.
Conversely, the other appliances may operate incorrectly.
Battery Installation
ENGLISH
< The CD-ROM must be ISO 9660 compatible.
< When more than 255 files are recorded on the disc, the unit might
not be able to play it correctly.
USB
< This unit supports USB 1.1 FULL SPEED (12Mbps).
< This unit can play MP3 files recorded in various external USB
storage devices such as USB flash memory, MP3 player or HDD.
The HDD must be formatted FAT 16 or FAT 32, but not NTFS.
< When more than 2000 files are recorded on the USB memory, the
unit might not be able to play it correctly.
< This unit might not be able to play MP3 memory player via the
USB.
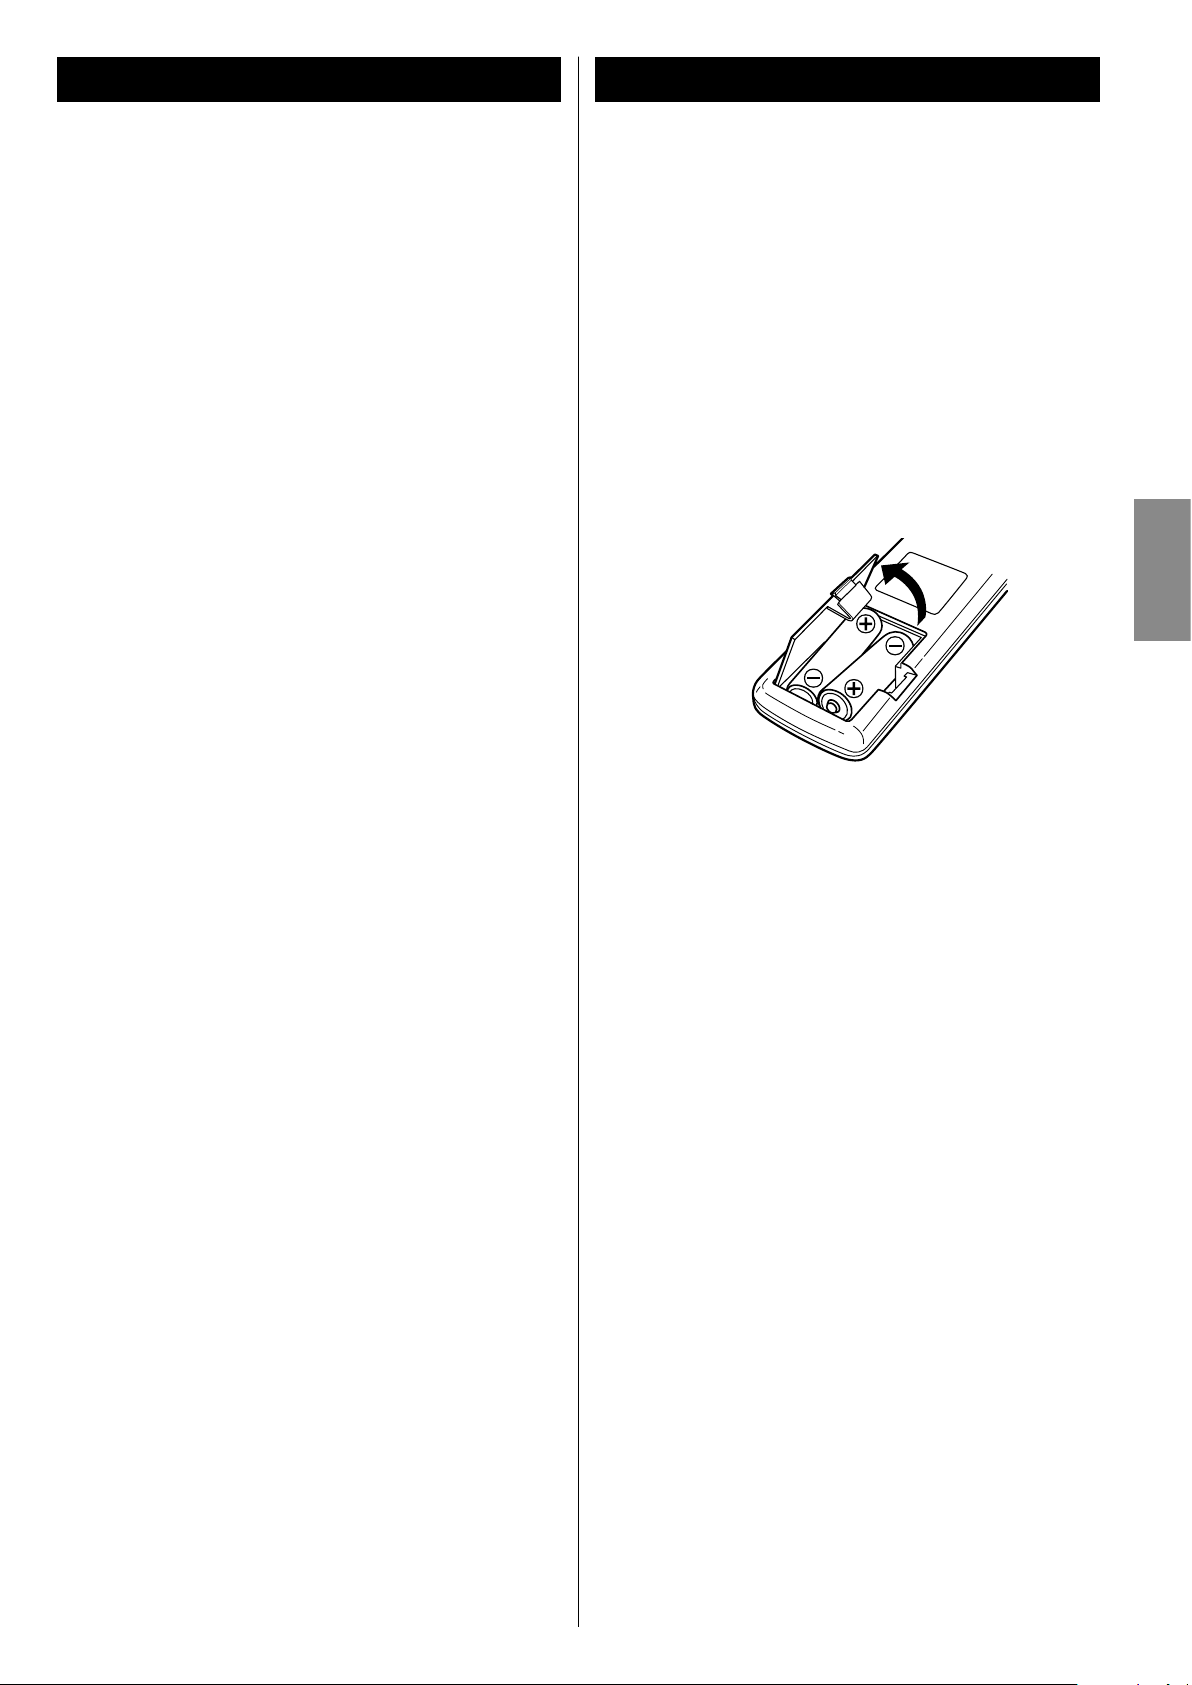
1. Remove the battery compartment cover.
2. Insert two ”AA” dry batteries. Make sure that the batteries
are inserted with their positive ”+” and negative ”_” poles
positioned correctly.
3. Close the cover.
Battery Replacement
If the distance required between the remote control unit and
main unit decreases, the batteries are exhausted. In this case
replace the batteries with new ones.
Precautions concerning batteries
< Be sure to insert the batteries with correct positive ”+” and
negative ”_” polarities.
< Use batteries of the same type. Never use different types of
batteries together.
< Rechargeable and non-rechargeable batteries can be used.
Refer to the precautions on their labels.
< When the remote control unit is not to be used for a long time
(more than a month), remove the batteries from the remote
control unit to prevent them from leaking. If they leak, wipe
away the liquid inside the battery compartment and replace the
batteries with new ones.
< Do not heat or disassemble batteries and never dispose of old
batteries by throwing them in a fire.
5
Page 6
6
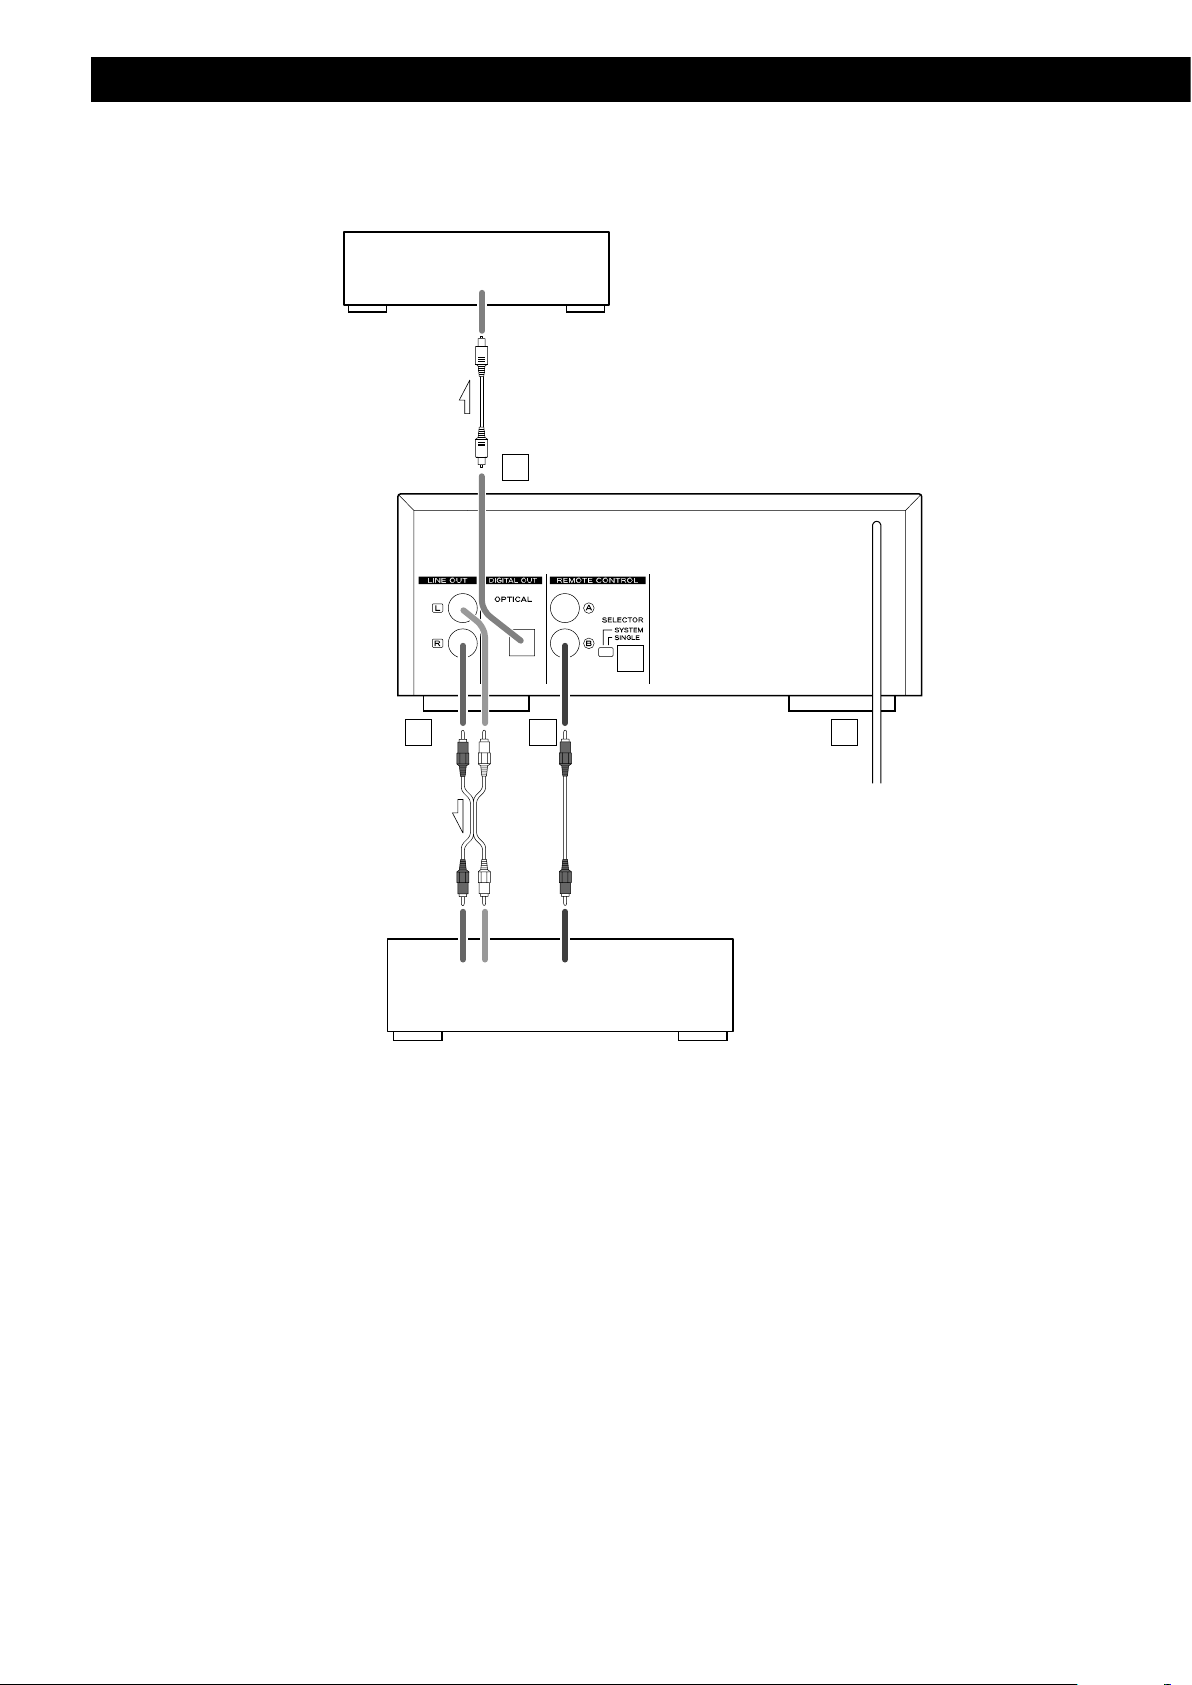
Connection
CD
(LINE IN)
REMOTE CONTROL
R L
DIGITAL IN
(OPTICAL)
B
A C E
D
CD Recorder, MD Recorder etc.
PD-H380
Amplifier (A-H380)
CAUTION:
< Switch off the power to all equipment before connecting any components.
< Read the instructions of each component you intend to use with this unit.
Page 7
A
White (L)
Red (R)
White (L)
Red (R)
LINE OUT jack
This jack transmits an analog 2-channel audio signal. Connect
the components using RCA cables. Connect this jack to the CD
jack of the amplifier (A-H380) with an RCA cable.
Make sure to connect the cables as follows:
white plug q white jack (L: left channel)
red plug q red jack (R: right channel)
< Be sure to insert each plug securely. To prevent hum and noise,
avoid bundling the signal interconnection cables together with
the AC power cord or speaker cables.
B
DIGITAL OUT
Connect it to the digital input terminal of a digital device such
as a CD recorder, MD deck, etc. Use a commercially-available
optical digital cable.
< The optical terminal is covered by a shutter. Make sure that
the cable is firmly inserted, but do not force the cable when
connecting it or removing it, in order not to cause damage to
the unit.
D
SELECTOR switch
If the REMOTE CONTROL jacks of this unit and the A-H380 are
connected with the remote control connection cord, selecct
“SYSTEM“. You can use the remote control unit provided with
the A-H380, and convenient system control operations will be
available.
When you don’t use the system control operations, or you don’t
have an A-H380, select “SINGLE“.
E
AC Power Cord
After all other connections are complete, connect the plug to
the AC wall socket.
< Be sure to connect the power cord to an AC outlet which
supplies the correct voltage.
< Hold the power plug when plugging or unplugging the power
cord.
ENGLISH
C
REMOTE CONTROL jacks
If you have TEAC A-H380, convenient system control operations
are available:
< When you press the PLAY button, the input selector of the A-
H380 is set to “CD” automatically.
< When the A-H380 is turned on during the input selector of the
A-H380 is set to “CD“, playback of CD will start automatically.
Connect the REMOTE CONTROL jack (A or B) to the REMOTE
CONTROL jack of A-H380 with the provided remote control
connection cord.
7
Page 8
8
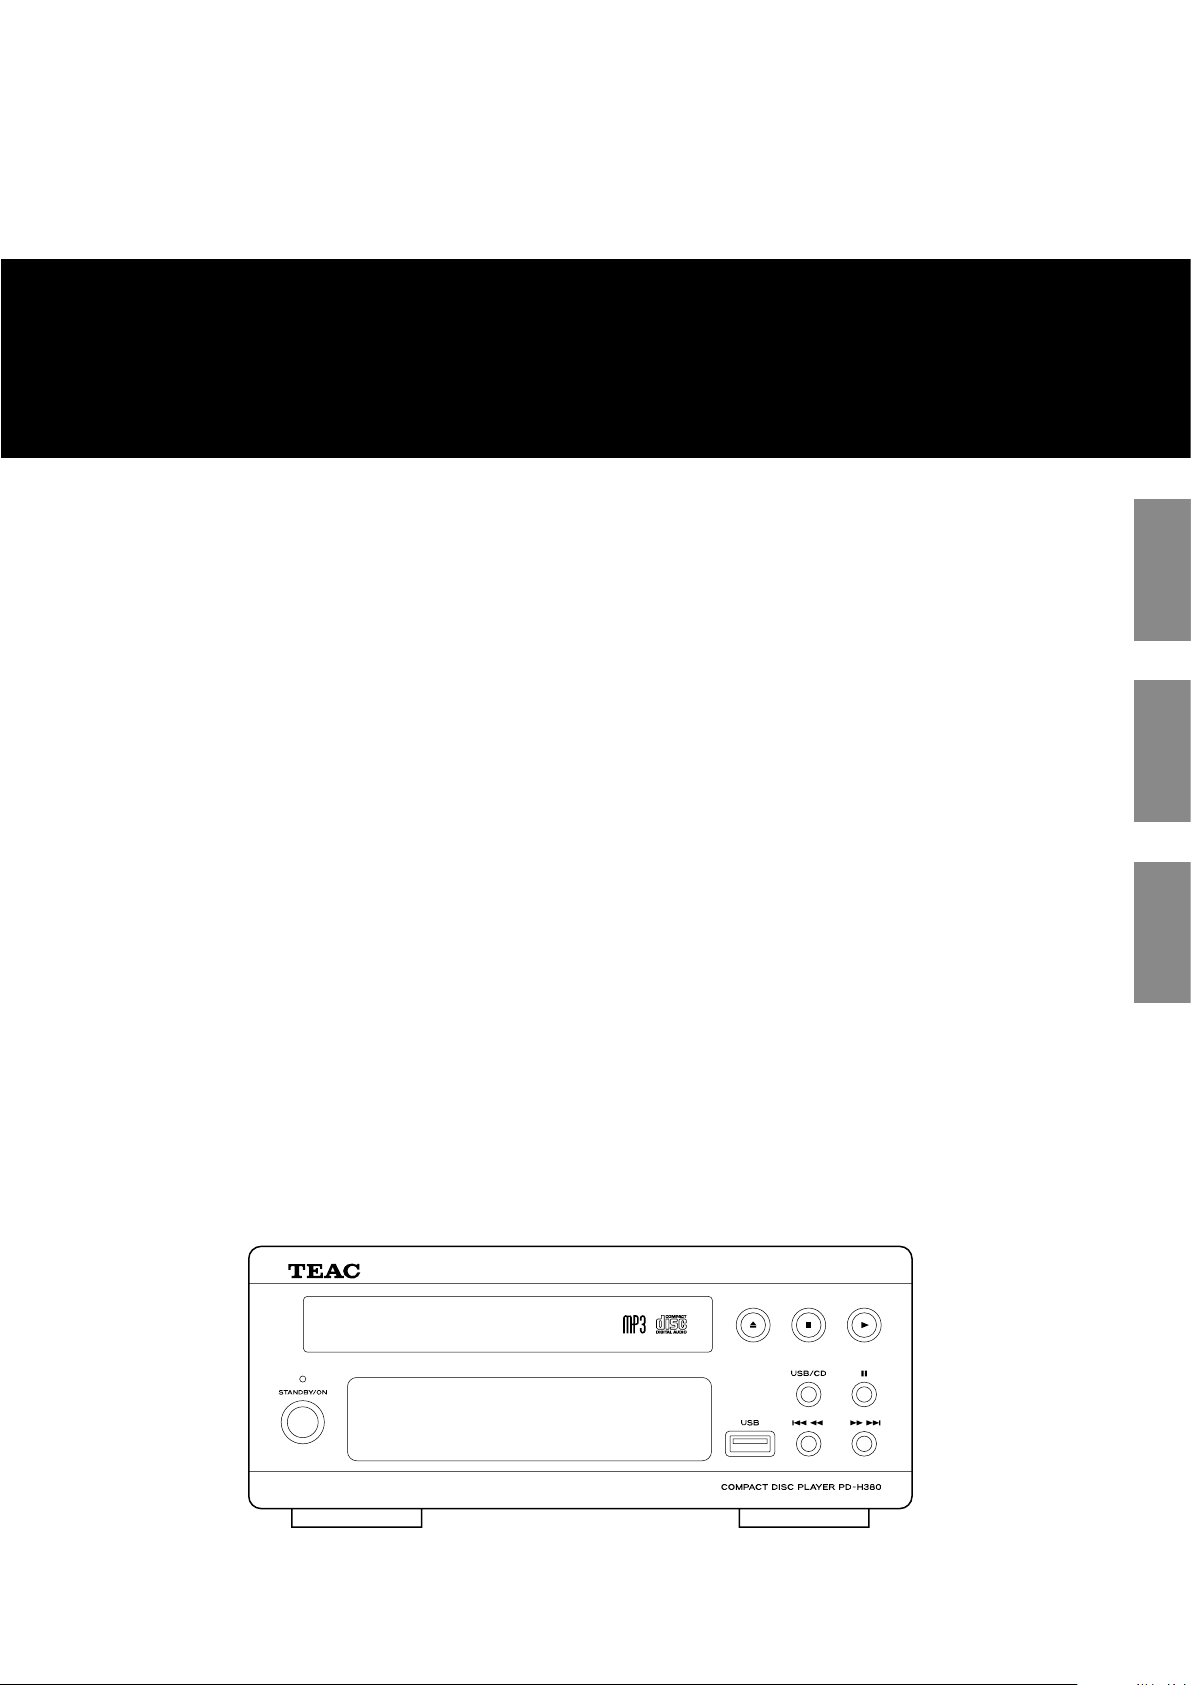
Identifying the Parts
DC EBA
FJ IK H G
A
T
S
L
R
V
N
U
F
D
E
Q
O
M
W
P X
Page 9

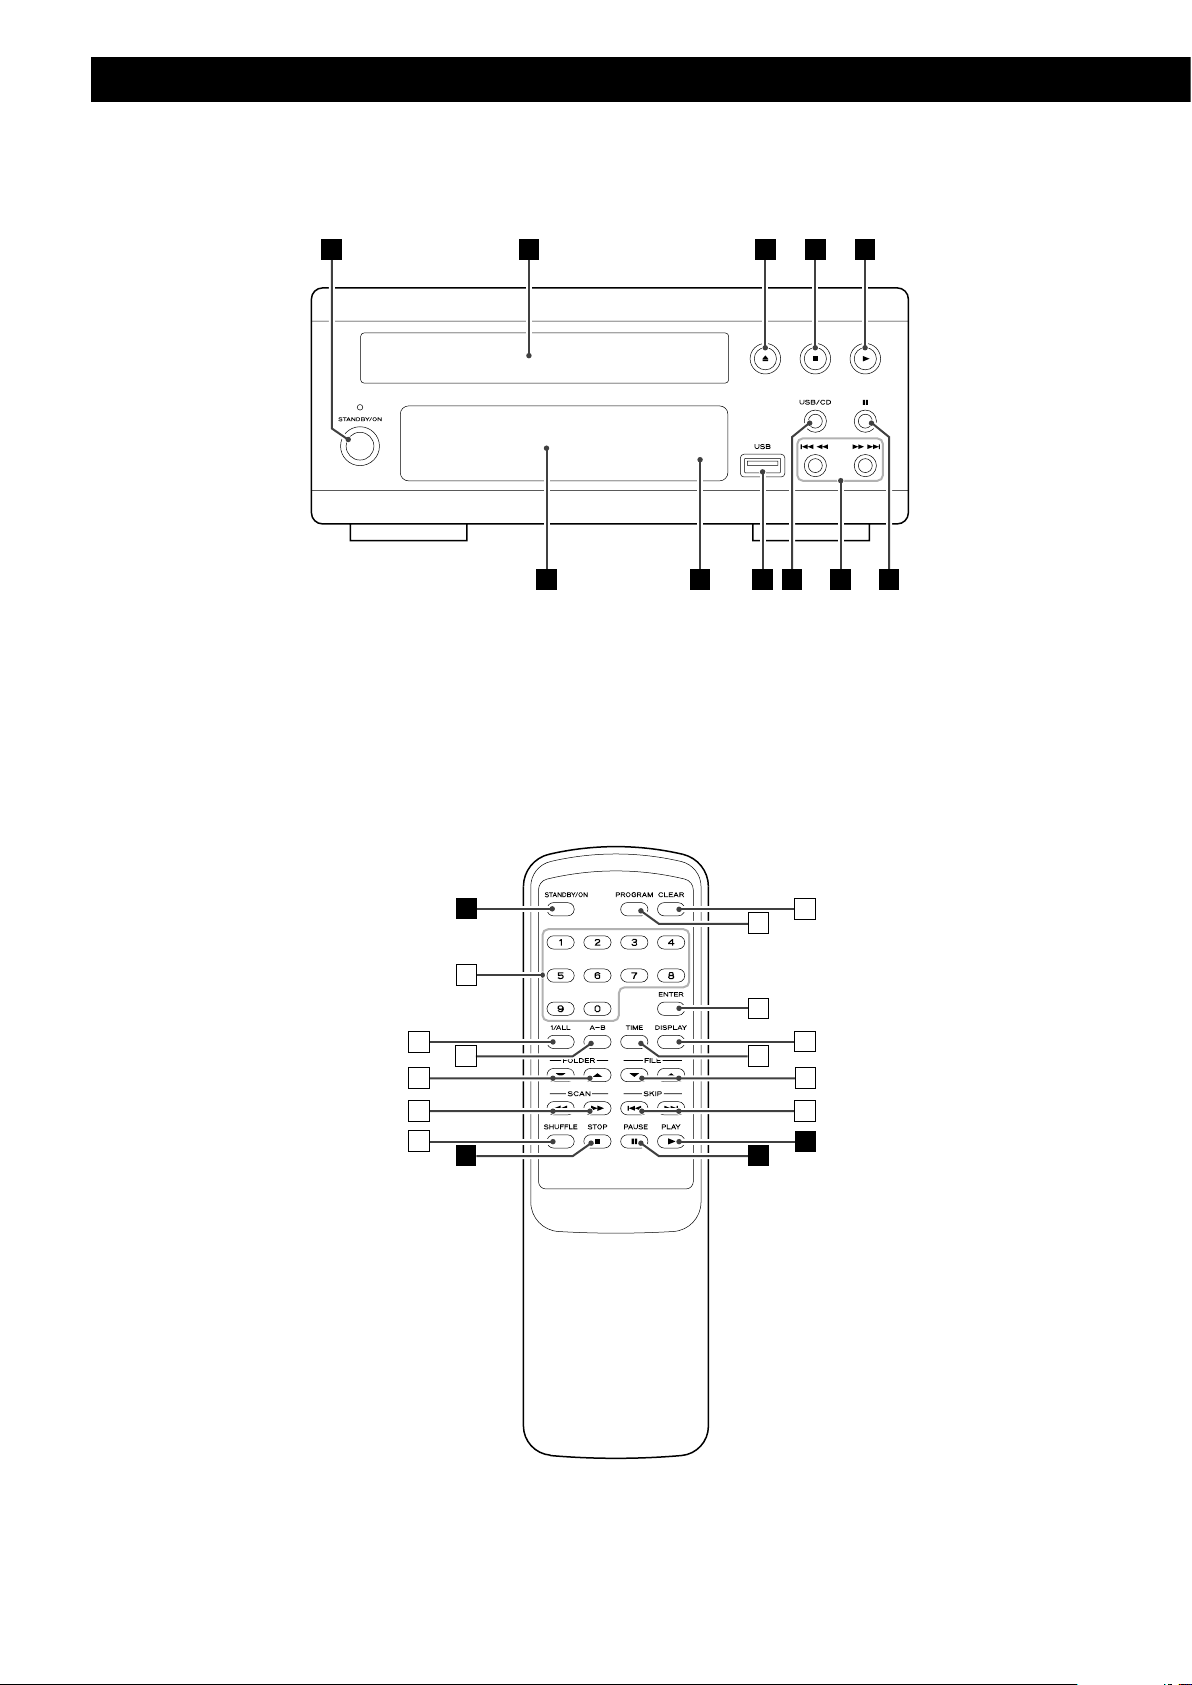
A
STANDBY/ON
Press this button to turn the unit on or to put it in standby mode.
The standby indicator lights orange when the unit is in the
standby mode. When the unit is turned on, it lights blue.
B
Disc tray
R
CLEAR
Use this button to clear a program. (page 15)
S
PROGRAM
Use this button to enter the program mode. In program mode,
use this button to enter the selection.
C
Open/close (L)
Use this button to open and close the disc tray.
D
Stop (H)
Use this button to stop playback.
E
Play (G)
Use this button to start playback.
F
Pause (J)
Use this button to pause playback.
G
Skip/Scan (.m/,/)
Use these buttons to skip tracks. (page 12)
During playback, hold down these buttons to serch for a track or
a file.
H
USB/CD
Use this button to select USB or CD mode.
I
USB terminal
This USB terminal supports USB 1.1.
T
ENTER
Use this button to enter the selection of FOLDER/FILE. (page 13)
U
DISPLAY
During MP3/WMA playback, use this button to change what
information is displayed.
V
TIME
During playback, use this button to change the time display.
W
FILE (b,5)
Use these buttons to select a file of MP3/WMA. (page 13)
X
SKIP (.//)
Use these buttons to skip tracks/files.
ENGLISH
J
Remote Sensor
When operating the remote control unit, point it towards the
remote sensor.
K
Display
L
Numeric buttons
Use these buttons to select a track or a file number.
For instance, to select track/file number 35, press “3“ and “5“.
(page 13)
M
REPEAT 1/ALL
Use this button to select the repeat mode. (page 16)
N
A-B
Use this button to set the point for A-B repeat.
O
FOLDER (5,b)
Use these buttons to select a folder of MP3/WMA.
P
SCAN (m/,)
During playback, use these buttons to search the part you want
to listen to.
Q
SHUFFLE
Use this button for shuffle playback. (page 15)
9
Page 10
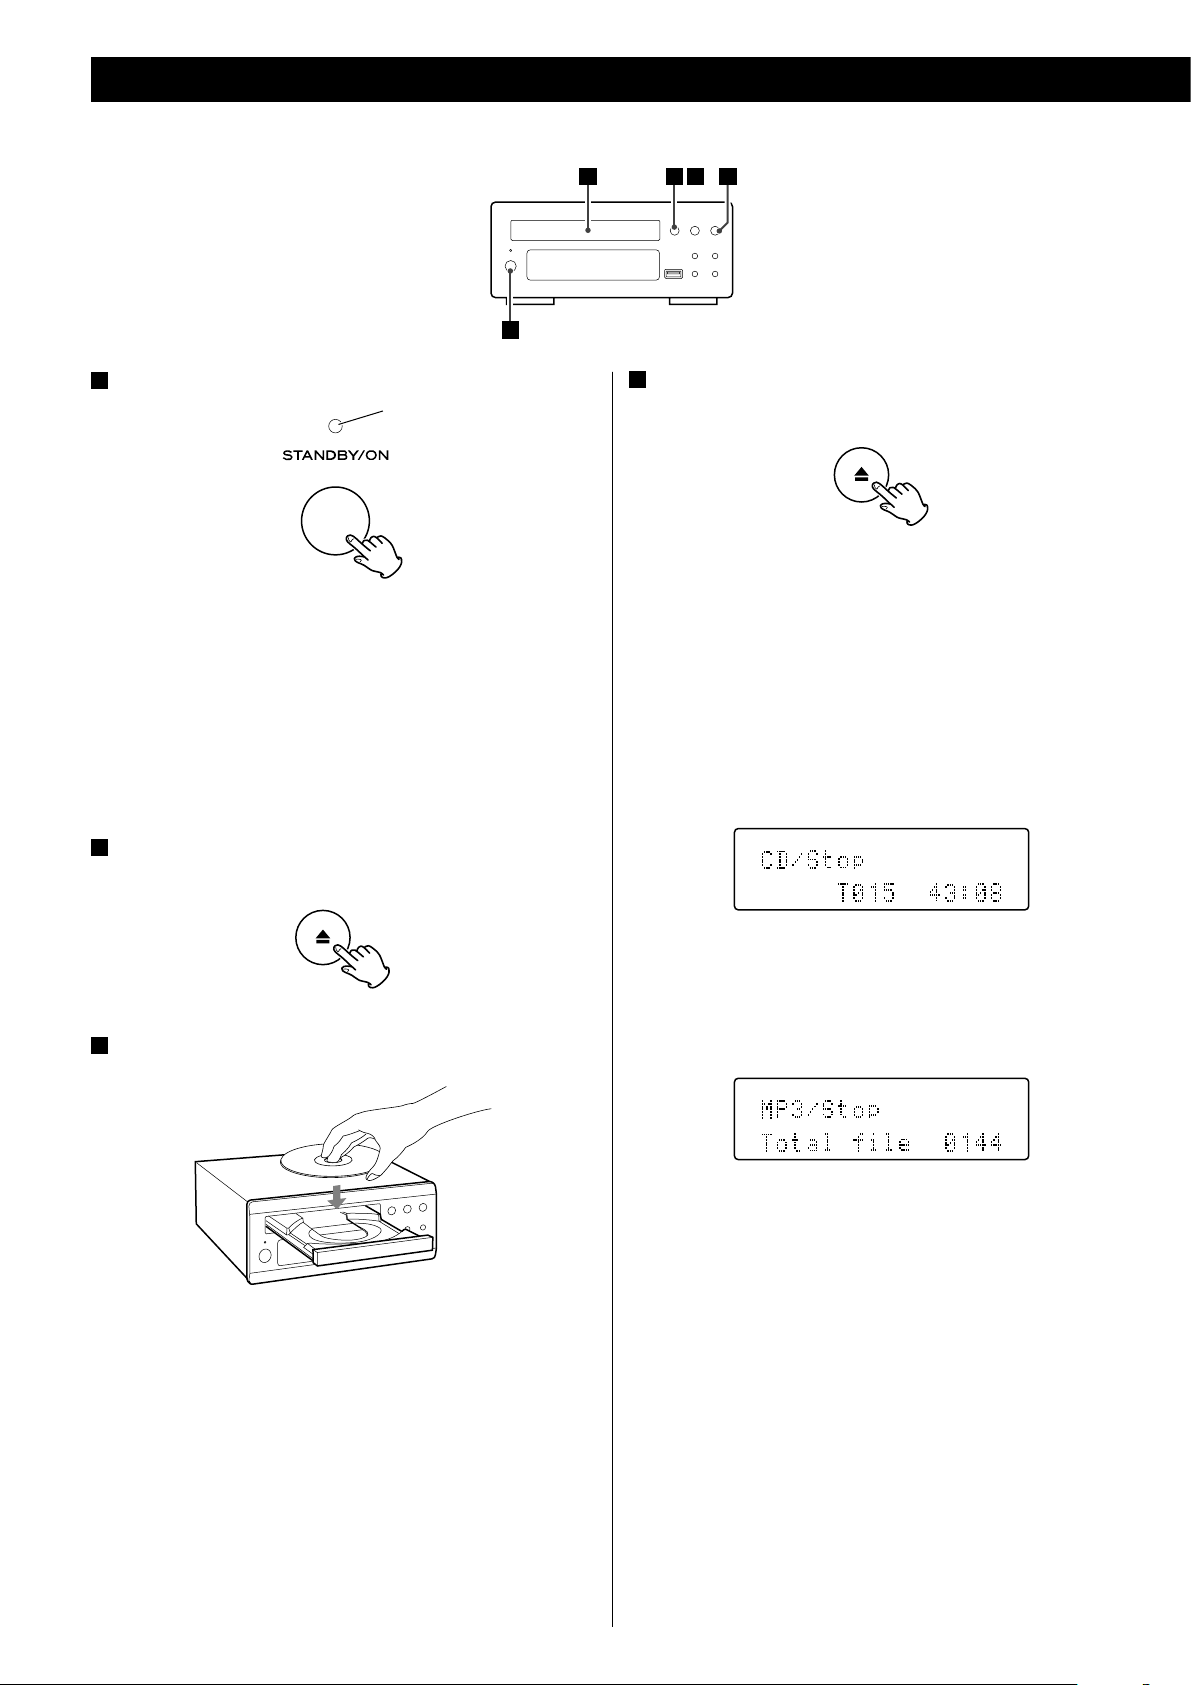
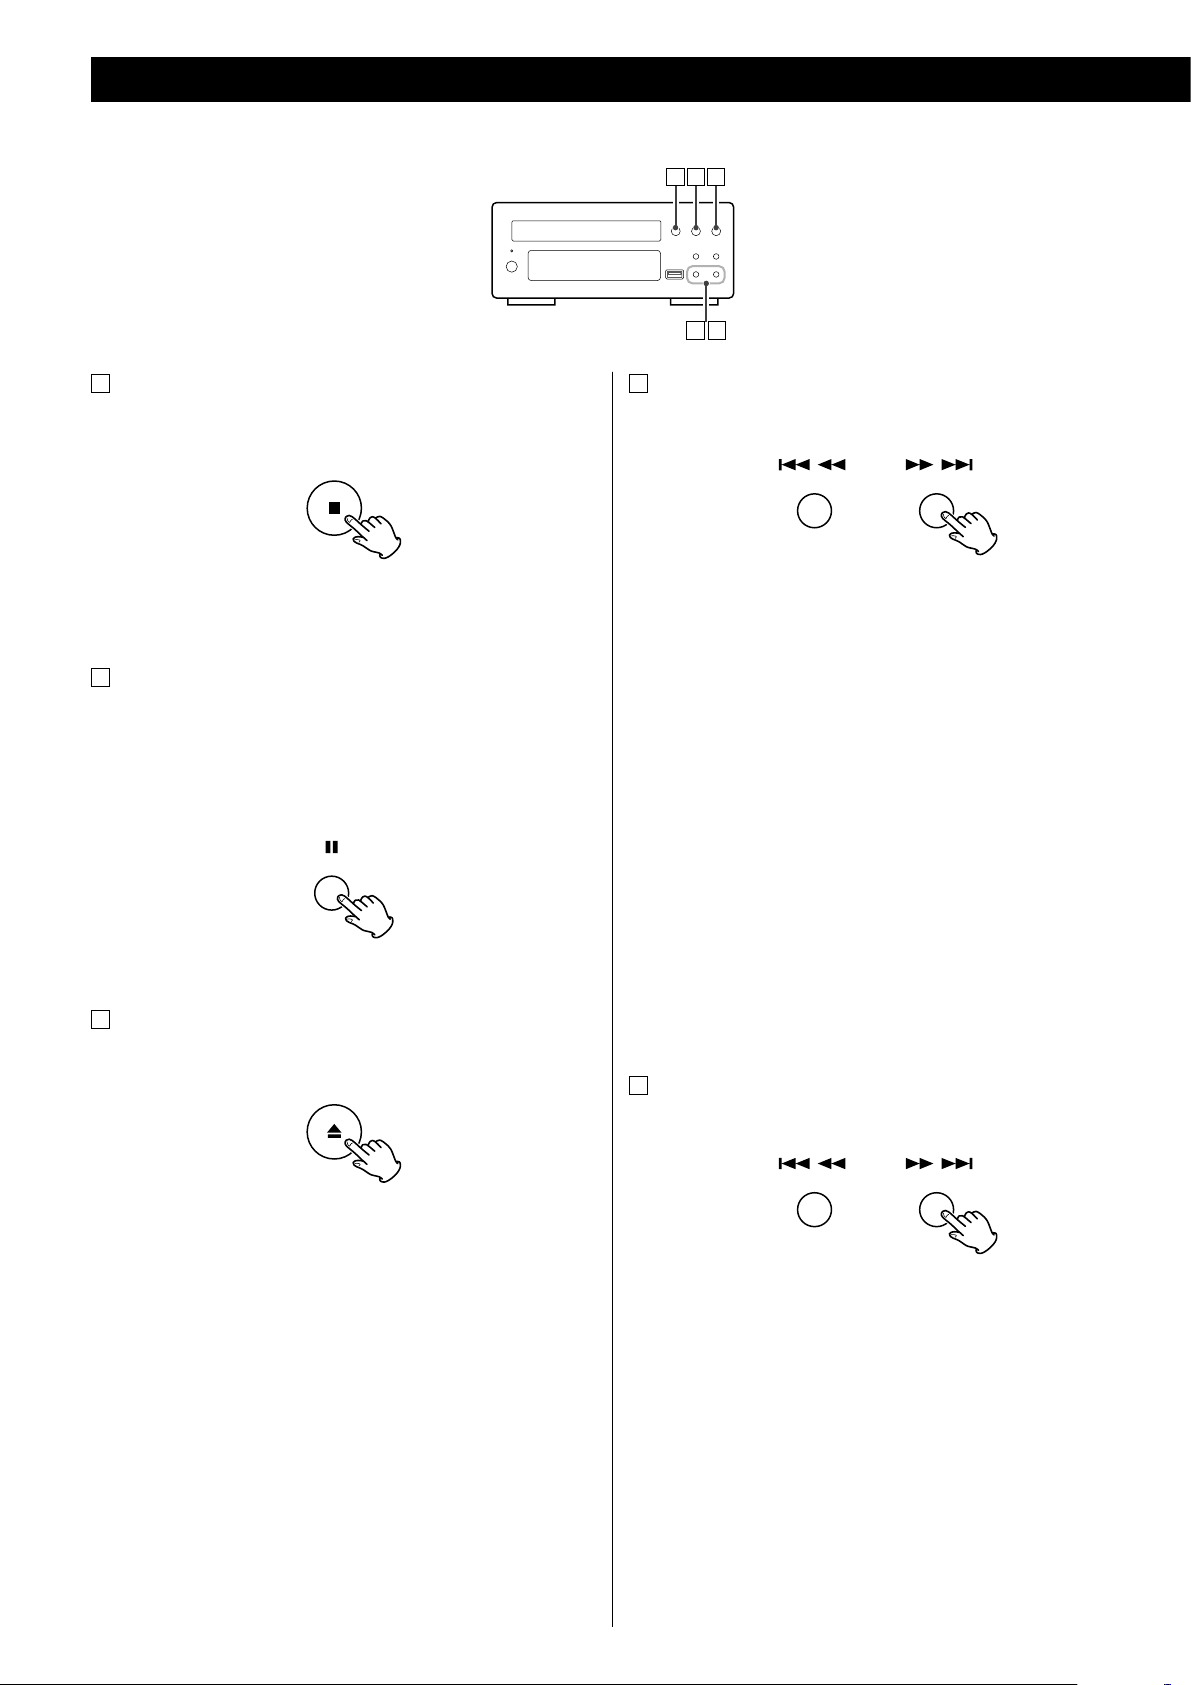
Playback (disc)
1
2 4 53
4
1
Press the STANDBY/ON button to turn the unit on.
Standby/On indicator
The Standby/On indicator turns from orange to blue.
“No disc“ will be displayed if no disc has been inserted.
< If the REMOTE CONTROL jacks of this unit and the A-H380 are
connected with the remote control connection cord, and the
REMOTE CONTROL SELECTOR is set to “SYSTEM“, you can turn on
this unit using the remote control unit supplied with the A-H380.
< Select “CD“ if the unit is in “USB“ mode.
Press the open/close button (L) to close the tray.
< Keep fingers clear of moving tray to avoid trapping them.
< It takes a few seconds for the unit to load a disc. No buttons will
work during loading. Wait until the total number of the tracks and
the total play time of the disc are displayed.
Audio CD
The total number of the tracks and total play time of the disc are
displayed.
2
Press the open/close button (L).
3
Place a disc on the tray with the printed label face up.
< The disc must be loaded centrally into the disc tray. If the disc
is not correctly loaded, it may not be possible to open the tray
again once it has closed.
MP3/WMA disc
The total number of files of the disc is displayed.
“MP3“ is displayed even if the playback file is WMA.
< Never place more than one disc on the tray.
< Do not stick labels or tapes on the disc.
< Do not use irregularly-shaped discs.
10
Page 11
31
2
5
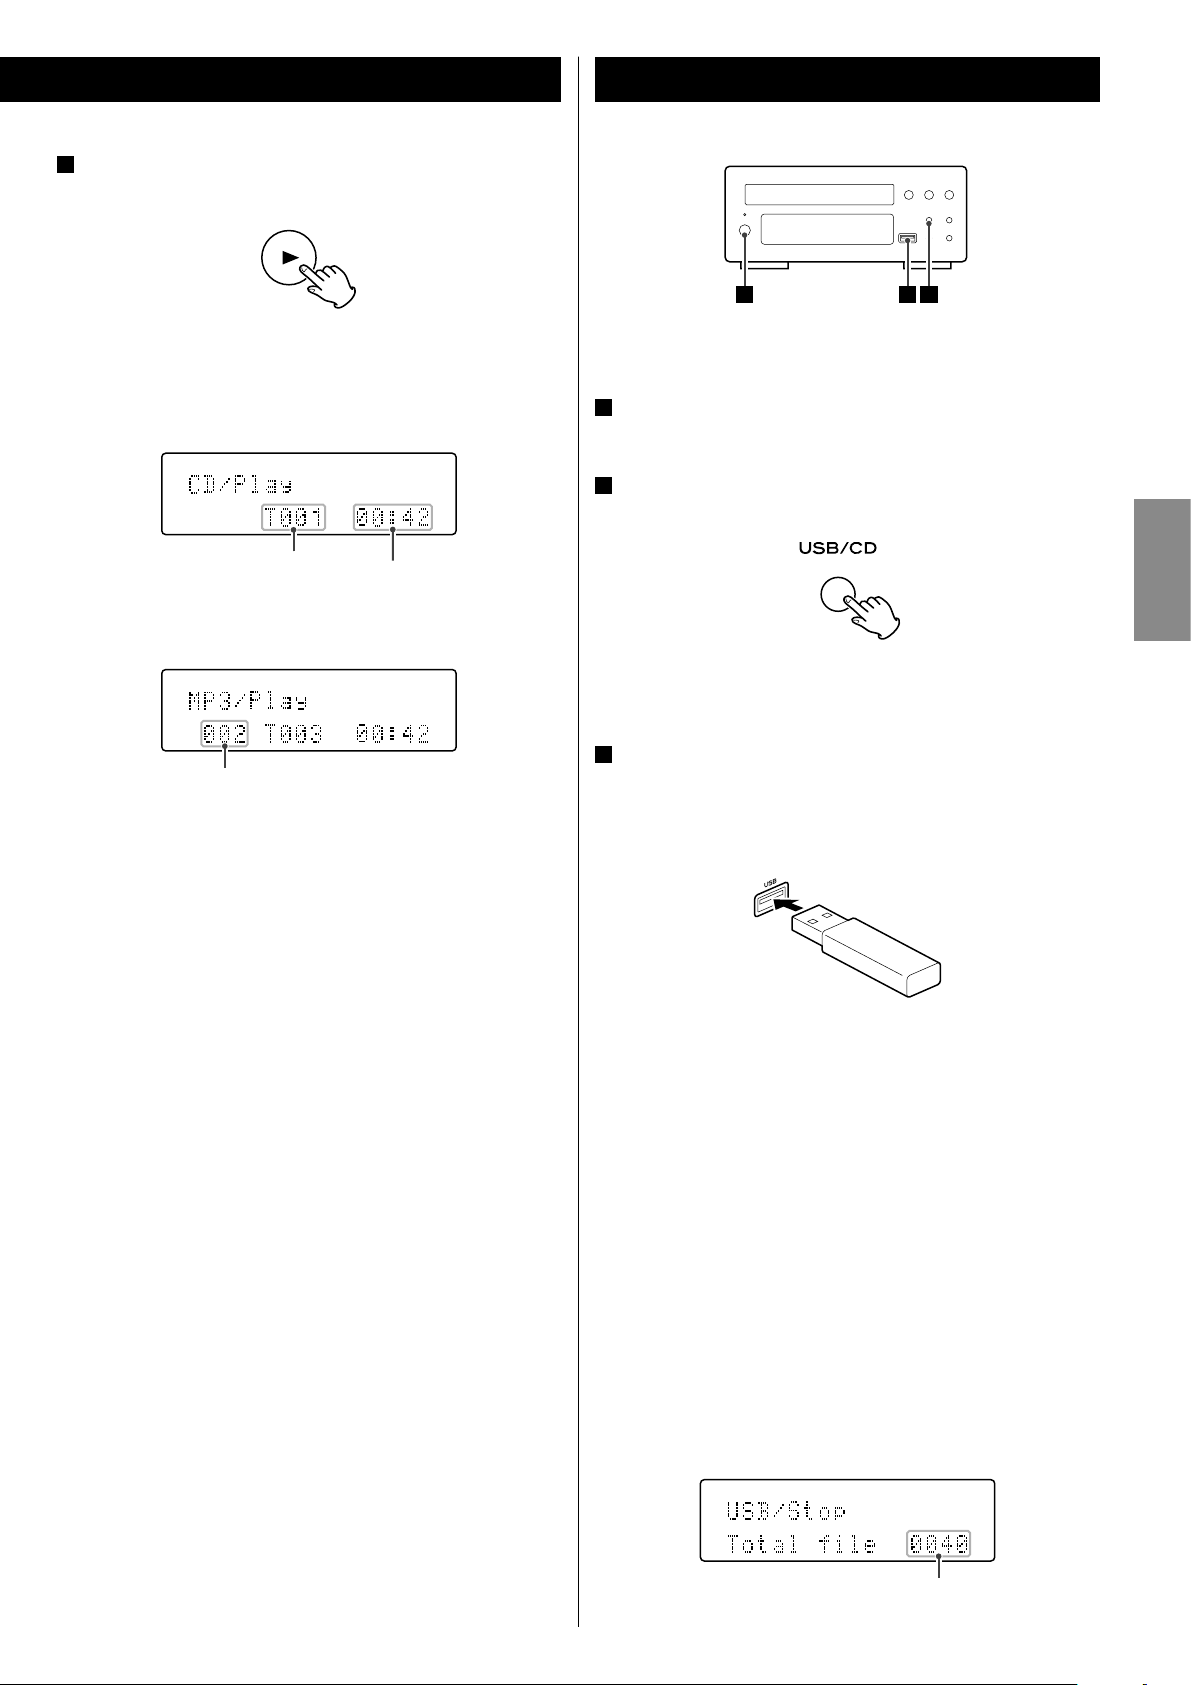
Press the play button (y) to start playback.
Disc playback starts from the first track/file.
Audio CD
current track number elapsed time of the current track
MP3/WMA disc
current folder number
< MP3/WMA files recorded out of folders are automatically put in
the “ROOT“’ folder, and playback starts from the first file of the
ROOT folder.
This unit can not play the files in a mass storage hard disk.
1
Press the STANDBY/ON button to turn the unit on.
2
Select “USB“ by pressing the USB/CD button.
“Not connected “ will be displayed if no USB device is connected.
3
Connect a USB memory device to the USB port on the front
panel of the unit.
Playback starts from the first file.
ENGLISH
< If there are folders that has no MP3/WMA file, this unit skips them.
< During playback of MP3/WMA file, “file name_artisit_Album“ is
scrolled across the display.
< The unit stops automatically when playback of all the tracks/files
has finished.
< If you load a disc, and then press the PLAY button (or the numeric
buttons of the remote control unit) without having first closed
the disc tray, the disc tray closes and playback starts.
< Keep the protective cap supplied to protect the USB port when it
is not in use.
< It may take several minutes to load the USB memory device
depending on the number of files and folders.
< If an iPod shuffle is connected to this port, it can not be played.
< MP3/WMA files recorded out of folders are automatically put in
the “ROOT“’ folder, and playback starts from the first file of the
ROOT folder.
< If there are folders that has no MP3/WMA file, this unit skips them.
< During playback of MP3/WMA file, “file name_artisit_Album“ is
displayed scrolling.
< When the playback of all the tracks/files has finished, the unit
stops automatically.
When the STOP button (H) is pressed, the display shows the total
number of files.
total number of files
11
Page 12
12
Basic Playback
CAB
D E
To stop playback
A
Press the stop button (H) to stop playback.
To start playback again, press the play button (G).
Playback starts from the first file.
To suspend playback temporarily (pause mode)
B
Press the pause button (J) during playback. Playback stops at the
current position, and J is displayed.
To resume playback, press the play button (G) or pause button
(J).
To eject the disc.
C
To skip to the next or a previous track/file
D
During playback, press the skip/scan button (.m/,/)
repeatedly until the desired track is found. The selected track/file
will be played from the beginning.
On the remote control unit use the skip button (.//).
In the stop or pause mode, press the skip/scan button (.
m/,/) repeatedly until the track you want to listen to is
found. Press the PLAY button to start playback from the selected
track.
< When the .mbutton is pressed during playback, the track
being played will be played from the beginning. To return to the
beginning of the previous track, press the .mbutton twice.
< During programmed playback, the next or previous track in the
program is played.
When the open/close button (L) is pressed, playback stops and
the tray will open.
Afer the disc is ejected, close the tray by pressing the open/close
button (L).
E
Search for a part of a track/file
Dur i n g pl ay ba ck , hold d ow n the s ki p/ sc an but t on
(.m/,/) and release it when the part you want to
listen to is found.
On the remote control unit use the scan button (m/,).
< The unit stops when the end of the last track is reached.
Page 13
1
3
2
4
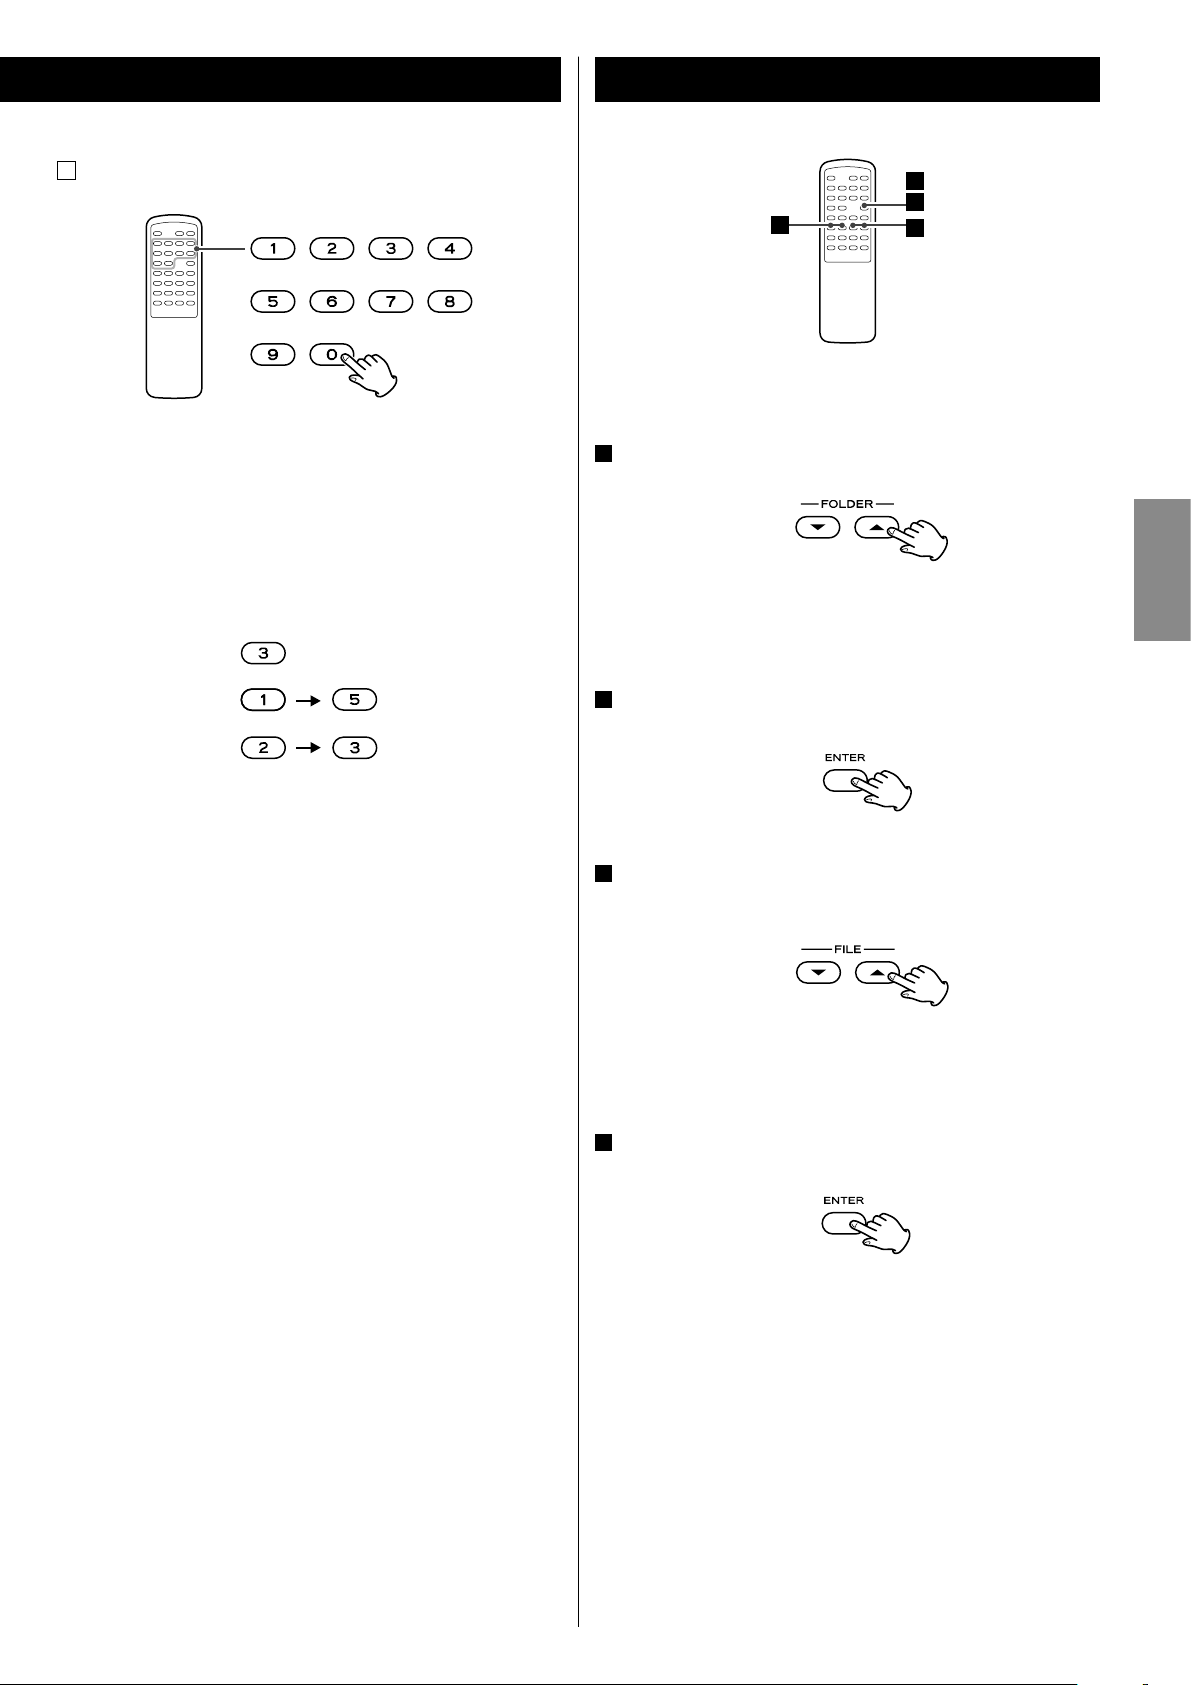
Direct Playback
F
While in stop or playback mode, you can use the numeric buttons
of the remote control to select a track/file.
Press the numeric buttons to select a track/file. Playback starts
from the selected track/file.
Track 3:
Folder Search
While in stop or playback mode, you can select and playback a
desired folder or a desired file in an MP3/WMA folder.
1
Press the FOLDER buttons (b/5) to select a directory.
The order of the folders may changed depending on the
hierarchy of the folders.
ENGLISH
Track 15:
Track 23:
2
Press the ENTER button.
3
If you want to select a file, press the FILE buttons (b/5).
< You can select a file in the selected folder.
4
Press the ENTER button.
13
Page 14
Programmed Playback
2
1
3
./
ENTER
CLEAR
3
Press the PLAY button (y) to start programmed playback.
Up to 40 tracks/files can be programmed in any desired order.
< Inser t a d i sc or c onnect U S B memo ry devi ce befo re
programming.
< When the SHUFFLE button is pressed, program mode is cancelled
and shuffle playback starts.
1
Press the PROGRAM button in the stop mode.
< You can not program during playback.
2
Select a track/file using the numeric buttons.
To program track/file 15:
Th e programmed p lay back starts and the unit wil l stop
automatically when the playback of all the programmed contents
is finished.
< If you press the time button in the program mode, the total
number of the tracks and the total play time will not be shown
on the display.
To check the programmed order
the track/file programmed in the progoram 1
The track/file number flashes after pressing the numeric button.
After the program is completed, the track/file number will stop
blinking.
< If the PROGRAM button is pressed during blinking of the track/file
number, the track/file will be programmed and blinking will stop.
< Up to 40 tracks can be programmed. If you attempt to program
more than 40 tracks, ”P-FULL” (Program is full) is displayed and no
more tracks can be programmed.
< If you made a mistake, press the CLEAR button. The last
programmed track/file will be deleted. (disc only)
You can also program tracks/files using the SKIP button (./
/), and press the PROGRAM button.
In the stop mode, press the PROGRAM button repeatedly.
The track/file number and program number will be shown on the
display.
To return to the normal display press the STOP button(H).
To delete a track from the program
In stop mode, press the PROGRAM button repeatedly until
the program number to be deleted appears on the display,
then press the CLEAR button. The selected track/file is deleted
from the program and the next programmed track/file will be
displayed.
14
Page 15
To add a track to the program
1. In stop mode, press the PROGRAM button repeatedly until the
program number you want to insert a track/file appears on the
display.
Shuffle Playback
When the SHUFFLE button is pressed the tracks or files of the disc on
the USB memory device will be played randomly.
2. Select a track/file number using the numeric buttons, then press
the PROGRAM button.
If you want to add a track to the end of the program, press the
PROGRAM button repeatedly until “P-End” briefly appears on the
display.Then select a track/file number using the numeric buttons
and press the PROGRAM button. The track/file is added to the
program.
To cancel the program mode
Whe n the STO P but ton ( H ) o r the S HUFFL E butt on is
pressed in stop mode, program mode will be cancelled, but
the programmed contents aren’t lost. You can return to the
programmed playback by pressing the PROGRAM button and the
PLAY button(G).
ENGLISH
< If you press the SHUFFLE button or the STOP button (H) during
shuffle playback, the unit stops and the shuffle playback mode is
cancelled.
< If you press the / button during shuffle playback, next
track will be randomly selected and played. If you press the
.button, the currently played track/file will be played from
the beginning. A track/file cannot be replayed during shuffle
playback.
< The numeric buttons does not work during shuffle playback.
To clear the program
1. In stop mode, press the PROGRAM button.
2. Hold down the CLEAR button for more than 2 seconds.
If the open/close button (L ) is pressed, the programmed
contents will also be cleared.
15
Page 16
Repeat Playback
R1 (repeat one track)
Rf (repeat folder)
Ra (repeat all)
(Repeat Off )
(Blinking, Only MP3/WMA disc)
Every time the REPEAT 1/ALL button is pressed, the mode is changed
as follows:
< When the STOP button (H) is pressed the repeat mode is
cancelled.
Repeat One Track (R1)
The track/file being played will be played repeatedly. If you select
another track/file in R1 mode, the track/file you selected will be
played repeatedly.
If you select R1 mode in the stop mode and select a track/file, the
selected track/file will be played repeatedly.
Repeat A-B
This function allows repeat playback of any desired portion of the
disc.
Designate the point at which repeat playback should start by
pressing the A-B button.
“Repeat A-“ lights up and “B“ flashes.
When the point at which repeat playback should end is
reached, press the A-B button again.
“Repeat A-B“ lights up.
The designated point with A-B button will be played back
repeatedly.
< To return to normal play, press A-B button until “Repeat A-
B“disappears from the display.
< It must be more than 3 seconds between A and B.
< If one of the following buttons is pressed, A-B repeat mode will
be cancelled:
STOP, SKIP, 1/ALL, A-B, SHUFFLE, OPEN/CLOSE, STANDBY/ON
Repeat Folder (Rf) (MP3/WMA discs only)
All the tracks or files in the folder will be played repeatedly.
If you select another folder in Rf mode, the tracks/files in the
folder will be played repeatedly.
< You can not select Rf mode in the stop mode.
< You can not select Rf mode during playback of a USB memory
device.
Repeat All (Ra)
All the tracks or files will be played repeatedly.
< In the program mode, the programmed contents are played
repeatedly.
16
Page 17

Display (MP3/WMA)Time Display
Default display (scrolling)
File Name
Song Title
Artist Name
Album Name
Year
Comment
During playback, each time the TIME button is pressed the display
changes as follows:
In the stop mode
The total number of tracks/files and the total playing time
In the play mode
current track/file number and elapsed time of the current track/
file
current folder number (only MP3/WMA)
current track/file number and remaining time of the
current track/file
During MP3 playback, press the DISPLAY button repeatedly to
change what information is displayed.
Default display (scrolling):
ENGLISH
Song Title - Artist Name - Album Name
Display changes as follows:
The total number of tracks and the total playing time
(only audio CD)
The total number of tracks and the total remaining time
(only audio CD)
17
Page 18

Specifications
Troubleshooting
Frequency Response . . . . . . . . . . . . . . . . . . . . . 20 Hz - 20 kHz, ±2.0 dB
Total Harmonic Distortion . . . . . . . . . . . . .Less than 0.005 % (1 kHz)
Signal-to-Noise Ratio (S/N) . . . . . . . . . . . . . . . . . . . . More than 120 dB
(1 kHz, 0 dB, A weight)
Output . . . . . . . . . . . . . . . . . . . . . . . Analog: 2.0 Vrms (RCA, 1kHz, 0db)
Digital: TOS OPTICAL
Power Requirement . . . . . . . . . . . . . . . . . . . . . . . . . . . . . AC 230 V, 50 Hz
Power Consumption . . . . . . . . . . . . . . . . . . . . . . . . . . . . . . . . . . . . . . 13 W
Dimensions (W x H x D) . . . . . . . . . . . . . . . . . . . . . . 215 x 93 x 275 mm
Weight (Net) . . . . . . . . . . . . . . . . . . . . . . . . . . . . . . . . . . . . . . . . . . . . . .2.8 kg
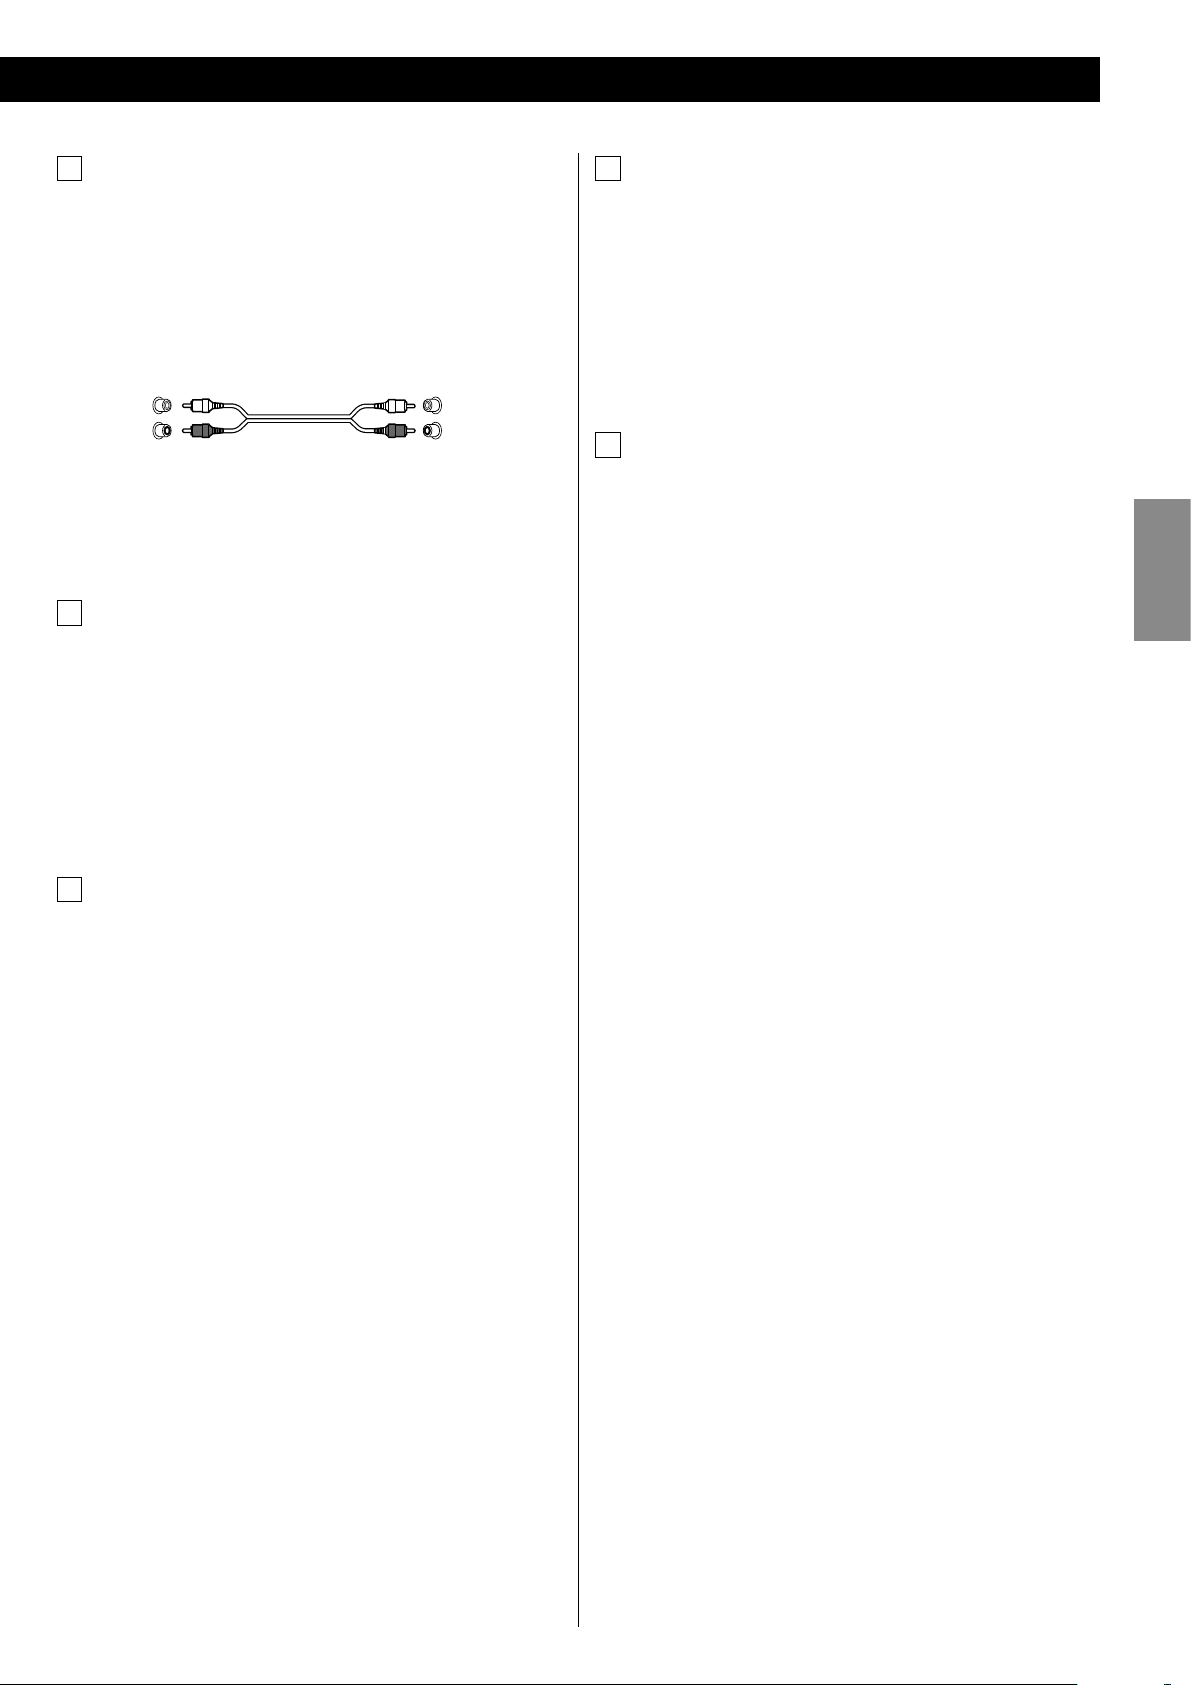
Standard Accessory . . . . . . . . . . . . . . . . . . . . . . . . . . . . . . . RCA cable x 1
Remote control connection cord x 1
Remote control unit x1
Batteries (AA) x2
Owner’s manual x1
Warranty card x1
< Design and specifications are subject to change without notice.
< Weight and dimensions are approximate.
< Illustrations may differ slightly from production models.
For European customers
Disposal of your old appliance
1. When thi s cro ssed -out w heel ed bin
symbol is attached to a product it means
the product is covered by the European
Directive 2002/96/EC.
If you experience any problems with the unit, please take a moment
to look through this chart and see if you can solve the problem
yourself before you call your dealer or a TEAC service center.
No power
e Check the connection to the AC power source. Check and
make sure the AC source is not a switched outlet and if it is, the
switch is turned on. Make sure there is power to the AC outlet
by plugging another item such as a lamp or fan.
No sound.
eCheck the connection to the amplifier.
eCheck the operation of the amplifier.
Remote control doesn’t work.
e If the batteries are exhausted, change the batteries.
e Use remote control unit within the range (5m) and point at the
front panel.
e Make sure that there are no obstacles between the remote
control unit and the main unit.
e If a fluorescent light is near the unit, turn it off.
e Set the REMOTE CONTROL SELECTOR to “SYSTEM“, and connect
the REMOTE CONTROL jacks of this unit and the A-H380 with
the remote control connection cord, if you want to operate
with the remote control unit supplied with the A-H380.
e When you use the remote control unit supplied with the A-
H380, press the CD button of the remote control unit before
operation.
Cannot play.
e Load a disc with the playback side facing down.
e A blank disc has been loaded. Load a prerecorded disc.
e Depending on the disc, etc. it may not be possible to play back
CD-R/CD-RW discs. Try again with another disc.
e You cannot play back unfinalized CD-R/CD-RW discs. Finalize
such a disc in a CD recorder and try again.
Sound skips.
e Place the unit on a stable place to avoid vibration and shock.
e If the disc is dirty, clean the surface of the disc.
e Don’t use scratched, damaged or warped discs.
Can not programmed play.
e If the unit turns off or the tray is opened, the programmed
contents are erased.
If normal operation cannot be achieved, unplug the power
cord from the outlet and plug it again.
2. All ele ctrical and electronic produ cts
should be disposed of separately from the
municipal waste stream via designated collection facilities
appointed by the government or the local authorities.
3. The correct disposal of your old appliance will help prevent
potential negative consequences for the environment and
human health.
4. For more detailed information about disposal of your old
appliance, please contact your city office, waste disposal
service or the shop where you purchased the product.
18
Beware of condensation
When the unit (or a disc) is moved from a cold to a warm place,
or used after a sudden temperature change, there is a danger of
condensation; vapor in the air could condense on the internal
mechanism, making correct operation impossible. To prevent
this, or if this occurs, leave the unit for one or two hours with the
power turned on. Then the unit will stabilize at the temperature
of its surroundings.
Maintenance
If the surface of the unit gets dirty, wipe with a soft cloth or
use diluted neutral cleaning liquid. Be sure to remove any fluid
completely. Do not use thinner, benzine or alcohol as they may
damage the surface of the unit.
Page 19

Avant utilisationSommaire
Nous vous remercions pour l’achat d’un appareil TEAC.
Lire ce manuel avec attention pour obtenir les meilleures
performances possibles de cet appareil.
Avant utilisation. . . . . . . . . . . . . . . . . . . . . . . . . . . . . . . . . . . . . . . . . . . . . . . . . 19
Disques . . . . . . . . . . . . . . . . . . . . . . . . . . . . . . . . . . . . . . . . . . . . . . . . . . . . . . . . . 20
MP3 et WMA . . . . . . . . . . . . . . . . . . . . . . . . . . . . . . . . . . . . . . . . . . . . . . . . . . . . 21
Télécommande . . . . . . . . . . . . . . . . . . . . . . . . . . . . . . . . . . . . . . . . . . . . . . . . . 21
Raccordements . . . . . . . . . . . . . . . . . . . . . . . . . . . . . . . . . . . . . . . . . . . . . . . . . 22
Identification des parties . . . . . . . . . . . . . . . . . . . . . . . . . . . . . . . . . . . . . . . . 24
Lecture (disque) . . . . . . . . . . . . . . . . . . . . . . . . . . . . . . . . . . . . . . . . . . . . . . . . . 26
Lecture (périphérique USB) . . . . . . . . . . . . . . . . . . . . . . . . . . . . . . . . . . . . . 27
Lecture de base . . . . . . . . . . . . . . . . . . . . . . . . . . . . . . . . . . . . . . . . . . . . . . . . 28
Recherche de dossier . . . . . . . . . . . . . . . . . . . . . . . . . . . . . . . . . . . . . . . . . . . 29
Lecture programmée. . . . . . . . . . . . . . . . . . . . . . . . . . . . . . . . . . . . . . . . . . . . 30
Lecture aléatoire . . . . . . . . . . . . . . . . . . . . . . . . . . . . . . . . . . . . . . . . . . . . . . . . 31
Lecture répétée . . . . . . . . . . . . . . . . . . . . . . . . . . . . . . . . . . . . . . . . . . . . . . . . . 32
Affichage de la durée . . . . . . . . . . . . . . . . . . . . . . . . . . . . . . . . . . . . . . . . . . . 33
Affichage (MP3 et WMA) . . . . . . . . . . . . . . . . . . . . . . . . . . . . . . . . . . . . . . . . 33
Spécifications . . . . . . . . . . . . . . . . . . . . . . . . . . . . . . . . . . . . . . . . . . . . . . . . . . . 34
Solución de problemas . . . . . . . . . . . . . . . . . . . . . . . . . . . . . . . . . . . . . . . . . . 34
Lire les consignes suivantes avant toute utilisation
< L'appareil pouvant éventuellement dégager de la chaleur lors de
son utilisation, veillez à toujours laisser un espace suffisant audessus de celui-ci afin de garantir une ventilation correcte.
< La tension d'alimentation utilisée doit être identique à la tension
indiquée à l'arrière de l'appareil. En cas de doute, n'hésitez pas à
consulter un électricien.
< Choisir soigneusement l'endroit où vous installerez l'appareil.
Eviter de le placer dans un endroit exposé aux rayons directs du
soleil ou à proximité d'une source de chaleur. Eviter également
les endroits exposés aux vibrations et à la poussière, à la chaleur,
au froid et à l'humidité.
< Ne pas placer l'appareil sur l'amplificateur ou le récepteur.
< Ne pas ouvrir l'appareil, ceci risquant d'endommager les circuits
ou de provoquer un court-circuit. Au cas où un objet tomberait
par inadvertance dans l'appareil, contacter votre revendeur.
< Pour débrancher le cordon de la prise murale, retirer directement
la prise, ne jamais tirer sur le cordon.
FRANÇAIS
ATTENTION
< N’exposez pas l’appareil à des éclaboussures ou à des gouttes
d’eau.
< Ne posez pas d’objet contenant du liquide, tel qu’un vase, sur
l’appareil.
< N’installez pas cet appareil dans un espace confiné, dépourvu
de ventilation, comme par exemple une bibliothèque ou
similaire.
< L’appareil tire un courant nominal de veille de la prise secteur,
avec son interrupteur STANDBY/ON en position STANDBY.
< L’appareil doit être placé suffisamment près de la prise secteur
pour que vous puissiez à tout moment saisir la fiche du cordon
d’alimentation.
< Pour faire en sorte que la tête de lecture laser reste propre, ne
jamais la toucher avec les doigts et ne pas oublier de fermer le
plateau porte-disque.
< Ne pas essayer de net toyer l'appareil avec un détergent
chimique, ceci risquant d'abîmer le revêtement extérieur.
Utiliser toujours un chiffon propre et sec.
< Conserver ce manuel dans un endroit sûr afin de pouvoir vous y
référer ultérieurement.
NE JAMAIS DEPLACER L'APPAREIL LORSQUE
CELUI-CI FONCTIONNE
Lorsque l'appareil fonctionne, le disque tourne très rapidement.
NE PAS soulever ou déplacer l'appareil en cours d'utilisation, ceci
risquant de détériorer disque ou l'appareil.
POUR DEPLACER L'APPAREIL
Pour déplacer l'appareil ou le remballer avant de le déplacer,
veiller à retirer le disque et à remettre le plateau porte-disque
dans sa position d'origine. Puis, appuyer sur l'interrupteur
principal pour éteindre l'appareil et débrancher le cordon
d'alimentation. Si vous déplacez l'appareil, alors qu'un disque est
dans l'appareil, celui-ci risque d'être abîmé.
< Un appareil de classe ! doit être connecté à une prise secteur
via une fiche avec mise à la terre.
19
Page 20

Disques
Disques lisibles par cet appareil:
M CD audio conventionnels portant le logo COMPACT DISC
DIGITAL AUDIO:
M CD-R et CD-RW correctement finalisés
M CD de MP3
Note:
< Selon la qualité du disque et/ou les conditions de la gravure,
certains CD-R/CD-RW peuvent ne pas être lisibles.
< Le s disq ues protég és con tre la cop ie et les disque s ne
se conformant pas au standard CD peuvent ne pas être lus
correctement par cet appareil. Si vous utilisez de tels disques
dans cet appareil, TEAC Corporation et ses filiales ne peuvent
être tenus pour responsables d’aucune conséquence et ne
garantissent pas la qualité de reproduction. Si vous rencontrez
des problèmes avec de tels disques non standards, vous devez
contacter les fabricants du disque.
< Placez toujours le disque dans le lecteur avec ses inscriptions sur
le dessus. (Les Compact Discs ne peuvent être lus ou enregistrés
que sur une face.)
< Pour retirer un disque de son boîtier, appuyez sur la rosace au
centre du boîtier et sortez le disque, en le tenant soigneusement
par la tranche.
< Les disques doivent être remis dans leur boîtier après usage pour
éviter la poussière et les rayures qui pourraient causer des ”sauts”
du capteur laser.
< N’exposez pas les disques directement au soleil ou à une humidité
et température élevées durant des périodes prolongées. Une
longue exposition à de fortes températures fera se gondoler le
disque.
< Ne faites pas reproduire un disque gondolé, déformé ou
endommagé.
Faire reproduire de tels disques peut causer des dommages
irréparables aux mécanismes de lecture.
< Les CD-R et CD-RW sont plus sensibles aux effets de la chaleur
et des rayons ultraviolets que les CD ordinaires. Il est important
de ne pas les conserver dans un lieu soumis directement aux
rayons du soleil, et de les tenir éloignés de sources de chaleur
comme des radiateurs ou des appareils électriques producteurs
de chaleur.
< Les disques imprimables ne sont pas recommandés car la face
avec étiquette peut être collante et risque d’endommager
l’appareil.
< Ne collez pas de papiers ou de feuillets de protection sur les
disques et n’employez aucune bombe diffusant un revêtement
protecteur.
< Utilisez un stylo feutre doux à base d’huile pour inscrire les
informations du côté inscriptible. N’utilisez jamais de stylo bille ou
à pointe dure car cela pourrait endommager la face enregistrée.
< En cas de salissure du disque, essuyez la surface de façon radiale
(du trou central vers l’extérieur) avec un chiffon sec et doux:
< N’employez jamais de produits chimiques comme des bombes
pour disque, des bombes ou liquides antistatiques, de la benzine
ou du diluant pour nettoyer les disques. Ils causeraient des
dommages irréparables à la surface plastique du disque.
< N’employez jamais de stabilisateurs. L’emploi dans cet appareil de
stabilisateurs de CD disponibles dans le commerce endommagera
les mécanismes et conduira à leur mauvais fonctionnement.
< N’employez pas de disque de forme particulière (octogonal, en
forme de coeur, de taille carte de visite, etc.). Ce type de disque
peut endommager l’appareil:
< En cas de doute sur l’entretien et le maniement d’un disque, lisez
les précautions données avec le disque, ou contactez directement
le fabricant du disque.
20
Page 21

Boîtier de télécommandeMP3 et WMA
< Cet appareil peut reproduire les fichiers MP3 et WMA enregistrés
sur un CD-R, CD-RW ou une mémoire USB.
< Les noms des fichiers MP3 ou WMA doivent être composés de
caractères alphanumériques. Cet appareil ne peut pas afficher
correctement les symboles et les caractères grand format ou
à deux octets (tels que les caractères japonais, chinois, etc.).
Assurez-vous aussi d’utiliser l’extension de fichier correct. (“.mp3”
pour les fichiers MP3, “.wma” pour les fichiers WMA.)
< Les fichiers MP3 sont au format MPEG-1 Audio Layer 3 mono ou
stéréo. Cet appareil peut reproduire les fichiers MP3 avec une
fréquence d’échantillonnage 44.1 kHz ou 48 kHz et un débit
binaire 320 kbps ou inférieur.
< Cet appareil peut reproduire les fichiers WMA avec une fréquence
d’échantillonnage 44,1 kHz et un débit binaire 192 kbps ou
inférieur.
< Les fichiers sonores codés en 128 Kbps sont d’une qualité
équivalente à un CD audio ordinaire. Bien que ce lecteur puisse
reproduire les plages MP3 de débit binaire inférieur, la qualité
sonore peut être détériorée si le débit binaire est faible.
Le boîtier de télécommande fourni permet la commande à distance
defourni permet la commande à distance de l’appareil.
Pour l’utilisation du boîtier de télécommande, le diriger vers le
détecteur de télécommande du panneau avant de l’appareil.
< Même si le boîtier de télécommande est activé dans la zone de
fonctionnement, la commande à distance peut être impossible s’il
y a des obstacles entre le lecteur et le boîtier de télécommande.
< Si le boîtier de télécommande fonctionne dans le voisinage
d’autres appareils générant des rayons infrarouges, ou si d’autres
télécommandes utilisant des rayons infrarouges sont utilisées
près du lecteur, le lecteur peut de ne pas bien fonctionner. Dans
la situation inverse, les autres appareils peuvent ne pas bien
fonctionner.
Mise en place des piles
FRANÇAIS
Disques
< Le disque doit être finalisé afin d’être reproduit.
< Le CD-ROM doit être compatible ISO 9660.
< Si plus de 255 fichiers sont enregistrés sur le disque, il se peut que
l’appareil ne puisse pas les reproduire correctement.
USB
< Cette unité est compatible USB 1.1 pleine vitesse (12 Mb/s).
< Cette unité peut reproduire les fichiers MP3 enregistrés sur carte
mémoire SD ou sur divers dispositifs de stockage USB externes
tels que des clés mémoire USB. Mais cette unité n'accepte pas la
lecture ou l'enregistrement de lecteurs MP3.
< Quand plus de 1000 fichiers sont enregistrés sur une mémoire
USB ou une carte mémoire SD, l'unité peut ne pas être capable
de les lire correctement.
< L'unité peut ne pas être capable de lire un lecteur MP3 à mémoire
via la connexion USB.
1. Retirer le couvercle du compartiment des piles.
2. Introduire deux pil es “AA”. S’a ssur er que les pile s sont
correctement mises en respectant les polarités plus + et moins
_ .
3. Fermer le couvercle jusqu’au déclic.
Remplacement des piles
Si vous r emar quez que l a dis tanc e ent re l e boî tier de
télécomma nde et le lecteur devient plus courte pour un
fonctionnement correct, ceci indique que les piles sont usées.
Dans ce cas, remplacer les piles par des nouvelles.
Précautions à observer concernant les piles
< Bien placer les piles en respectant les polarités plus + et moins
_ .
< Utiliser des piles du même type. Ne jamais essayer d’utiliser des
types de pile différents ensemble.
< Des piles rechargeables ou non peuvent être utilisées. Se référer à
leurs étiquettes pour les précautions à respecter.
< Si le boîtier de télécommande n’est pas utilisé pendant une
longue période (plus d’un mois), retirer les piles du boîtier de
télécommande pour éviter des fuites de pile. Si elles coulent,
essuyer le liquide dans le compartiment des piles et remplacer les
piles par des neuves.
< Ne pas chauffer, démonter les piles ni les mettre au feu.
21
Page 22

Raccordements
CD
(LINE IN)
REMOTE CONTROL
R L
DIGITAL IN
(OPTICAL)
B
A C E
D
Enregistreur CD, platine MD, etc.
PD-H380
Amplificateur (A-H380)
PRÉCAUTION:
< Co upez l’alime ntation d e tous l es app areils avant d’effe ctuer les
raccordements.
< Lisez les instructions qui accompagnent chaque appareil que vous avez
l’intention d’utiliser en association avec cet appareil-ci.
22
Page 23

A
Blanche (L)
Rouge (R)
Blanche (L)
Rouge (R)
Prise LINE OUT
Cette prise transmet les signaux audio analogique à 2 canaux.
Connectez cette prise à la prise CD de l'amplificateur (A-H380)
avec un câble Cinch.
Veillez à brancher:
la fiche blanche q la prise blanche (L: voie gauche)
la fiche rouge q la prise rouge (R: voie droite)
< Veillez à ce que chaque fiche soit soigneusement insérée. Pour
éviter les ronflements et les bruits parasites, évitez d’attacher
les câbles d’interconnexion parcourus par les signaux avec
le cordon d’alimentation secteur ou les câbles de liaison aux
enceintes.
D
Commutateur SELECTOR
Si le s pr ise s R EMOT E CO NTRO L de cet appa reil et du
A-H380 sont connectées avec le cordon de connexion de
télécommande, sélectionnez “SYSTEM“. Vous pouvez utiliser
la télécommander fournie avec le A-H380 et accéder à une
commande facile du système.
Quand vous n'utilisez pas les opérations de commande du
système, ou si vous ne possédez pas un A-H380, sélectionnez
“SINGLE“.
E
Cordon Secteur
Après avoir terminé toutes les autres connexions, branchez le
câble dans une prise secteur.
< Assurez-vous de raccorder le câble à une prise qui délivre une
tension correcte.
B
Sortie DIGITAL OUT
Raccordez-la à la prise d’entrée numérique d’un appareil
numérique tel qu’un enregistreur de CD, une platine MD,
etc. Utilisez un câble numérique optique en vente dans le
commerce.
< La prise optique est recouverte d’un capuchon. Assurez-vous
que le câble est inséré solidement, mais ne forcez pas sur le
câble quand vous le branchez ou le débranchez afin de ne pas
endommager l'appareil.
C
Prises REMOTE CONTROL
Si vous avez un TEAC A-H380, vous disposez d’un système de
contrôle cohérent:
< Lorsque vous appuyez sur PLAY, le sélecteur d’entrée (INPUT
SELECTOR) de l’A-H380 se met sur “CD” automatiquement.
< Quand le A-H380 est mis sous tension alors que le sélecteur
d'entrée du A-H380 est réglé sur “CD“, la lecture du CD démarre
automatiquement.
Raccordez la prise REMOTE CONTROL (A ou B) à la prise REMOTE
CONTROL de l’A-H300mkIII, l’AG-H300mkIIIou le T-H380 avec le
cordon de raccordement de télécommande fourni.
Tournez le commutateur SELECTOR sur SYSTEM.
Lisez le mode d’emploi de l’A-H380 pour plus de détails.
< Tenez la prise lorsque vous branchez ou débranchez le câble
secteur.
FRANÇAIS
23
Page 24

Identification des parties
DC EBA
FJ IK H G
A
T
S
L
R
V
N
U
F
D
E
Q
O
M
W
P X
24
Page 25

A
STANDBY/ON
Appuyez sur cette touche pour mettre l’appareil en marche (ON)
ou en veille (STANDBY).
L'indicateur de veille est orange quand l'appareil est en mode de
veille. Quand l’unité est mise sous tension, l’indicateur est bleu.
B
Tiroir disque
C
Open/close (L)
Utilisez cette touche pour ouvrir et fermer le tiroir.
D
Stop (H)
Utilisez cette touche pour arrêter la lecture.
E
Play (G)
Use this button to start playback.
F
Pause (J)
Utilisez cette touche pour démarrer la lecture.
G
Skip/Scan (.m/,/)
Utilisez ces touches pour sauter des plages. (page 28)
Pendant la lectur e mainten ez ces touches pressées pour
rechercher une plage ou un fichier.
H
USB/CD
Utilisez cette touche pour sélectionner le mode USB ou CD.
I
Port USB
Utilisez cette prise pour connecter un périphérique de mémoire
USB extérieur à l’appareil.
J
Télécommande
Lors de l’utilisation de la télécommander, dirigez-la vers le capteur
de télécommande.
P
SCAN (m/,)
Pendant la lecture, utilisez ces touches pour rechercher le
passage que vous souhaitez écouter.
Q
SHUFFLE
Utilisez cette touche pour la lecture aléatoire. (page 31)
R
CLEAR
Utilisez cette touche pour annuler un programme. (page 31)
S
PROGRAM
Uti lisez cette touch e pou r entr er en m ode de l ectu re
programmée. En mode de lecture programmée, utilisez cette
touche pour entrer une sélection.
T
ENTER
Utilisez cette touche pour entrer la sélection. (page 29)
U
DISPLAY
Pendant la lecture MP3/WMA, utilisez cette touche pour changer
les informations affichées.
V
TIME
Pendant la lecture, utilisez cette touche pour changer l’affichage
de l’heure.
W
FILE (b,5)
Utilisez ces touches pour sélectionner un fichier MP3/WMA. (page
29)
X
SKIP (.//)
Utilisez ces touches pour sauter des plages.
FRANÇAIS
K
Afficheur
L
Touches numériques
Utilisez ces touches pour sélectionner un numéro de plage ou de
fichier.
Par exemple pour sélectionner la plage ou le fichier 35, appuyer
sur “3” puis sur “5”. (page 29)
M
REPEAT 1/ALL
Utilisez cette touche pour sélectionner le mode de répétition.
(page 32)
N
A-B
Utilisez cette touche pour régler les points A et B pour la
répétition A-B.
O
FOLDER (5,b)
Utilisez ces touches pour sélectionner un dossier MP3/WMA.
25
Page 26

Lecture (disque)
1
2 4 53
1
Appuyez sur la touche STANDBY/ON pour mettre l’appareil
en marche.
Indicateur de veille/sous tension
L'indicateur de veille/sous tension passe de l'orange au bleu.
“No Disc” apparaît s’il n’y a pas de disque dans le lecteur.
< Si les prises REMOTE CONTROL de cet appareil et du A-H380 sont
connectées avec le cordon de connexion de télécommande
et que REMOTE CONTROL SELECTOR est réglé sur “SYSTEM“,
vous pouvez mettre cet appareil sous tension en utilisant la
télécommander fournie avec le A-H380.
< Sélectionnez “CD“ si l'appareil est en mode “USB“.
4
Appuyez sur la touche open/close (L) pour fermer le tiroir.
< Tenez vos doigts à l'écart du plateau à disque quand il bouge
pour éviter de vous les faire coincer.
< Il faut quelques secondes à l'appareil pour charger un disque.
Aucune touche ne fonctionne pendant le chargement. Attendez
que le nombre total de plages et la durée totale de lecture du
disque apparaissent.
CD audio
Le nombre total de plages et la durée totale de lecture du disque
apparaissent.
2
Appuyez sur la touche open/close (L).
3
Placez un disque sur le plateau avec la face imprimée
dirigée vers le haut.
< Le disque doit être centré dans le tiroir. Si le disque n’est pas
correctement positionné, le tiroir risque de ne pas pouvoir s’ouvrir
après s’être refermé, aussi devez vous vous assurer que le disque
est bien placé au centre dans le tiroir.
< Ne mettez jamais plus d’un disque sur le tiroir.
< Ne collez pas d'étiquettes ni de ruban adhésif sur le disque.
< N'utilisez pas des disques avec des formes irrégulières.
Disque MP3/WMA
Le nombre total de fichiers du disque apparaît.
“MP3“ est affiché même si le fichier de lecture est un fichier WMA.
26
Page 27

31
2
5
Appuyez sur la touche PLAY (y) pour démarrer la lecture.
La lecture du disque commence au premier morceau ou fichier.
CD audio
Numéro de morceau en cours
Disque MP3/WMA
numéro de dossier actuel
< Les fichiers MP3/WMA enregistrés en dehors des dossiers sont mis
automatiquement dans le dossier “ROOT“, et la lecture démarre à
partir du premier fichier du dossier ROOT.
< S'il y a des dossiers qui ne contiennent pas de fichier MP3, c'est
appareil les saute.
< Pendant la lecture du fichier MP3/WMA, “nom du fichier_artiste_
Album“ défile sur l'affichage.
< L'appareil s'arrête automatiquement quand la lecture de toutes
les plages/fichiers est terminée.
< Si vous changez un disque puis appuyez sur la touche PLAY (ou
sur les touches numériques de la télécommande) sans avoir
d'abord fermé le plateau à disque, le plateau à disque se ferme
automatiquement et la lecture démarre.
Temps écoulé du morceau
en cours
Cette appareil ne peut pas reproduire les fichiers se trouvant dans
un disque dur de grande capacité.
1
Appuyez sur la touche STANDBY/ON pour mettre l’appareil
sous tension.
2
Sélectionnez la fonction USB en appuyant sur la touche
USB/CD .
“Not connected “ est affiché si aucun périphérique USB n'est
connecté.
3
Connectez une mémoire USB à la prise USB sur le panneau
avant de l’appareil.
La lecture commence par le premier fichier.
< Laissez le capuchon protecteur en place pour protéger la prise
USB quand celle-ci n'est pas utilisée.
< Le chargement de la mémoire USB peut prendre plusieurs
minutes en fonction du nombre de fichier et de dossiers.
< Si un iPod shuffle est connecté à cette prise, il ne peut pas être
reproduit.
< Les fichiers MP3/WMA enregistrés en dehors des dossiers sont mis
automatiquement dans le dossier “ROOT“, et la lecture démarre à
partir du premier fichier du dossier ROOT.
< S'il y a des dossiers qui ne contiennent pas de fichier MP3, c'est
appareil les saute.
< Pendant la lecture du fichier MP3/WMA, “nom du fichier_artiste_
Album” défile sur l'affichage.
< Quand la lecture de toutes les plages/fichiers est terminée,
l'appareil s'arrête automatiquement.
FRANÇAIS
Quand vous appuyez sur la touche STOP (H), l'affichage affiche le
nombre total de fichiers.
nombre total de fichiers
27
Page 28

Lecture de base
CAB
D E
A
Pour arrêter la lecture
Appuyez sur la touche STOP (H) pour arrêter la lecture.
Pour redémarrer la lecture, appuyez sur la touché de lecture (G).
La lecture commence par le premier fichier.
B
Pour suspendre la lecture momentanément (mode pause)
Appuyez sur la touche PAUSE (J) en lecture. La lecture s’arrête à
la position actuelle, et l’afficheur PAUSE (J) s’illumine sur l’écran.
Pour reprendre la lecture, appuyez sur PLAY ou sur PAUSE.
D
Pour passer directement à la plage ou au fichier suivant ou
précédent
En lecture, maintenez la touche SKIP (.mou, / )
appuyée (ou appuyez sur la touche SKIP plusieurs fois) jusqu’à ce
que le morceau désiré soit atteint. Le morceau sélectionné sera
joué à partir du début.
En mode S TOP o u PAU SE, a ppuye z sur la touche S KIP
(.mou ,/) plusieurs fois et relâchez-le lorsque le
morceau que vous voulez écouter est trouvé. Appuyez sur PLAY
pour démarrer la lecture du morceau désiré.
< Quand la touche .mest pressé en lecture, le morceau en
cours reprendra à partir du début. Pour retourner au début du
morceau précédant appuyez sur la touche .m deux fois.
C
Pour éjecter le disque.
Quand vous appuyez sur la touche d'ouverture/fermeture (L), la
lecture s'arrête et le plateau s'ouvre.
Après l'éjection du disque, fermez le plateau en appuyant sur la
touche d'ouverture/fermeture (L).
< En lecture programmée, c’est le morceau programmé suivant ou
précédant qui est lu.
E
Recherche d’un passage donné sur une plage ou un fichier
Pendant la lecture, maintenez pressée la touche de saut/balayage
(.m/,/) , puis relâchez-la quand vous avez atteint le
passage que vous souhaitez écouter.
Sur la télécommande, utilisez la touche de balayage (m/,).
< L'appareil s'arrête quand la fin de la dernière plage est atteinte.
28
Page 29

F
1
3
2
4
Lecture Directe
En mode d’arrêt ou de lecture, vous pouvez utiliser les touches
numériques de la télécommande pour sélectionner une plage ou
un fichier.
Appuyez sur les touches numériques pour sélectionner une plage
ou un fichier. La lecture commence par la place ou le fichier
séléctionné.
Recherche de dossier
Quand l'appareil est arrêté ou pendant le mode de lecture, vous
pouvez sélectionner et reproduire le dossier souhaité ou un
fichier donné dans un dossier MP3/WMA.
1
Appuyez sur les touches FOLDER (b/5) pour sélectionner
un dossier.
Plage 3:
Plage 15:
Plage 23:
L'ordre des dossiers peut changer en fonction de la hiérarchie des
dossiers.
2
Appuyez sur la touche ENTER.
3
Si vous souhaitez sélectionner un fichier, appuyez sur les
touches FILE (b/5).
< Vous pouvez sélectionner un fichier dans le dossier sélectionné.
4
Appuyez sur la touche ENTER.
FRANÇAIS
29
Page 30

Lecture programmée
2
1
3
./
ENTER
CLEAR
3
Appuyez sur la touche PLAY (y) pour démarrer la lecture
programmée.
Un maximum de 40 plages/fichiers peuvent être programmées dans
l'ordre souhaité.
< Insérez un disque ou connectez une mémoire USB avant de
commencer le programme.
< Quand vous appuyez sur la touche SHUFFLE, le mode de lecture
programmé est annulé est la lecture aléatoire démarre.
1
Appuyez sur la touche PROGRAM en mode stop.
La lectu re p rogram mée démarr e e t l 'appar eil s'arrê te
automatiquement quand la lecture de tous le contenu du
programme est terminée.
< Si vous appuyez sur la touche TIME e n mode de lect ure
programmée, le nombre total de plages et la durée de lecture
totale ne sont pas affichés sur l'affichage.
Pour vérifier l’ordre du programme
< Vous ne pouvez pas faire un programme pendant la lecture.
2
Sélectionnez une plage/fichier en utilisant les touches
numériques.
Pour programmer la plage/fichier 15:
la plage/fichier programmée dans le programme 1.
Pour vérifier l’ordre de la liste programmée
En mode stop, appuyez sur la touche PROGRAM plusieurs fois.
Le numéro du morceau et son numéro d’ordre dans la liste
programmée s’afficheront.
Pour retourner à un affichage normal, appuyez sur la touche
STOP (H).
Pour supprimer une plage du programme
Le numéro de plage/fichier clignote après que vous avez appuyé
sur une touche numérique.
Une fois que le programme est terminé, le numéro de plage/
fichier s'arrête de clignoter.
< Si vous appuyez sur la touche PROGRAM pendant que le numéro
de plage/fichier clignote, la plage/fichier est programmée est le
clignotement s'arrête.
< Un maximum de 40 plages peuvent être programmées. Si vous
essayez de programmer plus de 40 plages/fichiers, “P-FULL” (le
programme est complet) est affiché pour indiquer que vous ne
pouvez plus rien programmer.
< Si vous avez fait une erreur, appuyez sur la touche CLEAR. Le
dernier numéro programmé sera effacé.(disque uniquement)
Vous pouvez aussi programmer des plages/fichiers en utilisant la
touche SKIP (.//), et appuyez sur la touche PROGRAM.
30
En mode d’arrêt, appuyez répétitivement sur la touche PROGRAM
jusqu’à ce que le numéro d’ordre du programme à supprimer
apparaisse, puis appuyez sur la touche CLEAR.La plage/fichier
sélectionnée est supprimée du programme et la plage/fichier
suivante programmée est affichée.
Page 31

Pour ajouter une plage au programme
1. En mode d’arrê t, appuyez répéti tivemen t s ur la touc he
PROGRAM jusqu’à ce que le numéro d’ordre du programme où
vous souhaitez insérer une plage ou un fichier apparaisse sur
l'affichage.
2. Sélectionnez un numéro de plage/fichier en utilisant les touches
numériques, puis appuyez sur la touche PROGRAM.
Si vous souhaitez ajouter une plage à la fin du programme,
appuyez répétitivement sur la touche PROGRAM jusqu’à ce que
“P-End” apparaisse brièvement sur l’affichage. Puis, sélectionnez
un numéro de plage/fichier en utilisant les touches numériques,
et appuyez sur la touche PROGRAM. La plage ou le fichier est
ajouté au programme.
Pour annuler le mode de lecture programmée
Lecture aléatoire
Quand vous appuyez sur la touche SHUFFLE, les plages ou les fichiers
du disque ou de la mémoire USB sont reproduites aléatoirement.
< Si vous appuyez sur la touche SHUFFLE ou sur la touche STOP
(H) pendant la lecture aléatoire, l'appareil s'arrête et le mode de
lecture aléatoire est annulé.
< Si vous appuyez sur la touche / pendant la lecture aléatoire, la
plage suivante est sélectionnée de façon aléatoire et reproduite.
Si vous appuyez sur la touche ., la plage ou le fichier en cours
de lecture est reproduit de nouveau à partir du début. Une plage
ou un fichier ne peut pas être reproduit répétitivement pendant
la lecture aléatoire.
FRANÇAIS
Quand vous appuyez sur la touche STOP (H) ou sur la touche
SHUFFLE en mode d'arrêt, le mode de lecture programmée est
annulé mais le contenu du programme n'est pas perdu.
Vous pouvez retourner à la lecture programmée en appuyant sur
la touche PROGRAM et sur la touche PLAY (G).
Pour effacer la liste programmée
< Les touches numériques ne marchent pas en lecture aléatoire.
1. En mode stop, appuyez sur la touche PROGRAM.
2. Maintenez pressée la touche CLEAR pendant plus de 2 secondes.
Si vous appuyez sur la touche open/close (L) , le contenu
programmé est aussi annulé.
31
Page 32

Lecture répétée
R1 (Répétition d’une seule plage)
Rf (Répétition de dossier)
Ra (Répétition de toutes les plages)
(Répétition hors service)
(Clignote, Uniquement disque MP3/WMA)
Chaque fois que vous appuyez sur la touche REPEAT 1/ALL, le mode
change comme suit:
< Quand vous appuyez sur la touche STOP (H) le mode de lecture
répétée est annulé..
Répétition d’une seule plage (R1)
La plage ou le fichier en cours de lecture est reproduit de façon
répétée. Si vous sélectionner une autre plage ou un autre fichier
en mode Repeat 1, la plage ou le fichier sélectionné est reproduit
répétitivement.
Si vous sélectionner une autre plage ou un autre fichier en mode
R1, la plage ou le fichier sélectionné est reproduit répétitivement.
Répétition A-B
Cette fonction permet de reproduire répétitivement un passage
souhaité du disque.
Désignez le point à partir duquel la lecture répétée doit
démarrer en appuyant sur la touche A-B.
“Repeat A-” s’allume et “B” clignote.
Lorsque le disque a atteint le point où la lecture répétée doit
s’arrêter, appuyez de nouveau sur la touche A-B.
“Repeat A-B” s’allume.
Le passage défini à l’aide de la touche A-B est reproduit de façon
répétée.
< Pour revenir en mode de lecture normale, appuyez sur la touche
A-B jusqu’à ce que “Repeat A-B” disparaisse de l’affichage.
< Il doit y avoir plus de 3 secondes entre A et B.
< Si l’un des touches suivants est pressé, le mode répétition A-B
sera désactivé
STOP, SKIP, 1/ALL, A-B, SHUFFLE, OPEN/CLOSE, STANDBY/ON
Repeat Folder (Rf) (Disque MP3/WMA uniquement)
Toutes les plages du dossier sont reproduites répétitivement.
Si vous sélectionnez un autre dossier en mode Rf, les plages/
fichiers dans le dossier sont reproduites répétitivement.
< Vous ne pouvez pas sélectionner le mode Rf en mode d'arrête.
< Vous ne pouvez pas sélectionner le mode Rf pendant la lecture
d'une mémoire USB.
Répétition de toutes les plages (Ra)
Toutes les plages ou les fichiers sont reproduits répétitivement.
< En mode de lecture programmée, le contenu du programme est
reproduit de façon répétée.
32
Page 33

AffichageAffichage de la durée
Achage par défaut (délement)
Nom du chier
Titre du morceau
Nom de l'artiste
Nom de l'album
Année
Commentaire
Lors de la lecture, l’affichage change comme suit chaque fois que
vous appuyez sur la touche TIME:
En mode d'arrêt
Le nombre total de plages/fichier et la durée totale de lecture
En mode de lecture
le numéro de la plage/fichier actuelle et la durée écoulée de la
plage/fichier actuelle
numéro du dossier actuel (uniquement MP3/WMA)
numéro de la page/fichier actuelle et durée restante de la
plage/fichier actuelle
Pendant la lecture MP3, appuyez répétitivement sur la touche
DISPLAY pour changer les informations affichées.
Affichage par défaut (défilement):
Titre du morceau - Nom de l'artiste - Nom de l'album
L’affichage change comme suit:
FRANÇAIS
Le nombre total de plages et la durée totale de lecture
(uniquement pour les CD audio)
Le nombre total de plages et la durée totale de lecture
(uniquement pour les CD audio)
33
Page 34

Spécifications
Solución de problemas
Réponse en fréquence . . . . . . . . . . . . . . . . . . . 20 Hz - 20 kHz, ±2.0 dB
Distorsion harmonique totale. . . . . . . . . . Less than 0.005 % (1 kHz)
Rapport signal/bruit (S/B) . . . . . . . . . . . . . . . . . . . . . More than 120 dB
(1 kHz, 0 dB, A weight)
Sortie . . . . . . . . . . . . . . . . . . . . . . . . . Analog: 2.0 Vrms (RCA, 1kHz, 0db)
Digital: TOS OPTICAL
Alimentation . . . . . . . . . . . . . . . . . . . . . . . . . . . . . . . . . . . . AC 230 V, 50 Hz
Consommation . . . . . . . . . . . . . . . . . . . . . . . . . . . . . . . . . . . . . . . . . . . 13 W
Dimensions (L x H xP) . . . . . . . . . . . . . . . . . . . . . . . . 215 x 93 x 275 mm
Poids (net) . . . . . . . . . . . . . . . . . . . . . . . . . . . . . . . . . . . . . . . . . . . . . . . .2.8 kg
Accessoire standard . . . . . . . . . . . . . . . . . . . . . . . . . . . . . . . Câble RCA x 1
Cordon de raccordement de télécommande x 1
Télécommande x1
Piles (AA) x2
Manuel de l’utilisateur x1
Carte de garantie x1
< Les caractéristiques et la présentation peuvent être modifiées
sans avis préalable.
< Poids et dimensions sont approximatifs.
< Les illustrations peuvent légèrement différer des modèles de
production.
Mise au rebut de votre ancien appareil
1. Quand ce symbole de poubelle sur roues barrée d’une croix
est joint à un produit, cela signifie que ce produit est couvert
par la Directive Européenne 2002/96/EC.
2. Tous les produits électriques et électroniques doivent être
jetés séparément des ordures ménagères via des collecteurs
désignés agréés par le gouvernement ou les autorités locales.
3. La gestion correcte de l’élimination de
votre ancien appareil aide à prévenir les
conséquences potentiellement négatives
pour l’environnement et la santé humaine.
4. Pour des informations plus détaillées sur
la mise au rebut de votre ancien appareil,
veuillez contacter votre mairie, le service
de traitement des ordures ou le magasin
dans lequel vous avez acheté le produit.
En cas de problème avec l’appareil, prenez le temps de lire ce
tableau et de voir si vous pouvez résoudre le problème tout seul
avant de faire appel à votre revendeur ou au centre d'assistance
TEAC.
L'appareil ne s'allume pas
e Vérifier que l'appareil est bien branché sur la prise secteur.
Vérifiez que la source d'alimentation CA n’est pas une prise
équipée d’un interrupteur et si tel est le cas vérifiez que
l’interrupteur est bien sur ON. Vérifiez que la prise délivre bien
du courant en branchant un autre appareil électrique, une
lampe ou un ventilateur par exemple.
Pas de son
e Vérifiez le raccordement à l’amplificateur.
e Vérifiez le fonctionnement de l’amplificateur.
La télécommande ne fonctionne pas.
e Si les batteries sont usées, remplacez-les.
e Sans dépasser la portée (5 m) de la télécommande, l’orientez
vers la face avant de l’appareil.
e En l evez t out objet pouvan t faire o b stacle e ntre l a
télécommande et l’appareil.
e Eteignez tout éclairage fluorescent à proximité de cet appareil.
e Réglez RE MOTE CON TROL SE LECTOR sur “SYSTEM“, et
connectez les prises REMOTE CONTROL de cet appareil et du
A-H380 avec le cordon de connexion de télécommande si vous
souhaitez commander l'appareil avec la télécommande fournie
avec le A-H380.
e Quand vous utilisez la télécommande fournie avec le A-H380,
appuyez sur la touche CD sur la télécommande avant d'utiliser
une commande.
Ne peut pas lire.
e Chargez un disque avec la face gravée vers le bas.
e Un disque vierge a été chargé.. Mettez un disque préenregistré.
e Il peut ne pas être possible de relire certains disques CDR/ CD-
RW disques. Essayez avec un autre disque.
e Vous ne pouvez pas relire un disque CD-R/CD-RW non finalisé..
Veuillez finaliser un tel disque avec un enregistreur CD.
Le son saute.
e Placez le lecteur sur un support stable et évitez les vibrations et
les chocs.
e Si le disque est sale, nettoyez la surface du disque.
e N’utilisez pas des disques rayés, endommagés ou gondolés.
Impossible d'utiliser la lecture programmée.
e Si l'appareil est hors tension ou si le plateau est ouvert, le
contenu du programme est effacé.
Si malgré ces indications, vous ne parvenez pas à faire
fonctionner normalement l’appareil, débranchez le cordon
d’alimentation du secteur et rebranchez-le.
Entretien
Si la surface de l’appareil est sale, nettoyez-la avec un chiffon
doux ou utilisez une solution diluée de savon doux. Veillez à ce
qu’il ne reste pas de produit sur l’appareil. N’utilisez jamais de
diluant, de benzène ou d’alcool, ceux-ci risquant d’endommager
la surface de l’appareil.
34
Risque de condensation
En cas de déplacement de l'appareil (ou d'un disque) d'un
endroit froid vers un endroit chaud, ou en cas d'utilisation après
un changement de température brutale, il y a un risque de
condensation. La vapeur contenue dans l'air peut se condenser
sur le mécanisme interne et affecter le bon fonctionnement de
l'appareil. Pour éviter ceci, ou au cas où cela venait à se produire,
laisser l'appareil sous tension pendant une heure ou deux. Ceci
lui permettra de se stabiliser à la température ambiante.
Page 35

Previo al empleoIndice
Enhorabuena por la adquisición de un TEAC. Lea
detenidamente este manual a fin de o btener el mej or
rendimiento de esta unidad.
Previo al empleo . . . . . . . . . . . . . . . . . . . . . . . . . . . . . . . . . . . . . . . . . . . . . . . . 35
Discos . . . . . . . . . . . . . . . . . . . . . . . . . . . . . . . . . . . . . . . . . . . . . . . . . . . . . . . . . . 36
MP3 y WMA . . . . . . . . . . . . . . . . . . . . . . . . . . . . . . . . . . . . . . . . . . . . . . . . . . . . . 37
Control remoto. . . . . . . . . . . . . . . . . . . . . . . . . . . . . . . . . . . . . . . . . . . . . . . . . . 37
Conexión . . . . . . . . . . . . . . . . . . . . . . . . . . . . . . . . . . . . . . . . . . . . . . . . . . . . . . . 38
Identificación de las partes . . . . . . . . . . . . . . . . . . . . . . . . . . . . . . . . . . . . . . 40
Reproducción (disco) . . . . . . . . . . . . . . . . . . . . . . . . . . . . . . . . . . . . . . . . . . . 42
Reproducción (dispositivo USB) . . . . . . . . . . . . . . . . . . . . . . . . . . . . . . . . . 43
Reproducción básica . . . . . . . . . . . . . . . . . . . . . . . . . . . . . . . . . . . . . . . . . . . 44
Búsqueda de carpetas . . . . . . . . . . . . . . . . . . . . . . . . . . . . . . . . . . . . . . . . . . . 45
Reproducción programada . . . . . . . . . . . . . . . . . . . . . . . . . . . . . . . . . . . . . . 46
Reproducción aleatoria . . . . . . . . . . . . . . . . . . . . . . . . . . . . . . . . . . . . . . . . . . 47
Reproducción repetida . . . . . . . . . . . . . . . . . . . . . . . . . . . . . . . . . . . . . . . . . . 48
Visualización del tiempo . . . . . . . . . . . . . . . . . . . . . . . . . . . . . . . . . . . . . . . . . 49
Pantalla (MP3 y WMA) . . . . . . . . . . . . . . . . . . . . . . . . . . . . . . . . . . . . . . . . . . . 49
Especificaciones . . . . . . . . . . . . . . . . . . . . . . . . . . . . . . . . . . . . . . . . . . . . . . . . 50
Solución de problemas . . . . . . . . . . . . . . . . . . . . . . . . . . . . . . . . . . . . . . . . . . 50
Lire les consignes suivantes avant toute utilisation
< La unidad puede calentarse durante su funcionamiento, por
lo que habrá que dejar espacio suficiente alrededor para su
ventilación.
< La tensión suministrada a la unidad deberá coincidir con el valor
indicado en el panel posterior. En caso de duda, consulte a un
electricista.
< Elija cuidadosamente el emplazamiento de la unidad. No coloque
la unidad a la luz solar directa ni cerca de fuentes de calor. Evite
también los lugares expuestos a vibraciones o a un exceso de
suciedad, frío, calor o humedad.
< No coloque la unidad encima de un amplificador/receptor.
< No abra la carcasa de la unidad, ya que podrían dañarse los
circuitos o producirse descargas eléctricas. Si entra algún cuerpo
extraño en la unidad, póngase en contacto con su distribuidor o
empresa de servicios.
< Cuando desconecte el cable de la toma mural, sostenga
únicamente el conector y nunca el propio cable.
PRECAUCIÓN
< No permita que ningún líquido se derrame o salpique este
aparato.
< No coloque objetos que contengan líquidos, como jarrones,
encima de este aparato.
< No instale este aparato confinado en un espacio reducido,
como podría ser encastrado en una estantería o lugar similar.
< Este aparato recibe corriente nominal no operativa de la salida
de corriente AC aun cuando su interruptor STANDBY/ON esté
en la posición STANDBY.
< El aparato debe estar colocado lo suficientemente cerca de
la salida de corriente como para poder acceder al enchufe en
cualquier momento.
< Para mantener limpio el lector láser, no lo toque. Cierre siempre
la tapa del compartimento de disco cuando no utilice la unidad.
< No intente limpiar la unidad con disolventes químicos, ya que
podrían dañar el acabado. Utilice un paño limpio y seco.
ESPAÑOL
< Conserve el manual en un lugar seguro para futuras consultas.
NO MUE VA LA U NID AD DURANT E LA
REPRODUCCIÓN
Durante la reproducción, el disco gira a gran velocidad. No
levante ni mueva la unidad durante la reproducción. Podrían
resultar dañados el disco o la unidad.
TRASLADO DE LA UNIDAD
Cuando traslade o embale la unidad, asegúrese de retirar el disco
del compartimento. Si traslada la unidad con el disco insertado,
podrían ocasionarse daños en el propio equipo.
< Conecte siempre los aparatos de clase ! como este a salidas de
corriente con toma de tierra.
35
Page 36

Discos
Discos utilizables:
M CD-Audio convencionales con el logotipo COMPACT DISC
DIGITAL AUDIO en la etiqueta:
M Discos CD-R y CD-RW con la sesión correctamente cerrada
M CD-MP3
Observación:
< Dependiendo de la calidad del disco o del estado de la grabación,
algunos CD-R y CD-RW es posible que no puedan reproducirse.
< Los discos protegidos contra copia y otros que no se ajustan al
estándar de CD es posible que no se reproduzcan correctamente
en esta unidad. Si utiliza discos de éstos con la unidad, TEAC
Corporation y sus filiales no asumen responsabilidades por
las posi bles cons ecuencias ni garantizan la c alidad de la
reproducción. Si tiene problemas con tales discos, póngase en
contacto con sus fabricantes.
< Coloque el disco en la bandeja siempre con la cara de la etiqueta
hacia arriba. (Los discos compactos sólo se graban y reproducen
por una cara.)
< Para extraer un disco de su estuche, presione en el centro de la
caja, levante el disco y sosténgalo con cuidado por los bordes.
< Los discos deberán devolverse a sus estuches después de usarlos.
De lo contrario podrían ensuciarse o rayarse y provocar “saltos”
del lector láser.
< No exponga los discos a la luz solar directa o a elevados niveles
de temperatura o humedad durante periodos prolongados. La
exposición prolongada a temperaturas elevadas deformará el
disco.
< No reproduzca ningún disco que esté curvado, deformado o
dañado. La reproducción de estos discos puede causar daños
irreparables en los mecanismos de lectura.
< Los discos CD-R y CD-RW son más sensibles al calor y a los rayos
ultravioleta que los CD normales. Convendrá guardarlos en un
lugar donde no incida la luz solar directa, y alejados de fuentes de
calor (radiadores, etc.) o dispositivos eléctricos que generen calor.
< No se recomiendan los discos imprimibles, ya que la cara de la
etiqueta podría adherirse y dañar la unidad.
< No adhiera papeles ni láminas de protección a los discos, ni
aplique ningún tipo de aerosol de revestimiento.
< Utilice un rotulador de punta blanda para escribir en el lado de la
etiqueta. No emplee nunca bolígrafos ni lápices de punta dura, ya
que podría dañar la cara grabada del disco.
< Si se ensucia el disco, limpie la superficie en sentido radial (del
orificio central hacia fuera) con un paño suave y seco:
< No utilice nunca productos químicos, como aerosoles para
vinilo, líquidos o aerosoles antiestáticos, bencina o aguarrás para
limpiar los discos. Estos productos químicos ocasionarán daños
irreparables en la superficie de plástico del disco.
< No utilice nunca estabilizadores. Los estabilizadores de CD
existentes en el mercado producirán daños en los mecanismos y
anomalías en su funcionamiento.
< No utilice discos de diseño irregular (octogonales, forma de
corazón, tamaño tarjeta, etc.), ya que pueden dañar la unidad.
< Si tiene alguna duda sobre el cuidado y manipulación de un
disco, lea las instrucciones facilitadas con el mismo o póngase
directamente en contacto con el fabricante.
36
Page 37

Control remotoMP3 y WMA
< Esta unidad puede reproducir archivos MP3 y WMA grabados en
CD-R, CD-RW o un dispositivo de almacenamiento USB.
< Los nombres de los archivos MP3 o WMA deben ser compuestos
por caracteres alfanuméricos. Esta unidad no puede visualizar
símbolos y caracteres de tamaño total o de byte doble (como
caracteres japoneses, chinos, etc.) correctamente. De la misma
manera, asegúrese de utilizar la extensión de archivo correcta.
(“.mp3” para archivos MP3, “.wma” para archivos WMA.)
< Los archivos MP3 son del formato MPEG-1 Audio Layer 3,
monofónicos o estereofónicos. Esta unidad puede reproducir
archivos MP3 con una frecuencia de muestreo 44.1 kHz o 48 kHz,
y una tasa de bits 320 kbps o inferior.
< Esta unidad puede reproducir archivos WMA con una frecuencia
de muestreo 44,1 kHz, y una tasa de bits inferior a 192 kbps o
inferior.
< El audio codificado en 128 Kbps tendrá una calidad cercana a la de
los CD de audio normales. Aunque este reproductor reproducirá
pistas MP3 con velocidades de bits inferiores, la calidad de sonido
empeora notablemente a velocidades de bits inferiores.
La unidad de control remoto suministrada le permite controlar el
aparato a distancia.
Cuando opere con el control remoto, diríjalo hacia el sensor remoto
en el panel frontal del aparato.
< Aunque se utilice la unidad dentro del margen de funcionamiento
efectivo, es imposible el control a distancia si hay obstáculos
entre el reproductor y el control remoto.
< Si se utiliza la unidad cerca de otros aparatos que generen rayos
infrarrojos o si se emplean otros aparatos de control remoto por
rayos infrarrojos cerca del reproductor, es posible que éste no
funcione correctamente. Del mismo modo, es posible que los
otros aparatos tampoco funcionen correctamente.
Instalación de las pilas
Discos
< El disco debe estar finalizado para que pueda reproducirse.
< El CD-ROM debe ser compatible con ISO 9660.
< Cuando se graben más de 255 archivos en el disco, la unidad
puede no reproducirlo correctamente.
USB
< Esta unidad es compatible con USB 1.1 FULL SPEED (12Mbps).
< Este unidad puede reproducir archivos MP3 grabados en diversos
dispositivos de almacenamiento externos USB, tales como
memorias flash UBS, reproductores de MP3 o discos duros. El
disco duro debe estar formateado en FAT 16 o FAT 32, no en
NTFS.
< Cuando se graben más de 2.000 archivos en una memoria USB, la
unidad puede no reproducirla correctamente.
< Esta unidad puede no ser capaz de reproducir canciones
guardadas en un reproductor MP3 conectado a través de un
puerto USB.
1. Abra la tapa del compartimiento de las pilas.
2. Coloque dos pilas “AA”. Asegúrese de que las pilas queden
ubicadas con sus polos positivo + y negativo _ correctamente
posicionados.
3. Cierre la tapa hasta que se trabe.
Cambio de pilas
Si nota que ha disminuido la distancia necesaria para un control
correcto entre el control remoto y el reproductor, significa que
las pilas están gastadas. En este caso, reemplácelas por nuevas.
Precauciones con las pilas
< Asegúrese de insertar las pilas con sus polaridades positiva + y
negativa _ correctas.
< Utilice el mismo tipo de pilas. Nunca utilice diferentes tipos de
pilas juntas.
< Pueden utilizarse pilas recargables y no recargables. Refiérase a
las precauciones en sus rótulos.
ESPAÑOL
< Si no va a utilizar el control remoto por mucho tiempo (más de un
mes), retire las pilas para evitar pérdidas. Si se produce pérdidas,
limpie el líquido en el interior del compartimiento y cambie las
pilas por nuevas.
< No caliente ni desarme las pilas y nunca arroje pilas gastadas al
fuego.
37
Page 38

Conexión
CD
(LINE IN)
REMOTE CONTROL
R L
DIGITAL IN
(OPTICAL)
B
A C E
D
Grabadora de CD, platina MD, etc.
PD-H380
Amplificador (A-H380)
PRECAUCIÓN:
< Apague todos los equipos antes de realizar las conexiones.
< Lea las instrucciones de cada equipo que intenta utilizar con esta unidad.
38
Page 39

A
Blanco (L)
Rojo (R)
Blanco (L)
Rojo (R)
Salida de línea (LINE OUT)
Este conector transmite una señal de audio analógica de
dos canales. Inserte este conector en el conector de CD del
amplificador (A-H380) con un cable RCA.
Asegúrese de conectar:
Enchufe blanco q Enchufe blanco (L: canal izquierdo)
Enchufe rojo q Enchufe rojo (R: canal derecho)
D
Interruptor SELECTOR
Si los conectores REMOTE CONTROL de esta unidad y del
A-H380 están conectados con un cable de control remoto,
seleccione “SYSTEM“. Puede utilizar el mando a distancia
suministrado con el A-H380, para poder realizar convenientes
operaciones de control de sistema.
Cuando no utilice las operaciones del control del sistema, o no
posea un A-H380, seleccione “SINGLE“.
< Asegúrese de insertar firmemente cada enchufe. Para evitar
zumbidos y ruidos, evite poner los cables de conexión de señal
en haz con el cable de alimentación de CA o cables de altavoz.
B
Terminal DIGITAL OUT
Conéctelo a la terminal de entrada digital de un dispositivo
digital como una grabadora de CD, pletina de MD, etc. Utilice
un cable digital óptico disponible en comercios.
< El terminal óptico está cubierto por un obturador. Compruebe
que el cable está bien insertado, pero no fuerce el cable al
conectarlo o al extraerlo, para no provocar daños en la unidad.
C
Terminales REMOTE CONTROL
Con el modelo TEAC A-H380 se pueden usar las prácticas
funciones de control del sistema:
< Cuando pulse PLAY, el selector de entrada del A-H380 cambiará
automáticamente a “CD”.
< Si enciende el A-H380 cuando el selector de entrada del A-
H380 está ajustado en “CD“, la reproducción del CD comenzará
automáticamente.
E
Cable de alimentación (c.a.)
Una vez realizadas todas las conexiones restantes, conecte el
cable de alimentación a la toma mural.
< Asegúrese de conectar el cable de alimentación a una toma de
red que suministre la tensión adecuada.
< Al conectar o retirar el cable de alimentación, sostenga siempre
la clavija.
ESPAÑOL
Conecte el terminal REMOTE CONTROL (A o B) a los terminales
REMOTE CONTROL de los equipos A-H380 o T-H380, utilizando
el cable de conexión de control remoto facilitado. Posicione el
interruptor SELECTOR en SYSTEM. Encontrará más detalles en el
manual de instrucciones del A-H380.
39
Page 40

Identificación de las partes
DC EBA
FJ IK H G
A
T
S
L
R
V
N
U
F
D
E
Q
O
M
W
P X
40
Page 41

A
STANDBY/ON
Pulse este botón para encender la unidad o ponerla en el modo
de espera.
El indicador en espera es naranja cuando la unidad está en modo
de espera. Cuando se enciende la unidad, el indicador es azul.
B
Bandeja de disco
C
Open/close (L)
Utilice este botón para abrir y cerrar la bandeja de disco.
D
Stop (H)
Utilice este botón para detener la reproducción.
E
Play (G)
Utilice este botón para dar comienzo a la reproducción.
F
Pause (J)
Utilice este botón para activar una pausa en la reproducción.
G
Skip/Scan (.m/,/)
Utilice estos botones para omitir pistas. (página 44)
Durante la reproducción, mantenga pulsados estos botones para
buscar una pista o un archivo.
H
USB/CD
Utilice este botón para seleccionar modo USB o modo CD.
Q
SHUFFLE
Utilice este botón para activar la reproducción al azar. (página 47)
R
CLEAR
Utilice este botón para borrar un programa. (página 47)
S
PROGRAM
Utilice este botón para seleccionar el modo de programa.
T
ENTER
Utilice este botón para introducir una selección. (página 45)
U
DISPLAY
Durante la reproducción de MP3/WMA, utilice este botón para
cambiar la información visualizada.
V
TIME
Durante la reproducción, utilice este botón para cambiar la
visualización del tiempo.
W
FILE (b,5)
Utilice estos botones para seleccionar un archivo MP3/WMA.
(página 45)
X
SKIP (.//)
Utilice estos botones para saltar pistas o archivos.
I
Toma USB
Utilice para conectar el dispositivo de almacenaje USB exterior a
la unidad.
J
Sensor remoto
Cuando opere el control remoto, apúntelo hacia el sensor
remoto.
K
Pantalla
L
Botones numéricos
Utilice estos botones para seleccionar el número de pista o
archivo. Por ejemplo, para seleccionar la pista/archivo número 35,
pulse “3“ y “5“. (página 45)
M
REPEAT 1/ALL
Utilice este botón para seleccionar el modo de repetición. (página
48)
N
A-B
Utilice este botón para ajustar los puntos para la repetición AB.
O
FOLDER (5,b)
Utilice estos botones para seleccionar una carpeta de MP3/WMA.
ESPAÑOL
P
SCAN (m/,)
Durante la reproducción, utilice estos botones para buscar una
parte que desee escuchar.
41
Page 42

Reproducción (disco)
1
2 4 53
1
Pulse el botón STANDBY/ON para encender la unidad.
Indicador Standby/On
El indicador Standby/On pasa de naranja a azul.
Se visualizará “No Disc” si no hay un disco cargado.
< Si los conectores REMOTE CONTROL de esta unidad y del A-
H380 están conectados con un cable de control remoto, y el
REMOTE CONTROL SELECTOR está conmutado a “SYSTEM“,
puede encender esta unidad por medio del mando a distancia
suministrado con el A-H380.
< Seleccione “CD“ si la unidad está en modo “USB“.
2
Pulse el botón open/close (L).
4
Pulse el botón open/close (L) para cerrar la bandeja.
< Mantenga los dedos alejados de la bandeja móvil para evitar que
queden atrapados.
< La unidad tarda algunos segundos en cargar un disco. Ningún
botón funcionará durante la carga. Espere a que aparezca el
número total de pistas y el tiempo total de reproducción del
disco.
CD de audio
Se visualizan el número total de pistas y el tiempo total de
reproducción del disco.
Disco MP3/WMA
Se visualiza el número total de archivos del disco.
Se muestra “MP3“ aun cuando el archivo reproducido sea WMA.
3
Deposite un disco en la bandeja con la cara de la etiqueta
hacia arriba.
< El disco deberá quedar centrado en la bandeja. Si el disco no se
inserta correctamente, la bandeja podría quedar bloqueada y no
abrirse, por lo que conviene cargarlo debidamente centrado.
< No coloque nunca más de un disco en la bandeja.
< No pegue etiquetas ni cintas en el disco.
< No utilice discos con formas irregulares.
42
Page 43

31
2
5
Pul se el b otón P LAY (y ) para dar co mienz o a la
reproducción.
La reproducción se inicia en la primera pista o el primero archivo.
CD de audio
número de pista actual tiempo transcurrido de la pista
actual
Disco MP3/WMA
número de la carpeta actual
< Los archivos MP3/WMA grabados fuera de las carpetas se
ponen automáticamente en la carpeta “ROOT“; la reproducción
comienza con el primer archivo de la carpeta “ROOT“.
< Si hay carpetas que no tienen archivos MP3/WMA, la unidad
saltará las mismas.
Esta unidad no puede reproducir los archivos de un disco duro de
almacenamiento masivo.
1
Pulse el botón STANDBY/ON para encender la unidad.
2
Seleccione la función “USB“ pulsando el botón USB/CD.
Se muestra “Not connected“ (no conectado) si el dispositivo USB
no está conectado.
3
Conecte un dispositivo de memoria USB al puerto USB en
el panel delantero de la unidad.
La reproducción comienza desde el primer archivo.
ESPAÑOL
< Durante la reproducción de un archivo MP3/WMA, “nombre de
archivo_artista_Álbum“ se desplaza en la pantalla.
< La unidad se detiene automáticamente cuando ha finalizado la
reproducción de todas las pistas o archivos.
< Si carga un disco, y, a continuación, pulsa el botón PLAY (o los
botones numéricos del mando a distancia) sin haber cerrado la
bandeja para discos, ésta se cierra y comienza la reproducción.
< Guarde la tapa protectora suministrada para proteger el puerto
USB cuando no está en uso.
< Dependiendo del número de archivos y carpetas, la unidad
tardará varios minutos en cargar el dispositivo de memoria USB.
< Si se con ect a u n iP od s huff le a est e p uer to, no pod rá
reproducirse.
< Los archivos MP3/WMA grabados fuera de las carpetas se
ponen automáticamente en la carpeta “ROOT“; la reproducción
comienza con el primer archivo de la carpeta “ROOT“.
< Si hay carpetas que no tienen archivos MP3/WMA, la unidad
saltará las mismas.
< Durante la reproducción de un archivo MP3/WMA, “file name_
artisit_Album“ se desplaza en la pantalla.
< La unidad se detiene automáticamente cuando finalice la
reproducción de todas las pistas/archivos.
Cuando se pulsa el botón STOP (H ), la pantalla muestra el
número total de archivos.
número total de archivos
43
Page 44

Reproducción básica
CAB
D E
Para detener la reproducción
A
Pulse el botón STOP (H) para detener la reproducción.
Pa ra volver a iniciar la reproducción, pulse el bo tón d e
reproducción (G).
La reproducción comienza desde el primer archivo.
Para interrumpir momentáneamente la reproducción
B
(modo de pausa)
Pu lse el b otón PAUSE (J ) durante la reproduc ción . La
reproducción se detiene en la posición actual, y el indicador
PAUSE (J) se ilumina en la pantalla.
Para reanudar la reproducción, pulse el botón PLAY (G) o el
botón PAUSE (J).
Para saltar a la pista/archivo siguiente o anterior
D
Durante la reproducción, pulce el botón .m/,/
repetidas veces hasta localizar la pista o el archivo deseada. La
pista o el archivo seleccionada se reproducirá desde el principio.
Desde parada o pausa , pulse el botón. m /, /
repetidas veces hasta que localice la pista o el archivo que desea
oír. Pulse el botón PLAY para iniciar la reproducción desde la pista
el archivo seleccionada.
< Si pulsa el botón.mdurante la reproducción de un CD, la
pista o el archivo en curso se reproducirá desde el principio. Para
retroceder hasta el principio de la pista o el archivo anterior, pulse
dos veces el botón .m.
< Durante la reproducción programada, se saltará a la pista o el
archivo siguiente o anterior del programa.
Para expulsar el disco.
C
Cuando se pulsa el botón abrir/cerrar (L), la reproducción se
detiene y se abre la bandeja,
Una vez expulsado el disco, cierre la bandeja pulsando el botón
abrir/cerrar (L).
44
E
Búsqueda de un fragmento de la pista o el archivo
Durante la reproducción, mantenga pulsado el botón omitir/
escanear (.m/,/) y libérelo cuando encuentre la
parte que desea escuchar.
En el mando a distancia, utilice el botón escanear (m/,).
< La unidad se detiene cuando se alcanza el final de la última pista.
Page 45

Reproducción directa
1
3
2
4
F
En el modo de parada o reproducción, puede utilizar los botones
numéricos del control remoto para seleccionar la pista o el
archivo.
Pulse los botones numéricos para seleccionar una pista o el
archivo.
Búsqueda de carpetas
En el modo de parada o reproducción, puede seleccionar y
reproducir una carpeta deseada o archivo deseado en una
carpeta MP3/WMA.
1
Pulse los botones FOLDER (b /5) para seleccionar un
directorio.
Pista 3:
Pista 15:
Pista 23:
El orden de las carpetas puede cambiar dependiendo de la
jerarquía de las mismas.
2
Pulse el botón ENTER.
3
Si desea seleccionar un archivo, pulse los botones FILES
(b/5).
< Puede seleccionar un archivo en la carpeta seleccionada.
4
Pulse el botón ENTER.
ESPAÑOL
45
Page 46

Reproducción programada
2
1
3
./
ENTER
CLEAR
3
Pulse el botón PLAY (y ) para iniciar la reproducción
programada.
Pueden programarse hasta 40 pistas/archivos en el orden deseado.
La reproducción programada comienza y la unidad se detendrá
< Inserte un disco o conecte un dispositivo de memoria USB antes
de realizar la programación.
< Cuando se pulsa el botón SHUFFLE, se cancela el modo de
programa y comienza la reproducción al azar.
1
Pulse el botón PROGRAM desde la posición de parada.
automáticamente cuando finalice la reproducción del contenido
programado.
< Si pulsa el botón Time en el modo de programa, se mostrará
en la pantalla el número total de pistas y el tiempo total de
reproducción. Para comprobar el orden programado
.
< No se puede programar durante la reproducción.
2
Se leccione una pis ta/ arc hiv o m edi ant e l os bot one s
numéricos.
Para programar la pista/archivo 15:
Para comprobar el orden programado
Desde la posición de parada, pulse el botón PROGRAM repetidas
veces. En la pantalla aparecerán el número de pista/archivo y el
número de programa.
Para volver a la pantalla normal pulse el botón STOP (H).
Para borrar una pista del programa
la pista/archivo programado en programa 1
El número de pista/archivo destella después de pulsar el botón
numérico. Una vez completado el programa, el número de pista/
archivo dejará de parpadear.
< Si se pulsa el botón PROGRAM cuando el número de la pista/
archivo está parpadeando, se programará la pista/archivo y el
parpadeo se detendrá.
< Pueden programarse hasta 40 pistas. Si intenta programar más de
40 pistas/archivos, se muestra “P-FULL“ (el programa está lleno) y
no podrán programarse más pistas.
< Si comete un error, pulse el botón CLEAR. El último número
programado se eliminará de la lista. (disco solamente)
También puede programar pistas/archivos utilizando el botón
SKIP (.//) y pulsando el botón PROGRAM.
46
Desde la posición de parada, pulse el botón PROGRAM repetidas
veces hasta que aparezca en pantalla el número del programa del
que desea borrar la pista; a continuación, pulse el botón CLEAR.
Se borra del programa la pista/archivo seleccionado y se muestra
la siguiente pista/archivo seleccionado.
Page 47

Para añadir una pista al programa
1. En el modo de parada, pulse el botón PROGRAM repetidas veces
hasta que se muestre el número de programa donde desea
insertar una pista/archivo.
2. Seleccione el número de pista/archivo por medio de los botones
numéricos, a continuación pulse el botón PROGRAM.
Si desea añadir una pis ta a l final del programa, pulse el
botón PROGRAM repetidamente hasta que aparezca “P-End“
brevemente en la pantalla. Seguidamente, seleccione el número
de pista/archivo por medio de los botones numéricos y pulse el
botón PROGRAM. La pista/archivo se añade al programa.
Para cancelar el modo de programa
Reproducción al azar
Cuando se pulsa el botón SHUFFLE se reproducirán al azar las pistas
o archivos del disco en el dispositivo de memoria USB.
< Si pulsa el botón SHUFFLE o el botón STOP (H ) durante la
reproducción al azar, la unidad se detiene y se cancela el modo
de reproducción al azar.
< Si pulsa el botón / durante la reproducción al azar, la siguiente
pista se seleccionará al azar y se reproducirá. Si pulsa el botón
., la pista/archivo actual se reproducirá desde el principio.
No puede volver a reproducirse una pista/archivo durante la
reproducción al azar.
Cuando se pulsa el botón STOP (H) o el botón SHUFFLE en el
modo de parada, se cancela el modo de programa, pero no se
pierde el contenido programado.
Puede volver a la reproducción programada pulsando el botón
PROGRAM y el botón PLAY (G).
Para borrar el programa
< Los botones numéricos no funcionan durante la reproducción al
azar.
ESPAÑOL
1. Desde la posición de parada, pulse el botón PROGRAM.
2. Mantenga pulsado el botón CLEAR durante más de 2 segundos.
Si se pulsa el botón open/close (L ), también se borrará el
contenido programado.
47
Page 48

Repetición
R1 (Repetición simple)
Rf (Repetición de carpeta)
Ra (Repetición total)
(Repetición desactivada)
(Palpadea. Con sólo disco MP3/WMA)
Cada vez que pulse el botón REPEAT, el modo cambiará en el
siguiente orden:
< Cuando se pulsa el botón STOP (H), el modo de repetición se
cancela.
Repetición simple (R1)
La pista o el archivo que esté reproduciéndose se reproducirá
repetidamente. Si selecciona otra pista o otro archivo en el modo
de repetición 1, la pista o el archivo que se ha seleccionado se
reproducirá repetidamente.
Si selecciona otra pista/archivo en el modo R1, se reproducirá
repetidamente la pista/archivo seleccionado.
Repetición de una sección específica (A-B)
Esta función permite la reproducción repetida de cualquier parte
deseada del disco.
Asigne el punto en el cual desee iniciar la reproducción
repetida pulsando el botón A-B.
“Repeat A-” se encenderá y “B” parpadeará en la pantalla.
Al llegar al punto en el cual desee terminar la reproducción
repetida, pulse nuevamente el botón A-B.
“Repeat A-B” se encenderá.
La parte asignada con el botón A-B se reproducirá repetidamente.
< Para volver a la reproducción normal, pulse el botón A-B hasta
que “Repeat A-B” desaparezca de la pantalla.
< Debe haber más de 3 segundos entre A y B.
< Si pulsa uno de los siguientes botones, el modo de repetición A-B
quedará cancelado:
STOP, SKIP, 1/ALL, A-B, SHUFFLE, OPEN/CLOSE, STANDBY/ON
Repeat Folder (discos MP3/WMA solamente)
Todas las pistas de la carpeta se reproducirán repetidamente.
Si selecciona otra carpeta en el modo Rf, se reproducirán de
forma repetida las pistas/archivos en la carpeta.
< No puede seleccionar el modo Rf en el modo de parada.
< No puede seleccionar el modo Rf durante la reproducción de un
dispositivo de memoria USB.
Repetición total (Ra)
Todas las pistas o los archivos se reproducirán repetidamente.
< En el modo de programa, el contenido programado se reproduce
repetidamente.
48
Page 49

PantallaLectura de tiempo
Visualización predeterminada
(desplazamiento)
Nombre del archivo
Título de la canción
Nombre del artista
Nombre del álbum
Año
Comentario
Cada vez que pulse el botón TIME durante la reproducción, la lectura
cambiará en el siguiente orden:
En el modo de parada
El n úme ro total de p istas/archivos y el tiempo total de
reproducción
En el modo de reproducción
número de pista/archivo actual y tiempo transcurrido de la pista/
archivo actual
número de la carpeta actual (sólo MP3/WMA)
número de la pista/archivo actual y tiempo restante de la
pista/archivo actual
Durante la reproducción MP3, pulse el botón DISPLAY de forma
repetida para cambiar la información que se muestra.
Visualización predeterminada (desplazamiento):
Título de la canción -Nombre del artista - Nombre del álbum
La visualización cambia de la siguiente manera:
ESPAÑOL
El número total de pistas y el tiempo total de reproducción
(sólo CD de audio)
El número total de pistas y el tiempo total restante
(sólo CD de audio)
49
Page 50

Especificaciones
Solución de problemas
Respuestas de frecuencia . . . . . . . . . . . . . . . . . 20 Hz - 20 kHz, ±2.0 dB
Distorsión armónica total . . . . . . . . . . . . . .Less than 0.005 % (1 kHz)
Relación de señal a ruido (S/R) . . . . . . . . . . . . . . . . . More than 120 dB
(1 kHz, 0 dB, A weight)
Salida: . . . . . . . . . . . . . . . . . . . . . . . . Analog: 2.0 Vrms (RCA, 1kHz, 0db)
Digital: TOS OPTICAL
Alimentación . . . . . . . . . . . . . . . . . . . . . . . . . . . . . . . . . . . AC 230 V, 50 Hz
Consumo de energía . . . . . . . . . . . . . . . . . . . . . . . . . . . . . . . . . . . . . . 13 W
Dimensiones (A x Alt.x P) . . . . . . . . . . . . . . . . . . . . . 215 x 93 x 275 mm
Peso (neto) . . . . . . . . . . . . . . . . . . . . . . . . . . . . . . . . . . . . . . . . . . . . . . .2.8 kg
Accesorios estándar . . . . . . . . . . . . . . . . . . . . . . . . . . . . . . . Cable RCA x 1
Cable de conexión de control remoto x 1
Control remoto x1
Pilas (AA) x2
Manual del usuario x1
Tarjeta de garantía x1
< El diseño y las especificaciones están sujetos a cambios sin previo
aviso.
< El peso y dimensiones son aproximados.
< Las ilustraciones pueden diferir de los modelos de producción.
Reciclaje de su producto viejo
1. Cuando se adjunta a un producto este
símbolo tachado de un contenedor con
ruedas, significa que el producto está
cubierto por la Directiva Europea 2002/96/
EC.
2. T o do s los p ro du ctos el éc tr ic os y
electrónicos se deben reciclar de un modo separado del
sistema municipal de basura, a través de las instalaciones de
recogida señaladas por el gobierno o las autoridades locales
3. El reciclaje correcto de su producto viejo ayudará a prevenir
las consecuencias negativas potenciales para el ambiente y la
salud humana.
4. Para una información más detallada sobre el reciclaje de su
producto viejo, contacte por favor con su ayuntamiento,
servicio de basuras o la tienda en donde usted compró el
producto.
50
Si surge algún problema con la unidad, dedique unos instantes a
revisar los siguientes puntos por si puede solucionar el problema
sin necesidad de acudir al distribuidor o centro de servicio técnico
TEAC.
No hay corriente.
e Compruebe la conexión a la red. Compruebe que la fuente de
c.a. no es una toma conmutada y que, si lo es, el interruptor no
está activado. Compruebe que hay corriente en la toma de c.a.
conectando otro aparato como una lámpara o un ventilador.
No hay sonido
e Compruebe la conexión del amplificador.
e Compruebe que el amplificador funciona correctamente.
El control remoto no funciona.
e Si las pilas están agotadas, cámbielas.
e Emplee el control remoto sin sobrepasar la distancia indicada
(5 m) y apunte al panel frontal.
eRetire los obstáculos situados entre el mando a distancia y el
equipo.
eSi hay una luz fluorescente cerca del equipo, apáguela.
e Si desea operar con el mando a distancia suministrado con el
A-H380, conmute REMOTE CONTROL SELECTOR a “SYSTEM“, y
conecte los conectores REMOTE CONTROL de esta unidad y del
A-H380 con el cable de conexión de control remoto.
e Cuando utiliza el mando a distancia suministrado con el AH380,
pulse el botón CD del mando a distancia antes de la operación.
Imposible activar la reproducción.
e Inserte el disco con la cara grabada hacia abajo.
e Puede haber insertado un dis co vacío. Pruebe con uno
pregrabado.
e Dependiendo del formato, etc., quizá no sea posible reproducir
discos CD-R/CD-RW. Vuelva a intentarlo con otro disco.
e No se pueden reproducir discos CD-R/CD-RW que no tengan la
sesión cerrada. Cierre la sesión del disco en una grabadora de
CD e inténtelo de nuevo.
Intermitencias en el sonido.
e Coloque la unidad sobre una superficie estable, sin riesgos de
vibraciones o impactos.
e Si el disco está sucio, limpie su superficie.
e No utilice discos rayados, dañados o deformados.
No se puede reproducir el programa.
e Si la unidad se apaga o se abre la bandeja, el contenido
programado se borra.
Si no se restablece el funcionamiento normal, desconecte el
cable de alimentación de la toma y vuélvalo a conectar.
Atención a la condensación
Si la unidad (o un disco) se traslada de un entorno frío a
uno cálido, o se utiliza después de un cambio repentino de
temperatura, existe el riesgo de condensación: el vapor del aire
se podría condensar en el mecanismo interno y provocar errores
de funcionamiento. Para evitarlo, o en caso de que suceda, deje
la unidad encendida una o dos horas. Así se estabilizará a la
temperatura ambiental.
Mantenimiento
Si se ensucia la superficie del equipo, pase un paño suave o utilice
jabón líquido normal diluido. Limpie cualquier resto líquido
que pueda quedar en la unidad. No utilice aguarrás, bencina ni
alcohol, ya que podría dañar el acabado de la unidad. Espere a
que se seque por completo la superficie de la unidad antes de
utilizarla.
Page 51

Page 52

Z
TEAC CORPORATION
TEAC AMERICA, INC. 7733 Telegraph Road, Montebello, California 90640 Phone: (323) 726-0303
TEAC CANADA LTD. 5939 Wallace Street, Mississauga, Ontario L4Z 1Z8, Canada Phone: (905) 890-8008
TEAC MEXICO, S.A. De C.V Rio Churubusco 364, Colonia Del Carmen, Delegación Coyoacàn, CP 04100, México DF, México
TEAC UK LIMITED Unit 19 & 20, The Courtyards, Hatters Lane, Watford, Hertfordshire, WD18 8TE, U.K. Phone: (0845) 130-2511
TEAC EUROPE GmbH Bahnstrasse 12, 65205 Wiesbaden-Erbenheim, Germany Phone: 0611-71580
This appliance has a serial number located on the rear panel. Please record the
model number and serial number and retain them for your records.
Model number Serial number
1-47 Ochiai, Tama-shi, Tokyo 206-8530, Japan Phone: (042) 356-9156
Phone: (5255)5010-6000
0708.MA-1384A
 Loading...