

Page 1
PC-D910i
Portable CD Boombox for iPhone/iPod
Thank you for purchasing Teac. Please read this manual carefully to obtain the best performance from this
Portable CD Radio
OWNER’ S MANUAL
Page 2
CAUTION
INVISIBLE LASER RADIATIONW HEN OPEN
AND INTERLOCKS DEFEATED. AVOID
EXPOSURE TO BEAM
RISK OF ELECTRIC SHOCK
DO NOT OPEN
CAUTION:TO MINIMISE THE RISK OF ELECTRIC SHOCK, NEVER REMOVE
THE COVER.THIS PRODUCT CONTAINS NO USER-SERVICEABLE PARTS.
ONLY QUALIFIED REPAIR TECHNICIANS SHOULD WORK ON THIS
EQUIPMENT.
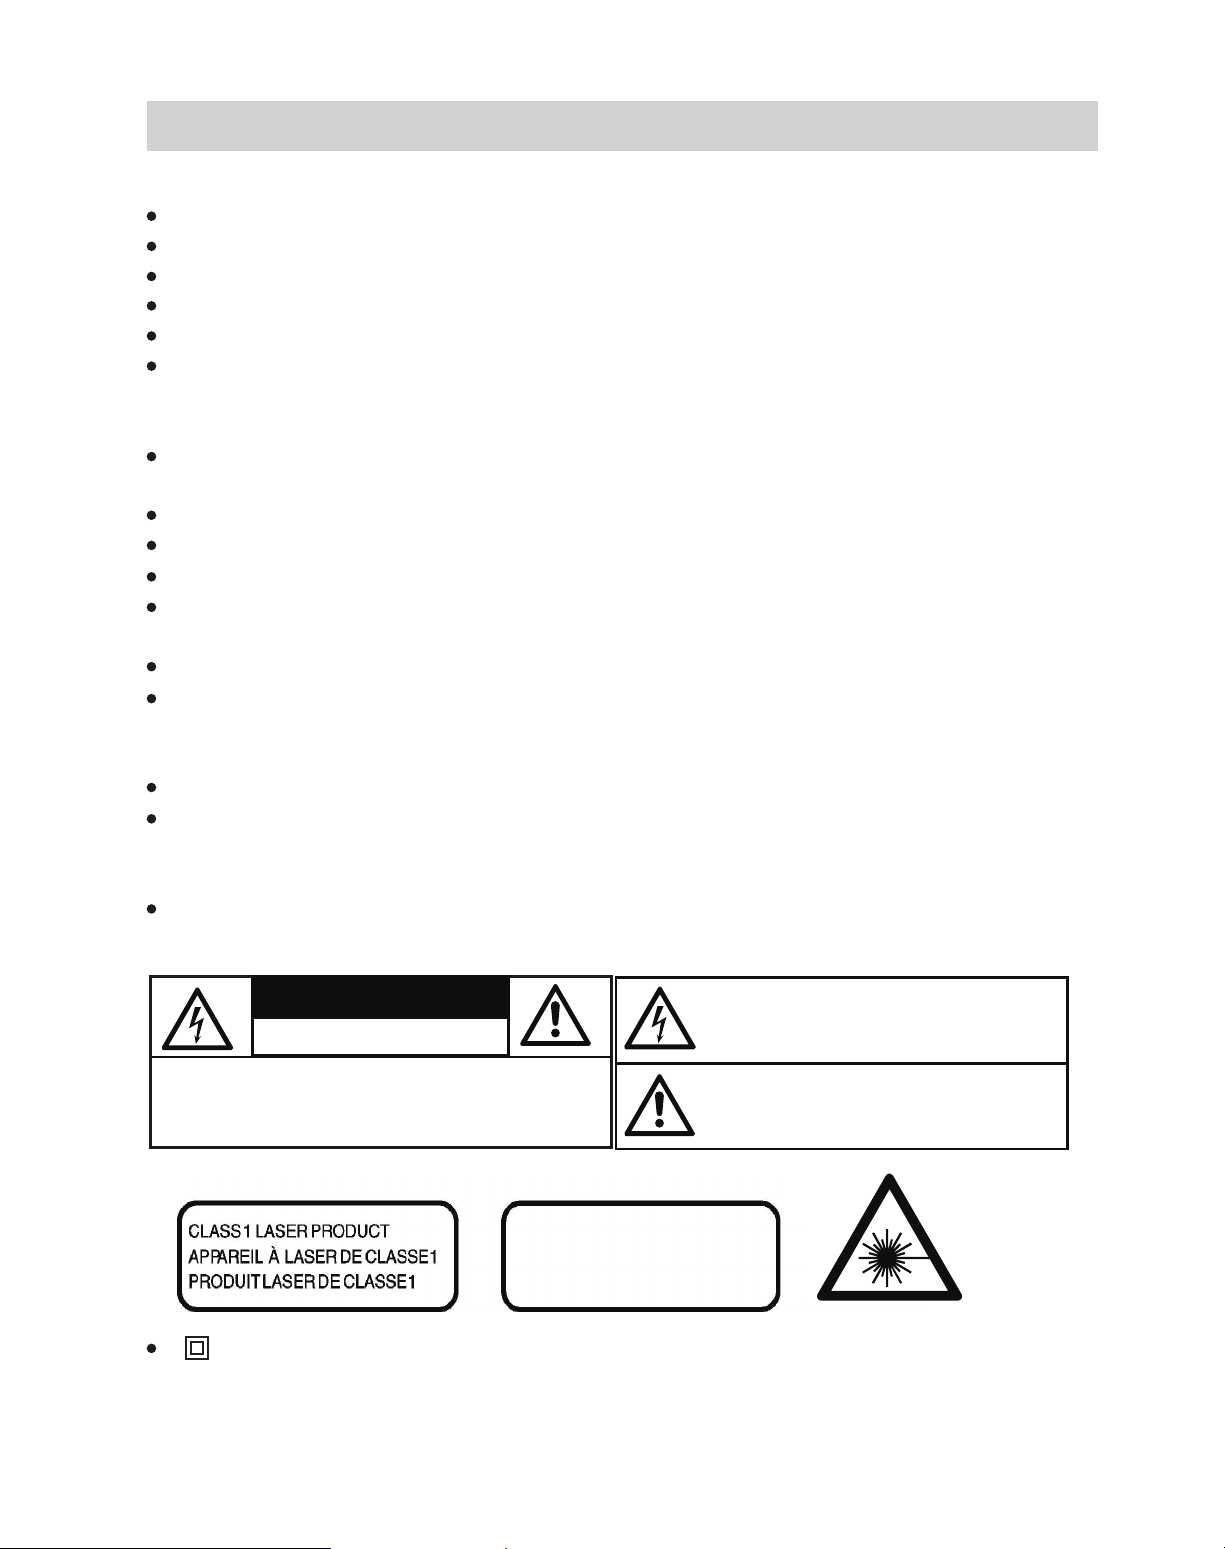
The lighting symbol inside an equilateral triangle warns the
user of the presence inside the product of un-insulated
hazardous electric voltages powerful enough to represent an
electrocution risk.
The exclamation on mark symbol inside an equilateral triangle
warns the user that important operating and servicing
(troubleshooting) instructions are contained in the
documentation accompanying the product.
HAZARD WARNING
SAFETY PRECAUTION
Keep away from water or moisture and dusty areas.
Ambient temperature 0~35°C. Never store in hot and very cold areas.
Be careful to avoid dropping or strong impact.
Do not try to open the case alone without technical support.
Only use attachments/accessories specified by the manufacturer.
Only connect the device at a properly installed plug socket . Pay attention that the
specific voltage corresponds to the voltage of the plug socket. The socket-outlet shall be
installed near the equipment and shall be easily accessible.
The ventilation should not be impeded by covering the ventilation openings with items
such as newspaper, table-cloths, curtains etc.
The minimum distances around the apparatus for sufficient ventilation is 10cm.
The apparatus should be used in moderate climate
No naked flame sources such as lighted candles should be placed on the apparatus.
The apparatus should not be exposed to water and objects filled with liquids, such as vases,
should not be placed on the apparatus.
Batteries should not be exposed to excessive heat such as extreme sunshine, or direct fire.
Never open the housing of the device. Incorrect repairs can constitute a considerable
risk for the user. Should the device become damaged, in particular the mains supply
cable, do not operate the device any longer, but rather have it repaired by an expert.
Check the mains supply cable regularly for damage.
For safety reasons a broken or damaged mains lead may only be replaced by an
equivalent lead from the manufacturer, our customer service department or a qualified
person.
If the device is not used for a longer period, remove the plug connector from the plug
socket or take out the batteries.
This is CLASS II apparatus with double insulation, and no protective earth provided.
2
Page 3
5
8 1112 13
9 106 7
4
3
14
21
15 16 17
18
19
20
21
5
26
25
24
23
22
Page 4

4
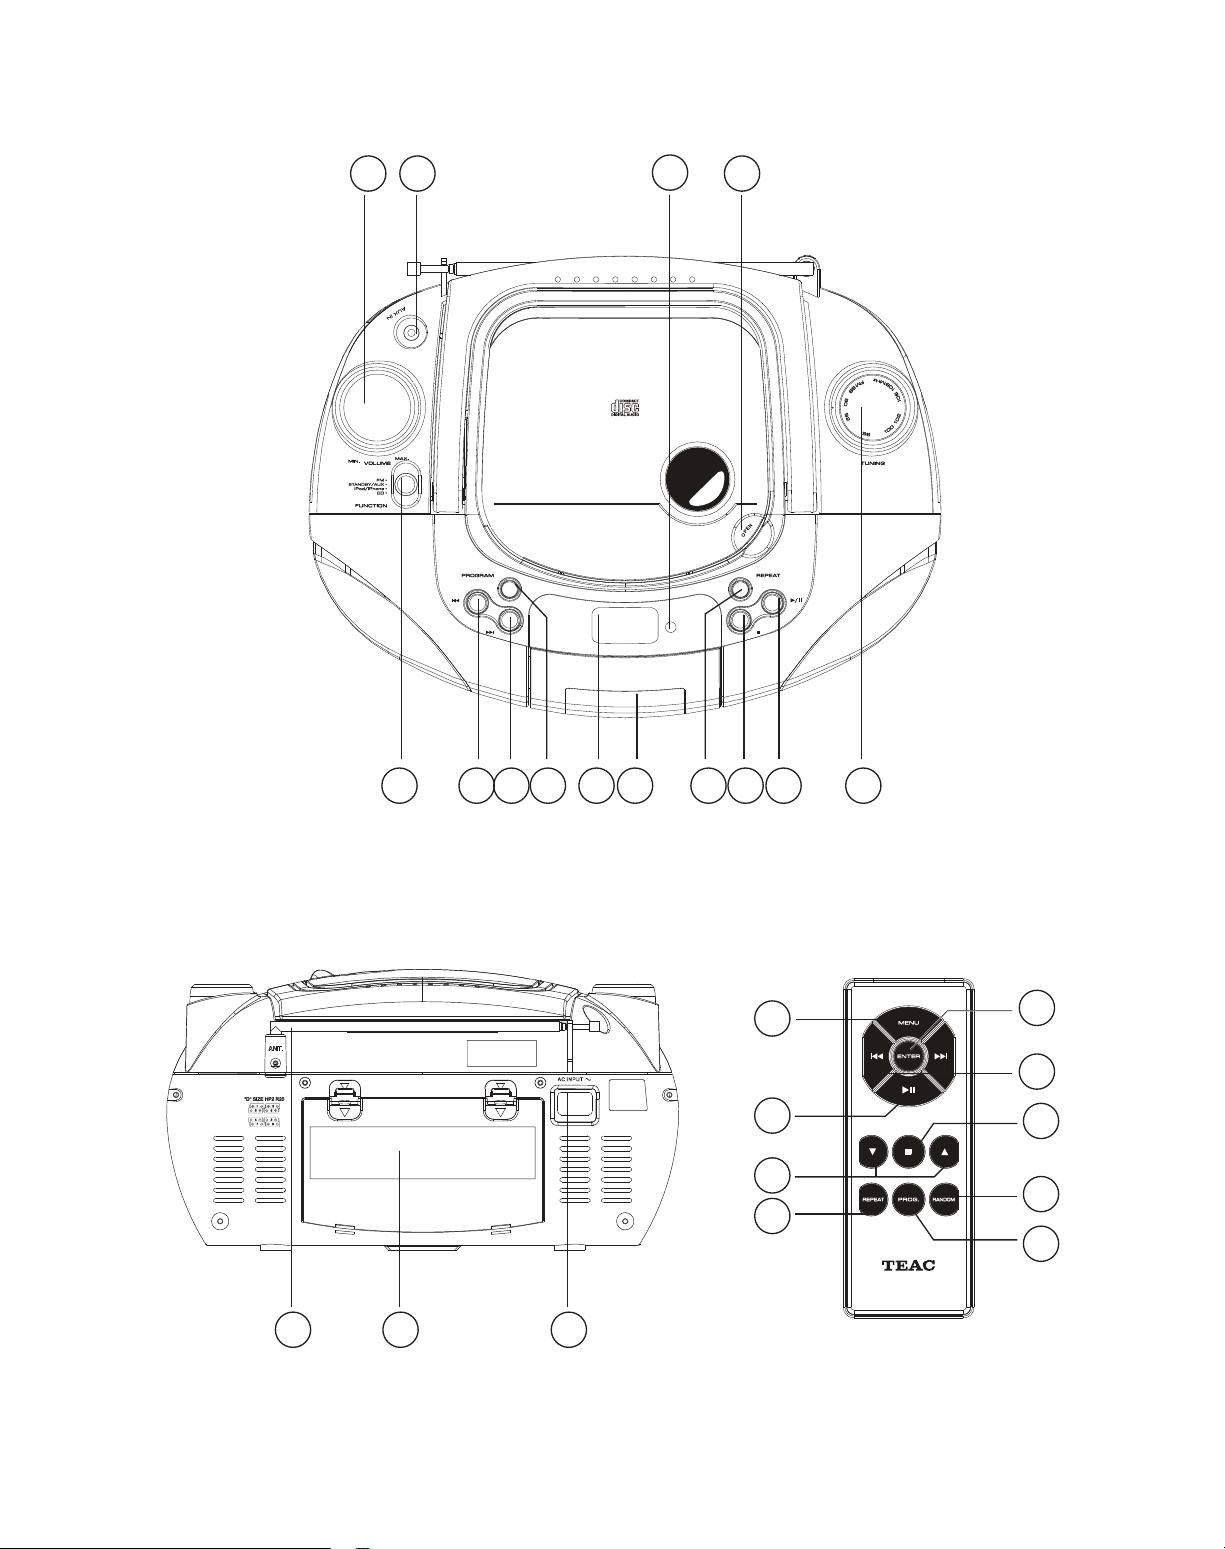
CONTROLS
1.VOLUME KNOB
- adjusts volume level.
2. AUX IN JACK
- 3.5mm AUX IN jack.
3.CD DOOR
-press here to open/close the CD door.
4.FUNCTION SELECTOR
- select source of sound FM,AUX, iPhone , CD
5. SKIP
--skips track backward.
6. SKIP
- skips track forward.
7. PROG.
-program and reviews programmed track numbers
8. DISPLAY
- show the CD functions
9.iPod/iPhone DOCK
-push here to open /close the iPod/iPhone door.
10.REPEAT
-play the track with repeat mode.
11.
STOP
-stop CD playback
-clear CD program.
12.
PLAY/PAUSE
-starts or pause CD/iPod play.
13. TUNING CONTROL
-select FM stations.
14. Remote sensor
15. FM ANTENNA
- to improve FM reception.
16. BATTERY DOOR
- battery compartment.
17. AC POWER
Using AC Power
1. Check if the power voltage, as shown on the
type plate local on the back of the set,
corresponds to your local AC power supply. If it
does not, consult your dealer or service centre.
2. Connect the power cord to the AC MAINS inlet
and the wall outlet. The power supply is now
connected and ready f
or use.
3. To switch off completely, unplug the power cord
From the wall outlet
• Unplug the power cord from the wall outlet to
protect your set during heavy thunderstorms.
• If the electric cable is damaged, it must be
replaced by the manufacturer, or by the
qualification persons, in order to avoid a danger.
Using the batteries (not included)
Open the battery compartment and insert eight
batteries, type 1.5V x 8 “D” SIZE HP2 R20,
(preferably alkaline) with the correct polarity as
indicated by the “+” and “-” symbols inside the
compartment.
Batteries contain chemical substances, so they
should be disposed of properly.
Incorrect use of batteries can cause electrolyte
leakage and will corrode the compartment or
cause the batteries to burst. Therefore:
• Do not mix battery types: e.g. alkaline
with carbon zinc. Only use batteries of
the same type for the set.
• When inserting new batteries, do not try to mix
old batteries with the new ones.
• Remove the batteries if the set is not to be used
for a long time.
18. MENU: select iPod/iPhone menu
19.
: starts or pause CD/MP3 play
20. UP/DOWN: select iPod/iPhone item
upward/downward
21. REPEAT: select repeat play mode
22. ENTER: enter to the item
23. SKIP
, : CD/MP3: skips track
backwards or forward
24. STOP: stop CD play
25. RANDOM: select random play mode
26. PROG.: play CD in program
Top and front panels (See 1 )
BACK Panel (See 1 )
Power Supply
Remote Control Handset (See 1 )
Page 5

5
Switching power on/off: Save energy to avoid
Unnecessary energy consumption always turn
OFF the unit when not in use.
.
1.To select your sound source adjust the
FUNCTION select to FM, AUX, iPhone, CD.
2 Adjust the sound with the VOLUME controls.
reyalp oidua lanosrep morf cisum yalp oT
1 .Slide FUNCTION selector to AUX position.
2. Connect your personal audio player to the
AUX IN jack.
3.Set the audio player to play.
4. Rotate the volume knob on your au
dio system
to the level you require. If the volume is not
setting high enough you may need to increase
the volume on your audio player.
Radio reception
1. Side the FUNCTION selector to FM position.
2. Rotate the TUNING control to find the desired
stations.
- For FM, pull out the telescopic antenna.
Inline and turn the antenna, reduce its
length if the signal is too strong (too close
to a transmier).
- This unit does not contain AM radio.
BASIC FUNCTION
RADIO
General operaon
AUX IN
Page 6

6
iPod/iPhone operation
Basic playback
1. Carefully align and gently insert the iPod/iPhone into the dock. Remove any case or
skin from the iPod/iPhone before attempting to dock.
2. Slid FUNCTION selector to iPhone position.
3. Press the MENU button (remote control only) to enter the main menu.
4. Press the UP or DN button (remote control only) to select the desired item.
5. Press the ENTER button (remote control only) to select the desired item.
6. Press the
button to skip to next track.
Press the button to skip back to the beginning of track currently play, press the
button again immediately to skip to previous track.
Temporarily stopping play
Press the PLAY/PAUSE
button. To resume play, press the button again.
Before use
Open the iPod holder, dock the iPod/iPhone correctly.
Note:
The iPod/iPhone will be charged when the unit is powered on.
This unit operates with the below iPod/iPhone models:
Apple is not responsible for the operation of this device or its compliance with safety and
regulatory standards.
Please note that the use of this accessory with iPod or iPhone may affect wireless
performance.
Page 7

7
CD PLAYER
CD Player
Playing a CD
This CD-player can play Audio discs,CD-R, and
CD Rewritables. Do not try to play CD-ROM,
CD-ROM,CDI,VCD,DVD or computer CD.
1 Adjust the FUNCTION selector to CD.
→Display: shows﹍Briefly.
2 To open the CD door, press the CD door at
the edge marked OPEN.
3 Insert a CD,CD-R or CD-RW with the printed
side facing up and press the CD door gently
to close it.
4 Press PLAY/PAUSE on the set to start
playback.
5 To pause playback press PLAY/PAUSE.
To resume, press PLAY/PAUSE again.
6 To stop CD playback, press STOP.
Selecting a different track
During playback you can use
or to select a
Particular track..
If you have selected a track number in the stop
or pause position, press PLAY/PAUSE to start
playback.
Press
once briefly for the next track, or
press repeatedly until the desired track number
appears on the display.
Press
more than once briefly for a previous
track.
REPEAT MODE:
REPEAT-plays the current track continuously
REPEAT ALL-plays the entire CD continuously
·
Press REPEAT button repeatedly to through
the repeat mode listed below
REPEAT 1﹥REPEAT ALL﹥NORMAL
Programming track numbers
You may store up to 20 tracks in the desired
sequence. If you like, store any track more than
once.
1 In the STOP mode, press PROG. button
-the display shows“01”and“PROG.”briefly.
2 Press
or for your desired track.
3 Press PROG. button to store the track
4 Repeat steps 1 to 3 to store all desired
tracks in this way.
5 To play your program, press PLAY/PAUSE.
Reviewing your set program
In the stop mode, press
or ,the display
will show you stored tracks.
Erasing a program
You can erase the contents of the
-Opening the CD door;
-Selecting other source;
-Press STOP button twice
Page 8

8
•Place the set on a hard and flat surface
so that the system does not tilt.
•Do not expose the set, batteries or CDs
to humidity, rain, sand or excessive heat
caused by heating equipment or direct
sunlight.
•Do not cover the set. Adequate
ventilation with a minimum gap of 6
inches between the ventilation holes
and surrounding surfaces is necessary
to prevent heat build-up’.
•The mechanical parts of the set contain
self-lubricating bearings and must not be
oiled to lubricated.
•To clean the set, use a soft dry cloth. Do
not use any cleaning agents containing
alcohol, ammonia, benzene or abrasives
as these may harm the housing.
•The lens of the CD player should never be touched!
•Sudden changes in the surround temperature can cause condensation to form and the
Lens of your CD player to cloud over. Playing a CD is then not possible. Do not attempt
to clean the lens but leave the set in a warm envir
onment until the moisture evaporats.
•Always close the CD door to keep the CD compartment dust-free. To clean, dust the
compartment with a soft dry cloth.
•To clean the CD, wipe in a straight line from the centre towards the edge using a soft,
lint-free cloth. Do not use cleaning agents as they may damage the disc.
•Never write on a CD or attach any stickers to it.
MAINTENANCE & SAFETY
Precauons & General Maintenance
CD player and CD handing
Page 9

9
If a fault occurs, first check the points listed below before taking the set for repair.
Do not open the set as there is a risk of electric shock.
If you are unable to remedy a problem by following these hints, consult your dealer or service center.
WARNING: Under no circumstances should you try to repair the set yourself ,as this will invalidate the
warranty.
-Problem
•Solution
NO sound/power
No disc indication
-Volume not adjusted -No CD inserted
•Adjust the VOLUME •Insert a CD,CD-R or CD-RW
-Power cord not securely connected
•Connect the AC power cord properly
-Batteries dead/incorrectly inserted - Laser lens steamed up
•Insert(fresh) batteries correctly •Wait until lens has cleared
Display does not function properly/ -CD-R is blank or the disc is not
No reaction to operation of any of the finalized
Control
•Use a finalized CD-R
-Electrostatic discharge
•Switch off and unplug set. Reconnect
after a few seconds
)ecnanetniam ees( DC naelc/ecalpeR•
iPod/iPhone does not respond
-Laser lens steamed up
-iPod not docked properly •Wait until lens has adjust to room
•Remove the iPod from the dock and temperature
check for obstruction on the connectors in
the dock and on your iPod .Then reseat it
in the dock.
-iPod software
•Replace or clean CD
•Upgrade your software on your iPod .For
details visit http://www.apple.com
or use
iTunes on your computer. Check the volume
setting. Make sure your iPod is working
properly before docking into the unit.
Please refer to our iPod manual for details.
Refer to iPod manual for details on how to
perform a reset.
We have done our best to reduce the packing and make it easy to separate into 3
materials: cardboard, paper pulp and expandable polyethylene.
Your set consists of materials which can be recycled if disassembled by a specialized
company. Please observe the local regulations regarding the disposal of packaging,
dead batteries and old equipment.
TROUBLESHOOTING
Troubleshoong
Environmental informaon
CD playback does not work
-CD badly scratched or dirty
-CD badly scratched or dirty
•Replace/clean CD, see Maintenance
The CD skips tracks
-CD damaged or dirty
•Replace or clean CD
-Program is active
•Quit Program(s)
Page 10

10
Specifications:
•Power supply : AC 240V, 50Hz
•Power consumption : 18watts
•Dimensions of unit : 295 (W)*175(H)*220(D)mm.
•Frequency range : FM 88 – 108MHz
•Antenna : FM-TELESCOPIC
ANTENNA.
•CD Section : TOP LOADING PLAYER.
•CD Size : 5”&3”COMPATIBLE.
•AUX IN Jack : 3.5mm.
Specification subjects to be changed without notice.
SPECIFICATION SPECIFICATION
Page 11

T E A C C O R P O R A T I O N
1-47,Ochiai,Tama-shi,Tokyo 206-8530,Japan
 Loading...