

Page 1
Z
CQX1A1705Z
NP
Integrated Amplifier
-
Network /USB DAC
MANUAL DEL USUARIO
BEDIENUNGSANLEITUNG
MANUALE DI ISTRUZIONI
GEBRUIKSAANWIJZING
H750
ENGLISH DEUTSCH ITALIANO
OWNER'S MANUAL
MODE D’EMPLOI
BRUKSANVISNING
FRANÇAIS ESPAÑOL
NEDERLANDS
SVENSKA
Page 2
IMPORTANT SAFETY PRECAUTIONS
CAUTION: TO REDUCE THE RISK OF ELECTRIC SHOCK,
DO NOT REMOVE COVER (OR BACK). NO USERSERVICEABLE PARTS INSIDE. REFER SERVICING TO
QUALIFIED SERVICE PERSONNEL.
For North American model:
This device complies with “Part 15 of FCC Rules” and
“RSS-Gen of IC Rules”.
Operation is subject to the following two conditions:
(1) this device may not cause interference, and (2) this
device must accept any interference, including interference that may cause undesired operation of this device.
The lightning flash with arrowhead in an equilateral triangle is intended to alert the user to
the presence of uninsulated “dangerous volt-
M
V
age” within the product’s enclosure that could
be of sufficient magnitude to constitute a risk
of electric shock to persons.
The exclamation point in an equilateral triangle is intended to alert the user to the
presence of important operating and maintenance (servicing) instructions in the literature
accompanying the appliance.
WARNING: TO PREVENT FIRE OR
SHOCK HAZARD, DO NOT EXPOSE THIS
APPLIANCE TO RAIN OR MOISTURE.
CAUTION
< DO NOT REMOVE EXTERNAL CASES OR CABINETS TO
EXPOSE THE ELECTRONICS. NO USER SERVICEABLE
PARTS ARE WITHIN!
<
IF YOU ARE EXPERIENCING PROBLEMS WITH THIS
PRODUCT, CONTACT TEAC FOR A SERVICE REFERRAL. DO
NOT USE THE PRODUCT UNTIL IT HAS BEEN REPAIRED.
<
USE OF CONTROLS OR ADJUSTMENTS OR PERFORMANCE
OF PROCEDURES OTHER THAN THOSE SPECIFIED HEREIN
COULD RESULT IN HAZARDOUS RADIATION EXPOSURE.
IN NORTH AMERICA USE ONLY ON 120 V SUPPLY.
2
This Class B digital apparatus complies with Canadian
ICES-003.
Cet appareil numérique de la classe B est conforme à la
norme NMB-003 du Canada.
CAUTION
Changes or modifications to this equipment not
expressly approved by TEAC CORPORATION for compliance will void the user’s warranty.
NOTE
For product available in the USA/Canada market, only
channels 1 to 11 can be operated. Selection of other channels is not possible.
This transmitter must not be co-located or operating in
conjunction with any other antenna or transmitter.
Information to the user:
This equipment has been tested and found to comply
with the limits for a Class B digital device, pursuant to
Part 15 of the FCC Rules. These limits are designed to
provide reasonable protection against harmful interference in a residential installation. This equipment
generates, uses, and can radiate radio frequency energy
and, if not installed and used in accordance with the
instructions, may cause harmful interference to radio
communications. However, there is no guarantee that
interference will not occur in a particular installation.
If this equipment does cause harmful interference
to radio or television reception, which can be determined by turning the equipment off and on, the user is
encouraged to try to correct the interference by one or
more of the following measures:
• Reorient or relocate the equipment and/or the receiving antenna.
• Increase the separation between the equipment and
receiver.
• Connect the equipment into an outlet on a circuit different from that to which the receiver is connected.
• Consult the dealer or an experienced radio/TV technician for help.
Page 3

MPEG Layer-3 audio coding technology licensed from
Fraunhofer IIS and Thomson.
Radiation Exposure Statement
This equipment complies with FCC/IC radiation
exposure limits set forth for an uncontrolled environment, meets the FCC radio frequency (RF) Exposure
Guidelines, and RSS-102 of the IC radio frequency (RF)
Exposure rules.
End-users and installers must be provided with antenna
installation instructions and transmitter operating conditions for satisfying RF exposure compliance.
Note
This equipment should be installed and operated with
minimum distance 20 cm between the radiator and your
body.
Q Precautions concerning batteries
Misuse of batteries could cause them to rupture or leak
leading to fire, injury or the staining of nearby things.
Please read and observe the following precautions
carefully.
o Be sure to insert the batteries with correct positive
(+) and negative (_) orientations.
o Use batteries of the same type. Never use different
types of batteries together.
o If the remote control is not used for a long time (more
than a month), remove the batteries to prevent them
from leaking.
o If the batteries leak, wipe away the leakage inside
the battery compartment and replace the batteries
with new ones.
o Do not use batteries of types other than those speci-
fied. Do not mix new batteries with old ones or use
different types of batteries together.
o Do not heat or disassemble batteries. Never throw
batteries into fire or water.
o Do not carry or store batteries with other metallic
objects. The batteries could short circuit, leak or
explode.
o Never recharge a battery unless it is confirmed to be
a rechargeable type.
Wi-Fi is a mark of the Wi-Fi Alliance.
The Wi-Fi CERTIFIED Logo is a certification mark of the
Wi-Fi Alliance.
This product is protected by certain intellectual property
rights of Microsoft. Use or distribution of such technology
outside of this product is prohibited without a license from
Microsoft.
Windows, Windows Vista, Windows 7, Windows Media and
Internet Explorer are either registered trademarks or trademarks of Microsoft Corporation in the United States and/or
other countries.
“Made for iPod,” “Made for iPhone,” and “Made for iPad”
mean that an electronic accessory has been designed to
connect specifically to iPod, iPhone, or iPad, respectively,
and has been certified by the developer to meet Apple
performance standards.
Apple is not responsible for the operation of this device or
its compliance with safety and regulatory standards.
Please note that the use of this accessory with iPod,
iPhone, or iPad may affect wireless performance.
Apple, Macintosh, Mac OS X, AirPlay, the AirPlay logo,
iPad, iPhone, iPod, iPod nano, iPod touch and iTunes are
trademarks of Apple Inc., registered in the U.S. and other
countries.
IOS is a trademark or registered trademark of Cisco in the
U.S. and other countries and is used under license.
DLNA®, the DLNA Logo and DLNA CERTIFIED® are trademarks, service marks, or certification marks of the Digital
Living Network Alliance.
Other company names, product names and logos in this
document are the trademarks or registered trademarks of
their respective owners.
NOTE: Open source software copyright and license infor-
mation is included at the end of this manual.
ENGLISH
3
Page 4

IMPORTANT SAFETY INSTRUCTIONS
1) Read these instructions.
2) Keep these instructions.
3) Heed all warnings.
4) Follow all instructions.
5) Do not use this apparatus near water.
6) Clean only with dry cloth.
7) Do not block any ventilation openings. Install in accordance with the manufacturer's instructions.
8) Do not install near any heat sources such as radiators,
heat registers, stoves, or other apparatus (including
amplifiers) that produce heat.
9) Do not defeat the safety purpose of the polarized or
grounding-type plug. A polarized plug has two blades
with one wider than the other. A grounding type plug
has two blades and a third grounding prong. The wide
blade or the third prong are provided for your safety. If
the provided plug does not fit into your outlet, consult
an electrician for replacement of the obsolete outlet.
10) Protect the power cord from being walked on or
pinched particularly at plugs, convenience receptacles,
and the point where they exit from the apparatus.
11) Only use attachments/accessories specified by the
manufacturer.
12) Use only with the cart, stand, tripod, bracket, or table specified by
the manufacturer, or sold with the
apparatus. When a cart is used, use
caution when moving the cart/
apparatus combination to avoid
injury from tip-over.
13) Unplug this apparatus during lightning storms or when
unused for long periods of time.
14) Refer all servicing to qualified service personnel.
Servicing is required when the apparatus has been
damaged in any way, such as power-supply cord or
plug is damaged, liquid has been spilled or objects
have fallen into the apparatus, the apparatus has been
exposed to rain or moisture, does not operate normally, or has been dropped.
The apparatus draws nominal non-operating power
o
from the AC outlet with its POWER or STANDBY/ON
switch not in the ON position.
The mains plug is used as the disconnect device, the
o
disconnect device shall remain readily operable.
Caution should be taken when using earphones or
o
headphones with the product because excessive sound
pressure (volume) from earphones or headphones can
cause hearing loss.
CAUTION
Do not expose this apparatus to drips or splashes.
o
Do not place any objects filled with liquids, such as
o
vases, on the apparatus.
Do not install this apparatus in a confined space such
o
as a book case or similar unit.
The apparatus should be located close enough to the
o
AC outlet so that you can easily reach the power cord
plug at any time.
If the product uses batteries (including a battery pack
o
or installed batteries), they should not be exposed to
sunshine, fire or excessive heat.
CAUTION for products that use replaceable lithium
o
batteries: there is danger of explosion if a battery is
replaced with an incorrect type of battery. Replace
only with the same or equivalent type.
WARNING
Products with Class construction are equipped with a
power supply cord that has a grounding plug. The cord
of such a product must be plugged into an AC outlet
that has a protective grounding connection.
CLASS apparatus with double insulation,
and no protective earth provided.
4
Page 5
For European Customers
Pb, Hg, Cd
Disposal of electrical and electronic equipment
(a) All electrical and electronic equipment should be
disposed of separately from the municipal waste
stream via collection facilities designated by the
government or local authorities.
(b) By disposing of electrical and electronic equipment
correctly, you will help save valuable resources and
prevent any potential negative effects on human
health and the environment.
(c) Improper disposal of waste electrical and electronic
equipment can have serious effects on the environment and human health because of the presence of
hazardous substances in the equipment.
(d) The Waste Electrical and Electronic
Equipment (WEEE) symbol, which shows
a wheeled bin that has been crossed out,
indicates that electrical and electronic
equipment must be collected and disposed of separately from household waste.
(e)
Return and collection systems are available to end
users. For more detailed information about the
disposal of old electrical and electronic equipment,
please contact your city office, waste disposal service
or the shop where you purchased the equipment.
Disposal of batteries and/or accumulators
(a) Waste batteries and/or accumulators should be
disposed of separately from the municipal waste
stream via collection facilities designated by the
government or local authorities.
(b) By disposing of waste batteries and/or accumulators
correctly, you will help save valuable resources and
prevent any potential negative effects on human
health and the environment.
(c)
Improper disposal of waste batteries and/or accumulators can have serious effects on the environment
and human health because of the presence of hazardous substances in them.
(d)
The WEEE symbol, which shows a wheeled
bin that has been crossed out, indicates
that batteries and/or accumulators must be
collected and disposed of separately from
household waste.
If a battery or accumulator contains more than the
specified values of lead (Pb), mercury (Hg), and/or
cadmium (Cd) as defined in the Battery Directive
(2006/66/EC), then the chemical symbols for those
elements will be indicated beneath the WEEE symbol.
(e) Return and collection systems are available to end
users. For more detailed information about the disposal of waste batteries and/or accumulators, please
contact your city office, waste disposal service or the
shop where you purchased them.
ENGLISH
55
Page 6

Contents
Before use
Thank you for choosing TEAC. Read this manual carefully to get the best performance from this unit.
Before use ......................................................6
Files ............................................................8
Connecting speakers ...........................................9
Connections ...................................................11
Names and functions of parts (main unit) ......................14
Names and functions of parts (remote control unit) ............16
Using the remote control unit .................................19
Playing back music on a computer .............................20
Setting the current time .......................................23
Basic operation ................................................24
About the ErP .................................................27
Listening files on a USB flash drive .............................27
Searching inside folders .......................................29
Information shown on the display .............................30
Shuffle playback ...............................................30
Repeat playback ...............................................31
Listening to an iPod/iPhone/iPad ..............................32
Initial network setup ...........................................34
Network configuration .........................................37
Listening to the Internet radio .................................38
Internet radio portal ...........................................41
Setting up the media player ...................................42
Listening with the media player ................................47
Using AirPlay ..................................................48
Using DLNA ...................................................49
Sleep Timer ....................................................50
Setting the wake-up timer .....................................50
Updating the firmware ........................................52
Troubleshooting ...............................................57
Restoring factory settings ......................................59
Specifications ..................................................60
Features of NP-H750
p USB port for iPod/iPhone/iPad/USB flash drives
p Internet radio (page 38)
p Media player (page 42)
p AirPlay (page 48)
p DLNA (page 49)
Tracks on a server connected to the network can be
played back by computers and mobile devices if they
have applications that support DLNA installed.
What’s in the box
Check to be sure the box includes all the supplied accessories shown below.
Please contact the store where you purchased this unit if
any of these accessories are missing or have been damaged during transportation.
Power cord × 1
Remote control unit (RC-1308) × 1
Batteries for remote control unit (AAA) × 2
Owner’s manual (this document) × 1
p Keep this manual in a safe place for future reference.
Warranty card × 1
66
Page 7

CAUTION
Read this before attempting any operations.
p Avoid placing the unit in direct sunlight or close to any
source of heat, such as a radiator, heater, open fireplace
or amplifier. Also avoid locations that are subject to vibrations or exposed to excessive dust, cold or moisture.
p This unit consumes energy when in standby.
p Place the unit in a stable location near the audio system
that you will use.
p Be careful to avoid injury when moving the unit due to
its weight. Get someone to help you if necessary.
p The voltage supplied to the unit should match the volt-
age as printed on the rear panel. If you are in any doubt
regarding this matter, consult an electrician.
p As the unit could become warm during operation, always
leave sufficient space around it for ventilation. When placing this unit, position it so that it is at least 30 cm (12”)
from walls and other devices in order to allow good heat
dissipation. When installing it in a rack, leave at least 30
cm (12”) open above and behind the unit. DO NOT place
anything, not even CDs, CD-Rs, LP records or cassette
tapes, on top of the unit.
p Do not open the body of the unit as this might result in
damage to the circuitry or cause electric shock. If a foreign object should get into the unit, contact your dealer
or TEAC service company.
p When removing the power plug from the wall outlet,
always pull directly on the plug; never yank on the cord.
p Depending on the electromagnetic waves of television
broadcasts, interference might appear on television
screens when this unit’s power is on. This does not indicate that this unit or the TV is malfunctioning. If this
occurs, put the unit in standby.
Maintenance
If the surface of the unit gets dirty, wipe it with a soft cloth
or use diluted mild liquid soap. Allow the surface of the
unit to dry completely before using.
B For safety, disconnect the power cord from the
socket before cleaning.
p Never spray liquid directly on this unit.
p Do not use thinner or alcohol as they could damage the
surface of the unit.
p Avoid allowing rubber or plastic materials to touch this
product for long periods of time, because they could
damage the cabinet.
ENGLISH
77
Page 8

Files
Playable Files
This unit can play audio files that are on external USB flash
drives.*
p USB flash drives must be formatted as FAT 16 or FAT 32,
but not NTFS.
* The USB port on this unit only supports USB flash
drives (also known as “thumb drives” and “jump drives”).
It does not support standard USB hard drives.
The file formats that can be played back by each playback
source are as follows.
Format
WAV
FLAC
MP3
OGG
WMA
AAC
WAV
File extension: .wav
Stream: LPCM
Sampling Frequency: 8 kHz to 48 kHz
USB flash
drive
Media player
WiFi
Ethernet
cable
WMA
File extension: .asf/.wma
Stream: WMA2/7/8/9/10, WMA Pro, WMA Lossless**
Sampling Frequency: 8 kHz to 48 kHz
Bit Rate: 5 kbps to 320 kbps
** WMA Pro and WMA Lossless formats are only supported
when the playback computer is using Windows Media
Player 12 or later. (Playback occurs after transcoding.)
AAC
File extension: .m4a/.aac
Stream: MPEG-4 AAC/MPEG-4, HE AAC (AAC Plus v1/2)
Sampling Frequency: 32 kHz to 96 kHz
File names shown on the display
The display of this unit can only show single-byte letters
and numbers. If the file information uses Japanese, Chinese
or other double-byte characters, playback is possible but
the name will not be shown correctly.
Precautions when using computers
FLAC
File extension: .flac
Stream: FLAC
Sampling Frequency: 8 kHz to 48 kHz
Only 48 kHz is supported with USB.
MP3
File extension: .mp3
Stream: MPEG-1/2 Layer III
Sampling Frequency: 8 to 48 kHz
Bit Rate: 8 to 320 kbps/VBR
Ogg Vorbis
File extension: .ogg
Stream: Ogg
Sampling Frequency: 8 kHz to 48 kHz
Bit Rate: 16 kbps to 128 kbps
88
and other devices to create files
p Always include the extension in the file name.
p See the manual for the software that you are using
when you create a file using a PC.
Files that cannot be played correctly
p Files without extensions cannot be played. Even if the
file name has an extension, playback is not possible if
the data format is incorrect.
p Variable bit rate files might not play back correctly.
p When more than 2000 files are recorded on the USB
flash drive, the unit might not be able to play them
correctly.
Page 9

Connecting speakers (1)
Speakers
V
Precautions when making connections
p Complete all other connections before connecting
power plugs to power outlets.
p Read the owner’s manuals of all devices that will
be connected, and follow their instructions.
p Do not bundle connecting cables with power cords.
Doing so could cause noise.
SPEAKERS terminals
A
Connect speakers to this unit using commercially
available speaker cables.
This unit’s + (positive) terminals are red ( for the right
speaker) and white (for the left speaker).
speaker terminals are ^ (negative). Generally, the ¥
wire of the speaker cable is marked to make it distinguishable from the ^ wire of the cable. Connect the
marked wires to the red and white ¥ terminals and the
unmarked wires to the black ^ terminals.
p Check the impedance of your speakers. Connect
speakers with an impedance of 6 ohms or more.
Before connections
1. Remove about 1 cm (1/2”) of the sheath at the end
of the speaker cable.
2. Twist the cable core well.
The black
ENGLISH
A
Making cable connections
B
1. Turn the terminal cap counterclockwise to loosen it.
2. Insert the wire into the hole in the terminal screw
and turn the terminal cap clockwise to connect it
securely.
RCA cable
LINE
IN
V
CAUTION
Subwoofer
If the exposed end of a core wire in a speaker
cable contacts another cable or terminal, a short
could occur. Do not allow this to happen.
99
Page 10

Connecting speakers (2)
Using an iPod/iPhone/iPad
Connecting speakers using banana plugs
You can also connect speakers using commercially available
banana plugs. Connect the speaker cable to the banana
plug first, and then insert the plug into the terminal.
p Carefully read the instructions of the banana plugs that
you intend to use with this unit.
p For North American customers
Before inserting banana plugs, remove the black cap
from the top of each terminal cap.
For European customers
In accordance with European safety regulations, it is not
possible to connect banana plugs into the speaker terminals on European models. The holes into which banana
plugs are inserted have been covered with black caps.
Connect the speakers using spades or bare wires. If the
black caps become separated from the terminals, return
them to their original position.
Compatible iPod/iPhone/iPad models
This unit can be connected to and used with the following
iPod/iPhone/iPad models.
iPod nano ( 2nd, 3rd, 4th, 5th, and 6th generation)
iPod touch (1st, 2nd, 3rd, and 4th generation)
iPhone 4S, iPhone 4, iPhone 3GS, iPhone 3G
iPad 2, iPad
p To connect an iPod/iPhone/iPad, use the USB cable sup-
plied with the iPod/iPhone/iPad.
SUBWOOFER OUT jack
B
You can connect a subwoofer to enhance low frequencies here.
Connect a commercially available powered subwoofer
to this u nit using a commercially available RCA cable.
p Use a subwoofer with a built-in amplifier. In
order to balance the levels with the main
speakers, adjust the subwoofer volume while
listening to audio that you know well. Adjust
it as you like to suit the music.
1010
iPod/iPhone/iPad software
If the unit or remote control buttons do not work properly
with your iPod/iPhone/iPad, updating its software might
solve the problem.
Download the latest software for your iPod/iPhone/iPad
from the following Apple website.
http://www.apple.com/downloads/
Page 11
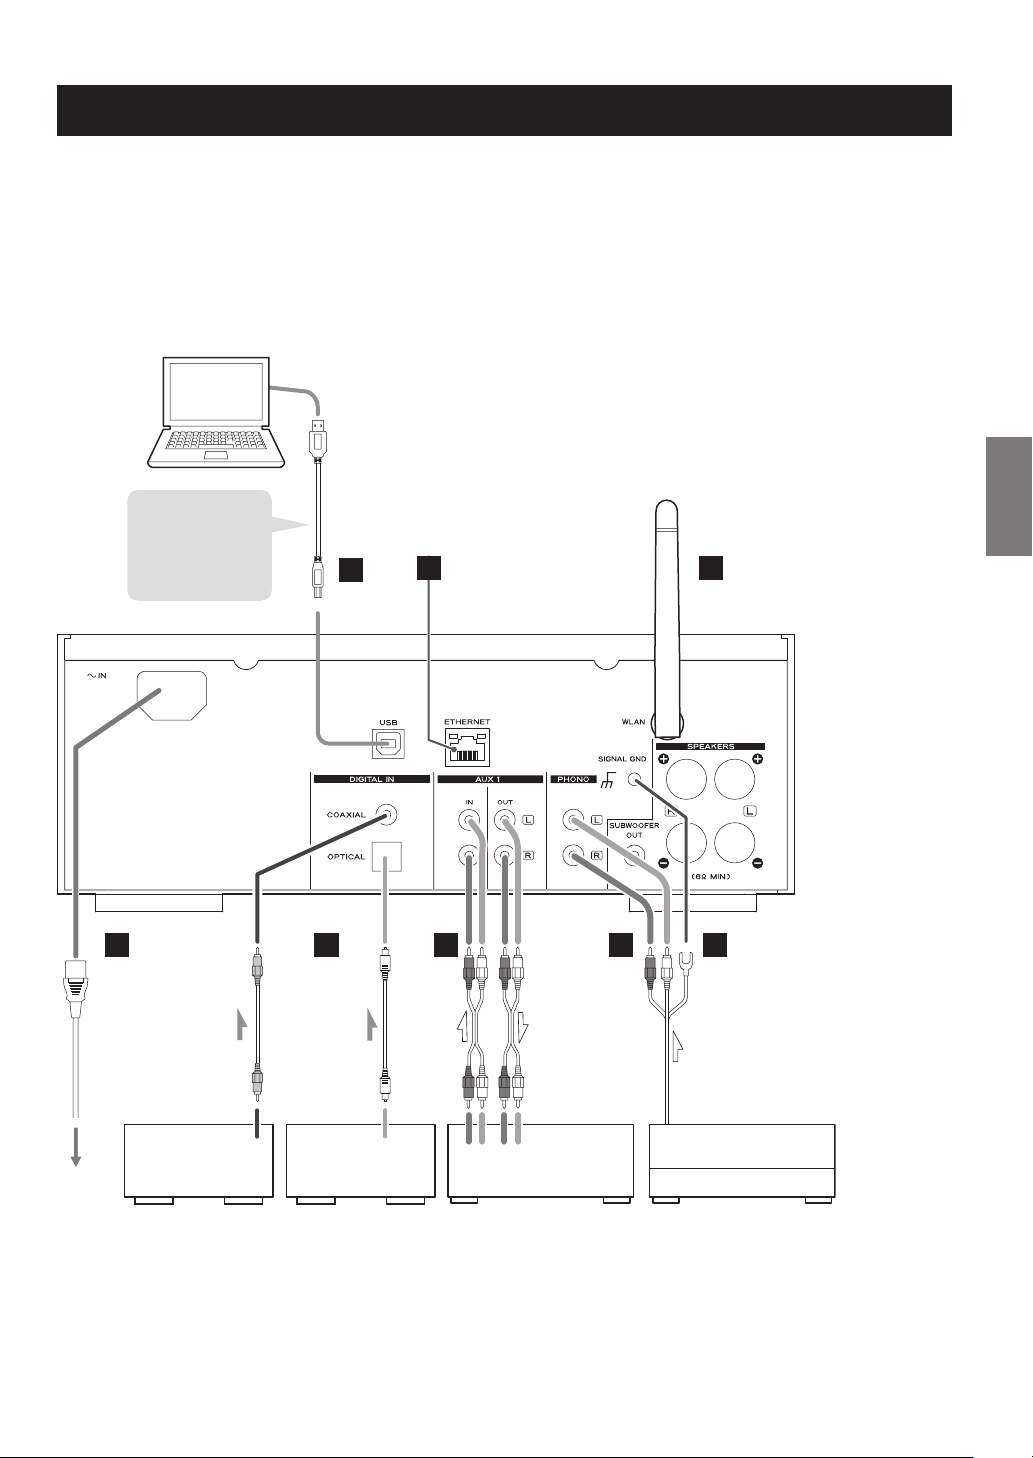
Connections (1)
Power
outlet
Personal computer
output device
output device
CD recorder, etc.
V
Precautions when making connections
p Complete all other connections before connecting power plugs to power outlets.
p Read the owner’s manuals of all devices that will be connected, and follow their instructions.
p Do not bundle connecting cables with power cords. Doing so could cause noise.
Install the
dedicated driver
on the computer
before connecting
(page 20)
D
Included power cord
USB cable
A
B
RCA coaxial digital cable
E
F
Optical digital cable
Audio cable
G H
ENGLISH
C
Audio cable
DIGITAL OUT
(COAXIAL)
Digital audio
DIGITAL OUT
(OPTICAL)
Digital audio
LRLR
LINE
LINE
IN
OUT
Cassette deck/
Turntable
1111
Page 12

Connections (2)
USB audio input port
A
Use to input digital audio from a computer. Connect
with a USB port on the computer.
Use a commercially available USB cable to make the
connection.
p Install the dedicated driver before connecting the
computer to this port by USB (page 20).
ETHERNET port
B
If you want to use a wired Internet connection, connect the ETHERNET port of this unit to an Ethernet
network using a commercially available Ethernet cable.
p If you connect or disconnect the Ethernet cable
while the unit is turned on, put the unit in standby,
disconnect the power cord from the wall outlet,
connect it and turn the unit on again.
Wireless LAN antenna
C
If you can use a wireless LAN in your installation site,
the unit connects to the LAN using the wireless LAN
antenna. As shown in the illustration on page 11,
turn the antenna so that it points up.
Power inlet [~IN]
D
Connect the supplied power cord here.
p Unplug the cord from the outlet when not using
the unit for a long time.
V CAUTION
p Be sure to connect the power cord to an AC outlet
that supplies the correct voltage.
p Hold the power plug when plugging it into an outlet
or unplugging it. Never pull or yank on the power cord.
Digital audio input connectors [COAXIAL,
E
OPTICAL]
Use to input digital audio. Connect to the digital audio
output connectors of a device capable of outputting
digital audio.
COAXIAL: Coaxial digital cable (RCA)
OPTICAL: Optical digital cable (TOS)
1212
Page 13

AUX 1 IN/OUT jacks
White (L)
Red (R)
White (L)
Red (R)
F
These input/output analog audio signals.
Connect this unit’s input and output jacks to the output
and input jacks of other devices using commercially
available audio cables.
p Connect an audio cable’s white pin plug to the
white (L) jack and connect its red pin plug to the
red (R) jack.
PHONO jacks
G
Connect the turntable’s RCA pin cable to the PHONO
jacks.
p Connect an audio cable’s white pin plug to the
white (L) jack and connect its red pin plug to the
red (R) jack.
p Be sure to insert each plug securely. To prevent hum-
ming and interference, avoid bundling the signal
interconnection cables together with the AC power
cord or speaker cables.
ENGLISH
p If you want to use a recorder (eg. a cassette deck or
a CD recorder) with this unit, connect the output
jacks of the recorder to the AUX 1 IN jacks of this
unit and connect its input jacks to the AUX 1 OUT
jacks.
p Be sure to insert each plug securely. To prevent hum-
ming and interference, avoid bundling the signal
interconnection cables together with the AC power
cord or speaker cables.
p This unit supports the use of MM cartridges (input
sensitivity: 2.5 mV/47 kΩ). It does not support the
use of MC cartridges.
Grounding connector [SIGNAL GND]
H
Connect the grounding wire of the turntable here.
p This is not an electrical safety ground.
p If the grounding wire of the turntable is not con-
nected here, hum noise may be heard.
1313
Page 14

Names and functions of parts (main unit) (1)
A B
C
D
E
F
MULTI JOG knob
A
Use this knob to set the clock and the timer.
In USB/iPod mode, use this knob to scroll up and down
the menu when an iPod/iPhone/iPad is connected.
In USB/iPod mode, turn the MULTI JOG knob to search
files inside folders or at the root level.
p When a USB flash drive is connected, turning this
knob skips between all the files (tracks) and folders
within only the selected folder.
p In network mode, use for each file or setting mode.
p Use this knob to adjust the low and high frequency
levels (bass and treble).
I J K
Remote sensor
B
When operating the remote control unit, point it
towards the remote sensor.
Display
C
VOLUME knob
D
Use this knob to adjust the volume. Turn it clockwise
to increase and counterclockwise to decrease the
volume.
p After adjusting the volume, the volume level will
be retained even if you press the STANDBY/ON
button to put the unit into standby.
L
M
NHG
1414
Page 15
STANDBY/ON button
E
Press this button to turn the unit on or put it in standby
mode.
The color of the indicator above the STANDBY/ON
button shows the status of the unit.
Indicator Status
Orange Standby
Blue ON
PHONES jack
F
To listen with headphones, first minimize the volume.
Then, insert the headphones’ plug into the PHONES
jack and gradually increase the volume.
No sound will be output from the speakers while the
headphones’ plug is inserted in the PHONES jack.
V
CAUTION
Do not connect or disconnect headphones or
turn the unit on or put it in standby while wearing them.
Sudden loud noises could occur, which might
cause hearing damage.
AUX 2 IN jack
G
Connect this jack to the headphones’ jack (or an audio
output jack) of a portable audio player or other device
using a commercially available 3.5 mm stereo mini plug
cable.
SOURCE button
I
Use this button to select the source.
MENU button
J
In USB/iPod mode, use this button to go back to the
previous menu when an iPod/iPhone/iPad is connected.
When in network mode (Internet radio/media player),
the setup menu appears.
Skip buttons [.//]
K
In USB/iPod mode, use these buttons to skip to the previous or next track or file when playing back or paused.
Use these buttons to adjust the balance.
When a menu is shown, use / to select in the same
way as the ENTER button.
When a folder is shown, press . to move up one
folder level.
ENTER button
L
In USB/iPod mode, use this button to confirm selections
in menus when an iPod/iPhone/iPad is connected.
When making settings, use this button to confirm
selection of a menu item.
In network mode (Internet radio/media player), use to
select a station or track.
ENGLISH
USB port
H
Connect an iPod/iPhone/iPad or USB flash drive.
1515
Page 16
Names and functions of parts (MU) (2)
INFO button
M
While listening to the Internet radio or with the media
player function, use this button to change the information on the display.
p For information about use in network mode, see
page 18.
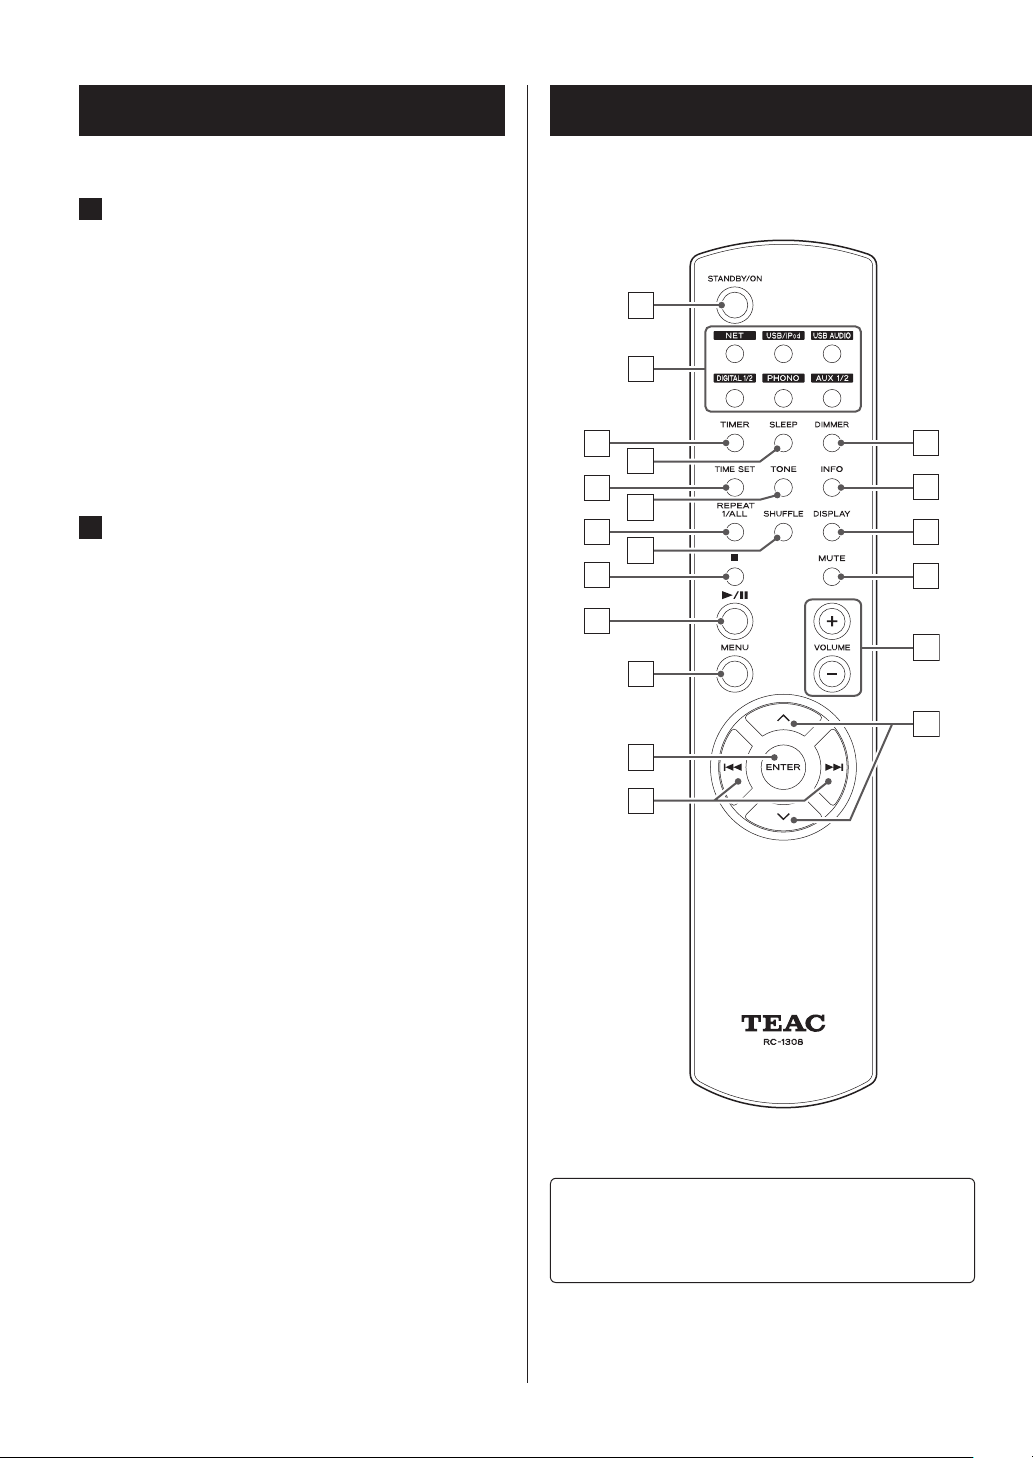
Names and functions of parts (RC) (1)
a
Stop button [8]
In USB/iPod mode, use this button to stop playback.
When “Media Player” is selected as the input source,
hold this button for at least 2 seconds to stop playback.
NET button
N
Press when in network mode to switch between
Internet radio and media player.
Play/pause button [7/9]
In USB/iPod mode, use this button to start or pause
playback.
p For information about use in network mode, see
page 18.
g
b
c
n
d
e
o
f
p
h
i
j
q
r
k
s
l
m
1616
When both the main unit and the remote control have
buttons with the same functions, this manual explains
how to use either of them. The corresponding buttons
can be used in the same manner.
Page 17
a
STANDBY/ON button
Press this button to turn the unit on or put it in standby
mode.
The color of the indicator above the STANDBY/ON
button shows the status of the unit.
TONE button
f
Use this button with the Scroll buttons (k/j) to
adjust the low and high frequency levels as well as the
left-right balance (page 26).
Indicator Status
Orange Standby
Blue ON
Source buttons [NET, USB/iPod, USB AUDIO,
b
COAXIAL, OPTICAL, PHONO, AUX 1/2]
Use these buttons to select a source.
NET............. Network mode (Internet radio/media
player)
USB/iPod.......USB/iPod mode
USB AUDIO ....USB audio input mode
COAXIAL .......Digital input mode (coaxial)
OPTICAL .......Digital input mode (optical)
PHONO.........Phono mode
AUX 1/2 ........External input mode (AUX)
p To select the media player, use the NET button.
p Press the AUX 1/2 button again to switch between
AUX 1 and AUX 2.
g
REPEAT 1/ALL button
In USB/iPod mode, use this button to set the repeat
playback of an iPod/iPhone/iPad or a USB flash drive
(page 31).
SHUFFLE button
h
In USB/iPod mode, use this button to start shuffle
playback of an iPod/iPhone/iPad or a USB flash drive.
Stop button [H]
i
In USB/iPod mode, use this button to stop playback of
an iPod/iPhone/iPad or a USB flash drive.
When “Media Player” is selected as the input source,
hold this button for at least 2 seconds to stop playback.
j
Play/pause button [y/J]
In USB/iPod mode, use this button to start or pause
playback of the iPod or USB.
p Refer to the table on the next page for operation in
network mode.
ENGLISH
c
TIMER button
Use this button to select the timer function (“Timer
Daily”, “Timer Once”, or “Timer Off”).
SLEEP button
d
Use this button to set the sleep timer (page 50).
e
TIME SET button
Use this button to adjust the clock and to set the
wake-up timer.
MENU button
k
In USB/iPod mode, use this button to go back to the
previous menu. This button is equivalent to the MENU
button on your iPod.
When in network mode (Internet radio/media player),
the setup menu appears.
ENTER button
l
In USB/iPod mode, use this button to confirm selections
in menus when an iPod/iPhone/iPad is connected.
When making settings, use for menu selection.
In network mode (Internet radio or media player), use
to select a station or track.
1717
Page 18
Names and functions of parts (remote control) (2)
m
Skip button [.//]
In USB/iPod mode, use these buttons to skip to the previous or next track or file when playing back or paused.
Use these buttons to adjust the balance.
When a menu is shown, use / to select in the same
way as the ENTER button.
When a folder is shown, press . to move up one
folder level.
n
DIMMER button
Use this button to change the brightness of the display (page 26).
o
INFO button
While listening to the Internet radio or with the media
player function, use this button to change the information on the second line of the display.
p
DISPLAY button
In USB/iPod mode, use this button to change what
information is displayed.
p When in network mode, the buttons on the unit and
the remote control function differently.
Main unit
Status Button Function
Stopped Play/pause button
(7/9)
Stop button (8)
Playing back Play/pause button
(7/9)
Stop button (8)
Remote control
Status Button Function
Stopped Play/pause button
(7/9)
INFO button No function
Playing back Play/pause button
(7/9)
Stop button (8)
INFO button Show information
Change network mode
No function
Play/pause
Show information
Start playback
Play/pause
Stop playback
q
MUTE button
Use this button to mute the sound.
r
VOLUME buttons [+/−]
Use these buttons to adjust the volume level.
Press + to increase and − to decrease the volume.
s
Scroll buttons [k/j]
In USB/iPod mode, use these buttons to select a folder
or file that is on a device connected to the unit’s USB
port. (When an iPod/iPhone/iPad is connected, use
these to scroll through its menu.)
When making settings, use these to scroll through
menus.
After pressing the TONE button, use to adjust the tone
settings (low and high frequency levels) (page 26).
1818
Page 19
Using the remote control unit
Precautions for use
V Misuse of batteries could cause them to rupture
or leak leading to fire, injury or the staining of
items nearby. Please carefully read and observe
the precautions on page 3.
p Point the remote control unit at the main unit’s remote
sensor from within 5 meters (16 feet) of it. Make sure
that there are no obstructions between the remote
control and the main unit.
p If direct sunlight or strong artificial illumination shines
on the remote sensor, the remote control might not
function. If that is the case, move this unit to another
location.
p If the remote control unit is operated near other devices
that generate infrared rays, or if other remote control
devices using infrared rays are used near the unit, it
might operate incorrectly. The other devices might also
operate incorrectly.
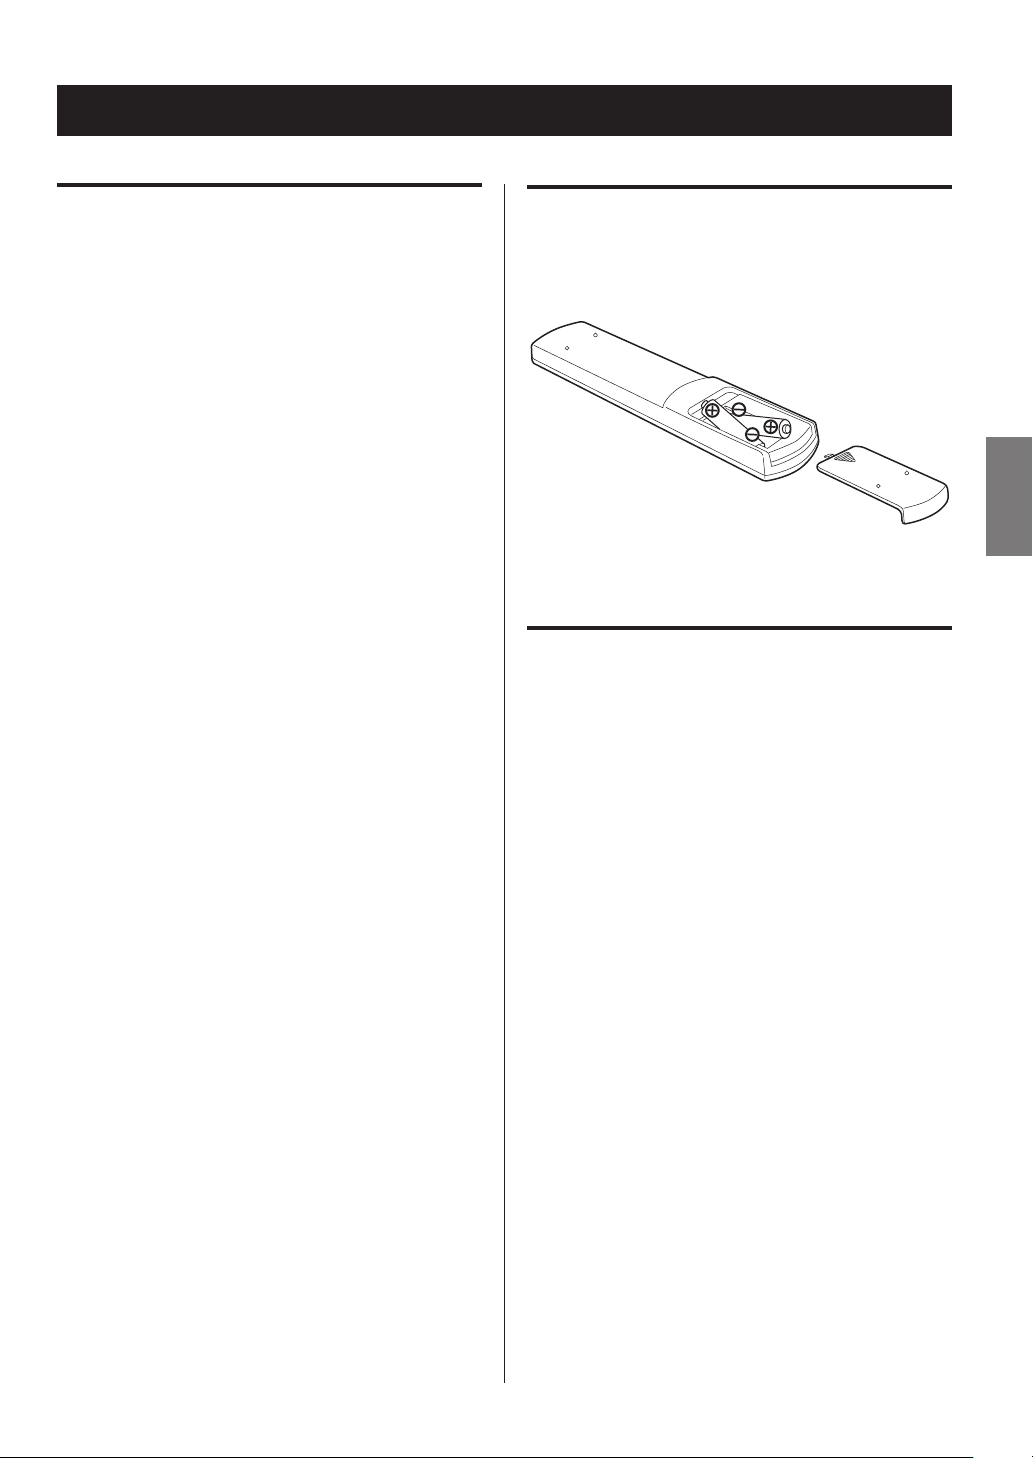
Battery installation
Remove the cover from the back of the remote control and
insert two AAA batteries with their ¥/^ ends oriented in
the case as shown. Replace the cover.
ENGLISH
Battery replacement
If the operation range of the remote control decreases, the
batteries have become exhausted. In this case, replace the
batteries with new ones.
For detailed information about the collection of batteries,
please contact your local municipality, your waste disposal
service or the point of sale where you purchased the items.
1919
Page 20

Playing back music on a computer (1)
Transmission mode
Installing the driver
In order for this unit to play back audio files stored on a
computer, you must first install a driver on the computer.
Please download this driver from the following web
address.
Driver software download page
http://www.teac.co.jp/audio/software_teac_e.html
USB connection is only possible with computers running
the following operating systems.
Windows XP (32-bit)
Windows Vista (32/64-bit)
Windows 7 (32/64-bit)
Mac OS X 10.6 (Snow Leopard)
(OS X 10.6.4 or later)
Mac OS X 10.7 (Lion)
Mac OS X 10.8 (Mountain Lion)
(As of October, 2012)
Operation with other operating systems is not guaranteed.
CAUTION
Install the driver before connecting the computer to
this unit’s USB audio input port by USB.
If you connect this unit with a computer before installing
the driver, it will not work properly. Moreover, if the computer is running Windows XP, its operation could become
noticeably slower, requiring it to be restarted.
p Do not change the transmission mode during playback.
Doing so could cause the unit to freeze or other problems.
p Quit the music playback software on your computer
before changing the transmission mode.
Press the SOURCE button repeatedly to
1
select “USB Audio In”.
Press the NET button to select the mode.
2
Press once to show the current mode. Press again to
change the mode.
p For instructions about driver installation procedures,
please see our download page.
p Depending on the combination of hardware and soft-
ware, proper operation might not be possible even with
the above operating systems.
Transmission modes
You can choose from two transmission modes when connecting this unit’s USB audio input port to a computer by
USB.
Transmittable sampling frequencies are 32 kHz, 44.1 kHz,
48 k Hz, 88.2 kHz, 96 kHz, 176.4 kHz and 192 kHz.
2020
Example:
86% $XGLR ,Q
>0@
Page 21
M1 mode
Use the settings to select M1.
The unit connects with the computer using highspeed mode.
When properly connected, you will be able to select
“TEAC USB HS AUDIO” as an audio output from the
computer OS.
M2 mode
Use the settings to select M2.
The unit connects with the computer using highspeed asynchronous mode.
When properly connected, you will be able to select
“TEAC USB HS ASYNC AUDIO” as an audio output from
the computer OS.
p In M2 mode, the audio data sent from the computer is
processed using this unit’s clock. By reducing the jitter
during data transmission, this contributes to playback
with better audio quality.
p When you connect this unit and a computer in M2
mode, if the playback sound should skip or noise should
occur at fixed intervals, set the unit to M1 mode instead.
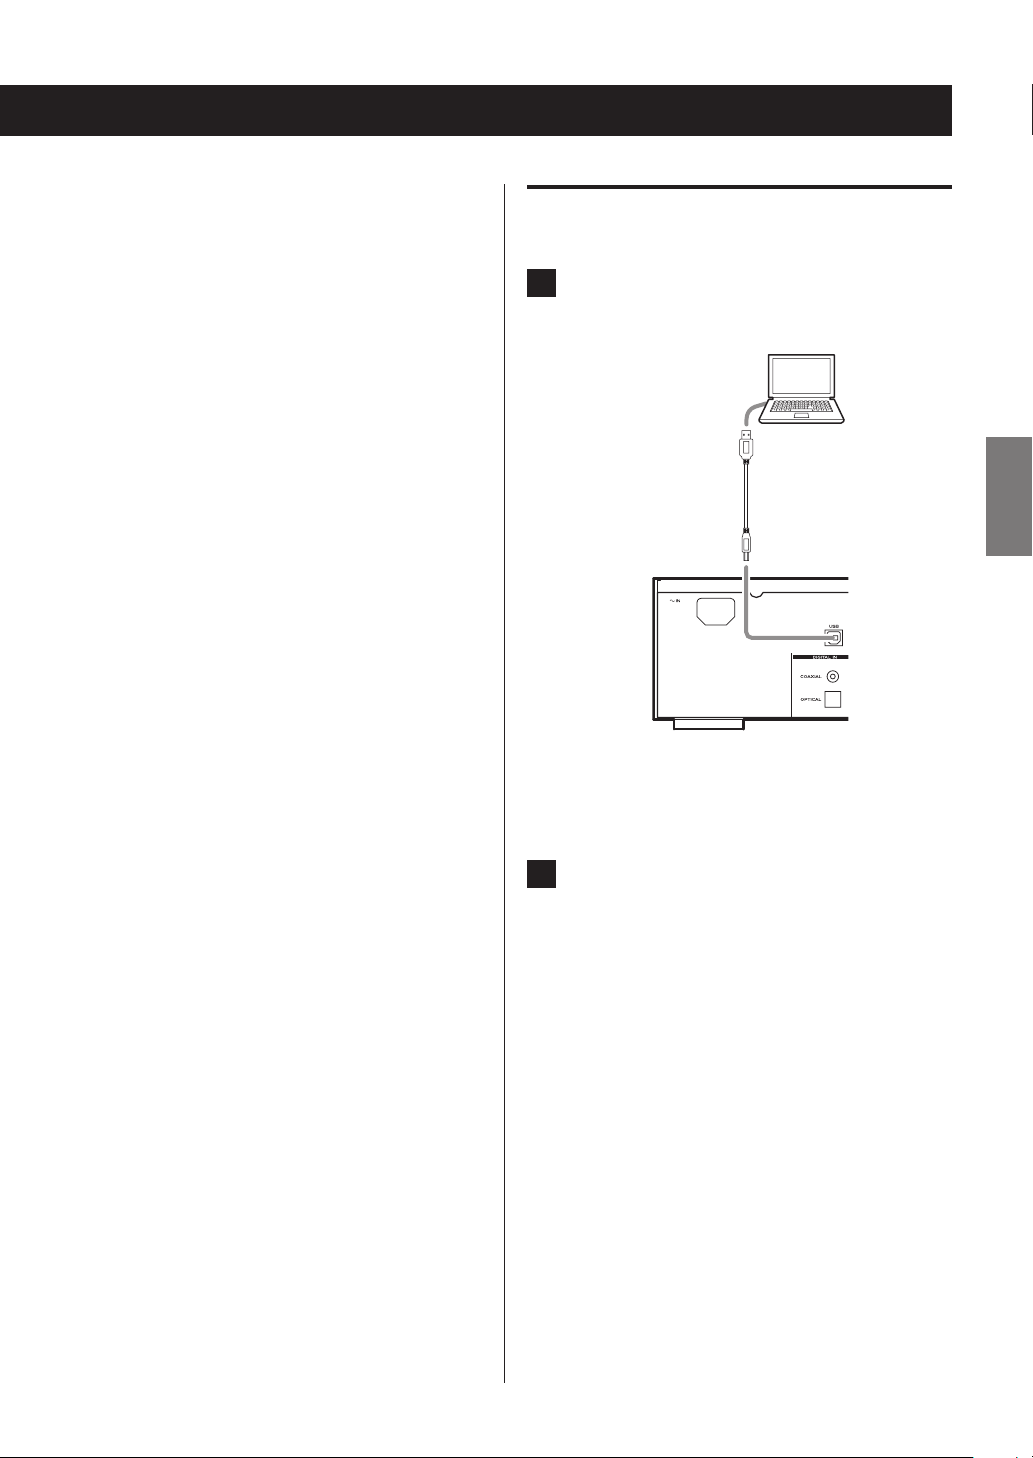
Playing back audio files on a computer
Connect a computer to this unit using a USB
1
cable.
USB cable
p Use a cable with a connector that matches that of
this unit.
ENGLISH
Turn the computer power on.
2
p Confirm that the operating system has started
properly.
Continued on the next page e
2121
Page 22

Playing back music on a computer (2)
Press the POWER button to turn this unit on.
3
Press the SOURCE button repeatedly to
4
select “USB Audio In”.
Start playback of a music file on the computer.
5
Maximize the volume on the computer and use this
unit’s VOLUME knob to adjust the output level for better sound quality.
Minimize the volume on this unit before starting playback and gradually raise the level.
p You cannot control this unit from the computer, and
you cannot control the computer from this unit.
p Do not do any of the following when connected to a
computer and playing back an audio file. Doing so
could cause the computer to malfunction. Always quit
the music playback software before doing any of the
following.
u Unplugging the USB cable
u Putting the unit in standby
u Changing the current input selection
u Switching between transmission modes
p When connected to a computer and playing back an
audio file, computer operation sounds will also be output. If you do not want these sounds to be output,
change settings on the computer to turn them off.
2222
p If you connect this unit with the computer or change its
input to “USB Audio In” after starting the music playback
software, audio files might not play back correctly. If this
should occur, restart the audio playback software or
restart the computer.
p Do the following before starting the music playback
software. Doing them after could prevent proper music
file playback. If this occurs, restart the music playback
software or restart the computer.
• Connect the unit with the computer
• Set the unit input to “USB Audio In”
• Switch between M1 and M2 modes
Page 23
Current Time
On
O
Sour
Status
Setting the current time (1)
Set the current time before using the unit.
p If the power cord is disconnected from the outlet, the
set time will be reset to the default.
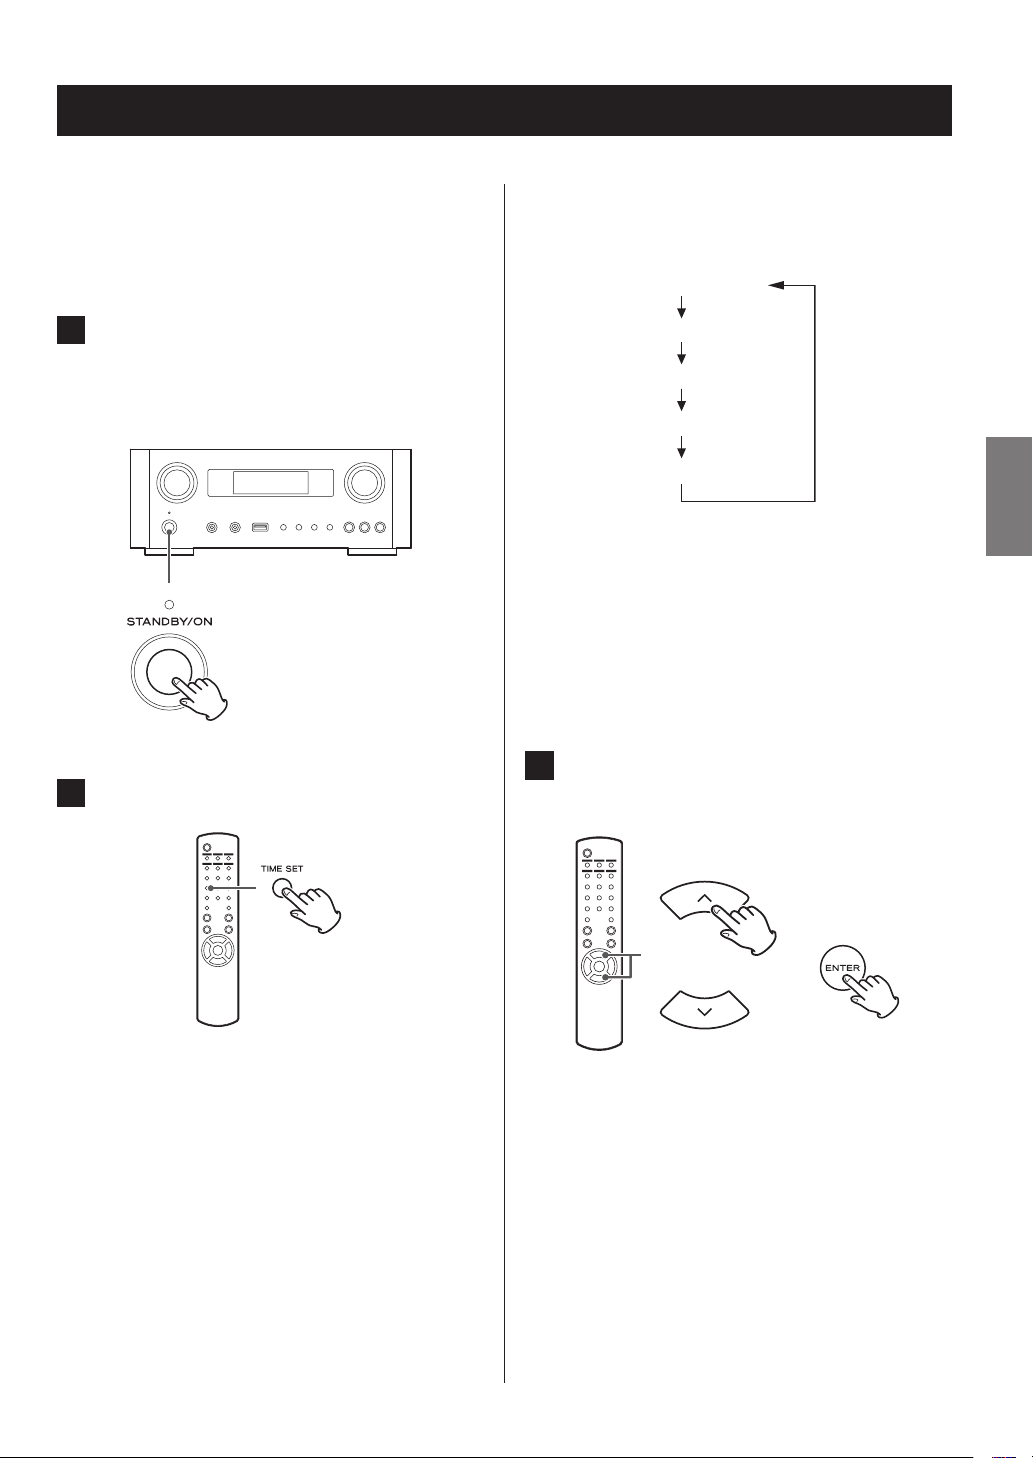
Press the STANDBY/ON button to turn the
1
unit on.
The indicator above the STANDBY/ON button lights
blue.
Press the TIME SET button.
2
p Press the TIME SET button repeatedly to cycle through
the following menu items. The items other than Current
Time are used to set the alarm clock (page 50).
Time
Time
ce Select
p For Europe, the unit uses the 24-hour “military” clock.
For North America, the unit uses the 12-hour clock.
p Press the stop button (H) to cancel the time setting.
p When no action is taken for 30 seconds, the clock
setting mode will be cancelled.
Press the scroll buttons (k/j) to set the
3
current hour and press the ENTER button.
ENGLISH
“Current Time” appears and the hour value blinks.
e
The “minute” value blinks.
p You can also use the MULTI JOG knob and ENTER
button on the main unit in the same way.
Continued on the next page e
2323
Page 24
Setting the current time (2)
Basic operation (1)
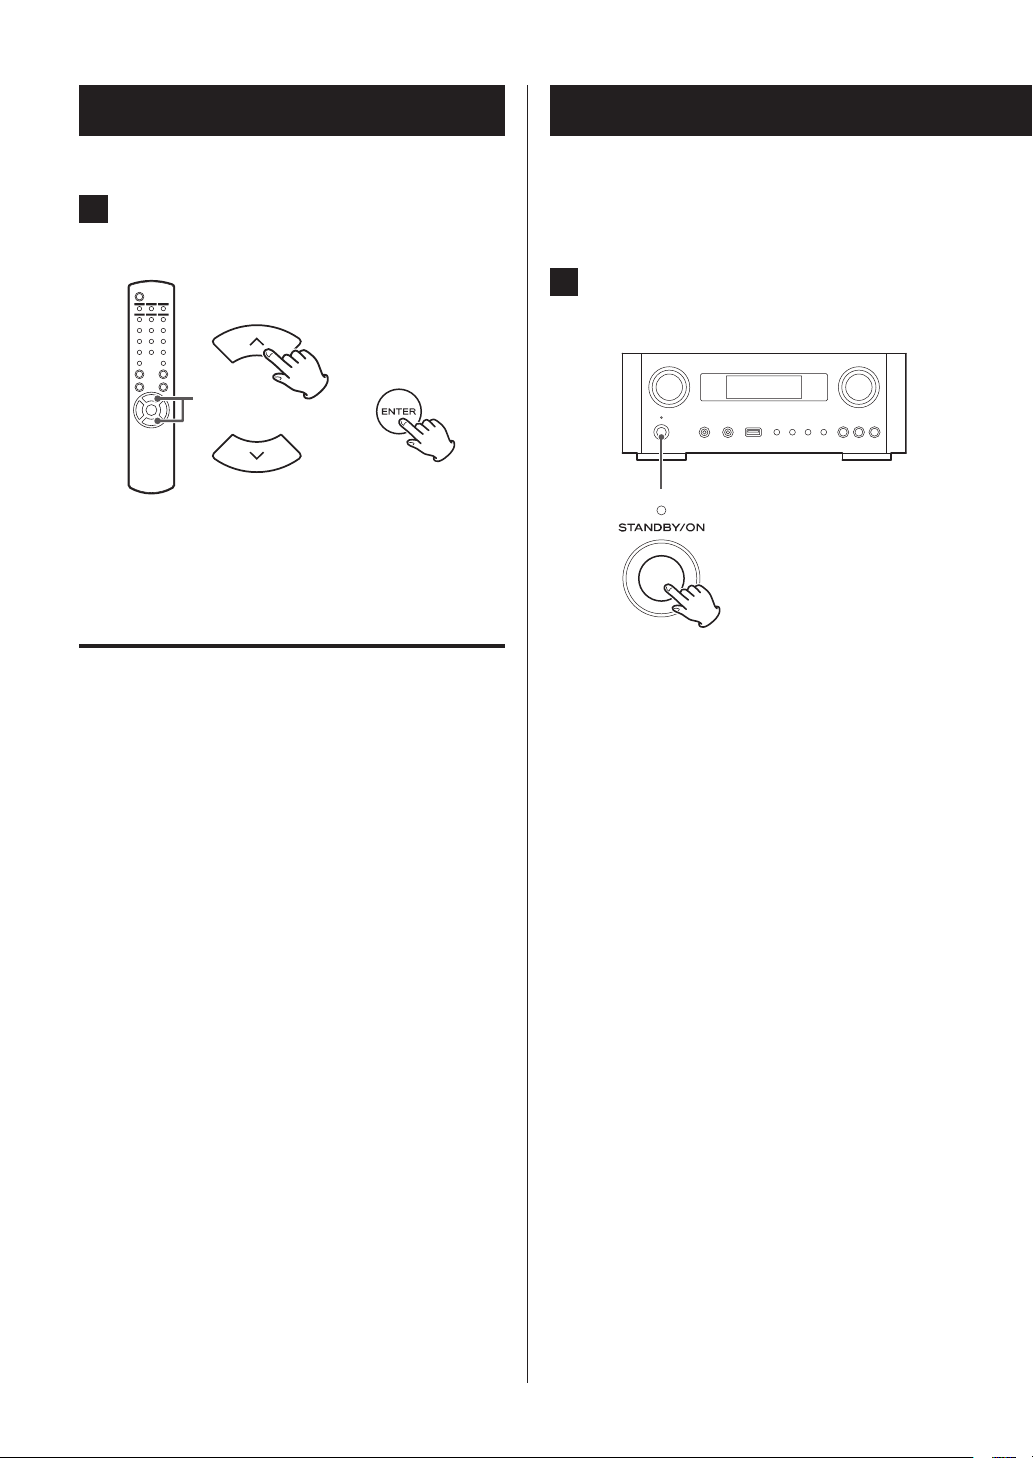
Press the scroll buttons (k/j) to set the
4
current minute and press the ENTER button.
e
The clock will start from the set minute at 0 seconds.
Checking the current time
When the source is set to Audio In, AUX 1/2, COAXIAL,
OPTICAL or PHONO, press and hold the INFO button for at
least three seconds to show the current time for five
seconds.
In this section, we explain operations that are the same in
every mode.
Press the STANDBY/ON button to turn the
1
unit on.
The indicator above the STANDBY/ON button lights
blue.
2424
Page 25
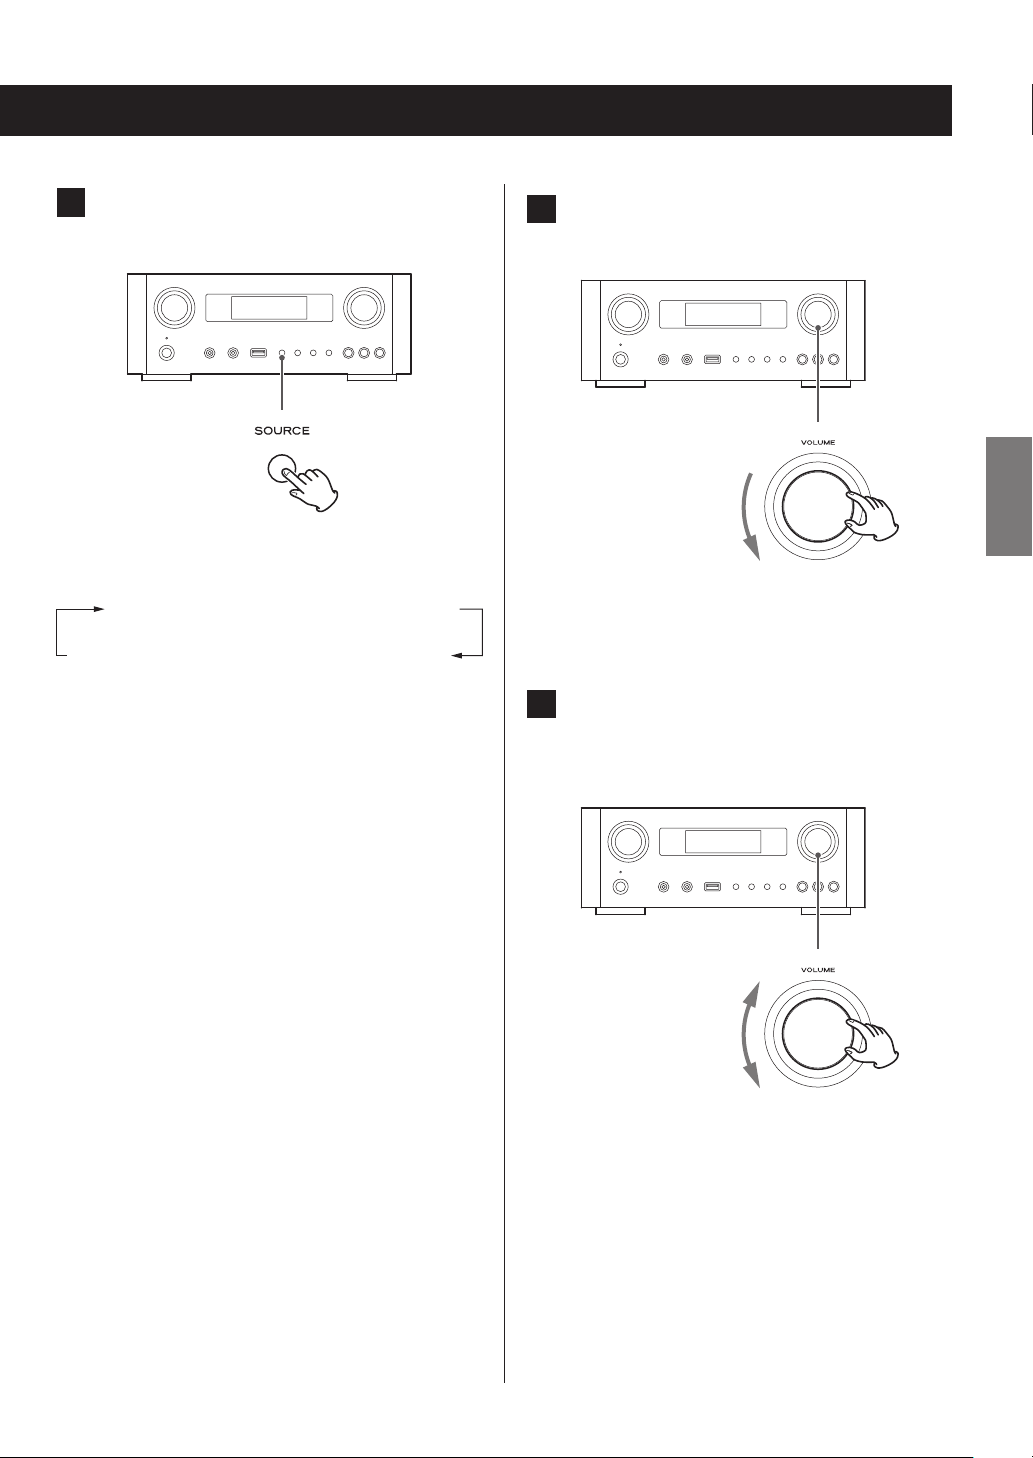
Press the SOURCE button to select the
Internet Radio/wUSB/iPodwUSB Audio In
AUX2sAUX1sPHONOsOPTICALsCOAXIAL
2
source.
Every time you press the SOURCE button, the source
changes as follows:
MediaPlayer
Turn the VOLUME knob counterclockwise to
3
decrease the volume.
VOLUME MIN: Minimum volume
VOLUME MAX: Maximum volume
ENGLISH
NET............. Network mode (Internet radio/media
player)
USB/iPod.......USB/iPod mode
USB Audio In...USB audio input mode
COAXIAL .......Digital input mode (coaxial)
OPTICAL .......Digital input mode (optical)
PHONO.........Phono mode
AUX 1/2 ........External input mode (AUX)
p To select the media player, use the NET button.
p Press the AUX 1/2 button again to switch between
AUX 1 and AUX 2.
Start playback on the source and use the
4
VOLUME knob to adjust the volume to its
optimal level.
VOLUME MIN: Minimum volume
VOLUME MAX: Maximum volume
p In order to prevent sudden loud noises, raise the vol-
ume gradually.
p When connecting the headphone jack of a portable
audio player to this unit, you must raise the player’s
headphone output volume level.
Continued on the next page e
2525
Page 26
Basic operation (2)
BASS TREBLE
p If you raise the volume level of the connected device
too high, the sound might distort. If this occurs, lower
the volume of the connected device until distortion
stops and then adjust the volume on this unit.
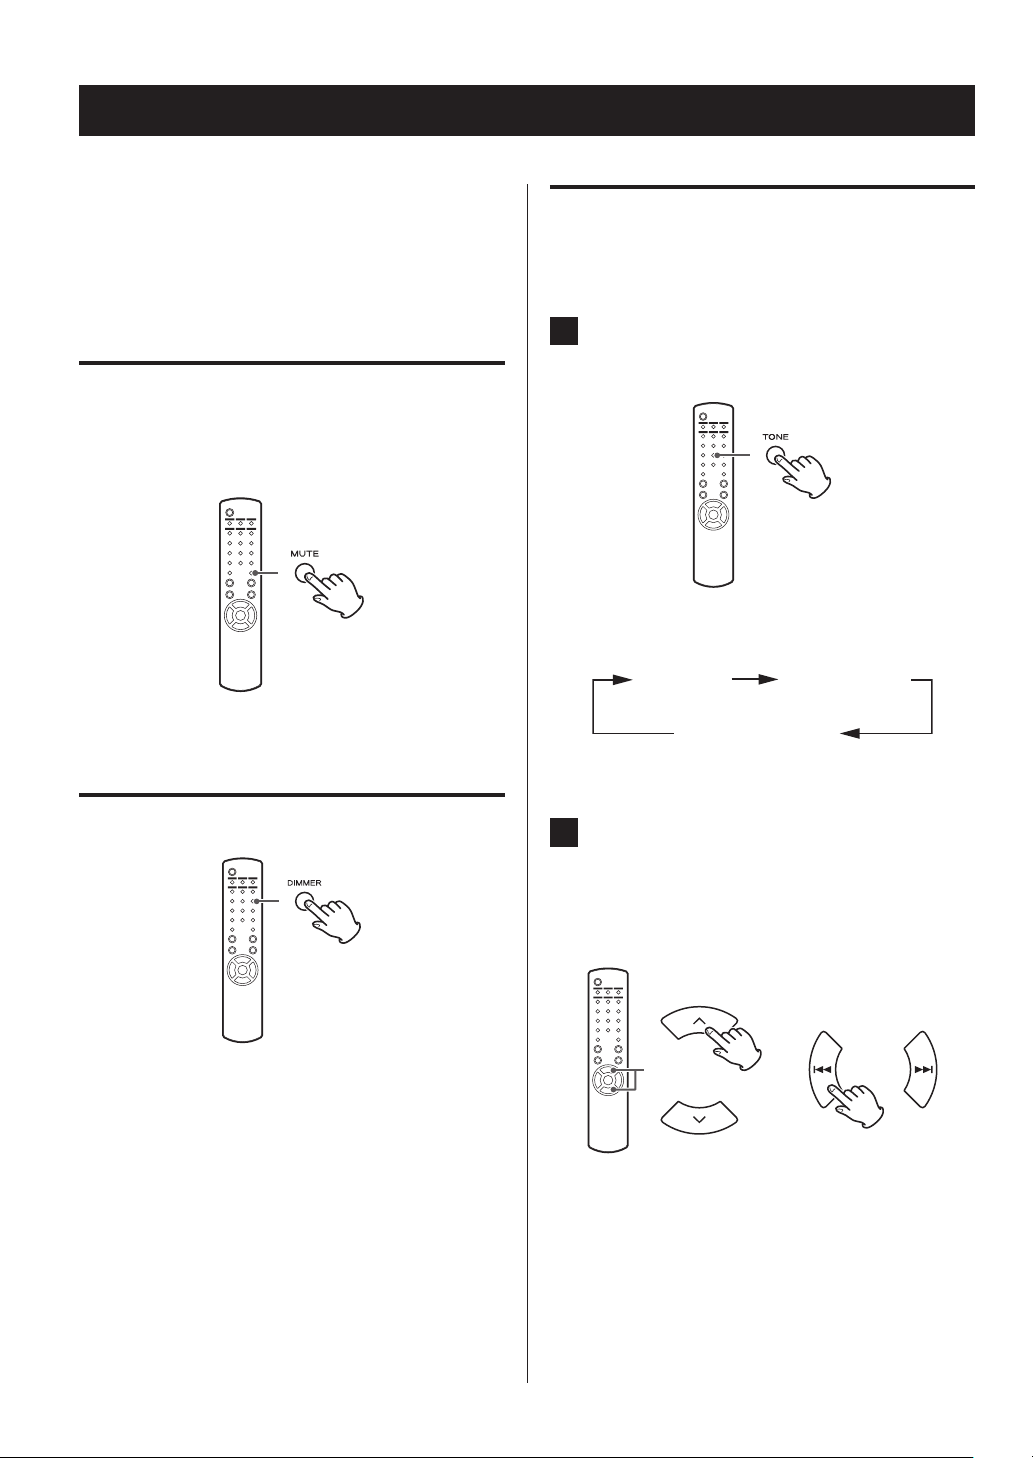
Muting the output
To mute the sound temporarily, press the MUTE button.
Press the MUTE button again or change the volume setting
to restore the sound.
Adjusting the tone and balance
You can adjust the low and high frequency levels as well as
the left-right balance as you like.
Press the TONE button repeatedly to select
1
BASS, TREBLE, or BALANCE.
Every time you press the TONE button, the mode
changes as follows.
BALANCE
Dimmer
Press the DIMMER button to switch between the two
brightness settings: bright and dim.
p The dimmer setting is turned off when you press the
STANDBY/ON button.
2626
Within 3 seconds, press the scroll buttons
2
(k/j) to adjust the bass or treble, or press
the skip buttons (.//) to adjust the
balance.
e
p The low (BASS) and high (TREBLE) frequency set-
tings can each be adjusted in a range between –5
and +5. The left-right balance can be set to CENTER
or from +1 to +6 L/R (left/right).
p You can also use the main unit’s MULTI JOG knob
to adjust the low and high frequency levels (bass
and treble).
Page 27

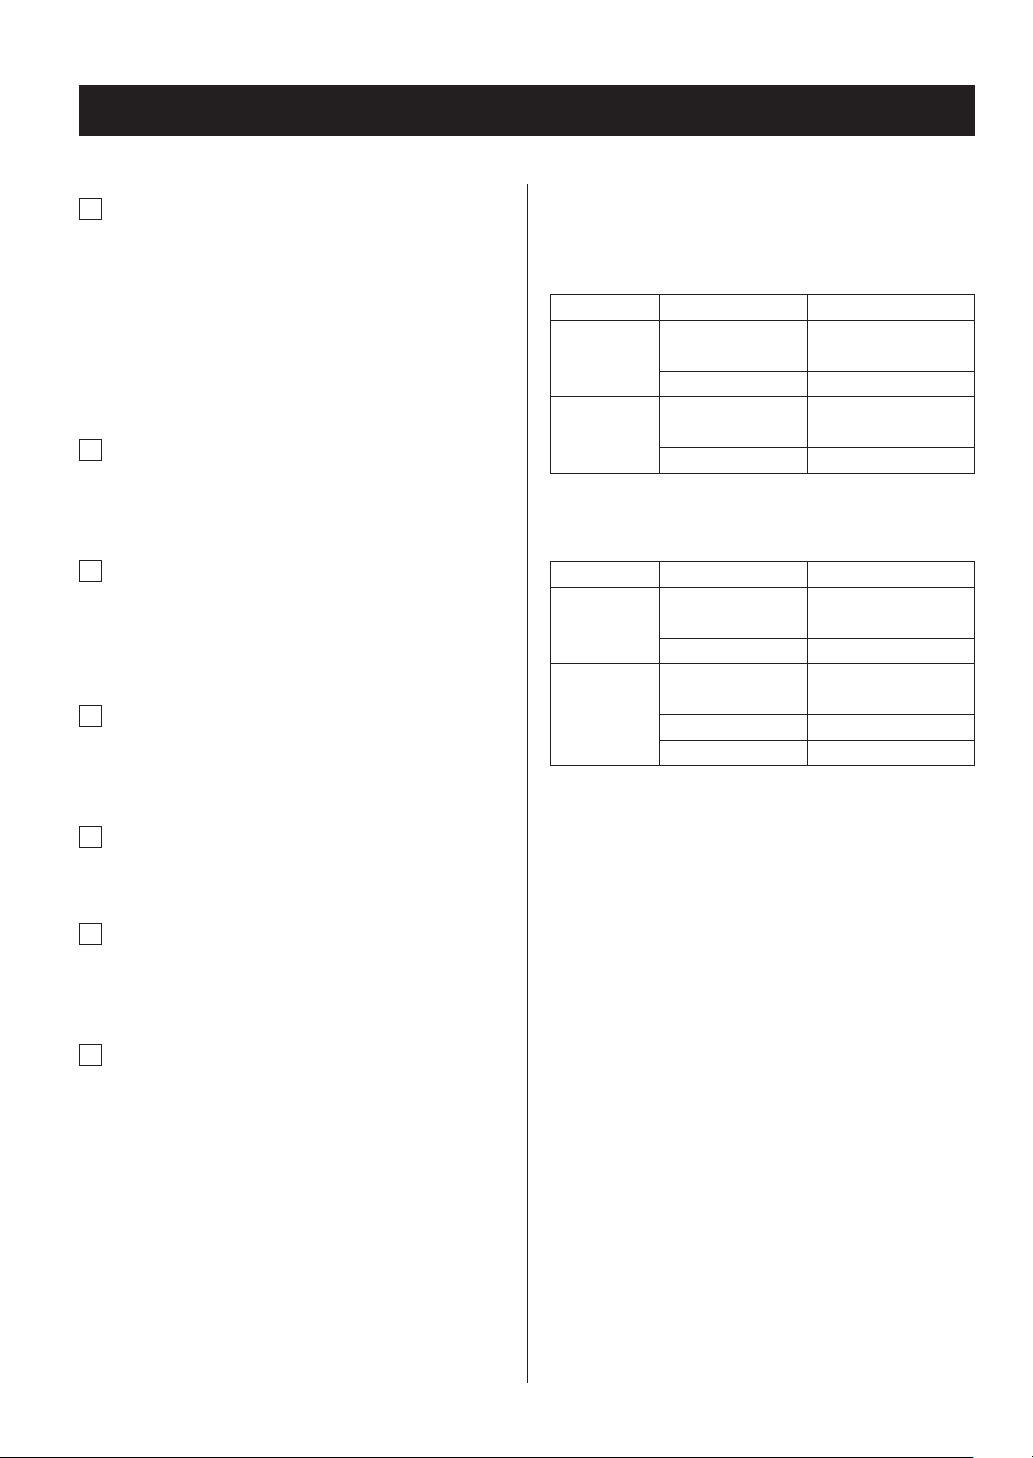
About the ErP
Listening files on a USB flash drive (1)
This product is compliant with the European ErP Standby
Power Regulation. In order to comply with this regulation, the
automatic power saving function of this unit is set to 30 minutes when shipped new, so the unit will automatically enter
standby if 30 minutes pass under the conditions shown in the
following table.
However, when “On” is selected for the network standby setting (page 37), this function is not active. (The default
network standby setting is “Off”.)
p When you turn on the unit, the selected source is the
one selected before the unit was put into standby.
p During playback in iPod mode, if you put the unit into
standby by pressing the STANDBY/ON button, the next
time the power is turned on again, the unit will be in
iPod mode and playback will start automatically when
an iPod/iPhone/iPad is connected. Playback will not
start automatically in other modes.
Status AirPlay,
iPod/
iPhone/
iPad
No
connection
Stopped/
paused
No input
signal
USB flash
drive
*
- - -
Media
player
Internet
External
input
You can play audio files stored on a USB flash drive by connecting it to this unit.
For details on playable files, see page 8.
Press the SOURCE button repeatedly to
1
select “USB/iPod”.
p You can also use the USB/iPod button to select this
directly.
p “Not Connected” will be displayed if no USB flash
drive is connected.
Connect a USB flash drive to the unit.
2
ENGLISH
External input: USB Audio In, COAXIAL, OPTICAL, PHONO,
AUX 1/2
Automatic power saving function active
- Automatic power saving function not active
* Compatible only with AirPlay
/ Not applicable
Select the file you want to play.
3
For details, see page 29.
Press the play/pause button (y/9) or
4
ENTER button to start playback.
p If you press the / button when a file is
displayed, playback will also start.
2727
Page 28
Listening files on a USB flash drive (2)
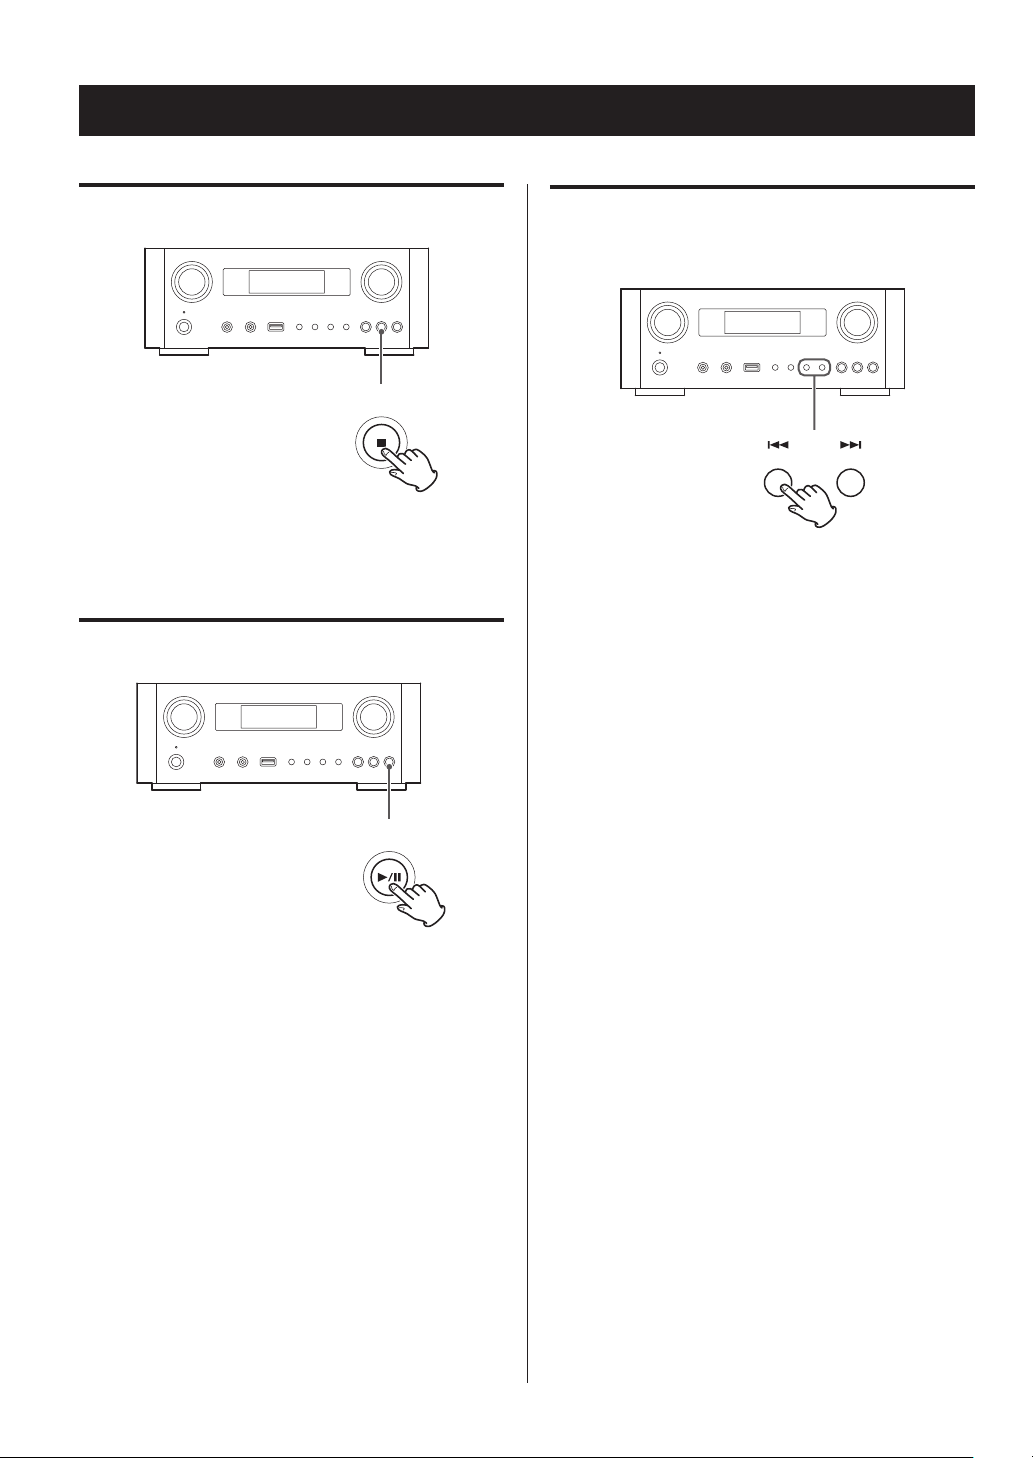
Stopping playback
Press the stop button (H) to stop playback.
Pausing playback
Skipping to the next or previous
track/file
During playback, press the skip buttons (. //)
repeatedly until the desired track/file is found. The selected
track/file will be played from the beginning.
p When the .button is pressed during playback, the
track/file being played will be played from the beginning. To return to the beginning of the previous track/
file, press the .button again.
Press the play/pause button (y/J) to pause playback at
the current position.
To resume playback, press the play/pause button (y/J)
again.
p When the playback time is five seconds or less, press
. to play the previous track.
p When playing tracks on a USB flash drive, skipping to
the next track from the last track will stop playback.
2828
Page 29
Searching inside folders
You can search for and select tracks by name within folders
on a USB flash drive and play them back.
If double-byte characters, such as Japanese kana, are used
in a file name, this unit cannot show them correctly, so
accurate searching will not be possible.
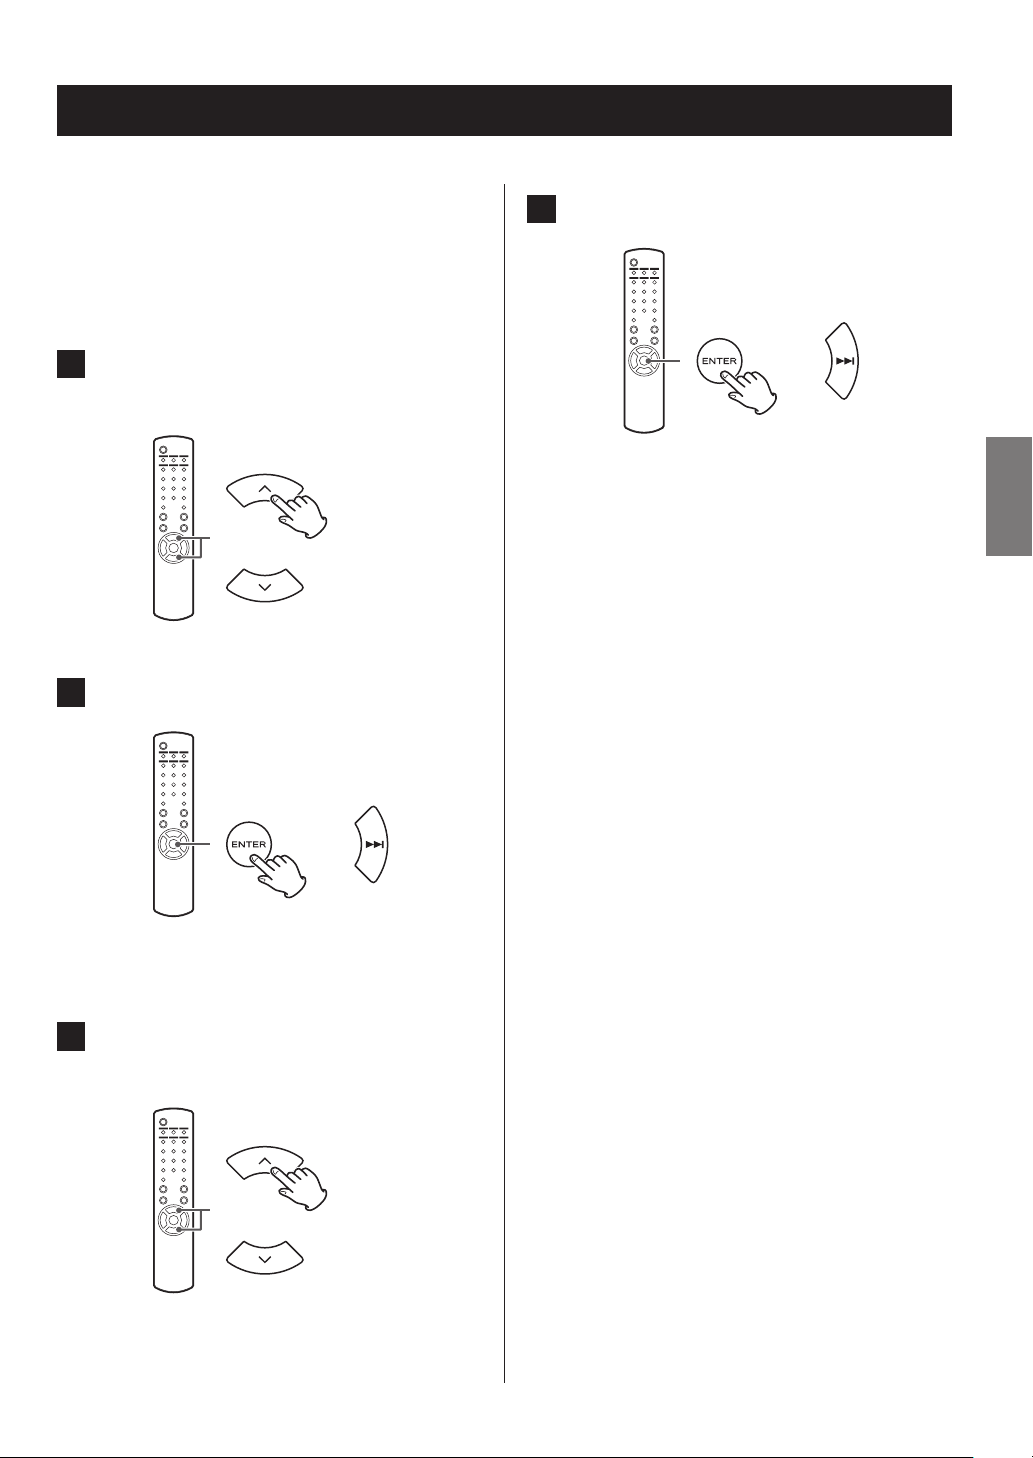
Press the scroll buttons (k/j) to select the
1
folder you want to listen to the track within.
Press the ENTER button.
2
Press the ENTER button.
4
or
Playback starts from the selected track.
p When playing files on a USB flash drive, press the
skip (.) button to move to the folder before.
p When viewing a folder, press the skip (/) button
to move to the next folder.
p When a file is selected, press the skip (/|) button
to start playback of the track.
ENGLISH
or
p MP3/WMA files that are not inside folders will be
shown after the folders in order.
Press the scroll buttons (k/j) to select the
3
track you want to listen to.
2929
Page 30
Playback time
(normal)
Artist
T
Album
Information shown on the display
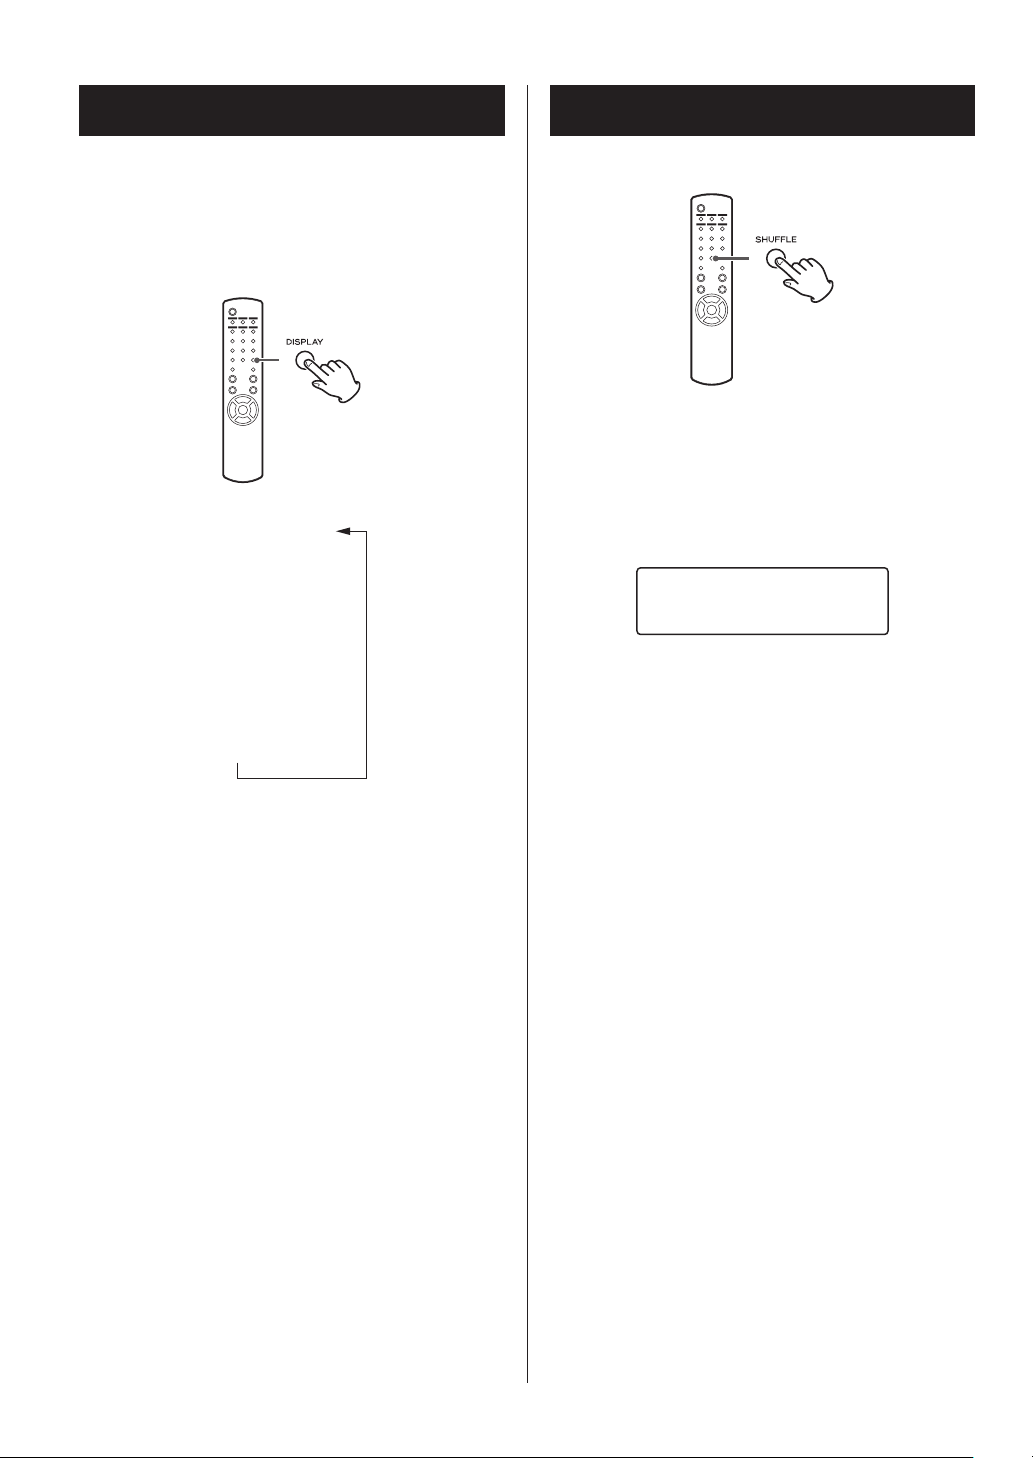
During playback of a file on a USB flash drive, information
about the track scrolls on the display.
During playback, press the DISPLAY button repeatedly to
change what is shown on the display.
Shuffle playback
Press the SHUFFLE button to activate shuffle playback
mode. Tracks on the USB flash drive will be played in random order.
USB flash drive
Example:
Z
Z
itle
Z
p The display of this unit can only show single-byte letters
and numbers. If the file information uses Japanese,
Chinese or other double-byte characters, playback is
possible but the name will not be shown correctly.
p A maximum of 80 characters of track information can
be shown.
86%6KXIIOH
:0$
p If you press the skip button (/) during shuffle play-
back, the next track/file will be randomly selected and
played. If you press the skip button (.), the currently
played track/file will be played from the beginning.
During shuffle playback, playback will not return to a
track that has already completed playing.
p To cancel shuffle playback, press the SHUFFLE button.
p If you press the stop button (H), shuffle playback will
stop, but shuffle mode will remain active.
p Shuffle playback of a USB flash drive will play all the
files in the selected folder only.
3030
Page 31

(r
RPT 1 (repeat one track/le)
(r
RPT 1 (repeat one track/le)
Repeat playback
M
L
Press the REPEAT 1/ALL button to cycle through repeat
Press the REPEAT 1/ALL button to cycle through repeat
modes as follows.
modes as follows.
RPT ALL
RPT ALL
epeat all tracks/les in the folder)
epeat all tracks/les in the folder)
(Repeat O)
(Repeat O)
Repeat all tracks/files in the folder
(RPT ALL)
All the tracks/files in the folder will be played repeatedly.
p Use the scroll buttons (k/j) during repeat playback to
move to other folders.
Use the skip buttons (.// ) to move up and
down folder levels.
All the tracks in the open folder will be played back
repeatedly.
Selecting a folder or file
Folder
File
File
ENGLISH
p Repeat mode will not be cancelled if you press the
p Repeat mode will not be cancelled if you press the
stop button (H).
stop button (H).
Repeat one track/file (RPT 1)
Repeat one track/file (RPT 1)
The track/file being played will be played repeatedly.
The track/file being played will be played repeatedly.
p If you press the skip buttons (.//) to select
p If you press the skip buttons (.//) to select
another track/file in “RPT 1” mode, the track/file you
another track/file in “RPT 1” mode, the track/file you
selected will be played repeatedly.
selected will be played repeatedly.
p When stopped, use the MULTI JOG knob on the main
p When stopped, use the MULTI JOG knob on the main
unit or the scroll buttons (k/j) on the remote control
unit or the scroll buttons (k/j) on the remote control
to select the file. Then, press the play/pause button
to select the file. Then, press the play/pause button
(7/9) or the skip button (/) to start playback fol-
(7/9) or the skip button (/) to start playback followed by the REPEAT 1/ALL button.
lowed by the REPEAT 1/ALL button.
p If you press the REPEAT 1/ALL button when stopped,
p If you press the REPEAT 1/ALL button when stopped,
the REPEAT 1 function will become active but will not
the REPEAT 1 function will become active but will not
appear on the display.
appear on the display.
Folder
Folder
Folder
File
Folder
File
File
File
3131
Page 32

Listening to an iPod/iPhone/iPad (1)
For detailed information about compatibility, see page 10.
p The following explanations refer to an iPod, but they
also apply to use with an iPhone or iPad.
Press the SOURCE button repeatedly to
1
select “USB/iPod”.
p The remote control’s USB/iPod button can also be
used.
p “Not Connected” will appear when no iPod is
connected.
Connect an iPod to this unit using the USB
2
cable supplied with the iPod.
p When the iPod is connected while a mode other
than iPod/USB mode is selected in the NP-H750, the
iPod will turn on and enter pause mode.
p If an iPod is connected to this unit, it will only be
recharged when this unit is ON.
p Recharging will stop when the iPod is fully recharged.
p Recharging is not possible when this unit is in standby.
Pausing playback
Press the play/pause button (G/J) to pause playback.
Playback stops at the current position.
To resume playback, press the play/pause button (G/J)
again.
The iPod automatically turns on and starts playback
from the iPod music list.
3232
Skipping to the next or previous file/
track
During playback or when paused, press the skip buttons
(.//) repeatedly until the desired file/track is found.
p When the . button is pressed during playback, the
file/track being played will be played from the beginning. If you want to play the previous files/tracks, press
the . button twice or more.
Page 33

Play (nomal playback)
RPT 1 (r
RPT ALL (r
Searching for a part of a song
Selecting a menu item
e
Hold down
During playback, hold down the skip buttons (.//)
and release it when the part you want to listen to is found.
Going back to the previous menu
Press the MENU button to go back to the previous menu.
When stopped, press the scroll buttons (k/j) to select a
menu item and then press the ENTER button.
Repeat playback
Press the REPEAT 1/ALL button to change the playback
mode.
epeat 1)
ENGLISH
epeat all)
If the iPod is set to repeat one song, the »icon appears
on the display of the iPod.
If the iPod is set to repeat all songs, the ¼icon appears
on the display of the iPod.
3333
Page 34

SHU Songs SHU Album
Shue o (normal playback)
Listening to an iPod/iPhone/iPad (2)
Initial network setup (1)
Shuffle playback
During playback, press the SHUFFLE button to change the
shuffle mode.
SHU: SHUFFLE
When you select “SHU Songs”, the iPod shuffles songs
within the list you choose to play.
When you select “SHU Album”, the iPod plays all the songs
on an album in order, and then randomly selects another
album in the list and plays through it in order.
When you use the network function for the first time, the
unit starts an initial setup procedure to connect to the
Internet.
Press the SOURCE button repeatedly to select
1
“Internet Radio”.
p You can also use the remote control’s NET button.
If the iPod is set to either of the shuffle modes, the ½
icon will appear on the iPod’s display.
p Each time you press the NET button, the source
switches between Internet radio and media player.
3434
Page 35

Press the MENU button to select “Setup
2
Menu”, turn the MULTI JOG knob to select
“Network”, and then press the ENTER button.
c
Turn the MULTI JOG knob to select “Wired” or
3
“Wireless”, and then press the ENTER button.
or
p When you select “Wired”:
Use the MULTI JOG knob and the ENTER button to
change settings of “DHCP” and “Proxy Setting”.
For detailed information, contact your network
administrator.
ENGLISH
or
p To go back to the previous screen, press the .
button.
p Make sure that the unit is connected to the net-
work using a LAN cable.
Continued on the next page e
3535
Page 36

Initial network setup (2)
p When you select “Wireless”:
1. Turn the MULTI JOG knob to select “Search AP”,
and then press the ENTER button.
(AP: access point)
2. Turn the MULTI JOG knob to select the desired
access point, and then press the ENTER button.
3. If you are asked to enter a wireless security password “KEY”, turn the MULTI JOG knob to select
characters you want to enter.
See “Entering characters” on the right column.
4. When you have finished entering all the characters of your password, press the ENTER button.
p The wireless security password is case-sensitive,
so be careful to enter lower and upper case letters as necessary.
p If you enter an incorrect password, “Failure” will
appear followed by “Network Problem”.
In that case, go back to Step 2 and make settings again.
When the unit has been successfully connected to
the access point, “Success” will appear on the
display.
p Make sure that no LAN cable is connected to
this unit.
Now the unit starts to connect to the Internet.
When the connection is established successfully,
the internet radio menu will be displayed. See
page 38 to select a station.
p If you are unable to connect the unit to the Internet,
refer to the Network item of the Troubleshooting section (page 58).
Entering characters
Turn the MULTI JOG knob to select a character.
1
Move the cursor by pressing/ button.
2
Press the . button to go back to the previous
character.
p Repeat steps 1 to 2 to enter next characters.
p To change a character, move the cursor to that char-
acter’s position and turn the MULTI JOG knob to
select the character desired.
Press the ENTER button to confirm the
3
selection.
When you have finished entering all the char-
4
acters, make sure that the cursor is to the right
of the last character you entered, and then
press the ENTER button.
Available characters
0123456789
ABCDEFGHIJKLMNOPQRSTUVWXYZ
abcdefghijklmnopqrstuvwxyz
(space)!”#¤%&’()*+,-./:;<=>?@[\]–_||`{|}¯
3636
Page 37

Network configuration (1)
Searching an access point
If you have moved or modified your Wi-Fi network environment, or if you have a problem connecting to the Internet,
perform the initial network setup to establish the Internet
connection again.
Follow the menu items as follows:
”Setup Menu” w ”Network” w ”Wireless” w ”Search AP”
p Follow the procedures described on pages 34-35 to
open the menu.
Network standby setting
If you select “On“ for this setting, the unit turns on and
starts playback automatically when it detects an AirPlay or
DLNA signal.
Follow the menu items as follows:
”Setup Menu” w ”Network” w ”Wireless” w “Wired” w
”Standby (Off)”, and then select “On”.
p Follow the procedures described on pages 34-35 to
open the menu.
To configure Wireless LAN settings
Select “Setup Menu” w “Network” w “Wireless”, and then
change settings of “DHCP”, “SSID”, “Security ”, “Key”, and “Proxy
Setting”.
p Follow the procedures described on pages 34-35 to
open the menu.
Using iPod Wi-Fi login sharing
Using this function, you can send the Wi-Fi setting on your
iPod/iPhone/iPad to this unit. If you have already finished
the Wi-Fi setting for this unit, you do not need to follow the
steps below.
This function is supported by the iPod/iPhone/iPad with
iOS 5.x or later only.
p The following explanations refer to an iPod, but they
also apply to use with an iPhone or iPad.
Connect an iPod to a Wi-Fi network.
1
ENGLISH
Manual Internet setup
You can check and modify detailed settings of the Internet
connection.
Follow the menu items as follows:
To check the current network settings
”Setup Menu” w ”Information”
To configure Wired LAN settings
Select “Setup Menu” w “Network” w “Wired”, and then
change settings of “DHCP” and “Proxy Setting”.
Turn the unit on.
2
p DO NOT connect a LAN cable to the unit.
Repeatedly press the SOURCE button to select
3
“Internet Radio”.
If the unit cannot be connected to a Wi-Fi network by
using the Internet radio or media player function, the
message “Network problem” will appear on the unit’s
display. Move on to the next step.
Repeatedly press the SOURCE button on the
4
unit or the USB/iPod button on the remote control to select USB/iPod as the source.
Continued on the next page e
3737
Page 38

Network configuration (2)
Listening to the Internet radio (1)
Connect the iPod to the unit’s USB port using
5
the USB cable that was supplied with your iPod.
Press and hold the MENU button on the unit for
6
about 3 seconds.
The buttons “Allow” and “Ignore” appear on the
7
iPod. Selec t “Allow”.
The message “Wi-Fi Sharing connecting.” appears on
the unit’s display.
When the setting process is completed, the message
“Wi-Fi Sharing Success” will appear on the display.
After the message “Wi-Fi Sharing Success” dis-
8
appears, put the unit in standby and turn it on
again, and then set the unit to AirPlay mode.
Listening to an Internet radio
broadcast/a podcast
Make sure to perform settings required for Internet connections before you listen to an Internet radio broadcast or
podcast.
Press the SOURCE button repeatedly to
1
select “Internet Radio”.
p You can also use the remote control’s NET button.
3838
Each time you press the NET button, the source
switches between Internet radio and media player.
Page 39

Turn the MULTI JOG knob to select a search
2
option, and then press the ENTER button.
Location:
Search by the location of the broadcaster.
Genre:
Search by the genre of music played on the station/podcast.
Podcasts By Location:
Search by the Podcast’s location.
Podcasts By Genre:
Search by the podcast’s genre.
ENGLISH
New Stations:
Select from a list of recently added stations.
or
Example:
¹,QWHUQHW 5DGLR
)DYRULWHV
Favorites:
A list of stations/podcasts you stored as favorite is displayed.
Select a station/podcast you want to listen to. You can make
a Favorites list at our Internet portal site. See page 41.
CAUTION:
The first time you access it, nothing will have been added
to the Favorites and “---- empty ----” will be displayed.
In this case, press the . button to return to the display
shown above. Then, select a different search method, or create a Favorite list (page 41) and select this method again.
Most Popular Stations:
Select from a list of popular stations.
Recently Played:
You can select the station/podcast from the ones you listened to recently.
If you have selected “Location”, “Genre”
3
“Podcasts By Location”, or “Podcasts By
Genre” in step , turn the MULTI JOG knob
2
to select an item, and then press the ENTER
button.
or
Added Stations:
Search the list created on our Internet portal site. Even
though the station list contains thousands of stations/podcasts, you may want to listen to stations not listed. You can
add your own stations/podcasts via the internet radio portal.
See page 41.
Example:
%XVLQHVV 1HZV
¹&HOWLF
The list of stations/podcasts is displayed.
Continued on the next page e
3939
Page 40

Playing
back
Bu
Openin
Listening to the Internet radio (2)
Elapsed time and le format
Turn the MULTI JOG knob to select the sta-
4
tion you want to listen to, and then press
the ENTER button.
or
Example when the information shown on the display is set
to elapsed time and file format:
,QWHUQHW 5DGLR
g
ering
,QWHUQHW 5DGLR
Information shown on the display
Each time you press the INFO button, the information on
the second line of the display changes as shown below.
(“Internet Radio” is shown on the first line of the display.)
Station
Track
Album
p If no information is available, the line will be empty.
p When opening or buffering, the amount of data
being downloaded is shown as a percentage.
4040
,QWHUQHW 5DGLR
03
Page 41

Internet radio portal
Access the radio portal on the Internet using your computer to fully enjoy the internet radio function of this unit.
Creating a list of favorite stations/podcasts
You can create a list of your favorite stations/podcasts on
the portal. This list can be viewed from your unit, making it
easier for you to find your usual programmes.
You can see the list of your favorite stations from “Favorites”
in the internet radio menu.
Adding favorite stations/podcasts
If the station/podcast you want to listen to is not in the
channel list, you can create your own list.
You can see the list of your added stations from “Added
Stations” in the internet radio menu.
Accessing the radio portal
Registering as a user
Enter the MAC address of the unit.
3
You can confirm the MAC address from “Setup Menu”
w “Information” w “MAC Address”.
When you enter the MAC address, do not enter “:”
between the alphanumeric characters.
Select a genre from the list.
4
Select a station to add to your favorite list.
5
Click the button to add the station, then a dialog box
appears.
Input a group name in the dialog box to
6
make a group, then click the button.
The group name is added to “My Favourite Groups”.
You can access the group from “Favourites” in the
Internet Radio menu.
ENGLISH
Open your Internet browser and access the fol-
1
lowing website.
http://teac.vtuner.com/
You can change the language by clicking each nation’s
flag icon on the top.
Enter your e-mail address and password to
2
register.
p To delete a station from your favorite list, select a station,
and then click the button. The station will be deleted
and a dialog box will appear.
4141
Page 42

Setting up the media player (1)
About the media player function
Using the media player function, you can play back the
music files on your computers through the LAN.
There are two ways of connecting to the computer: using
media sharing and using folder sharing.
Media sharing
Media sharing allows this unit to play back a shared media
library on the computer, as well as browsing the tracks using
tag items such as artist names, genres and album names.
p This unit can display only single-byte alphanumeric
characters. If a file includes double-byte characters (such
as Japanese, Chinese, etc.), they cannot be displayed
correctly. However, it does not affect file playback.
You need a PC running on Windows XP, Windows Vista, or
Windows 7, and Windows Media Player 11 or later on it.
Folder sharing
To use file sharing method, you need to configure your
music files open to access, so that other computers or this
unit can read those files.
Click “Turn on media streaming”.
5
On Windows Media Player, open “Stream”,
6
then “More streaming options...”.
Select “NP-H750” from the list, then click
7
“Customize...“.
Setting Windows Media Player 12
Connect your computer to a LAN.
1
Connect this unit to the LAN.
2
p If you have a problem connecting to the LAN, see
page 58.
If the files you want to share are not yet added
3
to the media library of Windows Media Player,
add them to the media library.
p Refer to the manual of Windows Media Player for
details.
On Windows Media Player, open “Stream”,
4
then “Turn on media streaming”.
4242
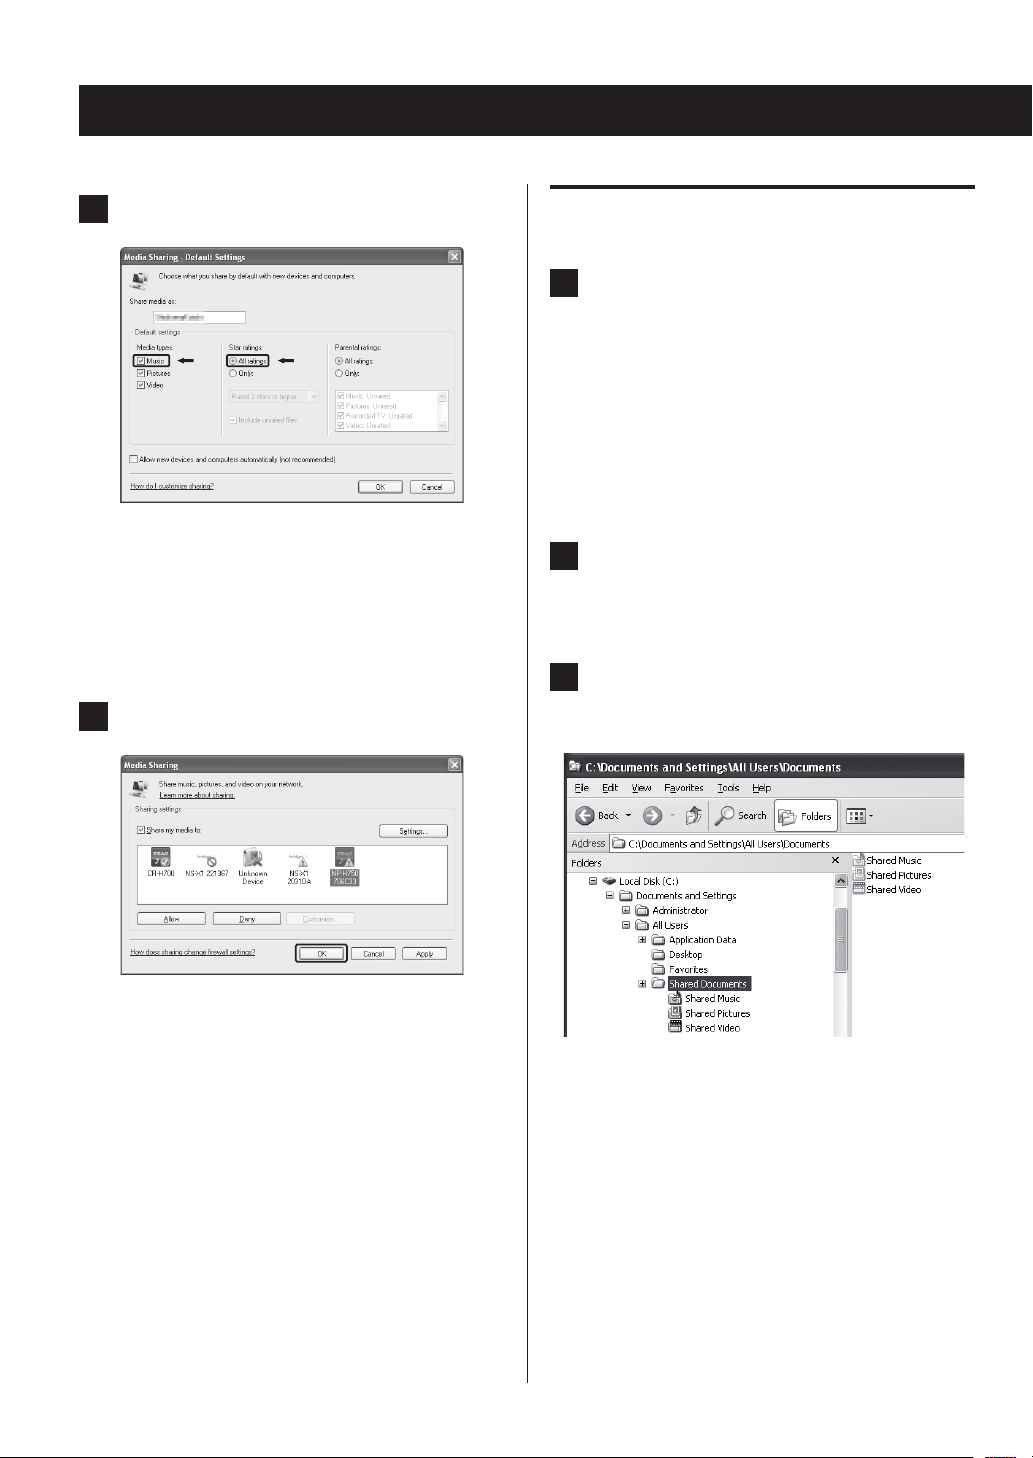
Configure detailed sharing settings.
8
p To listen to music files regardless of their rating, set
“Choose star ratings” to “All ratings”.
p Ensure that “Music” is checked.
Page 43

Click “OK“.
9
For the procedure of playback, see page 47.
Setting Windows Media Player 11
Connect your computer to a LAN.
1
Connect this unit to the LAN.
2
p If you have a problem connecting to the LAN, see
page 58.
If the files you want to share are not yet added
3
to the media library of Windows Media Player,
add them to the media library.
p Refer to the manual of Windows Media Player for
details.
Select “NP-H750” and click “Allow”.
6
The NP-H750 can now access to the shared library.
Click “Settings...”.
7
ENGLISH
On Windows Media Player, open “Library”,
4
then “Media Sharing...”.
Media Sharing window opens.
Activate “Share my media to:”.
5
“NP-H750” appears in the device list.
Continued on the next page e
4343
Page 44
Setting up the media player (2)
Configure detailed sharing settings. Click “OK”.
8
p To listen to music files regardless of their rating, set
“Star ratings” to “All ratings”.
p Ensure that “Music” is checked under the “Media
types” setting.
p For the procedure of playback, see page 47.
Click “OK”.
9
Setting shared folders (Windows XP)
Check the name of the Domain or the
1
Workgroup your computer belongs to.
To enable Shared Folders, your computer needs to be
a member of a Domain or a Workgroup.
Usually, your computer belongs to a Workgroup by
default. To see the name of the Domain or the
Workgroup your computer belongs to, check the PC
setting as follows:
Control Panel w System w Computer Name
Check the user account name and its password.
2
To access the computer from this unit, you need the
user account name and the password of the computer.
Copy files to the “Shared Music” folder in
3
“Shared Documents”.
4444
p You cannot play back files in the folder other than the
“Shared Music” folder with this unit. You need to perform settings for the shared folder to play back files.
Page 45

Right-click the folder which contains the
4
music files you want to share, and select
“Sharing and Security”.
In the “Sharing” tab, check “Share this folder”.
5
Setting shared folders (Windows Vista)
Check the name of the Domain or the
1
Workgroup your computer belongs to.
To enable Shared Folders, your computer needs to be
a member of a Domain or a Workgroup.
Usually, your computer belongs to a Workgroup by
default. To see the name of the Domain or the
Workgroup your computer belongs to, check the PC
setting as follows:
Control Panel w System and Maintenance w System
Check the user account name and its password.
2
To access the computer from this unit, you need the
user account name and the password of the computer.
Open “Control Panel”, “Network and Internet”,
3
then “Network and Sharing Center”.
Set “Public folder sharing” to “On (read only)”.
4
ENGLISH
Add files in the “Shared Music” folder to
6
“Media Library” on Windows Media Player.
If “Media Player” is selected as the current source,
select “Media Player” again (page 47).
Continued on the next page e
4545
Page 46

Setting up the media player (3)
Set “Password protected sharing” to “On”.
5
Copy the music files you want to play back
6
with this unit into the “Public Music” folder
in the “Public” folder.
Setting shared Folders (Windows 7)
Click “Change advanced sharing setting”.
4
Select “Turn on sharing so anyone with net-
5
work access can read and write files in the
Public folders” for “Public folder sharing”.
Check the name of the Domain or the
1
Workgroup your computer belongs to.
To enable Shared Folders, your computer needs to be
a member of a Domain or a Workgroup.
Usually, your computer belongs to a Workgroup by
default. To see the name of the Domain or the
Workgroup your computer belongs to, check the PC
setting as follows:
Control Panel w System and Security w System
Check the user account name and its password.
2
To access the computer from this unit, you need the
user account name and the password of the computer.
Open “Control Panel”, “Network and Security”,
3
then “Network and Sharing Center”.
4646
Click “Save changes”.
6
Copy the music files you want to play back
7
with this unit into the “Public Music” folder
in the “Public” folder.
Page 47

Listening with the media player (1)
M
L
p Before listening with the media player function, perform
setup for the Internet connection. For details, see pages
34-36.
Connect the unit and the computer or NAS
1
(Network Attached Storage) server to the
network through a wired or wireless LAN
connection.
Select “Media Player” by pressing the NET
2
button.
The server name appears on the display.
Turn the MULTI JOG knob to select the file/
4
track you want to play back, and then press
the ENTER button or / button.
or
This unit can display only single-byte alphanumeric characters. If a file includes double-byte characters (such as
Japanese, Chinese, etc.), they cannot be displayed correctly.
However, it does not affect file playback.
ENGLISH
Turn the MULTI JOG knob to select the com-
3
puter or server you want to use, and then
press the ENTER button or / button.
or
Selecting a folder or file
NAS
NAS
Folder
Folder
Folder
Folder
Folder
File
File
File
File
File
File
File
4747
Page 48

Listening with the media player (2)
Playback time
Using AirPlay (1)
Information shown on the display
During playback, press the INFO button repeatedly to change
what is shown on the display.
(normal)
Z
Artist
Z
Title
Z
Album
This unit is compatible with AirPlay. You can play back
audio files on your computer with iTunes 10 or later or iPod
touch/iPhone/iPad with iOS 4.2.1 or later through AirPlay.
p The following explanations refer to an iPod touch, but
they also apply to use with an iPhone or iPad.
From your iPod touch/iPhone/iPad:
p Before using AirPlay, perform setup for the Internet con-
nection. For details, see
Press the STANDBY/ON button to turn the
1
unit on.
pages 34-36
.
p To stop playback, press the stop (8) button on the main
unit for at least two seconds.
The indicator above the STANDBY/ON button lights
blue.
Turn your iPod touch on.
2
Connect your iPod touch to the network
3
where this unit is connected.
Select “Music” on your iPod touch.
4
Tap the (AirPlay) icon.
5
The available device list is displayed.
4848
Page 49

Using DLNA
Select “NP-H750” from the list.
6
p “NP-H750” can be set to appear in the list when you
have changed the Device Name Edit setting on the
Setup Menu.
Start playing back a file from your iPod touch.
7
It takes five or six seconds to start playing back a file.
p If you do not select another source after AirPlay has been
stopped, “Air Play” will not disappear from the display.
p When the iPod touch is connected to this unit’s USB
port, AirPlay cannot be used.
From your Computer:
p Before using AirPlay, perform setup for the Internet con-
nection. For details, see
Turn your computer on.
1
pages 34-36
.
You can play back audio files on the server connected to
the network, from your computer or mobile device.
p Before using DLNA, perform setup for the Internet con-
nection. For details, see pages 34-36.
p Make sure that DLNA application software is installed
on your computer or mobile device.
p Prepare an NAS (Network Attached Storage) server
compatible with DLNA.
Turn your computer or mobile device on.
1
Connect a NAS (Network Attached Storage)
2
server to the network.
For details on how to connect, refer to the server’s
instructions.
Connect your computer or mobile device to
3
the unit and the NAS server using the DLNA
application software.
ENGLISH
Connect your computer to the network
2
where this unit is connected.
Start iTunes on your computer.
3
Click the (AirPlay) icon on iTunes.
4
The available device list is displayed.
Select the “NP-H750” from the list.
5
Start playing back a file from iTunes.
6
Start playing back a file from your com-
4
puter, mobile device or DLNA application
software.
4949
Page 50

Sleep Timer
SLEEP 90
SLEEP 80
SLEEP 10
SLEEP OFF
Setting the wake-up timer (1)
Using the sleep timer, you can put the unit in standby after
a specified amount of time.
Press the SLEEP button repeatedly until the desired setting
appears on the display.
The settings for the time until the unit enters standby
change as follows.
Enter standby
after 90 minutes
Enter standby
after 80 minutes
・
・
・
・
(More options
in 10-minute steps)
Enter standby
after 10 minutes
You can set the wake-up timer to start playback at a set
time.
p Adjust the clock before setting the timer (page 23).
Setting the time of the timer
Press the TIME SET button repeatedly until
1
“On Time” is displayed.
The “hour” value blinks.
Press the scroll buttons (k/j) to set the
2
hour value, and press the ENTER button.
5050
Set the sleep timer setting
to OFF
p The display will be dimmed when you set the sleep
timer.
p After setting the sleep timer, press the SLEEP button
once to show for three seconds the amount of time
until the unit enters standby.
p When the sleep timer setting is set to OFF, dimming of
the display also stops.
e
The “minute” value blinks.
p If you do not do anything for 30 or more seconds,
the unit will exit timer setting mode automatically.
p To exit timer setting mode, press the stop (8) button.
Page 51

Press the scroll buttons (k/j) to set the
Timer O
Timer Daily
Timer Once
3
minute value, and press the ENTER button.
Changing the timer mode
Press the remote control’s TIMER button to cycle through
timer modes as follows.
e
or
“Off Time” appears on the display, and the “hour” value
blinks.
Repeat step 2 and 3 to set the Off time.
4
“Source Select” appears on the display.
Press the scroll buttons (k/j) to select the
5
source, and press the ENTER button.
e
Setting the timer (daily or once)
At the set On Time, the unit will turn on and start playback
(every day or once). At the set Off Time, the unit will enter
standby.
Set the timer on and off times (page 50).
1
ENGLISH
This completes setting the clock time used for the timer.
Next, you must activate the timer. Follow the procedures in the next sections.
p USB playback is not possible. Only iPod/iPhone/iPad
playback is possible.
p AirPlay cannot be used with the wake-up timer.
Select “Timer Daily” or “Timer Once” by
2
pressing the TIMER button on the remote
control unit.
The timer indicator “ ” lights on the display.
p When in standby, power consumption is less than
0.5 W, so “ ” will not be shown.
Continued on the next page e
5151
Page 52

Setting the wake-up timer (2)
Updating the firmware (1)
Press the ENTER button.
3
Prepare the playback source.
4
Before setting the wake-up timer, connect the input
source to be used and adjust the volume.
p AUX 1, AUX 2, iPod, OPTICAL and COAXIAL can be
used as input sources for the wake-up timer.
p If the input source is an iPod, it will start playing
automatically. Other types of sources will not play
automatically, so they must be playing back at the
On Time or no audio will be output. (Use the timer
function of the input device to start its playback,
for example.)
p Playback will not occur if a USB flash drive is
connected.
Press the STANDBY/ON button to put the
5
unit in standby.
This completes setting the wake-up timer.
Using the latest firmware file that is available on the internet, you can update this unit’s firmware (built-in program
that controls the unit).
We recommend that you use the unit with the latest firmware
because updating the firmware to the latest version can add
more functions to or improve the stability of the unit.
Cautions when updating the firmware
p If the following window is displayed on the screen dur-
ing the update process, the unit’s firmware is being
updated. Please wait.
p During the update process, do not put the NP-H750
into standby, or do not turn off the power of the computer or any network peripherals (access point, router,
splitter, repeater, etc.) that are required for Wi-Fi communication. Do not unplug those power cords, either.
Turning the timer off
When not using the timer, press the remote
control’s TIMER button to select “Timer Off”.
The timer indicator “ ” disappears from the display.
5252
WARNING
Putting the unit into standby or unplugging the power
cord of the devices mentioned above as well as power
outage may interrupt the update process and may
result in permanent damage to the unit.
p If the following message appears, do not click OK before
the unit restarts automatically.
If you click OK by mistake before the unit restarts, the
webpage will not appear.
Page 53

Downloading the latest firmware
You can download the latest version of the firmware from
the NP-H750 product information page of TEAC website.
http://www.teac.eu/
p If there is no firmware update, no firmware files will be
available on the website.
p You can check the current firmware version of your unit
using “Setup Menu”. Follow the menu items as follows:
“Setup Menu” w “I nformation” w “Firmware Version”
Wireless connection
Press the SOURCE button repeatedly to select
2
network mode.
ENGLISH
Updating the firmware using a LAN
Connect the unit to your LAN through a wired
1
or wireless connection.
For detailed information, see pages 11 and 37.
Wired connection
Hub or
rooter
Select “Internet Radio” or “Media Player” by
3
pressing the NET button on the unit or on
the remote control.
Press the MENU button on the unit. Select
4
“Software Update”, and then select “Webpage”.
p The unit will restart automatically.
p The unit’s IP address will appear on the unit’s dis-
play after the unit restarts.
Start your web browser, and then enter the
5
unit’s IP address.
p In this example, we explain this procedure using
Internet Explorer 8 on Windows XP.
Continued on the next page e
5353
Page 54

Updating the firmware (2)
Click Browse..., and then select the desired
6
firmware file (.fw).
c
Click “OK” to start the firmware update.
8
When the update starts, the following message will
appear.
p The update status is also displayed on the unit.
Click “Upload”.
7
If the following message appears, click “OK”, and then
return to Step
Check the file and its name.
5
5454
When the firmware update is completed, the unit will
restart automatically.
Disconnect the power cord from the outlet,
9
connect it again, and then press the STANDBY/
ON button to turn the unit on.
Page 55

Updating the firmware via the Internet
Press the SOURCE button repeatedly to
1
select network mode.
Select “Internet Radio” by pressing the NET
2
button.
Select “Software Update” from “Setup Menu”
4
by turning the MULTI JOG knob, and then
press the ENTER button or / button.
or
“Software Update” appears on the display.
ENGLISH
Open “Setup Menu” by pressing the MENU
3
button.
Setup Menu
›Software Update
Continued on the next page e
5555
Page 56

Updating the firmware (3)
Turn the MULTI JOG knob to select “Internet”,
5
and then press the ENTER button or the /
button.
or
p You can check the current firmware version of your
unit using “Setup Menu”. Follow the menu items as
follows:
“Setup Menu” w “I nformation” w “Firmware Version”
Updating the firmware using a USB
flash drive
Download the latest version of the firmware
1
file from TEAC website, save it on a USB flash
drive, and insert the USB flash drive into the
USB port in the unit’s front panel.
p For information about downloading the firmware,
see page 53.
Follow Steps 1 to 4 in “Updating the firm-
2
ware via the Internet” on page 55 to show
the following on the unit’s display.
Setup Menu
›Software Update
Turn the MULTI JOG knob to select “USB”,
3
and then press the ENTER button or the /
button.
Installation of the firmware file starts automatically.
Disconnect the power cord from the outlet,
6
connect it again, and then press the STANDBY/
ON button to turn the unit on.
5656
or
Disconnect the power cord from the outlet,
4
connect it again, and then press the STANDBY/
ON button to turn the unit on.
Page 57

Troubleshooting (1)
If you experience a problem with this unit, please check
the following items before requesting service. If it still does
not operate correctly, contact the retailer where you purchased the unit or TEAC customer support (See the back
cover for contact information).
General
No power.
e Check that the power cord is completely plugged into
the power outlet.
No sound output
e Press the SOURCE button to select proper source.
e Adjust the volume.
Remote control unit does not work.
e If the batteries are exhausted, change the batteries.
e Use remote control unit within the range (5 m/16 ft.)
and point at the front panel.
e Clear obstacles between the remote control unit and
the main unit.
e If a fluorescent light is near the unit, turn the light off.
Some unknown characters are displayed on the display panel.
e This unit cannot display symbols and full-size or
double-byte characters (such as Japanese, Chinese,
etc.) correctly. File names for MP3, WMA or other file
formats should consist of alphanumeric characters.
iPod/iPhone/iPad
p The following explanations refer to an iPod, but they
also apply to use with an iPhone or iPad.
Will not play.
e Remove the iPod from the USB port, wait a few
seconds, and insert it again.
e Software update may solve the problem. Visit the
Apple website and download the latest iPod software.
http://www.apple.com/downloads/
Cannot operate the iPod/iPhone/iPad.
e Make sure the HOLD switch of the iPod is not set to
HOLD.
e You cannot adjust the unit volume using an iPod/
iPhone/iPad.
ENGLISH
The sound is noisy.
e The unit is too close to a TV set or similar appliances.
Install the unit apart from them, or turn them off.
Audio Files
There is no sound even if the play/pause button
(y/J) is pressed.
e Check the file format (page 8).
“Artist:[ ]”, “Title:[ ]”, and “Album:[ ]” appears on
the display.
e There is no ID3 tag information for the music file.
Edit the title, artist, and album information of the song
on a PC using editing application software for MP3,
WMA or other file formats.
USB connections with a computer
The computer does not recognize this unit.
e
USB connection is only possible with computers running
the following operating systems.
Windows XP (32-bit)
Windows Vista (32/64-bit)
Windows 7 (32/64-bit)
Mac OS X 10.6 (Snow Leopard)
(Mac OS X 10.6.4 or later)
Mac OS X 10.7 (Lion)
Mac OS X 10.8 (Mountain Lion)
(As of October, 2012)
Operation with other operating systems is not
guaranteed.
e You must install the dedicated driver on the computer.
If you connect this unit with a computer before installing the driver, it will not work properly (page 20).
5757
Page 58

Troubleshooting (2)
There is noise.
e If other applications are run while a music file is being
played back, the sound could break up and noise
might be heard. Avoid running other applications
during playback.
e If you connect this unit with the computer via a USB
hub, noise might occur. If this happens, connect this
unit directly to the computer.
Audio files cannot be played back.
e Connect the computer with this unit and switch to
“USB Audio In” before starting the music playback
software and music file playback.
If you connect this unit and the computer, or switch
the input to “USB Audio In” after launching the music
playback software, the audio data might not play back
properly.
Network
Cannot connect to the Internet.
e Check if your computer can connect to the Internet
using the same network.
e Enter a correct pass key to the network.
e Check the settings of your network’s firewall. The unit
needs access to the following UDP and TCP ports as a
minimum: 80, 554, 1755, 5000 and 7070.
e If the Internet connection speed is too slow, searching
might take time.
AirPlay
Will not play.
e Check if you selected the unit as the device for Airplay.
e Check the connection with the access point (page
37).
Media player
Will not play.
e Check if you selected the unit as the device for Music
Streaming.
Cannot connect to the LAN.
e Check the settings of your network’s firewall. The unit
needs access to the following UDP and TCP ports at
least: 80, 554, 1755, 5000 and 7070.
e Check if your computer can connect to the Internet
using the same network.
e Enter a correct password to the network.
e Check if the computer is not shut down or in the sleep
mode. Set up the computer not to shut down or enter
sleep mode automatically.
Cannot listen to a station/podcast.
e The broadcaster has a temporary problem with
Internet connection.
e Check if your Internet connection is not temporarily
disconnected or disturbed.
Cannot find a station/Podcast in the station list.
e Add the station/podcast to your own station list by
accessing the internet radio portal (page 41).
e The station/podcast may not be broadcast at the
moment.
e The link of the station/podcast may be out of date.
e The broadcast station or podcast might no longer be
available.
5858
e
There may be a problem with the network authentication.
Press the SOURCE button or NET button to select
“Media Player” again.
Cannot find a track. (Shared Media)
e Add the track to the media library of Windows Media
Player.
e Select “NP-H750“ from the list (Windows 7) or select
“Allow” for “NP-H750” (Windows Vista).
e Check the file format (page 8).
e If you have antivirus security software enabled on
your computer, the unit may fail to connect.
Page 59

Restoring factory settings
Cannot find a folder/file. (Shared Folders)
e Configure the folder/file sharing setting (pages
44-46).
e Add the file to the shared folder.
e Enter a correct password of the user account.
e Check the file format (page 8).
e If you have antivirus security software enabled on
your computer, the unit may fail to connect.
Since this unit uses a microcontroller, external noise
and other interference can cause the unit to malfunction. If this should occur, unplug the unit’s power
from the outlet and wait a little while before plugging the power in again and retrying the operation.
If the unit still does not function properly after doing
this, follow the procedures in the next section to
restore the unit to its factory default settings.
If the unit does not operate properly, follow the procedures
below to restore the unit to its factory default settings. This
might return it to ordinary operation.
When the unit is in standby, hold down the
1
SOURCE button and play/pause button (y/J)
together for at least 4 seconds.
Hold down for
at least 4 seconds
Disconnect the power cord from the outlet,
2
connect it again, and then press the STANDBY/
ON button to turn the unit on.
ENGLISH
The unit is restored to its factory default settings.
p If the power supply is interrupted for 14 days or
longer, all the settings kept in memory (such as
timer settings) will be erased.
p It takes more than 3 days after plugging the power
cord into the outlet to charge enough electricity
for the memory backup function.
5959
Page 60

Specifications
Amplifier
Output Power .......... 40 W + 40 W (6 ohms, 0.5 %, 1 kHz)
Input Sensitivity .................... PHONO: 2.5 mV/47 kΩ
AUX1, AUX2: 200 mV/47 kΩ
Frequency Response .......... 20 Hz to 60 kHz (+1/−3 dB)
Subwoofer pre-out ........................ 10 Hz to 35 kHz
USB port (front panel)
USB-A connector ........................USB 2.0 compliant
Playable format .......... WAV, FLAC, MP3, OGG, WMA, AAC
Frequency Response .............. 20 Hz to 20 kHz (±2 dB)
Signal-to-Noise Ratio ..................... more than 85 dB
Power supplied ........................ 500 mA − 2100 mA
USB audio input connector (rear panel)
USB-B connector ........................USB 2.0 compliant
Sampling frequency
32 kHz, 44.1 kHz, 48 kHz, 88.2 kHz, 96 kHz, 176.4 kHz,192kHz
Quantization bit rates .............................16/24-bit
Internet Radio
Format ....................... WAV, FLAC, MP3, OGG, WMA
Internet connection
LAN terminal ................................10/100 BASE-T
Wireless LAN .......................IEEE 802.11b compliant
(modulation method: DSSS)
IEEE 802.11g compliant
(modulation method: OFDM)
Security ......................... WEP, WPA-PSK, WPA2-PSK
GENERAL
Power Requirements
European model ....................... AC 230 V, 50 Hz
North American model ..................AC 120 V, 60 Hz
Power Consumption .................................120 W
less than 0.5 W (standby)
Dimensions (W x H x D) .............. 290 × 113 × 340 mm
(9 3/8” × 3 3/4” × 11”)
Weight ....................................... 5.4 kg (12 lb)
Standard Accessories
Power Cord × 1
Remote Control Unit (RC-1308) × 1
Batteries (AAA) × 2
Owner’s manual × 1
Warranty card × 1
p Design and specifications are subject to change with-
out notice.
p Weight and dimensions are approximate.
p Illustrations may differ slightly from production models.
Digital audio inputs
COAXIAL digital ................................RCA jack × 1
(0.5 Vp-p/75 Ω)
OPTICAL digital
Optical digital connector (rectangular) × 1
(−24.0 to −14.5 dBm peak)
6060
Page 61

INSTRUCTIONS DE SÉCURITÉ IMPORTANTES
Pb, Hg, Cd
o N'exposez pas cet appareil aux gouttes ni aux
éclaboussures.
o Ne placez pas d'objet rempli de liquide sur l'appareil,
comme par exemple un vase.
o N’installez pas cet appareil dans un espace confiné
comme une bibliothèque ou un meuble similaire.
o L’appareil tire un courant nominal de veille de la prise
secteur quand son interrupteur POWER ou STANDBY/
ON n’est pas en position ON.
o L’appareil doit être placé suffisamment près de la prise
de courant pour que vous puissiez à tout moment
atteindre facilement la fiche du cordon d’alimentation.
o La fiche secteur est utilisée comme dispositif de
déconnexion et doit donc toujours rester disponible.
o Les produits de Classe sont équipés d'un cordon
d'alimentation ayant une fiche de terre. Le cordon de
ces produits doit être branché dans une prise de terre.
o Si le produit utilise des batteries (y compris un pack
d'accus ou des piles), elles ne doivent pas être exposées
au soleil, au feu ou à une chaleur excessive.
o PRÉCAUTION pour les produits utilisant des batteries au
lithium remplaçables: il existe un danger d'explosion en
cas de remplacement par un type de batterie incorrect.
Remplacez-les uniquement par des modèles identiques
ou équivalents.
o Des précautions doivent être prises pour l'emploi
d'écouteurs ou d'un casque avec le produit car une
pression acoustique (volume) excessive dans les écouteurs
ou dans le casque peut provoquer une perte d’audition.
Q Précautions concernant les piles
Un mauvais emploi des piles peut entraîner leur rupture
ou leur fuite, avec pour conséquence un incendie, des
blessures ou la salissure des objets proches. Veuillez lire
et suivre attentivement les précautions suivantes.
o Veillez à insérer les piles avec leurs pôles positif (+) et
négatif (_) correctement orientés.
o Utilisez des piles du même type. N’utilisez jamais des
types de pile différents ensemble.
o Si la télécommande doit rester inutilisée durant une
période prolongée (plus d’un mois), retirez ses piles
pour éviter qu’elles ne coulent.
o Si les piles coulent, essuyez le liquide dans le
compartiment des piles et remplacez les piles par des
neuves.
o N'utilisez pas de piles d'un type autre que ceux spécifiés.
Ne mélangez pas des piles neuves avec des anciennes et
n’utilisez pas ensemble des types de pile différents.
o Ne chauffez pas et ne démontez pas les piles. Ne jetez
jamais les piles dans un feu ou dans de l’eau.
o Ne conservez et ne transportez pas les piles avec
d’autres objets métalliques. Les piles pourraient entrer
en court-circuit, couler ou exploser.
o Ne rechargez jamais une batterie sans avoir vérifié
qu’elle peut l’être.
Pour les consommateurs européens
Mise au rebut des équipements électriques et
électroniques
(a) Tout équipement électrique et électronique doit être
traité séparément de la collecte municipale d'ordures
ménagères dans des points de collecte désignés par
le gouvernement ou les autorités locales.
(b)
En vous débarrassant correctement des équipements
électriques et électroniques, vous contribuerez à la
sauvegarde de précieuses ressources et à la prévention
de potentiels effets négatifs sur la santé humaine et
l'environnement.
(c)
Le traitement incorrect des déchets d'équipements
électriques et électroniques peut avoir des effets
graves sur l'environnement et la santé humaine en
raison de la présence de substances dangereuses dans
les équipements.
(d) Le symbole de déchets d'équipements
électriques et électroniques (DEEE), qui
représente une poubelle à roulettes barrée
d'une croix, indique que l'équipement
électrique et électronique doit être collecté et
traité séparément des déchets ménagers.
(e)
Des systèmes de retour et de collecte sont disponibles
pour l'utilisateur final. Pour des informations plus
détaillées sur la mise au rebut des vieux équipements
électriques et électroniques, veuillez contacter votre
mairie, le service d'ordures ménagères ou le magasin
dans lequel vous avez acquis l'équipement.
Mise au rebut des batteries et/ou accumulateurs
(a) Les batteries et/ou accumulateurs hors d'usage
doivent être traités séparément de la collecte
municipale d'ordures ménagères dans des points
de collecte désignés par le gouvernement ou les
autorités locales.
(b) En vous débarrassant correctement des batteries et/
ou accumulateurs hors d'usage, vous contribuerez
à la sauvegarde de précieuses ressources et à la
prévention de potentiels effets négatifs sur la santé
humaine et l'environnement.
(c) Le traitement incorrect des batteries et/ou
accumulateurs hors d'usage peut avoir des effets
graves sur l'environnement et la santé humaine car ils
contiennent des substances dangereuses.
(d)
Le symbole de déchets d'équipements
électriques et électroniques (DEEE), qui
représente une poubelle à roulettes barrée
d'une croix, indique que les batteries et/ou
accumulateurs doivent être collectés et traités
séparément des déchets ménagers.
Si une batterie ou un accumulateur contient plus que
les valeurs spécifiées de plomb (Pb), mercure (Hg) et/ou
cadmium (Cd) telles que définies dans la directive sur
les batteries (2006/66/EC), alors les symboles chimiques
de ces éléments seront indiqués sous le symbole DEEE.
(e)
Des systèmes de retour et de collecte sont disponibles
pour l'utilisateur final. Pour des informations plus
détaillées sur la mise au rebut des batteries et/
ou accumulateurs, veuillez contacter votre mairie,
le service d'ordures ménagères ou le magasin dans
lequel vous les avez achetés.
6161
ENGLISH
FRANÇAIS
Page 62

Sommaire
Avant l’utilisation
Nous vous remercions d’avoir choisi TEAC. Lisez ce
mode d'emploi avec attention pour tirer les meilleures performances de cette unité.
Avant l’utilisation ..............................................62
Fichiers ........................................................64
Branchement des enceintes ...................................65
Raccordements ................................................67
Nomenclature et fonctions des parties (unité principale) .......70
Nomenclature et fonctions des parties (télécommande) .......72
Emploi de la télécommande ...................................75
Lecture de musique sur un ordinateur .........................76
Réglage de l'heure .............................................79
Fonctionnement de base ......................................80
À propos de l'ErP ..............................................83
Écoute des fichiers d'une clé USB ..............................83
Recherche dans les dossiers ...................................85
Informations affichées .........................................86
Lecture aléatoire («Shuffle») ...................................86
Lecture en boucle (répétition) .................................87
Écoute d’un iPod/iPhone/iPad .................................88
Configuration réseau initiale ...................................90
Configuration réseau ..........................................93
Écoute de la radio Internet .....................................94
Portail radio Internet ...........................................97
Configuration du lecteur de média ............................98
Écoute avec le lecteur de média ..............................103
Emploi d'AirPlay ..............................................104
Emploi du DLNA ..............................................105
Minuterie d'extinction ........................................106
Réglage du réveil .............................................106
Mise à jour du firmware .......................................108
Guide de dépannage .........................................113
Rappel des réglages d'usine ..................................115
Caractéristiques techniques. . . . . . . . . . . . . . . . . . . . . . . . . . . . . . . . . . .116
Fonctions du NP-H750
p Port USB pour iPod/iPhone/iPad/clés USB
p Radio Internet (page 94)
p Lecteur de média (page 98)
p AirPlay (page 104)
p DLNA (page 105)
Les pistes (morceaux) présents sur un serveur connecté
au réseau peuvent être lues par des ordinateurs et
appareils mobiles si des applications compatibles DLNA
sont installées sur ceux-ci.
Contenu de l'emballage
Vérifiez que vous disposez bien de tous les accessoires
représentés ci-dessous.
Veuillez contacter le magasin dans lequel vous avez acheté
cette unité si l'un de ces accessoires manque ou a été
endommagé durant le transport.
Cordon d’alimentation × 1
Télécommande (RC-1308) × 1
Piles pour télécommande (AAA) × 2
Mode d'emploi (ce document) × 1
p Conservez ce mode d'emploi dans un endroit sûr pour
référence ultérieure.
Carte de garantie × 1
6262
Page 63

ATTENTION
Lisez ce qui suit avant d’utiliser l’unité.
p Évitez d'exposer l'unité directement au soleil et de la pla-
cer près d'une quelconque source de chaleur telle qu'un
radiateur, une bouche de chauffage, une cheminée ou
un amplificateur. Évitez aussi les endroits sujets aux vibrations ou exposés à une poussière excessive, au froid et à
l’humidité.
p En veille, cette unité consomme de l'énergie.
p Placez l'unité sur une surface stable près du système
audio que vous allez utiliser.
p En raison du poids de l'unité, prenez garde à ne pas
vous blesser quand vous la déplacez. Faites vous aider si
nécessaire.
p La tension d’alimentation doit correspondre à la tension
imprimée sur le panneau arrière. Si vous avez des
doutes à ce sujet, consultez un électricien.
p Il est possible que l’unité chauffe durant l’utilisation, lais-
sez donc toujours un espace suffisant autour d'elle pour
sa ventilation. Quand vous posez cette unité, positionnez-la pour qu'elle soit au moins à 30 cm des murs et
autres appareils afin de permettre une bonne dissipation
thermique. Si vous l'installez dans un rack, laissez au
moins 30 cm de libre au-dessus et derrière l'unité. NE placez RIEN sur le dessus de l'unité, pas même des CD, CD-R,
disques vinyle ou cassettes.
p N’ouvrez pas le boîtier de l'unité car cela peut endom-
mager le circuit ou causer un choc électrique. Si un
objet étranger pénètre dans l’unité, consultez votre
revendeur ou le service après-vente TEAC.
p Quand vous débranchez le cordon d'alimentation de la
prise secteur, tirez toujours sur la prise, jamais sur le
cordon.
p En fonction des ondes électromagnétiques de télédiffu-
sion, des parasites peuvent apparaître sur les écrans de
télévision quand cette unité est sous tension. Ce n'est
pas un mauvais fonctionnement de cette unité ou du
téléviseur. Si cela se produit, mettez l'unité en veille.
Entretien
Si la surface de l'unité est sale, essuyez-la avec un chiffon
doux ou utilisez un détergent liquide léger dilué. Laissez la
surface de l'unité sécher complètement avant utilisation.
B Par sécurité, débranchez le cordon d'alimenta-
tion de la prise secteur avant tout nettoyage.
p Ne vaporisez jamais du liquide directement sur cette
unité.
p N’utilisez pas de diluant ni d'alcool car ils peuvent
endommager la surface de l’unité.
p Évitez un contact prolongé de l'unité avec des maté-
riaux caoutchouteux ou plastiques car ceux-ci peuvent
endommager le boîtier.
FRANÇAIS
6363
Page 64

Fichiers
Fichiers lisibles
Cette unité peut lire des fichiers audio conservés sur des
clés USB.*
p Les clés USB doivent être formatées en FAT 16 ou FAT 32,
mais pas en NTFS.
* Le port USB de cette unité ne prend en charge que les
mémoires flash USB (aussi appelées «clés USB»). Il ne
prend pas en charge les disques durs USB standard.
Les formats de fichier lisibles par chaque source de lecture
sont les suivants.
Format Clé USB
WAV
FLAC
MP3
OGG
WMA
AAC
Lecteur de média
WiFi Câble Ethernet
WMA
Extension de fichier: .asf/.wma
Flux: WMA2/7/8/9/10, WMA Pro, WMA Lossless**
Fréquence d'échantillonnage: 8 kHz à 48 kHz
Débit binaire: 5kb/s à 320kb/s
** Les formats WMA Pro et WMA ne sont pris en charge que
si l'ordinateur de lecture utilise le lecteur Windows Media
12 ou ultérieur (la lecture se fait après transcodage).
AAC
Extension de fichier: .m4a/.aac
Flux: MPEG-4 AAC/MPEG-4, HE AAC (AAC Plus v1/2)
Fréquence d’échantillonnage: 32 kHz à 96 kHz
Affichage des noms de fichier
L'écran de cette unité ne peut afficher que les lettres et
chiffres à simple octet. Si des informations de fichier utilisent des caractères japonais, chinois ou autres à double
octet, la lecture est possible mais le nom ne sera pas affiché correctement.
WAV
Extension de fichier: .wav
Flux: LPCM
Fréquence d'échantillonnage: 8 kHz à 48 kHz
FLAC
Extension de fichier: .flac
Flux: FLAC
Fréquence d'échantillonnage: 8 kHz à 48 kHz
L'USB n'accepte qu'une fréquence de 48kHz.
MP3
Extension de fichier: .mp3
Flux: MPEG-1/2 Layer III
Fréquence d'échantillonnage: 8 à 48 kHz
Débit binaire: 8 à 320 kb/s et débit binaire variable (VBR)
Ogg Vorbis
Extension de fichier: .ogg
Flux: Ogg
Fréquence d'échantillonnage: 8 kHz à 48 kHz
Débit binaire: 16kb/s à 128kb/s
Précautions d'emploi des ordinateurs
et autres appareils pour créer des
fichiers
p Incluez toujours l'extension dans le nom de fichier.
p Lisez le mode d'emploi du logiciel que vous employez
pour créer un fichier au moyen d'un ordinateur.
Les fichiers ne peuvent pas être
correctement lus
p Les fichiers sans extension ne peuvent pas être lus.
Même si le nom de fichier porte une extension, la lecture n'est pas possible si le format des données est
incorrect.
p Les fichiers à débit binaire variable peuvent ne pas être
lus correctement.
p Si plus de 2000fichiers sont enregistrés sur une clé USB,
l'unité risque de ne pas pouvoir les lire correctement.
6464
Page 65

Branchement des enceintes (1)
Enceintes
V
Précautions lors des branchements
p Faites tous les autres branchements avant de
brancher les fiches d'alimentation dans les prises
secteur.
p Lisez les modes d'emploi de tous les appareils qui
seront connectés et suivez leurs instructions.
p Ne regroupez pas les câbles de connexion avec des
cordons d'alimentation. Cela pourrait entraîner des
bruits.
Prises SPEAKERS
A
Raccordez les enceintes à cette unité à l'aide de câbles
d’enceinte du commerce.
Les borniers + (plus) de cette unité sont rouges (pour
l'enceinte droite) et blancs (pour l'enceinte gauche).
Les borniers d'enceinte noirs sont les borniers ^
(moins). Généralement, le conducteur ¥ du câble
d'enceinte est marqué pour le distinguer du conducteur
^ du câble. Branchez ce conducteur marqué aux borniers¥ rouge et blanc, et le conducteur non marqué
aux borniers ^ noirs.
p Vérifiez l’impédance de vos enceintes. Branchez
des enceintes ayant une impédance d'au moins
6ohms.
Avant raccordement
1. Dénudez environ 1 cm de l'extrémité du câble
d'enceinte.
2. Épissez bien le conducteur.
FRANÇAIS
A
Branchement des câbles
B
Câble RCA
LINE
IN
1. Dévissez le capuchon du bornier en le tournant
dans le sens anti-horaire.
2. Insérez le fil conducteur dans le trou du bornier à
vis et revissez le capuchon en le tournant dans le
sens horaire afin que le fil soit bien maintenu
connecté.
Caisson
de graves
V
ATTENTION
Si l'extrémité dénudée d'un conducteur de câble
d'enceinte entre en contact avec un autre câble
ou bornier, un court-circuit peut en résulter.
Empêchez cela.
6565
Page 66

Branchement des enceintes (2)
Emploi d'un iPod/iPhone/iPad
Raccordement aux enceintes à l'aide de fiches
bananes
Vous pouvez aussi raccorder les enceintes à l'aide de fiches
bananes du commerce. Branchez d'abord le câble d'enceinte à la fiche banane, puis insérez la fiche dans le bornier.
p Lisez attentivement les instructions des fiches bananes
que vous comptez employer avec cette unité.
p Pour les utilisateurs Nord-Américains
Avant d'insérer des fiches bananes, retirez le capuchon
noir au sommet de chaque bornier.
Pour les consommateurs européens
Conformément aux réglementations de sécurité européennes, il n'est pas possible de brancher des fiches
banane dans les borniers d'enceinte des modèles européens. Les orifices dans lesquels s'insèrent les fiches
banane ont été occultés par des capuchons noirs. Branchez
les enceintes à l'aide de cosses à fourche ou de câbles nus.
Si les capuchons noirs sortent des borniers, remettez-les en
place.
Modèles d'iPod/iPhone/iPad
compatibles
Cette unité peut être utilisée avec les modèles d'iPod/
iPhone/iPad suivants.
iPod nano ( 2e, 3e, 4e, 5e et 6e génération)
iPod touch (1ère, 2e, 3e et 4e génération)
iPhone 4S, iPhone 4, iPhone 3GS, iPhone 3G
iPad 2, iPad
p Pour connecter un iPod/iPhone/iPad, utilisez le câble
USB fourni avec l'iPod/iPhone/iPad.
Prise SUBWOOFER OUT
B
Vous pouvez brancher ici un caisson de graves pour
améliorer les basses fréquences.
Connectez à cette unité un caisson de graves amplifié
du commerce au moyen d'un câble RCA ordinaire.
p Utilisez un caisson de graves à amplificateur
intégré. Pour équilibrer le niveau avec celui
des enceintes principales, réglez le volume du
caisson de graves tout en écoutant un signal
audio que vous connaissez bien. Réglez-le à
votre goût pour convenir à la musique.
6666
Logiciel de l'iPod/iPhone/iPad
Si l'unité ou les touches de la télécommande ne fonctionnent pas bien avec votre iPod/iPhone/iPad, mettre à
jour le logiciel de ce dernier peut résoudre le problème.
Téléchargez le dernier logiciel pour votre iPod/iPhone/iPad
sur le site web Apple suivant.
http://www.apple.com/downloads/
Page 67

Raccordements (1)
Prise
secteur
Ordinateur personnel
audio numérique
audio numérique
enregistreur de CD, etc.
V
Précautions lors des branchements
p Faites tous les autres branchements avant de brancher les fiches d'alimentation dans les prises secteur.
p Lisez les modes d'emploi de tous les appareils qui seront connectés et suivez leurs instructions.
p Ne regroupez pas les câbles de connexion avec des cordons d'alimentation. Cela pourrait entraîner des bruits.
Câble USB
Installez le pilote
dédié sur
l’ordinateur avant
le raccordement
(page 76)
A
B
C
FRANÇAIS
D
d’alimentation fourni
Câble
DIGITAL OUT
(COAXIAL)
Appareil à sortie
E
Câble numérique
coaxial RCA
DIGITAL OUT
(OPTICAL)
Appareil à sortie
F
Câble numérique
Câble audio
optique
LRLR
LINE
LINE
IN
OUT
Platine cassette/
G H
Câble audio
Platine disque
6767
Page 68

Raccordements (2)
Port d'entrée audio USB
A
Sert à recevoir l'audio numérique d'un ordinateur.
Raccordez-le à un port USB de l'ordinateur.
Pour le branchement, utilisez un câble USB du
commerce.
p Installez le pilote dédié avant de brancher l'ordina-
teur à ce port par USB (page 76).
Port ETHERNET
B
Pour utiliser une connexion Internet filaire, reliez le port
ETHERNET de cette unité à un réseau Ethernet en utilisant un câble Ethernet du commerce.
p Si vous branchez ou débranchez le câble Ethernet
alors que l'unité est allumée, mettez l'unité en
veille, débranchez son cordon d'alimentation de la
prise secteur, rebranchez-le et rallumez l'unité.
Antenne pour réseau local sans fil
C
Si vous pouvez utiliser un réseau sans fil sur le site
d'installation, l'unité se connecte au réseau local (LAN)
au moyen de l'antenne pour réseau local sans fil.
Comme représenté dans l'illustration de la page 67,
tournez l'antenne pour qu'elle pointe vers le haut.
Prise d'entrée d'alimentation [~IN]
D
Branchez ici le cordon d'alimentation fourni.
p Débranchez le cordon de la prise secteur en cas de
non-utilisation prolongée de l'unité.
V ATTENTION
p Veillez à brancher le cordon d'alimentation dans
une prise secteur fournissant la tension correcte.
p Tenez le cordon d'alimentation par sa fiche quand vous
le branchez ou le débranchez. Ne tirez jamais sur le
cordon lui-même.
Prises d'entrée audio numérique [COAXIAL,
E
OPTICAL]
Servent à recevoir l'audio numérique. Raccordez-les
aux prises de sortie audio numérique d'un appareil
pouvant produire de l'audio numérique.
COAXIAL: câble numérique coaxial (RCA)
OPTICAL: câble numérique optique (TOS)
6868
Page 69

Prises AUX 1 IN/OUT
Blanc (L)
Rouge (R)
Blanc (L)
Rouge (R)
F
Reçoivent/produisent les signaux audio analogiques.
Raccordez les prises d'entrée et de sortie de cette unité
aux prises de sortie et d'entrée d'autres appareils au
moyen de câbles audio du commerce.
p Branchez la fiche RCA blanche d'un câble audio à la
prise blanche (L) et sa fiche RCA rouge à la prise
rouge (R).
Prises PHONO
G
Connectez le câble à fiches RCA de la platine disque
aux prises PHONO.
p Branchez la fiche RCA blanche d'un câble audio à la
prise blanche (L) et sa fiche RCA rouge à la prise
rouge (R).
p Assurez-vous que chaque fiche est bien enfoncée.
Pour éviter les ronflements et les parasites, ne
regroupez pas les câbles de modulation avec le cordon d’alimentation secteur ou les câbles d’enceinte.
p Si vous désirez utiliser un enregistreur (par ex. une
platine cassette ou un enregistreur de CD) avec
cette unité, reliez les prises de sortie de l'enregistreur aux prises AUX 1 IN de cette unité et les prises
d'entrée de l'enregistreur aux prises AUX 1 OUT.
p Assurez-vous que chaque fiche est bien enfoncée.
Pour éviter les ronflements et les parasites, ne
regroupez pas les câbles de modulation avec le cordon d’alimentation secteur ou les câbles d’enceinte.
p Cette unité prend en charge l'emploi de car-
touches à aimant mobile MM (sensibilité d'entrée:
2,5 mV/47kΩ). Elle ne prend pas en charge l'emploi
de cartouches à bobine mobile MC.
Borne de mise à la masse [SIGNAL GND]
H
Connectez ici le fil de masse de la platine disque.
p Ce n'est pas un branchement de terre de sécurité
électrique.
p Si le fil de masse de la platine disque n'est pas
connecté à ce bornier, un ronflement peut se faire
entendre.
FRANÇAIS
6969
Page 70

Nomenclature et fonctions des parties (unité principale) (1)
A B
C
D
E
F
Molette MULTI JOG
A
Utilisez cette molette pour régler l'horloge et la
minuterie.
En mode USB/iPod, utilisez cette molette pour faire
défiler le menu vers le haut et le bas quand un iPod/
iPhone/iPad est connecté.
En mode USB/iPod, tournez la molette MULTI JOG
pour rechercher des fichiers au sein des dossiers ou au
niveau racine.
p Quand une clé USB est connectée, tourner cette
molette fait sauter d'un fichier (morceau) et dossier
à l'autre uniquement dans le dossier sélectionné.
p En mode réseau, utilisez-la pour chaque fichier ou
mode de réglage.
p Utilisez cette molette pour régler les niveaux des
basses et hautes fréquences (graves et aigus).
I J K
Capteur de télécommande
B
Pour utiliser la télécommande, pointez-la vers le capteur de télécommande.
Écran
C
Bouton VOLUME
D
Utilisez ce bouton pour régler le volume. Tournez-le
dans le sens horaire pour monter le volume et dans le
sens anti-horaire pour le baisser.
p Après avoir réglé le volume, le niveau de volume
sera conservé même si vous appuyez sur la touche
STANDBY/ON pour mettre l'unité en veille.
L
M
NHG
7070
Page 71

Touche STANDBY/ON
E
Appuyez sur cette touche pour allumer l'unité ou la
mettre en veille (standby).
La couleur du voyant au-dessus de la touche
STANDBY/ON indique l'état de l'unité.
Voyant État
Orange Veille
Bleu En service (ON)
Prise casque (PHONES)
F
Pour écouter au casque (Phones), baissez d'abord le
volume au minimum. Insérez ensuite la fiche du casque
dans la prise PHONES et montez progressivement le
volume.
Aucun son ne sort par les enceintes tant qu'une fiche
de casque est insérée dans la prise PHONES.
V
ATTENTION
Ne branchez/débranchez pas le casque et n'allumez/ne mettez pas en veille l'unité quand vous le
portez.
De forts bruits soudains pourraient être produits, risquant d'endommager votre audition.
Prise d'entrée auxiliaire AUX IN 2
G
Reliez cette prise à la sortie casque (ou à la prise de sortie audio) d'un lecteur audio portable ou autre appareil
à l'aide d'un câble mini-jack 3,5 mm stéréo du
commerce.
Touche SOURCE
I
Utilisez cette touche pour sélectionner la source.
Touche MENU
J
En mode USB/iPod, utilisez cette touche pour revenir au
menu précédent quand un iPod/iPhone/iPad est
connecté.
En mode réseau (radio Internet/lecteur de média), le
menu de configuration apparaît.
Touches de saut [.//]
K
En mode USB/iPod, utilisez ces touches pour sauter au
fichier ou piste précédent ou suivant, en lecture ou en
pause.
Utilisez ces touches pour régler la balance.
Quand un menu est affiché, utilisez / pour la sélection de la même façon que la touche ENTER.
Quand un dossier est affiché, appuyez sur . pour
remonter au niveau de dossier supérieur.
Touche ENTER
L
En mode USB/iPod, utilisez cette touche pour confirmer
les sélections dans les menus quand un iPod/iPhone/
iPad est connecté.
Quand vous faites des réglages, utilisez cette touche
pour confirmer la sélection d'une option de menu.
En mode réseau (radio Internet/lecteur de média), utilisez-la pour sélectionner une station ou une piste.
FRANÇAIS
Port USB
H
Branchez ici un iPod/iPhone/iPad ou une clé USB.
7171
Page 72

Nomenclature et fonctions des parties (UP) (2)
Touche INFO
M
Lors de l'écoute de la radio Internet ou avec la fonction
lecteur de média, utilisez cette touche pour changer
l'affichage des informations.
p Pour des informations sur l'emploi en mode réseau,
voir page 74.
Nomenclature et fonctions des parties (TC) (1)
a
Touche Stop [8]
En mode USB/iPod, utilisez cette touche pour arrêter la
lecture.
Quand la source d'entrée est réglée sur «Media Player»
(lecteur de média), maintenez cette touche pressée au
moins 2secondes pour arrêter la lecture.
Touche NET
N
Pressez-la en mode réseau pour alterner entre radio
Internet et lecteur de média.
Touche Lecture/Pause [7/9]
En mode USB/iPod, utilisez cette touche pour lancer la
lecture ou la mettre en pause.
p Pour des informations sur l'emploi en mode réseau,
voir page 74.
e
g
b
c
n
d
o
f
p
h
i
j
q
r
k
s
l
m
7272
Quand l'unité principale et la télécommande ont toutes
les deux des touches ayant les mêmes fonctions, ce
mode d'emploi explique comment utiliser l'une ou
l'autre. La touche correspondante peut s'utiliser de la
même façon.
Page 73

a
Touche STANDBY/ON
Appuyez sur cette touche pour allumer l'unité ou la
mettre en veille (standby).
La couleur du voyant au-dessus de la touche
STANDBY/ON indique l'état de l'unité.
Touche TONE
f
Utilisez cette touche avec les touches de défilement
(k/j) pour régler les niveaux de basses et hautes
fréquences ainsi que la balance gauche-droite (page
82).
Voyant État
Orange Veille
Bleu En service (ON)
Touches de source [NET, USB/iPod, USB
b
AUDIO, COAXIAL, OPTICAL, PHONO, AUX 1/2]
Utilisez ces touches pour sélectionner une source.
NET............. Mode réseau (radio Internet/lecteur
de média)
USB/iPod.......Mode USB/iPod
USB AUDIO ....Mode d'entrée audio USB
COAXIAL .......Mode d'entrée numérique (coaxiale)
OPTICAL .......Mode d'entrée numérique (optique)
PHONO.........Mode phono
AUX 1/2 ........Mode d'entrée externe (AUX)
p Pour sélectionner le lecteur de média, utilisez la
touche NET.
p Appuyez une seconde fois sur la touche AUX 1/2
pour alterner entre AUX 1 et AUX 2.
c
Touche TIMER
Utilisez cette touche pour sélectionner le fonctionnement de la minuterie («Timer Daily», «Timer Once »,
ou «Timer Off»).
Touche SLEEP
d
Utilisez cette touche pour régler la minuterie d'extinction (page 106).
g
Touche REPEAT 1/ALL
En mode USB/iPod, utilisez cette touche pour régler la
lecture en boucle sur un iPod/iPhone/iPad ou une clé
USB (page 87).
Touche SHUFFLE
h
En mode USB/iPod, utilisez cette touche pour régler la
lecture aléatoire sur un iPod/iPhone/iPad ou une clé
USB.
Touche Stop [H]
i
En mode USB/iPod, utilisez cette touche pour arrêter
la lecture sur un iPod/iPhone/iPad ou une clé USB.
Quand la source d'entrée est réglée sur «Media Player»
(lecteur de média), maintenez cette touche pressée au
moins 2secondes pour arrêter la lecture.
j
Touche Lecture/Pause [y/J]
En mode USB/iPod, utilisez cette touche pour lancer la
lecture ou la mettre en pause sur l'iPod ou la clé USB.
p Référez-vous au tableau de la page suivante pour
le fonctionnement en mode réseau.
Touche MENU
k
En mode USB/iPod, utilisez cette touche pour revenir
au menu précédent. Cette touche est équivalente à la
touche MENU de votre iPod.
En mode réseau (radio Internet/lecteur de média), le
menu de configuration apparaît.
FRANÇAIS
e
Touche TIME SET
Utilisez cette touche pour régler l'horloge et programmer le réveil.
Touche ENTER
l
En mode USB/iPod, utilisez cette touche pour confirmer
les sélections dans les menus quand un iPod/iPhone/
iPad est connecté.
sert à la sélection de menu.
En mode réseau (radio Internet ou lecteur de média),
utilisez-la pour sélectionner une station ou une piste.
Quand vous faites des réglages, elle
7373
Page 74

Nomenclature et fonctions des parties (télécommande) (2)
m
Touches de saut [.//]
En mode USB/iPod, utilisez ces touches pour sauter au
fichier ou piste précédent ou suivant, en lecture ou en
pause.
Utilisez ces touches pour régler la balance.
Quand un menu est affiché, utilisez / pour la sélection de la même façon que la touche ENTER.
Quand un dossier est affiché, appuyez sur . pour
remonter au niveau de dossier supérieur.
n
Touche DIMMER
Utilisez cette touche pour changer la luminosité de
l'afficheur (page 82).
o
Touche INFO
Lors de l'écoute de la radio Internet ou avec la fonction
lecteur de média, utilisez cette touche pour changer
l'affichage des informations en seconde ligne d’écran.
p
Touche DISPLAY
En mode USB/iPod, utilisez cette touche pour changer
le type d'information affiché.
p En mode réseau, les touches de l'unité et celles de la
télécommande fonctionnent différemment.
Unité principale
État Touche Fonction
Arrêtée Touche Lecture/
Pause (7/9)
Touche Stop (8)
Lecture Touche Lecture/
Pause (7/9)
Touche Stop (8)
Télécommande
État Touche Fonction
Arrêtée Touche Lecture/
Pause (7/9)
Touche INFO Pas de fonction
Lecture Touche Lecture/
Pause (7/9)
Touche Stop (8)
Touche INFO Affiche les informations
Change le mode réseau
Pas de fonction
Lecture/Pause
Affiche les informations
Lance la lecture
Lecture/Pause
Arrête la lecture
q
Touche MUTE
Utilisez cette touche pour couper le son.
r
Touches VOLUME [+/−]
Utilisez ces touches pour régler le niveau de volume.
Appuyez sur + pour monter le volume et sur − pour le
baisser.
s
Touches de défilement [k/j]
En mode USB/iPod, utilisez ces touches pour sélectionner un dossier ou fichier présent sur un appareil
connecté au mort USB de l'unité (quand un iPod/
iPhone/iPad est connecté, utilisez-les pour faire défiler
son menu).
Quand vous faites des réglages, utilisez-les pour parcourir les menus.
Après avoir appuyé sur la touche TONE, utilisez-les
pour régler la tonalité (niveaux des basses et hautes
fréquences) (page 82).
7474
Page 75

Emploi de la télécommande
Précautions d'emploi
V Un mauvais emploi des piles peut entraîner leur
rupture ou leur fuite, avec pour conséquence un
incendie, des blessures ou la salissure des objets
proches. Veuillez attentivement lire et respecter
les précautions en page 61.
p Pointez la télécommande vers le capteur correspondant
de l'unité principale à moins de 5mètres de cette dernière. Assurez-vous qu’il n’y a pas d’obstacle entre la
télécommande et l’unité.
p Si le soleil ou une forte source de lumière artificielle
donne sur le capteur de télécommande, cette dernière
peut ne pas fonctionner. Si c'est le cas, déplacez cette
unité ailleurs.
p Si la télécommande est employée à proximité d’autres
appareils générant des rayons infrarouges, ou si d’autres
télécommandes utilisant des rayons infrarouges sont
utilisées près de l'unité, cette dernière peut ne pas bien
fonctionner. Les autres appareils peuvent aussi mal
fonctionner.
Mise en place des piles
Ouvrez l'arrière de la télécommande et insérez deux piles
AAA avec leurs pôles ¥/^ orientés comme illustré.
Replacez le couvercle.
FRANÇAIS
Remplacement des piles
Si la portée de fonctionnement de la télécommande se
réduit, c'est que les piles sont déchargées. Dans ce cas,
remplacez-les par des neuves.
Pour des informations détaillées sur la collecte des piles,
veuillez contacter votre mairie, votre service d’ordures
ménagères ou le point de vente dans lequel vous avez
acheté les articles.
7575
Page 76

Lecture de musique sur un ordinateur (1)
Mode de transmission
Installation du pilote
Pour que cette unité puisse lire les fichiers audio d’un ordinateur, vous devez d'abord installer un pilote sur ce dernier.
Veuillez télécharger ce pilote à l'adresse web suivante.
Page de téléchargement du pilote logiciel
http://www.teac.co.jp/audio/software_teac_e.html
La connexion USB n'est possible qu'avec des ordinateurs
ayant les systèmes d'exploitation suivants.
Windows XP (32 bits)
Windows Vista (32/64bits)
Windows 7 (32/64bits)
Mac OS X 10.6 (Snow Leopard)
(OS X 10.6.4 ou ultérieur)
Mac OS X 10.7 (Lion)
Mac OS X 10.8 (Mountain Lion)
(à date d'octobre 2012)
Le fonctionnement avec d'autres systèmes d'exploitation
n'est pas garantie.
ATTENTION
Installez le pilote avant de brancher l'ordinateur au
port d'entrée audio USB de cette unité.
Si vous connectez cette unité à l'ordinateur avant d'installer
le pilote, elle ne fonctionnera pas correctement. De plus, si
l'ordinateur utilise Windows XP, son fonctionnement ralentira nettement, ce qui nécessite de le faire redémarrer.
p Pour des instructions sur les procédures d'installation
du pilote, veuillez consulter notre page de
téléchargement.
p Ne changez pas le mode de transmission durant la lecture.
Cela pourrait entraîner le blocage de l'unité ou d'autres
problèmes.
p Quittez le logiciel de lecture musicale sur votre ordina-
teur avant de changer le mode de transmission.
Appuyez plusieurs fois sur la touche
1
SOURCE afin de sélectionner «USB Audio
In» (entrée audio USB).
Appuyez sur la touche NET pour sélection-
2
ner le mode.
Appuyez une fois pour afficher le mode actuel.
Appuyez à nouveau pour changer le mode.
p Selon la combinaison ordinateur et logiciel, un bon
fonctionnement peut ne pas être possible même avec
les systèmes d'exploitation ci-dessus.
Modes de transmission
Vous avez le choix entre deux modes de transmission
quand vous connectez le port d'entrée audio USB de cette
unité à un ordinateur.
Les fréquences d'échantillonnage transmissibles sont
32kHz, 44,1 kHz, 48kHz, 88,2 kHz, 96kHz, 176,4kHz et
192kHz.
7676
Exemple:
86% $XGLR ,Q
>0@
Page 77

Mode M1
Utilisez les réglages pour sélectionner M1.
L'unité se connecte à l'ordinateur en mode haute
vitesse.
Quand la connexion est correcte, vous pouvez sélectionner «TEAC USB HS AUDIO » comme sortie audio
dans le système d'exploitation de l'ordinateur.
Mode M2
Utilisez les réglages pour sélectionner M2.
L'unité se connecte à l'ordinateur en mode haute
vitesse asynchrone.
Quand la connexion est correcte, vous pouvez sélectionner «TEAC USB HS ASYNC AUDIO» comme sortie
audio dans le système d'exploitation de l'ordinateur.
Lecture de fichiers audio sur un
ordinateur
Connectez un ordinateur à cette unité au
1
moyen d'un câble USB.
Câble USB
p En mode M2, les données audio envoyées par l'ordina-
teur sont traitées au moyen de l'horloge de cette unité.
En réduisant la gigue durant la transmission des données, cela contribue à une lecture de meilleure qualité
audio.
p Quand vous connectez cette unité et un ordinateur en
mode M2, s'il y a des sauts ou du bruit à intervalles
constants lors de la lecture, réglez plutôt l'unité en
mode M1.
p Utilisez un câble ayant une fiche qui correspond à
la prise de cette unité.
Mettez l'ordinateur sous tension.
2
p Vérifiez que son système d'exploitation a normale-
ment démarré.
FRANÇAIS
Suite à la prochaine page e
7777
Page 78

Lecture de musique sur un ordinateur (2)
Appuyez sur l’interrupteur d’alimentation
3
POWER pour allumer cette unité.
Appuyez plusieurs fois sur la touche
4
SOURCE afin de sélectionner «USB Audio
In» (entrée audio USB).
Lancez la lecture d'un fichier musical sur
5
l'ordinateur.
Pour une meilleure qualité sonore, maximisez le
volume sur l'ordinateur et utilisez la commande
VOLUME de cette unité pour régler le niveau de sortie.
Minimisez le volume sur cette unité avant de lancer la
lecture et montez progressivement le niveau.
p Vous ne pouvez pas contrôler cette unité depuis l'ordi-
nateur, et vous ne pouvez pas contrôler l'ordinateur
depuis cette unité.
p Lors de la lecture d'un fichier audio au moyen d'une
connexion à un ordinateur, n'essayez aucune des opérations suivantes Cela pourrait entraîner un mauvais
fonctionnement de l'ordinateur. Quittez toujours le logiciel de lecture de musique avant d'entamer une des
actions suivantes.
u Débrancher le câble USB
u Mettre l'unité en veille
u Changer la sélection d'entrée actuelle
u Changer de mode de transmission
p Lors de la lecture d'un fichier audio au moyen d'une
connexion à un ordinateur, les sons du système de l'ordinateur seront aussi produits. Si vous ne souhaitez pas
que ces sons soient produits, changez les réglages de
l'ordinateur pour les couper.
7878
p Si vous branchez cette unité à l'ordinateur ou si vous
réglez son entrée sur «USB Audio In» après avoir lancé
le logiciel de lecture de musique, les fichiers audio
peuvent ne pas être lus correctement. Si cela se produit,
faites redémarrer le logiciel de lecture audio ou
l'ordinateur.
p Faites ce qui suit avant de lancer le logiciel de lecture de
musique. Le faire après pourrait empêcher la lecture
correcte du fichier musical. Si cela se produit, faites
redémarrer le logiciel de lecture de musique ou
l'ordinateur.
• Connectez l'unité à l'ordinateur
• Réglez l'unité sur «USB Audio In»
• Choisissez le mode M1 ou M2
Page 79

Current Time
On
O
Sour
Status
Réglage de l'heure (1)
Réglez l'heure avant d'utiliser l'unité.
p Si le cordon d'alimentation est débranché de la prise,
l'heure réglée se réinitialise par défaut.
Appuyez sur la touche STANDBY/ON pour
1
allumer l’unité.
Le voyant au-dessus de la touche STANDBY/ON s'allume en bleu.
Appuyez sur la touche TIME SET.
2
p Appuyez plusieurs fois sur la touche TIME SET pour pas-
ser en revue les paramètres de menu suivants. Les
paramètres autres que Current Time servent à régler le
réveil (page 106).
Time
Time
ce Select
p Pour l'Europe, l'unité utilise l'heure «militaire» (sur
24 heures). Pour l'Amérique du Nord, l'unité utilise
l'heure exprimée sur 12 heures.
p Appuyez sur la touche Stop (H) pour annuler le
réglage d'heure.
p En cas d'absence d'action pendant 30secondes, le
mode de réglage d'horloge est annulé.
FRANÇAIS
«Current Time» (heure actuelle) apparaît et la valeur
des heures de l'horloge clignote.
Appuyez sur les touches de défilement (k/
3
j) pour régler l'heure et appuyez sur la
touche ENTER.
e
La valeur des «minutes» clignote.
p Vous pouvez aussi utiliser de la même façon la
molette MULTI JOG et la touche ENTER de l'unité
principale.
Suite à la prochaine page e
7979
Page 80

Réglage de l'heure (2)
Fonctionnement de base (1)
Appuyez sur les touches de défilement (k/
4
j) pour régler les minutes et appuyez sur
la touche ENTER.
e
L'horloge repartira de la minute ainsi réglée à 0seconde.
Vérification de l'heure
Quand la source est réglée sur Audio In, AUX 1/2, COAXIAL,
OPTICAL ou PHONO, maintenez la touche INFO pressée au
moins trois secondes pour afficher l'heure durant cinq
secondes.
Dans cette section, nous expliquons les opérations communes à tous les modes.
Appuyez sur la touche STANDBY/ON pour
1
allumer l’unité.
Le voyant au-dessus de la touche STANDBY/ON s'allume
en bleu.
8080
Page 81

Appuyez sur la touche SOURCE pour sélec-
Internet Radio/wUSB/iPodwUSB Audio In
AUX2sAUX1sPHONOsOPTICALsCOAXIAL
2
tionner la source.
Chaque fois que vous appuyez sur la touche SOURCE,
la source change comme suit:
MediaPlayer
Tournez le bouton VOLUME dans le sens
3
anti-horaire pour diminuer le volume.
VOLUME MIN: volume minimal
VOLUME MAX: volume maximal
FRANÇAIS
NET............. Mode réseau (radio Internet/lecteur
de média)
USB/iPod.......Mode USB/iPod
USB Audio In...Mode d'entrée audio USB
COAXIAL .......Mode d'entrée numérique (coaxiale)
OPTICAL .......Mode d'entrée numérique (optique)
PHONO.........Mode phono
AUX 1/2 ........Mode d'entrée externe (AUX)
p Pour sélectionner le lecteur de média, utilisez la
touche NET.
p Appuyez une seconde fois sur la touche AUX 1/2
pour alterner entre AUX 1 et AUX 2.
Lancez la lecture de la source et utilisez le
4
bouton VOLUME pour régler le volume à son
niveau optimal.
VOLUME MIN: volume minimal
VOLUME MAX: volume maximal
p Pour éviter la survenue de bruits forts soudains,
montez progressivement le volume.
p Quand vous branchez la prise casque d'un lecteur
audio portable à cette unité, vous devez monter le
niveau de volume de la sortie casque du lecteur.
Suite à la prochaine page e
8181
Page 82

Fonctionnement de base (2)
BASS TREBLE
p Si vous montez trop le niveau de volume de l'appareil
connecté, le son peut souffrir de distorsion. Dans ce
cas, baissez le volume de l'appareil connecté jusqu'à
disparition de la distorsion puis réglez le volume sur
cette unité.
Coupure du son en sortie
Pour couper temporairement le son, appuyez sur la touche
MUTE. Appuyez à nouveau sur la touche MUTE ou changez
le réglage de volume pour rétablir le son.
Réglage de tonalité et de balance
Vous pouvez régler à loisir les niveaux des basses et hautes
fréquences ainsi que la balance gauche-droite.
Avec la touche TONE, sélectionnez tour à tour
1
BASS (graves), TREBLE (aigus), BALANCE.
Chaque fois que vous appuyez sur la touche TONE, le
mode change comme suit.
BALANCE
Atténuateur (Dimmer)
Appuyez sur la touche DIMMER pour alterner entre les
deux réglages de luminosité: lumineux et atténué.
p Le réglage de l'atténuateur est désactivé quand vous
appuyez sur la touche STANDBY/ON.
8282
Dans les 3 secondes, appuyez sur les
2
touches de défilement (k/j) pour régler
les graves ou les aigus, ou sur les touches de
saut (.//) pour régler la balance.
e
p Les réglages des fréquences basses (BASS) et
hautes (TREBLE) peuvent se faire entre –5 et +5. La
balance gauche-droite peut être réglée au CENTRE
ou de +1 à +6 L/R (L pour gauche/R pour droite).
p Vous pouvez aussi utiliser la molette MULTI JOG de
l'unité principale pour régler les niveaux des basses
et hautes fréquences (graves et aigus).
Page 83

À propos de l'ErP
Écoute des fichiers d'une clé USB (1)
Ce produit est conforme à la directive européenne ErP sur
l'économie d'énergie. Pour se conformer à cette réglementation, la fonction d'économie automatique d'énergie de cette
unité est réglée sur 30minutes à sa sortie d'usine, de sorte que
l'unité passe automatiquement en veille après 30minutes dans
les conditions indiquées par le tableau suivant.
Toutefois, quand le réglage de veille réseau est sur «On »
(page 93), cette fonction n'est pas active (le réglage par
défaut de la veille réseau est «Off»).
p Quand vous allumez l'unité, la source sélectionnée est la
dernière employée avant le passage de l'unité en veille.
p Durant la lecture en mode iPod, si vous faites passer
l'unité en veille en appuyant sur la touche STANDBY/
ON, à la prochaine mise sous tension, l'unité sera en
mode iPod et la lecture démarrera automatiquement si
un iPod/iPhone/iPad est connecté. La lecture ne
démarre pas automatiquement dans les autres modes.
État AirPlay,
iPod/
iPhone/
iPad
Pas de
connexion
À l'arrêt/en
pause
Pas de
signal
entrant
*
Clé USB Lecteur
de média
Internet
- - -
Entrée
externe
Vous pouvez lire les fichiers audio sauvegardés sur une clé
USB en connectant cette dernière à cette unité.
Pour des détails sur les fichiers lisibles, voir page 64.
Appuyez plusieurs fois sur la touche
1
SOURCE pour sélectionner «USB/iPod».
p Vous pouvez aussi utiliser la touche USB/iPod pour
faire directement cette sélection.
p «Not Connected» s'affichera si aucune clé USB n'est
branchée.
Branchez une clé USB au port USB de l'unité.
2
FRANÇAIS
Entrée externe: USB Audio In, COAXIAL, OPTICAL, PHONO,
AUX 1/2
Fonction d'économie automatique d'énergie activée
-
Fonction d'économie automatique d'énergie non activée
* Compatible uniquement avec AirPlay
/ Non applicable
Sélectionnez le fichier que vous voulez lire.
3
Pour des détails, voir page 85.
Appuyez sur la touche Lecture/Pause
4
(y/9) ou sur la touche ENTER pour lancer
la lecture.
p Si vous appuyez sur la touche / quand un
fichier est affiché, la lecture démarre aussi.
8383
Page 84

Écoute des fichiers d'une clé USB (2)
Arrêt de la lecture
Appuyez sur la touche Stop (H) pour arrêter la lecture.
Mise en pause de la lecture
Saut au fichier/piste suivant ou
précédent
Pendant la lecture, appuyez plusieurs fois sur une touche
de saut (.//) jusqu’à ce que le fichier/piste souhaité
soit trouvé. Le fichier/piste sélectionné sera lu depuis son
début.
p Si on appuie sur la touche . durant la lecture, la lec-
ture du fichier/piste en cours reprend au début. Pour
revenir en début de piste/fichier précédent, appuyez à
nouveau sur la touche ..
Appuyez sur la touche Lecture/Pause (y/J) pour mettre
la lecture en pause à la position actuelle.
Pour reprendre la lecture, appuyez de nouveau sur la
touche Lecture/Pause (y/J).
p Quand la durée de la lecture n'a pas dépassé 5secondes,
appuyez sur . pour lire la piste précédente.
p Lors de la lecture de pistes d'une clé USB, sauter à la
piste suivante à partir de la dernière piste arrête la
lecture.
8484
Page 85

Recherche dans les dossiers
Vous pouvez rechercher et sélectionner des pistes par leur
nom dans les dossiers d'une clé USB puis les lire.
Si des caractères à double octet, comme les kanas japonais,
sont utilisés dans un nom de fichier, cette unité ne peut
pas les afficher correctement, donc une recherche précise
ne sera pas possible.
Avec les touches de défilement (k/j),
1
sélectionnez le dossier dont vous désirez
écouter les pistes.
Appuyez sur la touche ENTER.
2
Appuyez sur la touche ENTER.
4
ou
La lecture démarre par la piste sélectionnée.
p Lors de la lecture de fichiers d'une clé USB, appuyez
sur la touche de saut (.) pour passer au dossier
précédent.
p Quand vous examinez un dossier, appuyez sur la
touche de saut (/) pour passer au dossier suivant.
p Quand un fichier est sélectionné, appuyez sur la
touche de saut (/|) pour lancer la lecture de la
piste.
FRANÇAIS
ou
p Les fichiers MP3/WMA hors dossiers seront affichés
dans l'ordre après les dossiers.
Avec les touches de défilement (k/j ),
3
sélectionnez la piste àécouter.
8585
Page 86

Durée de lecture
(normal)
Artiste
T
Album
Informations affichées
Durant la lecture d'un fichier sur une clé USB, les informa-
tions concernant la piste défilent à l'écran.
Durant la lecture, appuyez sur la touche DISPLAY pour
changer ce qui est affiché.
Lecture aléatoire («Shuffle»)
Appuyez sur la touche SHUFFLE pour activer le mode de
lecture aléatoire. Les pistes de la clé USB seront lues en
ordre aléatoire.
Clé USB
Exemple:
Z
Z
itre
Z
p L'écran de cette unité ne peut afficher que les lettres et
chiffres à simple octet. Si des informations de fichier utilisent des caractères japonais, chinois ou autres à
double octet, la lecture est possible mais le nom ne sera
pas affiché correctement.
p Un maximum de 80 caractères d'informations de piste
peuvent être affichés.
86%6KXIIOH
:0$
p Si vous appuyez sur la touche de saut (/) durant la
lecture aléatoire (Shuffle), la piste ou le fichier lu ensuite
sera choisi aléatoirement. Si vous appuyez sur la touche
de saut (.), la lecture du fichier/piste en cours
reprend à son début.
La lecture aléatoire ne revient pas sur une piste qui a
déjà été entièrement lue.
p Pour annuler la lecture aléatoire, appuyez sur la
touche SHUFFLE.
p Si vous appuyez sur la touche Stop (H), la lecture
aléatoire s'arrête, mais sans quitter le mode aléatoire.
p La lecture aléatoire d'une clé USB fait jouer tous les
fichiers du dossier sélectionné mais uniquement eux.
8686
Page 87

(
RPT 1 (
répéter un chier/piste
)
Lecture en boucle (répétition)
M
L
Appuyez sur la touche REPEAT 1/ALL pour passer en revue
les modes de lecture en boucle comme suit.
Répétition de tous les fichiers/pistes
du dossier (RPT ALL)
Tous les fichiers/pistes du dossier seront lus en boucle.
p Utilisez les touches de défilement (k/j) durant la lec-
ture en boucle pour passer aux autres dossiers.
Utilisez les touches de saut (.//) pour monter et
descendre dans les niveaux de dossiers.
Toutes les pistes du dossier ouvert seront lues en boucle.
Sélection d'un dossier ou d'un fichier
RPT ALL
répéter tous les chiers/pistes du dossier
(
Pas de répétition/lecture en boucle
p Le mode de lecture en boucle ne sera pas annulé si
vous appuyez sur la touche Stop (H).
Répétition d'un fichier/piste (RPT 1)
Le fichier/piste reproduit est lu en boucle.
p Si vous appuyez sur les touches de saut (.//)
pour sélectionner un autre fichier/piste en mode «RPT
1», le fichier/piste sélectionné sera lu en boucle.
p À l'arrêt, utilisez la molette MULTI JOG de l'unité princi-
pale ou les touches de défilement (k/j ) de la
télécommande pour sélectionner le fichier. Puis
appuyez sur la touche Lecture/Pause (7/9) ou la
touche de saut (/) pour lancer la lecture puis la
touche REPEAT 1/ALL.
Dossier
)
)
Dossier
Dossier
Fichier
Fichier
Dossier
Fichier
Dossier
FRANÇAIS
Fichier
Fichier
Fichier
p Si vous appuyez à l'arrêt sur la touche REPEAT 1/ALL, la
fonction REPEAT 1 deviendra active mais ne s'affichera
pas.
8787
Page 88

Écoute d’un iPod/iPhone/iPad (1)
Pour des informations détaillées sur la compatibilité, voir
page 66.
p Les explications suivantes se réfèrent à un iPod, mais
elles s'appliquent aussi à l'emploi avec un iPhone ou un
iPad.
Appuyez plusieurs fois sur la touche SOURCE
1
afin de sélectionner «USB/iPod».
p La touche USB/iPod de la télécommande peut aussi
être utilisée.
p «Not Connected » s'affiche si aucun iPod n'est
connecté.
Connectez un iPod à cette unité au moyen
2
du câble USB fourni avec l'iPod.
p Si l’iPod est connecté alors qu’un autre mode
qu'iPod/USB est sélectionné sur le NP-H750, l'iPod
s'allume et passe en mode de pause.
p Si un iPod est connecté à l'unité, il n'est rechargé que
quand cette unité est allumée.
p La recharge s'arrête quand l'iPod est complètement
rechargé.
p La recharge n'est pas possible quand cette unité est
en veille.
Mise en pause de la lecture
Appuyez sur la touche Lecture/Pause (G/J) pour mettre
la lecture en pause. La lecture s'arrête à la position actuelle.
Pour reprendre la lecture, appuyez de nouveau sur la
touche Lecture/Pause (G/J).
L’iPod s'allume automatiquement et démarre la lecture
à partir de sa liste de titres.
8888
Saut au fichier/piste suivant/ précédent
Pendant la lecture ou en pause, appuyez plusieurs fois sur
les touches de saut (.//) jusqu’à ce que le fichier/
piste souhaité soit trouvé.
p Si on appuie sur la touche . durant la lecture, la lec-
ture du fichier/piste en cours reprend au début. Si vous
souhaitez reproduire les fichiers/pistes précédents,
appuyez deux fois ou plus sur la touche ..
Page 89

Play (
lecture normale
)
RPT 1
RPT ALL
Recherche d'un passage de morceau
Sélection d'une option de menu
e
Maintenir
Pendant la lecture, maintenez pressée une touche de saut
(.//) puis relâchez-la lorsque vous avez trouvé le
passage que vous souhaitez écouter.
Retour au menu précédent
Appuyez sur la touche MENU pour revenir au menu
précédent.
À l'arrêt, avec les touches de défilement (k/j), sélectionnez une option de menu puis appuyez sur la touche
ENTER.
Lecture en boucle (répétition)
Appuyez sur la touche REPEAT 1/ALL pour changer le
mode de lecture.
(
répéter 1 morceau
)
FRANÇAIS
(
tout répéter
Quand l'iPod est réglé pour lire un morceau en boucle,
l'icône » apparaît sur l'écran de l'iPod.
Quand l'iPod est réglé pour lire en boucle tous les morceaux, l'icône ¼ apparaît sur l'écran de l'iPod.
)
8989
Page 90

SHU Songs SHU Album
Shue o (lecture normale)
Écoute d’un iPod/iPhone/iPad (2)
Configuration réseau initiale (1)
Lecture aléatoire («Shuffle»)
Pendant la lecture, appuyez sur la touche SHUFFLE pour
changer le mode aléatoire.
SHU: SHUFFLE
Si vous sélectionnez «SHU Songs», l’iPod lit aléatoirement
les morceaux de la liste que vous avez choisie de lire.
Si vous sélectionnez «SHU Album», l'iPod lit tous les mor-
ceaux de l’album dans l’ordre, puis sélectionne
aléatoirement un autre album dans la liste et lit ses titres
dans l’ordre.
Si vous utilisez la fonction réseau pour la première fois,
l'unité lance une procédure de configuration initiale pour
la connexion à Internet.
Appuyez plusieurs fois sur la touche SOURCE
1
pour sélectionner «Internet Radio».
p Vous pouvez aussi utiliser la touche NET de la
télécommande.
Si l’iPod est réglé sur un ou l'autre des modes de lecture
aléatoire, l’icône ½ apparaît sur son écran.
9090
p Chaque fois que vous appuyez sur la touche NET, la
source alterne entre radio Internet et lecteur de
média.
Page 91

Appuyez sur la touche MENU pour sélection-
2
ner «Setup Menu» (menu de configuration),
tournez la molette MULTI JOG pour sélectionner «Network» (réseau), puis appuyez
sur la touche ENTER.
Tournez la molette MULTI JOG pour sélec-
3
tionner «Wired» (filaire) ou «Wireless» (sans
fil), puis appuyez sur la touche ENTER.
c
ou
p Pour retourner à l’écran précédent, appuyez sur la
touche . .
ou
p Si vous sélectionnez «Wired» (filaire):
Utilisez la molette MULTI JOG et la touche ENTER
pour changer les réglages de «DHCP» et « Proxy
Setting» (réglage de Proxy).
Pour des informations détaillées, contactez votre
administrateur de réseau.
p Assurez-vous que l'unité est connectée au
réseau au moyen d'un câble de réseau local
(LAN).
FRANÇAIS
Suite à la prochaine page e
9191
Page 92

Configuration réseau initiale (2)
p Si vous sélectionnez «Wireless» (sans fil):
1. Tournez la molette MULTI JOG pour sélectionner «Search AP» (rechercher point d'accès),
puis appuyez sur la touche ENTER.
(AP: point d'accès)
2. Tournez la molette MULTI JOG pour sélectionner le point d'accès désiré, puis appuyez sur la
touche ENTER.
3. S'il vous est demandé de saisir un mot de passe
de sécurité sans fil («KEY»), tournez la molette
MULTI JOG pour sélectionner les caractères à
saisir.
Voir «Saisie des caractères» en colonne de
droite.
4. Quand vous avez fini la saisie des caractères de
votre mot de passe, appuyez sur la touche
ENTER.
p Le mot de passe de sécurité sans fil tient
compte de la casse, aussi faites bien attention à
respecter les majuscules et minuscules
nécessaires.
p Si vous saisissez un mot de passe incorrect,
«Failure» (échec) apparaît, suivi de «Network
Problem» (problème réseau).
Dans ce cas, revenez à l'étape 2 et refaites les
réglages.
Saisie des caractères
Tournez la molette MULTI JOG pour sélection-
1
ner un caractère.
Déplacez le curseur en appuyant sur la touche
2
/.
Appuyez sur la touche . pour revenir au caractère
précédent.
p Répétez les étapes 1 à 2 pour saisir les caractères
suivants.
p Pour changer un caractère, amenez le curseur sur ce
caractère et tournez la molette MULTI JOG afin de
sélectionner le caractère désiré.
Appuyez sur la touche ENTER pour confir-
3
mer votre sélection.
Quand l'unité s'est connectée avec succès au point
d'accès, «Success» s'affiche à l'écran.
p Assurez-vous qu'aucun câble réseau local (LAN)
n'est branché à cette unité.
L’unité lance alors la connexion à Internet.
Quand la connexion est établie avec succès, le
menu de radio Internet est affiché. Voir page 94
pour sélectionner une station.
p Si vous ne parvenez pas à connecter l'unité à Internet,
référez-vous à la rubrique Réseau de la section Guide de
dépannage (page 114).
9292
Quand vous avez terminé la saisie de tous les
4
caractères, assurez-vous que le curseur est à
droite du dernier caractère, puis appuyez sur
la touche ENTER.
Caractères disponibles
0123456789
ABCDEFGHIJKLMNOPQRSTUVWXYZ
abcdefghijklmnopqrstuvwxyz
(espace)!”#¤%&’()*+,-./:;<=>?@[\]–_||`{|}¯
Page 93

Configuration réseau (1)
Recherche d'un point d'accès
Si vous avez déménagé ou modifié votre environnement
réseau Wi-Fi, ou si vous avez un problème de connexion à
Internet, utilisez l’assistant de configuration initiale pour
établir de nouveau la connexion Internet.
Suivez les options de menu comme ci-après.
«Setup Menu» w «Network» w «Wireless» w «Search
AP»
p Suivez les procédures décrites en pages 90-91 pour
ouvrir le menu.
Réglage de veille réseau
Si vous sélectionnez «On» pour ce réglage, l'unité s'allume
et lance automatiquement la lecture quand elle détecte un
signal AirPlay ou DLNA.
Suivez les options de menu comme ci-après:
«Setup Menu» w «Network» w «Wireless» w «Wired»
w «Standby (Off)», et sélectionnez «On».
p Suivez les procédures décrites en pages 90-91 pour
ouvrir le menu.
Pour configurer les réglages de réseau local (LAN)
sans fil
Sélectionnez «Setup Menu» w «Network» w «Wireless»,
puis changez les réglages de «DHCP», «SSID», «Security»,
«Key» et «Proxy Setting».
p Suivez les procédures décrites en pages 90-91 pour
ouvrir le menu.
Emploi du partage de connexion
Wi-Fi de l’iPod (Login Sharing)
Grâce à cette fonction, vous pouvez envoyer le paramétrage Wi-Fi de votre iPod/iPhone/iPad à cette unité. Si vous
avez déjà fini le paramétrage Wi-Fi pour cette unité, vous
n’avez pas besoin de suivre les étapes ci-dessous.
Cette fonction n'est prise en charge par les iPod/iPhone/
iPad qu'avec iOS 5.x ou ultérieur.
p Les explications suivantes se réfèrent à un iPod, mais
elles s'appliquent aussi à l'emploi avec un iPhone ou un
iPad.
FRANÇAIS
Réglage Internet manuel
Vous pouvez vérifier et modifier les réglages détaillés de la
connexion Internet.
Suivez les options de menu comme ci-après:
Pour vérifier les réglages de réseau actuels
«Setup Menu» w «Information»
Pour configurer les réglages de réseau local (LAN)
filaire
Sélectionnez «Setup Menu» w «Network» w «Wired»,
puis changez les réglages de «DHCP» et «Proxy Setting».
Connectez un iPod à un réseau Wi-Fi.
1
Allumez l'unité.
2
p NE connectez PAS de câble réseau local (LAN) à
l’unité.
Appuyez plusieurs fois si nécessaire sur la
3
touche SOURCE pour choisir «Internet Radio».
Si l’unité ne peut pas être connectée à un réseau Wi-Fi
avec la radio Internet ou la fonction lecteur de média,
le message «Network problem» (problème réseau)
s’affiche sur l’écran de l'unité. Passez à l’étape suivante.
Appuyez plusieurs fois si nécessaire sur la
4
touche SOURCE de l'unité ou sur la touche
iPod/USB de la télécommande pour sélectionner iPod/USB comme source.
Suite à la prochaine page e
9393
Page 94

Configuration réseau (2)
Écoute de la radio Internet (1)
Connectez l’iPod au port USB de l’unité au
5
moyen du câble USB livré avec votre iPod.
Maintenez la touche MENU de l’unité pressée
6
environ 3 secondes.
Les boutons «Allow» (autoriser) et « Ignore»
7
(ignorer) s’affichent sur l’iPod. Sélectionnez
«Allow».
Le message «Wi-Fi Sharing connecting.» s’affiche sur
l’unité.
Quand le processus de réglage est terminé, le message «Wi-Fi Sharing Success» s’affiche à l’écran.
Après disparition du message «Wi-Fi Sharing
8
Success», mettez l’unité en veille et rallumez-la, puis réglez-la en mode AirPlay.
Écoute d’une émission radio
Internet/d’un podcast
Veillez à faire les réglages requis pour la connexion à
Internet avant d'écouter une émission radio Internet ou un
podcast.
Appuyez plusieurs fois sur la touche
1
SOURCE afin de sélectionner « Internet
Radio».
p Vous pouvez aussi utiliser la touche NET de la
télécommande.
9494
Chaque fois que vous appuyez sur la touche NET, la
source alterne entre radio Internet et lecteur de
média.
Tournez la molette MULTI JOG pour sélec-
2
tionner une option de recherche, puis
appuyez sur la touche ENTER.
Page 95

ou
Podcasts By Location:
Recherchez par l’emplacement du podcast.
Podcasts By Genre:
Recherchez par genre de podcast.
New Stations:
Choisissez dans une liste des stations ajoutées récemment.
Most Popular Stations:
Choisissez dans une liste de stations populaires.
Recently Played:
Vous pouvez sélectionner une station/un podcast parmi
ceux que vous avez écoutés récemment
Exemple:
¹,QWHUQHW 5DGLR
)DYRULWHV
Favorites:
La liste des stations/podcasts que vous avez mémorisés
comme favoris est affichée. Sélectionnez la station/le podcast que vous souhaitez écouter. Vous pouvez faire une liste
de favoris sur notre portail Internet. Voir page 97.
ATTENTION:
La première fois que vous y accédez, rien n'a été ajouté aux
favoris et «---- empty ----» (vide) s'affiche.
Dans ce cas, appuyez sur la touche . pour revenir à l'affichage représenté ci-dessus. Ensuite, sélectionnez une autre
méthode de recherche ou créez une liste de favoris (page
97) et sélectionnez de nouveau cette méthode.
Added Stations:
Recherchez la liste créée sur notre portail Internet. Même si
la liste des stations contient des milliers de stations/podcasts, vous pouvez vouloir écouter des stations non listées.
Vous pouvez ajouter vos propres stations/podcasts via le
portail radio Internet Voir page 97.
Si vous avez sélectionné « Location »,
3
« Genre», « Podcasts By Location » ou
«Podcasts By Genre» à l’étape , tournez la
2
molette MULTI JOG pour sélectionner un
élément, puis appuyez sur la touche ENTER.
ou
Exemple:
%XVLQHVV 1HZV
¹&HOWLF
La liste des stations/podcasts est affichée.
FRANÇAIS
Location:
Recherchez par l’emplacement du diffuseur.
Genre:
Recherchez par genre de musique diffusée par la station/le
podcast.
Suite à la prochaine page e
9595
Page 96

Le
Mise en
mémoir
tampon
Ou
Écoute de la radio Internet (2)
Temps écoulé et format de chier
Tournez la molette MULTI JOG pour sélec-
4
tionner la station que vous voulez écouter
puis appuyez sur la touche ENTER.
ou
Exemple quand l'information affichée est le temps écoulé
et le format de fichier:
verture
,QWHUQHW 5DGLR
,QWHUQHW 5DGLR
e
Informations affichées
Chaque fois que vous appuyez sur la touche INFO, les informations affichées sur la seconde ligne changent comme
indiqué ci-dessous.
(«Internet Radio » est affiché sur la première ligne de
l'écran.)
Station
Piste
Album
cture
p À l'ouverture ou à la mise en mémoire tampon, la
quantité de données téléchargée est affichée en
pourcentage.
9696
,QWHUQHW 5DGLR
03
p Si aucune information n'est disponible, la ligne est
vide.
Page 97

Portail radio Internet
Accédez au portail radio sur Internet en utilisant votre ordinateur pour profiter pleinement de la fonction radio
Internet de cette unité.
Création d'une liste de stations/podcasts favoris
Vous pouvez créer une liste de vos stations/podcasts favoris sur le portail. Cette liste peut être vue à partir de votre
unité, vous permettant de trouver plus facilement vos programmes habituels.
Vous pouvez voir la liste de vos stations favorites depuis
«Favorites» dans le menu radio Internet.
Ajout de stations/podcasts favoris
Si la station/le podcast que vous souhaitez écouter ne se
trouve pas dans la liste des canaux, vous pouvez créer votre
propre liste.
Vous pouvez voir la liste de vos stations ajoutées depuis
«Added Stations» dans le menu radio Internet.
Accès au portail radio
Enregistrement comme utilisateur
Saisissez l'adresse MAC de l'unité.
3
Vous pouvez vérifier l’adresse MAC dans «Setup
Menu» w «Information» w «MAC Address».
Lors de la saisie de l’adresse MAC, ne saisissez pas les
«:» entre les caractères alphanumériques.
Sélectionnez un genre dans la liste.
4
Sélectionnez une station à ajouter à votre
5
liste de favoris.
Cliquez sur le bouton pour ajouter la station, et une
fenêtre de dialogue s'ouvre.
Saisissez un nom de groupe dans la fenêtre
6
de dialogue pour constituer un groupe, puis
cliquez sur le bouton .
Le nom du groupe est ajouté à «My Favourite
Groups».
Vous pouvez accéder au groupe depuis «Favourites»
dans le menu Radio Internet.
FRANÇAIS
Ouvrez votre navigateur Internet et accédez au
1
site web suivant.
http://teac.vtuner.com/
Vous pouvez changer la langue en cliquant sur l'icône
de drapeau correspondant à chaque nation dans le
bandeau du haut.
Saisissez votre adresse e-mail et votre mot
2
de passe pour vous enregistrer.
p Pour supprimer une station de votre liste de favoris,
sélectionnez-la puis cliquez sur la touche . La station
sera supprimée et une fenêtre de dialogue apparaîtra.
9797
Page 98

Configuration du lecteur de média (1)
À propos de la fonction lecteur de
média
Avec la fonction lecteur de média, vous pouvez lire les
fichiers musicaux de vos ordinateurs via le réseau local (LAN).
Il existe deux façons de se connecter à votre ordinateur:
par partage de support ou par partage de dossier.
Partage de support
Le partage de support permet à l’unité de lire une bibliothèque de support partagé sur l’ordinateur et de retrouver
les morceaux grâce à des balises telles que le nom de l’artiste, le genre ou le nom de l’album.
p Cette unité ne peut afficher que des caractères alphanu-
mériques à simple octet. Si un fichier a des caractères à
double octet (japonais, chinois, etc.), ils ne peuvent pas
correctement s'afficher. Cela n'affecte toutefois pas la
lecture du fichier.
Windows XP, Windows Vista ou WIndows7 avec le
Lecteur Windows Media 11 ou ultérieur installé.
Partage de dossier
Pour utiliser la méthode par partage de fichiers, les fichiers
musicaux doivent être en accès libre de sorte que d’autres
ordinateurs ou cette unité puissent les lire.
Il vous faut un PC fonctionnant sous
Cliquez sur «Activer la diffusion de média
5
en continu».
Dans le lecteur Windows Media, ouvrez
6
«Diffuser en continu», puis «Plus d'options
de diffusion en continu...».
Sélectionnez «NP-H750» dans la liste, puis
7
cliquez sur «Personnaliser...».
Réglage du lecteur Windows Media 12
Connectez votre ordinateur au réseau local.
1
Connectez cette unité au réseau local.
2
p Si vous avez un problème pour vous connecter au
réseau local, reportez-vous à la page 114.
Ajoutez à la bibliothèque du lecteur Windows
3
Media les fichiers à partager qui manquent.
p Référez-vous au mode d'emploi du lecteur
Windows Media pour des détails.
Dans le lecteur Windows Media, ouvrez
4
«Diffuser en continu», puis «Activer la diffusion de média en continu».
9898
Réglez les paramètres détaillés de partage.
8
p Pour écouter les fichiers musicaux quelle que soit
leur classification, réglez Nombre d’étoiles sur
«Toutes les classifications».
p Assurez-vous que «Musique» est coché.
Page 99

Cliquez sur «OK».
9
Pour la procédure de lecture, voir page 103.
Réglage du lecteur Windows Media 11
Connectez votre ordinateur au réseau local.
1
Connectez cette unité au réseau local.
2
p Si vous avez un problème pour vous connecter au
réseau local, reportez-vous à la page 114.
Ajoutez à la bibliothèque du lecteur Windows
3
Media les fichiers à partager qui manquent.
p Référez-vous au mode d'emploi du lecteur
Windows Media pour des détails.
Dans le lecteur Windows Media, ouvrez
4
«Bibliothèque», puis «Partage des fichiers
multimédias».
Sélectionnez «NP-H750» et cliquez sur
6
«Autoriser».
Le NP-H750 peut maintenant accéder à la bibliothèque partagée.
Cliquez sur «Paramètres...».
7
FRANÇAIS
La fenêtre Partage des fichiers multimédias s’ouvre.
Cochez «Partager mes fichiers multimédias
5
dans:».
«NP-H750» apparaît dans la liste des appareils.
Suite à la prochaine page e
9999
Page 100

Configuration du lecteur de média (2)
Configurez les paramètres détaillés de par-
8
tage. Cliquez sur «OK».
p Pour écouter les fichiers musicaux quelle que soit
leur classification, réglez Nombre d’étoiles sur
«Toutes les classifications».
p Assurez-vous que «Musique» est cochée sous l’inti-
tulé «Contrôle parental».
p Pour la procédure de lecture, voir page 103.
Cliquez sur «OK».
9
Réglage des dossiers partagés
(Windows XP)
Vérifiez le nom du domaine ou du «Groupe de
1
travail» auquel appartient votre ordinateur.
Pour activer le partage de dossiers, votre ordinateur
doit être membre d’un domaine ou d’un groupe de
travail.
Généralement, votre ordinateur appartient par défaut
à un groupe de travail. Pour voir le nom du domaine
ou du groupe de travail auquel appartient votre ordinateur, vérifiez le réglage du PC comme suit:
Panneau de configuration w Système w Nom de
l’ordinateur
Vérifiez le nom du compte utilisateur et son
2
mot de passe.
Pour accéder à l’ordinateur depuis cette unité, vous
avez besoin du nom de compte utilisateur et du mot
de passe de l’ordinateur.
Copiez les fichiers dans le dossier «Musique
3
partagée» dans «Documents partagés».
p Avec cette unité, vous ne pouvez pas lire les fichiers
d'autres dossiers que «Musique partagée ». Vous
devez paramétrer le dossier partagé pour lire les
fichiers.
100100
 Loading...