

Page 1

TASER CAM™ HD Recorder
Operating Manual
MMU0036 Rev: A Page 1 of 48
Page 2

TASER CAM HD Recorder
Table of Contents
Chapter 1: Warnings and Cautions .................................................................................................. 4
General Safety Information ........................................................................................................... 4
Battery Safety Information ............................................................................................................ 5
Safety Information: General Maintenance & Use ......................................................................... 6
Safety Information: Loss of Data .................................................................................................. 7
Chapter 2: General Overview ........................................................................................................... 9
TASER CAM HD General Features ............................................................................................. 9
Automatic Shut-Down TASER CAM HD Recorder ....................................................................... 9
Minimum System Requirements ................................................................................................. 11
In the Box .................................................................................................................................... 11
Chapter 3: Charging the TASER CAM HD Recorder ..................................................................... 12
Charging the TASER CAM HD Recorder Using the Wall Power Charging Cable ..................... 12
Charging the TASER CAM HD Recorder Using the PC USB Download Cable ......................... 13
Chapter 4: Installing the EVIDENCE Sync Software ...................................................................... 15
Chapter 5: Configuring the TASER CAM HD Recorder with EVIDENCE Sync Software .............. 16
Viewing Device Information ........................................................................................................ 17
Chapter 6: Operating the TASER CAM System ............................................................................. 19
Testing the TASER CAM HD Recorder ...................................................................................... 19
Using the TASER CAM HD Recorder ........................................................................................ 21
Chapter 7: Downloading and Viewing Records .............................................................................. 22
Uploading Records to EVIDENCE.com Services with EVIDENCE Sync (Online) Software ...... 22
Viewing Uploaded Videos (Online) ............................................................................................. 23
Viewing the ECD Event Log (Online) ......................................................................................... 24
Downloading Records to Your Computer with EVIDENCE Sync (Offline) Software .................. 25
Viewing Downloaded Videos (Offline) ........................................................................................ 26
Viewing the ECD Event Log (Offline) ......................................................................................... 27
Chapter 8: Firmware Update .......................................................................................................... 29
First-Time ECD Firmware Update – Online ................................................................................ 29
First-Time ECD Firmware Update – Offline ................................................................................ 32
Recorder and ECD Firmware Update – Online .......................................................................... 35
Recorder and ECD Firmware Update – Offline .......................................................................... 39
Chapter 9: Use and Care ................................................................................................................ 43
Storage ....................................................................................................................................... 43
Cleaning ...................................................................................................................................... 43
Lens ........................................................................................................................................ 43
MMU0036 Rev: A Page 2 of 48
Page 3

TASER CAM HD Recorder
Gold Contacts ......................................................................................................................... 43
Battery .................................................................................................................................... 43
Replacing the TASER CAM Battery ........................................................................................... 44
Chapter 10: CID Icons .................................................................................................................... 45
Chapter 11: Troubleshooting the TASER CAM .............................................................................. 46
MMU0036 Rev: A Page 3 of 48
Page 4

TASER CAM HD Recorder
Chapter 1: Warnings and Cautions
General Safety Information
Read, study, understand, and follow all instructions, product manuals,
warnings, information, training bulletins, and TASER training materials
before using the TASER CAM™ HD system. Failure to comply could
result in injury, system malfunctions, or loss of data.
5-Second Discharge Cutoff and Audio Alert. The optional
Automatic Shut-Down TASER CAM HD Recorder will stop a continual
ECD trigger discharge at 5 seconds (even if the user continues to hold
back the trigger) and require an additional ECD trigger pull by the user
for an additional cycle. The ECD programmed with the Automatic ShutDown TASER CAM HD Recorder an audible alert 3 seconds into the
ECD output cycle. Under high stress circumstances or noisy
environments, the user may not hear the audible warning.
MMU0036 Rev: A Page 4 of 48
Page 5

TASER CAM HD Recorder
Battery Safety Information
Failure to maintain the TASER CAM HD battery as instructed may cause
the battery, X2 ECD or system to malfunction or fail to function properly
or optimally. Follow and comply with the following instructions to
reduce the risk of malfunction, including failure:
Charge the Battery Before Use. The TASER CAM HD battery must
be charged and functional prior to use. Be aware that a battery can fail
to function, fail to charge, fail to maintain a charge, or deteriorate over
time. Properly maintain the battery and ensure that it is fully functional.
If the battery is not fully functional, immediately replace it with a fully
functional battery. See the TASER CAM HD Battery Replacement Guide
for instructions.
Cleaning Battery Terminals. In case the battery terminals (electrical
contacts) are contaminated, clean the terminals with a dry cloth before
use. Otherwise power failure or charge failure may occur due to the
poor connection between the battery and the electronic circuitry of the
device.
To prevent potential injuries, leaking, overheating or explosion of
batteries, please be advised to take the following precautions:
Battery Fluid Contact with Skin or Eyes. In case the battery fluid
gets into the eyes due to the leakage of battery, do not rub the eyes.
Rinse the eyes with clean running water, and seek medical attention
immediately. Battery fluid’s contact with the eyes or skin could cause
serious injury, including a loss of eyesight.
Extreme Temperatures. Do not expose the battery to excessive
heat, cold, or water. Do not use or leave the battery near a heat source
or at a very high temperature (for example, fire, heater, in strong direct
sunlight, or in a vehicle in extremely hot weather). Otherwise, the
battery may overheat, cause a fire, or its performance will be
degenerated and its service life will be shortened.
Static Electricity. Keep the battery away from sources of static
electricity. Static electricity can cause damage to the battery, which
could result in serious injury.
MMU0036 Rev: A Page 5 of 48
Page 6

TASER CAM HD Recorder
Replacement. The rechargeable battery in the TASER CAM HD
system may be replaced by a qualified technician. Do not use any
battery other than those designated by TASER. Doing so may cause
battery explosion, battery leakage, system damage, injury, or fire.
Handling. Do not carry or store the TASER CAM HD recorder in places
where the battery contacts may become dirty or short-circuited. To
avoid risk of fire, burns, or damage to your battery pack, do not allow a
metal object to touch the battery contacts. Do not strike or throw the
battery against hard surfaces. Do not directly solder the battery or
pierce the battery with a nail or other sharp object. Never disassemble,
short circuit, or heat batteries or put batteries in a fire. Doing so may
cause battery explosion, battery leakage, system damage, injury, or fire.
Abnormal Appearance. If the battery gives off an odor, generates
heat, becomes discolored or deformed, or in any way appears abnormal
during use, recharging, or storage, immediately remove it from the
device or battery charger and place it in a contained vessel such as a
metal box.
Disposal. Dispose of the battery properly; contact your local waste
disposal provider regarding local restrictions on the disposal or
recycling of batteries. Do not dispose of the battery in fire or heat. The
battery may explode if placed in the fire.
Safety Information: General Maintenance & Use
Failure to use or maintain the TASER CAM HD system as instructed
may cause the ECD or system to malfunction or fail to function properly
or optimally. Follow and comply with the following instructions to
reduce the risk of malfunction, including failure or loss of data:
Charging the TASER CAM HD recorder. Do not insert the TASER
CAM HD recorder into an X2 ECD until the recorder is fully charged.
Recharge the TASER CAM HD recorder frequently, before the remaining
battery capacity is less than 50 percent. If the battery is not properly
charged the ECD and/or the TASER CAM HD may not work or may fail to
function as expected. To charge the recorder, only use the approved
TASER charging cables. Do not recharge the TASER CAM HD recorder
out of the recommended temperature range of 32 °F to 104 °F (0 °C to
40 °C). Charging out of this recommended range may cause damage to
MMU0036 Rev: A Page 6 of 48
Page 7

TASER CAM HD Recorder
the battery and may also cause deterioration of the battery’s
characteristics and cycle life.
Update Software. The TASER CAM HD recorder has the capability
for firmware updating. It is important to acquire, update, and maintain
the latest firmware update. Current software may be obtained from
www.taser.com. NEVER disconnect the TASER CAM HD recorder from
the USB download cable during a firmware update, whether you are
updating the recorder or X2 ECD.
USB download cable. Never shift the ECD safety to the up (ARMED)
position or pull the trigger when the USB download cable is plugged
into the TASER CAM HD recorder. Never insert the TASER CAM HD
recorder into an X2 ECD while the TASER CAM HD recorder is
connected to a computer or wall charger. Do not unplug the USB
download cable from the PC or TASER CAM HD recorder while
downloading from the device.
Removal of the TASER CAM HD recorder. Do not remove the
TASER CAM HD recorder from the ECD while the safety is in the up
(ARMED) position.
EMI. High voltage discharge or electromagnetic interference (EMI) may
cause video corruption in the TASER CAM HD recorder.
Handling the TASER CAM HD recorder. Avoid dropping the
TASER CAM HD recorder. Handle the camera lens with care, if the
camera lens is scratched this may result in a distorted image.
Avoid Exposure to Wet Conditions. If the TASER CAM HD recorder
is drenched or immersed in water, seawater, or other liquid, DO NOT
use the recorder until completing the procedure recommended in the
current version of the TASER Instructor Training materials or the
product manual. Do not attempt to dry the recorder with an external
heat source, such as a microwave oven or hair dryer. A recorder that
has been damaged as a result of exposure to liquids is not serviceable.
Safety Information: Loss of Data
Failure to maintain the TASER CAM HD recorder or ECD as instructed
may cause the system to malfunction or fail to function properly or
optimally. Recorded content in memory may be destroyed or erased by
operating mistakes, unit malfunction, or during repair work. Back up
MMU0036 Rev: A Page 7 of 48
Page 8

TASER CAM HD Recorder
and save important content after each shift and before returning the
unit for repair work.
MMU0036 Rev: A Page 8 of 48
Page 9

TASER CAM HD Recorder
Chapter 2: General Overview
The TASER CAM HD recorder is an optional accessory for use with any
TASER X2 electronic control device (ECD). The TASER CAM HD system,
with its microphone and light-sensitive camera, adds audio and video
recording capabilities to the X2 ECD. It is also rechargeable.
The TASER CAM HD recorder can be configured without the audio recording
capability for locations where audio recording is restricted. Configuration
settings are available in the EVIDENCE Sync™ software.
The TASER CAM HD recorder works with EVIDENCE Sync™ software to
download audiovisual files onto a local computer or server and store them in
a searchable library. Files may also be stored on the EVIDENCE.com™
website, offering digital storage in a secure and easily accessible
environment.
TASER CAM HD General Features
The TASER CAM HD recorder improves upon the previous TASER CAM
product with color footage and superior image quality.
A fully charged battery will provide enough power for approximately 100
5-second firings at 77 °F (25 °C) and 1 hour of video/audio recording at
maximum video resolution and frame rate.
The TASER CAM system records both video and audio when the safety is in
the up (ARMED) position, and stops recording when the safety is in the down
(SAFE) position.
Note: There is an approximate 2-second delay between the safety switch
being placed in the up (ARMED) position and when the TASER CAM
begins to record.
The TASER CAM HD recorder stores the video and audio records; the X2
ECD stores the firing records. Because these data are kept in different
places, the same recorder and ECD should be used together.
Automatic Shut-Down TASER CAM HD Recorder
The auto shut-down TASER CAM HD (AS) recorder a is a modified recorder
that shuts down the high voltage output of the ECD after 5 seconds and also
contains a built-in speaker that alerts the user to the impending shut down.
MMU0036 Rev: A Page 9 of 48
Page 10

TASER CAM HD Recorder
The AS recorder provides an audible beeping alert for the last two seconds of
a trigger-activated firing cycle before automatically shutting down the cycle.
After 5 seconds’ deployment duration, the energy burst will stop even if your
finger is still pulling the trigger switch. To reenergize the deployed cartridge,
first ensure that your finger is off the trigger switch, and then press the ARC
switch.
Note: The TASER CAM HD AS recorder has no impact on the ARC switch
functionality and will not prevent the user from energizing the X2 ECD
with the ARC switch. Nor will the TASER CAM HD AS shut down the
high voltage output of the ECD at any predetermined time when the
user continuously holds down the ARC switch.
Note: TASER CAM HD AS feature has no impact on video and audio
recording; however the audio alert will be captured on the recording
and may distort any audio captured from the incident during the
duration of the audio alert. As long as the safety switch is in the up
(ARMED) position, the TASER CAM HD AS will continue to capture
the event.
Under stressful situations, audio exclusion might prevent you from
hearing the alert from the automatic shut-down TASER CAM HD
recorder.
Your ECD recognizes the TASER CAM HD AS as a unique type of battery
pack which enables the automatic shut-down feature of the ECD. The ECD
will indicate that this feature is enabled via a special TASER CAM HD AS
icon in the upper left hand corner of the ECD CID as shown below:
This feature is automatically disabled if replaced by another battery pack
type, and the X2 ECD will return to its normal configuration (that is, there will
no longer be an audio alert, and the energy cycle will continue after 5
seconds if your finger is still holding down the trigger switch). Always confirm
that the ECD performs as expected before returning it to duty after changing
any battery pack.
MMU0036 Rev: A Page 10 of 48
Page 11
TASER CAM HD Recorder
Remove the cartridges before testing the ECD function. See the
Unloading section in the TASER X2 ECD User Manual for more
information.
Minimum System Requirements
Windows® 2000, 2003, XP, or 7
Microsoft Direct X® (Version 7.0 or greater for exported incident video
processing)
Adobe® Reader®
Apple® QuickTime® or VLC™ media player
Pentium® 4 or AMD Athlon™ processor
128 MB of RAM
Audio card
Video card (800 x 600 resolution or better, with 24-bit color)
PATA hard drive with at least 2 GB of available disk space
Internet access (recommended)
2.0 self-powered USB BUS or HUB
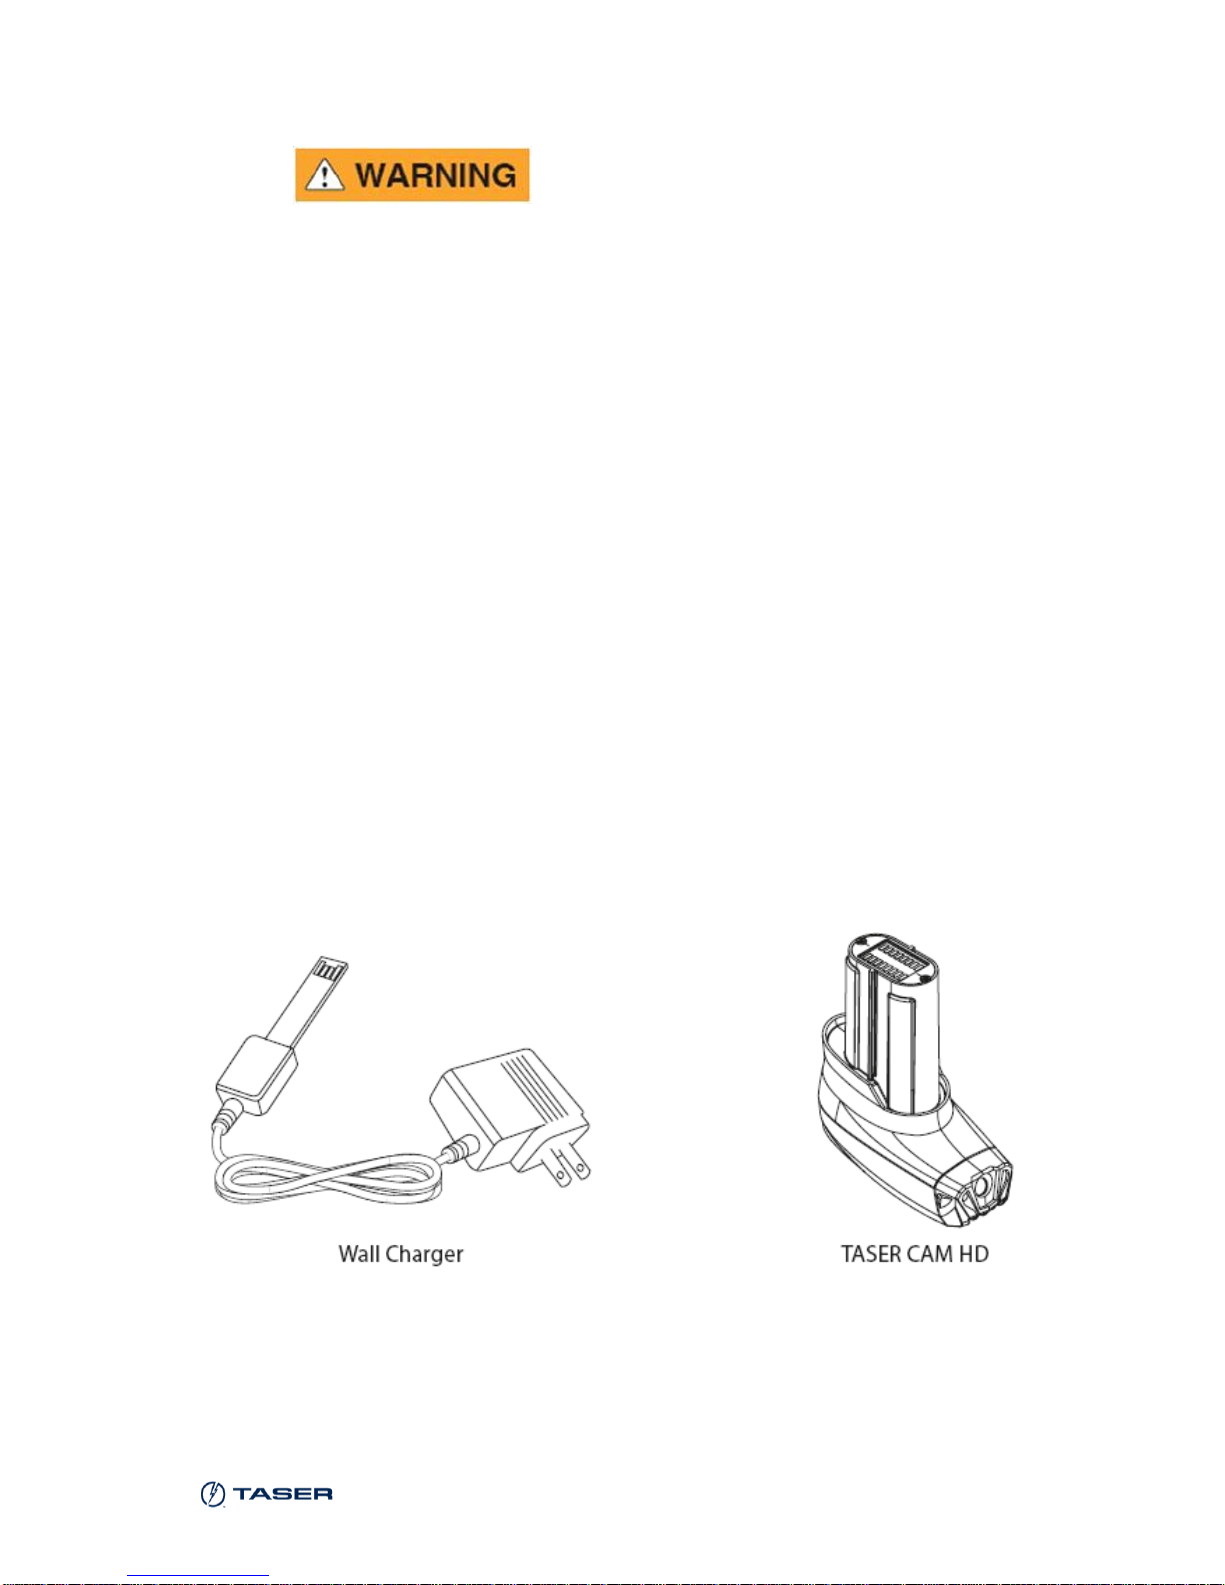
In the Box
Your TASER CAM HD system includes a wall charger assembly. A USB
download cable is available separately.
MMU0036 Rev: A Page 11 of 48
Page 12
TASER CAM HD Recorder
Chapter 3: Charging the TASER CAM HD
Recorder
Note: Ensure that you fully charge the TASER CAM HD recorder before the
first use (before it is inserted into an X2 ECD).
For any subsequent charging performed with the recorder inserted in
the ECD, ensure that the safety switch is in the down (SAFE) position
and that the Smart cartridges are removed from the ECD. See the
TASER X2 ECD Operating Manual for more information.
After the initial charging cycle is complete, there are two ways to recharge the
TASER CAM HD recorder, through a: (1) wall power charging cable; or (2)
PC USB download cable. Depending on the amount of charge in the battery,
it may take up to 5 hours for the TASER CAM HD recorder to fully charge.
Charging can be accomplished with the TASER CAM HD recorder in the X2
ECD or independently (with the TASER CAM HD recorder out of the X2
ECD).
Charging the TASER CAM HD Recorder Using the Wall Power
Charging Cable
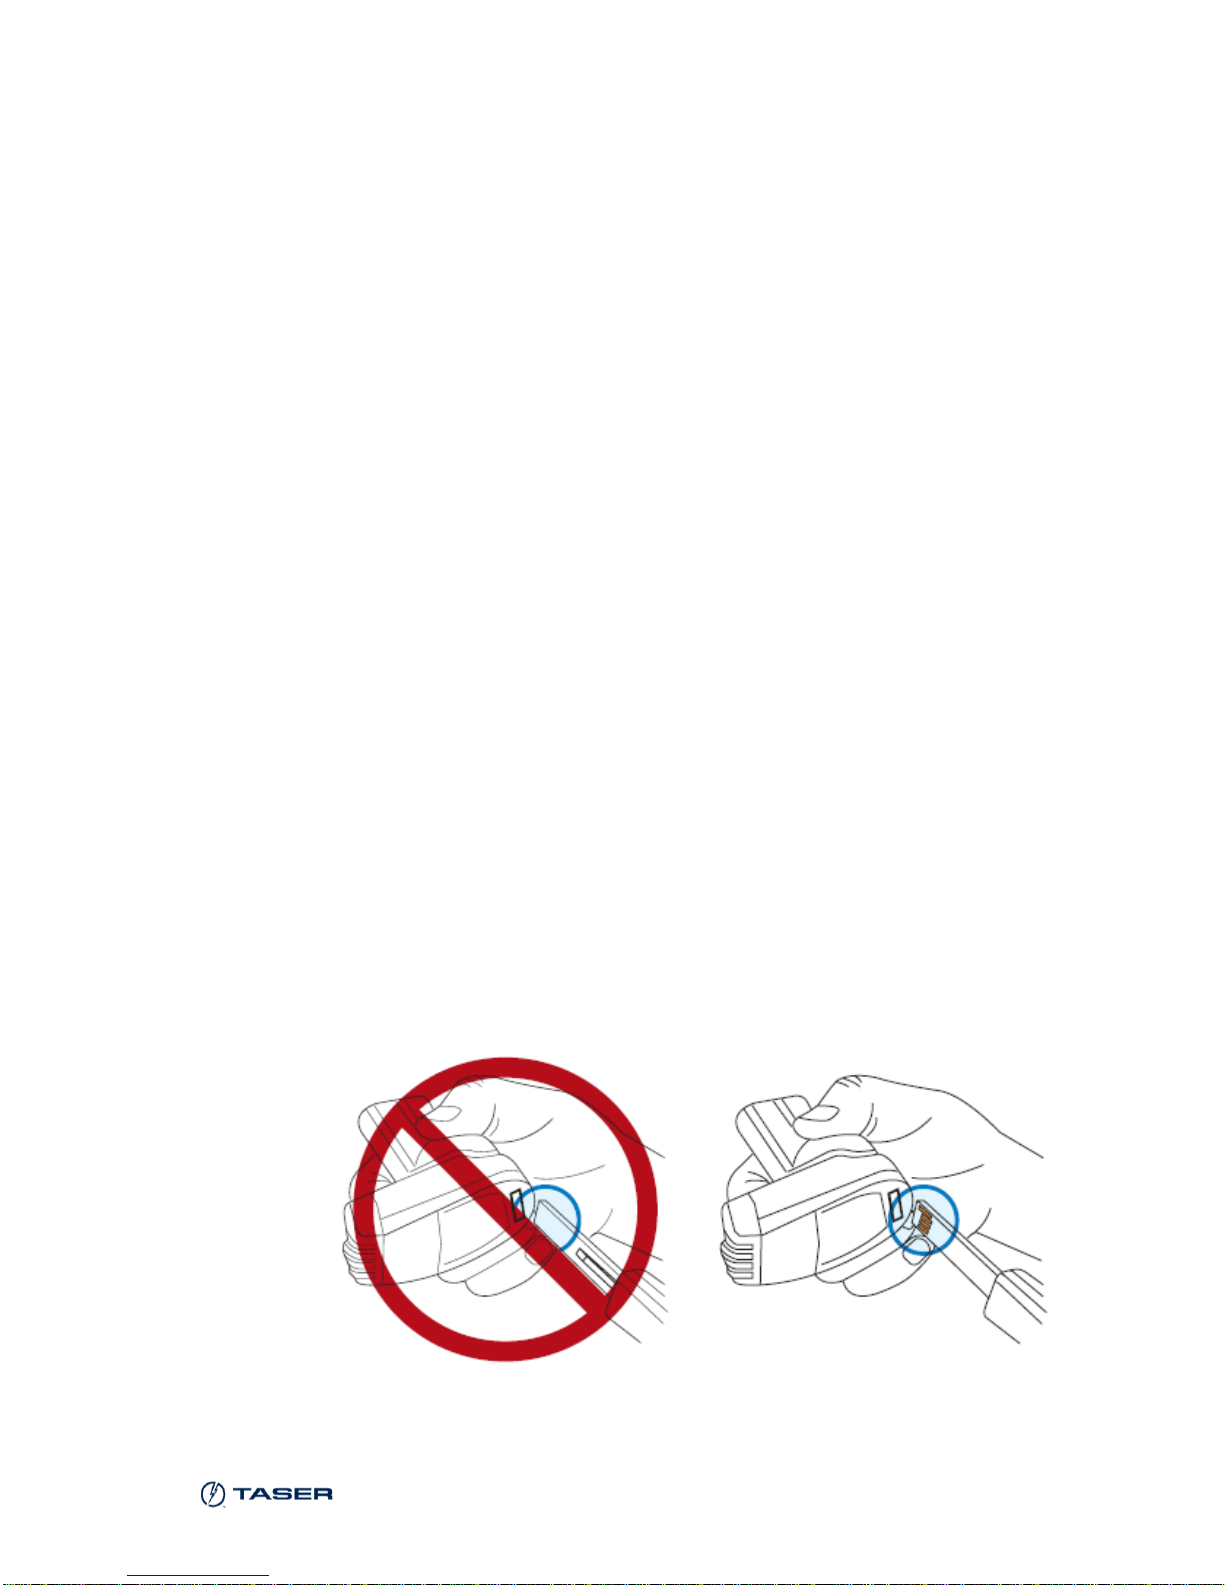
1. Remove the data port plug from the bottom of the TASER CAM HD
recorder.
2. Connect the wall power cable to the TASER CAM HD recorder.
Note: When inserting the power cable, it is important that the gold tabs
face forward toward the camera lens.
3. Connect the wall power cable to a wall outlet.
MMU0036 Rev: A Page 12 of 48
Page 13
TASER CAM HD Recorder
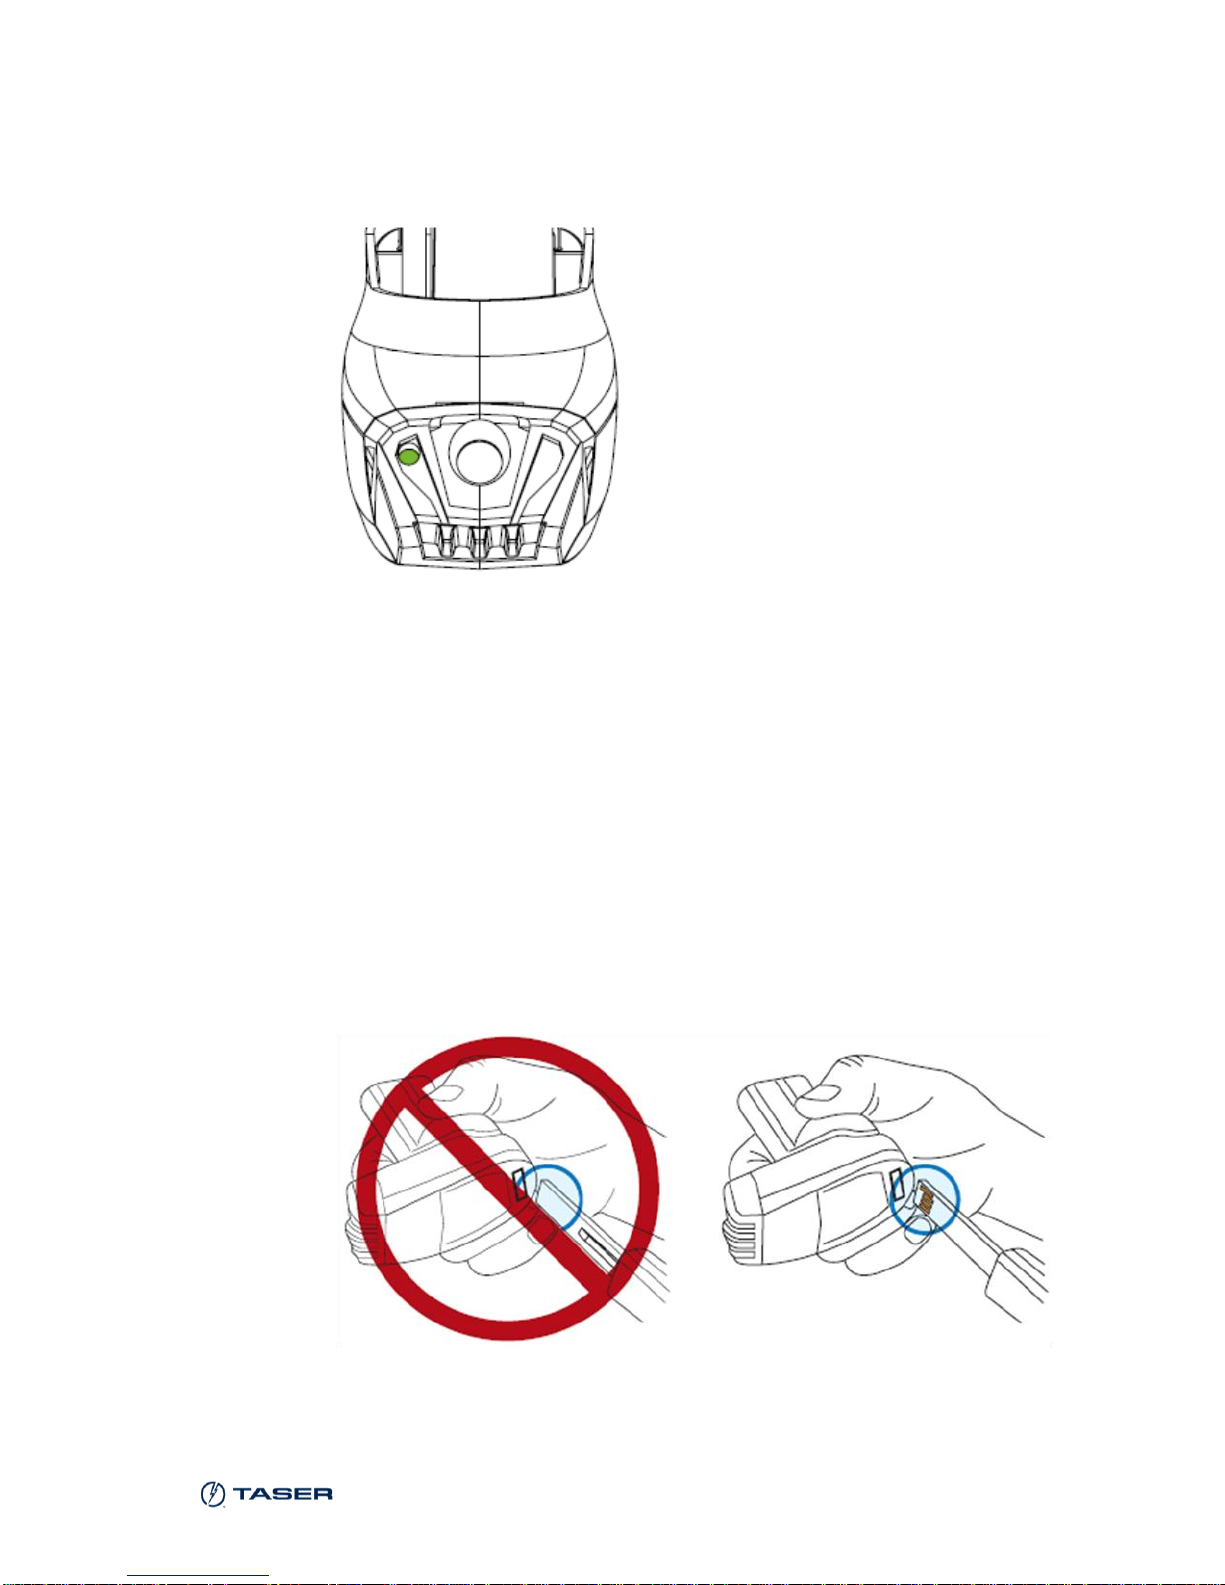
4. A green light near the TASER CAM HD lens will flash to indicate
charging.
5. When charging is complete, the green light will remain steady.
6. After unplugging the charging cable from the TASER CAM HD recorder,
remember to replace the dataport plug on the TASER CAM HD recorder
to prevent damage from any debris or moisture.
Charging the TASER CAM HD Recorder Using the PC USB
Download Cable
Note: Do not connect the TASER CAM HD recorder to your computer until
you have installed the EVIDENCE Sync software. See Chapter 5:
Configuring the TASER CAM HD Recorder with EVIDENCE Sync
Software.
1. Connect the USB download cable to the TASER CAM HD recorder.
2. Connect the USB download cable to the PC. Be sure to fully insert the
cable into the USB port.
MMU0036 Rev: A Page 13 of 48
Page 14

TASER CAM HD Recorder
3. A green light near the TASER CAM HD lens will flash to indicate
charging.
4. When the TASER CAM HD recorder is fully charged, the green light will
remain steady.
5. After unplugging the cable from the TASER CAM HD recorder,
remember to replace the dataport plug on the TASER CAM HD recorder
to prevent damage from any debris or moisture.
Notes:
Never remove the TASER CAM HD recorder from the ECD while
the safety is in the up (ARMED) position.
Never remove the TASER CAM HD recorder from the ECD while
the recorder is plugged into a computer.
MMU0036 Rev: A Page 14 of 48
Page 15
TASER CAM HD Recorder
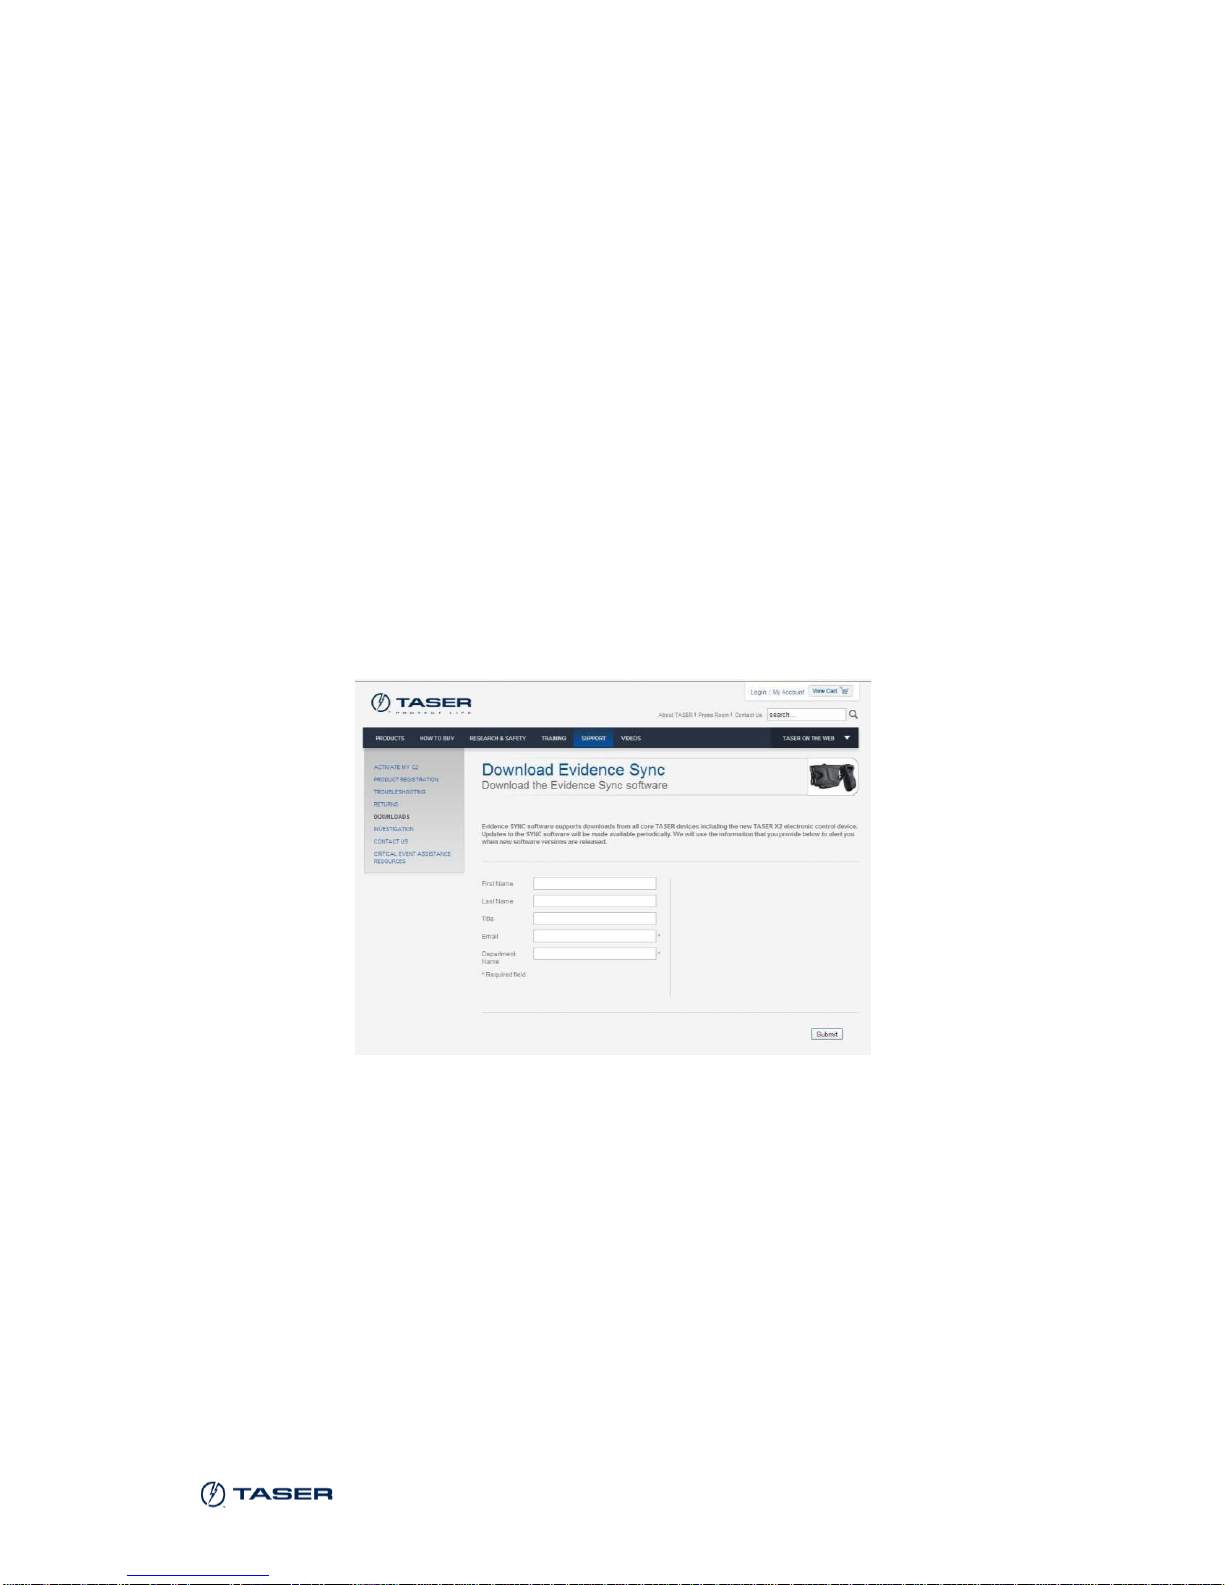
Chapter 4: Installing the EVIDENCE Sync Software
To download videos from your TASER CAM HD recorder, you will need to
install the EVIDENCE Sync software onto your PC.
Note: Do NOT plug the TASER CAM HD recorder’s USB cable into the
computer at this step.
1. On your computer, close all open applications.
2. Launch your web browser.
3. Go to www.taser.com/sync_download.
4. Click Download Software Evidence Sync and follow the instructions.
5. When the installation is complete, click Finish to exit.
MMU0036 Rev: A Page 15 of 48
Page 16

TASER CAM HD Recorder
Chapter 5: Configuring the TASER CAM HD
Recorder with EVIDENCE Sync Software
The EVIDENCE Sync software is used to set up your recorder.
1. Connect the USB download cable (available separately) to the TASER
CAM HD recorder.
2. Connect the USB download cable to your computer.
3. Start the EVIDENCE Sync software. The main screen will appear. Fill in
the operator information.
If you have an EVIDENCE.com account, log into the system.
If you do not have an EVIDENCE.com account, select the Offline
option. The program will restart in the offline mode.
4. Click DEVICE SETTINGS.
You have several options for customizing you recorder’s settings:
A frame rate of 30 or 15 frames per second. If you expect to use
your TASER CAM HD recorder in low-light conditions, the 15 frames
per second setting may produce better images. The slower frame
rate also enables you to record more footage.
Four resolution options. Higher resolution takes maximum
advantage of the HD recorder’s capabilities.
MMU0036 Rev: A Page 16 of 48
Page 17

TASER CAM HD Recorder
Microphone on or off. This option is included because some
jurisdictions restrict audio recordings.
Viewing Device Information
1. Connect the TASER CAM HD recorder to your computer with the USB
download cable.
2. Start the EVIDENCE Sync software.
If you have an EVIDENCE.com account, log into the system.
If you do not have an EVIDENCE.com account, select the Offline
option. The program will restart in the offline mode.
3. Click DEVICE SUMMARY.
The screen displays information about the ECD and the TASER CAM
HD recorder, and provides you the ability to print reports and update
device firmware.
MMU0036 Rev: A Page 17 of 48
Page 18

TASER CAM HD Recorder
MMU0036 Rev: A Page 18 of 48
Page 19

TASER CAM HD Recorder
Chapter 6: Operating the TASER CAM System
When the TASER CAM HD recorder is inserted into an X2 ECD and
disconnected from an external charging source (PC or wall power), it
provides power to the ECD and to the sensitive camera and microphone used
by the TASER CAM HD recorder.
The X2 ECD’s firmware must be upgraded to firmware version v03.022
or greater before installing the TASER CAM HD recorder. If the firmware
is outdated the recorder should provide power to the ECD, but the
recording function will not work.
Install the EVIDENCE Sync software on your computer, update the X2 and
TASER CAM HD devices’ firmware, and configure your TASER CAM HD
recorder before attempting to use it with the ECD. See Chapter 3: Charging
the TASER CAM HD Recorder, Chapter 5: Configuring the TASER CAM HD
Recorder with EVIDENCE Sync Software, and Chapter 8: Firmware Update
for more information.
Testing the TASER CAM HD Recorder
1. Disconnect the TASER CAM HD recorder from the PC or wall power and
remove the charging cable from the recorder.
2. Confirm that the X2 safety is in the down (SAFE) position.
3. Remove the Smart™ cartridges from the X2 ECD. (See the TASER X2
ECD User Manual for more information on unloading Smart cartridges.)
4. Confirm that the charging cable is removed from the TASER CAM HD
recorder.
5. Firmly insert the TASER CAM HD recorder into the ECD until it clicks
and the X2 ECD’s ejector button pops out completely.
When the ECD’s safety is in the up (ARMED) position, the TASER
CAM HD unit starts recording. The light next to the TASER CAM HD
recorder’s lens will blink red to indicate the unit is recording. When
the ECD’s safety is in the down (SAFE) position, the TASER CAM
HD recorder stops recording. (If the ECD is in the stealth mode or
the flashlight and LASERs are turned OFF [OO], the red LED will not
MMU0036 Rev: A Page 19 of 48
Page 20

TASER CAM HD Recorder
TASER CAM
HD Recorder
Operating Mode
Energy Cell Indicator
blink. See the TASER X2 ECD User Manual for more information on
light and LASER settings.)
Also when the ECD’s safety is in the up (ARMED) position, the
camera icon should display in the upper-left hand corner of the
ECD’s central information display (CID).
CID Screen with TASER CAM HD Recorder Installed
If an automatic shut-down TASER CAM HD AS recorder is installed
correctly in an ECD and the recorder is functioning properly, the
automatic shut-down icon should display in the upper-left side of
the central information display (CID):
CID Screen with TASER CAM HD AS Recorder Installed
If the camera lens is blocked by hands, gloves, debris, etc., the CID
will flash. When the CID flashes, the colors will reverse (the icons
MMU0036 Rev: A Page 20 of 48
Page 21

TASER CAM HD Recorder
will be black and the background will be yellow). Blocking the lens
will result in poor or no visibility in the video.
CID Screen Indicating a Blocked Lens
Note: With previous-generation TASER CAM recorders, the ECD’s
LASER sight would flash when the TASER CAM lens was
covered. Covering the lens of a TASER CAM HD recorder will not
cause the LASER to flash; the CID flashes instead.
6. Shift the safety to the up (ARMED) position. The TASER CAM HD
recorder will begin recording in approximately 2 seconds.
7. Test fire the X2 ECD.
8. Shift the safety to the down (SAFE) position. The TASER CAM HD
recorder will stop recording.
9. Connect the TASER CAM HD recorder to a PC to download and view
the video/audio recorded during this test. You also can use the TASER
CAM HD recorder to download the firing logs from the weapon (see
Chapter 6: Operating the TASER CAM System for more information).
Using the TASER CAM HD Recorder
The function and use of the X2 ECD do not change with the addition of a
TASER CAM HD recorder (unless you have installed a TASER CAM HD AS
recorder, see Chapter 2: General Overview above). However, there are a
few points to remember:
The TASER CAM HD recorder does not have a flashlight. For low-light
video recording, the X2 ECD must have its LED flashlight turned on.
Hold the ECD as steady as possible while recording.
Recharge the TASER CAM HD recorder before the remaining battery
capacity is less than 50 percent.
Do not block the lens of the TASER CAM HD recorder. If the lens is
blocked, the CID will flash. With a two-handed hold, the user might
unintentionally block the lens, particularly when wearing gloves.
Note: The CID also may flash in conditions of extreme darkness even if
the lens is not blocked.
MMU0036 Rev: A Page 21 of 48
Page 22

TASER CAM HD Recorder
Chapter 7: Downloading and Viewing Records
The proper software must be installed before video/audio recordings and
firing logs can be downloaded (see Chapter 5: Configuring the TASER CAM
HD Recorder with EVIDENCE Sync Software).
The TASER CAM HD recorder can store 1 hour of records. After that, new
footage will overwrite the old footage in 10-minute segments.
Note: Because video/audio records are stored in the TASER CAM HD
recorder and firing record data are stored in the X2 ECD, if
downloading records separately, remember to download firing records
from the weapon before or after downloading video/audio from the
TASER CAM HD recorder. You also can download both video/audio
records and firing data by inserting the TASER CAM HD recorder in
the associated ECD and then downloading both through the
EVIDENCE Sync software.
Uploading Records to EVIDENCE.com Services with EVIDENCE
Sync (Online) Software
Follow these instructions if you have an EVIDENCE.com account. If you do
not have an EVIDENCE.com account, see Downloading Records to Your
Computer with EVIDENCE Sync (Offline) Software.
1. Confirm that the X2 safety is in the down (SAFE) position.
2. Remove the Smart cartridges from the ECD. (See the TASER X2 ECD
User Manual for more information on unloading Smart cartridges.)
3. Connect the TASER CAM HD recorder to your computer with the USB
download cable.
4. Start the EVIDENCE Sync software.
5. Enter your login information.
6. Click DEVICE VIDEOS.
7. Click UPLOAD for the video(s) you wish to review. The TIME STAMP
column gives you the time each video was recorded.
Note: When an ECD is connected to the recorder during this process,
the ECD’s Event Log will be uploaded automatically into the
EVIDENCE Sync application from the ECD. The time stamp is
MMU0036 Rev: A Page 22 of 48
Page 23

TASER CAM HD Recorder
created by the ECD in Greenwich Mean Time (GMT), but the
EVIDENCE Sync software will convert it to your computer’s local
time. Videos will remain stored on the TASER CAM HD recorder
(until overwritten by new footage) whether they are uploaded or
not.
After the videos and the ECD’s Event Log have been uploaded, you can
play the video(s) or upload another TASER CAM HD recorder and/or X2
ECD.
You will be able to see records only for the recorder and ECD connected
to your computer. To view records for other devices, disconnect and
follow the instructions in Viewing Uploaded Videos (Online).
Viewing Uploaded Videos (Online)
As described in Uploading Records to EVIDENCE.com Services with
EVIDENCE Sync (Online) Software, you can view videos you just uploaded
while your recorder is connected to your computer. If you have disconnected
the recorder from your computer, go to the EVIDENCE.com website to view
the records.
MMU0036 Rev: A Page 23 of 48
Page 24

TASER CAM HD Recorder
1. Start your web browser and log into your EVIDENCE.com account.
2. Click UPLOADED VIDEOS.
3. Click the thumbnail for the video you want to watch.
Viewing the ECD Event Log (Online)
If you uploaded your TASER CAM HD recorder while it was installed in the
ECD, you can use the EVIDENCE Sync program to view the ECD Event
Logs.
1. Start your web browser and log into your EVIDENCE.com account.
2. Click EVENT LOG.
You can filter (sort) the events by type, and the time they occurred. You
also can generate a formatted event report by clicking the PDF REPORT
button.
MMU0036 Rev: A Page 24 of 48
Page 25

TASER CAM HD Recorder
Downloading Records to Your Computer with EVIDENCE Sync
(Offline) Software
Follow these instructions if you do not have an EVIDENCE.com account. If
you have an EVIDENCE.com account, see Uploading Records to
EVIDENCE.com Services with EVIDENCE Sync (Online) Software.
1. Confirm that the X2 safety is in the down (SAFE) position.
2. Remove the Smart cartridges from the ECD. (See the TASER X2 ECD
User Manual for more information on unloading Smart cartridges.)
3. Connect the TASER CAM HD recorder to your computer with the USB
download cable.
4. Open the EVIDENCE Sync software.
Note: If the login page displays, click Offline to launch the offline version
of the EVIDENCE Sync software.
5. Wait for the device information to load.
MMU0036 Rev: A Page 25 of 48
Page 26

TASER CAM HD Recorder
6. Click DEVICE VIDEOS.
7. Click DOWNLOAD for the video(s) you wish to review. The TIME
STAMP column gives you the time each video was recorded.
The time stamp is created by the ECD in Greenwich Mean Time (GMT),
but the EVIDENCE Sync software will convert it to your computer’s local
time. Videos will remain stored on the TASER CAM HD recorder (until
overwritten by new footage) whether they are uploaded or not.
Note: When an ECD is connected, the Event Log will be downloaded
automatically into EVIDENCE Sync from the ECD.
After the videos and firing records have been downloaded, you can play the
video(s) or download another TASER CAM HD recorder and/or X2 ECD.
You will be able to see records only for the recorder and ECD connected to
your computer. To view records for other devices, disconnect and follow the
instructions in Viewing Downloaded Videos (Offline).
Viewing Downloaded Videos (Offline)
As described in Downloading Records to Your Computer with EVIDENCE
Sync (Offline) Software, you can view videos you just uploaded while your
recorder is connected to your computer. If you have disconnected the
recorder from your computer, follow these steps.
1. Start the EVIDENCE Sync software.
2. Click Data.
3. Click DOWNLOADED VIDEOS.
MMU0036 Rev: A Page 26 of 48
Page 27

TASER CAM HD Recorder
Viewing the ECD Event Log (Offline)
If you uploaded your TASER CAM HD recorder while it was installed in the
ECD, you can use the EVIDENCE Sync program to view the ECD event logs.
1. Start the EVIDENCE Sync software.
2. Click EVENT LOG.
You can filter (sort) the events by type, and the time they occurred. You
also can generate a formatted event report by clicking the PDF REPORT
button.
MMU0036 Rev: A Page 27 of 48
Page 28

TASER CAM HD Recorder
MMU0036 Rev: A Page 28 of 48
Page 29

TASER CAM HD Recorder
Chapter 8: Firmware Update
It is important that your X2 ECD has firmware revision V03.022 or later when
using it with the TASER CAM HD recorder. (See the TASER X2 ECD User
Manual for instructions on determining your ECD’s firmware revision.)
If you have not installed the EVIDENCE Sync software, follow the Chapter 5:
Configuring the TASER CAM HD Recorder with EVIDENCE Sync Software
instructions before performing any of the procedures in this chapter.
If your X2 ECD does not have V03.022 or higher and you have an
EVIDENCE.com account, follow the First-Time ECD Firmware Update –
Online instructions.
If your X2 ECD does not have V03.022 or higher and you do not have an
EVIDENCE.com account, follow the First-Time ECD Firmware Update –
Offline instructions.
If your X2 ECD has V03.022 or higher and you have an EVIDENCE.com
account, follow the Recorder and ECD Firmware Update – Online
instructions.
If your X2 ECD has V03.022 or higher and you do not have an
EVIDENCE.com account, follow the Recorder and ECD Firmware Update
– Offline instructions.
First-Time ECD Firmware Update – Online
1. Confirm that the safety on the X2 ECD is in the down (SAFE) position.
2. Remove the Smart cartridges. (See the TASER X2 ECD User Manual
for more information on unloading Smart cartridges.)
3. Insert an X2 download cable into the ECD.
4. Start your EVIDENCE Sync software.
5. Type your username and password and click SUBMIT.
MMU0036 Rev: A Page 29 of 48
Page 30

TASER CAM HD Recorder
6. Plug the USB download cable into your computer.
MMU0036 Rev: A Page 30 of 48
Page 31

TASER CAM HD Recorder
7. After the device information loads, the system should display available
updates; if not, click CHECK FOR UPDATE for the ECD you want to
update.
If a firmware update is available, a dialog box will display.
8. Click UPGRADE.
MMU0036 Rev: A Page 31 of 48
Page 32

TASER CAM HD Recorder
9. Click UPDATE.
10. After the Update Succeeded box displays, follow the onscreen
instructions.
First-Time ECD Firmware Update – Offline
1. Confirm that the safety on the X2 ECD is in the down (SAFE) position.
2. Remove the Smart cartridges. (See the TASER X2 ECD User Manual
for more information on unloading Smart cartridges.)
3. Insert an X2 download cable into the ECD.
4. Start your EVIDENCE Sync software.
MMU0036 Rev: A Page 32 of 48
Page 33

TASER CAM HD Recorder
5. Plug the USB download cable into the computer.
6. After the device information loads, click the UPDATE button for the ECD
you want to update.
MMU0036 Rev: A Page 33 of 48
Page 34

TASER CAM HD Recorder
7. Click UPDATE.
8. Navigate to the firmware file on your computer and click Open.
9. Click UPDATE.
MMU0036 Rev: A Page 34 of 48
Page 35

TASER CAM HD Recorder
10. After the Update Succeeded box displays, follow the onscreen
instructions.
Recorder and ECD Firmware Update – Online
1. Confirm that the safety on the X2 ECD is in the down (SAFE) position.
2. Remove the Smart cartridges. (See the TASER X2 ECD User Manual
for more information on unloading Smart cartridges.)
3. If your TASER CAM HD recorder is not attached to your ECD, firmly
insert the recorder in the X2 ECD until it clicks and the X2 ECD’s ejector
button pops out completely.
4. Start your EVIDENCE Sync software.
MMU0036 Rev: A Page 35 of 48
Page 36

TASER CAM HD Recorder
5. Type your username and password and click SUBMIT.
6. Plug the USB download cable into your computer.
MMU0036 Rev: A Page 36 of 48
Page 37

TASER CAM HD Recorder
7. Plug the other end of the USB cable into the recorder.
8. After the device information loads, the system should display available
updates; if not, click CHECK FOR UPDATE for the ECD or recorder you
want to update.
Note: Both the ECD and recorder can be updated during this process,
but remember to click the CHECK FOR UPDATE button for each
of the devices.
If a firmware update is available, a dialog box will display.
MMU0036 Rev: A Page 37 of 48
Page 38

TASER CAM HD Recorder
9. Click UPGRADE.
10. Click UPDATE.
11. After the Update Succeeded box displays, follow the onscreen
instructions.
MMU0036 Rev: A Page 38 of 48
Page 39

TASER CAM HD Recorder
Recorder and ECD Firmware Update – Offline
1. Confirm that the safety on the X2 ECD is in the down (SAFE) position.
2. Remove the Smart cartridges. (See the TASER X2 ECD User Manual
for more information on unloading Smart cartridges.)
3. If your TASER CAM HD recorder is not attached to your ECD, firmly
insert the recorder in the X2 ECD until it clicks and the X2 ECD’s ejector
button pops out completely
4. Start your EVIDENCE Sync software.
5. Plug the USB download cable into the recorder.
MMU0036 Rev: A Page 39 of 48
Page 40

TASER CAM HD Recorder
6. Plug the other end of the USB cable into the computer.
7. After the device information loads, click the UPDATE button for the
device you want to update (you can update either the ECD or the TASER
CAM HD recorder, or both).
MMU0036 Rev: A Page 40 of 48
Page 41

TASER CAM HD Recorder
8. Click UPDATE.
9. Navigate to the firmware file on your computer and click Open.
10. Click UPDATE.
MMU0036 Rev: A Page 41 of 48
Page 42

TASER CAM HD Recorder
11. After the Update Succeeded box displays, follow the onscreen
instructions.
MMU0036 Rev: A Page 42 of 48
Page 43

TASER CAM HD Recorder
Chapter 9: Use and Care
Storage
Do not store the TASER CAM HD recorder in extreme cold or heat.
Do not store the TASER CAM HD recorder where the contacts may
become short-circuited.
Keep the TASER CAM HD recorder dry.
Recharge the battery every 30 to 60 days if not in use. This is intended to
maintain battery integrity.
Cleaning
Lens
Clean any debris, fingerprints, dust, etc. from the lens using a soft cloth such
as an eyeglass lens cloth. Avoid using any synthetic cleaners (for example
Windex® or similar cleaners).
Gold Contacts
Debris on the gold contacts may cause the TASER CAM HD recorder and/or
the X2 ECD to not function correctly. Clean the contacts using the TASER
International recommended cleaning kit.
Battery
The TASER CAM HD recorder uses a lithium ion rechargeable battery.
Fully charge the battery before using the TASER CAM HD recorder for
the first time.
Frequently charge the battery. Do not let the battery capacity go below
50 percent.
Keep the TASER CAM HD recorder away from extreme temperatures.
Do not recharge the battery out of the recommended temperature range
of 32 °F to 104 °F (0 °C to 40 °C).
Battery performance will decrease over time and in lower-temperature
environments.
MMU0036 Rev: A Page 43 of 48
Page 44

TASER CAM HD Recorder
If it takes longer than 7 hours to charge the battery, contact TASER
International for assistance.
Replacing the TASER CAM Battery
The TASER CAM HD recorder’s battery may be replaced by a qualified
technician. See the TASER CAM HD Battery Replacement Guide for more
information.
DO NOT attempt to replace the TASER CAM HD battery unless you have
been trained in the replacement procedure.
MMU0036 Rev: A Page 44 of 48
Page 45

TASER CAM HD Recorder
The TASER CAM HD icon displays
in the upper-left corner of the CID.
This TASER CAM HD recorder is
configured with the Auto Shut-Down
feature.
A Flashing CID indicates the camera
lens is covered.
No TASER CAM HD icon indicates
that the firmware on the ECD needs
to be updated.
A battery icon turned on its side and
displaying OO% indicates the
TASER CAM HD battery is depleted.
When the battery capacity is 1–20
percent, the CID will display a
flashing LO BATT warning.
LO BATT
Chapter 10: CID Icons
An X2 ECD equipped with a TASER CAM HD recorder may display one or
more of the combinations of icons shown here. For information on other CID
icons, see the TASER X2 ECD User Manual.
MMU0036 Rev: A Page 45 of 48
Page 46

TASER CAM HD Recorder
Symptom
Cause
Possible Solution
The TASER CAM HD
recorder will not charge fully
or at all, but the charge
indicator light is flashing.
The battery may not be
functioning properly.
Replace the battery.
The TASER CAM HD
recorder charge indicator
light will not come on.
The cable/charger is bad.
Use a different cable.
The wall outlet is not working.
Use a different wall
outlet/socket.
The USB port is not working on
the PC.
Use a different port on the
PC.
The USB/wall charging cable is
disconnected.
Make sure the cable is
connected properly.
The USB/wall charging cable is
not properly inserted into the
TASER CAM HD recorder.
Make sure the cable is
inserted properly.
The TASER CAM HD recorder is
damaged.
Contact TASER
International.
The TASER CAM HD
recorder power runs down
too quickly.
The TASER CAM HD recorder is
operating in extremely cold
conditions.
The battery has had too many
charge cycles.
Replace the battery.
The battery capacity is too low to
maintain power
Replace the battery.
The CID battery icon is
displaying a blinking
exclamation point.
The TASER CAM HD recorder is
not making good contact with the
X2 ECD because it is not fully
inserted.
Fully insert the TASER CAM
HD recorder into the X2
ECD.
The TASER CAM HD recorder is
not making good contact with the
X2 ECD because of debris on the
gold battery contacts.
Clean the gold battery
contacts using the TASER
International recommended
cleaning kit.
If the problem persists after
applying the above solutions,
contact TASER International
for further instructions.
!
Chapter 11: Troubleshooting the TASER CAM
MMU0036 Rev: A Page 46 of 48
Page 47

TASER CAM HD Recorder
Symptom
Cause
Possible Solution
The TASER CAM HD
recorder is installed properly,
but the TASER CAM icon
does not display on the CID.
The ECD’s firmware is outdated.
Check if the firmware is at
revision V03.022 or higher.
Follow the instructions in
Chapter 8: Firmware Update.
If the problem persists,
contact TASER International
for instructions.
The CID is displaying OO%.
The TASER CAM HD battery is
depleted.
Charge the TASER CAM HD
recorder.
The CID is displaying LO
BATT.
When the TASER CAM HD
battery is at 20% to 1%, the CID
will flash “LO BATT”. The ECD
and TASER CAM HD Recorder
will continue normal functionality
during this time. However, the
battery needs to be charged.
Charge the TASER CAM
recorder.
The CID colors are reversed,
and the CID is flashing.
The lens is obstructed (possibly
by the operator’s hand).
Check for obstructions over
the lens. Remove the
obstructions.
The X2 ECD is not working
at all with the TASER CAM
HD recorder inserted.
The TASER CAM HD recorder is
not fully inserted.
Remove the TASER CAM
HD recorder, clean the
contacts, and fully insert the
recorder into the X2 ECD.
If the problem persists,
contact TASER International
for further instructions.
The EVIDENCE Sync
application does not
recognize the device.
The USB port is not working on
the PC.
Use a different port on the
PC.
The USB cable is not fully
inserted into the PC.
Fully insert the USB cable
into the PC and TASER
CAM HD recorder
If the problem persists after
applying the above solutions,
contact TASER International
for further instructions.
LO BATT
MMU0036 Rev: A Page 47 of 48
Page 48

TASER CAM HD Recorder
Symptom
Cause
Possible Solution
The video recording is
unclear or distorted.
There is debris on the TASER
CAM lens.
Clean the lens using a soft
cloth.
The lens of the TASER CAM HD
recorder is scratched/damaged.
Contact TASER
International.
The TASER CAM HD recorder is
unfocused.
Contact TASER
International.
Adobe® and Reader® are either registered trademarks or trademarks of Adobe Systems Incorporated in the United
States and/or other countries. Apple® and QuickTime® are registered trademarks of Apple Inc. Athlon™ is a trademark
of Advanced Micro Devices, Inc. Pentium® is a registered trademark of Intel Corporation in the U.S. and/or other
countries. Direct X® and Windows® are registered trademarks of Microsoft Corporation in the United States and other
countries. VLC™ is a trademark or registered trademark of VideoLAN non-profit organization. Windex® is a registered
trademark of S.C. Johnson & Son, Inc.
EVIDENCE.com™, EVIDENCE Sync™, Smart™, TASER CAM™ and X2™ are trademarks of TASER International, Inc.,
and TASER®, ® and © are registered trademarks of TASER International, Inc., registered in the U.S. © 2012 TASER
International, Inc. All rights reserved.
MMU0036 Rev: A Page 48 of 48
 Loading...