

Page 1
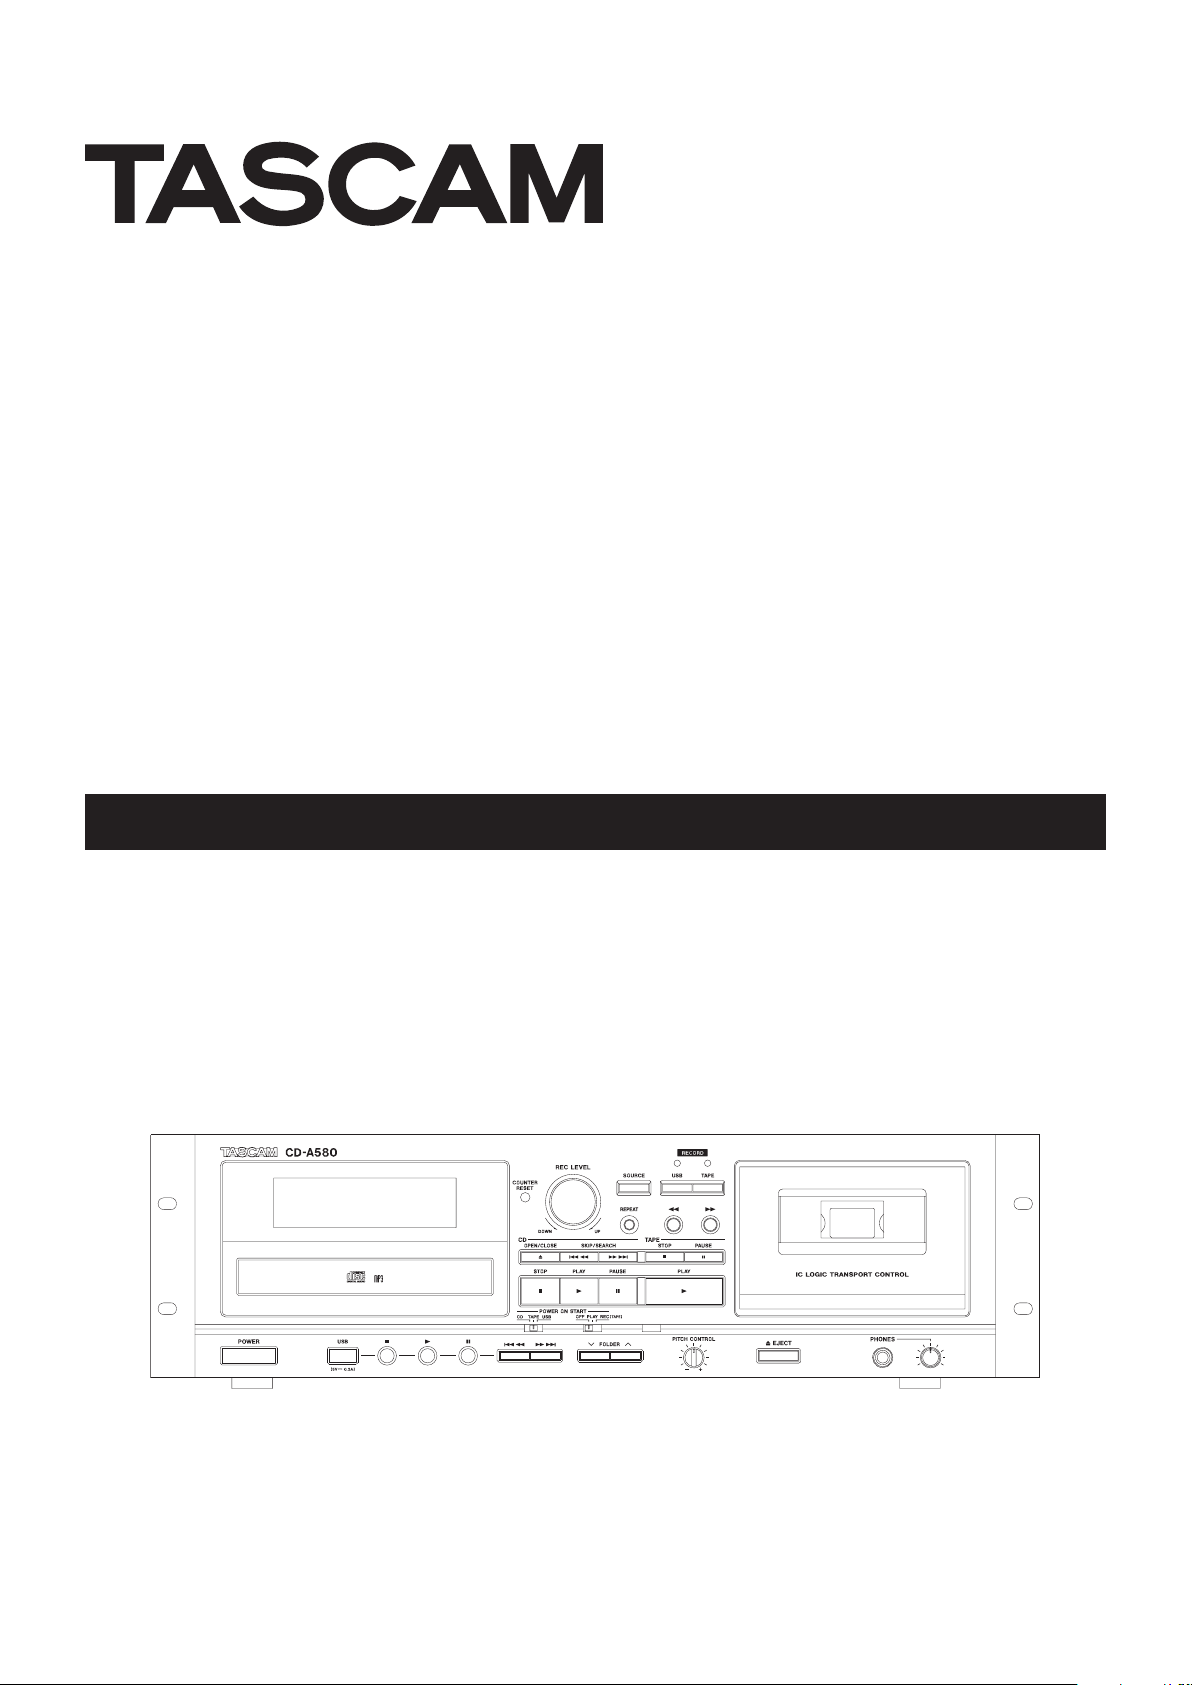
CD-A580
CD Player / Cassette Deck
D01310420B
OWNER’S MANUAL
Page 2

IMPORTANT SAFETY INSTRUCTIONS
CAUTION: TO REDUCE THE RISK OF ELECTRIC SHOCK,
DO NOT REMOVE COVER (OR BACK). NO USERSERVICEABLE PARTS INSIDE. REFER SERVICING TO
QUALIFIED SERVICE PERSONNEL.
The lightning flash with arrowhead symbol, within an
<
B
WARNING: TO PREVENT FIRE OR SHOCK HAZARD,
DO NOT EXPOSE THIS APPLIANCE TO RAIN OR
MOISTURE.
equilateral triangle, is intended to alert the user to the
presence of uninsulated “dangerous voltage” within the
product’s enclosure that may be of sufficient magnitude
to constitute a risk of electric shock to persons.
The exclamation point within an equilateral triangle is
intended to alert the user to the presence of important
operating and maintenance (servicing) instructions in
the literature accompanying the appliance.
10) Protect the power cord from being walked on or pinched particularly at plugs, convenience receptacles, and the point where
they exit from the apparatus.
11) Only use attachments/accessories specified by the manufacturer.
12) Use only with the cart, stand, tripod, bracket,
or table specified by the manufacturer, or
sold with the apparatus. When a cart is
used, use caution when moving the cart/
apparatus combination to avoid injury from
tip-over.
13) Unplug this apparatus during lightning storms or when unused
for long periods of time.
14) Refer all servicing to qualified service personnel. Servicing is
required when the apparatus has been damaged in any way,
such as power-supply cord or plug is damaged, liquid has been
spilled or objects have fallen into the apparatus, the apparatus
has been exposed to rain or moisture, does not operate normally,
or has been dropped.
o The apparatus draws nominal non-operating power from the
AC outlet with its POWER or STANDBY/ON switch not in the ON
position.
o The mains plug is used as the disconnect device; the disconnect
device shall remain readily operable.
CAUTION
o DO NOT REMOVE THE EXTERNAL CASES OR CABINETS TO EXPOSE
THE ELECTRONICS. NO USER SERVICEABLE PARTS ARE INSIDE.
o IF YOU ARE EXPERIENCING PROBLEMS WITH THIS PRODUCT,
CONTACT THE STORE WHERE YOU PURCHASED THE UNIT FOR A
SERVICE REFERRAL. DO NOT USE THE PRODUCT UNTIL IT HAS BEEN
REPAIRED.
o USE OF CONTROLS OR ADJUSTMENTS OR PERFORMANCE OF
PROCEDURES OTHER THAN THOSE SPECIFIED HEREIN MAY RESULT
IN HAZARDOUS RADIATION EXPOSURE.
IN USA/CANADA, USE ONLY ON 120 V SUPPLY.
1) Read these instructions.
2) Keep these instructions.
3) Heed all warnings.
4) Follow all instructions.
5) Do not use this apparatus near water.
6) Clean only with dry cloth.
7) Do not block any ventilation openings. Install in accordance with
the manufacturer’s instructions.
8) Do not install near any heat sources such as radiators, heat
registers, stoves, or other apparatus (including amplifiers) that
produce heat.
9) Do not defeat the safety purpose of the polarized or groundingtype plug. A polarized plug has two blades with one wider than
the other. A grounding type plug has two blades and a third
grounding prong. The wide blade or the third prong are provided
for your safety. If the provided plug does not fit into your outlet,
consult an electrician for replacement of the obsolete outlet.
o Caution should be taken when using earphones or headphones
with the product because excessive sound pressure (volume) from
earphones or headphones can cause hearing loss.
CAUTION
o Do not expose this apparatus to drips or splashes.
o Do not place any objects filled with liquids, such as vases, on
the apparatus.
o Do not install this apparatus in a confined space such as a book
case or similar unit.
o The apparatus should be located close enough to the AC outlet
so that you can easily reach the power cord plug at any time.
o If the product uses batteries (including a battery pack or
installed batteries), they should not be exposed to sunshine, fire
or excessive heat.
o CAUTION for products that use replaceable lithium batteries:
there is danger of explosion if a battery is replaced with an
incorrect type of battery. Replace only with the same or equivalent type.
Laser information
This product contains a semiconductor laser system inside the cabinet
and is classified as a “CLASS 1 LASER PRODUCT”.
To prevent being exposed to the laser beam, do not try to open the
enclosure.
Laser:
Type: EP-C101
Manufacturer: GUANGDONG EVER BRIGHT GROUP CO.,LTD
Laser output: Less than 1 mW on the objective lens
Wavelength: 790 ±25 nm
2
Page 3

Model for USA
For U.S.A.
This product has been designed and manufactured according to
FDA regulations “title 21, CFR, chapter 1, subchapter J, based on the
Radiation Control for Health and Safety Act of 1968”, and is classified
as class ! laser product. There is not hazardous invisible laser radiation
during operation because invisible laser radiation emitted inside of
this product is completely confined in the protective housings.
The label required in this regulation is as follows:
Model for USA
This equipment has been tested and found to comply with the limits for a Class B digital device, pursuant to Part 15 of the FCC Rules.
These limits are designed to provide reasonable protection against
harmful interference in a residential installation. This equipment
generates, uses, and can radiate radio frequency energy and, if not
installed and used in accordance with the instructions, may cause
harmful interference to radio communications. However, there is no
guarantee that interference will not occur in a particular installation.
If this equipment does cause harmful interference to radio or television reception, which can be determined by turning the equipment
off and on, the user is encouraged to try to correct the interference
by one or more of the following measures:
• Reorient or relocate the equipment and/or the receiving antenna.
• Increase the separation between the equipment and receiver.
• Connect the equipment into an outlet on a circuit different from
that to which the receiver is connected.
• Consult the dealer or an experienced radio/TV technician for help.
Model for Europe
This product complies with the European
Directives request, and the other Commission
Regulations.
RACK-MOUNTING THE UNIT
Use the supplied rackmount screw kit to mount the unit in a standard
19-inch rack, as shown in the illustration below.
Remove the feet of the unit before mounting.
ATTENTION
o Leave 1U of space above the unit for ventilation.
o Allow at least 10 cm (4 in) at the rear of the unit for ventilation.
Model for Canada
Industry Canada’s Compliance Statement:
This Class B digital apparatus complies with Canadian ICES-003.
CET APPAREIL NUMÉRIQUE DE LA CLASSE B EST CONFORME À LA
NORME NMB-003 DU CANADA
CAUTION
Changes or modifications not expressly approved by the party
responsible for compliance could void the user’s authority to operate the equipment.
V
Precautions concerning batteries
Misuse of batteries could cause them to rupture or leak leading to fire,
injury or the staining of nearby things. Please read and observe the
following precautions carefully.
o Be sure to insert the batteries with correct positive (¥) and nega-
tive (^) orientations.
o Use batteries of the same type. Never use different types of batter-
ies together.
o If the remote control is not used for a long time (more than a
month), remove the batteries to prevent them from leaking.
o If the batteries leak, wipe away the leakage inside the battery com-
partment and replace the batteries with new ones.
o Do not use batteries of types other than those specified. Do not
mix new batteries with old ones or use different types of batteries
together.
o Do not heat or disassemble batteries. Never throw batteries into
fire or water.
o Do not carry or store batteries with other metallic objects. The bat-
teries could short circuit, leak or explode.
o Never recharge a battery unless it is confirmed to be a recharge-
able type.
3
Page 4

For European Customers
Pb, Hg, Cd
Trademarks and copyrights
Disposal of electrical and electronic equipment and
batteries and/or accumulators
a) All electrical/electronic equipment and waste batteries/accu-
mulators should be disposed of separately from the municipal
waste stream via collection facilities designated by the government or local authorities.
b) By disposing of electrical/electronic equipment and waste
batteries/accumulators correctly, you will help save valuable
resources and prevent any potential negative effects on human
health and the environment.
c) Improper disposal of waste electrical/electronic equipment
and batteries/accumulators can have serious effects on the
environment and human health because of the presence of
hazardous substances in the equipment.
d) The Waste Electrical and Electronic Equipment (WEEE)
symbols, which show wheeled bins that have been
crossed out, indicate that electrical/electronic equipment and batteries/accumulators must be collected
and disposed of separately from household waste.
If a battery or accumulator contains more than the
specified values of lead (Pb), mercury (Hg), and/or cadmium (Cd) as defined in the Battery Directive (2006/66/
EC), then the chemical symbols for those elements will
be indicated beneath the WEEE symbol.
e) Return and collection systems are available to end users. For
more detailed information about the disposal of old electrical/electronic equipment and waste batteries/accumulators,
please contact your city office, waste disposal service or the
shop where you purchased the equipment.
TASCAM is a trademark of TEAC Corporation, registered in the U.S. and
other countries.
Supply of this product does not convey a license nor imply any right
to distribute MPEG Layer-3 compliant content created with this product in revenue-generating broadcast systems (terrestrial, satellite,
cable and/or other distribution channels), streaming applications (via
Internet, intranets and/or other networks), other content distribution
systems (pay-audio or audio-on-demand applications and the like) or
on physical media (compact discs, digital versatile discs, semiconductor chips, hard drives, memory cards and the like).
An independent license for such use is required. For details, please
visit http://mp3licensing.com.
MPEG Layer-3 audio coding technology is licensed from Fraunhofer IIS
and Thomson.
Other company names, product names and logos in this document
are the trademarks or registered trademarks of their respective owners.
Information is given about products in this manual only for the
purpose of example and does not indicate any guarantees against
infringements of third-party intellectual property rights and other
rights related to them.
TEAC Corporation will bear no responsibility for infringements on
third-party intellectual property rights or their occurrence because
of the use of these products.
With the exception of personal enjoyment and similar uses,
copyrighted materials belonging to third parties cannot be used
without permission from the rights holders in accordance with
copyright law. Please use the equipment appropriately.
TEAC Corporation will bear no responsibility for rights infringements committed by users of this product.
4
Page 5
Thank you for choosing this TEAC product. Read this manual
LINE IN
LINE IN
LINE IN
carefully to get the best performance from this unit.
IMPORTANT SAFETY INSTRUCTIONS ..............................2
Trademarks and copyrights .......................................4
What you can do with this unit ...................................5
Before use ........................................................6
Discs .............................................................7
Cassette tapes ....................................................8
USB flash drives ..................................................9
MP3 files ....................................................... 10
Identifying the parts (remote control) ........................... 10
Identifying the parts (main unit) .................................12
Using the remote control ........................................14
Display ..........................................................14
Connections ....................................................16
Basic operation ..................................................17
Listening to a CD ................................................18
Repeat playback ................................................ 20
Shuffle playback ................................................20
Programmed playback ......................................... 21
Listening to a cassette tape ..................................... 24
Listening to files on a USB flash drive ........................... 26
Recording on a USB flash drive .................................28
Erasing files from a USB flash drive .............................. 30
Recording on a cassette tape ....................................31
Timer-controlled playback and recording .......................34
Automatic power saving function ..............................36
Troubleshooting ................................................ 37
MP3 playback order ............................................ 39
Maintenance ...................................................39
Specifications ..................................................40
What you can do with this unitContents
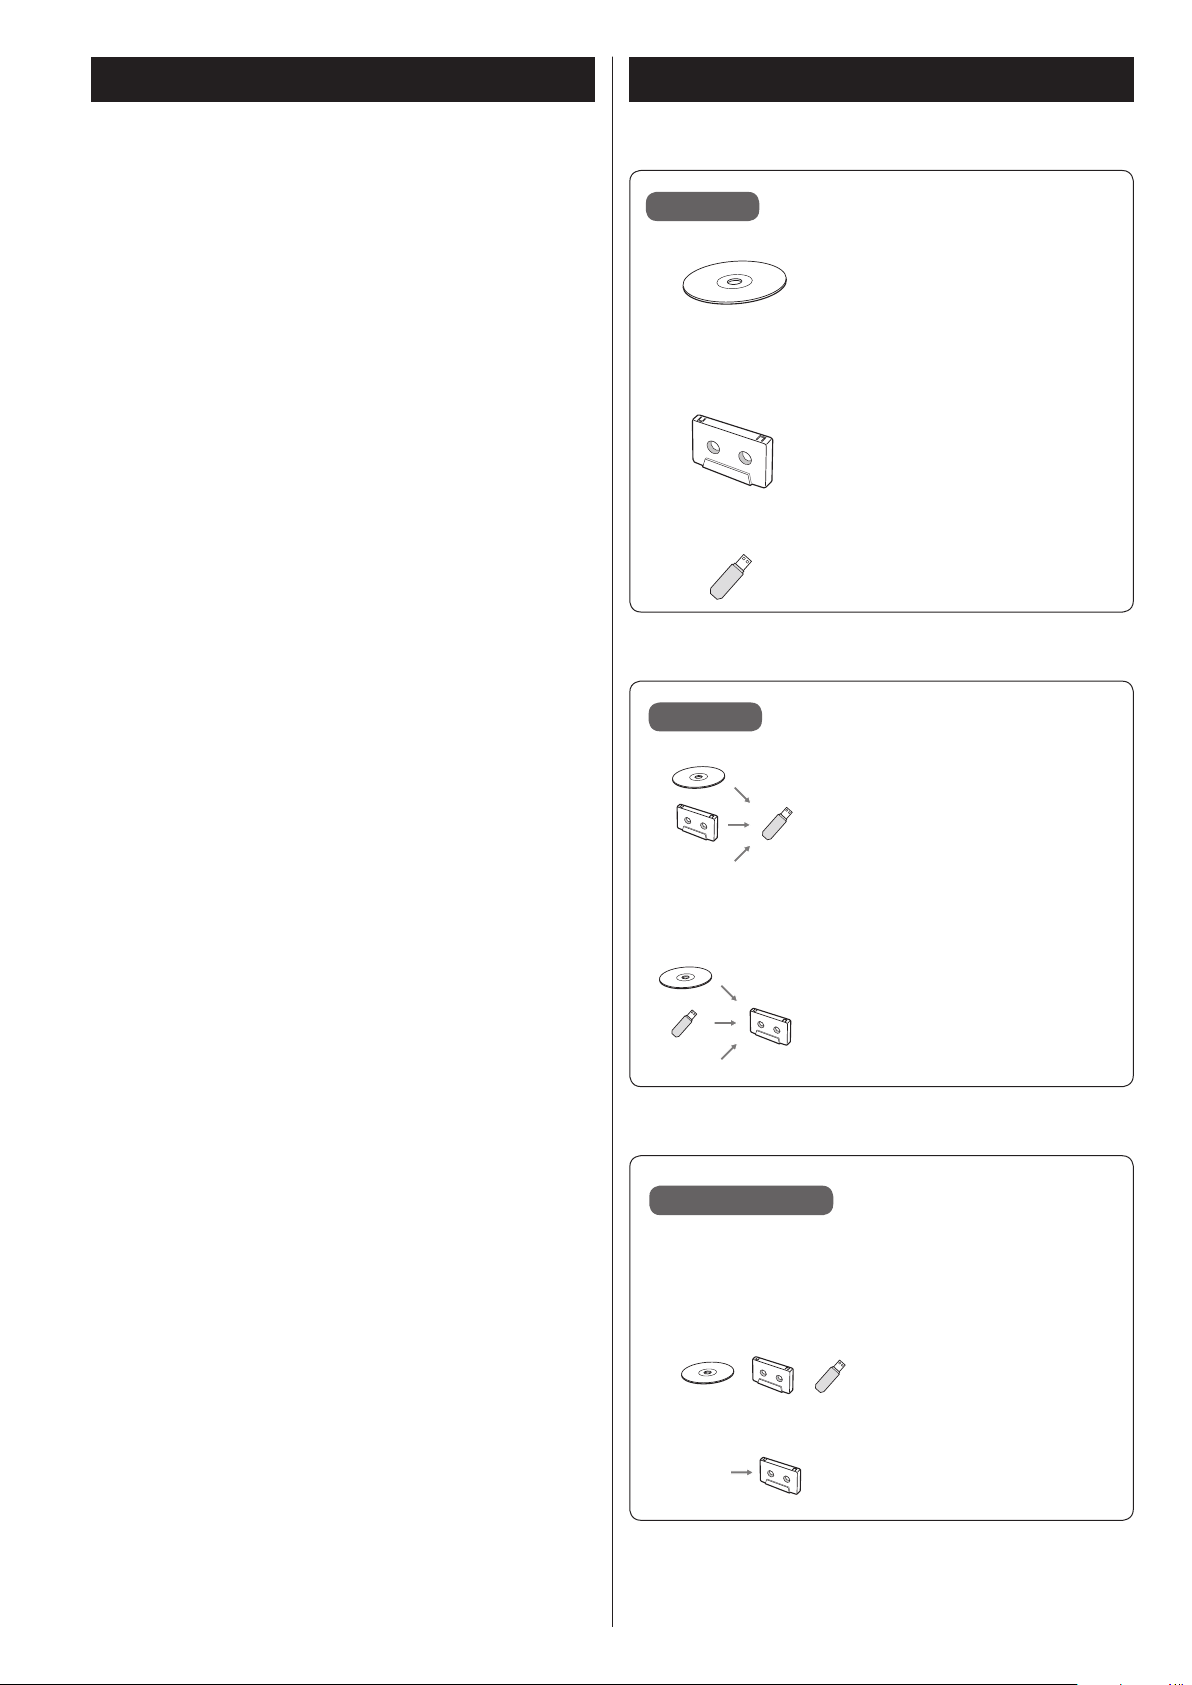
Playback
CD/CD-R/CD-RW
(Audio CD/MP3 disc)
e “Listening to a CD” on page 18
Cassette tape
e “Listening to a cassette tape” on
page 24
MP3 files on a USB flash drive
e “Listening to files on a USB flash
drive” on page 26
Recording
Record on a USB flash drive from a
CD, a cassette tape or an external
source
e “Recording on a USB flash drive” on
page 28
Record on a cassette tape from a
CD, a USB flash drive or an external
source
e “Recording on a cassette tape” on
page 31
Timer operation
Requires a commercially-available timer
e “Timer-controlled playback and recording” on page 34
Timer-controlled playback
Timer-controlled recording
5
Page 6
Before use
What’s in the box
Confirm that the standard accessories are included.
Please contact the store where you purchased this unit if any of these
items are missing or have been damaged during transportation.
Remote control (RC-1329) × 1
Batteries (AAA) for remote control × 2
Rackmount screw kit × 1
Owner’s manual (this document, including warranty) × 1
o Keep this manual in a safe place for future reference.
Precautions for placement and use
o The operating temperature range of this unit is 5–35 °C.
o Do not install this unit in the following types of locations.
Doing so could make the sound quality worse or cause malfunction.
Places with significant vibrations
Near windows or other places exposed to direct sunlight
Near heaters or other extremely hot places
Extremely cold places
Places with bad ventilation or high humidity
Very dusty locations
o To enable good heat dissipation, do not place anything on top of
the unit.
o Do not place this unit on top of a power amplifier or other device
that generates heat.
Beware of condensation
Condensation could occur if the unit is moved from a cold place to a
warm place, it is used immediately after a cold room has been heated
or it is otherwise exposed to a sudden temperature change. To prevent this, or if this occurs, let the unit sit for one or two hours at the
new room temperature before using it.
Precautions for use
< Do not move the unit during CD playback.
During CD playback, the disc rotates at high speed. Do not lift or
move the unit during playback. Doing so might damage the disc
or the unit.
< The voltage supplied to the unit should match the voltage that
is printed on the rear panel. If you are in any doubt regarding this
matter, consult an electrician.
< Do not open the cabinet as this might result in damage to the
circuitry or electrical shock. If a foreign object should get into the
unit, contact your dealer or service company.
< When removing the power plug from the wall outlet, always pull
directly on the plug, never yank on the cord.
< Always remove the disc before relocating or moving this unit.
Moving the unit with a disc inside it could cause malfunction
Using the TEAC Global Site
You can download updates for this unit from the TEAC Global Site:
http://teac-global.com/
1) Open the TEAC Global Site.
2) In the TASCAM Downloads section, click the desired language to
open the Downloads website page for that language.
NOTE
If the desired language does not appear, click Other Languages.
3) Click the “Search by Model Name” section to open the Downloads
page for that product. (Users in Europe should follow the instructions on screen to select the product.)
4) Select and download the updates that are needed.
Product registration
Customers in the USA, please visit the following TASCAM website to
register your TASCAM product online.
http://tascam.com/
6
Page 7
Discs
Discs that can be played by this unit
CDs (12-cm and 8-cm) that bear the “COMPACT disc DIGITAL
AUDIO” logo can be played by this unit.
< The logo should be on the disc label or the CD jacket.
CD-R and CD-RW discs that have been correctly recorded in
the audio CD format and finalized, as well as finalized CD-R and
CD-RW discs that contain MP3 files, can be played by this unit.
This unit can play these types of discs without an adapter. It cannot
play any other type of disc.
Playback of any other type of disc could cause loud noise and
damage to speakers as well as harm hearing. Never try to play
any other type of disc.
< Depending on the quality of the disc and/or the condition of the
recording, some discs might not be playable.
< Video CDs, CD-ROMs and similar types of discs can be read by the
unit, but they will make no sound when played back.
Precautions for use
< Do not play any disc that is warped, deformed or damaged.
Playing such discs could cause irreparable harm to the playing
mechanisms.
< Printable CD-R and CD-RW discs are not recommended because
their label sides could be sticky and damage the unit.
< Do not stick paper or protective sheets on discs and do not use
any protective coating sprays.
< Never use a stabilizer. Using commercially-available CD stabilizers
with this unit will damage the mechanisms and cause them to
malfunction.
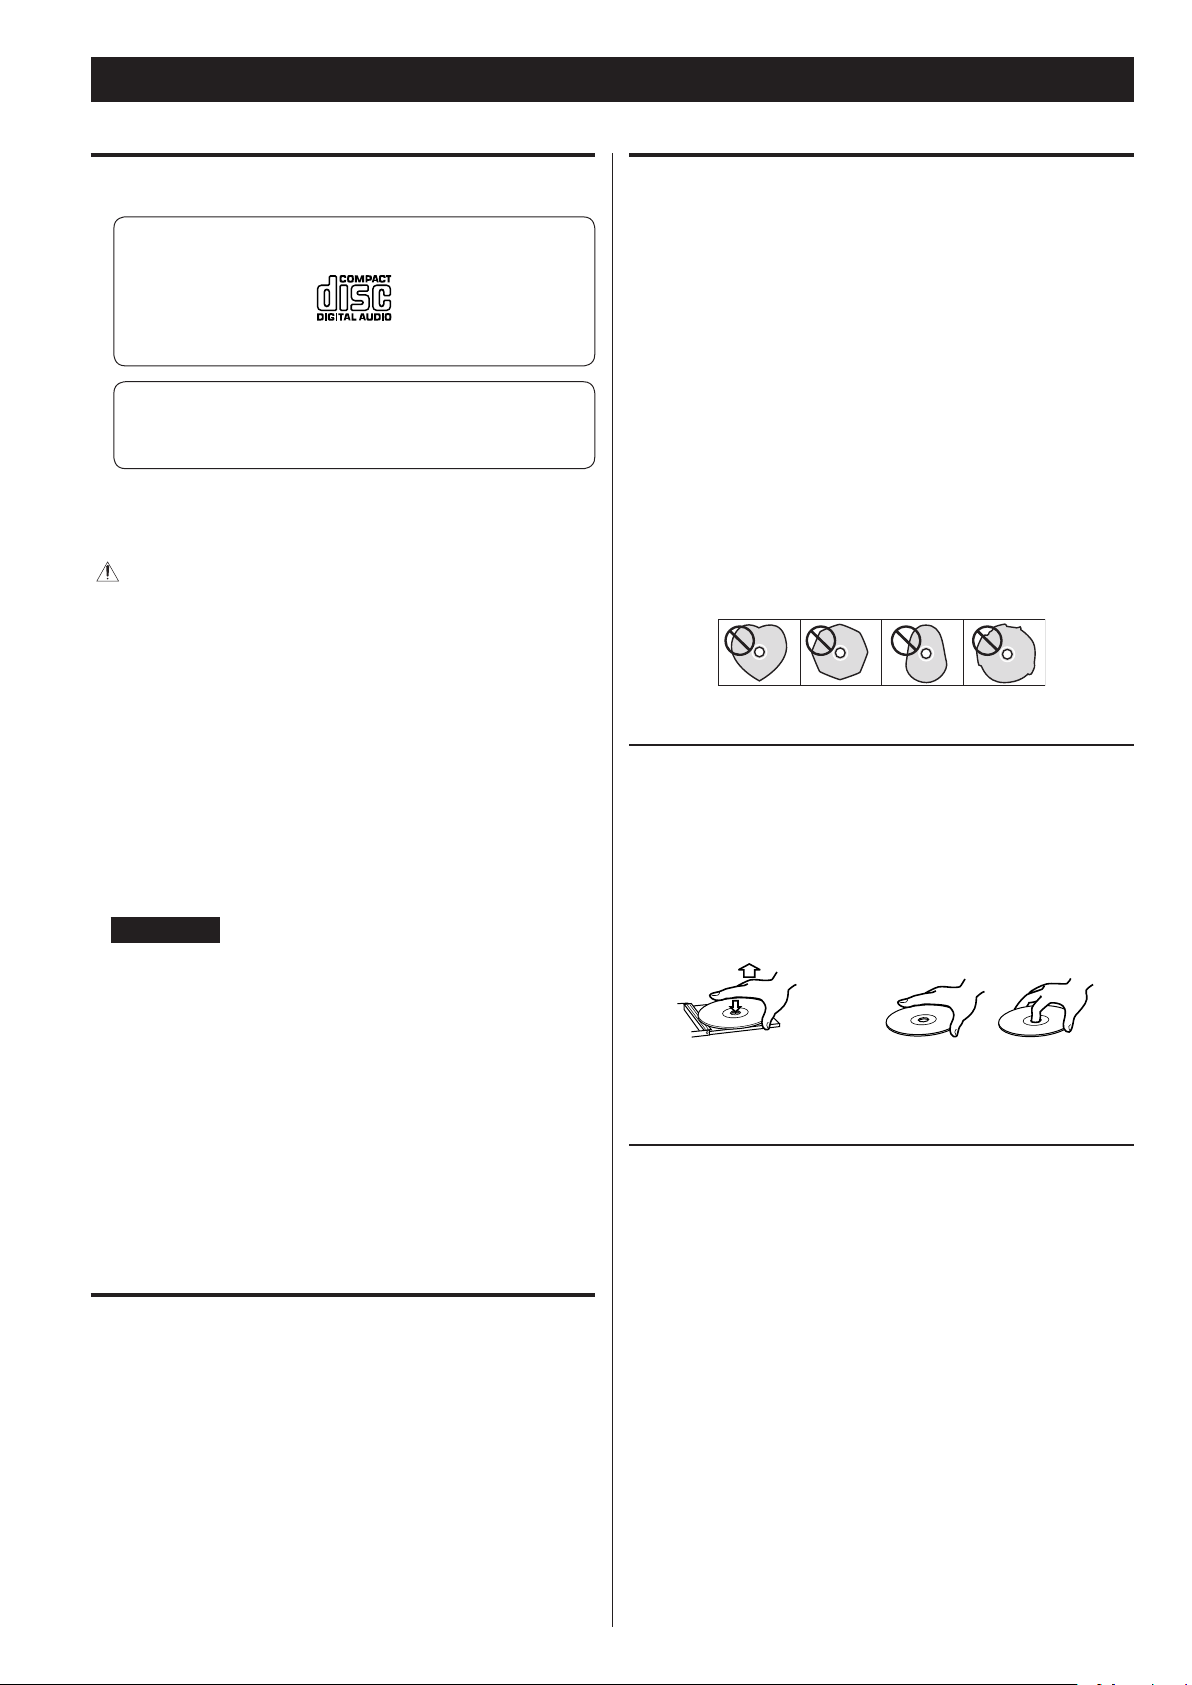
< Do not use irregularly-shaped discs (octagonal, heart-shaped,
business card size, etc.). Such CDs could damage the unit.
Handling precautions
< Super Audio CDs cannot be read or played back by this unit.
< Video and audio DVDs, DVD-ROMs and other types of DVDs
cannot be read or played back by this unit.
ATTENTION
If you put a video or audio DVD, DVD-ROM or other type of DVD
into the disc tray, the unit will attempt to read the disc and rotate
at high speed. If you accidentally insert such a disc, wait until the
unit stops spinning before ejecting it in order to avoid possibly
damaging the disc. Do not attempt to remove the disc when
“READING” appears on the display.
< Copy-protected discs and other discs that do not conform to the
CD standard might not play correctly in this player. If you use such
discs in this unit, TEAC Corporation and its subsidiaries will not
be responsible for any consequences or guarantee the quality of
reproduction. If you experience problems with such non-standard
discs, you should contact their issuers.
About CD-R/CD-RW discs
This unit can play back CD-R and CD-RW discs that have been
recorded in the audio CD format (CD-DA) and the MP3 format.
< Discs created by a CD recorder must be finalized before use with
this unit.
< Depending on disc quality and recording conditions, playback of
some discs might not be possible. Please see the manual for the
device that you used to create the disc.
< Always place the disc on the disc tray with the label side up. Only
one side of a Compact Disc can be played or used for recording.
< To remove a disc from a standard storage case, press down on the
case through the center of the disc and lift the disc out, holding it
carefully by its edges.
How to remove a disc How to hold a disc
Storage precautions
< Discs should be returned to their cases after use to avoid dust and
scratches that could cause the laser pickup to “skip.”
< Do not expose discs to direct sunlight or high temperature
or humidity for extended periods. Long exposure to high
temperatures will warp discs.
< CD-R and CD-RW discs are more sensitive to the effects of heat
and ultraviolet rays than ordinary CDs. It is important that they
not be stored in locations where they will be exposed to direct
sunlight. They should also be kept away from sources of heat, such
as radiators and heat-generating electrical devices.
< If you are uncertain about the handling of a CD-R or CD-RW disc,
please contact the seller of the disc directly.
7
Page 8
Discs (continued)
Cassette tapes
Maintenance
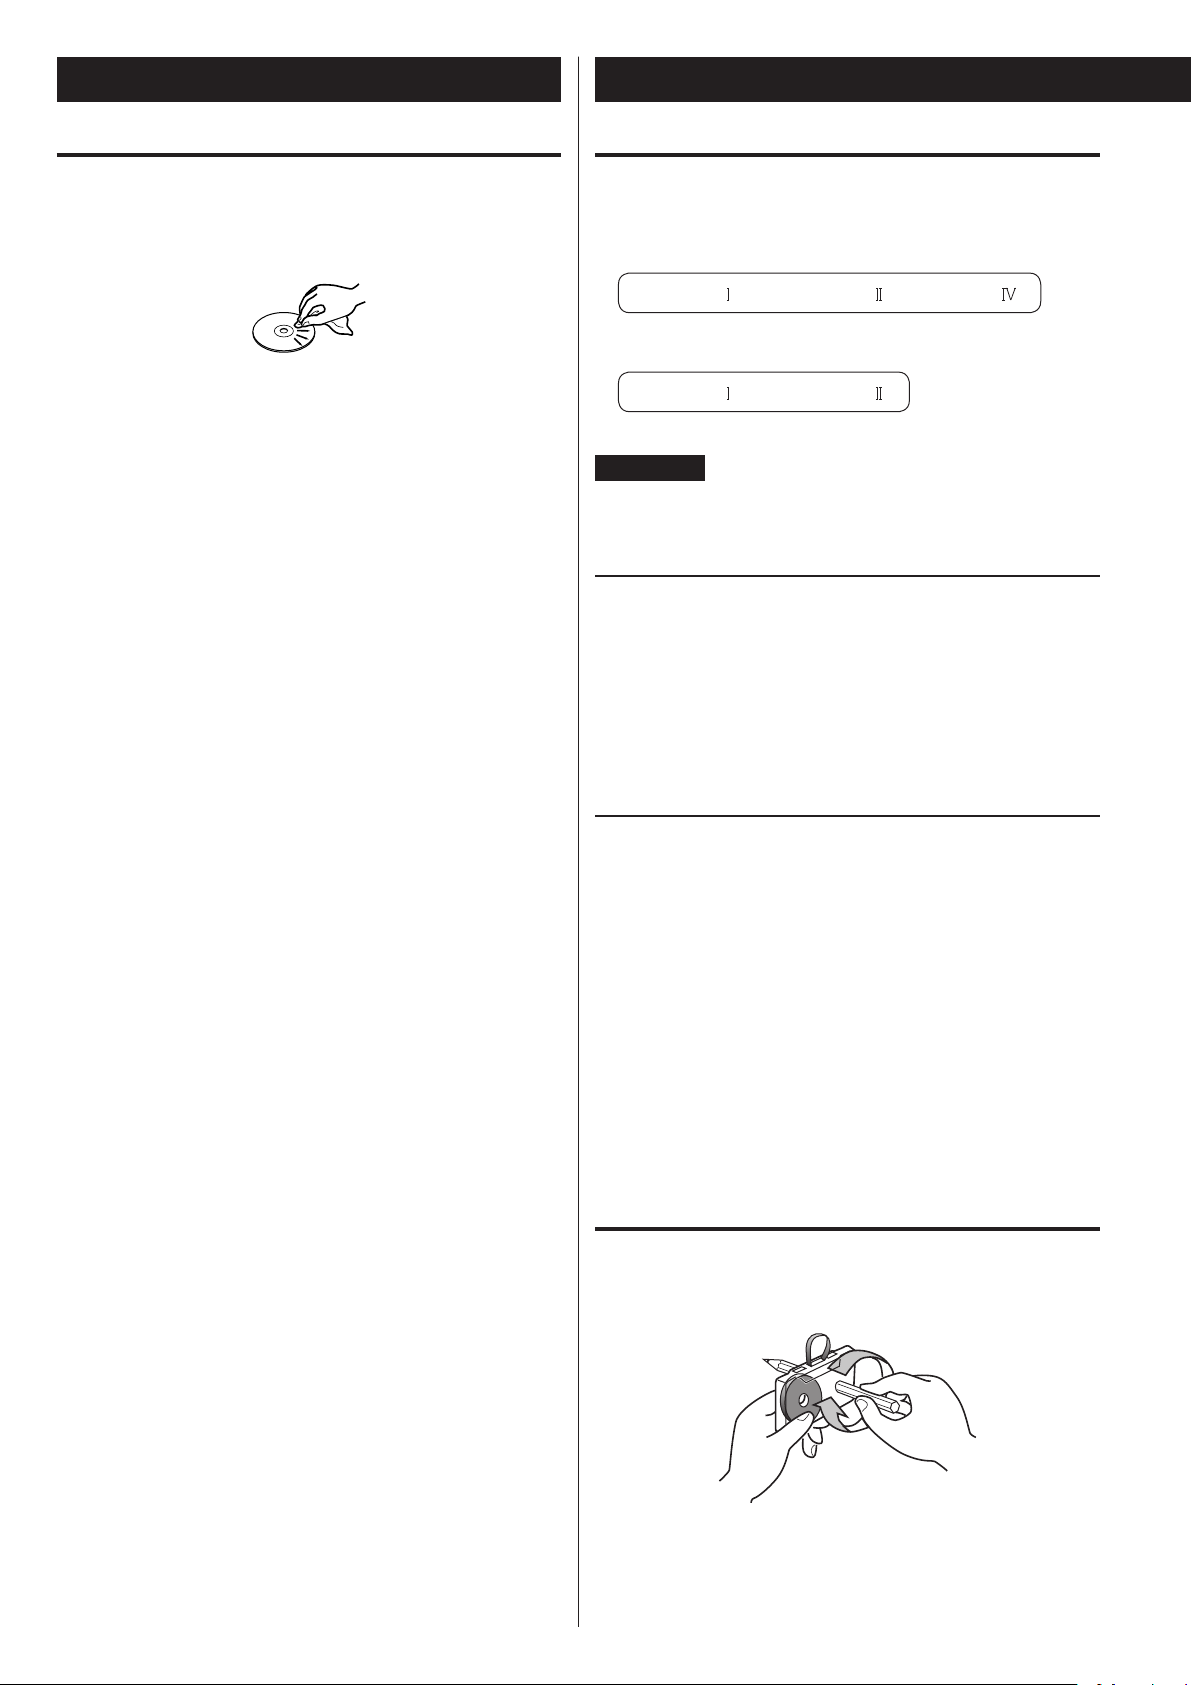
< If a disc becomes dirty, wipe its surface radially from the center
hole outward towards the outer edge with a soft, dry cloth.
< Never clean discs using chemicals such as record sprays, antistatic
sprays and fluids and thinners. Such chemicals will do irreparable
damage to the disc’s plastic surface.
If you are in any doubt as to the care and handling of a CD-R or
CD-RW disc, read the precautions supplied with the disc or contact
the disc manufacturer.
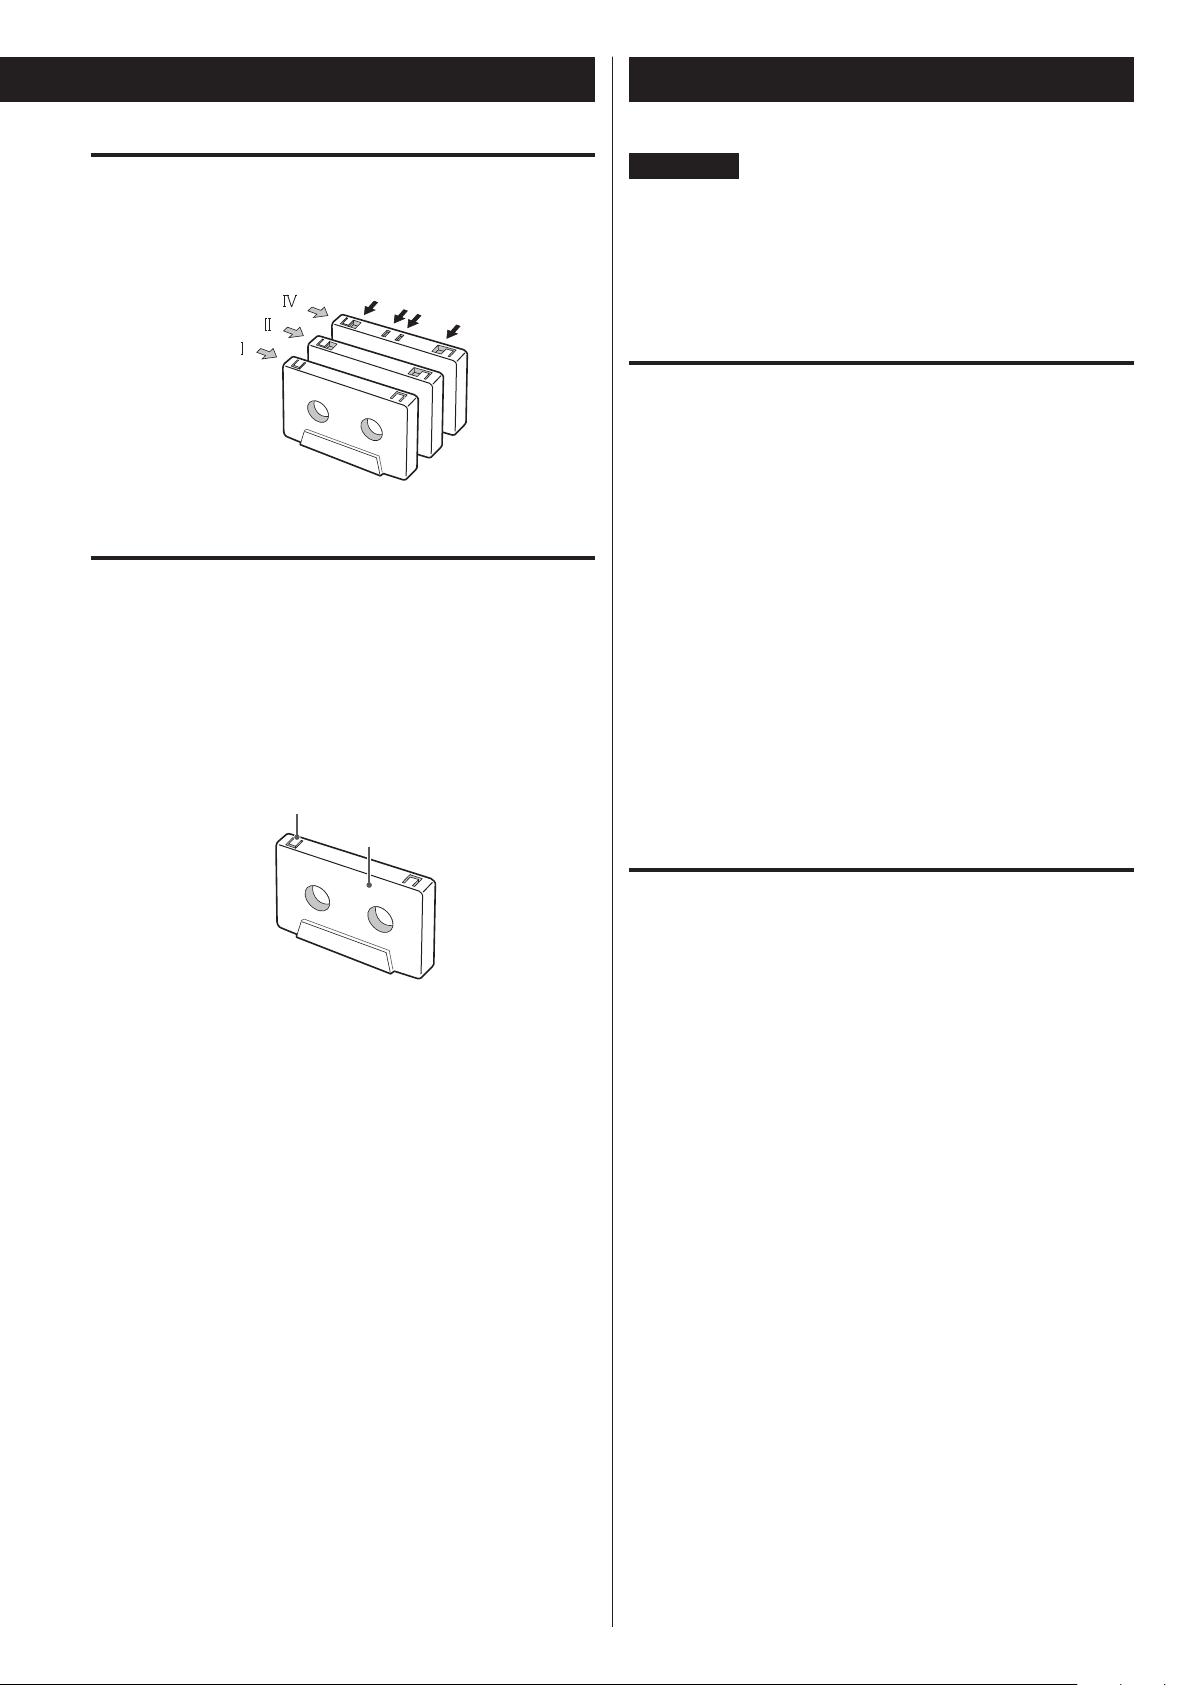
Tape types
There are several types of cassette tapes.
Cassette tapes that can be played by this unit
Normal (type ) Chrome (type ) Metal (type )
Cassette tapes that can be recorded on by this unit
Normal (type ) Chrome (type )
ATTENTION
< Do not open a cassette or pull out the tape.
< Do not touch the tape.
Storage precautions
< Keep cassette tapes away from magnets or magnetized items
because they may cause noise or erase recorded contents.
< Do not leave cassette tapes in a dusty place.
< Do not store cassette tapes in a place with high temperature or
humidity.
Types of cassette tapes that should be avoided
The following types of cassette tapes might prevent the unit from
operating or functioning normally. The tape of such cassette tapes
could be caught in the unit and cause unexpected problems.
Deformed cassette tapes
Cassettes that are deformed, that have tape that does not track
properly, or that generate abnormal noise during fast-forwarding
or rewinding.
Long-duration tapes
Tapes that allow recording for longer than 90 minutes sometimes
get caught by the capstan because they are extremely thin and
stretch easily. Do not use them.
Slackening of tapes
Slack tape could get caught in the capstan or other parts.
Eliminate slack by using a pencil or similar tool before use.
8
Page 9
USB flash drives
Normal
Automatic tape type
detection holes
Accidental erasure prevention
tab
Automatic tape type detection function
This cassette deck can detect what type of tape is being used based
on the detection holes in the cassette shell. Be sure to use cassettes
with detection holes.
Metal (Type
Chrome (Type
(
Type
)
)
)
Accidental erasure prevention tabs
Tabs in the top of the cassette shell allow you to prevent important
recordings from being erased by mistake. There are two tabs in each
cassette shell—one for “side A” and one for “side B.”
Once these tabs have been removed using a screwdriver or similar
tool, there is no chance of the recording function being activated by
accident.
for “side A”
ATTENTION
Never turn the unit off or disconnect a USB flash drive when
it is being accessed, for example, during writing, playback,
recording or the erasure of files.
Doing so could damage the unit and the connected USB flash
drive.
Compatibility
o Only USB flash drive can be used.
o Hard disk drives, CD/DVD drives, and other devices connected via
USB cannot be used.
o This unit cannot copy or move files.
o Playable formats: FAT12, FAT16, FAT32
o NTFS, HFS and HFS+ formats cannot be used.
o Max. number of playable folders: 255
o Max. number of playable/recordable files: 999
o Operation with all USB flash drives is not guaranteed.
See the TEAC Global Site (http://teac-global.com/) for information
about USB flash drives that our company has confirmed for operation with this unit.
o When recording from a CD to a USB flash drive, the monitored
sound might skip depending on the type of USB flash drive, but
this will not affect the recorded data.
“side A”
o To record on a cassette that has had its tab broken off, put a piece
of adhesive tape over the hole. Be careful not to block the tape
type detection holes.
Recording
This unit can record sound from CDs, cassette tapes and connected
external devices, including tuners, to USB flash drives in MP3 format.
See page 28 for details.
9
Page 10
MP3 files
This unit can play MP3 files that are on CD-R/CD-RW discs and external
USB flash drives.
o Playable audio file formats
MP3 (with “.mp3” extension)
8–320kbps bit rate
16–48kHz sampling frequency
NOTE
DRM (Digital Rights Management) is not supported.
o Up to eight levels of subfolders are supported.
File information display
Identifying the parts (remote control)
The display of this unit can only show single-byte letters and numbers.
o If the file information uses Japanese, Chinese or other double-byte
characters, playback is possible but the name will not be shown
correctly. In such cases, “
Precautions when preparing MP3 files using a computer or
other device
o Discs that have not been recorded in accordance with ISO 9660
specifications cannot be played back.
o MP3 files are recognized by the “.mp3” extension. Always include an
extension at the end of the file name.
o Files without extensions cannot be recognized. Files that are not in
the MP3 data format cannot be played back even if they have an
extension.
o After writing to a CD-R/CD-RW, close the session (complete disc
creation). If the session has not been closed, the disc cannot be
played back.
o This unit can play a maximum of 999 files in a maximum of 255
folders. If data exceed these numbers, proper playback might not
be possible for files numbered 1000 or higher and files in folders
numbered 256 or higher.
o Discs recorded using multiple sessions are not supported. Only the
first session will be played back.
o Depending on the disc condition, this unit might not be able to
play some discs or skipping could occur.
o Files protected by DRM cannot be played back by this unit.
” is displayed.
C
D
A
B
E
F
G
H
I
J
K
If both the main unit and the remote control have buttons with
the same function, we only explain procedures using one of them
in this manual. However, the other can also be used in the same
manner.
10
Page 11

A
SOURCE button
Use this button to select a source (page 17).
B
C
D
E
F
DISPLAY button
Press this button to change the display information (page 15).
REPEAT button
Use this button to set the repeat function (page 20).
SHUFFLE button
Use this button to start shuffle playback (page 20).
PROGRAM button
Use this button to program tracks/files (page 21).
CLEAR button
Use this button to clear programmed tracks/files (page 23).
RECORD (>) button
Use this to record to an external USB flash drive. Press it once to
enable recording standby, and press it again to start recording.
(page 28)
Press it during recording to divide the file at that point (page
30).
Stop (H) button
This stops USB flash drive recording/playback.
Play (t) button
Press this button to start playback.
When in USB recording standby, press this to start recording.
Pause (J) button
Press this button to pause playback or recording.
Press this button again to resume playback or recording.
J
Stop (H) button
Press this button to stop playback.
Press this button to stop recording to a tape.
G
H
I
FOLDER ( / ) buttons
Use these buttons to select MP3 folders (pages19 and 27).
Skip (.//)/Search (m/,) buttons
Press these buttons to skip through tracks/files.
Hold down these buttons to search for part of a track/file.
OPEN/CLOSE (L) button
Press this button to open and close the disc tray.
Stop (H) button
Press this button to stop playback.
Play (t) button
Press this button to start playback.
Pause (J) button
Press this button to pause playback. To resume playback, press
this button again.
ERASE button
Use this button to erase files from a USB flash drive (page 30).
Play (t) button
This starts cassette tape playback.
Press when a cassette tape is paused to resume playback/
recording.
Pause (J) button
Press this button to pause playback or recording.
Press this button again to resume playback or recording.
ATTENTION
When stopped, pressing the Pause (9) button will not put the
tape into a paused state.
Fast-forward/Rewind (m/,) buttons
Press these buttons to fast-forward/rewind the tape.
RECORD (>) button
Use to record to a tape. Press it once to enable recording standby,
and press it again to start recording (page 31).
COUNTER RESET button
Press this button to reset the tape counter to “0000”.
K
REC LEVEL ( − / + ) but tons
Use these buttons to adjust the recording level.
Skip (.//)/Search (m/,) buttons
Press these buttons to skip through files.
Hold down these buttons to search for a part of a file.
11
Page 12
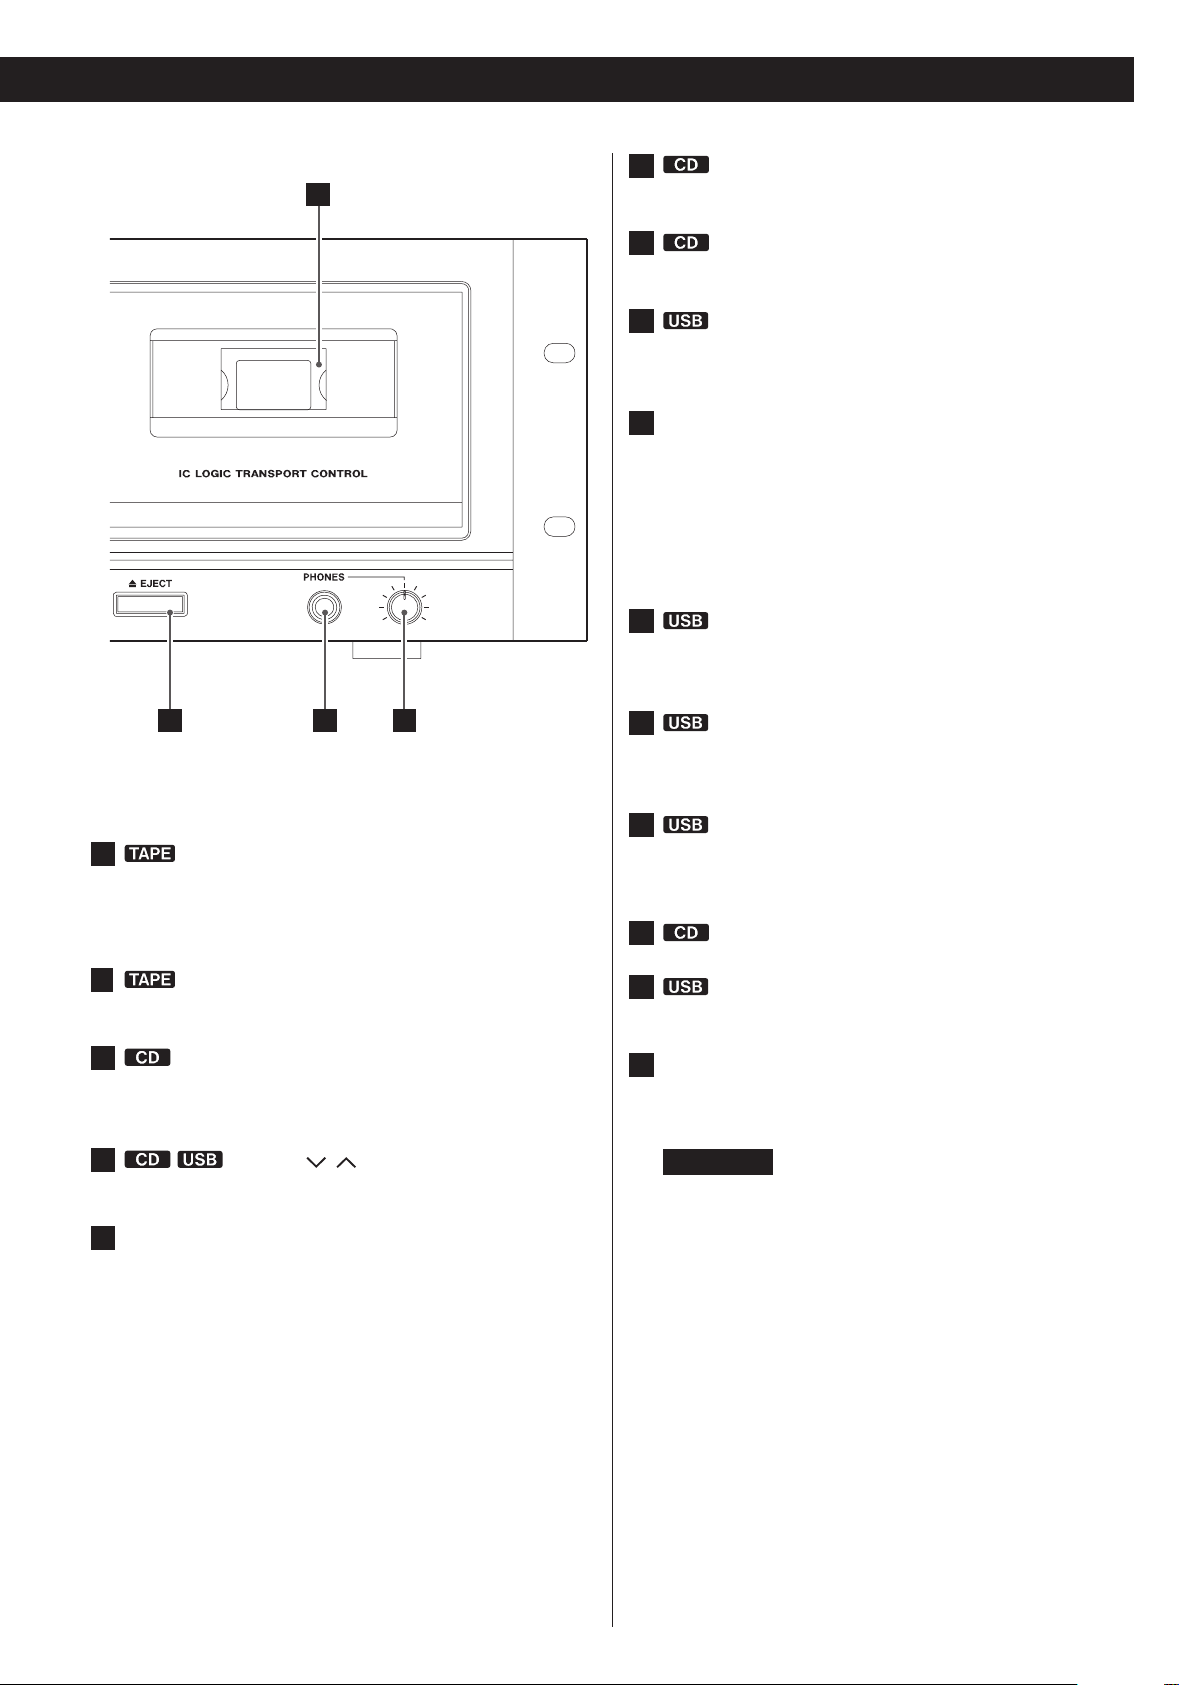
Identifying the parts (main unit)
1
2831 30 29 27 25 23 2132 26 22 20
43 5 86 7 1110 12 132
24
9
19
18
1
Display
This shows the total number of tracks/files, playback time and
other information (page 14).
2
Remote sensor
When operating the remote control, point it towards here.
3
4
5
6
7
8
OPEN/CLOSE (L) button
Press this button to open and close the disc tray.
COUNTER RESET button
Press this button to reset the tape counter to “0000”.
REC LEVEL knob
Turn this knob to adjust the recording level.
Skip (.//)/Search (m/,) buttons
Press these buttons to skip through tracks/files.
Hold down these buttons to search for part of a track/file.
REPEAT button
Use this button to set the repeat function (page 20).
SOURCE button
Use this button to select the source (page 17).
10
RECORD USB button
Use to record to an external USB flash drive. Press it once to
enable recording standby, and press it again to start recording
(page 28).
Press it during recording to divide the file at that point (page
30).
11
RECORD TAPE button
Use to record to a tape. Press it once to enable recording standby,
and press it again to start recording (page 31).
12
13
14
15
16
Fast-forward/Rewind (m/,) buttons
Press these buttons to fast-forward/rewind the cassette tape.
Pause (J ) button
Press this button to pause cassette tape playback or recording.
Press this button again to resume playback or recording.
Cassette tape compartment
Headphone knob (PHONES)
Use the headphone knob to adjust the headphone output level.
Headphone jack (PHONES)
Use this standard stereo jack to connect stereo headphones. Use
an adapter to connect headphones with mini plugs.
9
Stop (H ) button
Press this button to stop cassette tape playback.
Press this button to stop recording to a tape.
12
17
EJECT (L) button
When the tape is stopped, press this button to open the cassette
tape compartment.
Page 13
23
17
15
16
14
Play (t) button
Press this button to start CD playback.
24
25
26
27
28
Stop (H ) button
Press this button to stop CD playback.
Skip (.//)/Search (m/,) buttons
Press these buttons to skip through files.
Hold down these buttons to search for part of a file.
POWER ON START CD-TAPE-USB switch
Use this switch to set the sound source that is active when the
power is turned on.
Use this switch to set the media used for timer playback/
recording. (The timer recording can only record to cassette tape.)
To use timer playback/recording, connect a commerciallyavailable programmable timer to this unit (page 34).
Pause (J ) button
Press this button to pause USB playback or recording.
Press this button again to resume playback or recording.
Play (t) button
Press this button to start USB playback.
When in USB recording standby, press this to start recording.
18
Play (
This starts cassette tape playback.
Press when a cassette tape is paused to resume playback/
recording.
19
Turn this knob to vary the playback speed (page 25).
20
Pause (J) button
Press this button to pause CD playback. To resume playback,
press this button again.
21
Use these buttons to select folders (pages19 and 27).
22
POWER ON START OFF-PLAY-REC (TAPE) switch
Use this switch to set the timer operation mode (off, play or record).
To use this when set to play or record, connect a commerciallyavailable programmable timer to this unit (page 34).
o Select OFF to not use timer playback or recording.
t
) button
PITCH CONTROL knob
FOLDER ( / ) buttons
29
Stop (H ) button
Press this button to stop USB playback.
Press this button also to stop recording to USB.
30
31
32
Disc tray
USB port
Connect an external USB flash drive here.
POWER button
Press this button to turn the unit on or off.
ATTENTION
Never turn the unit off or disconnect a USB flash drive when
it is being accessed, for example, during writing, playback,
recording or the erasure of files.
Doing so could damage the unit and the connected USB
flash drive.
13
Page 14
Currently playing track number
Elapsed time of current track (min./sec.)
Elapsed time of current track
Currently playing file number
(scrolls when long)
Total tracks
Total playing time
Total number of folders
Total number of files
Using the remote control
Display
Precautions when using the remote control
V
CAUTION
Misuse of batteries could cause them to rupture or leak, which
might result in fire, injury or the staining of nearby materials.
Please read and observe the precautions on page 3 carefully.
o Use the remote control within the following range.
Operation distance
Within 7 m (23 ft) and 15º to the left or right of the front
o Do not place obstructions between the main unit and the remote
control.
o Even if the remote control is used within its effective range, opera-
tion by remote control might not be possible if there are any
obstacles between the unit and the remote control.
o If the remote control is operated near other devices that generate
infrared rays, or if other remote controls that use infrared rays are
operated near the unit, this unit and the other devices might not
operate correctly.
CD mode
During playback
Audio CD
MP3 disc
(starting with 001 in each folder)
Currently playing folder number
Battery installation
1. Remove the battery compartment cover.
2. Insert two AAA batteries. Make sure that they are inserted with
their positive (+) and negative (_) poles oriented correctly.
3. Close the cover.
(min./sec.)
Currently playing file name
When playback is stopped
Audio CD
MP3 disc
Battery replacement
If the distance from the main unit that the remote control works effectively decreases, the batteries are probably exhausted. Replace the
batteries with new ones when this happens.
For more information about the collection of batteries, please contact
your local municipality, your waste disposal service or the place where
you purchased them.
14
Page 15

TAPE mode
Tape counter
Elapsed time of current file
Currently playing file number
(scrolls when long)
Total number of folders
Total number of files
Recording source Recording indicator
Remaining time of current track (min./sec.)
Total elapsed time of the disc (min./sec.)
Total remaining time of the disc (min./sec.)
Currently playing track number
and elapsed time of current track (min./sec.)
File name
o The tape counter shows the approximate position of the tape. This
is not a time indication.
USB mode
Changing the display (CD/USB mode)
During playback in CD mode or USB mode, each time the DISPLAY
button is pressed, the display changes as follows:
During playback
(starting with 001 in each folder)
Currently playing folder number
Currently playing file name
When playback is stopped
(min./sec.)
Audio CD
MP3 disc/USB
Title
Artist
Album
Currently playing folder and file number,
elapsed time of current track (min./sec.),
and currently playing file name
Recording mode
(Example: Recording on a cassette tape from a USB flash drive)
Current file
number
current file (min./sec.)
o “No title”, “No album” or “No artist” appears when there is no
information.
o “
o The display of this unit can only show single-byte letters and
numbers. If a file name uses Japanese, Chinese or other doublebyte characters, playback is possible but the name will not be
shown correctly. In such cases, “
Tape counterElapsed time of
” appears when the unit cannot read the information.
” is displayed.
15
Page 16

Connections
Complete all other connections before turning the unit
V
on.
o Read the instructions of each device that you intend to use with
this unit.
o Be sure to connect each plug securely. Do not bundle connecting
cables with power cords. Doing so could cause noise.
A
LINE IN/OUT connectors
These connectors transmit an analog 2-channel audio signal.
Connect a stereo amplifier, mixer or other equipment to this
unit’s analog audio input and output connectors.
Use commercially-available RCA audio cables for connections.
Connect this unit’s R input connector to the R output connector
of the audio output device, and this unit’s L input connector to
the L output connector of the other device.
CD-A580 (back side)
RCA audio cables
Amplifier
LINE
LINE
OUT
IN
Tuner, etc.
Speakers
Wall socket
White (L)
Red (R)
This unit Amplifier, etc.
B
AC Power Cord
After all other connections are complete, connect the plug to an
AC wall outlet.
Be sure to connect the power cord to an AC outlet that
supplies the correct voltage.
Hold the power plug when plugging it into an outlet or
unplugging it. Never pull or yank on the power cord.
White (L)
Red (R)
Example
Notes on turning on or off the power
When an amplifier is connected to the unit, turn on or off the power
of the unit and the amplifier in the following sequence.
When turning on the power
1. This unit
2. Amplifier
When turning off the power
1. Amplifier
2. This unit
16
Page 17

Basic operation
Turning the unit on or off
Press the POWER button to turn the unit on or off.
When the unit turns on, the display lights.
Check the POWER ON START switches that determine what the
unit does when the power is turned on.
When the power is turned on, and the POWER ON START
OFF-PLAY-REC (TAPE) switch for the timer is set to PLAY
or REC
Automatic power saving function
(European models only)
See “Automatic power saving function” on page 36.
Selecting a source for playback/recording
Each time the SOURCE button is pressed, the source changes as
follows:
or
The source set with the POWER ON START CD-TAPE-USB
switch starts playback/recording.
The timer recording can only record to cassette tape (page
35).
When the power is turned on, and the POWER ON START
OFF-PLAY-REC (TAPE) switch for the timer is set to OFF
The source set with the POWER ON START CD-TAPE-USB
switch becomes the active source.
o When you do not want to use the timer, be sure to set the
POWER ON START OFF-PLAY-REC (TAPE) switch to the OFF
position to prevent accidentally recording over an important
cassette tape.
The selected source is shown on upper left of the display.
o During recording, the source cannot be changed.
o Pressing the play button for a source also selects and starts play-
back of that source.
o Select “LINE” to use an external source connected to the LINE
connectors.
17
Page 18

Listening to a CD
Press the SOURCE button repeatedly to select “CD”.
1
< When a different source is selected, pressing the CD Play (t)
button automatically selects the CD and, if a disc is loaded, starts
playback.
Press the CD OPEN/CLOSE (L) button to open the disc
2
tray.
Press the CD OPEN/CLOSE (L) button again to close the
4
tray.
CAUTION
Be careful not to let your finger be pinched by the tray.
Loading a disc takes a few seconds.
During loading, “READING” appears on the display and no buttons
will work. Wait until the total number of tracks/files is displayed.
< When no disc is loaded, “NO DISC” is displayed.
Press the CD Play (t) button to start playback.
5
Place a disc on the tray with the label side up.
3
< Always confirm that the disc is centered on the tray. The disc
must be centred on the disc tray. If a disc is not correctly loaded,
it might not be possible to open the tray again after it has been
closed.
ATTENTION
< Do not load more than one disc.
< Do not force the tray by hand when opening and closing it.
< Do not attach adhesive labels or similar materials to either side
of a disc.
< Do not use irregularly-shaped discs.
Failure to follow any of the above could cause malfunction.
Playback starts from the first track/file on the disc.
< If you load a disc, and then press the CD Play (t) button
without having first closed the disc tray, the disc tray closes and
playback starts.
< When playback of all the tracks/files has finished, the unit stops
automatically.
< MP3 files that are not placed in folders are automatically put in
the “ROOT” folder. Playback starts from the first file in the ROOT
folder.
< See page 39 for information about the playback order of MP3
discs.
18
Page 19

Suspending playback temporarily
(Pause mode)
Search for a part of a track/file
Press and hold
Press the CD Pause (J) button during playback to stop playback at
the current position.
To resume playback, press the CD Pause (J) button again or press
the CD Play (t) button.
Stopping playback
Press the CD Stop (H) button to stop playback.
Opening the disc tray
During playback, hold down a CD Search (m or ,) button to
search a part of a track/file. Release it when you find the beginning
of the part you want to hear.
Skipping to an earlier or later track/file
During playback
Press a CD Skip (.//) button repeatedly until the desired
track/file is selected. The selected track/file will be played from the
beginning.
o If the . button is pressed once during playback, the track/
file being played will be played again from its beginning. To
return to the beginning of the previous track/file, press the .
button twice.
When playback is stopped or paused
Press a CD Skip (.//) button repeatedly to select the track/
file you want to hear. Then, press the CD Play (t) button or CD
Pause (J) button to start playback of the selected track/file.
Press the CD OPEN/CLOSE (L) button to open the disc tray.
< You can also open the tray when in modes other than CD mode.
Selecting a folder (MP3 disc)
Press the FOLDER ( / ) buttons to select a folder. Then, press
the CD Play (t) button to start playback.
19
Page 20

REPEAT 1 REPEAT ALL
(off)
REPEAT 1 REPEAT ALL
(off)
REPEAT FOLDER
Repeat playback
This function can be used in CD and USB modes.
Press the REPEAT button to cycle through the following playback
modes:
Audio CD
MP3
Shuffle playback
This function can be used in CD and USB modes.
Use this function to play the tracks/files on a disc/USB flash drive in
random order.
Pressing the SHUFFLE button turns the shuffle mode on and off.
During shuffle playback, “SHUFFLE” appears on the display.
After playing back all tracks/files, the unit exits the “Shuffle” playback mode and stops playback.
To stop shuffle playback, press the CD/USB Stop (H) button.
< If any of the following buttons are pressed, the repeat mode will
be canceled.
In CD mode
POWER button, SOURCE button, CD OPEN/CLOSE (L)
button, REPEAT button, SHUFFLE button
In USB mode
POWER button, SOURCE button, REPEAT button, SHUFFLE
button
REPEAT 1 (Repeat one track/file)
The track/file being played will be played repeatedly.
“REPEAT 1” appears on the display.
< If you use the CD/USB Skip (. or /) buttons to select a
different track/file, that track/file will be played repeatedly.
< You can select a track/file to be repeated when playback is
stopped. Press the REPEAT button, select a track/file using the CD/
USB Skip (. or /) buttons, and then press the CD/USB Play
(t) button or CD/USB Pause (J) button to start playback.
o If you press the / button during shuffle playback, the next
track/file will be randomly selected and played. If you press the
. button, the currently played track/file will be played from the
beginning. During shuffle playback, a track/file that has completed
playback will not be played again.
< The shuffle function does not work during program playback.
o If any of the following buttons are pressed, shuffle mode will be
canceled.
In CD mode
POWER button, SOURCE button, CD OPEN/CLOSE (L)
button, REPEAT button, SHUFFLE button
In USB mode
POWER button, SOURCE button, REPEAT button, SHUFFLE
button
REPEAT ALL (Repeat all tracks/files)
All the tracks/files on the disc will be played repeatedly.
“REPEAT ALL” appears on the display.
< During program playback, the programmed tracks/files will be
played repeatedly.
REPEAT FOLDER (Repeat all the files in a folder) (MP3 only)
All the files in the selected folder will be played repeatedly.
“REPEAT FOLDER” appears on the display.
20
Page 21

Programmed playback
This function can be used in CD and USB modes.
Up to 30tracks/files can be programmed in the desired order.
When playback is stopped, press the PROGRAM button
1
to enter program mode.
“PROGRAM” blinks and “P-01” appears on the display.
Example when in CD mode
< To stop programming, press the CD/USB Stop (H ) button.
Press the CD/USB Skip (. or /) buttons to select a
3
track/file, then press the PROGRAM button.
The track/file is programmed, and “P-02” is displayed.
o Repeat steps 2 and 3 to program more tracks/files.
o You can program up to 30tracks/files.
o To stop programming, press the CD/USB Stop (H) button.
Programming is canceled, but the program contents are
retained in memory. If you want to restart program playback,
press the PROGRAM button, and then press the CD/USB Play
(t) button.
(When programming MP3 files)
2
Press the CD/USB FOLDER ( / ) buttons to select a
folder, then press the PROGRAM button.
< MP3 files not located in a specific folder are in the “001” (ROOT)
folder.
NOTE
The ROOT folder is the top-level folder.
When the selection of track/file numbers is completed,
4
press the CD/USB Play (t) button to start program
playback.
To stop program playback, press the CD/USB Stop (H) button.
o After program playback finishes, press the PROGRAM button and
then the CD/USB Play (t) button to play the program again.
o You can use the CD/USB Skip (. and /) buttons during pro-
gram playback to select and play other tracks/files in the program.
o The shuffle function does not work during program playback.
o “REPEAT 1” and “REPEAT ALL” playback are possible during program
playback. When set to “REPEAT ALL” mode, the programmed tracks/
files will be played repeatedly.
21
Page 22

Program number
to be changed
Programmed playback (continued)
Adding tracks/files to the end of the program
When playback is stopped, press the PROGRAM button repeatedly
until “TRACK 00” appears on the display.
Press
repeatedly
Select a track/file number you want to add using the CD/USB Skip
(. and /) buttons, and then press the PROGRAM button.
Overwriting part of the program
When playback is stopped, press the PROGRAM button repeatedly until the program number of the track that you want to
change appears on the display.
Press
repeatedly
Select the track/file number that you want to add using the CD/
USB Skip (. and /) buttons, and then press the PROGRAM
button.
The track/file is added to the end of the program.
The selected track/file is added to the program, replacing the track
that had been at that program number before.
22
Page 23

Checking the program order
Program number
to be deleted
Clearing the program
Press
repeatedly
When playback is stopped, press the PROGRAM button repeatedly.
The numbers of the programmed tracks/files and their program
numbers will be shown in order.
Deleting tracks/files from the program
When playback is stopped, press the PROGRAM button repeatedly
until the program number of the track to be deleted appears
on the display.
Press
repeatedly
Press
at least
1second
When playback is stopped, press the PROGRAM button, followed by
the CLEAR button or CD/USB Stop (H) button more than 1second.
The PROGRAM indicator disappears and all the contents of the
program are cleared.
< If the PROGRAM indicator is not shown, press the PROGRAM button
to activate program mode before pressing the CLEAR button.
< If one of the following buttons is pressed, the contents of the
program are also cleared.
In CD mode
POWER button, CD OPEN/CLOSE (L) button, SOURCE
button
In USB mode
POWER button, SOURCE button
Press the CLEAR button.
The track/file is deleted from the program.
Exiting program mode
Press
at least
1second
When playback is stopped, press and hold the PROGRAM button
more than 1second or press the CD/USB Stop (H) button. The
PROGRAM indicator will disappear.
o This does not clear the contents of the program. Press the PROGRAM
button again and then press the CD/USB Play (t) button if you
want to restart program playback.
23
Page 24

Listening to a cassette tape
You can play Normal (type ), Chrome (type ) and Metal (type ) tapes
with this unit.
Press the SOURCE button repeatedly to select “TAPE”.
1
< When a different source is selected, starting tape playback
automatically selects the tape.
Press the TAPE EJECT (L) button to open the cassette
2
tape compartment.
Press the TAPE play (t) button to start playback.
4
Pausing playback temporarily
Put a cassette tape in the compartment.
3
Insert the cassette tape with its open edge facing down and the
side that you want to play facing you. Then, close the cassette
compartment by pushing its door in.
Press the TAPE Pause (J) button during playback to stop playback
at the current position.
To resume playback, press the TAPE Pause (J ) button again or
press the TAPE Play (t) button.
Stopping playback
Press the TAPE Stop (H) button to stop playback.
ATTENTION
o Do not use deformed or slack cassette tapes. The tape could
become tangled, and the cassette might become stuck in the
unit.
o Do not force the door of the compartment by hand when
opening it.
Failure to follow any of the above could cause malfunction.
24
Page 25

Opening the cassette tape compartment
When the tape is stopped, press the TAPE EJECT (L) button to
open the cassette tape compartment.
o Do not press the TAPE EJECT (-) button during playback.
o You can also open the compartment when in modes other than
TAPE mode.
Fast-forwarding/Rewinding a tape
Pitch control
This control varies the pitch of the music during playback.
Turning the PITCH CONTROL knob clockwise increases the playback
speed and raises the pitch by a maximum of +10%.
Turning the PITCH CONTROL knob counterclockwise reduces the
playback speed and lowers the pitch by a maximum of −10%.
o This does not function when recording to tape.
o Keep it set to the 12 o’clock (vertical) position for normal pitch.
o Pitch control can be used when recording from a cassette tape to a
USB flash drive.
Press the Fast-forward (,) button or the Rewind (m) button to
wind the tape rapidly.
Winding stops when the end of the tape is reached. To stop
winding before the end, press the TAPE Stop (H) button.
< You can wind the tape when CD/USB/LINE is selected as a source.
These buttons do not, however, function when in a recording
mode.
Tape counter
Press the COUNTER RESET button to reset the tape counter to
“0000”. You can use this function to easily locate any desired point
on the tape.
25
Page 26

Listening to files on a USB flash drive
ATTENTION
Never turn the unit off or disconnect a USB flash drive when
it is being accessed, for example, during writing, playback,
recording or the erasure of files.
Doing so could damage the unit and the connected USB flash
drive.
Press the SOURCE button repeatedly to select “USB”.
1
< When a different source is selected, starting USB playback
automatically selects the USB mode.
Press the USB Play (t) button to start playback.
3
< When playback of all the files has finished, the unit stops
automatically.
< MP3 files that are not put in folders are automatically put in the
“ROOT” folder. Playback starts from the first file in the ROOT
folder.
< See page 39 for information about the playback order of MP3
files.
Connect an external USB flash drive to the USB port of
2
this unit.
Reading the USB flash drive takes a few seconds.
USB flash drives with especially large capacities might take more
time.
When “READING” is shown while the drive is being read, pressing
buttons will have no effect.
< If no MP3 file is on the USB flahs drive, “NO MUSIC FILE” is
displayed.
Pausing playback temporarily
Press the USB Pause (J) button during playback to stop playback
at the current position.
To resume playback, press the USB Pause (J) button again or press
the USB Play (t) button.
26
Page 27

Stopping playback
Skipping to an earlier or later file
Press the USB Stop (H) button to stop playback.
Search for a part of a file
Press and hold
During playback, hold down a USB Search (. or /) button
to search for a part of a file. Pressing and holding a Search button
increases the search speed.
Release it when you find the beginning of the part that you want
to hear.
During playback
Press a USB Skip (.//) button repeatedly until the desired
file is selected. The selected file will be played from the beginning.
< If the . button is pressed once during playback, the file being
played will be played again from the beginning. To return to the
beginning of the previous file, press the . button twice.
When playback is stopped or paused
Press a USB Skip (.//) button repeatedly to select the file
you want to hear. Then, press the USB Play (t) button or USB
Pause (J) button to start playback of the selected file.
Selecting a folder
Press the FOLDER ( / ) buttons to select a folder. Then, press
the USB Play (t) button to start playback.
Repeat, shuffle and programmed playback
These functions can be used in USB mode.
Please see the following sections for details about using them.
Repeat playback
Shuffle playback
Programmed playback e page 21
page 20
e
page 20
e
27
Page 28

Recording on a USB flash drive
This unit can record sound from a CD, cassette tape or connected
external device in MP3 format to a USB flash drive.
o This unit can also record to cassette tape, but it cannot record to
both USB flash drive and tape at the same time.
o Correct recording might not be possible depending on the USB
flash drive. If this occurs, try using a different USB flash drive.
o This unit cannot record to a USB flash drive with the timer record-
ing function.
o When recording from a CD to a USB flash drive, the monitored
sound might skip depending on the type of USB flash drive, but
this will not affect the recorded data.
ATTENTION
Do not disconnect the USB flash drive during recording. Do
not turn the unit off or disconnect the power cord during
recording. Doing so might cause damage to the unit and the
connected USB flash drive.
About recorded MP3 files
o When recording, “RECORD” folder is automatically created and a
subfolder for each source (“CD”, “TAPE” or “LINE”) is also created in the
“RECORD” folder. MP3 files are added to the corresponding subfolder.
Connect an external USB flash drive to the USB port of
1
this unit.
< You cannot record to an external USB flash drive if there is no
free space or the device is locked.
< Before recording, check the remaining capacity of the USB flash
drive using a PC. You cannot check the remaining memory
capacity with this unit.
Press the SOURCE button repeatedly to select the source
2
to be recorded (CD, TAPE, or LINE).
o File names are assigned automatically with a numerical endings in
order.
When recorded from a CD
“CD001.MP3”, “CD002.MP3” …
If there are, for example, files named “CD004.MP3” and “CD009.MP3”
in the USB folder already, and you make a recording, the next new
file will be named “CD010.MP3”.
When recorded from a cassette tape
“T001.MP3”, “ T002A.MP3“ …
When record from an external source
“L001.MP3”
o During recording from a tape or LINE input, you can divide the file
manually (page 30). In this case, consecutive numbers are added
to the ends of the file names.
Example:
If “T001.MP3” is divided, files named “T001.MP3” and “T002.MP3” are
created.
o This unit can record up to 999files to a USB flash drive. However, if
the USB flash drive already contains files, those files are included in
the maximum total of 999 files when recording.
Press the RECORD USB button to start recording standby.
3
The red indicator above the RECORD USB button and the
icon on the display blink.
o Preparation for USB recording takes a few seconds.
USB flash drives with especially large capacities might take
more time.
When “Record prepare” is shown during preparation, pressing
buttons will have no effect.
o To stop recording, press the USB Stop (H) button.
o The maximum time possible for a recorded file is 240minutes.
o Tracks recorded onto a USB flash drive are converted to MP3 files at
a bit rate of 128kbps.
28
Page 29

(When recording from a tape or an external source)
4
Adjust the recording level.
Before recording, adjust the recording level. Failure to do so
could cause the recorded sound to be distorted or noisy.
1. Play the source (cassette tape or external source) to be
recorded.
2. Use the REC LEVEL knob to adjust the recording level so that
the loudest sound never lights the “OVER” indicator on the
peak level meter.
Press the RECORD USB button again to start recording.
6
When recording from an external source, you must also start
playback of that source.
If the recording source is a CD or cassette tape, that source will
automatically start playing back.
o Pressing either the USB Pause (9) or USB Play (t) button will
start recording.
The red indicator above the RECORD USB button and the
icon on the display stop blinking.
o If the USB flash drive runs out of open space during recording,
recording stops automatically.
< Different sources to be recorded have different volumes. In
order to record at the optimal volume for each source, it is
necessary to adjust the recording level for each source.
< When recording from a CD, the recording level does not
need to be changed, and it cannot be adjusted.
Prepare the recording source.
5
Recording from a CD
To record all the tracks/files on a CD, stop the disc first. To record
only some of the tracks/files on a CD, pause at the beginning of
the part that you want to record.
You can also record tracks in programmed order. For information
about how to set the program, see page 21.
Recording from a cassette tape
To record the entire tape, rewind the tape to its starting point.
To record from the middle of a tape, stop or pause at the point
from where you want to start recording.
o To pause recording, press the USB Pause (J) button. A second
press of the button resumes recording.
Pressing the RECORD USB or USB Play (t) button will also
resume recording. You can also resume recording by pressing
the source playback button if the recording source is a CD or
tape.
Recording from a CD or a cassette tape
When source playback stops, recording also automatically stops.
To stop recording, press the USB Stop (H) button. Doing this
also stops playback of the recording source.
Recording from an external source
When source playback stops, recording does not automatically
stop. Press the USB Stop (H) button to stop recording.
Recording from an external source
Prepare to start playback of the source device.
Example: Set the source selection of an amplifier.
Set the playback media in a connected player.
To record from a tuner, tune in a station.
29
Page 30

Recording on a USB flash drive (contd.)
Manual file division
When recording from a tape or a device connected to the LINE inputs,
you can manually divide the MP3 file as it is being recorded. This
function cannot be used when recording from a CD. A recorded CD
will automatically be divided at each track.
During recording, press the RECORD USB button at the point
where you want to divide the recorded file.
File division takes about 10 seconds.
Erasing files from a USB flash drive
ATTENTION
Do not disconnect the USB flash drive during erasing. Do not
turn the unit off or disconnect the power cord during erasing.
Doing so might cause damage to the unit and the connected
USB flash drive.
Erasing all files
ATTENTION
Using this function will erase all the contents of a USB flash
drive. Non-audio files that are not recognized by this unit will
also be erased. Confirm that this is acceptable before beginning this operation.
Press the SOURCE button repeatedly to select “USB”.
1
o “File increment” appears on the display during division.
o “Record Ending” will appear when you press the USB stop (8)
button.
When recording from a tape:
During file division, the tape stops, but almost no gap in the
recording should occur.
When recording from the LINE inputs:
During file division, a gap will occur in the recording.
< This unit cannot divide an already recorded MP3 file. This function
only works during recording.
< Consecutive numbers are added to the end of the file names after
division.
Example:
If “T001.MP3” is divided, files named “T001.MP3” and “T002.MP3”
are created.
Connect an external USB flash drive to the USB port of
2
this unit.
Press the ERASE button for more than 2seconds.
3
30
Press at least
2second
“Erase all?” appears on the display.
Within 6seconds, press the ERASE button again.
4
The USB flash drive is completely erased.
“NO MUSIC FILE” appears on the display.
Page 31

Recording on a cassette tape
Erasing a file
Select the file that you want to delete (page 27).
1
Press the ERASE button.
2
“Erase File?” appears on the display.
Within 6seconds, press the ERASE button again.
3
This unit can record sound from a CD, USB flash drive, or connected
external device to a cassette tape.
You can record on Normal (type ) and Chrome (type ) tapes with
this unit. Metal (type ) cannot be recorded with this unit.
< This unit can also record to a USB flash drive, but it cannot record
to both USB flash drive and tape at the same time.
ATTENTION
Never turn the power off or disconnect the power cord during
recording. Doing so could damage this unit and connected
equipment.
Put a cassette tape in the compartment.
1
“Erasing” appears on the display, the file currently being played is
erased, and playback stops.
< If the erasure prevention tabs of the cassette tape have been
broken off, put pieces of adhesive tape over the hole(s).
Press the SOURCE button repeatedly to select the source
2
to be recorded (CD, USB, or LINE).
Continued on the next page
31
Page 32

Recording on a cassette tape (continued)
Press the RECORD TAPE button to start recording
3
standby.
The red indicator above the RECORD TAPE button and the
icons on the display blink.
< To stop recording, press the TAPE Stop (H ) button.
Adjust the recording level.
4
Before recording, adjust the recording level. Failure to do so
could cause the recorded sound to be distorted or noisy.
Prepare a recording source.
5
Recording from a CD
To record all the tracks/files on a CD, stop the disc first. To record
only some of the tracks/files on a CD, pause at the beginning of
the part that you want to record.
You can also record tracks in programmed order. For information
about how to set the program, see page 21.
Recording from a USB flash drive
To record the entire contents of the USB flash drive, stop the
unit. To record from the middle of the USB flash drive, pause at
the point from where you want to start recording.
You can also record tracks in programmed order. For information
about how to set the program, see page 21.
< See page 39 for information about the playback order of
MP3 files.
1. Play the source (external source) to be recorded.
2. Adjust the REC LEVEL knob so that the peak level meter never
exceeds 0 continuously.
< Different sources to be recorded have different volumes. In
order to record at the optimal volume for each source, it is
necessary to adjust the recording level for each source.
Recording from an external source
Prepare to start playback of the source device.
Example: Set the source selection of an amplifier.
Set the playback media in a connected player.
To record from a tuner, tune in a station.
32
Page 33

Press the RECORD TAPE button again to start recording.
6
When recording from an external source, you must also start
playback of the source.
If the recording source is a CD or USB flash drive, that source will
automatically start playing back.
o Pressing either the TAPE Pause (9) or TAPE Play (t) button
will start recording.
The red indicator above the RECORD TAPE button and the
icon on the display stop blinking.
< To pause recording, press the TAPE Pause (J) button. Press the
button again to resume recording.
Pressing the RECORD TAPE or TAPE Play (t) button will also
resume recording. You can also resume recording by pressing
the source playback button if the recording source is a CD or USB
flash drive.
Erasing recordings
When you make a recording, the tape is overwritten (the previous
recording is erased). You can erase a tape recording by setting the
recording level to MIN and recording silence.
Press the TAPE RECORD button to start recording
1
standby.
Set the REC LEVEL control to the minimum MIN position.
2
Recording from a CD or a USB flash drive
When source playback stops, recording also automatically stops.
To stop recording, press the TAPE Stop (H) button. Doing this
also stops playback of the recording source.
Recording from an external source
When source playback stops, recording does not automatically
stop. Press the TAPE Stop (H) button to stop recording.
Press the TAPE RECORD button to start erasing (by
3
recording silence).
33
Page 34

Timer-controlled playback and recording
Connecting a commercially-available programmable timer to your
audio setup lets you wake up to your favorite music or start recording
at specified times.
< The source for timer playback must be CD, TAPE or USB. Timer
playback does not work with external devices connected to the
LINE inputs.
< The timer recording source can only be an external device
connected to the LINE inputs. And the timer recording can only
record to cassette tape.
Connections
Referring to the illustration below, connect your audio equipment.
Wall socket
Timer
Timer-Controlled Playback (
< The source for timer playback must be CD, TAPE or USB. Timer
playback does not work with an external device connected to the
LINE input.
Connect this unit and a stereo system to a commercially-
1
available programmable timer (see the previous section).
Set the power switch of all components to ON.
2
Prepare the source for timer playback.
3
Set the POWER ON START CD-TAPE-USB switch to the
4
desired source for timer playback.
)
Audio source
To make a timer-controlled recording
of a radio program, set your tuner as
required.
Amplifier
Set the input/output selectors
and other options to their proper
positions.
Signal flow
during
recording
Complete all other connections before turning the unit
V
on.
Signal flow
during
playback
CD-A580
Set the POWER ON START OFF-PLAY-REC (TAPE) switch to
5
the PLAY position.
“TIMER” appears on this unit’s display.
o Read the instructions of each device that you intend to use with
this unit.
o Be sure to connect each plug securely. Do not bundle connecting
cables with power cords. Doing so could cause noise.
34
Page 35

Set the programmable timer to your desired start (power
6
on) and stop (power off) times.
When this setting is completed, the power to all components
should be turned off.
At this time, do not press this unit’s POWER button.
Leave the button pushed in (the on position). If the
POWER button is in the off position, timer playback will
not function.
When the preset start time is reached, power will be supplied
and playback will start automatically.
Set the POWER ON START CD-TAPE-USB switch to TAPE.
4
o This function cannot be used to record to USB flash drives. It
can only be used to record to cassette tapes.
< When you do not want to use the timer, set the POWER ON
STAR T OFF-PLAY- R EC ( TA PE) switch to the OFF position.
Timer-Controlled Recording (
o The timer recording source can only be an external device con-
nected to the LINE inputs. And the timer recording can only record
to cassette tape.
(Example: Recording a broadcast program)
Connect this unit and a stereo system to a commercially-
1
available programmable timer (see page 34).
Set the power switches of all components to ON.
2
)
Set the POWER ON START OFF-PLAY-REC (TAPE) switch to
5
the REC position.
“TIMER” and appear on this unit’s display.
o If the POWER ON START CD-TAPE-USB switch is not set to
TAPE, “INVALID” will be shown and timer recording will not be
possible.
Tune in the station that you want to record (when
6
recording from radio).
Prepare the cassette tape that you want to record to with
3
timer recording.
If the erasure prevention tabs of the cassette tape have been
broken off, put pieces of adhesive tape over the hole(s).
You can record on Normal (type ) and Chrome (type ) tapes
with this unit.
ATTENTION
Load the cassette tape with the side to be recorded facing forward. Be careful not to put a tape in backward and accidentally
erase an important recording.
Continued on the next page
35
Page 36

Timer-controlled playback and recording (contd.)
Automatic power saving function
Adjust the recording level.
7
Failure to do so could cause the recorded sound to be distorted
or noisy.
Adjust the REC LEVEL knob so that the peak level meter never
exceeds 0 continuously.
Set the programmable timer to your desired start (power
8
on) and stop (power off) times.
ATTENTION
The automatic power saving function is only included in
European models.
The automatic power saving function is ON when this unit is shipped
new, so it will automatically enter standby if 30 minutes pass under
the conditions shown below.
Status CD USB flash drive Cassette tape
No disc , cassette tape or
connection
Stopped
Recording paused
Automatic power saving function active
- Automatic power saving function not active
/ Not applicable
To reactivate the unit after it has entered standby automatically, press
any button on the main unit or the remote control.
o If pressing the POWER button on the main unit, you must press it
twice.
- -
Changing the automatic power saving setting
1 Press the SOURCE button to select CD.
When this setting is completed, the power to all components
will be switched off.
2 Press the CD OPEN/CLOSE (-) button to open the
disc tray.
ATTENTION
o Do not close the disc tray until the following steps are
completed.
o The disc tray will close automatically if one minute passes
without operation.
3 Press the REPEAT button for at least 5 seconds to
show the current setting (“ERP ON” or “ERP OFF”).
4 Use the CD Skip (. //) buttons to change the
setting, and press the REPEAT button to conrm the
change.
5 Press the CD OPEN/CLOSE button to close the disc
tray.
36
Page 37

Troubleshooting
If you experience a problem with the unit, please take a moment to
review the following information before requesting service. Moreover,
the problem might be caused by something other than this unit.
Please also check the operation of the connected units.
If these measures do not solve the problem, please contact the store
where you purchased this unit or TEAC customer support service.
General
No power
e Check the connection to the AC power source. Confirm that the
AC source is not a switched outlet, and, if it is, that the switch
is turned on. Confirm that there is power to the AC outlet by
plugging another device such as a lamp or a fan into the outlet.
The unit turns off automatically (European models only).
e This is because the automatic power saving function turned
it off. Press any button on the main unit or the remote control
to turn it on. Change the automatic power saving setting if
necessary (page 36).
No sound or only a very low sound level is heard.
e Check the connections to the amplifier.
e Check that the speakers and other audio components are
connected securely.
e Check the operation of the connected component.
e There might be a +/_ short in a speaker cable. Check the
speaker cables.
e Select the correct input source using the SOURCE button.
Severe hum or noise is heard.
e Place the unit as far away from TVs as possible.
CD player
Will not play
e Load a disc with the label side up.
Remote control does not work.
e Press the POWER switch of the main unit to turn it on.
e If the batteries are exhausted, change the batteries.
e Use the remote control within its effective range (23ft/7m) and
point it toward the remote sensor on the front panel.
e Make sure that there are no obstacles between the remote
control and the main unit.
e If a fluorescent light is near the unit, turn it off.
Other devices with remote controls operate incorrectly.
e Other devices with remote controls might operate incorrectly
because of infrared light “overspill” when you operate the remote
control of this unit.
Buttons do not work properly.
e If the disc is dirty, clean the surface of the disc. If the disc is
scratched or has any sticky substance on its surface, do not play
the disc until you have corrected the condition of the disc. Never
under any circumstances use after-market stick-on labels or “disc
enhancement” devices that sit on top of or wrap around a disc.
e If a blank disc has been loaded, load a prerecorded disc.
e Depending on the disc and other factors, playback of some CD-R/
RW discs might not be possible. Try again with another disc.
e You cannot play unfinalized CD-R/RW discs. Finalize such a disc in
a CD recorder and try again.
Sound skips.
e Place the unit in a stable place to avoid vibrations and shocks.
e If the disc is dirty, clean its surface.
e Do not use scratched, damaged or warped discs.
e If another operation is still in process, wait a moment and try again.
37
Page 38

Troubleshooting (continued)
Cassette tape recorder
Cassette tape compartment does not close.
e The cassette tape is not properly loaded. Reinsert it.
Sound quality is poor.
e Clean the heads (page 39).
Playback speed seems somewhat fast or slow.
e Check the pitch control setting (page 25).
Cannot record
e If the erasure prevention tabs on top of the cassette are broken
off, cover the holes using pieces of adhesive tape.
Monitored sound skips.
e When recording from a CD to a USB flash drive, the monitored
sound might skip depending on the type of USB flash drive, but
this will not affect the recorded data.
MP3 files
Unknown characters are displayed on the display panel.
e This unit cannot display double-byte symbols and characters
(such as Japanese and Chinese) correctly. MP3 file names must
only be alphanumeric characters to be shown properly.
“No title”, “No artist” or “No album” appears on the display.
e ID3 tag information for the music file is missing. Edit the title,
artist and/or album information of the song on a PC using a
suitable application.
e Check the recording level setting (page 32).
USB flash drive
No sound even if the USB Play (t) button is pressed.
e Confirm that there are MP3 files on the USB flash drive.
e File formats other than MP3 (e.g. MPEG 1 LAYER 2 file) cannot be
played.
Cannot record
e Confirm that the USB flash drive has open space.
e Confirm that the USB flash drive is not locked.
e When record from an analog source, check the recording level
setting (page 29).
e Correct recording might not be possible depending on the USB
flash drive. If this occurs, change to a different USB flash drive. See
the TEAC Global Site (http://teac-global.com/) for information
about USB flash drives that our company has confirmed for
operation with this unit.
Recording to all USB flash drives using this unit is not guaranteed.
Since this device uses a microcontroller, external noise and
other interference can cause the unit to malfunction. If this
occurs, turn the power off and, after waiting for about one minute, restart operation.
Beware of condensation
Condensation could occur if the unit is moved from a cold place
to a warm place, it is used immediately after a cold room has
been heated or it is otherwise exposed to a sudden temperature
change. To prevent this, or if this occurs, let the unit sit for one or
two hours at the new room temperature before using it.
38
Page 39

MP3 playback order
001 “ROOT”
Maintenance
MP3 files on a CD or a USB flash drive can be stored in folders in the
same way that files are managed on a computer. Moreover, multiple
folders can be contained inside another folder.
Here is an example of the file and folder structure of an MP3
disc or a USB flash drive, showing the order of the folders
(001 “ROOT” to 005) and the playback order of the files
(
1 to 9
1
2
002 folder
).
MP3 file
MP3 file
3
4
004 folder
MP3 file
MP3 file
If the surface of the unit gets dirty, wipe it with a soft cloth or
use diluted mild liquid soap. Allow the surface of the unit to dry
completely before using.
For safety, disconnect the power cord from the outlet before
cleaning.
< Never spray liquid directly on this unit.
< Do not use thinner or alcohol as they could damage the surface of
the unit.
Cleaning the cassette deck
A dirty head can cause poor sound quality or the sound to skip. Dirt
on the tape tracking roller might catch the tape.
Clean the head, pinch roller, and capstan with a cotton applicator
dampened with a commercially-available cleaning solution about
every ten hours of use.
Erasing head
Capstan
5
003 folder
7
MP3 file
folder
005 folder
o Files will be shown and played back in the following order.
USB: the order that MP3 files were copied
CD: ASCII-code order
MP3 file
6
MP3 file
8
MP3 file
9
MP3 file
Playback/recording
head
o Do not put a cassette tape in the cassette holder of the unit until
the cleaning solution on the head dries.
Pinch roller
39
Page 40

Specifications
CD Player
Compatible discs ................... CD/CD-R/CD-RW (12 cm/8 cm)
Disc formats
Audio CD ................................................. CD-DA
Data CD .......................................ISO 9660 Level 1/2
Playable formats
CD-DA
Sampling frequency ....................................44.1 kHz
Quantization bit depth ................................... 16-bit
Number of channels ..........................................2
MP3
Audio modes ..STEREO/JOINT STEREO/DUAL CHANNEL/MONO
Sampling frequency .............................16 kHz – 48 kHz
Bit rate ......................................8 kbps – 320 kbps*
Frequency response ..........................20Hz – 20kHz ±2dB
Total harmonic distortion ...................... 0.02% or less (1kHz)
Signal-to-noise ratio (S/N) ....................87dB or more (IHF-A)
Line output (RCA) ............Maximum output level +6 dBV (2.0 V)
(load impedance of 50kΩ or more)
*DRM (Digital Rights Management) is not supported.
Cassette tape player
Tra ck system .............................4-track, 2-channel stereo
Heads .............................. Record/playback × 1, erase × 1
Type of tape ..................................C-10 to C-90 cassette
Tape speed ............................................4.76 cm/sec.
Motor ......................................... DC servo motor × 1
Pitch control. . . . . . . . . . . . . . . . . . . . . . . . . . . . . . . . . . ±10% (playback only)
Wow and flutter ....................................0.25% (W. RMS)
Frequency response (overall) ......50 Hz – 12.5kHz ± 4dB, chrome
50 Hz – 12.5kHz ± 4dB, normal
Signal-to-noise ratio (overall)
59dB (Maximum recording level input, A-weighted)
Rewinding time ....................... Approx. 120sec. (with C-60)
Line input (RCA) ..............Nominal input level −4.5 dBu (0.46 V)
(input impedance of 50kΩ or more)
Line output (RCA) ..........Nominal output level −4.5 dBu (0.46 V)
(load impedance of 50kΩ or more)
USB
Interface .......................................USB 1.1 FULL SPEED
(12 Mbps)
Connector ............................................. USB A port
Playback
Frequency response ....................20Hz – 20,000Hz (±2dB)
Signal-to-noise ratio ...............................85dB or more
Format ......................................................MP3
Sampling frequency ..............................16 kHz – 48 kHz
Playback bit rate ...............................8 kbps – 320kbps
Line output (RCA) ...........Maximum output level +6 dBV (2.0 V)
(load impedance of 50kΩ or more)
Recording
Frequency response
CDwUSB ................................20Hz – 15kHz (±3dB)
LINEwUSB ..............................100Hz – 15kHz (±3dB)
Signal-to-noise ratio ...............................85dB or more
Format ......................................................MP3
Sampling frequency .....................................44.1 k Hz
Record bit rate .......................................... 128kbps
Line input (RCA) ............Nominal input level −4.5 dBu(0.46 V)
(input impedance of 50 kΩ or more)
Headphones
Headphone output connector ................Standard stereo jack
Rated output ......................................10 mW + 10 mW
(CD monitoring, THD+N 0.1%, 32 Ω)
General
Power requirement
Model for Europe .................................AC 230V, 50Hz
Model for USA/Canada ...........................AC 120 V, 60 Hz
Power consumption .......................................... 13W
Dimensions (W × H × D)
483 × 138.5 × 290mm (19" × 5.5” × 11.4 ” )
(including protrusions)
Weight (Net) ........................................6.0kg (13.2lb)
Operating temperature ..............................+5°C to +35°C
40
Included Accessories
Remote control (RC-1329) × 1
Batteries (AAA) for remote control × 2
Rackmount screw kit × 1
Owner’s manual (this document, including warranty) × 1
Page 41

Dimensional drawings
o Design and specifications are subject to change without notice.
o Weight and dimensions are approximate.
o Illustrations may differ slightly from production models.
41
Page 42

42
Page 43

WARRANTY
< In the United States >
This warranty gives you specific legal rights and you may also have
other rights which vary from state to state. This warranty is only valid
within the country the unit was originally purchased.
WHAT IS AND IS NOT COVERED
Except as specied below, this warranty covers all defects in materials and
workmanship in this product. The following are not covered by the warranty:
1. Damage to or deterioration of the external cabinet.
2. Damages resulting from accident, misuse, abuse or neglect.
3. Damage resulting from failure to perform basic daily
maintenance and/or calibration or otherwise resulting from
failure to follow instructions contained in your owner’s
manual.
4. Damage occurring during shipment of the product. (Claims
must be presented to the carrier)
5. Damage resulting from repair or attempted repair by
anyone other than TEAC or an authorized TASCAM service
station.
6. Damage resulting from causes other than product defects,
including lack of technical skill, competence, or experience
of the user.
7. D amage to any unit which has been altered or on which the
serial number has been defaced, modied or is missing.
WHO MAY ENFORCE THE WARRANTY
This warranty may be enforced only by the original purchaser. This warranty
is not valid if the product was purchased through an unauthorized dealer.
LENGTH OF WARRANTY
All parts except heads and disk drives are warranted for one (1) year
from the date of original purchase. Heads and disk drives are warranted
to ninety (90) days from date of original purchase. Labor is warranted for
ninety (90) days from date of original purchase.
WHAT WE WILL PAY FOR
We will pay all labor and material expenses for items covered by the
warranty. Payment of shipping charges is discussed in the next section
of this warranty.
HOW YOU CAN GET WARRANTY SERVICE
Your unit must be serviced by an authorized TASCAM service station in
the United States. (This warranty is not enforceable outside the U.S.) If
you are unable to locate an authorized TASCAM service station in your
area, please contact us. We either will refer you to an authorized service
station or instruct you to return the unit to the factory. Whenever
warranty service is required, you must present a copy of the original
dated sales receipt from an Authorized TASCAM Dealer.
You must pay any shipping charges if it is necessary to ship the product to
service. However, if the necessary repairs are covered by the warranty, we will
pay return surface shipping charges to any destination within the United States.
LIMITATION OF IMPLIED WARRANTIES
Any implied warranties, INCLUDING WARRANTIES OF MERCHANTABILITY
AND FITNESS FOR A PARTICULAR PURPOSE, are limited in duration to the
length of this warranty.
EXCLUSION OF DAMAGES
TEAC’s liability for any defective product is limited to repair or
replacement of the product, at TEAC’s option. TEAC shall not be liable for:
1.
Damages based upon inconvenience, loss of use of the product,
loss of time interrupted operation or commercial loss; or
2. Any other damages, whether incidental, consequential or
otherwise.
Some states do not allow limitations on how long an implied warranty lasts
and/or do not allow the exclusion or limitation of incidental or consequential
damages, so the above limitations and exclusions may not apply to you.
To locate an Authorized Service Center in Your Area
CALL 1-800-447-8322
< Europe >
This product is subject to the legal warranty regulations of the country
of purchase. In case of a defect or a problem, please contact the dealer
where you bought the product.
Ce produit est sujet aux réglementations concernant la garantie
légale dans le pays d’achat. En cas de défaut ou de problème, veuillez
contacter le revendeur chez qui vous avez acheté le produit.
Dieses Gerät unterliegt den gesetzlichen Gewährleistungsbestimmungen
des Landes, in dem es erworben wurde. Bitte wenden Sie sich im
Gewährleistungsfall an den Händler, bei dem sie das Gerät erworben
haben.
Questo apparecchio è conforme alle norme sulla garanzia vigenti nel
rispettivo Paese in cui esso è stato acquistato. Si prega di rivolgersi al
proprio commerciante, presso il quale è stato acquistato l’apparecchio,
nel caso in cui si voglia richiedere una prestazione in garanzia.
Las condiciones de garantía de este aparato están sujetas a las disposiciones
legales sobre garantía del país en el que ha sido adquirido. En caso de
garantía, debe dirigirse al establecimiento donde adquirió el aparato.
< In other countries/areas >
This warranty gives you specific legal rights, and you may also have
other rights that vary by country, state or province.
If you have a warranty claim or request, please contact the dealer where
you bought the product.
该保证书赋予了顾客特定的合法权利,并且因国家,
州或省等地域的不同,顾客可能拥有其他权利。如需
申请或要求保修,请与购买本产品的销售店进行联系。
If you require repair services for your
contact the dealer where the product was purchased from or the
TASCAM
Distributor in your country. A list of
can be found on our website at:
TASCAM
equipment, please
http://teac-global.com/
TASCAM
Distributors
✂
Page 44

TEAC CORPORATION
Phone: +81-42-356-9143
1-47 Ochiai, Tama-shi, Tokyo 206-8530 Japan
https://tascam.jp/jp/
TEAC AMERICA, INC. http://tascam.com/
Phone: +1-323-726-0303
1834 Gage Road, Montebello, California 90640 USA
TEAC MEXICO, S.A. de C.V. http://teacmexico.net/
Phone: +52-55-5010-6000
Río Churubusco 364, Colonia Del Carmen, Delegación Coyoacán, CP 04100, México DF, México
TEAC UK Ltd. http://tascam.eu/
Phone: +44-8451-302511
2 Huxley Road, Surrey Research Park, Guildford, GU2 7RE, United Kingdom
TEAC EUROPE GmbH http://tascam.eu/
Phone: +49-611-71580
Bahnstrasse 12, 65205 Wiesbaden-Erbenheim, Germany
TEAC SALES & TRADING(SHENZHEN) CO., LTD http://tascam.cn/
Phone: +86-755-88311561~2
Room 817, Block A, Hailrun Complex, 6021 Shennan Blvd., Futian District, Shenzhen 518040, China
Printed in China
✂
WARRANTY
Model/Modèle/Modell
Modello/Modelo/型号
CD-A580
Serial No./No de Série/Seriennummer
Numero di serie/Número de serie/序列号
Date of purchase/Date de l’achat/Datum des Kaufs
Data dell’acquisto/Fecha de compra/购买日期
http://teac-global.com/
Owner’s name/Nom du possesseur/Name des Eigentümers
Nome del proprietario/Nombre del propietario/顾客姓名
Address/Adresse/Adresse
Indirizzo/Dirección/顾客地址
Dealer’s name/Nom du détaillant/Name des Händlers
Nome del commerciante/Nombre del establecimiento/销售店名
Dealer’s address/Adresse du détaillant/Adresse des Händlers
Indirizzo del commerciante/Dirección del establecimiento/销售店地
址
 Loading...