

Page 1
D01057520B
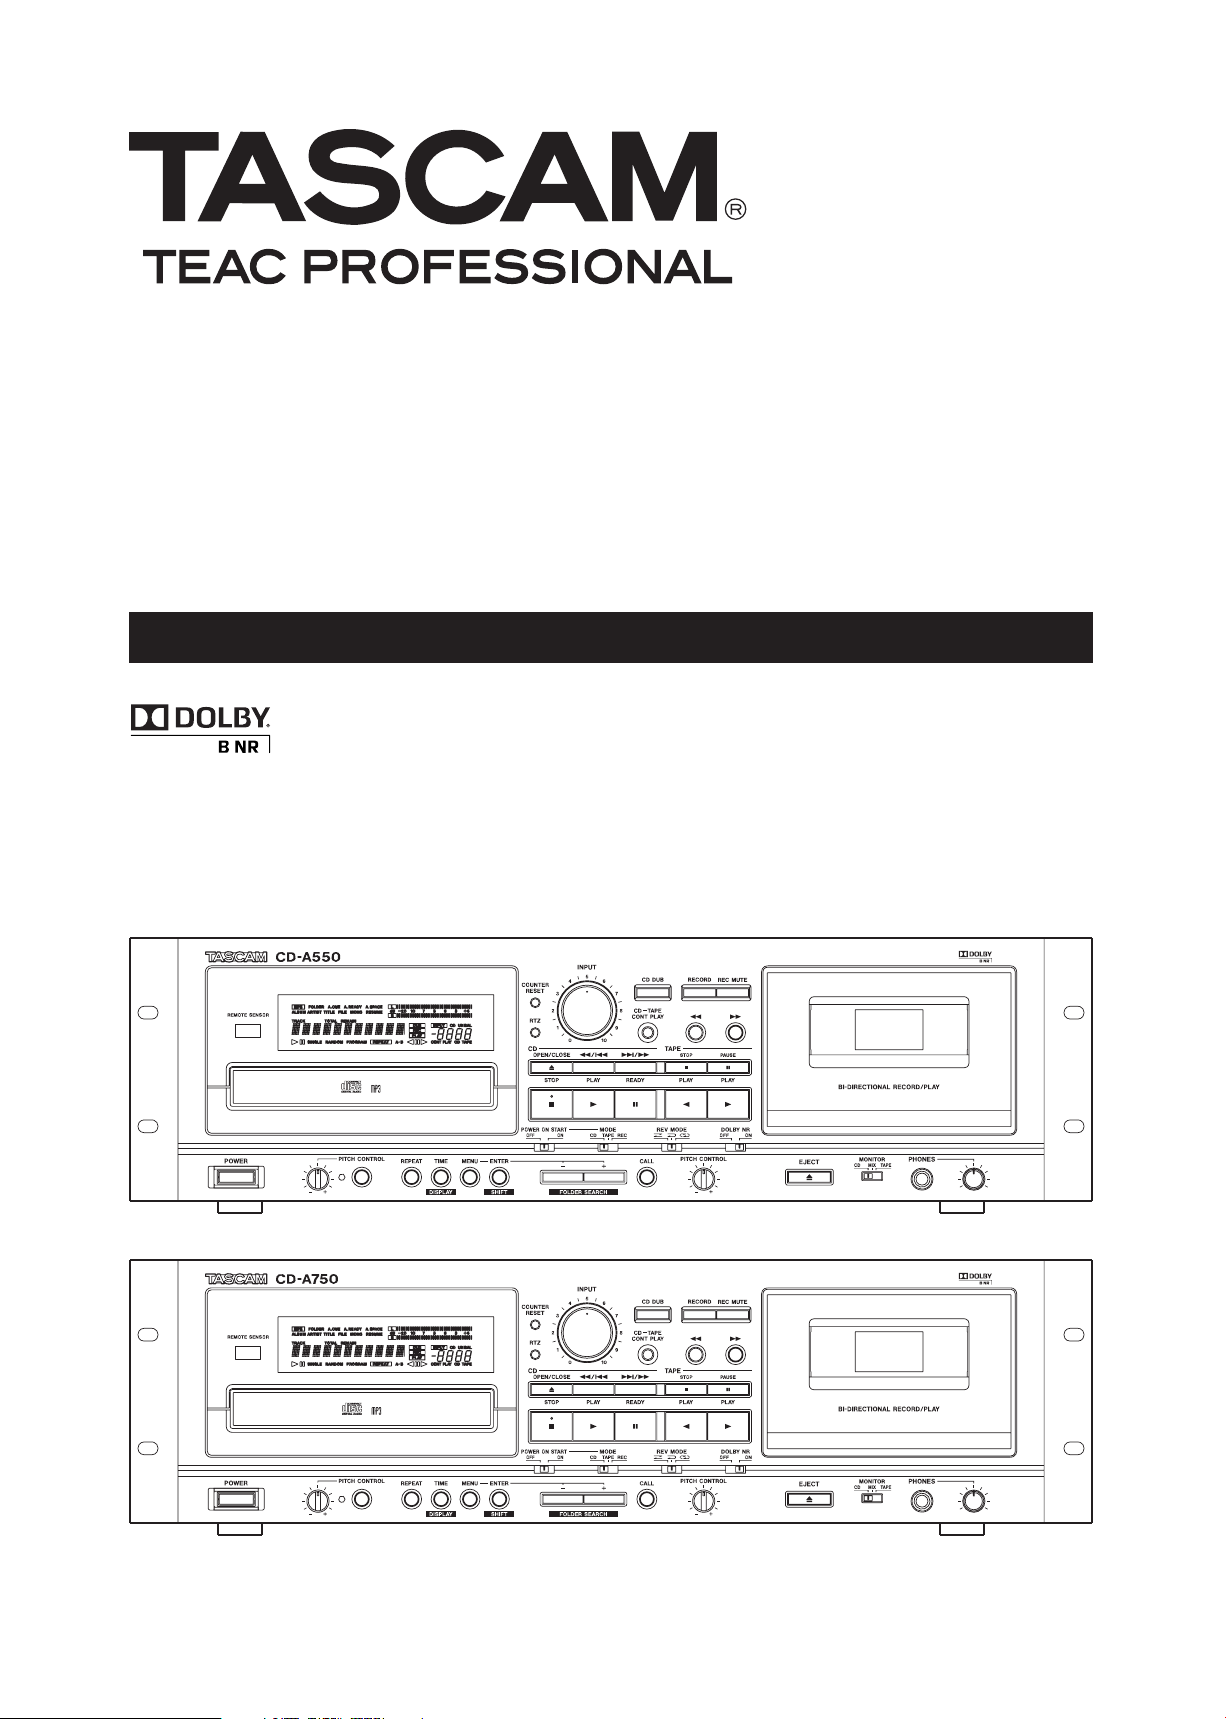
CD-A550/CD-A750
Compact Disc Player/Reverse Cassette Deck
OWNER'S MANUAL
Page 2

2 TASCAM CD-A550/CD-A750
IMPORTANT SAFETY PRECAUTIONS
CAUTION: TO REDUCE THE RISK OF ELECTRIC SHOCK, DO NOT REMOVE
COVER (OR BACK). NO USER-SERVICEABLE PARTS INSIDE. REFER SERVICING
TO QUALIFIED SERVICE PERSONNEL.
The lightning flash with arrowhead symbol, within equilateral triangle, is intended
to alert the user to the presence of uninsulated “dangerous voltage” within the
product’s enclosure that may be of sufficient magnitude to constitute a risk of
electric shock to persons.
The exclamation point within an equilateral triangle is intended to alert the user to
the presence of important operating and maintenance (servicing) instructions in
the literature accompanying the appliance.
This appliance has a serial number located on the rear panel.
Plea se rec or d the model n um ber a nd se rial nu mber and
retain them for your records.
Model number
Serial number
WARNING: TO PREVENT FIRE OR SHOCK
HAZARD, DO NOT EXPOSE THIS
APPLIANCE TO RAIN OR MOISTURE.
For U.S.A.
TO THE USER
This e q u ipment h a s b e e n te sted and foun d t o
comply with the limits for a Class A digital device,
pursuant to Par t 15 of the FCC Rules. These limits
are d esig ned to p r ovi de reas o nabl e prot ecti o n
against harmful interference when the equipment
is o p erat ed in a com m erci al env iron m ent. T his
equipment generates, uses, and can radiate radio
frequency energy and, if not installed and used in
accordance with the instruction manual, may cause
harmful interference to radio communications.
Operation of this equipment in a residential area is
likely to cause harmful interference in which case the
user will be required to correct the interference at his
own expense.
CAUTION
Changes or modifi cations to this eq uipme nt not
expressly approved by TE AC CO RP OR ATION fo r
compliance could void the user's authority to operate
this equipment.
CE Marking Information
a) Applicable electromagnetic environment: E4
For the customers in Europe
WARNING
This is a Class A product. In a domestic environment,
this product may cause radio interference in which
ca se the us er may be require d to t ake ade quate
measures.
Pour les utilisateurs en Europe
AVERTISSEMENT
Il s'a g i t d'un p r o d u i t de C l a s s e A. D a n s u n
env i r o nnement domest i q u e, ce t ap p a reil peut
pr ovoquer des interfé rences rad io, dans ce cas
l'utilisateur peut être amené à prendre des mesures
appropriées.
Für Kunden in Europa
WARNUNG
Dies ist eine Einrichtung, welche die Funk-Entstörung
nach Klasse A besit zt. Diese Einrichtung kann im
Wo h nbereic h F unkst ö r ungen versu r s a c hen; in
dies em Fa ll kann vom Be tr ieber verlang we rden,
angemessene Maßnahmen durchzuführen und dafür
aufzukommen.
b) Peak inrush current: 2.5 A
In North America use only on 120V supply.
Page 3

TASCAM CD-A550/CD-A750 3
IMPORTANT SAFETY INSTRUCTIONS
1 Read these instructions.
2 Keep these instructions.
3 Heed all warnings.
4 Follow all instructions.
5 Do not use this apparatus near water.
6 Clean only with dry cloth.
7 Do not block any ventilation openings. Install in
accordance with the manufacturer's instructions.
8 Do not in s t a l l near an y heat so u r c e s such
as radiators, hea t registers , stoves, or other
apparatus (including amplifiers ) that produce
heat.
9 Do not defeat the safety purpose of the polarized
or grounding-type plug. A polarized plug has
two blades wi th one wide r than the other. A
grou n ding t y p e plug has two blades and a
third grounding prong. The wide blade or the
third prong are provided for your safety. If the
pro vided plug does not f it into yo u r o u tlet,
consult an electrician for replacement of the
obsolete outlet.
10 Protect the power cord from being walked on
or pinched particularly at plugs, convenience
receptacles, and the point where they exit from
the apparatus.
Do not expose this apparatus to drips or splashes.
•
Do not place any objects filled with liquids, such
•
as vases, on the apparatus.
Do not install this apparatus in a confined space
•
such as a book case or similar unit.
The appa r atus draw s nomin a l non-op e r atin g
•
power from th e AC outle t with its P OWER or
STANDBY/ON switch not in the ON position.
The apparatus should be located close enough
•
to the AC outlet so that you can easily grasp the
power cord plug at any time.
The mains plug is used as the disconnect device,
•
the di s c o nne c t de v i c e shall remai n r e a dily
operable.
An appar atus with C lass I constr uctio n s hall
•
be connected to an AC outlet with a protective
grounding connection.
Ba tter ies (bat ter y pack or bat teri es ins talled)
•
shall not be exposed to excessive heat such as
sunshine, fire or the like.
CAUTION: Danger of explosion if battery is incor-
•
rectly replaced. Replace only with the same or
equivalent type.
Excessive sound pressure from earphones and
•
headphones can cause hearing loss.
11 Only use attachments/accessories specified by
the manufacturer.
12 Use only with the cart, stand, tripod, bracket, or
table specified by the manufacturer, or sold with
the apparatus. When a cart is used, use caution
when moving the cart/apparatus combination to
avoid injury from tip-over.
13 Unplug this apparatus during lightning storms or
when unused for long periods of time.
14 Refer all servicing to qualified service personnel.
Servicing is required when the apparatus has
been damaged in any way, such as power-supply
cord or plug is damaged, liquid has been spilled
or objects have fallen into the apparatus, the
apparatus has been exposed to rain or moisture,
does not operate normally, or has been dropped.
Page 4
4 TASCAM CD-A550/CD-A750
IMPORTANT SAFETY PRECAUTIONS
CAUTIONS ABOUT BATTERIES
ª
This product use s bat terie s. Misuse of batteries
could cause a leak, rupture or other trouble. Always
abide by the following precautions when using batteries.
Never recharge non-rechargeable batteries. The
•
batteries could rupture or leak, causing fire or
injury.
When installing batte rie s, pay attention to the
•
polarity indications (plus/minus (+/–) orientation),
and install them correctly in the battery compartment as indicated. Putting them in backward could
make the batteries rupture or leak, causing fire,
injury or stains around them.
When you store or dispose batteries, isolate their
•
terminals with insulation tape or something like that
to prevent them from contacting other batteries or
metallic objects.
When throwing used batteries away, follow the
•
disposal instructions indicated on the batteries
and the local disposal laws.
Do not use batteries other than those specified.
•
Do not mix and use new and old batteries or differ-
ent types of batteries together. The batteries could
rupture or leak, causing fire, injury or stains around
them.
If the battery fluid leaks, wipe away any fluid on
•
the battery case before inserting new batteries. If
the battery fluid gets in an eye, it could cause loss
of eyesight. If fluid does enter an eye, wash it out
thoroughly with clean water without rubbing the
eye and then consult a doctor immediately. If the
fluid gets on a person’s body or clothing, it could
cause skin injuries or burns. If this should happen,
wash it off with clean water and then consult a
doctor immediately.
The unit power should be off when you install and
•
replace batteries.
Remove the batteries if you do not plan to use
•
the unit for a long time. Batteries could rupture or
leak, causing fire, injury or stains around them.
If the battery fluid leaks, wipe away any fluid on
the batter y compar tment before inser ting new
batteries.
Do not disassemble a battery. The acid inside the
•
battery could harm skin or clothing.
Do not carry or store batteries together with small
•
metal objects. The batteries could short, causing
leak, rupture or other trouble.
Do not heat or disassemble batteries. Do not put
•
them in fire or water. Batteries could rupture or
leak, causing fire, injury or stains around them.
Page 5

TASCAM CD-A550/CD-A750 5
IMPORTANT SAFETY PRECAUTIONS
This product has been designed and manufactured
according to FDA regulations “title 21, CFR, chapter
1, subchapter J, based on the Radiation Control for
Health and Safety Act of 1968”, and is classified as
a class 1 laser product. There is no hazardous invisible laser radiation during operation because invisible
laser radiation emitted inside of this product is completely confined in the protective housings.
The label required in this regulation is shown at .
CD-A550
Optical pickup
Type : SF-P101VF
Manufacturer : SANYO Electric Co., Ltd.
Laser output : Less than 0.25 mW on the objective lens
Wavelength : 760 to 820 nm
Rack-mounting the unit
If you are mounting the unit in a rack, leave 1U of
space above it and 4 inch (10cm) or more of space at
the rear.
Use the rack-mounting kit to mount the unit in a standard 19-inch equipment rack, as shown in this section. Remove the feet of the unit before mounting.
CD-A750
CAUTION:
DO NOT REMOVE THE PROTECTIVE HOUSING
•
USING A SCREWDRIVER.
USE OF C ONTROLS OR A D JUSTME N TS OR
•
PERFORMANCE OF PROCEDURES OTHER THAN
THOS E SPECIFI ED HEREI N M AY RES U LT IN
HAZARDOUS RADIATION EXPOSURE.
IF THI S PR O D U C T D E V E L O P S TRO U B L E ,
•
CONTACT YOUR NEAREST QUALIFIED SERVICE
PERSONNEL, AND DO NOT USE THE PRODUCT
IN ITS DAMAGED STATE.
Page 6

6 TASCAM CD-A550/CD-A750
Contents
1 – Introduction ..........................................8
Main Features ................................................. 8
Items included with this product ................... 8
About this manual .......................................... 8
About trademarks .......................................... 9
Precautions for placement ............................. 9
Beware of condensation ............................... 9
Cleaning the unit ............................................ 9
Cleaning the cassette recorder head
section ........................................................ 9
About compact discs (CDs) ............................ 9
Precautions for CD use ............................ 9
About cassette tapes .................................... 10
Precautions for cassette use .................... 10
Dolby NR .................................................. 10
2 – Names and Functions of Parts ........... 11
Front panel .................................................... 11
Rear panel ..................................................... 13
Wireless remote control (RC-A550) ............ 14
Display ........................................................... 15
3 – Menu ................................................... 17
Menu structure ............................................ 17
Using the menu ............................................ 17
4 – Preparations........................................19
Making connections ..................................... 19
Setting the common output signal ............. 20
Preparing the remote control ...................... 20
Installing the batteries ........................... 20
When to change the batteries ............... 20
Precautions for the use of batteries ....... 20
Considerations for the use of
the remote control .................................. 21
Adjust the display brightness (DIMMER) ... 21
5 – Playing Back CDs ................................ 22
Discs that can be played .............................. 22
Data CD folders and tracks .......................... 22
Loading a CD ................................................. 22
Tray lock function ........................................ 23
CD playback .................................................. 23
Selecting a track ........................................... 24
Skipping to the next or previous track .. 24
Selecting by track number ...................... 24
Selecting a folder (data CDs only) ......... 24
Search forward and backward .................... 25
Folder playback (data CDs only) ................. 25
Setting the folder playback mode
with the remote control ......................... 25
Setting the folder playback mode
from the main unit ................................. 25
Playback modes ............................................ 26
Selecting the playback mode .................. 26
Programmed playback ................................. 27
Setting the program ................................ 27
Clearing the entire program ................... 28
Checking the program ............................. 28
Editing the program ................................ 28
Playback time display mode ........................ 29
Text information display mode ................... 29
Repeat playback ........................................... 30
Ordinary repeat playback ....................... 30
A–B repeat playback ............................... 30
Pitch control ................................................. 31
Auto cue function (audio CDs only) ........... 31
Turning auto cue ON and OFF using the
remote control A.CUE key ....................... 32
Auto ready function .................................... 32
Turning the auto ready function ON and
OFF from the main unit .......................... 32
Auto space function .................................... 32
Turning the auto space function ON and
OFF from the main unit .......................... 33
Incremental play .......................................... 33
Call function ................................................. 33
Resume playback ......................................... 34
EOM function ............................................... 34
How to use the tally signal
(CD-A750 only) ........................................ 34
6 – Playing Back Cassette Tapes .............. 35
Preparation for tape playback .................... 35
Selecting the reverse mode .................... 35
Turning Dolby NR ON and OFF during
playback ................................................... 35
Playing a tape ............................................... 35
Tape counter ................................................ 36
RTZ ................................................................. 37
Pitch control ................................................. 37
Page 7

TASCAM CD-A550/CD-A750 7
Contents
7 – Recording Cassette Tapes ..................38
Preparing to record ...................................... 38
Selecting the reverse mode ..................... 38
Turning Dolby NR ON and OFF during
recording .................................................. 38
Selecting the recording source ............... 38
Recording ...................................................... 39
Recording mute function ....................... 39
Dubbing a CD to a tape ................................ 39
Basic dubbing (recording to the A side
of a tape from its beginning) ................. 39
Adjusting the record level when
dubbing .................................................... 40
Using the TAPE EDIT function ................. 40
Recording from the middle of a tape .... 41
8 – Other Functions ..................................42
Continuous playback of both the CD
and the tape ................................................. 42
Power-on start ............................................. 43
Restoring default settings ............................ 43
Mono playback ............................................ 44
Viewing information about this unit ......... 44
Checking versions .................................... 44
Checking the motor operation time ....... 44
12 – Specifications .................................... 49
Ratings ........................................................... 49
CD player .................................................. 49
Cassette tape ........................................... 49
Analog audio ............................................... 49
CD player section .................................... 49
Cassette tape section .............................. 50
Headphones section ............................... 50
Digital audio ................................................. 50
CD player section .................................... 50
Control I/O (CD-A750 only) ......................... 50
General ......................................................... 50
Dimensional drawing.................................... 51
9 – Using the control I/O (CD-A750 only) 45
Using the RS-232C connector ....................... 45
Menu items related to the RS-232C ....... 45
Using the parallel connector .................. 45
10 – Message list ...................................... 46
Operation messages ..................................... 46
Warning messages ....................................... 46
Error messages ............................................. 47
11 – Troubleshooting ...............................48
Page 8
8 TASCAM CD-A550/CD-A750
1 – Introduction
Thank you very much for purchasing a TASCAM
CD-A550/750 Compact Disc Player/Reverse Cassette Deck.
Before using your unit, please read this manual carefully so
that you will understand the correct operating procedures
and be able to use all its functions fully. We hope that you
will enjoy using this product for many years to come.
Please keep this manual for future reference. You can also
download a digital copy from our website (http://www.
tascam.com/).
Main Features
CD player and cassette recorder can be operated com-
•
pletely independently
Includes CD-only output jacks and common output
•
jacks that can output the tape signal, the mixed CD and
tape signals or prioritize the tape signal
Unbalanced and balanced analog inputs and outputs
•
(CD-A550 has only unbalanced)
Continuous CD and cassette tape playback possible
•
When dubbing from a CD to a cassette tape, automatic
•
division of tracks to the tape A and B sides is possible
(TAPE EDIT function)
CD or cassette tape power-on playback and cassette tape
•
power-on record are possible
Monitoring with headphones possible
•
Wireless remote control with numerical keys included
•
Parallel and serial control ports allow external control
•
and tally output (CD-A750 only)
Four playback modes (continuous, single, random, pro-
•
gram)
Repeat playback function
•
Pitch control function (±12.5%)
•
Tray opening prevention during playback
•
Cassette tape functions
Auto reverse recording and playback possible
•
Dolby B noise reduction (for recording and playback)
•
RTZ (return-to-zero) function
•
Playback pitch control function (±10%)
•
Items included with this product
The following items are included with this product. Unpack
the unit carefully to avoid damaging it. Please save the box
and packaging materials for transportation of the unit in
the future. If any of the accessories are missing or appear
to have been damaged during transportation, please contact
TASCAM.
Main unit• .........................................................................1
Wireless remote control (RC-A550)• ...............................1
AA batteries • ...................................................................2
Screw kit for rack-mounting• ...........................................1
Warrant y • .........................................................................1
Owner’s Manual (this document)• ....................................1
The batteries are not supplied for Taiwan.
3U rack-mount size
•
CD functions
CD-R and CD-RW disc playback possible
•
CD text display possible
•
MP3 and WAV file playback possible
•
Resume playback function allows playback to be contin-
•
ued from the last played position
Auto cue function finds the position of the first sound in
•
a track (audio CDs only)
Auto ready function can pause playback at the begin-
•
ning of the next track after playing a track
When playback is stopped in the middle of a track, the
•
incremental play function automatically pauses at the
beginning of the next track
Auto space function can automatically create space
•
between playback tracks
Call (back cue) function can return to the playback
•
starting point
EOM function gives advance notice before a track ends
•
About this manual
The following conventions are used in this manual.
Keys, jacks and other parts on this unit and external
•
devices are indicated with a bold typeface like this:
MENU
When the alphanumeric portion of the display shows
•
a message, this is shown in the following typeface:
RANDOM
If a preset indicator in the display (i.e. one which cannot
•
change) is shown, this is shown as follows: REMAIN
The state when the main display area shows times and
•
titles is called the “standard display.”
Discs in CD-DA format are sometimes called “audio
•
CD s.”
CDs with MP3 and WAV audio files on them are some-
•
times called “data CDs.”
Page 9
TASCAM CD-A550/CD-A750 9
Additional information is presented as necessary in sec-
CAUTION
CAUTION
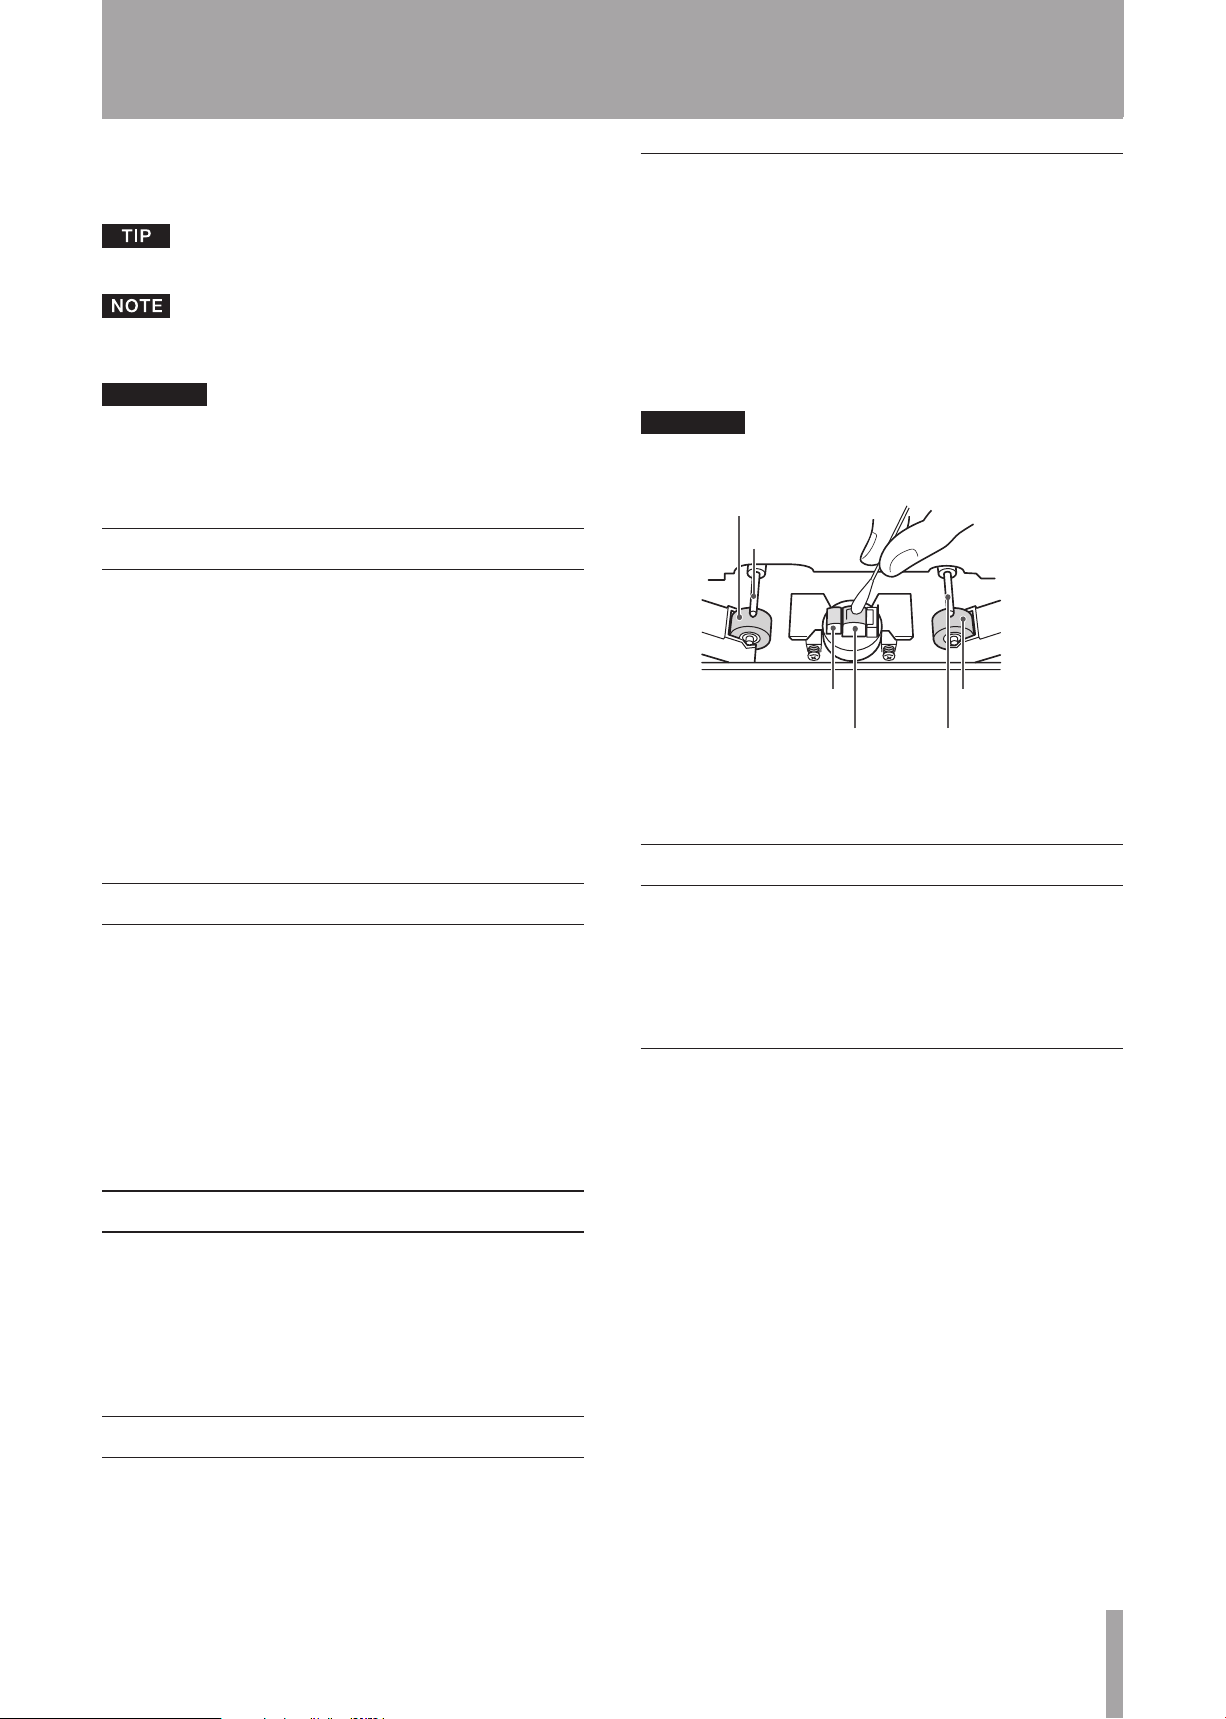
Pinch Roller
Erase Head
Capstan
Pinch Roller
Capstan
Record/Play Head
•
tions with “TIP,” “NOTE” and “CAUTION” labels.
Tips suggest ways that the unit can be used.
Notes provide additional explanation and describe special cases, for example.
Cautions are instructions that must be followed to avoid
possible injury, equipment malfunction or damage to
CDs or cassette tapes.
About trademarks
TASCAM is a trademark of TEAC Corporation.
•
Manufactured under license from Dolby Laboratories.
•
Dolby and the double D symbol are trademarks of Dolby
Laboratories.
1 – Introduction
Cleaning the cassette recorder head section
If the cassette recorder head becomes dirty, the quality of
playback and recording could be degraded and the sound
could even be interrupted.
Moreover, if the tape transport becomes dirty, the tape
could become entangled, for example. Clean the cassette
recorder’s head, pinch roller and capstan using a cotton
swab moistened with a commercially available cleaning
fluid after about every 10 hours of use.
Do not play or record a tape until the cleaning fluid has
dried.
MPEG Layer-3 audio coding technology is licensed
•
from Fraunhofer IIS and Thomson.
Other company names, product names and logos in this
•
document are the trademarks or registered trademarks
of their respective owners.
Precautions for placement
The guaranteed operating temperature of this unit is
•
between 5º and 40º C.
Install the unit in a level position.
•
To improve dissipation of heat, do not place other items
•
on top of this unit.
Do not place this unit on top of a powered amplifier or
•
other equipment that generates much heat.
Beware of condensation
Condensation could occur if the unit is moved from a cold
place to a warm place, used in a room that has just been
heated or subject to other sudden temperature change. To
prevent this, let the unit sit for one or two hours before
turning the power on in such situations.
About compact discs (CDs)
In addition to commercially-available music CDs, this unit
can play CD-R and CD-RW discs that have been recorded
in audio CD (CD-DA) format, as well as CD-R and CD-RW
discs that have MP3 audio and WAV audio files recorded on
them. This unit can also play 8-cm CDs.
Precautions for CD use
Always place compact discs in the tray with their labels
•
facing upward.
To remove a disc from its case, press down on the center
•
of the disc holder and lift the disc out by its outer edge.
Do not touch the signal side (the unlabeled side).
•
Fingerprints, oils and other substances can cause errors
during playback.
If there are fingerprints or dust on the signal side, use
•
a soft cloth to wipe it gently from the center outwards.
Dirt on discs can lower the sound quality, so clean them
and always store them in a clean state.
Cleaning the unit
To clean the unit, wipe it gently with a soft dry cloth. Do
not use chemical cleaning cloths, benzene, paint thinner,
alcohol or other chemical agents to clean the unit as they
could damage the surface or cause fading.
Never use record cleaner, antistatic solutions, benzene,
•
thinner or other chemical substances to clean a disc.
Doing so could damage the surface and make the CD
unplayable.
Do not apply labels or other materials to discs. Do not
•
use discs that have had tape, stickers or other materials applied to their surface. Do not use discs that have
Page 10

10 TASCAM CD-A550 /CD-A750
1 – Introduction
sticky residue from stickers, etc. Such discs could
become stuck in the unit or cause it to malfunction.
Never use commercially available CD stabilizers. Their
•
use could make disc playback impossible or cause the
unit to malfunction.
Do not use cracked discs.
•
Do not use specially shaped discs, including heart-
•
shaped, business card-shaped or octagonal discs. Using
such discs could damage the unit.
With the intention of protecting copyrights, several
•
record companies sell discs with a “copy control CD”
designation. Some of these discs do not comply with CD
specifications and might not be playable in this unit.
About cassette tapes
Usable types of tapes
Recordable tapes: Type I (normal)
Type II (high position/chrome)
Playable tapes: Type I (normal)
Type II (high position/chrome)
Type IV (metal)
Write-protection tabs for preventing unintentional
recording
Cassettes have write-protection tabs to prevent the
unintentional erasure of recordings. There are tabs for
cassette sides A (1) and B (2). Use the tip of a screwdriver
or similar tool to remove these tabs to prevent future
recording. Put adhesive tape over the hole to allow
recording again.
movement or that make unusual noises during fastforwarding and rewinding should not be used.
Long-play tapes
•
Tapes that are longer than 90 minutes are very thin and
easily stretched, which can result in warbling or flutter.
Moreover, these tapes can become entangled in the
equipment, so their use should be avoided.
Precautions for cassette use
Do not open cassettes or pull out their tape.
•
Do not touch the side of the tape that has the magnetic
•
coating with bare hands.
Do not leave them in places with lots of garbage or dust.
•
Do not use or store them in hot or humid places.
•
Avoid using or storing them in places with strong mag-
•
netic fields. Doing so could cause noise or the erasure of
recorded contents.
Dolby NR
Dolby NR reduces tape hiss during recording. This unit has
Dolby B Type noise reduction.
Dolby NR affects both recording and playback, so you
•
should set NR ON or OFF, using the same setting during
playback as used during recording.
On cassettes that have been recorded with Dolby NR
•
make a note that Dolby B NR is ON.
Tape slack
Before using a cassette confirm that the tape is not slack.
Slack tape could become entangled in the capstan or other
parts. Use a pencil or the like to wind the tape until it is no
longer slack.
Automatic tape type detection holes
Cassettes have automatic tape detection holes that allow this
unit to automatically determine the type of tape inserted.
Types of cassette tapes that are not recommended
for use with this unit
Use of the following types of cassette tapes might prevent
normal operation or performance. Moreover, use of these
types of tapes should be avoided because they could become
entangled in the unit and result in unexpected malfunction.
Irregular cassette tapes
•
Cassettes that are deformed, have irregular tape
Page 11
TASCAM CD-A550/CD-A750 11
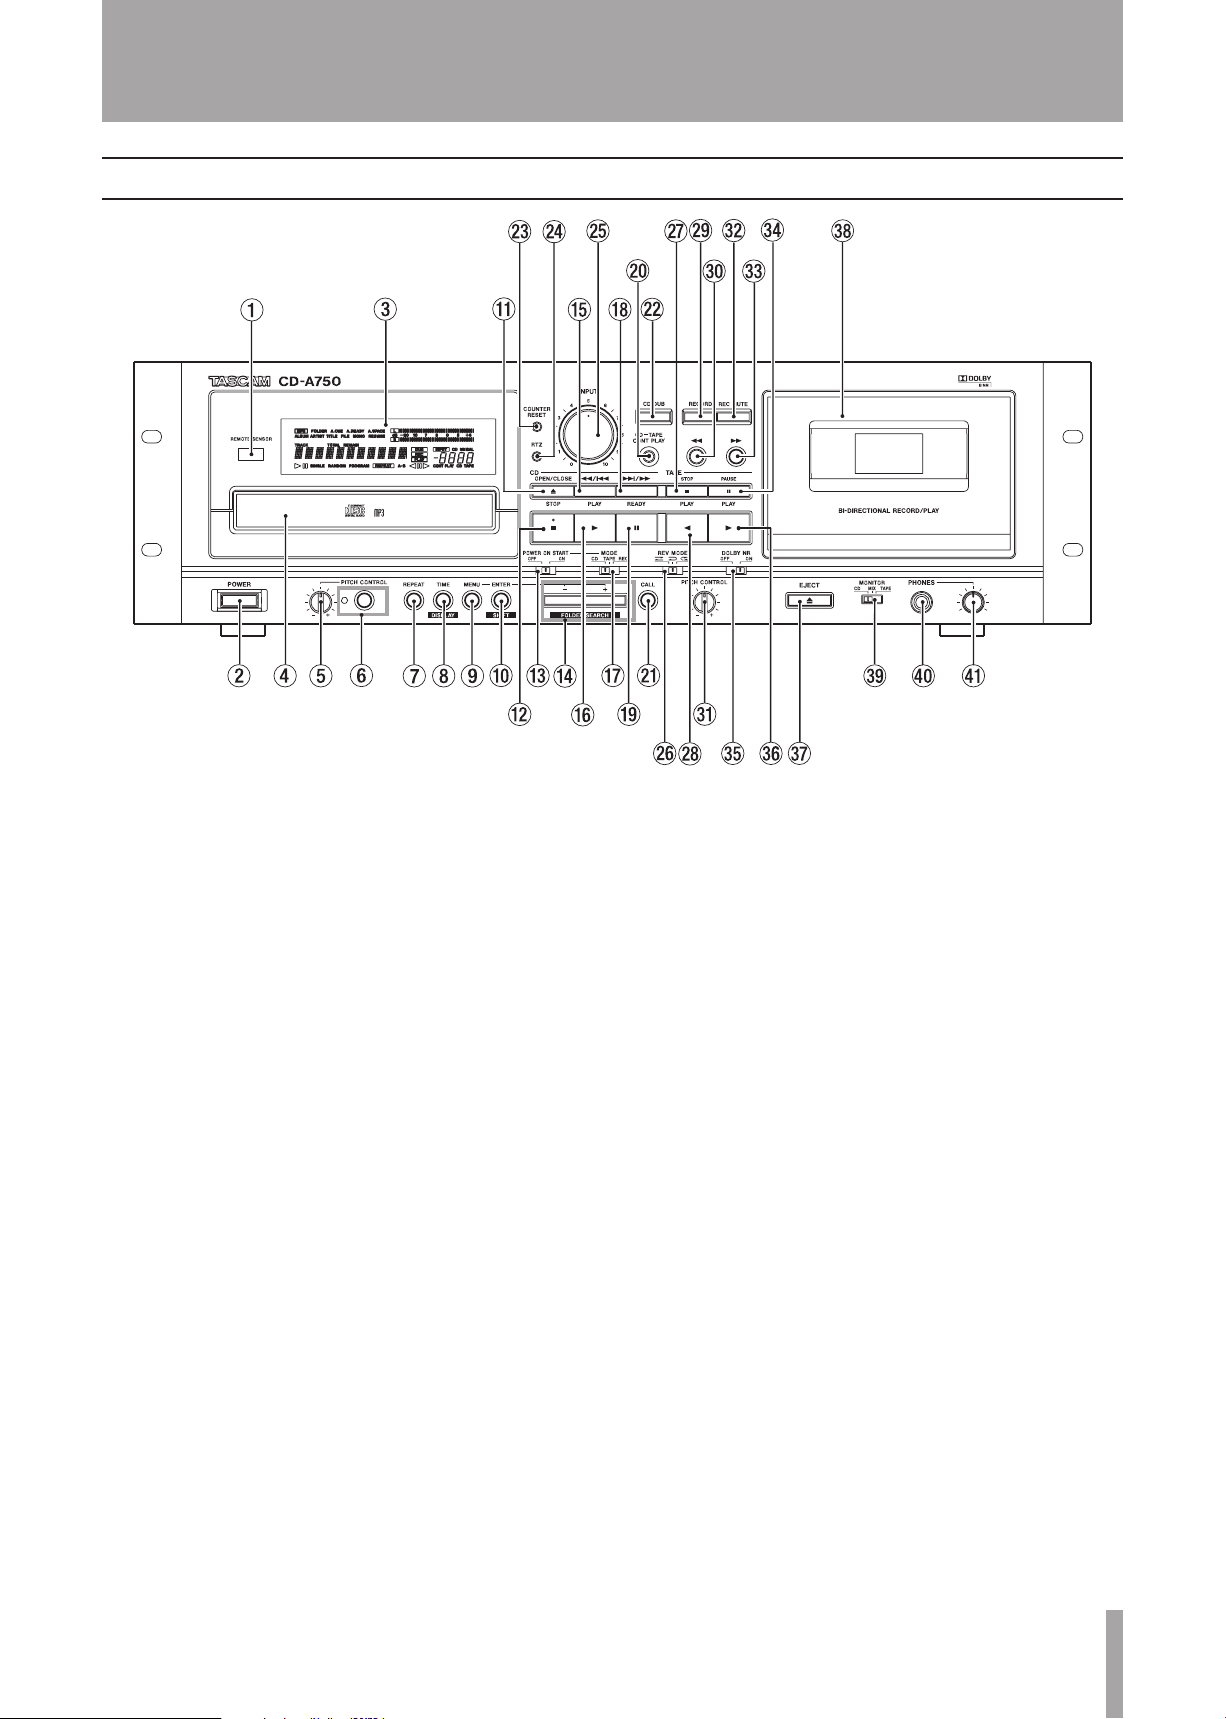
Front panel
2 – Names and Functions of Parts
Remote sensor
Signals from the included wireless remote control
(RC-A550) are received here. When using the remote
control, point it towards this sensor.
POWER button
Use to turn the unit’s power ON and OFF.
Display
Shows the transport status, currently selected input
source, record and playback signal levels, menus, etc.
CD section
Disc tray
Press the
insert and remove discs. Press the
OPEN/CLOSE
key to open the disc tray and
OPEN/CLOSE
again to close the disc tray.
PITCH CONTROL knob
Use to adjust the playback pitch of a CD. (See “Pitch
control” on page 31.)
PITCH CONTROL key/indicator
Use this key to turn the CD pitch control function ON
and OFF. (See “Pitch control” on page 31.) The indicator
lights when ON.
REPEAT key
Press to turn the repeat playback function ON and OFF.
(See “Repeat playback” on page 30.)
TIME/DISPLAY key
When the playback time is displayed, press this key
to cycle the playback time display mode through track
elapsed time, track remaining time and total remaining
time. When text information is displayed, press this key
key
to switch to playback time display. (See “Playback time
display mode” on page 29.)
When the playback time is displayed, press this key
while holding down the
SHIFT
key to switch to text
information display, which includes album name, song
name, artist name and file name.
During text information display, press this key while
holding down the
SHIFT
key to switch between text
information contents (album name, song name, artist
name and file name).
Press and hold this key during text information
display to scroll through the display items. (See “Text
information display mode” on page 29.)
MENU key
When in standard display mode, press this key to switch
to menu mode, which allows menu items to be selected.
When in menu item selection mode, press this to return
to the standard display mode. When editing a menu
item, press this key to return to menu item selection
display. (See “Menu” on page 17.)
ENTER/SHIFT key
When in menu mode, press this to make a selection
or confirm a setting. When not in menu mode, this
functions as the
OPEN/CLOSE key
SHIFT
key.
Press to open and close the disc tray.
STOP key
Press to stop CD playback.
Page 12

12 TASCAM CD-A550/CD-A750
2 – Names and Functions of Parts
POWER ON START switch
Turn the power-on start function ON and OFF. (See
“Power-on start” on page 43.)
–/+/FOLDER SEARCH keys
When in menu mode, use these to make selections and
settings.
When a data CD is loaded, use these keys while holding
down the
SHIFT
key to change the current folder. (See
“Folder playback (data CDs only)” on page 25.)
Ô/Â key
Press briefly to skip to the previous track.
Press and hold to search backwards.
PLAY key
When stopped or paused, press to start CD playback.
MODE switch
Set the power-on start mode to CD playback, cassette
tape playback or cassette tape record. (See “Power-on
start” on page 43.)
¯/ key
Press briefly to skip to the next track.
Press and hold to search forwards.
READY key
Press to pause CD playback.
CD-TAPE CONT PLAY key
Press to turn the cassette tape and CD continuous
playback mode ON and OFF. (See “Continuous
playback of both the CD and the tape” on page 42.)
CALL key
Press to pause playback and return to the point where
playback was last started from a paused state. (See “Call
function” on page 33.)
CD DUB key
Press to record (dub) the CD playback sound to a
cassette tape. (See “Dubbing a CD to a tape” on page
39.)
Cassette tape section
COUNTER RESET key
Press to reset the tape counter to “0000.”
RTZ key
Press to return the cassette tape playback position to the
counter zero point (0000).
INPUT knob
Adjusts the cassette tape record level. (See “Recording”
on page 39.)
REV MODE switch
Use to set the tape playback mode to one-way (Ä), both
directions (Ë) or continuous (ä). (See “Selecting
the reverse mode” on page 35.) When recording, the
unit records only once in both directions even if set to
continuous (ä). (See “Selecting the reverse mode” on
page 38.)
STOP key
Press to stop the cassette tape.
PLAY [Ó] key
Press to play a cassette tape in the reverse direction.
When the unit is record ready or playback is paused,
recording or playback starts.
However, if you press this key when playback is paused
in the forward direction, playback is paused in the
reverse direction.
RECORD key
Puts the cassette tape into record ready status.
Ô key
Press to rewind the cassette tape.
PITCH CONTROL knob
Use to adjust the cassette tape playback pitch (±10%).
(See “Pitch control” on page 37.)
REC MUTE key
Press during recording to put the unit into record ready
status after recording about four seconds of silence. (See
“Recording mute function” on page 39.)
key
Press to fast-forward the cassette tape.
PAUSE key
Press to pause cassette tape playback or recording.
When the unit is record ready or playback is paused,
press to start recording or playback.
DOLBY NR switch
Use to turn Dolby B noise reduction ON and OFF for
cassette tape playback and recording. (See “Turning
Dolby NR ON and OFF during playback” on page 35
and “Turning Dolby NR ON and OFF during recording”
on page 38.)
PLAY [Á] key
Press to play a cassette tape in the forward direction.
Use to start recording or playback when in record ready
mode or when playback is paused.
However, if you press this key when playback is paused
in the reverse direction, the playback is paused in the
forward direction.
EJECT button
Press to open the cassette compartment.
Cassette compartment
Press the
EJECT
button to open the cassette
compartment so that cassette tapes can be removed or
loaded. To close the cassette compartment, press its door
directly with your hand.
Monitoring section
MONITOR switch
Set the sound output from the
PHONES
jack to either
the CD sound only, the tape sound only, or a mix of the
CD and tape sounds.
Page 13
TASCAM CD-A550/CD-A750 13
2 – Names and Functions of Parts
PHONES jack
Connect stereo headphones (standard stereo phone jack).
PHONES knob
Use to adjust the volume of the sound output from the
PHONES
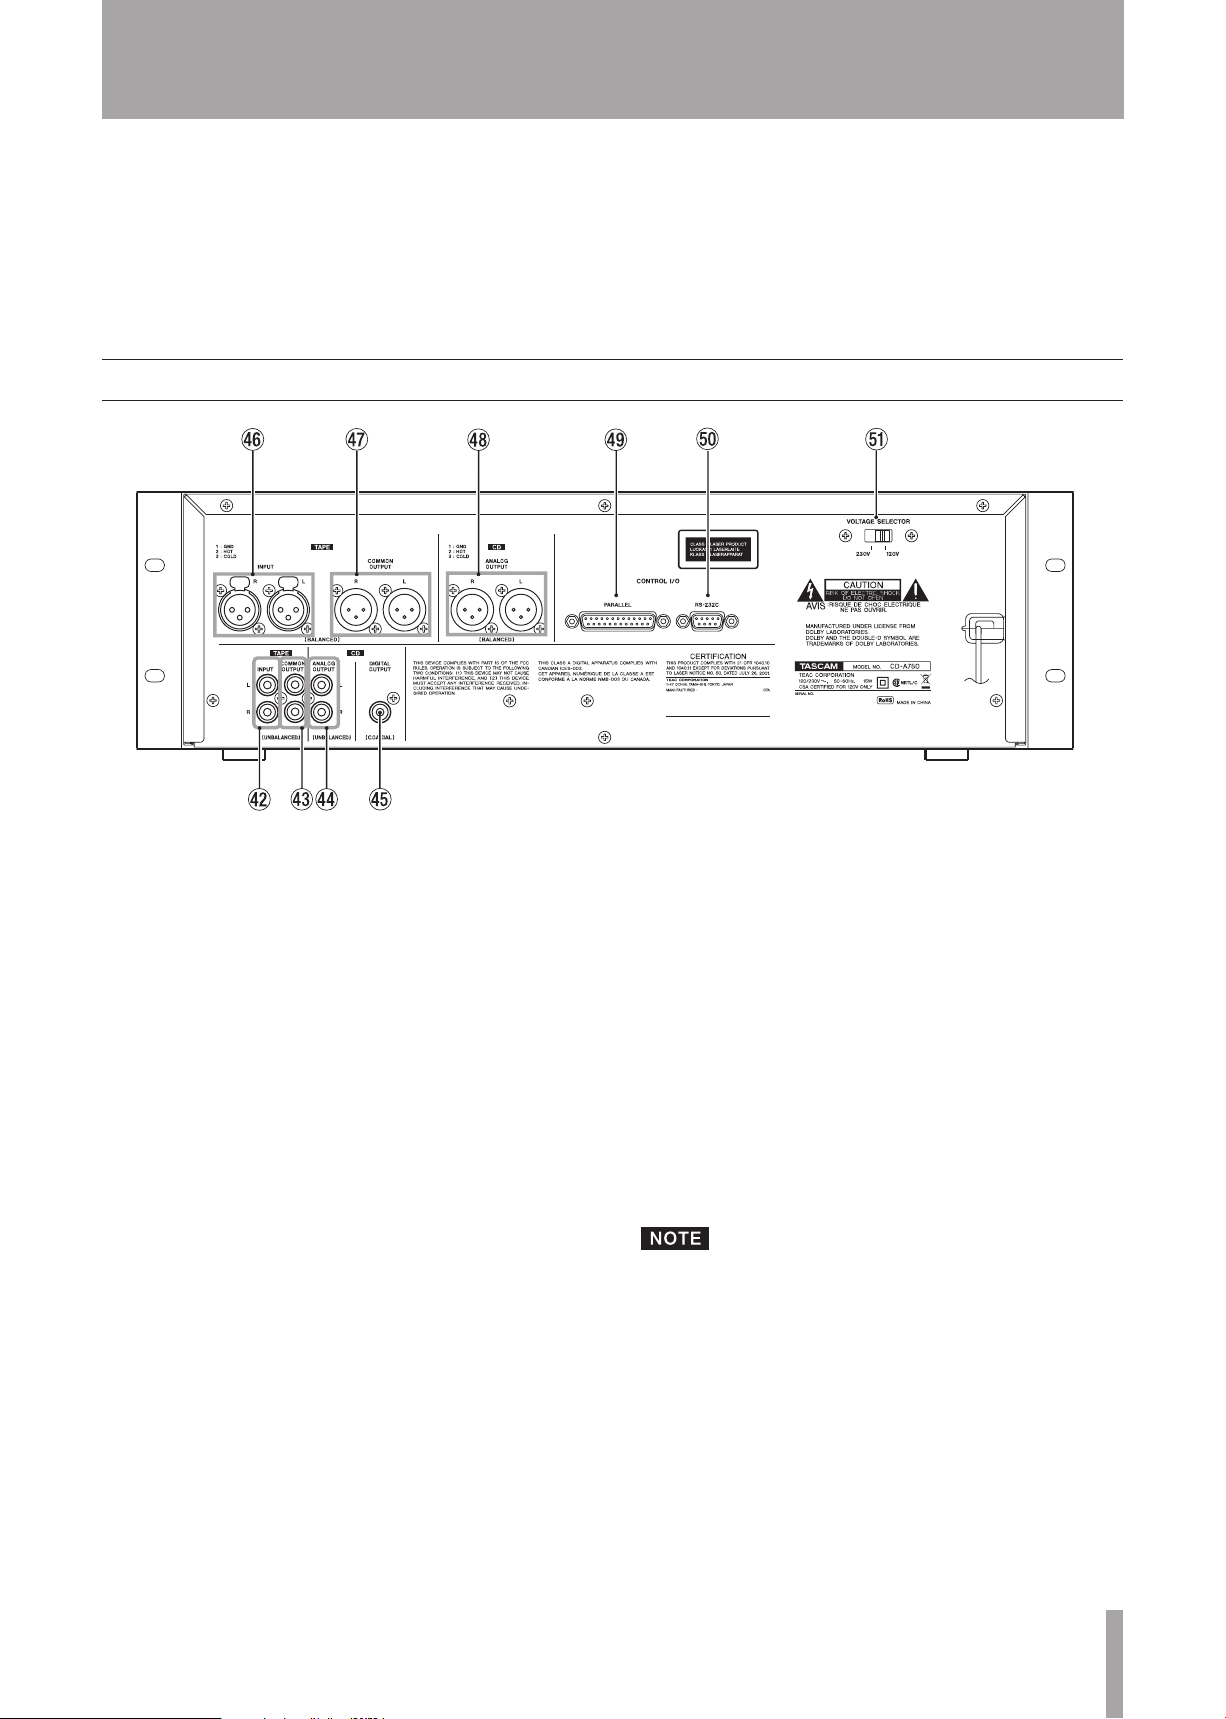
Rear panel
jack.
TAPE INPUT (UNBALANCED) jacks
Input for analog source signals (–9 dBu, unbalanced) to
record to the cassette tape.
TAPE COMMON OUTPUT (UNBALANCED) jacks
These are unbalanced outputs (–4.5 dBu) for the cassette
tape playback signal. During recording or when in
record ready mode, the signal being recorded is output.
However, depending on the setting of the COMMON
OUT item in the menu, the CD playback signal can be
output instead. (See “Setting the common output signal”
on page 20.)
CD OUTPUT (UNBALANCED) jacks
These are unbalanced outputs (–10 dBV) for the CD
playback signal.
CD DIGITAL OUTPUT (COAXIAL) jack
This digital output sends the CD playback signal in S/
PDIF format.
TAPE INPUT (BALANCED) jack (CD-A750 only)
These are balanced inputs for recording analog source
signals (+4 dBu) to cassette tape.
TAPE COMMON OUTPUT (BALANCED) jack
(CD-A750 only)
These are balanced outputs (+4 dBu) for the cassette
tape playback signal. During recording or when in
record ready mode, the signal being recorded is output.
However, depending on the setting of the COMMON
OUT item in the menu, the CD playback signal can be
output instead. (See “Setting the common output signal”
on page 20.)
CD OUTPUT (BALANCED) jack (CD-A750 only)
These are balanced outputs (+4 dBu) for the CD
playback signal.
CONTROL I/O PARALLEL connector (CD-A750 only)
Use this parallel control connector to control this
unit from an external device. (See “Using the parallel
connector” on page 45.)
CONTROL I/O RS-232C connector (CD-A750 only)
Use this serial control connector to control this unit from
an external device. (See “Using the RS-232C connector”
on page 45.)
VOLTAGE SELECTOR SW
Use this switch to set the input voltage to either 230V or
120V.
The voltage selector is only available on units for specific
markets.
Page 14
14 TASCAM CD-A550/CD-A750
2 – Names and Functions of Parts
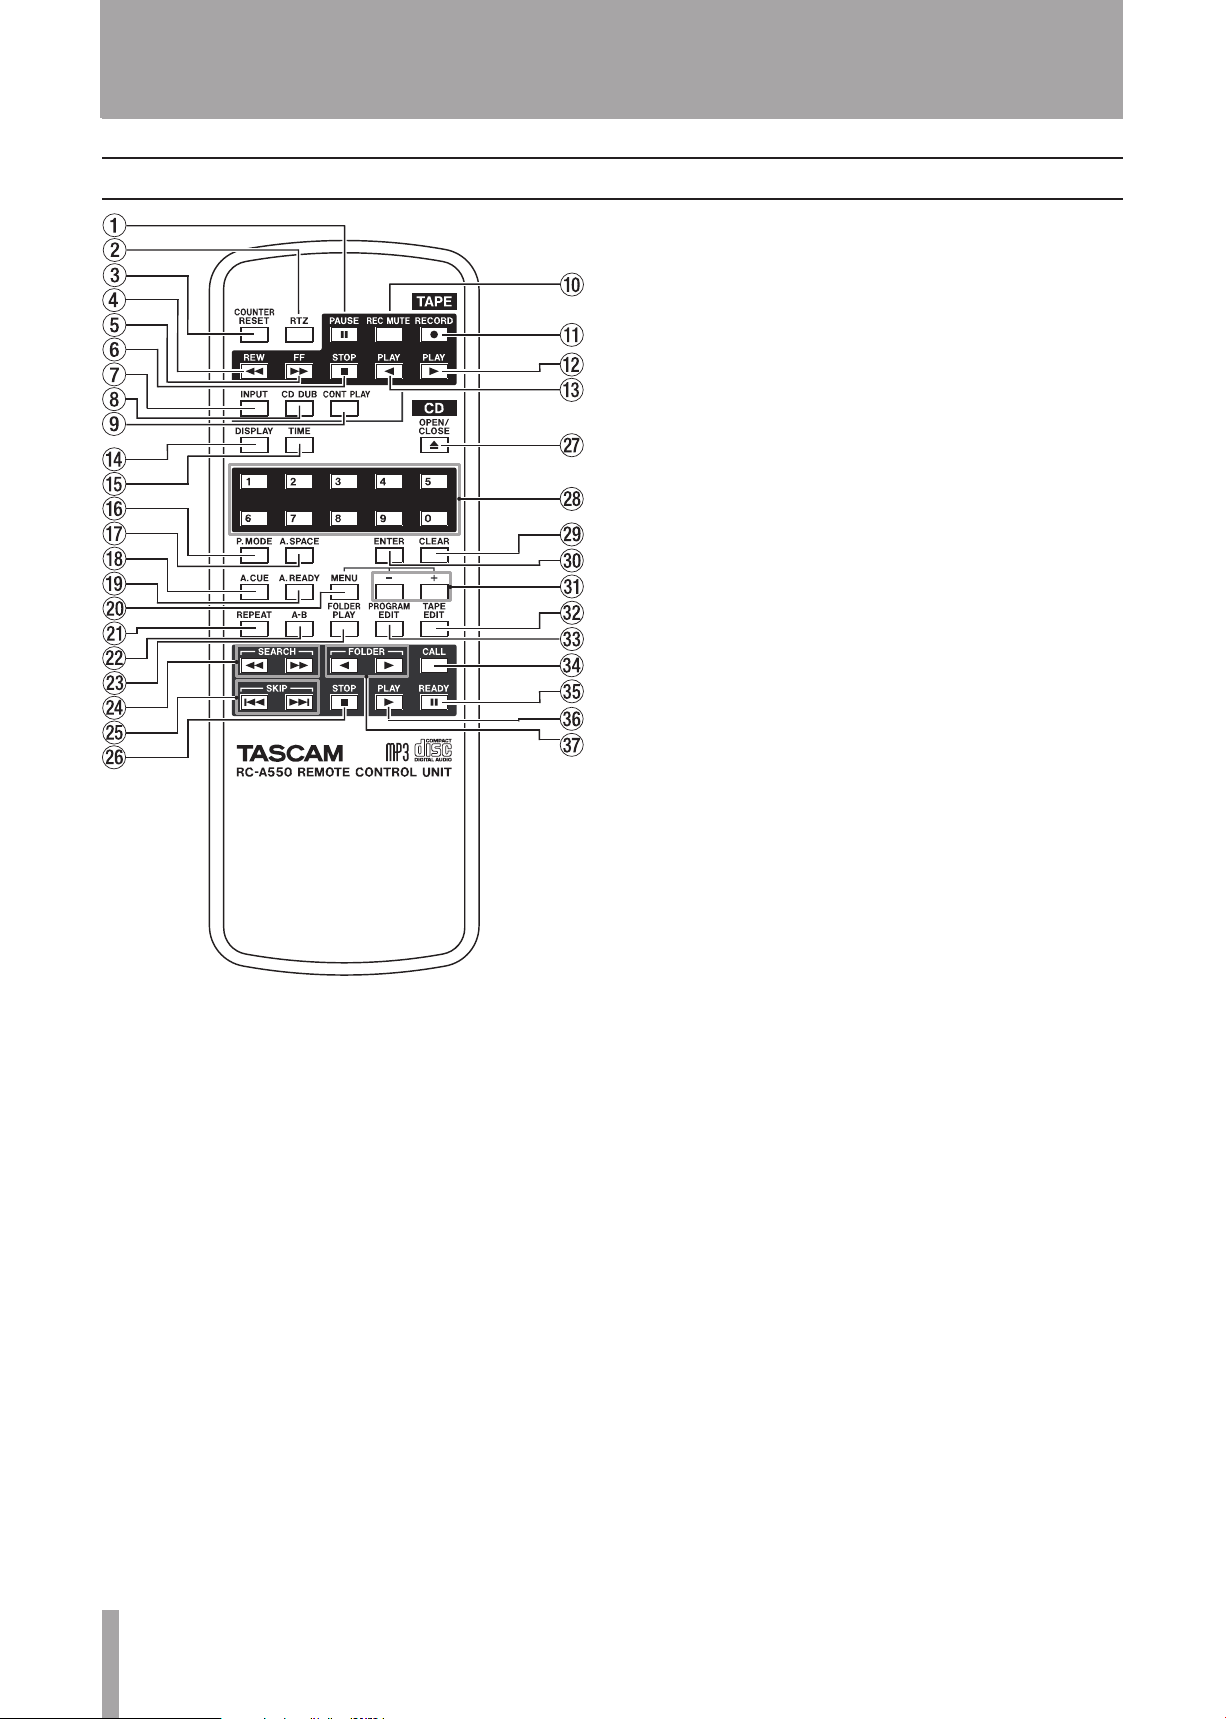
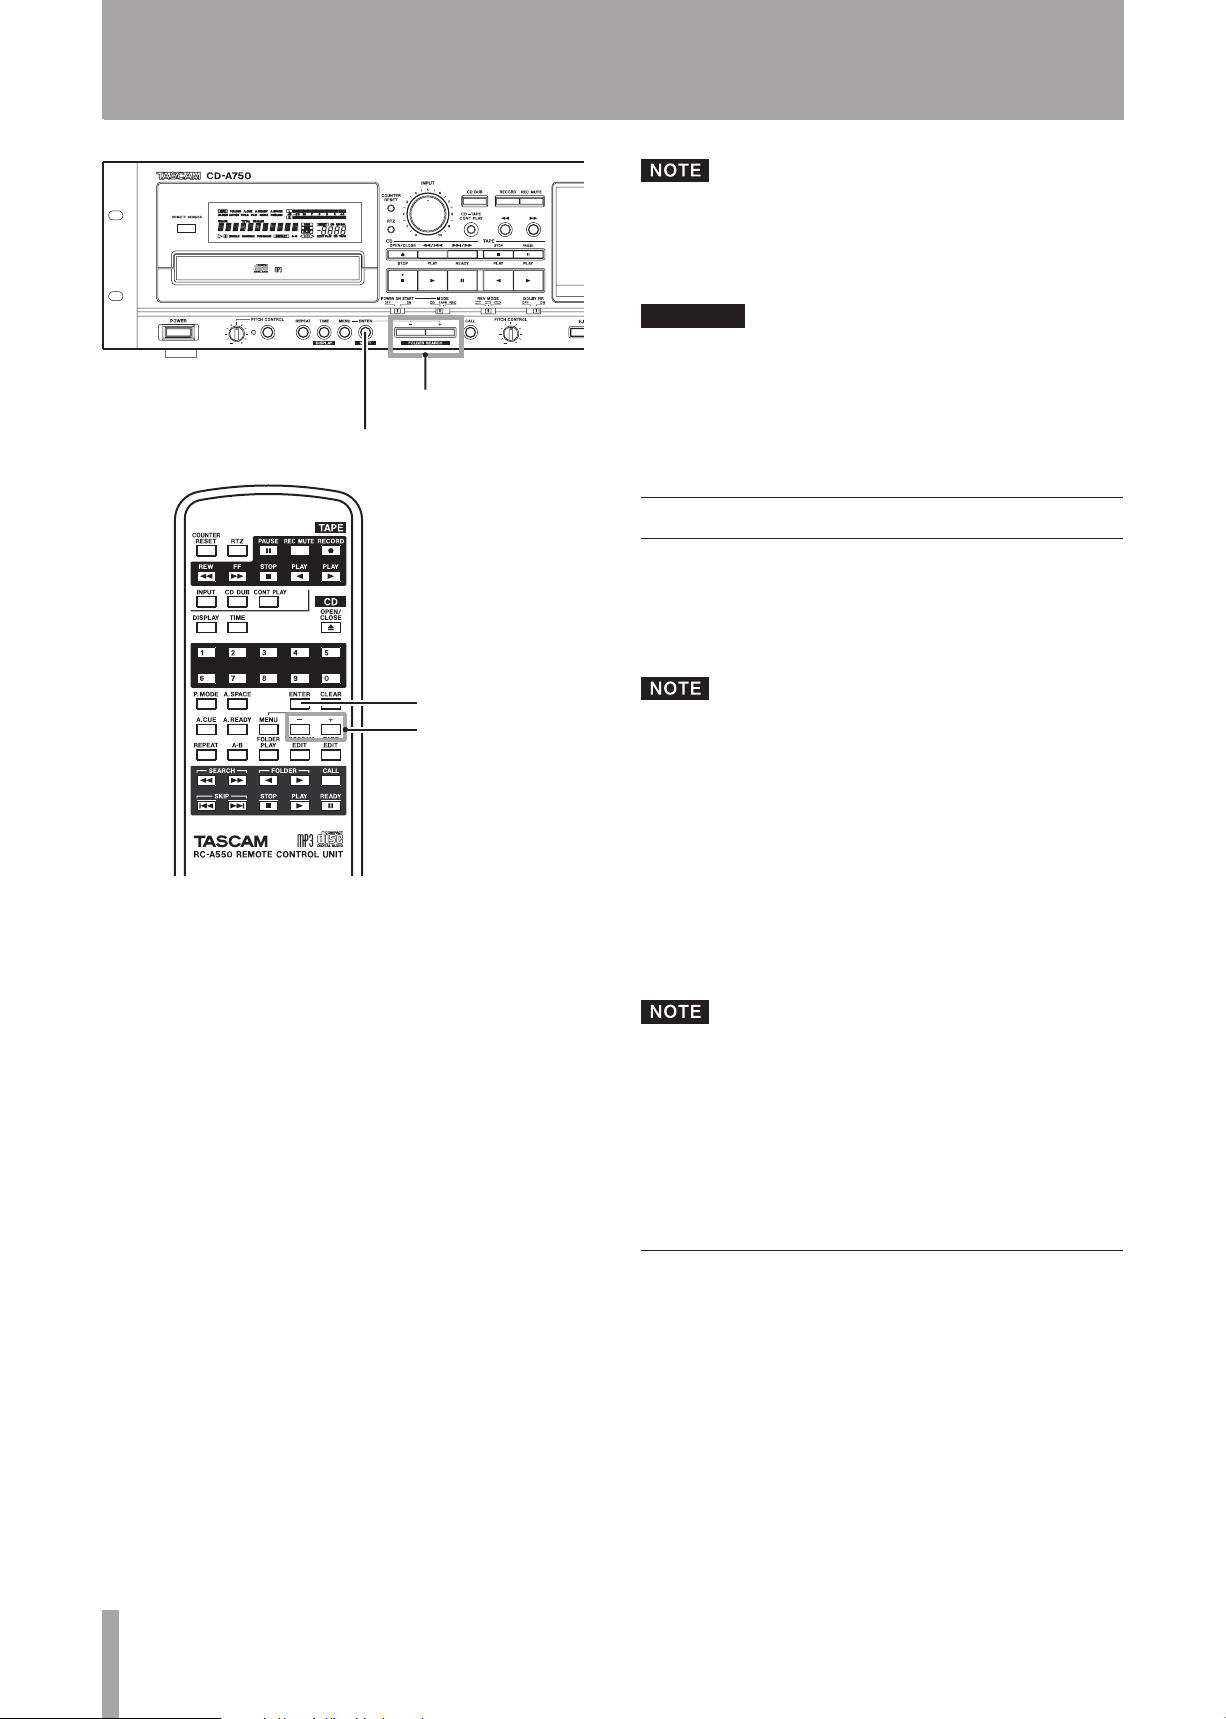
Wireless remote control (RC-A550)
CD DUB key
Press to record (dub) the CD playback sound to a
cassette tape. (See “Dubbing a CD to a tape” on page
39.)
CONT PLAY key
Press to turn the cassette tape and CD continuous
playback mode ON and OFF. (See “Continuous
playback of both the CD and the tape” on page 42.)
REC MUTE key
Press during recording to put the unit into record ready
status after recording about four seconds of silence. (See
“Recording mute function” on page 39.)
RECORD key
Puts the cassette tape into record ready status.
PLAY [Á] key
Press to play a cassette tape in the forward direction.
Press to start recording or playback when in record
ready mode or when playback is paused.
Cassette tape section
PAUSE key
Press to pause playback and recording.
When the unit is record ready or playback is paused,
press to start recording or playback.
RTZ key
Press to return the cassette tape playback position to the
counter zero point (0000).
COUNTER RESET key
Press to reset the tape counter to “0000.” (See “Tape
counter” on page 36.)
REW key
Press to rewind the cassette tape.
FF key
Press to fast-forward the cassette tape.
STOP key
Press to stop the cassette tape.
INPUT key
Press to select the source to be recorded on the cassette
tape. (See “Selecting the recording source” on page 38.)
However, if you press this key when playback is paused
in the reverse direction, playback is paused in the
forward direction.
PLAY [Ó] key
Press to play a cassette tape in the reverse direction.
When the unit is record ready or playback is paused,
recording or playback starts.
However, if you press this key when playback is paused
in the forward direction, playback is paused in the
reverse direction.
CD Section
DISPLAY key
When the playback time is displayed, press this key to
switch to text information display, which includes album
name, song name, artist name and file name.
When text information is displayed, press this key to
cycle through the text information shown, including
album name, song name, artist name and file name.
Press and hold this key during text information
display to scroll through the display items. (See “Text
information display mode” on page 29.)
TIME key
When the playback time is displayed, press this key to
change the playback time display mode (track elapsed
time, track remaining time, and total remaining time).
When text information is displayed, press this key to
switch to playback time display. (See “Playback time
display mode” on page 29.)
P.MODE key
Press this to switch between the four playback modes,
including continuous playback, single playback, random
playback and program playback. (See “Playback modes”
on page 26.)
Page 15
TASCAM CD-A550/CD-A750 15
2 – Names and Functions of Parts
A.SPACE key
Press to turn the auto space function ON and OFF. (See
“Auto space function “on page 32.)
A.CUE key
Press to turn the auto cue function ON and OFF. (See
“Auto cue function (audio CDs only)” on page 31.)
A.READY key
Press to turn the auto ready function ON and OFF. (See
“Auto ready function” on page 32.)
MENU key
When in standard display mode, press this key to switch
to the menu mode, which allows menu items to be
selected. When in menu item selection mode, press this
to return to the standard display mode. When editing
a menu item, press this key to return to menu item
selection display. (See “Menu” on page 17.)
REPEAT key
Press to turn the repeat playback function ON and OFF.
(See “Repeat playback” on page 30.)
A–B key
Press this to set and unset the start point and end point
for A–B repeat playback. (See “A–B repeat playback”
on page 30.)
FOLDER PLAY key
Press to turn the folder playback function ON and OFF.
(See “Folder playback (data CDs only)” on page 25.)
SEARCH Ô/ keys
Press and hold these keys to search backwards or
forwards.
SKIP Â/¯ keys
Press these to skip to the previous or next track.
STOP key
Press to stop CD playback.
OPEN/CLOSE key
Press to open and close the disc tray.
Numerical keys
Use these to designate track numbers during CD
playback and program input.
CLEAR key
Press this to remove a track from the program when
editing the program. (See “Programmed playback” on
page 27.)
ENTER key
When in menu mode, press this to make a selection or
confirm a setting.
–/+ keys
When in menu mode, use these to make selections and
settings.
TAPE EDIT key
Press to execute the TAPE EDIT function. (See “Using
the TAPE EDIT function” on page 40.)
PROGRAM EDIT key
Press to enter program editing mode. (See “Programmed
playback” on page 27.)
Press during program editing mode to exit program
editing mode and return to the standard display.
CALL key
Press to pause playback and return to the point where
playback was last started from a paused state. (See “Call
function” on page 33.)
READY key
Press to pause CD playback.
PLAY key
When stopped or paused, press to start CD playback.
FOLDER Ó/Á key
Press to switch the folder on a data CD.
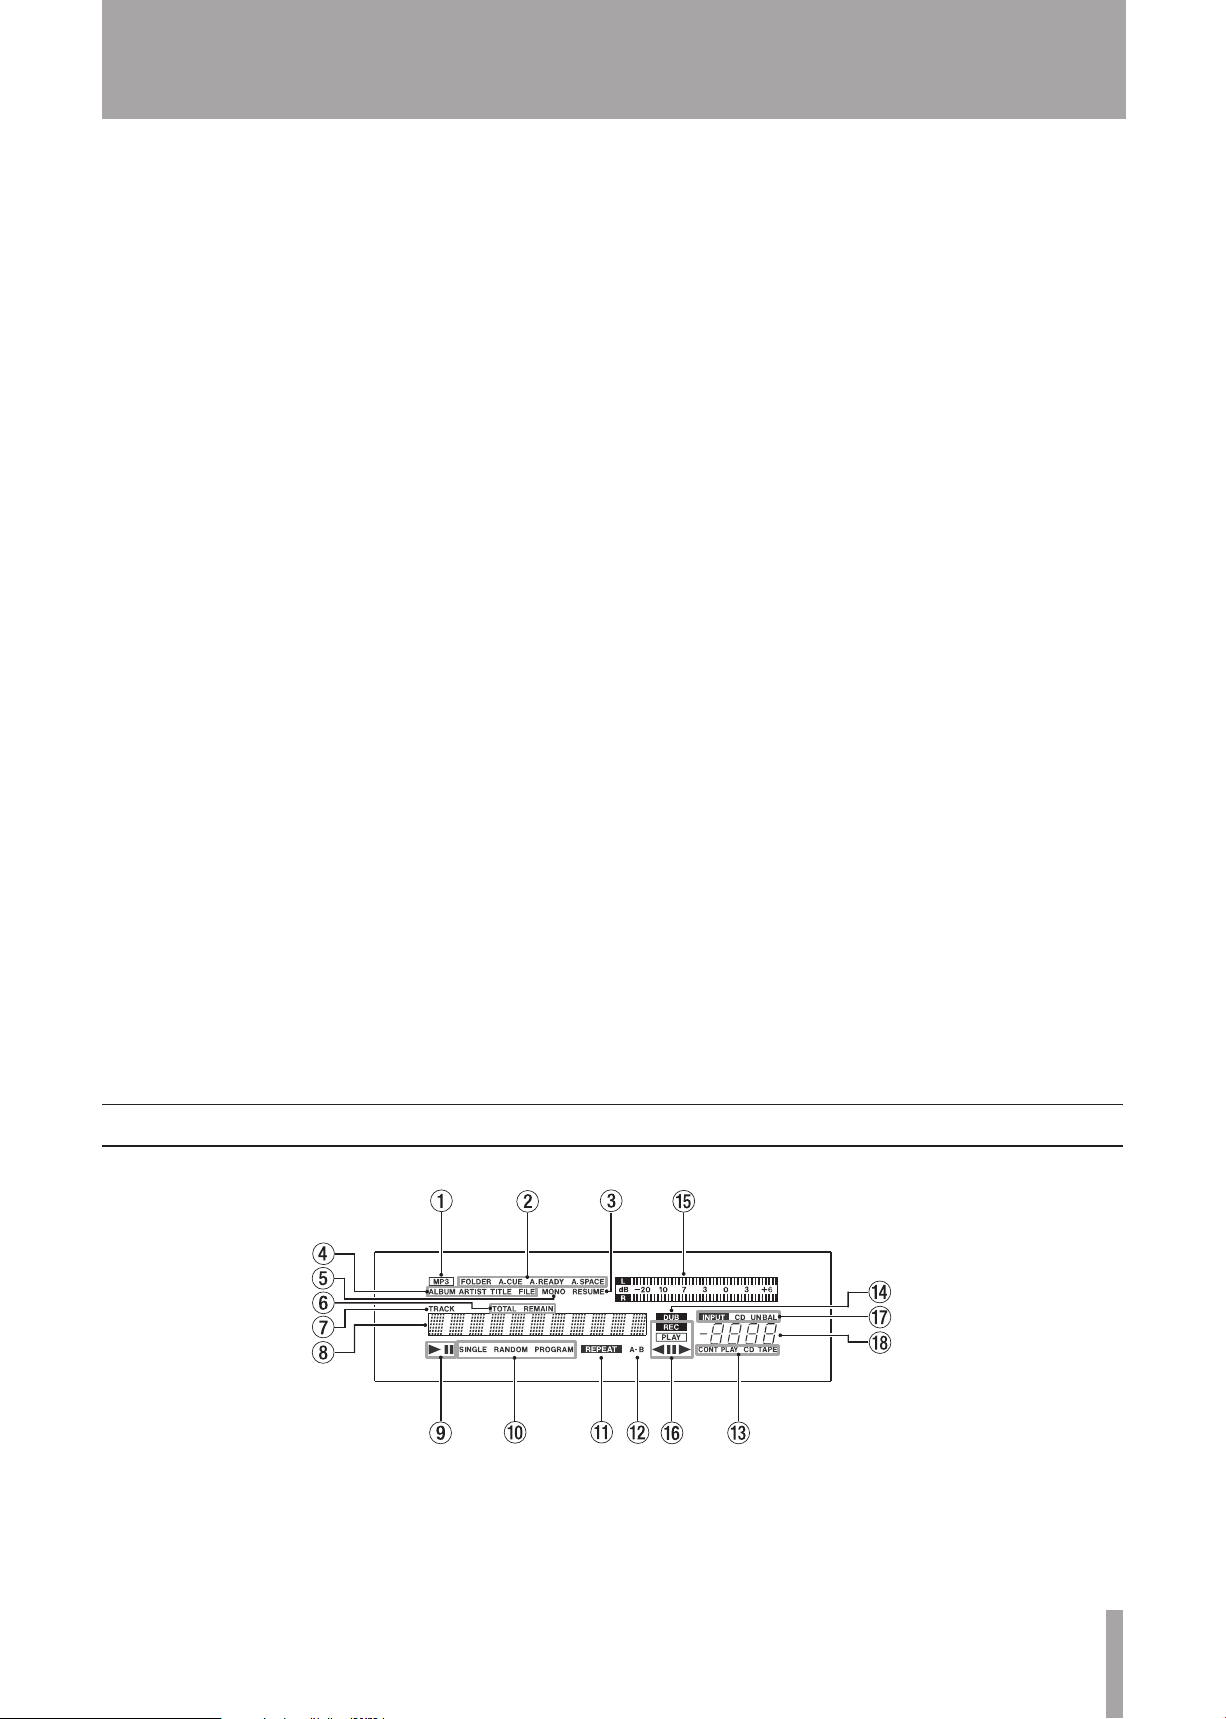
Display
This unit shows the following information on the display.
CD Section
MP3 indicator
This indicator appears when a data CD with MP3 or
WAV files is loaded in the unit.
CD function display
The FOLDER, A.C UE, A.READY and A .SPACE indicators appear
when the CD folder playback function, auto ready
function, auto cue function and auto space function are
ON, respectively.
Page 16

16 TASCAM CD-A550/CD -A750
2 – Names and Functions of Parts
RESUME indicator
This appears when the CD resume playback function is
ON.
Text information mode display indicators
When disc text information is being shown, ALBUM,
ARTIST, TITLE and FILE indicators appear according to the
contents.
MONO indicator
This indicator appears when output is set to mono.
Playback time display mode display
When the playback time is being displayed, these
indicators show the current time display mode.
TOTAL REMAIN
•
appears when the playback time display
mode is total remaining time.
REMAIN
•
appears when the playback time display mode
is track remaining time.
No indicator appears when the playback time display
•
mode is track elapsed time. No indicator appears
when the main display is showing text information
(menu, title display, etc.) or when in menu mode or
program setting mode.
TRACK indicator
This appears when the main display is showing the time
display. It blinks during incremental play operation.
This indicator does not appear when the main display is
showing text information (menu, title, etc.) or is in menu
mode or program setting mode.
DUB indicator
This appears during CD dubbing.
Cassette section
Level meters
These show the cassette tape playback and recording
sound levels.
Tape transport status indicators
PLAY appears when the cassette tape is playing or paused.
REC and PLAY both appear when recording or record ready.
REC blinks when recording mute is functioning. “π”
appears when playback is paused or the unit is record
ready. The current transport direction (Á or Ó) is also
shown at all times.
Cassette input source indicators
The cassette tape input source is shown as CD for the CD,
UNBAL for the unbalanced input, or BAL for the balanced
input (CD–A750 only).
Tape counter
This shows the cassette tape counter value. The counter
value increases when moving forward. After “9999” the
counter returns to “0000.” The counter value decreases
when moving in reverse direction. After “0000” the
counter reverts to “9999.”
Main display
This display area has 11 characters. In addition to
showing CD track, playback time and title information,
this area shows information when in menu mode and
various status messages (errors, etc.).
CD transport status indicators
When a CD is playing, the Á indicator appears. When a
CD is paused the π indicator appears.
Playback mode indicators
Indicators appear according to the CD playback mode.
None of the indicators appear during ordinary playback
(continuous playback) mode. During single mode,
random mode and program mode, SINGLE, RANDOM and
PROGRAM appear, respectively.
REPEAT indicator
This appears when the CD repeat playback function is
ON.
A–B indicator
This appears when CD A–B repeat playback is on.
When only the A point is set A– light and B blinks.
CONT PLAY CD TAPE indicator
This appears when continuous playback mode is
operative. CONT PLAY blinks before starting operation
(when CD and tape are stopped). CD blinks during CD
playback. TAPE blinks during cassette tape playback.
Page 17

TASCAM CD-A550/CD-A750 17
3 – Menu
MENU key
MENU key
This unit uses a menu system to make various settings and
use certain functions.
Menu structure
This unit’s menu system includes the following menu items.
Menu
No.
1 PLAY MODE Playback mode selection
2 AUTO CUE Set auto cue function
3 AUTO READY Turn auto ready function ON
4 AUTO SPACE Turn auto space function ON
5 FOLDER PLAY Turn folder playback function
6 INCREMENTAL
7 RESUME PLAY Turn resume playback ON and
8 PROGRAM EDIT Edit the program
9 TAPE EDIT Use the TAPE EDIT function
10 TRAY LOCK Turn tray lock function ON and
11 EOM DISPLAY Set EOM display function
12 TAPE INPUT
13 COMMON OUT Select COMMON OUTPUT
14 MONO OUT Turn mono output function ON
15 DUBBING LEVEL Set record level during CD
16 RS232C BAUD
17 RS232C DATA
18 RS232C PARITY
19 RS232C STOP
20 FL DIMMER Set the display brightness
21 VERSION Show version information
22 MOTOR TIME Show motor operation time
23 DEFAULT Restore the unit to its default
Item Function
and OFF
and OFF
ON and OFF
Turn incremental play function
PLAY
SOURCE
RATE
LENGTH
BIT
BIT
ON and OFF
OFF
OFF
Select input source
source
and OFF
dubbing (fixed/volume)
Set the RS232C baud rate
(CD-A750 only)
Set the RS232C data length
(CD-A750 only)
Set the RS232C parity bit
(CD-A750 only)
Set RS232C stop bit length
(CD-750 only)
settings
Using the menu
Follow the basic procedures below to use the menu system
to make settings. However, to use the PROGRAM EDIT
and TAPE EDIT items, which are more complicated, see
“Programmed playback” (page 27) and “Using the TAPE
EDIT function” (page 40).
Moreover, selecting the VERSION and MOTOR TIME
items causes information to be shown on the main display,
but there are no settings to be made.
1 When in standard display mode, press the MENU
key on the main unit or the remote control.
This puts the unit in menu mode, and the main display
shows menu item selections. The menu item that was
last selected the previous time that the menu was used is
shown.
Press the MENU key when the menu item selection is
shown to return to the standard display.
Page 18
18 TASCAM CD-A550/CD-A750
3 – Menu
–/+ key
–/+ key
ENTER key
ENTER key
2 Use the –/+ keys on the main unit or the remote con-
trol to select the desired menu item.
3 Press the ENTER key on the main unit or the remote
control to confirm the selection.
The menu item name and currently set value are shown.
Use the following steps to change the settings.
4 Use the –/+ keys on the main unit or the remote con-
trol to select the desired value.
The selection takes effect immediately.
5 Press the ENTER key on the main unit or the remote
control to return to the standard display.
If you press the MENU key while menu item names and
setting values are displayed, the display returns to menu
item selection.
Page 19

TASCAM CD-A550/CD-A750 19
Making connections
Computer
External
controller
Headphones
Mixer
4 – Preparations
Connecting headphones
Connect stereo headphones to the
front panel. Use the
PHONES
Use the
jack to adjust the volume.
MONITOR
PHONES
switch to the left of the
to select the sound that is output through the
PHONES
jack on the
knob to the right of the
PHONES
PHONES
jack
jack.
Choose either CD sound only (CD position), tape sound
TAPE
only (
MIX
(
position) or a mix of the CD and tape sounds
position).
Connecting external audio devices (input)
Connect external audio sources, including CD players
and mixers, to this unit’s
UNBALANCED
) jacks. Use the TAPE INPUT SOURCE
menu item to select the input. Use the
TAPE INPUT (BALANCED
INPUT
knob on the
or
front panel to adjust the input volume.
Connecting external audio devices (output)
For analog output, this unit has
CD ANALOG OUTPUT
and
BALANCED
both
(XLR) and
TAPE COMMON OUTPUT
jacks. The CD-A750 model has
UNBALANCED
(RCA pin)
jacks, while the CD-A550 model has only
UNBALANCED
jacks.
In addition, the CD playback signal can be output digitally
from the
The
output the CD playback signal. The
OUTPUT
CD DIGITAL OUTPUT
CD OUTPUT
jacks (
jack in S/PDIF format.
ANALOG
DIGITAL
and
TAPE COMMON
jacks output the signal selected using the
) always
COMMON OUT menu item. (See “Setting the common
output signal” on page 20.)
Parallel controller (CD-A750 only)
To control a CD-A750 with parallel control from an
external controller, use the
PARALLEL
(25-pin D-Sub)
connector. See “Using the parallel connector” (page 45)
for information about the pin allocation of the
PARALLEL
connector. In addition to receiving external control signals,
PARALLEL
the
connector can output various types of status
information. You can use this to show the status of this
unit with an external display or lamp, as well as trigger the
operation of other devices according to the activity of this
unit, for example.
Page 20

20 TASCAM CD-A550/ CD-A750
4 – Preparations
RS-232C controller (CD-A750 only)
Use the
of the CD-A750 with an external editor or controller. See
“Using the RS-232C connector” on page 45 for details.
RS-232C
(9-pin D–Sub) connector for serial control
Setting the common output signal
Set the signal output from the
jacks according to your operating needs for this unit.
1 When in standard display mode, press the MENU
key on the main unit or the remote control to enter
menu mode.
2 Use the –/+ keys on the main unit or the remote con-
trol to show the
display, and press the ENTER key on the main unit
or the remote control.
COMMON OUT?
TAPE COMMON OUTPUT
item on the main
Preparing the remote control
Installing the batteries
3 Use the –/+ keys on the main unit or the remote con-
trol to select one of the following choices.
TAPE
: This always outputs the tape playback signal.
AUTO
(default value): outputs either the CD or the
tape playback signal. When both are playing at the same
time, only the tape signal is output.
MIX
: Outputs both the CD and tape playback signals,
mixing them when they are playing simultaneously.
4 Press the ENTER key to return to the standard dis-
play.
If you want to output the CD and tape signals to
•
different devices (or different channels of a mixer,
for example), set the COMMON OUT item to “TAPE.”
By doing so, the CD signal will be output from the CD
OUTPUT jacks, while the tape signal will be output
from the TAPE COMMON OUTPUT jacks.
If you’re outputting the signal of this unit to one ex-
•
ternal device, such as an amplifier, set the COMMON
OUT item to “AUTO” or “MIX.” By doing so, this unit
outputs the signal of the CD and/or the tape depending on their playback status.
1 Open the cover on the back.
2 Insert two AA batteries, paying careful attention to
their +/– orientation.
3 Close the cover.
The batteries are not supplied for Taiwan.
When to change the batteries
If the remote control operating distance becomes short
or functions do not respond when their keys are pressed,
replace both batteries with new ones at the same time.
Precautions for the use of batteries
Misuse of batteries can cause them to leak or rupture, for
example. Please read the battery caution indications and
page 4 of this manual carefully.
Page 21
TASCAM CD-A550/CD-A750 21
4 – Preparations
Remote sensor
15°
15°
Considerations for the use of the remote control
When using other devices that are controlled by infra-
•
red signals, operation of this unit’s remote control could
cause those devices to function improperly.
Operate the remote control within the following range.
•
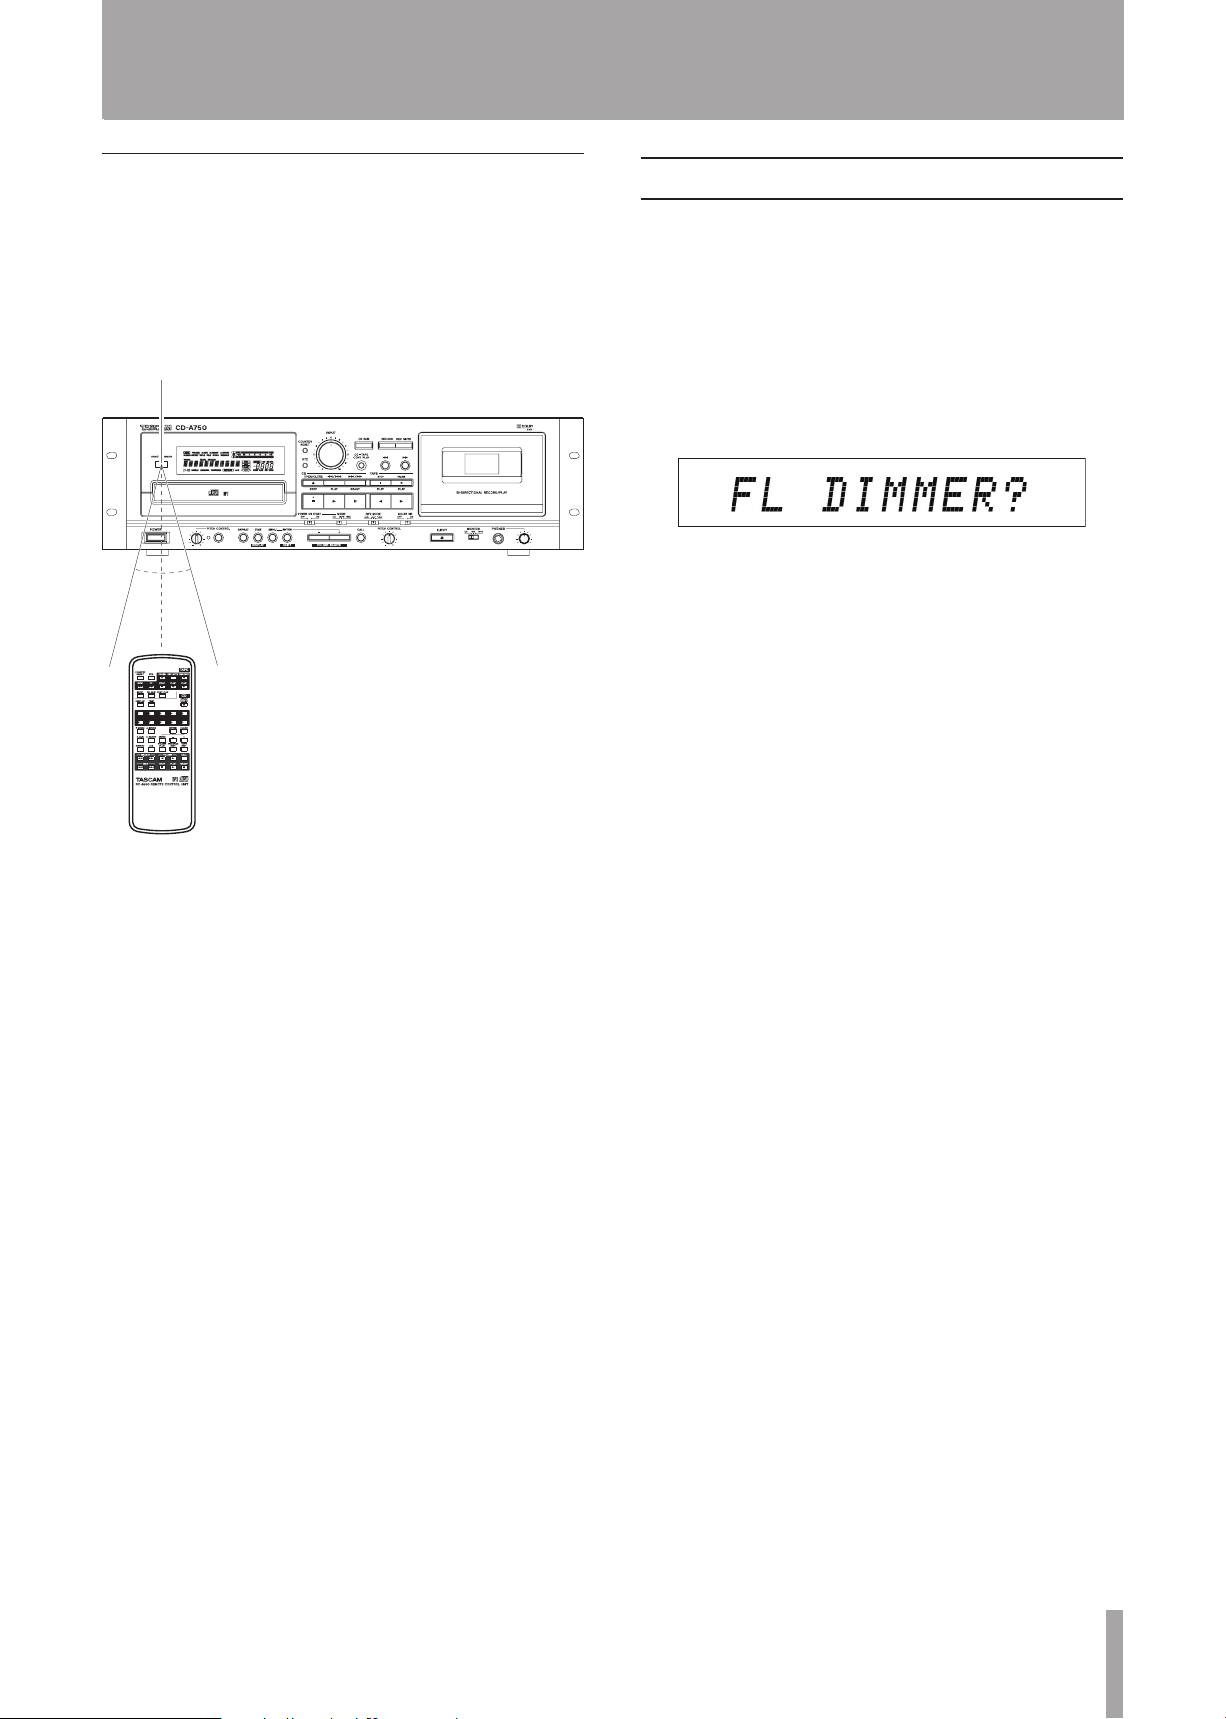
Adjust the display brightness (DIMMER)
You can adjust the display brightness to suit the operating
environment of the unit.
1 When in standard display mode, press the MENU
key on the main unit or the remote control to enter
menu mode.
2 Use the –/+ keys on the main unit or the remote con-
trol to show the
display, and press the ENTER key on the main unit
or the remote control.
3 Use the –/+ keys on the main unit or the remote con-
trol to select a value between 1 and 10.
The higher the number the brighter the display becomes.
(The default value is 7.)
4 Press the ENTER key to return to the standard dis-
play.
FL DIMMER?
item on the main
Operation distance
Front: 7 meters or less
Within a 15º angle: 7 meters or less
Page 22
22 TASCAM CD-A550/CD-A750
5 – Playing Back CDs
CAUTION
Folder
MP3/WAV file
An Example of Data CD Structure
OPEN/CLOSE key
This chapter explains the playback functions of this unit’s
CD player.
Discs that can be played
This unit’s CD player can play the following types of discs.
• CD-DA (audio CD) format discs
This unit can play commercially available audio CDs and
CD-R and CD-RW discs that have been recorded in audio
CD format. These discs are called “ audio CDs” in this
manual.
• CD-ROM (data CD) format discs
This unit can play discs that contain MP3 and WAV files.
These discs are called “data CDs” in this manual.
MP3 files that can be played include files that have sampling frequencies of 32, 44.1 or 48 kHz, and bit rates of
32 to 320 kbps or variable bit rate (VBR). WAV files that
can be played include files that have sampling frequencies of 8 to 48 kHz and are 8-bit or 16-bit.
MP3 files that use VBR compression
Due to format limitations, positions in VBR files cannot
be accurately detected. For this reason, when using the
call function, the A–B repeat function or other functions
that require points to be set in the middle of tracks, the
points set and the actual playback starting points might
be slightly different.
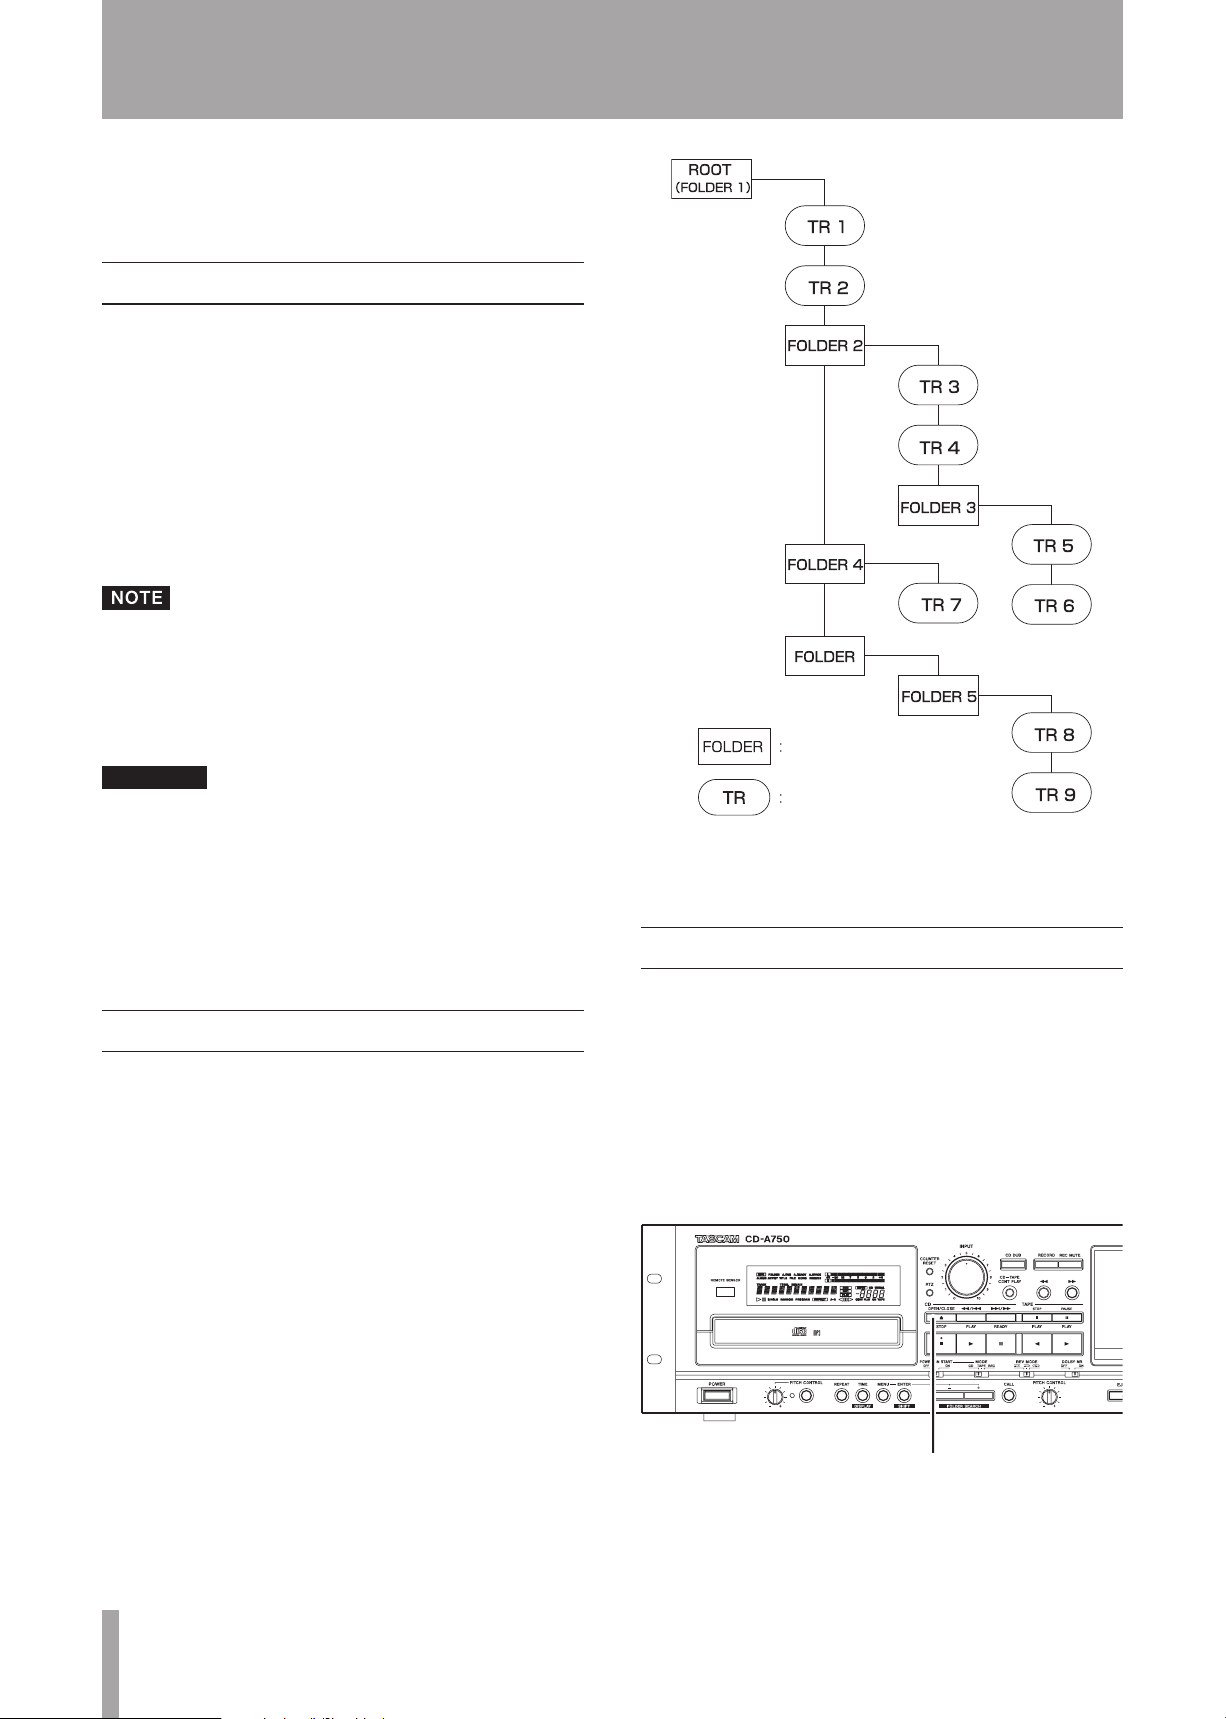
Data CD folders and tracks
This unit treats all the audio files (WAV and MP3) on data
CDs as “tracks.” Some data CDs store files inside folders
in the same way that ordinary computers do. In addition,
multiple folders can be stored inside another folder creating
a multilevel structure.
This unit assigns a folder number to each folder to manage
them. Folder numbers are assigned sequentially starting
with the first folder at the highest level followed by the
folders (subfolders) inside it. Folders inside a higher-level
folder are numbered in order before the next folder in the
higher-level is numbered as shown in the illustration below.
If the root folder of a data CD contains one or more audio
files, it will be numbered as the first folder.
Loading a CD
To load a CD, press the
or the remote control to open the disc tray and place a disc
on it with the label side up.
Press the
After a disc is loaded, this unit reads the disc information
and shows on the display the total number of tracks and
total playback time for an audio CD or the total number of
tracks in the current folder or on the entire disc for a data
CD.
OPEN/CLOSE
OPEN/CLOSE
key again to close the disc tray.
key on the main unit
Each audio file is also assigned a track number. Track
numbers are assigned in order starting from those in the
lowest numbered folder. During ordinary playback of data
CDs, tracks are played back in the order of their assigned
numbers just like the tracks on an audio CD. Folders that
do not directly contain audio files are not given numbers.
For example, in the illustration below the folder that
contains folder 5 is not given a number.
Page 23

TASCAM CD-A550/CD-A750 23
5 – Playing Back CDs
OPEN/CLOSE key
CAUTION
CD-PLAY key
CD PLAY key
CD playback
The following explanation assumes that the necessary
connections have been made, the unit’s power is ON and a
CD (audio CD or data CD) has been loaded.
Instead of pressing the OPEN/CLOSE key to close the disc
tray, you can press the CD PLAY or READY key on the
main unit or the remote control to close the disc tray
and begin playback immediately.
If you open the disc tray while this unit is in use, the following settings are lost.
• Program
• CALL point
• Resume point
• Current folder (for data CDs)
To start CD playback, press the
CD PLAY
key on the main
unit or the remote control.
A CD and a cassette tape can be played at the same
time.
Tray lock function
Turn the tray lock function ON to disable the
keys during playback and when playback is paused so that
the disc tray is not opened unintentionally. This allows you
to prevent accidentally interrupting playback by pressing
OPEN/CLOSE
the
key. The default setting for the unit is
OFF. To turn the tray lock function ON, use the menu and
conduct the following procedures.
1 When in standard display mode, press the MENU
key on the main unit or the remote control to enter
menu mode.
2 Use the –/+ keys on the main unit or the remote con-
trol to show “
TRAY LOCK?
” on the main display,
and press the ENTER key.
3 Use the –/+ key to change the setting from
(default value) to ON.
4 Press the ENTER key to return to the standard dis-
play.
OPEN/CLOSE
OFF
• Stopping playback
Press the CD STOP key on the main unit or the
remote control.
• Pausing Playback
Press the READY key on the main unit or the remote
control.
In this Owner’s Manual, explanations assume that the CD
playback mode is set to CONTINUE (continuous playback
mode) unless otherwise specified.
Page 24

24 TASCAM CD -A550/CD-A750
5 – Playing Back CDs
SKIP (
Ô/Â, ¯/
) key
SKIP Â/¯ key
Numeric keys (0-9)
Selecting a track
There are two ways to select a track. You can move (skip) to
the previous or next track, or you can select a track directly
by its track number. In addition, you can skip to the next or
previous folder of a data CD.
Skipping to the next or previous track
Press the Ô/Â or ¯/ key on the main unit or
SKIP
the
if you press and hold a
control, the unit skips through multiple tracks successively.
•
•
Â/¯ key on the remote control. In addition,
SKIP
Â/¯ key on the remote
If you skip to a track during playback, the selected
track begins playing immediately.
If you skip to a track while playback is paused or
stopped, playback pauses at the beginning of the
selected track.
• To select track 1:
Press the “1” key one time.
• To select track 12:
Press the “1” key followed by the “2” key.
2 Press the CD PLAY key on the main unit or the
remote control. The selected track begins to play.
If you press the READY key instead of the CD PLAY
•
key, playback is paused at the beginning of the
selected track.
If you press the ENTER key instead of the CD PLAY
•
key, the following occurs depending on whether the
unit was playing before the track number was input
in step 1 above.
Playing: the selected track starts to play.
Paused or stopped: the unit pauses at the beginning of the selected track.
The numeric keys cannot be used to select a track
•
when in program or random mode.
Selecting a folder (data CDs only)
When using a data CD, you can skip to the previous or next
folder by pressing the
pressing and holding the
pressing the
FOLDER
This will skip to the beginning of the first track in the
previous or next folder. If you hold down one of these keys,
you can skip through folders continually.
FOLDER SEARCH –/+
SHIFT
key on the main unit or by
keys while
Ó/Á keys on the remote control.
Selecting by track number
You can use the numeric keys (0–9) on the remote control
to directly set a track for playback by number.
Track numbers can have up to two digits for audio CDs and
up to three digits for data CDs.
1 Use the remote control numeric keys (0–9) to input
the track number. Input the track number starting
with the first digit as in the example below.
Page 25
TASCAM CD-A550/CD-A750 25
5 – Playing Back CDs
SHIFT key
FOLDER SEARCH –, + key
FOLDER Ó/Á key
FOLDER PLAY key
Folder playback (data CDs only)
By turning folder playback mode ON when playing a data
CD, you can set the playback area to the selected (current)
folder.
Setting the folder playback mode with the remote control
Press the FOLDER PLAY key to turn folder playback
mode ON and OFF and show the current setting on
the display.
If folder playback mode is ON, when you skip to a different folder, it becomes the current folder. See “Folder
playback (data CDs only)” on page 25 for details.
Search forward and backward
You can search forward and backward in a track while
listening to its sound.
1 Play or pause the desired track.
2 Press and hold the Ô/Â or ¯/ keys on
the main unit or the SEARCH Ô/ keys on the
remote control to start searching forward or backward.
3 Release the key that you are holding down to stop
searching and return to the state (playback or
pause) before you began searching.
The setting is shown for two seconds and then disappears from the display.
Press the FOLDER PLAY key again to change the set-
ting.
When the folder playback function is ON, FOLDER appears
on the display.
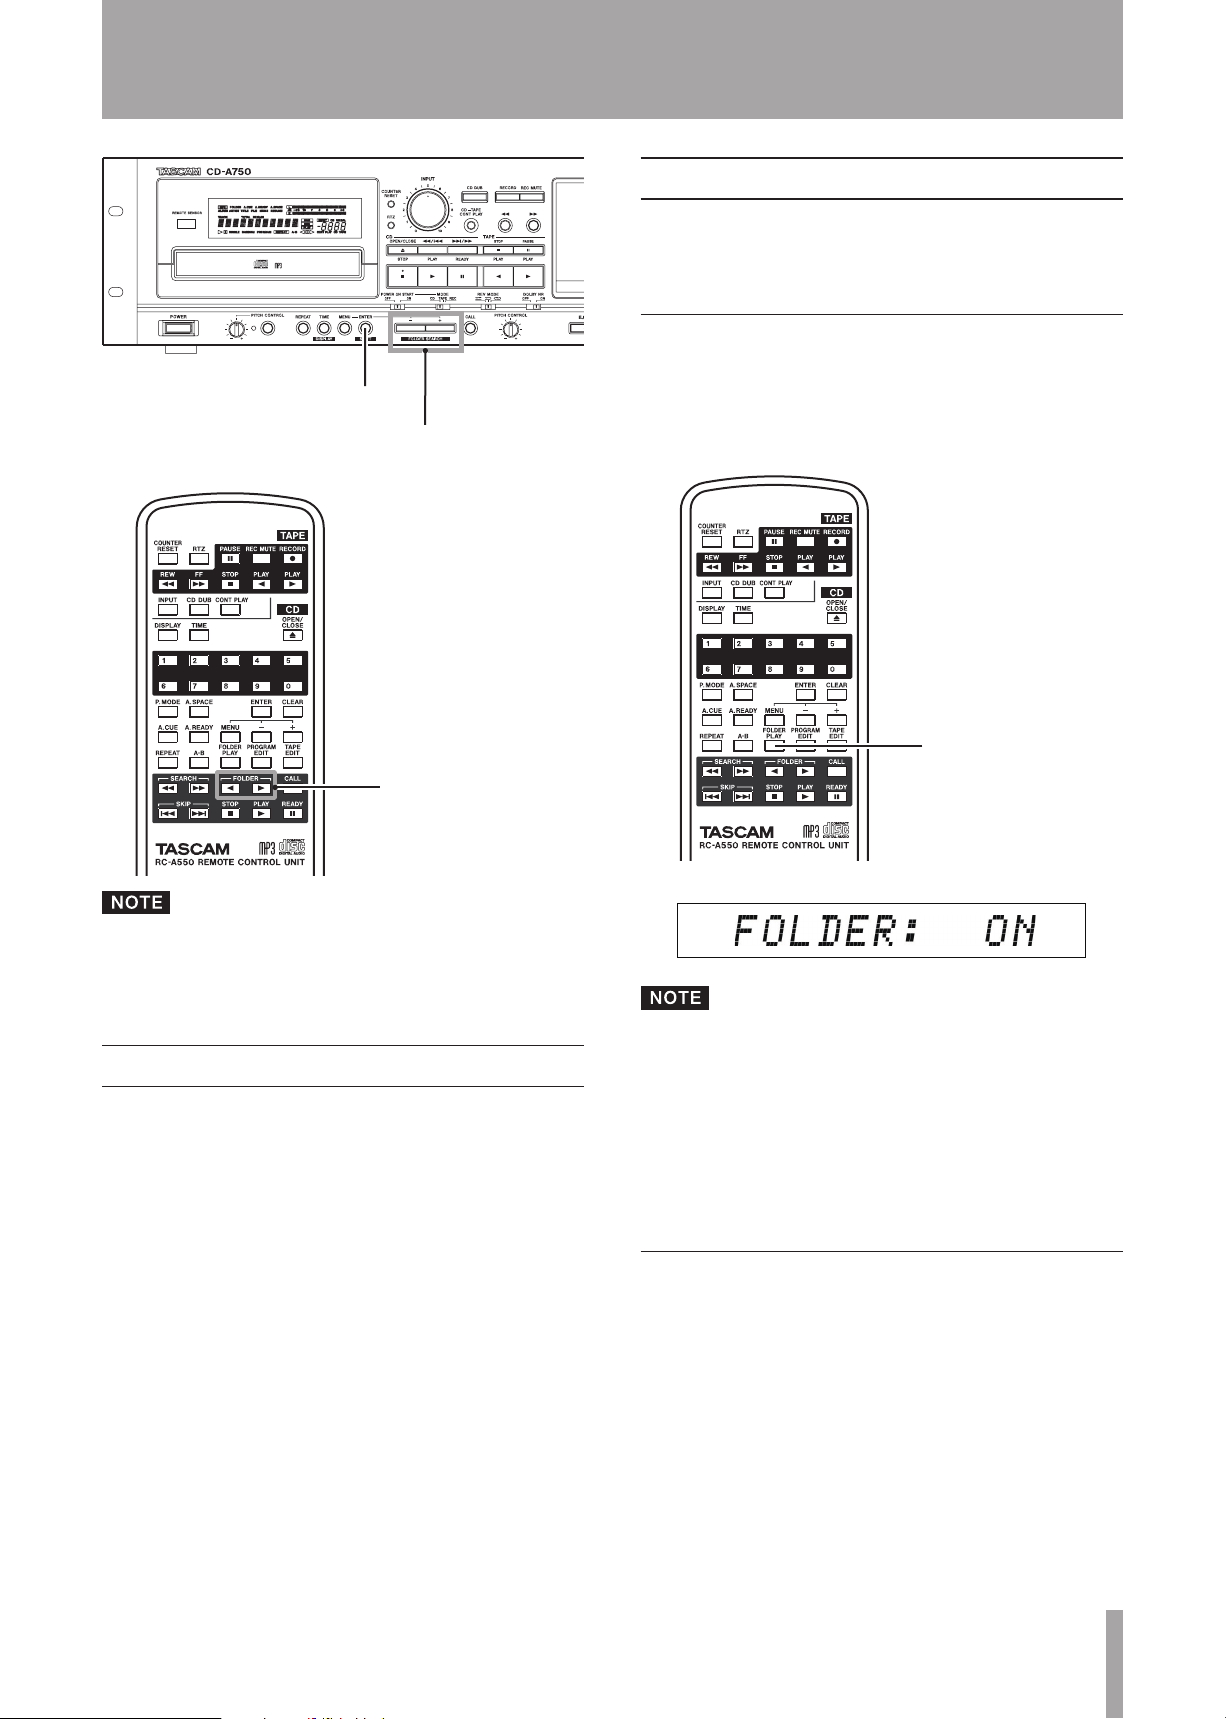
Setting the folder playback mode from the main unit
(See “Using the menu” on page 17 for details about making
menu settings.)
1 When in standard display mode, press the MENU
key on the main unit or the remote control to enter
menu mode.
2 Use the –/+ keys on the main unit or the remote
control main display to show
press the ENTER key on the main unit or the remote
control.
FLDR PLAY?
and
Page 26
26 TASCAM CD-A550/CD-A750
5 – Playing Back CDs
–/+ key
ENTER key
ENTER key
–/+ key
CAUTION
You cannot skip through folders during playback or
when paused if the current playback mode is program
mode.
The following settings are lost when the current folder
is changed.
Program
•
CALL point
•
Playback modes
This unit can play tracks using the following four methods
(playback modes).
Continuous playback (default setting)
The tracks on a disc are played back in numerical order.
3 Use the –/+ keys on the main unit or the remote con-
trol to select “ON.”
4 Press the ENTER key on the main unit or the remote
control to return to the standard display.
If the FOLDER PLAY item is set to “OFF,” the playback
area is set as the entire data CD.
Selecting the current folder
When using the controls on the main unit, with playback stopped, press the FOLDER SEARCH –/+ keys
while pressing and holding the SHIFT key to switch
folders. When using the remote control, with playback
stopped, press the FOLDER Ó/Á keys to switch folders.
During this operation, folder titles (album titles) appear on
the display.
If the folder was changed while playback was stopped, the
unit returns to the standard display and playback is stopped
at the beginning of the new folder.
In folder playback mode, the tracks in the current playback folder on a data CD are played back in numerical
order. See “Folder playback (data CDs only)” on page 25.
Single playback
The currently selected track is played once and then
playback stops.
Random playback
The tracks on the disc are played back randomly regardless
of track number. After all tracks have been played once,
playback stops.
In folder playback mode, the tracks in the current playback folder on a data CD are played back in random
order. (See “Folder playback (data CDs only)” on page
25.)
Programmed playback
Tracks are played back in the programmed order. See
“Programmed playback” on page 27 for details.
Selecting the playback mode
Use the dedicated
select playback mode easily. You can also use the menu to
set it from the main unit.
P.MODE
key on the remote control to
If the folder was changed during playback or while paused,
after changing to the desired folder using the procedures
above, the folder is confirmed after one second elapses, and
the folder name is shown on the display for two seconds.
Page 27

TASCAM CD-A550/CD-A750 27
5 – Playing Back CDs
P.MODE key
PROGRAM
EDIT key
Using the P.MODE key on the remote
ª
control
1 Each time you press the P.MODE key on the remote
control, the playback mode changes.
Programmed playback (PROG), however, cannot be
selected during playback or when paused. To select
programmed playback, press the P.MODE key when
playback is stopped or no CD is loaded. The current
mode is shown with an indicator on the display as
follows.
Display Playback mode
No indicator Continuous playback
SINGLE
RANDOM
PROGRAM
Single playback
Random playback
Programmed playback
3 Use the –/+ keys to select the desired playback mode
(see above).
4 Press the ENTER key to return to the standard dis-
play. The selected playback mode is retained even if
the power is turned OFF.
Programmed playback
If you set the playback mode to “PROGRAM” as described
in “Selecting the playback mode” above, this unit can
conduct programmed playback. In this mode, if you press
CD PLAY
the
playback proceeds from the first track in the set program
(program step “01”). Press the Ô/Â and ¯/ keys
on the main unit or the
control to skip to the previous/next program step.
You must set a program in advance to use programmed
playback.
Setting the program
Use the remote control to set the program following the
procedures below.
You can set the program at any time regardless of the
current playback mode.
1 When playback is stopped, press the PROGRAM
EDIT key.
key on the main unit or the remote control,
SKIP
Â/¯ keys on the remote
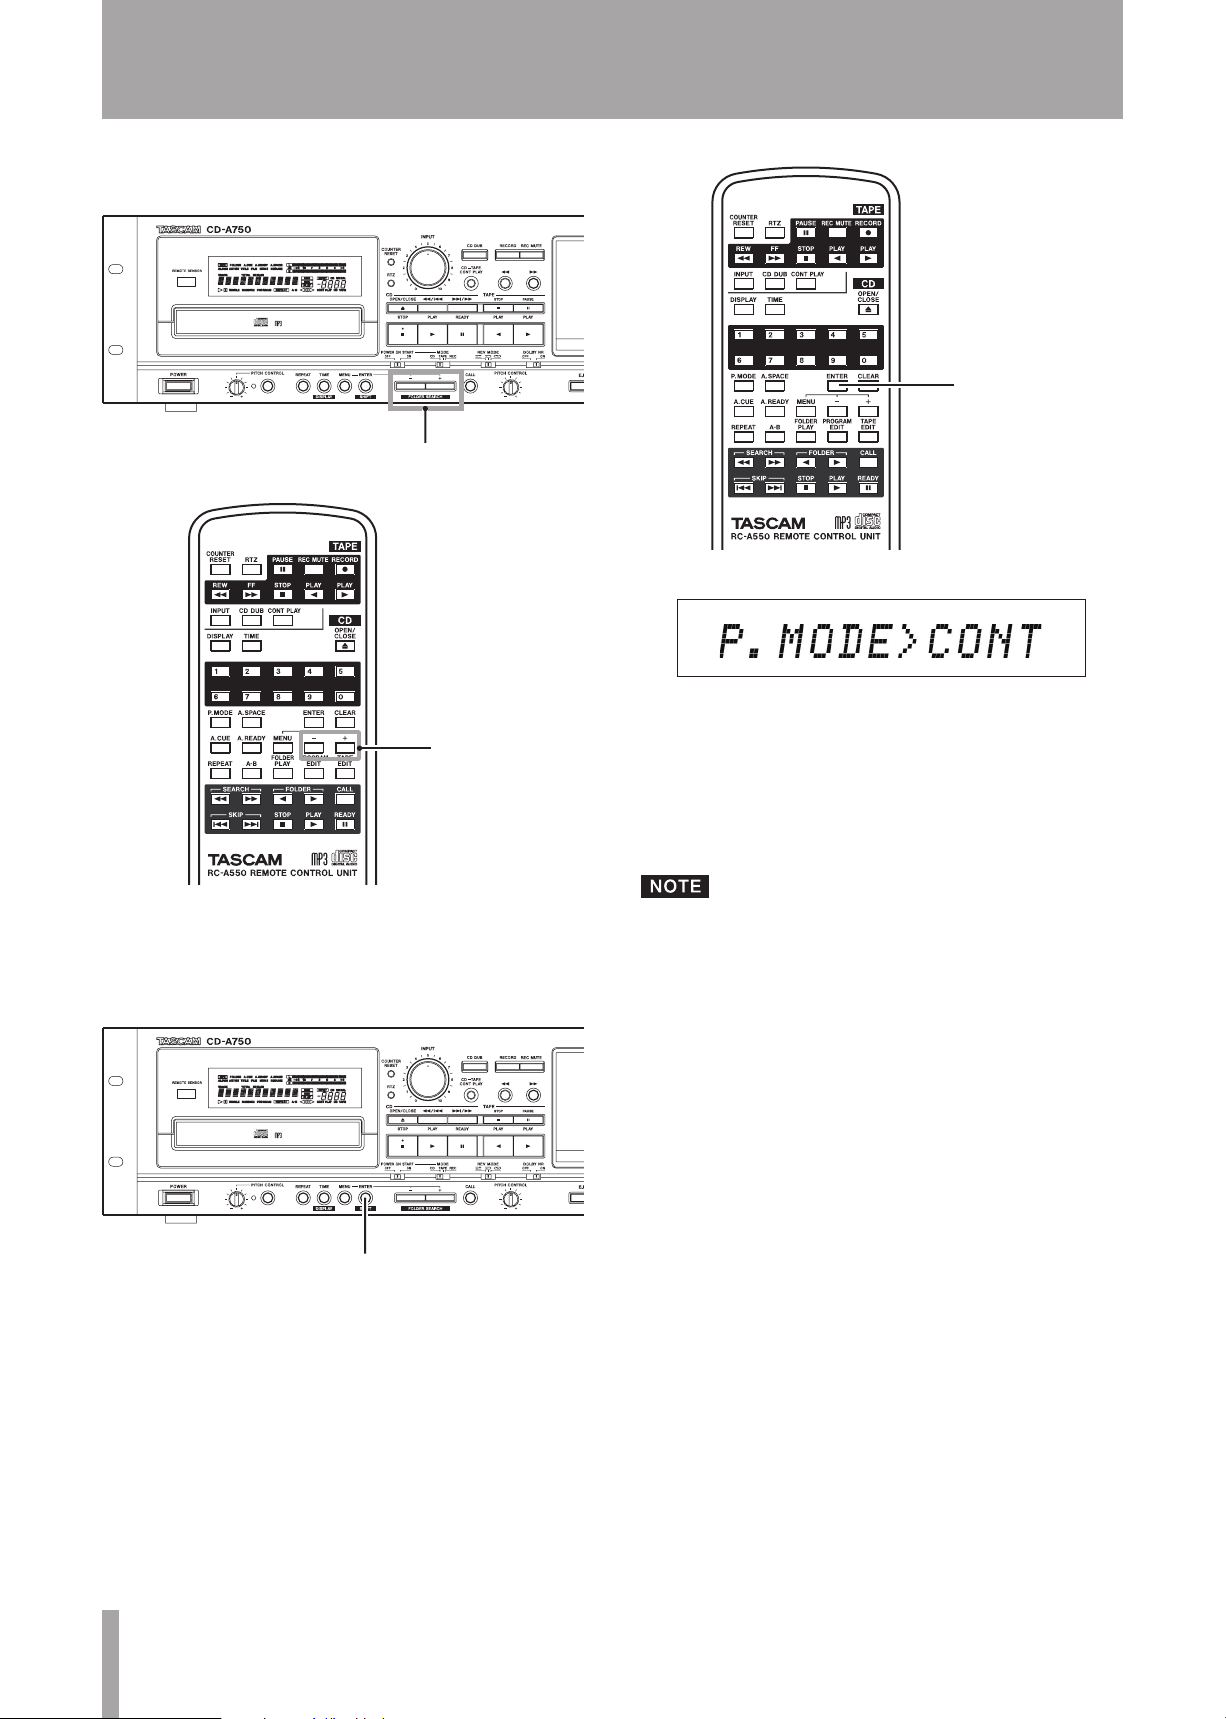
Immediately after pressing the P.MODE key, the
•
selected mode is shown in the main display area as
follows.
Continuous playback mode selected: CONT
–
Single playback mode selected: SNGL
–
Random playback mode selected: RNDM
–
Programmed playback mode selected: PROG
–
In this Owner’s Manual, explanations assume that
•
the CD playback mode is set to CONTINUE (continuous
playback mode) unless otherwise specified.
Setting the playback mode with the menu
ª
(See “Using the menu” on page 17 for further explanation
about how to use the menu.)
1 When in standard display mode, press the MENU
key to enter menu mode.
2 Use the –/+ keys to show “
PLAY MODE
?” in the
main display area, and press the ENTER key.
This starts program input mode and the following types of
information appear on the display. The top example is of an
audio CD and the lower one is of a data CD.
Page 28

28 TASCAM CD-A550/ CD-A750
5 – Playing Back CDs
In program input mode, the total program time and the
number of programmed tracks is shown on the display.
(However, the total program time is not shown for data
CDs.) When no tracks have been added to the program,
0:00/00
Program input mode can be activated by selecting the
PROGRAM EDIT item from the menu. (See “Using the
menu” on page 17 for details about using the menu.)
2 Use the numeric keys or the SKIP Â/¯ keys to
select a track to add as program step 01.
When using the numeric keys, input the leftmost digit
first.
is shown.
[Audio CD]
The same track can be added to the program mul-
•
tiple times.
Press the remote control CLEAR key to remove the
•
last added track from the program.
Press the CD STOP key to remove all tracks from the
•
program.
The program can have a maximum of 99 tracks. If
•
you try to add more than 99 tracks, the “PGM Full!”
error message appears on the display.
If the total playback time of the programmed tracks
•
exceeds 999 minutes and 59 seconds “ –––: ––” is
shown on the display.
You cannot add a pause as the final program step.
•
You cannot add a pause that would result in two
•
consecutive pauses.
In program input mode, use the –/+ keys to change
•
program steps and confirm their contents.
Programmed playback mode and the program set-
•
tings are retained even if the power is turned OFF.
In programmed playback mode, playback is impos-
•
sible if no tracks have been added to the program.
[Data CD]
When using a data CD, if you do not press the numeric
keys or the SKIP Â/¯ keys for a second, the display
switches from showing the track number to showing the
file name.
3 Press the ENTER key to add the selected track to the
program and return to program input mode, which
allows you to add the next program step.
4 Repeat steps 2 and 3 above to add as many tracks as
you desire in order.
5 When finished program setting, to exit program
input mode, press the ENTER key or the PROGRAM
EDIT key to return to the standard display.
Clearing the entire program
In addition to pressing the
program in program input mode, as described above, all the
following actions also clear the entire program.
Opening the disc tray
•
Turning the folder playback function ON or OFF
•
Changing the playback mode
•
Changing the folder
•
CD STOP
key to clear the entire
Checking the program
You can check the contents of the program.
1 Press the PROGRAM EDIT key on the remote control
to put the unit into program setting mode.
2 Press the –/+ keys to cycle through the program
steps shown on the display, starting at the first.
Pressing the – key cycles through the tracks in the
program in reverse order from the last added step.
Pause program
You can set the program to pause by entering “0” for a
track number using the numeric keys. During programmed
playback, when the program reaches a step set to pause, the
unit’s CD player pauses. You must press the
CD PLAY
key
to advance to the next program step.
Editing the program
You can edit a program that has already been created.
1 Press the remote control PROGRAM EDIT key to put
the unit into program input mode.
2 Use the –/+ keys to select the program step that you
want to edit.
Page 29

TASCAM CD-A550/CD-A750 29
5 – Playing Back CDs
TIME/DISPLAY key
TIME key
Replacing a track
ª
Use the numeric keys or SKIP Â/¯ keys to select
the replacement track and press the ENTER key.
The selected track replaces the track in the step and the
unit returns to program input mode.
Erasing a track
ª
Press the remote control CLEAR key to remove the
track from the program.
All following tracks are moved one step forward in the
program.
Playback time display mode
You can set what is shown on the display when in playback
time display mode.
1 Press the main unit TIME/DISPLAY key (or the
remote control TIME key) to cycle through the three
types of time display.
The currently selected display mode is shown above the
main display.
No indicator
The elapsed time of the current track is shown.
“REMAIN” indicator
The remaining time of the current track is shown.
“TOTAL” and “REMAIN” indicators
The total remaining time is shown.
When stopped, the total time is always shown
•
regardless of whether the “TOTAL” or “REMAIN”
indicators are shown.
When a data CD is loaded, the remaining time and
•
total remaining time during playback and the total
time when playback is stopped are not shown. (Only
the number of tracks or the track number is shown;
“ ––” appears in place of the time display.)
In programmed playback mode, the program total
•
elapsed time and remaining time are shown.
The time display mode setting is retained even if the
•
power is turned OFF.
Text information display mode
Text information can be shown on the display. ID3 tag
information can be shown for data CDs and CD text
information can be shown for audio CDs. This information
cannot be shown if it is not recorded in the disc or file.
1 To show text information, press the TIME/DISPLAY
key while holding the SHIFT key on the main unit (or
press the DIS PLAY key on the remote control). Press
again to cycle through the available text information
(see below).
An indicator for the currently selected display mode
is shown above the main display. The contents shown
differ during playback and when paused and between
data CDs and audio CDs.
[Audio CD/Data CD title]
[Data CD file name]
During playback
TITLE
indicator
•
The track title is shown.
ARTIST
•
indicator
The track artist name is shown.
Page 30
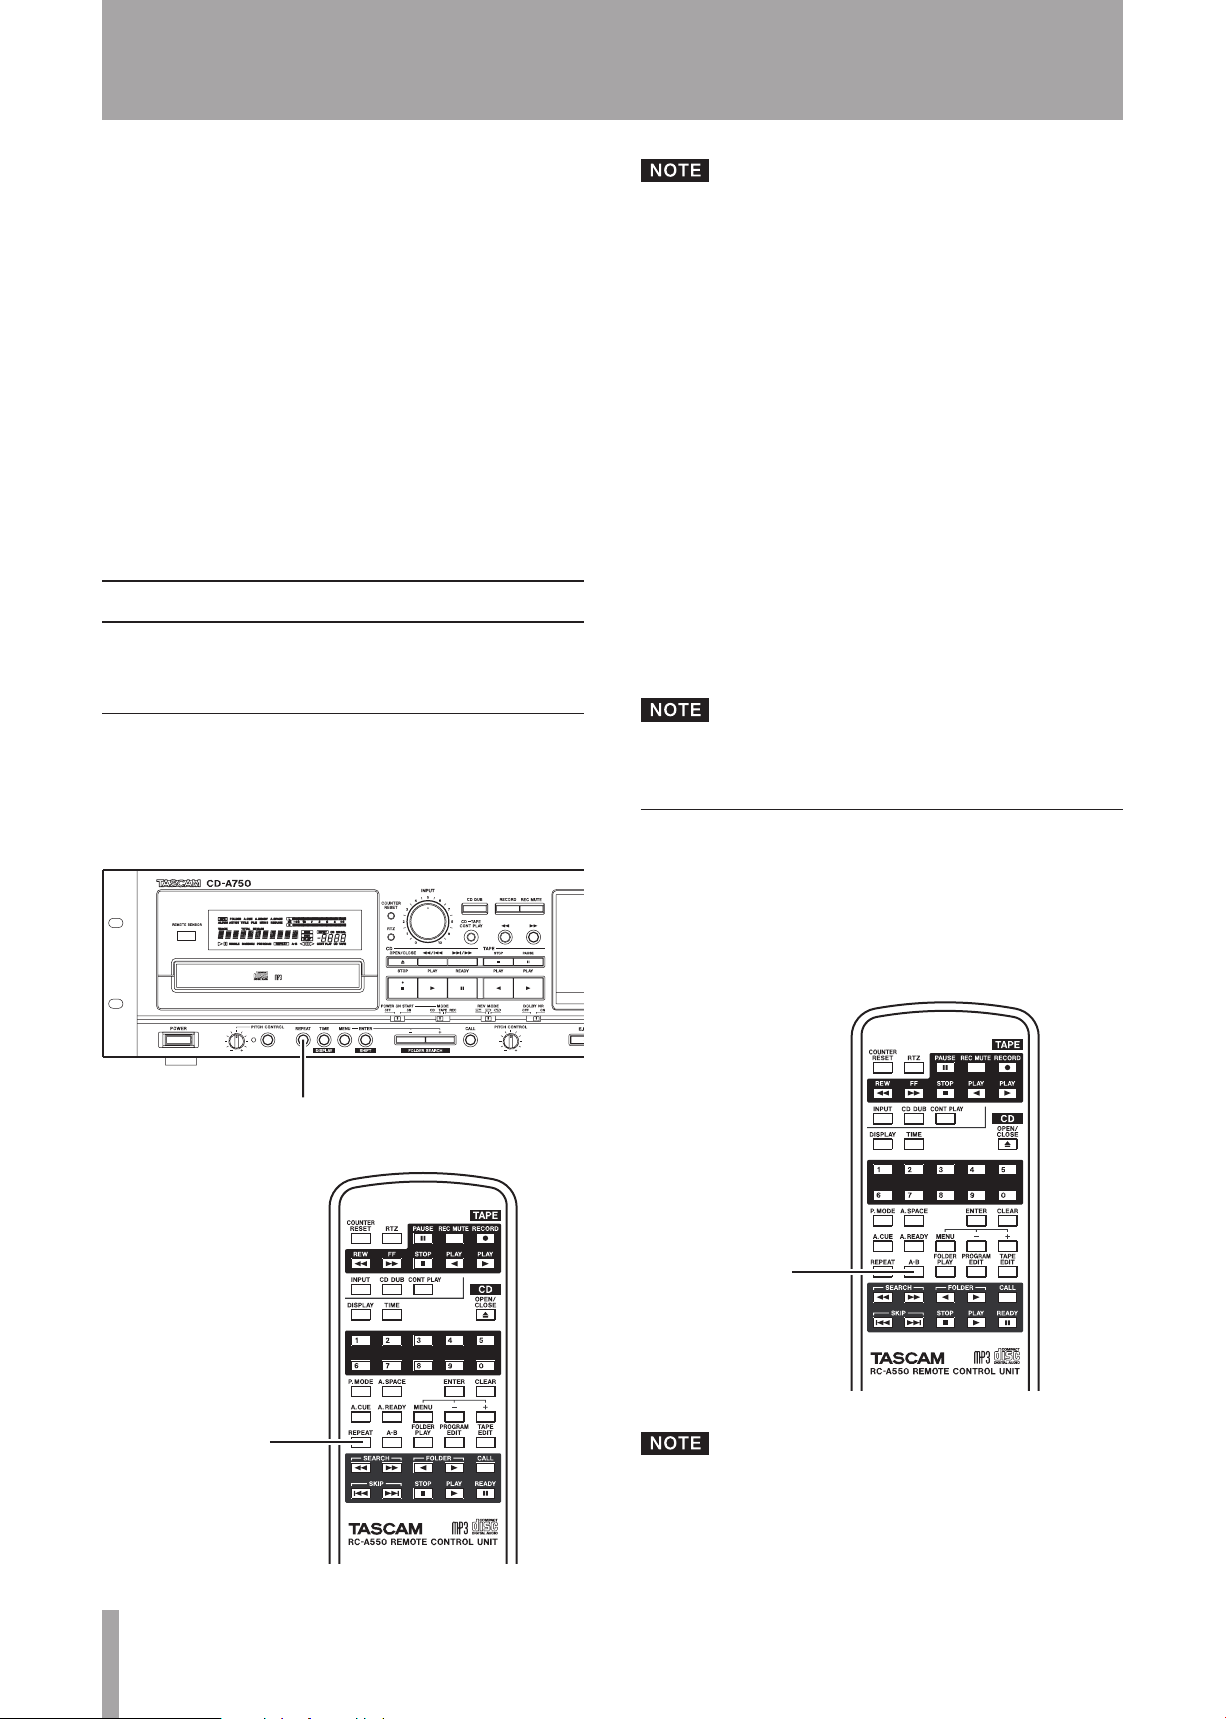
30 TASCAM CD-A550/CD-A750
5 – Playing Back CDs
REPEAT key
REPEAT key
A-B key
FILE
indicator (data CDs only)
•
The file name is shown.
When paused
ALBUM TITLE
•
The album title is shown (when using an audio CD).
The folder name or volume label is shown (when using
a data CD).
ALBUM ARTIST
•
The album artist name is shown.
2 To return to time display, press the TIME key on the
main unit or the remote control.
Repeat playback
This unit can play all tracks repeatedly or repeat a selected
section of one track (A–B repeat playback).
indicator
indicator (audio CDs only)
If the folder playback function is ON when using a
•
data CD, only the tracks in the current folder are
played.
If repeat playback is turned ON when programmed
•
playback mode is active, the tracks in the program
are played back repeatedly. If repeat playback is
turned ON when single playback mode is active, the
currently selected track is played back repeatedly.
When the auto ready function is ON, playback pauses
•
at the start of each track regardless of whether the
repeat function is ON or OFF. Turn the auto ready
function OFF to conduct continuous repeat playback.
If repeat playback is turned ON during playback, playback
continues without interruption and repeats from the
beginning of the first track after the end of the last track is
reached. If repeat playback is turned ON when playback is
stopped, it begins when the
REPEAT
the
key on the main unit or the remote control
CD PLAY
key is pushed. Press
again to turn repeat playback OFF (REP EAT disappears from
the screen).
Ordinary repeat playback
Press the R EPE AT key on the main unit or the
remote control to turn repeat playback ON (REPE AT
appears on the display) and play all tracks repeated ly.
The repeat function ON/OFF setting is retained even if
the power is turned OFF.
A–B repeat playback
Repeat playback of a selection of a track (A–B) is possible.
1 During playback or when paused, press the remote
control A–B key at the point where you want to set
the start point (A) for the repeat playback selection.
REP EAT and A– appear on the display and B blinks.
If you press the REPEAT key, the repeat playback start
point (A) is canceled and “REPEAT” and “A–” disappear
from the display.
Page 31
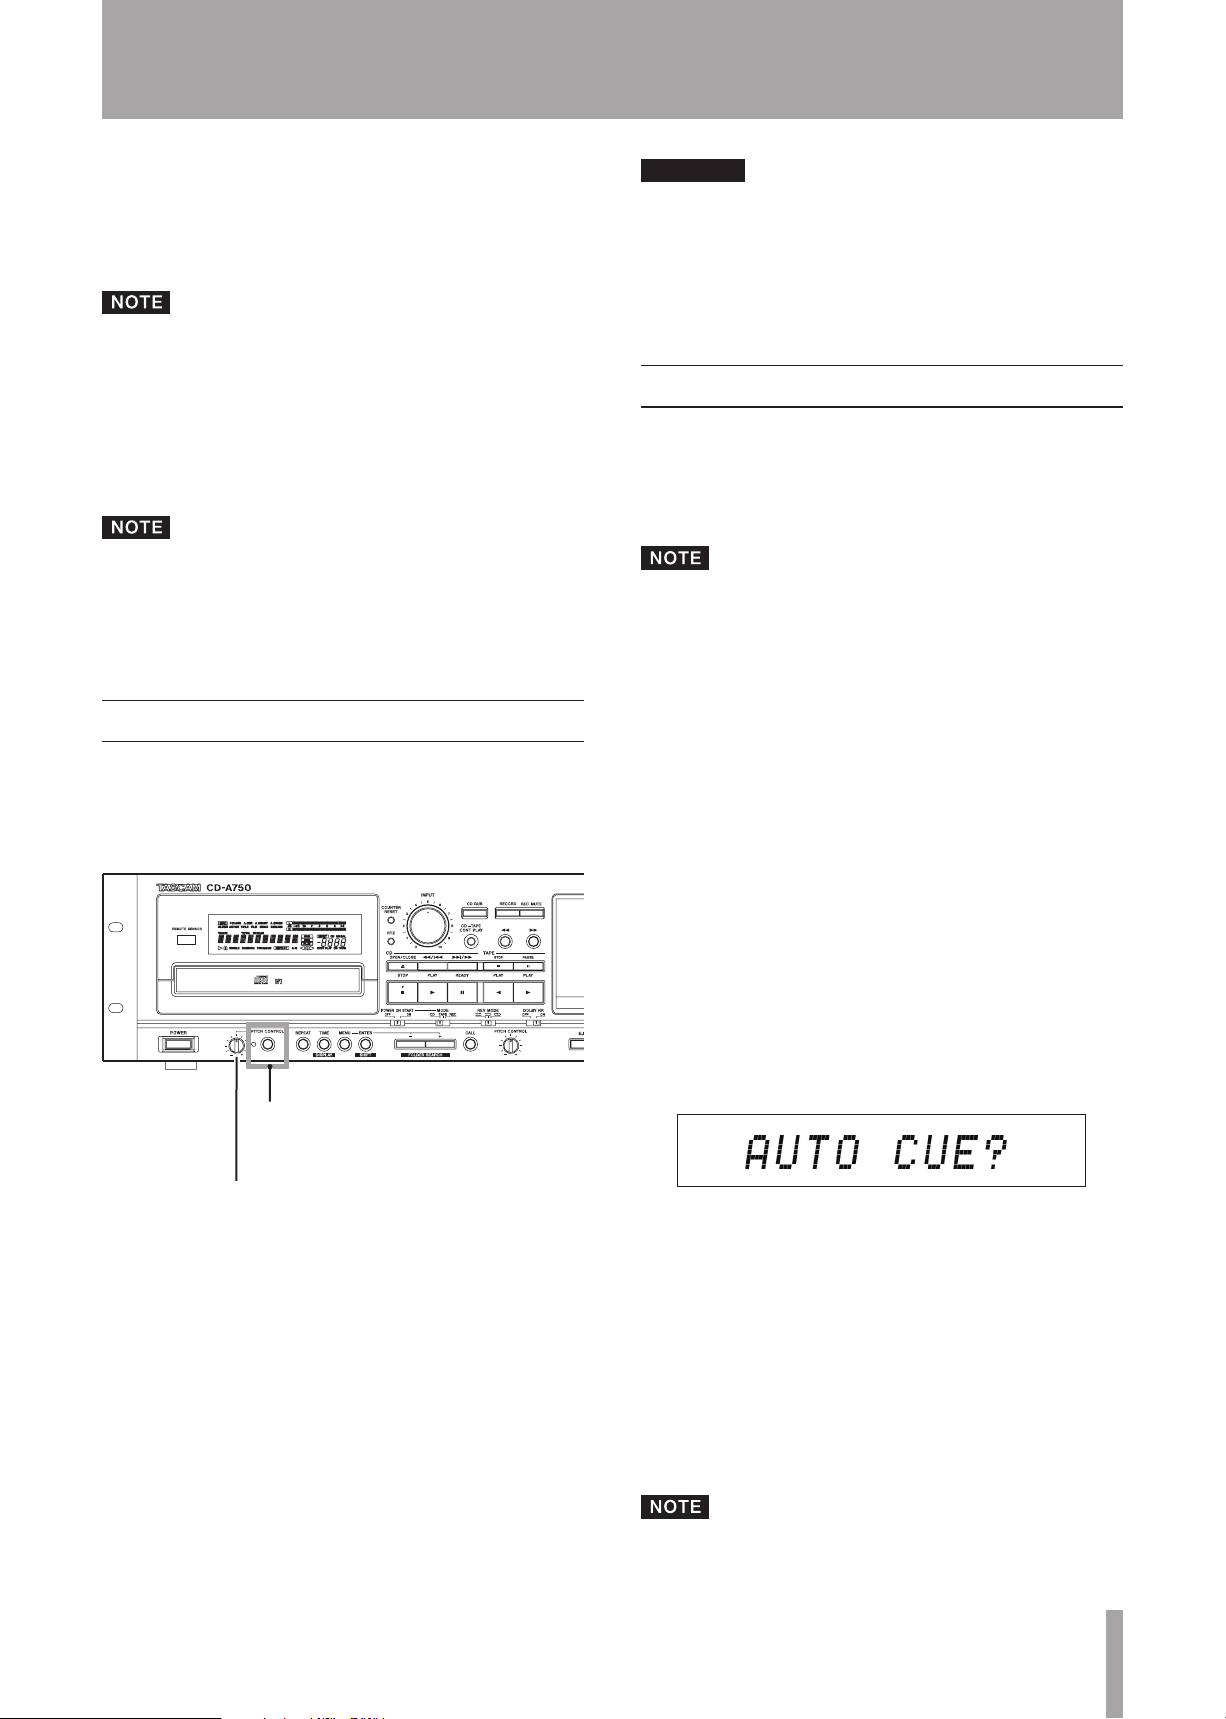
TASCAM CD-A550/CD-A750 31
2 Press the remote control A–B key again at the point
PITCH CONTROL key/
Indicator
PITCH CONTROL knob
CAUTION
where you want to set the end point (B) for the
repeat playback section. R EPEAT and A–B appear on the
display, the repeat section (A–B) is confirmed and
A–B repeat playback begins.
The A–B repeat playback section cannot span more than
one track.
Stopping A–B repeat playback
ª
Press the remote control A–B key or the REPE AT key.
REP EAT and A–B disappear from the display and A–B
repeat playback stops.
If A–B repeat playback is stopped during playback,
•
the track continues playing past the B point.
Press the CD STOP key to stop CD playback and cancel
•
the designated repeat section (A–B).
Pitch control
This unit can change the pitch (sound frequency and
playback speed) during CD playback (pitch control
playback).
Follow the procedures below to use pitch control playback.
5 – Playing Back CDs
During playback, turning pitch control playback
•
ON or OFF might cause the playback sound to skip
momentarily.
Using pitch control playback with a data CD (MP3,
•
WAV) sometimes causes the playback sound to skip.
Auto cue function (audio CDs only)
If the auto cue function is ON, when a track is selected, the
silence at the beginning of the track is skipped and the unit
pauses at the position where the “signal” actually starts in
the track. This allows sound to be heard immediately after
playback is started.
The auto cue function cannot be used with data CDs.
•
When the auto cue function is ON, even if a track
•
is selected during playback, playback pauses at the
position where the “signal” actually starts after the
track is selected.
You can also set the audio signal detection threshold level
auto cue level) for use with the auto cue function. In short,
this unit recognizes signals above the auto cue level as
“signal” and ignores any signal below the auto cue level as
“silence.”
Follow the procedures below to use the menu to turn the
auto cue function ON and OFF and set the auto cue level.
(See “Using the menu” on page 17 for details about how to
use the menu.)
1 Press the PITCH CONTROL key on the main unit to
turn pitch control playback ON. The indicator next
to the PITCH CONTROL key lights.
2 Use the CD PITCH knob on the main unit to adjust
the pitch. You can raise or lower the pitch by up to
12.5%.
Turning pitch control playback OFF
ª
Press the PITCH CONTROL key on the main unit
again to turn pitch control playback OFF.
PITCH CONTROL
The
indicator turns off.
1 When in standard display mode, press the MENU
key on the main unit or the remote control to enter
menu mode.
2 Use the -/+ keys on the main unit or the remote con-
trol to show
AUTO CUE?
on the main display,
and press the ENTER key.
3 Use the –/+ key to select the desired value from the
following options.
The auto cue function is turned ON by all values besides
“OFF” and they set the auto cue level.
Options: OFF (default value), –24dB, –30dB, –36dB,
–42dB, –48dB
4 Press the ENTER key to return to the standard dis-
play.
When the auto cue function is ON, A.CUE appears on the
display.
The auto cue setting is retained even if the power is
•
turned OFF.
Page 32
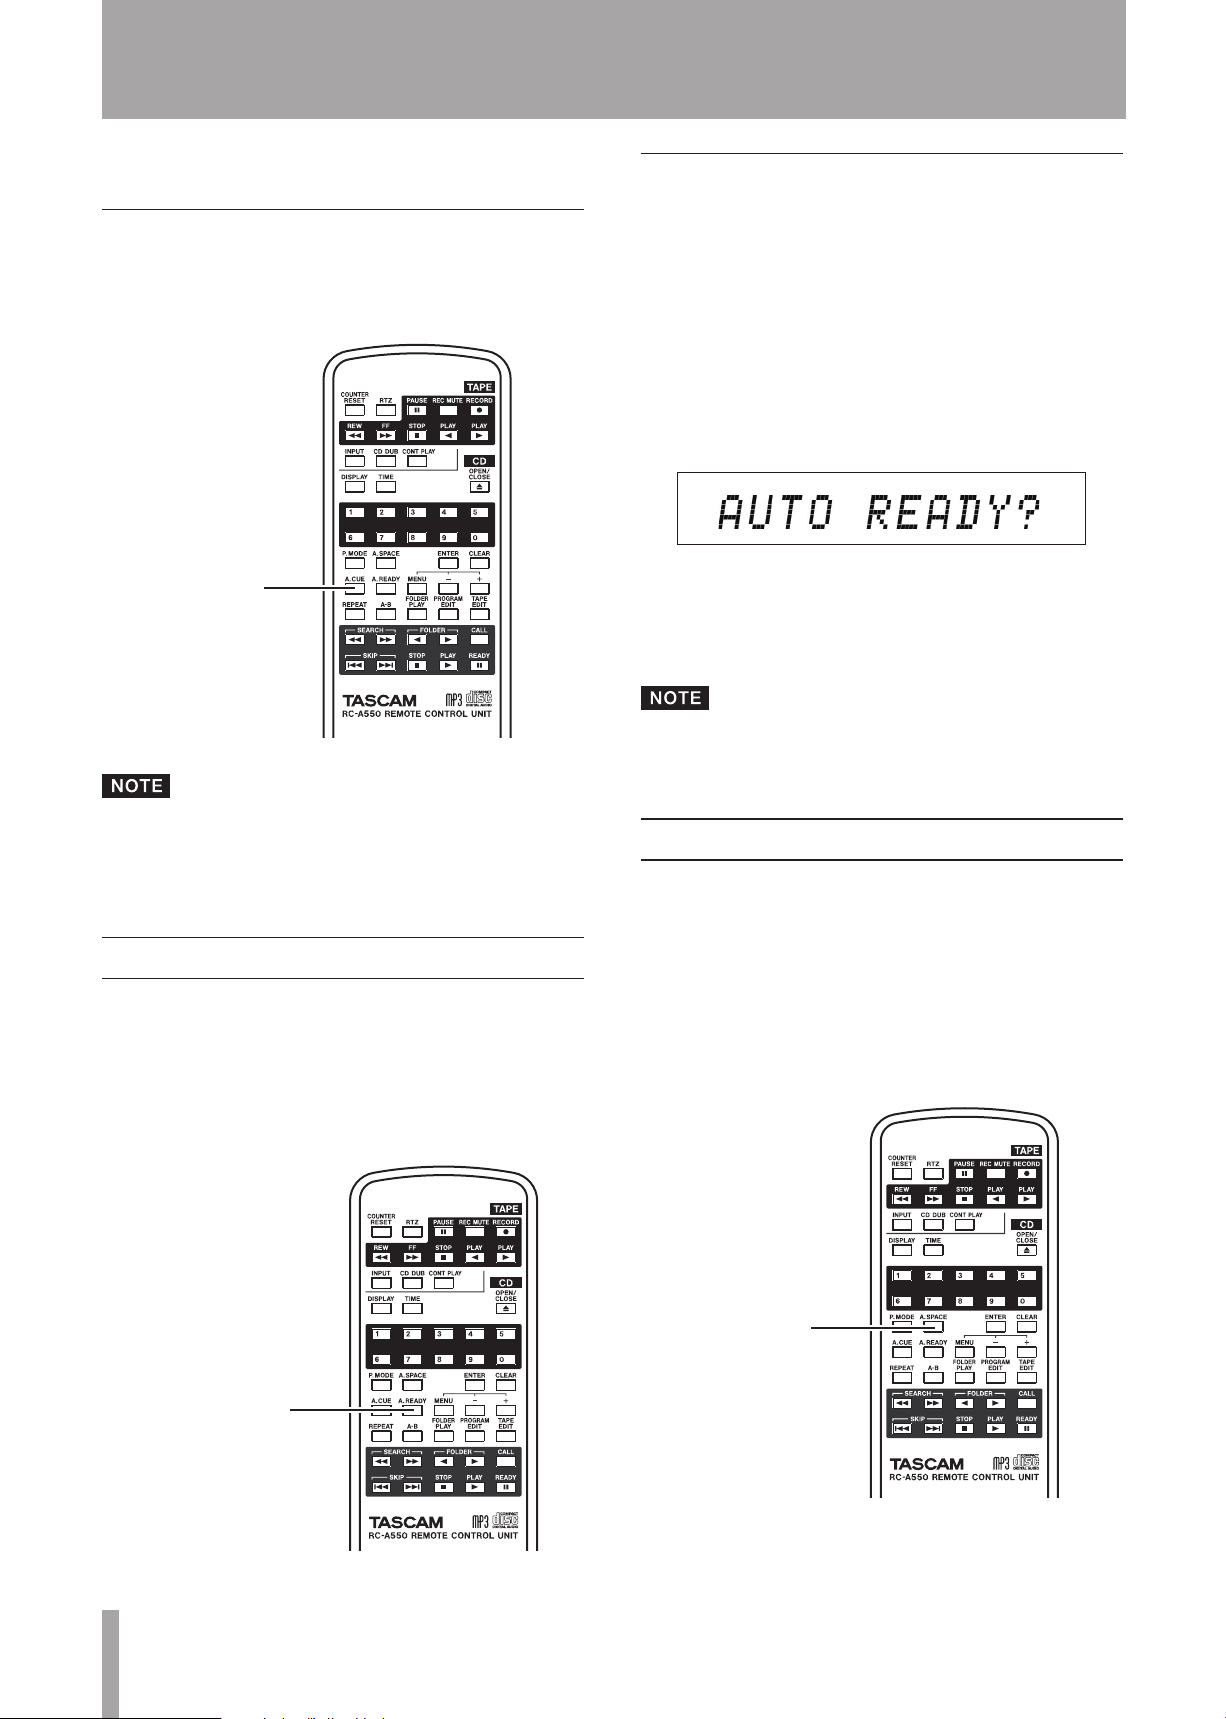
32 TASCAM CD-A550/CD-A750
5 – Playing Back CDs
A.CUE key
A.READY key
A.SPACE key
The auto cue function cannot be used with data CDs.
•
Turning auto cue ON and OFF using the remote control A.CUE key
Press the A.CUE key on the remote control to turn
the auto cue function ON and OFF.
Turning the auto ready function ON and OFF from the main unit
The auto ready function can be turned ON and OFF from
the main unit using the menu. (See “Using the menu” on
page 17 for details about how to use the menu.)
1 When in standard display mode, press the MENU
key on the main unit or the remote control to enter
menu mode.
2 Use the –/+ keys on the main unit or the remote con-
trol to show
and press the ENTER key.
3 Use the –/+ keys to choose “ON” or “OFF” (default
value).
4 Press the ENTER key to return to the standard dis-
play.
AUTO READY?
on the main display,
The auto cue setting is retained even if the power is
•
turned OFF.
The auto cue level cannot be set with the A.CUE key.
•
Auto ready function
When the auto ready function is ON, after playback of a
track finishes, playback pauses at the start of the next track.
Press the A.READY key on the remote control to turn
the auto ready function ON and OFF.
A.READY appears on the display when the auto ready
function is ON.
The auto ready setting is retained even if the power is
turned OFF.
Auto space function
When the auto space function is ON, a four-second space is
automatically added between tracks during playback.
In other words, after a track finishes playing, the CD pauses
for four seconds before the next track starts to play.
Press the A.SPACE key on the remote control to turn
the auto space function ON and OFF.
When the auto space function is ON, A. SPACE appears on
the display.
Page 33
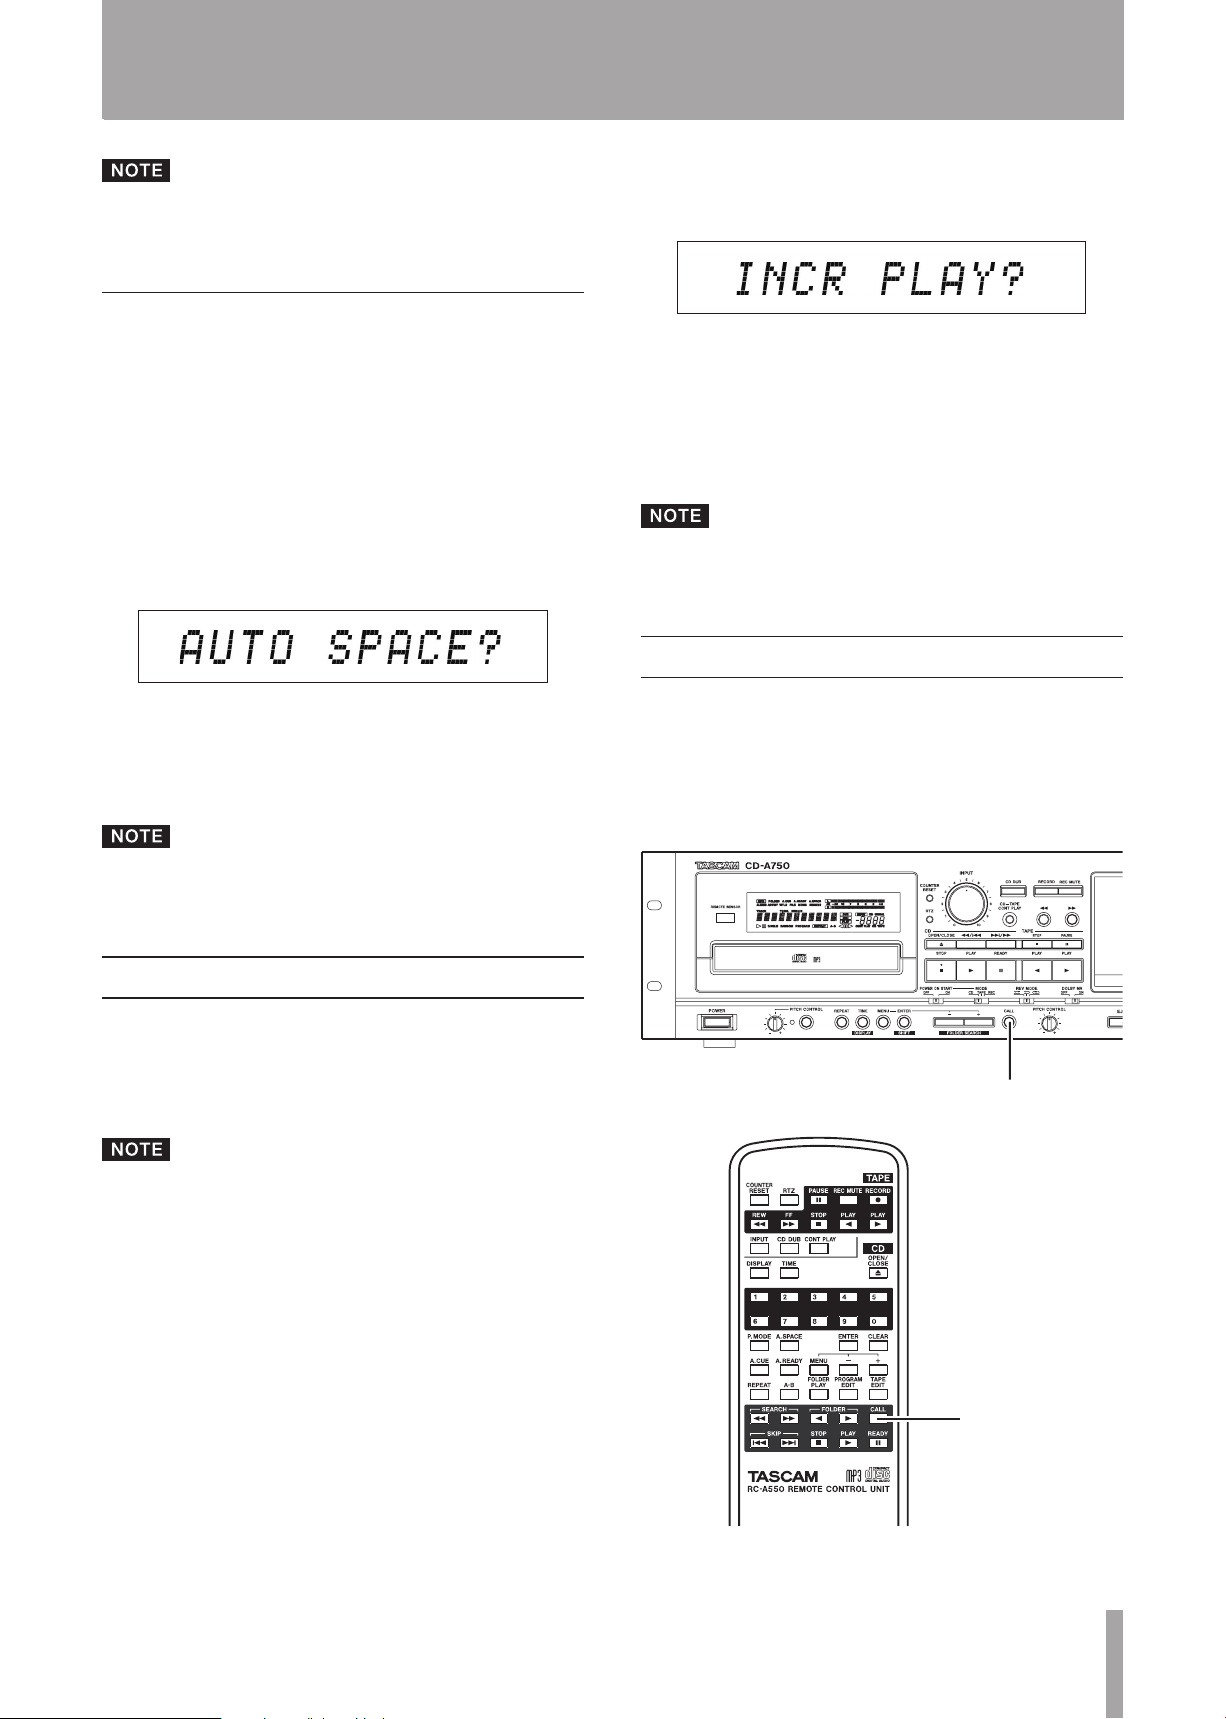
TASCAM CD-A550/CD-A750 33
To use the auto space function, the auto ready function
CALL key
CALL key
must be OFF. The auto space function does not work if
the auto ready function is ON.
Turning the auto space function ON and OFF from the main unit
The auto space function can be turned ON and OFF from
the main unit using the menu. (See “Using the menu” on
page 17 for details about how to use the menu.)
5 – Playing Back CDs
2 Use the –/+ keys on the main unit or the remote con-
trol to show “
and press the ENTER key.
3 Use the –/+ keys to select “ON” or “OFF” (default
value).
4 Press the ENTER key to return to the standard dis-
play.
INCR PLAY?
” on the main display,
1 When in standard display mode, press the MENU
key on the main unit or the remote control to enter
menu mode.
2 Use the –/+ keys on the main unit or the remote con-
trol to show
AUTO SPACE?
on the main display,
and press the ENTER key.
3 Use the –/+ keys to select “ON” or “OFF” (default
value).
4 Press the ENTER key to return to the standard dis-
play.
The auto space setting is retained even if the power is
turned OFF.
Incremental play
If the Incremental play function is ON, pressing the
PL AY
key during playback cause the next track to play
from its beginning, and pressing the
CD STOP
playback causes the unit to pause at the beginning of the
next track.
CD
key during
When the incremental play function is ON, TRACK blinks on
the display during playback.
The incremental play setting is retained even if the
power is turned OFF.
Call function
The call function allows you to return to the last point
where playback was started from a paused state (call point)
and pause again.
Press the CALL key on the main unit or the remote
control during playback or when stopped to use the
call function.
If the CD PLAY key is pressed when the incremental play
function is ON, playback resumes from the paused position, and if the CD STOP key is pressed when paused,
playback stops.
Moreover, if the CD PLAY key is pressed during playback
of the final track, the first track begins to play, while if
the CD STOP key is pressed, playback pauses at the first
track.
Use the menu to turn the incremental function ON and OFF.
(See “Using the menu” on page 17 for details about how to
use the menu.)
1 When in standard display mode, press the MENU
key on the main unit or the remote control to enter
menu mode.
Page 34

34 TASCAM CD-A550/CD-A750
5 – Playing Back CDs
The call point is erased after any of the following
operations.
The power is turned OFF
•
The disc tray is opened
•
The playback mode is changed
•
The folder playback function ON/OFF setting is
•
changed
The folder is changed
•
If you press the CALL key when no call point has
•
been set, “No Call Pt!” appears on the main display.
The call function cannot be used during random
•
playback mode.
Resume playback
Turn the resume playback function ON to allow playback
to restart from the position where playback was last stopped
(resume point).
When the resume playback function is ON, RESUME appears
on the display.
1 When in standard display mode, press the MENU
key on the main unit or the remote control to enter
menu mode.
2 Use the –/+ keys on the main unit or the remote con-
trol to show “RESUME?” on the main display, and
press the ENTER key on the main unit or the remote
control.
EOM function
Turn the EOM (End Of Message) function ON to have the
unit start blinking the playback time display when the audio
CD reaches the remaining playback time set in advance. In
addition, the CD-A750 model can send an EOM tally signal
with this information from its
jack, and this tally signal can be used to light an external
lamp, for example. Use the menu to set the EOM function.
(See “Using the menu” on page 17 for details about how to
use the menu.)
1 When in standard display mode, press the MENU
key on the main unit or the remote control to enter
menu mode.
2 Use the –/+ keys on the main unit or the remote con-
trol to show “
and press the ENTER key.
3 Use the –/+ keys to choose one of the following set-
tings.
Options: OFF (default value), 5sec, 10sec, 15sec, 20sec,
25sec, 30sec, 35sec
All the settings except for “OFF” turn the EOM function
ON and indicate the number of seconds before the end
of the track when the unit’s playback time starts to blink
on the display.
4 Press the ENTER key to return to the standard dis-
play.
EOM DISP?
CONTROL I/O PARALLEL
” on the main display,
3 Use the –/+ keys on the main unit or the remote con-
trol to select “ON” or “OFF” (default value).
4 Press the ENTER key to return to the standard dis-
play.
The resume point ON/OFF setting is retained even if
•
the power is turned OFF.
The resume point is erased after any of the following
•
operations.
The disc tray is opened
–
The folder playback function ON/OFF setting is
–
changed
The folder is changed
–
The playback mode is changed
–
This setting is retained even if the power is turned OFF.
How to use the tally signal (CD-A750 only)
1 Following the procedures above, use the menu to
set the EOM DISPLAY item to any setting besides
“OFF.”
2 Connect this unit to the device that is to receive the
EOM tally signal using the CONTROL I/O PARALLEL
jack. See “Using the parallel connector” on page 45
for information about the PARALLEL jack pin allocation.
3 Turn the power of this unit and the receiving device
ON.
4 Start playback of the CD in this unit. During play-
back, when the set track remaining time is reached
the EOM tally signal is output from the CONTROL I/
O PARALLEL jack.
Page 35

TASCAM CD-A550/CD-A750 35
REV MODE switch
DOLBY NR switch
TAPE PLAY key
TAPE PLAY key
TAPE STOP key
6 – Playing Back Cassette Tapes
This chapter explains the playback functions of this unit’s
cassette recorder. The following explanation assumes
that this unit’s power is ON and that a cassette tape with
a recorded signal has been loaded with the A side facing
forward.
Preparation for tape playback
Selecting the reverse mode
Use the
REV MODE
switch to set the reverse mode.
Playing a tape
Press the
remote control to play the A side or the
key to play the B side.
TAPE PLAY
[Á] key on the main unit or the
TAPE PLAY
[Ó]
ä: Repeat playback of both A and B sides five times
Ë: Play both A and B sides once each and then stop
playback
ï: Play either the A or the B side once and then stop
playback
Turning Dolby NR ON and OFF during playback
To play a tape recorded using Dolby B noise reduction, turn
DOLBY NR
the
switch ON before playback.
You can play both a CD and a cassette tape at the same
time.
Stopping playback
ª
Press the TAPE STOP key.
Use the same Dolby B noise reduction ON/OFF setting as
was used during recording.
Page 36

36 TASCAM CD-A550/ CD-A750
6 – Playing Back Cassette Tapes
TAPE STOP key
TAPE Ô/ key
TAPE Ô/ key
Tape counter
COUNTER RESET key
COUNTER
RESET key
Tape counter
The tape counter value increases as the tape runs from left
to right, and it decreases as it runs from right to left.
To fast-forward or rewind
ª
Press the TA PE or Ô key on the main unit or
the remote control. Press the TAPE STOP key to stop
fast-forwarding or rewinding.
Press the
remote control to reset the tape counter to “0000.”
COUNTER RESET
key on the main unit or the
Page 37

TASCAM CD-A550/CD-A750 37
6 – Playing Back Cassette Tapes
RTZ key
RTZ key
TAPE PITCH CONTROL knob
RTZ
Pitch control
The pitch of the sound can be changed during cassette
playback.
Turn the TAPE PITCH CONTROL knob on the main
unit to the right to increase the playback speed and
raise the playback pitch. Turn it to the left to slow
the playback speed and lower the playback pitch.
The knob has an indentation at the center, which is
the position for playback at the standard pitch. The
pitch can be raised or lowered by up to 10%.
Press the RTZ key on the main unit or the remote
control to return the cassette tape playback position
to the counter zero point (0000). The RTZ key does
not function, however, if pressed when the counter
value is between “9996” and “0004.”
RTZ is an abbreviation for “return to zero.”
Cassette playback pitch cannot be controlled with
•
the remote control.
Although there is a PITCH CONTROL key to turn
•
the CD pitch control ON and OFF, there is no key to
turn the cassette recorder pitch control ON and OFF.
To play a tape at the standard pitch, set the PITCH
CONTROL knob to its center (indented) position.
Page 38

38 TASCAM CD-A550/ CD-A750
7 – Recording Cassette Tapes
REV MODE switch
DOLBY NR switch
INPUT key
This unit can record to cassette tapes. The following
procedures explain how to prepare for recording by setting
the reverse mode and Dolby NR and selecting the input and
then actual recording. This explanation assumes that the
unit’s power is ON and that a recordable (write-protect tabs
not removed) cassette tape has been loaded already.
Preparing to record
Selecting the reverse mode
Use the
or both sides.
REV MODE
Ë: After recording on both A and B sides, the unit
stops.
ï: After recording on either the A or B side, the unit
stops.
switch to set the unit to record on one
the input source. Press the key repeatedly to cycle
through the input sources.
The active input source appears on the main area of the
display.
INPUT CD
player
INPUT UNBAL
INPUT (UNBALANCED)
INPUT BAL
TAPE INPUT (BALANCED)
the
Using the menu
ª
You can also use the menu to set the record source signal
(input source).
: the playback signal from this unit’s CD
: the signal input through the
jacks on the rear panel
(CD-A750 only): the signal input through
jacks on the rear panel
TAPE
If ä is selected, the unit functions as though Ë had
been selected. In other words, after recording on both A
and B sides, the unit stops.
Turning Dolby NR ON and OFF during recording
Turn the DOLBY NR switch on the main unit ON to
record with Dolby (B Type) noise reduction.
Selecting the recording source
Using the INPUT key on the remote control
ª
The remote control INPUT key can be used to select
1 When in standard display mode, press the MENU
key on the main unit or the remote control to enter
menu mode.
2 Use the –/+ keys on the main unit or the remote con-
trol to show “
play, and press the ENTER key on the main unit or
the remote control.
3 Use the –/+ keys on the main unit or the remote con-
trol to select the input source from the following
options.
CD
: the playback signal from this unit’s CD player.
UNBAL
TAPE INPUT (UNBALANCED)
BAL
(CD-A750 only): the signal input through the
TAPE INPUT (BALANCED)
4 Press the ENTER key on the main unit or the remote
control to return to the standard display.
TAPE INPUT?
(default value): the signal input through the
” on the main dis-
jacks on the rear panel
jacks on the rear panel
Page 39
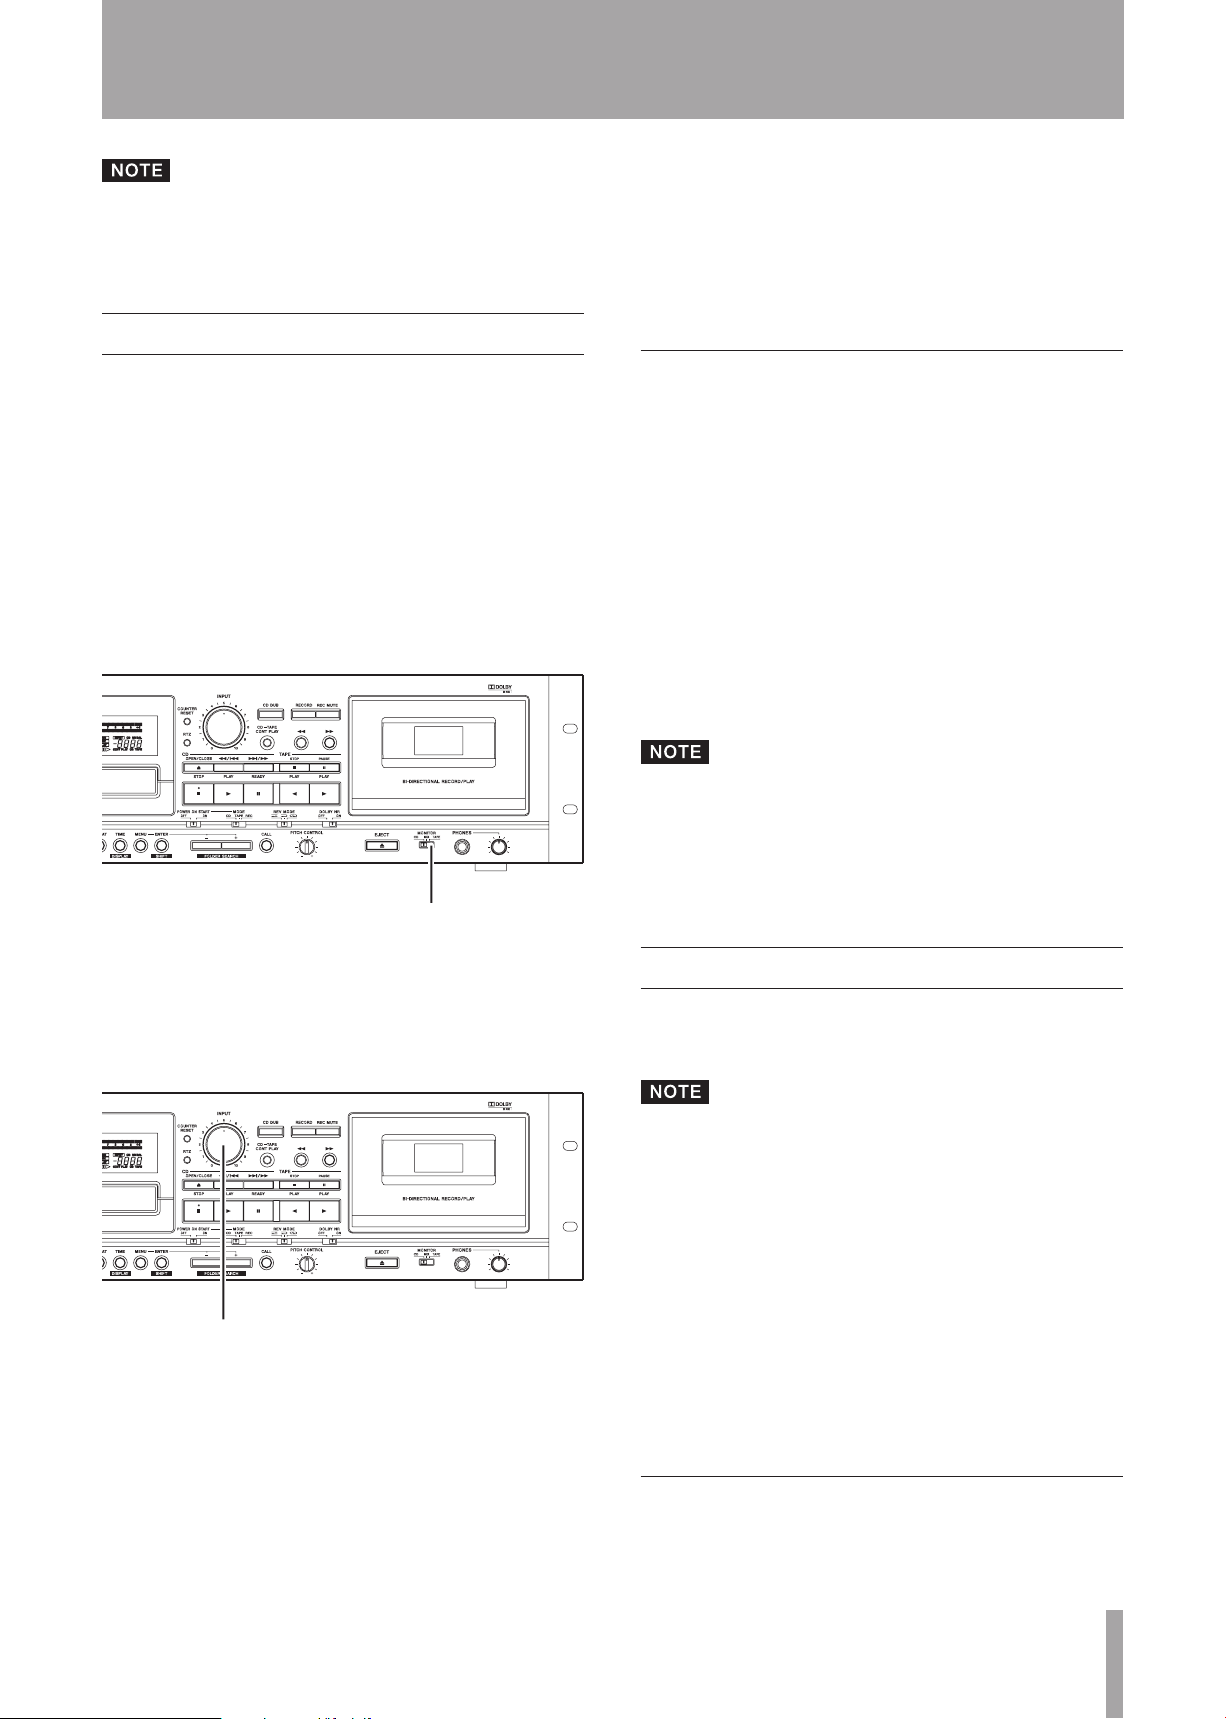
TASCAM CD-A550/CD-A750 39
MONITOR switch
INPUT knob
7 – Recording Cassette Tapes
The CD dubbing function is convenient when recording a CD. See “Dubbing a CD to a tape” on page 39 for
details.
Recording
After completing the above preparations, set the recording
level and begin recording.
1 Press the RECORD key on the main unit or the
remote control.
This makes the unit ready to record ready. The meters
on the display show the input level and the REC indicator
appears.
The sound of the recording source is output through the
TAPE COMMON OUTPUT
MIX
PHONES
TAPE
or
output from the
switch to
jack. This sound can also be
jack by setting the
MONITOR
.
Stopping recording
ª
Press the TAPE STOP key.
Pausing recording
ª
Press the PAUSE key. Press the PAUSE key again or
the TAPE PLAY key to restart recording.
Recording mute function
During recording, press the REC MUTE key on the
main unit or the remote control to record about four
seconds of silence and then pause recording. Press
the TAPE PLAY or PAUSE key on the main unit or the
remote control to restart recording.
Press and hold the REC MUTE key on the main unit
or the remote control for more than four seconds to
create a silence of longer than four seconds. The unit
pauses when the key is released after being held for
more than four seconds.
To create a silence of less than four seconds, press
the PAUSE key during the recording of the silence.
This pauses the unit.
2 To set the record level, start playback of the record-
ing source and adjust the INPUT knob on the main
unit to set the optimal level while looking at the
meters. Adjust the input so that the meters indicate
0 dB at its highest level.
3 Select and confirm the tape operation direction.
The current tape operation direction is shown on the
display with the reverse (Ó) or forward indicator (Á).
To record in the opposite direction, press the
PL AY
key of the desired direction to change the tape
TAPE
operation direction.
4 Press the TAPE PLAY or PAUSE key on the main unit
or the remote control to start recording.
If you press the REC MUTE key again during the
•
recording of silence, ordinary recording restarts.
If you press the REC MUTE key when recording is
•
paused, the unit will record four seconds of silence
and then pause again.
Dubbing a CD to a tape
The CD dubbing function allows you to press the
key on the main unit or the remote control to dub the CD
loaded in the unit to a cassette tape with one touch.
The input source does not need to be selected.
•
The record level is automatically set to the default
•
setting, but you can also set it manually. (See
“Adjusting the record level when dubbing” on page
40.)
The CD programmed playback, random playback,
•
single playback, repeat playback and other functions
can be used as desired when dubbing a CD.
The auto ready and incremental play functions can-
•
not be used during CD dubbing.
The following explanations assume that the CD to be
dubbed and a recordable cassette tape have been loaded in
the unit.
Basic dubbing (recording to the A side of a tape from its beginning)
When playback is stopped, press the CD DUB key on
the main unit or the remote control.
CD DUB
Page 40

40 TASCAM CD-A550/ CD-A750
7 – Recording Cassette Tapes
CD DUB key
CD DUB key
1 Set "CD" as the recording source. (See “Selecting
the recording source” on page 38.)
2 When in standard display mode, press the MENU
key on the main unit or the remote control to enter
menu mode.
3 Use the –/+ keys on the main unit or the remote con-
trol to show "
and press the ENTER key on the main unit or the
remote control.
4 Use the –/+ keys on the main unit or the remote con-
trol to select “VARI.”
Options: FIX (default value), VARI
5 Press the ENTER key on the main unit or the remote
control to return to the standard display.
6 Press the RECORD key on the main unit or the
remote control to make the unit record ready and
enable monitoring of the recording source.
DUB LEVEL?
" on the main display,
The tape automatically rewinds to the start of the A side,
and the tape counter resets to “0000.” The CD pauses at
the beginning of its first track. After the tape records about
eight seconds of silence (to avoid the leader tape), dubbing
starts with the CD beginning playback and the cassette
recorder beginning recording at the same time. (The DUB
indicator appears on the display.)
When the CD playback stops or the tape end is
•
reached, the tape stops (the tape side end that it
stops at depends on the reverse mode) and dubbing
ends.
When dubbing in two-side recording mode, if the
•
last track being recorded to the first side of the tape
is not recorded completely before the operation
direction reverses, that track is recorded again from
its beginning on the second side of the tape.
When dubbing in two-side recording mode, nothing
•
is recorded for eight seconds after the operation
direction is reversed. (CD playback pauses while the
cassette recorder continues in record mode.)
Press the TAPE or CD STOP key to stop dubbing at
•
any time.
7 Play the CD and observe the recording level meters
on the display.
8 Use the INPUT knob to adjust the recording level.
(See “Recording” on page 39.)
9 Press the CD STOP key to stop the CD and the TAPE
STOP key to take the unit out of record ready mode.
10 Press the CD DUB key on the main unit or the
remote control to conduct dubbing in the same way
as described above in “Basic dubbing.”
Using the TAPE EDIT function
Using the TAPE EDIT function, this unit can follow an
automatically prepared program and dub a CD according to
the tape length.
With the TAPE EDIT function, starting with the first track,
CD tracks that total less than the length of the tape side are
recorded in order to the A side of the tape. Then, recording
continues from the next track in order to the B side.
1 When CD playback is stopped, press the TAPE EDIT
key on the remote control to enter TAPE EDIT
mode. The main display appears as shown below.
Adjusting the record level when dubbing
The recording level is automatically set when dubbing a
CD to a tape by default, but the record level can be adjusted
with the
INPUT
knob when dubbing.
Page 41
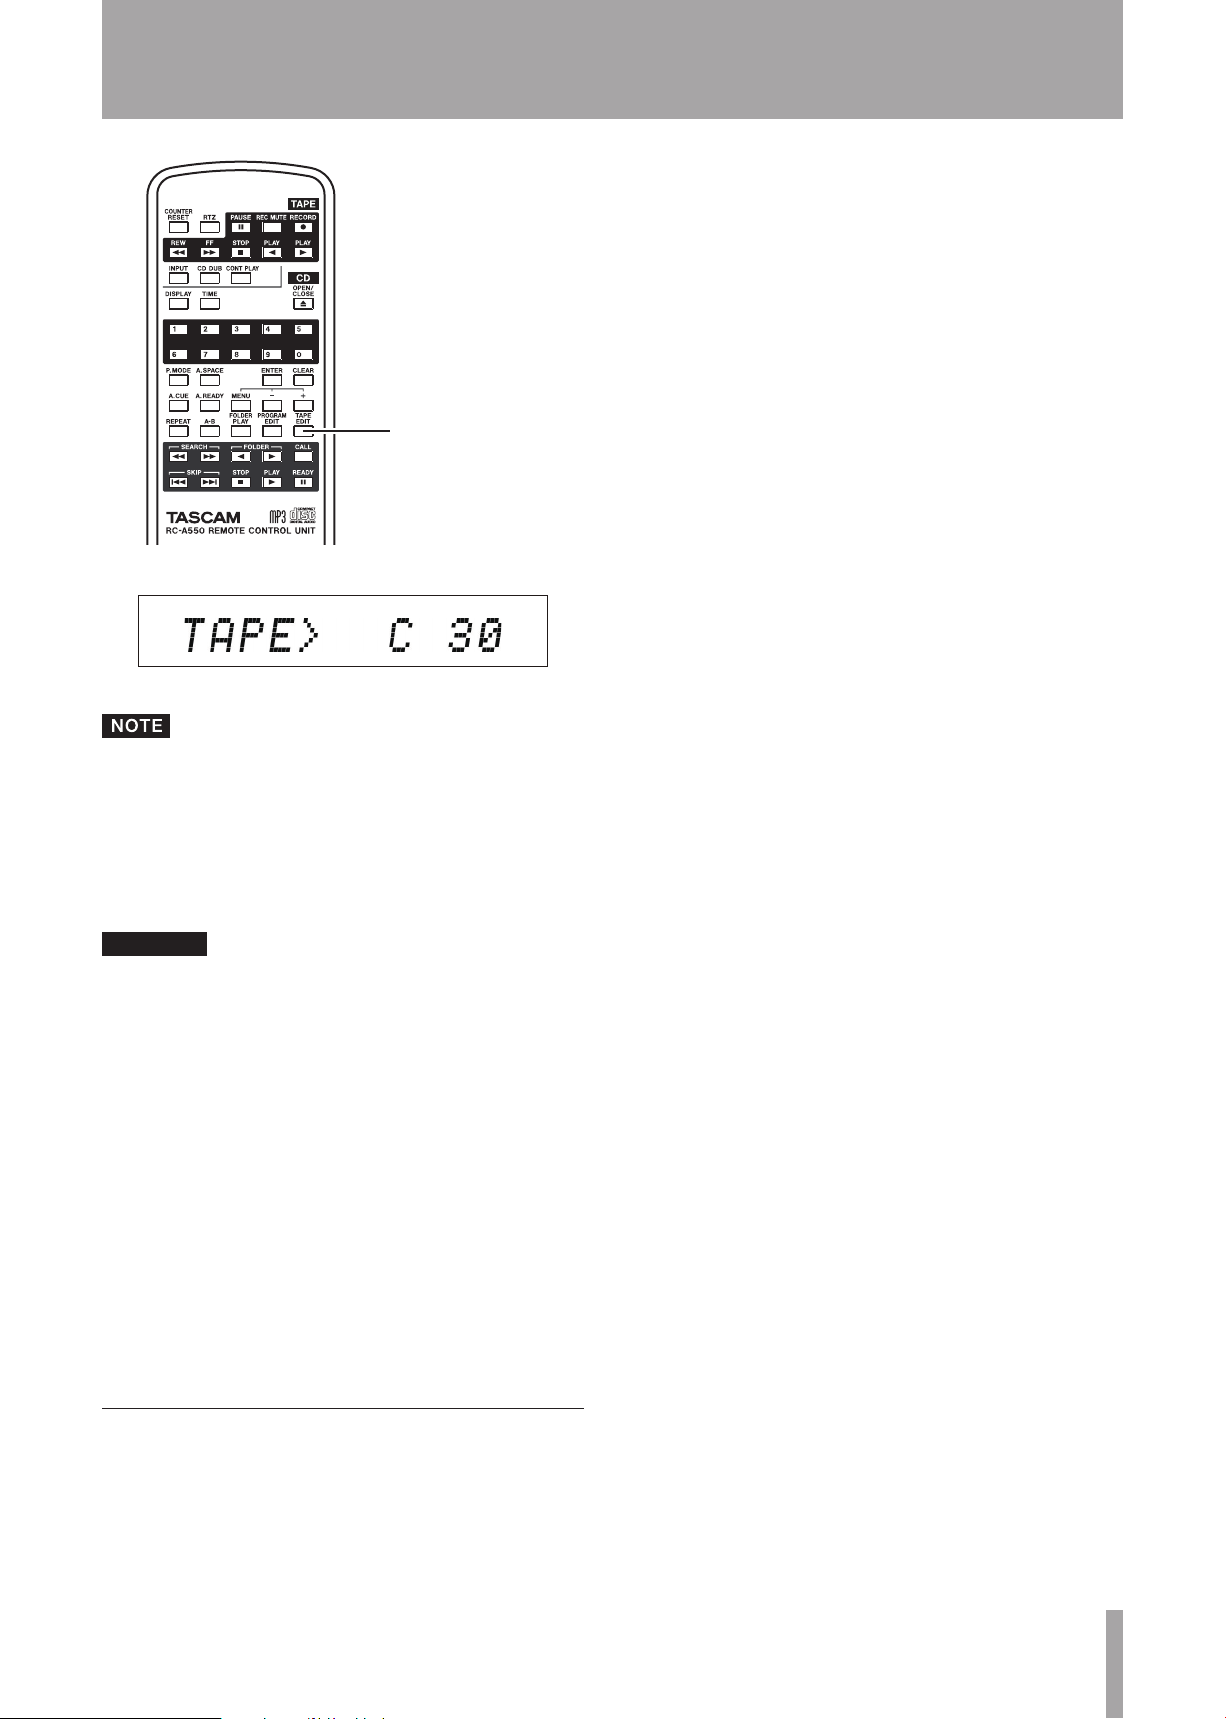
TASCAM CD-A550/CD-A750 41
TAPE EDIT key
CAUTION
7 – Recording Cassette Tapes
3 Press the CD DUB key on the main unit or the
remote control. Dubbing in the set recording direction begins from that position.
You can also select the TAPE EDIT menu item to enter
TAPE EDIT mode.
2 Use the –/+ keys on the main unit or the remote con-
trol to select the length (in minutes) of the tape being
used.
Options: 30 (default), 46, 54, 60, 80, 90, 120
You can select “120” (for a 120-minute tape) when using
the TAPE EDIT function, but use of tapes longer than 90
minutes with this unit is not recommended. (See “Types of
cassette tapes that are not recommended for use with this
unit” on page 10.)
3 Press the ENTER key on the main unit or the remote
control.
If a program has not already been set, this unit
automatically creates a program to fit the length of the
tape.
If a program has already been set, “
appears in the main area of the display.
Press the ENTER key again to discard the current
program and automatically create a program to fit
the length of the tape.
OVERWRITE?
”
Recording from the middle of a tape
1 Set the tape at the position from where you want to
start recording.
2 Press the RECORD key on the main unit or the
remote control to make the unit record ready. REC
and π appear on the display.
Page 42
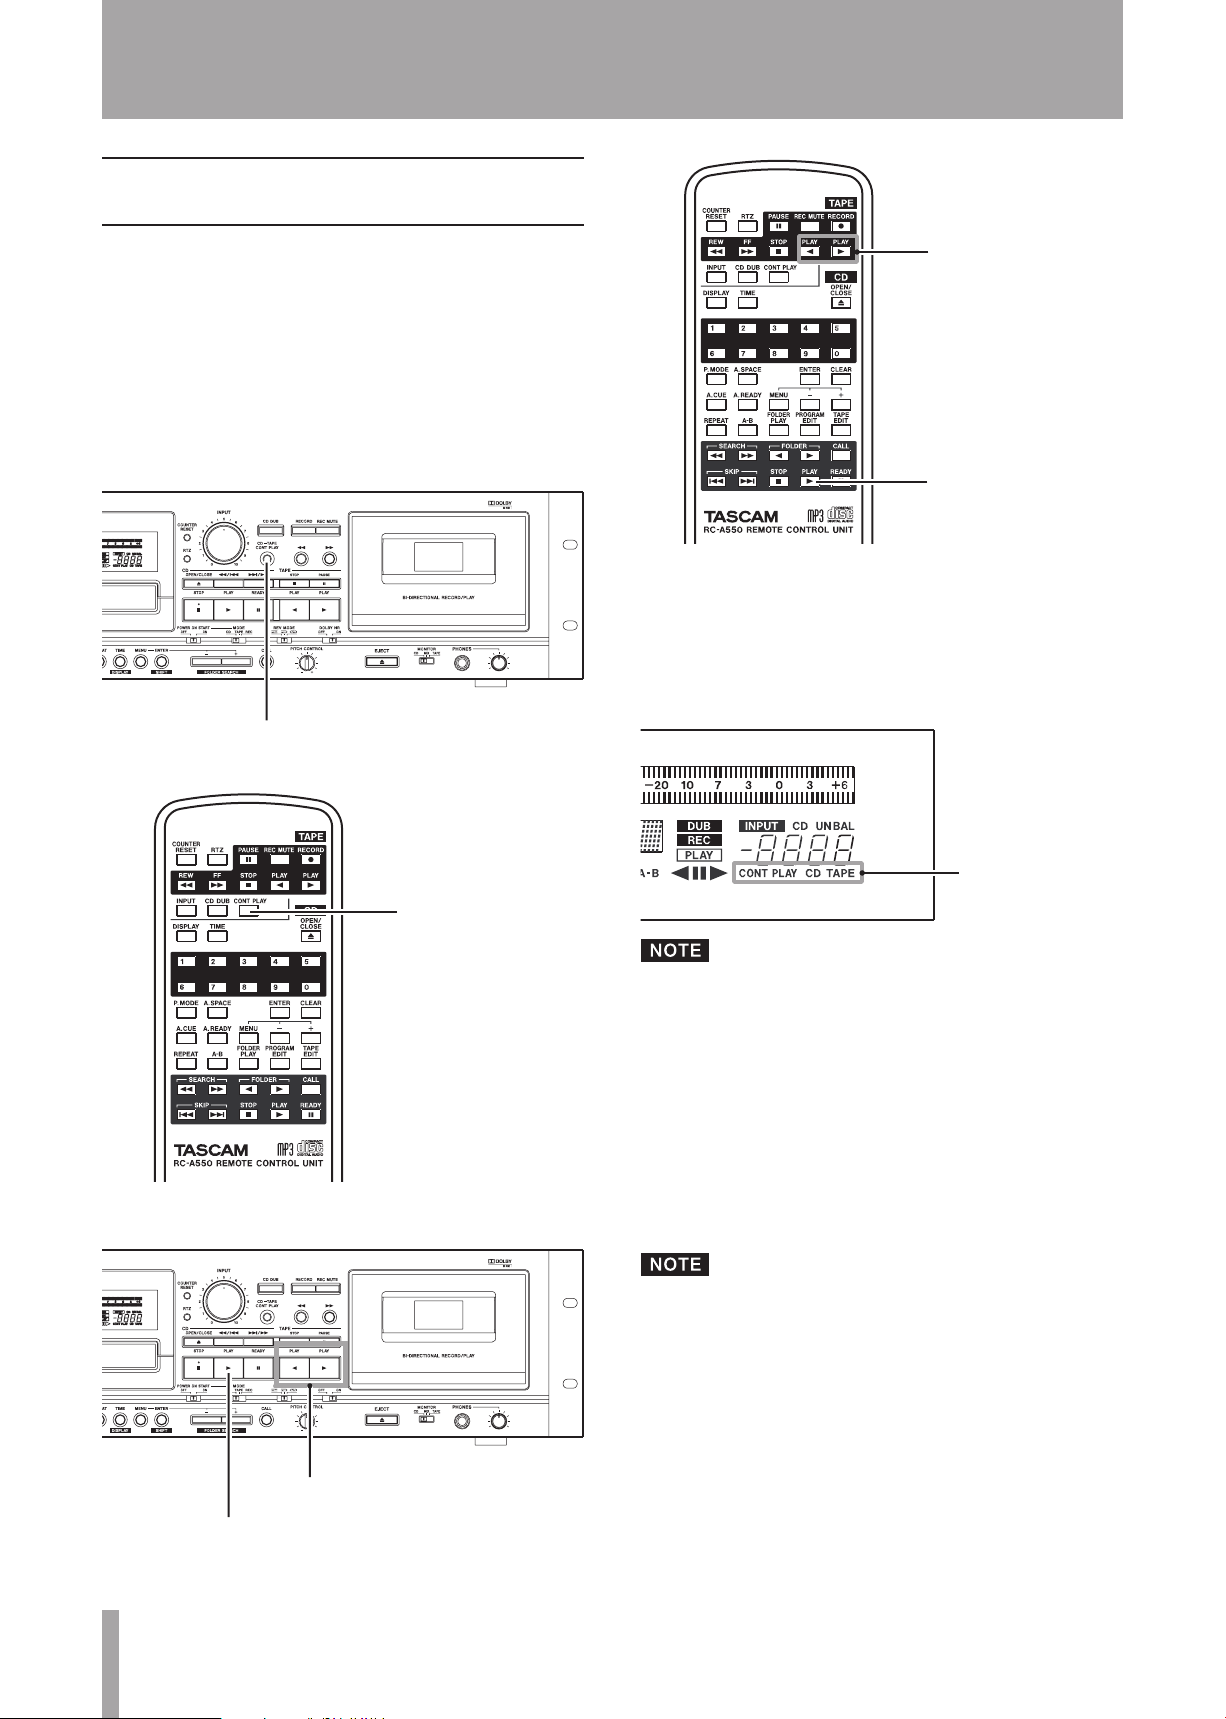
42 TASCAM CD-A550/CD-A750
CD-TAPE CONT PLAY key
CONT PLAY key
TAPE PLAY key
CD PLAY key
TAPE PLAY key
CD PLAY key
CONT PLAY display
8 – Other Functions
Continuous playback of both the CD and the tape
This unit can alternately play the loaded CD and the
cassette tape. In other words, tape playback starts when CD
playback ends and CD playback starts when tape playback
ends.
Before using the following procedures, load a recorded
cassette tape and a CD.
1 Press the CD-TAPE CONT PLAY key on the main unit
or the CONT PLAY key on the remote control.
Depending on the key pressed, the CD or tape begins to
play. When playback of the selected media ends, playback
of the other media automatically starts.
During continuous playback mode, the CONT PLAY indicator
appears on the display, and the indicator for the media
currently being played (TAPE or CD) blinks.
2 Press the CD or TAPE PLAY key.
If you press the TAPE STOP key to manually stop play-
•
back, the other media automatically starts playing.
When playing a CD in REPEAT mode, tape playback
•
does not start until you manually stop the CD
playback. Likewise, when the tape is in auto reverse
mode (ä), CD playback does not start until both
sides of the tape have played five times or playback is
stopped manually.
3 To stop using continuous playback mode, press the
CD-TAPE CONT PLAY key on the main unit or the
CONT PLAY key on the remote control again.
If the factory default settings have not been changed,
the CD playback signal is output from the CD OUTPUT
jacks and the tape playback signal is output from the
COMMON OUTPUT jacks independently. Set the menu
COMMON OUT item to “MIX” or “AUTO” to output both
the tape and CD signals from the COMMON OUTPUT
jacks. (See “Setting the common output signal” on page
20.)
Page 43

TASCAM CD-A550/CD-A750 43
8 – Other Functions
POWRE ON START switch
MODE switch
Power-on start
This unit can be set to automatically start playing a CD or
cassette tape when its power is turned ON. The unit can also
be set to automatically start recording to a cassette tape.
You can, for example, connect this unit’s power cord to
a timer that controls the power supply in order to make it
record or play automatically at a specific time.
1 Load a CD or cassette for playback, or a cassette for
recording into the unit.
2 Set the POWER ON START switch to ON.
3 Set the MODE switch to the desired position.
Restoring default settings
The following items can be restored to their factory default
settings.
All menu items
•
Repeat playback function (OFF)
•
Playback time display (track elapsed time)
•
Text information display (album name)
•
CD pitch control (OFF)
•
Program setting (none)
•
1 When in standard display mode, press the MENU
key on the main unit or the remote control to enter
menu mode.
2 Use the –/+ keys on the main unit or the remote con-
trol to show “
and press the ENTER key on the main unit or the
remote control. “
confirm that you want to restore the default settings.
DEFAULT?
SURE?
” on the main display,
” appears on the display to
CD
: CD playback starts when the power is turned ON.
TAPE
: Cassette tape playback starts when the power is
turned ON.
REC
: Cassette tape recording starts when the power is
turned ON.
If using a timer, use it to turn the power to this unit OFF.
With this setting ON, the unit functions as set automatically
as soon as power is supplied to it.
3 Press the ENTER key on the main unit or the remote
control to confirm and restore the default settings.
Page 44
44 TASCAM CD-A550/ CD-A750
8 – Other Functions
Mono playback
The CD and cassette tape playback signal can be output to
mono using a menu setting.
When the mono playback function is ON, MONO appears on
the display.
1 When in standard display mode, press the MENU
key on the main unit or the remote control to enter
menu mode.
2 Use the –/+ keys on the main unit or the remote con-
trol to show “
area, and press the ENTER key on the main unit or
the remote control.
3 Use the –/+ keys on the main unit or the remote con-
trol to select “ON” or “OFF” (default value).
When set to “ON,” a mono signal is output through the
CD OUTPUT, TAPE COMMON OUTPUT
jacks.
4 Press the ENTER key to return to the standard dis-
play.
MONO OUT?
” on the main display
PHONES
and
Viewing information about this unit
Checking versions
You can check the unit’s firmware version and build
number.
1 When in standard display mode, press the MENU
key on the main unit or the remote control to enter
menu mode.
2 Use the –/+ keys on the main unit or the remote
control to show “
area, and press the ENTER key on the main unit or
the remote control.
3 Use the –/+ keys on the main unit or the remote con-
trol to cycle through showing the version (
build number (
D>
).
4 When finished checking, press the ENTER key to
return to the standard display.
VERSION?
BUIL D>
) and CD drive version (
” in the main display
VER>
),
CD
This setting is retained even if the power is turned
•
OFF.
The CD digital output is not affected by this setting;
•
it cannot be set to mono.
Checking the motor operation time
You can check the operation time of the unit’s CD player
and cassette recorder.
1 When in standard display mode, press the MENU
key on the main unit or the remote control to enter
menu mode.
2 Use the –/+ keys on the main unit or the remote con-
trol to show “
play area, and press the ENTER key on the main unit
or the remote control.
3 Use the –/+ keys on the main unit or the remote con-
trol to switch between showing the CD player motor
operation time (
motor operation time (
4 When finished checking, press the ENTER key to
return to the standard display.
MOTOR TIME?
C D>
) and the cassette recorder
TA PE>
” in the main dis-
).
Page 45
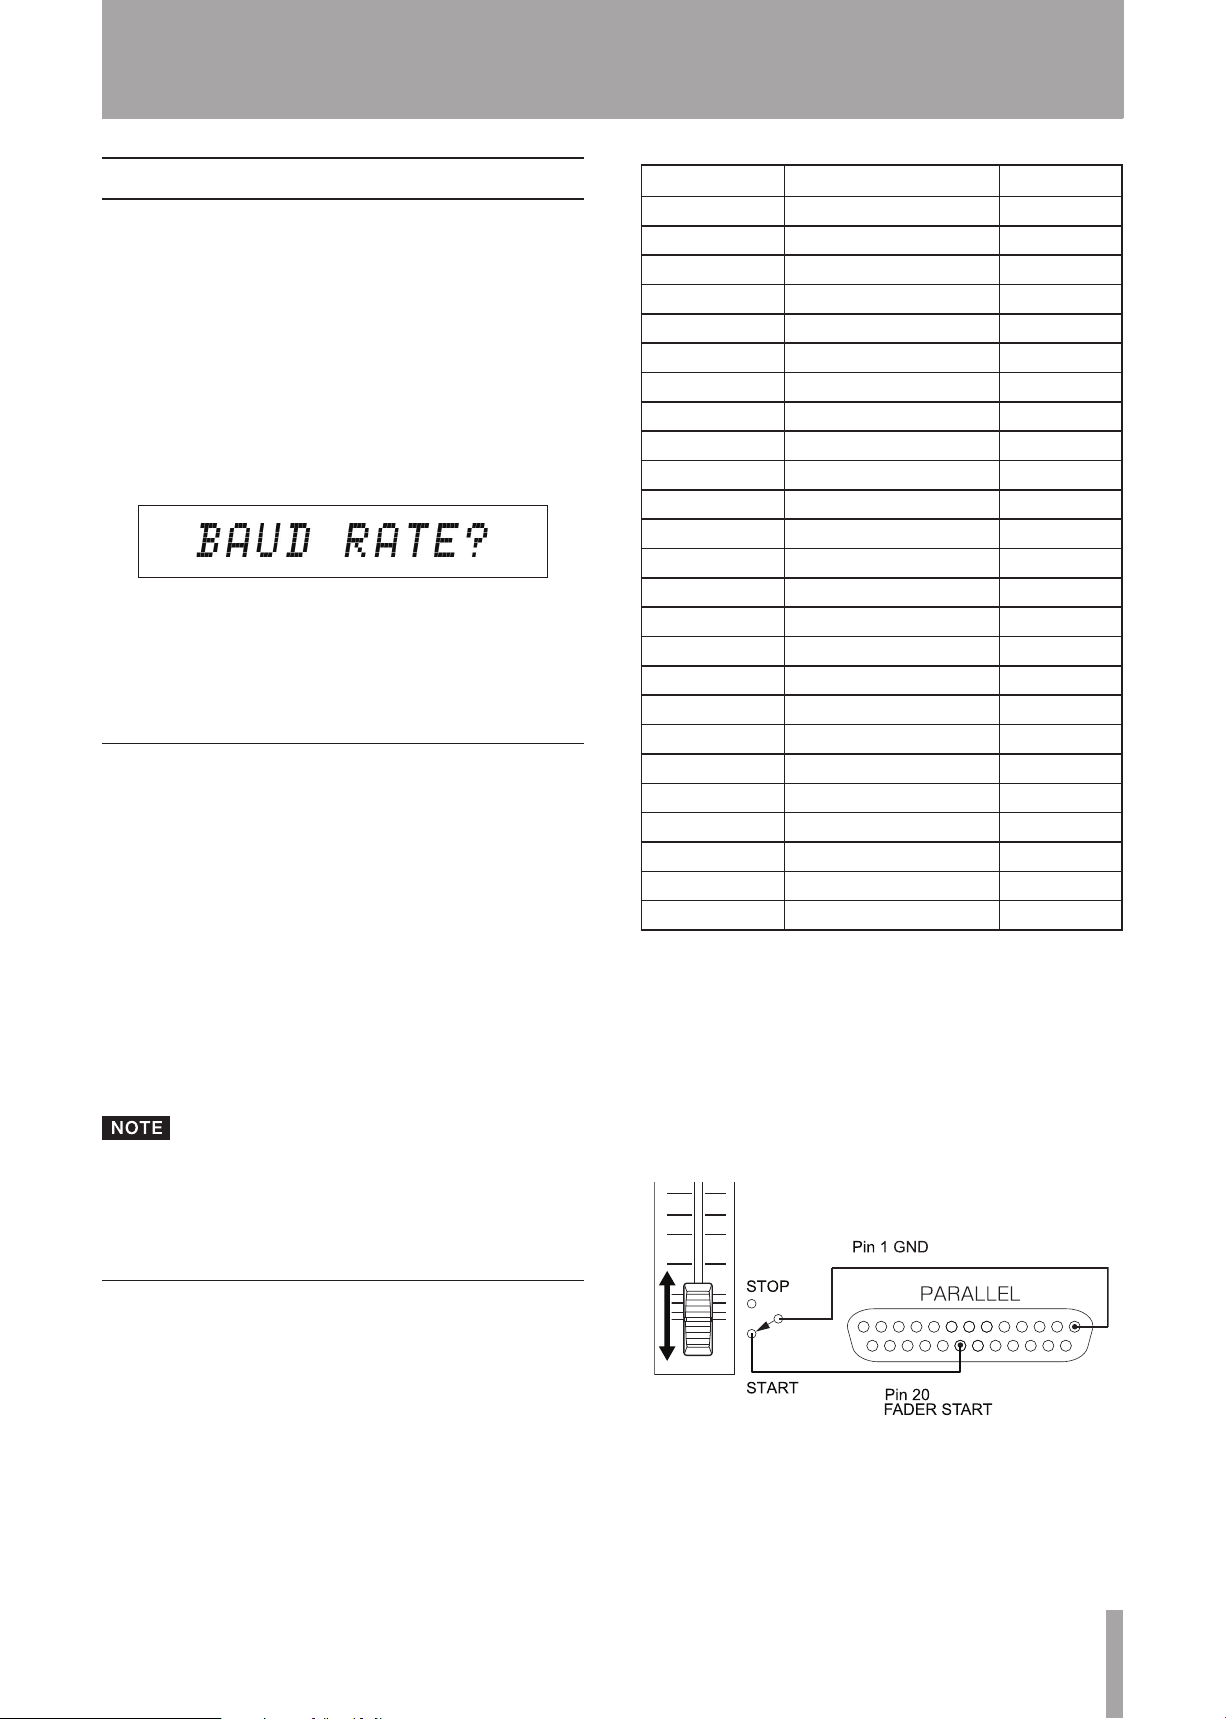
TASCAM CD-A550/CD-A750 45
9 – Using the control I/O (CD-A750 only)
Using the RS-232C connector
By connecting the RS-232C connector on this unit with
an RS-232C connector on a computer, this unit can be
controlled from a computer. Settings related to signals are
made from the menu.
1 When in standard display mode, press the MENU
key on the main unit or the remote control to enter
menu mode.
2 Use the –/+ keys on the main unit or the remote con-
trol to show the following menu items related to the
RS-232C, and press the ENTER key on the main unit
or the remote control.
3 Use the –/+ keys on the main unit or the remote con-
trol to make settings.
4 When finished making settings, press the ENTER
key to return to the standard display.
Menu items related to the RS-232C
BAUD RATE
Use to set the baud rate (signal speed) to 4800, 9600, 19200
(default) or 38400 bps.
LENGTH
Use to set the signal data length to 7 or 8 (default) bits.
PA RITY BIT
Use to set the signal parity bit to NON (default), EVEN or
ODD. “NON” is none.
STOP BIT
Use to set the signal stop bit to 1 (default) or 2.
RS-232C settings are retained even if the power is
•
turned OFF.
Please contact TASCAM customer support for infor-
•
mation about this unit’s RS-232C command protocol.
Pin number Function IN/OUT
1 GND –
2 TAPE PLAY REV In
3 TAPE PLAY FWD In
4 TAPE STOP In
5 TAPE RECORD In
6 TAPE REW In
7 TAPE FF In
8 TAPE PAUSE In
9 TAPE RECORD TALLY Out
10 TAPE STOP TALLY Out
11 TAPE PAUSE TALLY Out
12 TAPE PLAY TALLY Out
13 TAPE DIRECTION TALLY Out
14 CD PLAY In
15 CD STOP In
16 CD CALL In
17 CD PREVIOUS In
18 CD NEXT In
19 CD READY In
20 CD FADER START In
21 CD STOP TALLY Out
22 CD READY TALLY Out
23 CD PLAY TALLY Out
24 CD EOM TALLY Out
25 +5V* –
In: +5V pull-up, external command reception active when
low (operates at ground of 30 ms or more)
Out: transport status display signal by open collector (15-V
dielectric strength, 35-mA maximum electric current)
*50-mA maximum supplied electric current
The illustration below shows an example of connection to
allow playback control of this unit using fader start and stop
signals.
Using the parallel connector
An external controller using parallel control can control
this unit through its
signals can be output through the
allowing external devices to be operated or indicator
triggers to be sent, for example. This table shows the pin
allocation.
PARALLEL
connector. In addition, tally
PARALLEL
connector,
Page 46

46 TASCAM CD-A550/ CD-A750
10 – Message list
Operation messages
The following messages are shown on the main display according to the operation of this unit.
Message
Clos e
No Disc
No Files
No Filename
No Name
No Title
Open
OVERWRITE?
PGM CLEAR!
TOC Reading
Message lit or
blinking
Lit
Lit There is no disc or the disc cannot
Lit The disc has no files that can be
Lit The file name cannot be shown. Text information must be 7-bit ASCII
Lit There is no artist data or no data
Lit There is no title data or no data that
Lit The disc tray is open.
Lit This is confirming that you want to
Lit This informs that the program has
Lit TOC information is being read.
Warning messages
Meaning Response
The disc tray is closing.
be verified.
played back.
that can be displayed.
can be displayed.
overwrite the existing program.
been cleared completely.
Load a disc that has MP3 or WAV files.
compatible text to be displayed.
Text information must be 7-bit ASCII
compatible text to be displayed.
Text information must be 7-bit ASCIIcompatible text to be displayed.
If an operation cannot be completed, one of the following messages is shown. It will appear for about two seconds before
disappearing automatically.
Message
No Call Pt!
No Program!
PG M Full!
Message lit or
blinking
Lit A call point has not been set. Set a CALL point. (Press READY then PLAY.)
Meaning Response
Lit No program has been created. Add tracks to the program.
Lit You cannot add more than 99 tracks
to the program.
Either stop trying to add to the program or
clear the program.
Page 47
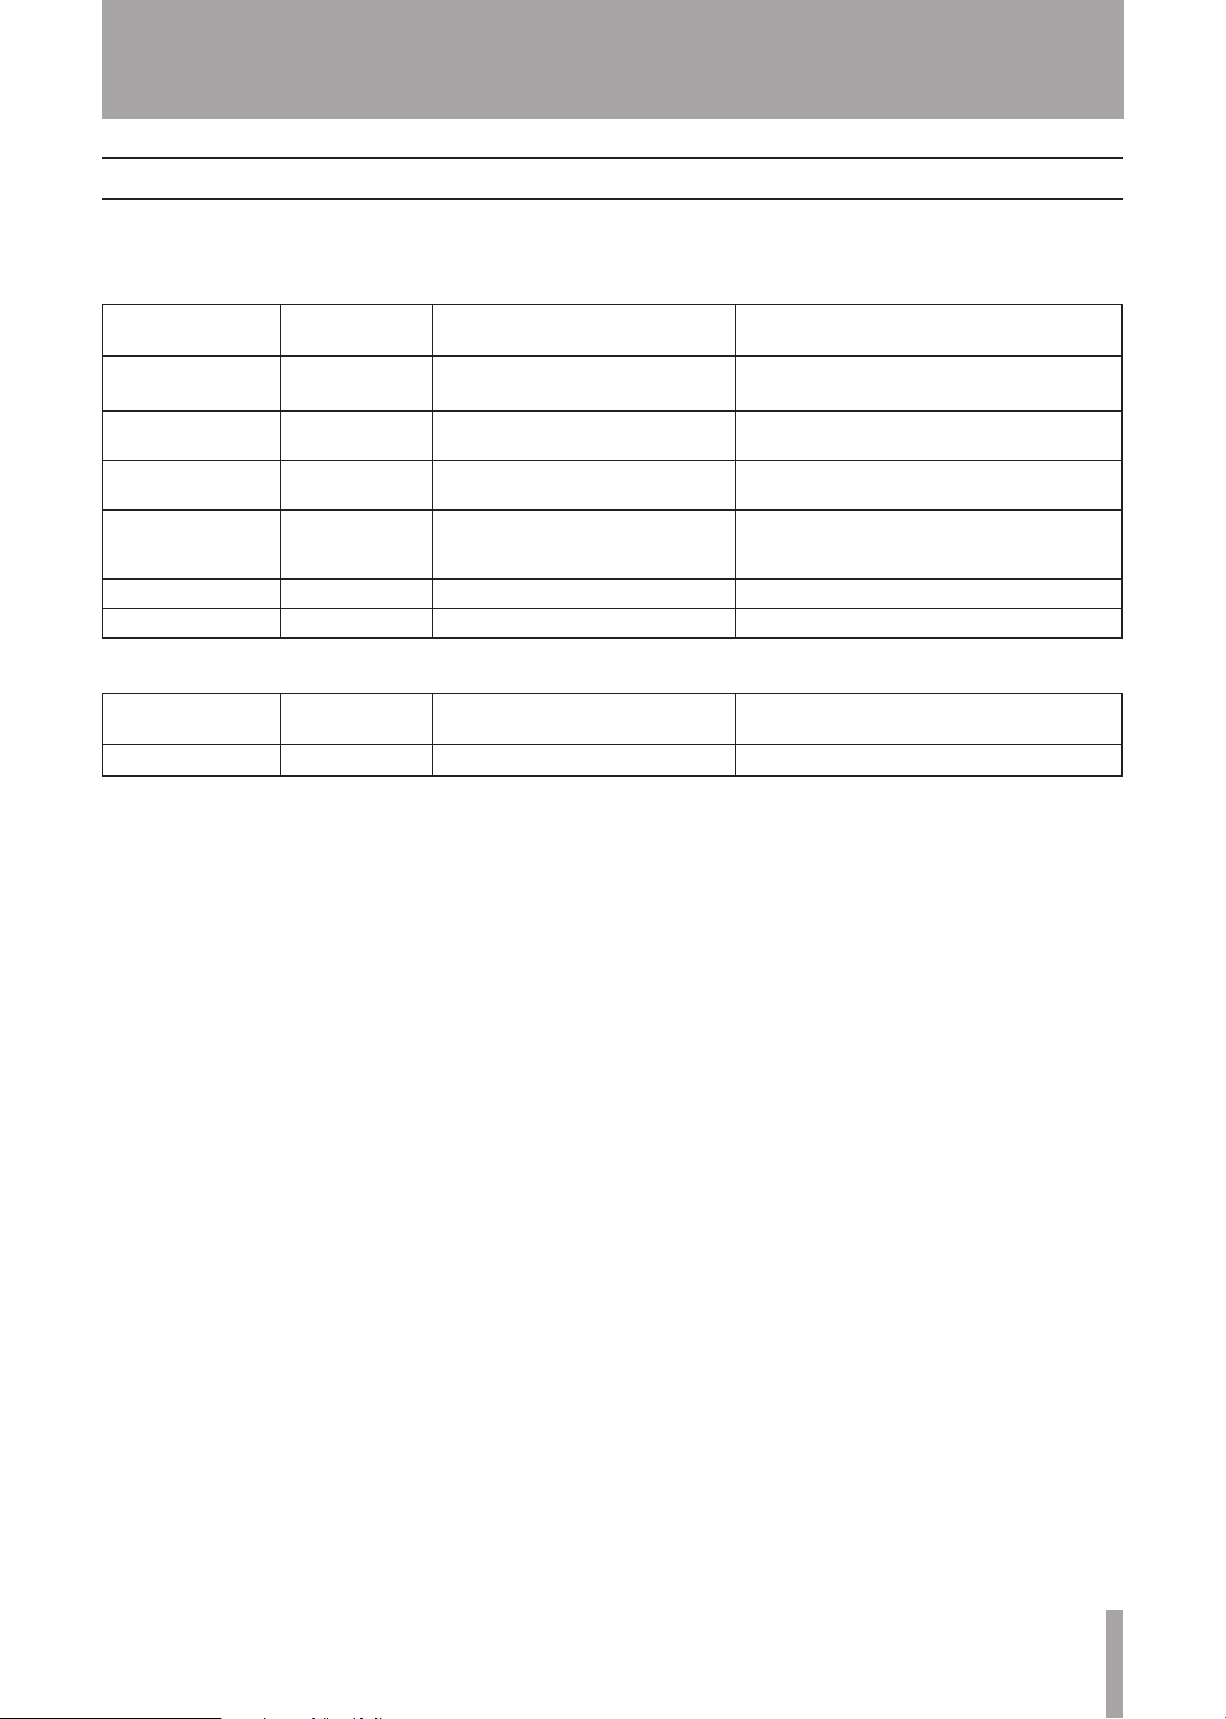
TASCAM CD-A550/CD-A750 47
10 – Message list
Error messages
If one of the following error messages is shown, please refer to the Response column and try to resolve it. If this does not
correct the problem, please contact a TEAC repair center.
CD Drive
Message
Comm Error
Comm Error
Decod Error
Disc Error
Drive Error
Read error
Cassette deck
Message
Err
Message lit or
blinking
Blinking
Cannot communicate with the CD
Meaning Response
Please contact a TEAC repair center.
drive.
Lit An error occurred during
communication with the CD drive.
Lit The file type is not supported or
otherwise could not be played.
Lit The TOC or file system could not be
read, or focus adjustment was not
possible.
Lit The CD drive hardware is broken. Please contact a TEAC repair center.
Lit The track cannot be accessed. Clean or change the disc.
Message lit or
blinking
Lit
The cassette mechanism is broken. Please contact a TEAC repair center.
Meaning Response
Please contact a TEAC repair center.
Change the disc.
Clean or change the disc.
Page 48

48 TASCAM CD-A550/CD-A750
11 – Troubleshooting
If you have problems with this unit, please check the
following points before seeking repair. If you are still
unable to resolve the problem, please contact the shop
where you purchased the unit or a TEAC repair center.
The power does not turn ON.
ª
Is the power plug completely plugged into the outlet?
•
The unit does not respond to the remote
ª
control.
Are charged batteries in the remote control?
•
There is no sound.
ª
Confirm the connections with the monitoring system.
•
Confirm the amp volume and settings.
•
The sound from tape playback is never output from the
•
CD OUTPUT jacks. Moreover, the signals output from
the COMMON OUTPUT jacks depend on the menu
COMMON OUT item setting.
There is unwanted noise.
ª
Are the connecting cables all properly connected and
•
functioning?
Cannot play a CD.
ª
If using an MP3 file, confirm that its bit rate is one that
•
can be used by this unit.
Is the disc damaged or dirty?
•
Cannot play all of a data CD.
ª
Is the FOLDER PLAY item in the menu “ON”?
•
The playback sound is mono.
ª
Is the MONO OUT item in the menu set to “ON”?
•
Cannot record to the cassette tape.
ª
Has the write-protection tab been removed from the cas-
•
sette to prevent the unintentional erasure of recordings?
Is the cassette recorder stopped or in record ready
•
mode?
Recheck the input connections.
•
Is the
•
•
INPUT knob turned up?
Is the TAPE INPUT SOURCE item in the menu set to
the correct input source?
The playback sound of the cassette tape is
ª
strange.
Is the head or pinch roller dirty? Use a cleaning fluid to
•
clean it if dirty.
If a head has become magnetized, demagnetize it.
•
Is the Dolby B noise reduction setting correct?
•
Is pitch control set to a positive or negative value?
•
Cannot dub from a CD to a cassette.
ª
Is the CD playing or paused?
•
Has the write-protection tab been removed from the cas-
•
sette to prevent the unintentional erasure of recordings?
Page 49

TASCAM CD-A550/CD-A750 49
Ratings
12 – Specifications
Pitch control range
ª
±10% or more
CD player
Compatible disc formats
ª
CD-DA (12-cm/8-cm), CD-ROM (12-cm/8-cm) ISO 9660
LEVEL 1/2/ROMEO/JOLIET format (CD-R/CD-RW disc
compatible)
MP3 playback specifications
ª
Audio modes: STEREO/JOINT STEREO/DUAL
CHANNEL/MONO/VBR
MPEG1 Audio Layer III (MP3)
•
Sampling frequency: 32/44.1/48 kHz
•
Bit rate: 32–320 kbps
•
WAV playback specifications
ª
Sampling frequency: 8/11.025/12/16/22.05/24/32/44.1/48
kHz
Quantization bit rate: 8-bit/16-bit
CD playback specifications
ª
Sampling frequency: 44.1 kHz
Wow and flutter
ª
0.25% (JIS WRMS) or less
Rewind time
ª
160 seconds or less (C-60 tape)
Recording and playback frequency
ª
characteristics
Normal (type): 50 Hz – 10 kHz ±3 dB
Chrome (type): 50 Hz – 12.5 kHz ±3 dB
Recording and playback channel separation
ª
1 kHz: 35 dB or more (1 kHz, using BPF)
Recording and playback S/N ratio
ª
58 dB (NR OFF, Specified record level)
69 dB (Dolby NR ON, CCIR ARM-weighting)
Recording and playback distortion
ª
2.5% or less (400 Hz/Dolby level)
Quantization bit rate: 16-bit
Number of channels: 2
Audio characteristics
ª
Frequency characteristics: 20 Hz – 20 kHz ±0.8 dB
S/N ratio: 98 dB (20 kHz LPF, A-weighted)
Distortion (THD+N): 0.006% (1 kHz: 20 kHz LPF)
Dynamic range: 96 dB (20 kHz LPF, A–weighted)
Channel separation: 90 dB (1 kHz: 1 kHz BPF)
Cassette tape
Track system
ª
4-track 2-channel stereo
Head structure
ª
Record/playback x 1 (rotary reverse), erase x 1
Usable tape types
ª
C-46 – C-90 type cassette tapes (metal tapes can only be
played back)
Analog audio
CD player section
CD LINE OUTPUT [BALANCED] jacks
ª
(CD-A750 only)
Analog balanced output
Connectors: XLR–3–32 equivalent
Standard output level: +4 dBu
Maximum output level: +20 dBu
Output impedance: 100Ω
CD LINE OUTPUT [UNBALANCED] jacks
ª
Analog unbalanced output
Connector: RCA pin jacks
Standard output level: –10 dBV
Maximum output level: +6 dBV
Output impedance: 200Ω
Tape speed
ª
4.76 cm/sec
Page 50
50 TASCAM CD-A550/ CD-A750
12 – Specifications
Cassette tape section
TAPE LINE OUTPUT [BALANCED] jacks
ª
(CD-A750 only)
Analog balanced output
Connectors: XLR–3–32 equivalent
Standard output level: +4 dBu
Output impedance: 100Ω
TAPE LINE OUTPUT [UNBALANCED] jacks
ª
Analog unbalanced output
Connectors: RCA pin jacks
Standard output level: –4.5 dBu
Output impedance: 200Ω
TAPE LINE INPUT [BALANCED] jacks
ª
(CD-A750 only)
Analog balanced input
Connectors: XLR–3–31 equivalent
Standard input level: +4 dBu
Minimum input level: –6 dBu
Input impedance: 14.4 kΩ
Output impedance: 75Ω
Control I/O (CD-A750 only)
CONTROL I/O [PARALLEL] connector
ª
(CD-750 only)
Parallel control input and output
Connector: 25-pin D-Sub connector
Maximum input voltage: +5.5 V
High-level minimum input voltage: +3.75 V or more
Low-level maximum input voltage: +1.25 V or less
Output format: open collector (15-V dielectric strength, 35
mA maximum)
Low-level maximum output voltage: +0.5 V or less
+5V power maximum current supply: 50 mA or more
CONTROL I/O [RS-232C] connector
ª
(CD-A750 only)
Signal: conforming to RS-232C protocol 1.00 specifications
Connector: D–Sub 9-pin connector
TAPE LINE INPUT [UNBALANCED] jacks
ª
Analog unbalanced input
Connectors: RCA pin jacks
Standard input level: –9 dBu
Minimum input level: –19 dBu
Input impedance: 22 kΩ
Headphones section
PHONES jack
ª
Headphones output
Connector: standard stereo jack
Rated output: 20 mW + 20 mW or more (during CD
monitoring, THD+N 0.1% or less, 32Ω load)
Digital audio
CD player section
General
Power:
•
AC 120 V, 60 Hz (U.S.A./Canada)
AC 230 V, 50 Hz (U.K./Europe)
AC 240 V, 50 Hz (Australia)
Power consumption: 14 W (CD-A550), 15 W (CD-A750)
•
External dimensions: 483 x 138 x 275 mm (width x
•
height x depth)
Weight: 6.3 kg (CD-A550), 6.5 kg (CD-A750)
•
Some of the illustrations in the Owner’s Manual
•
might differ from the actual equipment.
Specifications and appearance might be changed
•
without notification for product improvement.
CD DIGITAL OUTPUT [COAXIAL] jack
ª
Connector: RCA pin jack
Compatible signal format: S/PDIF (IEC–60958–3 standard
for consumer applications)
Page 51
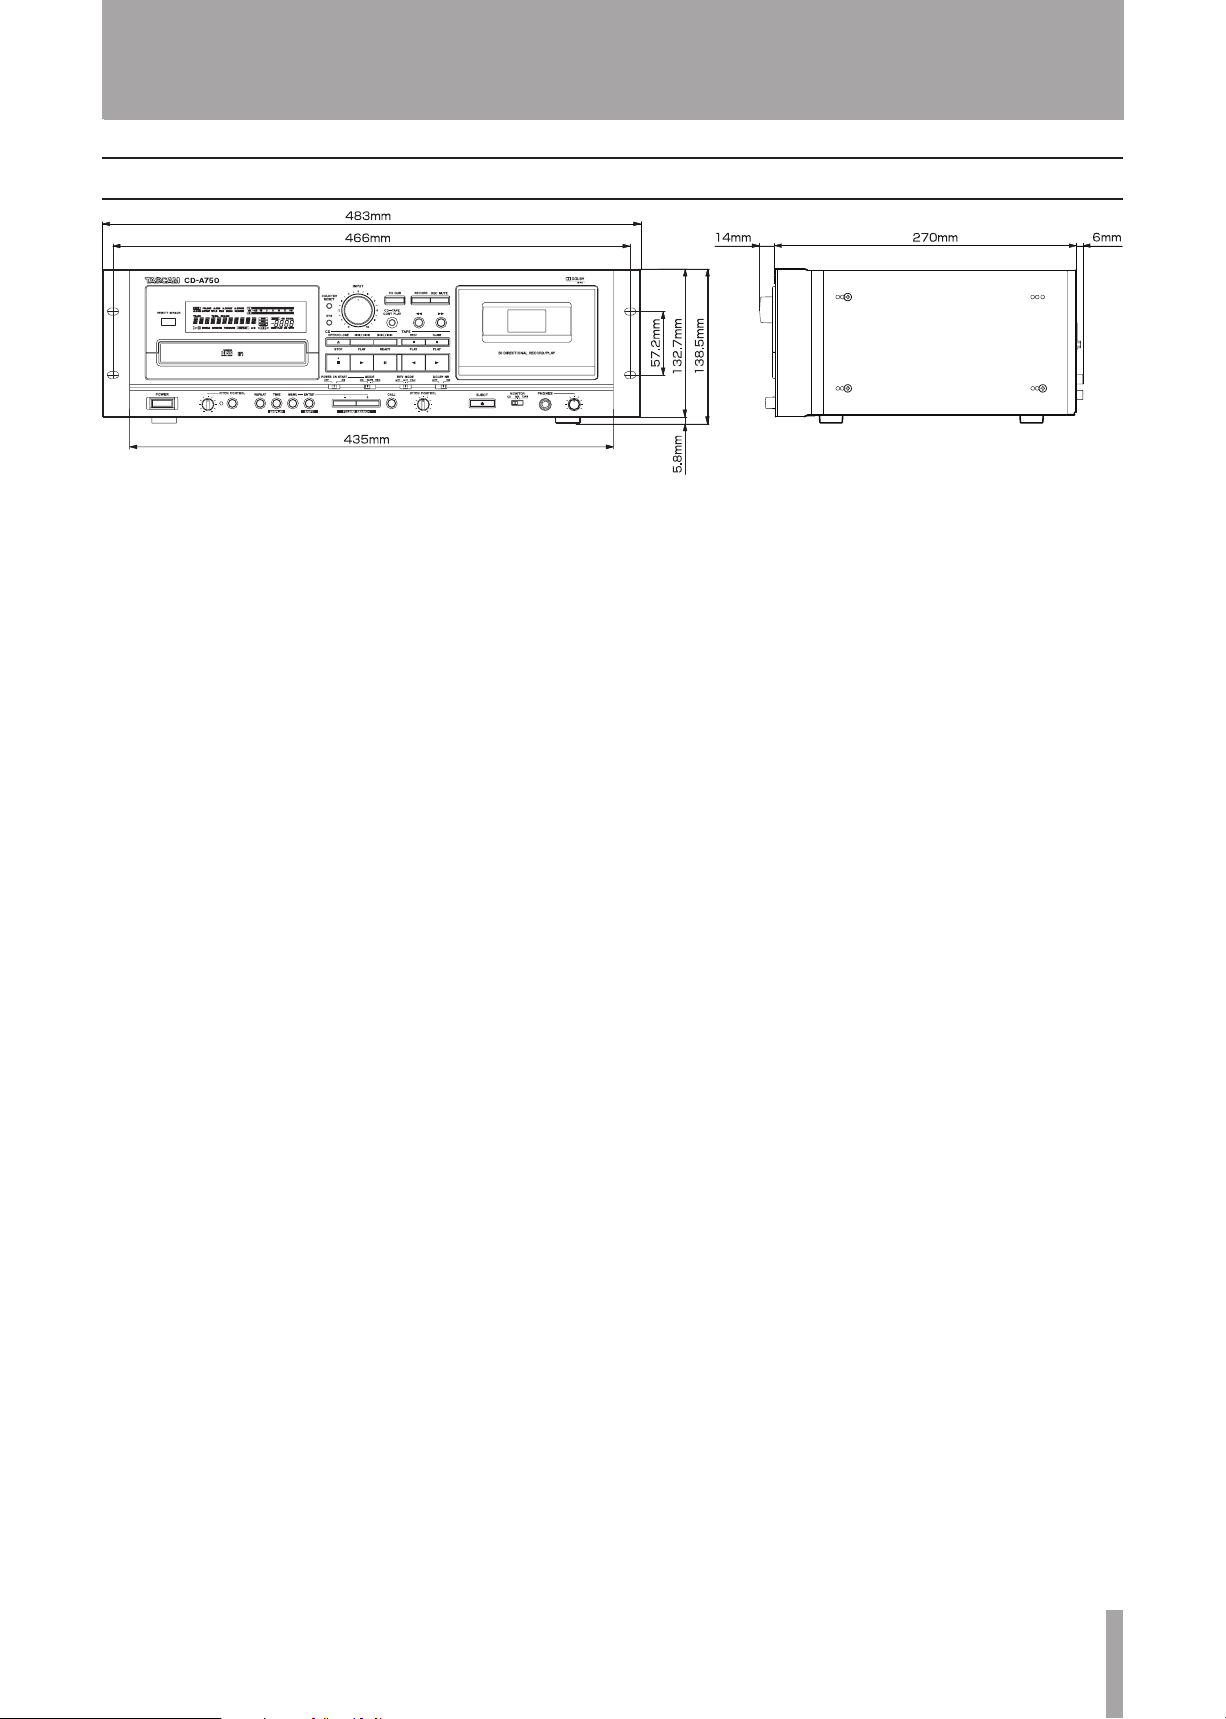
TASCAM CD-A550/CD-A750 51
Dimensional drawing
12 – Specifications
Page 52

CD-A550/CD-A750
TEAC CORPORATION
Phone: +81-42-356-9143
1-47 Ochiai, Tama-shi, Tokyo 206-8530, Japan
TEAC AMERICA, INC. www.tascam.com
Phone: +1-323-726-0303
7733 Telegraph Road, Montebello, California 90640 USA
TEAC CANADA LTD. www.tascam.com
Phone: +1905-890-8008 Facsimile: +1905-890-9888
5939 Wallace Street, Mississauga, Ontario L4Z 1Z8, Canada
TEAC MEXICO, S.A. de C.V. www.teacmexico.net
Phone: +52-55-5010-6000
Río Churubusco 364, Colonia Del Carmen, Delegación Coyoacán, CP 04100, México DF, México
TEAC UK LIMITED www.tascam.co.uk
Phone: +44-8451-302511
Suites 19 & 20, Building 6, Croxley Green Business Park, Hatters Lane, Watford, Hertfordshire, WD18 8TE, UK
TEAC EUROPE GmbH www.tascam.de
Phone: +49-611-71580
Bahnstrasse 12, 65205 Wiesbaden-Erbenheim, Germany
www.tascam.jp
Printed in China
 Loading...