

Page 1

TP9100 portables
User’s Guide
www.taitworld.com
Page 2

Page 3

Chassis engraving will void warranty
Caution: Engraving the chassis can significantly reduce its mechanical
strength and will void any warranty. If the chassis has been engraved,
it must be replaced.
Copyright and trademarks
All information contained in this manual is the property of Tait
Electronics Limited. All rights reserved. This manual may not, in whole
or in part, be copied, photocopied, reproduced, translated, stored, or
reduced to any electronic medium or machine-readable form, without
prior written permission from Tait Electronics Limited.
The word TAIT and the TAIT logo are trademarks of Tait
Electronics Limited.
All trade names referenced are the service mark, trademark or
registered trademark of the respective manufacturers.
Disclaimer
There are no warranties extended or granted by this manual. Tait
Electronics Limited accepts no responsibility for damage arising from
use of the information contained in the manual or of the equipment
and software it describes. It is the responsibility of the user to ensure
that use of such information, equipment and software complies with
the laws, rules and regulations of the applicable jurisdictions.
Enquiries and comments
If you have any enquiries regarding this manual, or any comments,
suggestions and notifications of errors, please contact
Technical Support.
Updates of manual and equipment
In the interests of improving the performance, reliability or servicing of
the equipment, Tait Electronics Limited reserves the right to update
the equipment or this manual or both without prior notice.
3
Page 4

Intellectual property rights
This product may be protected by one or more patents of Tait
Electronics Limited together with their international equivalents,
pending patent applications and registered trade marks: NZ508054,
NZ508340, NZ508806, NZ508807, NZ509242, NZ509640,
NZ509959, NZ510496, NZ511155, NZ511421, NZ516280/519742,
NZ519118, NZ519344, NZ520650/537902, NZ521450, NZ524509,
NZ524537, NZ524630, NZ530819, NZ534475, NZ534692,
NZ535471, NZ536945, NZ537434, NZ534369, NZ522236,
NZ524378, AU2003281447, AU2002235062, AU2004216984,
CA2439018, EU03784706.8, EU02701829.0, EU04714053.8,
GB23865476, GB2386010, GB2413249, GB0516092.4, US60/
613748, US60/539617, US10/520827, US10/468740,
US5,745,840, US10/520827.
This product may also be made under license under one or more of
the following U.S. Patents: 4,590,473 4,636,791 4,716,407
4,972,460 5,146,497 5,148,482 5,164,986 5,185,795 5,185,796
5,271,017 5,377,229 5,502,767.
The IMBE™ voice coding Technology embodied in this product is
protected by intellectual property rights including patent rights,
copyrights and trade secrets of Digital Voice Systems, Inc. This voice
coding Technology is licensed solely for use within this
Communications Equipment. The user of this Technology is explicitly
prohibited from attempting to decompile, reverse engineer, or
disassemble the Object Code, or in any other way convert the Object
Code into a human-readable form. Protected by U.S. Patents
5,870,405 5,826,222 5,754,974 5,701,390 5,715,365 5,649,050
5,630,011 5,581,656 5,517,511 5,491,772 5,247,579 5,226,084
and 5,195,166.
4
To our European customers
Tait Electronics Limited is an environmentally responsible company
which supports waste minimization and material recovery.
The European Union’s Waste Electrical and Electronic Equipment
Directive requires that this product be disposed of separately from the
general waste stream when its service life is over. Please be
environmentally responsible and dispose through the original supplier,
your local municipal waste “separate collection” service, or contact
Tait Electronics Limited.
Page 5

For your safety
Before using your radio, please read the following
important safety and compliance information.
Radio frequency exposure information
For your own safety and to ensure you comply with the
Federal Communication Commission’s (FCC) radio
frequency (RF) exposure guidelines, please read the
following information before using this radio.
Using this radio
You should use this radio only for work-related
purposes (it is not authorized for any other use) and if
you are fully aware of, and can exercise control over,
your exposure to RF energy. To prevent exceeding FCC
RF exposure limits, you must control the amount and
duration of RF that you and other people are
exposed to.
It is also important that you:
! Do not remove the RF Exposure label from
the radio.
! Ensure this RF exposure information accompanies
the radio when it is transferred to other users.
For your safety
! Do not use the radio if you do not adhere to the
guidelines on controlling your exposure to RF.
Controlling your exposure to RF energy
This radio emits radio frequency (RF) energy or radio
waves primarily when calls are made. RF is a form of
electromagnetic energy (as is sunlight), and there are
recommended levels of maximum RF exposure.
To control your exposure to RF and comply with the
maximum exposure limits for occupational/controlled
environments, follow these guidelines:
! Do not talk (transmit) on the radio more than the
rated transmit duty cycle. This is important because
For your safety 5
Page 6

For your safety
the radio radiates more energy when it is transmitting than when it is receiving.
! When listening and talking on the radio, hold it
upright in front of your face so that it is at least one
inch (2.5 cm) away from any part of your face.
Keeping the radio at the recommended distance is
important because exposure to RF decreases rapidly
the further away the antenna is from your body.
! Keep the antenna at least one inch (2.5 cm) from
your face at all times.
! If you wear your radio, you must always put it in a
carrying accessory that has been specifically
approved by Tait for this radio. Using non-approved
body-worn accessories may mean you expose yourself to higher levels of RF than recommended by the
FCC’s occupational/controlled environment RF
exposure limits.
! Ensure you only use Tait-approved antennas, batter-
ies, and accessories.
For more information on what RF energy is and how to
control your exposure to it, visit the FCC website at
http://www.fcc.gov/oet/rfsafety/rf-faqs.html.
Compliance with RF energy exposure standards
This two-way radio complies with these RF energy
exposure standards and guidelines:
6 For your safety
! United States Federal Communications Commis-
sion, Code of Federal Regulations; 47 CFR §§
1.1307, 1.1310, and 2.1093.
! American National Standards Institute (ANSI) / Insti-
tute of Electrical and Electronic Engineers
(IEEE) C95.1-1992.
! Institute of Electrical and Electronic Engineers (IEEE)
C95.1-1999 Edition.
Page 7

This radio complies with the IEEE and ICNIRP exposure
limits for occupational/controlled RF exposure
environments at operating duty factors of up to 50%
transmitting (even though the approved batteries for
this radio are rated for a 5-5-90 duty factor (5% talk5% listen-90% standby)).
Radio frequency emissions limits in
the USA
Part 15 of the FCC Rules imposes RF emission limits
on receivers.
This radio complies with Part 15 of the FCC Rules.
Operation is subject to the condition that this device
does not cause harmful interference.
Unapproved modifications or changes
to radio
The radio is designed to satisfy the applicable
compliance regulations. Do not make modifications or
changes to the radio that are not expressly approved by
Tait Electronics Limited. Failure to do so could invalidate
compliance requirements and void the user’s authority
to operate the radio.
For your safety
USA public safety bands
(764 –776MHz and 794–806MHz)
Part 90R of the FCC Title 47 of the Code of Federal
Regulations (CFR) deals with the use of frequencies in
the 764 to 776MHz and 794 to 806MHz bands.
Low-power channels
This radio complies with §90.531 (b) (3) and
§90.531 (b) (4) of 47 CFR. These sections state that only
low-power transmission is permitted on the
following channels:
! Regional Planning channels, as defined in
§90.531 (b) (3).
For your safety 7
Page 8

! Itinerant channels, as defined in §90.531 (b) (4).
Use of encryption
This radio complies with §90.553 (a) of 47 CFR. This
states that:
! Encryption is not permitted on the nationwide
Interoperability calling channels. These channels are
defined in §90.531 (b) (1) (ii).
! Radios using encryption must have a readily accessi-
ble switch or control to allow the radio user to
disable encryption.
Frequency band reserved for
distress beacons
Frequency band 406 to 406.1 MHz is reserved for use by
distress beacons. Transmissions should not be made
within this frequency band.
Safe radio operation
Warning: Switch off the radio:
For your safety
8 For your safety
! at petrol filling stations or near flammable liquids
or gases
! in the vicinity of explosive devices and
blasting zones.
! before boarding an aircraft. Using your radio
while in the air is not permitted.
Using a handheld microphone or a radio while driving a
vehicle may violate the laws and legislation that apply in
your country or state. Please check the vehicle
regulations in your area.
Interference with electronic devices
Some electronic devices may be prone to malfunction
due to the lack of protection from RF energy that is
present when your radio is transmitting.
Page 9

Examples of electronic devices that may be affected by
RF energy are:
! vehicular electronic systems such as fuel injection,
anti-skid brakes, and cruise control
! medical devices such as hearing aids
and pacemakers
! medical equipment in hospitals or health
care facilities.
Consult the manufacturer (or its representative) of the
equipment to determine whether these electronic
circuits will perform normally when the radio
is transmitting.
For your safety 9
For your safety
Page 10

For your safety
10 For your safety
Page 11

These menu functions are
restricted to radios programmed
for dispatcher operation
*
Zeroize key
Zeroize all
Low power tx
Monitor
Set scan key
Functions
Key settings
Version info
Battery info
Radio info
Squelch
Radio ID
Zones
Talkgroups
Channels
Menu map
Note: The menus shown below may not be available for your radio.
Status request*
Status update Radio monitor* Radio inhibit* Radio uninhibit*Radio check*Send call alert
Messages
Individual call
Services
Priority call
Recent Calls
Preset keys
Change all Advanced
Encryption
Security
Backlighting
Contrast adjust
Talk Party ID
Display settings
Alert settings
Extra features
RSSI
Indicator level
Keypress tones
Quiet operation
Silent operation
Loneworker
Radio Settings
Menu map 11
Menu map
Page 12
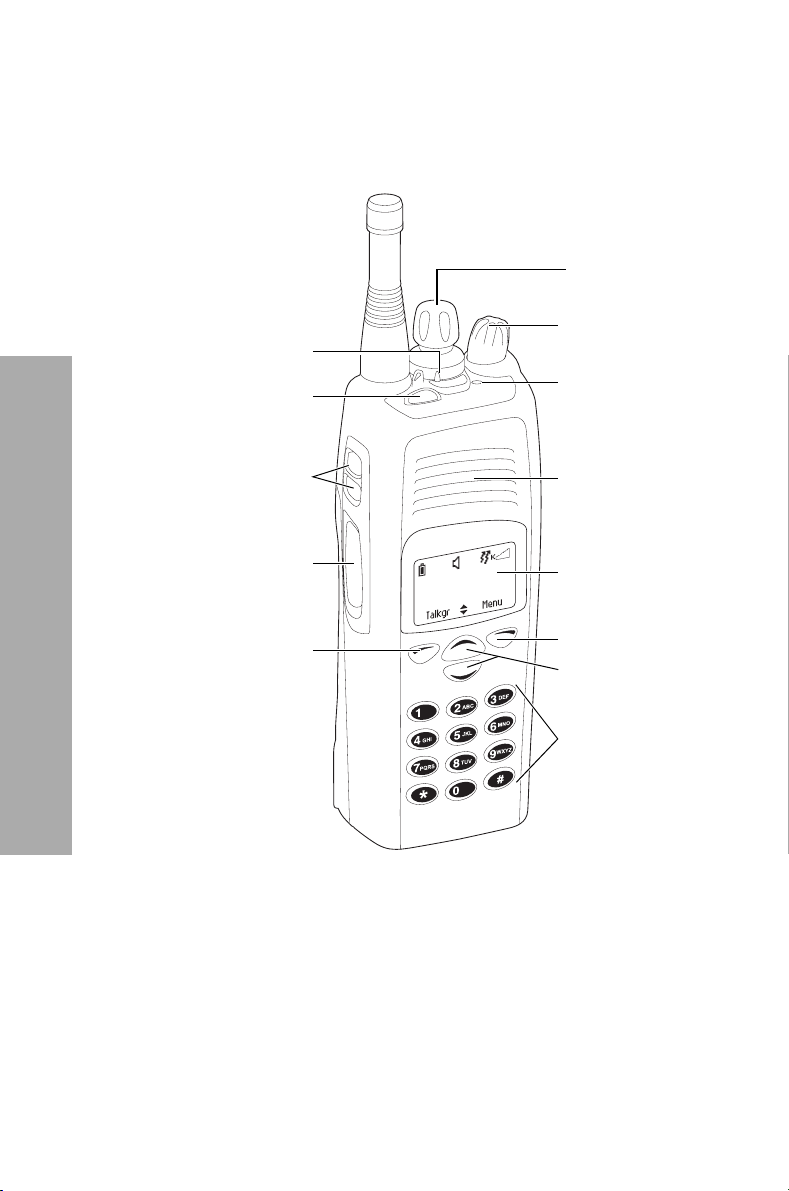
Radio controls
For more information about the radio controls, see
“About your radio” on page 23.
3-way selector
control
function key 1
(top key)
channel selector
power / volume
control
status LED
function keys 2 & 3
(side keys)
PTT key
(press-to-talk)
left selection key
Channel 12
Zone 11
Radio controls
speaker /
microphone
display
right selection key
scroll keys
alphanumeric
keys
12 Radio controls
Page 13

Contents
For your safety ............................................................... 5
Menu map ................................................................... 11
Radio controls .............................................................. 12
1 About this guide ........................................ 17
Safety warnings used in this guide ............................... 17
Related documentation ................................................ 17
2 Before first use of your radio.................... 18
Charging the battery before first use ........................... 19
Attaching a battery ...................................................... 20
Attaching the antenna ................................................. 20
Attaching a belt clip ..................................................... 20
Fitting a speaker microphone ....................................... 21
Removing the protective cover ................................. 21
Attaching the accessory connector ........................... 21
Attaching the antenna to the RF speaker microphone.. 22
3 About your radio ....................................... 23
About your digital radio ............................................... 24
Lack of static noise ................................................... 24
Coverage ................................................................. 24
Basic operation ............................................................ 25
Turning your radio on and off .................................. 26
Adjusting the volume ............................................... 26
About the channel selector....................................... 26
Using function keys to access frequently used features. 26
Three-way selector control ....................................... 27
Emergency key ......................................................... 27
Understanding the radio display ................................... 28
Using the menus to access settings and features .......... 29
Selection keys........................................................... 29
Scroll keys ................................................................ 29
Accessing the Main menu ........................................ 30
Accessing frequently used menus ............................. 30
Understanding the radio indicators .............................. 32
Audible tones........................................................... 32
Status indicators....................................................... 34
Contents 13
Contents
Page 14

Contents
4 Making and receiving calls ....................... 35
Making calls ................................................................ 36
Selecting a zone....................................................... 37
Selecting a channel .................................................. 38
Understanding talkgroups ........................................ 39
Making an emergency call........................................ 40
Making an individual call.......................................... 40
Receiving calls ............................................................. 41
Identifying a caller (talking party ID) ......................... 41
Communicating directly with other radios ................... 42
Checking your recent calls ........................................... 43
Checking that the channel is clear (monitor) ................ 44
Turning monitor on and off...................................... 44
Call alert paging .......................................................... 45
Checking whether a radio is available .......................... 46
5 Listening to channel traffic....................... 47
Selecting a voting or scan group .................................. 48
Using your radio in different repeater areas ................. 50
Suspending a channel from a voting group .............. 50
Scanning a group of channels ...................................... 51
Understanding the different types of scanning ......... 51
Making a call while scanning.................................... 51
Suspending a channel from a scan group ................. 52
Editing a background scan group ............................. 52
Hearing faint and noisy signals .................................... 55
Turning squelch override on and off......................... 55
6 Sending and receiving messages ............. 56
7 Safeguarding you and your radio ............ 61
14 Contents
About messages .......................................................... 57
Sending a message .................................................. 57
Informing other radio users of your status ................... 59
Requesting a status update .......................................... 60
Locking and unlocking the keypad ............................... 62
Making a radio inoperable ........................................... 63
Sending a Radio Inhibit request ................................ 63
Sending a Radio Uninhibit request............................ 64
Radio monitor ............................................................. 65
Sending a Radio monitor request ............................. 65
Page 15

About encryption ......................................................... 66
Encrypting your calls................................................. 66
Making an encrypted call ......................................... 67
Receiving an encrypted call....................................... 68
Changing your radio’s encryption key....................... 69
Removing encryption keys from your radio ............... 70
About emergency calls ................................................. 71
Making a priority call................................................ 71
Understanding emergency mode .............................. 72
About the Lone Worker feature ................................... 75
About the Man Down feature ...................................... 76
8 Charging and caring for batteries ............ 77
Removing the battery .................................................. 78
About your charger ..................................................... 79
About battery charging ................................................ 80
Low battery warning ................................................ 80
Optimal charging temperature ................................. 80
Charging the battery ................................................ 81
Receiving and making calls while charging ............... 82
Maintaining battery life and performance .................... 83
Battery safety vent.................................................... 83
Storing batteries .......................................................... 84
Using nickel-based batteries after storage................. 84
Disposing of batteries .................................................. 84
Contents
9 Customizing your radio ............................. 85
About display and keypad backlighting ........................ 86
Turning backlighting on or off .................................. 86
Turning backlighting on momentarily ....................... 87
Adjusting the display contrast................................... 87
Extending battery life on a shift ................................... 88
Turning low power transmit on or off....................... 88
Customizing the audible alert settings ......................... 89
Changing the volume of all audible tones................. 89
Changing the keypress volume................................. 90
Turning off radio controls and keypress tones........... 90
Hearing only channel traffic...................................... 91
Contents 15
Page 16

Contents
10 Troubleshooting ........................................ 92
Troubleshooting .......................................................... 93
Error messages......................................................... 93
When your radio won’t turn on................................ 94
Identifying the radio’s audible tones......................... 94
Removing a belt clip................................................. 95
Checking the version of your radio ........................... 95
Troubleshooting your charger .................................. 96
General care ................................................................ 97
Cleaning the radio ................................................... 97
11 Glossary...................................................... 98
Licence agreement................................... 100
Index.......................................................... 102
16 Contents
Page 17

1 About this guide
This user’s guide provides information about the
TP9155 and TP9160 portable radios.
Safety warnings used in this guide
Within this user’s guide, the following warnings are
used to alert you to important safety information:
Warning: There is a potential risk of death or serious
injury.
Caution: There is the risk of minor or moderate injury
to people.
Caution: There is a risk of equipment damage
or malfunction.
Related documentation
The following documentation is also available for your
Tait radio, which you can access from the Tait Technical
Support website (http://support.taitworld.com/):
! TP9100 Battery Care and Charging Guide—supplied
with each battery and charger. (The same information is in the section “Charging and caring for bat-
teries” on page 77.)
About this guide
! TP9100 Safety and Compliance Information—sup-
plied with each radio. (The same information is
included in this user guide.)
About this guide 17
Page 18

2 Before first use of your
radio
Once you have unpacked your radio, there are a few
tasks you must do before you can use it. The most
important of these is to charge your battery for the first
time—allow 14 hours for this.
This section covers:
! Charging the battery before first use
! Attaching a battery
! Attaching the antenna
! Attaching a belt clip
! Fitting a speaker microphone
Before first use of your radio
18 Before first use of your radio
Page 19

Charging the battery before
first use
Before using your battery for the first time, you must
charge it for 14 hours (subsequent charges should be
complete in two hours or less). This first charge is
important because it prepares (‘primes’) the battery for
use. The battery may take two or three shifts (charge/
discharge cycles) to reach maximum capacity.
Note: Before charging begins, the battery temperature
must be close to the room temperature in which the
battery is to be charged. Charging is best performed at
temperatures between 50 °F (10 °C) and 77 °F (25 °C)
and will start only when the temperature of the battery
is between 41°F (5°C) and 95 °F (35°C).
1 Ensure that the charger is connected to the correct
Tait power adaptor (desktop charger) or powered on
(multi-charger).
2 Put the battery in the charger.
Note: For optimal charging
results, the radio should be
turned off while in the charger.
The red ‘Charging’ LED glows to
indicate that the battery is being charged.
Note: If the amber ‘Fault’ LED lights up, refer to
“General care” on page 97.)
3 Leave the battery in the charger for 14 hours. When
the green ‘Ready’ LED on the charger glows, the
battery is ready for use.
You can safely leave the battery in the charger when
charging is complete—the charger will not overcharge
the battery.
For further information on batteries, see “Charging and
caring for batteries” on page 77.
Charging the battery before first use 19
Before first use of your radio
Page 20

Attaching a battery
To attach a battery to your radio:
1 Insert the bottom edge of the battery into the two
slots at the back of the radio.
2 Press down on the top of the battery to snap it
into place.
Attaching the antenna
Before using the radio, screw the antenna clockwise
into the antenna connector. The antenna should be
screwed sufficiently tight so that it doesn’t unscrew
easily. This is important as it creates a seal.
Attaching a belt clip
To attach a belt clip to your radio:
1 Slide the belt clip into the two grooves at the top of
the battery.
Before first use of your radio
20 Attaching a battery
belt clip
battery
2 Push down on the belt clip until it snaps into place.
See also “Removing a belt clip” on page 95.
Page 21

Fitting a speaker microphone
Speaker microphones are attached to the radio via an
accessory connector. The standard speaker
microphones do not have an antenna connector,
whereas the RF speaker microphone has a connector for
the radio antenna.
Removing the protective cover
Before fitting the speaker microphone, you may need to
remove the radio’s protective cover. This cover is located
above the battery on the rear of the radio.
1 Insert a coin, or other suitably shaped object, into
the slot of the protective cover. Twist the coin
clockwise from the locked to unlocked position.
2 Remove the cover and store in a safe place.
Attaching the accessory connector
Once you have removed the protective cover, you can fit
the speaker microphone accessory connector to the
back of the radio.
1 Push and hold the metal clip to release the lever.
lever
metal clip
2 Rotate the lever clockwise to an upright position.
3 Insert the white locking clip into the matching hole
at the rear of the radio.
insert the white locking
clip into this hole
4 Rotate the lever counterclockwise until you hear
it click.
5 Check that the accessory connector is firmly locked
into place.
Fitting a speaker microphone 21
Before first use of your radio
Page 22

Attaching the antenna to the RF speaker microphone
Once you have attached the accessory connector to the
radio, you can attach the speaker-microphone coax to
the radio’s antenna connector and then screw the
radio’s antenna onto the speaker microphone.
1 Remove the antenna from the radio.
2 Place the brass RF coaxial connector onto the radio’s
antenna connector.
coaxial connector
3 Tighten the connector with the 5/16 inch spanner,
until it sits deep into the radio housing.
4 On the speaker microphone, screw the antenna
Before first use of your radio
22 Fitting a speaker microphone
clockwise into the antenna connector.
antenna connector
Page 23

3 About your radio
This section describes all the various buttons and keys
on your radio.
This section covers:
! About your digital radio
! Basic operation
! Using function keys to access frequently used
features
! Understanding the radio display
! Using the menus to access settings and features
! Understanding the radio indicators
About your radio 23
About your radio
Page 24

About your radio
About your digital radio
Your digital radio may have some channels
programmed as either analog or dual mode. Dual
mode channels are able to receive both digital and
analog calls.
You may notice differences between your radio’s
analog and digital channels in terms of:
! static noise in low signal areas, and
! radio coverage in marginal reception areas.
Lack of static noise
On digital channels there is no static noise, even in low
signal areas. This lack of static is because your digital
radio removes the ‘noise’ from the call, so that you hear
only clear voice.
Coverage
With analog channels, the background noise in a call
gets progressively worse when you are in fringe areas or
even slightly outside normal coverage areas. With digital
channels, a call remains clear and then drops off quickly
at the border of a coverage area. The reason for this is
that a digital call is either received or it isn't.
24 About your digital radio
Page 25

Basic operation
The radio controls are the PTT key, power/volume
control, channel selector, 3-way selector control, scroll
keys, selection keys, and function keys. Some keys have
functions assigned to both short and long key presses:
! a short key press is less than one second, and
! a long key press is more than one second.
The radio controls and their functions are described in
the following sections.
3-way selector
control
function key 1
(top key)
channel selector
power / volume
control
status LED
function keys 2 & 3
(side keys)
PTT key
(press-to-talk)
left selection key
Channel 12
Zone 11
speaker /
microphone
display
right selection key
scroll keys
alphanumeric
keys
Basic operation 25
About your radio
Page 26
Turning your radio on and off
Rotate the power/volume control switch clockwise to
turn the radio on. Rotate the switch counterclockwise to
turn the radio off.
Note: Your radio may not turn on if your battery is very
low. (See “Low battery warning” on page 80.)
Adjusting the volume
With the radio turned on, rotate the power/volume
control clockwise to increase the speaker volume and
counterclockwise to decrease the volume.
Note: The volume control also changes the volume
level of the radio’s audible indicators.
About the channel selector
The channel selector allows you to select and change
channels. When first turned on, the radio will go to the
channel that was last selected.
See also “Selecting a channel” on page 38.
About your radio
26 Basic operation
Using function keys to access frequently used features
The function keys provide quick access to some of the
features you will use most often. These features are
assigned to the function keys when the radio is
programmed. Some keys may have a feature associated
with both a short key press and a long key press.
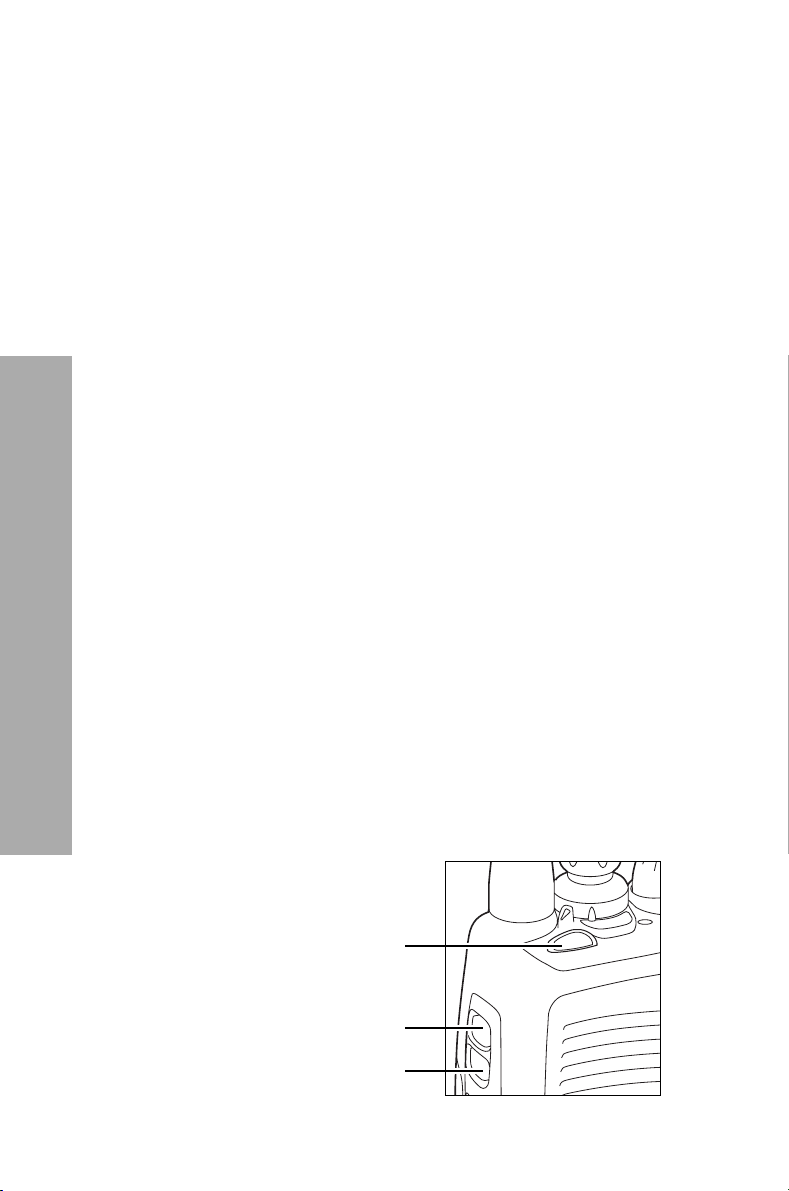
function key 1
function key 2
function key 3
Page 27

Viewing your function key settings
To check which functions are assigned to the function
keys:
1 Press Menu and select Radio settings > Radio info
> Key settings.
2 In the menu list, scroll to a function key and press
Select to view the associated function.
The example shown is for
a function key
programmed to turn
backlighting on and off.
3 Press a selection key or to return to
the menu.
Three-way selector control
You can use the 3-way selector control to access to
some of the features you use most often, such as
changing zones, locking the radio keypad and activating
such features as encryption and repeater talkaround.
3-way selector
control
Emergency key
You can activate emergency mode by pressing the
function key 1, if your radio is programmed in this way.
Backlighting
Toggle
Back OK
About your radio
See also “About emergency calls” on page 71.
Basic operation 27
Page 28
About your radio
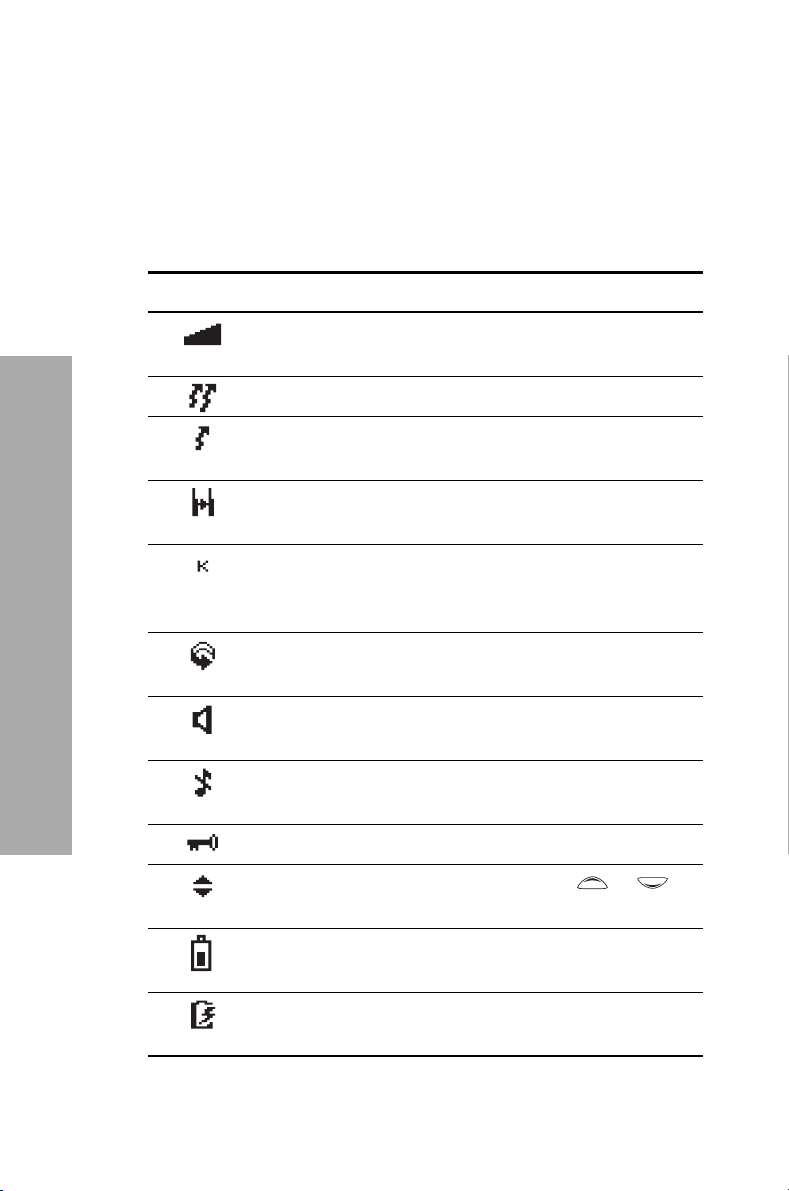
Understanding the radio display
The messages and symbols you see on your radio display
depend on the mode in which your radio is operating
and the way it is programmed.
These are the various symbols you may see on your
radio display:
Symbol Meaning
Signal strength indicator: the more bars, the
stronger the signal being received by your radio
Transmit: your radio is transmitting
Low-power transmit: indicates that low power
mode is turned on
Repeater talkaround: your radio is operating in
repeater talkaround mode
Zone: this letter represents the zone in which your
radio is operating, where
26 (in the example shown,
Scanning: your radio is monitoring a group of
channels for activity
Monitor or squelch override: monitor or squelch
override is active
A is zone 1 and Z is zone
K represents zone 11)
Silent operation: your radio’s audible tones have
been turned off
Encryption: your radio’s transmissions are encrypted
Scrolling: you can use the scroll keys or to
move through a list
Battery indicator: shows how much charge is
available in the battery
Battery in charger: appears when you place a radio
(with a TP9100 battery attached) in the charger
28 Understanding the radio display
Page 29
Using the menus to access settings and features
You can access settings and features for your radio
using the menu.
The selection and scroll keys enable you to make
selections and move around the menus.
Selection keys
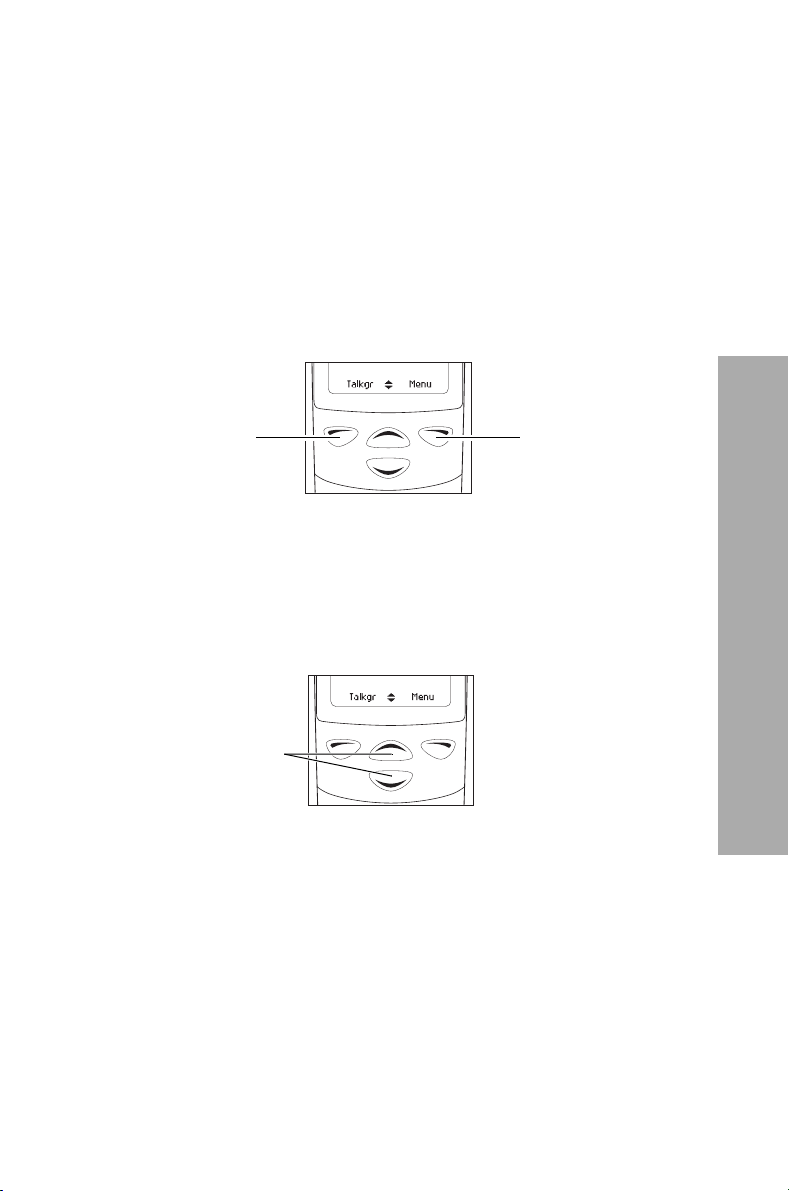
Zone 11
selection
There are two selection keys beneath the display screen.
How these keys work depend on the word that appears
above them on the screen.
Scroll keys
scroll keys
The up and down scroll keys allow you to:
! access the Quick Access menu
! scroll up and down through a list
! display the previous or next part of a message that
is too long to be displayed on the screen.
left
key
Zone 11
right
selection
key
About your radio
Using the menus to access settings and features 29
Page 30
About your radio
Accessing the Main menu
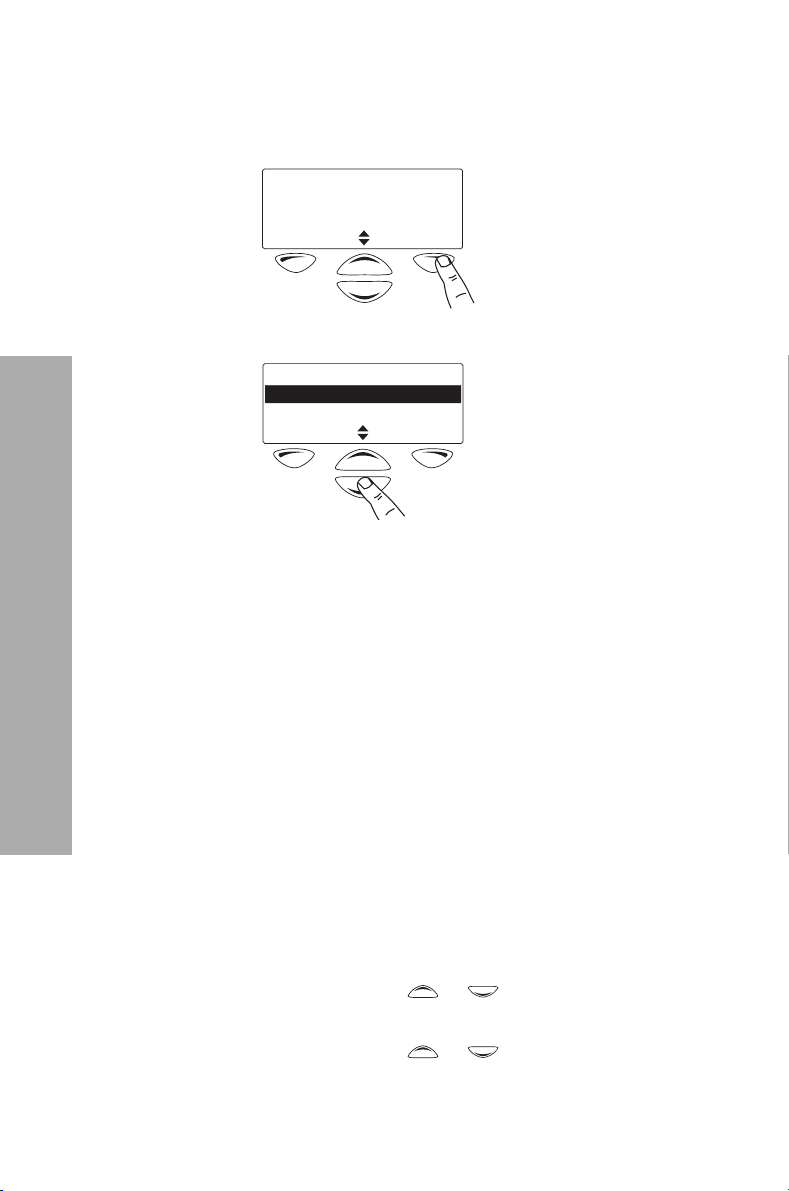
1 To access the Main menu, press the right selection
key whenever Menu appears above it.
Channel 12
Zone 11
Menu
2 Use the scroll keys to move through the menu list.
Main menu
Zones
Talkgroups
Back Select
3 When the menu you want is highlighted, press
Select to enter the menu you have chosen.
Tip: To quickly exit the menu system, press and hold the
left selection key when the word Cancel or Back
appears above it.
Accessing frequently used menus
Depending on how your radio is programmed, you may
have two different ‘quick access’ menus. One quick
access menu is displayed when you press a scroll key,
and the other when you press the left selection key.
These give you easy access to the menus you use
most often.
Using the scroll key Quick Access menu
There are two ways to use this Quick Access menu:
! Press a scroll key or , to begin scrolling
through a list of zones or channels.
! Press a scroll key or , and the Quick Access
menu appears.
30 Using the menus to access settings and features
Page 31
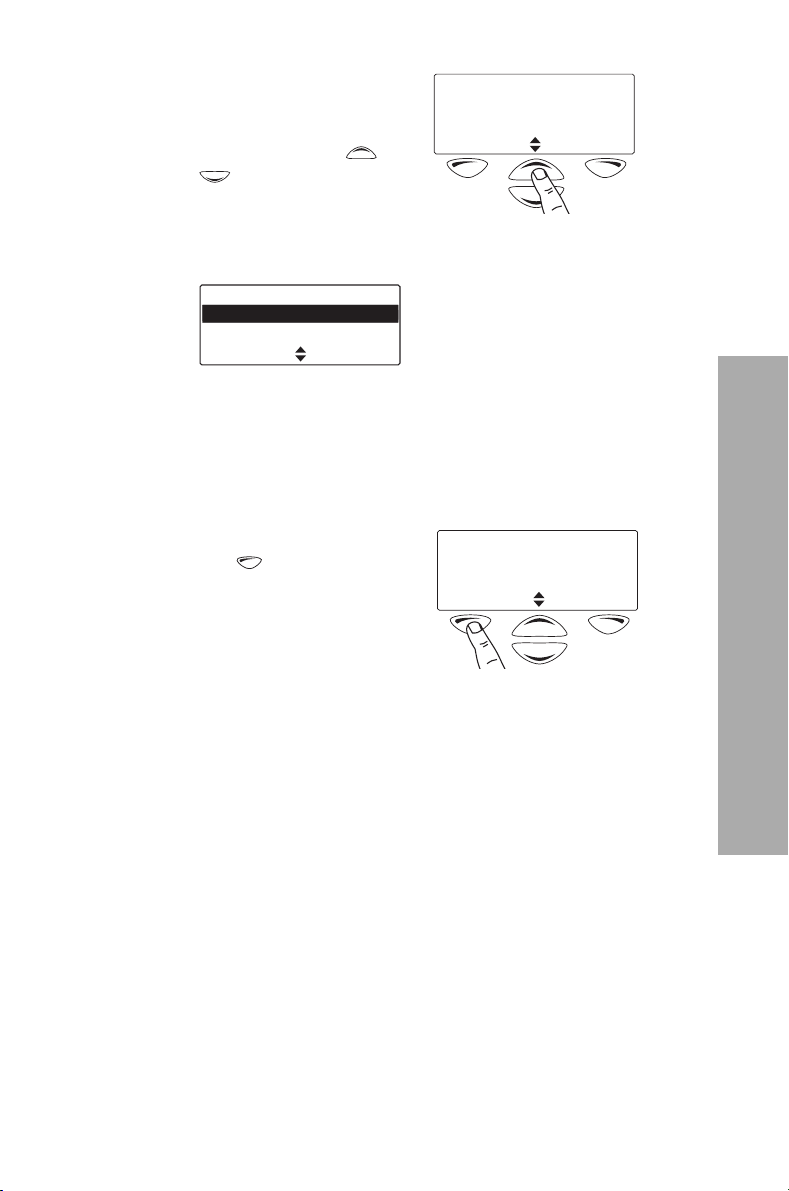
In this example, the
Talkgroups menu is the
Quick Access menu.
Press a scroll key
or
Channel 12
Menu
to go directly to the
Talkgroups menu.
The Talkgroups menu, with a list of your available
talkgroups, is now displayed:
Talkgroups
Talkgroup 01
Talkgroup 02
SelectCancel
Using the left selection key Quick Access menu
The text above the left selection key corresponds to the
Quick Access menu, for example, Talkgroups.
To use this Quick Access menu:
! Press your left selection
key
, and the associated
menu appears.
Channel 12
Zone 11
Talkgr Menu
Using the menus to access settings and features 31
About your radio
Page 32

Understanding the radio indicators
The status LED indicator and the radio’s audible tones—
together with the radio display—all combine to give you
information about the state of your radio.
The most common way the indicators work is described
in the following sections.
Audible tones
The radio uses audible tones to alert you to its status:
! Radio controls and keypress tones—the tones and
beeps you hear when you press your radio’s keys or
use the controls. (You can turn these tones off—see
“Turning off radio controls and keypress tones” on
page 90.)
! Incoming call tone—when the radio is receiving
a call.
! Warning tones—when there is an error, or the bat-
tery is low, for example.
About your radio
Tone Meaning
One short beep ! Valid keypress: the action you have
32 Understanding the radio indicators
hear any alert tones. See “Customizing the audible alert
settings” on page 89.
Some of the more common audible tones are
described below:
Note: If quiet or silent mode is turned on, you will not
attempted is permitted, or
! Function activated: a function has been
turned on (using either the Main menu
or a function key)
Page 33

Tone Meaning
One long, lowpitched beep
! Invalid keypress: the action you have
attempted is not permitted, or
! Transmission inhibited: you have
attempted to transmit, but for some reason you cannot make a call at this time
One short, lowpitched beep
Function deactivated: a function has been
turned off (using either the Main menu or a
function key)
Two short beeps Radio turned on: the radio is powered on
and ready to use
About your radio
Understanding the radio indicators 33
Page 34
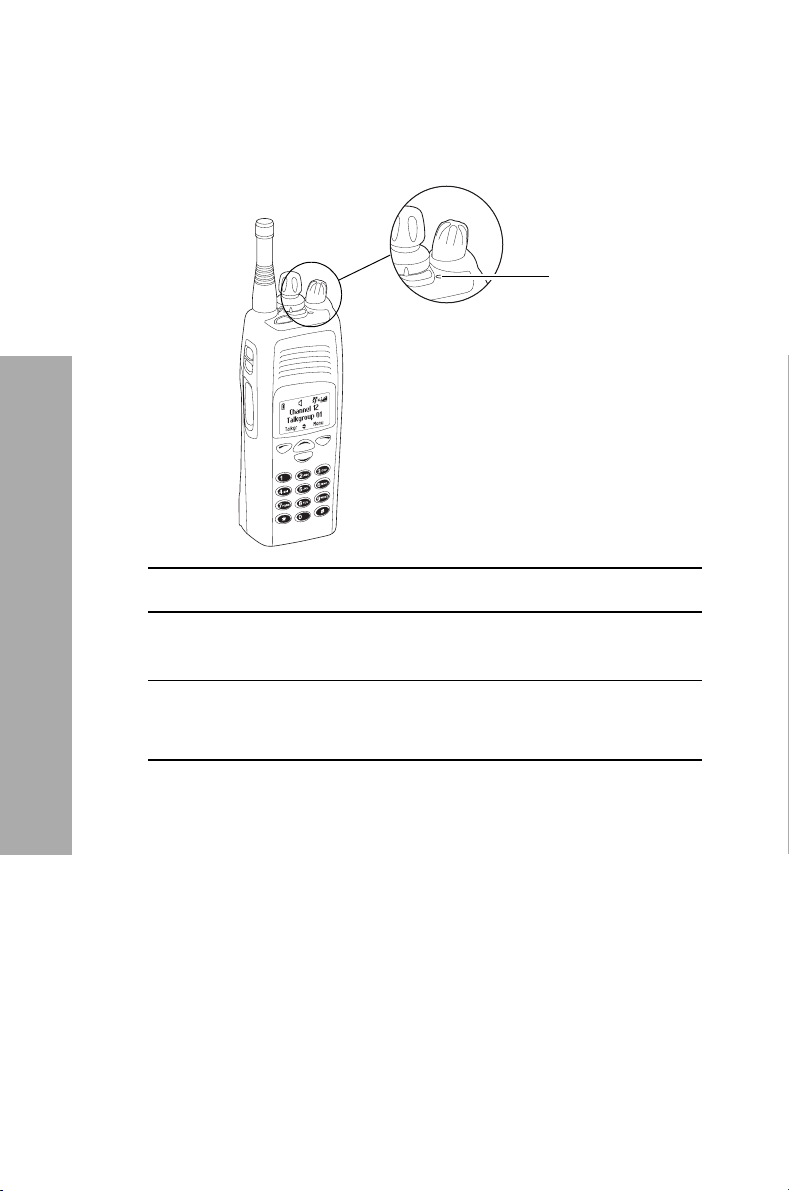
Status indicators
Note: The way these indicators behave may be affected
by the way your radio is programmed.
status LED
Color Meaning
Red (transmit) Glowing: your radio is transmitting
About your radio
Green (receive) Glowing: the current channel is busy
34 Understanding the radio indicators
Flashing: you have received a call
Page 35

4 Making and receiving
calls
This section describes how to make and receive calls.
This section covers:
! Making calls
! Receiving calls
! Communicating directly with other radios
! Checking your recent calls
! Checking that the channel is clear (monitor)
! Call alert paging
! Checking whether a radio is available
Making and receiving calls 35
Making and receiving calls
Page 36
Making calls
1 Select the required zone (see “Selecting a zone” on
page 37).
2 Select the required channel (“Selecting a channel”
on page 38).
3 Select the required talkgroup (see “Making a
talkgroup call” on page 39) or individual radio
unit ID (see “Making an individual call” on page 40).
4 Hold the radio so that the microphone is about
one inch (2.5 cm) from your mouth and press the
PTT key to transmit.
Note: If the channel is busy, you may not be able to
transmit. Wait until the green status LED has
stopped glowing, and then try again.
5 Speak clearly into the microphone and release the
PTT key when you have finished talking.
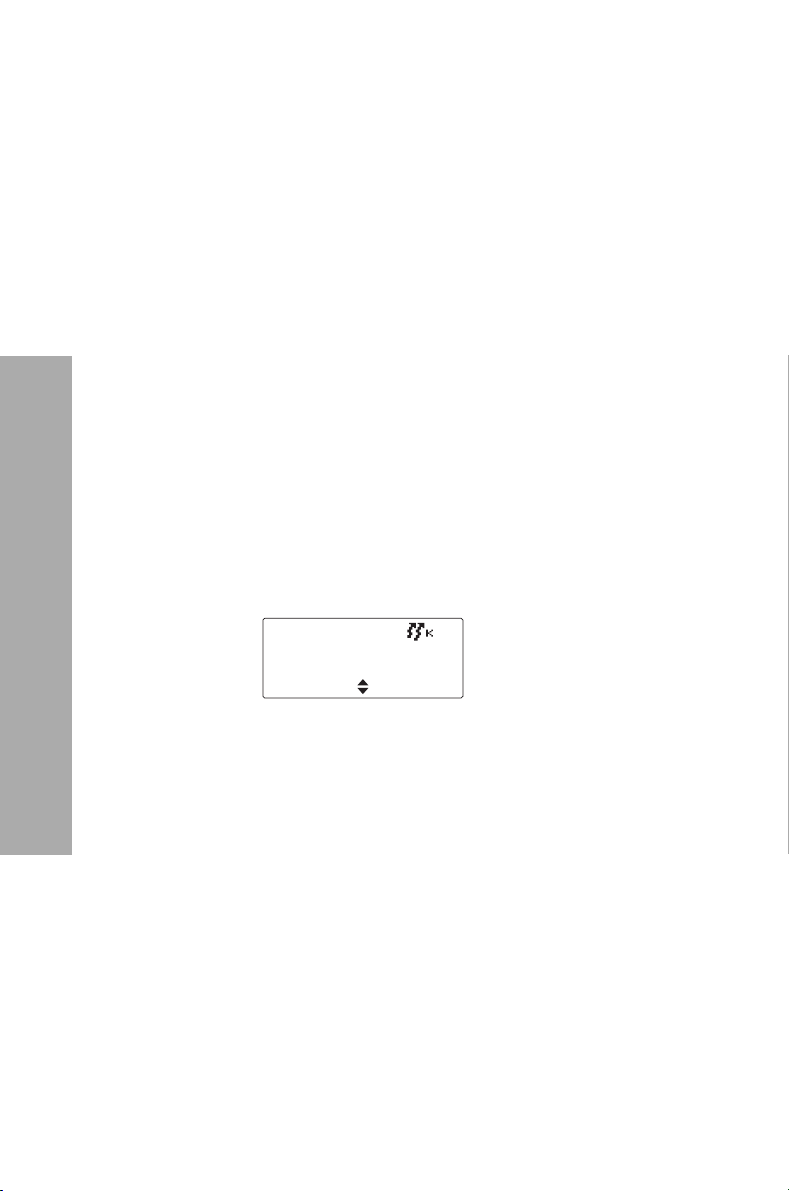
While you are transmitting the LED glows red and
the transmit symbol appears in the display:
Calling..
Cancel
Car2
Menu
Making and receiving calls
36 Making calls
Limiting call time (transmit timer)
Your radio may limit the amount of time you can talk
(transmit) continuously. This is known as the ‘transmit
timer’ or ‘time-out timer’ and allows other radio users to
make calls on that channel.
The message Transmit Timeout Imminent appears in
the display.
Finish your conversation as soon as possible and release
the PTT. For a short time, your radio may prevent you
from making a call.
Page 37
Selecting a zone
A zone is a collection of channels. Zones are a way of
grouping channels, for example, by public safety agency
type (fire, police, ambulance, etc.) or by geographical
region (Dallas, Houston, etc.).
1 Press Menu and select Zones.
2 Scroll to the zone you want.
3 Press Select.
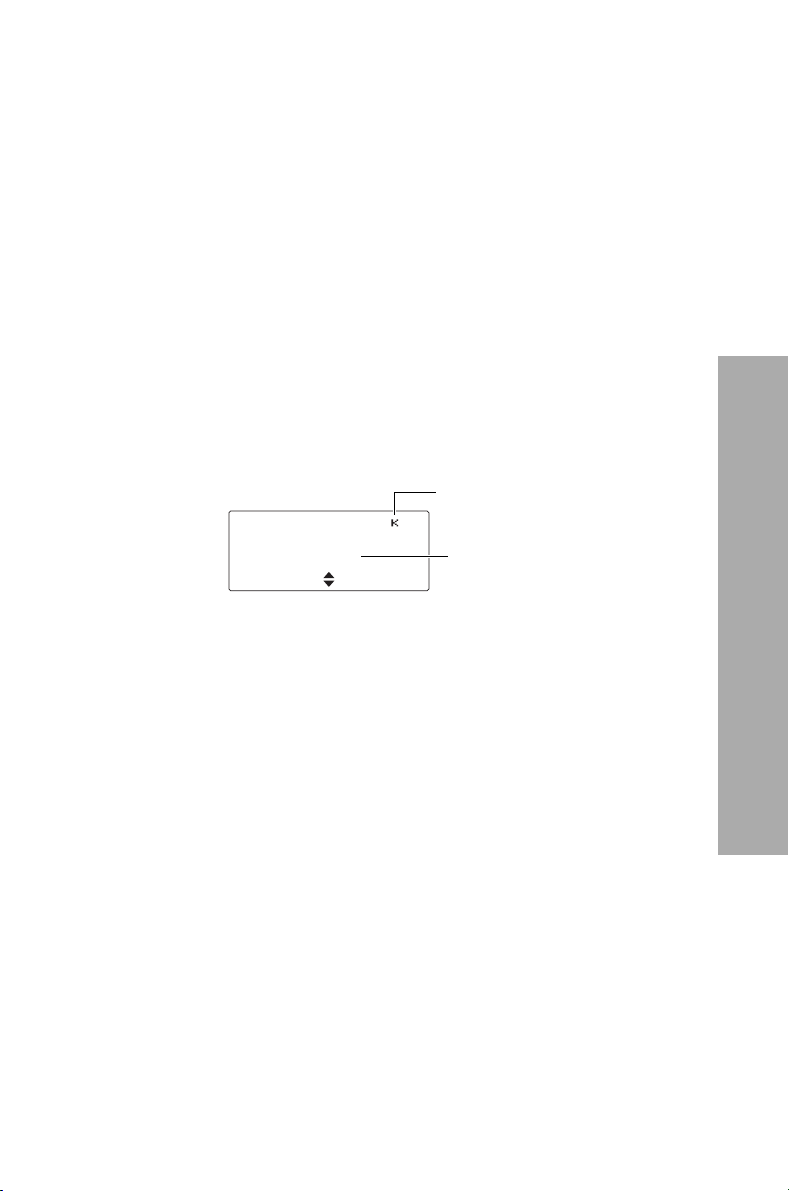
Your radio may indicate the zone in which it is
currently operating in the following ways:
! the name of the zone appears below the channel
name in the default radio display, or
! the zone symbol appears as a letter in the top
right corner of the display.
Talkgr
Other ways of selecting a zone
You may also be able to use the following controls to
select a zone:
! 3-way selector (see “Three-way selector control” on
page 27)
! left selection key (see “Using the left selection key
Quick Access menu” on page 31), or
! scroll keys (see “Using the scroll key Quick Access
menu” on page 30).
Channel 6
Zone 11
zone represented
as a letter
Menu
programmed
zone name
Making and receiving calls
Making calls 37
Page 38

Selecting a channel
It is important to distinguish between channels and
talkgroups. A channel is frequency-related, whereas a
talkgroup is a group of radio users. Talkgroups are only
available for digital channels.
For an explanation of talkgroups, see “Understanding
talkgroups” on page 39.
Using the channel selector
For channels 1 to 16, rotate the channel selector to the
channel you want. For all other channels, use the Main
menu to select a channel.
Using the Main menu
1 Press Menu and select Channels.
2 Scroll to the channel you want and press Select.
Other ways of selecting a channel
You may also be able to use the following controls to
select a channel:
! function key (see “Using function keys to access fre-
quently used features” on page 26)
Making and receiving calls
38 Making calls
! left selection key (see “Using the left selection key
Quick Access menu” on page 31)
! scroll keys (see “Using the scroll key Quick Access
menu” on page 30).
Page 39
Understanding talkgroups
Note: This feature is available for digital channels only.
Talkgroups are a collection of people (radio unit IDs)
with whom you want to have private conversations as
a group.
For example, a state's public safety agencies could have
the following talkgroups:
! Local talkgroups—used by a specific agency to com-
municate within their own local agency. It may even
be made up of a county of public safety officers.
! Regional talkgroups—used by large state agencies
that have regional divisions.
! Statewide talkgroups—used by an agency to com-
municate with a public safety member in another
region. Statewide talkgroups, as their name suggests,
enable public safety agencies to communicate with
each other from one end of the state to the other.
! Special event talkgroups—may be used to manage
emergencies encompassing a large area, or even
events such as visits by heads of state.
Making a talkgroup call
1 Press Menu and select Talkgroups.
(Depending on how your radio is programmed, you
may be able to use a Quick Access menu to go to the
Talkgroup menu.)
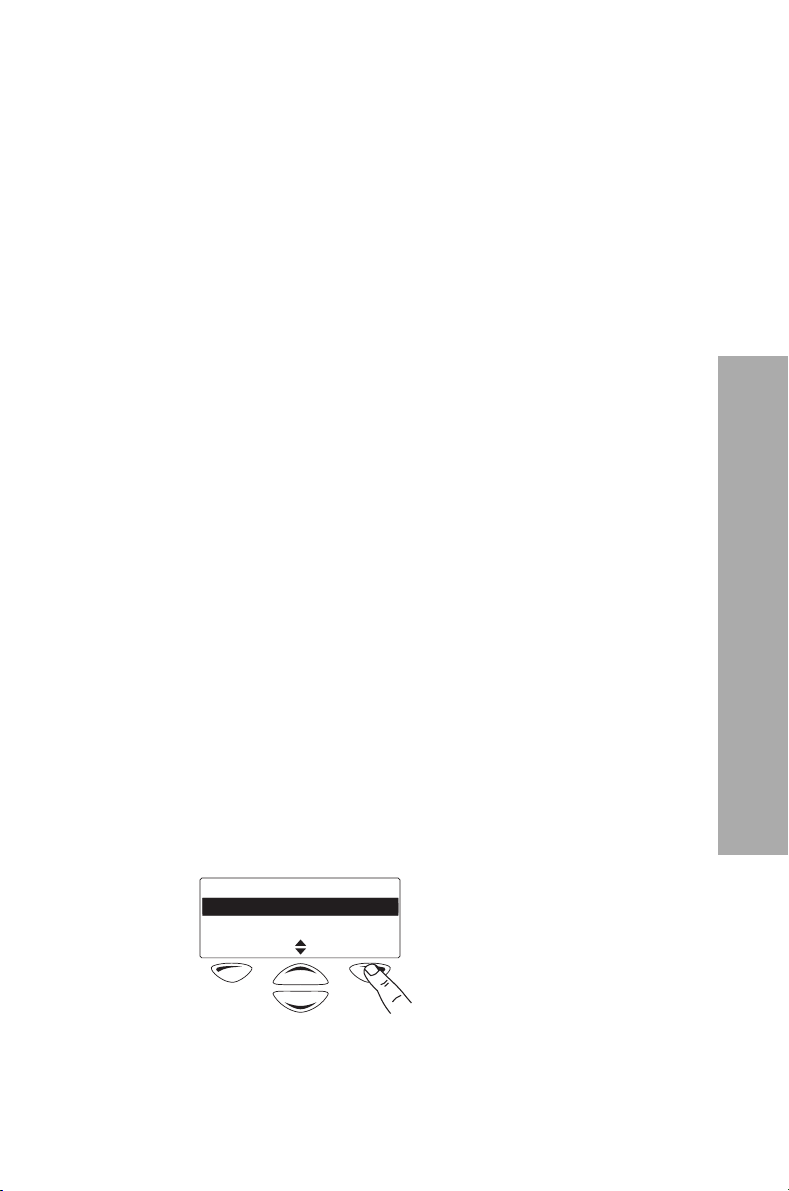
2 Scroll through the list of talkgroups to the one you
want and press Select.
Talkgroups
Talkgroup01
Talkgroup02
SelectCancel
3 Press the PTT key to make a call to the currently
selected talkgroup.
Making calls 39
Making and receiving calls
Page 40
Making an emergency call
For information about making and ending emergency
calls together with a explanation of how your radio
behaves in emergency mode, see “About emergency
calls” on page 71 and “Understanding emergency
mode” on page 72.
Making an individual call
Note: This feature is available for digital channels only.
To make a call to one person rather than a group of
people:
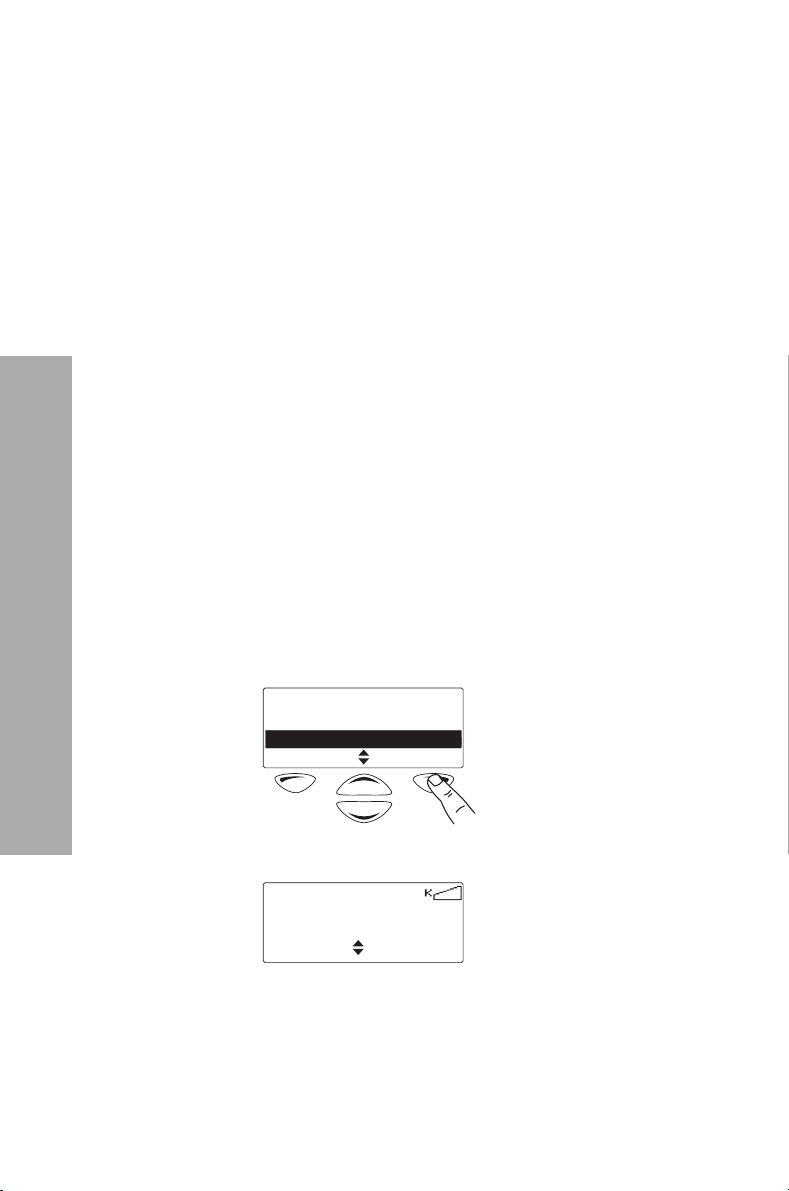
1 Press Menu and select Individual call. (The person
to whom you last made an individual call is
highlighted.)
(Depending on how your radio is programmed, you
may be able to press a function key or use your
Quick Access menu to select individual calls.)
2 Scroll to the person you want to call and press the
PTT key to make the call immediately.
3 Alternatively, scroll to the person you want to call
and press Select.
Making and receiving calls
40 Making calls
Individual call
Car 1
Car 2
SelectCancel
The message Call...? briefly appears in the screen:
Call...?
Car2
MenuCancel
4 Press the PTT key to make the call.
Page 41
Receiving calls
When a call is received with valid signaling, the radio
unmutes and you can hear the call.
Identifying a caller (talking party ID)
Note: This feature is available for digital channels only.
You can use Talking Party ID to identify the radio user
calling you. (This feature is usually turned on when the
radio is programmed.)
! talkgroup call: the name of the talkgroup is dis-
played:
Car 2
Talkgroup 01
Talkgr
! individual call: the name of the radio name from
your call list is displayed (if there is no associated
name, only the radio unit ID is shown):
Call Received
Car 2
Talkgr
Menu
Menu
Turning talking party ID off and on
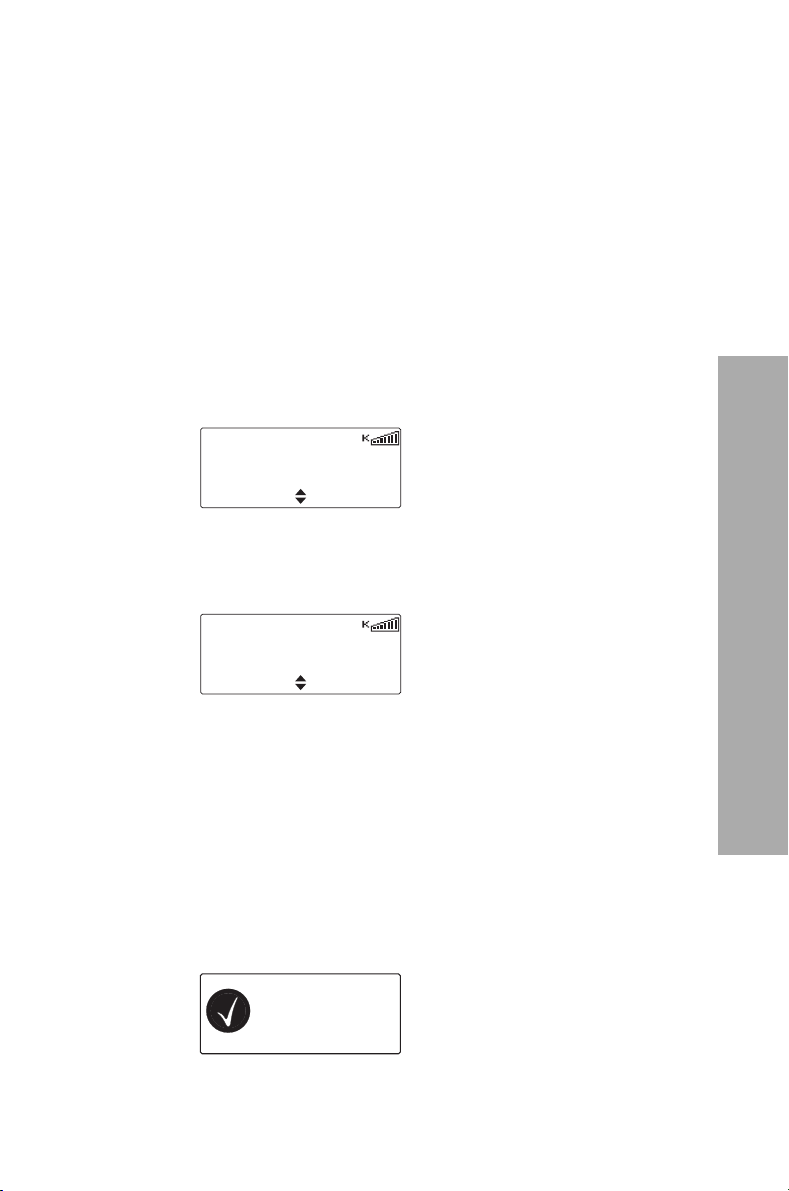
1 Press Menu and select Radio settings > Display
settings > Talk party ID.
2 Scroll to either On (or Off) and press Select. (The
current setting is highlighted).
The message Talking party ID activated (or
Talking party ID deactivated) appears in
the display:
Talking party
ID activated
Receiving calls 41
Making and receiving calls
Page 42

Communicating directly with other radios
You can bypass the radio repeater and communicate
directly with another radio using the Radio Talkaround
feature. You can do this when you are out of range of
the repeater, or if the repeater is busy.
While repeater talkaround is active, all calls are made on
your current channel’s receive frequency.
Turning repeater talkaround on and off
You can turn repeater talkaround on and off using a
function key, if your radio is programmed in this way.
! Press the function key to turn repeater
talkaround on.
The message Repeater talkaround activated (or
Repeater talkaround deactivated) appears and
the repeater talkaround symbol
the display.
Repeater talkaround remains on until you press the
function key again.
appears in
Making and receiving calls
42 Communicating directly with other radios
Page 43
Checking your recent calls
Note: This feature is available for digital channels only
and applies to individual calls and call alert pages only.
Your radio may be able to store a list of the last 20 calls.
These calls may be calls that you have received or calls
that you have made.
Using your recent calls list to make a call
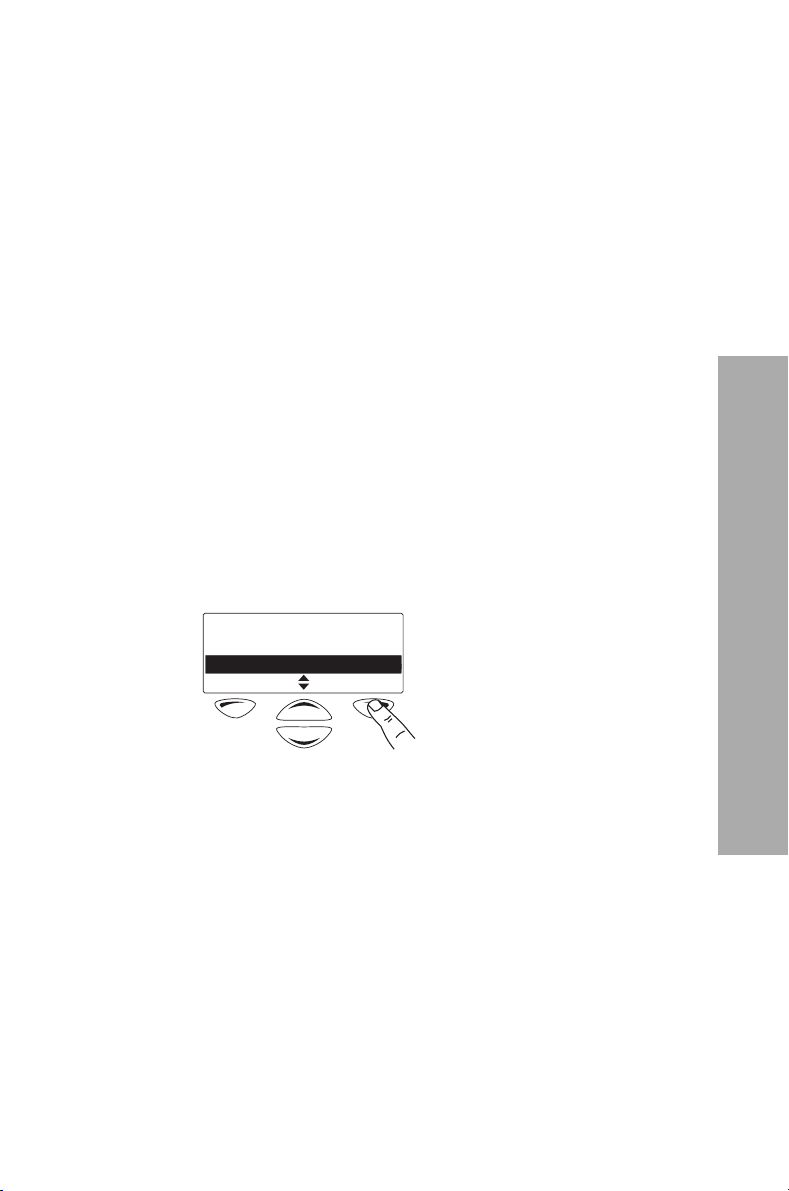
1 Press Menu and select Recent calls. (Depending on
how your radio is programmed, you may be able to
press a function key or use your Quick Access menu
to select recent calls.)
The most recent call is displayed at the top of the list.
If you have not participated in any calls since your
radio was switched on, the message No items in list
appears in the display.
2 Scroll through the list of recent calls until the call you
want appears, and then press Call.
Recent calls
Dispatcher
Car 2
CallCancel
The message Call...? briefly appears in the screen.
Press the PTT key to make the call.
3 Alternatively, scroll through the list of recent calls
until the call you want appears.
Press the PTT key to make the call immediately.
Checking your recent calls 43
Making and receiving calls
Page 44

Checking that the channel is clear (monitor)
Monitor allows you to override some or all of the radio’s
mutes, allowing you to hear if there is any traffic
(including talkgroup and individual calls) on a channel.
For analog channels, this is so that you can check that
the channel is clear before you make a call.
Turning monitor on and off
1 Press Menu and select Radio settings > Functions
> Monitor.
(Depending on how your radio is programmed, you
may be able to press a function key to toggle
monitor on and off.)
2 Scroll to On (or Off) and press Select.
The monitor symbol appears in the display and
remains on while monitor is active.
Making and receiving calls
44 Checking that the channel is clear (monitor)
Page 45
Call alert paging
Note: This feature is available for digital channels only
and applies to individual calls only.
You can let another radio user know that you want to
talk to them by sending them a call alert page. When
the other radio user receives the call alert page, they can
call you back when it is convenient.
Sending a call alert page
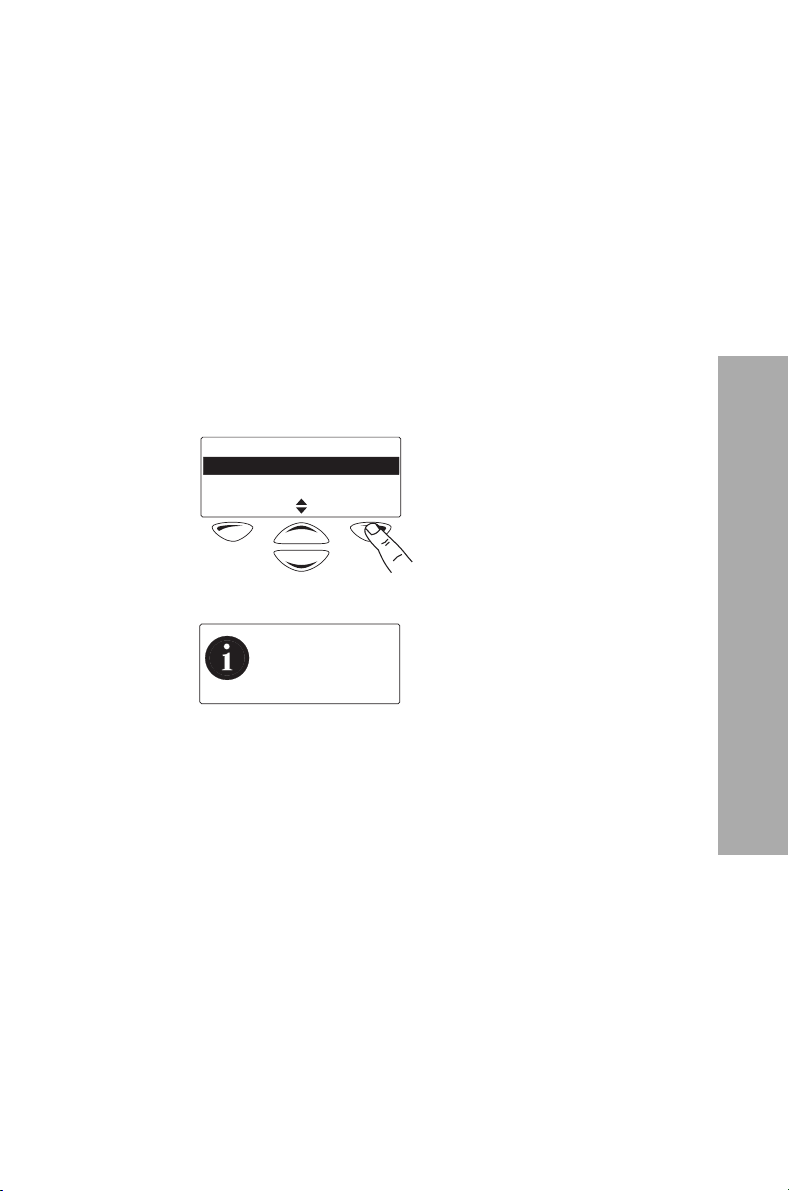
1 Press Menu and select Services > Send call alert.
2 Scroll to the radio you wish to page from the call list
and press Send to.
Send call alert
Richard
John
A message appears in the display:
Sending Page
to Richard
Cancel
Send toCancel
The LED glows red and a message may be displayed
to advise you whether the call alert has been sent
successfully or not.
If an acknowledgement is not received from the
recipient’s radio, you may have the option of either
cancelling or resending the call alert page.
Answering a call alert page
If you receive a call alert page from another radio user,
the message Page Rx’d from ... briefly appears in the
display.
Select Call to return the page or OK to delete it. If you
miss the call alert page, the identity of the caller may be
saved in your recent calls list.
Call alert paging 45
Making and receiving calls
Page 46
Checking whether a radio is available
Note: This feature is available for digital channels only
and for radios configured for dispatcher operation.
If you want to find out whether a particular radio is
available on the system, you can use the Radio Check
feature. This sends a radio-check message to the radio
unit you have specified.
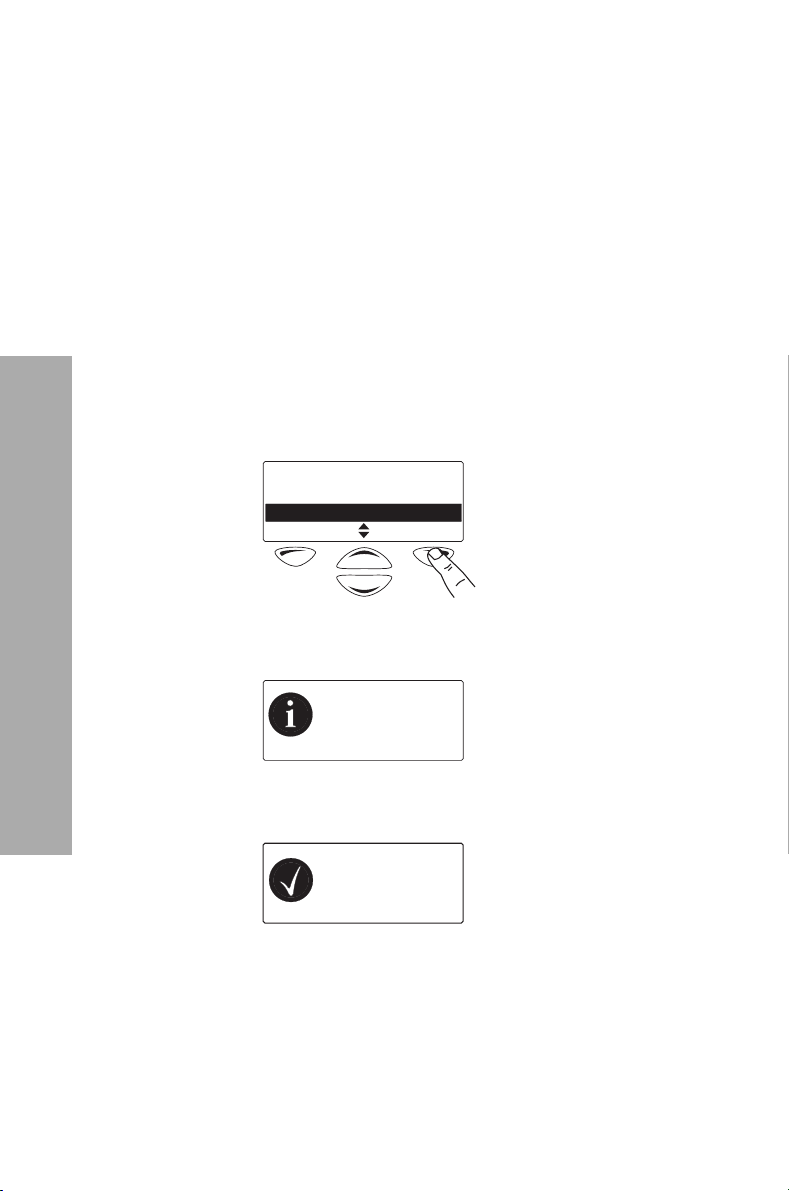
1 Press Menu and select Services > Radio check.
2 Scroll to the radio you wish to check from the
call list.
3 Press Send to.
Radio check
Car 1
Car 2
Send toCancel
The LED glows red and a message showing the
destination appears in the display:
Making and receiving calls
Cancel
If the radio is available on the system, an
acknowledgement message is displayed:
46 Checking whether a radio is available
Sending
Radio Chk to
Car 2
Ack received
OK
Page 47

5 Listening to channel
traffic
This section describes using your radio in different
repeater areas, scanning a group of channels for
activity, and using the squelch override function to hear
faint and noisy signals on a channel.
This section covers:
! Selecting a voting or scan group
! Using your radio in different repeater areas
! Scanning a group of channels
! Hearing faint and noisy signals
Listening to channel traffic 47
Listening to channel traffic
Page 48
Selecting a voting or scan group
A group is a collection of channels that are grouped
together for either voting or scanning. Voting or
scanning groups can be made up of channels from
different zones. You may be able to select groups either
by using a function key, the channel selector or by using
the Main menu.
The following sections explain how your radio operates
once a group has been selected:
! voting groups: “Using your radio in different
repeater areas” on page 50,and
! scan groups: “Scanning a group of channels” on
page 51.
Using the channel selector
You can use the channel selector to select a preset
voting or scan group, if your radio is programmed in
this way.
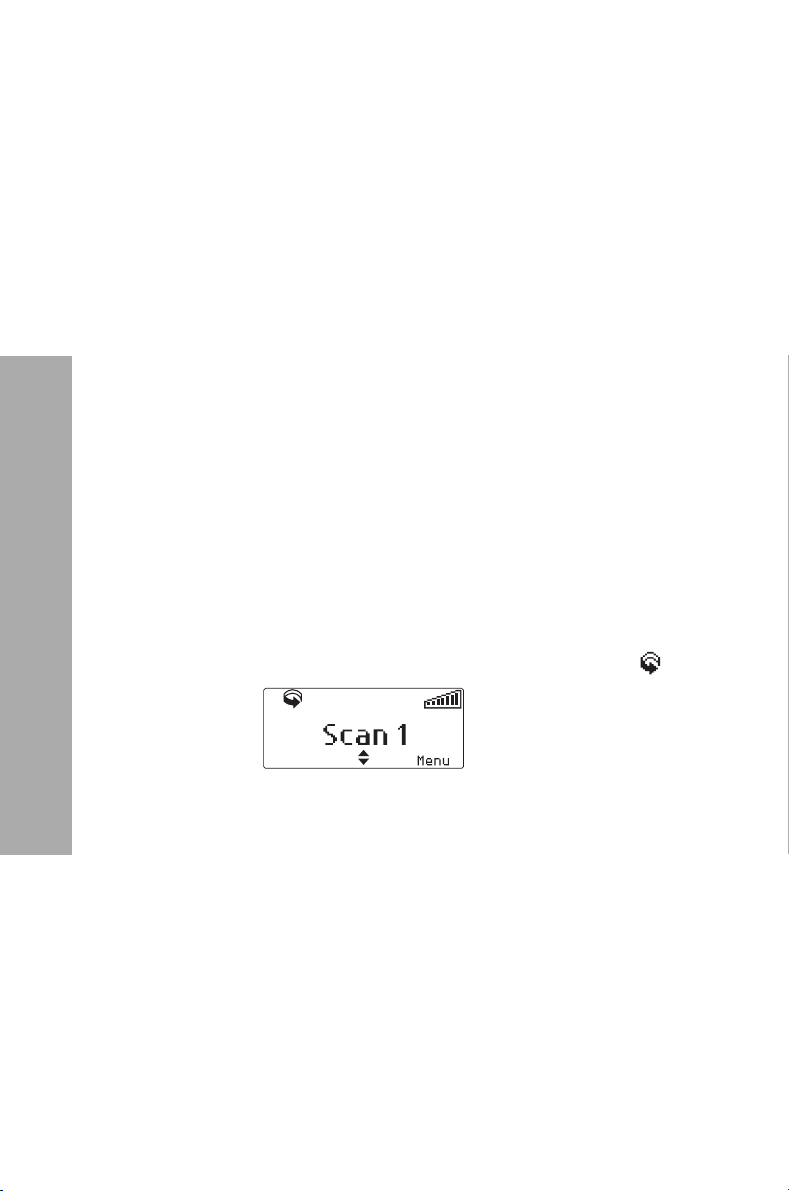
! Rotate the channel selector to the group you want.
The programmed group name may now appear in
the display along with the scanning symbol
:
Listening to channel traffic
Using a function key
To use a function key to select a preset voting or scan
group:
! Press the function key to select and activate a preset
48 Selecting a voting or scan group
voting or scan group.
Page 49
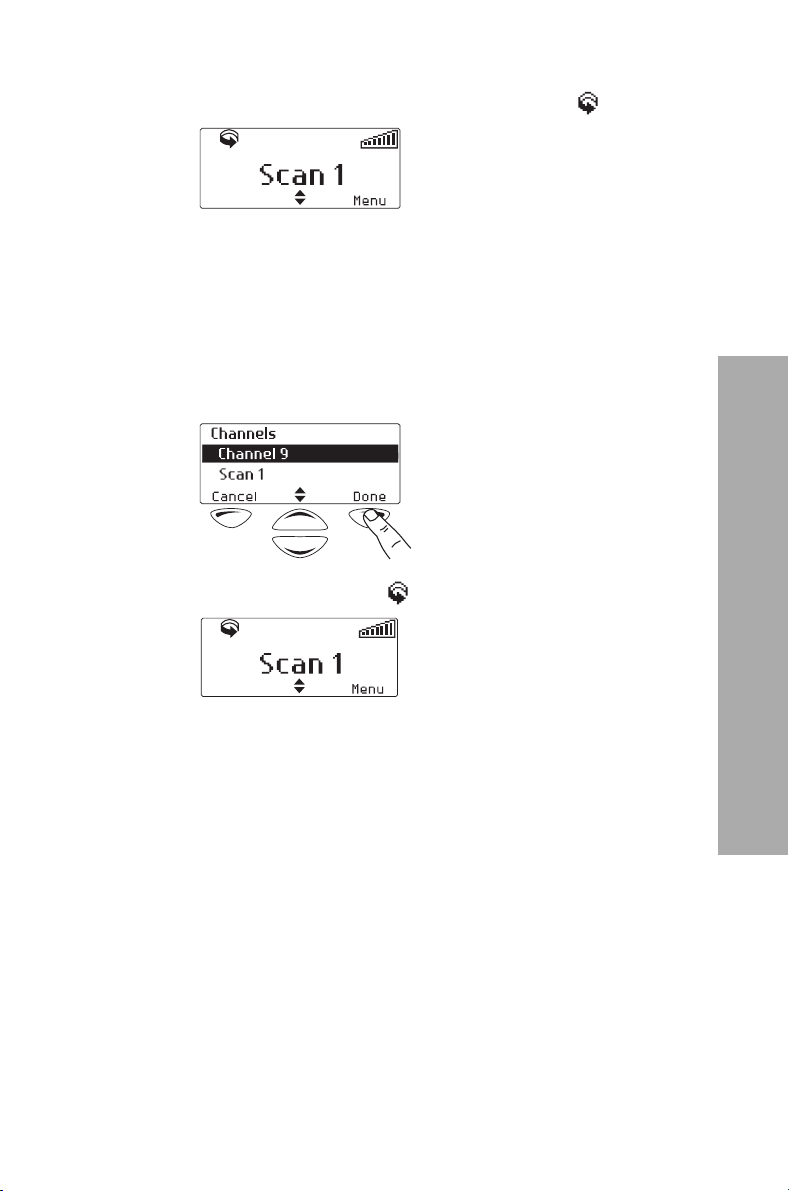
The programmed group name may now appear in
the display along with the scanning symbol
:
Using the Main menu
To select a voting or scan group using the Main menu:
Note: This method is not available for background scan.
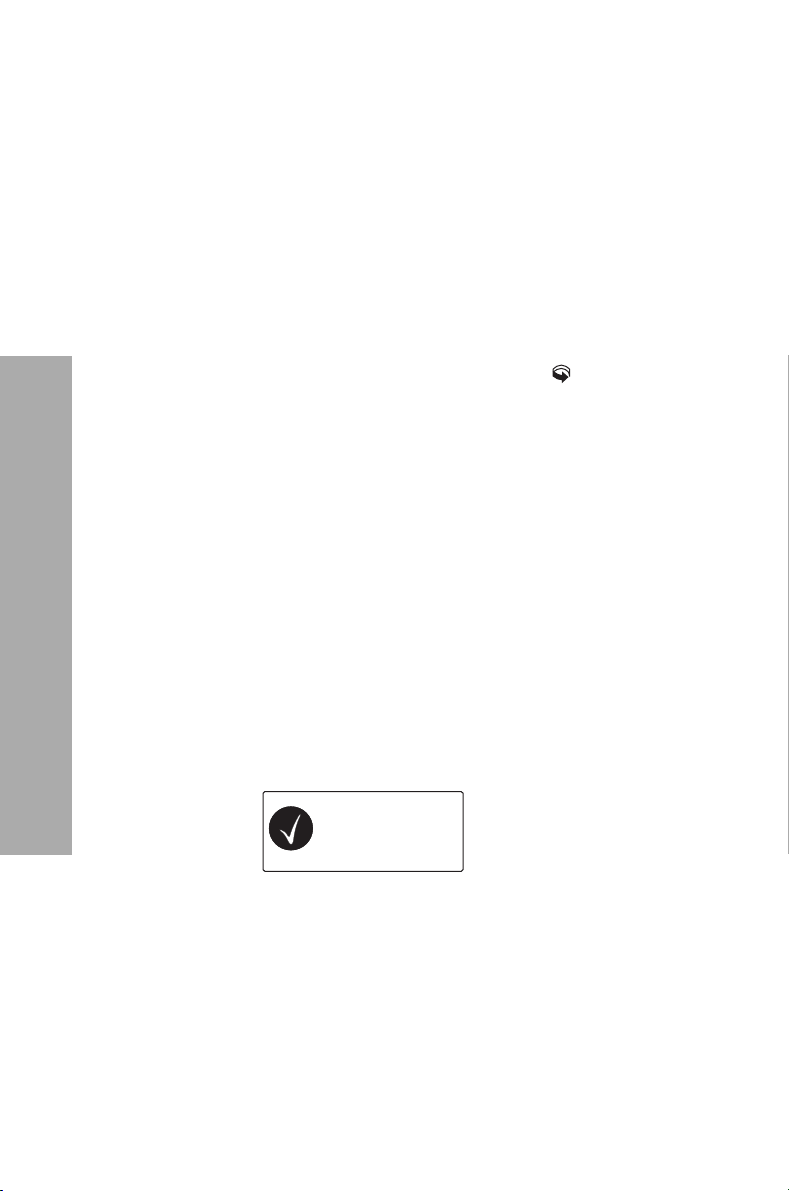
1 Press Menu and select Channels.
2 Scroll to the group you want and press Done.
The scanning symbol appears in the display:
Selecting a voting or scan group 49
Listening to channel traffic
Page 50
Listening to channel traffic
Using your radio in different repeater areas
Your radio may have a group of channels programmed
as a voting group. The channels in the voting group all
carry the same traffic, but from different repeaters. As
your radio moves in and out of different repeater
coverage areas, the best communication channel is
automatically selected for you to use.
This channel is known as the ‘home’ channel, and may
be the channel you make and receive calls on. While
voting is active, the scanning symbol
the display.
Suspending a channel from a voting group
You may be able to use the function key programmed
for ‘nuisance delete’ to temporarily remove one of the
channels from the voting group.
To remove a channel from a voting group:
1 Wait until the radio has stopped on the channel that
you want to remove from the voting group.
2 Press the function key programmed for nuisance
delete.
If the channel has been successfully been removed,
the message Channel deleted from group briefly
appears in the display:
appears in
Channel deleted
from group
The channel remains removed from the voting
group until you either select another voting group or
the radio is turned off and then on again.
Note: The function key programmed to activate a
voting group may be programmed so that a short key
press activates voting and a long key press activates
nuisance delete.
50 Using your radio in different repeater areas
Page 51

Scanning a group of channels
The scanning feature is used to monitor a preprogrammed group of channels for activity. When a
busy channel is detected in a group, the radio stops on
(‘captures’) that channel, and you can now hear the call.
Scanning resumes when the channel is no longer busy.
Note: ‘Priority’ channels may be specified when the
radio is programmed. These are channels that you want
the radio to check for activity more often than other
‘non-priority’ channels. Priority channels are scanned
periodically when a non-priority channel is busy.
Understanding the different types of scanning
The two types of scanning that may be available on your
radio are standard scanning and background scanning.
Background scan can only be activated using a function
key programmed for background scan. When you
activate background scan, the currently selected
channel automatically becomes a member of the
scan group.
Making a call while scanning
If you want to make a call while your radio is scanning:
1 Lift the microphone off the microphone clip.
2 Press the PTT key to transmit.
If background scan is active, your radio will now call
the currently selected channel.
If standard scan is active and there has been no
recent activity on the channel, then the channel that
is called depends on the way your radio has been
programmed. The possible options are:
! your radio calls a predetermined channel e.g.
your dispatcher
Scanning a group of channels 51
Listening to channel traffic
Page 52
! your radio calls the channel where activity was
last detected
! your radio calls the last free channel.
3 When the called party responds, proceed with
your conversation.
Suspending a channel from a scan group
If the radio is continuously stopping on an undesired
channel (for example, if there is too much activity or
even interference) while scanning, you may be able to
temporarily remove this channel from the scan group.
To remove a channel from a scan group:
1 Wait until the radio has stopped on the channel that
you want to remove from the scan group.
2 Press the function key programmed for
nuisance delete.
If the channel has been successfully been removed,
the message Channel deleted from group appears in
the display:
Channel deleted
from group
Listening to channel traffic
Note: The function key programmed to activate a scan
group may be programmed so that a short key press
activates scanning and a long key press activates
nuisance delete.
Editing a background scan group
You may be able to permanently change the
membership of your background scan group by using
the function key programmed for nuisance delete.
52 Scanning a group of channels
The channel remains removed from the scan group
until you either select another scan group or the
radio is turned off and then on again.
Page 53
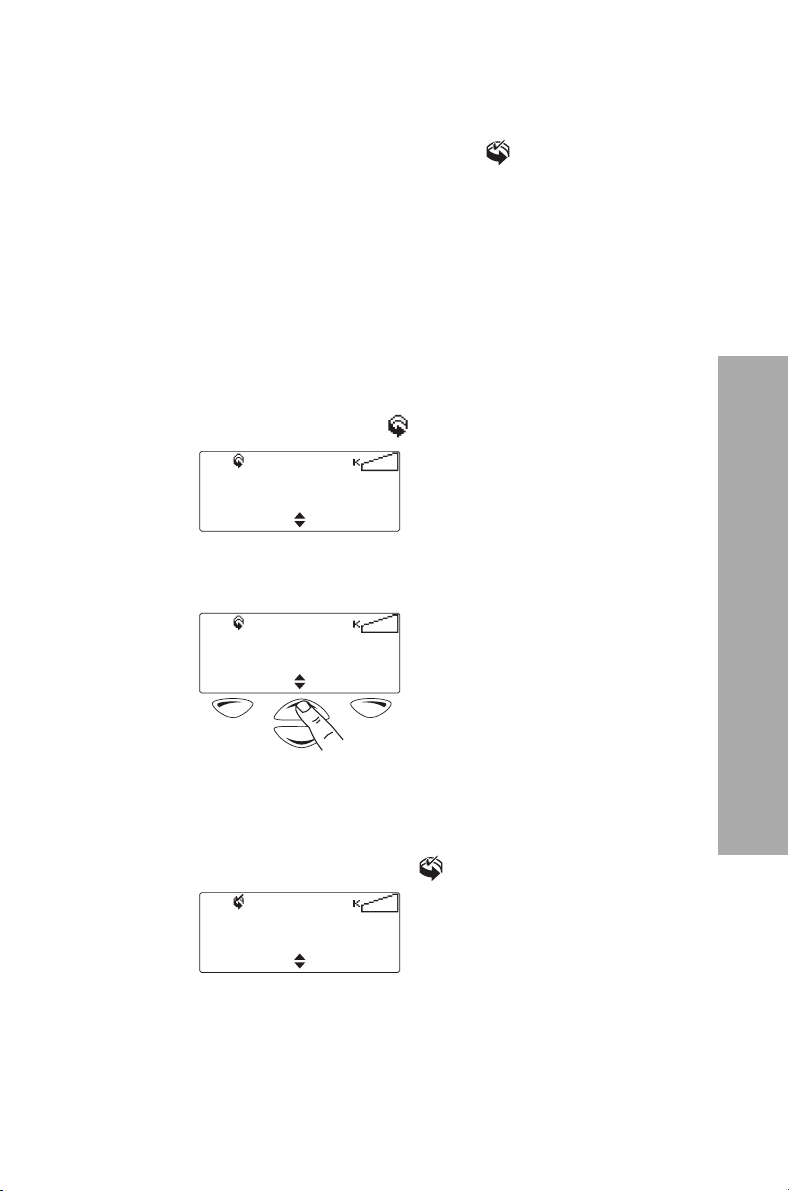
When background scan is active, you can scroll through
the channel list to see which channel is a member of
your background scan group. When the channel is a
group member, the scanning symbol
Note: The function key programmed to activate your
background scan group may be programmed so that a
short key press activates background scan and a long
key press activates nuisance delete.
includes a tick.
Adding a channel to your background
scan group
1 Press the function key that activates
background scan.
The scanning symbol appears in the display:
Channel 9
Menu
2 Scroll through the list of channels until the channel
that you want to add appears.
Channel 8
Menu
3 Press the nuisance delete key and this channel is
now added to your background scan group.
The message Channel added appears in the display
and the scanning symbol
now includes a tick:
Channel 8
Menu
Scanning a group of channels 53
Listening to channel traffic
Page 54
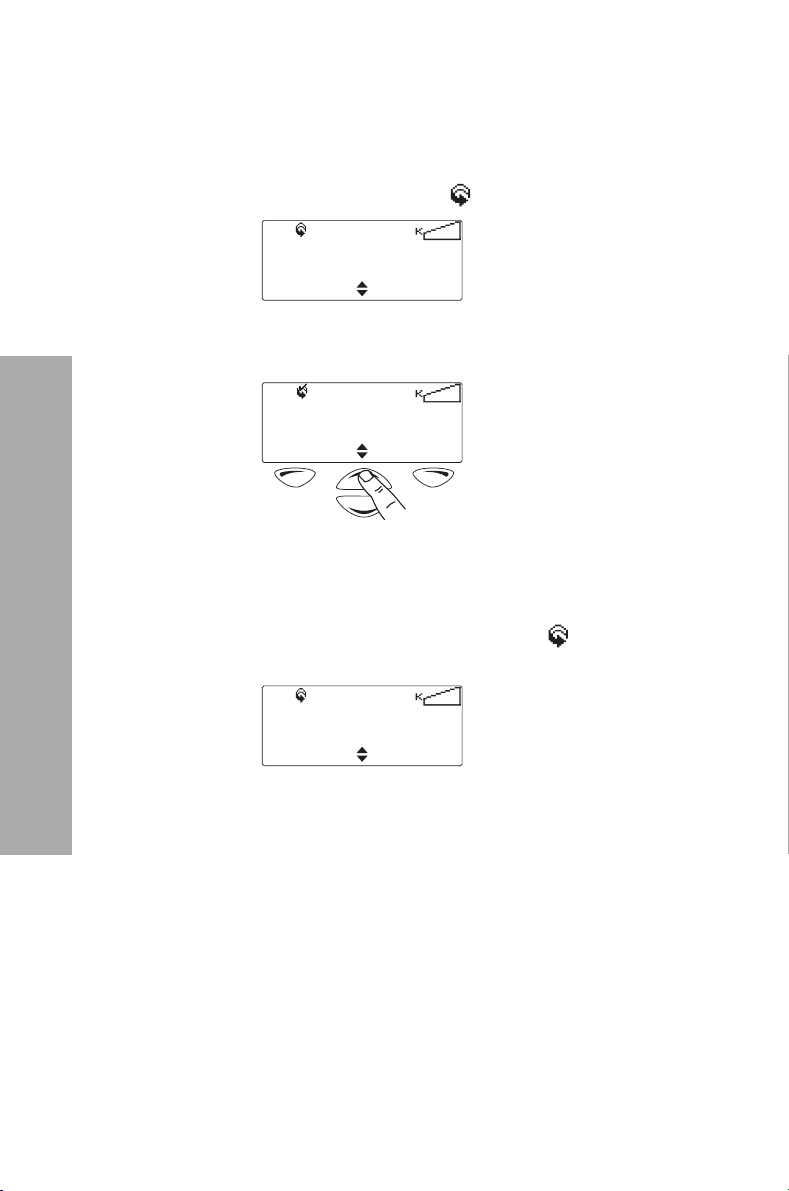
Removing a channel from your background
scan group
1 Press the function key that activates
background scan.
The scanning symbol appears in the display:
Channel 9
Menu
2 Scroll through the list of channels until the channel
that you want to delete appears.
Channel 8
Menu
3 Press the nuisance delete key and this channel is
now deleted from your background scan group.
The message Channel deleted appears in the
display and the scanning symbol
includes a tick.
no longer
Listening to channel traffic
54 Scanning a group of channels
Channel 8
Menu
Page 55

Hearing faint and noisy signals
Note: This feature is only applicable to analog channels.
Usually the radio’s squelch mute (known as ‘squelch’)
prevents you from hearing faint or noisy calls on a
channel. Without squelch, the radio’s speaker would
‘chatter’ in low signal strength areas.
On occasions when you want to hear everything that is
being said on a channel, even if it is hard to understand,
you can use the Squelch Override feature to force the
mute open.
Turning squelch override on and off
1 Press Menu and select Radio settings > Functions
> Squelch override.
(Depending on how your radio is programmed, you
may be able to press a function key to turn squelch
override on and off.)
2 Scroll to On (or Off) and press Select.
The message Squelch override activated (or
Squelch override deactivated) appears in
the display.
Hearing faint and noisy signals 55
Listening to channel traffic
Page 56

6 Sending and receiving
messages
This section describes sending messages as well as
responding to requests for status information.
This section covers:
! About messages
! Informing other radio users of your status
! Requesting a status update
Sending and receiving messages
56 Sending and receiving messages
Page 57
About messages
Note: This feature is available for digital channels only.
You may be able to send short messages to another
radio user. These messages are defined at programming
time and are also known as ‘pre-programmed
messages’.
The person to whom you are sending the message must
have the same message programmed into their radio in
order to read and display your message.
Sending a message
You may be able to send your message to a
predetermined person or talkgroup, or to a person of
your choice.
Sending a message to a predetermined person or talkgroup
1 Press Menu and select Services > Messages.
(Depending on how your radio is programmed, you
may be able to press a function key or use your
Quick Access menu to select messages.)
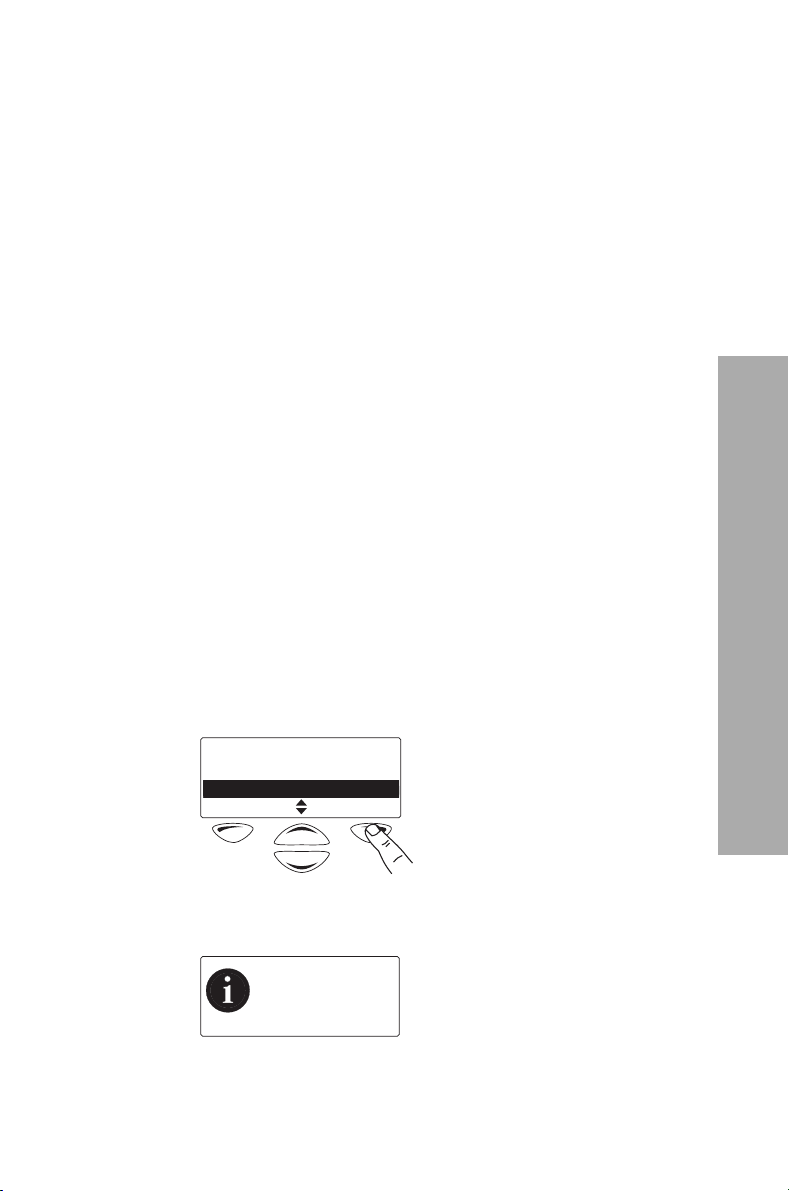
2 Select the message you want from the message list
and press Select.
Messages
At scene
En route
SelectCancel
A message showing the destination appears in the
display:
Sending
Message to
CurrentGroup
Cancel
About messages 57
Sending and receiving messages
Page 58
The LED glows red and a message may be displayed
to advise you whether the message has been sent
successfully or not.
Sending a message to a person of your choice
1 Press Menu and select Services > Messages.
(Depending on how your radio is programmed, you
may be able to press a function key or use your
Quick Access menu to select messages.)
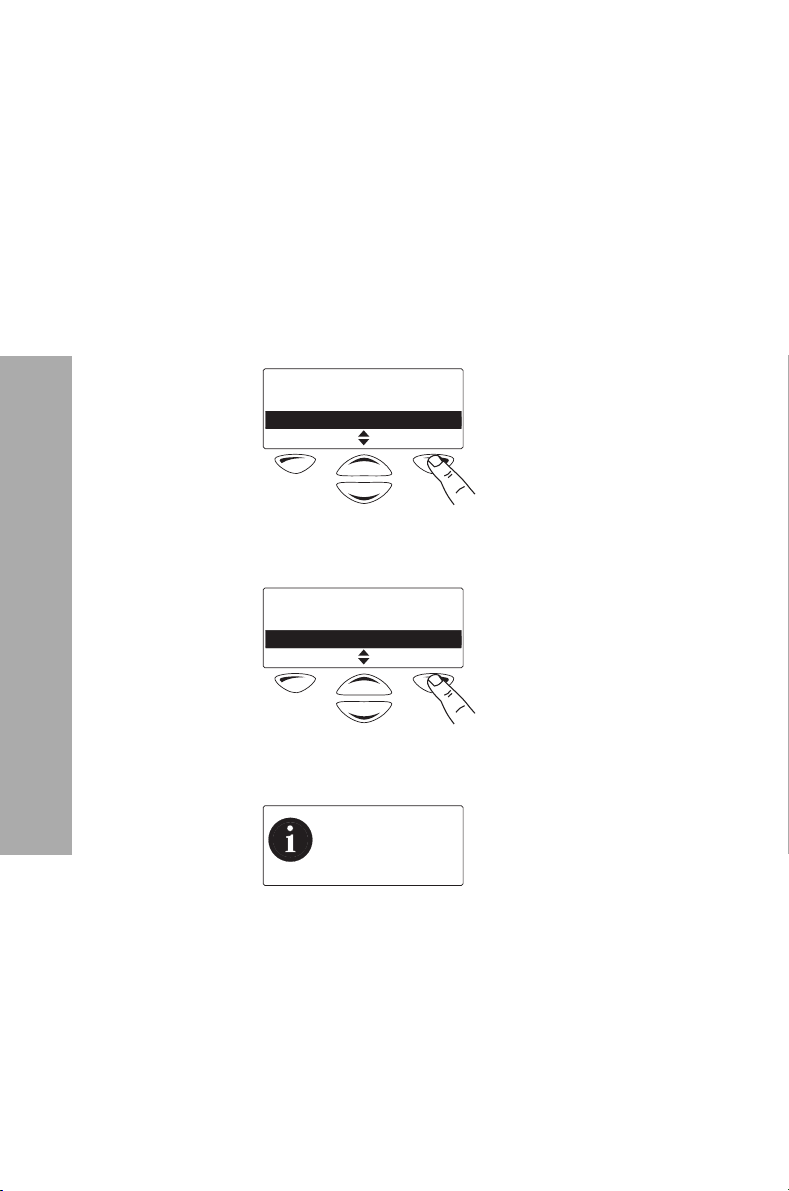
2 Select the message you want from the message list
and press Select.
Messages
At scene
En route
SelectCancel
3 Select the message recipient from the list and press
Send to.
Send Message
Car 1
Car 2
Send toCancel
Sending and receiving messages
58 About messages
A message showing the destination briefly appears
in the display.
Sending
Message to
Car 2
Cancel
The LED glows red and a message may be displayed
to advise you whether the message has been sent
successfully or not.
Page 59
Informing other radio users of your status
Note: This feature is available for digital channels only.
You can inform other radio users of your current status
by sending them a status update, for example, ‘At
scene’. You may be able to send the status update to a
predetermined person or talkgroup, or to a person of
your choice.
When you send a status message, you are also setting
your status, which the dispatcher may be able to check
by ‘interrogating’ your radio. You can change your
status at any time by selecting another status message
and sending it. See “Requesting a status update” on
page 60.
To send a status update:
1 Press Menu and select Services > Status update.
(Depending on how your radio is programmed, you
may be able to press a function key or use your
Quick Access menu to select status update.)
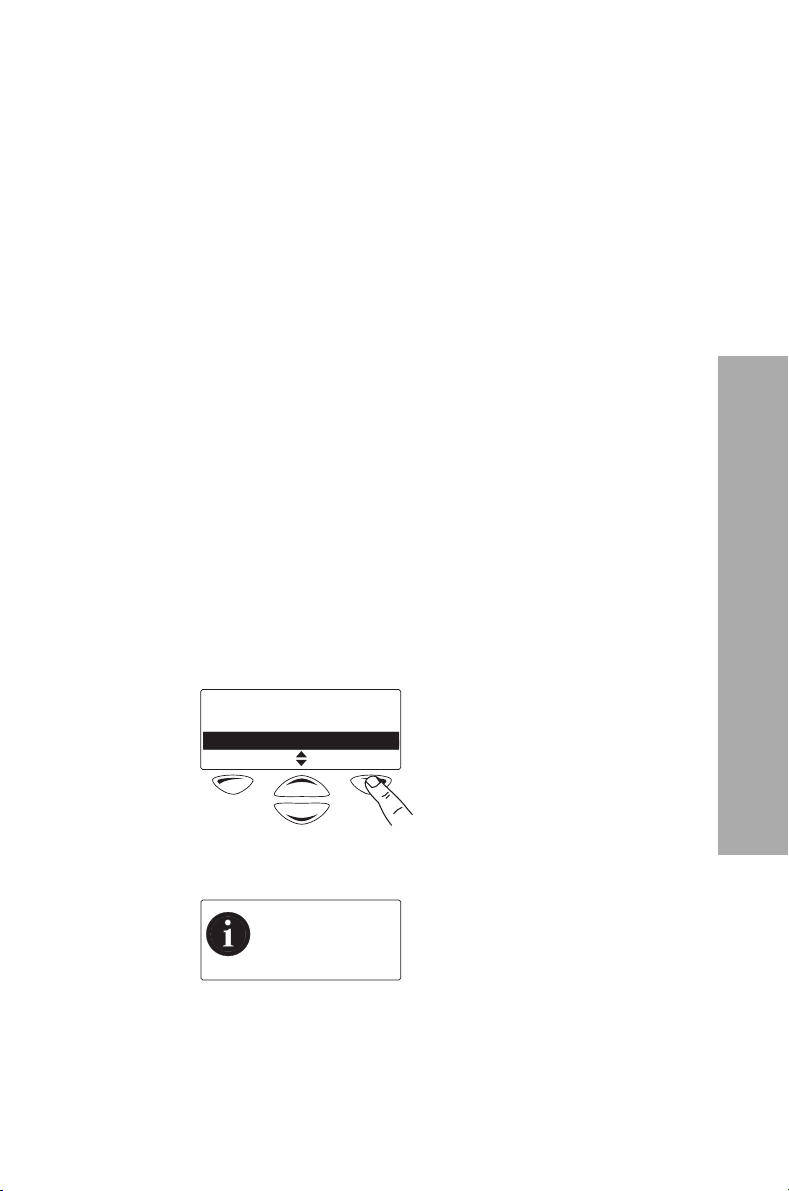
2 Select the status message you want from the
message list and press Send to or Select.
Status update
At lunch
On site
SelectCancel
A message showing the destination appears in the
display:
The LED glows red and a message may be displayed
to advise you whether the status update has been
sent successfully or not.
Sending
Status to
CurrentGroup
Cancel
Informing other radio users of your status 59
Sending and receiving messages
Page 60
Requesting a status update
Note: This feature is available for digital channels only
and for radios configured for dispatcher operation.
You can find out what another radio user is currently
doing by asking them to send you a status update.
To send a status request:
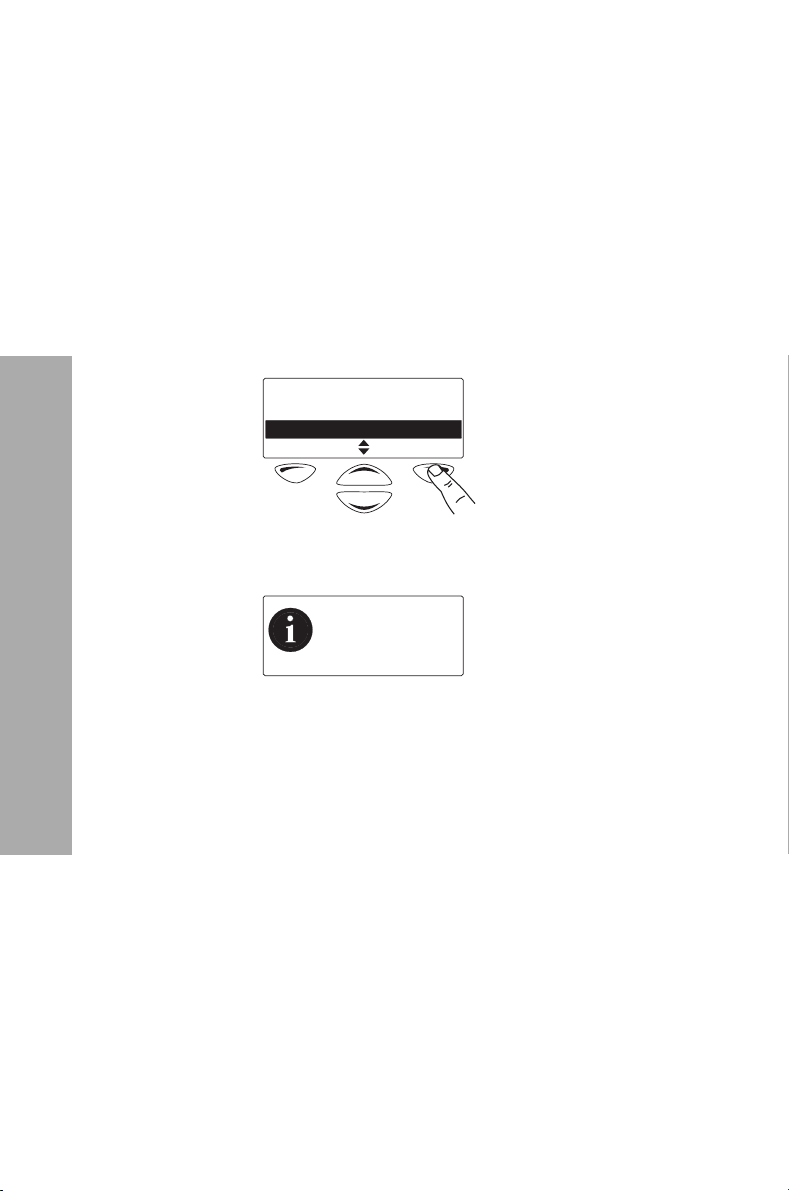
1 Press Menu and select Services > Status request.
2 Select the status request recipient from the list and
press Send to key.
Status request
Car 1
Car 2
Send toCancel
A message showing the destination appears in the
display:
Sending Sts
Rqst to
Car 2
Cancel
Sending and receiving messages
60 Requesting a status update
The LED glows red and a message may be displayed
to advise you whether the message has been sent
successfully or not.
Page 61

7 Safeguarding you and
your radio
This section describes how to prevent unauthorized use
of your radio, how to make your communications
completely private and how to get help when you need
it most.
This section covers:
! Locking and unlocking the keypad
! Making a radio inoperable
! Radio monitor
! About encryption
! About emergency calls
! Making a priority call
! Understanding emergency mode
! About the Lone Worker feature
! About the Man Down feature
Safeguarding you and your radio 61
Safeguarding you and your radio
Page 62
Locking and unlocking the keypad
You can lock the keypad to prevent accidental calls
caused by the keypad being bumped.
When the keypad is locked, you can still answer calls as
normal by pressing the PTT.
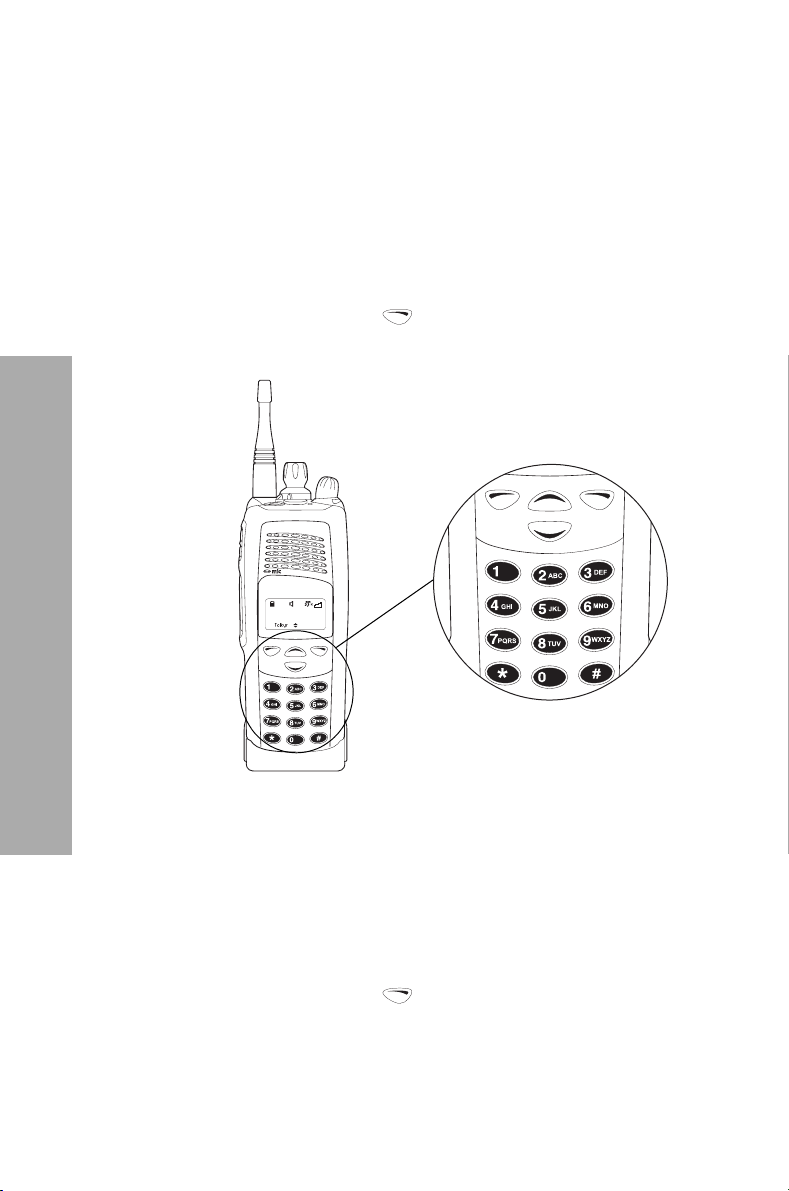
1 To lock the keypad, press and hold the right
selection key
Channel 12
Zone 11
Unlock
for about one second.
These are the keys that
are locked.
Safeguarding you and your radio
The message Keypad locked briefly appears in the
display, and Unlock appears above the right
selection key, in place of Menu.
When any of the locked keys are pressed, the
message Keypad lock active appears.
2 To unlock the keypad, press and hold the right
selection key
62 Locking and unlocking the keypad
for about one second.
Page 63
Making a radio inoperable
Note: This feature is available for digital channels only
and for radios configured for dispatcher operation.
If you want to make another radio on the system
inoperable, you can use the Radio Inhibit feature. This
feature is also known as ‘stun’.
To the user of the inhibited radio, it appears as though
the radio has turned off. The radio remains inoperable
even if it is turned off and then on again.
The radio cannot return to operation until it receives an
‘uninhibit’ request. This is also known as ‘revive’.
Sending a Radio Inhibit request
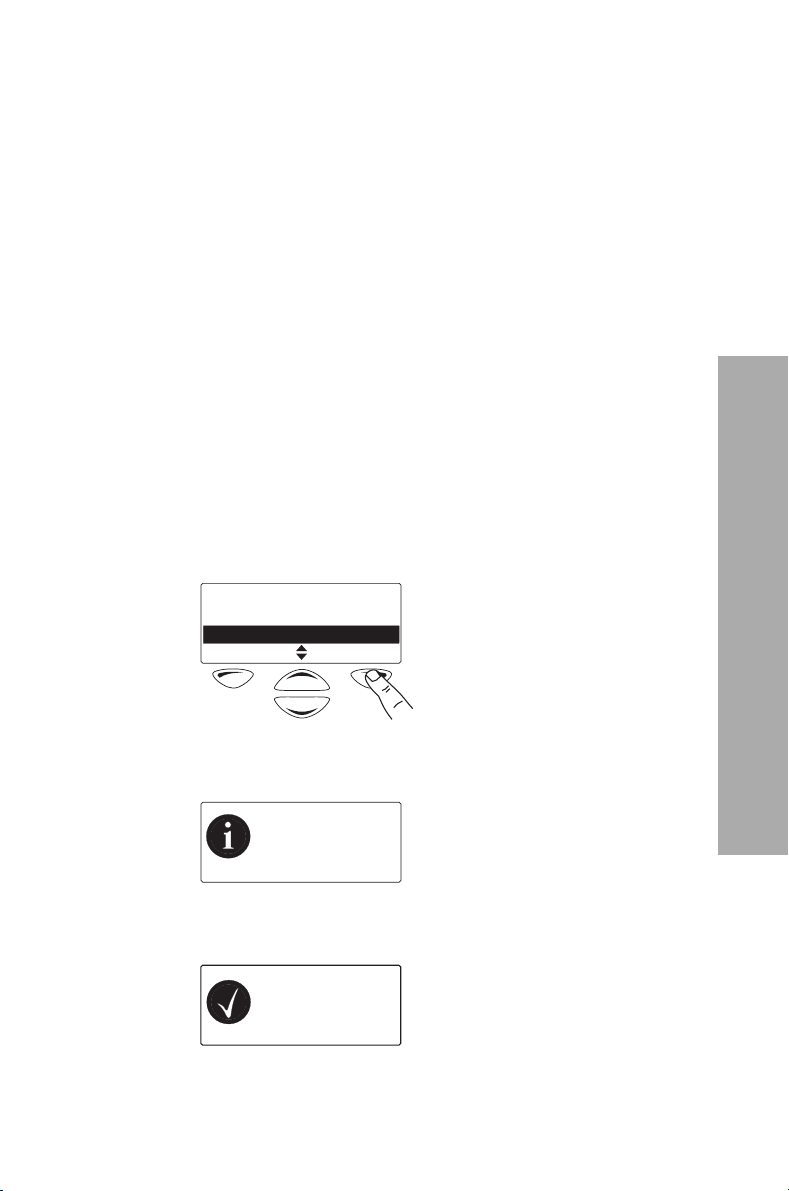
1 Press Menu and select Services > Radio inhibit.
2 Scroll to the radio you wish to make inoperable.
3 Press Send to.
Radio inhibit
Car 1
Car 2
Send toCancel
The LED glows red and a message appears in the
display:
Sending
Inhibit to
Car 2
Cancel
If the radio has been successfully immobilized, an
acknowledgement message is displayed:
Ack received
OK
Making a radio inoperable 63
Safeguarding you and your radio
Page 64
Sending a Radio Uninhibit request
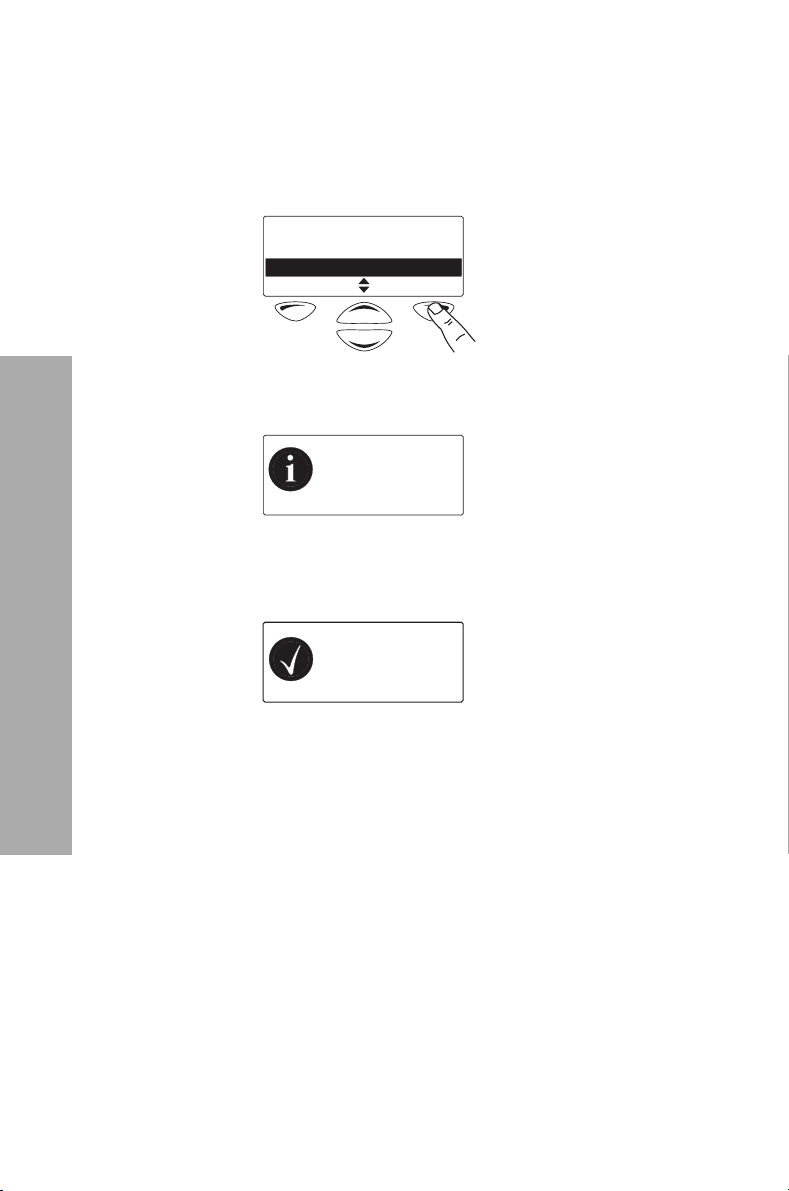
1 Press Menu and select Services > Radio uninhibit.
2 Scroll to the radio you wish to make operable.
3 Press Send to.
Radio uninhibit
Car 1
Car 2
Send toCancel
The LED glows red and a message appears in the
display:
Sending
Uninhibit to
Car 2
Cancel
If the radio has been successfully returned to
operation, an acknowledgement message is
displayed:
Ack received
Safeguarding you and your radio
64 Making a radio inoperable
OK
Page 65
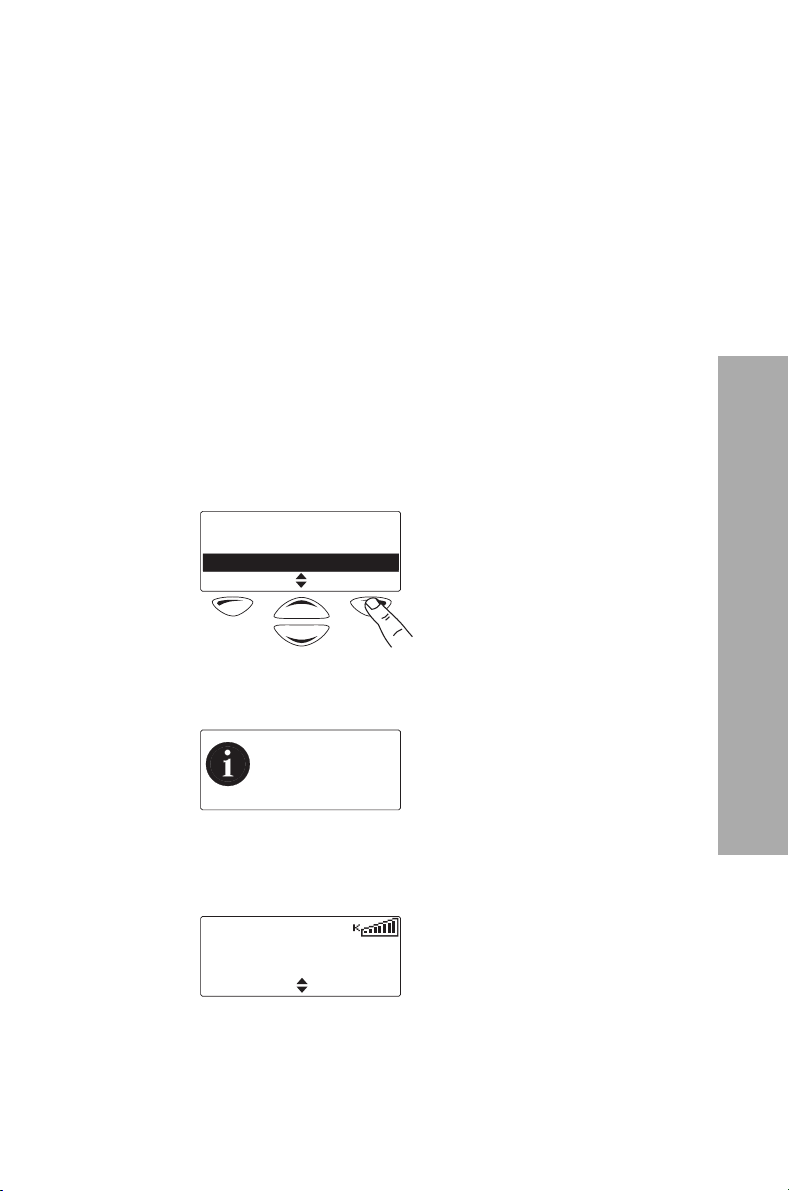
Radio monitor
Note: This feature is available for digital channels only
and for radios configured for dispatcher operation.
The Radio Monitor feature can be used when you are
concerned about the safety of a radio user on your
system. When you send a radio-monitor request to a
radio, it calls you back without giving any indication that
it is making a call. You can hear any activity near the
radio for up to 20 seconds.
Sending a Radio monitor request
1 Press Menu and select Services > Radio monitor.
2 Scroll to the radio you wish to monitor.
3 Press Send to.
Radio monitor
Car 1
Car 2
Send toCancel
The LED glows red and a message appears in the
display:
Sending
R.U.M. to
Car 2
Cancel
If the other radio has received your request, it will
now call you, so that you can monitor activity near
the radio.
Call Received
Car 2
Menu
Radio monitor 65
Safeguarding you and your radio
Page 66
About encryption
Note: This feature is available for digital and dual-mode
channels only.
To make communications with other users on your
system completely private, your radio may be able to
encrypt outgoing calls, using a confidential encryption
key. The radio receiving your call must have the same
encryption key installed before it can hear your
encrypted call.
Encrypting your calls
Your radio may be able to turn encryption on and off.
While encryption is on, your outgoing calls are
encrypted on channels programmed for encryption, and
the encryption symbol
Note: This setting only affects outgoing calls. Incoming
calls will still be decoded by your radio so long as the key
required to decode the call is stored in your radio.
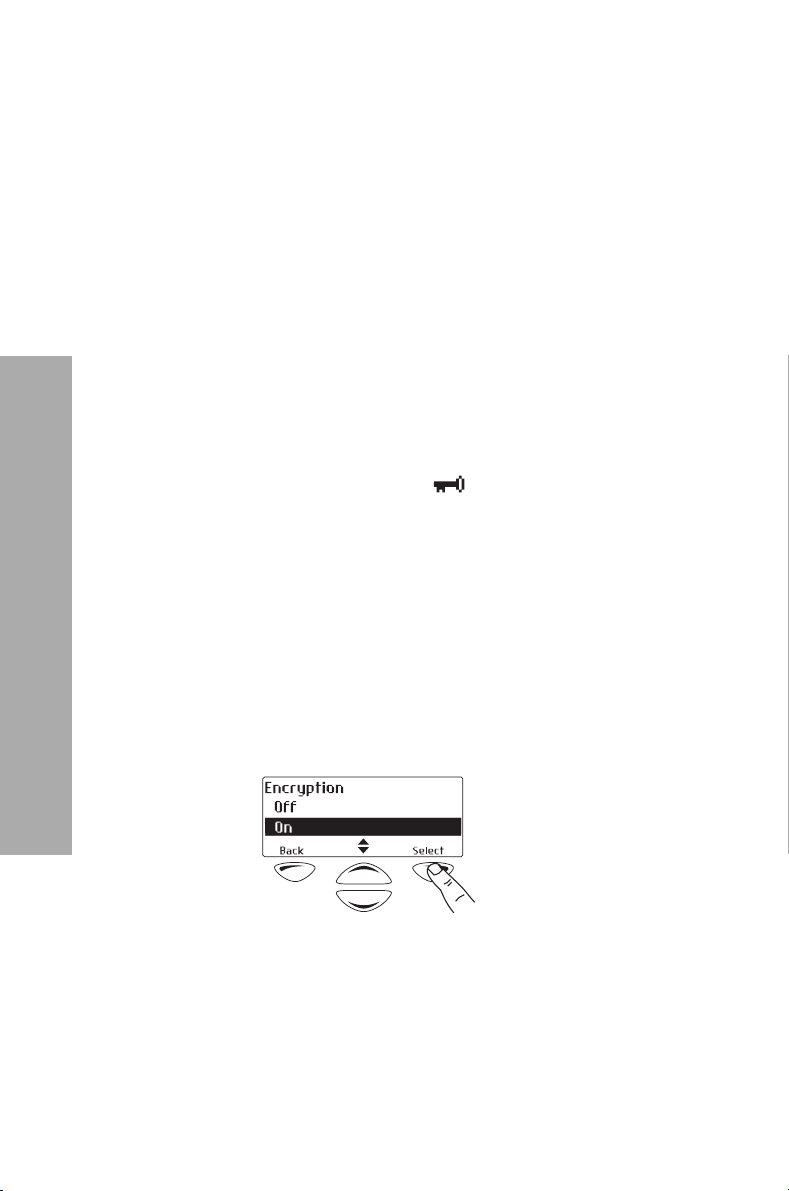
To turn encryption on or off:
1 Press Menu and select Security > Encryption.
(Depending on how your radio is programmed, you
may be able to press a function key to turn
encryption on and off.)
remains in the display.
Safeguarding you and your radio
66 About encryption
2 Scroll to On (or Off) and press Select.
The message Encryption activated (or Encryption
deactivated) appears in the display.
Page 67
Using the 3-way selector
To turn encryption on and off using the 3-way selector:
1 Rotate the 3-way selector to either position A or B to
turn encryption on.
The message Encryption activated briefly appears
in the display.
2 Rotate the 3-way selector to position C to turn
encryption off.
The message Encryption deactivated briefly
appears in the display.
Making an encrypted call
1 Select the channel or group you wish to call.
2 Check that encryption is on (the encryption symbol
is showing in the display).
3 Check that the channel is free (green LED is off).
4 Press and hold the PTT key to transmit.
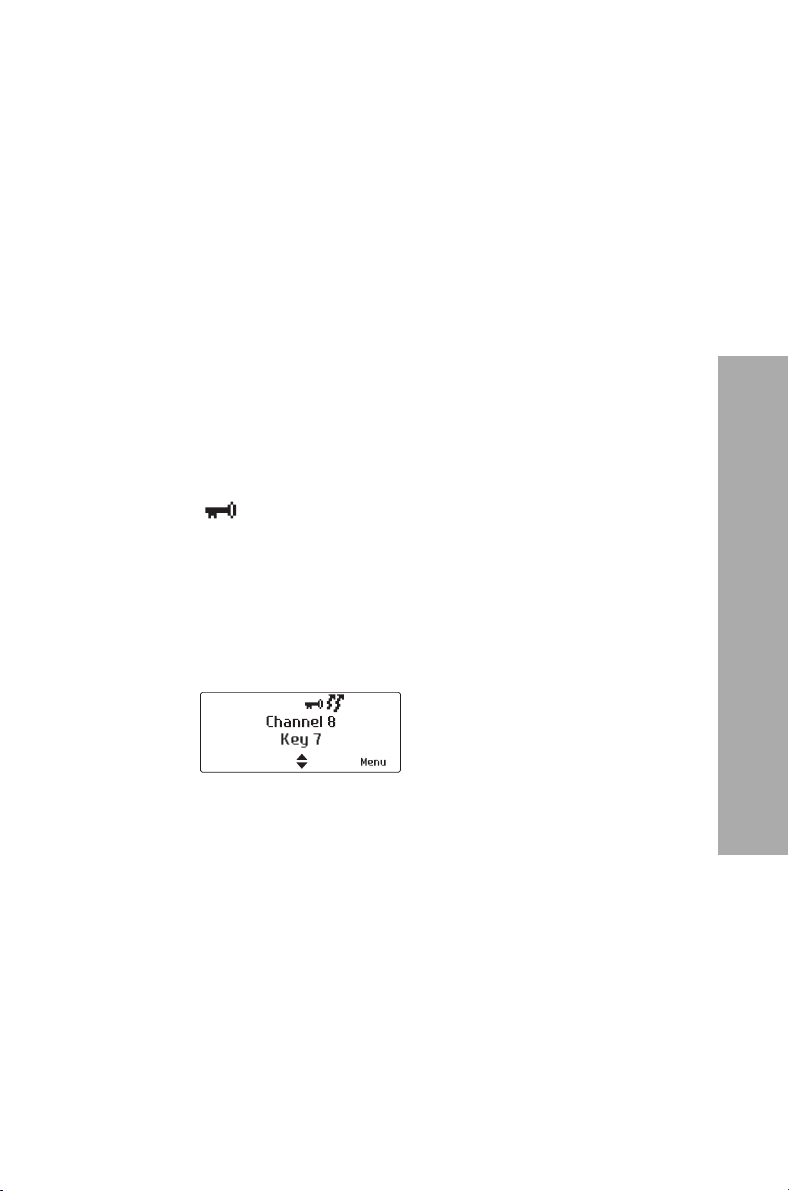
The name of the encryption key that your radio is
using for the transmission may briefly appear in
the display:
While you are transmitting, the LED glows red and
the transmit symbol appears in the display.
About encryption 67
Safeguarding you and your radio
Page 68
Receiving an encrypted call
When you receive an encrypted call, your radio unmutes
and you can hear clear speech, so long as the key
required to decode the call is stored in your radio.
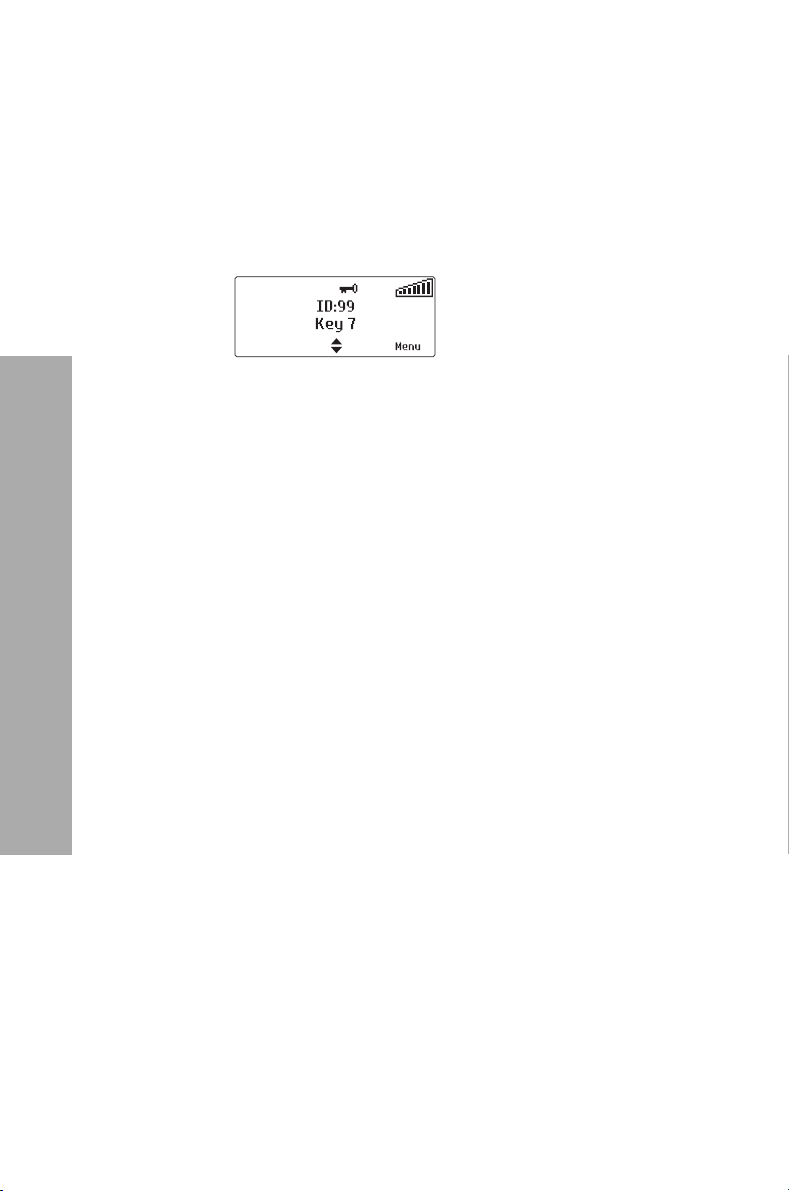
The name of the encryption key used to encrypt the
incoming call may briefly appear in the display, below
the name of the caller:
If the key required to decode the call is not stored in
your radio, then your radio remains muted.
Note: Your radio may also remain muted if the
currently selected channel has ‘proper key detect’
programmed.
Proper Key Detect feature
Your radio may be programmed with ‘proper key
detect’. This means that you can only hear an encrypted
call if the key used to encrypt the incoming call matches
the key used to encrypt your outgoing calls on that
channel.
Safeguarding you and your radio
68 About encryption
Note: Encryption does not need to be turned ‘on’ for
the radio to unmute.
For example, you are encrypting your outgoing calls
using encryption key 7. Although key 1 and key 2 are
also stored in your radio, your radio has been
programmed so that it will only unmute for incoming
calls encrypted using key 7.
Page 69
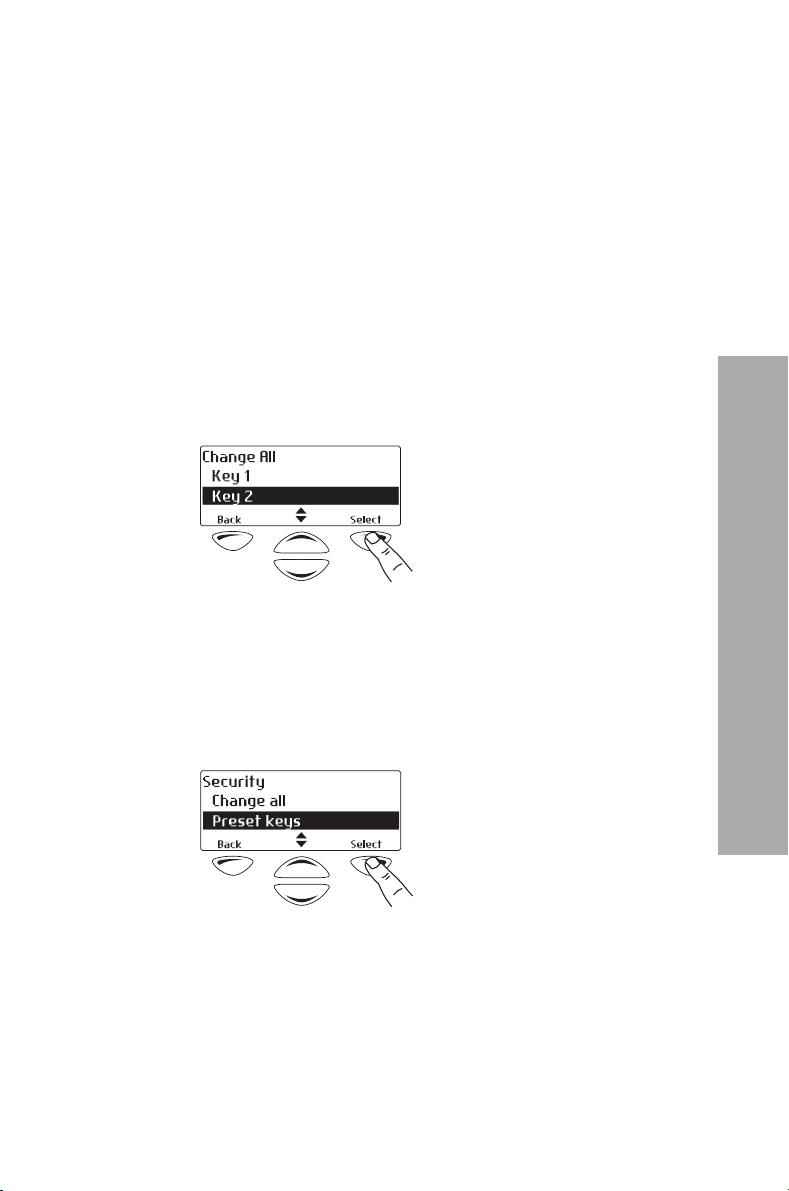
Changing your radio’s encryption key
You may be able to use the Change All menu to change
the encryption key that encrypts your outgoing calls.
You can then use the Preset Keys menu to change the
encryption keys back to the default encryption key for
each channel.
Note: Once you change the encryption key, it may also
automatically update the encryption keys used to
encrypt calls on other channels.
Changing your transmit encryption key
1 Press Menu and select Security > Change all.
2 Scroll to the key you want and press Select.
The message Global Key Selected briefly appears
in the display.
Changing your transmit encryption key back to the default setting
1 Press Menu and select Security > Preset keys.
The message Select Preset Keys? appears in
the display.
2 Select OK and the message Preset Keys selected
briefly appears in the display.
About encryption 69
Safeguarding you and your radio
Page 70
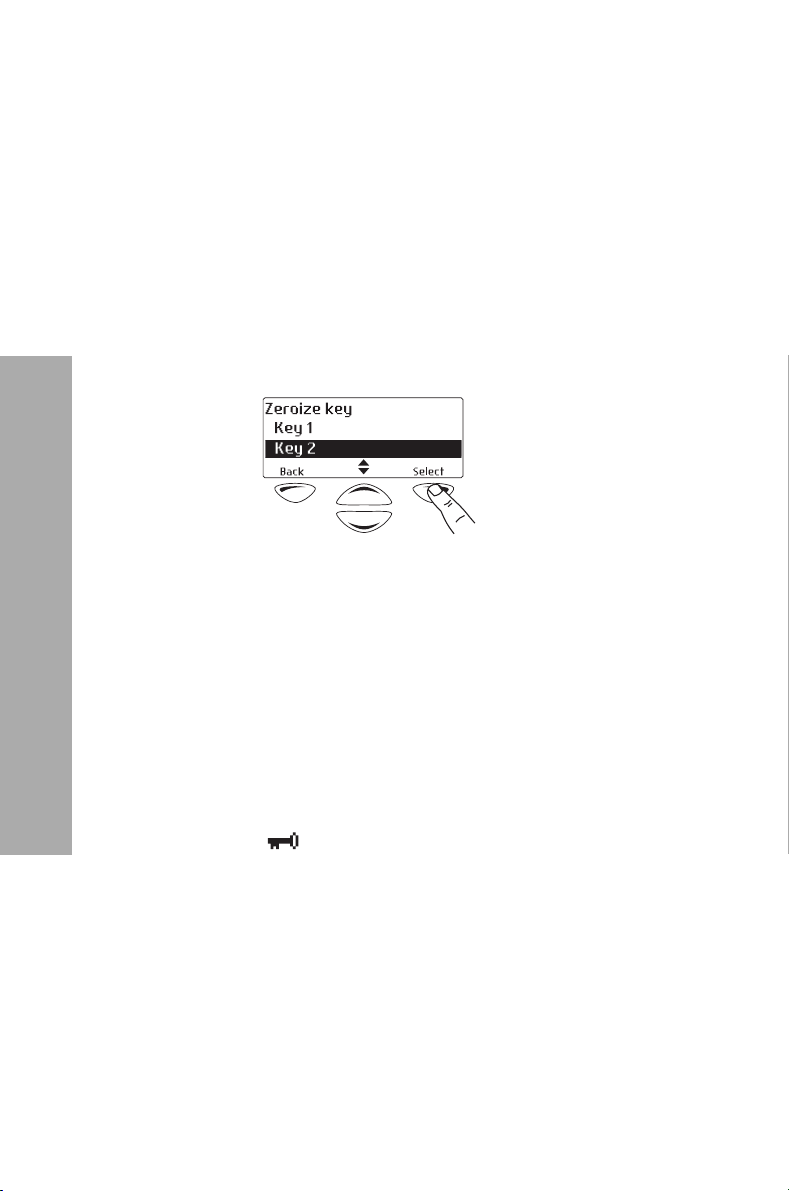
Removing encryption keys from your radio
It may be possible for you to delete encryption keys from
your radio.
Note: When emergency mode is activated, or when
your radio is immobilized (‘inhibited’), your encryption
keys may be automatically deleted from your radio.
Deleting an encryption key
1 Press Menu and select Security > Advanced >
Zeroize key.
2 Scroll to the key you want and press Select.
The message Single Key Zeroized briefly appears
in the display.
Deleting all encryption keys
1 Press Menu and select Security > Advanced >
Zeroize all.
Safeguarding you and your radio
70 About encryption
The message Zeroize All Keys? appears in
the display.
2 Press OK and the message All Keys Zeroized briefly
appears in the display and the encryption symbol
no longer appears.
Page 71

About emergency calls
In an emergency you can summon help by sending an
emergency call. There are two types of emergency calls:
Call type Explanation
Priority call (Digital channels only.) An emergency
alert is automatically sent to the current
talkgroup. Calls made when the priority
call feature is turned on are flagged as
‘emergency’ calls.
Emergency
call
Typically for life and death situations.
When an emergency call is initiated, the
radio enters ‘emergency mode’. For
further information see “Understanding
emergency mode” on page 72.
Making a priority call
Note: This feature is available for digital channels only.
When you turn the Priority Call feature on, the radio
automatically sends an emergency alert (message) to
the current talkgroup.
Any calls you make while the Priority Call feature is
turned on are flagged as ‘emergency’ calls.
To turn the priority call feature on and off:
1 Press Menu and select Priority call.
(Depending on how your radio is programmed, you
may be able to press a function key to turn priority
call on and off.)
2 Scroll to On (or Off) and press Select.
Safeguarding you and your radio
About emergency calls 71
Page 72

Understanding emergency mode
When you press the emergency key your radio enters
‘emergency mode’, if your radio is programmed in this
way.
When the radio enters emergency mode, it will
automatically send alerts together with your radio unit
ID to the dispatcher. These alerts are usually sent on a
designated emergency channel.
Note: The way your radio behaves in emergency mode
depends on how your radio is programmed.
For further information on what your radio may do in
emergency mode, see “What happens during an
emergency call?” on page 72.
Stealth and non-stealth emergency modes
Your radio is programmed to operate in one of
these ways:
! Stealth: you often work in situations where you do
not want an assailant to know that you have activated emergency mode. For this reason, the radio is
silent and the display remains unchanged—there is
no indication that the radio has entered
emergency mode.
Safeguarding you and your radio
72 About emergency calls
! Non-stealth: you often work in situations where
you want audible and visual confirmation that you
have activated emergency mode (for example, at an
accident scene).
What happens during an emergency call?
The exact way your radio behaves when it enters
emergency mode depends on how your radio is
programmed. The main phases for both stealth and
non-stealth emergency modes are summarized below.
The length of each phase is determined when the radio
is programmed.
Page 73
When the emergency key is pressed:
b
The radio continually sends alerts to the
dispatcher until a response is received. Details
of your location may also be sent (if this
feature is available for your radio).
c
The radio alternately transmits and receives so
the dispatcher can hear what is happening in
the vicinity of your radio.
(Non-stealth emergencies end once this phase
is complete or when you end emergency
mode.)
d
Stealth emergencies only: The radio is
inactive, but it can receive special ‘messages’
from the dispatcher so that he or she can hear
what is happening in the vicinity of the radio.
(Stealth emergencies end once this phase is
complete or when you end emergency mode.)
See also “Stealth and non-stealth emergency modes”
on page 72.
Activating emergency mode
You can activate emergency mode using the emergency
function key.
1 Press the function or emergency key to activate
emergency mode.
‘Emergency mode’ appears in the display:
Emergency mode
About emergency calls 73
Safeguarding you and your radio
Page 74

One or more emergency calls are sent to your
dispatcher or another predetermined radio user.
During emergency mode, the radio will behave as
described in “What happens during an emergency
call?” on page 72.
2 Turn the radio off and on again to end emergency
mode. The radio returns to normal operation.
Safeguarding you and your radio
74 About emergency calls
Page 75

About the Lone Worker feature
Lone Worker is a safety feature for people who work
alone. The radio requests a response from you at regular
predetermined intervals. If you are unable to respond,
the radio either enters emergency mode or sends a
status update to a predetermined person or talkgroup.
An audible warning is given one or two minutes before
the radio enters emergency mode or sends the status
update, to warn you and to prevent false activation.
Responding to a Lone Worker alarm
If you hear a beep to indicate that the radio is expecting
a response from you to acknowledge that you are safe:
! Press the programmed function key.
Otherwise the radio will activate emergency mode or
send a status update.
About the Lone Worker feature 75
Safeguarding you and your radio
Page 76

About the Man Down feature
The Man Down feature activates when the radio is tilted
more than 60 degrees (for example, the radio user has
been attacked and is lying on the ground).
If the radio remains in this position for one or two
minutes, it will beep to warn the radio user. If you do
not respond after a further beep, the radio either enters
emergency mode or sends a status update to a
predetermined person or talkgroup.
Preventing false activation of emergency mode
If you hear a beep to warn you that the radio has sensed
it is not upright, and it is not an emergency situation,
you can prevent the radio from falsely activating
emergency mode by either:
! restoring the radio to an upright position (by stand-
ing up, for example), or
! pressing the programmed function key.
Safeguarding you and your radio
76 About the Man Down feature
Page 77

8 Charging and caring for
batteries
This section describes how to charge your Tait radio
battery as well as care for it to ensure maximum
performance and prolonged battery life.
Note: The instructions in this section apply to both the
desktop charger and the multi-charger.
This section covers:
! Removing the battery
! About your charger
! About battery charging
! Maintaining battery life and performance
! Storing batteries
! Disposing of batteries
Charging and caring for batteries 77
Charging and caring for batteries
Page 78
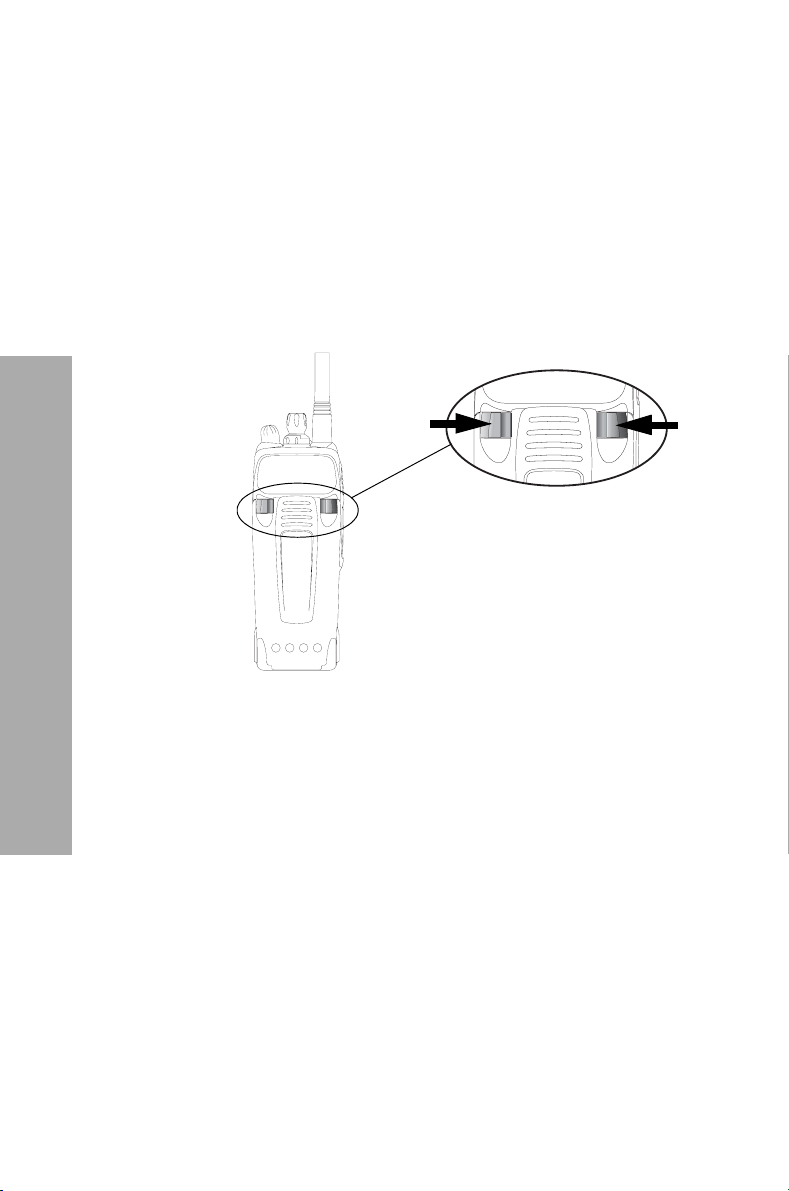
Removing the battery
See also “Attaching a battery” on page 20.
To remove the battery from the radio so that the battery
can be charged or replaced:
1 Squeeze and quickly release both battery catches to
release the catch mechanism. (Don’t push down on
the battery; allow the catch mechanism to release
the battery from the radio)
Charging and caring for batteries
78 Removing the battery
2 Remove the battery from the radio.
Page 79
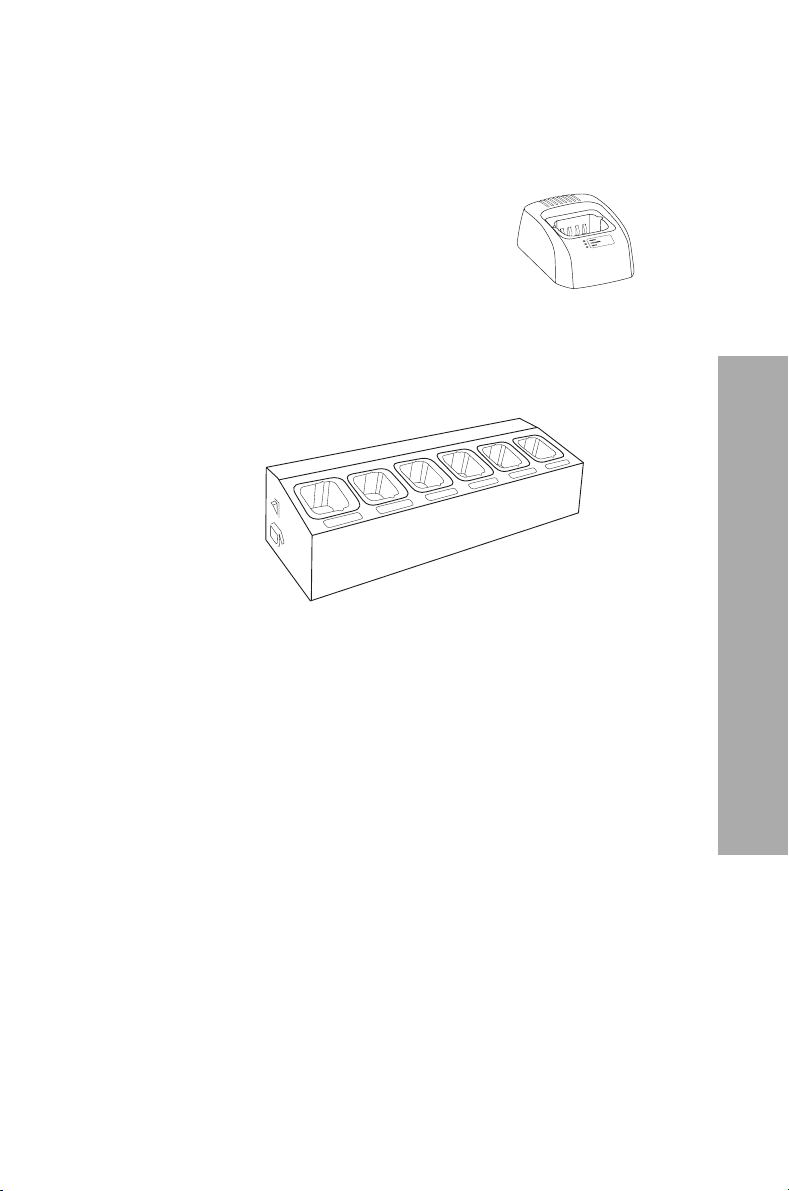
About your charger
There are two types of charger available for your Tait
radio battery:
! Desktop charger—small enough to
fit on your desk, it charges one
battery at a time.
! Multi-charger—charges up to six
batteries. It can be mounted on a
desk, on a wall, or in an equipment rack.
Note: The charging instructions in this section apply
to both the desktop charger and the multi-charger.
When the charger is first connected to a suitable power
supply, all three LEDs light up briefly.
About your charger 79
Charging and caring for batteries
Page 80
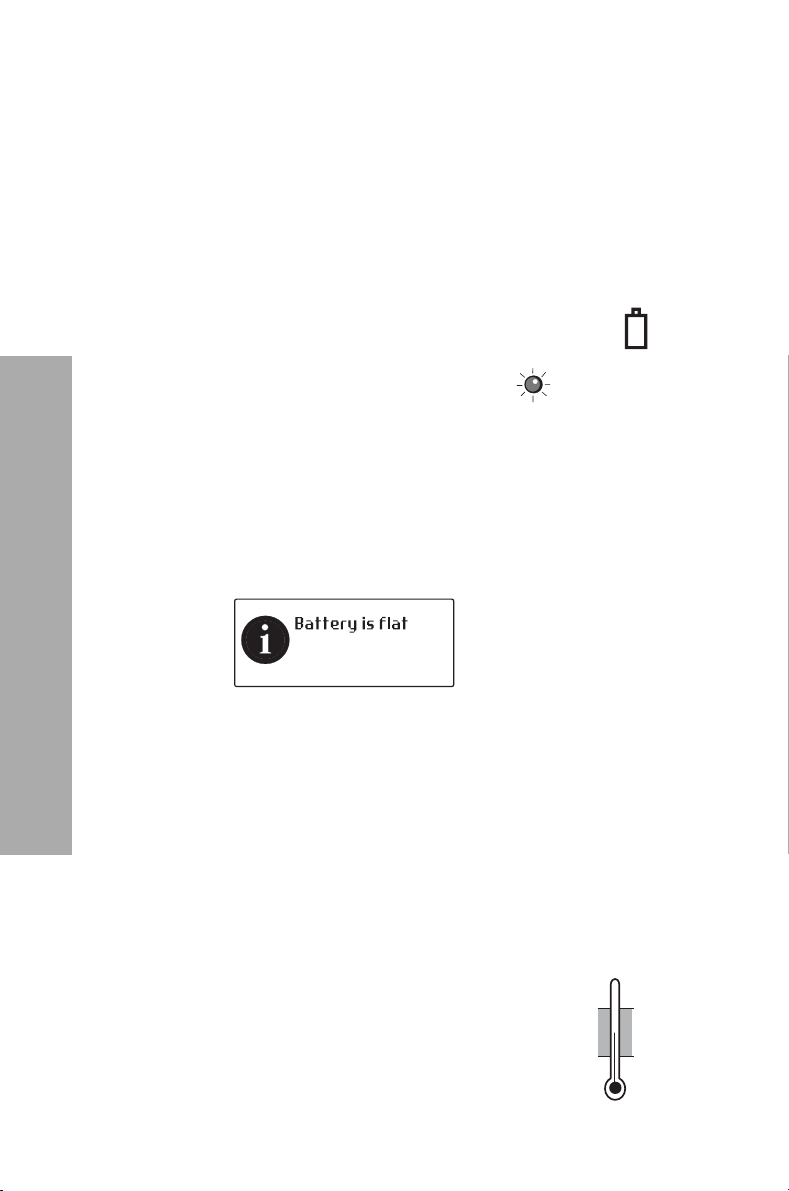
About battery charging
See also “Charging the battery before first use” on
page 19.
Low battery warning
When the battery is almost empty, your radio warns you
in the following ways:
! The battery indicator on the radio display
looks empty.
! The status LED slowly flashes red.
! A high-pitched beep sounds.
You should recharge or replace the battery as soon
as possible.
When the battery is completely empty, the message
Battery is flat appears on the display. The radio emits
a long, low-pitched beep and then stops operating.
Charging and caring for batteries
Optimal charging temperature
80 About battery charging
Turn off the radio immediately. You will reduce the
battery’s service life if you allow the battery to fully
discharge each time you use it.
To achieve the best results when charging your battery:
! Before charging begins, the battery temperature
must be close to the room temperature in which the
battery is to be charged.
! Charging is best performed
between 50°F (10 °C) and
77°F (25°C) and starts only
when the battery is between
41°F (5°C) and 95°F (35°C).
95°F 35°C
41°F 5°C
Page 81
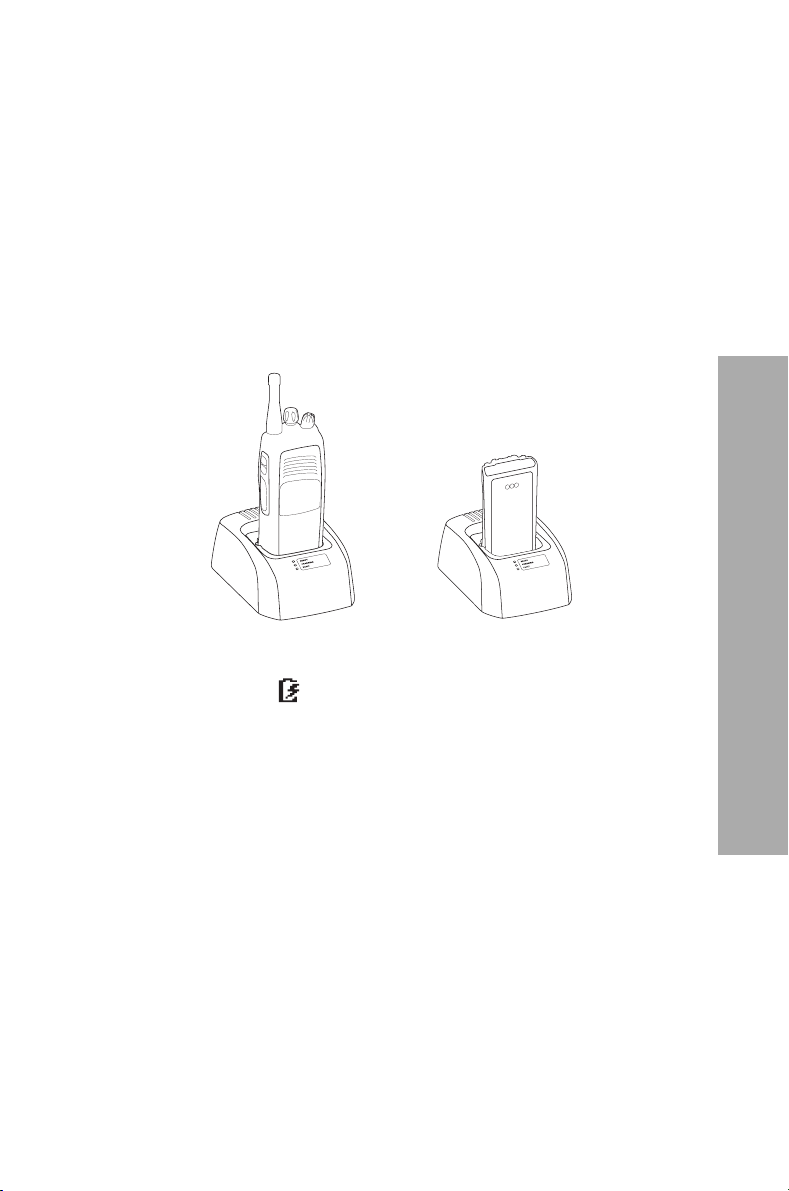
Charging the battery
Important: If you are charging the battery for the first
time, follow the instructions on page 19.
1 Desktop charger—ensure that the charger is
connected to the correct Tait power adaptor.
Multi-charger—ensure the charger is powered on.
2 Put the battery in the charger.
Note: For optimal results, the radio should be
turned off while in the charger.
Turn your radio off while
charging, for best results.
If a radio is attached and turned on, the ‘battery in
charger’
The red ‘Charging’ LED glows to indicate that the
battery is charging. For a battery that is almost
completely discharged, allow two hours.
symbol appears in the radio display.
Note: If the amber ‘Fault’ LED lights up, refer to
“General care” on page 97.
3 The green ‘Ready’ LED on the charger glows when
the battery is fully charged. Remove it when you are
ready—the charger will not overcharge the battery.
Note: If the radio was turned on while being
charged, the battery indicator may not be accurate
when the radio is initially removed from the charger.
After a few seconds, the battery indicator is updated
to display the amount of charge available in
the battery.
About battery charging 81
Charging and caring for batteries
Page 82

Receiving and making calls while charging
You can receive or make a call while the radio is in the
charger. If you do remove the radio from the charger to
answer a call, the call will not be disrupted.
Note: Removing the radio from the charger to make or
receive a call ends the charging process. Charging safely
recommences when the radio is reinserted into
the charger.
Charging and caring for batteries
82 About battery charging
Page 83
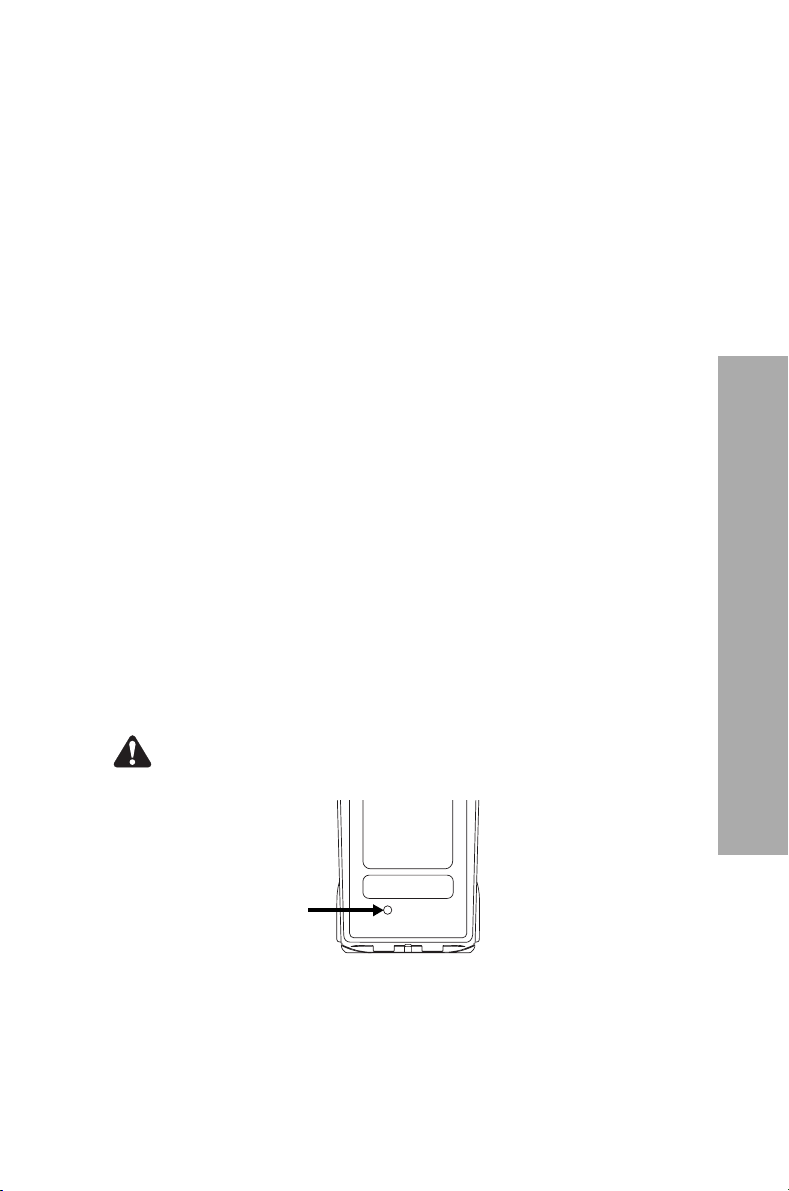
Maintaining battery life and performance
With proper care and maintenance you will maintain
the performance and life of the battery. It is
recommended that you:
! Use only Tait chargers.
! Avoid exposing batteries to high temperatures
(above 122°F (50°C)) or extremely cold
temperatures for long periods of time (-4 °F
(-20°C) for NiMH, and -22 °F (-30°C) for NiCd).
! Charge batteries at room temperature (between
50°F (10°C) and 77 °F (25°C)).
! Allow your nickel-based battery to fully discharge
every so often—NiCd batteries once a month and
NiMH batteries once every 3 months. To do this,
leave your radio turned on and ignore the
‘battery low’ warnings. When the radio turns off,
the battery is fully discharged.
! Store batteries properly when not in use. See
“Storing batteries” on page 84.
Battery safety vent
Warning: Do not cover the battery safety vent
(shown below).
Charging and caring for batteries
Maintaining battery life and performance 83
Page 84
Storing batteries
When not in use for a month or more, batteries should
be stored correctly to prolong their life:
! Remove the battery from the radio before storage.
! Store the battery (in either a charged or discharged
state) in a cool dry place.
Using nickel-based batteries after storage
Batteries that have been stored for any length of time
must be charged before being used. See “Charging the
battery” on page 81.
When first using nickel-based batteries that have been in
storage for three months or more, you may notice that
they do not last an entire shift. This is normal. If stored
properly, the battery’s optimal capacity should be restored
after two or three shifts (charge/discharge cycles).
Disposing of batteries
Batteries should be disposed of properly. NiCd (nickel
cadmium) batteries contain cadmium which, if disposed
of in landfills, is very hazardous to the environment.
Charging and caring for batteries
84 Storing batteries
Please contact your radio provider for information on
recycling programs in your area.
Page 85

9 Customizing your radio
This section describes the ways in which you can
customize your radio.
This section covers:
! About display and keypad backlighting
! Extending battery life on a shift
! Customizing the audible alert settings
Customizing your radio 85
Customizing your radio
Page 86
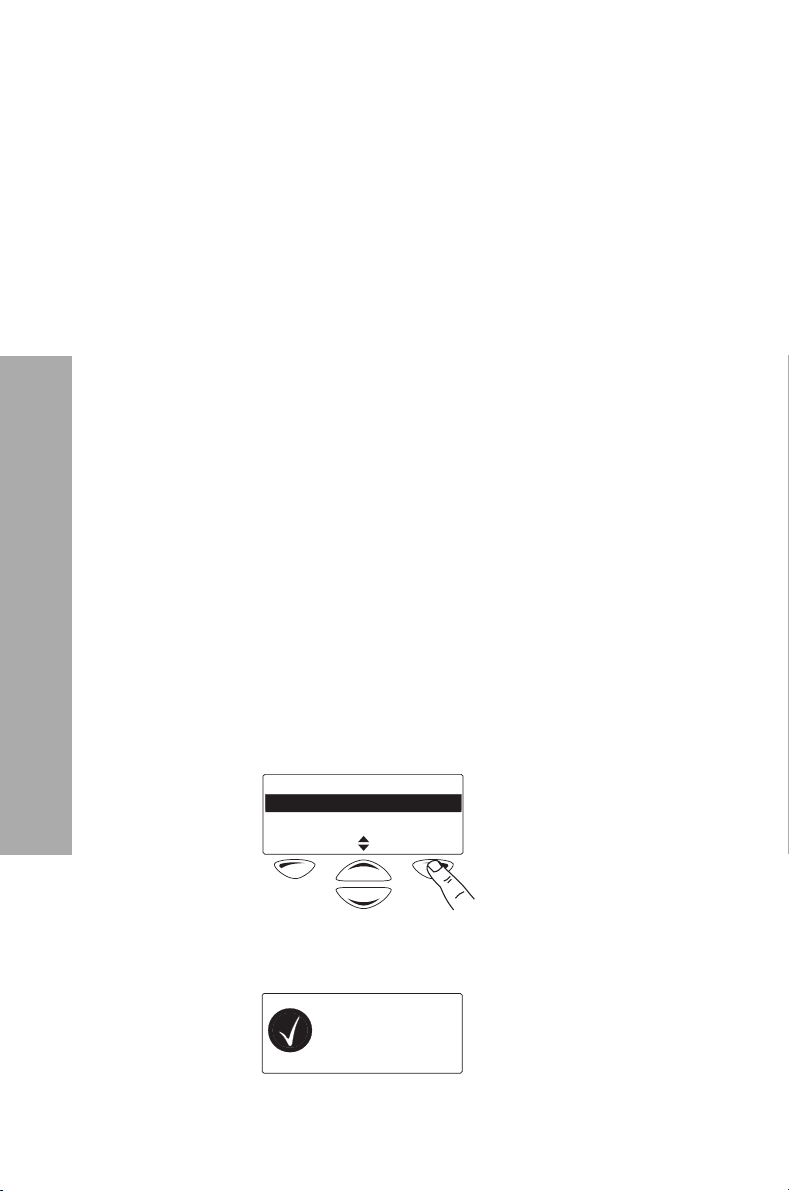
Customizing your radio
About display and keypad backlighting
Whenever the keypad is pressed, the 3-way or channel
selector controls are turned, or a call is received, the
keypad and display light up automatically to make it
easy to read in poor light conditions.
Backlighting usually remains on for a few seconds,
unless further radio activity is detected. The period of
time that the backlighting remains on once no further
radio activity is detected is determined by the
backlighting timer. The duration of this timer is set
when the radio is programmed.
The radio’s display can also be made darker or lighter to
suit your working conditions. See “Adjusting the display
contrast” on page 87.
Turning backlighting on or off
1 Press Menu and select Radio settings > Display
settings > Backlighting.
(Depending on how your radio is programmed, you
may be able to press a function key to turn
backlighting on or off.)
2 Scroll to either On or Off and press Select. (The
current setting is highlighted.)
Backlighting
Off
On
The message Backlighting activated (or
deactivated) appears in the display:
Backlighting
activated
86 About display and keypad backlighting
SelectBack
Page 87
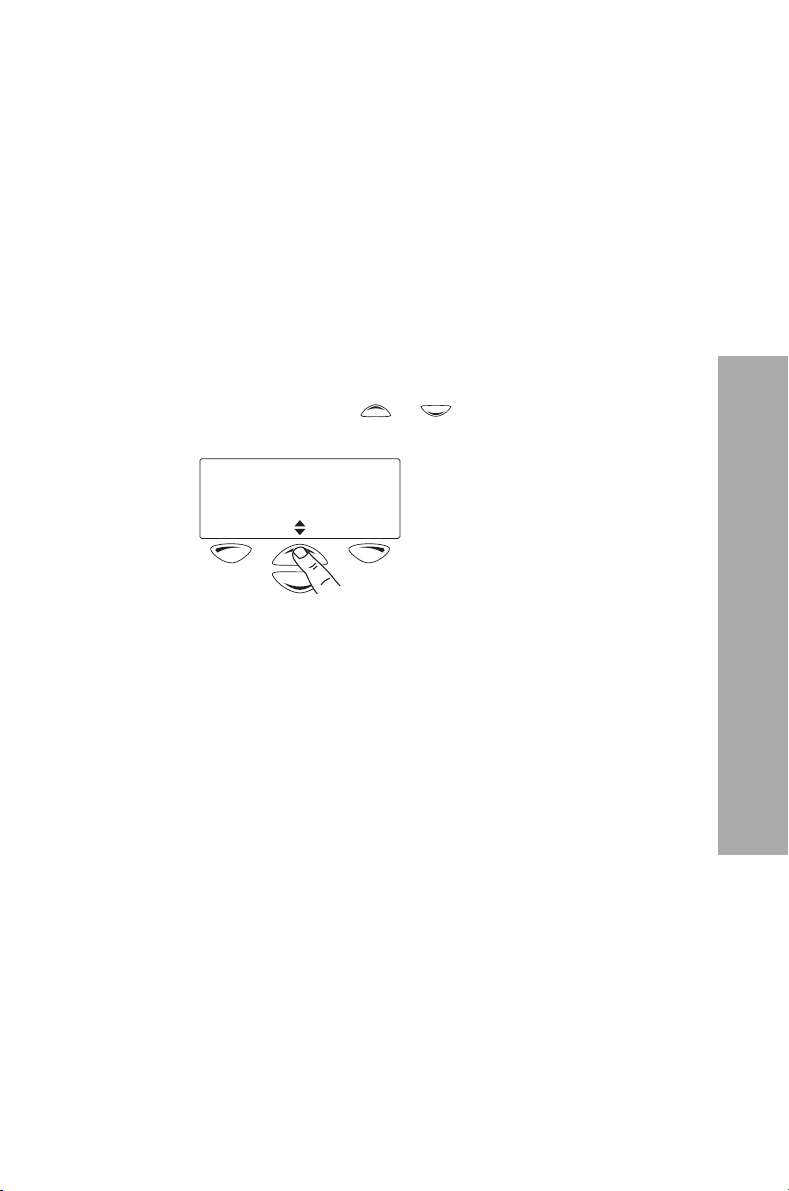
Turning backlighting on momentarily
You can turn backlighting on momentarily using a
function key, if your radio is programmed in this way.
Backlighting remains on for a few seconds and then
turns off.
Adjusting the display contrast
To change the contrast of your radio display to suit the
lighting conditions that you are working in:
1 Press Menu, and select Radio settings > Display
settings > Contrast adjust.
2 Use the scroll keys or to adjust the display
contrast to the level you want.
Use scroll keys
to adjust
Cancel
3 Press Save to save this setting.
Save
About display and keypad backlighting 87
Customizing your radio
Page 88
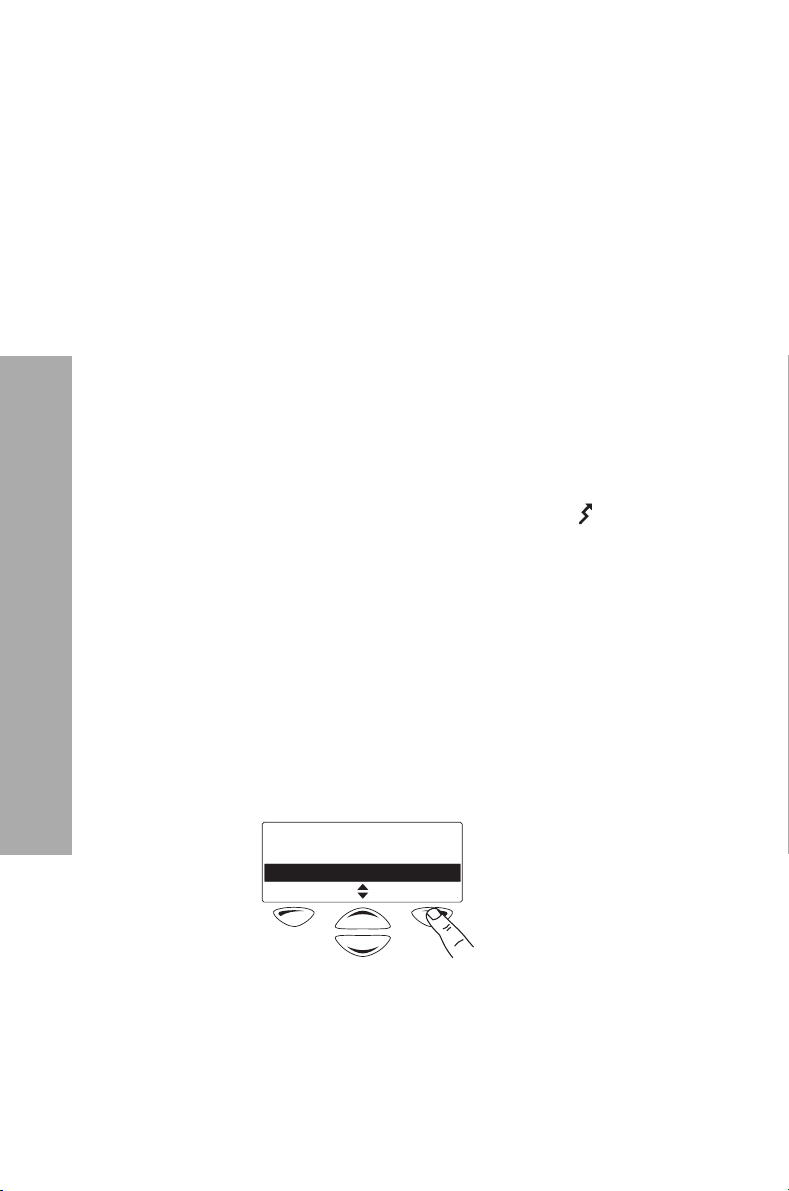
Extending battery life on a shift
You can reduce the power consumption of your radio
(and thereby extend the life of the battery during a shift)
in the following ways:
! Transmit at low power (if your radio is not already
configured to do this).
! Ensure that backlighting automatically turns off
when no radio activity is detected (see “About dis-
play and keypad backlighting” on page 86).
Turning low power transmit on or off
If you are using your radio in conditions where signal
strength is high, you can extend the shift life of your
battery by transmitting at low power.
When low power transmit is turned on, appears in
the display and calls are made at low power rather than
at the programmed power setting.
To turn low power transmit on or off for all channels:
1 Press Menu and select Radio settings > Functions
> Low power transmit.
Customizing your radio
2 Scroll to On (or Off) and press Select. (The current
88 Extending battery life on a shift
(Depending on how your radio is programmed, you
may be able to press a function key to turn low
power transmit on or off.)
setting is highlighted.)
Low power transmit
Off
On
SelectBack
The message Low power transmit activated (or
deactivated) appears in the display.
Page 89
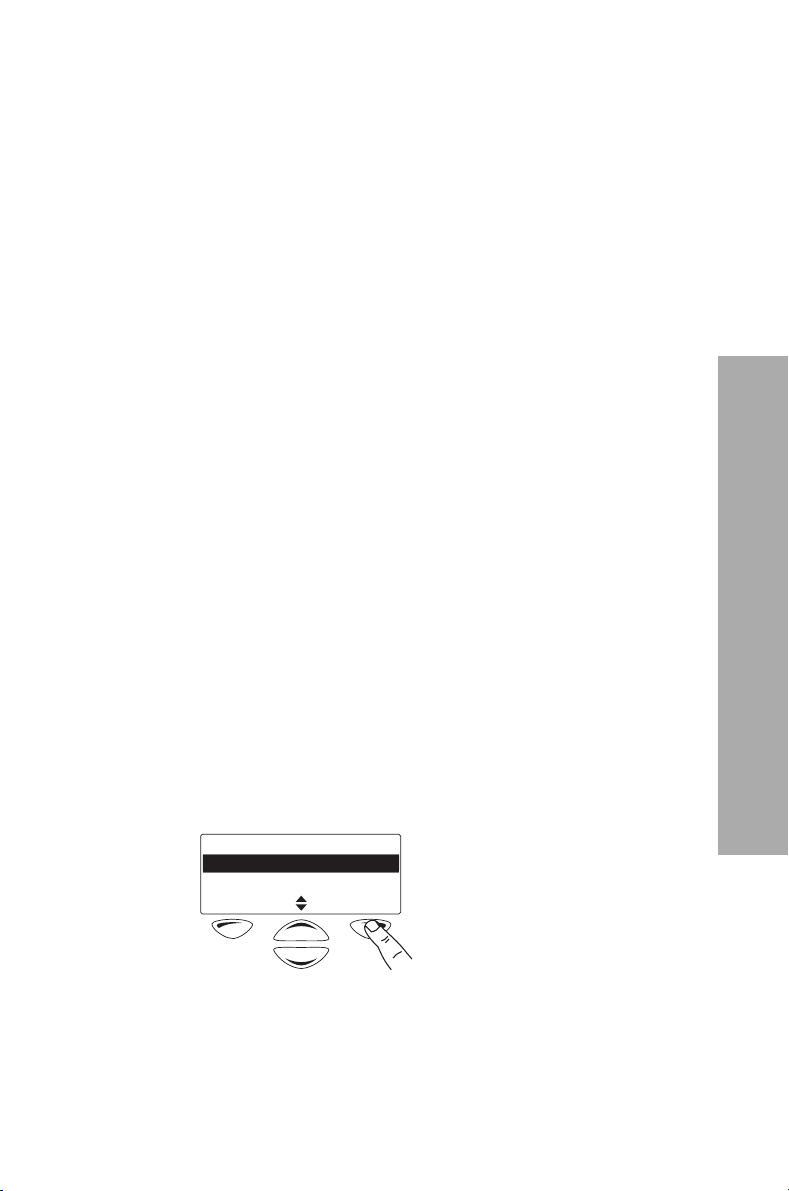
Customizing the audible alert settings
The radio uses audible tones to alert you to its status:
! Radio controls and keypress tones—the beeps you
hear when you press your radio’s keys or use the
controls. (You can turn these tones off—see “Turn-
ing off radio controls and keypress tones” on
page 90.)
! Incoming call tone—when the radio is receiving
a call.
! Warning tones—when there is an error, or the bat-
tery is low, for example.
Changing the volume of all audible tones
You can set the volume of all the audible sounds that
the radio makes to indicate what is happening.
To change the volume of the audible tones between
high or low:
1 Press Menu and select Radio settings > Alert
settings > Indicator level.
(Depending on how your radio is programmed, you
may be able to press a function key to change the
volume of the audible tones between high or low.)
2 Scroll to High or Low and press Select. (The current
setting is highlighted.)
Indicator level
High
Low
SelectBack
Customizing the audible alert settings 89
Customizing your radio
Page 90
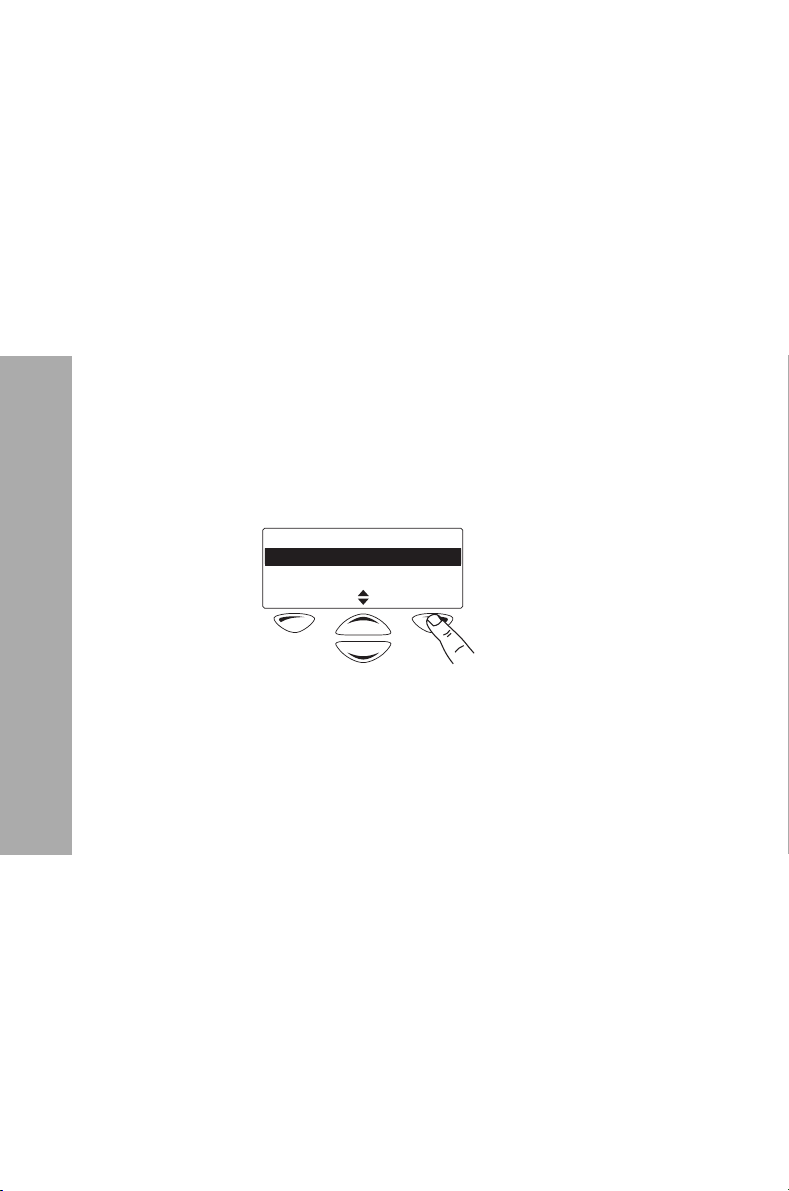
Changing the keypress volume
Whenever you press a key, you will hear a beep to
indicate whether or not what you are trying to do is
allowed:
! Allowed: a short, medium-pitched beep.
! Not allowed: a long, low-pitched beep.
To change the volume of the keypress beeps between
high, low, and off:
1 Press Menu and select Radio settings > Alert
settings > Keypress tones.
(Depending on how your radio is programmed, you
may be able to use a function key to switch the volume
of the keypress beeps between high, low, and off.)
2 Scroll to High, Low, or Off and press Select. (The
current setting is highlighted.)
Keypress tones
High
Low
SelectBack
Customizing your radio
Turning off radio controls and keypress tones
You can turn off all the tones and beeps you hear when
you press the keys or use the radio controls. This is
known as ‘quiet operation’. You will still hear incoming
call and warning tones.
To turn quiet operation on or off:
1 Press Menu and select Radio settings > Alert
settings > Quiet operation.
(Depending on how your radio is programmed, you
may be able to press a function key to turn
backlighting on or off.)
90 Customizing the audible alert settings
Page 91
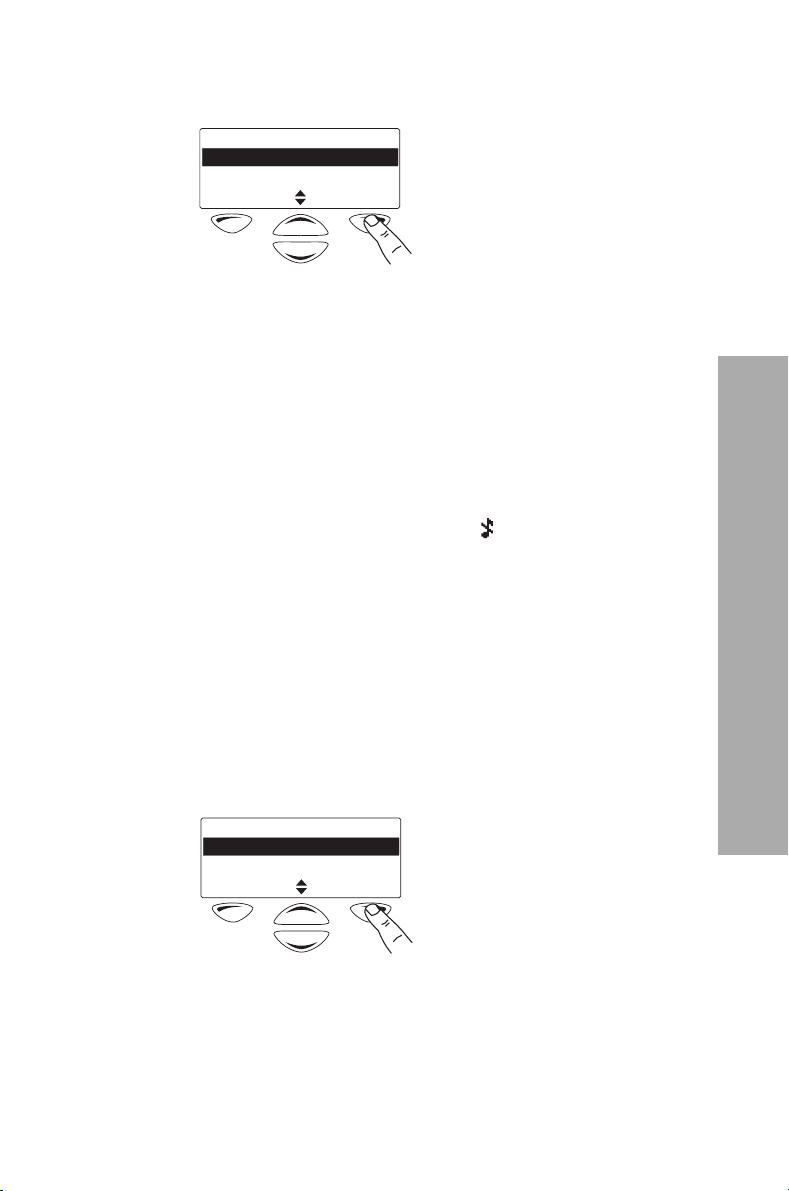
2 Scroll to On or Off and press Select. (The current
setting is highlighted.)
Quiet operation
Off
On
SelectBack
The message Quiet operation activated (or
deactivated) appears in the display.
Hearing only channel traffic
You can turn off all the audible tones that the radio
makes so that the only sound you will hear from the
speaker is channel traffic. This is known as ‘silent
operation’.
When silent operation is turned on appears in
the display.
To turn silent operation on or off:
1 Press Menu, and select Radio settings > Alert
settings > Silent operation.
(Depending on how your radio is programmed, you
may be able to press a function key to turn silent
operation on or off.)
2 Scroll to On or Off and press Select. (The current
setting is highlighted.)
Silent operation
Off
On
SelectBack
The message Silent operation activated (or
deactivated) appears in the display.
Customizing the audible alert settings 91
Customizing your radio
Page 92

10 Troubleshooting
This section describes troubleshooting procedures and
basic maintenance.
This section covers:
! Troubleshooting
! Error messages
! When your radio won’t turn on
! Removing a belt clip
! Checking the version of your radio
! Troubleshooting your charger
! General care
! Cleaning the radio
Troubleshooting
92 Troubleshooting
Page 93
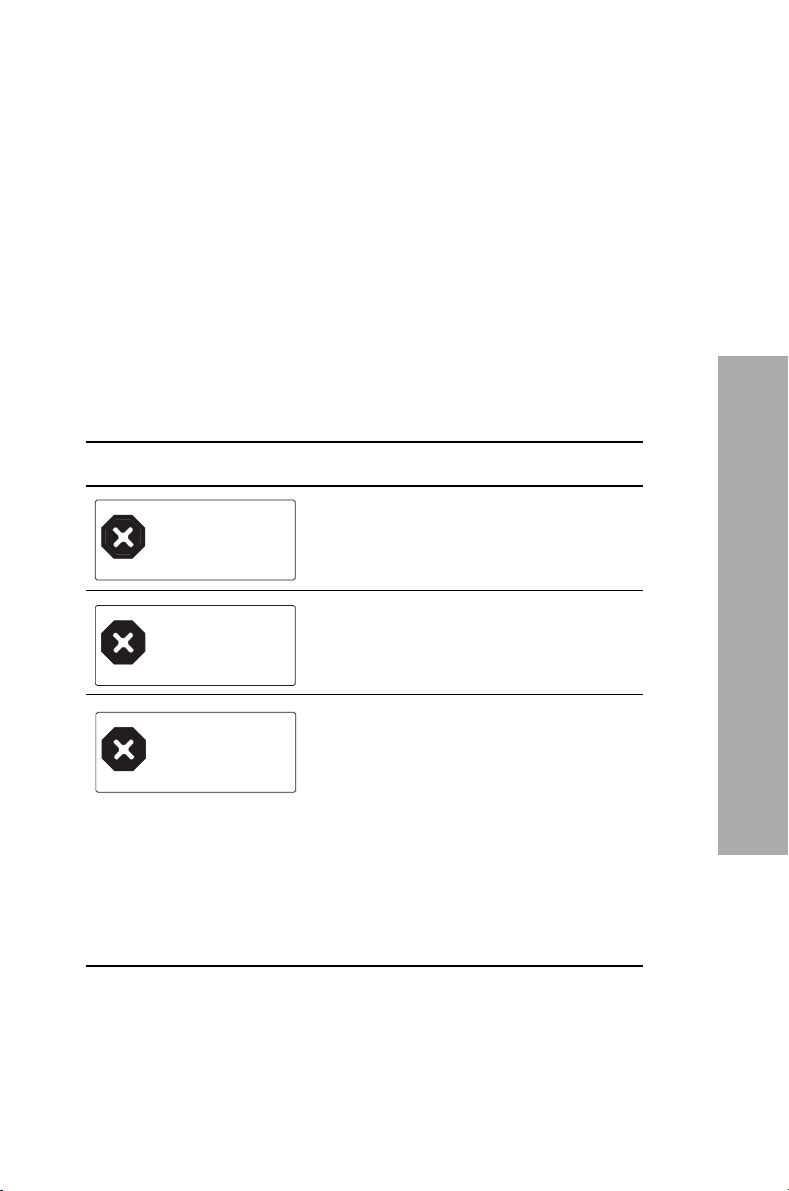
Troubleshooting
If you are experiencing difficulty operating your radio,
you may find the following sections helpful. Consult
your radio provider for assistance, if necessary.
Error messages
If an error message appears in the radio display, refer to
the table below.
For any error messages not shown in the table below, it
is recommended that you make a note of the error code
(the letter ‘E’ followed by a four-digit number, for
example, E0001) and consult your radio provider.
Error message What you must do
Error E0001
Unknown
Reboot radio
Error E0009
High Temp
Stop Tx
Error E0017
Discharge
battery
Turn the radio off and back
on again.
The radio is very hot—turn it off and
allow it to cool down.
Troubleshooting
The battery has not been fully
discharged for some time and the
battery capacity information is now
out of date. The battery indicator in
the radio display may not accurately
indicate the remaining charge.
Fully discharge the battery (for
instructions see “Maintaining
battery life and performance” on
page 83) and then charge it.
Troubleshooting 93
Page 94

When your radio won’t turn on
If the red LED on the radio does not light up when the
radio is turned on, it is probable that power is not
reaching the radio. Check the following:
! Is the battery firmly attached to the radio?
! Is the battery sufficiently charged?
! Is the battery charger working properly?
If all appears to be in order, but your radio still fails to
operate properly, contact your radio provider for
further assistance.
Identifying the radio’s audible tones
The radio’s audible tones can help you identify a
potential problem:
Audible tone Meaning
One short, highpitched beep
Two short beeps The radio has been made operable
Troubleshooting
Two low-pitched
beeps
Two high-pitched
beeps
94 Troubleshooting
The radio has been made inoperable
(‘stunned’ or ‘inhibited’) by your service
provider.
(‘revived’ or ‘uninhibited’) by your service
provider.
The radio’s temperature is high. (The radio
will continue to operate.)
The radio’s temperature is in the very high
range and all calls will now be at low
power. If the radio’s temperature rises
above this range, calls will be inhibited.
Turn off the radio and allow it to cool
down.
Page 95
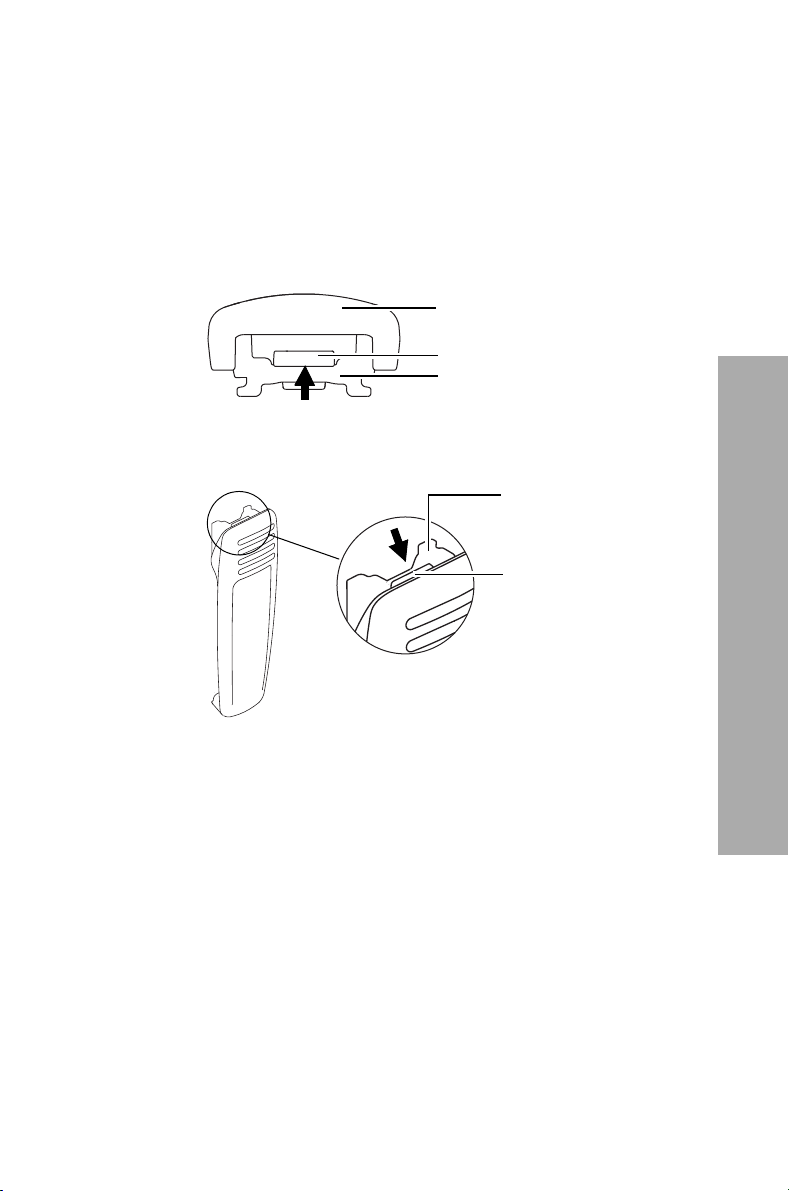
Removing a belt clip
The belt clip has been designed to prevent accidental
removal, but you can take it off, if required.
To remove a belt clip from a battery:
1 Insert a flat screwdriver blade or similar flat object
under the lip of the release lock (that is, between it
and the metal slider).
2 Lift the release lock up (away from the metal slider)
and hold it in position.
black plastic clip
release lock
metal slider
metal slider
release lock
3 Slide the belt clip out.
Checking the version of your radio
Your radio provider may ask you for the hardware
and firmware version of your radio, for
troubleshooting purposes.
Using the Main menu
1 Press Menu and select Radio info > Version info.
2 Scroll to the version information you want to view
and press Select.
Troubleshooting
Troubleshooting 95
Page 96
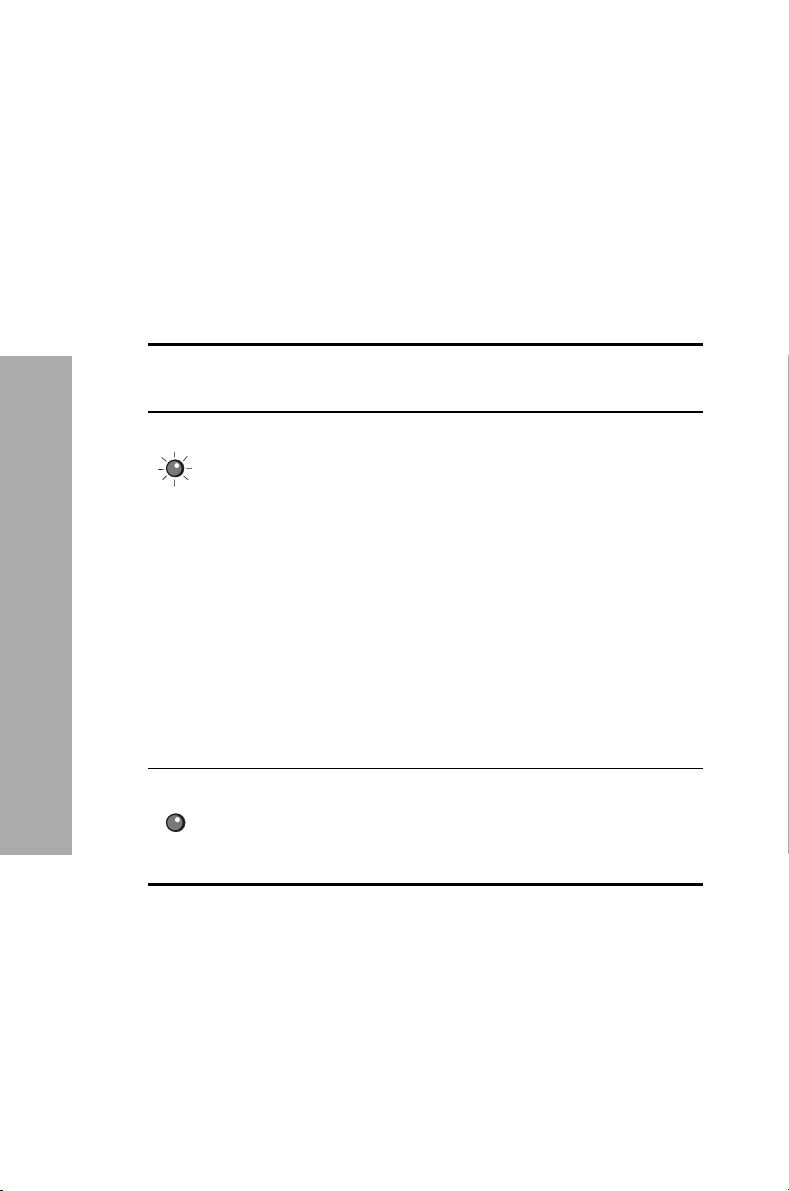
Using the PTT key
! Hold down the PTT key and turn on the radio.
The firmware and hardware versions, and your
radio’s frequency band may be briefly displayed.
Troubleshooting your charger
The table below describes what to do if the amber
‘Fault’ light on the battery charger is either flashing
or glowing.
Charger
Fault LED
Flashing Fault ! The battery is not compatible
Troubleshooting
Glowing Charging
Meaning Possible reason(s)
and solution
with the charger—use only Tait
chargers and batteries.
! There is insufficient voltage to the
charger—check you are using the
correct power adaptor.
! The battery may be deeply
discharged (less than 3V)—
disconnect the battery from the
radio and charge the battery.
! The battery may be faulty—
consult your radio provider for
advice.
The battery is either too hot or too
suspended
cold. Charging will begin when the
temperature of the battery is
between 41°F (5 °C) and 95°F (35°C).
96 Troubleshooting
Page 97

General care
Your radio requires no regular maintenance other than
ensuring that the battery has sufficient charge and that
no damage has occurred to the antenna or the battery.
To prevent permanent damage to the radio case, do not
allow the radio to come into contact with detergents,
alcohol, aerosol sprays, or petroleum-based products.
For battery care, see “Maintaining battery life and
performance” on page 83.
Cleaning the radio
If you need to clean the radio case, use a cloth
dampened with clean water. Do not immerse the radio
in fluids.
General care 97
Troubleshooting
Page 98

Glossary
11 Glossary
A
APCO The Association of Public Safety
Communications Officials.
The APCO Project 25 standards committee
(http://www.apcointl.org/) defined a digital
radio standard. The standard is often referred
to as ‘APCO’ or ‘P25’.
C
channel A channel is a pair of frequencies used to
transmit and receive radio signals.
F
FCC Federal Communications Commission, an
independent United States government
agency that regulates interstate and
international radio communications.
L
LED Light Emitting Diode, a device that is able to
M
mute A mute controls the circumstances under
98 Glossary
emit light.
which a received signal is passed to the radio’s
speaker. For example, when a signal is
received by the radio, the mute may remain
‘closed’ if the signal is not strong enough,
does not have valid signaling or is encrypted.
Page 99

P
P25 Project 25. The Association of Public Safety
Communications Officials (APCO) established
Project 25 (P25). This project was led by
United States Federal, state, and local
government representatives to develop
standards for interoperable digital radios and
systems to meet the needs of public safety
users. See http://www.project25.org for
further information.
R
repeater A repeater is a relaying site, usually situated
above a city or town. The repeater extends
the range of radio communications by
receiving and re-transmitting signals received
from radios.
RF Radio Frequency, the part of the
electromagnetic spectrum that is suitable for
radio transmissions. The frequency of the RF
signal is described in terms of the number of
cycles per second or Hertz (Hz).
Glossary
RSSI Received Signal Strength Indicator, a symbol
or number that shows the strength of a
received signal.
V
valid signal A valid signal is a signal that the radio
responds to by unmuting the receiver.
A signal may be valid, for example, when it is
stronger than a minimum level or has special
signaling that matches the signaling
programmed for the receiving radio.
Glossary 99
Page 100

Licence agreement
Licence agreement
This legal document is an Agreement
between you (the “Licensee”) and Tait
Electronics Limited (“Tait”). By using
any of the Software or Firmware items
prior-installed in the related Tait
product, included on CD or
downloaded from the Tait website,
(hereinafter referred to as “the
Software or Firmware”) you agree to
be bound by the terms of this
Agreement. If you do not agree to the
terms of this Agreement, do not install
and use any of the Software or
Firmware. If you install and use any of
the Software or Firmware that will be
deemed to be acceptance of the terms
of this licence agreement.
The terms of this Agreement shall
apply subject only to any express
written terms of agreement to the
contrary between Tait and
the Licensee.
LICENCE
TAIT GRANTS TO YOU AS LICENSEE THE NON-
EXCLUSIVE RIGHT TO USE THE SOFTWARE OR
FIRMWARE ON A SINGLE MACHINE PROVIDED
YOU MAY ONLY:
1. COPY THE SOFTWARE OR FIRMWARE INTO
ANY MACHINE READABLE OR PRINTED
FORM FOR BACKUP PURPOSES IN SUPPORT
OF YOUR USE OF THE PROGRAM ON THE
SINGLE MACHINE (CERTAIN PROGRAMS,
HOWEVER, MAY INCLUDE MECHANISMS
TO LIMIT OR INHIBIT COPYING, THEY ARE
MARKED “COPY PROTECTED”), PROVIDED
THE COPYRIGHT NOTICE MUST BE
REPRODUCED AND INCLUDED ON ANY
SUCH COPY OF THE SOFTWARE OR
FIRMWARE;
AND / OR
2. MERGE IT INTO ANOTHER PROGRAM FOR
YOUR USE ON THE SINGLE MACHINE (ANY
PORTION OF ANY SOFTWARE OR
FIRMWARE MERGED INTO ANOTHER
PROGRAM WILL CONTINUE TO BE SUBJECT
TO THE TERMS AND CONDITIONS OF THIS
AGREEMENT).
THE LICENSEE MAY NOT DUPLICATE, MODIFY,
REVERSE COMPILE OR REVERSE ASSEMBLE ANY
SOFTWARE OR FIRMWARE IN WHOLE OR PART.
IMPORTANT NOTICE
THE SOFTWARE OR FIRMWARE MAY CONTAIN
OPEN SOURCE SOFTWARE COMPONENTS
(“
OPEN SOURCE COMPONENTS”). OPEN
SOURCE COMPONENTS ARE EXCLUDED FROM
THE TERMS OF THIS AGREEMENT EXCEPT AS
EXPRESSLY STATED IN THIS AGREEMENT AND
ARE COVERED BY THE TERMS OF THEIR
RESPECTIVE LICENCES WHICH MAY EXCLUDE
OR LIMIT ANY WARRANTY FROM OR LIABILITY
OF THE DEVELOPERS AND/OR COPYRIGHT
HOLDERS OF THE OPEN SOURCE COMPONENT
FOR THE PERFORMANCE OF THOSE OPEN
SOURCE COMPONENTS. YOU AGREE TO BE
BOUND BY THE TERMS AND CONDITIONS OF
EACH SUCH LICENCE. FOR MORE
INFORMATION SEE:
http://support.taitworld.com/go/
opensource
TITLE TO SOFTWARE
THIS AGREEMENT DOES NOT CONSTITUTE A
CONTRACT OF SALE IN RELATION TO THE
SOFTWARE OR FIRMWARE SUPPLIED TO THE
LICENSEE. NOT WITHSTANDING THE LICENSEE
MAY OWN THE MAGNETIC OR OTHER
PHYSICAL MEDIA ON WHICH THE SOFTWARE
OR FIRMWARE WAS ORIGINALLY SUPPLIED, OR
HAS SUBSEQUENTLY BEEN RECORDED OR
FIXED, IT IS A FUNDAMENTAL TERM OF THIS
AGREEMENT THAT AT ALL TIMES TITLE AND
OWNERSHIP OF THE SOFTWARE OR
FIRMWARE, WHETHER ON THE ORIGINAL
MEDIA OR OTHERWISE, SHALL REMAIN VESTED
IN TAIT OR THIRD PARTIES WHO HAVE
GRANTED LICENCES TO TAIT.
TERM AND TERMINATION
THIS LICENCE SHALL BE EFFECTIVE UNTIL
TERMINATED IN ACCORDANCE WITH THE
PROVISIONS OF THIS AGREEMENT. THE
LICENSEE MAY TERMINATE THIS LICENCE AT
ANY TIME BY DESTROYING ALL COPIES OF THE
SOFTWARE OR FIRMWARE AND ASSOCIATED
WRITTEN MATERIALS. THIS LICENCE WILL BE
TERMINATED AUTOMATICALLY AND WITHOUT
NOTICE FROM TAIT IN THE EVENT THAT THE
LICENSEE FAILS TO COMPLY WITH ANY TERM
100 Licence agreement
 Loading...