


1
English

 English
2

5
WELCOME
Congratulations on your purchase of TAG Heuer LINK. You have made an excellent choice of selecting the ultimate tool in innovation, quality and endurance – a perfect combination of the highperformance sports and elegance criteria that have been hallmarks of TAG Heuer ’s commitment since 1860.
Each TAG Heuer Communication Instrument is built to the most exacting requirements. We paid the very same careful attention to detail on this communication instrument, from design to fi nished article that we have continuously done on our watches for more than 150 years. The materials used in our communication instruments make them exceptionally resilient, even when used under the most rigorous conditions. This device features Android Operating System, 2.2. Android software and works with the Android Market on which you have access to more than 250 000 applications. Every new Tag Heuer product is put through countless reliability and quality tests prior to launch to ensure performance and reliability.
With its modern, unique and timeless design, the TAG Heuer LINK smartphone combines Swiss watchmaking heritage with Avant-Garde technology to bring you complete satisfaction.
English
TABLE OF CONTENTs |
|
Packaging content...................................................................................... |
10 |
Guidelines for safe and efficient use........................................................ |
11 |
• Precautions when using batteries.................................................................................... |
11 |
• Product care................................................................................................................... |
12 |
• Radio frequency energy................................................................................................... |
13 |
• Electronic devices........................................................................................................... |
14 |
• Potentially explosive atmospheres.................................................................................. |
14 |
• Respect Special Regulations.......................................................................................... |
14 |
• Pacemaker.................................................................................................................. |
14 |
• Driving..................................................................................................................... |
15 |
• Hearing aids..................................................................................................................... |
15 |
• Aircraft...................................................................................................................... |
16 |
• Use properly your phone................................................................................................ |
16 |
• Emergency calls............................................................................................................... |
16 |
Getting to know your phone and accessories....................................... |
17 |
• Installing the SIM card and the SD memory card............................................................ |
17 |
• The battery...................................................................................................................... |
18 |
• The stereo headset.......................................................................................................... |
20 |
• Turn your phone on and off............................................................................................ |
20 |
• Enter the PIN code......................................................................................................... |
21 |
• Set up your phone for the first time................................................................................ |
21 |
Phone controls............................................................................................ |
23 |
• Soft key functions............................................................................................................ |
23 |
• Quick keys tab................................................................................................................. |
24 |
• Home screen................................................................................................................... |
25 |
Phone and status notifications................................................................. |
30 |
•Status bar......................................................................................................................... |
30 |
• Status icons..................................................................................................................... |
31 |
• Notifications panel........................................................................................................... |
32 |
Settings......................................................................................................... |
33 |
• Adjusting phone settings................................................................................................. |
33 |
• Adjusting the volume....................................................................................................... |
35 |
• Using the onscreen keyboard.......................................................................................... |
36 |
Using phone features and managing contacts....................................... |
41 |
• Making calls..................................................................................................................... |
41 |
• Answering or rejecting calls............................................................................................. |
43 |
• Managing multiple calls................................................................................................... |
46 |
• Set up a conference call................................................................................................... |
46 |
• Using the call log.............................................................................................................. |
48 |
• To add a new phone number to contacts........................................................................... |
49 |
Adjusting call settings................................................................................. |
50 |
• Turning the phone function On / Off................................................................................. |
51 |
• Creating and managing your contacts............................................................................ |
51 |
Managing your time.................................................................................... |
56 |
• Using the clock................................................................................................................ |
57 |
• Set an alarm..................................................................................................................... |
57 |
• Sending SMS and MMS messages................................................................................. |
60 |
• Manage messages and message threads................................................................... |
65 |
• Using Emails................................................................................................................... |
69 |
• Manage emails on your external email account............................................................ |
71 |
• Add more email accounts............................................................................................. |
72 |
• Getting connected to internet........................................................................................ |
72 |
• AdjustBrowsersettings................................................................................................... |
78 |
Entertaining through multimedia functions............................................. |
83 |
•Using camera and camcorder.......................................................................................... |
83 |
•Usinggallery.................................................................................................................... |
86 |
• Usingmusic.................................................................................................................... |
92 |
Managing your phone................................................................................ |
96 |
•Changing basic settings.................................................................................................. |
96 |
• Synchronizing your data................................................................................................. |
99 |
• Protecting your phone and personal data.................................................................. |
100 |
• Managing memory........................................................................................................ |
102 |
• Resetting and rebooting the phone............................................................................. |
103 |
Trouble shooting........................................................................................ |
104 |
International warranty................................................................................ |
106 |
Important legal information....................................................................... |
110 |
• FCC / Industry Canada notice....................................................................................... |
110 |
• Declaration of conformity.............................................................................................. |
111 |
• Disposal of your old appliance..................................................................................... |
112 |

English
PACKAGING CONTENT
• 1 TAG Heuer phone
• 1 International warranty card
• 1 User guide • 1 CD-ROM ( including user guides in all languages and the Data Suite to synchronize your
contacts, email, music, etc. )
• 1 Recommendation of Applications leafl et • 1 International charger with 5 plugs • 1 USB data cable
• 1 Cleaning cloth
• 1 Pouch
• 1 Stereo headset
• 1 Extractor tool
Note :
•The items supplied with your phone and the accessories available at your dealer may vary, depending on your country or service provider.
•Use the purchased accessories with only authorized devices. The use of these accessories with other devices could cause problems and any repair costs would not be covered by the warranty.
10
11
GUIDELINEs FOR sAFE AND EFFICIENT UsE
Please read this information before using your mobile phone. Not following these guidelines may be dangerous or illegal. Your phone is a highly sophisticated electronic device. We kindly invite you to read this user manual before you use your phone, charger or any accessory.
The TAG Heuer LINK is approved for use on GSM 900, DCS 1800, GSM 850, PCS 1900 and W-CDMA 850, 1900 and 2100 (i.e. bands I, II and V) networks. Contact your service provider for more information about networks.
Precautions when using batteries
•Do not use any charger or battery that is damaged in any way.
•No indication of charging: when you start charging a battery that is empty or a battery that has not been used for a long time, it may take up to 30 minutes before the battery icon appears in the display.
•If you use the phone near the network’s base station, it uses less power; talk and standby times are greatly affected by the signal strength on the cellular network and the parameters
set by the network operator.
•Battery charging time depends on the remaining battery charge and the type of battery and charger used. The battery can be charged and discharged hundreds of times, but it will gradually wear out. When the operation time (talk time and standby time) is noticeably shorter than normal, it is time to replace the battery by calling the appropriate service center.
•If left unused, a fully charged battery will discharge itself over time. When charging after complete discharge, the phone will not display anything for about 30 minutes.
•Use only the approved chargers for the TAG Heuer LINK. When a charger is not in use, disconnect it from the power source. Do not leave the battery connected to a charger for more than a week, since overcharging may shorten the battery life.
•Extreme temperatures will affect the charging capacity of your battery. (40° C = 140° F)
English

English
•To avoid a reduction in battery capacity; do not leave the battery in hot or cold places, such as in a car in summer or winter conditions. Li-ion batteries are particularly affected by temperatures below
0°C (32°F).
•If you have any problem with your battery, we kindly invite you to contact the authorized service center.
•Dispose of batteries according to local regulations. Always recycle. Do not dispose of batteries in a fi re.
Product care
Your phone is a product of superior design and craftsmanship and should be treated with care. The suggestions below will help you fulfi l the warranty obligations and enjoy this product for many years.
•Keep your phone and all its parts out of young children’s reach.
•Keep your phone dry.
•Avoid exposing your phone to extreme hot or cold temperatures.
•Avoid placing your phone close to lit cigarettes, naked fl ames or any heat source.
•Do not attempt to disassemble. Non-expert handling of the device may cause damage.
•Do not drop or knock. Rough handling may cause damage to internal electronic components.
•Do not paint your phone as the paint could obstruct the earphone, microphone or any moveable parts and prevent normal use.
•Treat your phone with care, keep it in a clean and dust free place.
•If the phone or any of its accessories are not working properly, take them to your nearest qualifi ed service centre. The personnel there will assist you, and if necessary, arrange for the phone to be repaired.
12

13
Radio frequency energy
Your phone is a radio transmitter and receiver. It is designed and manufactured, so as not to exceed the limits for exposure to radio-frequency ( RF ) energy, as recommended by the International standards. These limits are part of comprehensive guidelines and establish permitted levels of RF energy for the general population. The guidelines were developed by independent scientifi c organizations through periodic and thorough evaluation of scientifi c studies. The limits include a substantial safety margin designed to ensure the safety of all persons, regardless of age and health.
The exposure standard for phones employs a unit of measurement known as SAR ( Specifi c Absorption Rate ). Your SAR level phone has been designed and controlled to be compliant with the recommended standards.
This phone has been designed to comply with applicable safety requirements for exposure to radio waves. These requirements are based on scientifi c guidelines that include safety margins designed to assure the safety of all persons, regardless of age and health.
• The radio wave exposure guidelines employ a unit of measurement known as the Specifi c Absorption Rate, or SAR. Tests for SAR are conducted using standardised methods with the phone transmitting at its highest certifi ed power level in all used frequency bands. • While there may be differences between the SAR levels of various TAG Heuer LINK mobile phones, they are all designed to meet the relevant guidelines for exposure to radio waves.
• The SAR limit recommended by the International Commission on Non-Ionizing Radiation Protection ( ICNIRP ) is 2W/kg averaged over 10 g of tissue. • The highest SAR value for this model phone tested according to the EN 62209-1, prior use at the ear is 0.860 W/kg ( 10g ) and when worn on the body is 0.687W/Kg ( 10 g ). The phone has been shown to be capable of compliance with the SAR limits specifi ed in European Council Recommendation 1999 519 EC.
English

English
Electronic devices
Most modern electronic equipment is shielded from RF energy. However, certain electronic equipment
may not be shielded against the RF signals from your wireless phone, therefore :
• Do not use your phone near medical equipment without requesting permission.
Potentially explosive atmospheres
Switch off your phone when in any area with a potentially explosive atmosphere and obey all signs and instructions. It is rare, but your phone or its accessories could generate sparks. Sparks in such areas could cause an explosion or fi re resulting in bodily injury or even death. Areas with a potentially explosive atmosphere are often, but not always, clearly marked. They include fuelling areas, such as petrol station, below deck on boats, fuel or chemical transfer or storage facilities, and areas where the air contains chemicals or particles, such as grain, dust, or metal powders; and any other area where you would normally be advised to turn off your vehicle engine.
Respect Special Regulations
Please follow special regulations in any areas wherever it is applicable. It is recommended to switch off your phone whenever it is illegal to use, or when it may cause interferences, such as in hospitals.
Pacemaker
Phones may affect the operation of some implanted cardiac pacemakers and other medically implanted equipment. Pacemaker manufacturers recommend that a minimum separation of 20 cm (6 inches) be maintained between a hand-held wireless phone and a pacemaker to avoid potential interference with the pacemaker. These recommendations are consistent with the independent
14

15
research by and recommendations of Wireless Technology Research.
Persons with pacemakers: • Should always keep the phone more than 20 cm ( 6 inches ) from their pacemaker when the phone is switched on.
• Should not carry the phone in a breast pocket.
• Should use the ear opposite the pacemaker to minimize the potential for interference.
• If you have any reason to suspect that interference is taking place, switch off your phone immediately.
Driving
Check the laws and regulations on the use of phones in the areas where you drive. If you are going to use your phone while driving, please :
• Give full attention to driving
• Use hands free. The law in many countries requires that the use of phones in vehicles while driving should be hands free with the mobile phone fi xed in a secure mount. • Pull off the road and park before making or answering a call if driving conditions so require.
RF energy may affect some electronic systems in motor vehicles such as car stereo, safety equipment etc. in addition ; some vehicle manufacturers do not allow use of phones, unless the installation is supported by a hands free kit with an external antenna in their vehicles. Check with your vehicle manufacturer’s representative to be sure that your phone will not affect the electronic systems in your vehicle.
Hearing aids
Some hearing aids might be disturbed by phones. In the event of such disturbance, you may want to consult your service provider, or call the customer services line to discuss alternatives.
English

English
Aircraft
• Turn off or activate fl ight mode of your mobile phone before boarding any aircraft. • Do not use it on the ground without crew permission
To prevent interference with communication systems, you must not use your phone while the plane is in the air.
Use properly your phone
Use only in the normal position ( hold to the ear ). Avoid unnecessary contact with the antenna when the phone is switched on.
Emergency calls
When you want to make an emergency call, please ensure that the phone is switched on and is in service. On the Dialer tab, enter the international emergency number for your local country ( for example, 000 ), and then press on your phone. Inform your current location. Do not end the call until given permission to do so. Press to end call.
16

17
GETTING TO KNOW YOUR PHONE AND ACCEssORIEs
Receiver
SIM card / SD memory card & USB connector
Microphone
 Power on/off key
5MP auto focus camera
Volume key 
 3.5” 480x800 pixel TFT display
Loud speaker 
Installing the SIM Card and the SD Memory Card
SIM card
The SIM card contains your service details and your phone book / message memory. Before installing or replacing the SIM card, we advise you to turn off your phone or to put it in fl ight mode.
Note : Some devices require inserting a micro SIM card. An adaptor may be supplied with your phone in order to insert properly any sort of SIM cards. (Micro SIM and SIM cards)
To install the SIM card
1. Make sure the phone is turned off or in fl ight mode.
2.Open the door situated on the left of your phone by rotating the crown by 45° anticlockwise.
3.Insert the SIM card with its gold contacts facing up as indicated on the drawing situated inside the door.
4.Slide the SIM card completely into its cavity.
English

 English
To remove the SIM card
1. Make sure the phone is turned off or in fl ight mode. 2. Use the appropriate extractor to push the SIM card out of the slot.
3. Close the door.
SD memory card
To store your pictures, music, and applications, the TAG Heuer LINK is sold with an 8GB SD Memory card already pre-installed into your phone. This phone can support up to 16GB of memory. ( SD memory card )
To install the storage card
1. Make sure the phone is turned off.
2. Using the tool supplied, insert the SD Memory card into its cavity ( situated just above the SIM card ) with the gold contacts facing down.
To remove the storage card
1.Make sure the phone is turned off or disconnect the SD Memory card by pressing on  – then click on Settings>SD card & phone storage>Unmount SD card.
2.With the tool provided, push and then release the SD Memory card to eject the SD Memory Card and extract it from its cavity.
18

19
The battery
Your phone comes with a rechargeable Lithium-ion battery (1400mAh ) and is designed to use only manufacturer-specifi ed original batteries and accessories. Battery performance depends on many factors, including network confi guration, signal strength, the temperature of the environment in which you operate your phone, the features and/or settings you select and use, items attached to connecting ports, and your voice, data, and other program usage patterns.
Battery autonomy
Talk time
•Up to 6 hours and 30 minutes for WCDMA (3G+)
•Up to 10 hours and 30 minutes for GSM (2G – 2.5G)
Standby time
•Up to 330 hours (~14 days) for WCDMA (3G+)
•Up to 360 hours (~15 days) for GSM (2G – 2.5G)
Note: Battery autonomy is subject to network and phone usage.
Charging the battery
New batteries are not fully charged when shipped. Before you start using your phone, please charge the battery for a minimum of eight hours. Your phone must be charged until the full battery icon is displayed in the status bar of the Home screen.
Note: The battery must be fully charged initially to improve battery lifetime.
English
English
To charge the battery
1.Rotate the crown situated on the left side of the phone.
2.Plug the USB connector to the charger.
3.Plug in the AC adapter inside the door of the phone to start charging the battery.
Note: You can also charge your phone via USB cable connected to your computer.
As the battery is being charged while the phone is on, |
is displayed in the status bar of the |
|
Home screen. |
|
|
After the battery has been fully charged, |
displays in the status bar of the Home screen. |
|
The stereo headset
To listen to music, video or FM radio, you might use the dedicated stereo headset which comes with the TAG Heuer LINK.
To insert the stereo headset, rotate the crown situated on the left hand side of your mobile and insert the dedicated headset into the same cavity as for the charger beside the SIM card and the SD Memory card cavities.
Turn your phone on and off
To turn on the phone
Press and hold 3 seconds the POWER On/Off key situated on the top of your phone.
20
21
To turn off the phone
1.Press and hold 3 seconds the POWER on/off key until the options menu opens.
2.On the options menu, you can put your mobile phone in silent mode, Airplane mode and power off your phone. Select Power off.
3.Touch OK when prompted to turn off the phone.
Enter the PIN code
If your SIM card is preset with a PIN ( personal identifi cation number ) code, you will be prompted to enter the PIN code before you can use the phone. Enter the SIM PIN code (0000 by default), then touch OK.
Important: If you entered the wrong PIN code three times, the SIM card will be blocked and you will not be able to use your phone. If this happens, you can unblock it with the PUK ( PIN Unblocking Key) obtained from your service provider.
Set up your phone for the fi rst time
When you turn on the phone for the fi rst time, you will be prompted to enter your SIM card password and request to sign-in or to create your Google account. Please follow the instructions showed on the phone.
Important: Usually, the default SIM password is 0000 and you may change the password from phone setting.
English

 English
Turn off the screen when your phone is not in use
To save battery power, the phone automatically turns off the screen when you leave it idle after a certain period of time. You will still be able to receive messages and calls while the phone’s screen is off.
If you want to set up your screen timeout, enter in the settings menu and then select “ Display ” and “ Screen timeout ”.
Scroll and touch between “ 15 seconds, 30 seconds, 1 minute, 2 minutes, 10 minutes or 30 minutes ”.
You can also turn off the screen by short pressing the POWER on/off key. Pressing the POWER on/ off key again or incoming calls will turn on your phone screen.
Transferring your contacts
To transfer your contacts from your SIM card to your phone:
Click on  in the Home Screen and go to the Contacts menu.
Touch on and select Import/Export and touch on “Import from your SIM card”.
Note: If you already have your contacts in an existing Google account, it will automatically transfer it to your handset. If you need to transfer from your PC to your phone, please read the section called “ Synchronising your data” for more details.
22
23
PHONE CONTROLs
Soft Key functions
Key |
Function |
|
|
HOME |
While on any application or screen, touch to return the main Home screen |
|
Touch and hold to open the recent-used applications window |
|
|
MENU |
Touch to open a list of options you can do on the current screen or selection |
BACK Touch to go back to the previous screen, or to close a dialog box, options
 menu, or the Notifi cations panels.
Touch and hold to return to the main screen of the current application
When the onscreen keyboard is open, touch to close the onscreen keyboard
SEARCH |
Touch to make a Google search on the web. When the onscreen keyboard is |
||
|
|
open, touch it to make a quick messaging research. |
|
Settings |
|
|
|
Press |
, then open |
, and then touch the Settings icon. |
|
Search
Press Search bar while in the Home screen or Browser to launch
Google Search™ and search information on the web.
Or, press  and select the Browser icon to launch Google Search™ and search information from the web.
English

English
Quick keys tab
The quick keys tab on your home screen provides you an easy, one-touch access to the functions you use the most.
Touch |
to make a call |
Touch |
to open the Top Menu and access to all your applications and functions of your mobile phone. |
Touch |
to open Browser and have access to Internet. |
Getting Around Your Phone
There are different ways to navigate around the Home screen, menus and application screens on your phone.
Touch
When you want to type using the onscreen keyboard, select items onscreen such as application and settings icons and touch them with your fi nger.
Touch and hold
To open the available options for an item (for example, contact or link in a webpage) simply touch and hold the item.
Swipe or slide
To swipe or slide means to quickly move your fi nger vertically or horizontally across the screen.
Drag
For each type of home screen you are able to add and drag objects (icons, widgets, folders) by pressing & holding your fi nger with some pressure. While moving, do not release your fi nger until you have reached the target position.
24
25
Rotate
For most screens, you can automatically change the screen orientation from portrait (vertical) to landscape (horizontal) by turning the phone sideways. When entering text, you can turn the phone sideways to bring up a bigger keyboard.
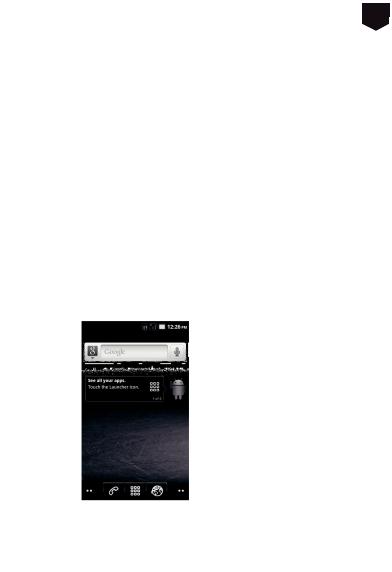
Home screen
The Home screen is your starting point for using the applications on your phone. You can customize the Home screen to display application icons, shortcuts, folders, and widgets.
 Information Status bar
 Google search
 Quick user guide
 Quick keys tab
English
 English
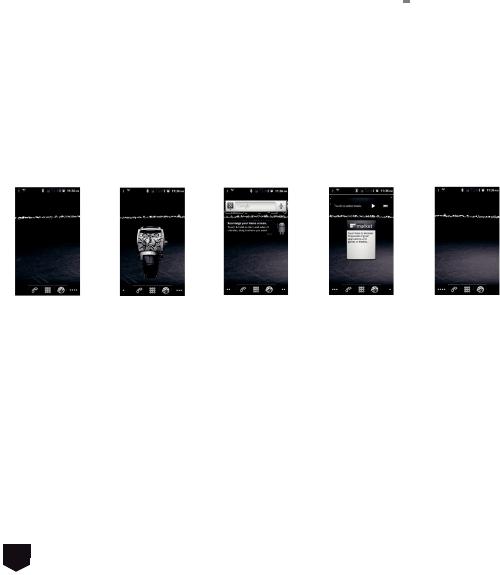
Extended Home screens
The Home screen extends beyond the screen width to provide more space for adding icons, widgets, and more. Slide your fi nger horizontally across the screen to go to the left or right side of the extended Home screen, then press Home key to back the main screen.
To quick switch to certain home screen extend
1.Touch and hold
2.A screen pop-up will propose you a small quick view of each extended home screen
3.Select the one you would like to jump to.
Customizing the Home screen
To add an Home screen item:
1.Press  , then touch and hold an empty area on the screen.
2.When the Add to Home options menu opens, select the item you want to add to the Home screen:
• Shortcuts. Add shortcuts such as applications, a bookmarked webpage, a favorite contact, an email label, a music playlist or an FM playlist.
26

27
Tip: To quickly add an application shortcut that is in the Top Menu to the Home screen, touch and hold an application icon. When the phone vibrates, release the icon on an empty area on the Home screen.
•Widgets. Add a wireless manager, profi le mode, clock, Facebook, weather, music player, FM player, a picture frame, the Google Search bar, power control, or a calendar that shows upcoming appointments.
•Folders. Add a folder where you can organize Home screen items, a shortcut to all your contacts, contacts with phone numbers, or starred contacts. Add a shortcut to all your contacts, contacts with phone numbers, or starred contacts. Contact details are automatically updated when there are changes in the source.
•Wallpapers. Change the Home screen wallpaper.
To reposition an Home screen item
1.Touch and hold the item on the screen you want to reposition to activate Move mode.
Note: When Move mode is activated, the item magnifi es and the phone vibrates.
2.Without lifting your fi nger, drag the icon to the desired position on the screen, and then release it.
Note: To drag an item from the Home screen to an extended Home screen, touch and hold the item and then slide it to the left or right edge of the screen until the display shifts to the extended Home screen. Position the item on the screen, and then release it.
English
English
To drag an Home screen item
1.Touch and hold the item on the screen you want to drag to activate Move mode.
Note: When Move mode is activated, the item magnifi es and the phone vibrates.
2.Drag the icon to the Quick Keys tab ( the Quick Keys tab will changes to red ).
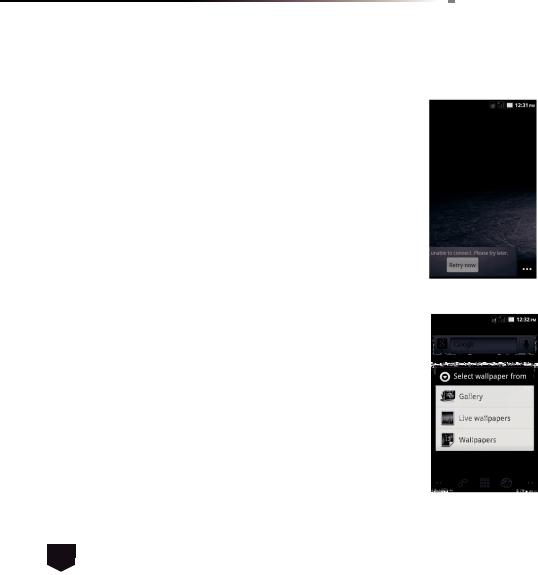
To change the Home screen wallpaper
1.While you are on the Home screen, touch and hold an empty area on the screen and select Wallpaper.
2.Touch Gallery, Live wallpapers or Wallpaper.
•Touch Gallery to use a picture that you have captured using the camera or copied to your phone as wallpaper. You can crop the picture before setting it as wallpaper.
•Touch Live wallpapers or Wallpaper to use preset wallpapers that came with the phone.
3. Touch Save or Set wallpaper.
To create a folder and add items to it
You can create folders on the home screen to hold application icons or shortcuts.
1.Press  in the home screen, and then touch Add > Folders. A new folder appears on the screen.
2.Select the folder and move and pull the applications on the desktop into the folder.
28
29
To access the items inside a folder, touch the folder to open it and then touch the icon of the application or shortcut you want to open.
Tip: To delete a folder, follow the same procedure when you want to remove a Home screen item.
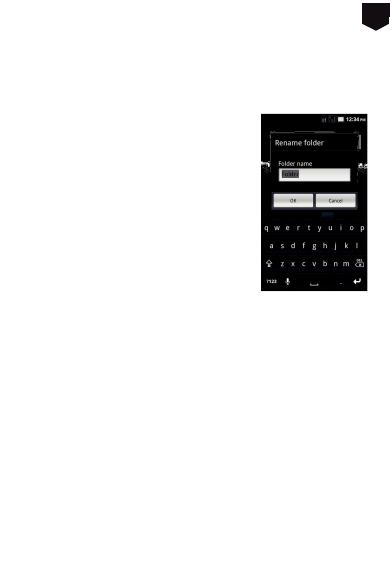
To rename a folder
1.Touch the folder to open it.
2.Touch and hold the folder’s title bar to open the Rename folder dialog box.
3.Enter the Folder name and then touch OK.
English

English
PHONE sTATUs AND NOTIFICATIONs
Status bar
On the top of the phone screen is situated the status bar. The left side of the status bar displays notifi cation icons while the right side of the status bar displays the phone status.
The bar can be pull down to indicate information, including call log, messages info, ongoing event or notifi cations. To go back, press  to return to the home screen.
|
New email message |
|
|
More ( not displayed ) notifi cation |
|
|
New SMS / MMS |
|
|
|
Call in progress |
|
Problem with SMS / MMS delivery |
|
Missed call |
||
|
New instant message |
|
|
Call on hold |
|
|
New voicemail |
|
|
|
Call forwarding on |
|
Upcoming event |
|
|
|
Content downloaded |
|
Song is playing |
|
|
|
Uploading data |
|
Problem with sign-in / sync |
|
Downloading data |
||
|
Storage card is full |
|
|
|
Wi-Fi is on and wireless networks are available |
|
Phone connected to computer via |
|
|
||
USB cable
30
 Loading...