

Page 1
8 Microsoft Pocket Outlook
Calendar
NOTE: You can customize the Calendar display, such as changing the first day of the week, by
tapping Menu, then Options.
Scheduling an appointment
You can use Calendar to create an appointment schedule.
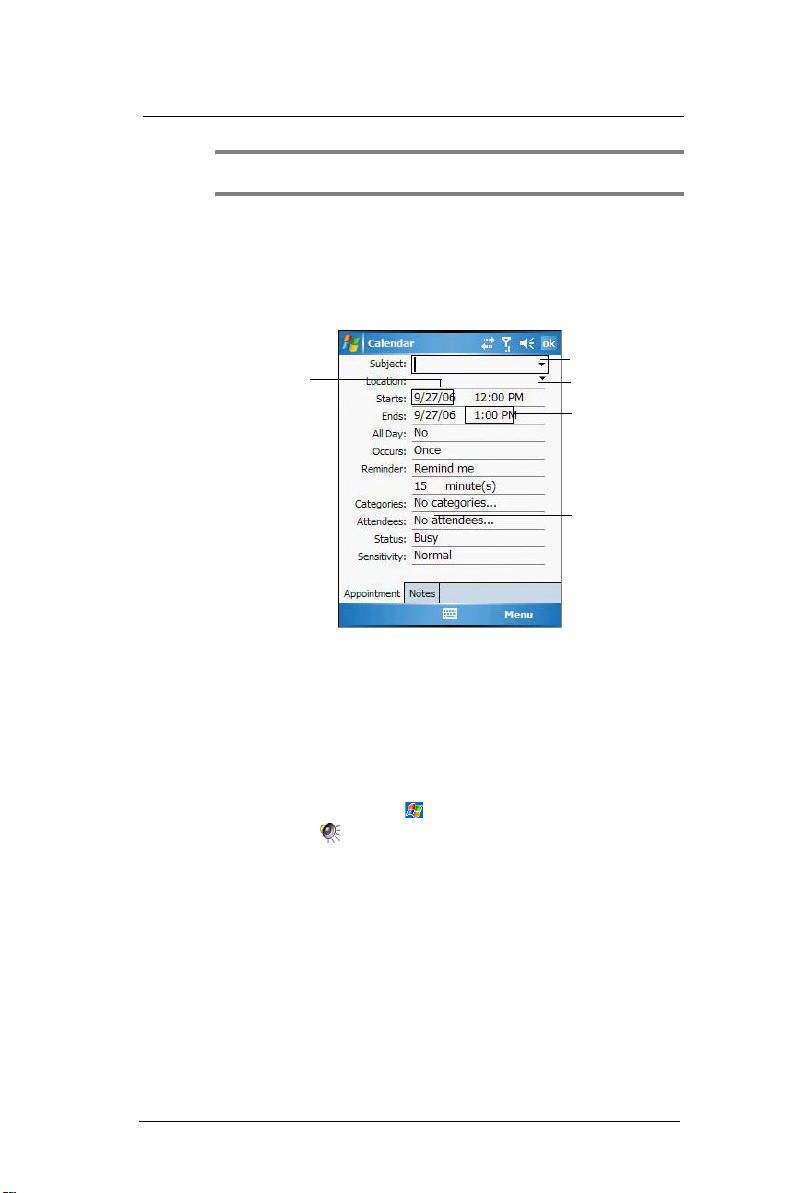
To create an appointment
1 If you are in Day or Week view, tap the desired date and time for the appointment.
2 Tap Menu, then New Appointment.
Tap to select a
date.
3 Using the soft keyboard, enter a description and a location.
To select a field, tap it.
4 If needed, tap the date and time to change them.
5 Enter other desired information.
Hide the input panel to see all available fields.
6 To add notes, tap the Notes tab.
You can enter text, draw, or create a recording.
7 After completing the details, tap OK.
If you select “Remind me” in an appointment, your device reminds you
according to the options set in , Settings, Personal tab, Sounds &
Notifications .
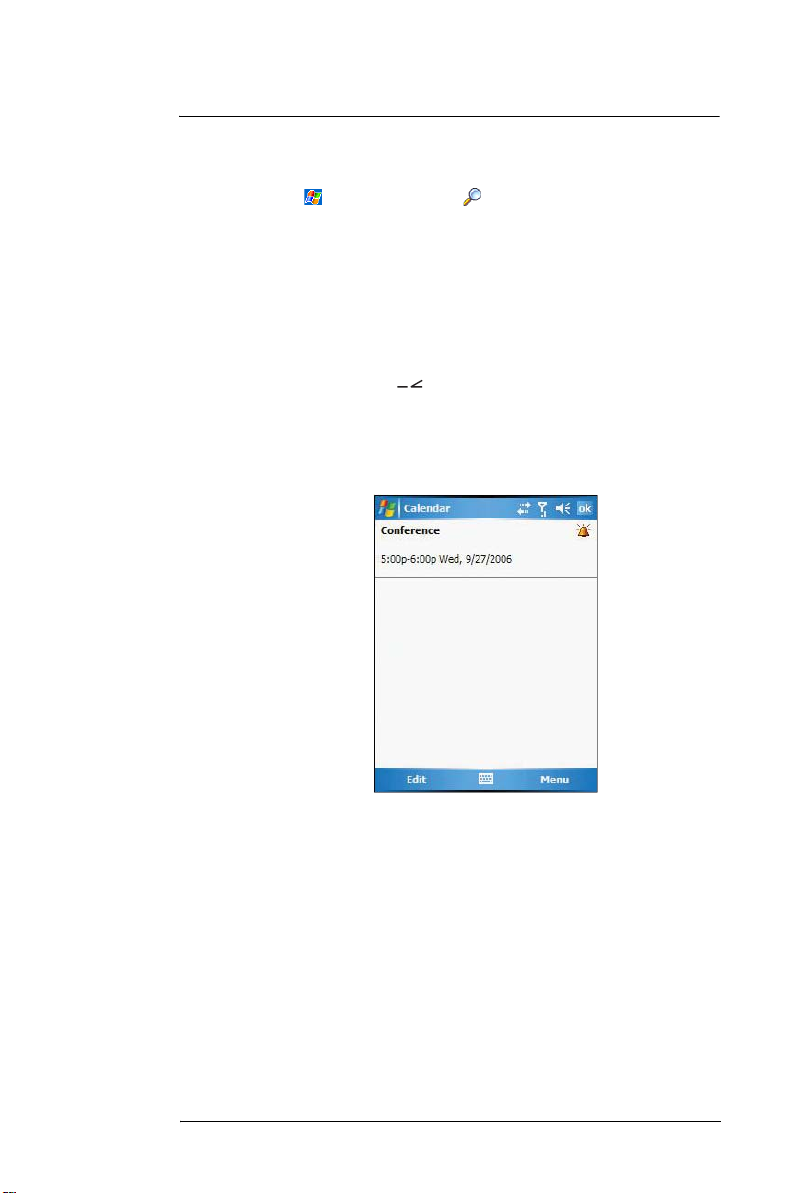
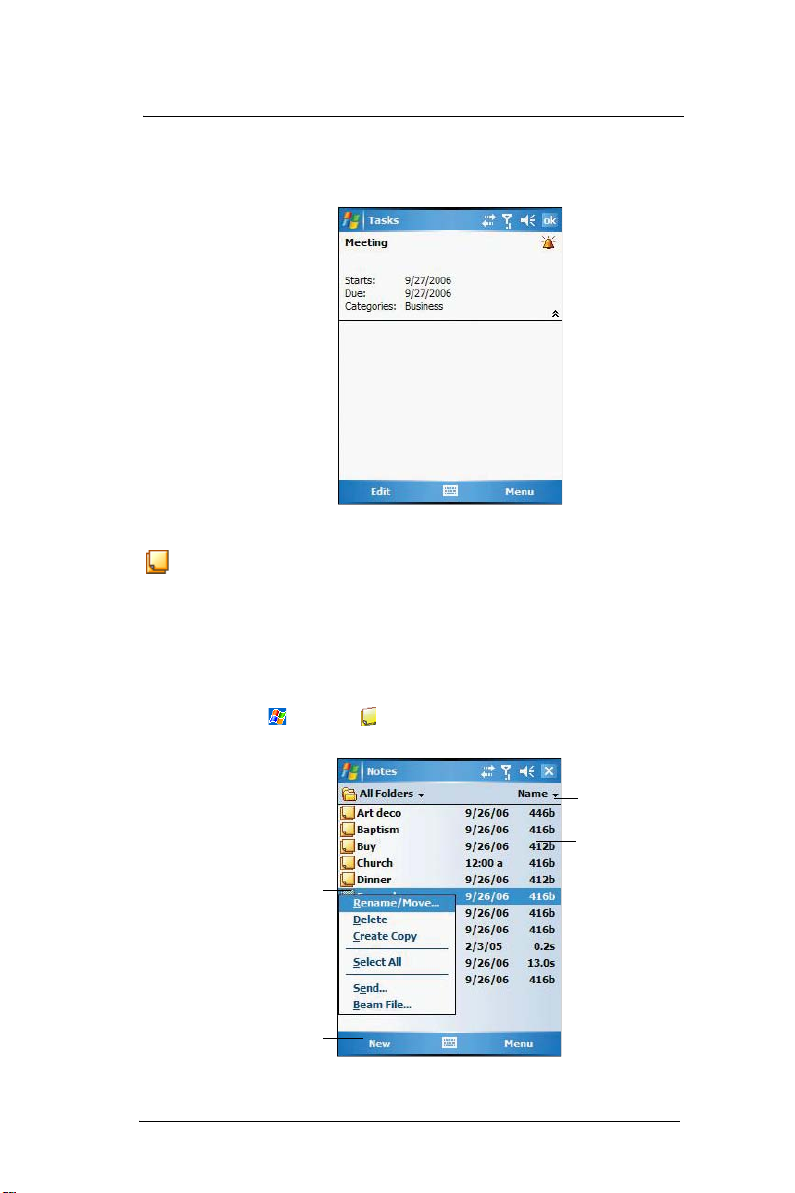
Viewing an appointment
You can view an appointment schedule in all views except for Year and Agenda view.
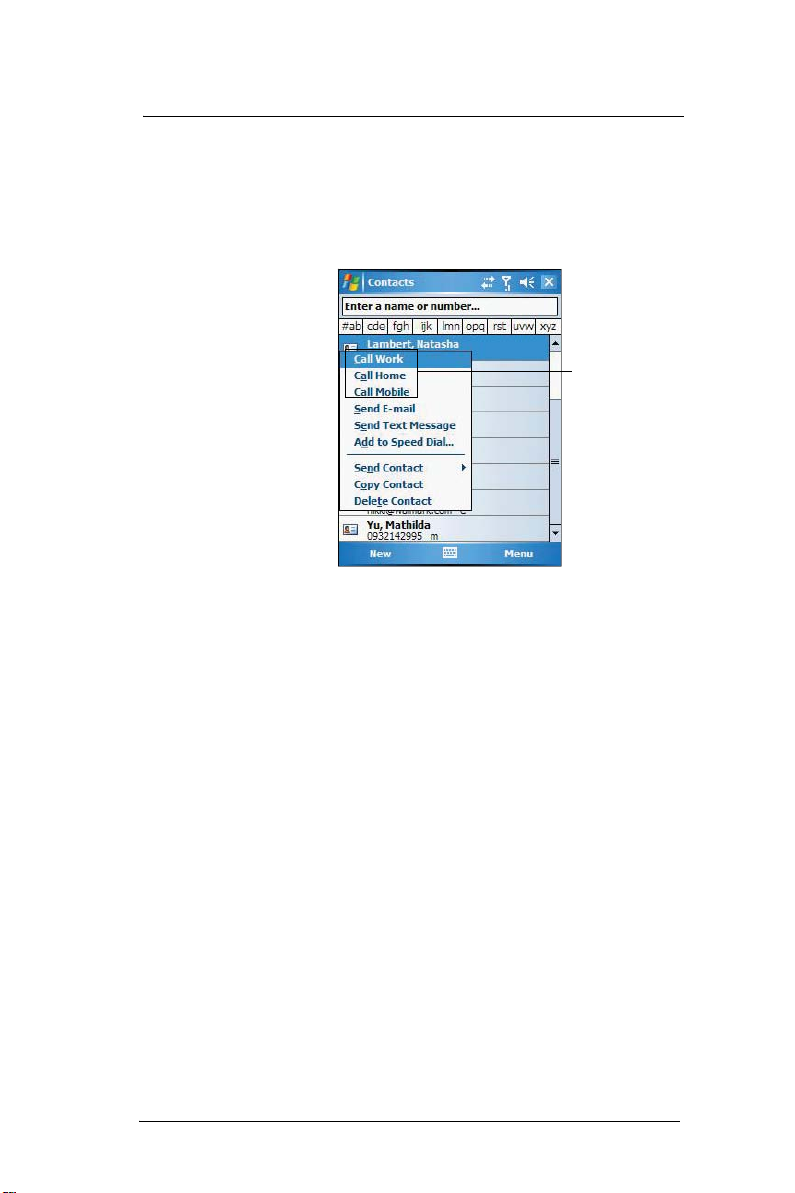
• To see the details of an appointment, tap the appointment.
• To see a pop-up menu of available actions for an appointment, tap and hold
the appointment.
• In Agenda view, upcoming appointments are displayed in bold text.
• In Month view, the time of appointments are indicated by symbols. An
upward triangle means a morning appointment; a downward triangle means
an afternoon appointment. A solid square indicates an appointment that
overlaps the noon day border.
Tap to choose from a
predefined text.
Tap to choose a
previously entered
location.
Tap to select a time.
Notes is a good place
for maps, directions,
or meeting reminders.
116
Page 2
8 Microsoft Pocket Outlook
Calendar
Finding an appointment
There are two ways to find an appointment:
• Tap , Programs, then Search , enter the appointment name, select
Calendar for the type, then tap Search.
• In Calendar, tap Menu, Filter, All Appointments, then select the check box
opposite the type of appointment you want displayed.
Beaming an appointment
You can send an appointment to another IR or Bluetooth-enabled device by beaming it.
1 In Agenda, Day or Month view, tap and hold the appointment.
2 Tap Menu, then Beam Appointment on the pop-up menu.
3 Do either one of the following:
• Select a Bluetooth-enabled device, then tap the Tap to send link.
• Align the IR port
device so that they are unobstructed and within close range, then select
the IR-enabled device and tap the Tap to send link.
of your device with that of the other IR-enabled
Using the Calendar summary screen
When you tap an appointment in Agenda or Day view, a summary screen is displayed. To
change the appointment, tap Edit.
Creating a meeting request
You can use Calendar to set up meetings with users of Outlook or Pocket Outlook. The
meeting request is created automatically and is sent when you synchronize Inbox or
when you connect to your email server. Indicate how you want meeting requests sent by
tapping Menu, then Options.
To schedule a meeting:
1 Create an appointment.
2 In the appointment details, hide the input panel, then tap Attendees.
3 Select the check box before the email address of the contacts you want to send a
meeting request to.
4 Tap OK twice—once to return to the appointment details page and another to save
the appointment.
The meeting request is created automatically and placed in the Outbox folder.
5 Tap OK.
117
Page 3
8 Microsoft Pocket Outlook
Contacts
Contacts
Keeping track of friends and colleagues
Contacts maintains a list of your friends’ and colleagues’ contact information. Using your
device’s infrared (IR) port, you can quickly share this list with other Windows-based, IRenabled device users.
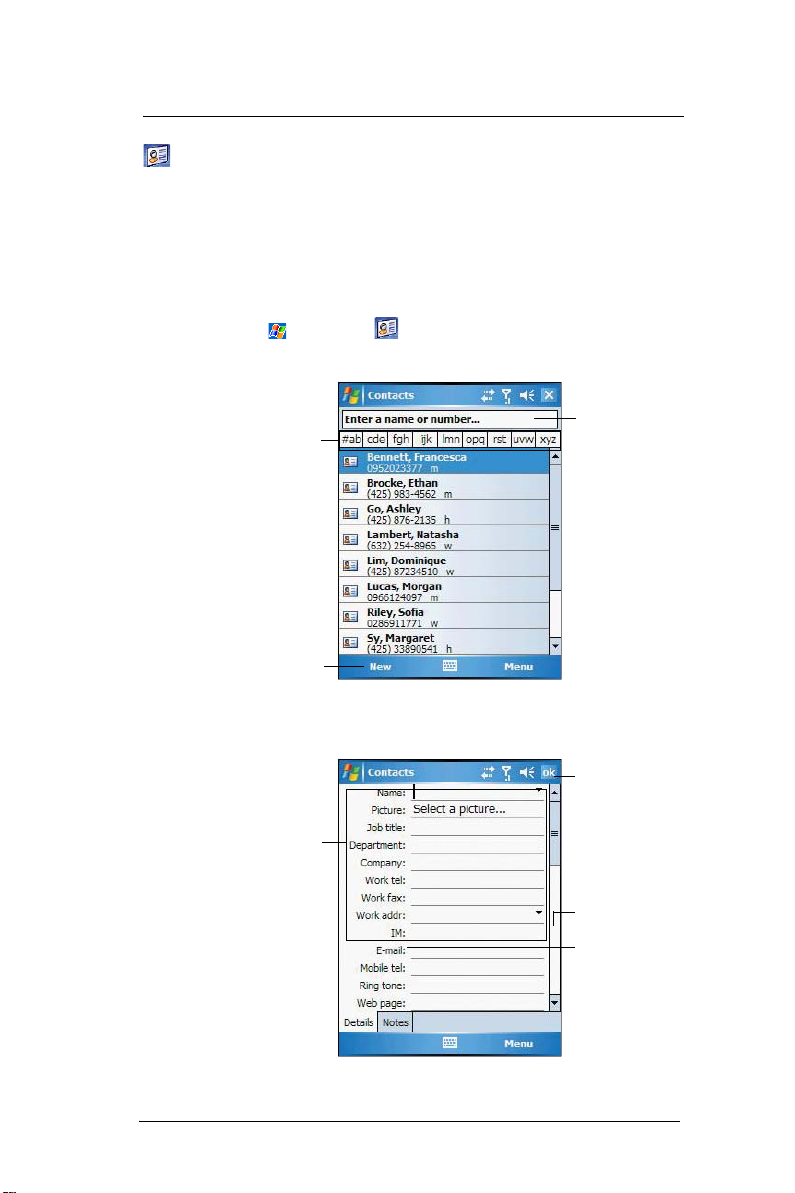
To open Contacts:
Do either of the following:
• On the Today screen, press the right soft button or tap Contacts.
• Tap , then Contacts .
Contacts opens to the contact list. To change the way information is
displayed in the list, tap Menu, then Options.
Tap one of the letter
blocks to display only
contact names
starting with such
letters.
Enter the name of the
contact you’re
searching for.
118
Tap to create a new
contact.
Creating a contact
1 Tap New.
Tap a field to enter
contact information.
Tap to return to the
Contacts list (the
new contact is saved
automatically).
Scroll to see more
fields.
Notes is a good
place for additional
contact information.
Page 4
8 Microsoft Pocket Outlook
Contacts
2 Using the soft keyboard, enter a name and other contact information.
Scroll down to see all available fields.
3 To assign the contact to a category, scroll down, tap Categories, then select a
category from the list.
4 In the contact list, you can display contacts by category by tapping the pick list on
the top-left corner of the screen.
5 To add notes, tap the Notes tab.
6 After completing the details, tap OK.
Finding a contact
There are several ways to find a contact. You can do any of the following. In the contact
list:
• Using the QWERTY keypad, press the starting letter of the contact name
• Tap one of the letter blocks displayed across the top of the screen.
• Use the Smart Lookup function by entering the first few letters of the contact
you’re looking for in the search box under the navigation bar. To show all
contacts again, clear text from the box or tap the button to the right of the
box.
• Tap the category pick list on the top-left corner of the screen and select the
type of contact that you want displayed.
• To show all contacts, tap Menu, Filter, then All Contacts.
• To view a contact that is not assigned to a category, tap Menu, Filter, then
No Categories.
• To view the names of companies your contacts work for, in the command
bar, tap View By, then Company.
The number of contacts that work for that company displays to the right of
the company name.
• Tap , Programs, then Search , enter the contact name, select
Contacts for the type, then tap the Go button.
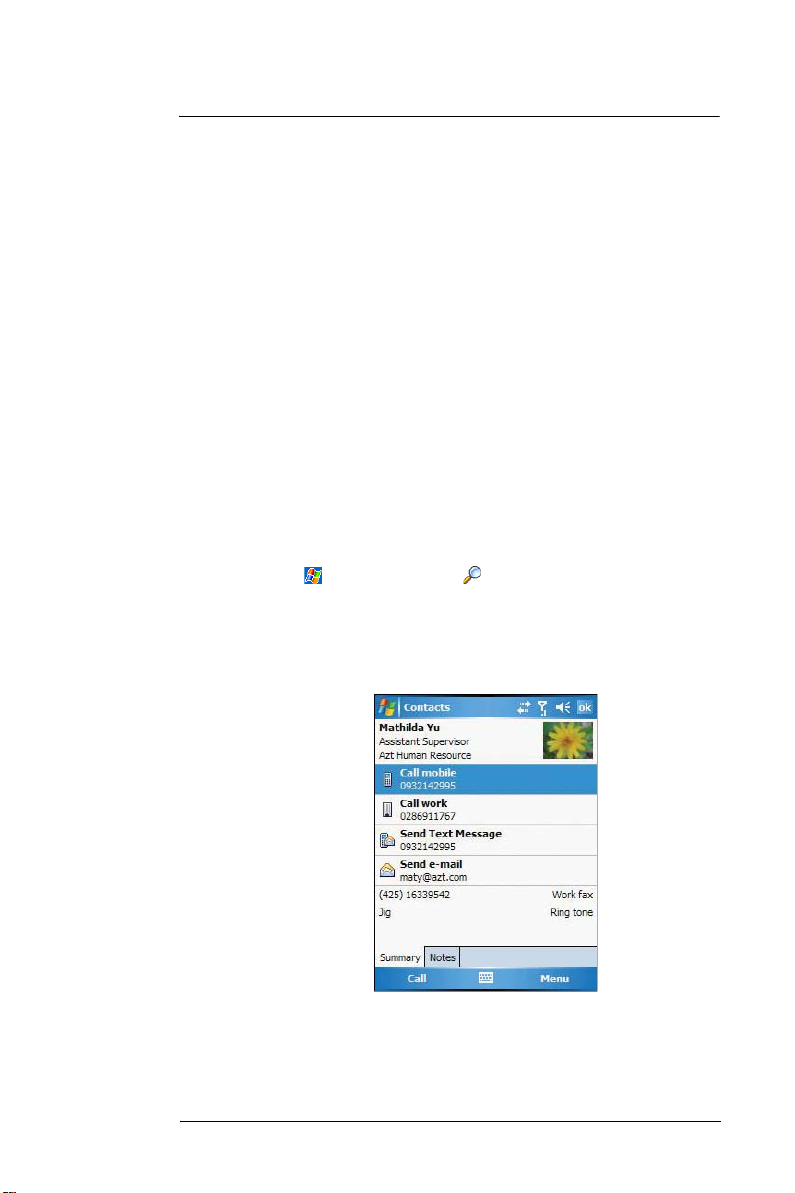
Using the Contacts summary screen
When you tap a contact in the contact list (or select it using the joystick), a summary
screen displays. This is referred to as a contact card. To change the contact information,
tap Menu, then Edit.
119
Page 5
8 Microsoft Pocket Outlook
Contacts
Calling a contact
You can make a call to a contact using either the contact list or the contact card.
To make a call from the contact list:
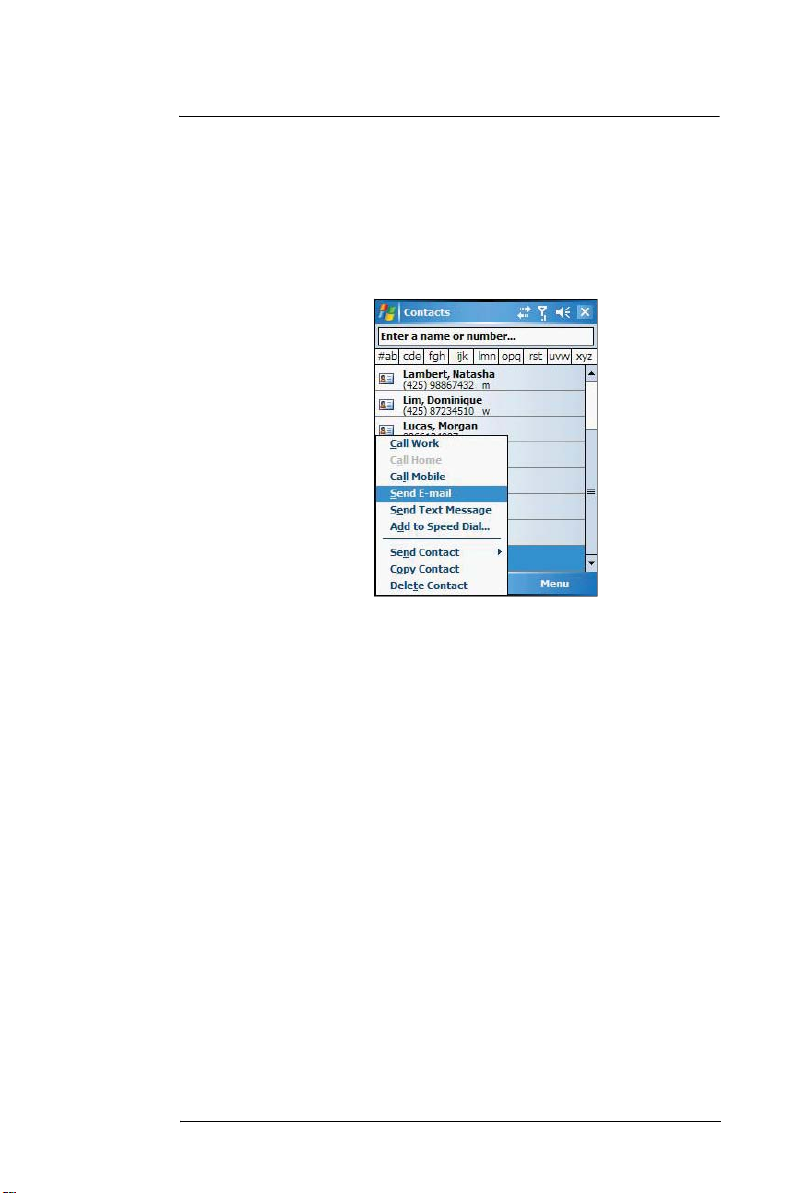
There are several ways to make a call from the contact list.
• Using commands in the pop-up menu
(a) Tap and hold a contact to display a pop-up menu of actions.
(b) Tap any of the Call options to make a call.
• Using the Contact list abbreviation
(a) Tap the letter in the right column next to the contact you want to call. The
contact’s summary screen appears.
(b) Tap which number to call or send email/text messages.
The letter that appears opposite a contact entry corresponds to a particular
contact information. These are as follows:
• e — Email address
• e2 — Second email address
• e3 — Third email address
• h — Home phone number
• h2 — Second home phone number
• m — Mobile phone number
• pgr — Pager phone number
• sms — SMS address
• w — Work phone number
• w2 — Second work phone number
• web — Web page
• Using the hardware buttons
(a) Move the joystick up or down to scroll through the contact list and select the
contact you want to call.
(b) Press the Send button twice—once to launch Phone and another to make the
call. The call will be made to that contact’s priority number.
To make a call from a contact card:
• Tap any of the listed phone numbers.
• Move the joystick up or down to scroll through the listed numbers and select
one, then press the joystick or Send button to make the call.
Tap any call options
to make a call.
120
Page 6
8 Microsoft Pocket Outlook
Contacts
Sending a Message to a contact
You can send an email or text message to a contact either from the contact list or from a
contact card window.
To send a message from the contact list:
1 Tap and hold a contact to display a pop-up menu of actions.
- or -
Move the joystick up or down to scroll through the list and select a contact, then
press the joystick to display a pop-up menu of actions.
2 Tap Send E-mail or Send Text Message.
- or -
Move the joystick up or down to select either Send option, then press the joystick to
enable it.
Inbox opens to a new message window with the To field automatically filled out with
the selected contact’s email/text address.
3 Proceed to composing the message.
To send a message from a contact card:
1 Tap any of the listed email/text addresses.
- or -
Move the joystick up or down to scroll through the listed email/text addresses and
select one, then press the joystick.
Inbox opens to a new message window with the To field automatically filled out with
the selected contact’s email/text address.
2 Proceed to composing the message.
Beaming a Contact Card
You can send a contact card to another IR or Bluetooth-enabled device either from the
contact list or from a contact card window.
To beam a contact card from the contact list:
1 Tap and hold a contact to display a pop-up menu of actions.
- or -
Move the joystick up or down to scroll through the list and select a contact, then
press the joystick to display a pop-up menu of actions.
2 Tap Beam Contact.
3 Do either one of the following:
121
Page 7
8 Microsoft Pocket Outlook
Tasks
• Select a Bluetooth-enabled device, then tap the Tap to send link.
• Align the IR port
device so that they are unobstructed and within close range, then select
the IR-enabled device and tap the Tap to send link.
of your device with that of the other IR-enabled
To beam an open contact card:
1 Tap Menu, then Beam Contact.
2 Do either one of the following:
• Select a Bluetooth-enabled device, then tap the Tap to send link.
• Align the IR port
device so that they are unobstructed and within close range, then select
the IR-enabled device and tap the Tap to send link.
of your device with that of the other IR-enabled
Tasks
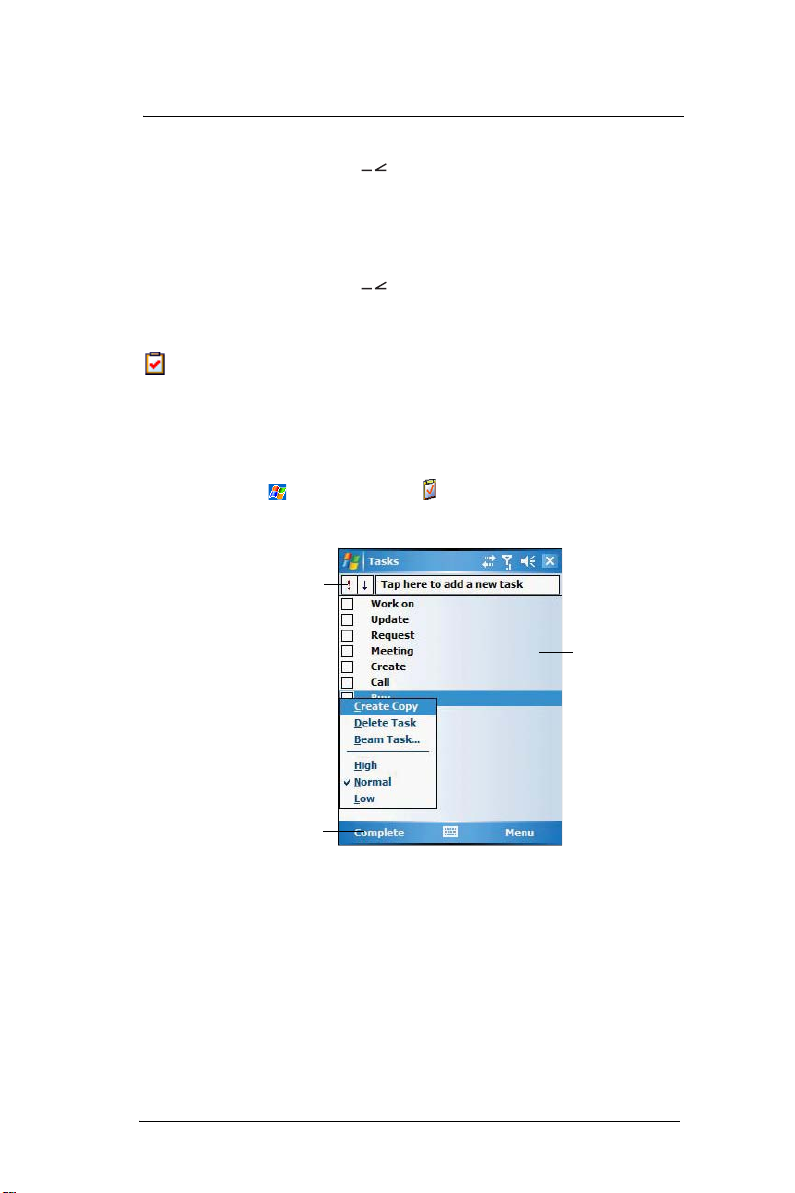
Keeping a to do list
Use Tasks to keep track of what you have to do and prioritize them based on their
importance and urgency.
To open Tasks:
• Tap , Programs, then Tasks .
Tasks opens to the tasks list. To change the way information displays in the
list, tap Menu, then Options.
Indicates high priority.
Tap to display or edit
task details.
Tap and hold to display a pop-up menu
of actions.
122
Tap to create a new
task.
Page 8
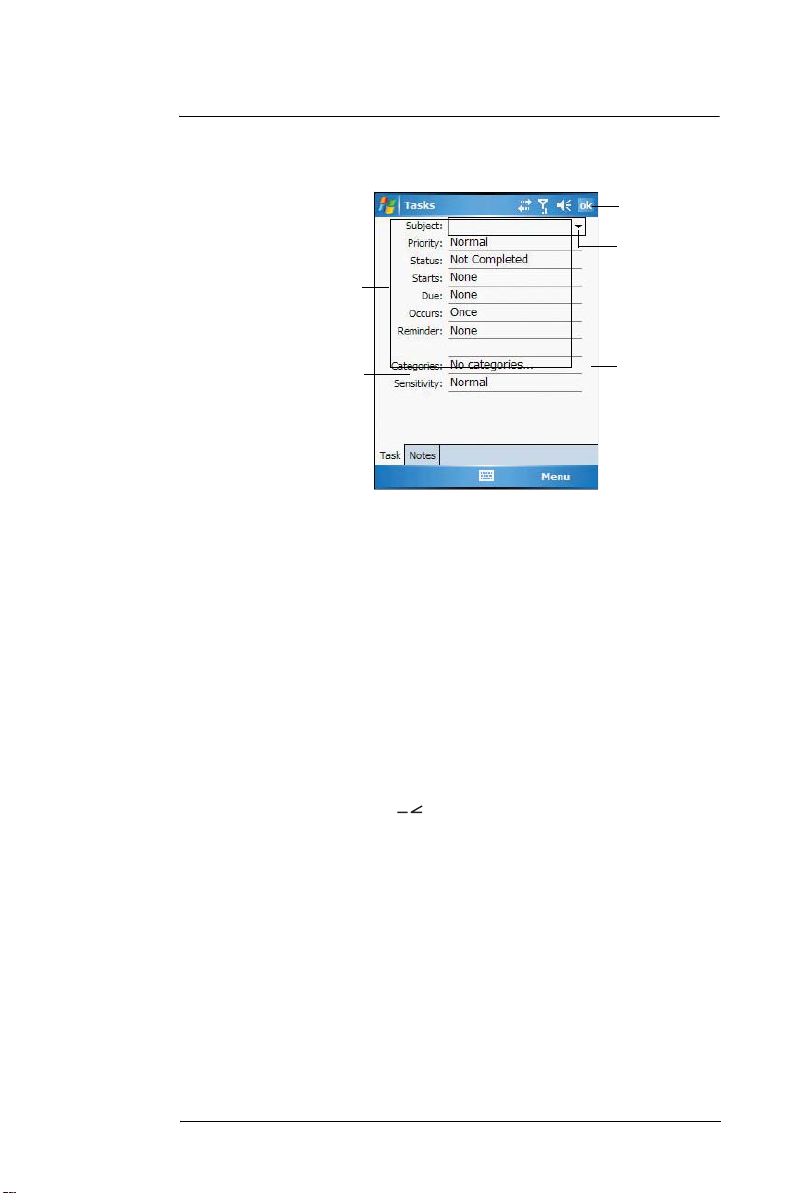
Creating a task
1 Tap New.
Tap a field to enter a
task information.
8 Microsoft Pocket Outlook
Tasks
Tap to return to the
Tasks list (the new
task is saved
automatically.
Tap to choose
predefined subjects.
Notes is a good
place for additional
task information.
Scroll to see more
fields.
2 Using the input panel, enter a description.
3 You can enter a start date and due date or enter other information by first tapping
the field.
If the soft keyboard is open, hide it to see all available fields.
4 To assign the task to a category, tap Categories and select a category from the list.
In the task list, you can display tasks by category by tapping the pick list on the topleft corner of the screen.
5 To add notes, tap the Notes tab.
You can enter text, draw, or create a recording.
6 After completing the details, tap OK.
Beaming a Task
You can send a task to another IR or Bluetooth-enabled device by beaming it.
1 Tap and hold the task item.
2 Tap Beam Task on the pop-up menu.
3 Do either one of the following:
• Select a Bluetooth-enabled device, then tap the Tap to send link.
• Align the IR port
device so that they are unobstructed and within close range, then select
the IR-enabled device and tap the Tap to send link.
of your device with that of the other IR-enabled
123
Page 9
8 Microsoft Pocket Outlook
Notes
Using the Tasks summary screen
When you tap a task in the task list, a summary screen displays. To change the task, tap
Edit.
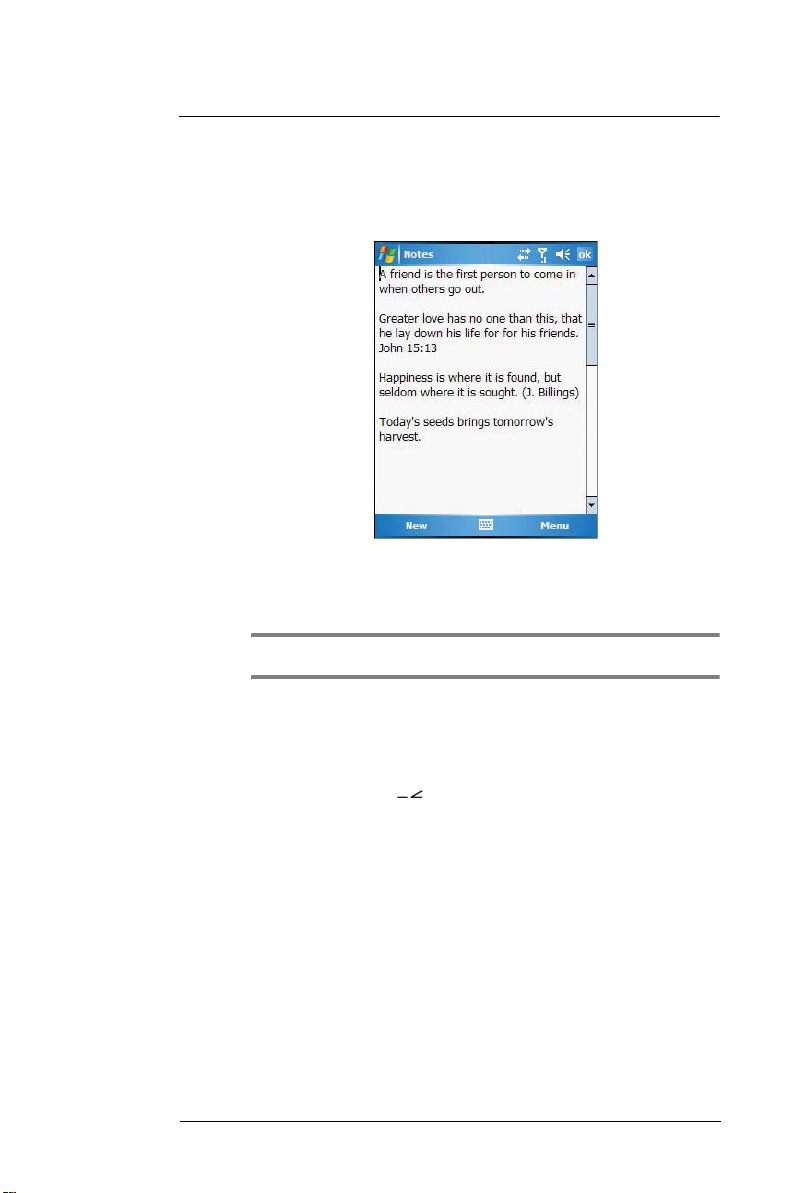
Notes
Capturing thoughts and ideas
Quickly capture thoughts, reminders, ideas, drawings, and phone numbers with Notes.
You can create a written note or a recording. You can also include a recording in a note.
If a note is open when you create the recording, it is included in the note as an icon. If the
note list displays, it is created as a stand-alone recording.
To open Notes:
• Tap , then Notes .
Notes opens to the note list.
124
Tap and hold to
display a pop-up
menu of actions.
Tap to create a new
item.
Tap to change the
sort order of the list.
Tap to open a note or
play a recording.
Page 10
8 Microsoft Pocket Outlook
Notes
Creating a note
1 Tap New.
2 Create the note by writing, drawing, typing, or recording.
For more information about using the input panel, writing and drawing on the
screen, and creating a recording, go to page 45.
Sending a Note
You can send a note to another person either by email or by beaming it to that person’s
IR or Bluetooth-enabled device.
NOTE: You must first set up an email account on your device before you can send a note by email.
Go to page 113 for instructions on setting up an email account.
To send a note by beaming:
1 In the task list, tap and hold the note.
2 Tap Beam File on the pop-up menu.
3 Do either one of the following:
• Select a Bluetooth-enabled device, then tap the Tap to send link.
• Align the IR port
device so that they are unobstructed and within close range, then select
the IR-enabled device and tap the Tap to send link.
of your device with that of the other IR-enabled
To send a note by email:
1 In the task list, tap and hold the note.
2 Tap Send via E-mail on the pop-up menu.
A new message window in Inbox displays with the selected note shown as an
attachment (*.pwi).
3 Proceed to completing the email message.
125
Page 11

8 Microsoft Pocket Outlook
Notes
126
Page 12

9 Companion Programs
9 Companion Programs
This chapter describes the companion programs available on your device— Word
Mobile, Excel Mobile, PowerPoint Mobile and Windows Media Player 10.1 Mobile for
Pocke t PC.
• Word Mobile
• Excel Mobile
• PowerPoint Mobile
• Windows Media Player 10.1 Mobile for Pocket PC
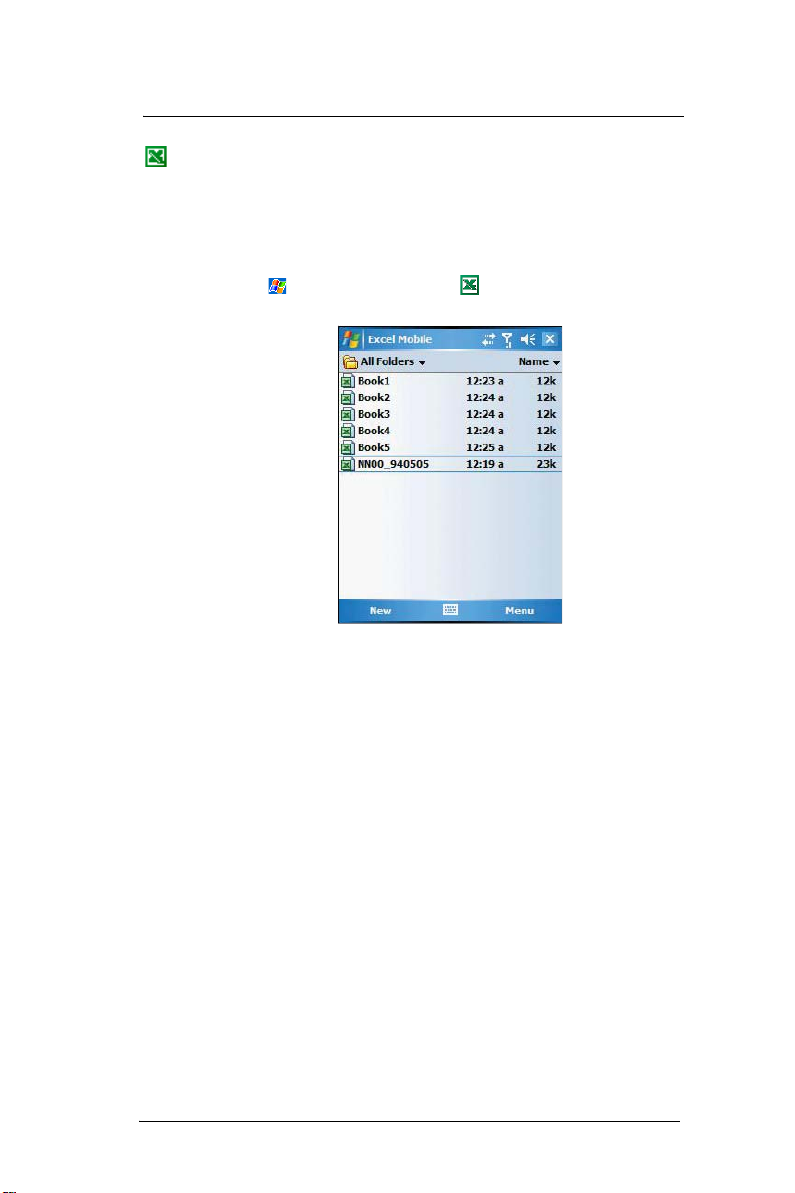
Word Mobile
With Word Mobile you can:
• Create new documents on your device or you can copy documents from
your PC to your device.
• Synchronize documents between your PC and your device so that you have the
most up-to-date content in both locations.
To open Word:
• Tap , Programs, then Word Mobile .
Word opens to the Pocket Word file list.
Creating a new Document
• In the document list window, tap New.
A blank document appears. Or, if you've selected a template for new
documents in the Options dialog box, that template appears with appropriate
text and formatting already provided.
You can save a document you create or edit in a variety of formats, including:
• Word (.doc)
• Document Template (.dot)
• Rich Text Format (.rtf)
• Plain Text (.txt)
Word Mobile provides basic formatting options, such as font style, paragraph alignment,
and bullet options, in its toolbar. You can show and hide this toolbar by tapping View,
then Toolbar on the command bar.
Using the Word Mobile file list
Word Mobile contains a list of the files stored on your device. The file list is the default
window when you open Word Mobile. Every time you tap OK in an open document, the
file list displays.
• Tap a file in the list to open it. You can open only one document at a time;
when you open a second document, you'll be asked to save the first.
Word Mobile
127
Page 13
9 Companion Programs
Word Mobile
• To delete, make copies of, and send files, tap and hold a file in the list, then
select the appropriate action on the pop-up menu.
Entering information
You can enter information in Word Mobile in one of four modes—typing, writing, drawing,
and recording—which are displayed on the View menu.
If you're opening a Word document created on a computer, select Wrap to Window on
the View menu so that you can see the entire document.
You can change the zoom magnification by tapping View, Zoom, then select the
percentage you want. Select a higher percentage to enter text and a lower one to see
more of your document.
Typing Mode
• Using the input panel, enter typed text into the document.
• To format existing text and to edit text, first select the text. You can select
text as you do in a Word document, using your stylus instead of the mouse
to drag through the text you want to select.
• To find text in a document, tap Menu, Edit, then Find/Replace.
Tap to return to the
document list
(changes are saved
automatically).
128
Tap to select
formatting options.
Tap to show or hide
toolbar.
Page 14

9 Companion Programs
Word Mobile
Recording Mode
In recording mode, you can embed a recording into your document. Recordings are
saved as .wav files. For more information on recording, see page 45.
Sending a document
You can send a Word document to another person either by email or by beaming it to that
person’s IR or Bluetooth-enabled device.
NOTE: You must first set up an email account on your device before you can send a note by email.
Go to page 113 for instructions on setting up an email account.
To send a document by beaming:
1 In the Word document list, tap and hold the document.
2 Tap Beam File on the pop-up menu.
3 Do either one of the following:
• Select a Bluetooth-enabled device, then tap the Tap to send link.
• Align the IR port
device so that they are unobstructed and within close range, then select
the IR-enabled device and tap the Tap to send link.
of your device with that of the other IR-enabled
To send a document by email:
1 In the Word document list, tap and hold the document.
2 Tap Send via E-mail on the pop-up menu.
A new message window in Inbox displays with the selected note shown as an
attachment (*.pwi).
3 Proceed to completing the email message.
Printing a document
Your device supports printing of documents on a Bluetooth-enabled printer. An additional
software needs to be installed on your device to enable you to print files to a Bluetoothenabled printer. Contact your local dealer for more information..
129
Page 15
9 Companion Programs
Excel Mobile
Excel Mobile
With Excel Mobile you can:
• Create new spreadsheets on your device or you can copy spreadsheets
from your PC to your device.
• Synchronize spreadsheets between your PC and your device so that you
have the most up-to-date content in both locations.
To open Excel:
• Tap , Programs, then Excel Mobile .
Excel opens to the Pocket Excel file list.
Creating a new spreadsheet
• In the Excel Mobile file list, tap New.
A blank spreadsheet appears. Or, if you've selected a template for new
spreadsheets in the Options dialog box, that template appears with
appropriate text and formatting already provided.
You can save a workbook you create or edit it in a variety of formats, including:
• Excel Workbook (.xls)
• Excel Template (.xlt)
130
Page 16
9 Companion Programs
Excel Mobile
Pocket Excel provides fundamental spreadsheet tools, such as formulas, functions,
sorting, and filtering, in its toolbar. You can show and hide this toolbar by tapping the
View, then Toolbar.
Tap to return to the
spreadsheet list
(changes are saved
automatically).
Zoom button
Using the Excel Mobile file list
Excel Mobile contains a list of the files stored on your device. The file list is the default
window when you open Excel Mobile. Every time you tap OK in an open workbook, the
file list displays.
• Tap a file in the list to open it. You can open only one workbook at a time;
when you open a second workbook, you'll be asked to save the first.
• To delete, make copies of, and send files, tap and hold a file in the list, then
select the appropriate action from the pop-up menu.
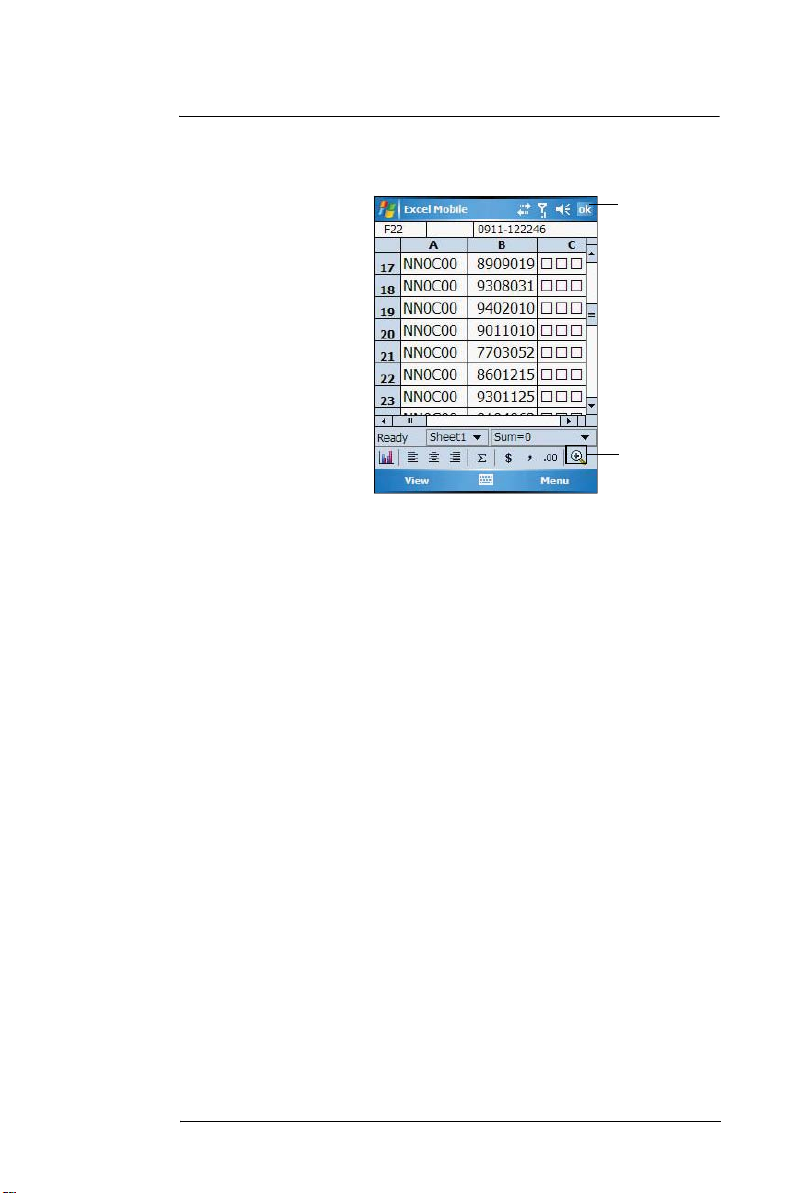
Tips for working in Excel Mobile
Note the following when working in large worksheets in Excel Mobile:
• View in full-screen mode to see as much of your worksheet as possible.
• Tap View, then Full Screen.
• To exit full screen mode, tap Restore.
• Show and hide window elements.
• Tap View, then tap the elements you want to show or hide.
• You might want to freeze the top and left-most panes in a worksheet to keep
row and column labels visible as you scroll through a sheet.
(a) Select the cell where you want to freeze panes.
(b) Tap View, then Freeze Panes.
• Split panes to view different areas of a large worksheet.
(a) Tap View, then Split.
(b) Drag the split bar to where you want it.
To remove the split, tap View, then Remove Split.
• Show and hide rows and columns.
• To hide a row or column:
(a) Select a cell in the row or column you want to hide.
(b) Tap Menu, Format, Row or Column, then Hide.
• To show a hidden row or column:
(a) Tap Menu, then Undo Row Height.
(b) Type a reference that is in the hidden row or column.
(c) Tap Menu, Format, Row or Column, and then Unhide.
131
Page 17

9 Companion Programs
PowerPoint Mobile
Beaming a worksheet
You can send a worksheet to another person either by email or by beaming it to that
person’s IR or Bluetooth-enabled device.
NOTE: You must first set up an email account on your device before you can send a note by email.
Go to page 113 for instructions on setting up an email account.
To send a worksheet by beaming:
1 In the Excel book list, tap and hold the file.
2 Tap Beam File on the pop-up menu.
3 Do either one of the following:
• Select a Bluetooth-enabled device, then tap the Tap to send link.
• Align the IR port
device so that they are unobstructed and within close range, then select
the IR-enabled device and tap the Tap to send link.
To send a worksheet by email:
1 In the Excel book list, tap and hold the file.
2 Tap Send via E-mail on the pop-up menu.
A new message window in Inbox displays with the selected note shown as an
attachment (*.pwi).
3 Proceed to completing the email message.
PowerPoint Mobile
Use PowerPoint Mobile to view slide show presentations. You can download slide show
presentations from a storage card, company network, internet, email attachment or
obtained by synchronizing with your personal computer.
To open PowerPoint Mobile:
• Tap , Programs, then PowerPoint Mobile .
Getting slide shows onto your device
You can download PowerPoint files from a memory card or the Web to your computer,
then synchronize them with your device. To do so, you need to activate your device (you
only need to activate it once), then set up synchronization for files in ActiveSync.
To get slide show presentation onto your device:
1 Open ActiveSync on your computer.
2 Use Windows Explorer on your computer to locate the PowerPoint Mobile folder
and the Pocket_PC My Documents folder.
3 Use ActiveSync to download the files from your computer to your device as
described in the Read Me file in the PowerPoint Mobile folder.
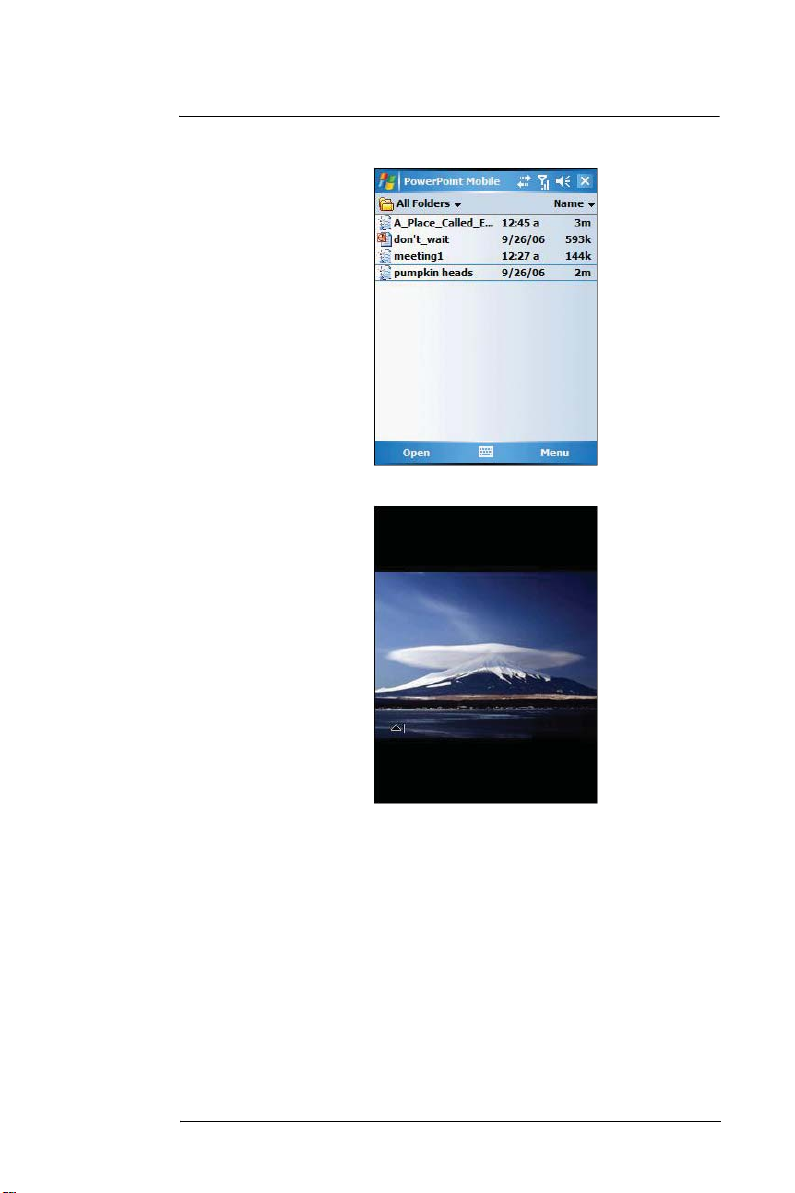
Using PowerPoint Mobile
PowerPoint Mobile contains a list of files stored on your device. The file list is the default
window when you open PowerPoint Mobile.
To open a PowerPoint presentation:
1 Tap , Programs, then PowerPoint Mobile .
of your device with that of the other IR-enabled
132
Page 18
9 Companion Programs
2 Tap the slide show you want to view.
3 Tap the current slide to advance to the next slide.
PowerPoint Mobile
133
Page 19
9 Companion Programs
PowerPoint Mobile
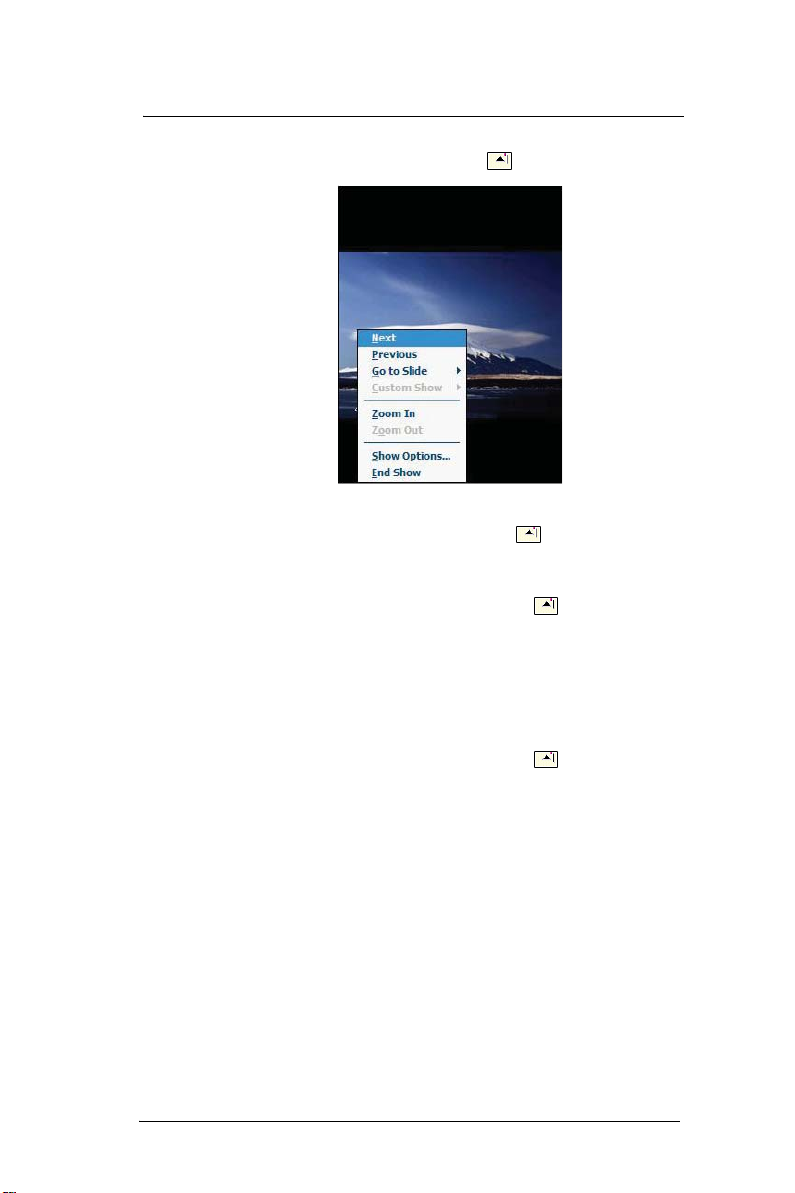
To stop a slide show presentation:
In a PowerPoint Mobile presentation, tap and hold , then tap End Show.
To change the slide show presentation:
1 In a PowerPoint Mobile presentation, tap and hold , then tap Show Options.
2 Tap the Orientation tab, then select the orientation.
To navigate between slides
1 In a PowerPoint Mobile presentation, tap and hold the , then tap
Go to Slide.
2 Tap the slide you want to view.
Setting the slide show playback options
You can change the PowerPoint presentation settings to turn off animation, prevent slide
show transitions from playing, or set time interval between each slide.
To set the slide show playback options:
1 In a PowerPoint Mobile presentation, tap and hold the , then tap
Show Options.
2 Tap the Playback tab, select the Override playback options for all files check box.
3 Do any of the following:
• Select “Show without animation” check box to turn off builds and other
animations.
• Select “Show withour slide transition” check box to prevent slide
transitions from playing.
• Select “Use slide timings, if present” check box to use the timings
recorded with each slide in a presentation.
• Select “Loop continuously” check box to automatically advance to the
first slide after the last slide in a presentation.
4 Tap OK.
134
Page 20

9 Companion Programs
Windows Media Player
Sending a PowerPoint file
You can send a PowerPoint file to another person either by email or by beaming it to that
person’s IR or Bluetooth-enabled device.
NOTE: You must first set up an email account on your device before you can send a note by email.
Go to page 113 for instructions on setting up an email account.
To send a PowerPoint file by beaming:
1 In the PowerPoint document list, tap and hold the document.
2 Tap Beam File on the pop-up menu.
3 Do either one of the following:
• Select a Bluetooth-enabled device, then tap the Tap to send link.
• Align the IR port
device so that they are unobstructed and within close range, then select
the IR-enabled device and tap the Tap to send link.
of your device with that of the other IR-enabled
To send a PowerPoint file by email:
1 In the PowerPoint document list, tap and hold the document.
2 Tap Send via E-mail on the pop-up menu.
A new message window in Inbox displays with the selected note shown as an
attachment (*.pwi).
3 Proceed to completing the email message.
Windows Media Player
Enjoy your favorite music and movies on the road, online or offline, with the new
Windows Media Player 10 Mobile for Pocket PC. The Player provides you with the
highest quality audio and video experience for your mobile entertainment and it works
seamlessly with Windows Media Player 10 on your Windows XP-based computer.
Program enhancements
A lot of new features are added to the new Windows Media Player 10 Mobile for Pocket
PC.
Improved playback support
• Supports Windows Media Audio and Video 9 Series codecs, which gives 20
percent improvements in audio compression and as much as 50 percent for
video compared with previous versions.
• Better MP3 playback support lets your enjoy MP3 music files more.
• Smoother video playback improves playback of broadband content from the
Web as well as local video content that is processor-intensive.
• Multiple bit-rate (MBR) support enhanced your music experience with
automatic sensing and selection of the bit rate that is best suited for your
device and connection.
• Variable Bit Rate (VBR) support lets you play content that has been
optimized for quality to give you optimum playback experience.
Enhanced broadband playback support
• Significant improvements in performance now allows you to play back nearly
any content from the web. Supports up to 300 Kbps content played back
directly from the Web over either a wired or Wi-Fi connection.
• Improved networking support for new IPv6 protocols lets you enjoy easier
Internet connection for enhanced Web streaming, providing you with a
seamless browsing and media playback experience.
135
Page 21

9 Companion Programs
Windows Media Player
Friendlier playback controls
• The button mapping function allows you to assign hardware buttons on your
device to perform standard playback functions such as Play, Pause, Stop or
Fast Forward. You can also assign a button to toggle off the screen to help
minimize power consumption while continuing to listen to music.
• The Player volume control is now separate from the system sounds control
allowing you to adjust the level of your media playback while retaining the
volume level set for system sounds.
Better media management
• Supports auto-discovery of supported media content means that the Player
now automatically scans your device‘s main memory and storage cards for
all supported digital media types including WMA, MP3, WAV, WMV and
ASF.
• Direct support in Windows Media Player 10 on your computer lets you chose
your playlists and easily transfer them to your device.
• Supports recording of your favorite TV shows to your computer. With the
Auto Sync feature in Windows Media Player 10 on your computer, you can
plug your device into your computer, and your favorite TV programs can be
automatically converted and synchronized to your device.
Customized entertainment experience
• Match the Player’s look with your style and mood by downloading a variety of
custom skins ranging from cute rubber duckies to retro Elvis themes.
• Use your favorite WMA music to create and apply your own custom WMA
ring tones.
Copying files to your device
Use the Windows Media Player on your computer to copy your digital media files to your
Pocket PC. Doing this, instead of simply copying files using the Explore button in
ActiveSync, ensures that licences are copied with protected files.
1 In Windows Media Player on your computer, click Copy to CD or Device.
-or-
On the File menu, point to Copy, and then click Copy to Portable Device (you
must first connect your device to your computer).
2 In the Items to Copy pane, in the drop-down list, click the playlist, category, or other
item that you want to copy.
3 Clear the check boxes next to any files you do not want to copy.
4 In the Items on Device pane, in the drop-down list, click the name of your device.
5 Click the Copy button.
The device Player verifies that there is sufficient storage space on your device to
copy the selected files. If there is sufficient space, the files are converted (if
necessary) and copied.
6 Repeat steps 2-5 for any other items that you want to copy to your device.
136
NOTE: To facilitate faster copying of audio files to your device, it is recommended that you configure
Windows Media Player 10 on your computer to automatically determine the quality level settings
applicable to your MC35 EDA.
To open Windows Media Player 10 Mobile for Pocket PC:
• Tap , then Windows Media .
The Player displays the last open window from your previous session.
Page 22
9 Companion Programs
Windows Media Player
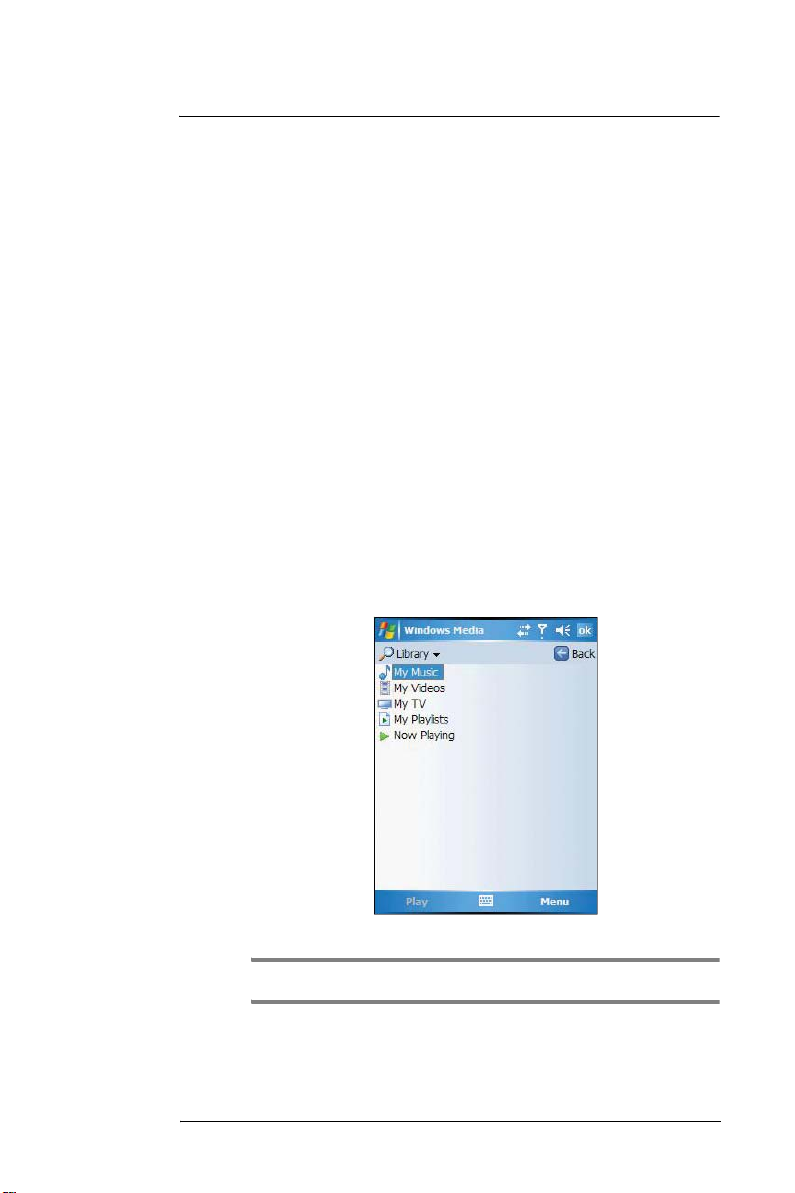
The library
The library contains links to your playlists and audio or video files. You can sort content
by criteria such as artist name, album title or genre. By default, Windows Media Player 10
Mobile automatically searches your device for compatible digital media files and adds
them to the My Device library. Similarly, when you insert a storage card into your device,
Windows Media Player 10 Mobile automatically detects the files and adds them to the
Storage Card library.
If the Player does not detect new files that you copy to your device, you can manually
update the library by tapping Menu, then Update Library.
The playlist
A playlist is a customized list of digital media files that you want to watch or listen to.
Using a playlist lets you group various digital media files together and specify the order
you want the files to play in. You can also use playlists to copy files to your computer.
You can create a playlist based on:
• Source - For example, tracks from various CDs of your favorite artist or
streaming media from an online music site.
• Personal preferences - For example, a playlist of tracks belonging to your
favored music genre or video clips from your funny movie collection.
• Mood or activities - For example, a playlist of tracks you want to listen while
travelling or during your R&R periods.
The Player has two default playlists:
• Local Content - Consists of all compatible audio and video files stored on
your device and/or storage card.
• Web Favorites - Consists of your favorite streaming media files. This playlist
is empty until you add items to it.
Adding items to the Now Playing playlist
1 In the Player window, tap Menu, then Library.
2 Select a library in the Library pick list (for example a storage card).
TIP: If the Player does not detect new files that you copy to your device, you can manually update
the library by tapping Menu, then Update Library. After the files have been added, then tap Done.
3 Select a category, then tap and hold the item that you want to add in the Now
Playing folder.
137
Page 23
9 Companion Programs
Windows Media Player
4 Tap Menu, then Queue Up.
5 Tap Menu, then Now Playing.
6 On the Now Playing window, tap the Add button to switch to the Library window and
find items to add to the Now Playing playlist.
NOTE: To quickly add a group of files to the Now Playing playlist, tap and hold an item in the library
(such as an album name, artist name or genre), then tap Queue Up.
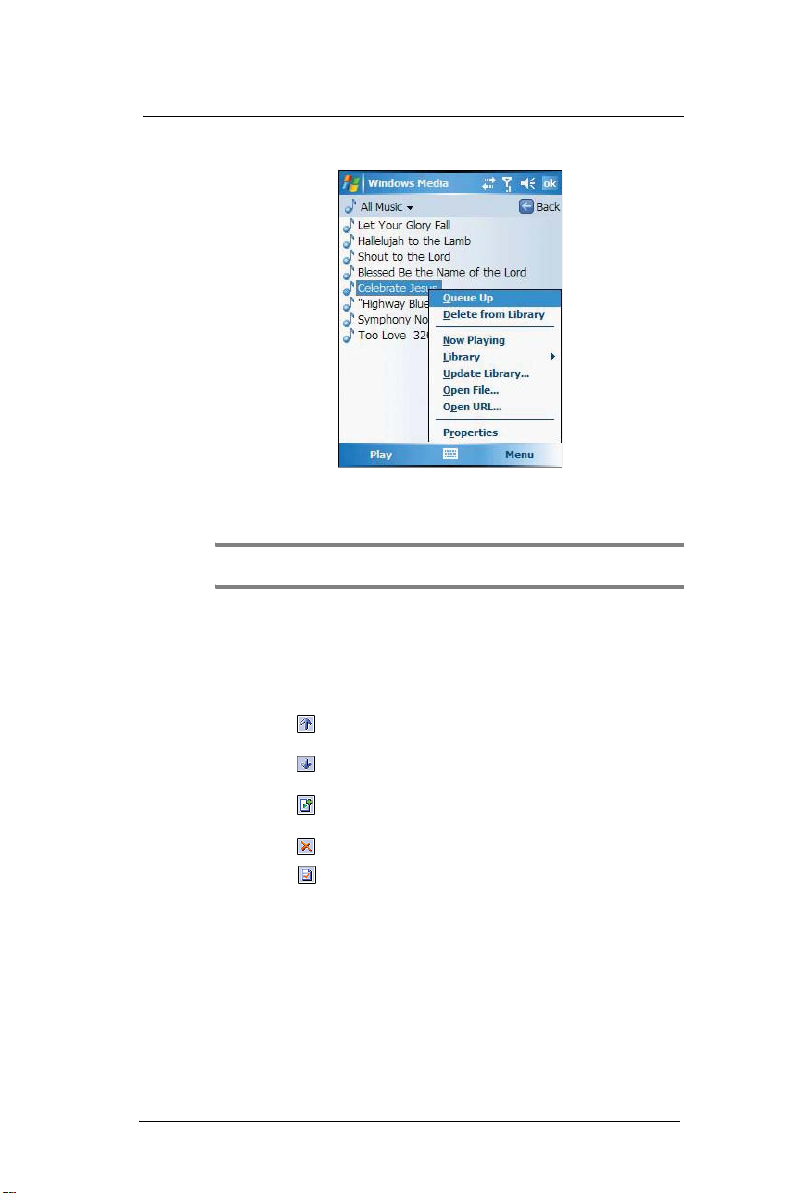
Editing the Now Playing playlist
1 In the Player window, tap Now Playing on the command bar.
- or -
Tap Menu, then Library, then tap Now Playing, then the playlist you want to edit.
2 Do any of the following:
• Tap to move the selected item up in the playlist. You can also tap
and drag an item to move it up in the playlist.
• Tap to move the selected item down in the playlist. You can also
tap and drag an item to move it down in the playlist.
• Tap to display the Library window and add items to the Now
Playing playlist.
• Tap to delete the selected item from the playlist.
• Tap to view track properties of the selected item.
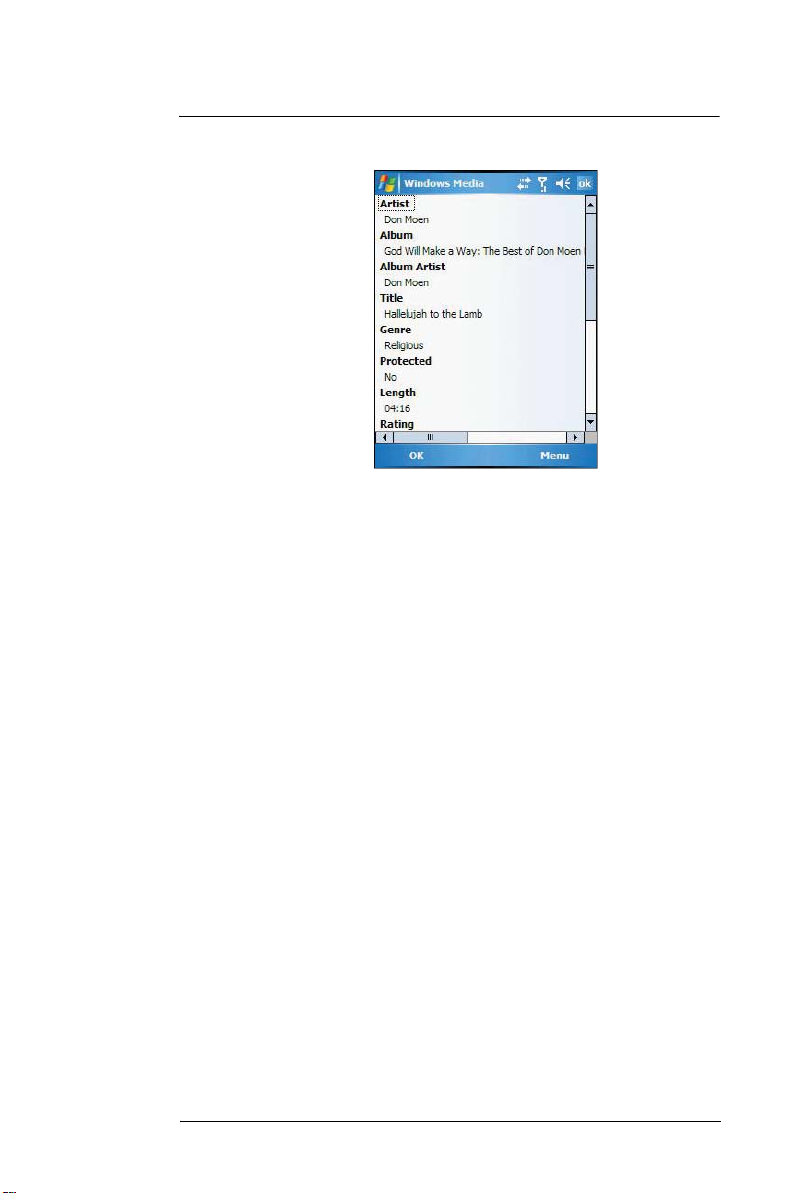
Viewing track properties
You can check the file properties of a track for your reference. You can do this either in a
playlist window or in the Player window.
To view track properties from a playlist window:
1 In the Player window, tap Now Playing.
- or -
Tap Menu, Library, then Now Playing.
138
Page 24
9 Companion Programs
Windows Media Player
2 Tap a file or Play a file, then tap Menu, then Properties.
3 Tap the scroll bar to view more fields.
To view track properties from the Player window:
• Tap Menu, then Properties.
Tap the scroll bar to view more fields.
Deleting an item in the Now Playing playlist
1 In the Player window, tap Now Playing.
2 Tap a library.
3 Tap and hold the playlist name, then tap Remove from Playlist from the pop-up
menu.
- or -
Tap the playlist name, tap Menu, then Remove from Playlist.
File Playback
The Player supports playback of the following file formats:
• Windows Media - Including .asf, .asx, .wax, .wm, .wma, .wmv, .wmx, and
.wvx files.
• MPEG - .mp3 files
You can play files stored in your device, a storage card, or a network.
Playing a file stored in your device or in a storage card
If you want to use files stored in a storage card, install the card to your device. Go to
page 36 for instructions.
1 In the Player window, tap Now Playing.
2 Tap the library, then the playlist/location where the file you want to play is assigned/
located.
3 Tap Play.
Screen shifts to the Player window. Unless you selected the last listed track in a
playlist or location, the rest of the tracks will automatically be played.
Playing a streaming media file
You can play files located on a network. Your device must first be connected to the
network before you can do this.
1 Tap Menu, then Library in the Player window.
139
Page 25
9 Companion Programs
Windows Media Player
2 Tap Menu, then Open URL.
3 Enter a URL.
4 Tap OK.
Screen shifts to the Player window.
Playback controls
The user interface of the Player window lets you easily manage all aspects of the track
playback. The screenshot below shows the functions of the Player control buttons, as
well as all available menus.
140
Displays the track
title, artist name,
and/or genre.
Tap to shift to full
screen mode.
Tap to go to http://
windowsmedia.com.
Tap to display the
Now Playing playlist.
Tap to skip to next track.
Tap to play or pause.
Tap to skip to previous track.
Displays the rating
current file
Adjust the progress
of the current track.
Tap to toggle the
sound on or off.
Tap to adjust
volume.
Tap to select
playback mode and
program settings.
Page 26
9 Companion Programs
Windows Media Player
To play a playlist in random order:
• Tap Menu, then Shuffle.
To repeat playback of a playlist:
• Tap Menu, then Repeat.
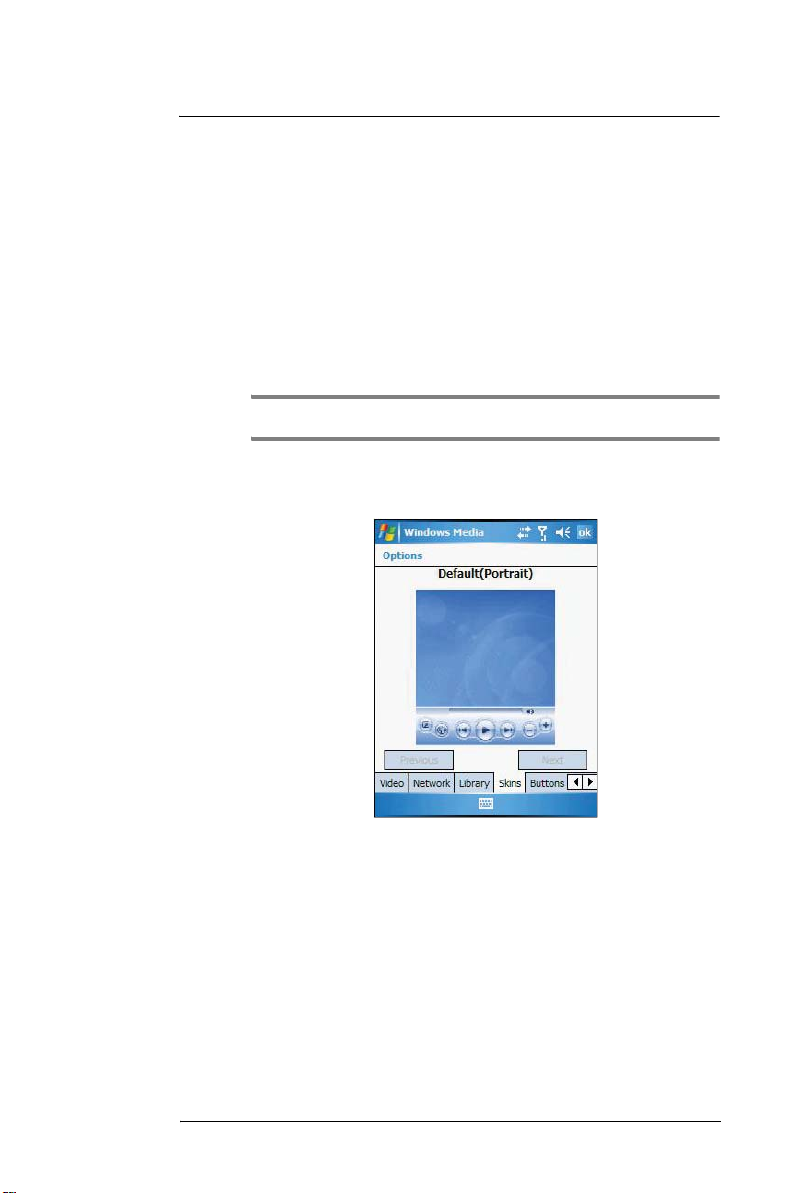
Customizing the Player
You can change the appearance and functionality of the Player to suit your personal style
and preferences.
Using skins to change the Player look
Change the appearance of the Player by using skins. To download skins and learn
related information, go to http://www.microsoft.com/windows/windowsmedia/.
To download skins from your computer to your device, follow the procedures described in
the “Using ActiveSync to exchange files” section on page 36.
NOTE: To make sure that downloaded skins appear in the Skin Chooser panel, do not store the skin
files in the Windows folder of your device.
To apply a skin:
1 In the Player window, tap Menu, then Options.
2 Tap the Skins tab, then tap the Previous or Next button to locate a skin.
3 Tap OK.
The Player switches to skin mode.
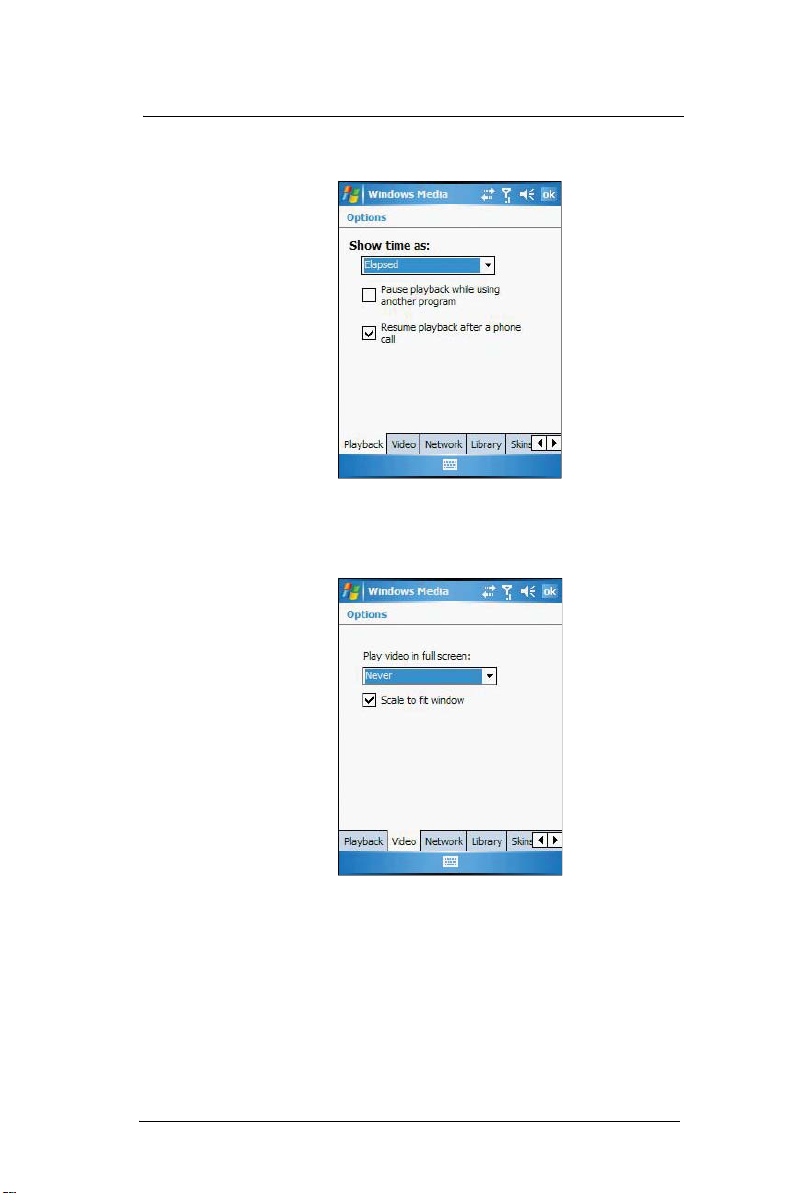
Changing your audio and video settings
You can change the audio and video settings of the Player to suit your listening
preferences.
To set audio and video preferences:
1 In the Player window, tap Menu, then Options.
2 Tap the Playback tab, then do any of the following:
• In the “Show time as” pick list, select whether to show how much time
has elapsed or remaining on the Player window.
• Tap the “Pause playback while using another program” check box, to
pause or continue playback when another program window is
displayed.
141
Page 27
9 Companion Programs
Windows Media Player
• Tap the “Resume playback after a phone call” check box, to continue
playback after a phone call.
3 Tap the Video tab, then do any of the following:
• In the “Play video in full screen” pick list, select a screen size for video
playback.
• Tap the “Scale to fit in window” check box to scale down oversized
video files (typically over 240 x 176 pixels).
142
4 Tap OK.
Page 28

9 Companion Programs
Windows Media Player
Changing your network settings
You can define Player settings for connecting to a network to optimized playback of
streaming media.
To set network settings:
1 Tap Menu, then Options.
2 Tap the Network tab, then select the check box opposite each network protocol you
want to enable.
You must select at least one protocol.
3 Select the speed of your network connection.
4 Tap OK.
NOTE: Some networks use a firewall that prevents users from receiving streams. Contact your
network administrator for more information.
Changing the startup screen
You can define the startup screen when you start the Windows Media Player Mobile.
To change the startup screen:
1 Tap Menu, then Options.
2 Tap the Library tab.
3 Do either one of the following:
• Select the “Start Player on Library screen” check box, to show the
Library window when you start the Windows Media Player Mobile.
143
Page 29

9 Companion Programs
Windows Media Player
• Clear the “Start Player on Library screen” check box, to show the Player
window when you start the Windows Media Player Mobile.
4 Tap OK.
Setting hardware playback controls
The button mapping function allows you to assign hardware buttons on your device to
perform standard playback functions. You can also assign a button to toggle off the
screen to help minimize power consumption while continuing to listen to music.
To map a button:
1 Tap Menu, then Options.
2 Tap the Buttons tab.
144
3 In the list of controls, tap a control name.
4 Tap the Assign button, then press the hardware button on your device.
5 Tap OK.
Page 30

9 Companion Programs
Windows Media Player
Licenses and Protected files
Some digital media content from the Internet, CD tracks, and videos have associated
licenses that protect them from being unlawfully distributed or shared.
Licenses are managed and created using digital rights management (DRM), which is the
technology for securing content and managing the rights for its access.
Some licenses may prevent you from playing files that are copied to your device. Files
that have licenses associated with them are called protected files.
Use the Windows Media Player on your computer to copy your digital media files to your
device. Doing this, button in ActiveSync, ensures that licences are copied with protected
files.
For more information on using Windows Media Player for Pocket PC, tap , then tap
Help .
145
Page 31

9 Companion Programs
Windows Media Player
146
Page 32

10 Wireless Data Programs
Internet Explorer Mobile
10 Wireless Data
Programs
Your MC35 has built-in support for a range of wireless data communication programs:
• Use Internet Explorer Mobile to browse the Web and view WAP-enabled sites.
• Use Messaging to send and receive email/text messages.
• Use MSN Messenger to send and receive instant messages.
• Use MSN Hotmail to send and receive email.
• Use Terminal Services Client to wirelessly log onto a Windows NT server type PC
that is running Terminal Services software
• Use ActiveSync to remotely synchronize with your computer.
This chapter describes how to use Internet Explorer Mobile, Messaging, MSN
Messenger, and Terminal Services Client.
• Internet Explorer
• Messaging
• MSN Messenger
• Terminal Services Client
Internet Explorer Mobile
Use Internet Explorer Mobile to view Internet or Intranet sites from your device. You can
download files and programs when browsing these sites. During synchronization with
your computer, you can choose to download your favorite links and mobile favorites that
are stored in the Mobile Favorites subfolder of Internet Explorer on your computer.
Internet Explorer Mobile includes support for:
• XHTML Basic
• Cascading Style Sheets
• WML 2.0
• JScript 5.5
• IPv6
Enter the web
address you want to
visit.
Go button
Tap to select a previously selected site.
147
Page 33

10 Wireless Data Programs
Internet Explorer Mobile
To open Internet Explorer Mobile:
• Tap , then Internet Explorer.
Browsing the Internet
To connect and start browsing, do either one of the following:
• Tap Menu, Favorites , then tap the favorite you want to view.
• In the address bar that appears at the top of the screen, enter the Web
address you want to visit, then tap .
• Tap the Address Bar pick list to choose from previously entered addresses.
Viewing the History list
• Tap Menu, then History.
To change the number of days of links stored in the History list and clear
the History list:
1 In the Internet Explorer Mobile main window, tap Menu, Tools, then Options.
2 Tap Memory tab.
148
3 Tap the pick list under “Save links to pages visited in the past” to set the number of
days of links.
4 Tap Clear History to delete the stored links.
5 Tap OK.
Page 34

10 Wireless Data Programs
Internet Explorer Mobile
Mobile favorites
1 To display the Mobile Favorites navigation window, tap Menu, then Favorites .
2 Tap the page you want to view.
The page that was downloaded the last time you synchronized with your computer
displays. If the page is not on your device, the favorite is dimmed. Synchronize with
your computer again to download the page to your device, or connect to the Internet
to view the page.
To add a favorite link:
1 While on the page you want to add, tap and hold on the page.
2 Tap Add to Favorites from the pop-up menu.
3 Make the changes you want on the Name and Address fields
4 In the Create in pick list, select the folder where you want the link to be stored.
5 Tap Add, then tap OK.
149
Page 35

10 Wireless Data Programs
Internet Explorer Mobile
Mobile Favorites folder
Only items stored in the Mobile Favorites subfolder of the Favorites folder of Internet
Explorer on your computer are synchronized with your device. This folder was created
when you selected the Favorites information type for ActiveSync synchronization with
your computer.
Favorite Links
During synchronization, the list of favorite links in the Mobile Favorites folder on your
computer is synchronized with Internet Explorer Mobile on your device. Both locations
are updated with changes made to either list each time you synchronize. Unless you
mark the favorite link as a mobile favorite, only the link will be downloaded to your device,
and you will need to connect to your ISP or network to view the content.
Mobile Favorites
If you are using Microsoft Internet Explorer 5.0 or later on your computer, you can
download mobile favorites to your device. Synchronizing mobile favorites downloads
Web content to your device and enables you to view pages while you are disconnected
from your ISP and computer. To quickly create mobile favorites, use the Internet Explorer
plug-in installed with ActiveSync.
To create a mobile favorite:
1 In Internet Explorer on your computer, click Tools, then Create Mobile Favorite.
2 To change the link name, enter a new name in the Name box.
3 Optionally, in Update, select a desired update schedule.
If you did not specify an update schedule, you need to manually download content
to keep the information updated on both your computer and device. Before
synchronizing with your device, in Internet Explorer on your computer, click Tools,
then Synchronize. You will see the last time content was downloaded to the
computer, and you can manually download content if needed.
4Click OK.
Internet Explorer downloads the latest version of the page to your computer.
TIP: You can add a button to the Internet Explorer toolbar for creating mobile favorites. In Internet
Explorer on your computer, click View, Toolbars, then Customize.
150
To download a mobile favorite:
1 Right-click the mobile favorite, then click Properties.
2 In the Download tab, specify the number of links deep you want to download.
To conserve device memory, go only one level deep.
3 Synchronize your device and computer.
Mobile favorites that are stored in the Mobile Favorites folder in Internet Explorer
are downloaded to your device.
To save device memory in downloading mobile favorites:
Mobile favorites take up storage memory on your device. To minimize the amount of
memory used, observe the following:
• In the settings for the Favorites information type in ActiveSync options, turn
off pictures and sounds, or top some mobile favorites from being
downloaded to your device.
• Limit the number of downloaded linked pages. In Internet Explorer on the
computer, right-click the mobile favorite you want to change, then click
Properties. In the Download tab, specify 0 or 1 for the number of linked
pages you want to download.
Page 36

10 Wireless Data Programs
Messaging
Use Messaging to:
• Send and receive email messages by connecting directly to an email server
through an Internet service provider (ISP) or a network.
• Synchronize email messages with Microsoft Exchange or Microsoft Outlook
on your computer.
• Send and receive text messages through your mobile service subscription.
Messaging supports 8 bits data with class 0, 1, 2, 3, as well as USDD
(Unstructured Supplementary Service Data).
To open Messaging:
• Tap , then Messaging .
Messaging
Tap to select which
account and/or folder
to display.
Tap to create a
new email or text
message.
Tap to select a sort
order for the
messages.
Tap Menu, Switch
Accounts to select
which account to
use.
To send and receive email:
• Tap Menu, then Send and Receive.
Synchronizing email messages
Email messages can be synchronized as part of the general synchronization process.
Enable E-mail synchronization in ActiveSync.
To enable E-mail synchronization in ActiveSync:
1 Open ActiveSync on your computer.
2Click Tools, then Options.
3 In the Mobile Device list under the Desktop area, select the check box before
E-mail.
4Click OK.
During synchronization:
• Messages are copied from the Outlook Inbox folder on your computer, or
from a Microsoft Exchange server, to the Inbox folder (under the ActiveSync
account) on your device.
• By default, when synchronizing Inbox information with your computer, you
receive only messages from the last three days and the first 0.5 KB of each
new message. You can also choose to download file attachments.
• The messages on your device and on your computer are linked. When you
delete a message on your device, it is also deleted from your computer the
next time you synchronize, and vice versa.
151
Page 37

10 Wireless Data Programs
Messaging
• Messages in subfolders in other email folders in Outlook are synchronized
only if the folders have been selected for synchronization in Inbox on your
device.
Using the message list
The messages you receive display in the message list. By default, the most recently
received messages display first in the list.
Tap and hold a
message to display
a pop-up menu of
actions.
When you receive a message, tap it to open it. Unread messages display in bold.
Tap to select the sort
order for messages.
152
You can mark the messages that you want to retrieve in full during your next
synchronization or email server connection. Follow the steps below:
1 In the message list, tap and hold the message you want to retrieve.
2 On the pop-up menu, tap Download Message.
The icons in the Inbox message list give you visual indications of message status.
3 Specify your downloading preferences when you set up the service or select your
synchronization options. You can change them at any time:
• Change options for E-mail synchronization using ActiveSync options.
Page 38

10 Wireless Data Programs
Messaging
• To change options for direct email server connections. In the
Messaging window on your device:
(a) Tap Menu, Tools, then tap Options.
(b) On the Accounts tab, tap the service you want to change.
(c) To remove a service, tap and hold the service, then select Delete.
Creating an email/text message
Whether you want to send an email or text message, you do so by changing the Account
option. To do so, tap the double arrows next to the Subject field, then tap the Account
field to choose what service you want.
The procedure on the next page applies to creating an email message. For procedures
on how to create an text message, see page 65.
To create an email message:
1 In the message list, tap New.
2 Enter the email address of your intended recipients in the To field. You can do this
in different ways.
• Manually enter the address using any of the input panel options.
• Type the first few letters of an email address that is stored in Contacts.
The auto-suggest feature suggests email addresses as you type so that
you find them more quickly.
• Tap the To field or Address Book to display the contact list, then tap a
contact from the list.
Tap OK to hide the contact list.
Make sure multiple email address within the same field are separated
with a semicolon.
3 Compose your message.
The Spell Check feature allows you to search your message for common spelling
errors. Tap Menu, then Spell Check.
To enter preset or frequently used messages, tap Menu, My Text, then select a
message.
To attach a voice recording, tap Menu, Insert, Voice Note, then proceed with
creating the recording. See page 45 for detailed instructions.
153
Page 39

10 Wireless Data Programs
Messaging
4 Tap Send when you've finished the message.
If you are working offline, the message is moved to the Outbox folder and sent the
next time you’re online.
Creating a message Signature
You can personalize your email and text messages by appending a signature to it. The
signature support of your device allows you to create different signatures for your email
and SMS account. This feature also eliminates the need to re-type a closing for every
message.
To create a signature:
1 In the message list, tap Menu, Tools, then Options.
2 Tap the Accounts tab, then Signatures.
154
3 Tap the pick list to select which account to create a signature for.
4 Select the “Use signature with this account” check box. The soft keyboard
automatically displays.
5 Enter a signature in the box.
Page 40

10 Wireless Data Programs
Pocket MSN
6 You can use the signature for new messages only, or you can select the “Use
signature when replying and forwarding” check box to append it to all outgoing
messages.
7 Tap OK.
Managing email messages and folders
By default, messages are displayed in one of five folders for each service you have
created—Deleted Items, Drafts, Inbox, Outbox, and Sent Items.
• The behavior of the Deleted and Sent Items folders depends on the options
you have chosen. To set these options, in the message list:
(a) Tap Menu, Tools, then Options.
(b) On the Message tab, select your options.
• If you want to organize messages into additional folders, tap Menu, Tools,
then Manage Folders to create new folders.
• To move a message to another folder, in the message list, tap and hold the
message, then tap Move on the pop-up menu.
Folder behavior with a direct connection to an email server:
The behavior of the folders you create depends on whether you are using ActiveSync,
Text Messages, POP3, or IMAP4 account.
• If you use ActiveSync, email messages in the Inbox folder in Outlook
automatically synchronize with your device. You can select to synchronize
additional folders by designating them for ActiveSync. The folders you create
and the messages you move are then mirrored on the server. For example, if
you move two messages from the Inbox folder to a folder named Family, and
you have designated Family for synchronization, the server creates a copy
of the Family folder and copies the messages into that folder. You can then
read the messages while away from your computer.
• If you use Text Messages, messages are stored in the Text Messages’ Inbox
folder.
• If you use POP3 and you move email messages to a folder you created, the
link is broken between the messages on your device and their copies on the
email server. The next time you connect, the email server sees that the
messages are missing from the device’s Inbox and delete them from the
server. This prevents you from having duplicate copies of a message, but it
also means that you will no longer have access to messages that you move
to folders created from anywhere except your device.
• If you use IMAP4, the folders you create and the email messages you move
are mirrored on the server. Therefore, messages are available to you
anytime you connect to your email server, whether it is from your device or
from your computer. This synchronization of folders occurs whenever you
connect to your mail server, create new folders or rename/delete folders
when connected.
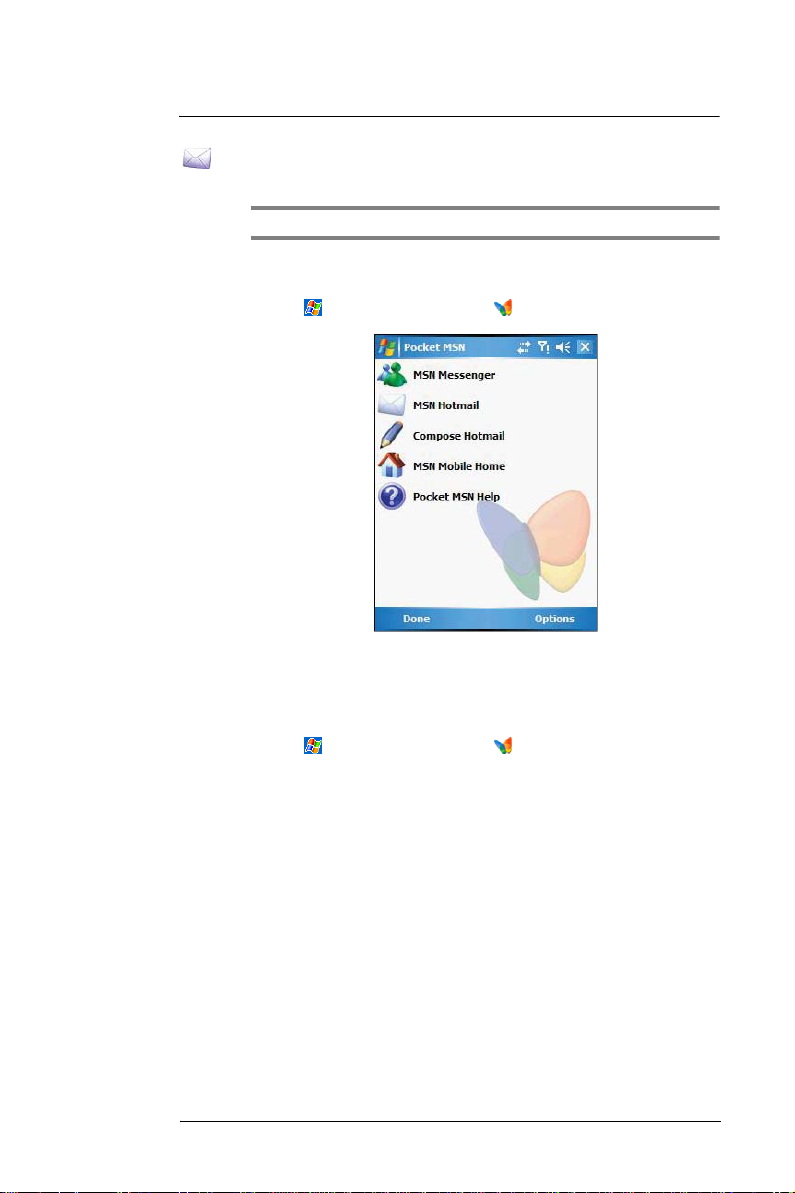
Pocket MSN
Pocket MSN includes support for the following:
• MSN Hotmail
You can read, write and send email, delete email and manage your Hotmail
folder.
• MSN Messenger
See who’s online. Send and receive instant messages. Subscribe to status
update for selected contacts so you are notified when they are online.
• MSN Mobile Home
Launch a personalized browser that offers email access and a portal that
allows access to customized stock lists, weather, sports, entertainment and
news headlines.
• Options and settings
Configure the Pocket MSN settings to create a custom Pocket MSN
experience.
155
Page 41

10 Wireless Data Programs
Pocket MSN
• Pocket MSN Help
Get detailed information on how to use pocket MSN.
To open Pocket MSN:
1 Tap , Programs, then Pocket MSN .
Signing in to Pocket MSN
Signing in to Pocket MSN helps to maintain a secure access to your MSN Hotmail and
MSN Messenger accounts.
1 Tap , then Today .
2 Tap the Tap here to sign in to Pocket MSN.
156
3 Enter your sign-in name and password.
Select the “Save password” check box so you need not enter these information
again the next time you sign in.
4 Tap Sign In.
Page 42
10 Wireless Data Programs
MSN Hotmail
MSN Hotmail on your device lets you access your Hotmail Inbox.
NOTE: Make sure you create a connection to the internet before using MSN Hotmail.
Viewing Hotmail Inbox
1 Tap , Programs, then Pocket MSN .
2 Tap MSN Hotmail.
To synchronize your Hotmail Inbox so you see your latest email messages, tap the
Send/Receive Mail.
Keeping your Hotmail Inbox up-to-date
1 Tap , Programs, then Pocket MSN .
2 Tap Options, then tap Hotmail.
3 Tap the “Downloadnew e-mail automatically” check box.
4 Tap OK.
Creating an email message
1 On the Hotmail Inbox window, tap New.
2 Enter the email add of your intended recipients in the To field.
3 Enter the subject in the Subject line.
4 Compose your message.
5 Tap Send when you have finished the message.
MSN Hotmail
157
Page 43

10 Wireless Data Programs
MSN Messenger
MSN Messenger
MSN Messenger on your device is an instant messaging program that lets you:
• See who is online
• Send and receive instant messages
• Conduct instant message conversations with groups of contacts
Requirements to use MSN Messenger
• For MSN Messenger Service, a Passport. If you have a Hotmail® or MSN
account, you already have a Passport.
• Sign up for a Microsoft Passport account at http://www.passport.com. Get a
free Microsoft Hotmail email address at http://www.hotmail.com.
• For Exchange Instant Messaging Service, an Exchange account.
• To set up an Exchange account, see your network administrator.
To open MSN Messenger:
1 Tap , Programs, then Pocket MSN.
2 Tap MSN Messenger.
Tap anywhere on the
screen to sign in.
158
Tap to access
program options.
Setting up an account
Before you can connect, you must enter Passport or Exchange account information.
NOTE: Make sure you create a connection to the internet before using MSN Messenger.
To set up an account and sign in:
1 In the MSN Messenger main window, tap Menu, then Options.
2 Tap the Messenger tab.
3 Select “Enable MSN Messenger Service” check box.
4 Your sign-in name and password are established the first time you sign into Pocket
MSN.
5 Tap OK.
Page 44

10 Wireless Data Programs
Terminal Services Client
Signing in to your account
1 Tap anywhere on the MSN Messenger main window
2 Enter your sign-in name and password.
Select the Save password check box so you need not enter these information again
the next time you sign in.
3 Tap Sign In.
If you already use MSN Messenger on your computer, your contacts will show up on
your device without being added again.
NOTE: To sign in after connecting to a wireless network, tap Menu, Options, Messenger, then
follow the direction on the screen.
Working with contacts
The MSN Messenger window shows all of your messenger contacts at a glance, divided
into Online and Not Online categories. From this view, while connected, you can chat,
send an email, block the contact from chatting with you, or delete contacts from your list
using the pop-up menu.
• To see others online without being seen, tap Menu, My Status, then select
Appear Offline.
• If you block a contact, you appear offline but remain on the blocked contact
list.
• To unblock a contact, tap and hold the contact, then tap Unblock on the
pop-up menu.
Chatting with contacts
1 To open a chat window, tap a contact name.
2 Enter your message in the text entry area at the bottom of the screen, or tap My
Text to enter a preset message.
3 Tap Send.
Tips when chatting with contacts
• To invite another contact to a multi-user chat, tap Menu, Chat, then tap the
contact you want to invite.
• To return back to your chat window, tap Menu, Chat, then select the person
with whom you were chatting.
• To see if the contact you are chatting with is responding, look for the
message under the text entry area.
Signing out of your account
• Tap Menu, then Sign Out.
Terminal Services Client
You can use Terminal Services Client to log onto a Windows NT server type PC that is
running Terminal Services software and use all of the programs that are available on that
PC from your device. For example, instead of running Microsoft
run the PC version of Microsoft
device.
NOTE: You cannot use Transcriber when entering information in Terminal Services. You must use
Keyboard, Block Recognizer, or Letter Recognizer.
Word and access all of the .doc files on that PC from your
Pocket Word, you can
159
Page 45

10 Wireless Data Programs
Terminal Services Client
Connecting to a terminal server
1 Start a remote connection to the server via your wireless modem connection.
2 Tap , Programs, then Terminal Services Client .
The Terminal Services Client main window appears.
3 To connect to a server you have previously connected to, in Recent Servers, tap a
server.
To connect to a new server, enter the server’s name in the Server box.
Select the limit size of desktop to fit on the screen check box only when using
applications that have been specifically sized for use with Pocket PC.
160
NOTE: If the network administrator has configured Terminal Services Client to reconnect to
disconnected sessions, and you previously disconnected from a Terminal Server without ending the
session, the Terminal Services Client reconnects to that session.
4 Tap Connect.
To disconnect without ending a session:
The following commands must be accessed from the Start menu in the Terminal
Services window used to access the PC’s commands. Do not use the Start menu on your
mobile device.
1 In the Terminal Services Client window, tap , then Shutdown.
2 Tap Disconnect.
NOTE: If the network administrator has configured Terminal Services Client to reconnect to
disconnected sessions, you will be reconnected to this session the next time you connect to this server.
To disconnect and end a session:
1 In the Terminal Services Client window, tap , then Shutdown.
2Tap Log Off.
Page 46

10 Wireless Data Programs
Terminal Services Client
Navigating inside Terminal Services Client
Once connected to the server, the PC’s screen may more than fill your device’s screen.
• If scroll bars are displayed on the server’s screen, you will see more than one set of
scroll bars on your device—one to scroll information on the PC, and the other one
to scroll the PC display through the Terminal Services window in Terminal Services
Client.
• To ensure you are scrolling the PC display through Terminal Services Client, use
the four directional buttons at the bottom of the Terminal Services Client screen.
• To better-fit information on your mobile device’s screen, select Limit size of server
desktop to fit on this screen. For best effect, programs on the PC should be
maximized.
Tips when using Terminal Services Client
To improve display performance:
Display performance is improved by decreasing the time it takes for the screen to be
refreshed on the PC.
1 On your PC, select , Settings, then Control Panel.
2Click Display.
3 Deselect the “Clear the Transition effects for menus and tool tips” check box.
To improve browser performance:
The level of Internet Explorer’s performance on your PC is improved by decreasing the
time it takes for Web pages to be refreshed.
1 In Internet Explorer on your PC, select Tools, Internet Options, then Advanced.
2 Deselect the Use smooth scrolling check box.
161
Page 47

10 Wireless Data Programs
Terminal Services Client
162
Page 48

11 Acessory Programs
11 Acessory Programs
Your Pocket PC has bundled several accessory programs that both extend and
complement your device’s computing and phone functions.
• Use SIM Manager to manage contacts stored in your SIM card
• Use Pictures & Videos to manage, view, and edit image files, as well as
record and play video clips.
• Use Camera to capture audio and video files.
SIM Manager
SIM Manager enables you to manage all contacts stored on your SIM card. This program
complements your device’s phone function by enabling not just the addition of new phone
numbers on your SIM card, but more importantly, exporting such contact information to
Microsoft Contacts. This eliminates the need to manually enter these new contact
information in your device.
To open SIM Manager:
• Tap , Programs, then SIM Manager .
Wait for SIM card contets to load. This may take a few seconds.
SIM Manager
Procedures on how to perform the various SIM Manager operations is
integrated in "5 Using The Phone Function" on page 47.
163
Page 49

11 Acessory Programs
Pictures & Videos
Pictures & Videos
Pictures & Videos extends your device’s function to the visual scene with its image
management, viewer and editing functions. It supports BMP, GIF and JPEG image
format, as well as record and launch video clips stored on your device or on a storage
card. Now you can keep those images of your favorite moments as mobile as you are.
To open Pictures & Videos:
• Tap , Programs, then Pictures & Videos .
Pictures & Videos opens to a thumbnail view of all image files stored on the
My Pictures folder on your device and/or on a storage card attached to your
device.
You can use Pictures & Videos to do any of the following:
• View images in thumbnail, full screen or slide show mode
• Edit BMP, GIF and JPEG images
• Set a BMP, GIF and JEG image as the background of the Today screen,
similar to using a wallpaper on your computer’s desktop screen.
• Send an image file or video clip via infrared or using Inbox
• Record a video clip
• Launch video clips stored on your device.
Copying image files or video clips to your device
To view your image files and video clips in Pictures & Videos, copy the files to the My
Pictures folder of your device or on a storage card folder.
To copy image files or video clips from your computer to your device:
1 Connect your device to your computer.
2 In ActiveSync on your computer, click Explore .
Windows Explorer opens the Mobile Device window for your device.
3 Locate then select the file(s) that you want to copy on your device.
4 Right-click the selected file(s), then click Copy.
5 Place the cursor on the My Pictures folder of the Mobile Device window, right-click,
then click Paste.
In Pictures & Videos, tap to view image files stored in the My Pictures folder.
To copy image files from a storage card to your device:
1 Install the storage card to your device’s SD/MMC slot.
2 Perform steps 1-4 of the procedure above.
3 Locate the Built-in Storage folder under the My Windows Mobile-Based Device
directory.
4 Open the folder under the Built-in Storage folder where you want to save your
image file(s).
5 Place the cursor on the selected folder, right-click, then click Paste.
In Pictures & Videos, tap to view image files stored in an attached storage card.
164
Organizing photos and videos
You can use Pictures & Videos to organize and search for images stored on your MC35
or on a SD/MMC card. You can also edit images and send them as an MMS or email
attachment, view a slideshow of your pictures or set a picture as a background on the
Today screen. Pictures & Videos display images in any of the three view modes—
thumbnail (default), full screen, and slide show.
Page 50

11 Acessory Programs
Pictures & Videos
Thumbnail mode
Thumbnail mode is the default view mode every time you open Pictures.
You can perform the following while in thumbnail mode:
• Tap and hold a thumbnail to display a pop-up menu of available actions.
• Place your stylus within the edge at the far left or far right of the screen and
then drag the stylus over the images to perform multiple selection useful in
deleting images by batch rather than by thumbnail.
• Move the joystick up or down to select the previous/next thumbnail.
To perform image management tasks:
It is only in thumbnail mode can you perform most of the image management tasks.
1 Tap and hold a thumbnail to display a pop-up menu of available actions.
2 Do any of the following:
• Tap Cut to move image file to the Storage Card folder.
• Tap Copy to create a duplicate image file. This is useful when you want
to edit an image but still want to retain an original copy of the image.
• Tap Delete to remove the selected thumbnail from its location. You are
prompted to confirm the deletion.
• Tap Send to attach image as an attachment to an email.
165
Page 51

11 Acessory Programs
Pictures & Videos
• Tap Beam to send the thumbnail to another Bluetooth or IR-enabled
device.
• Tap Set as Today Background to set image as background of the
Today screen.
Full screen mode
It is only in full screen mode can you perform any editing action on an image.
To view image in full screen mode:
• Tap a thumbnail or press the joystick while a thumbnail is selected.
In this view, the selected image is maximized so that it fits the entire screen
(with the navigator and command bars still visible) used to display it.
Tap OK or press the joystick to return to thumbnail mode.
To change the image orientation:
You can change the display orientation of an image.
• On the command bar, tap Menu, Edit then Rotate to rotate the image 90°
counter-clockwise.
166
Page 52

11 Acessory Programs
Pictures & Videos
To crop part of an image:
You have the option to specify a portion of an image and then save that portion as a new
JPEG file.
1 Tap Menu, then Edit.
2 Tap Menu, then Crop to enable the Crop tool.
3 Drag your stylus across part of the image you want to crop.
4 Tap inside the selection.
5 Tap Menu, then select Save As.
6 Fill out the fields in the Save As window.
7 Tap the OK button.
To zoom in/zoom out the image:
To view images in a larger or smaller scale use the Zoom tool.
1 Tap the image.
2 Tap Menu, then Zoom.
A zoom selection panel appears on the lower right corner of the screen.
167
Page 53
11 Acessory Programs
Pictures & Videos
3 Tap the Magnify button to enable the zoom selection tools.
The full screen image zooms in and a red selection border automatically appears on
the image inside the zoom selection panel.
4 Do any of the following:
• Tap to magnify the size of the image.
• Tap to reduce the size of the image.
• Tap to return the image to its original view size.
• Drag the red border to pan the image in any direction you want.
5 Tap Menu, then Zoom to hide the zoom selection panel.
To set an image as a Today wallpaper:
To add a custom look to the Today screen of your device, apply a wallpaper of your
choice using any image.
1 Tap and hold a thumbnail, then tap Set as Today Background.
168
2 Tap the up or down arrows to set the transparency level.
Page 54

11 Acessory Programs
Pictures & Videos
3 Tap the OK button.
Slide show mode
You can view images in a slide show much like viewing a PowerPoint presentation in your
computer. Images are adjusted to fit the entire display area and are shown in a five
seconds interval (default).
To view image in slide show mode:
• In thumbnail mode, tap Menu, then Play Slide Show.
During the slide show, you can use hardware buttons to control the image
display. Move the joystick up or down to display the previous image; rotate
down to display the next image.
To view the Slide Show toolbar:
• During the slide show, tap anywhere on the screen or press the joystick.
The icons in the Slide Show toolbar lets you control the pace of the slide
show, as well as change the orientation of the images.
• Tap to rotate the images counterclockwise.
• Tap to continue the slide show after pausing it.
• Tap to pause the slide show.
• Tap to display the previous image.
• Tap to display the next image.
• Tap to stop the slide show. Screen returns to thumbnail mode.
169
Page 55

11 Acessory Programs
Pictures & Videos
Customizing Pictures & Videos
Using the Options command you can set preference settings on how to use Pictures &
Videos.
To customize Pictures & Videos:
1 In either thumbnail or full screen mode, tap Menu, then Options.
2 In the General tab, set the following options:
• Select the size of the pictures you want to send through email. Only
pictures sent through anemail message is resized, the original picture
remains unchanged.
• Resize pictures for faster email transfer
• Rotate pictures towards left or right.
170
3 In the Slide Show tab, set the following options:
• Select the Portrait or landscape radio button to set slide show
orientation.
• Select the “Play a screensaver when connected to my PC and idle for 2
minutes”check box to set the image files in the My Pictures folder as a
screensaver whenever your device is connected to the USB sync cable
and is idle for 2 minutes.
Page 56

11 Acessory Programs
4 In the Camera tab, set the following options:
• Select to save image files to onboard memory or built-in storage.
• Enter the prefix to be used as a default title for the image file.
• Set a compression level when saving the image. The high quality
setting provides the best image quality but more memory is required.
5 In the Video tab, set the following options:
• Select to include audio when recording video files.
• Select the length for video clips recorded with the camera.
Pictures & Videos
6 Tap OK.
171
Page 57

11 Acessory Programs
Camera
Camera
You can take photos and videos and scan bar codes with the device’s built-in camera.
The camera lens is located on the rear of the device. Images can be stored on the
device’s onboard memory or a memory card. Once you take photos or video clips or
scan bar codes, you can associate the image with a name in the phone book, email it to
friends, or send it to other pocket PCs or phones. You can also send images to your
computer via Bluetooth or IR.
NOTE: The image capture application must be installed and enabled in order to operate the
scanner. For more information on the type of image capture application compatible with your device,
refer to the Symbol website.
Capture mode
The MC35 offers two types of capture mode:
• Camera
• Bar code scan
Selecting a capture mode
To select camera mode:
• Slide the mode switch to camera icon .
To select bar code scan mode:
• Slide the mode switch to the bar code icon .
Using the Camera
To take a photo:
172
1 Press the Camera button located on the lower-right side of the phone, to
activate the camera.
2 Check the image in the screen, adjust if necessary.
3 Press the Camera button to take the picture.
Page 58
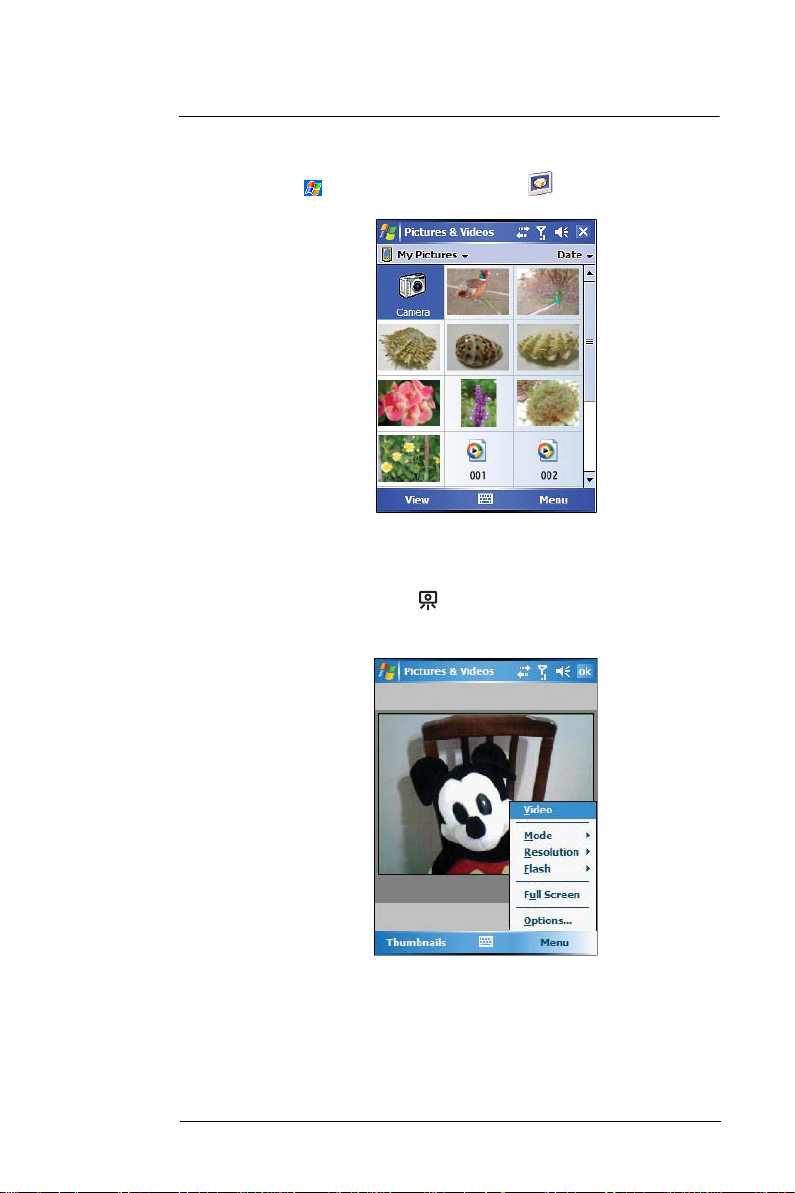
11 Acessory Programs
Camera
To view pictures and video clips:
1 Tap , Programs, then Pictures & Videos .
2 Tap the picture or video clip that you want to see.
To record a video clip:
1 Press the Camera button located on the lower-right side of the phone, to
activate the camera.
2 Tap Menu, then Video to set shooting mode to video.
The available recording time displays.
173
Page 59

11 Acessory Programs
Camera
3 Press the Camera button to begin recording.
The default video clip length is 1 minute and 47 seconds. Recording stops when you
press the camera button again.
To scan bar code labels:
1 Launch the image capture application.
2 Aim the camera lens at the selected bar code and press the Camera button to scan.
The scanned bar code data appears on the screen.
Camera settings
To configure the camera settings of your device:
1 Launch the camera, by doing one of the following:
• Press the Camera button located on the lower-right side of the
phone, to activate the camera.
• Open Pictures & Videos, then tap Camera.
• Open Pictures & Videos, then press the left soft button.
2 Tap Menu, then choose settings for the following parameters:
174
• Video - Tap to switch to video or still mode.
• Mode - Select from the following modes to take your picture:
• Normal - Takes picture using the default settings.
• Burst - Takes picture consecutively in continuous mode.
• Timer - Takes picture five seconds after pressing the Camera button.
• Brightness - Select the brightness setting to obtain optimum image
brightness.
• Resolution - The default resolution setting is 650 x 152 pixels.
• Flash - Turns flash on and off.
• Options - Displays the camera options window.
Page 60

11 Acessory Programs
GPS launcher
GPS launcher
The MC35’s GPS navigation system has its core on the Navigation software application.
Using a Navigation software requires that you load the digital maps. For GPS navigation
solutions recommended by Symbol, visit http://www.symbol.com.
AirBEAM Smart
The AirBEAM Smart product allows specially designed software packages to be
transferred between a host server and Symbol wireless handheld devices. Before
transfer, AirBEAM Smart checks and compares package version, so that only updated
packages are loaded.
AirBEAM Smart resides on radio-equipped client devices and allows them to request,
download and install software, as well as to upload files and status data. Both download
and upload of files can be accomplished in a single communications session. The ability
to transfer software over a radio network can greatly reduce the logistical efforts of client
software management.
In an AirBEAM Smart system, a network-accessible host server acts as the storage point
for the software transfer. The AirBEAM Smart Client uses the industry standard FTP or
TFTP file transfer protocols to check the host system for updates and, if necessary, to
transfer updated software.
NOTE: For more detailed information about AirBEAM, refer efer to the AirBEAM® Smart Windows®
CE Client Product Reference Guide (p/n 72-63060-xx).
AirBEAM Package Builder
In a typical distributed AirBEAM system, software to be transferred is organized into
packages. In general, an AirBEAM package is simply a set of files that are assigned
attributes both as an entire package and as individual component files. The package is
assigned a version number and the transfer occurs when an updated version is available.
An AirBEAM package can optionally contain developer-specified logic to be used to
install the package. Installation logic is typically used to update client device flash images
or radio firmware. Examples of common AirBEAM packages would include packages for
custom client application software, radio firmware and AirBEAM Smart Client software.
Once these packages are built, they are installed on the host server for retrieval by the
handheld device. The AirBEAM Package Builder is a utility used to define, generate and
install AirBEAM packages to a server. The packages are then loaded from the server
onto a client device equipped with an AirBEAM Smart Client executable.
For detailed instructions on how to define, generate and install AirBEAM packages to the
server, refer to the AirBEAM Package Builder Product Reference Guide, p/n 72-55769-
xx.
AirBEAM Smart Client
The AirBEAM Smart Client is installed on the handheld vehicle computer. It is configured
with the server access information, the names of the packages to be downloaded and
other controlling parameters. When the AirBEAM Smart Client is launched, the device
connects to the specified FTP server and checks the packages it is configured to look for.
If the package version was updated, the client requests the transfer.
AirBEAM License
The AirBEAM Smart Client is a licensed software product. The AirBEAM Smart Client's
version synchronization functionality is enabled through a license key file that is stored
on the client device. The license key file can be built into AirBEAM Smart Client's image,
or downloaded in a special AirBEAM package.
The AirBEAM license key file contains a unique key and a customer specific banner that
is displayed when the AirBEAM Smart Client version synchronization logic is invoked.
175
Page 61
11 Acessory Programs
AirBEAM Smart
To open AirBEAM:
• Tap , Programs, then AirBEAM .
Configuring the AirBEAM Smart Client
Using the Configure command you can set preference settings on how to use AirBEAM.
You can perform the following configuration options in AirBEAM:
• Specify the package name of the first four of eight packages that are to be
loaded during the AirBEAM synchronization process. The specified package
name must correspond to a package that is available on the specified
package server.
• Specify the package name of the last four of eight packages that are to be
loaded during the AirBEAM synchronization process. The specified package
name must correspond to a package that is available on the specified
package server.
• Specify the configurations of the server to which the client connects during
the package synchronization process.
• Set various miscellaneous AirBEAM features.
To configure AirBEAM Smart Client:
1 Tap , Programs, then AirBEAM .
176
2 Tap File, then Configure.
The configuration window has seven tabs that you can modify - Packages(1),
Packages(2), Server, Misc(1), Misc(2), Misc (3), and Misc(4).
NOTE: No inadvertent trailing spaces should be entered on the seven tabs. Information entered in
these fields are case and space sensitive.
Page 62
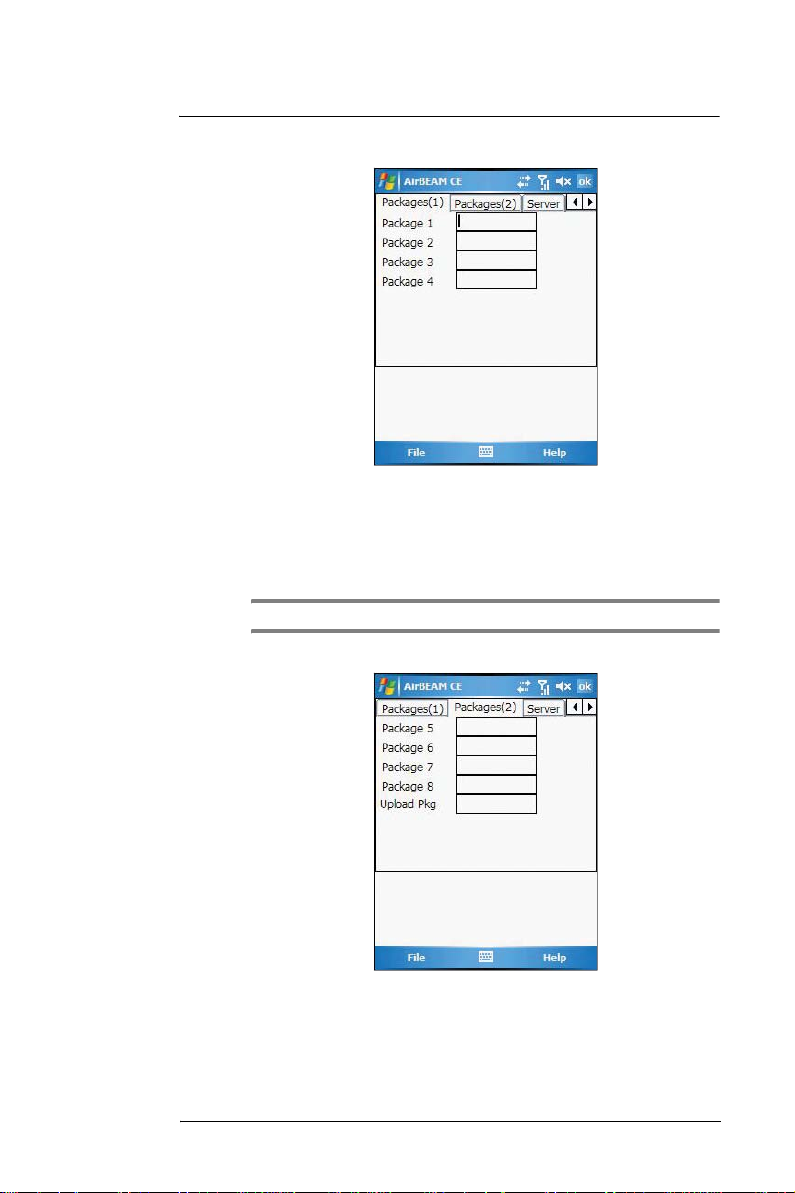
11 Acessory Programs
AirBEAM Smart
3 In the Packages(1) tab, set the following options:
• In the Package 1 field, enter the package name of the first of eight
packages.
• In the Package 2 field, enter the package name of the second of eight
packages.
• In the Package 3 field, enter the package name of the third of eight
packages.
• In the Package 4 field, enter the package name of the fourth of eight
packages.
NOTE: Package 1 to Package 4 fields are optional fields.
4 Tap Packages(2) tab, then set the following options:
• In the Package 5 field, enter the package name of the fifth of eight
packages.
• In the Package 6 field, enter the package name of the sixth of eight
packages.
• In the Package 7 field, enter the package name of the seventh of eight
packages.
177
Page 63
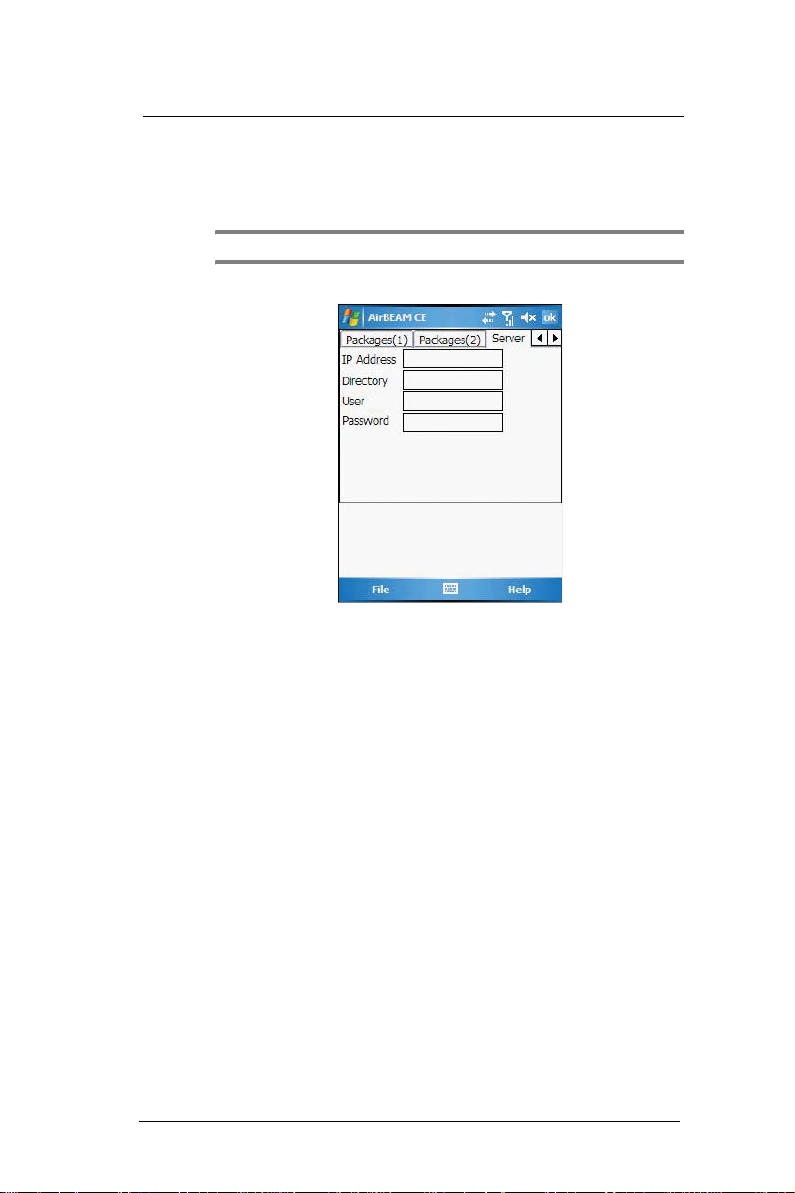
11 Acessory Programs
AirBEAM Smart
• In the Package 8 field, enter the package name of the eighth of eight
packages.
• In the Upload Pkg field, enter the name of a package that is to be
processed
The specified package name must correspond to a package that is
available on the specified package server.
NOTE: Package 5 to Package 8 and Upload Pkg fields are optional fields.
5 Tap Server tab, then set the following options:
• In the IP Address field, enter the IP address of the server. It may be
ahost name or a dot notation format.
• In the Directory field, enter the
AirBEAM package definition files. All AirBEAM package definition files are
retrieved from this directory during the package synchronization process.
• In the User field, enter the FTP user name that is used during the login
phase of the package synchronization process.
• In the Password field, enter the FTP password that corresponds to the
FTP user specified in the User field. The specified password is used
during the login phase of the package synchronization process.
for “upload files” during the AirBEAM synchronization process.
directory on the server that contains the
178
Page 64

11 Acessory Programs
AirBEAM Smart
6 Tap Misc(1) tab, then set the following options:
• In the Auto-load drop-down list, specify how the AirBEAM Smart Client
is to be invoked automatically when the client device is rebooted. The
selections include:
• Disable - The AirBEAM Smart Client is not invoked automatically during
the boot sequence.
• Interactive - The AirBEAM Smart Client is invoked automatically during
the boot sequence. The package synchronization process is started
automatically. The Synchronization Dialog box appears and the user is
required to press the OK button when the process is complete.
• Non-interactive - The AirBEAM Smart Client is invoked automatically
during the boot sequence. The package synchronization process is
started automatically. The Synchronization Dialog box is displayed, but
the user is not required to select OK when the process is complete. The
Synchronization Dialog box terminates automatically.
• Background - The AirBEAM Smart Client is invoked automatically during
the boot sequence. The package synchronization process is started
automatically. Nothing is displayed while the synchronization process is
occurring.
• Tap the RAM Management check box to specify whether the automatic
RAM management is enabled during the package synchronization
process.
If enabled, RAM management logic is invoked when there is not
enough free disk space to download a package. The RAM
management logic attempts to remove any discardable AirBEAM
packages resident on the client.
• Tap the Suppress Separator check box to specify whether the
automatic insertion of a file path separator character should be
suppressed when the client generated server package definition file
names.
When enabled, the parameter also disables the appending of .apd to
the package. This feature is useful for AS/400 systems, in which the file
path separator character is a period. When this feature is enabled, the
server directory (Directory) and package name (Package 1, Package 2,
Package 3 and Package 4) are appended “as is” when building the
name for the server package definition file.
When this feature is disabled, a standard file path separator is used to
separate the server directory (Directory) and package name (Package
1, Package 2, Package 3 and Package 4) when building the name for
the server package definition file. In addition, an .apd extension is
appended automatically.
179
Page 65
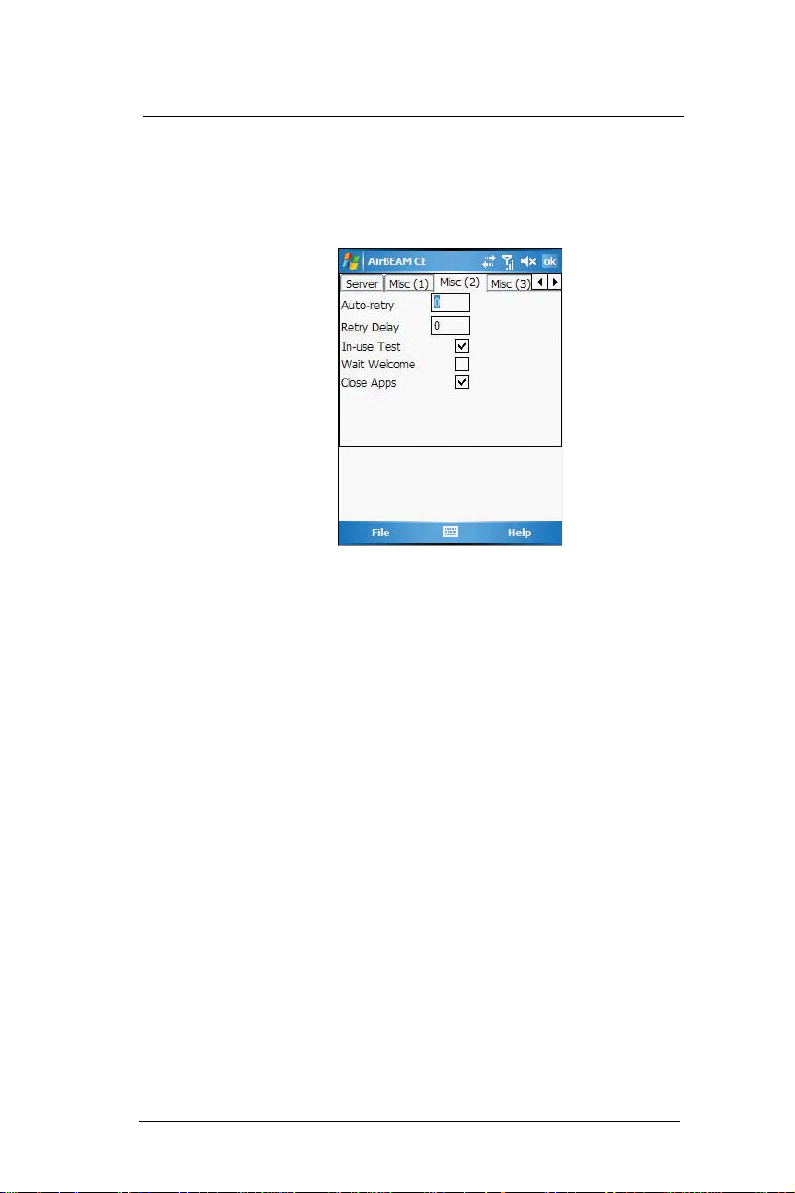
11 Acessory Programs
AirBEAM Smart
• Tap the TFTP check box to specify whether the TFTP protocol is to be
used to download files. By default, the AirBEAM Smart Client uses the
FTP protocol.
• Tap the WNMS check box to specify whether the AirBEAM Smart Client
uploads a WNMS information file at the end of each version
synchronization.
7 Tap Misc(2) tab, then set the following options:
• In the Auto-retry field, specify whether the AirBEAM Smart Client
automatically retries if there is a failure during the synchronization
process.
If this feature is enabled, the AirBEAM Smart Client displays a popup
dialog indicating the attempt of a retry. The popup dialog is displayed
for the number of seconds specified in the Retry Delay field.
The valid values for this field are:
• -1: The AirBEAM Smart Client automatically retries indefinitely.
• 0: The AirBEAM Smart Client does not automatically retry.
• -0: The AirBEAM Smart Client automatically retries up to the number of
times specified.
• In the Retry Delayfield, specify the amount of time, in seconds, that the
AirBEAM Smart Client delays before automatically retrying after a
synchronization failure.
• Tap the In-use Test check box to specify whether the AirBEAM Smart
Client tests to determine if a file is in-use before downloading.
If the In-use Test feature is enabled, the AirBEAM Smart Client
downloads a temporary copy of any files that are in-use. If any
temporary in-use files are downloaded the AirBEAM Smart Client
automatically resets the client to complete the copy of the in-use files. If
the In-use Test feature is disabled, the synchronization process fails
(-813) if any download files are in-use.
• Tap the Wait Welcome check box to specify whether the AirBEAM
Smart Client waits for the WELCOME windows to be completed before
automatically launching the synchronization process after a reset.
• Tap the Close Apps check box to specify whether the AirBEAM Smart
Client automatically attempts to close non-system applications prior to
resetting the mobile unit. If enabled the AirBEAM Smart Client sends a
WM_CLOSE message to all non-system applications before resetting
the mobile unit. This feature offers applications the opportunity to
prepare (i.e. close open files) for the pending reset.
180
Page 66

11 Acessory Programs
AirBEAM Smart
8 Tap Misc(3) tab, then set the following options:
• Tap the Use DHCP server check box to specify whether the AirBEAM
Smart Client uses the DHCP response option 66 to specify the IP
address of the FTP/TFTP server.
If enabled, special RF network registry settings are required to force the
DHCP server to return the “TFTP server name” field (option 66). The
special RF network registry settings are included, but commented out,
in the radio network registry initialization files (essid_xxxx_yy.reg).
• Tap the Use DHCP bootfile check box to specify whether the AirBEAM
Smart Client uses the DHCP response option 67 to specify the Package
and Package 1 parameters.
If enabled, special RF network registry settings are required to force the
DHCP server to return the “Bootfile name” field (option 67). The special
RF network registry settings are included, but commented out, in the
radio network registry initialization files (essid_xxxx_yy.reg).
9 Tap Misc(4) tab, then set the following options:
• In the Sched Mode drop-down list, specify whether (and how) the
scheduled mode is enabled. If enabled, schedule mode causes the
AirBEAM synchronization process to occur periodically. The selections
include:
• Disable - The schedule mode is disabled.
181
Page 67

11 Acessory Programs
AirBEAM Smart
• Fixed time - The schedule mode is enabled. The AirBEAM
synchronization will be launched once per day at the time specified in the
Sched Time setting. The synchronization will be launched every day
Sched Time minutes past midnight.
• Fixed period - The schedule mode is enabled. The AirBEAM
synchronization will be launched at a period by the Sched Time setting.
The synchronization will be launched every Sched Time minutes.
• In the Sched Time field, specify, in minutes, the period for the schedule
mode. The Sched Mode setting specifies how the Sched Time value is
used.
• In the Sched Load drop-down list, specify the load mode to be used for
scheduled synchronization, if enabled. The selections include:
• Default - Specifies that the load mode specified in the Auto-load setting is
to be used for scheduled synchronization sessions.
• Interactive - The Synchronization Dialog displays when a scheduled
synchronization session occurs. The user is required to press the OK
button to dismiss the dialog.
• Non-interactive - The Synchronization Dialog displays when a scheduled
synchronization session occurs. The dialog is automatically dismissed
when the synchronization is complete, unless an error occurs. If an error
occurs the user is required to press the OK button to dismiss the dialog.
• Background - Nothing is displayed when the scheduled synchronization
sessions occur.
• In the Sched Prompt drop-down list, specify whether the AirBEAM client
prompts the user when updates are available in schedule mode. The
settings include:
• Disable - Updated packages are automatically downloaded. The user is
not prompted.
• Alert - Updated packages are not automatically downloaded. The user is
prompted to warm boot the device to initiate the package downloads.
• Launch - Updated packages are not automatically downloaded. The user
is prompted to start the package download. The user can defer the
package download by responding no to the prompt. The MAXNOPRESS
registry setting can be used to limit the number of times the user can
defer the update.
• Confirm - Updated packages are not automatically downloaded. This
value behaves the same as the Launch value, except that the user is
required to confirm an additional prompt before the download starts.
Synchronizing with the Server
When the synchronization process is initiated, the AirBEAM Smart Client attempts to
open an FTP session using the AirBEAM Smart Client configuration. Once connected,
the client processes the specified packages. Packages are loaded only if the server
version of a given package is different from the version loaded on the client. Once the
upload process is complete, the AirBEAM Smart Client closes the FTP session with the
server.
The AirBEAM Smart Client can launch an FTP session with the server either manually,
when initiated by the user, or automatically.
Manual Synchronization
1 Configure the AirBEAM Smart Client. See “Configuring the AirBEAM Smart Client”
on page 176.
182
Page 68

11 Acessory Programs
AirBEAM Smart
2 From the main AirBEAM CE window, tap File, then Synchronize.
Once connected, the AirBEAM Synchronize window appears.
• The Status List displays status messages that indicate the progress of
the synchronization process.
• Press Enter to return to the Main Menu. This button remains inactive
until the synchronization process is complete.
• Select Retry and press ENTER
This button is activated only if there is an error during the
synchronization process.
Automatic Synchronization
The AirBEAM Smart Client can be configured to launch automatically using the Misc(1)
tab (see Misc(1) on page 179). When setting automatic synchronization, use the Autoload drop-down list to specify how the AirBEAM Smart Client should be invoked
automatically when the client device is rebooted. See Misc(1) on page 179 for
instructions on enabling Auto Sync.
to restart the synchronization process.
AirBEAM Staging
The AirBEAM Smart staging support is intended to speed up and simplify the process of
staging custom or updated operating software onto mobile devices directly from
manufacturing. The staging support is part of the AirBEAM Smart CE Client that is
integrated into the vehicle computer.
The AirBEAM Smart support works by defaulting the AirBEAM Client configuration to a
known set of values and launching the AirBEAM Smart package download logic. A
staging environment, including an RF network, FTP server and AirBEAM packages must
be setup. Ideally a staging network and server should be setup to match the default
AirBEAM Staging client configuration.
The AirBEAM Smart staging utility is invoked from the Application directory (tap ,
Programs, File Explorer> My Device icon > Windows).
The AirBEAM Staging support provides several benefits:
• Many devices can be simultaneously loaded over the RF network.
• The AirBEAM staging utility provides a simple single dialog user interface
that is used to quickly start the software installation process.
183
Page 69

11 Acessory Programs
Rapid Deployment Client
Rapid Deployment Client
The Rapid Deployment (RD) Client facilitates software downloads to a wearable terminal
from a Mobility Services Platform (MSP) Console’s FTP server. The MSP Console is a
web-based interface to the wireless infrastructure monitoring and management tools
provided by the MSP Lite or MSP Enterprise server.
When software packages are transferred to the FTP server, the wearable terminal on the
wireless network can download them to the wearable terminal. The location of software
packages are encoded in RD bar codes. When the wearable terminal scans a bar
code(s), the software package(s) is downloaded from the FTP server to the wearable
terminal. A single RD bar code can be scanned by multiple wearable teminals.
NOTE: For detailed information about the MSP Console, MSP Lite/MSP Enterprise servers and
creating RD bar codes, refer to the MSP User Guide.
Rapid Deployment Window
The Rapid Deployment window displays bar code scan status and provides features for
resetting and exiting the application.
To open Rapid Deployment window:
• Tap , Programs, then RDClient .
184
The Rapid Deployment window include the following parameters:
• Please scan all of the bar codes - Displays the status of a scanned bar
code.
• Waiting - indicates the wearable terminal is ready to scan a bar code.
• OK - indicates the wearable terminal successfully scanned a bar code.
(The Indicator LED bar on the wearable terminal turns green and a beep
sounds).
If there are no bar codes left to scan, the Rapid Deployment
Configuring window displays.
• Bar codes left to scan... - Displays a list of any remaining bar codes to
scan (1-D bar codes only). When all required bar codes are scanned
successfully, the Rapid Deployment Configuring window displays.
• About - Displays the Rapid Deployment Client Info window.
• Reset - Removes any previously scanned data.
• Exit - Closes the application. A confirmation window displays. Select
Yes to exit or No to return to the Rapid Deployment window.
Page 70

11 Acessory Programs
Rapid Deployment Client
NOTE: If the application is exited prior to scanning all required bar codes, any scanned data
collected up to that point is lost.
Scanning RD Bar Codes
When the wearable terminal scans and successfully decodes a single or multiple RD bar
codes, the data encoded in the bar code can:
• Reset the wearable terminal’s connection profile. A connection profile is a
set of Wireless Application parameters that the wearable terminal uses to
access the wireless network.
• Initiate downloads of one or more software packages from an FTP server to
the wearable terminal.
NOTE: Currently, RD only recognizes AirBEAM software packages. See “AirBEAM Smart” on page
175 for more information.
To scan an RD bar code:
1 Obtain the appropriate RD bar code(s) from the MSP Administrator.
2 Launch the RD application on the wearable terminal. The Rapid Deployment
window displays.
3 Scan the appropriate bar code(s) to complete the configuration and/or download.
(a) A PDF417 bar code (2-D bar code) can contain all download data in a single
bar code. In this case, only one bar code may be required to scan.
(b) Multi-part linear bar codes (1-D bar codes) can require scanning several bar
codes. Bar codes can be scanned in any order. The text box under Bar
4 After all appropriate bar codes are scanned successfully, the wearable terminal
NOTE: If the wearable terminal cannot connect to the server, it continues to retry until the user
cancels (exits) the application. If failure to connect to the server persists, see the MSP Administrator.
codes left to scan... shows the remaining bar codes to scan.
connects to the server and the Rapid Deployment Configuring window displays
while network settings are configured.
5 When configuration is complete:
(a) The Today screen displays.
(b) A new Wireless profile is created on the wearable terminal from the data
encoded in the bar code(s) scanned.
(c) The designated package(s) are downloaded from the FTP server.
185
Page 71

11 Acessory Programs
Rapid Deployment Client
186
Page 72

12 User Support
This chapter contains contact information for any technical assistance or update inquiry
you may have in using the MC35 EDA, as well as troubleshooting instructions for simple
problem conditions.
Customer support
If you encounter a problem with your MC35, do not call for technical assistance until you
have reviewed the following troubleshooting section. If the problem still persists, contact
your local dealer or distributor.
Troubleshooting
Troubleshooting reminders
When a troubleshooting procedure requires uninstalling the battery pack or resetting the
device, note the following:
• If the procedure requires uninstalling the battery pack, first turn the device
off. Once it is off, wait for five seconds to allow the device to completely enter
sleep mode before removing the battery pack.
Troubleshooting procedures
The following sections describes a list of possible situations that may arise during the
use of your device. Easy answers and solutions are provided for each one.
Battery problem
Memory on your MC35 EDA is shared between storage memory and program memory.
Storage memory is used to store the information you create and programs you install.
Program memory is used to run programs on your device. Your device automatically
manages the allocation between storage and program memory.
To view memory allocation and availability:
1 Tap , Settings, then System tab.
2 Tap Memory.
Battery loses power
When the battery is low, you see a battery icon (refer to page 23) in the navigation bar
and a pop up screen that tells you to recharge the battery as soon as possible.
Your device uses both a detachable and rechargable main battery pack and an
embedded backup battery cell. When the main battery pack is removed or is completely
drained out, your device shuts down. The backup battery cell retains data for 30 minutes
after which you risk losing all data on the internal memory of your device.
Tips on how to make battery charge last longer
To make your battery charge to last as long as possible, observe the guidelines listed
below:
• Use external power whenever possible
Use the AC adapter to plug your device into external power whenever possible,
especially when:
• Establishing a remote connection
• Using the backlight
• Watching/listening to audio or video files
• Connecting to a computer and/or server
12 User Support
Customer support
187
Page 73

12 User Support
Troubleshooting
• Shorten auto suspend time
While on battery power, your device automatically suspends operation if you
haven’t touched the hardware buttons or used the stylus for a specified period of
time. Maximize battery life by shortening this time.
(a) Tap , Settings, then System tab.
(b) Tap Power.
(c) On the Advanced tab, adjust the setting on the “On battery power” pick list.
• Turns off sounds you don’t need.
Your device emits sounds in response to a number of events, such as warnings,
reminders, and screen taps or hardware button actions. Optimize battery life, by
turning off any sounds you don’t need.
(a) Tap , Settings, then Personal tab.
(b) Tap Sounds & Notifications.
(c) Clear the check boxes on both Sound and Notifications tabs.
• Disable the phone function when no SIM card is installed on your device.
Password problem
Forgotten password
If you forget your password, you’ll need to clear your device’s memory by hard resetting
it. For instructions, refer to "To perform a hard reset:" on page 6.
Memory problem
Device memory run out
If you receive a message stating that storage or program memory is unavailable, try the
following solutions.
Finding space in storage memory
• Move data to an SD or MMC storage card.
(a) Insert an storage card to your device’s SD/MMC slot.
(b) Tap , Programs, then File Explorer.
(c) Tap and hold the file you want to move, then tap Cut from the pop-up menu.
(d) Open the My Documents folder, tap Menu, Edit, then Paste.
If the device lapses into sleep mode, allow ample time before turning it back
on to allow for a smoother power mode transition. The device wakes up from
sleep mode when any of the following events occur:
• The Power button or the volume key is pressed.
• The Send or End buttons are pressed.
• The device is connected to the USB sync cable.
• A storage card is inserted into the SD/MMC slot.
• A call is received by your device.
• A preset alarm event is activated.
188
NOTE: Files stored in folders other than My Documents or stored in folders within subfolders in My
Documents may not show up in the list view of some programs.
Page 74

12 User Support
Troubleshooting
• Move email attachments.
(a) Insert an storage card to your device’s SD/MMC slot.
(b) In Messaging, tap Menu, then Options.
(c) On the Storage tab, select “Store attachments on storage card” check box.
All attachments are moved to the storage card, and new attachments are
automatically stored on the storage card.
• Set programs such as Notes, Word Mobile, and Excel Mobile to
automatically save new items on the storage card. In the program, tap
Menu, then Options.
• If you are copying files from your computer or another device to your MC35
EDA, try adjusting the slider in the Memory setting.
(a) Tap , Settings, then System tab.
(b) Tap Memory.
(c) On the Main tab, check whether the slider can be adjusted manually before
copying files.
• Delete unnecessary files.
(a) Tap , Programs, then File Explorer.
(b) Locate the file for deletion.
(c) Tap and hold the file, then tap Delete on the pop up menu.
To find space in program memory
• Stop programs you are not currently using.
In most cases, programs automatically stop to free needed memory. However, in
some situations, such as when confirmation dialog boxes are waiting for a user
response, the program may not be able to automatically stop. To check the state of
your active programs:
(a) Tap , Settings, then System tab.
(b) Tap Memory.
(c) On the Running Programs tab, tap the program you want to view, then tap
Activate.
(d) Close any open windows or messages and return the program to list view.
If this doesn’t work, you can stop the program manually.
(a) Close all open confirmation dialog boxes and return the program to list view.
(b) Stop the program by tapping Stop or Stop All on the Running Programs tab.
• Clear storage memory as described in the preceding section.
This frees some storage memory so that it can be allocated to program
memory.
• Soft reset your device, see "To perform a soft reset:" on page 6.
Screen problems
Screen freezes or responds slowly
Perform a soft reset on your device. For instructions, go to page 6.
Screen is blank
Press and hold the Power button for a full second. If that doesn’t work:
• Remove the battery pack and check if the SIM card holder is closed properly.
• If you are using the device on battery power, shift the device to AC power.
• Soft reset the device. For instructions, go to page 6.
Screen is dark
Prolonged exposure to direct sunlight may cause your device screen to temporarily
darken. This is normal for LCD screens and is not permanent.
Screen is hard to read
If you’re having a hard time viewing a document in:
• Notes - try changing the size of the view. To do this, tap a zoom percentage
on the Menu.
189
Page 75

12 User Support
Troubleshooting
• Word Mobile and Excel Mobile - try changing the size of the view. Tap View,
Zoom, then select a zoom percentage.
• Internet Explorer - try changing the font size. Tap View, Text Size, then
select a size.
Tapping and writing problems
Inaccurate response to stylus taps
Recalibrate the screen. For instructions, refer to page 4.
Slow or no response
Perform a soft reset on your device. For instructions, go to page 6.
IR connection problem
Failure to beam information
If you’re having difficulty transferring information via IR, try the following:
• Transfer only one file or no more than 25 contact cards at a time.
• Align your device’s IR port
are unobstructed and within a close range.
• Adjust the room lighting. Some types of light interfere with IR connections.
Try moving to a different location or turning off some lights.
Bluetooth connection problem
Failure to beam information
If you’re having difficulty transferring information via Bluetooth, try the following:
• Transfer only one file or no more than 25 contact cards at a time.
• Turn on Bluetooth for MC35 and the receiving device.
• Make sure the devices are within close range.
Phone connection problem
If you have a problem using the phone function, try the following:
• Check if your device’s wireless connection to your mobile service provider is
switched on and the signal unobstructed.
• Contact your mobile phone service provider for assistance.
Internet connection problem
If you’re having difficulty establishing Internet connection, try the following:
• Make sure you have properly set up a connection to your device ISP
(Internet Service Provider).
• Check if your device’s wireless connection to your mobile service provider is
switched on and the signal unobstructed.
with that of the receiving device so that they
190
NOTE: When your device is connected to the USB sync cable while the GPRS function is on, you
will not be able to browse web pages.
• Verify your user name and password with your device ISP.
• Verify with your device’s ISP that the network you are trying to connect is
available, or try to connect to it using another device or from a computer.
Network connection problem
If you’re having network connection problems, try the following:
• Check if your device’s wireless connection to your mobile service provider is
switched on and the signal unobstructed.
• Verify that you have added necessary server information.
Page 76

12 User Support
Troubleshooting
(a) Tap , Settings, then Connections tab.
(b) Tap Connections.
Most networks use DHCP, so you need not change these settings unless
your network administrator instructs you to do so.
• If the option Network Connection is not listed as a connection method in
the ActiveSync dialog box when starting synchronization, wait for a few
minutes and try again. Also, if synchronization does not start right away,
the network is probably busy, and it may take a minute for your device to
connect to the network.
• Verify your user name and password with your network administrator.
• Verify with your network administrator that the network you are trying to
connect is available, or try to connect to it using another device or from a
computer.
• You may need to change your device name if you are trying to connect to
a network and cannot because another Pocket PC Phone with the same
name is already connected. To change your device’s name:
(a) Tap , Settings, then System tab.
(b) Tap About.
(c) On the Device ID tab, enter a new name on the Device name field.
(d) Tap OK.
Additional troubleshooting information is available in Connections Help of
your device and on the ActiveSync Help on your computer.
Cable problem
The following solutions may help if you encounter problems when connecting to your
computer.
• Make sure that your device is turned on.
• Plug the other end of the cable securely into the universal connector on the
base of your device.
Additional troubleshooting information is available in Connections Help of your device
and on the ActiveSync
Help on your computer.
191
Page 77

12 User Support
Troubleshooting
192
Page 78

13 Safety Information
This chapter contains contact information on safety instructions as well as related safety
notices.
Safety information
• Always contact an authorized service center, if repair or replacement is
required.
• If the plug will not fit into the available outlet, have a proper outlet installed by
a qualified electrician. Improper connection can result in the risk of electric
shock.
• Never allow the AC adapter to come into contact with water or any other
liquid. Water or any other liquid in contact with the AC adapter can create a
risk of fire or electric shock.
• Always use an authorized AC adapter to avoid any risk of fire or damage to
your device or battery.
• Bodily injury or property damage may occur as a result of the use of an
unauthorized and incompatible AC adapter.
• Never use an AC adapter if it has a damaged or worn power cord or plug.
The use of damaged or worn power cords or plugs could result in electric
shock, burns or fire. Contact an authorized service center immediately to
obtain a suitable replacement.
• Never attempt to connect or disconnect the power plug with damp or wet
hands. Connecting or disconnecting the power plug with damp or wet hands
could result in an electric shock.
• Always unplug the AC adapter from the power source before attempting any
cleaning in order to avoid the risk of electric shock. Always use a soft dry
cloth to clean the equipment, after it has been unplugged.
• Never attempt to use an unauthorized AC adapter with your device in order
to avoid any risk of bodily injury or property damage. Since unauthorized
accessories have different specifications, they may be incompatible with
your device.
• Always locate the power supply cable in an area where it will not be stepped
on, tripped over, or otherwise subjected to damage or stress.
• Never place heavy objects on the power supply cable, as this could result in
damage to the cable.
• Never bend or twist a power supply cable, and never pull it in an attempt to
remove the AC adapter or accessory plug from a socket. Always grasp the
AC adapter or the accessory plug directly when unplugging the power supply
cable in order to avoid damaging the cable.
• Always ensure the power plug pins are clean and free of dust or other
foreign material by wiping the pins with a clean dry cloth. Dust or other
foreign material accumulation on the power plug pins could cause fire.
• Be certain to insert the power plug deeply into a socket. Failure to do so
could cause a fire and an electric shock.
• Always disconnect the AC adapter from the power source when it is not in
use.
• Never place an AC adapter on a wooden surface (or any other surface that
could be marred by exposure to heat) while it is in use. Since the surface
temperature of the AC adapter increases during normal use, always rest it
on a suitable heat-insulating material.
• Never cover the AC adapter with any object while it is in use, and never
place it adjacent to a heat source. An excessive temperature increase could
detrimentally affect its performance.
• Never place the power supply cable near a heat source, as damage to the
cord or to its insulation could result.
• Always use a surge protector when utilizing the AC adapter during an
electrical storm. Otherwise, a power surge could result in the loss of stored
data.
• Always use a surge protector when utilizing the AC adapter near an
electrical noise source such as high voltage line or power source. Otherwise,
a power surge could result in loss of stored data.
13 Safety Information
Safety information
193
Page 79

13 Safety Information
Safety information
• In order to avoid any possibility of a fire, always insert the power plug into
household electric outlet supplying 120V AC.
• When traveling abroad, never plug the AC adapter into a power source that
does not correspond to both the voltage and the frequency specified on the
rating plate of the AC adapter, as equipment damage and fire will
result.When you connect to a power supply of more than 125V AC, change
the power supply cable with one that corresponds to the power supply
specification. Failure to do so could cause a fire.
• Never drop the AC adapter or subject it to severe shock. This may cause
ignition or electric shock, as well as damage to the adapter.
194
Page 80

Index
A
activate profile 73
ActiveSync 28
installing 29
synchronizing Calendar 35
synchronizing Contacts 35
synchronizing Inbox 35
synchronizing Tasks 35
synchronizing with PC 31
synchronizing with server 34
add program 97
AirBEAM 175
Client 175
configuration
Misc(1) tab 179
Misc(2) tab 180
Misc(3) tab 181
Misc(4) tab 181
Packages(1) tab 177
Packages(2) tab 177
Server tab 178
configuring 176
package builder 175
rapid deployment 185
staging 183
synchronization with server 182
B
backing up 5
Bluetooth
activate 104
create partnership 106
receive items 108
send items 107
C
Calendar 115
call history 70
call hold 61
call notes 62
call notification 60
caller identification 60
Camera 172
mode
bar code scan 172
camera 172
record video clip 173
settings 174
take photo 172
view pictures 173
view video clip 173
command interface 18
command bar 23
hardware buttons 19
navigation bar 23
notifications 24
pop-up menus 23
Today screen 22
command bar 23
navigation bar 23
Start menu 22
conference call 61
connections settings 94
connectivity features 101
Contacts 118
contacts integration 68
copyright ii
customer support 187
customize features
customizing your MC35 83
D
data capture
device 6
device features 11
device settings 83
dialer screen 50
drawing on the screen 44
E
email 151
email service 113
enter data 37
status icons 23
Beam 94
Bluetooth 95
Connections 95
Network Cards 95
Quick GPS Connection 96
USB to PC 96
Wireless Control 96
Wireless Manager 97
Bluetooth 104
connect to email server 112
connect to internet 112
connect to network 112
email service 113
infrared 101
WiFi 109
beaming 121
calling 120
creating 118
finding 119
sending a message 121
summary screen 119
viewing 118
device settings 83
install/remove program
add 97
using ActiveSync 97
via Internet 98
remove 99
scanning 185
activate from sleep mode 188
guides 1
locking 8
resetting 6
audio 11
battery pack 12
connectivity 12
display 11
ergonomics 12
GPS technology 12
performance 11
phone function 11
buttons 50
synchronize 151
195
Page 81

using block recognizer 39
using input panel 37
using letter recognizer 40
using QWERTY keypad 37
using soft keyboard 39
using star key 41
using transcriber 40
entering PIN 49
Excel Mobile 130
creating 130
file list 131
G
GPS launcher 175
H
hardware interface 18
SD/MMC slot 18
stylus 18
touch screen backlight button 18
I
Inbox 151
synchronize emails 151
Index 195
infrared
activate 101
receive items 103
send items 102
input panel 37
installing
requirements 29
Internet 112
Internet Explorer Mobile
Mobile favorites 149
using 147
K
keypad
lock 7
unlock 7
M
manage applications 25
finding information 27
opening 25
organising information 28
switching 25
Microsoft Pocket Outlook 115
Calendar 115
open 115
schedule appointment 116
Contacts 118
Inbox 151
synchronize email 151
Notes 124
create note 125
open 124
Tasks 122
Mobility Services Platform Console 184
MSP 184
My Text 46
N
Notes 124
P
package contents 1
personal settings 83
Buttons 84
Input 84
Lock 84
Menus 85
MSN Options 85
Owner Information 86
Phone 86
Sounds & Notification 86
Today 87
phone 47
adjusting volume 54
answering a call 53
ending a call 53
erasing number input 53
muting a call 54
rejecting a call 53
setup 47
speakerphone 54
status icons 51
turn off 53
turn on 52
phone calls 55
International call 59
using Call History 57
using dialer 55
using Microsoft Contacts 56
using SIM Manager 58
using Speed Dial 56
phone features 60
phone function 47
phone preferences 75
network 82
phone tab 76
services 77
call barring 77
call forwarding 79
call waiting 79
caller ID 78
fixed dialing 81
voice mail and text
Pictures & Videos 164
customizing 170
full screen mode 166
slide show mode 169
thumbnail mode 165
Pocket MSN 155
Help 156
MSN Hotmail 155
viewing Hotmail Inbox 157
MSN Messenger 155
set up 158
signing in 159
MSN Mobile Home 155
Options and settings 155
Signing in 156
PowerPoint Mobile 132
opening slideshows 132
slide show playback options 134
R
Rapid Deployment Client 184
rapid deployment client 184
RD 184
recording message 45
messages 8
0
196
Page 82

remove program 99
S
safety information 193
scanning
RD bar codes 185
screen 4
calibrating 4
lock 7
unlock 7
setup 3
charging 3
setup procedures 1
sharing contacts 68
SIM card
SIM Manager 163
speakerphone 54
storage card
synchronizing with PC
system settings 88
LED status 3
charging your device 3
install battery pack 2
turn on 4
uninstall battery pack 2
call history 69
Microsoft Contacts 68
SIM Contacts 69
installing 47
load 163
inserting 18
remove 19
using Bluetooth 33
using Infrared 32
using USB 31
using WiFi 34
About 88
Certificates 89
Clock & Alarms 89
Error reporting 89
GPS 90
Memory 90
Phone Profiles 90
Power 91
Regional Settings 91
Remove Programs 92
Screen 92
SIM Manager 92
System Information 93
system tour 13
front view 13
left view 17
rear view 16
right view 17
T
Tasks 122
beaming 123
creating 123
summary screen 124
Terminal Services Client 159
connecting 160
text messaging 63
troubleshooting 187
battery loses power 187
battery problem 187
cable problem 191
connection problem
Bluetooth 190
Internet 190
IR 190
network 190
phone connection 190
memory problem 188
password problem 188
reminders 187
screen problems 189
writing problems 190
V
voice mail 67
W
Windows Media Player 135
customizing 141
file playback 139
library 137
playback controls 140
playlist 137
Word Mobile 127
creating 127
entering information 128
file list 127
recording mode 129
typing mode 128
writing on the screen 42
197
Page 83

198
Page 84

Page 85

FCC IMPOTANT SAR INFORMATION
Your wireless phone is a radio transmitter and receiver. It is designed and
manufactured not to exceed the emission limits for exposure to radiofrequency
(RF) energy set by the FCC of USA. These limits are part of comprehensive
guidelines and establish permitted levels of RF energy for the general population.
The guidelines are based on standards that were developed by independent
scientific organizations through periodic and thorough evaluation of scientific
studies. The standards include a substantial safety margin designed to assure the
safety of all persons, regardless of age and health. The exposure standard for
wireless mobile phones employs a unit of measurement known as the Specific
Absorption Rate, or SAR. The SAR limit set by the FCC is 1.6 W/kg. *
Tests for SAR are conducted with the phone transmitting at its highest certified
power level in all tested frequency bands. Although the SAR is determined at the
highest certified power level, the actual SAR level of the phone while operating can
be well below the maximum value. This is because the phone is designed to
operate at multiple power levels so as to use only the power required to reach the
network. In general, the closer you are to a wireless base station antenna, the
lower the power output.
Before a phone model is available for sale to the public, it must be tested and
certified to the FCC that it does not exceed the limit established by the government
adopted requirement for safe exposure. The tests are performed in positions and
locations (e.g., at the ear and worn on the body) as required by the FCC for each
model. The highest SAR value for this model phone when tested for use at the ear
is 0.527 W/Kg and when worn on the body, as described in this user guide, is
0.810 W/Kg. (Body-worn measurements differ among phone models, depending
upon available accessories and FCC requirements). While there may be
differences between the SAR levels of various phones and at various positions,
they all meet the government requirement for safe exposure.
* In the United States and Canada, the SAR limit for mobile phones used by the
public is 1.6 watts/kg (W/kg) averaged over one gram of tissue. The standard
incorporates a substantial margin of safety to give additional protection for the
public and to account for any variations in measurements.
Use only the supplied or an approved antenna. Unauthorized antennas,
modifications, or attachments could impair call quality, damage the phone, or
result in violation of FCC regulations. Do not use the phone with a damaged
antenna. If a damaged antenna comes into contact with the skin, a minor burn may
result. Please contact your local dealer for replacement antenna.
This transmitter can only be co-located or operating in conjunction with Symbol
approved devices.
This device complies with part 15 of the FCC Rules. Operation is subject to the
following two conditions: (1) This device may not cause harmful interference, and
(2) this device must accept any interference received, including interference that
may cause undesired operation.
Warning:
This device has been tested and found to comply with the limits for a Class B
digital device pursuant to Part 15 of the Federal Communications Commissions
Rules and Regulations. These limits are designed to provide reasonable
protection against harmful interference when the equipment is operated in a
commercial environment. This equipment generates, uses, and can radiate radio
frequency energy and, if not installed and used in accordance with the instruction
manual, may cause harmful interference to radio communications. However, there
is no guarantee that interference will not occur in a particular installation.
Page 86

If this equipment does cause harmful interference to radio or television reception,
which can be determined by turning the equipment off and on, the user is
encouraged to try and correct the interference by one or more of the following
measures:
. Relocate this device
. Increase the separation between the device and the receiver
. Connect the device into an outlet on a circuit different from that of other
electronics. Consult the dealer or an experienced radio technician for help.
FCC Radiation Exposure Statement
Important Note: To comply with FCC RF exposure compliance
requirement, the antenna used for this transmitter can only be co-located
with Symbol approved devices.
Caution:
Any changes or modifications not expressly approved by the party
responsible for compliance could void the user's authority to operate this
equipment.
Page 87

IC SAR INFORMATION
Your wireless phone is a radio transmitter and receiver. It is designed and
manufactured not to exceed the emission limits for exposure to radiofrequency
(RF) energy set by the RSS 102 of the Industry Canada. These limits are part of
comprehensive guidelines and establish permitted levels of RF energy for the
general population. The guidelines are based on standards that were developed
by independent scientific organizations through periodic and thorough evaluation
of scientific studies. The standards include a substantial safety margin designed to
assure the safety of all persons, regardless of age and health. The exposure
standard for wireless mobile phones employs a unit of measurement known as the
Specific Absorption Rate, or SAR. The SAR limit set by the RSS 102 is 1.6 W/kg. *
Tests for SAR are conducted with the phone transmitting at its highest certified
power level in all tested frequency bands. Although the SAR is determined at the
highest certified power level, the actual SAR level of the phone while operating can
be well below the maximum value. This is because the phone is designed to
operate at multiple power levels so as to use only the power required to reach the
network. In general, the closer you are to a wireless base station antenna, the
lower the power output.
Before a phone model is available for sale to the public, it must be tested and
certified to the RSS 102 of Industry Canada that it does not exceed the limit
established by the government adopted requirement for safe exposure. The tests
are performed in positions and locations (e.g., at the ear and worn on the body) as
required by the Industry Canada for each model. The highest SAR value for this
model phone when tested for use at the ear is 0.527 W/Kg and when worn on the
body, as described in this user guide, is 0.
differ among phone models, depending upon available accessories). While there
may be differences between the SAR levels of various phones and at various
positions, they all meet the government requirement for safe exposure.
* In the United States and Canada, the SAR limit for mobile phones used by the
public is 1.6 watts/kg (W/kg) averaged over one gram of tissue. The standard
incorporates a substantial margin of safety to give additional protection for the
public and to account for any variations in measurements.
810 W/Kg. (Body-worn measurements
Use only the supplied or an approved antenna. Unauthorized antennas,
modifications, or attachments could impair call quality, damage the phone,
or result in violation of regulations. Do not use the phone with a damaged
antenna. If a damaged antenna comes into contact with the skin, a minor
burn may result. Please contact your local dealer for replacement antenna.
IC Statement
"Operation is subject to the following two conditions: (1) this device may not
cause interference, and (2) this device must accept any interference,
including interference that may cause undesired operation of the device."
Page 88

Symbol Technologies, Inc.
One Symbol Plaza
Holtsville, New York 11742-1300
http://www.symbol.com
Part Number Go Here
Revision A - November 2006
Part Number Bar Code
Goes Here
 Loading...