

Page 1
English
Advanced-Series
ADS-120
M120CAM041012E
1
Page 2
About the Camera
Congratulations on your purchase of this ADS-120 from Swann! You’ve chosen a
great little self contained, easy to install entry-level CCTV camera. This manual will
walk you through positioning, installing, connecting and using your camera, and
offer some tips to help you get the most out of your security monitoring system.
What will it see?
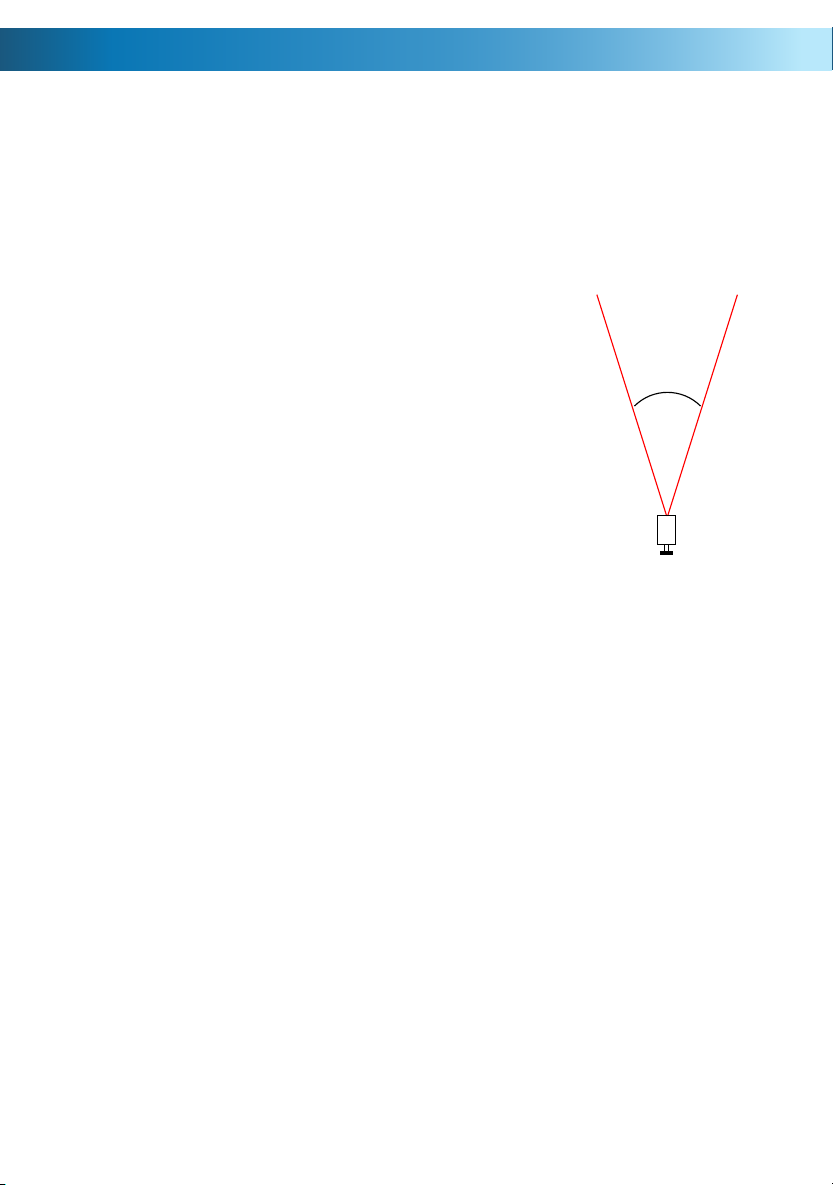
The ADS-120 has a 3.6mm, 53° lens built-in which allows it to focus its attention
onto one specific area. What does this mean for you when placing it?
• The camera will focus on the one particular area in
front of the lens, but won’t see much happening to the
sides of it. You’ll need to aim the camera specifically at
what you want to see.
• Objects and people will look like they are slightly closer
to the camera than they really are. You’ll be able to
monitor a space which is as long (or longer) than it is
wide.
The ADS-120 is great for monitoring long, narrow spaces
such as hallways or corridors. It’s also great for monitoring a
specific space, such as a doorway, smaller room or staircase.
It’s best mounted high-up in a corner looking down into the room, so that it
can look over intervening obstacles. Also, the higher the camera is mounted, the
harder it’ll be for an intruder to access the camera or interfere with it.
Rules is Rules
Regardless of all the tweaking of the lens and image processing you do, there are
a few immutable things that are true for all cameras, CCTV or otherwise.
• The closer the camera is to what you want to see, the more detail
you’re going to get. Really, there’s no substitute for proximity.
• Areas with varied lighting conditions are hard to view completely,
with any camera. If the bright bits are exposed correctly, then the shadows
will “black out”. If the shadowy areas are exposed correctly, then the bright
bits will overexpose and “white out”. Aiming the camera at an evenly lit
area will always give the best results.
• That “image enhancement” stuff that they do on CSI or 24 is all lies. You
can’t zoom in indefinitely on a video image. Licence plates are only readable
from a dozen or so feet (a few meters) away. If someone’s head is represented
by three pixels, that’s it. Sorry. This is technology, not magic. This is a great
entry-level CCTV camera, but it’s still an entry-level CCTV camera - it can’t see
much better than you can! Still, it does make for good television.
37°
53°
222
Page 3

Choosing a Location
The ADS-120 can be mounted just about anywhere indoors, provided there is
some protection against direct sunlight.
Some of the things you’ll have to consider when choosing a location are:
• What you want to monitor, and where you’ll get the best view of it.
• How you’re going to connect the camera to your monitoring system.
• How to keep the camera out of harm’s way. Up high in protected corners is a
good option.
Mounting
The camera mounts onto a flat surface using screws. The surface must have
sufficient strength to hold the camera. Materials such as hardwood, brick or
masonry are good options, and we’ve included all the gear you’ll need to mount
it there (except the tools - sorry, you’ll still need your own drill). You can mount
the camera onto a metal surface, but you’ll need to supply your own mounting
hardware.
To mount the camera:
• Using the holes on the camera stand as a guide, mark the locations on your
wall/ceiling to drill. Make sure the wall/ceiling is thick and strong enough that
you won’t drill through it.
• If the wall is masonry, brickwork or similar, use the provided wall plugs. If the
wall is made of wood, then the camera can be screwed directly onto the wall.
• Once the camera has been mounted, ensure that it is securely fixed in place.
3
Page 4

About the Camera
Connect the provided Audio / Video
cable into the connection located at the
1
back of the ADS-120. Do not force the
cable as it can only be inserted into the
connection the one way. Be careful not
to bend the pins inside the connection.
2
444
Page 5

3
Connect the provided power
adapter to the DC input located on
the cable. Plug the power adapter
into a wall socket.
Connecting to your existing DVR
As most DVRs have BNC sockets, your DVR
should have been provided with a BNC to
RCA adapter. Connect this to one of the
inputs on your DVR then connect the yellow
RCA connection to the BNC to RCA adapter.
If your DVR has an audio input, connect the
red RCA connection to the audio input as
well.
Connecting directly to your TV
Connect the yellow and red RCA connections
to the video and audio input on your TV. The
yellow RCA connection connects to the video
input and the red RCA connection connects
to the red audio input. If you have a mono TV
then connect this to the white audio input.
5
Page 6

Troubleshooting
Problem: I don’t see an image on the TV or the DVR.
Solution: Check that you have the audio / video cable connected correctly into the
connection located at the back of the ADS-120. Check that you have connected
the yellow RCA connection to the correct input on the TV. Make sure you have
selected the appropriate video input option on the TV. Consult the TV manual for
further assistance with selecting the correct A/V connection. On the DVR, check
that the BNC to RCA converter is securely fastened to the BNC socket. Make sure
the power adapter is plugged into the wall socket and the DC input on the camera
cable.
Problem: I can’t see anything at night.
Solution: The ADS-120 camera is designed for day time use only. It does not have
infrared capabities built-in.
Problem: I cannot hear any audio or the audio level is quite low.
Solution: The maximum range of the built-in microphone is nearly 10 feet / 3
meters. The microphone will not pickup audio from people or objects that are
further than this. If they are less than 10 feet / 3 meters, check that you have the
red RCA connection connected to the correct audio input and try increasing the
volume on your TV or DVR.
666
Page 7

Technical Specifications
Technical Specifications
Video
Image Sensor SwannTruColor (STC)
Video Quality 520 TV Lines
Effective Pixels NTSC & PAL: 640 x 480
Min. Illumination 1 Lux
Day/Night Mode Day only
White Balance Automatic
Gain Control Automatic
Backlight Comp. Yes
Wide Dynamic Range No
Lens 3.6mm F2.2
Viewing Angle 53 degrees
Audio
Microphone Yes
Audio Range 10ft / 3 meters
General
Indoor / Outdoor Indoor
Operating Power DC12V +/-10%
Operating Temp. 14°F ~ 122°F / 10°C ~ 50°C
Body Construction Aluminium
Dimensions
(Camera & Stand) 1.5” x 1.2” x 1.7” / 40mm x 35mm x 45mm
Weight
(Camera & Stand) 0.4lbs / 0.2kg
Cable Length 60ft / 18 meters
7
Page 8

Helpdesk / Technical Support Details
All Countries E-mail: tech@swannsecurity.com
USA toll free
1-800-627-2799
(Su, 2pm-10pm US PT)
(M-Th, 6am-10pm US PT)
(F 6am-2pm US PT)
USA Exchange & Repairs
1-800-627-2799 (Option 1)
(M-F, 9am-5pm US PT)
See http://www.worldtimeserver.com for information on time zones and the current time in
Melbourne, Australia compared to your local time.
Swann Technical Support
Telephone Helpdesk
AUSTRALIA toll free
1300 138 324
(M 9am-5pm AUS ET)
(Tu-F 1am-5pm AUS ET)
(Sa 1am-9am AUS ET)
NEW ZEALAND toll free
0800 479 266
UK
0203 027 0979
Warranty Information
Swann Communications USA Inc.
12636 Clark Street
Santa Fe Springs CA 90681
USA
Swann Communications warrants this product against defects in workmanship and material for a period of
one (1) year from it’s original purchase date. You must present your receipt as proof of date of purchase for
warranty validation. Any unit which proves defective during the stated period will be repaired without charge
for parts or labour or replaced at the sole discretion of Swann. The end user is responsible for all freight
charges incurred to send the product to Swann’s repair centres. The end user is responsible for all shipping
costs incurred when shipping from and to any country other than the country of origin.
The warranty does not cover any incidental, accidental or consequential damages arising from the use of
or the inability to use this product. Any costs associated with the fitting or removal of this product by a
tradesman or other person or any other costs associated with its use are the responsibility of the end user.
This warranty applies to the original purchaser of the product only and is not transferable to any third party.
Unauthorized end user or third party modifications to any component or evidence of misuse or abuse of the
By law some countries do not allow limitations on certain exclusions in this warranty. Where applicable by
local laws, regulations and legal rights will take precedence.
This equipment has been tested and found to comply with the limits for Class B digital device, pursuant to part 15 of
the FCC Rules. These limits are designed to provide reasonable protection against harmful interference in a residential
installation. This equipment generates, uses and can radiate radio frequency energy and, if not installed and used
in accordance with the instructions, may cause harmful interference to radio or television reception, which can be
determined by turning the equipment off and on, the user is encouraged to try to correct the interference by one or
more of the following measures:
• Reorient or relocate the receiving antenna
• Increase the separation between the equipment and the receiver
• Connect the equipment into an outlet on a circuit different from that to which the receiver is connected
• Consult the dealer or an experienced radio/TV technician for help
WARNING: Modifications not approved by the party responsible for compliance could void user’s authority to
Swann Communications
Unit 13, 331 Ingles Street,
Port Melbourne Vic 3207
device will render all warranties void.
© Swann Communications 2012
FCC Verification
operate the equipment.
Swann Communications LTD.
Stag Gates House
63/64 The Avenue
SO171XS
United Kingdom
888
 Loading...